Let’s get into it. I’ve spent over a decade in corporate, and if I had a dollar for every time someone asked me how to look “professional” without looking “boring,” I’d be retired on a beach in Bali by now.
The Struggle is Real: Finding Your Office Aesthetic
Ever felt like you had to choose between being taken seriously in a board meeting and having nails that actually reflect your personality? I’ve been there. In my early days, I once walked into a high-stakes meeting with neon “slime green” tips. Let’s just say the CEO spent more time looking at my hands than my slide deck. It was a vibe, sure, but not the right vibe.
What I’ve noticed over the years is that “work-friendly” doesn’t have to mean “invisible.” The mistake most people make is thinking they are limited to a single shade of dusty rose. Reality check: professional nails are about the grooming and the finish, not just the color. Whether you are a “short and square” devotee or an “almond shape” enthusiast, you can absolutely play with trends like chrome, velvet, and even minimalist art without raising an eyebrow in HR.
The secret is in the subtlety. You want your nails to look like an intentional part of your outfit, not a distraction from your brilliance. When you get this right, a simple hand gesture during a presentation becomes a power move. Ready to ditch the basic beige for something with a bit more soul?

Quick Results Snapshot
- What this look solves: Bridges the gap between corporate etiquette and personal style.
- Who it’s best for: Professionals in law, finance, tech, or creative corporate roles.
- Time required: 20 minutes for a DIY refresh, or 60 minutes for a full salon structured mani.
- Budget range: $10 (drugstore polish) to $90 (high-end BIAB/Gel).
- Expected timeline: Instant confidence boost.
- Biggest mistake people make: * Ignoring skin undertones (making hands look “washed out”).
- Neglecting cuticle hydration (crispy cuticles ruin expensive polish).
Let’s dive into the first few looks. Remember, the goal here is “Quiet Luxury” – we want people to notice how polished you look, not necessarily the polish itself.
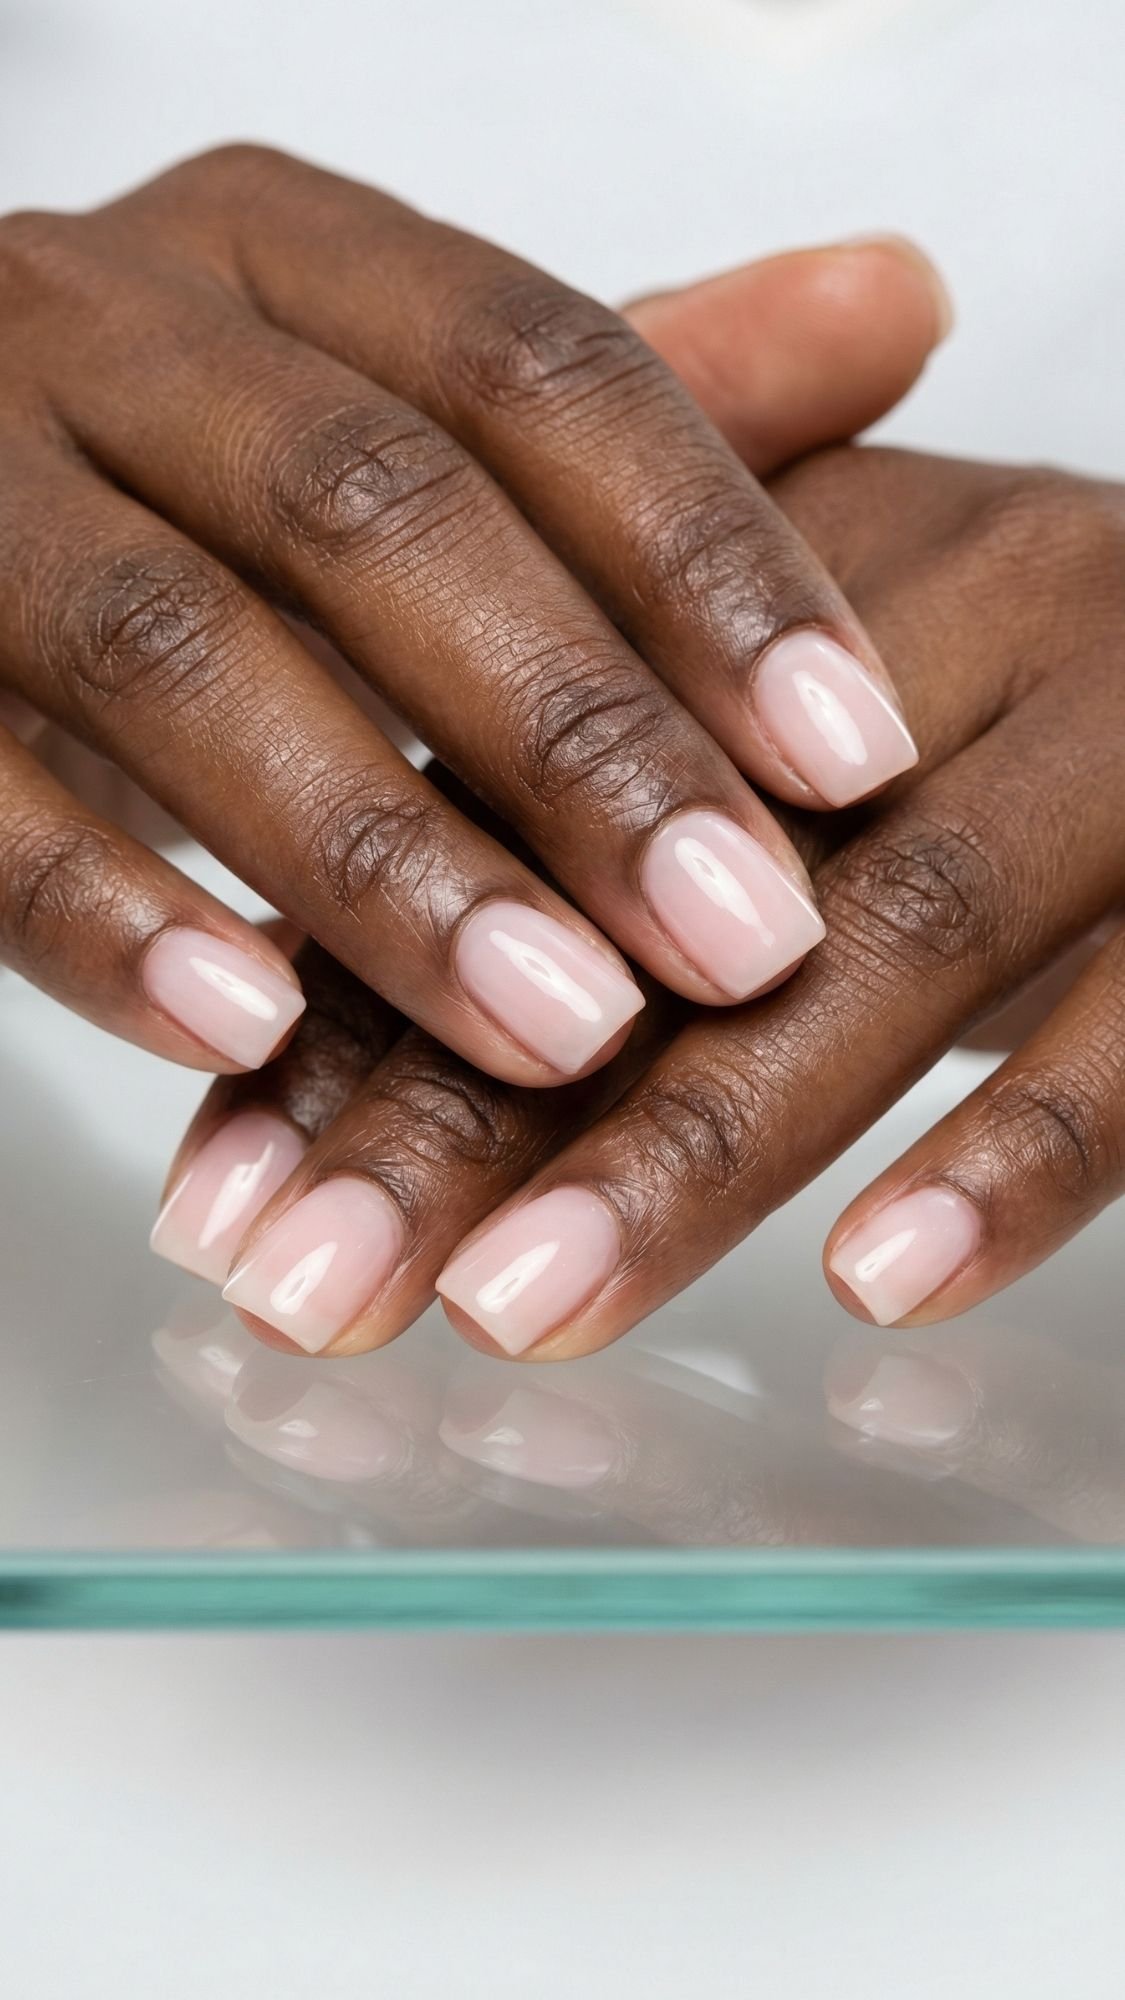
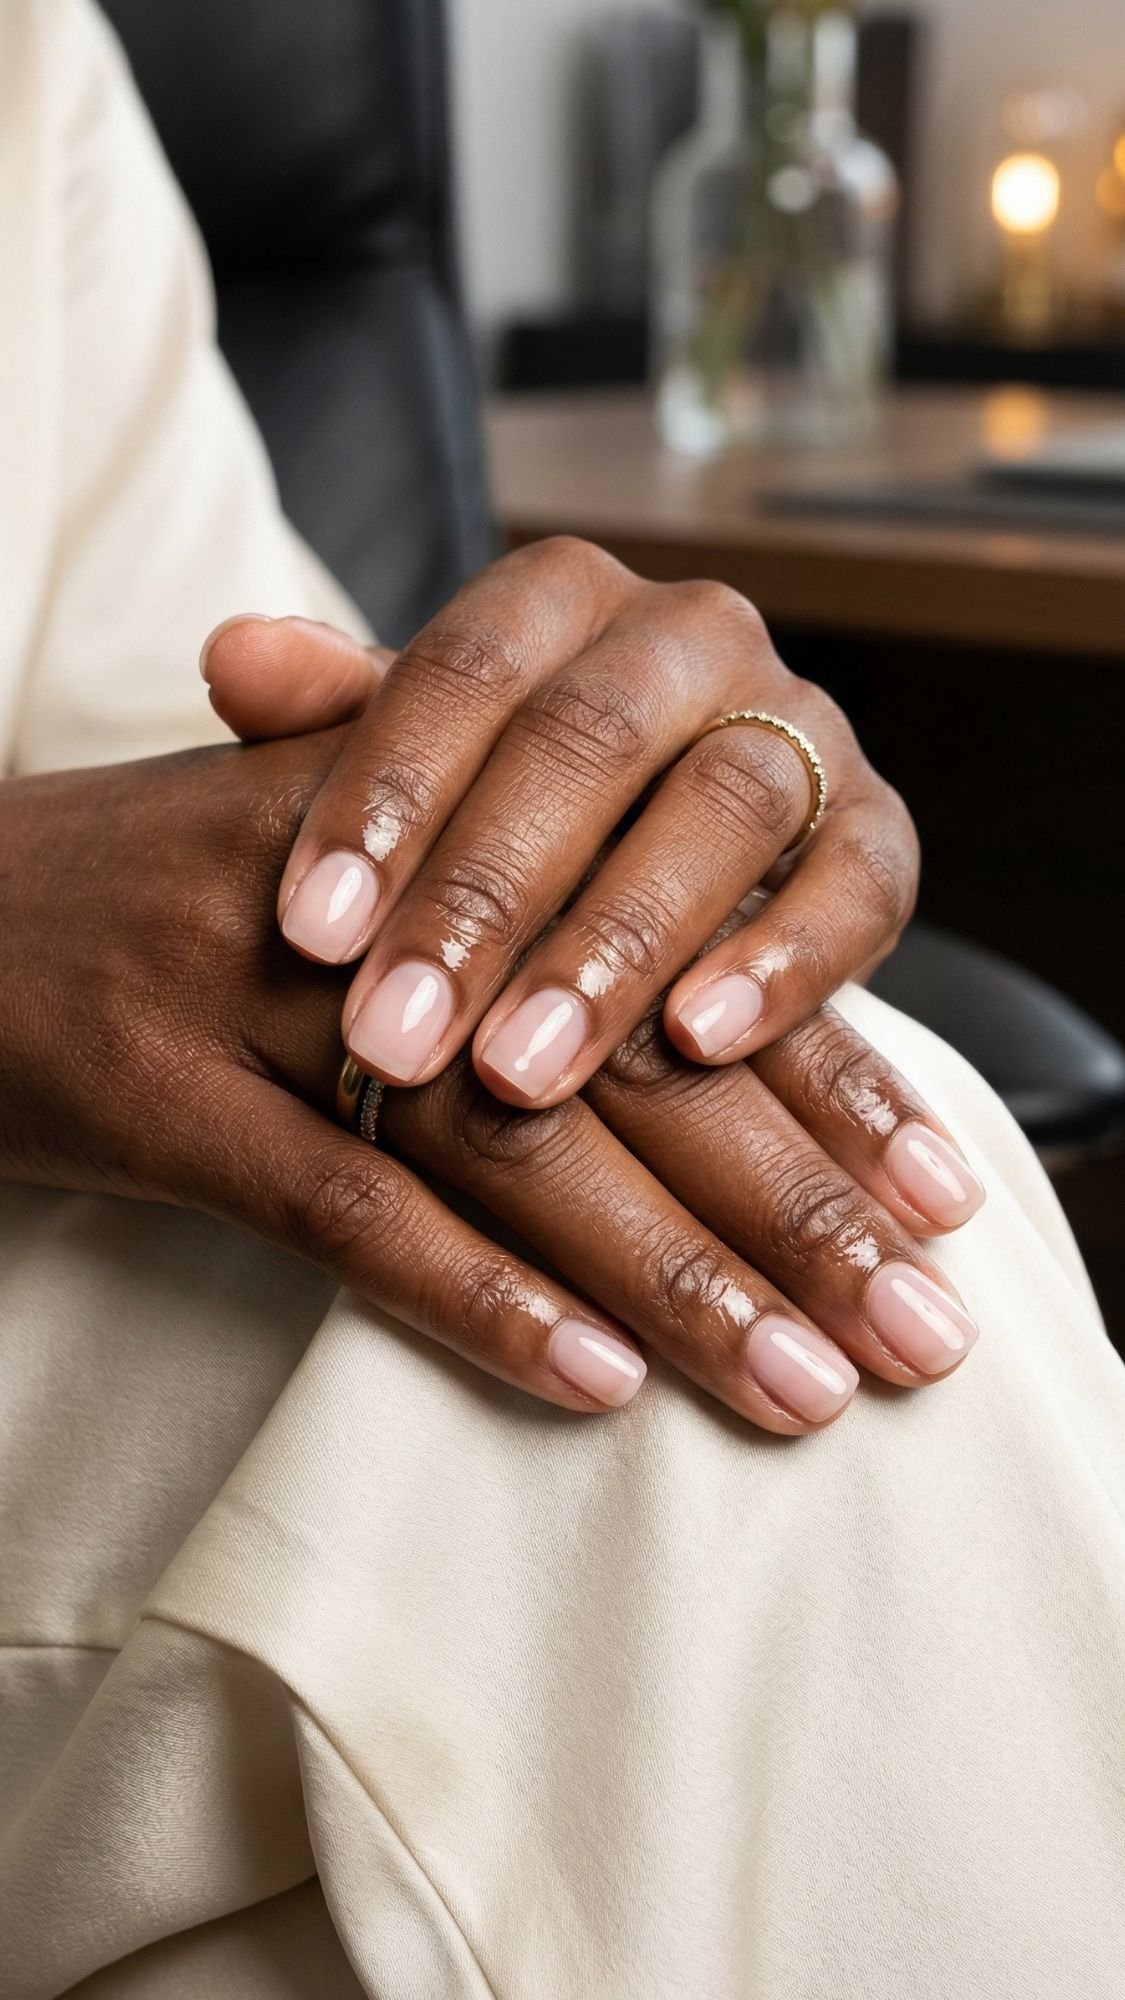
1. The “Soap Nail” (Ultra-Sheer Gloss)
The Soap Nail is the ultimate “clean girl” staple. It’s meant to look like your nails but better, with a translucent, soapy finish. What I’ve noticed over the years is that this look is the most forgiving when your nails inevitably grow out, making it perfect for the busy VP who can’t get to the salon every ten days.
The texture should be watery and thin, not goopy. The mistake most people make with this is applying too many coats. You want that “just-out-of-the-shower” transparency. If you can’t see the white of your natural nail tip through the polish, you’ve gone too heavy. It should look like a tinted lip gloss, but for your hands.
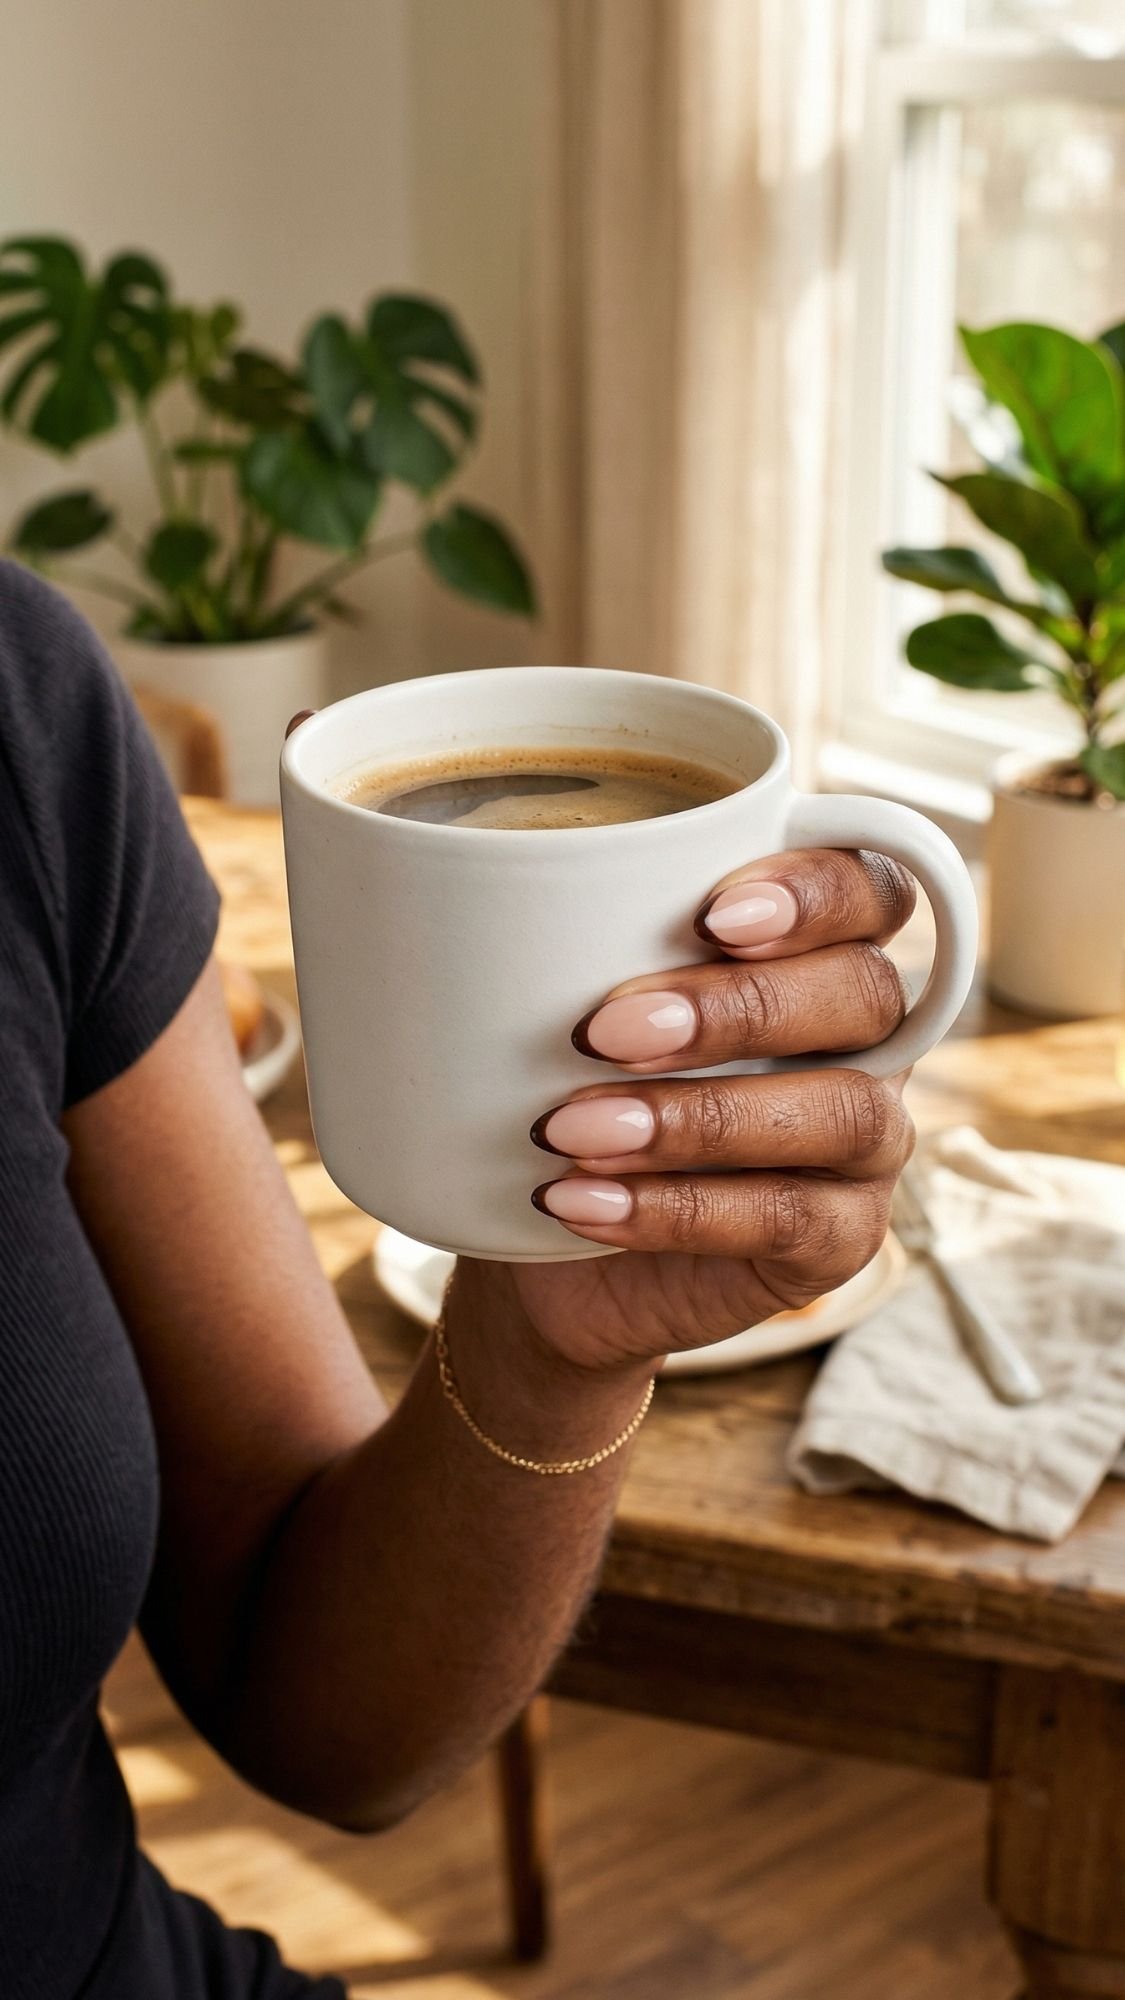
2. The Micro-French in Espresso
Traditional white French tips can feel a bit “bridal” or, dare I say, slightly dated for a modern office. Switching to a deep espresso or chocolate brown for that paper-thin line makes it instantly chic.
The technique here is all about the “micro” aspect. We’re talking a line so thin it almost looks like a natural shadow at the edge of the nail. Use a long, thin striping brush for this, and don’t try to draw a perfect curve in one go. Instead, keep the brush still and rotate your finger. It sounds counterintuitive, but it’s the only way to get that crisp, professional edge without a steady hand of a surgeon.
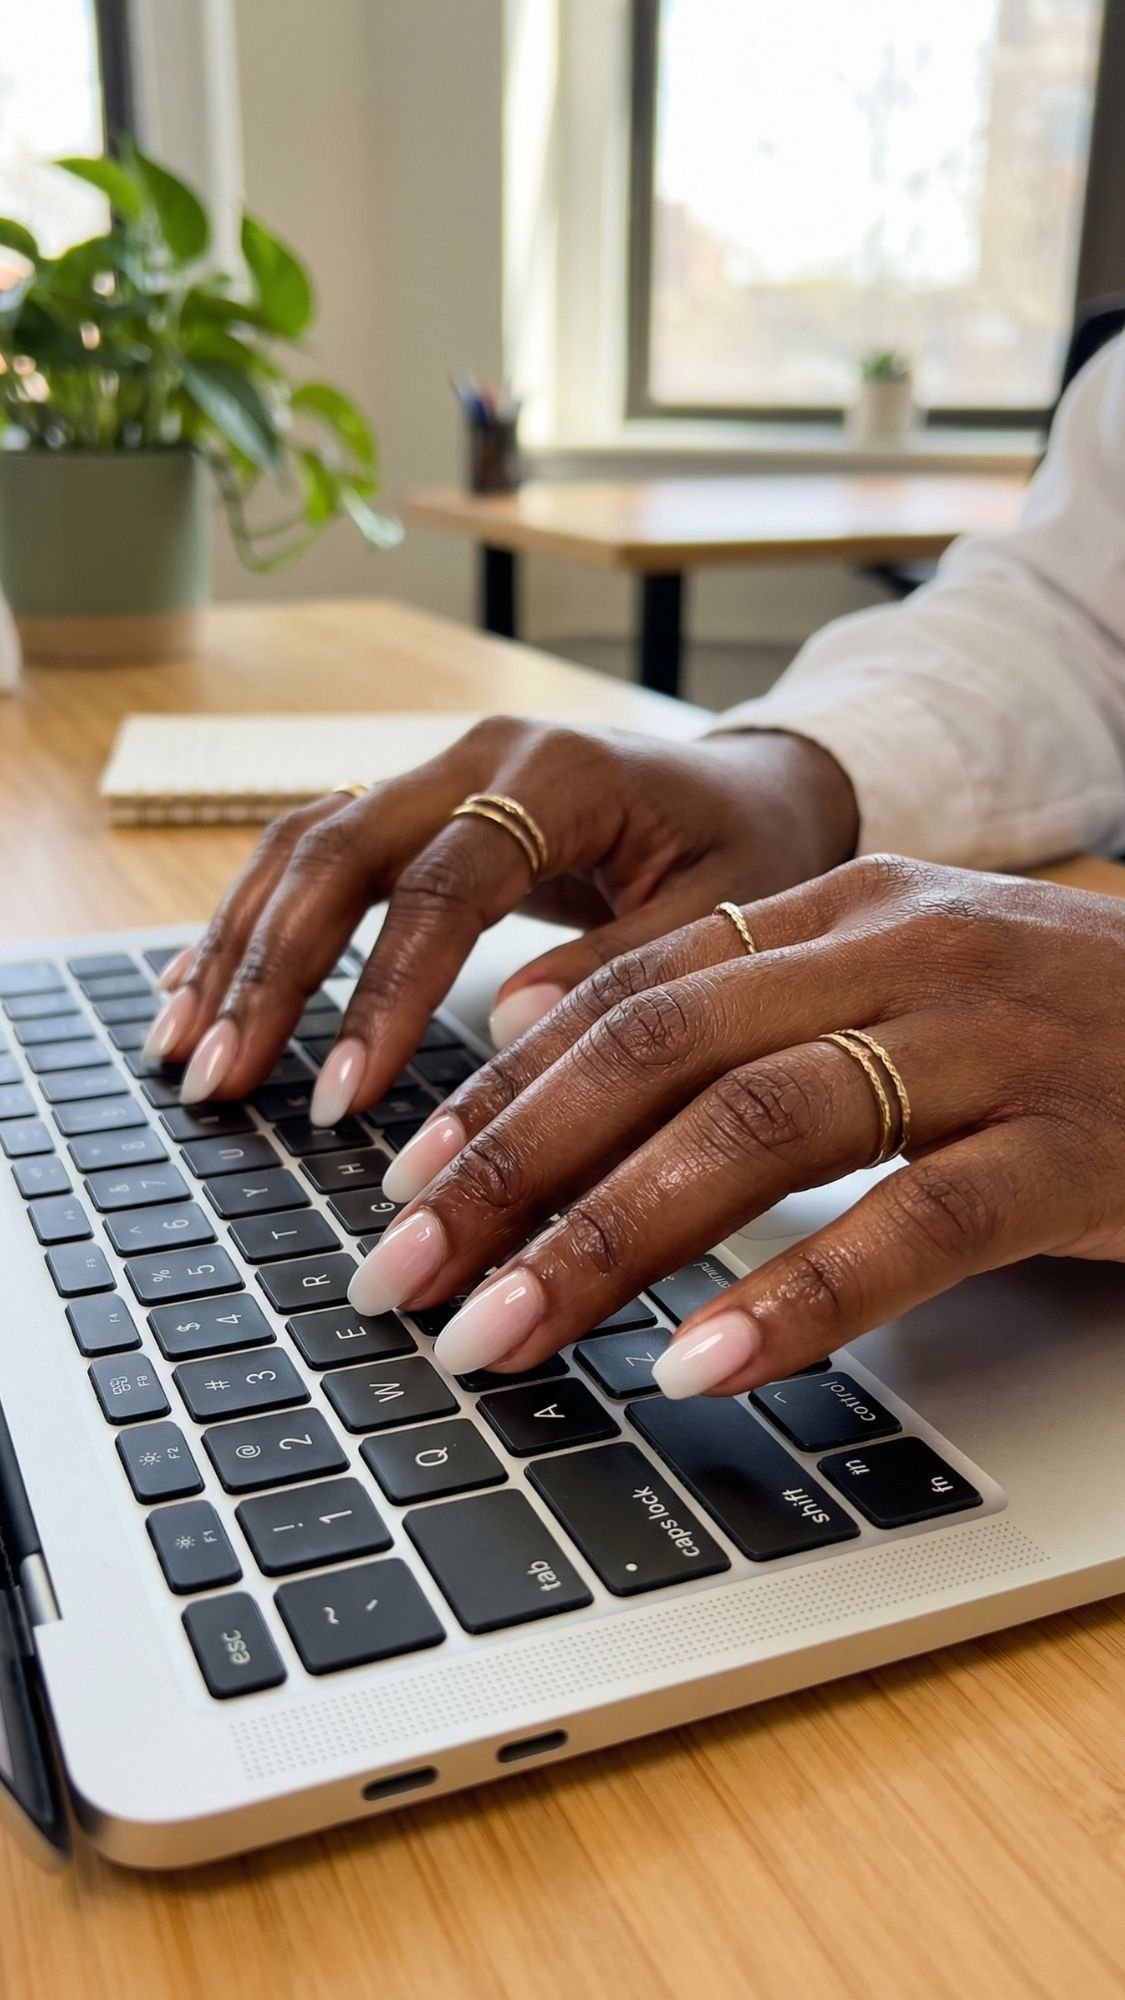
3. Milky Ombre (The “Soft Life” Mani)
In the industry, we often call these “Baby Boomer Nails,” but “Milky Ombre” sounds way more expensive, doesn’t it? This is for the woman who wants a gradient without the “rave” vibes.
Instead of a harsh white tip, the color softly melts into a sheer pink base. The secret “pro” hack? Use a makeup sponge to dab the transition, but make sure the sponge is slightly damp with water first. This prevents the sponge from soaking up all the polish and leaving those annoying little air bubbles in your finish. It looks incredibly sophisticated during a handshake.
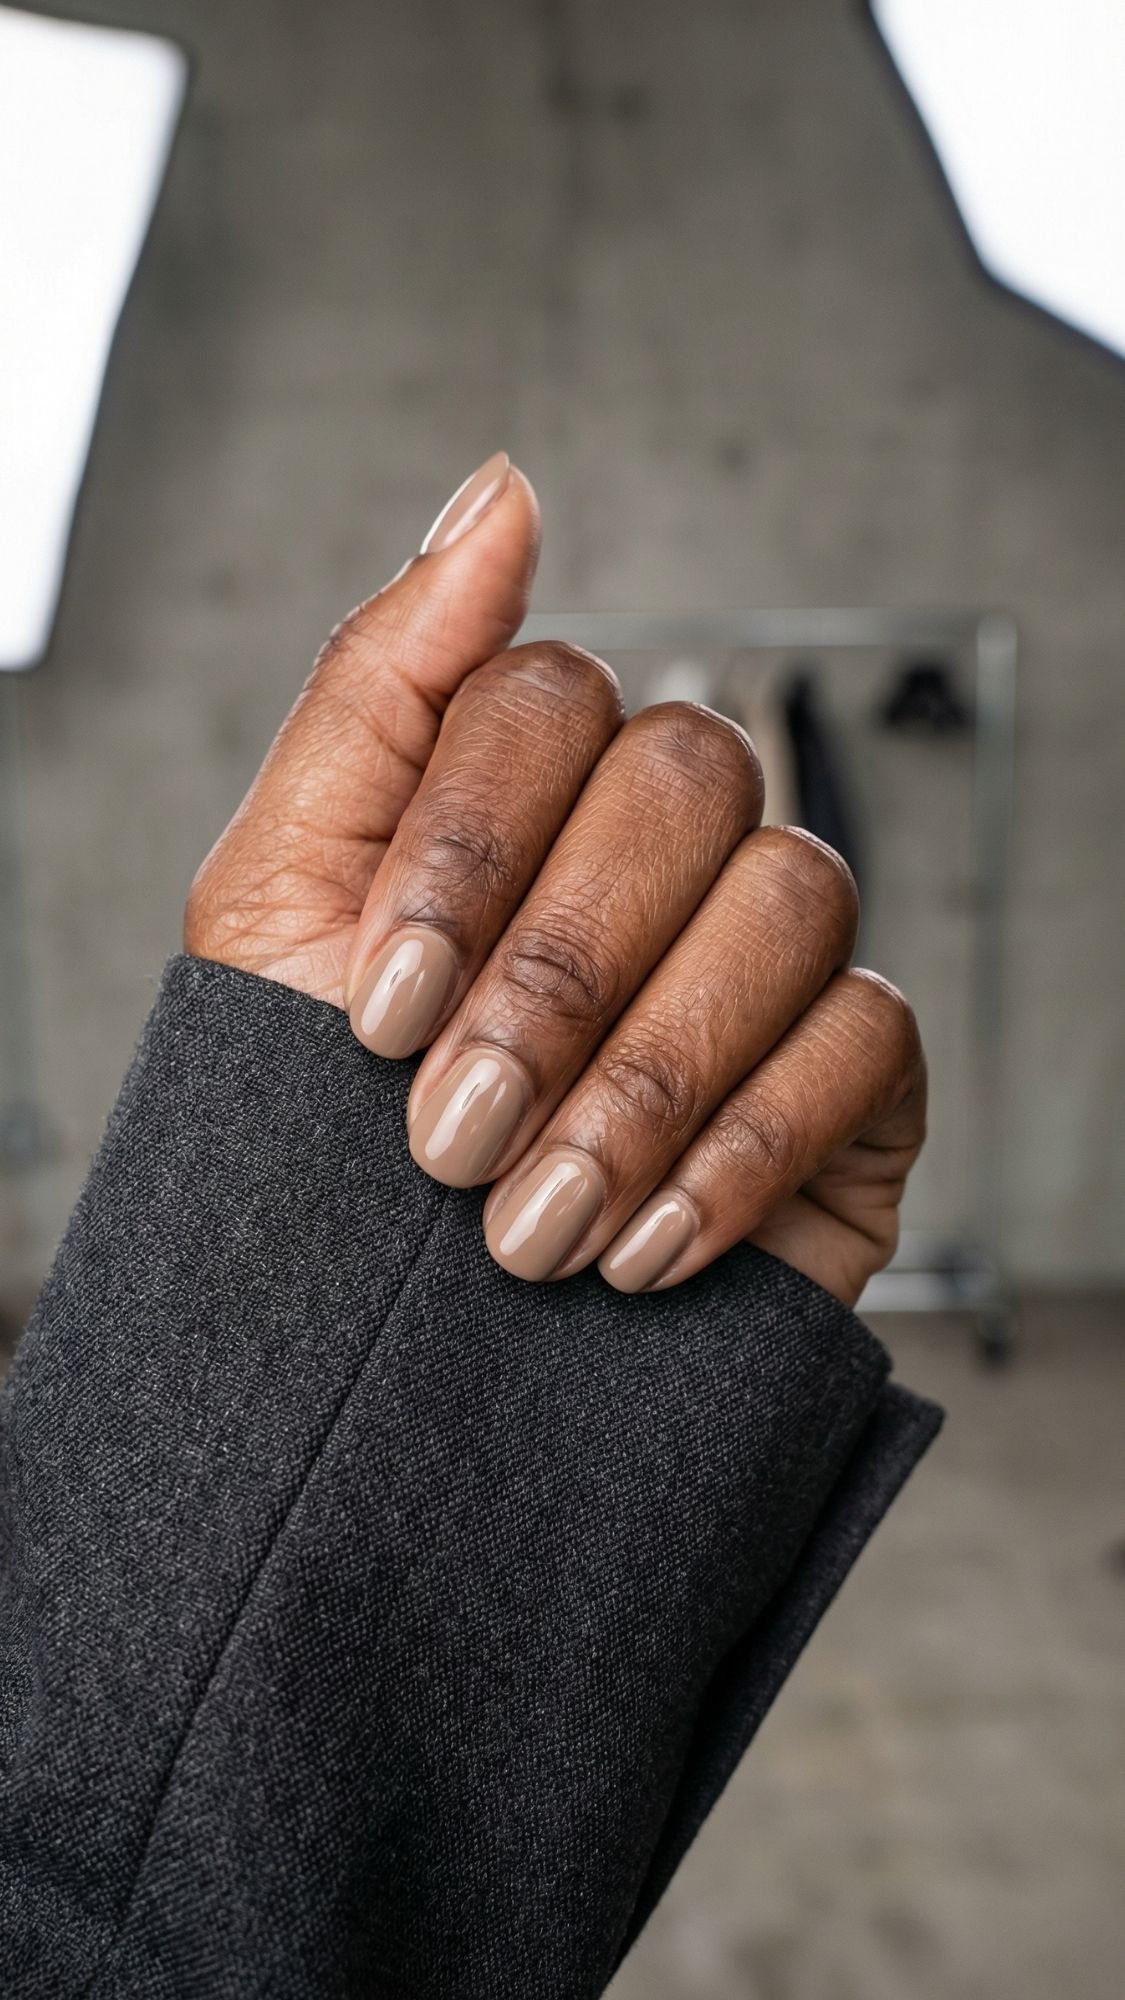
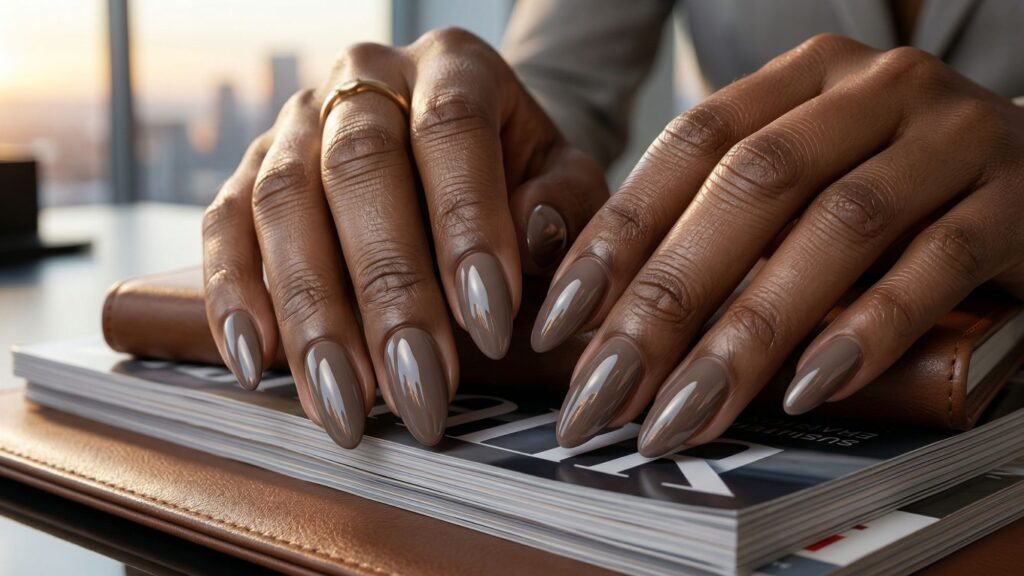
4. Rich Girl Beige
Coined by celebrity manicurists, this is a full-coverage, opaque creamy beige. Think of the color of an Hermès Birkin or a classic Burberry trench. It’s powerful, assertive, and undeniably clean.
The trick to making this look “rich” rather than “flat” is the top coat. You need a “plumping” top coat that gives it that thick, gel-like depth. FYI, if your beige looks a little streaky on the first coat, don’t panic. Beige is notoriously “difficult,” but a second thin coat followed by a self-leveling top coat will smooth everything out.
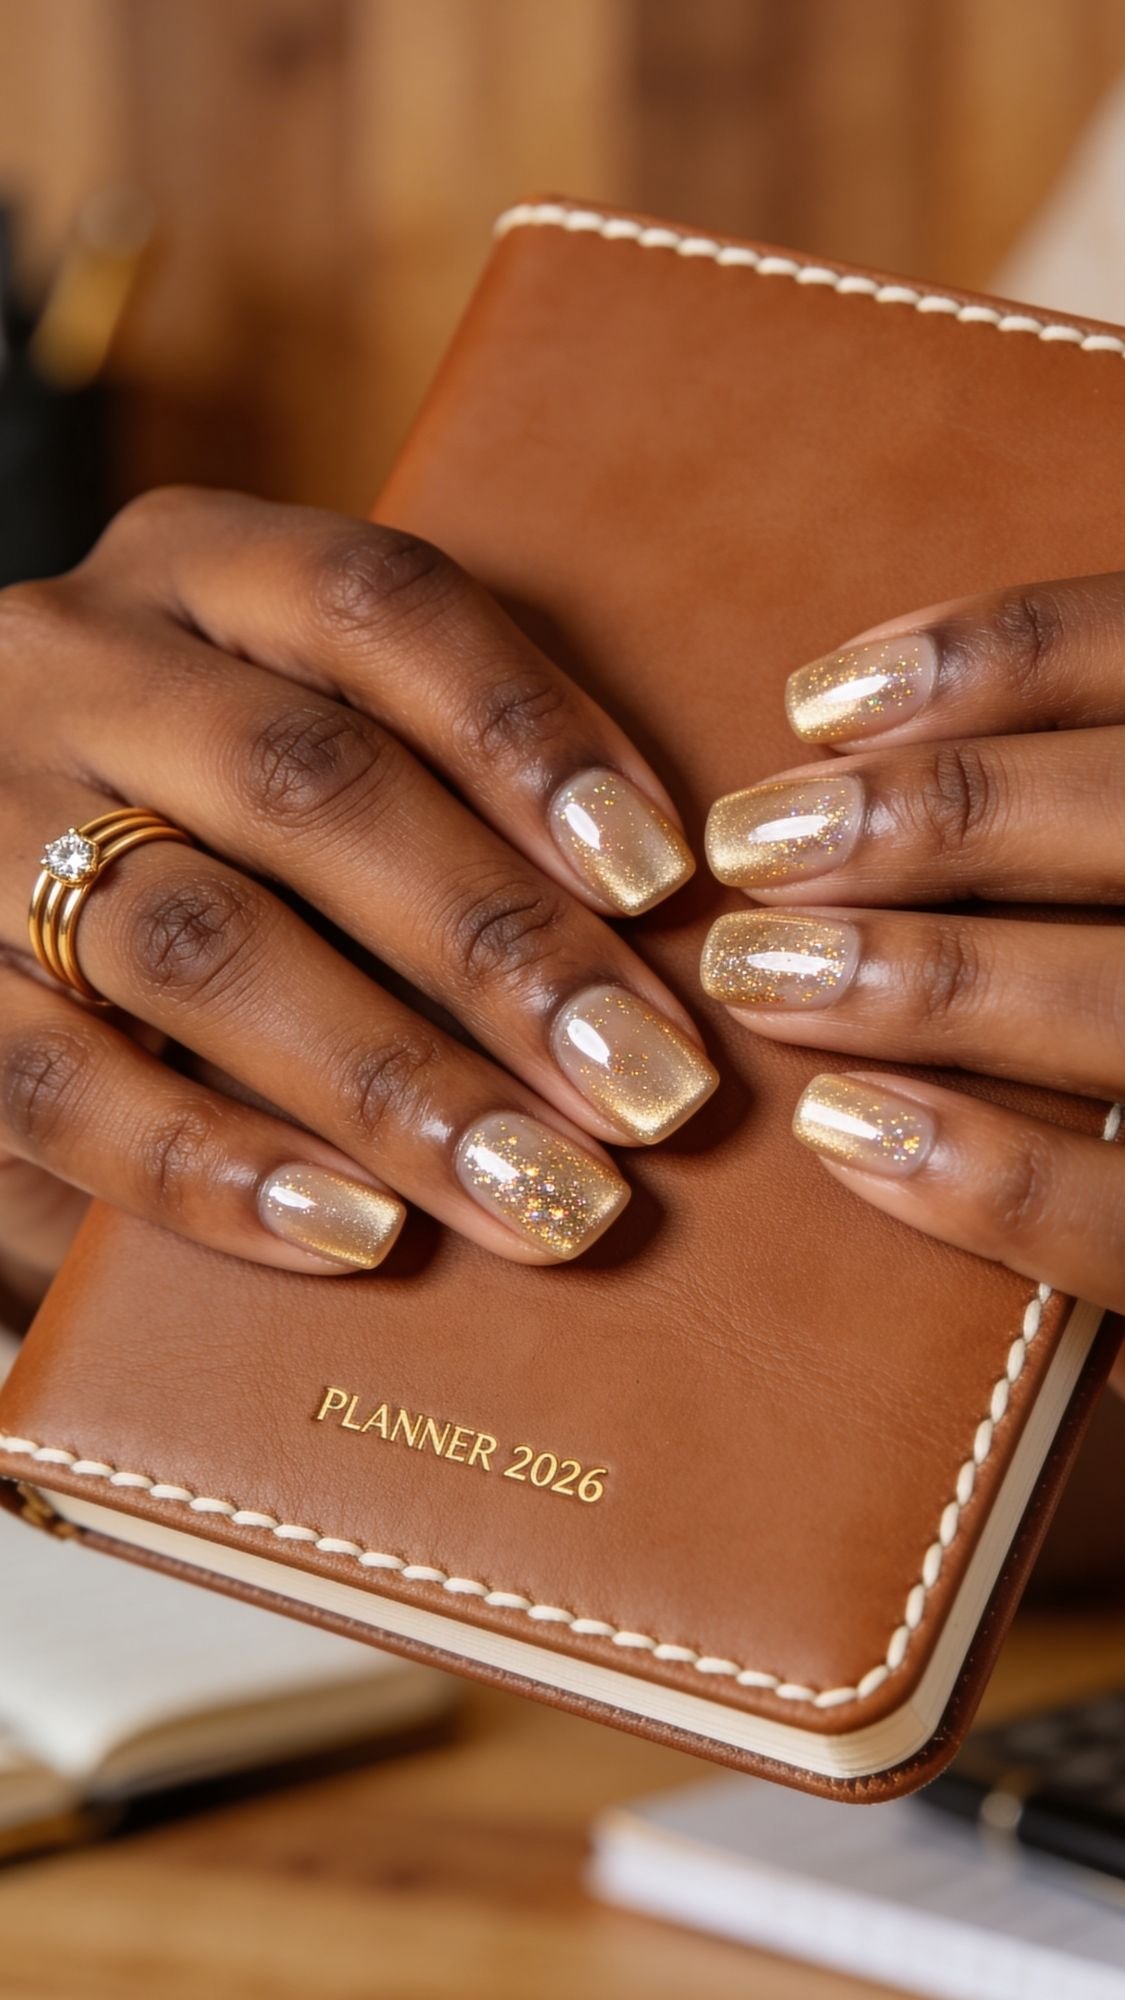
5. Champagne Shimmer (The “Adult” Glitter)
I know what you’re thinking—glitter in the office? Hear me out. We aren’t talking chunky, holographic craft glitter. We’re talking fine-milled champagne shimmer that looks like silk fabric.
This works because it acts as a neutral. It catches the light just enough when you’re gesturing during a presentation to look “alive,” but it doesn’t scream for attention. I love this for shorter nails; the shimmer actually helps hide any imperfections in the nail plate that a flat cream color might highlight.
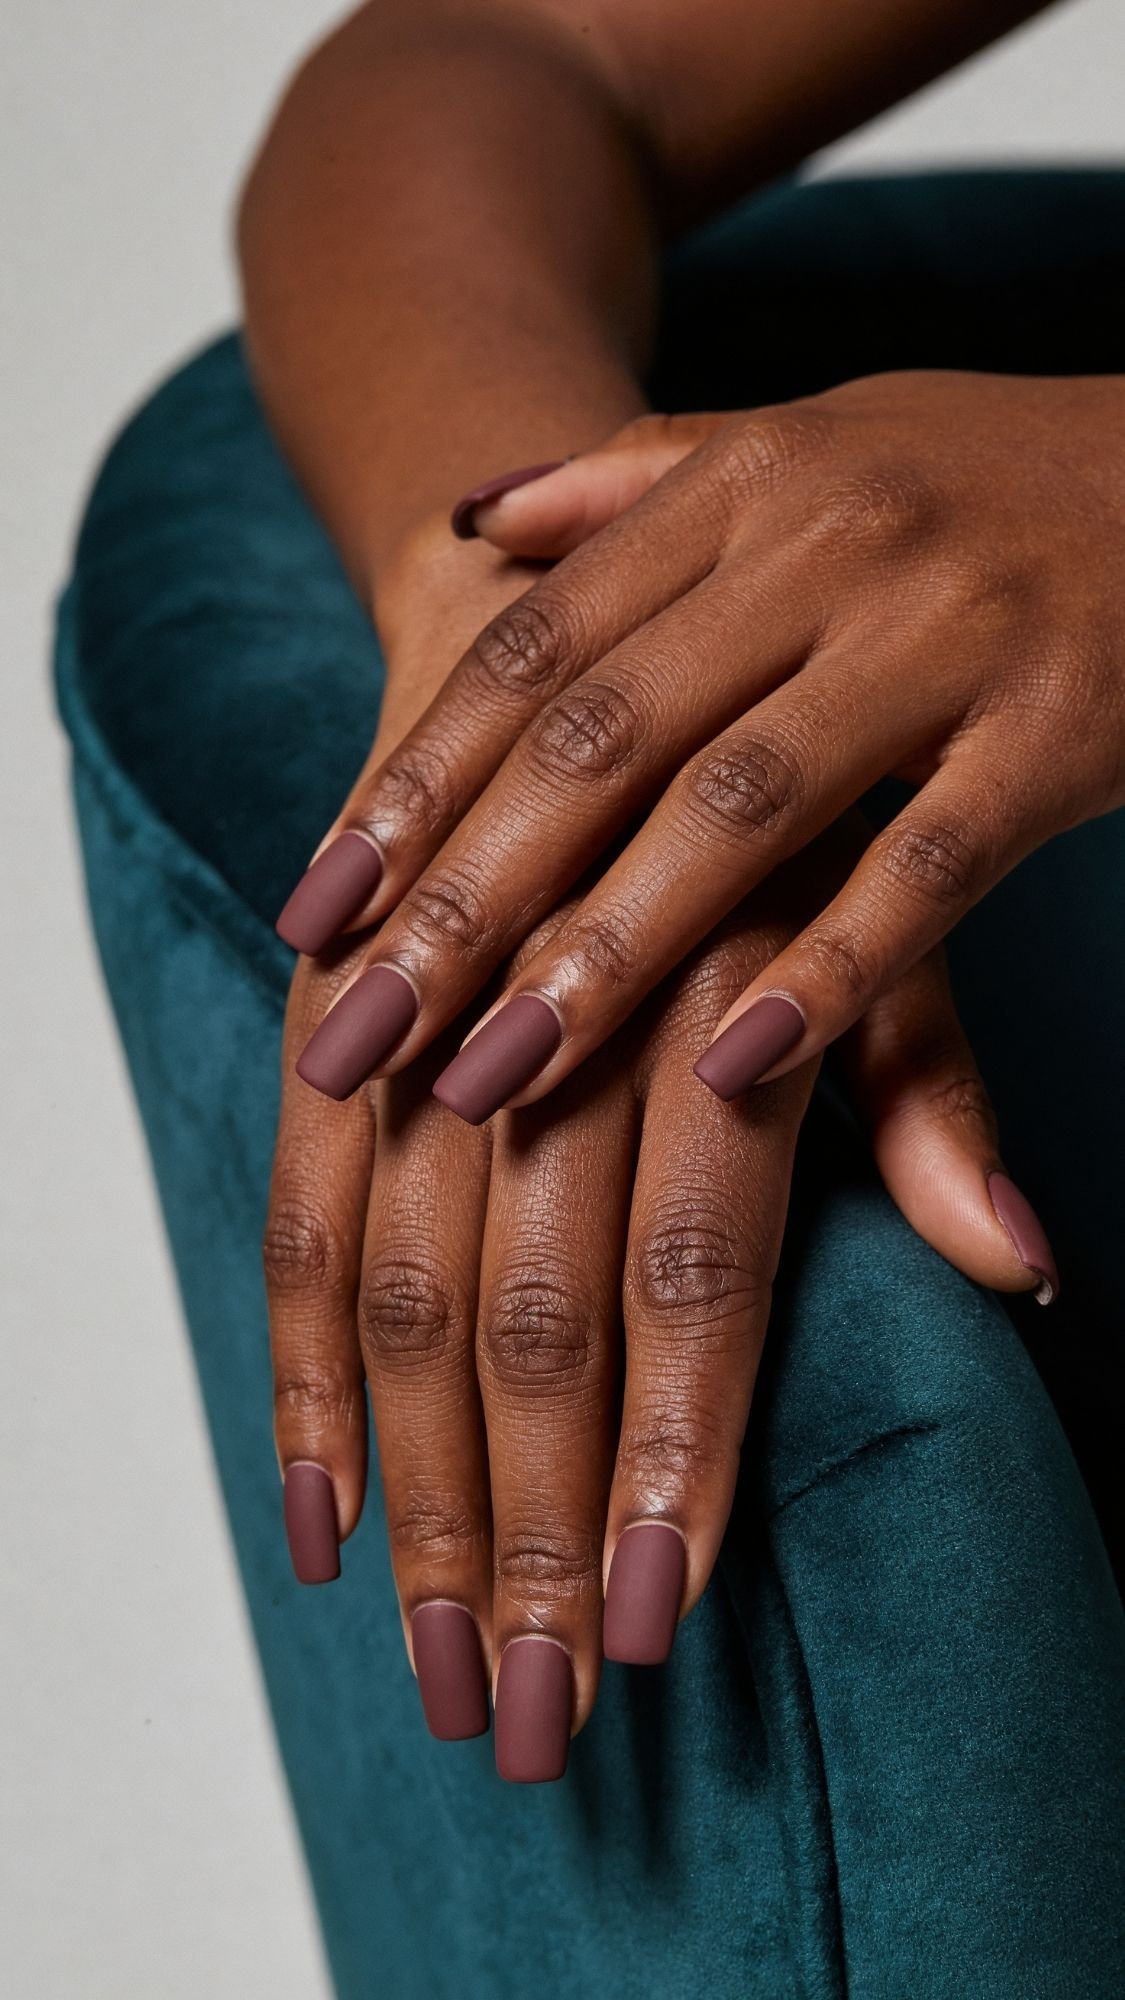
6. The Matte Mauve
Matte finishes are the unsung heroes of professional style. A deep mauve with a matte top coat looks like expensive suede. It’s tactile, sophisticated, and very “editorial.”
The warning I always give my clients: matte top coats are like magnets for makeup and ink. If you notice your nails looking a bit dingy by Wednesday, just wipe them with a quick alcohol pad. It’ll strip away the surface oils and bring that velvety “just-painted” finish right back to life.
Moving right along! Let’s get into the next set of looks. These are for when you want a little more “main character energy” while still keeping things strictly boardroom-approved.
7. Glass Skin Nails
You’ve heard of glass skin in your skincare routine, right? Well, the same high-shine, “bouncy” aesthetic has moved to our fingertips. This look uses jelly polishes—which are translucent but pigmented—to create a finish that looks like a literal sheet of glass.
What I’ve noticed over the years is that people often confuse “sheer” with “jelly.” Jellis have a distinct, squishy texture that sheers lack. To get this look perfectly, apply one thin layer of jelly pink, let it dry, and then hit it with a thick, high-shine top coat. It gives your hands a healthy, hydrated glow that looks incredible when you’re gesturing during a Zoom call.
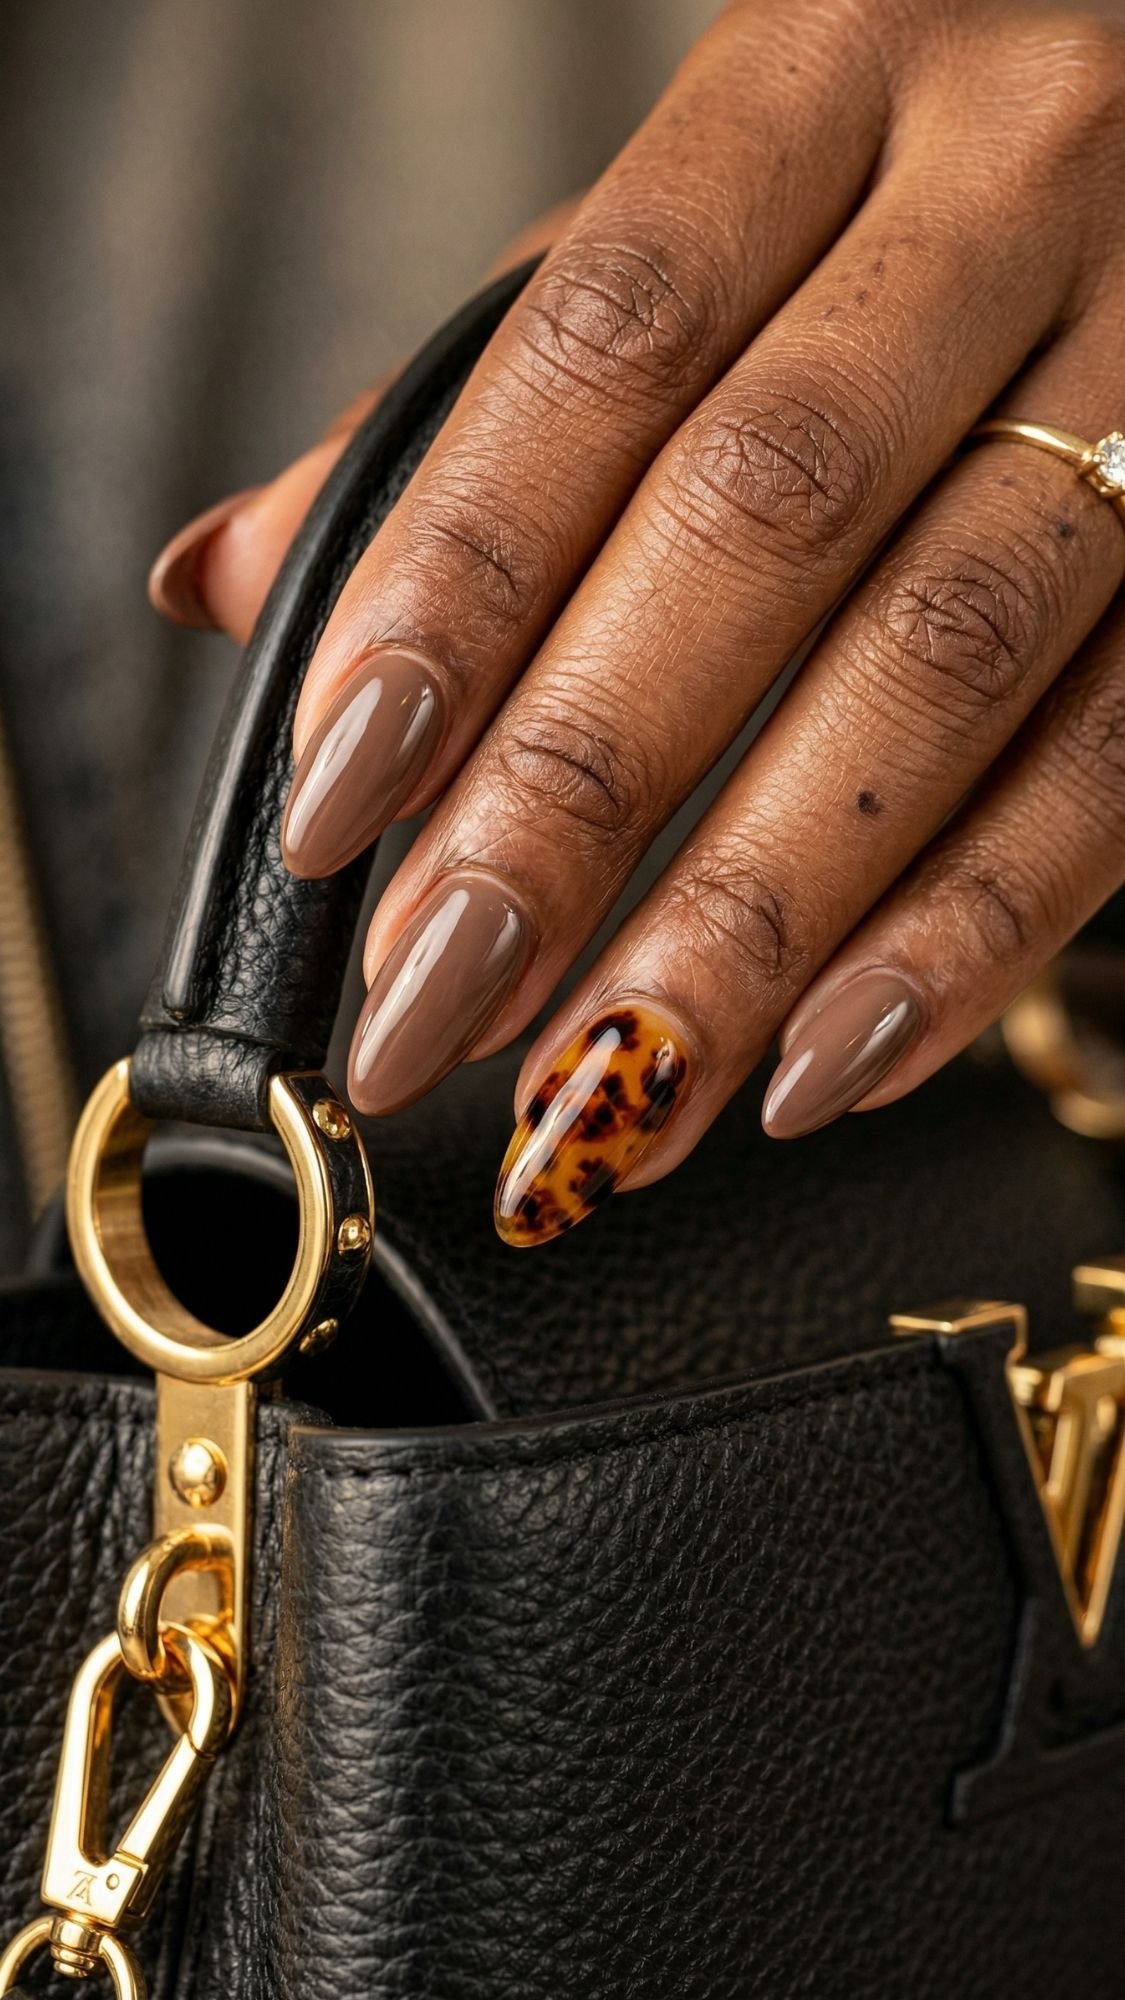
8. Tortoiseshell Accents
If you’re craving actual nail art but work in a conservative environment, tortoiseshell is your best friend. Because it uses ambers, deep browns, and blacks, it stays within the “natural” color palette while still feeling incredibly fashionable.
The mistake most people make with this technique is making the “spots” too uniform. You want them to look organic and slightly blurred. I always tell my followers: “The messier, the better.” Use a tiny bit of clear base coat to “bloom” the brown spots before they dry. IMO, keeping this to just the ring finger or the thumb makes it feel like an intentional accessory rather than a loud statement.
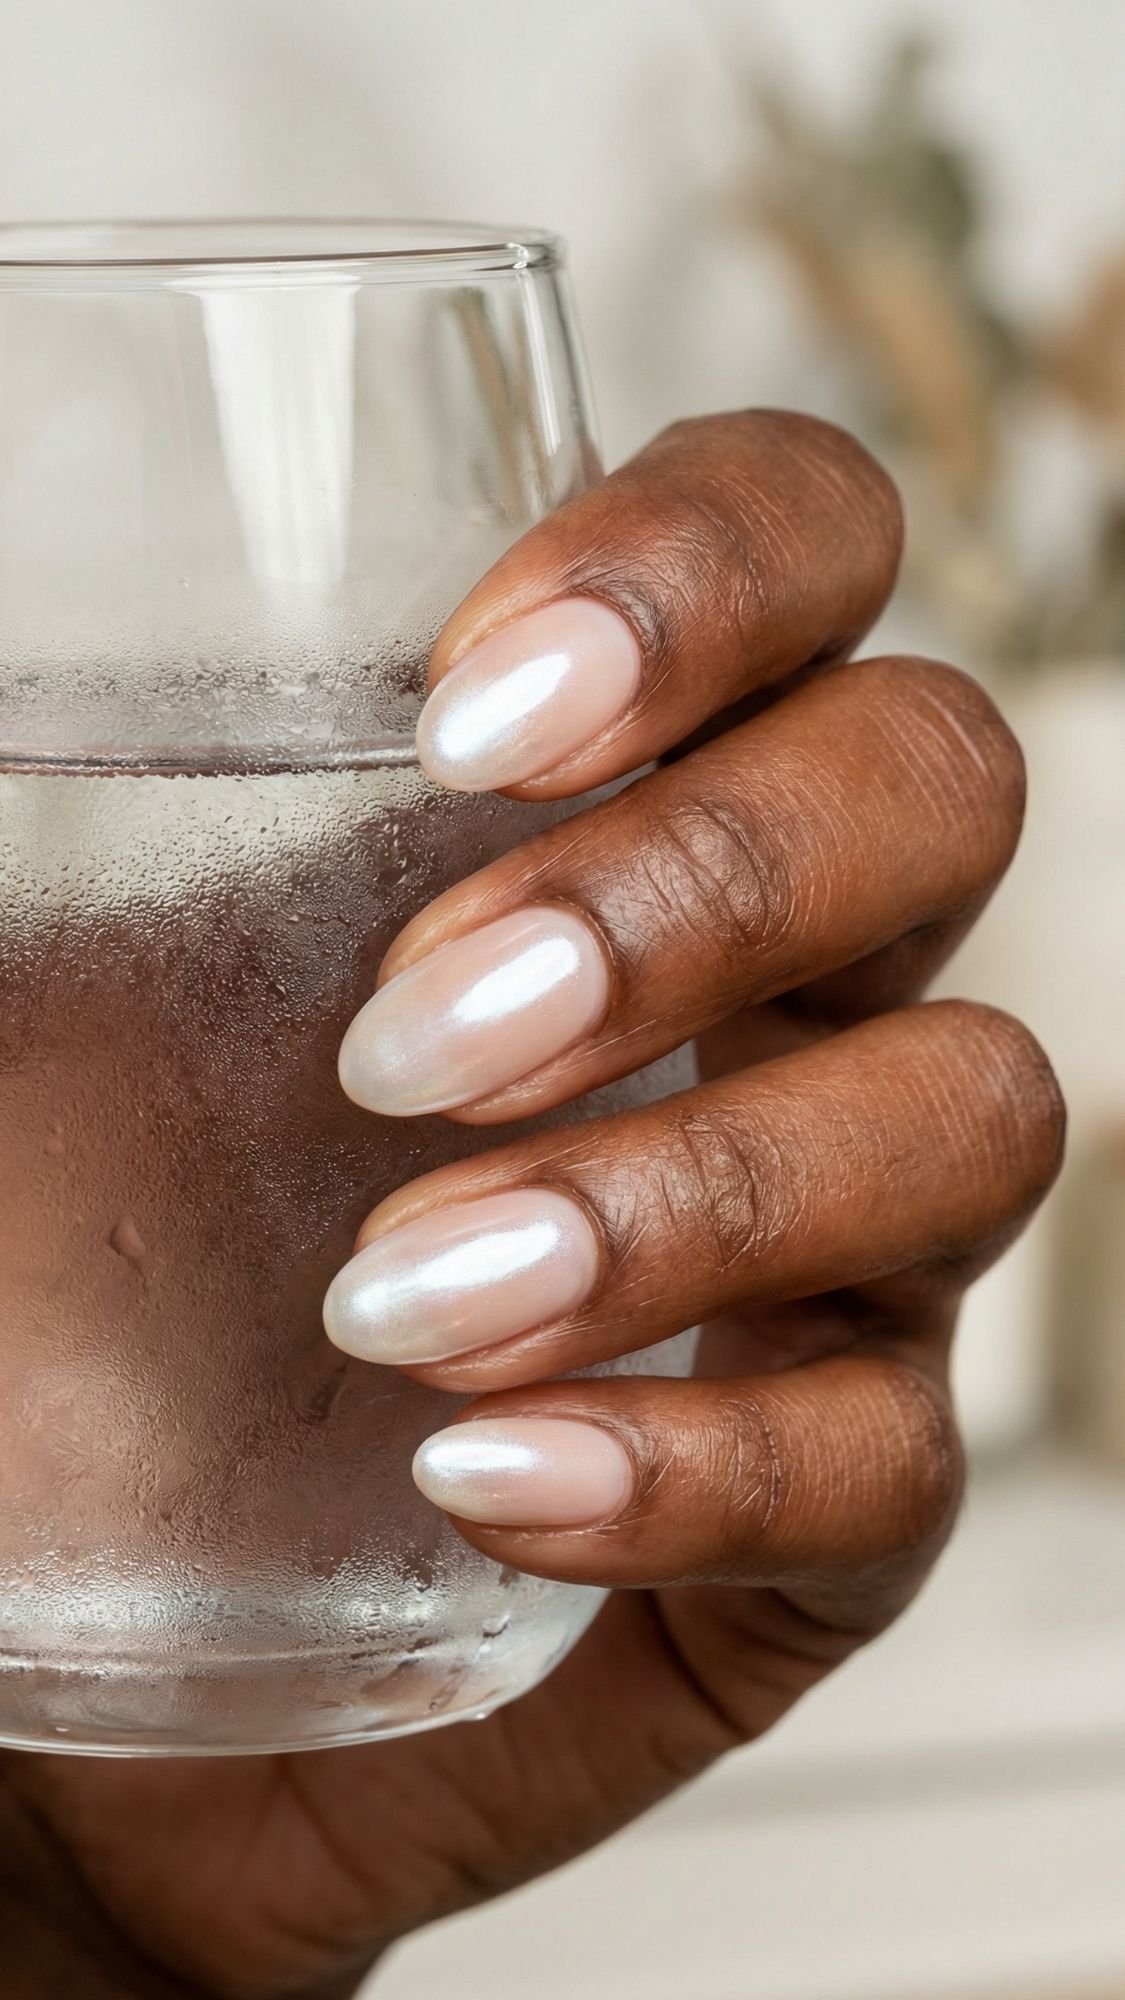
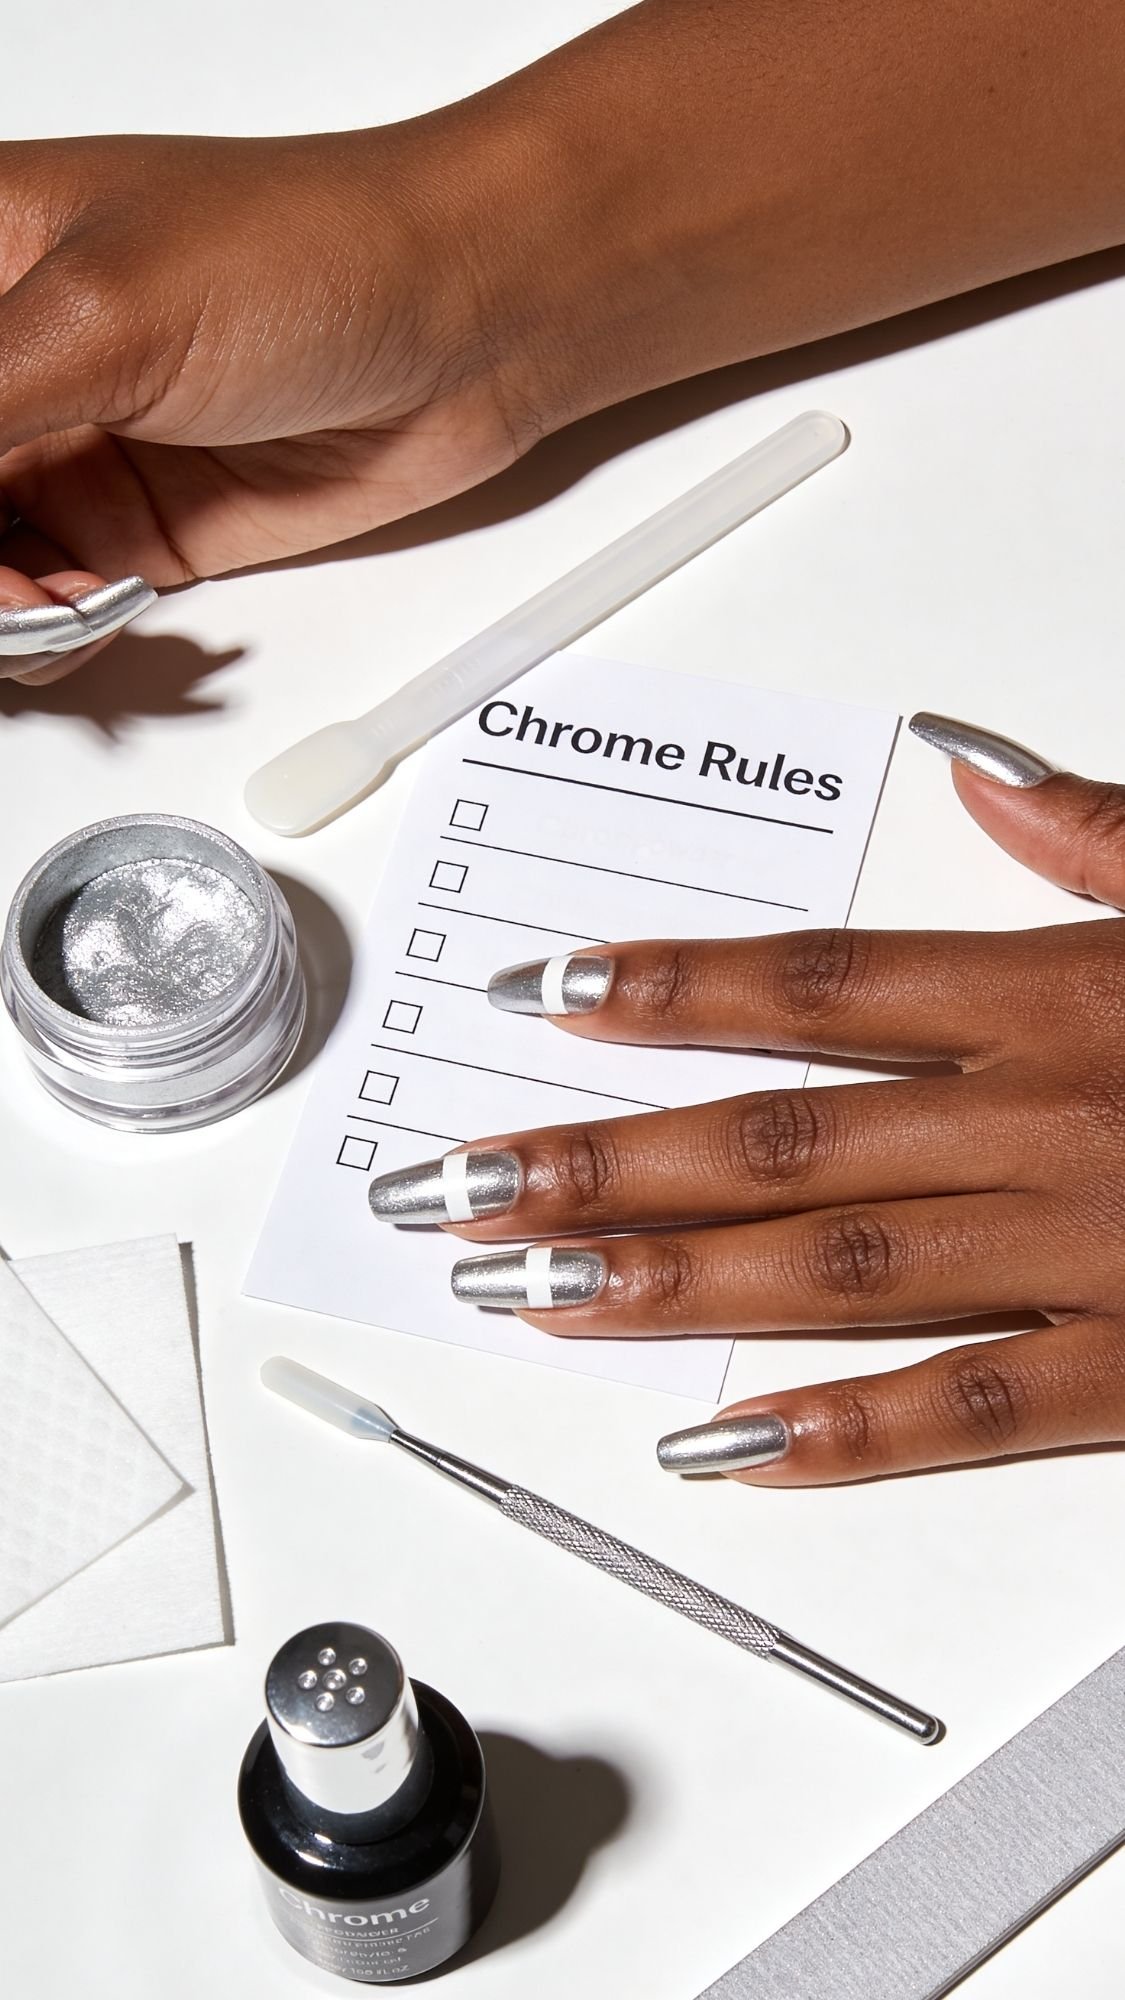
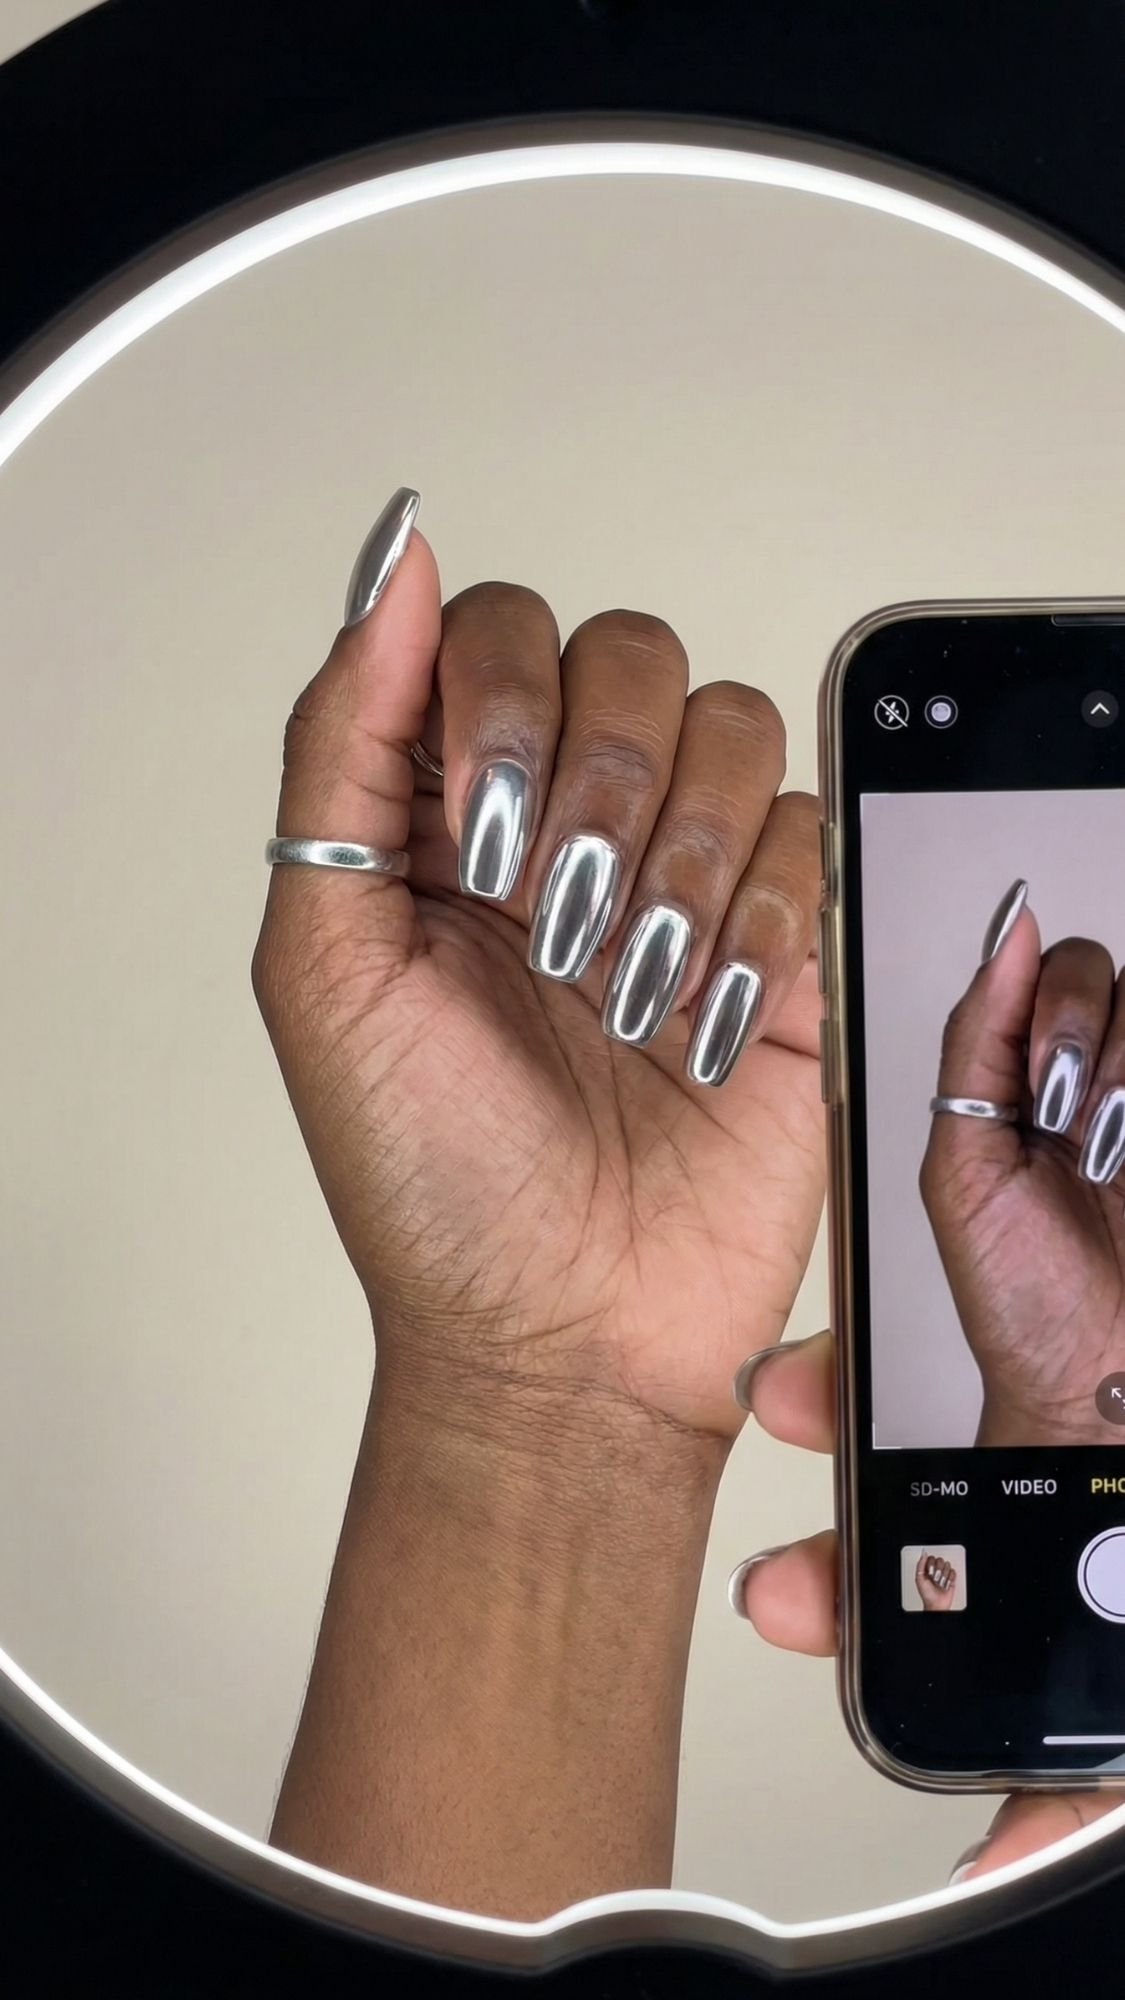
9. Frosted “Glazed Donut” (The Subtle Chrome)
The chrome trend isn’t going anywhere, but for the office, we have to dial it down from “mirror” to “pearl.” By using a soft white or “unicorn” chrome powder over a sheer nude base, you get a soft, pearlescent glow that looks like fine silk.
The secret pro tip? Do not use a sponge applicator for the powder. Use your clean ring finger to buff the powder into the nail. The warmth from your skin helps the chrome bond better, creating a smoother finish that won’t look grainy under fluorescent office lights. It’s the perfect “elevated neutral.”
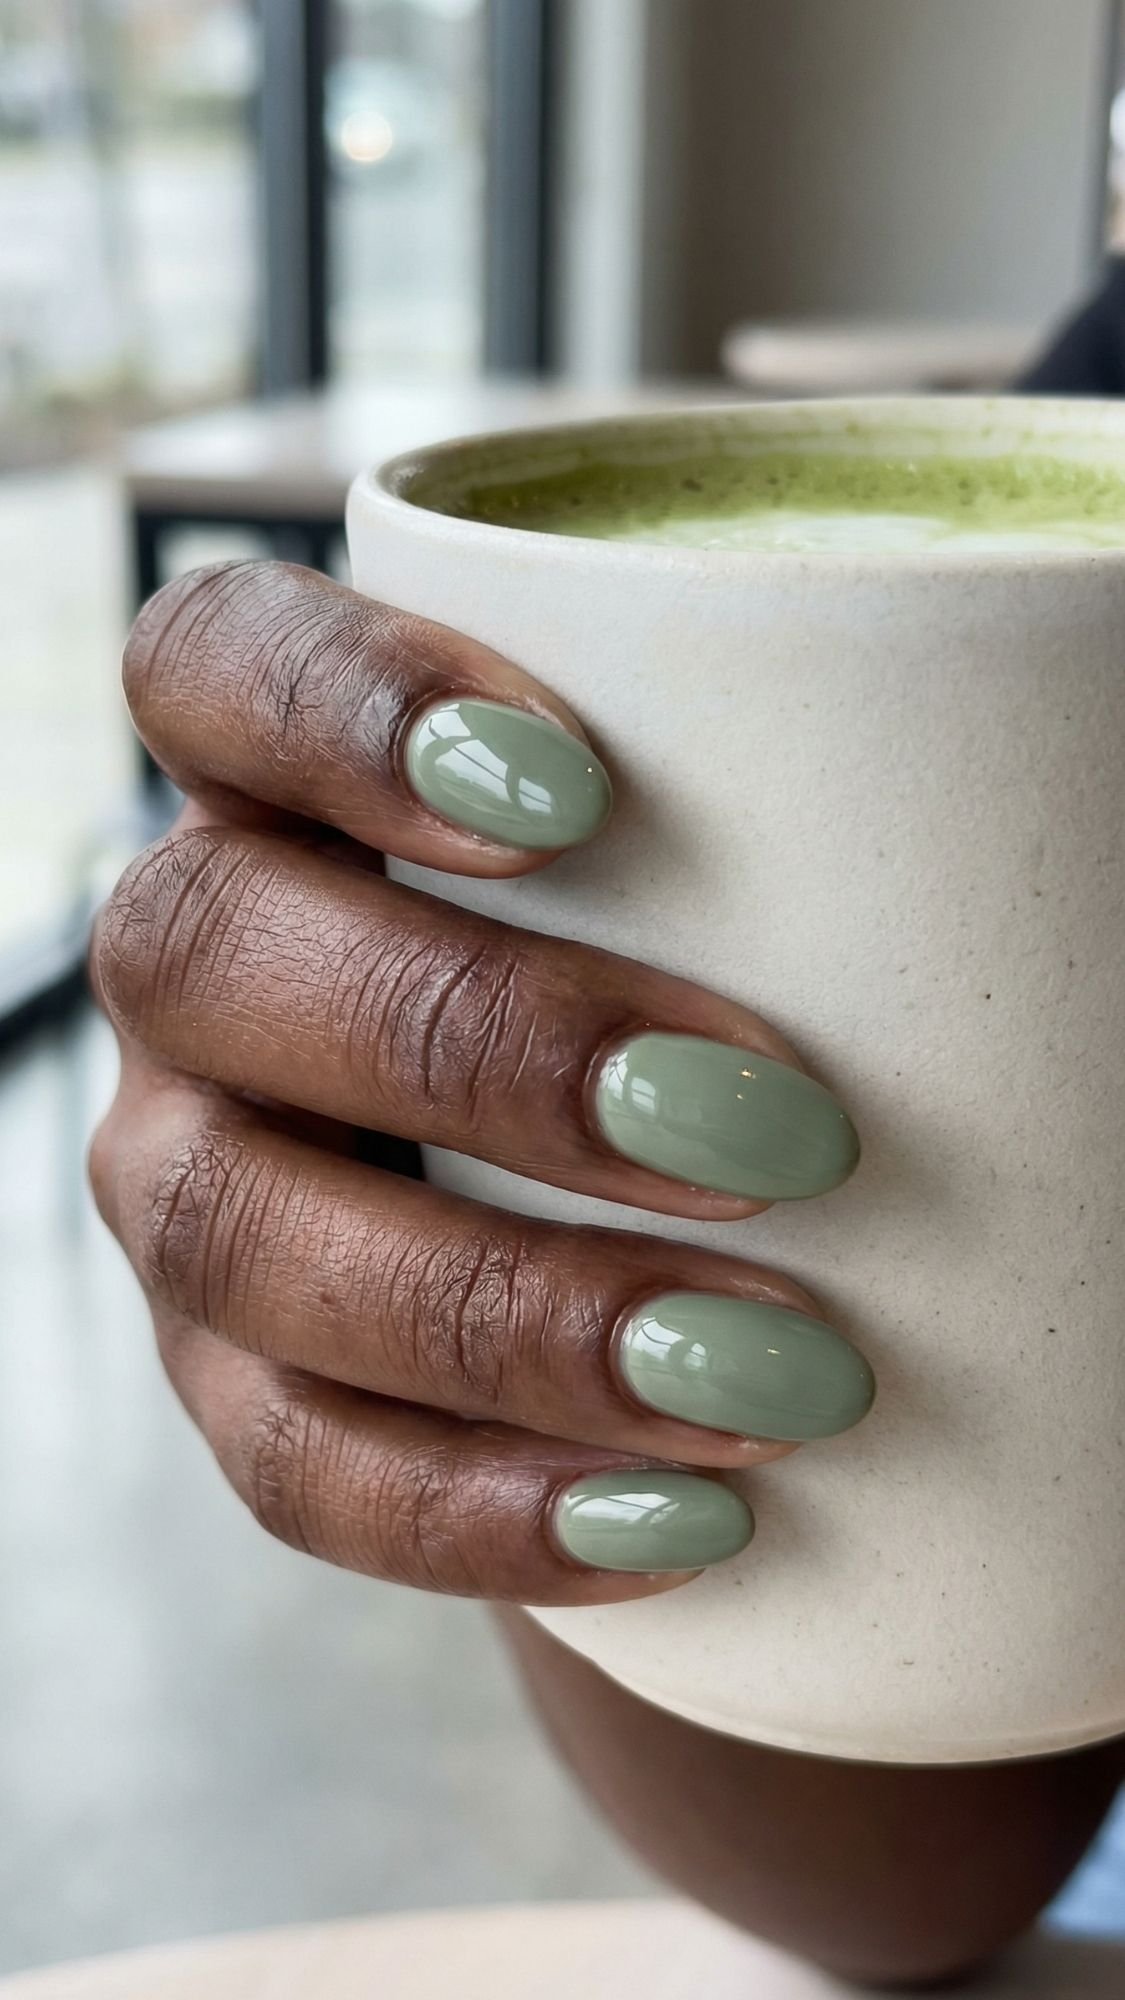
10. Muted Matcha Green
Green can be a polarizing choice for work, but the key is the saturation. A bright lime? Hard pass. A muted, creamy matcha or sage? Absolute yes. It acts as a modern neutral that feels fresh and unexpected.
I’ve found that this shade looks particularly stunning on deeper skin tones because the yellow undertones in the green pop against the warmth of the skin. It’s calm, professional, and looks amazing paired with a crisp navy or charcoal grey suit. Keep the shape short and rounded to maintain that “clean” look.
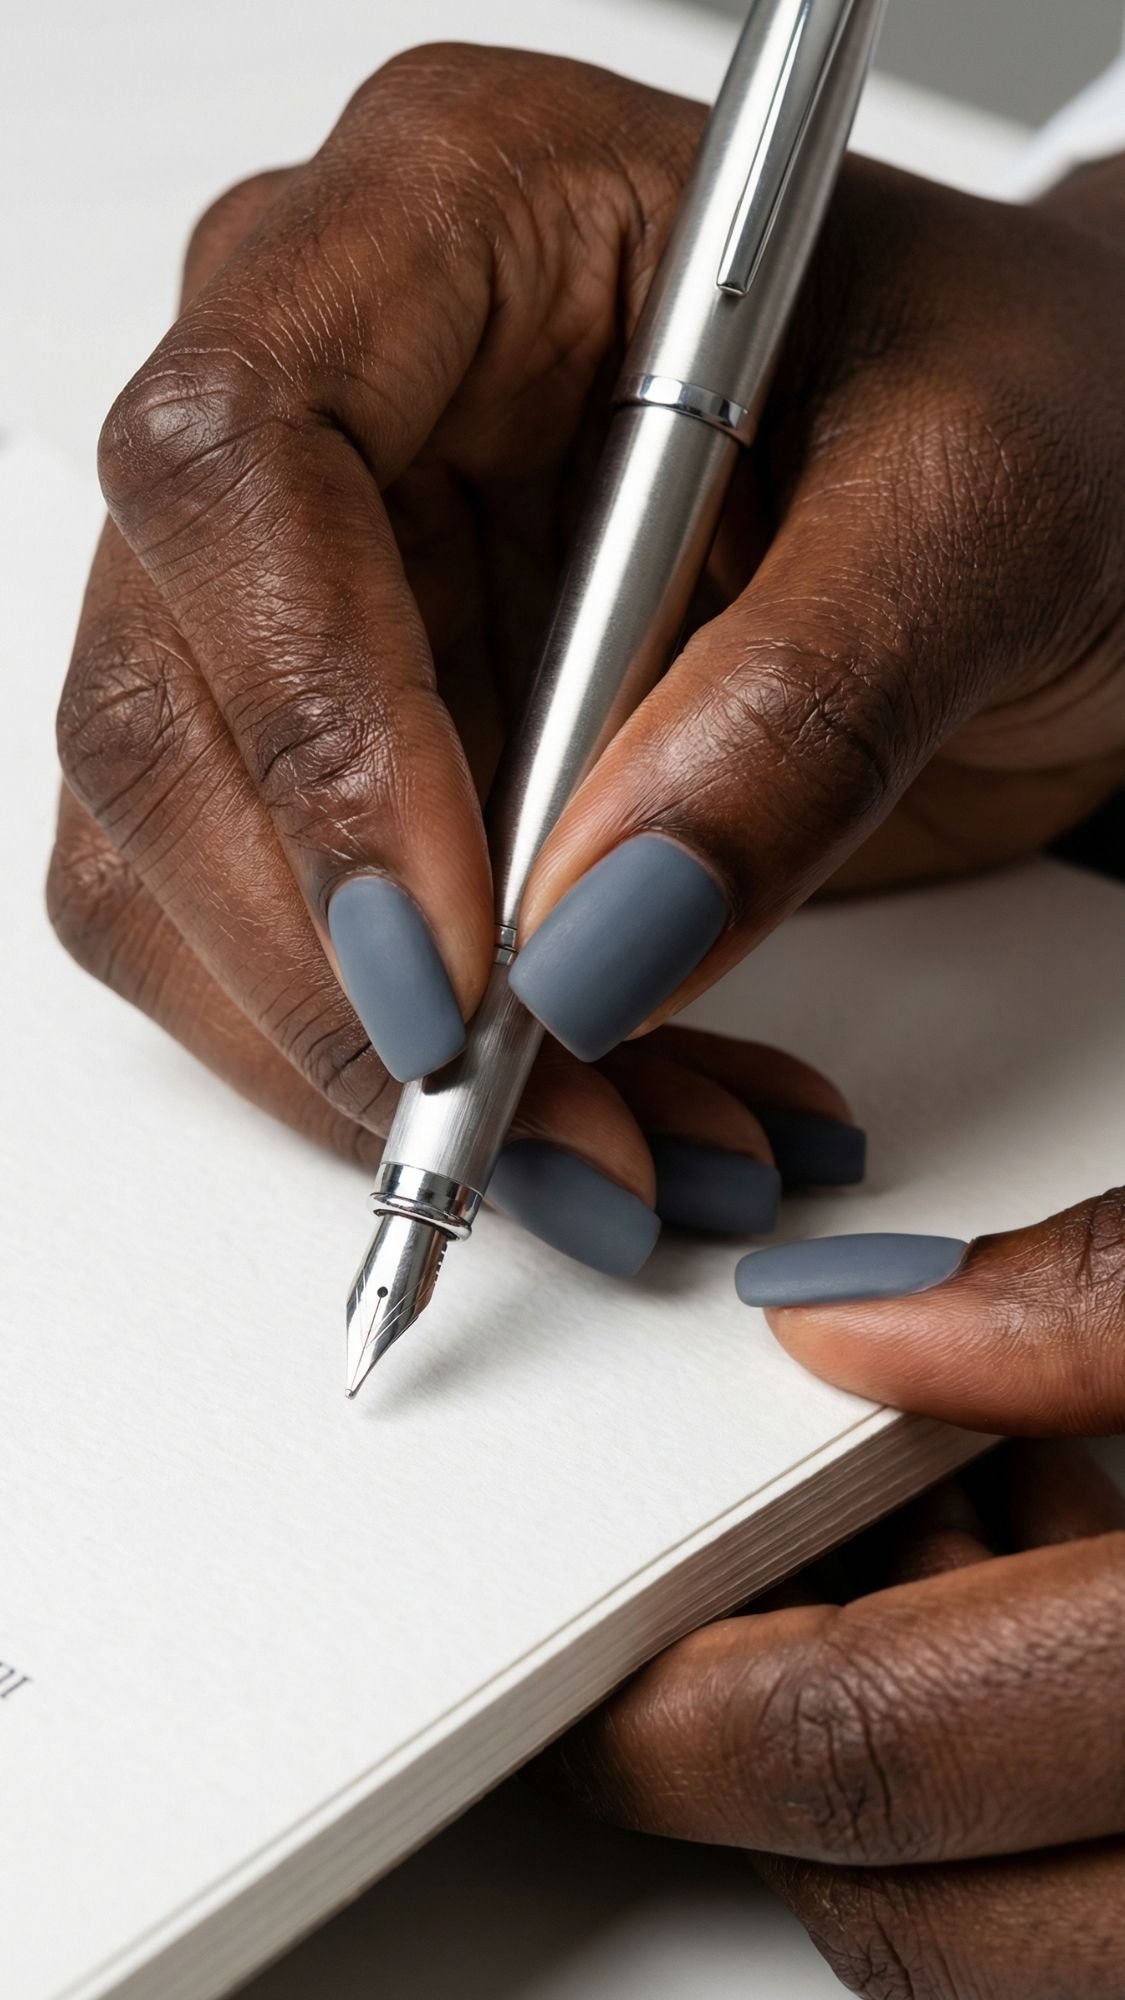
11. Slate Grey Matte
Grey is the ultimate power color. It’s serious, moody, and commands respect. When you take a slate grey—specifically one with a slight blue undertone—and add a matte top coat, it looks like architectural stone.
The mistake most people make with matte grey is picking a shade that is too light, which can make your hands look a bit “cadaverous.” Go for a medium-to-dark slate. It provides a beautiful contrast and looks very “architectural.” Just remember my tip from earlier: keep an alcohol wipe handy to keep that matte finish looking crisp and clean!
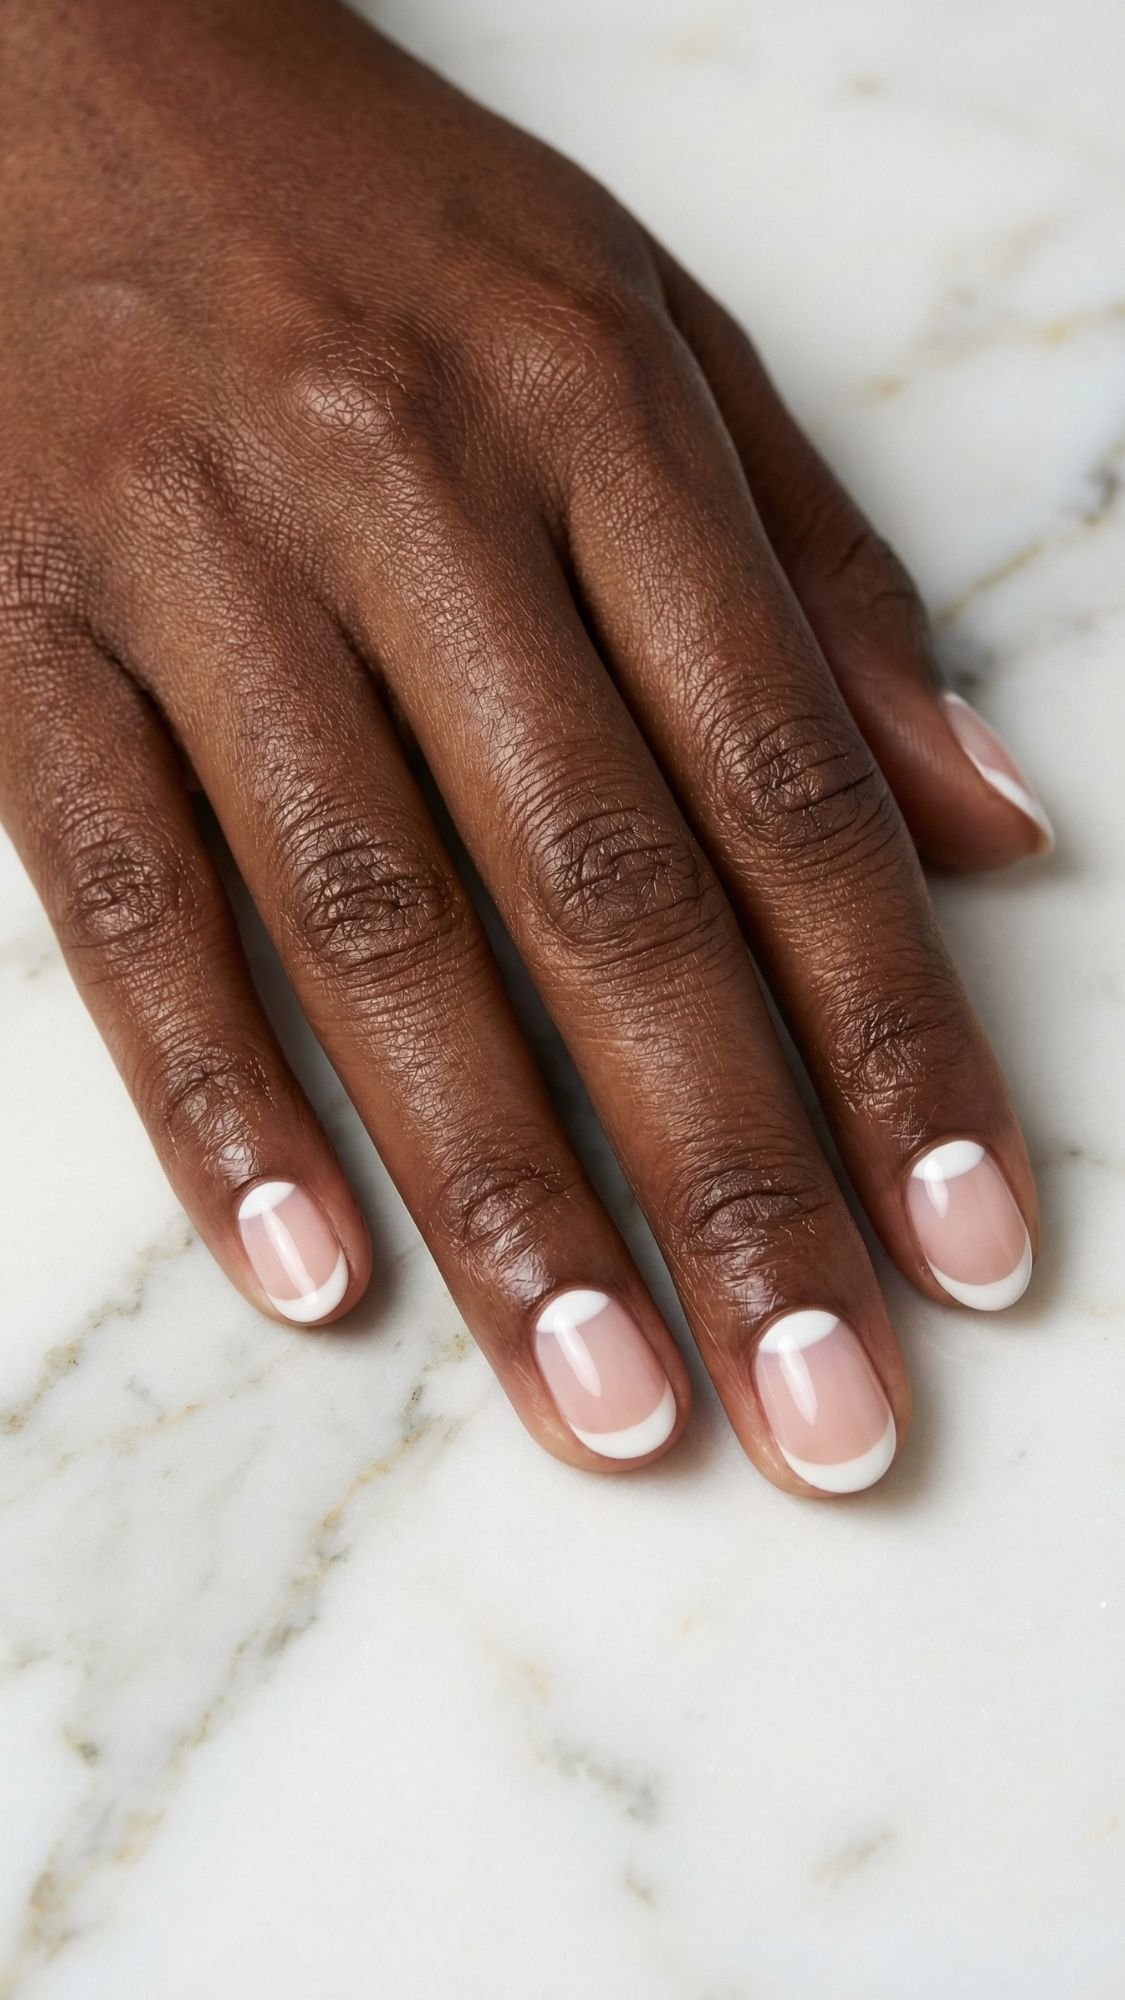
12. Half-Moon Manicure
This is a total “pro” hack for anyone who hates the look of nail growth. By leaving the “moon” (the little crescent at the base of your nail) bare or painted a very sheer color, the grow-out line becomes almost invisible.
It’s a vintage look that feels incredibly modern when done in a “high-contrast” way, like a sheer pink base with a crisp white moon. It shows you have an eye for detail and a bit of a creative side, but it’s still subtle enough for the most traditional workplace. Plus, it’s a great conversation starter.
We are in the home stretch of the designs! These last five are for the days when you want to feel a bit more “editorial” without getting a call from HR.
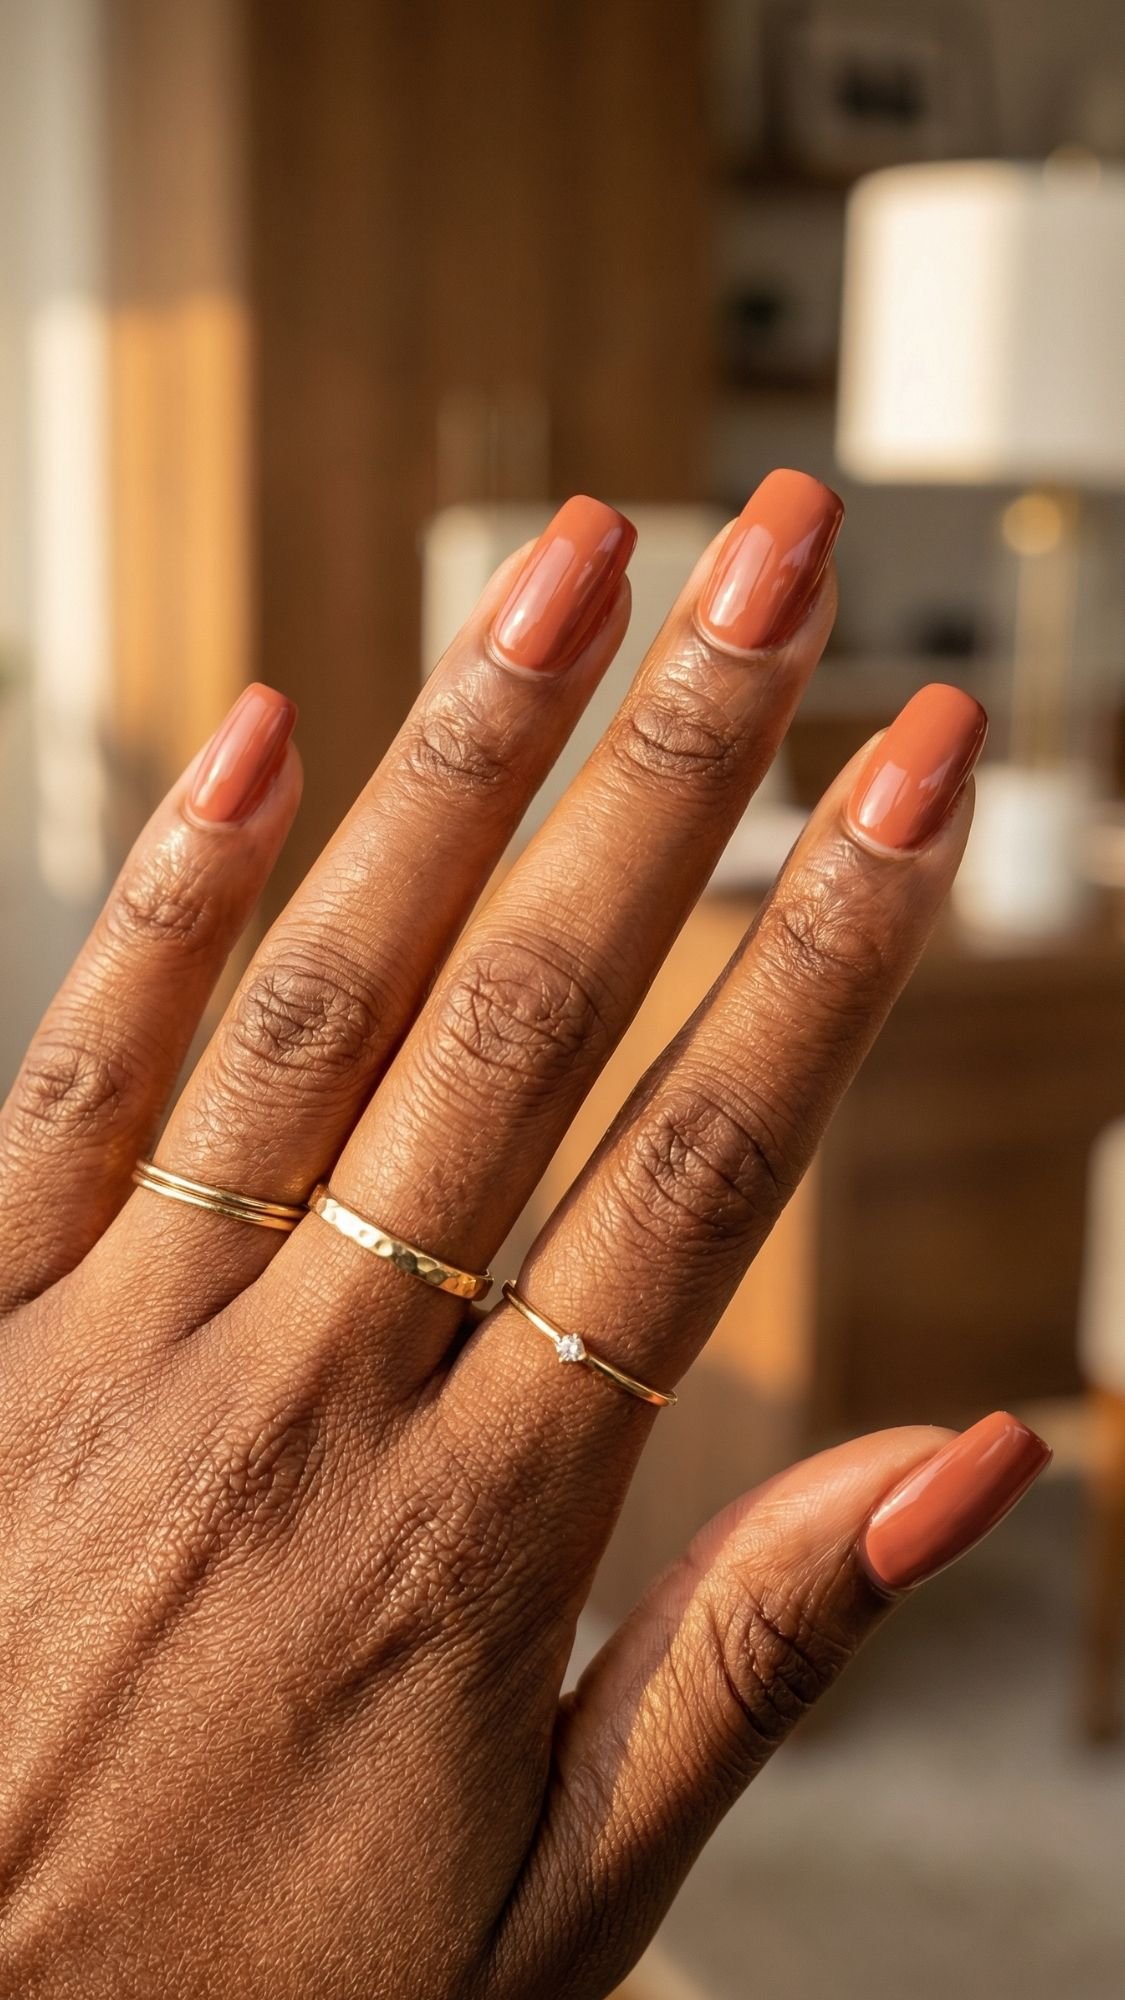
13. Terracotta Cream (The Warm Neutral)
For my ladies with warmer skin tones, terracotta is that “secret weapon” color. It’s an earthy, burnt-orange-meets-brown that feels incredibly grounded. What I’ve noticed over the years is that people shy away from orange at work, but terracotta isn’t “loud.” It’s basically the fall version of a nude.
The texture should be a thick, opaque cream that glides on like melted butter. The mistake most people make is choosing a shade that’s too “clay-like” and dry. Look for one with a high-shine finish. It looks particularly stunning against gold jewelry and makes your hands look warm and healthy.

14. Rose Gold Foil Flecks
Think of this as “nail jewelry.” Instead of chunky glitter or rhinestones that can snag on your knit sweaters, we use tiny, flat flecks of rose gold foil. It is the peak of minimalist sophistication.
The pro hack here? Don’t overdo it. Just a few tiny specks at the base of a nude nail is all you need. Use a toothpick to place the foil while your base color is still slightly tacky, then seal it with two thin coats of top coat. This ensures the surface is completely smooth. Nobody wants a “crunchy” manicure, right? 🙂
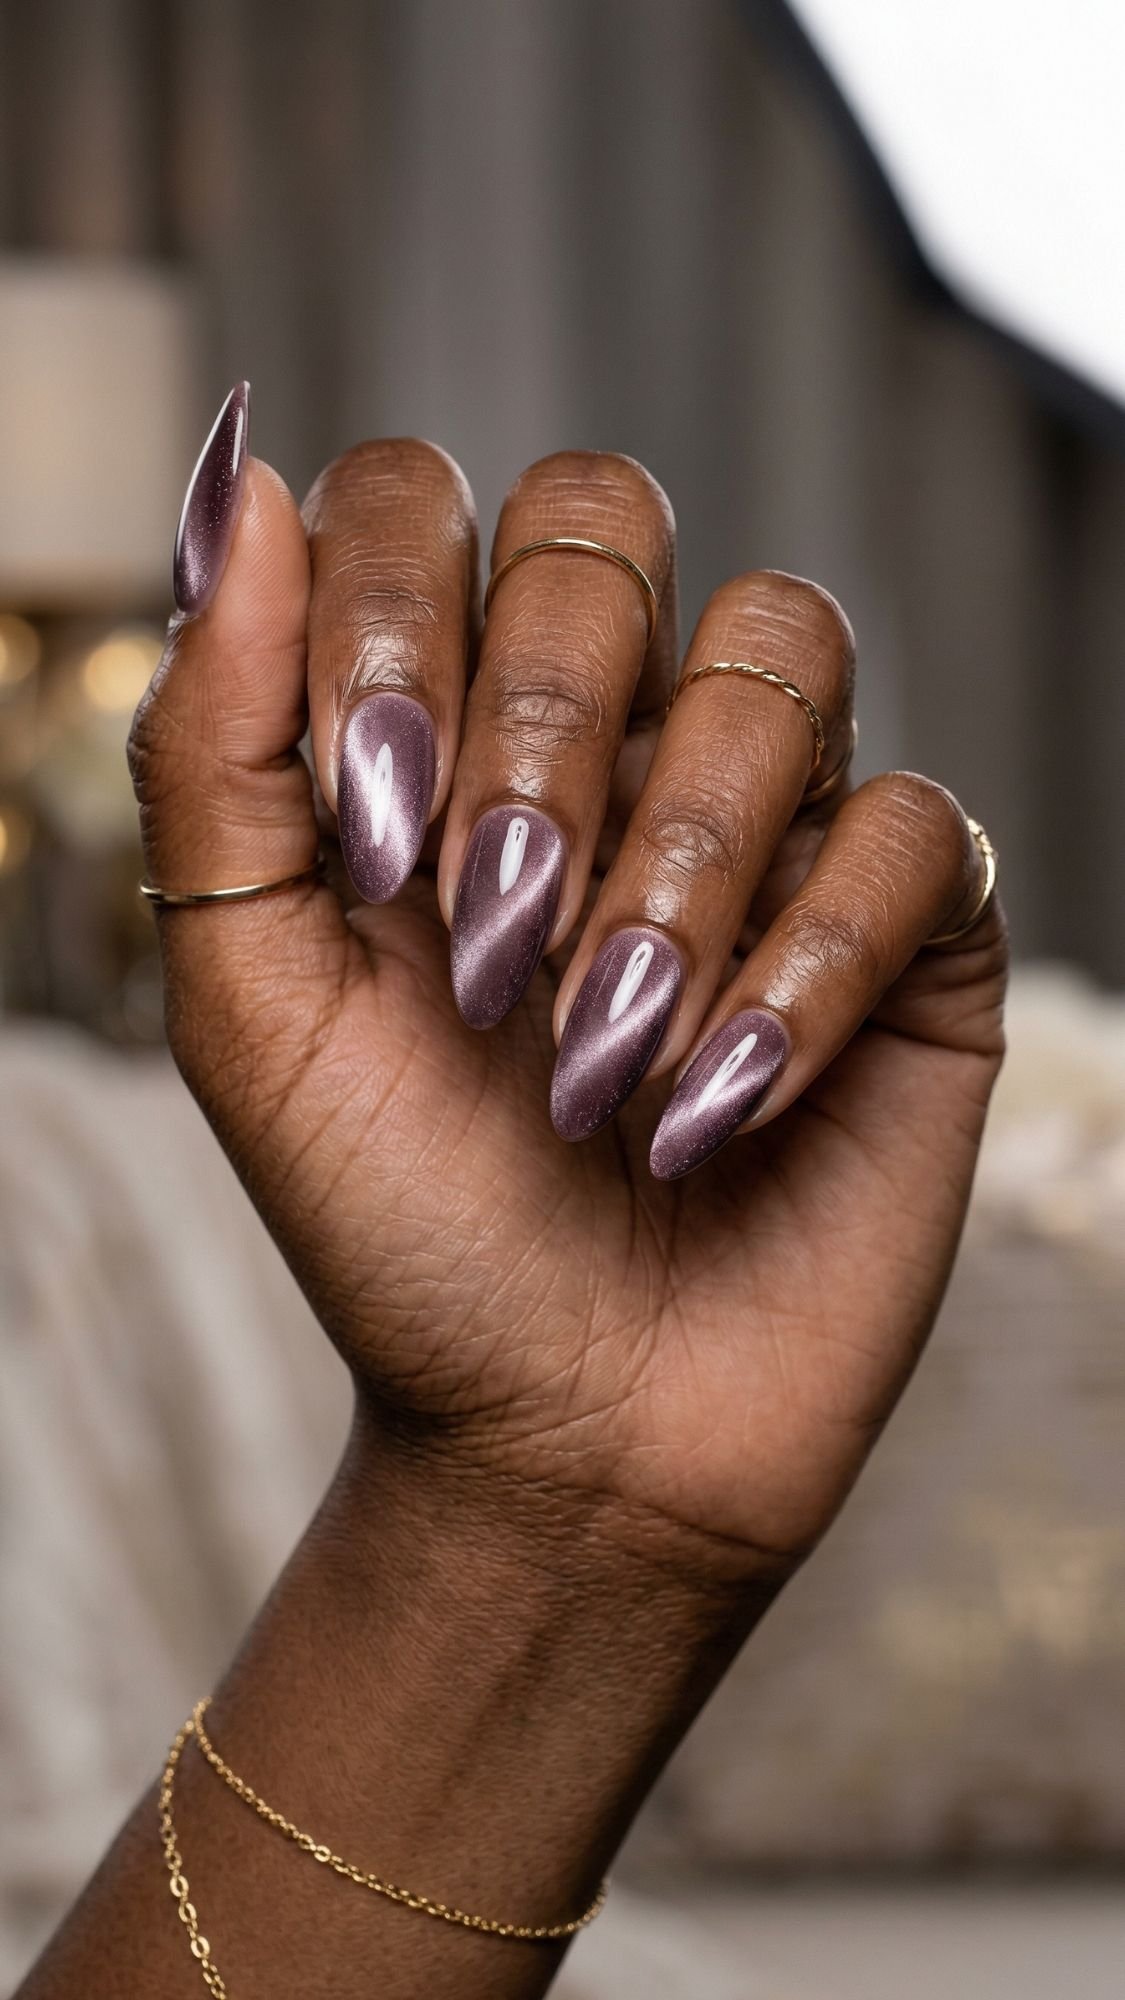
15. The “Velvet” Mauve
Velvet nails are a total mood. They use magnetic polish to create a multidimensional shimmer that looks like actual fabric. In a soft mauve or taupe, it’s completely office-appropriate but has a “hidden” depth that reveals itself when you move your hands.
The mistake most people make is moving the magnet too much. To get that soft “velvet” look rather than a sharp “cat-eye” line, hold the magnet under your finger while you apply the top coat. This pulls the metallic particles down evenly, creating a soft, hazy glow. It’s a literal “conversation starter” at the water cooler.
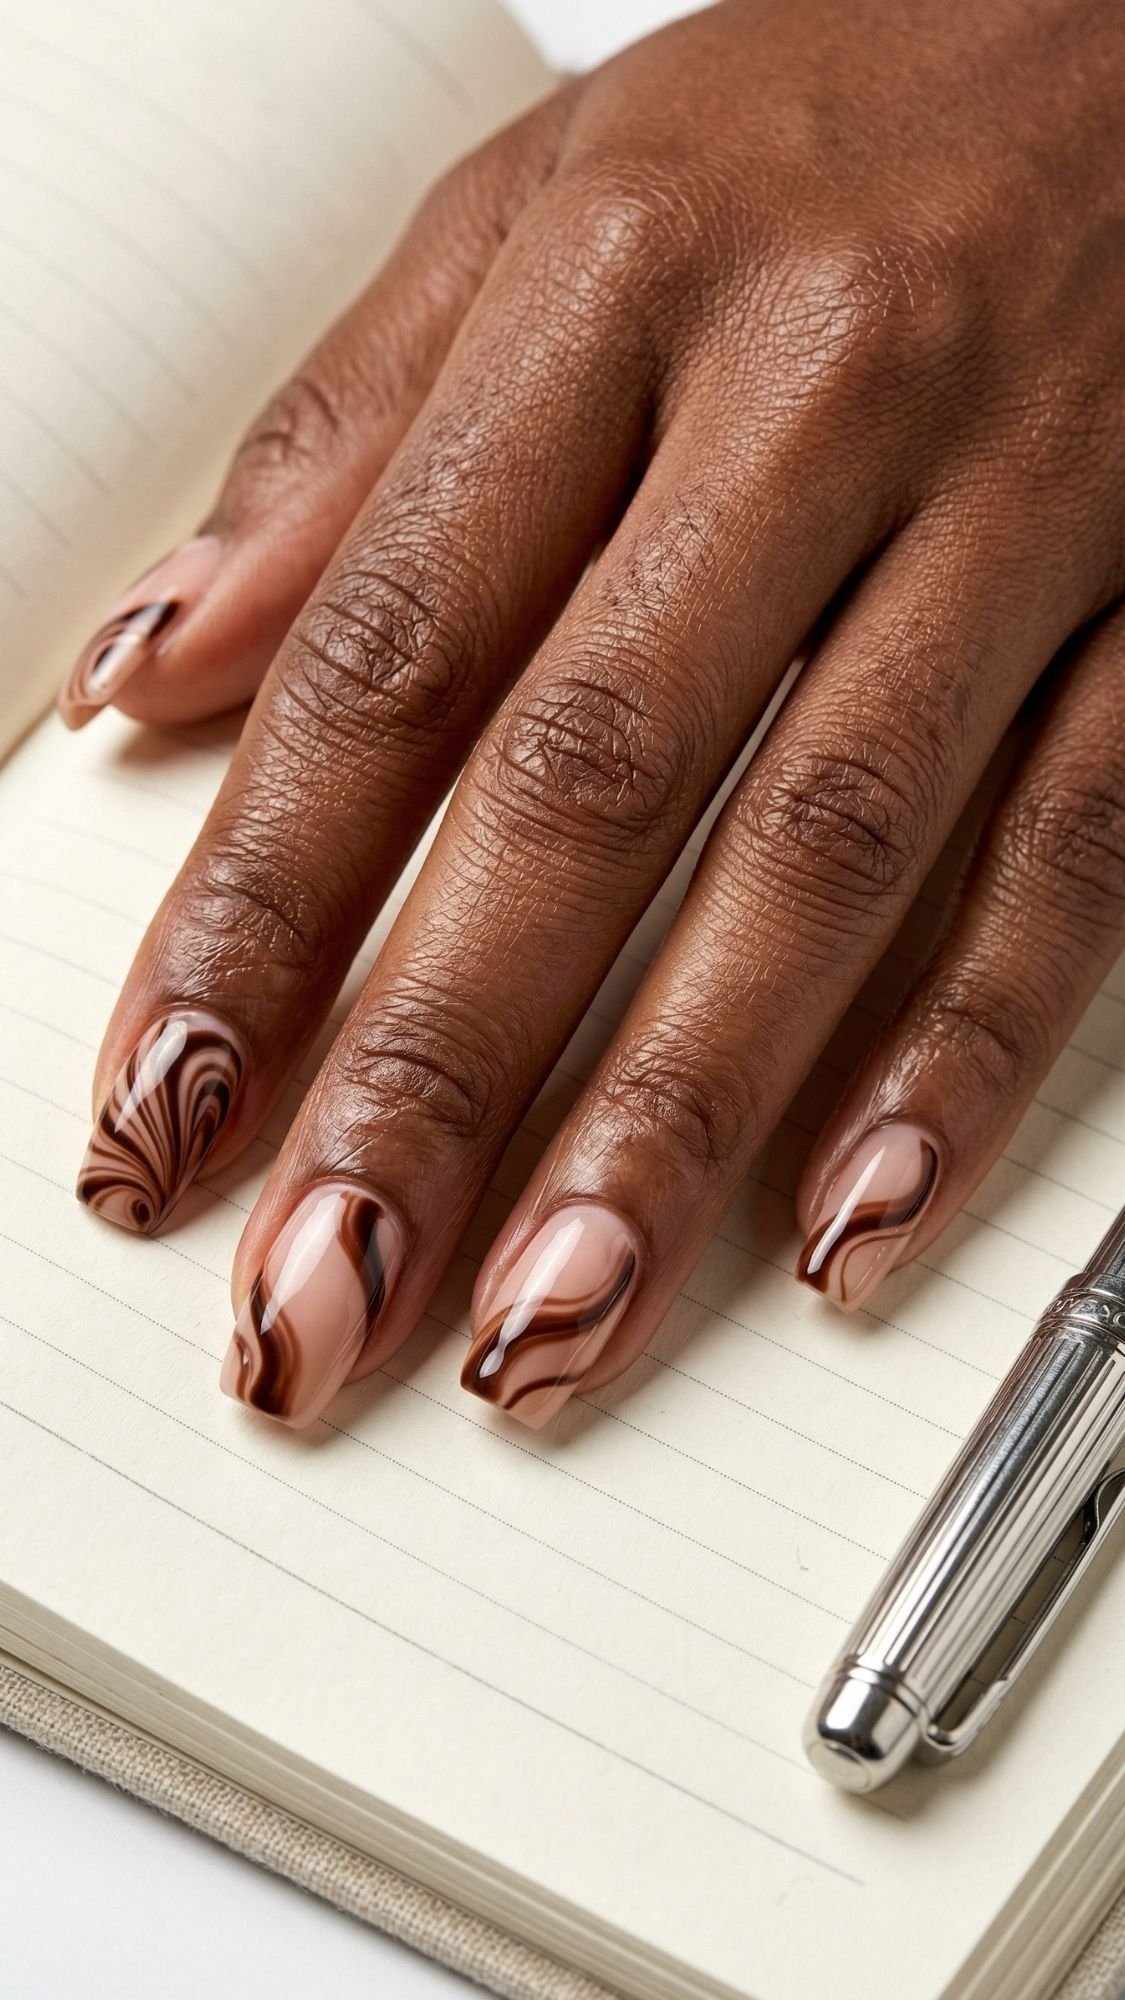
16. Mocha Swirls (Negative Space Art)
If you want art but need to keep it low-key, negative space is the way to go. This design uses your natural nail (or a very sheer base) with organic, wavy swirls of mocha brown. It looks like a piece of modern, minimalist art.
The key to this looking “chic” rather than “sloppy” is the thickness of the lines. You want them thin and purposeful. Ever wondered how pros get those perfect curves? The secret is a long-hair striping brush and very light pressure. Let the brush do the work for you. It’s subtle, creative, and looks great with a latte in hand.
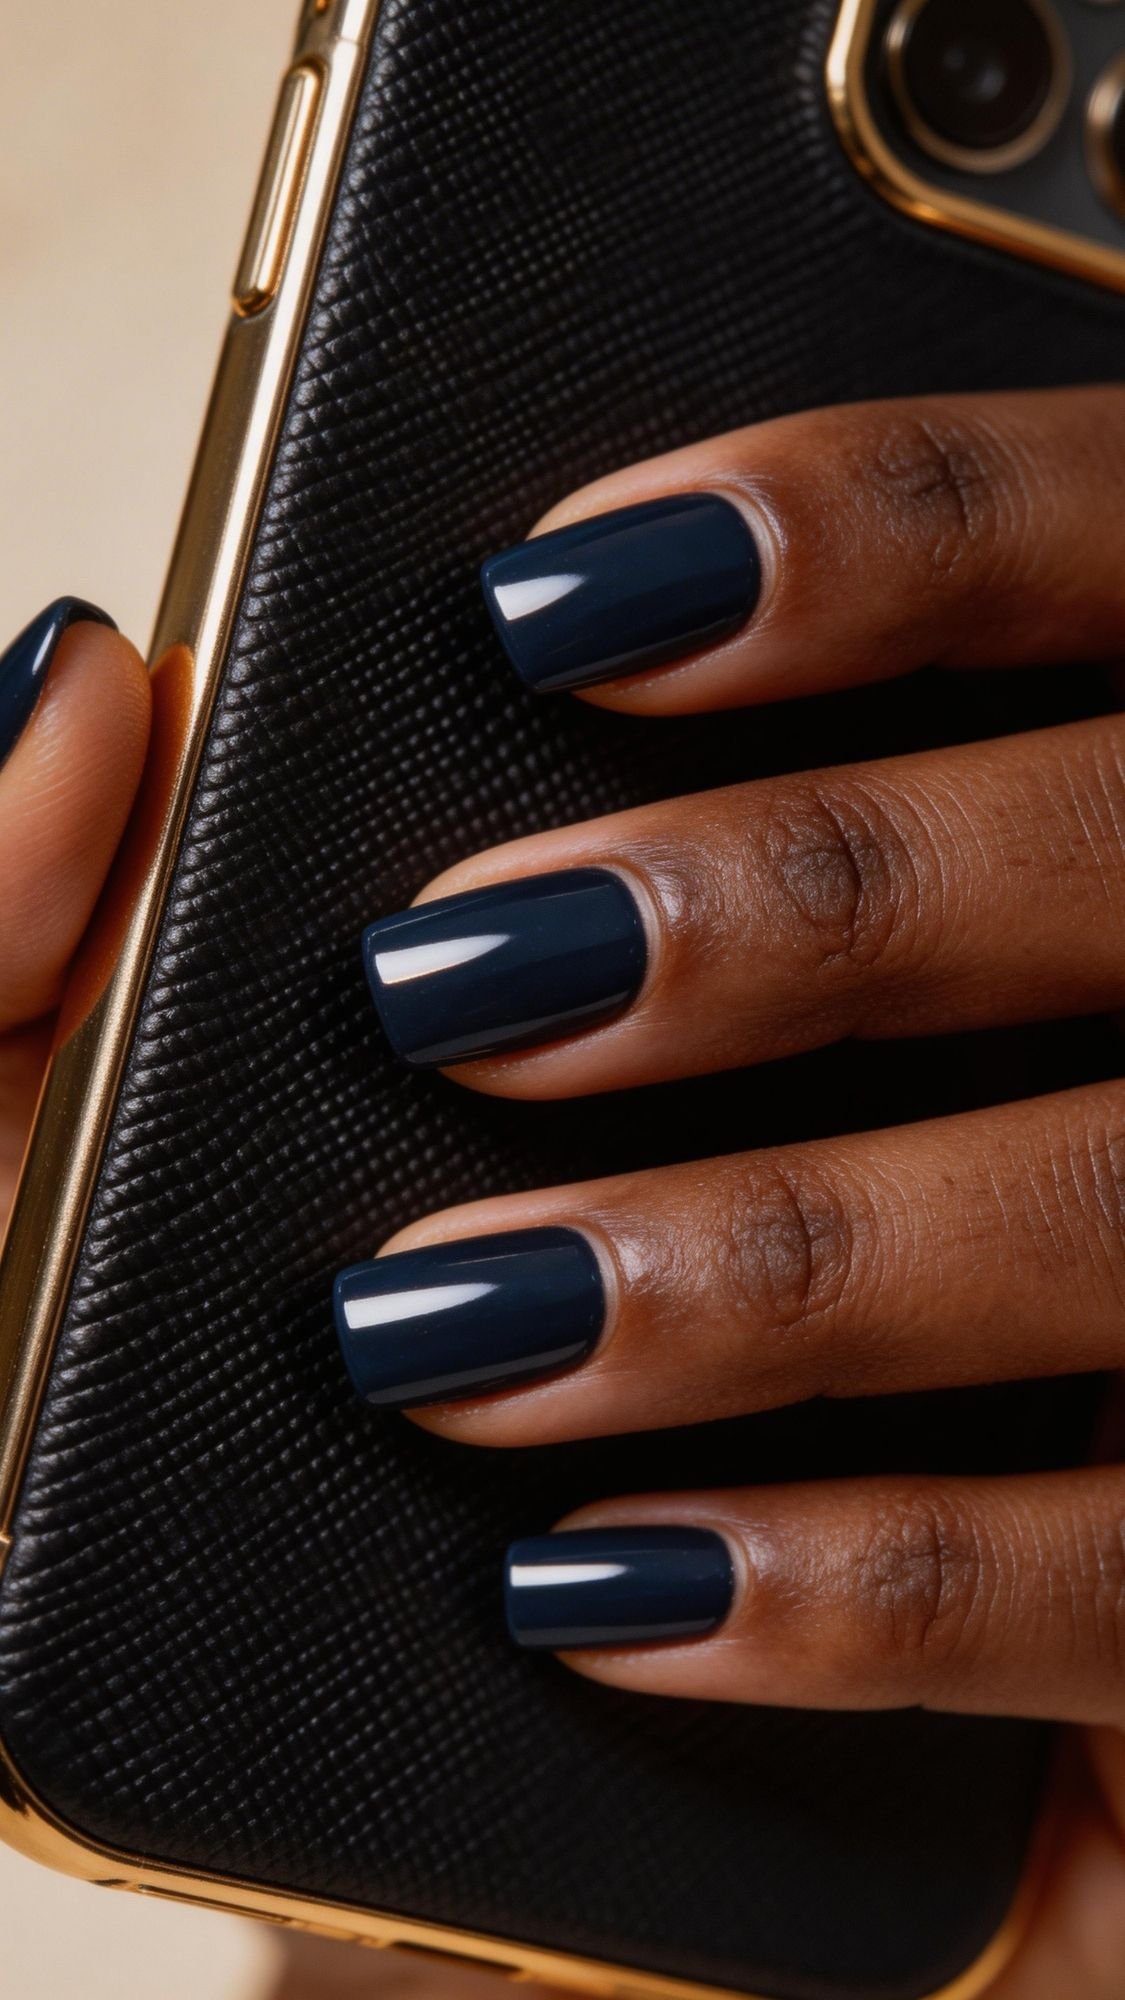
17. Deep Navy (The New Black)
Black nails can sometimes feel a bit “harsh” or “edgy” for conservative environments, but deep navy? Navy is the pinnacle of executive style. It’s the “New Black.”
IMO, dark colors look best on short, squared-off nails. It keeps the look crisp and modern. The secret to a long-lasting navy mani is the “cap.” Dark colors show chips immediately, so make sure you run your top coat brush along the very edge of your nail. This “seals” the color and buys you an extra few days of wear.
Alright, we’ve got the aesthetic down. Now let’s talk about the actual “work.” Because let’s be real: a chic design on a poorly prepped nail is just a waste of a good Sunday afternoon. If you want your mani to survive a week of typing, filing, and aggressive hand-washing, you need to treat the prep like it’s the main event.
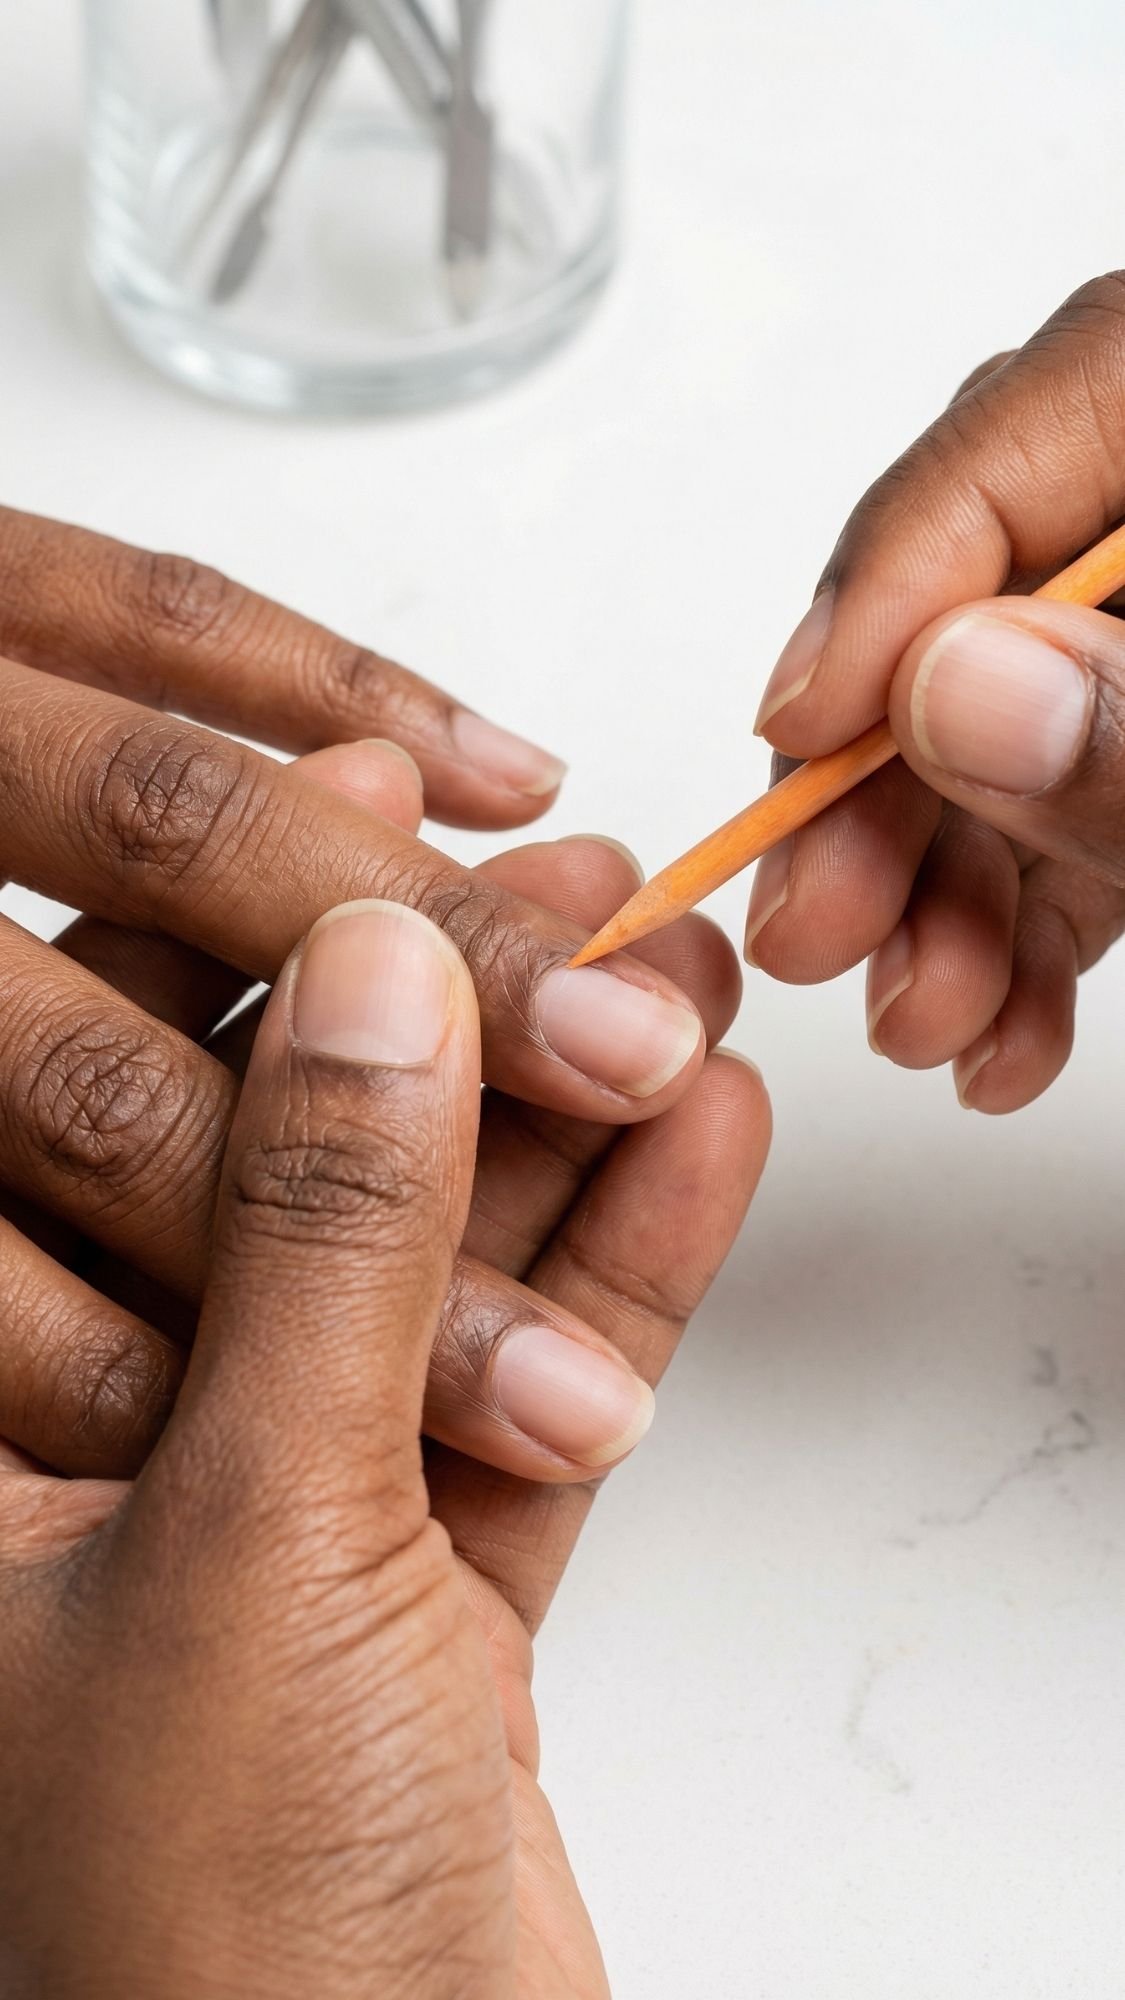
The Secret Sauce: Professional Nail Prep
The mistake most people make is thinking that polish “hides” bad nails. It actually magnifies them. What I’ve noticed over the years is that the best manicures in the world—the ones that look like they cost $200—always start with a clean canvas.
Key Takeaways for Prep:
- De-Gunk the Plate: Use a wooden stick to gently push back cuticles. Do not cut them unless you have a “hangnail” (dead skin sticking up). Cutting live tissue leads to redness and inflammation, which is the opposite of chic.
- The Alcohol Wipe: This is the most forgotten step. Wipe every nail with 90% alcohol right before the base coat. Any oil from your skin will cause the polish to lift within 24 hours.
- Gentle Buffing: Use a high-grit buffer (240+) to just remove the shine from the nail. You aren’t filing it down, you’re just creating “teeth” for the polish to bite into.
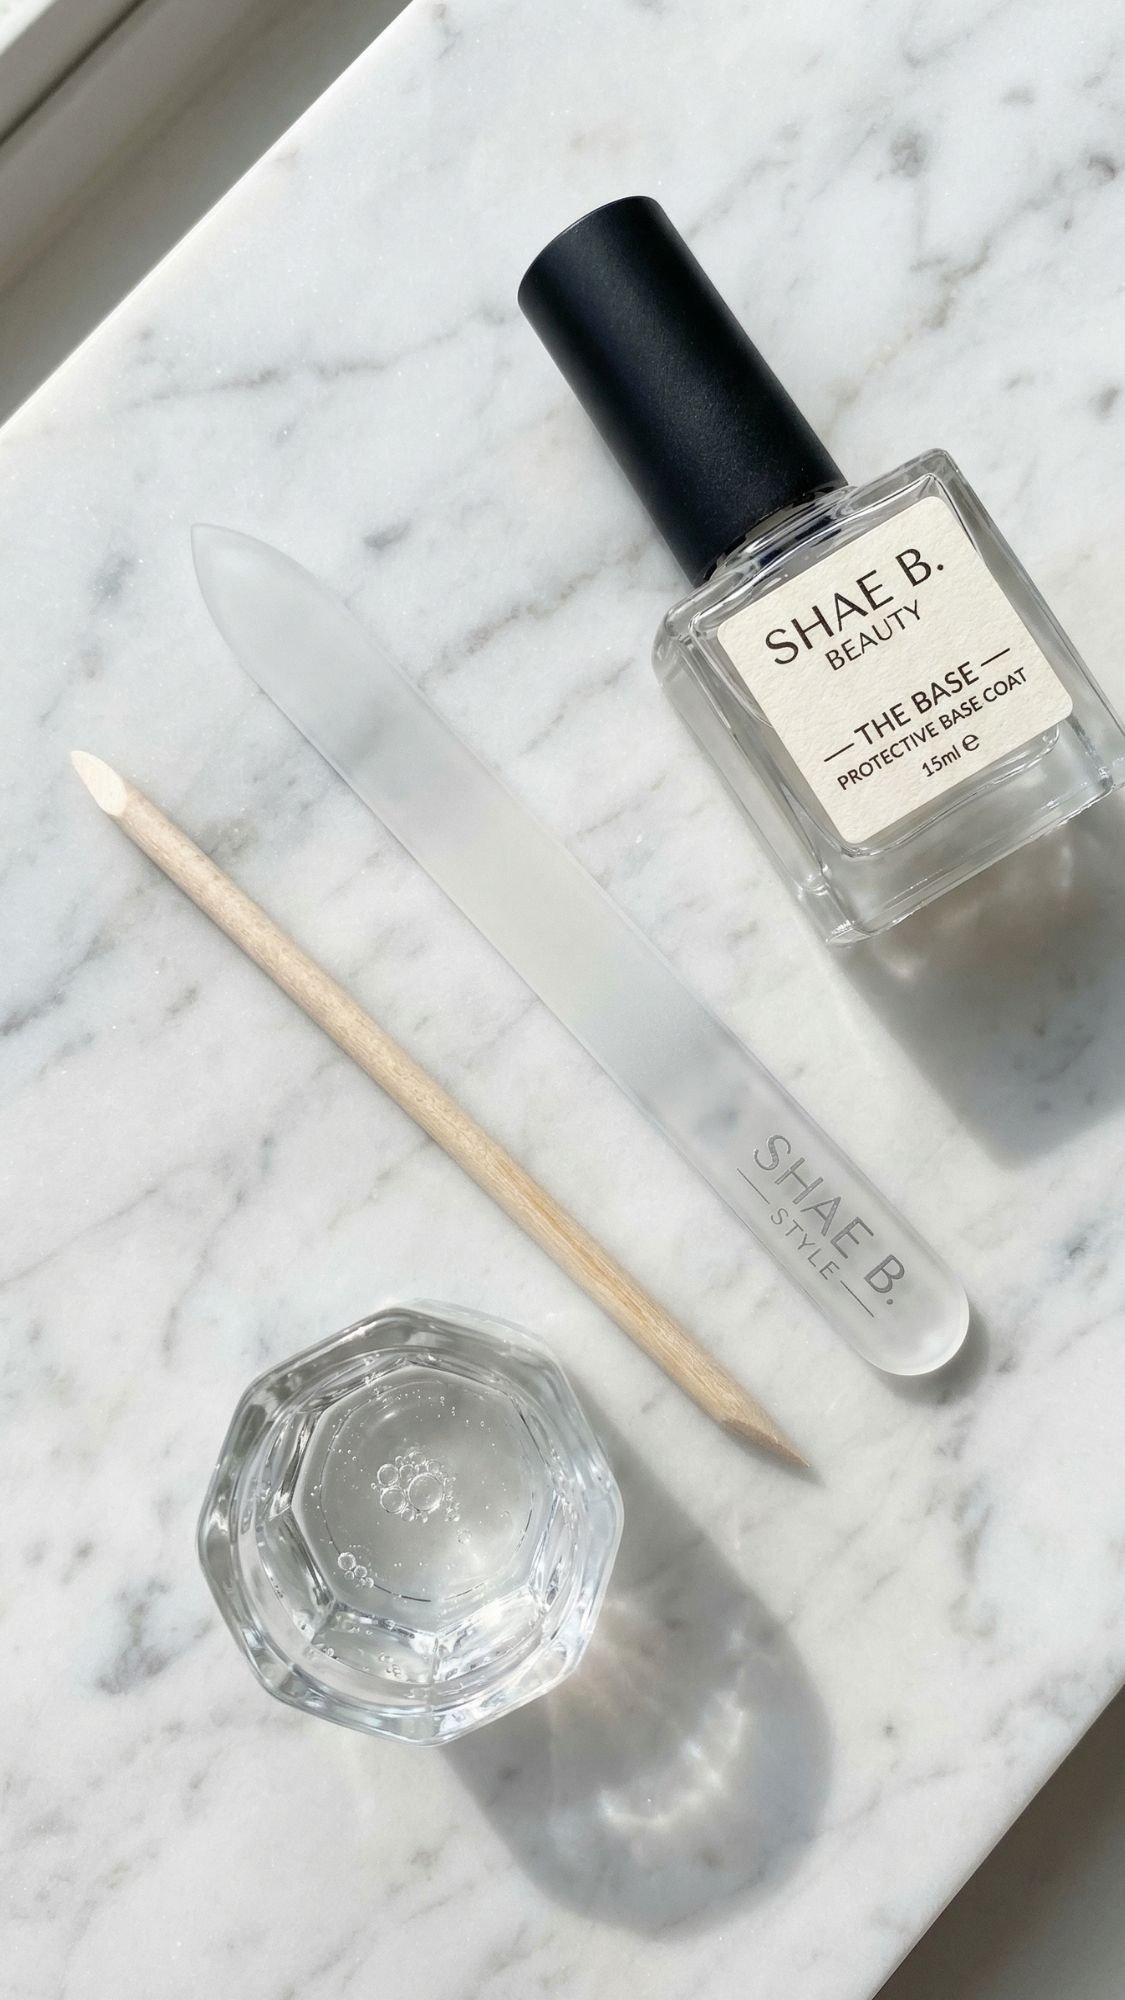
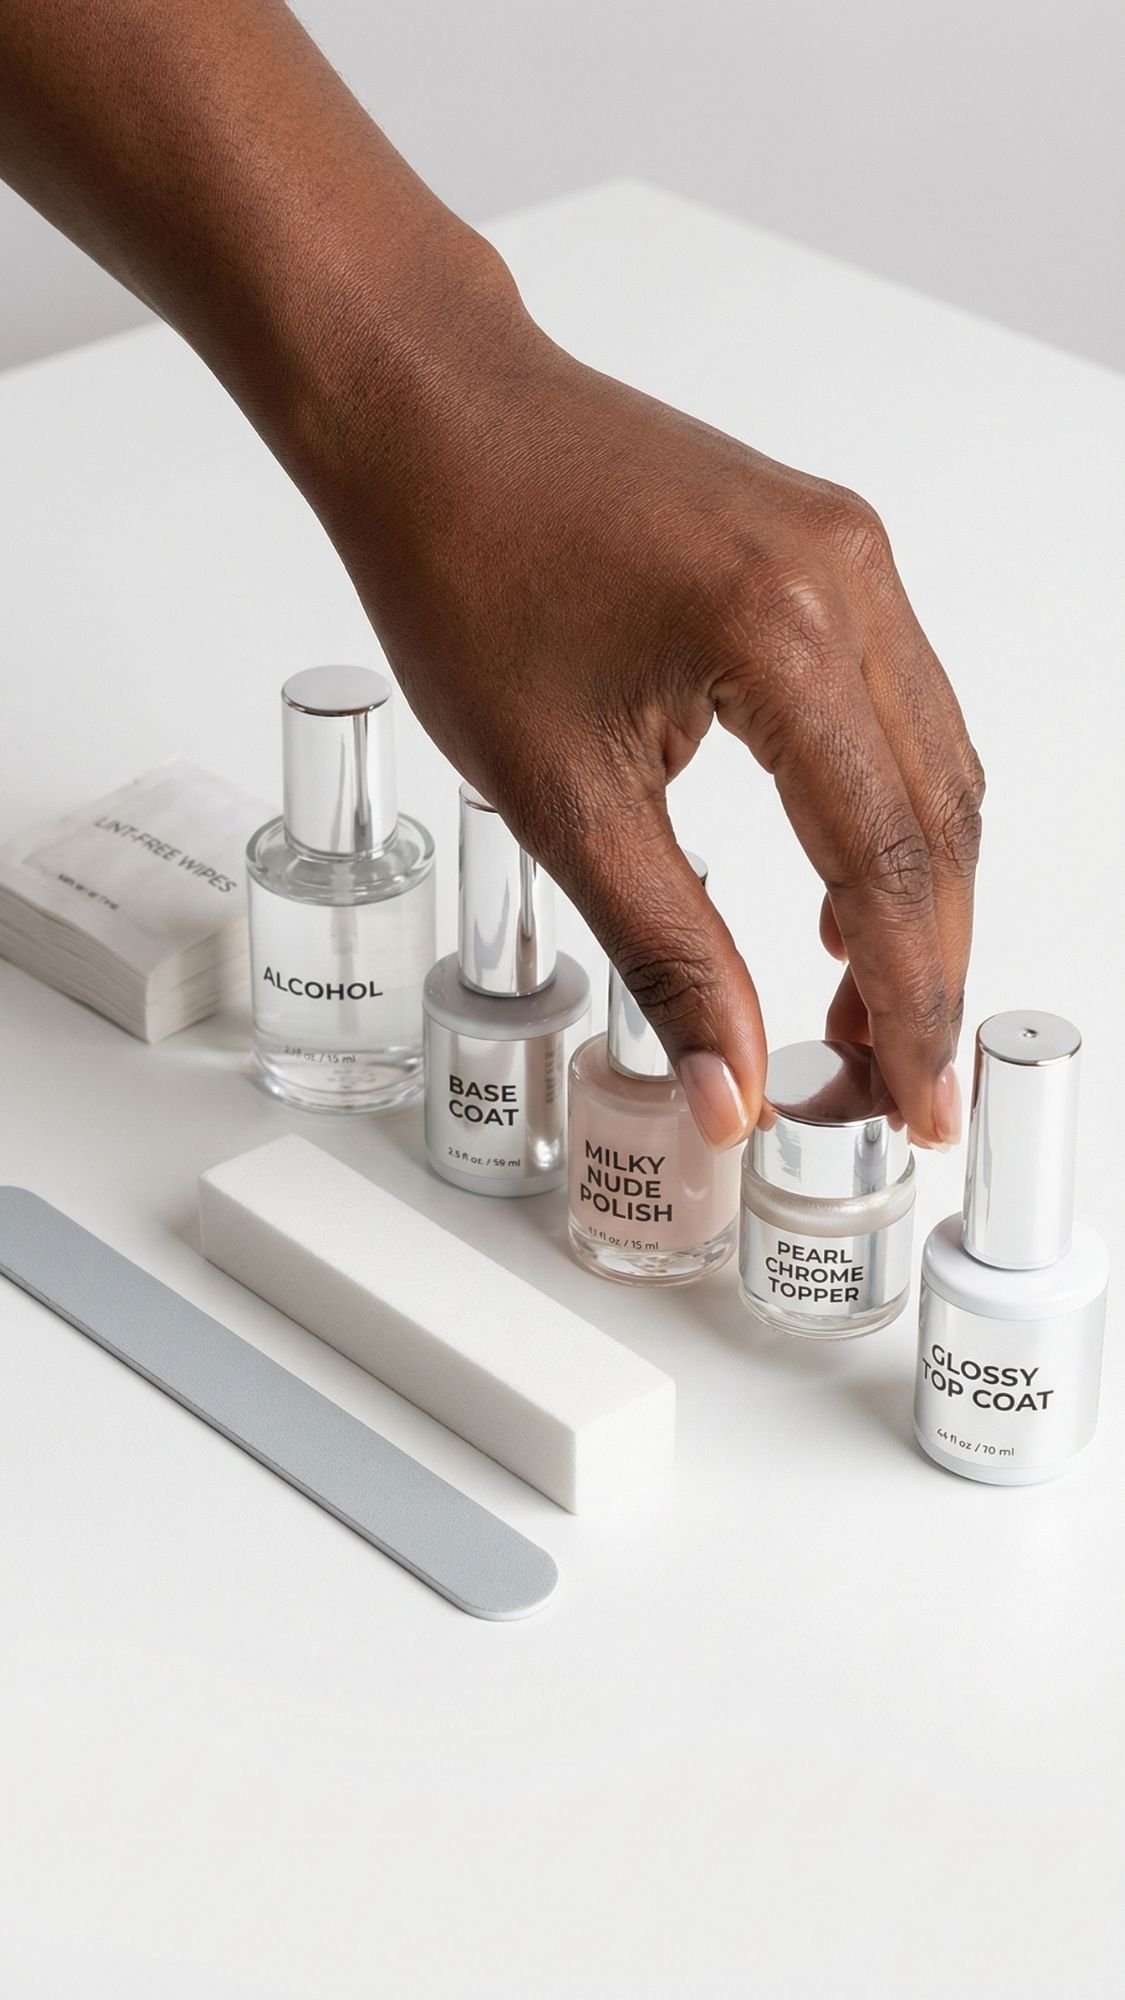
Tools of the Trade: What You Actually Need
Don’t get sucked into buying those 50-piece kits from Amazon. Most of it is filler. As an influencer who has tested hundreds of brands, here is my “no-fluff” list of essentials.
Must-Haves:
- Glass Nail File: Unlike emery boards, glass files seal the keratin layers together, preventing peeling and splitting.
- pH Bonder/Dehydrator: If you have “oily” nail beds (if your polish always peels in one piece), this is a non-negotiable.
- High-Quality Base Coat: Look for “Sticky” or “Rubber” bases. They act like double-sided tape for your color.
- 90% Isopropyl Alcohol: For cleansing and clean-up.
The Methods: How to Apply Like a Pro
Whether you are a regular polish loyalist or a gel-only girl, the technique is where the magic happens.
A) Regular Polish (The Express Lane)
The texture of your polish matters. If it feels thick or “gloppy,” it’s too old. Throw it out. Apply thin, even coats. The “Three-Stroke Rule” is a classic for a reason: one down the middle, one on each side.
- Pro Tip: Wait at least 2 minutes between coats. If the first coat is still “squishy,” the second coat will just drag it around and create streaks.
B) Press-On Strategy (The 10-Minute Miracle)
Sizing is everything. If you are between sizes, go smaller and file the edges of the press-on to fit your cuticle shape perfectly.
- The 45-Degree Angle: Don’t press them straight down. Slide the base of the nail under your cuticle at a 45-degree angle, then press down toward the tip. This creates a seamless “grown-from-the-root” look that won’t catch your hair.
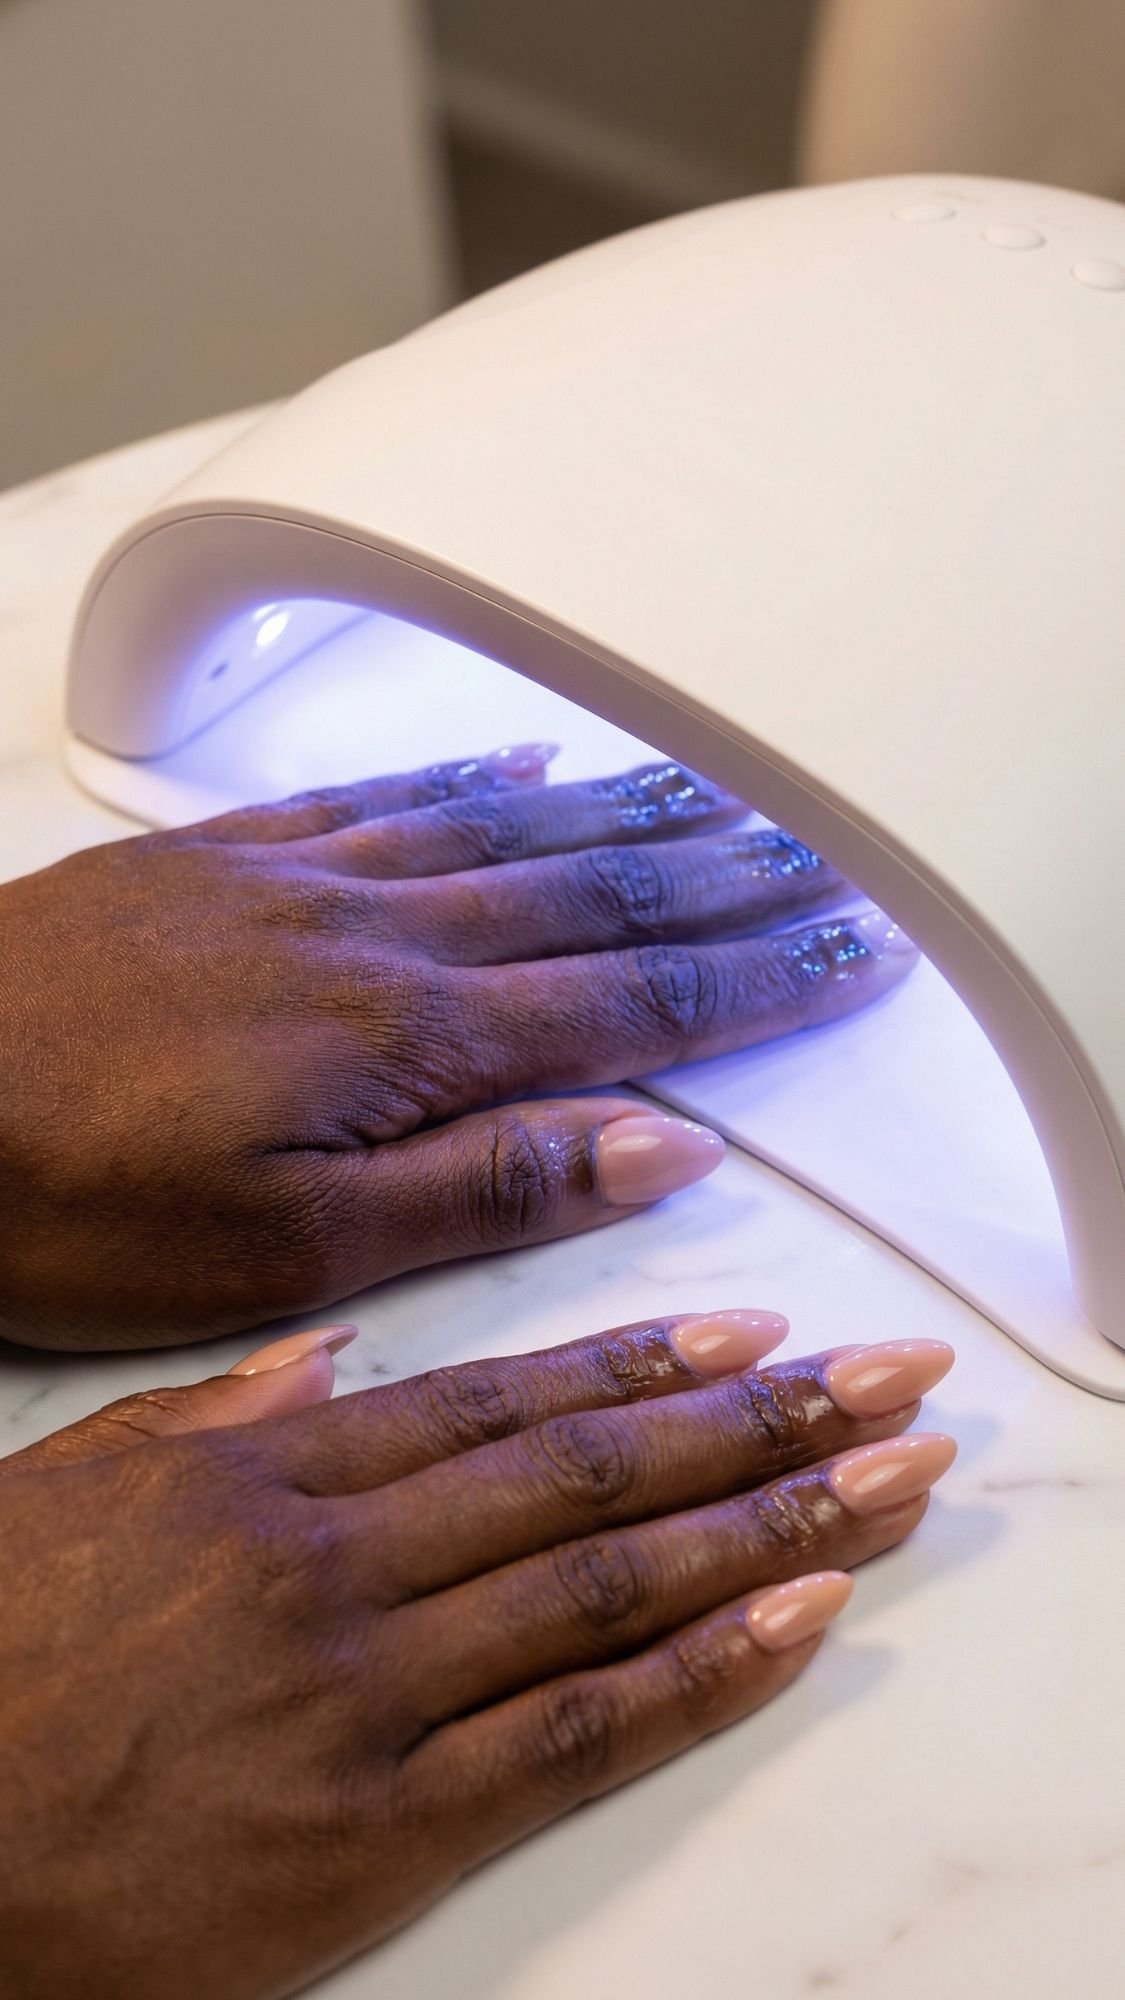
C) Gel With Lamp (The Executive Choice)
If you want 14 days of chip-free wear, this is the one.
- Safety Note: Avoid skin contact at all costs. If gel touches your skin and you cure it, you risk developing a permanent acrylate allergy. Use a clean-up brush dipped in alcohol to wipe the sidewalls before you put your hand in the lamp.
Now that you have the look, let’s make sure it actually lasts through your 9-to-5 and beyond. There is nothing less “chic” than a chipped nail during a handshake. I’ve lived through enough “nail emergencies” in the middle of fashion week to know that a little maintenance goes a long way.

The 7-Day Survival Guide
Most people think a manicure is “set it and forget it.” Wrong. If you want your nails to look salon-fresh on Friday, you have to put in about 30 seconds of work each day. IMO, the biggest enemy of your mani isn’t your keyboard; it’s your lifestyle habits.
Your Weekly Game Plan:
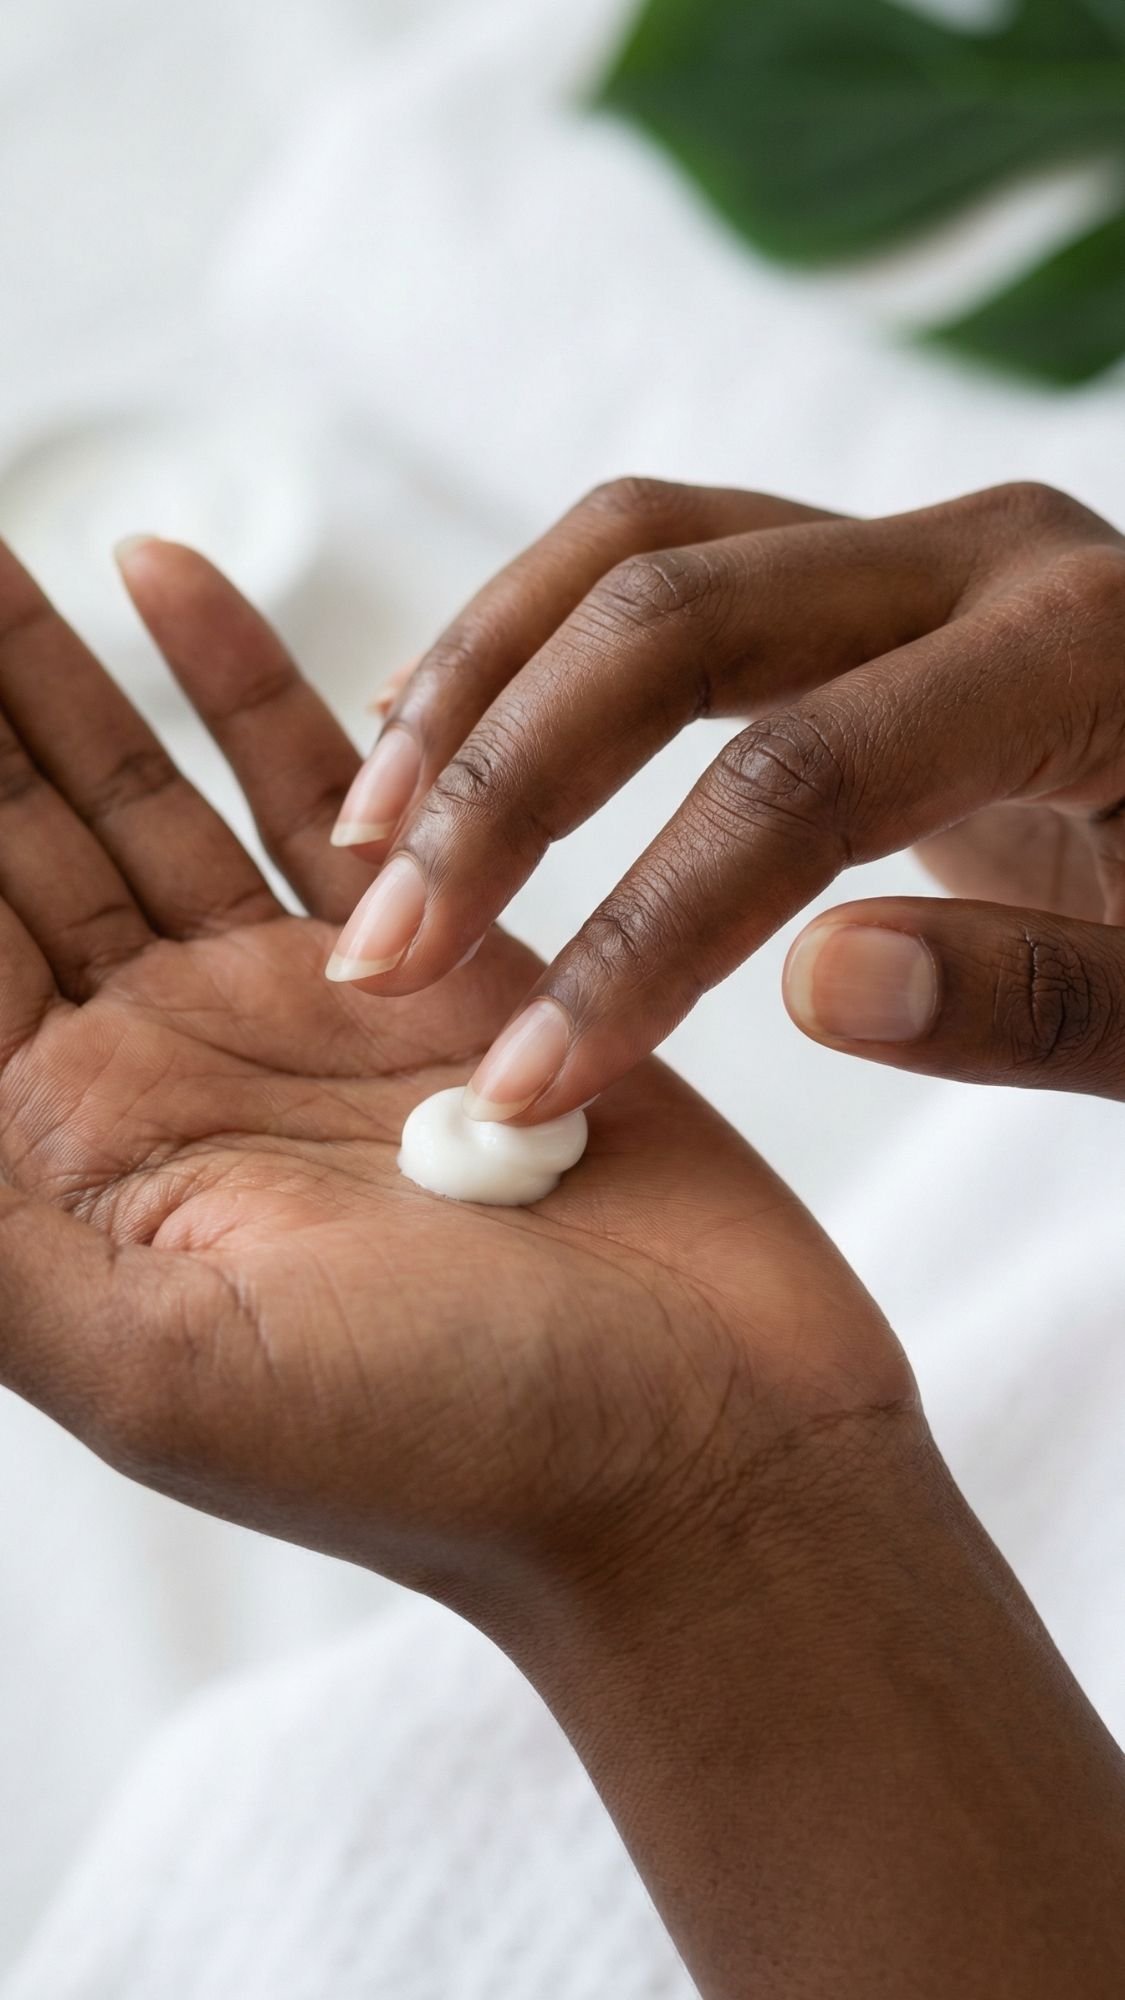
- Day 1-3: Focus on hydration. Apply cuticle oil every single night before bed. It keeps the polish flexible so it doesn’t crack when your nail bends.
- Day 4: Refresh the shine. Apply a very thin layer of high-gloss top coat. This fills in those microscopic scratches from your laptop and makes them look brand new.
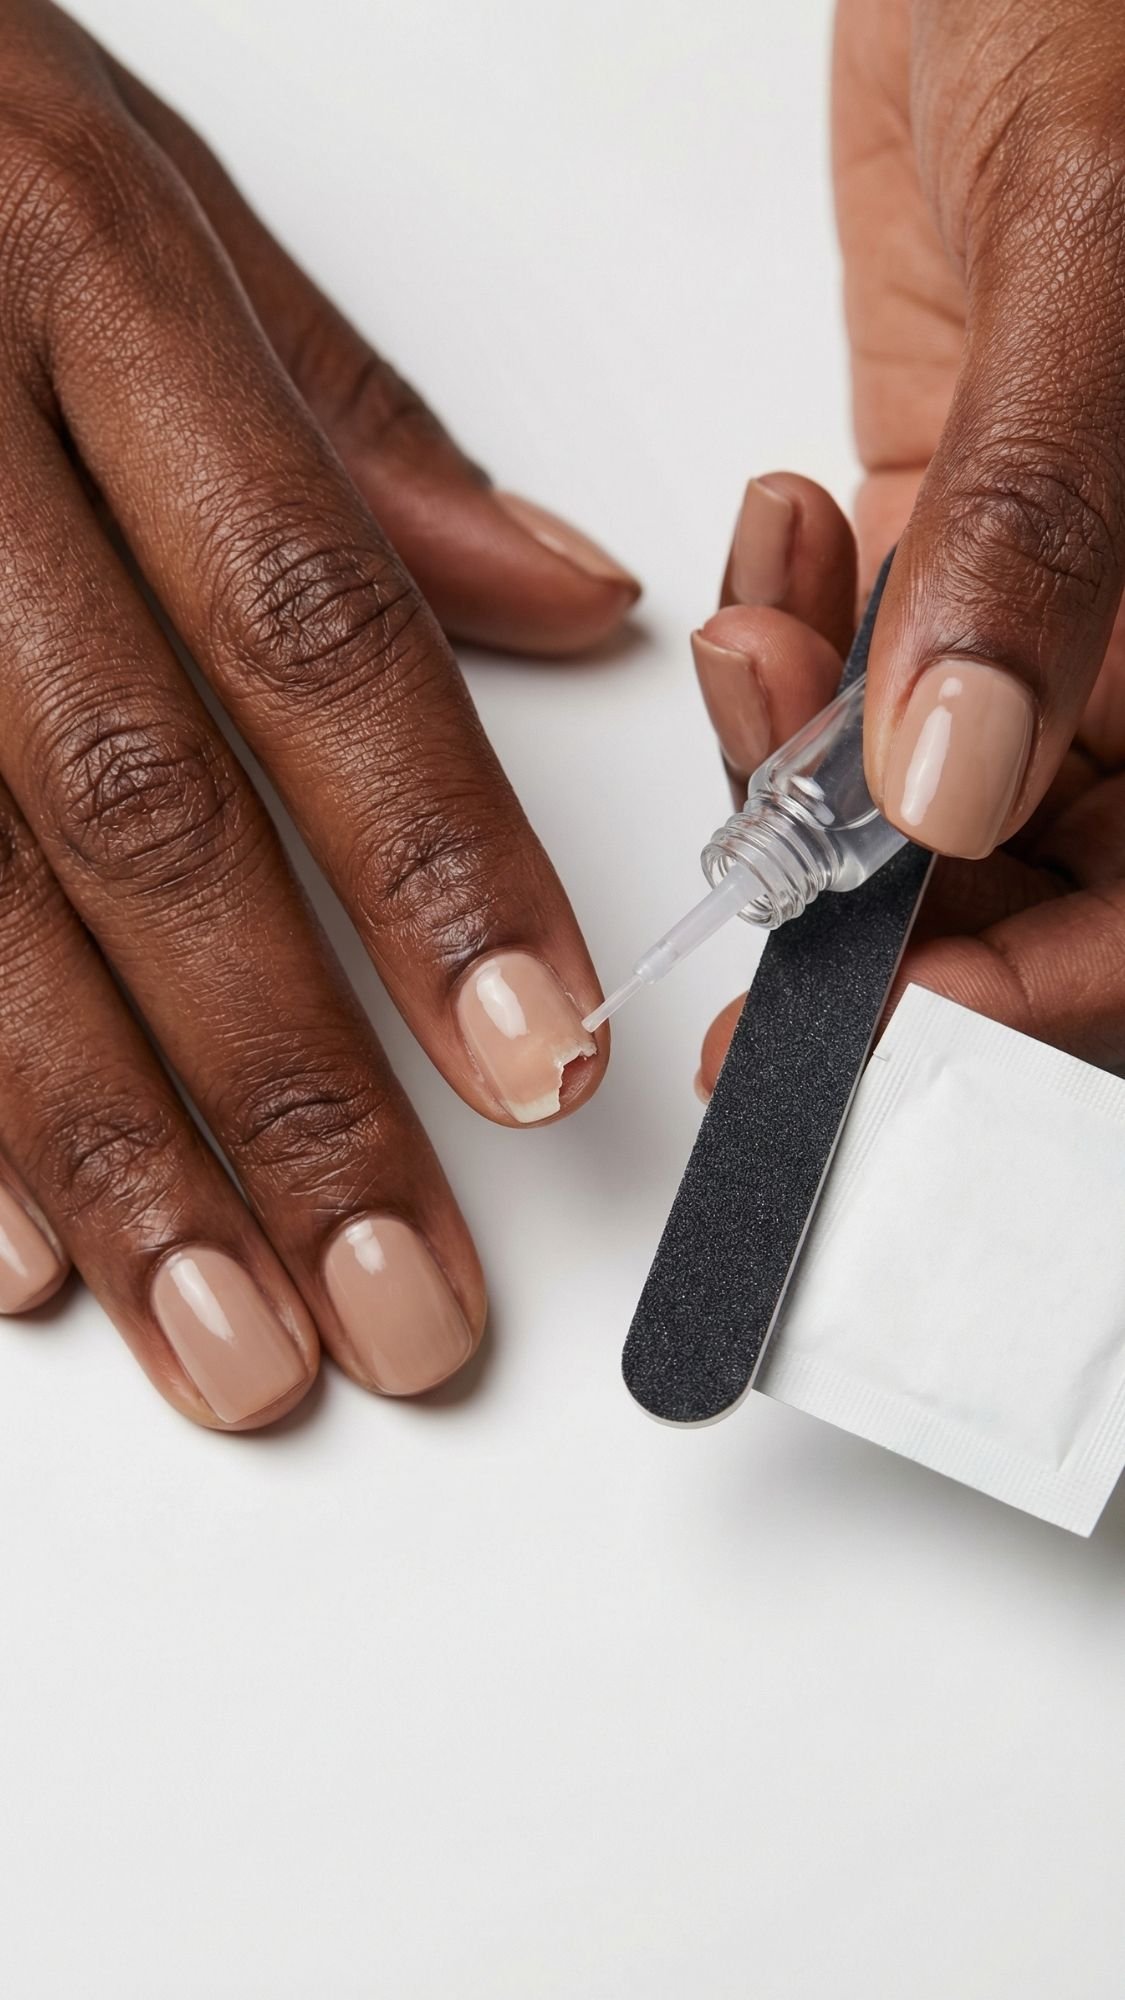
- Day 7: Check for snags. If you see a tiny lift at the corner, do not pull it! Use a drop of nail glue or a tiny bit of clear polish to seal it back down.
5 Manicure Fails & How to Fix Them
Even the pros have “bad nail days.” The mistake most people make is panicking and removing the whole set. Most issues have a 60-second fix if you know the secret.
- The Mystery Bubble: If your polish looks like it has tiny chickenpox, you likely shook the bottle. Fix: Next time, roll it between your palms. To fix current bubbles, wait for them to dry and use a buffer to smooth them down, then re-apply a thick top coat.
- The “Typing Tip” Chip: When the edge of your nail starts to show. Fix: Dip your finger in a bit of water to smooth the edge, dab a tiny bit of color on the tip, let it dry, and “cap” it with a top coat.
- The Press-On Pop: One nail flew off in the parking lot. Fix: Always carry a “brush-on” glue in your bag. Clean the natural nail with a quick swipe of an alcohol pad (or even hand sanitizer in a pinch) before re-gluing.
- Polish Shrinkage: When your polish pulls away from the cuticle. Fix: This usually happens if your top coat is too “fast-drying.” Next time, wait 3 minutes before applying the top coat. For now, just add a bit of glitter or a “half-moon” design to cover the gap.
- Dull Matte Finish: Your matte nails look greasy. Fix: Use an alcohol wipe or even a bit of Windex on a cotton pad. It sounds crazy, but it strips the surface oils and restores that velvety finish instantly.
Nail Health & Recovery: Don’t Forget the Foundation
Your nails are a reflection of your overall health. I’ve seen so many people ruin their nail beds by ripping off gels or press-ons. Please, for the love of all things beauty, stop doing that! It takes months for a nail plate to fully grow out.
The Golden Rules of Nail Health:
- The “Naked” Weekend: Every few weeks, give your nails 48 hours without any product. Use this time to slather them in a “nail strengthener” that contains keratin or jojoba oil.
- Gloves are Non-Negotiable: If you are doing dishes or cleaning the bathroom, wear rubber gloves. Water makes your nails swell and shrink, which causes the polish to peel.
- When to See a Pro: If you see any green or yellow discoloration under your nail, or if your cuticles feel hot and throbbing, stop everything and see a dermatologist. It could be a fungal infection or paronychia.
We’re at the finish line! To make sure you actually walk away from this feeling like a pro, I’ve distilled a decade of beauty secrets into these quick-reference guides. Whether you’re a minimalist or a total maximalist, these are the “beauty laws” I live by.
Beauty Rules of Thumb: The Cheat Sheet
If you remember nothing else from this article, remember these five rules. They are the difference between a “home job” and a “how did you get an appointment at that salon?” look.
- The “Shine is the Design”: Even a boring beige looks expensive if the top coat is thick and glossy. Invest in a high-end top coat; it’s the only product where price truly correlates with quality.
- Match Your Metals: Warm skin tones + gold jewelry = peachy/terracotta nudes. Cool skin tones + silver jewelry = mauve/slate grey nudes.
- Short and Squared is the “Power” Shape: It’s low-maintenance and conveys authority. If you have a big presentation, go short and crisp.
- Never Skip the Cap: Always run your brush along the very edge (the tip) of your nail. It’s the secret to getting 7 days of wear instead of 3.
- Hydrated Cuticles = No Lifting: Most “peeling” starts at the cuticle because the skin is dry. Oil them like it’s your job.
Beginner Shopping List: The “Starter Pack”
Don’t overcomplicate it. If you’re just starting your work-friendly nail journey, here is exactly what you should buy first (and what you can skip).
| Buy First (The Essentials) | Wait on These (The “Nice-to-Haves”) |
|---|---|
| Glass Nail File (Gentle on the plate) | Electric E-File (Too easy to damage your nails) |
| Rubber Base Coat (For grip) | 50-Color Polish Sets (Quality over quantity!) |
| Sheer Pink/Nude Polish (The most versatile) | Rhinestone Kits (Hard to keep on at work) |
| Pen-Style Cuticle Oil (For your desk) | Complex Nail Stamping Plates |
| 90% Isopropyl Alcohol (The ultimate cleaner) | Professional UV Sterilizer |
FAQ: Everything You’re Still Wondering
I get these questions in my DMs daily, so let’s clear the air.
Q: How do I make my hands look longer in photos or during meetings? A: Go for an Almond Shape and a shade that is one step lighter than your actual skin tone. This creates a continuous line from your finger to the tip of your nail, making your hands look elegant and elongated.
Q: Can I wear these looks if I have very short, bitten nails? A: Absolutely. In fact, the “Soap Nail” or “Rich Girl Beige” looks incredibly intentional on short nails. It shows you are caring for them while they grow. Avoid French tips on very short nails, as they can make the nail bed look even smaller.
Q: Why does my polish always bubble? A: You’re likely “pumping” the brush in the bottle or painting in front of a fan. Both trap air. Roll the bottle between your hands instead of shaking it, and paint in a still-air environment.
Q: Is it okay to use press-ons for a big interview? A: Yes! Modern press-ons are virtually indistinguishable from salon gels if you size them correctly. Just make sure you carry glue in your bag for that “just in case” moment.
Q: How long should a “work-friendly” manicure actually last? A: With proper prep and a mid-week top coat refresh, regular polish should last 5–7 days, and Gel/BIAB should last 14–21 days.

Your Hands Are Your Calling Card
At the end of the day, your nails are an extension of your professional brand. They tell the world you pay attention to detail, you value self-care, and you’re prepared for whatever the workday throws at you. Whether you go for a “Glass Skin” glow or a “Deep Navy” power move, own it with confidence.