Welcome To Your “Red Nails Fix Everything” Era
Red nails solve a very specific problem, you want your hands to look instantly polished, but you do not want to overthink it. I’ve tried every trend cycle for over a decade, and red stays undefeated because it reads clean, confident, and intentional in every season. The trick is not “pick a red,” it’s pick the right undertone and finish for the moment, then do the tiny prep steps that keep it from chipping by day two. Ever notice how one red looks expensive and another red looks like you borrowed craft paint from a middle school art bin? Yeah, technique does that.
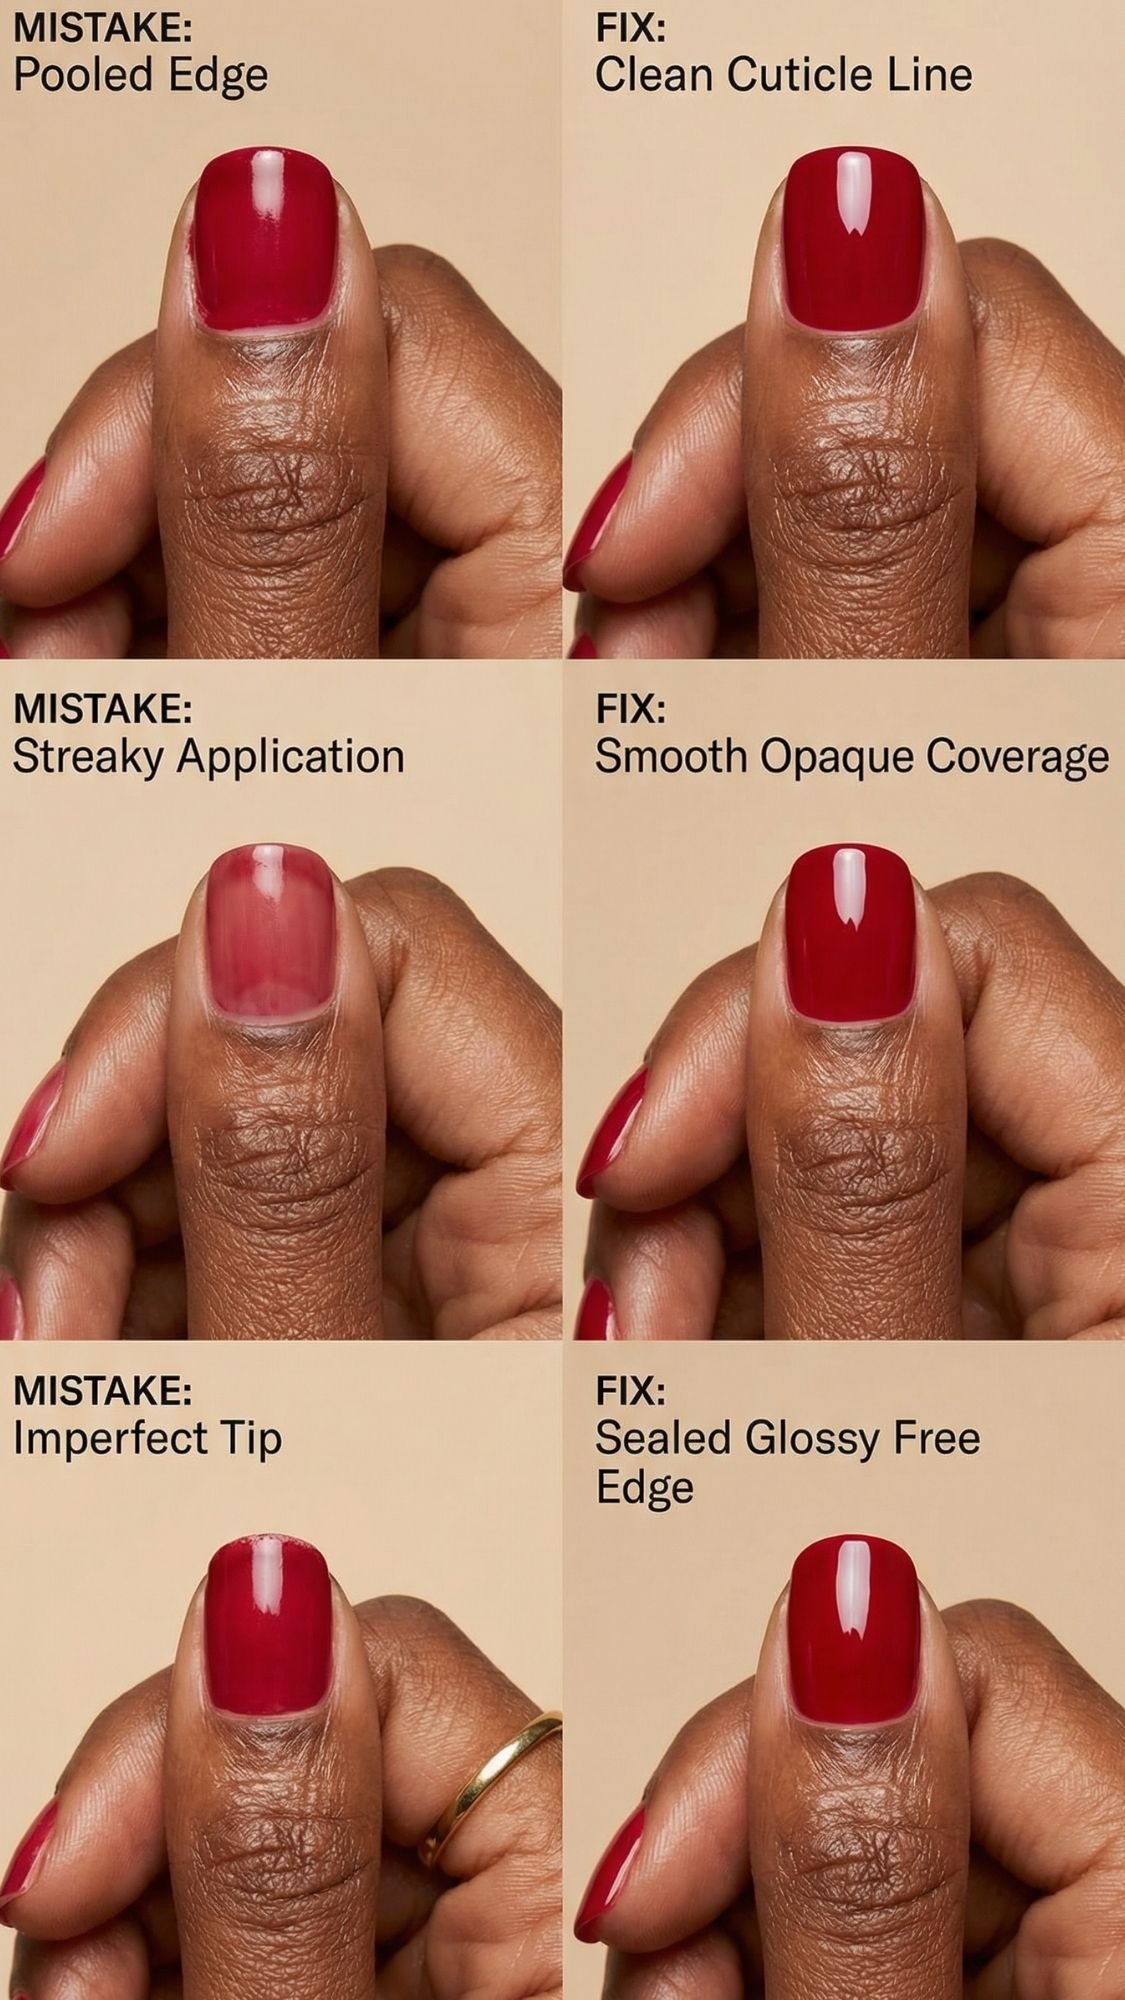
What I’ve noticed over the years is this, most people blame the polish when the manicure fails, but prep and thin coats decide the outcome. Red pigment shows everything, streaks, brush marks, a messy cuticle line, the whole story. I’m going to help you get that smooth, glossy, clean-edged result that looks like you paid salon money, even if you did it in your pajamas.
Key Takeaways
- Red nails look luxe when you keep the cuticle line crisp and the coats thin.
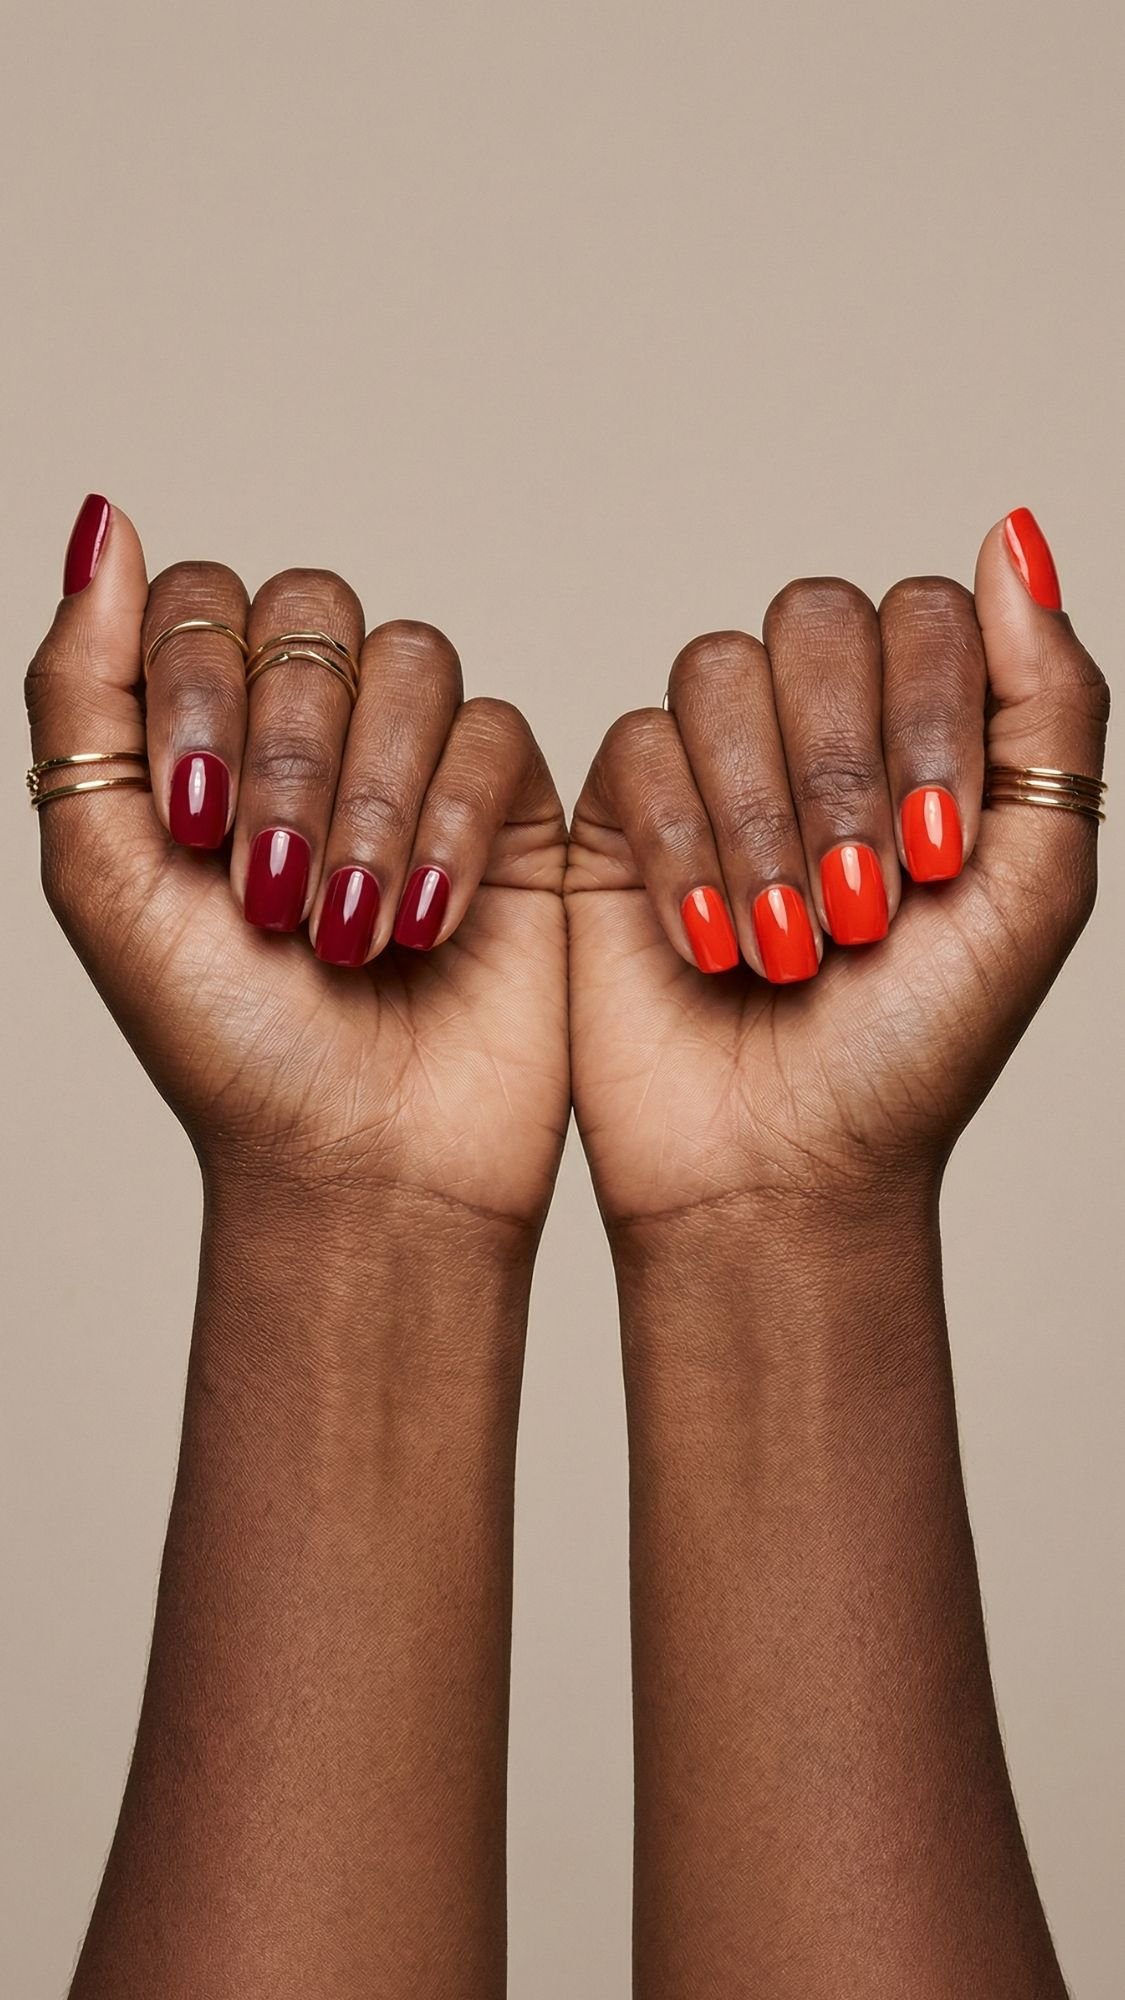
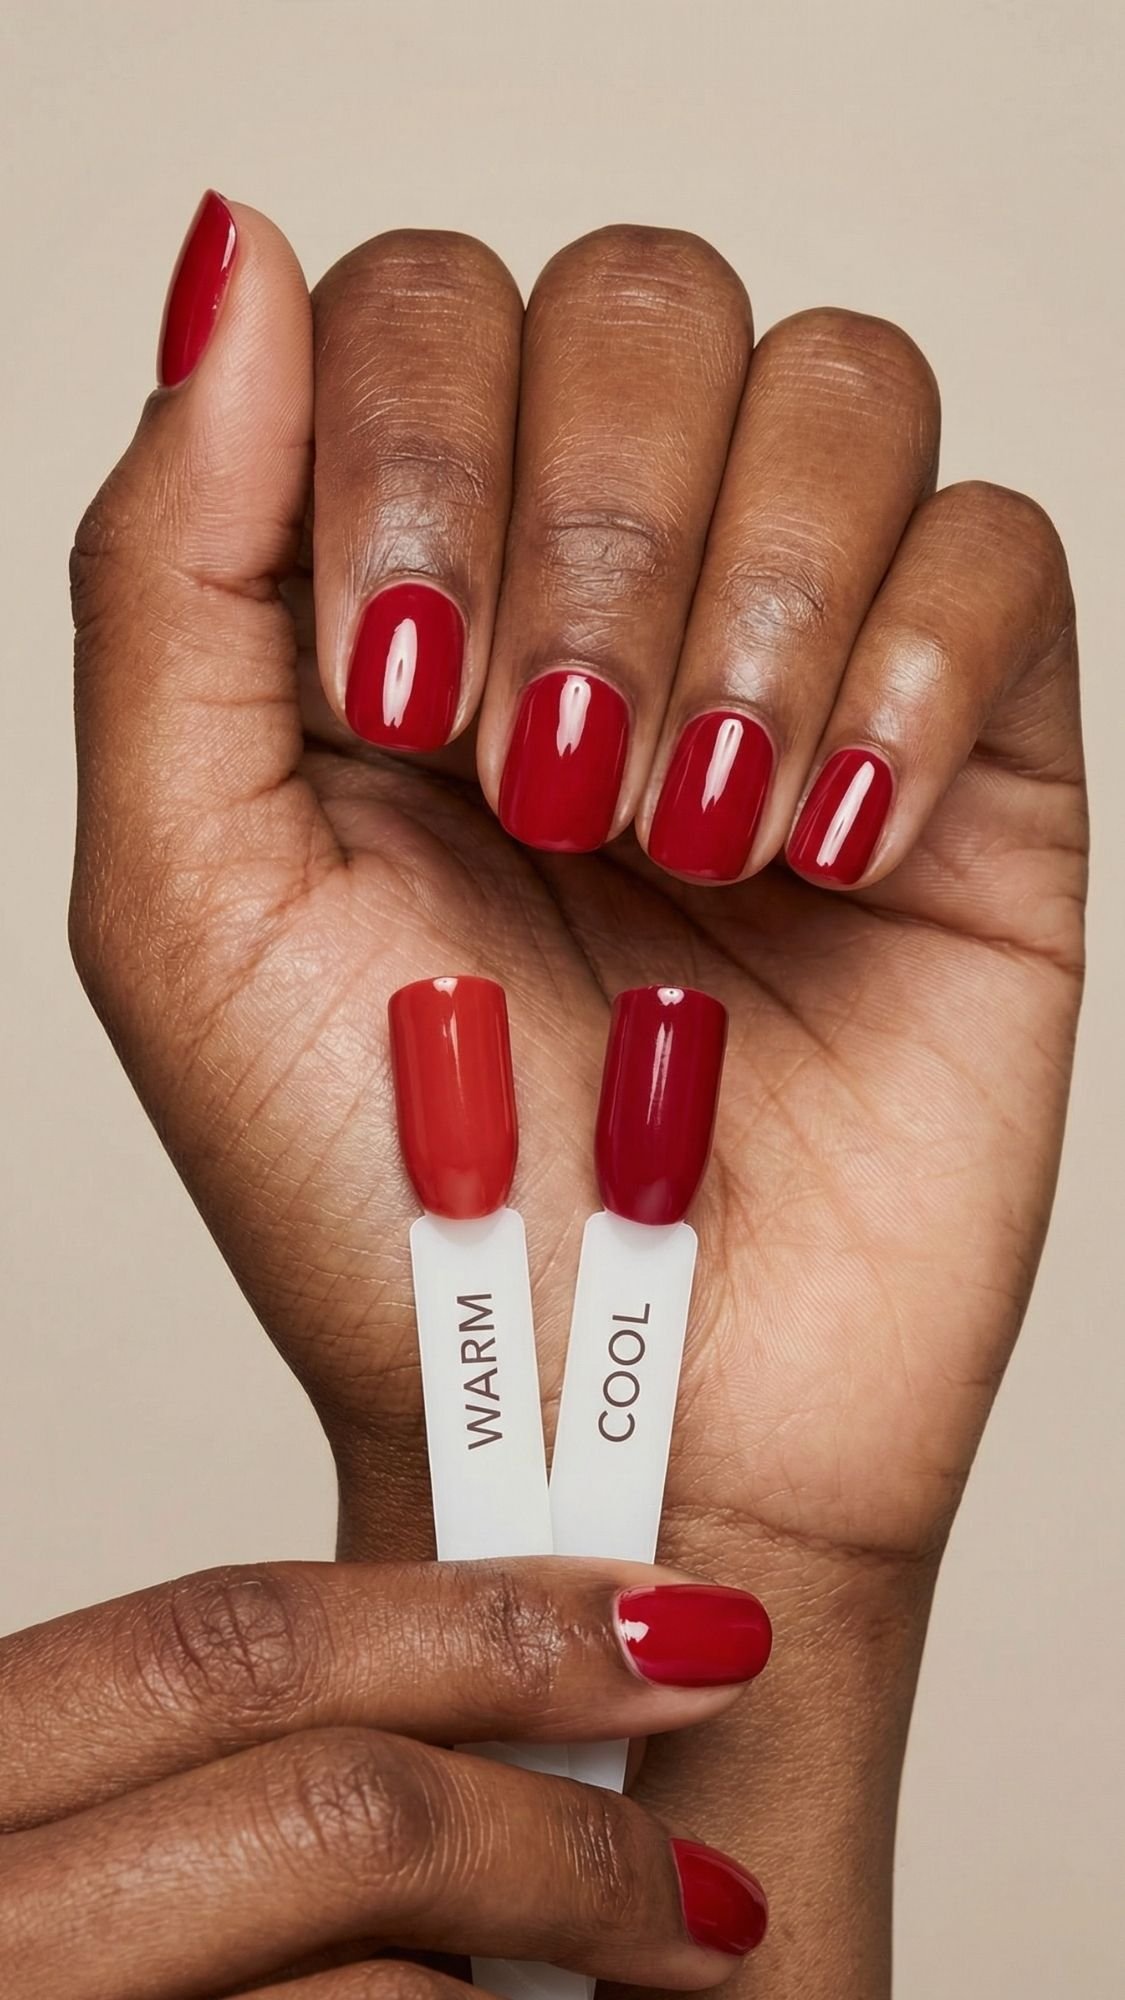
- Undertone matters more than brand, warm reds glow, cool reds pop, cherry reds flatter almost everyone.
- Top coat technique makes or breaks shine, especially at the free edge.
Quick Results Snapshot
- What this look solves: a put-together manicure that matches every outfit, every season
- Best for: beginners, short nails, busy hands, anyone who wants a high-impact color fast
- Time required: 25 to 45 minutes for regular polish, add 10 to 20 minutes for simple art
- Budget range: drugstore to salon, the method works at any price
- Expected timeline: instant results, best longevity once your polish fully sets overnight
- Biggest mistakes people make:
- painting thick coats because red feels “too sheer”
- skipping dehydration, then wondering why the tips chip first
Goal + Who It’s For
Let’s make this super clear, because “red nails” sounds simple until you stand in front of 47 reds and suddenly you forget how to be a person. The goal of this post is to give you season-proof red nail ideas that always look intentional, plus the prep and technique that keeps them looking fresh. I do not want you repainting your nails every other day like it’s a part-time job.
What I’ve noticed over the years is that most people treat red like one single color. It’s not. Red behaves like a whole family, cherry, tomato, blue-red, brick, merlot, oxblood. The undertone changes how it looks against your skin, and the finish changes how it photographs. So we’re going to rotate reds by vibe and season without losing that classic “I have my life together” effect.
The exact result we’re going for
- Clean edges, no flooded cuticles
- Smooth color, no streaks or patchy spots
- High-shine finish with a sealed free edge, so chips do not announce themselves
Best for
- Beginners who want a reliable color that always looks styled
- Short nails that need visual impact without extra length
- Wide nail beds because the right shape and placement can make fingers look longer
- Busy hands because red stays flattering even as it grows out
Who should skip or be extra cautious
- If you get itching, burning, or lifting with gel products, take that seriously, you might react to acrylates. Stick to regular polish and avoid skin contact.
- If you have open cuts, swelling, pain, or green discoloration, skip the DIY and see a professional. That stuff is not a “cute little nail moment.”
Shade guidance across skin tones, especially deeper tones
I always start with undertone, then I choose depth for the season.
- Warm undertones: tomato red, chili red, orange-reds look bright and juicy.
- Cool undertones: blue-red, cranberry, ruby looks crisp and bold.
- Neutral undertones: classic true red and cherry red usually look effortless.
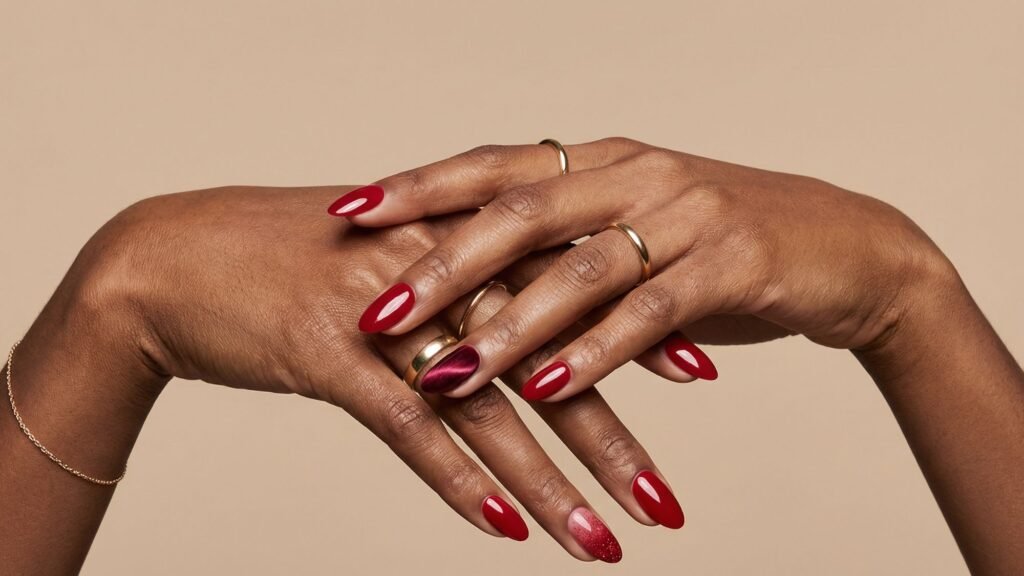
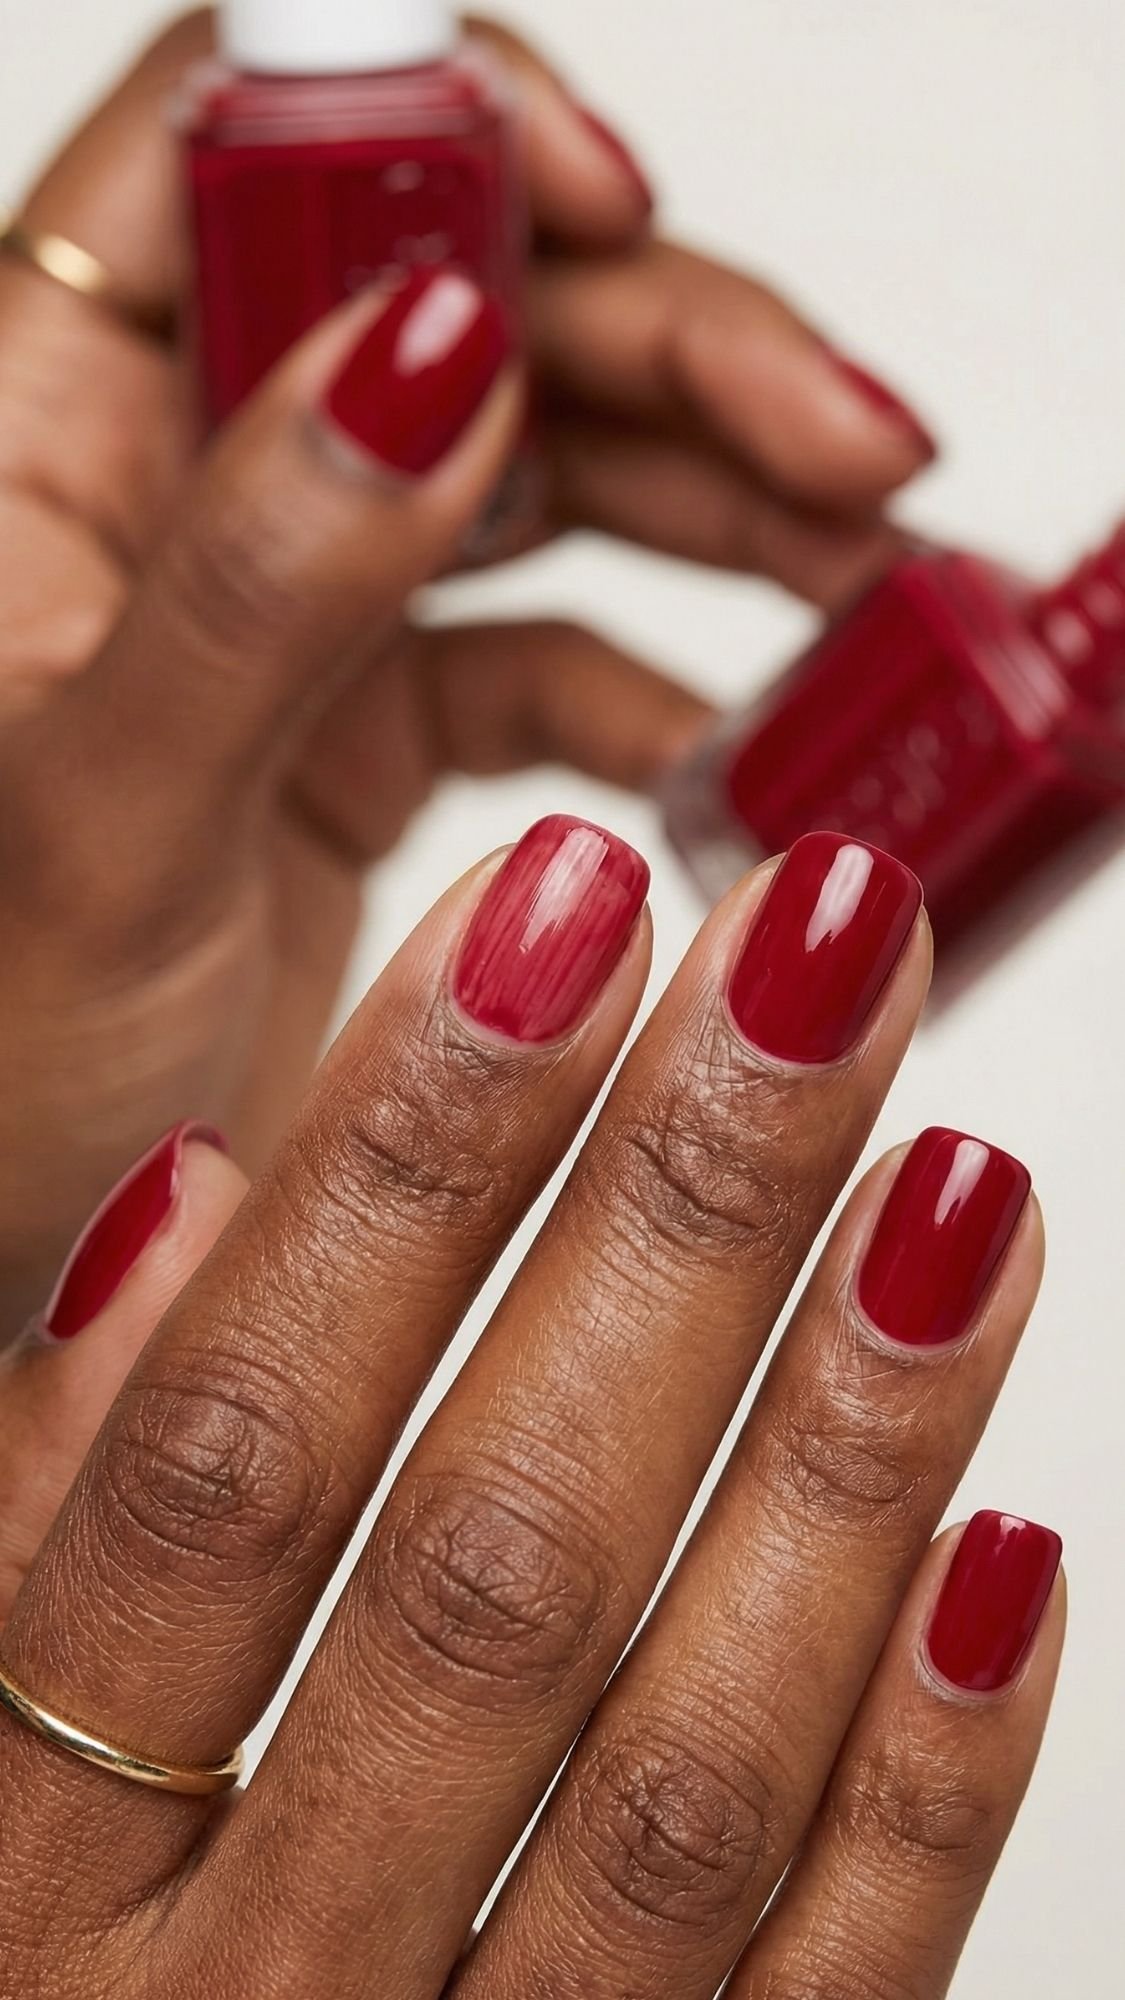
- On deeper skin tones: deep cherry, ruby, and oxblood look insanely rich because they keep saturation instead of turning flat. A glossy top coat makes them look like glass.
Key Takeaways
- Pick undertone first, finish second, that combo makes red look expensive.
- Deeper reds + high shine look especially luxe on deeper skin tones.
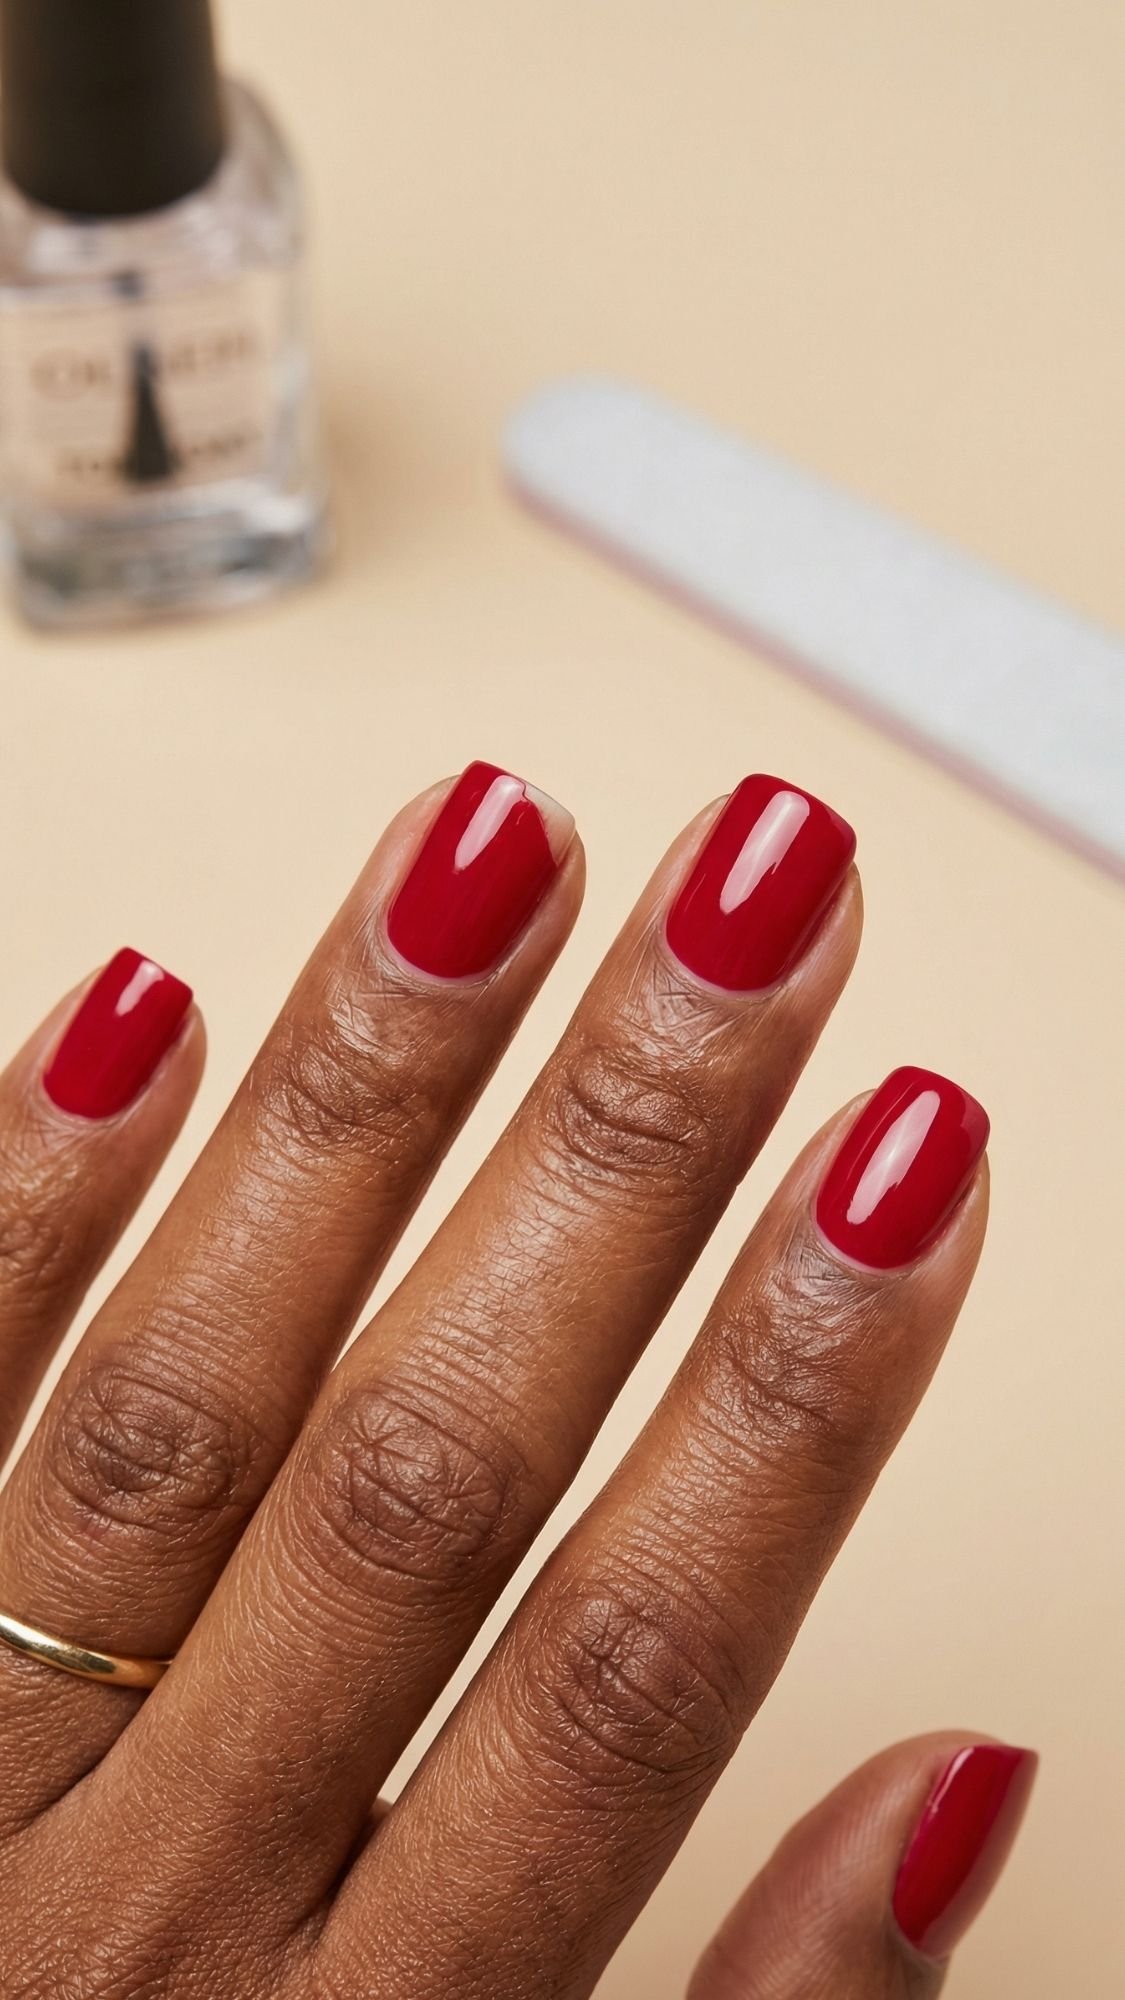
- Your manicure looks cleaner when you leave a tiny cuticle gap instead of painting into the skin.
Nail Prep (This Is the Difference Maker)
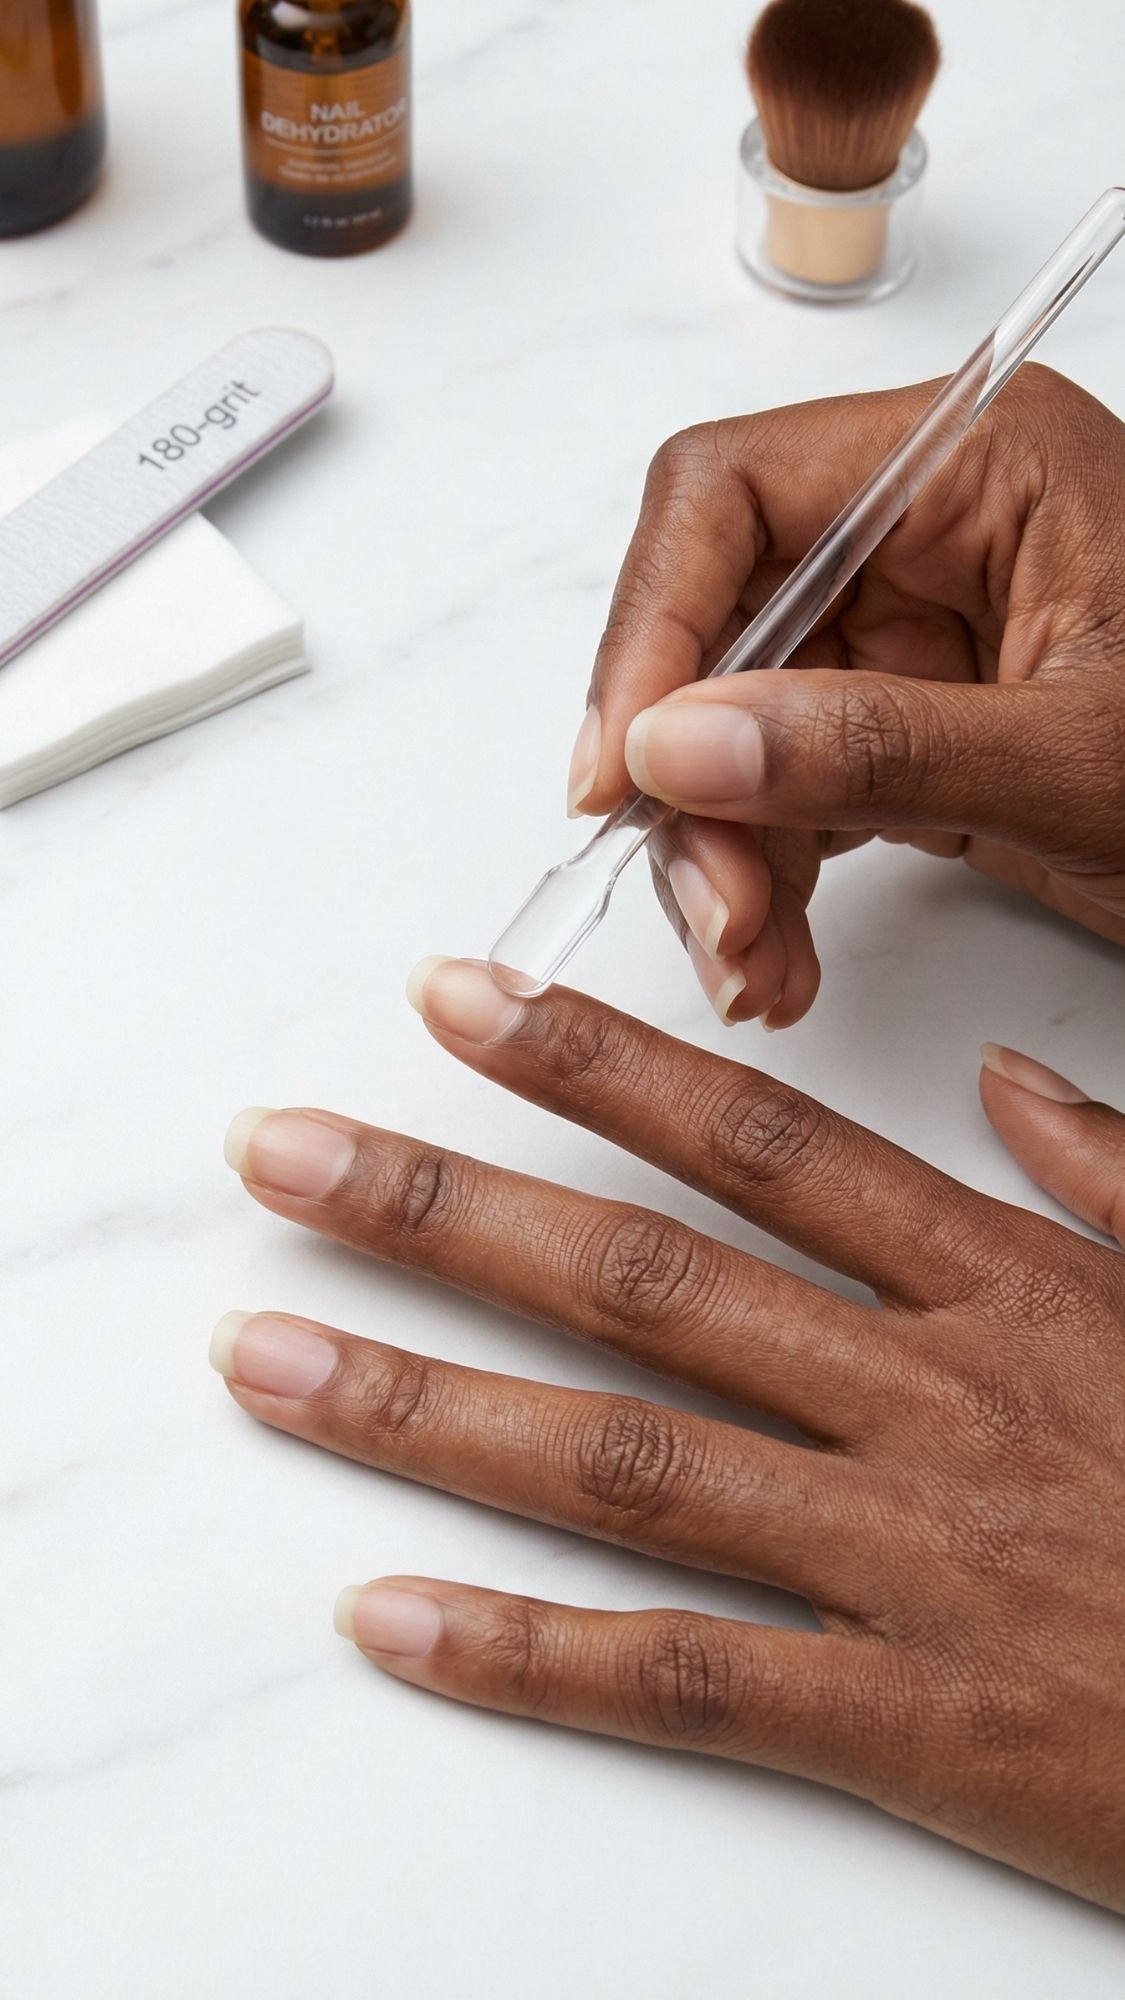
If red polish had a personality, it would be that friend who tells the truth a little too loudly. It shows every streak, every bump, every rushed cuticle line. So if you want your red to look smooth and expensive, you win this in the prep stage. I know, I know, prep feels boring. But skipping it turns your manicure into a 24-hour rental, and that’s not the vibe.
What I’ve noticed over the years is that most people either over-prep with aggressive buffing, or under-prep and leave invisible oils on the nail plate. You want the middle path. You want clean, lightly refined nails that feel dry and “grippy,” not slick.
Prep Step 1: Remove old product like you mean it
- What to do: Remove all old polish and base coat, even the faint tinted leftovers near the cuticle.
- Why it matters: Any leftover film blocks adhesion, and red will look patchy on top of it.
- Pro tip: Use a lint-free wipe, not a fluffy cotton pad, cotton fuzz loves to cling to wet polish.
- Common mistake + fix: You scrub hard and irritate the skin, then you smear red into micro-cuts. Fix it by holding remover on the nail for a few seconds, then wiping in one clean pass.
Prep Step 2: Shape first, always
- What to do: File to shape using 180 grit for structure or 240 grit for softer refining.
- Why it matters: You chip faster when you shape after polish, because you break the sealed edge.
- Pro tip: If you want your fingers to look longer, file the sidewalls slightly inward, not straight across.
- Common mistake + fix: You saw back and forth aggressively. Fix it by filing in controlled strokes, keep pressure light.
Prep Step 3: Cuticle work, gentle not chaotic
- What to do: Push back cuticles after a quick hand wash and full dry, then clean only what lifts easily.
- Why it matters: Red polish looks messy when it sits on cuticle tissue, and it will lift faster.
- Pro tip: I only nip hangnails, I never “dig” for cuticle, that’s how people end up sore and inflamed.
- Common mistake + fix: You cut too much, then everything burns with acetone. Fix it by pushing and cleaning with a soft tool, save nippers for true hangnails only.
Prep Step 4: Buff only if you need it
- What to do: Lightly buff ridges if they’re catching the light, stop as soon as it looks even.
- Why it matters: Over-buffing thins the nail plate, then your nails peel, and you blame the polish.
- Pro tip: If you use a ridge-filling base coat, you can often skip buffing completely.
- Common mistake + fix: You buff until the nail looks “matte perfect.” Fix it by doing 2 to 3 gentle passes max.
Prep Step 5: Cleanse and dehydrate
- What to do: Wipe nails with alcohol or a nail dehydrator right before base coat.
- Why it matters: Oils cause lifting and tip chipping, especially with bold colors like red.
- Pro tip: After this step, do not touch your nails. Your fingers instantly re-oil them, because life loves irony.
- Common mistake + fix: You wash your hands after dehydrating. Fix it by washing earlier, then dehydrating as your final step.
Prep Step 6: The red-stain and cleanup trick I swear by
This is the pro move that keeps red from turning into a cuticle crime scene. Before you paint, swipe a tiny bit of balm or cuticle oil around the cuticle line, not on the nail plate. It creates a slip barrier so your cleanup brush glides. The oil smells faintly sweet and feels slick for a second, and that’s exactly what you want around the skin, not on the nail.
Key Takeaways
- Prep decides longevity, not the price of your polish.
- Dehydrate last, then avoid touching the nail plate.
- Oil around the cuticle, never on the nail, for cleaner red edges.
Tools + Products You Actually Need

Let me save you from the classic trap, buying twelve “nail gadgets” and still ending up with a chipped thumb by Tuesday. You can get a salon-clean red manicure with a short list, as long as you pick the right basics and you use them correctly. Ever notice how your polish looks fine, then your top coat turns it into a wrinkly mess? Yeah, that’s usually a tool and timing issue, not you being “bad at nails.”
Must-haves (non-negotiable for a clean red)
- File (180 or 240 grit)
- What to look for: 180 for shaping strength, 240 for softer natural nails.
- Why it matters: clean shaping helps your tips resist chips.
- Cuticle pusher
- What to look for: gentle edge, not sharp, you want control.
- Why it matters: lifted cuticle tissue causes polish lifting.
- Lint-free wipes
- What to look for: truly lint-free, not “almost.”
- Why it matters: lint shows up like confetti under red polish.
- Nail cleanser or alcohol
- What to look for: quick-evaporating, no oily additives.
- Why it matters: removes oil so base coat can grip.
- Base coat
- Choose one lane:
- Ridge-filling base if you have visible ridges or texture.
- Sticky, grippy base if you chip at the tips fast.
- Why it matters: base coat acts like double-sided tape for polish.
- Choose one lane:
- Red polish
- What to look for: a formula that applies evenly in thin coats.
- Pro note: some reds stain more than others, a base coat helps.
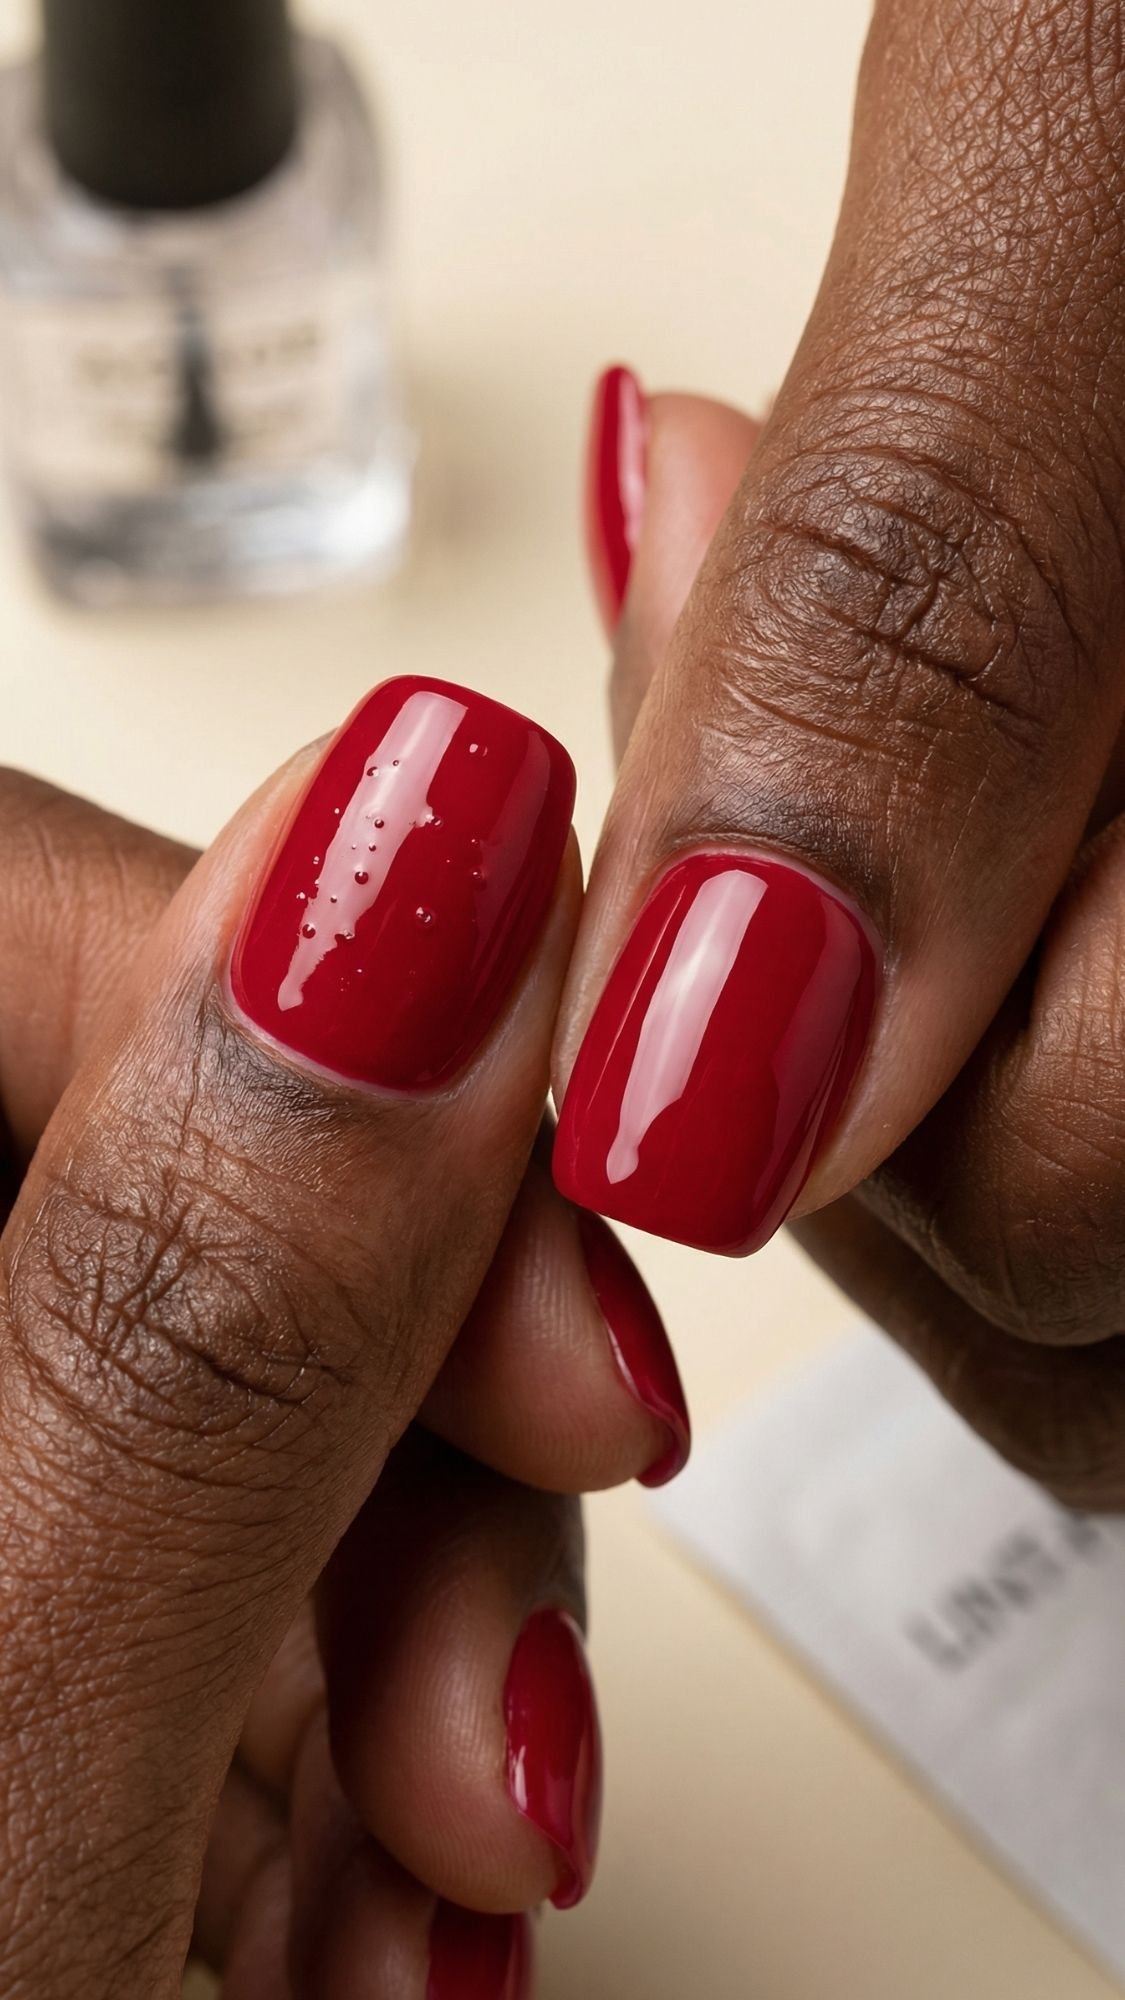
- Top coat
- What to look for: high-gloss, fast-drying, not “soft” feeling hours later.
- Why it matters: top coat seals the edge and locks in shine.
- Sensory detail: a good top coat smells a little sharp and solvent-y, and it feels slick for a minute, that’s your window to cap the free edge cleanly.
- Cleanup brush + acetone
- What to look for: a small, firm brush that holds its shape.
- Why it matters: crisp cuticles make red look expensive.
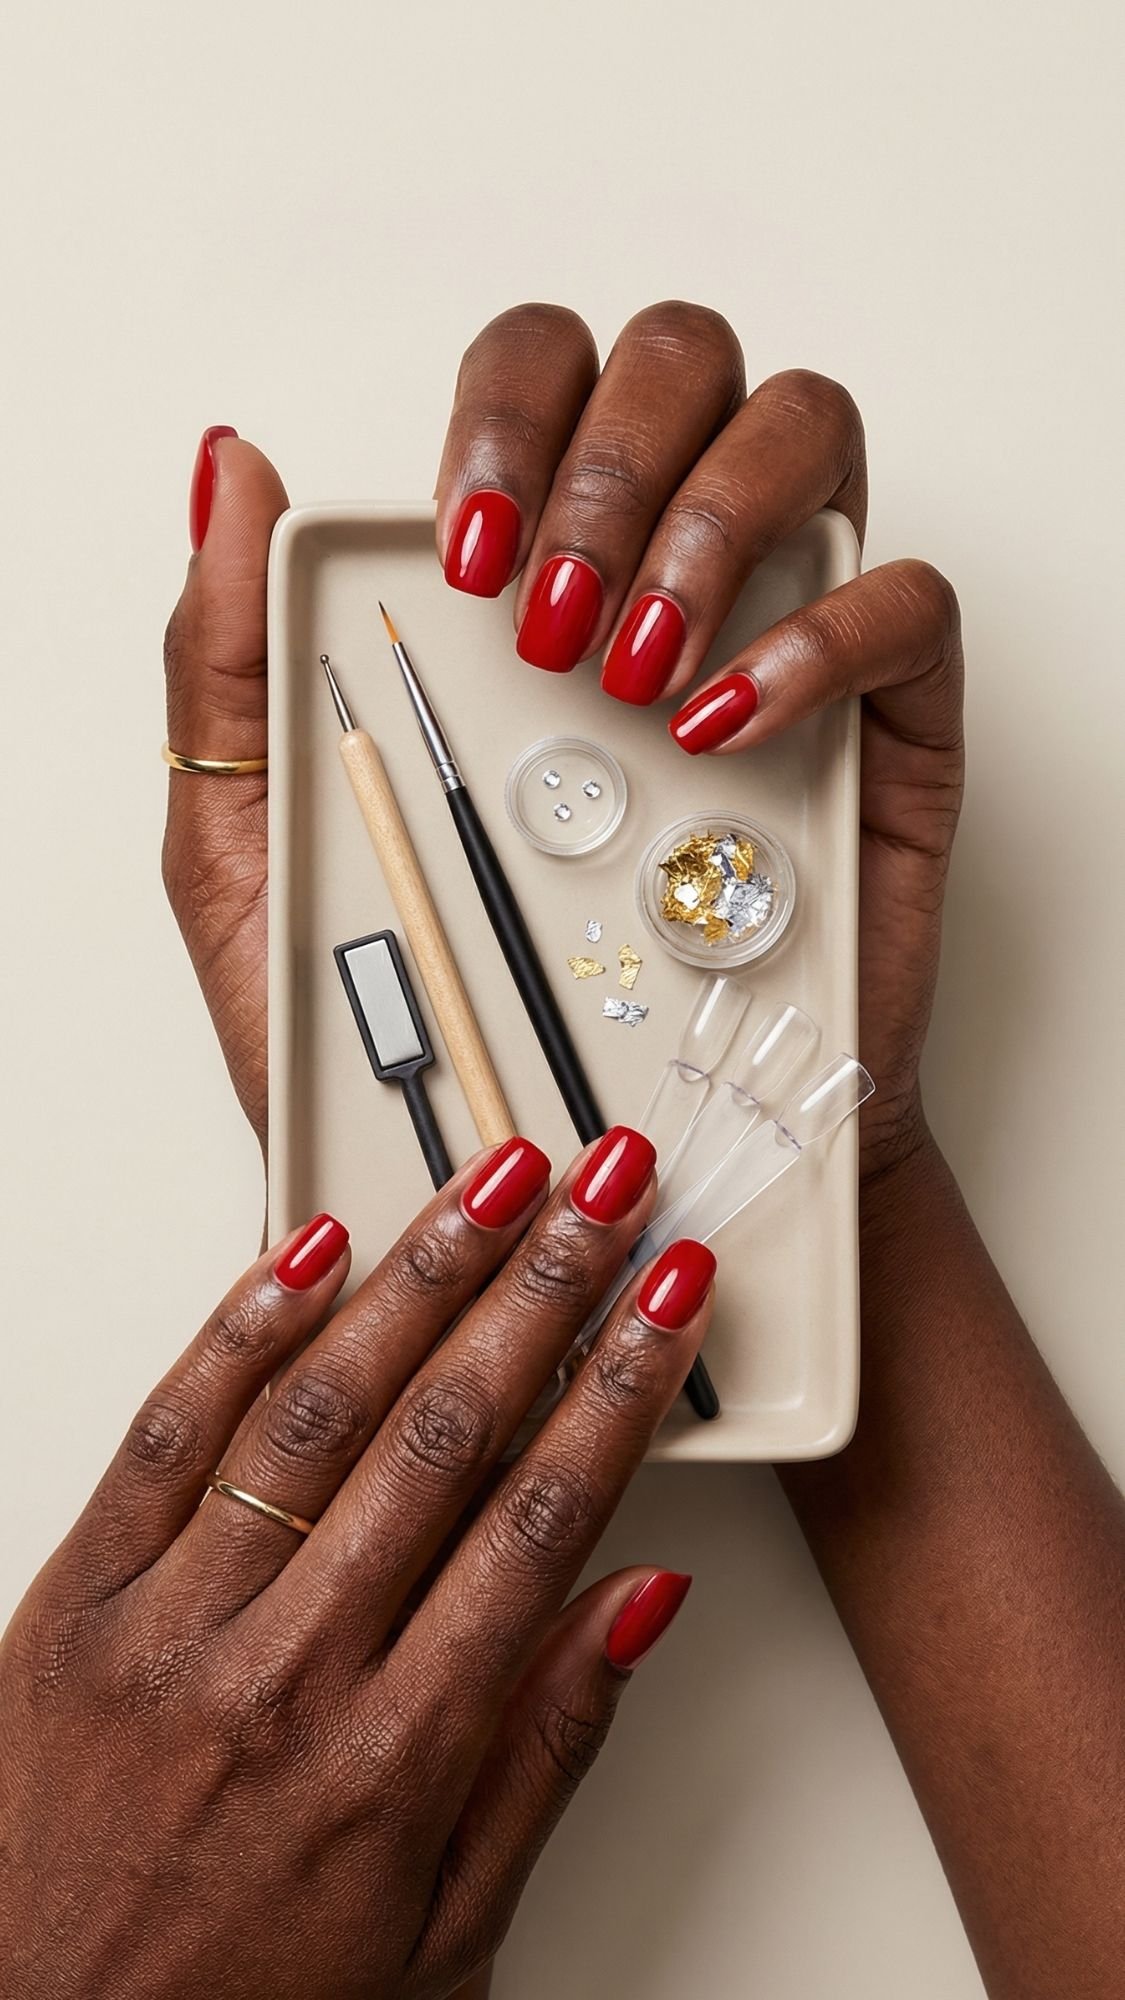
Nice-to-haves (helpful, not required)
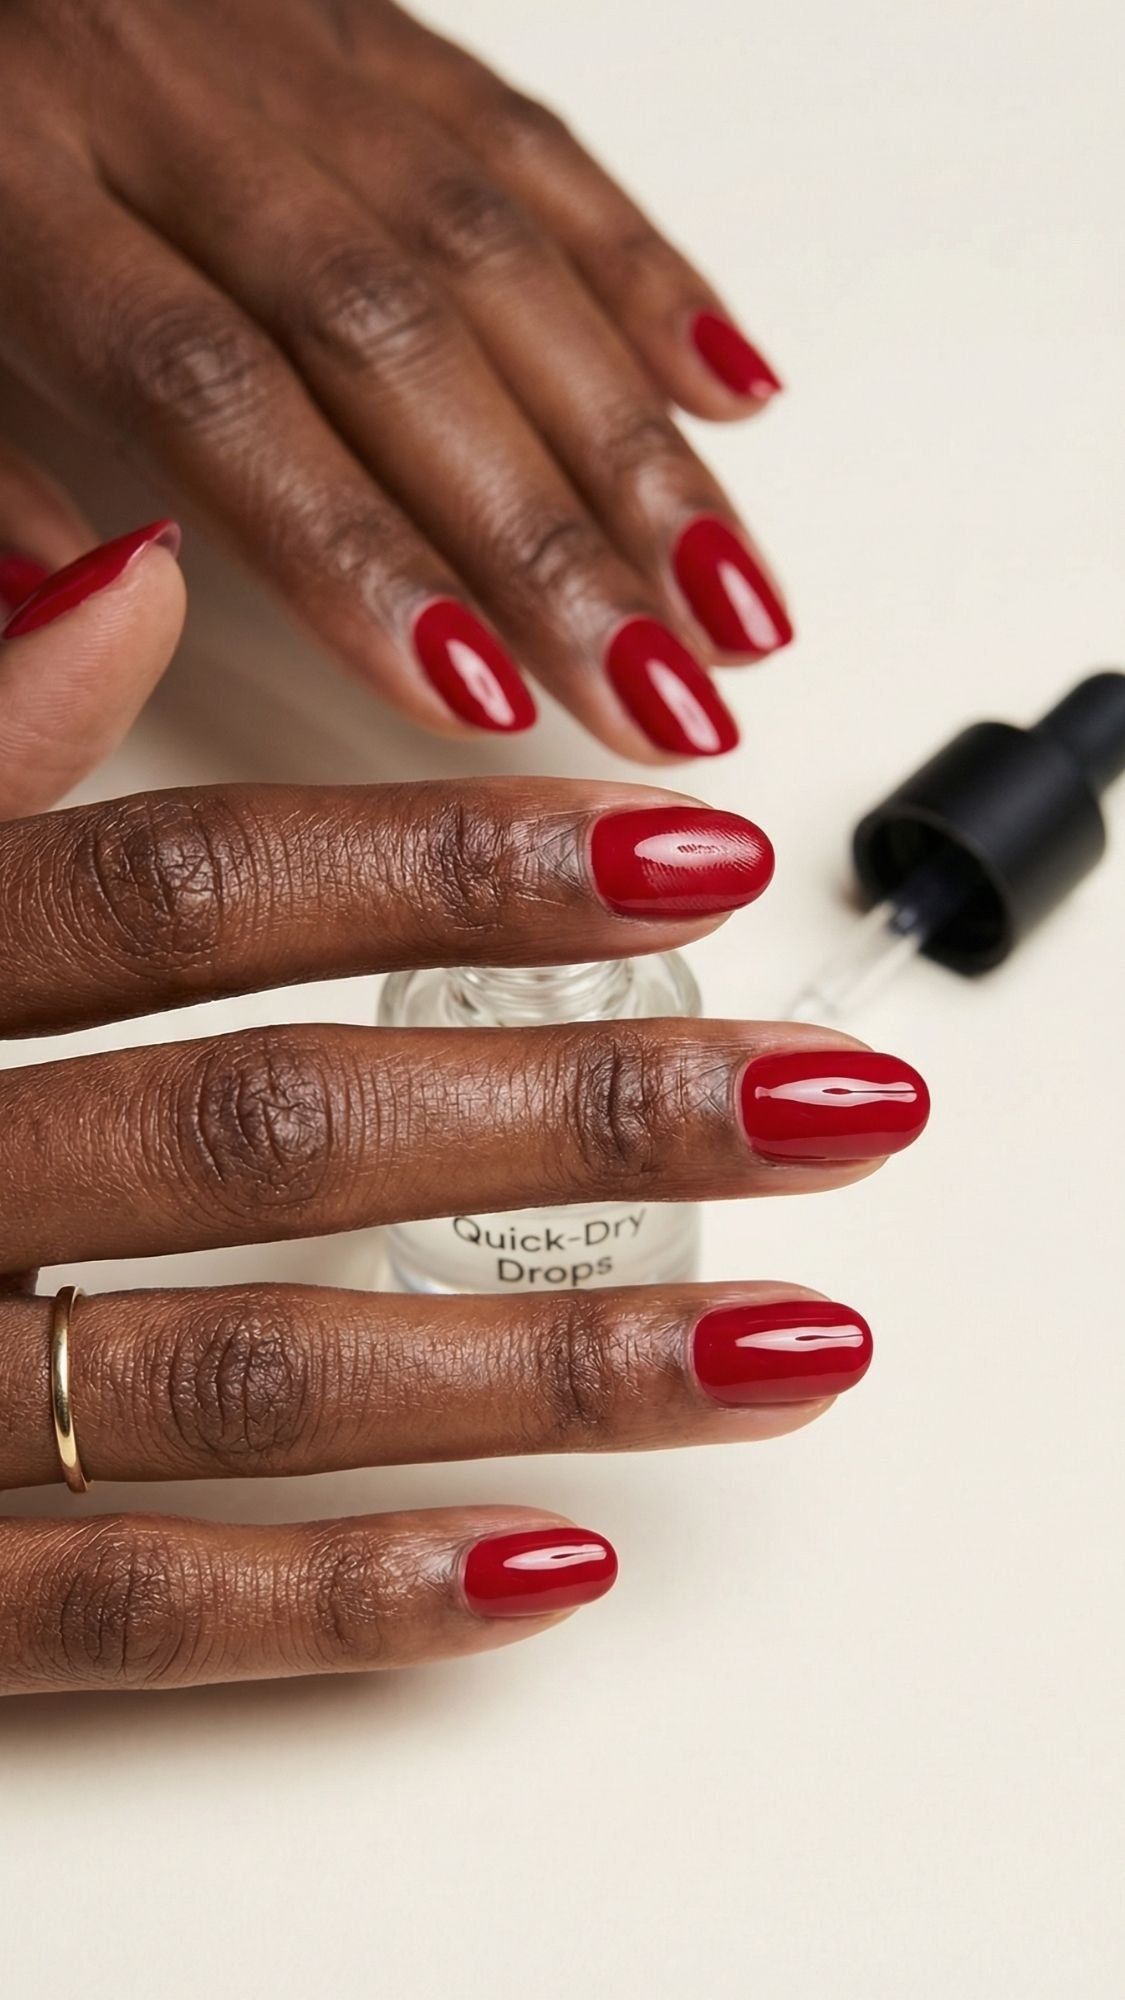
- Quick-dry drops
- Why it helps: reduces smudges if you always “test” your polish too early.
- Detail brush or striping brush
- Why it helps: makes micro French tips and swirl lines look intentional, not wobbly.
- Peel-off barrier (for nail art)
- Why it helps: saves your skin during messy designs.
- Swatch sticks or a swatch wheel
- Why it helps: lets you compare undertones without repainting ten times.
- Cuticle oil
- Why it helps: keeps the manicure looking fresh, and stops that dry cuticle halo.
If you want to try magnetic or velvet reds later
- Magnetic polish + a strong magnet
- Why it matters: the effect depends on magnet strength and placement.
- Pro tip: hold the magnet close, but not touching, and keep it steady for the full set time on each coat.
Budget alternatives that still look salon
- A drugstore base coat and top coat can still perform if you apply thin coats and seal the free edge.
- A simple cleanup brush makes a bigger difference than buying the most expensive red.
Safety notes (quick but real)
- Use acetone in a ventilated space, it dries skin fast.
- Avoid getting polish and especially gel products on your skin, repeated skin contact can trigger irritation over time.
- If you see pain, swelling, green discoloration, or lifting with odor, stop and see a professional.
Key Takeaways
- Base coat plus top coat matters more than the red brand.
- A cleanup brush turns “DIY” into “editorial.”
- Magnetic effects need steady hands and patience, not extra product.
Step-by-Step Application (Regular Polish Method, the “chip-free” version)
This part separates “cute for one day” from “still glossy on day five.” Red polish rewards patience, but you do not need monk-level calm. You just need thin coats, clean edges, and timing that makes sense. Ever painted red, felt proud, then smudged it because you touched it 90 seconds later? Same, and that’s why we use a strategy.
Step 1: Base coat, pick the right type and apply it like a pro
- What you’re trying to achieve: a smooth surface plus grip, so the red sticks.
- What to look for:
- Ridge-filling base if you see texture or ridges in overhead light.
- Sticky, grippy base if you chip at the tips fast.
- How to apply (amount + technique):
- Use one thin coat, think “barely there,” not “milky layer.”
- Start slightly away from the cuticle, then float the brush upward, then pull down.
- Why it matters: base coat acts like the anchor, red polish clings better and wears longer.
- Common mistake + fix:
- Mistake: you “seal” the nail with a thick base coat and it never fully sets.
- Fix: apply a thinner layer, wait 60 to 90 seconds before color.
- Sensitive-skin alternative: if acetone and solvents irritate you, keep product off the skin and use a barrier balm around the cuticle line, not on the nail.
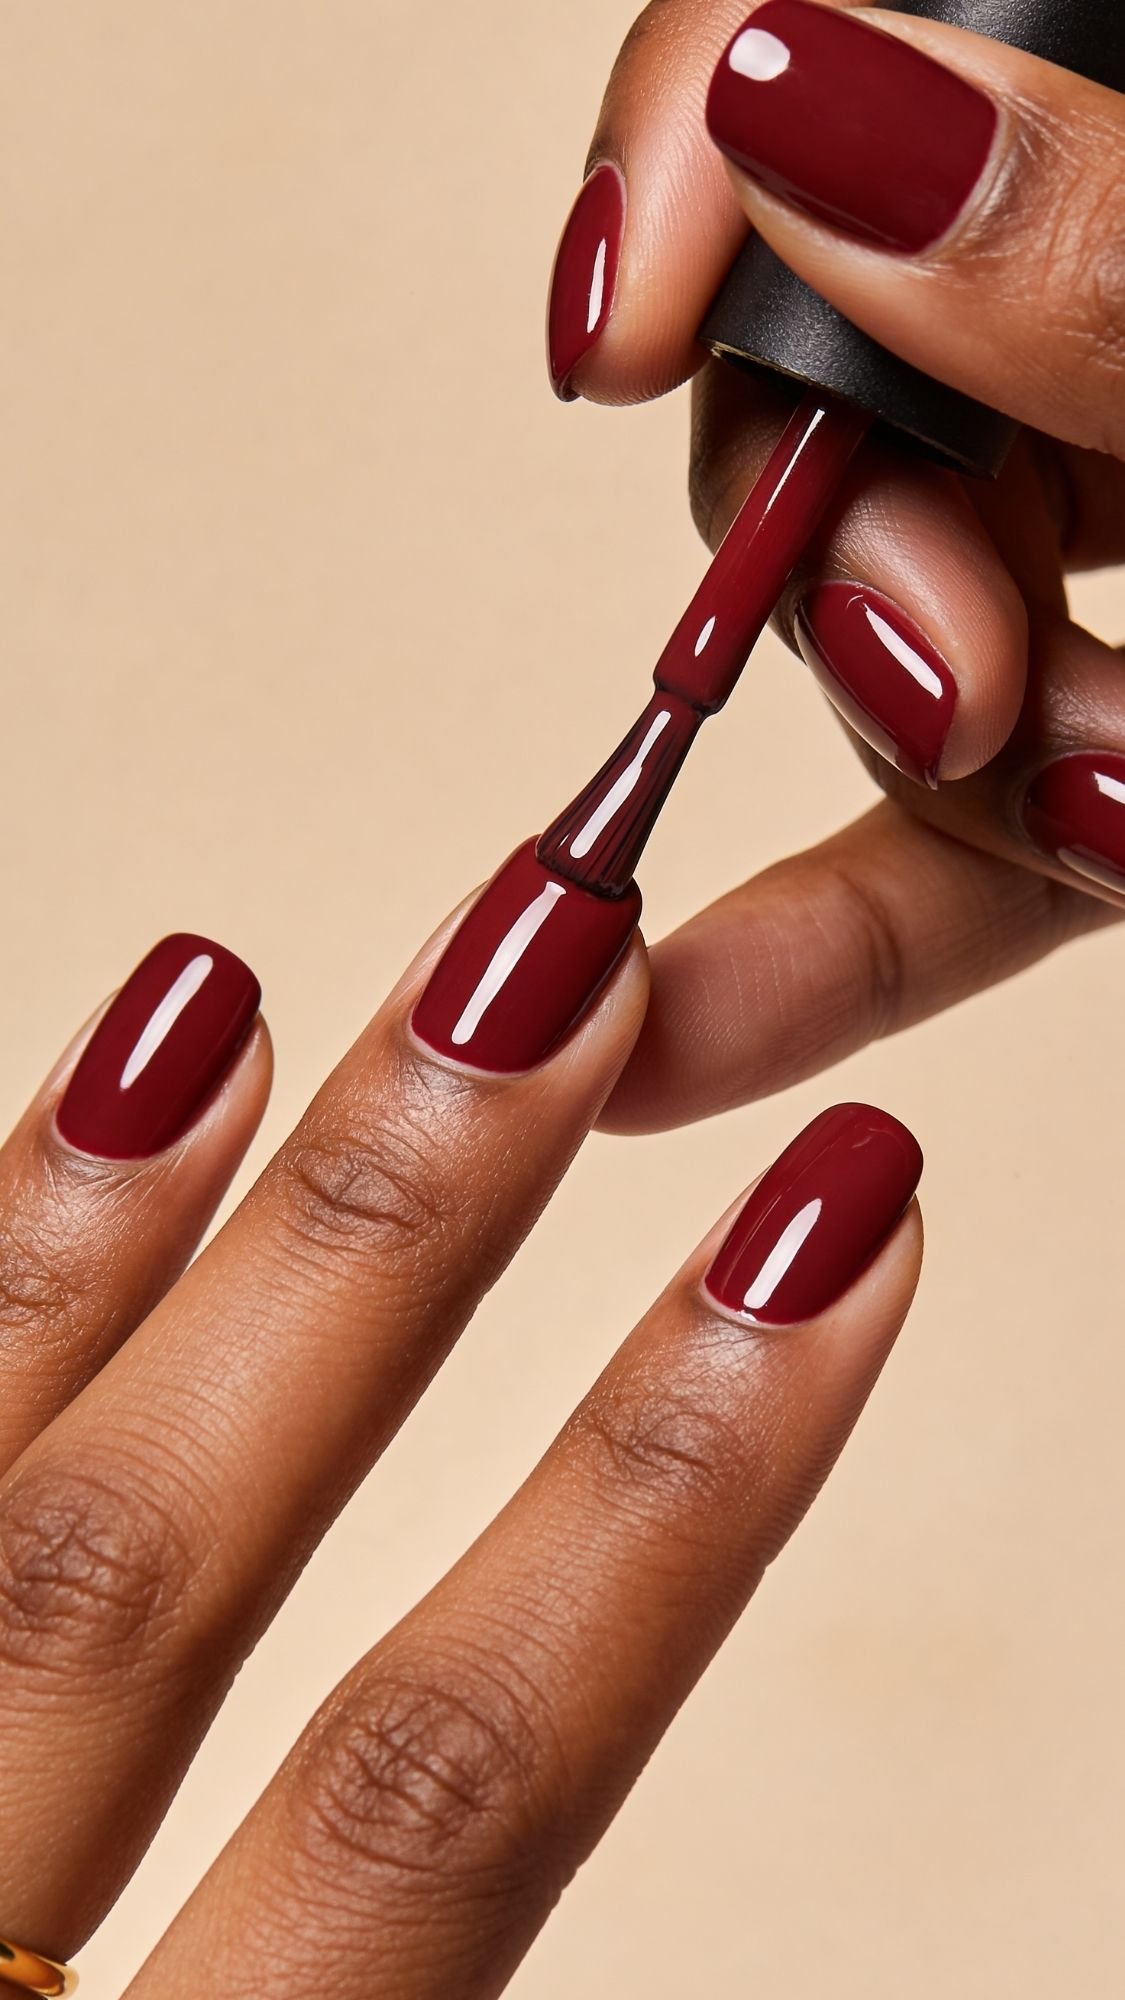
Step 2: The thin coat technique that makes red look expensive
- What you’re trying to achieve: even pigment with zero streaks.
- The 3-stroke rule (center, left, right):
- Wipe one side of the brush on the bottle neck. Leave a small bead on the other side.
- Place the bead one millimeter away from the cuticle, then push it slightly upward without touching skin.
- Pull straight down the center, then down the left, then down the right.
- How thin is thin: you should still see a tiny bit of translucency on coat one. That’s normal. Coat two finishes the job.
- Sensory detail: the first coat can feel slightly draggy, almost tacky as it levels, especially with high-pigment reds. That drag tells you the coat stays thin enough to self-smooth.
- Common mistake + fix:
- Mistake: you keep “going over” the same spot while it starts to set, then you create streaks.
- Fix: place the polish, do your 3 strokes, then stop touching it. Let it level.
Step 3: Dry time strategy, so you stop smudging your life away
I use a simple rule. Each coat needs time to settle, not just time to look dry.
- Between coats: wait 2 to 4 minutes depending on your formula and room temp.
- Before top coat: wait 5 to 8 minutes after your last color coat.
- What “safe to touch” actually means: you can lightly tap the side of your nail without leaving a dent, but you still should not press, pinch, or shove your hands in a hoodie pocket.
- Common mistake + fix:
- Mistake: you top coat too soon, then you trap solvent and get wrinkling.
- Fix: give the color an extra 2 minutes, especially on thumbs.
Step 4: Top coat sealing, the secret to red lasting longer
- What you’re trying to achieve: glassy shine plus a sealed edge that resists chips.
- How to apply:
- Use a generous, even top coat, not a dry brush skim.
- Float the top coat like you float polish, smooth strokes, minimal pressure.
- Cap the free edge by running the brush along the tip.
- Why it matters: red chips look dramatic because the contrast screams. Sealing the edge keeps the tip intact.
- Pro tip: I cap the edge once with base coat and again with top coat. I do not skip this, ever.
- Common mistake + fix:
- Mistake: you drag top coat too hard and it pulls color, then you get bald patches at the tips.
- Fix: use more top coat and a lighter touch.
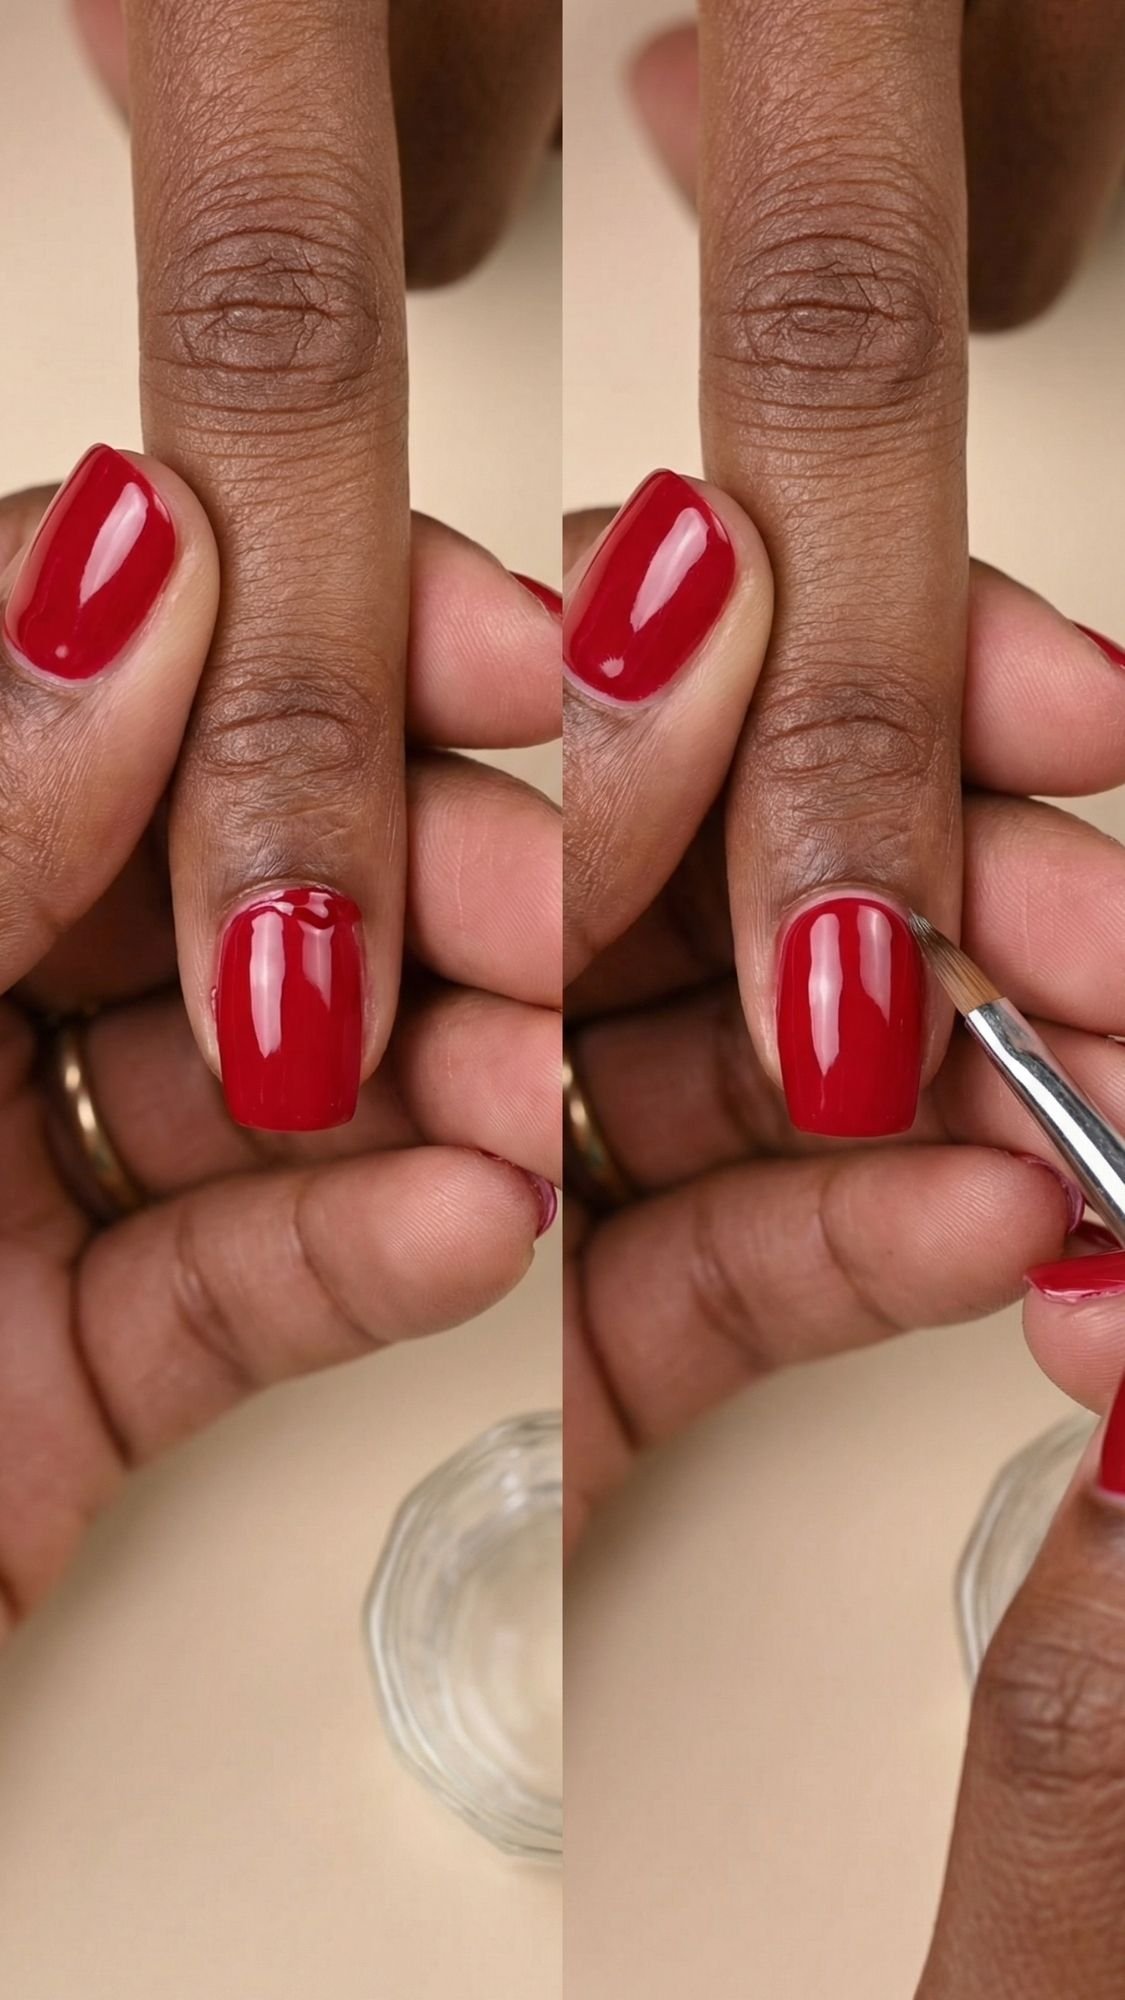
Step 5: Cleanup that looks crisp, not overworked
- What you’re trying to achieve: a clean cuticle line without smearing red everywhere.
- How to do it:
- Dip a small cleanup brush in acetone, blot it slightly.
- Trace the cuticle line in short strokes, then wipe the brush, then repeat.
- Pro tip: the tiny balm barrier around the cuticle makes cleanup glide in one pass instead of ten angry passes.
- Common mistake + fix:
- Mistake: you use too much acetone and it floods the sidewalls.
- Fix: blot the brush first, then work slowly.
Key Takeaways
- Thin coats beat thick coats, every single time.
- Timing prevents wrinkling and smudges, especially with red.
- Capping the free edge makes red look fresh for days.
All-Season Classics
If you want reds you can wear in January, June, and that random Tuesday when you need to feel like you have your life together, start here. These are the “always looks good” designs I come back to because they photograph clean, grow out nicely, and do not require a nail art degree.
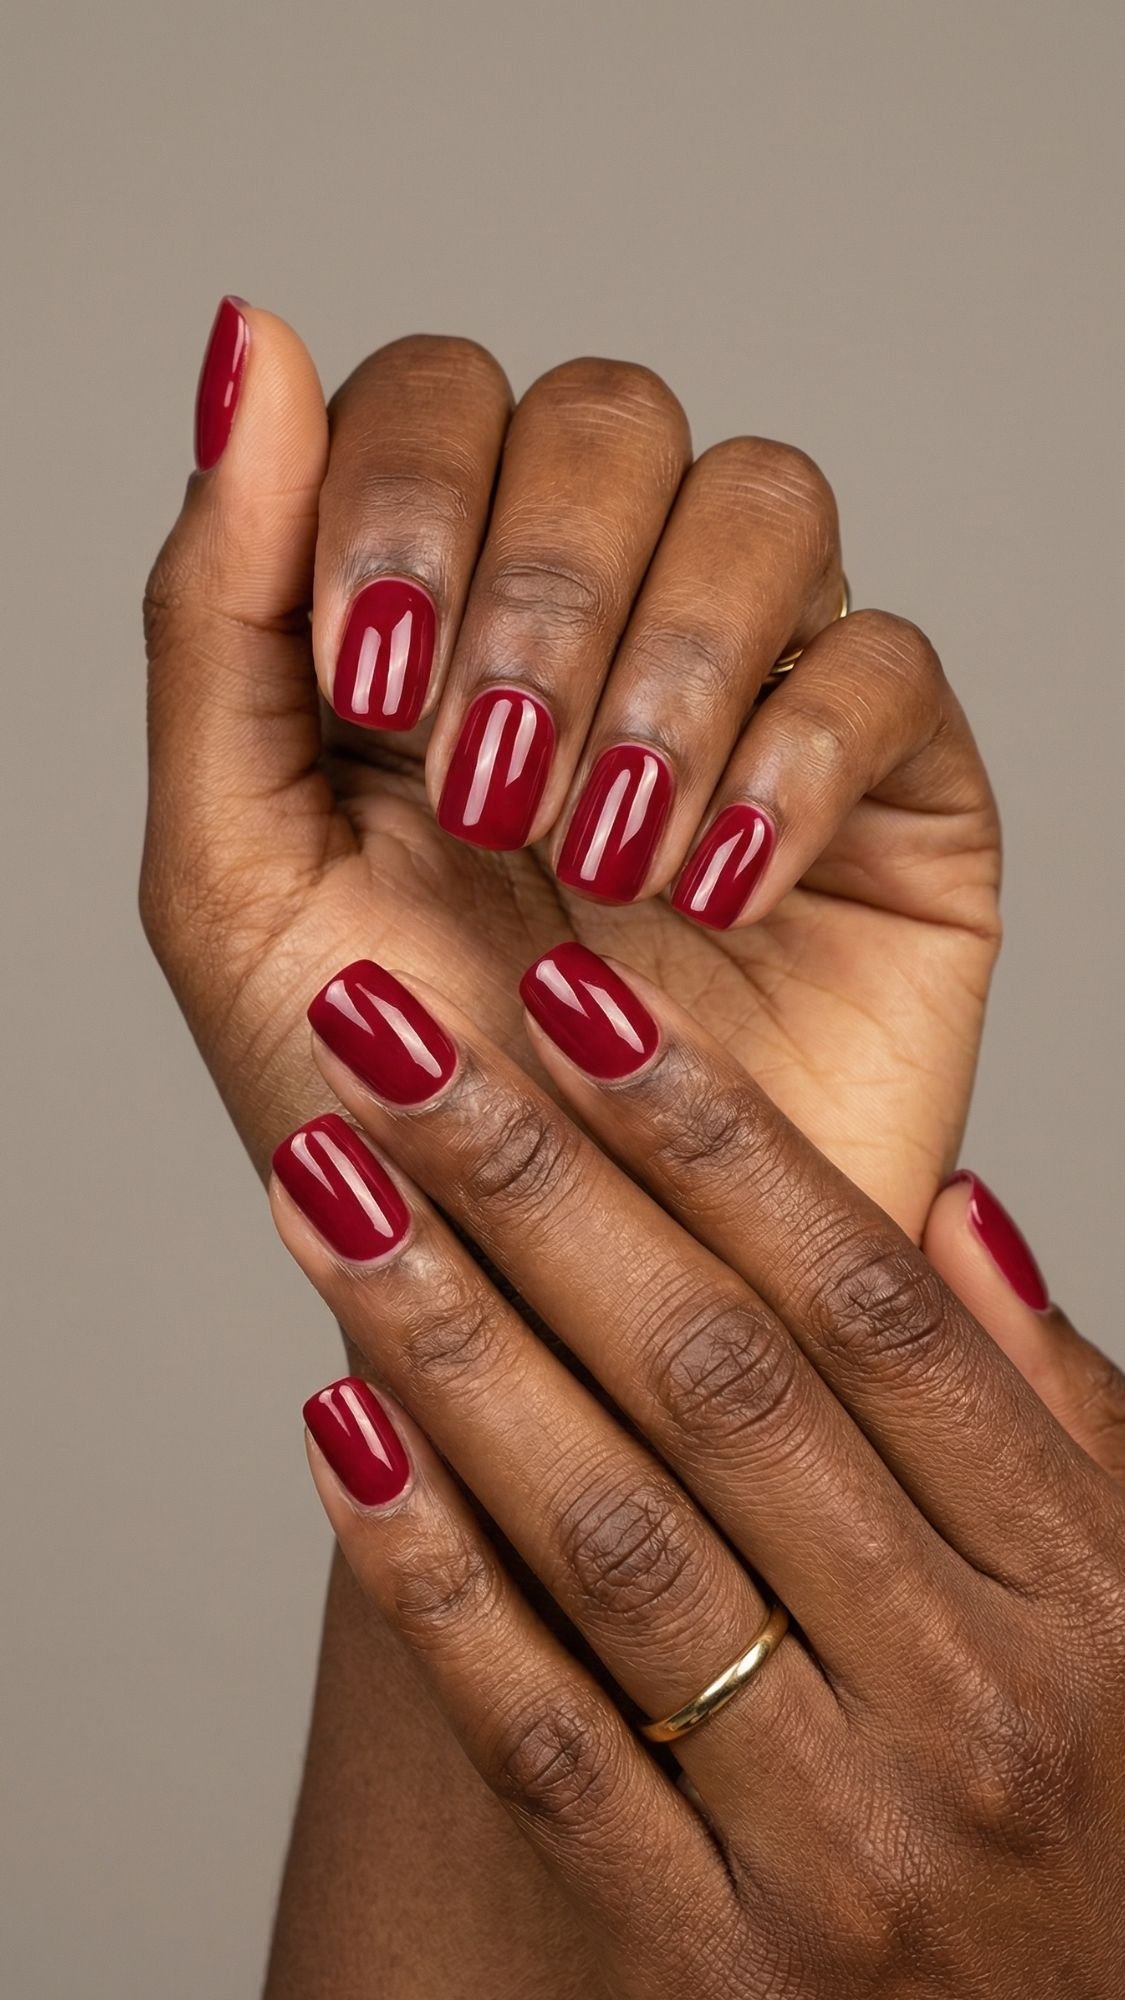
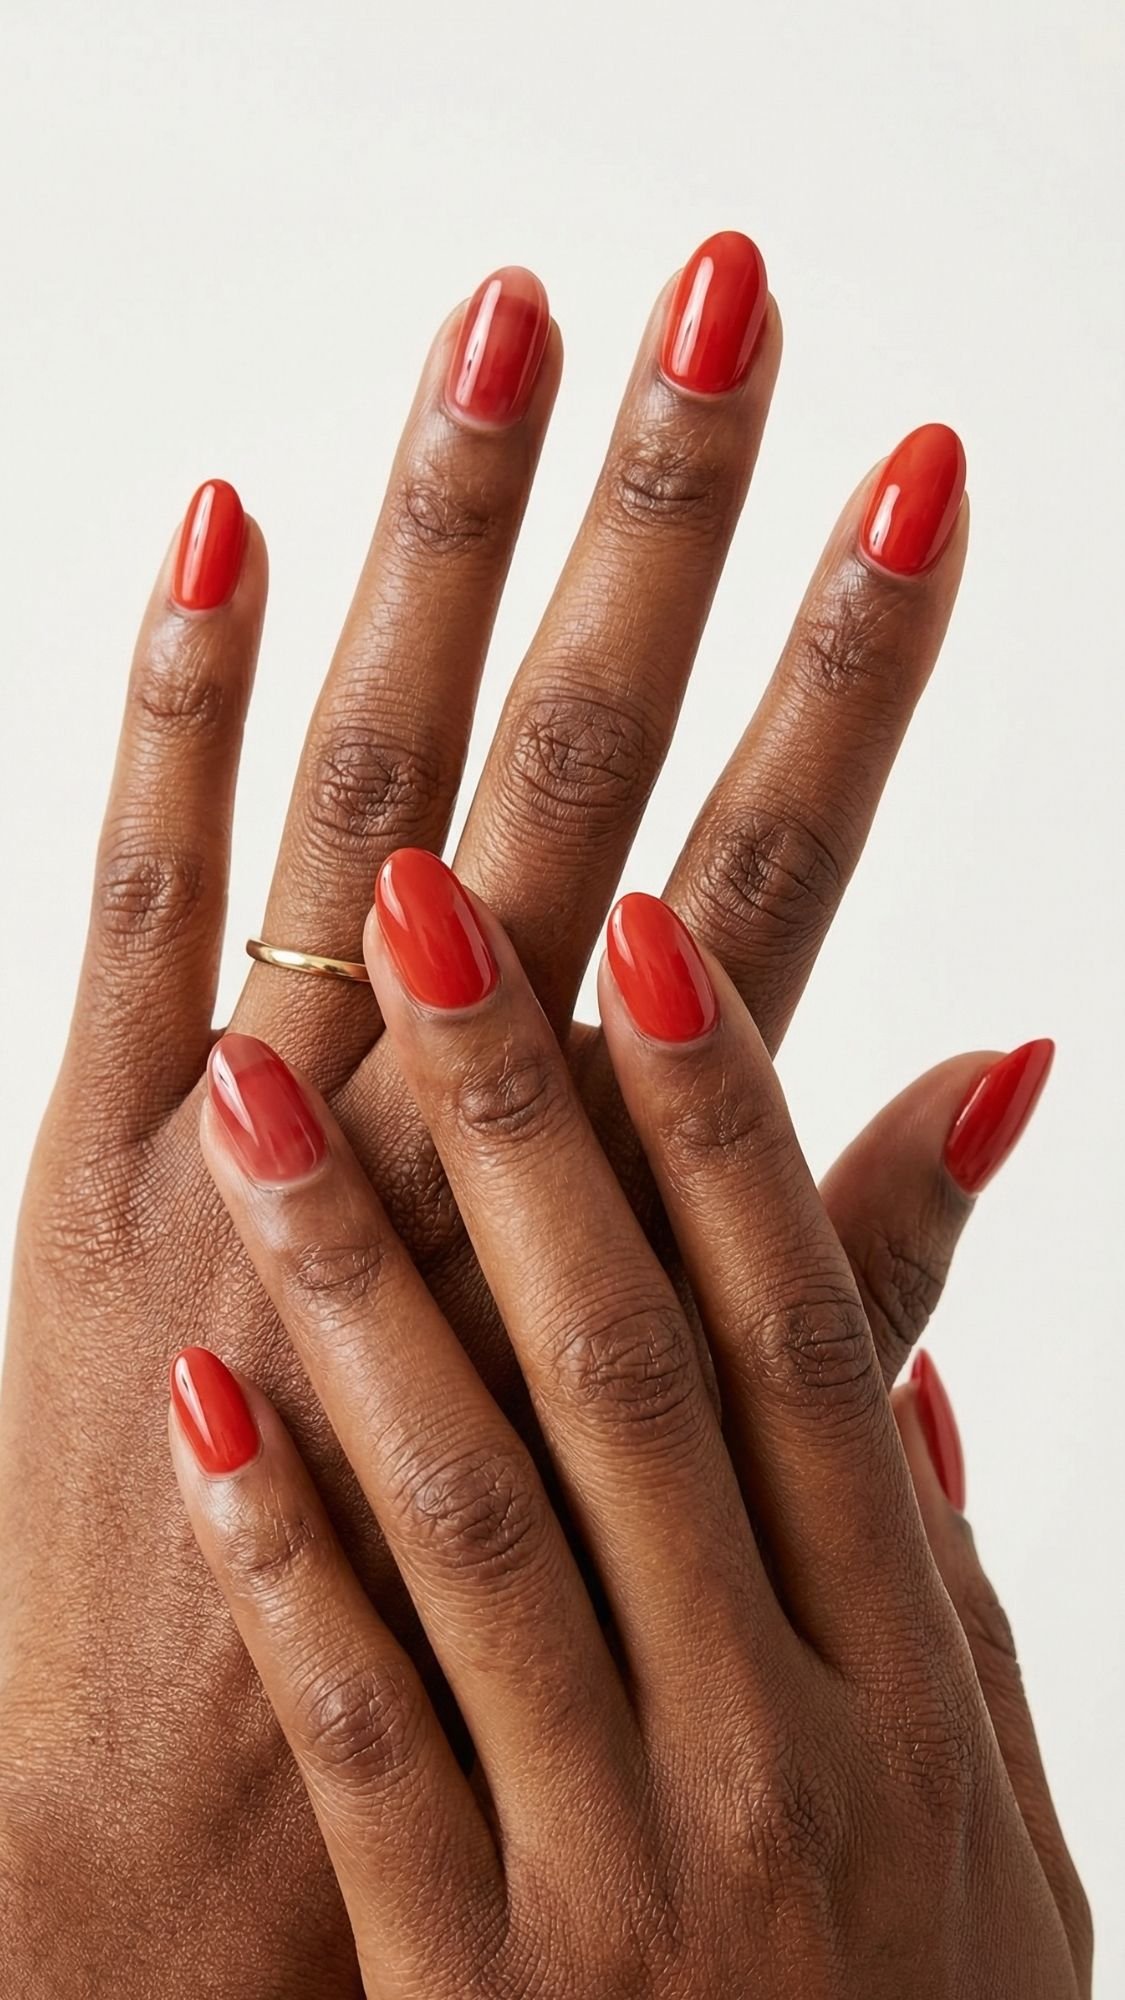
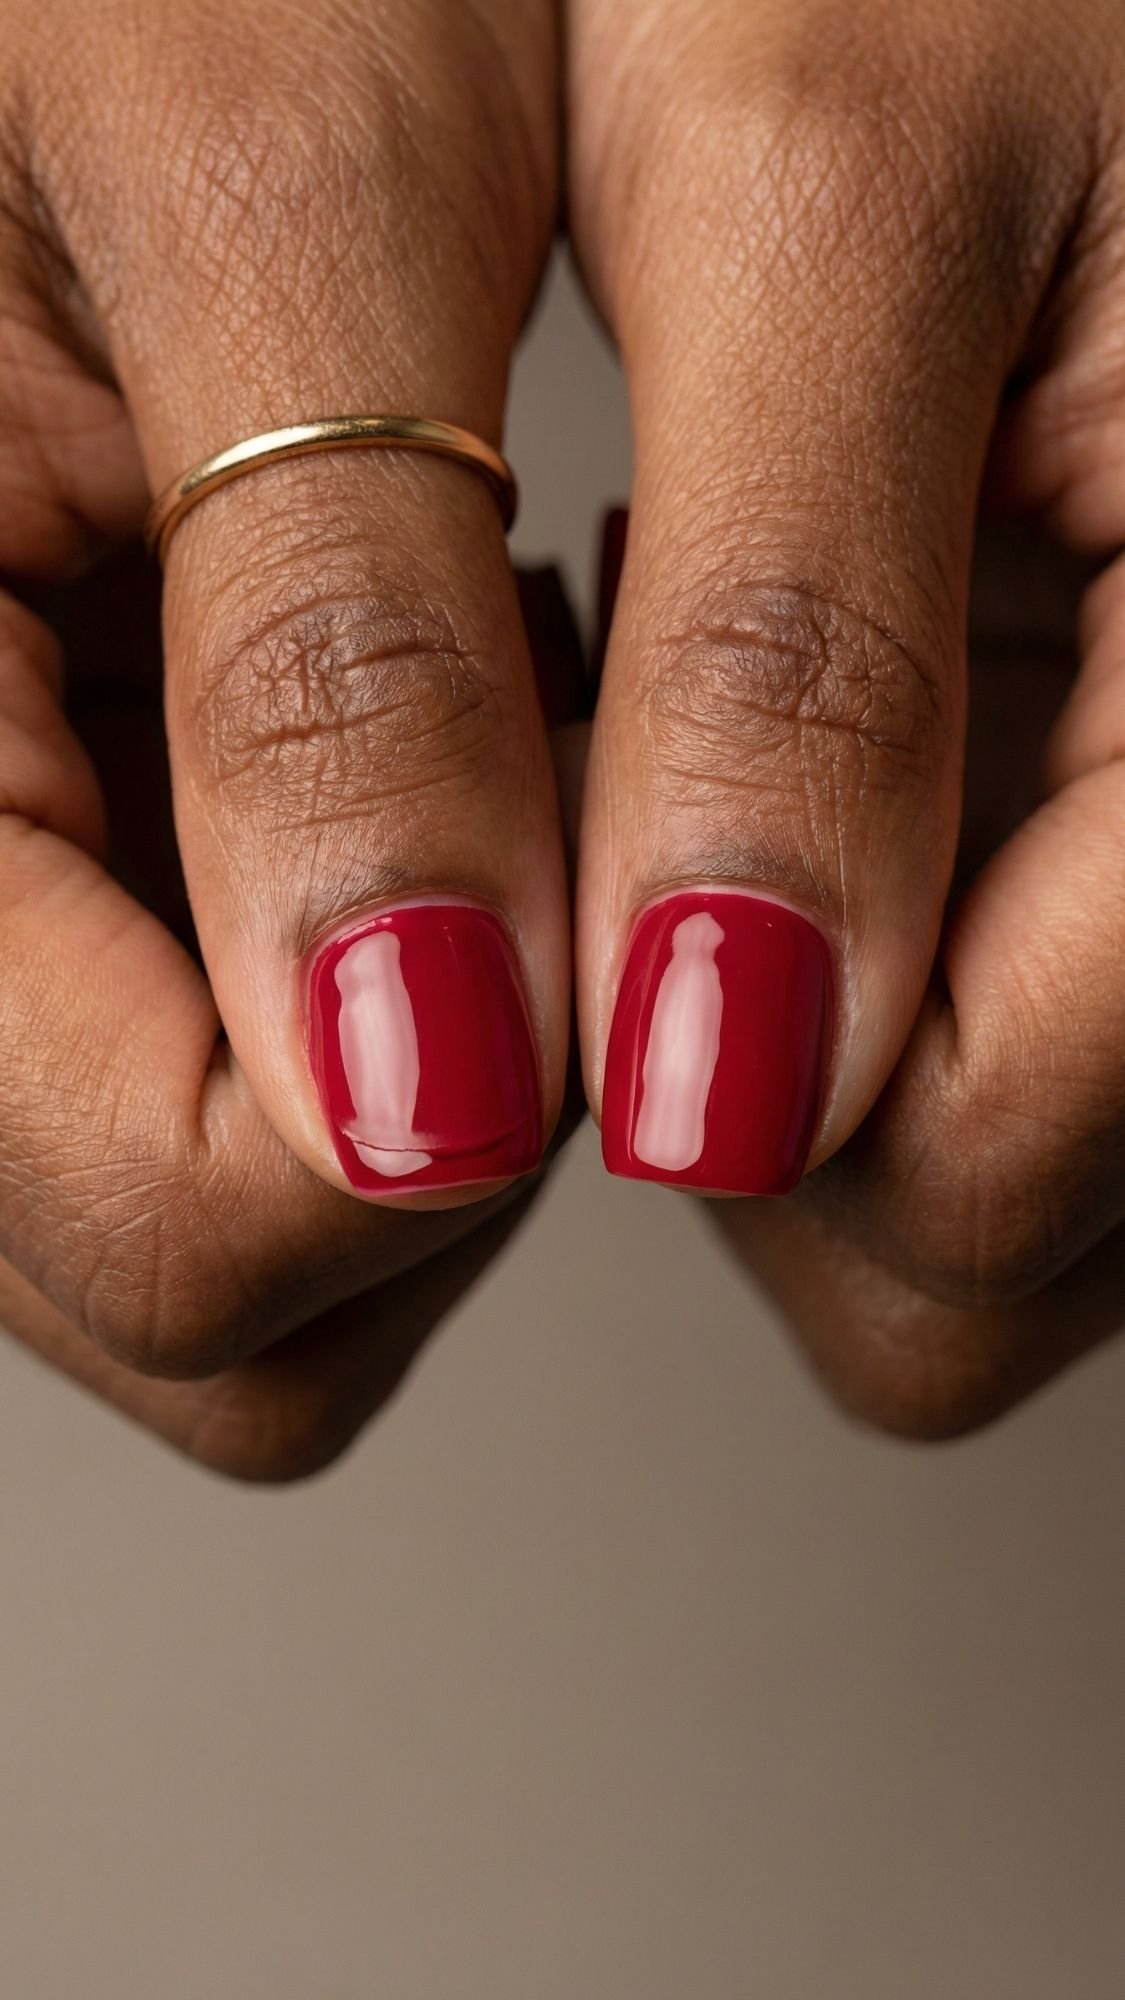
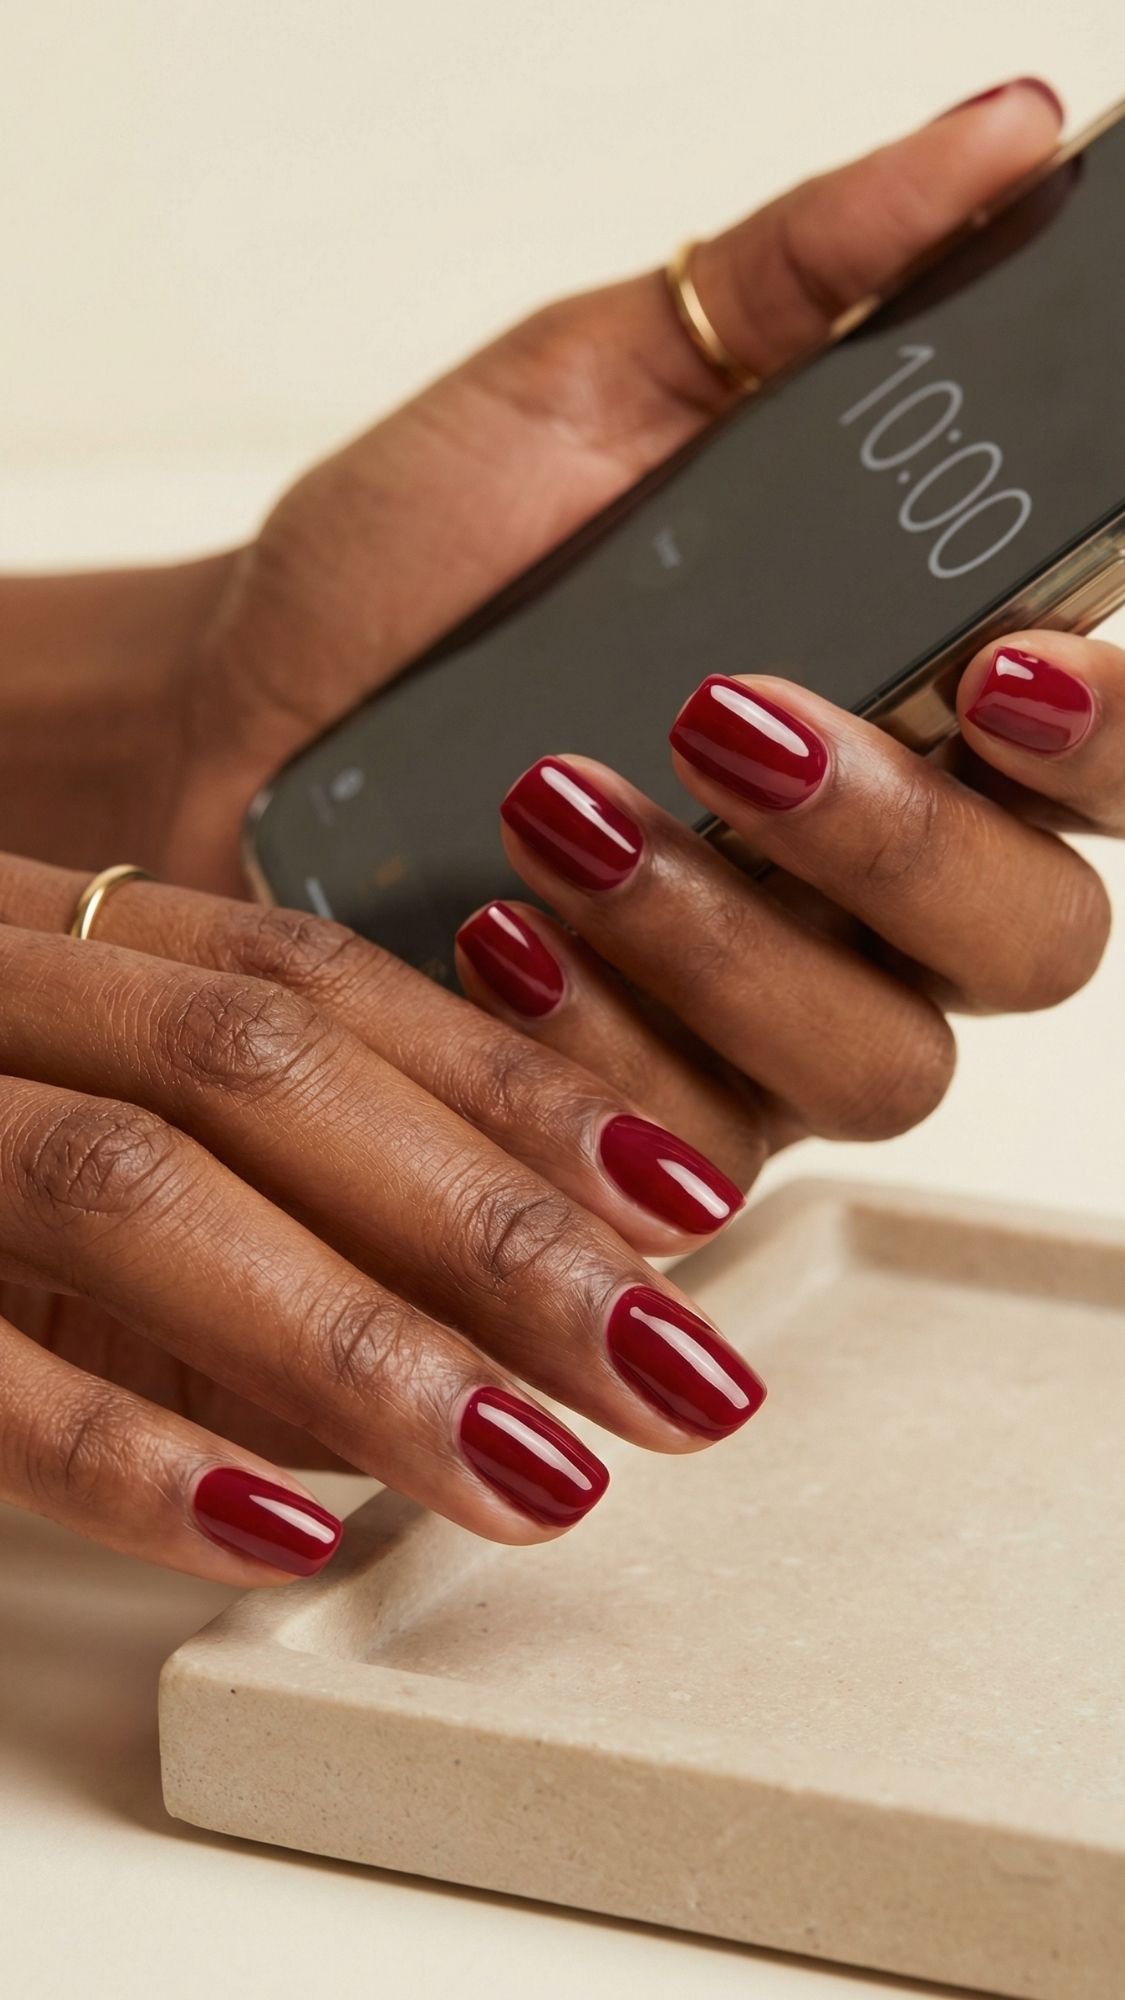
1) True Classic Cream Red, Ultra-Gloss Top
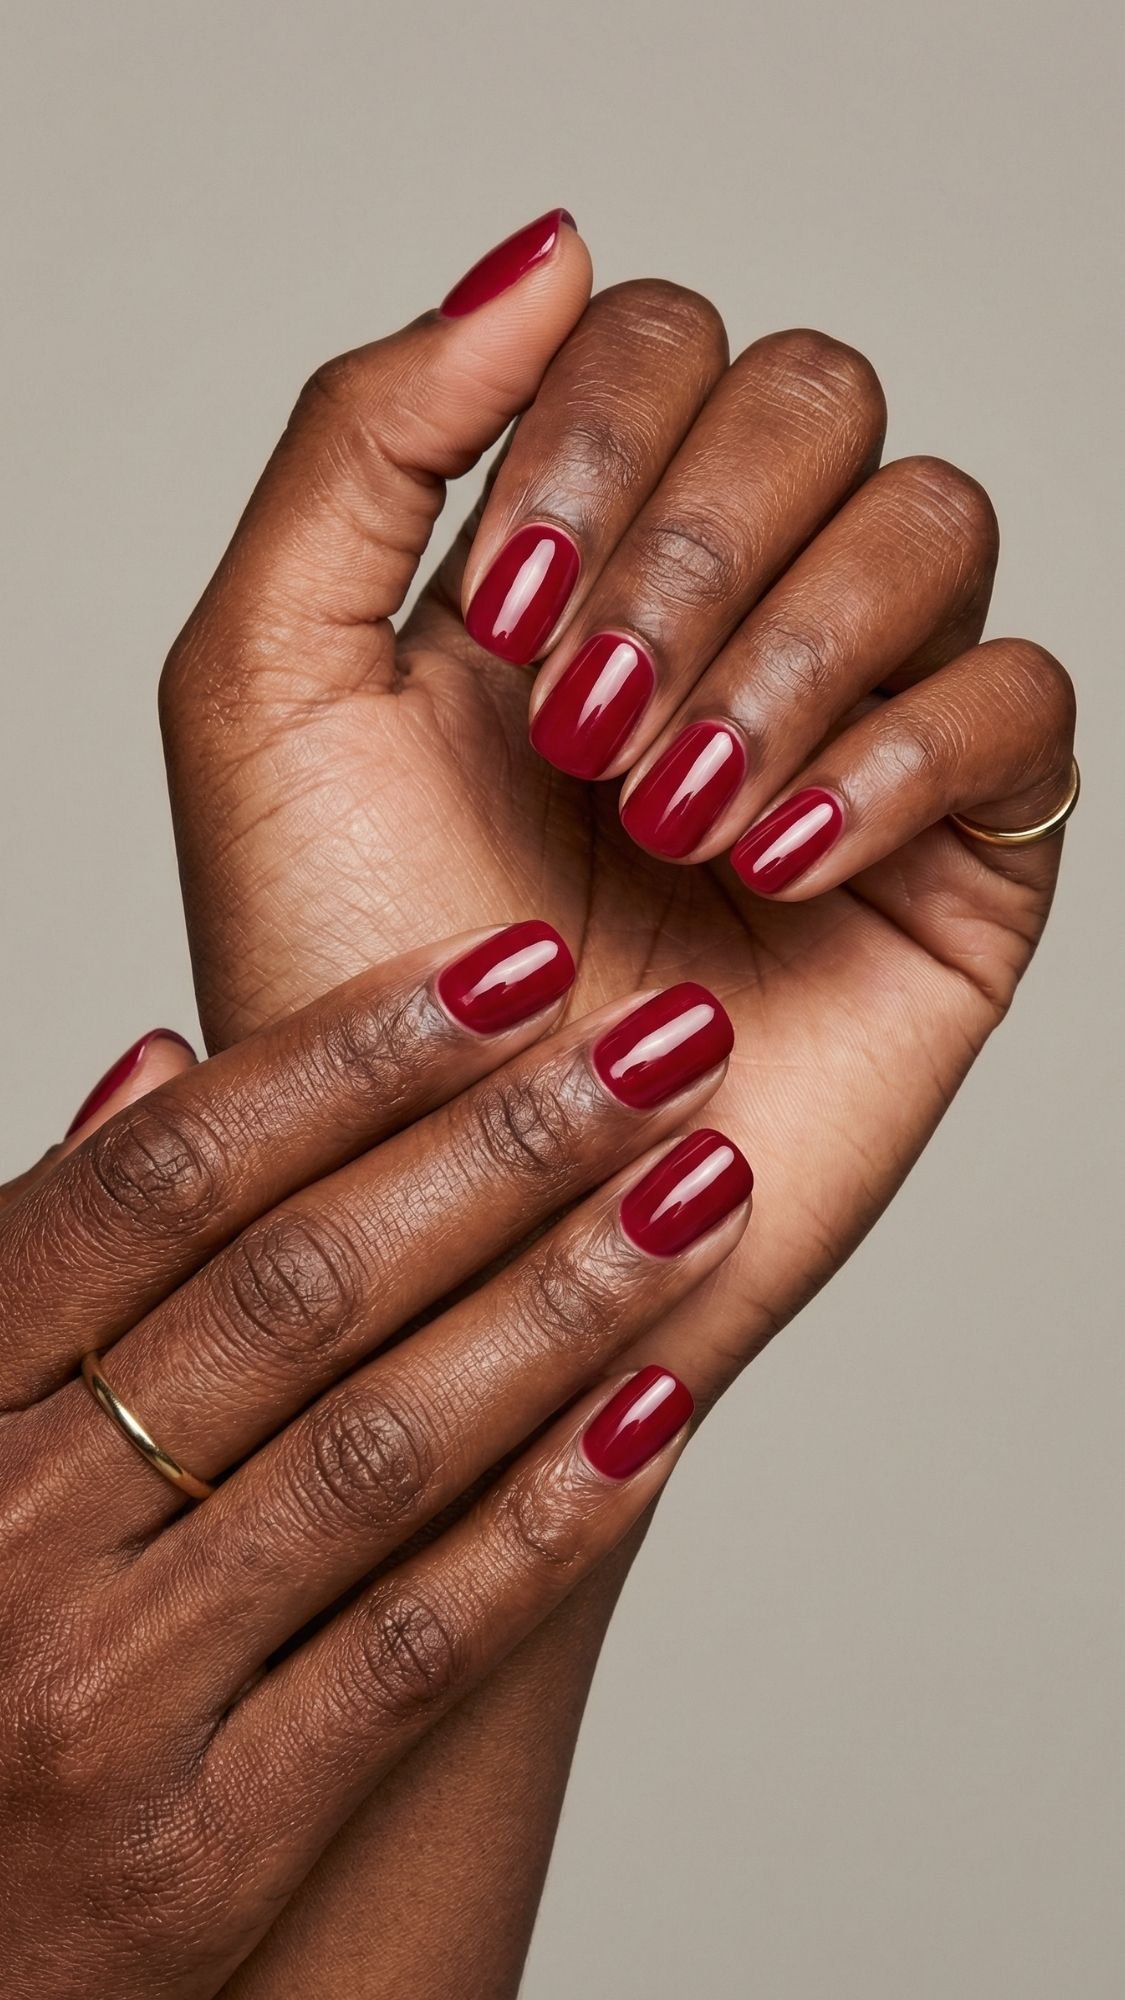
This is the red that never betrays you. It looks crisp, polished, and timeless on every nail length, especially short squoval and short almond.
- How to get it: Apply two thin coats of a cream red, then a glossy top coat that self-levels.
- Pro tip: Leave a tiny clean gap at the cuticle. That one millimeter makes the manicure look salon-clean for days.
- Common mistake + fix: You paint too close to the cuticle and it looks messy fast. Clean the curve with a small cleanup brush.
2) Blue-Red “Retro Pin-Up” (Short Squoval = Magic)
Blue-red looks bold in a clean way, not neon, not orange, just sharp and classic.
- How to get it: Choose a cool-leaning red, keep the shape short squoval for that vintage vibe.
- Pro tip: Cap the free edge carefully because chips show up instantly on cool reds.
- Common mistake + fix: Thick coats make this shade look uneven. Use thin coats so it levels smooth.
3) Cherry Jelly Red (Sheer, Glossy, Expensive-Looking)
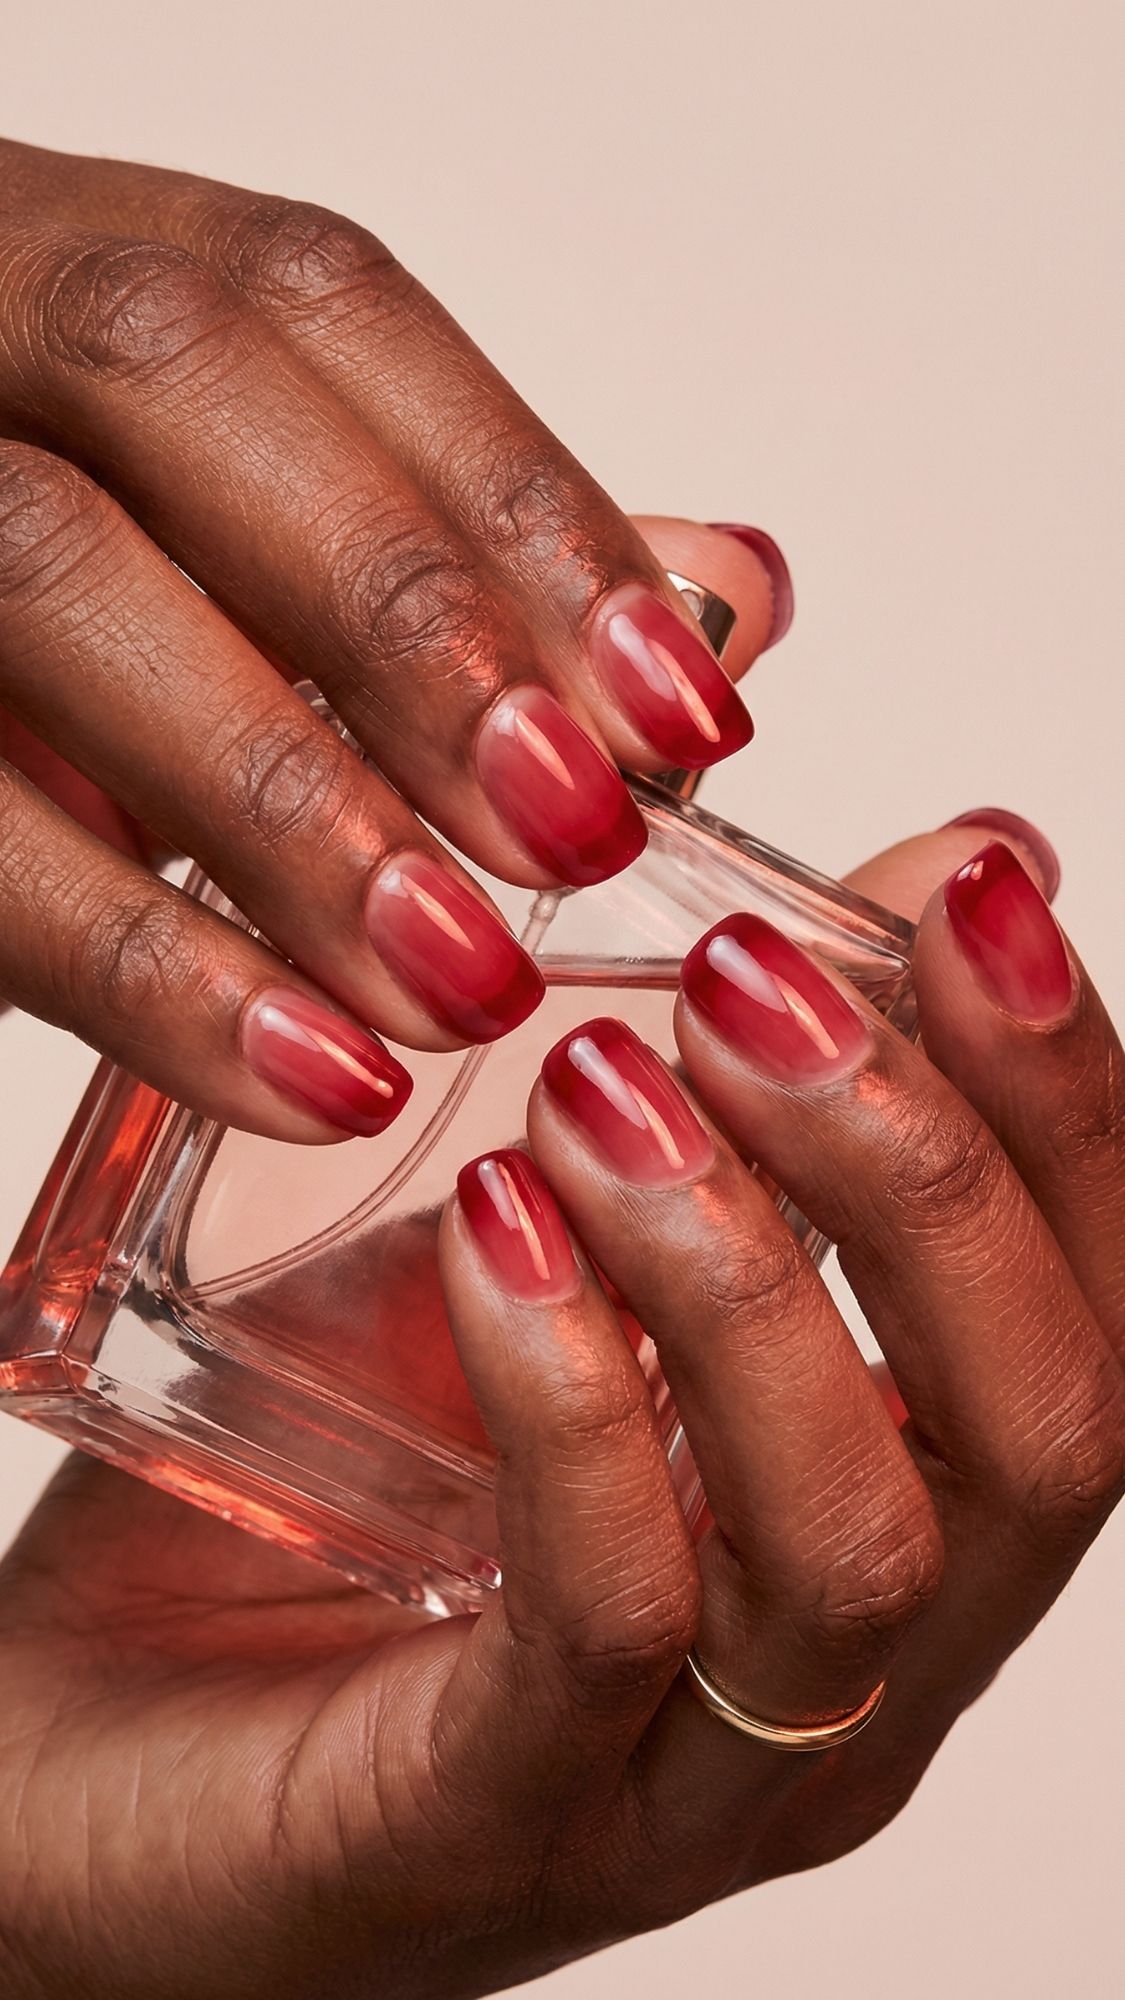
This looks like a glassy cherry candy layer on your nails. It feels softer than a full cream red, but still reads red from across the room.
- How to get it: Apply 2 to 3 thin coats, let each coat settle before the next.
- Pro tip: Build translucency in layers, depth makes it look high-end.
- Common mistake + fix: Rushing coats traps solvent and causes wrinkles. Wait a few extra minutes.
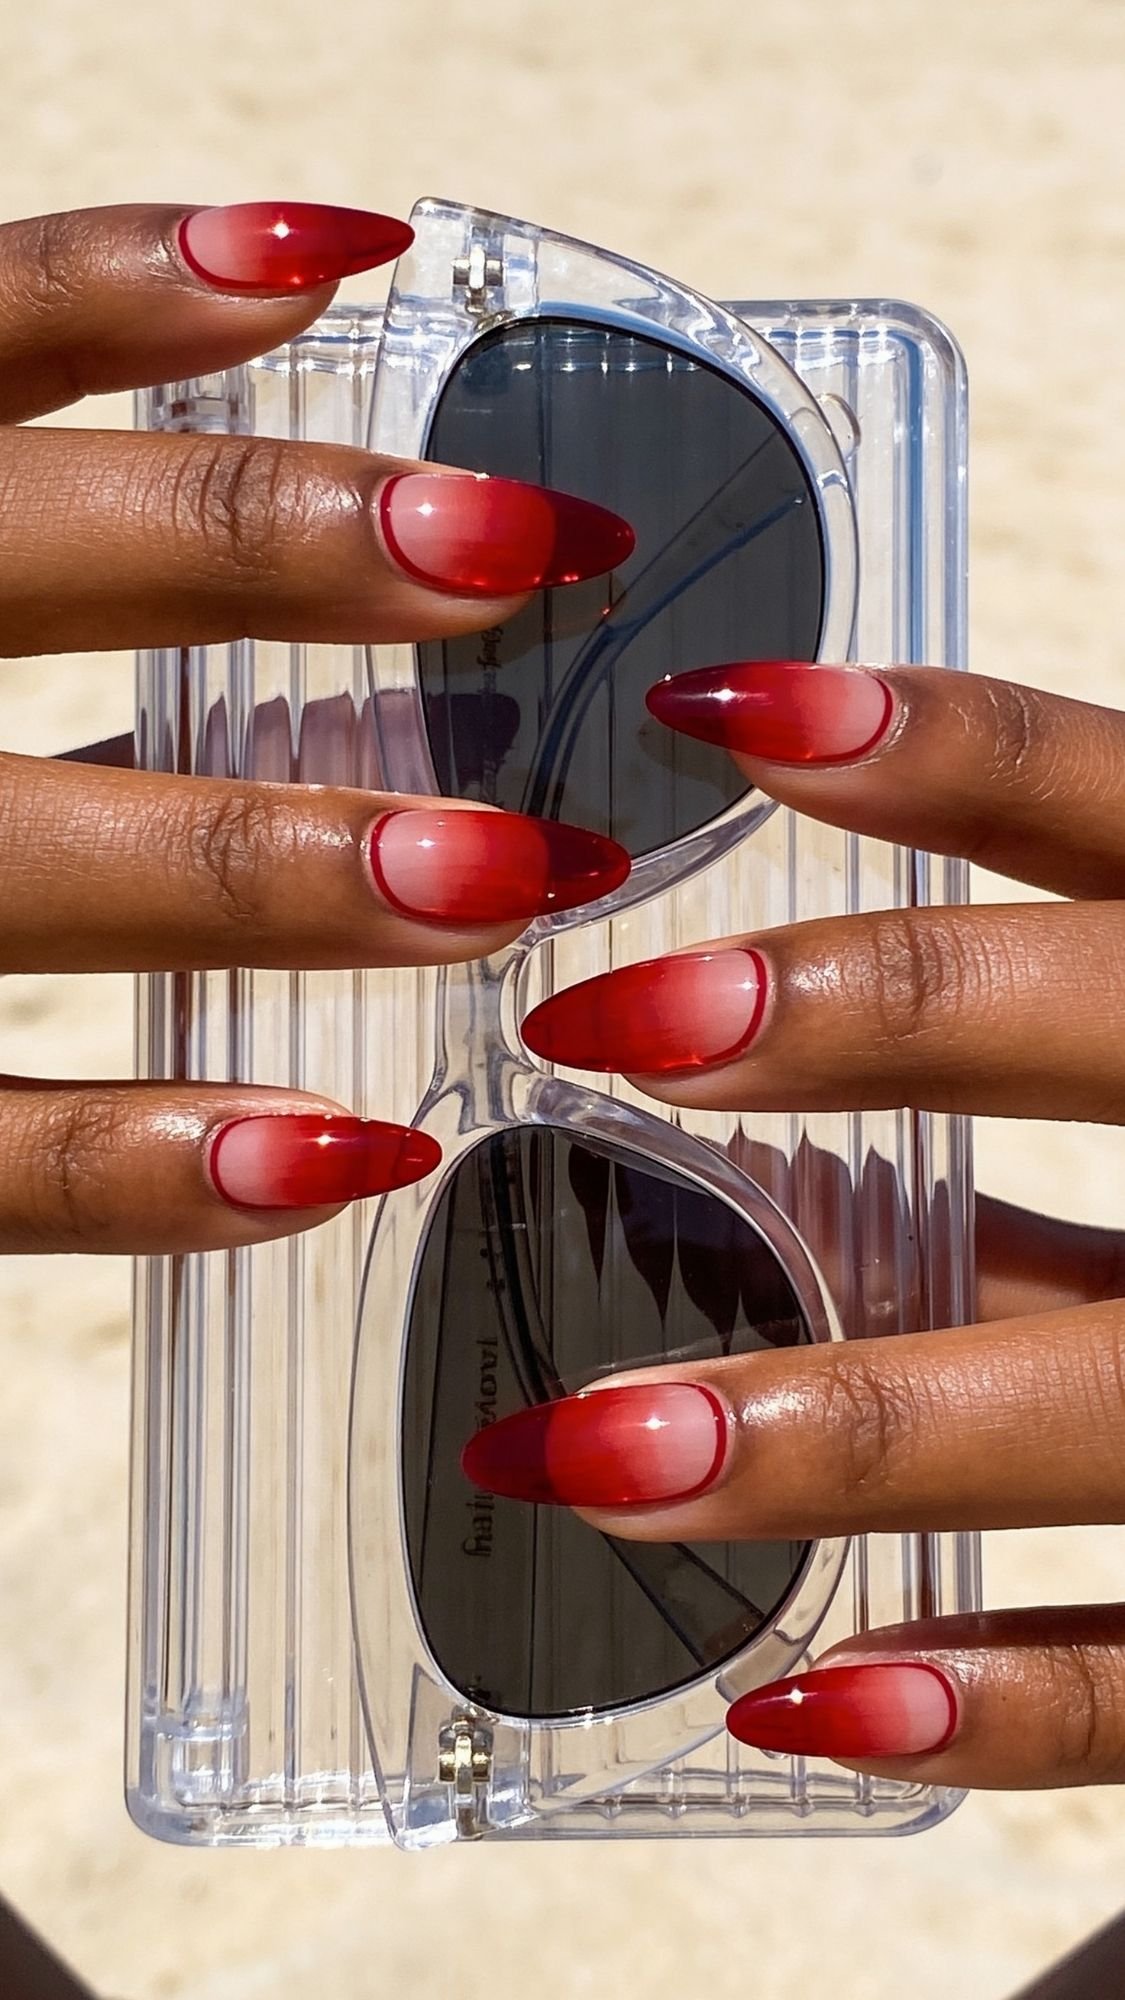
4) Micro Red French Tip (Tiny Tip, Big Chic Energy)
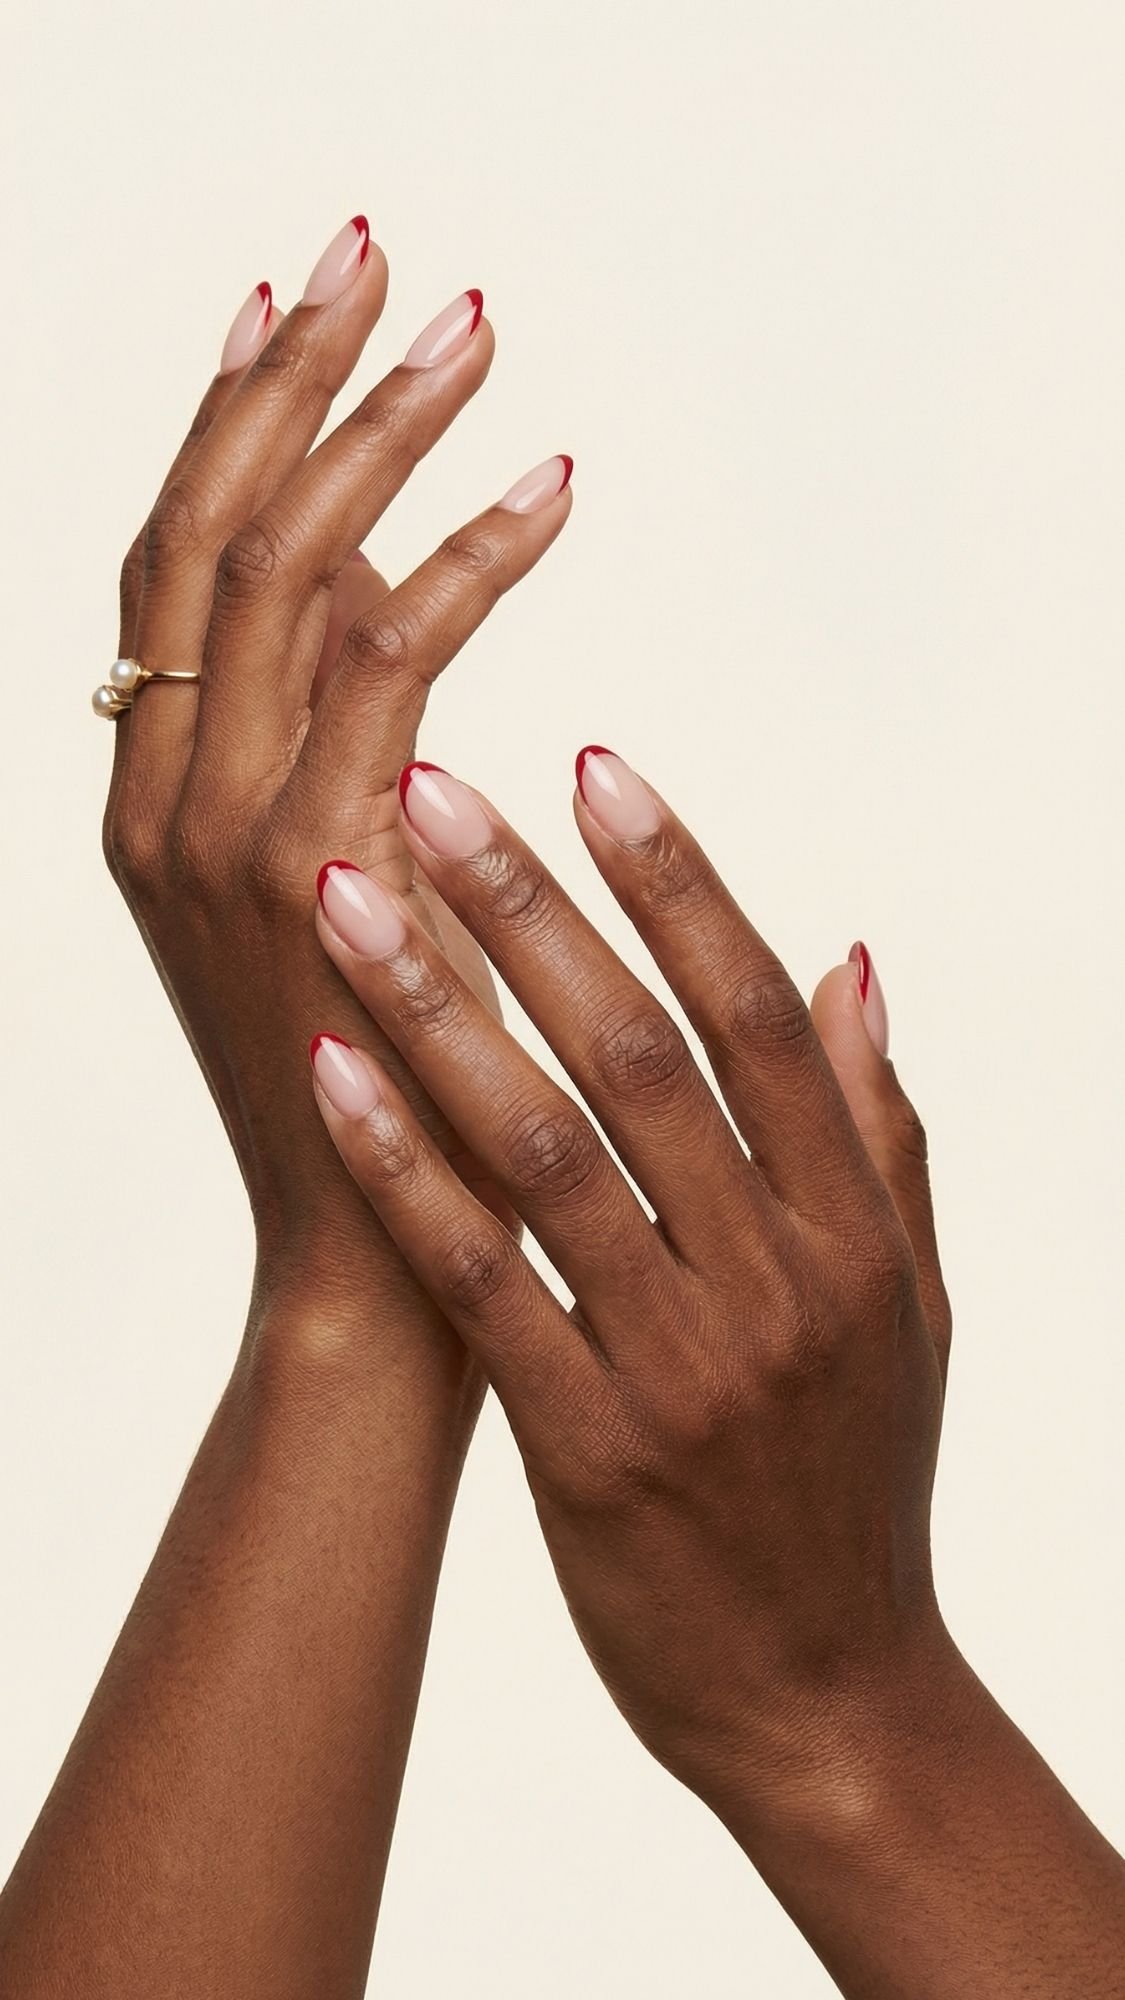
You get the vibe of red without committing to full coverage, and it grows out beautifully.
- How to get it: Sheer nude base, then a very thin red line across the tip with a striping brush.
- Pro tip: Keep the smile line thin and shallow, it lengthens the nail visually.
- Common mistake + fix: The line gets chunky with the polish brush. Switch to a detail brush.
5) Negative Space Half-Moon (Clean Cuticle, Designer Look)
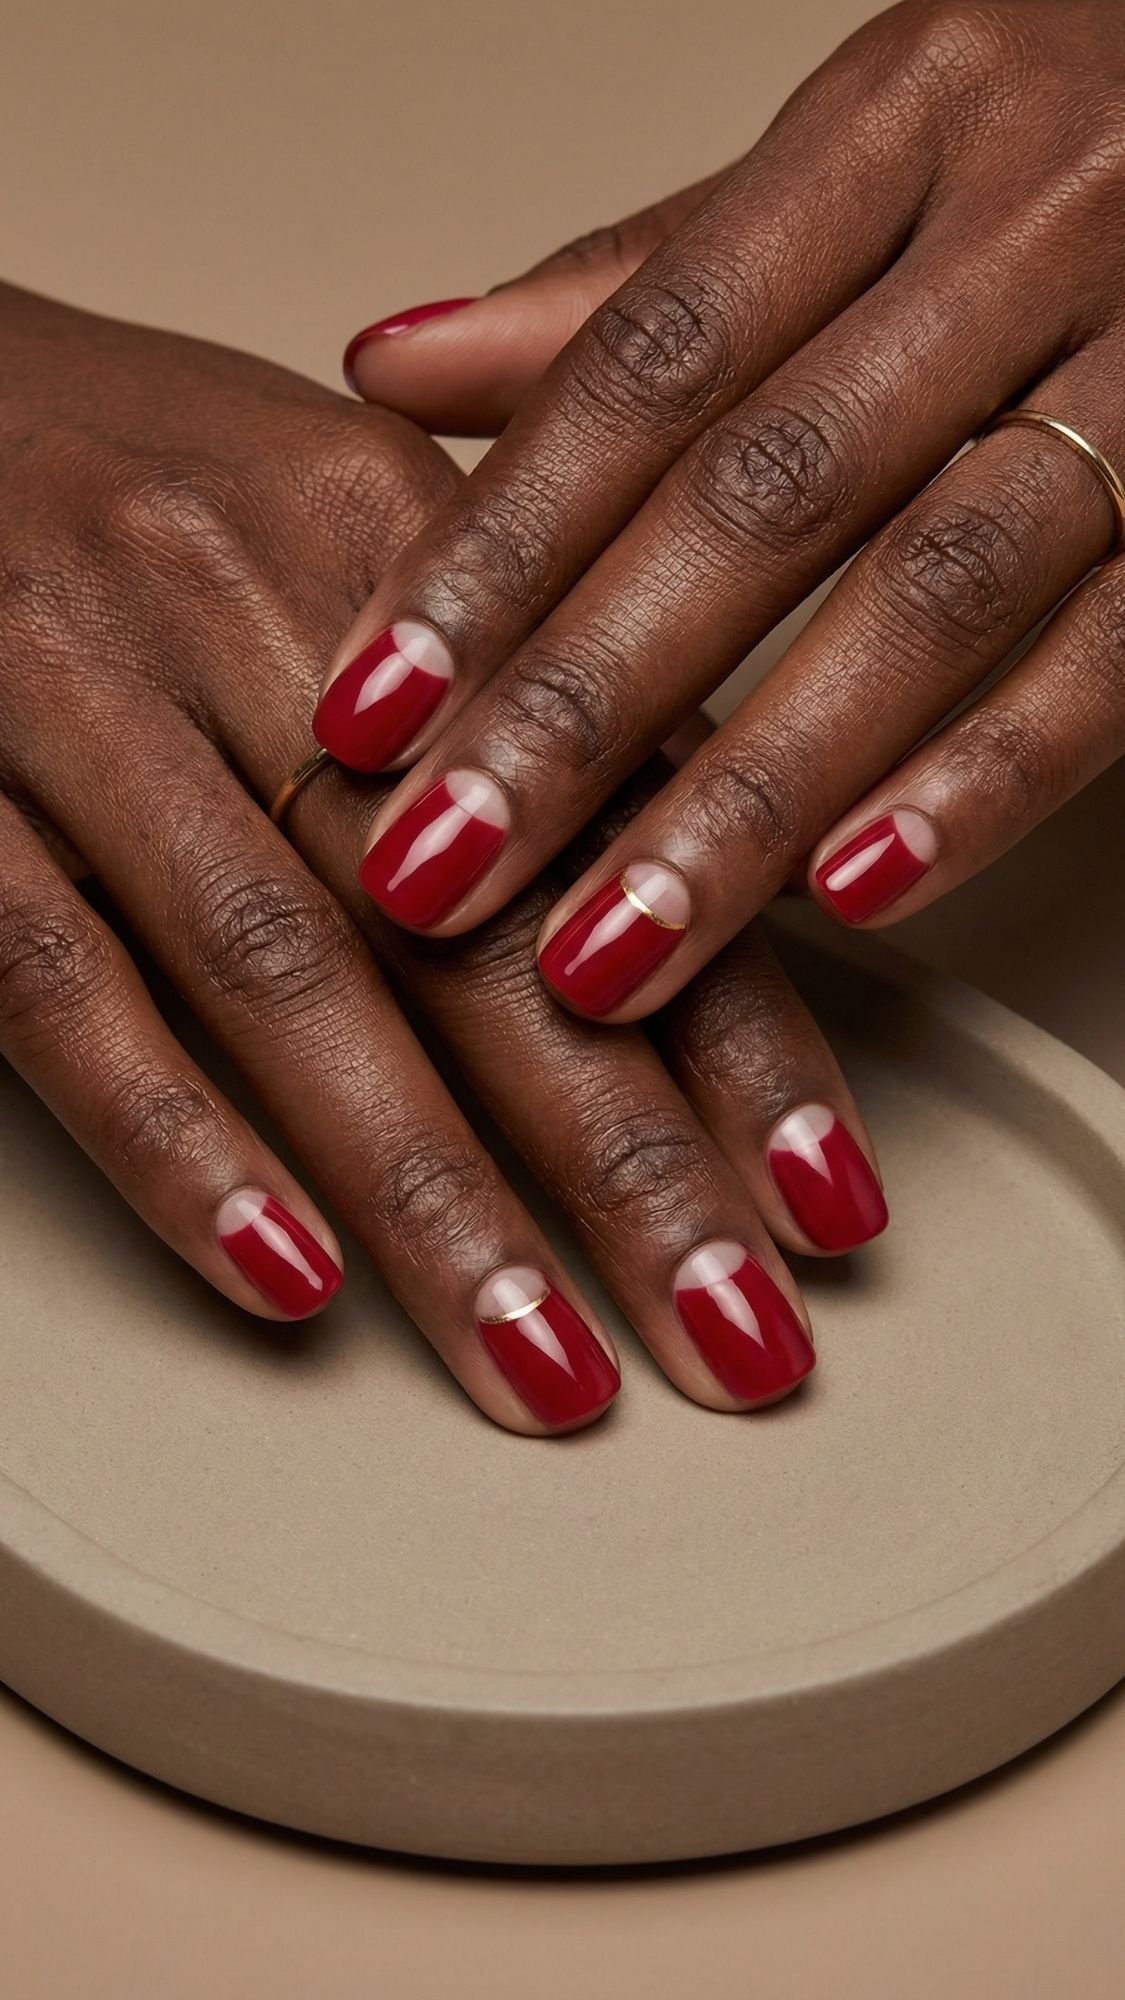
This one looks editorial because it frames the nail instead of covering everything, and it hides grow-out better than full red.
- How to get it: Sheer base, paint red around the nail while leaving a clean half-moon near the cuticle.
- Pro tip: Map the half-moon first, then fill in the red like coloring inside the lines.
- Common mistake + fix: Uneven half-moons across nails. Sketch lightly before committing.
6) “Lipgloss Red” Finish (Squishy Shine, Soft Focus Red)
This finish looks juicy and glossy, like your nails have that plump glass reflection. It’s the easiest way to make a simple red feel trendy without nail art.
- How to get it: Use a slightly translucent red, then a super glossy top coat.
- Pro tip: Use enough top coat to create a smooth shine line, then cap the edge.
- Common mistake + fix: A thin top coat makes the shine look flat. Float on a fuller layer.
Spring Reds
Spring reds feel lighter, fresher, and a little flirty, without losing that “put-together hands” effect. I love spring reds because they look amazing in natural light, and they make simple outfits feel intentional. You do not need complicated art here. You just need clean lines, balanced placement, and a finish that looks glossy and smooth. Ever notice how spring nail ideas can look cute in theory, then messy in real life? That usually happens when the design gets too big for the nail.
7) Tomato Red (Bright, Warm, Instant Mood Boost)
Tomato red gives you that fresh, sunny energy without turning neon. It looks especially good in spring because it reads warm and lively against the skin.
- How to get it: Choose a warm, slightly orange-leaning red, apply two thin coats, finish with a glossy top coat.
- Pro tip: Keep your cuticle line extra clean with tomato reds, they draw the eye fast.
- Common mistake + fix: The color pulls streaky when you rush. Let coat one fully settle, then apply coat two with the 3-stroke rule.
8) Red Aura Nails (Soft Airbrushed Glow, “Saved Immediately” Energy)
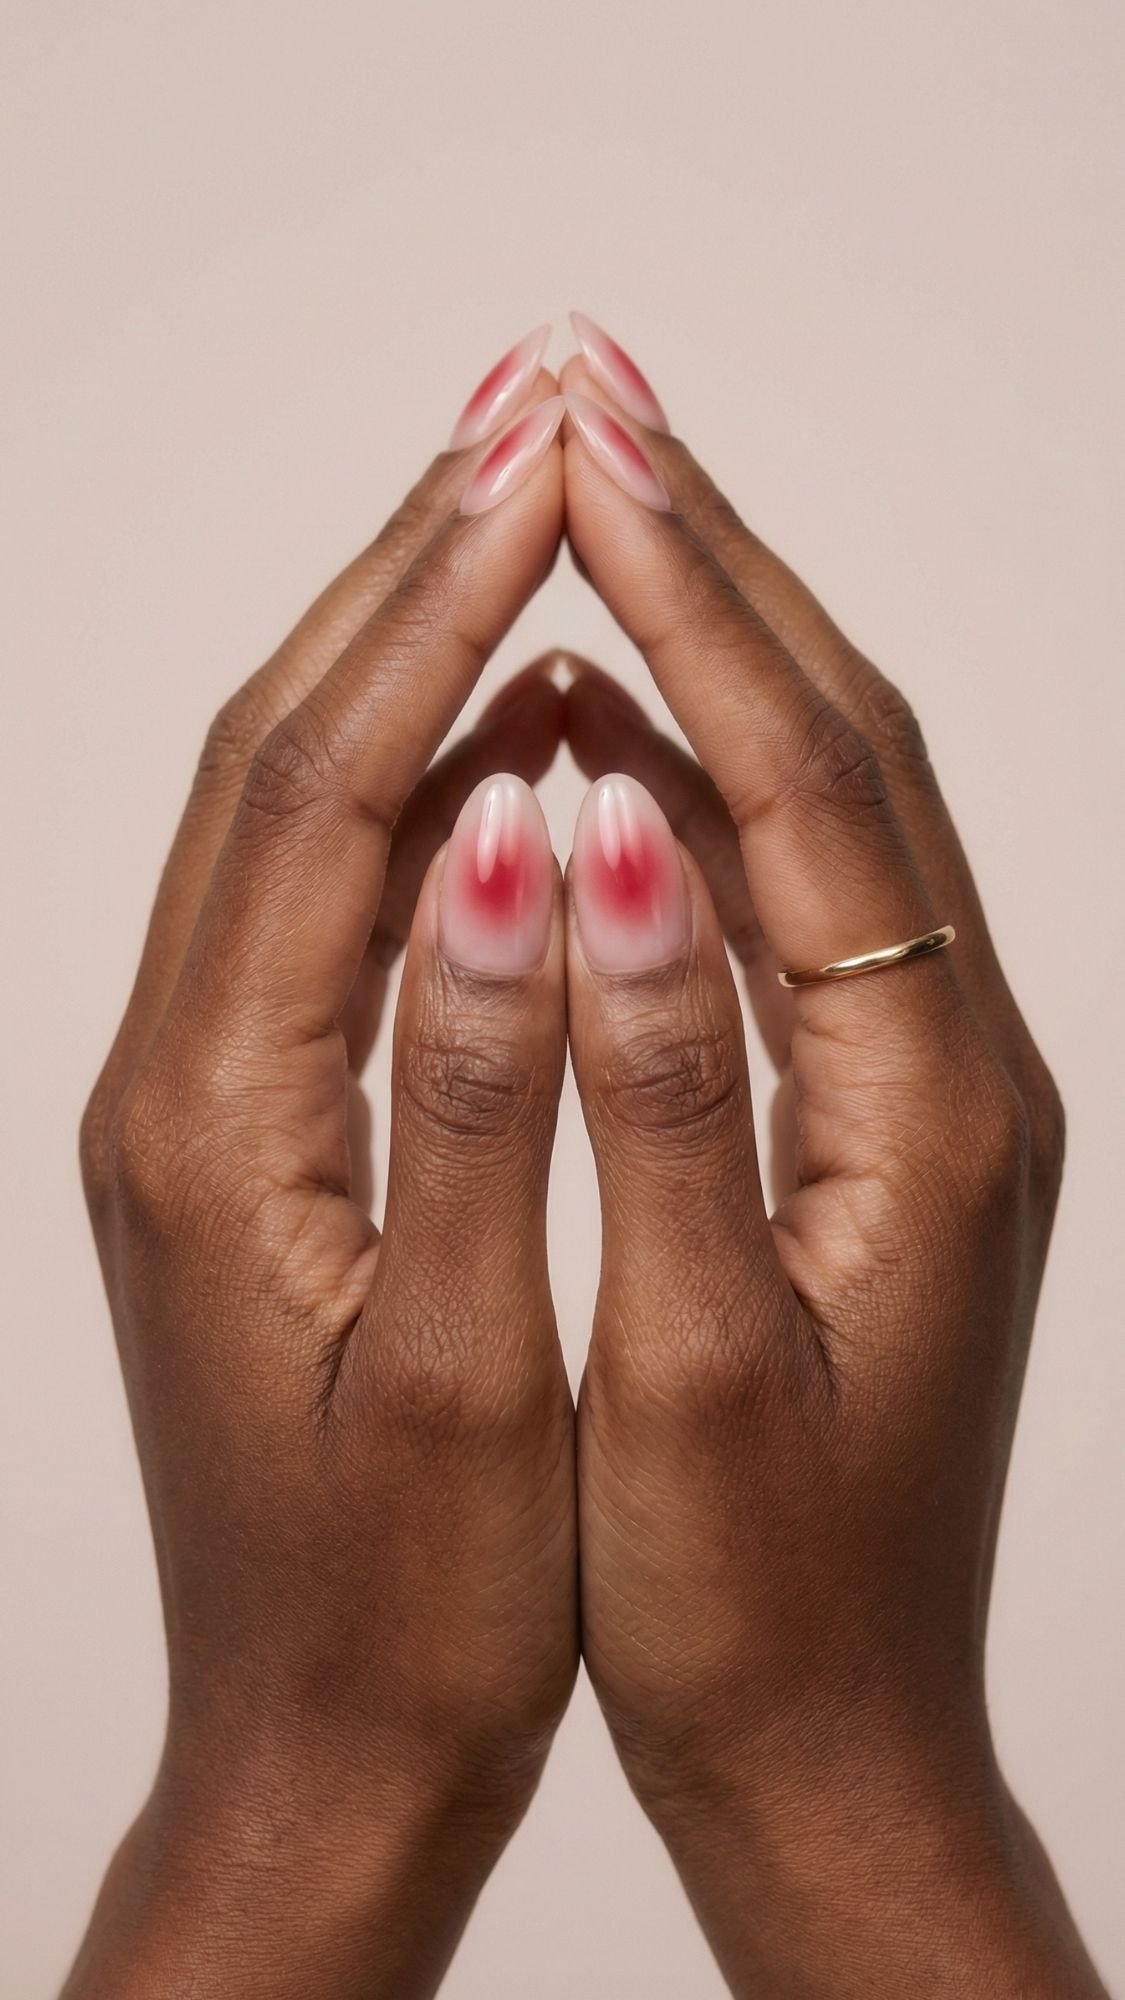
Aura nails look like a soft spotlight in the center of each nail. They photograph like art, but they still feel wearable.
- How to get it: Start with a sheer nude or milky base, then blend a cherry red glow in the center using a sponge or airbrush-style technique.
- Pro tip: Keep the aura soft, not a hard circle. I tap the sponge lightly, then build the color slowly.
- Common mistake + fix: The center looks blotchy. Use less polish on the sponge, and tap more times instead of pressing harder.
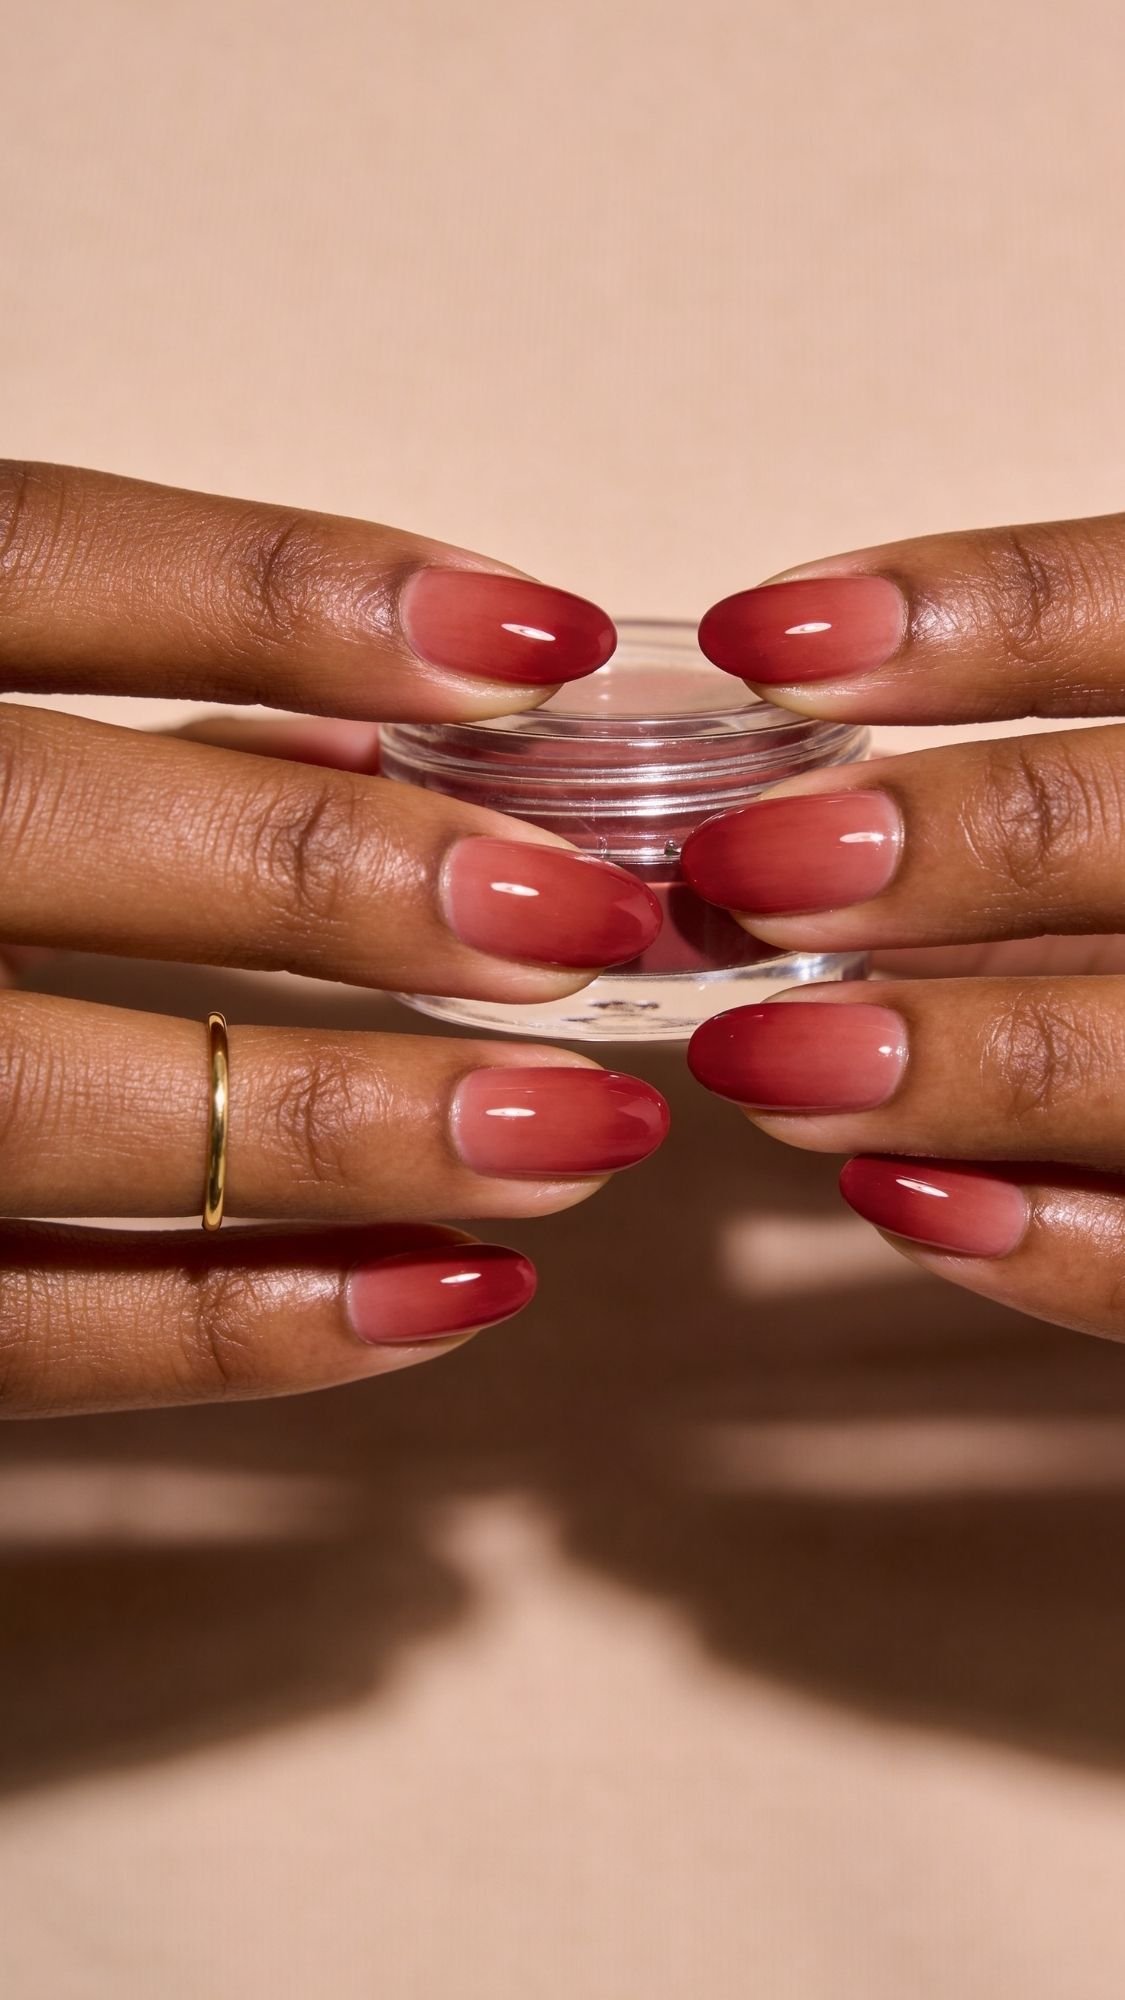
9) Cherry Glaze Ombré (Pink-to-Cherry Fade, Glossy Depth)
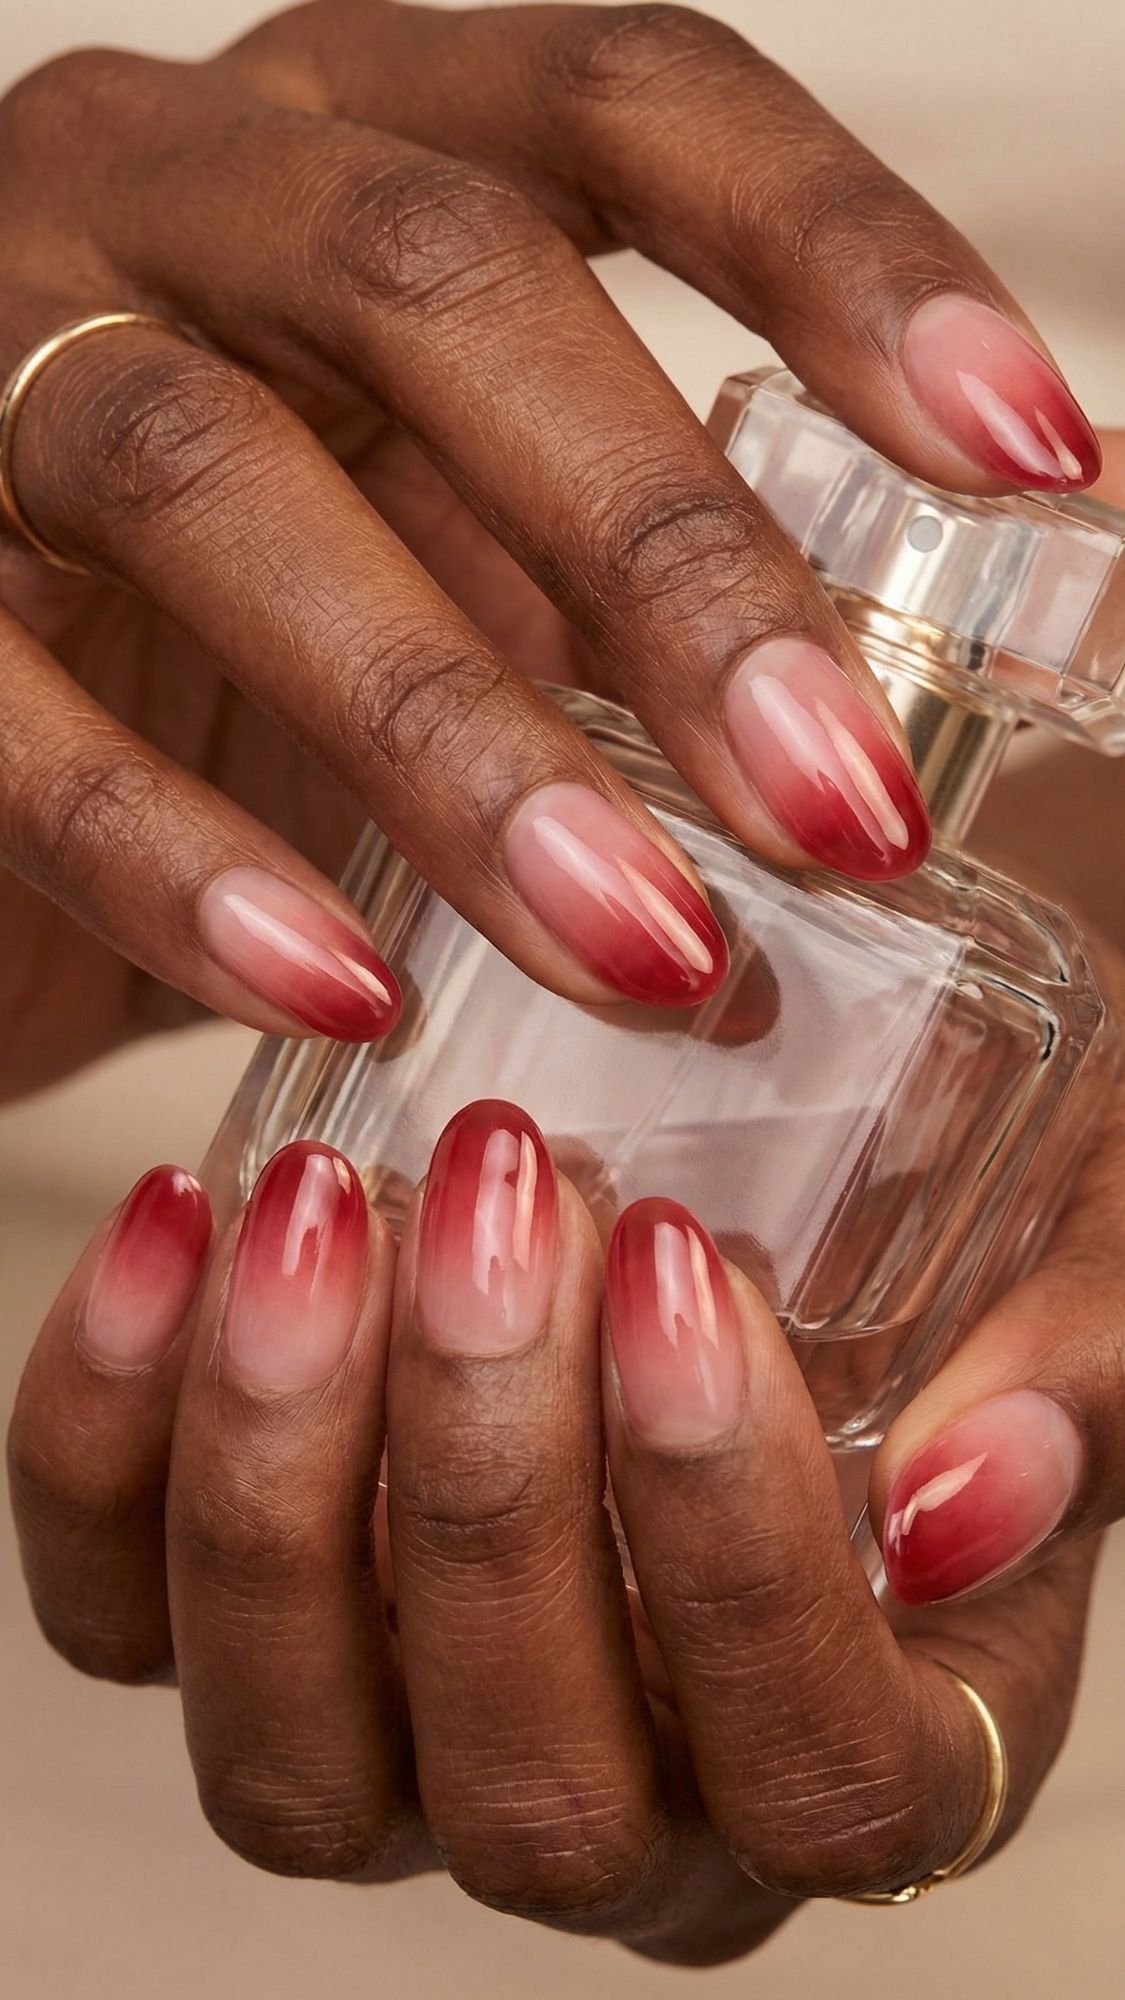
This one feels romantic without looking childish. The fade gives you dimension, and the gloss makes it look expensive.
- How to get it: Use a sheer pink or nude base, then blend cherry red from the tip downward into a soft ombré.
- Pro tip: I keep the strongest red at the tip, then fade upward. That placement looks clean as it grows out.
- Common mistake + fix: The fade looks harsh. Clean your sponge edges, and tap the transition area with a nearly dry sponge to soften it.
10) Minimal Red Florals (One Accent Nail, Tiny Petals)
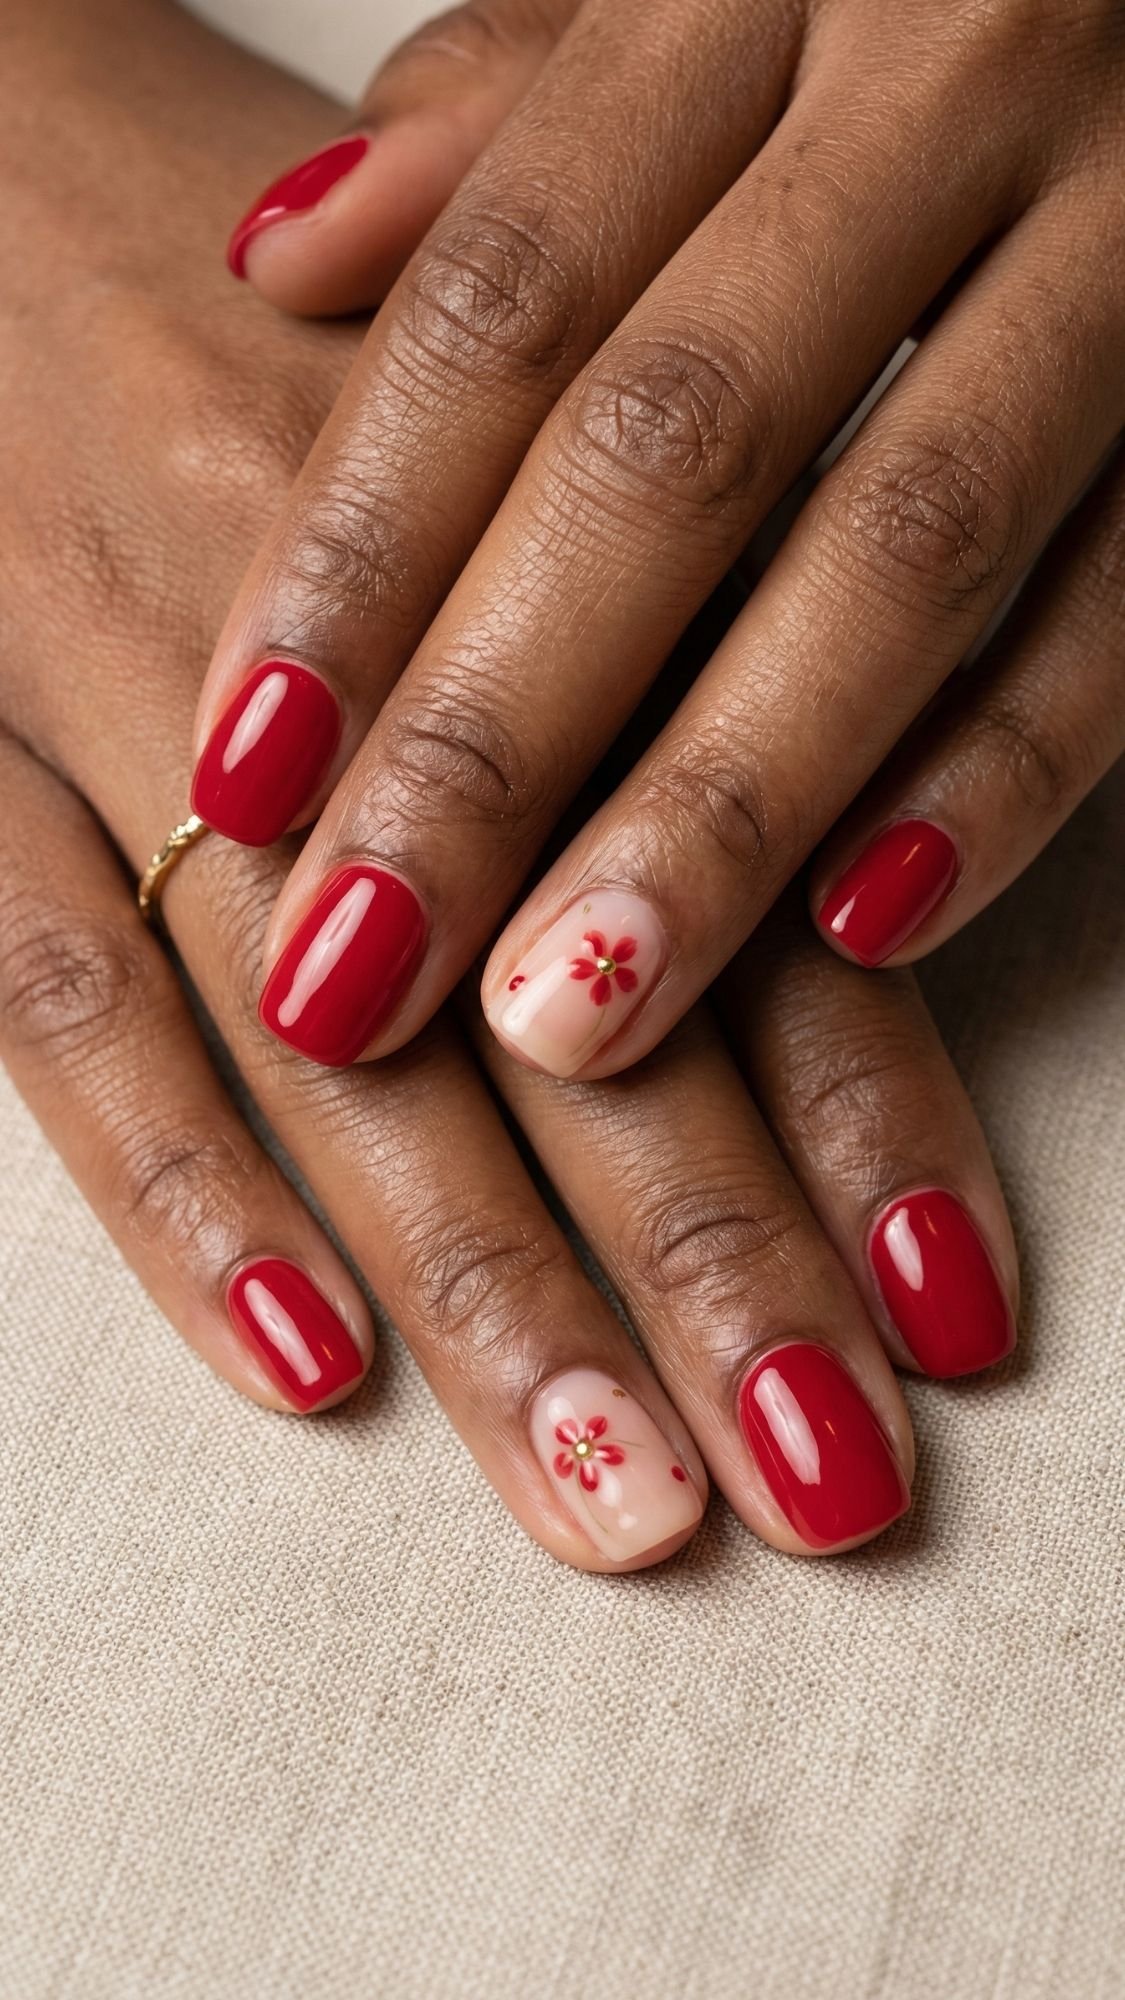
Florals can go sideways fast if they get too big. The move is tiny petals, clean spacing, and one accent nail so it stays chic.
- How to get it: Paint most nails a classic red, then add a tiny flower on one ring finger over a sheer nude base.
- Pro tip: Use a dotting tool or the tip of a bobby pin for petals, then add a micro dot center.
- Common mistake + fix: The petals blob together. Let each petal set for a minute, and use less polish on your tool.
11) Strawberry Dot Manicure (Tiny Clusters, Not Full Polka Dots)
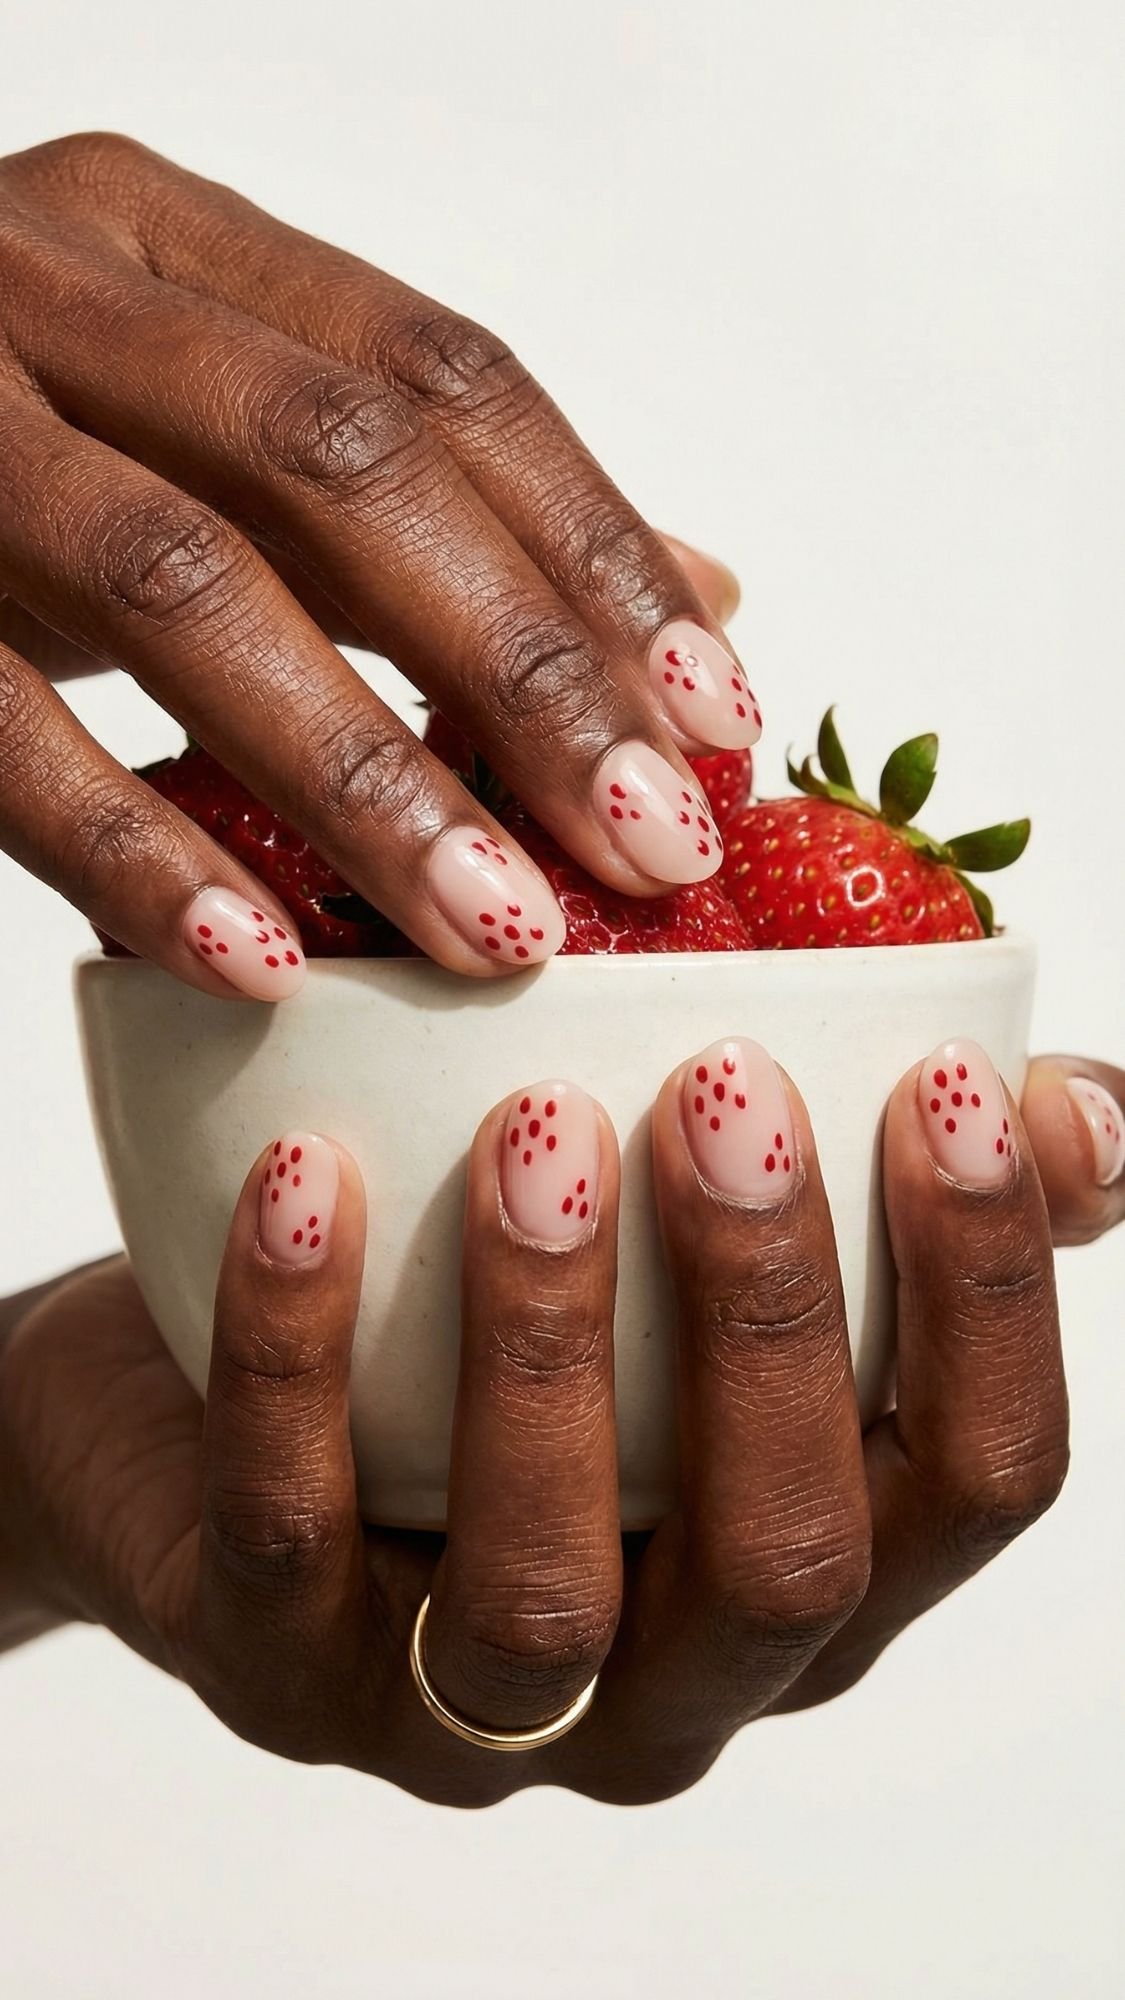
This gives playful spring energy, but you keep it grown by making the dots small and spaced. Think strawberry seeds, not clown polka dots.
- How to get it: Use a sheer nude or soft pink base, then place tiny red dots in loose clusters, add a few micro dots for dimension.
- Pro tip: I vary dot sizes slightly, it makes the design look intentional and airy.
- Common mistake + fix: The dots look too uniform. Change pressure on the dotting tool and rotate where you place clusters.
12) Baby Hearts on a Sheer Base (Small, Spaced, Sweet)
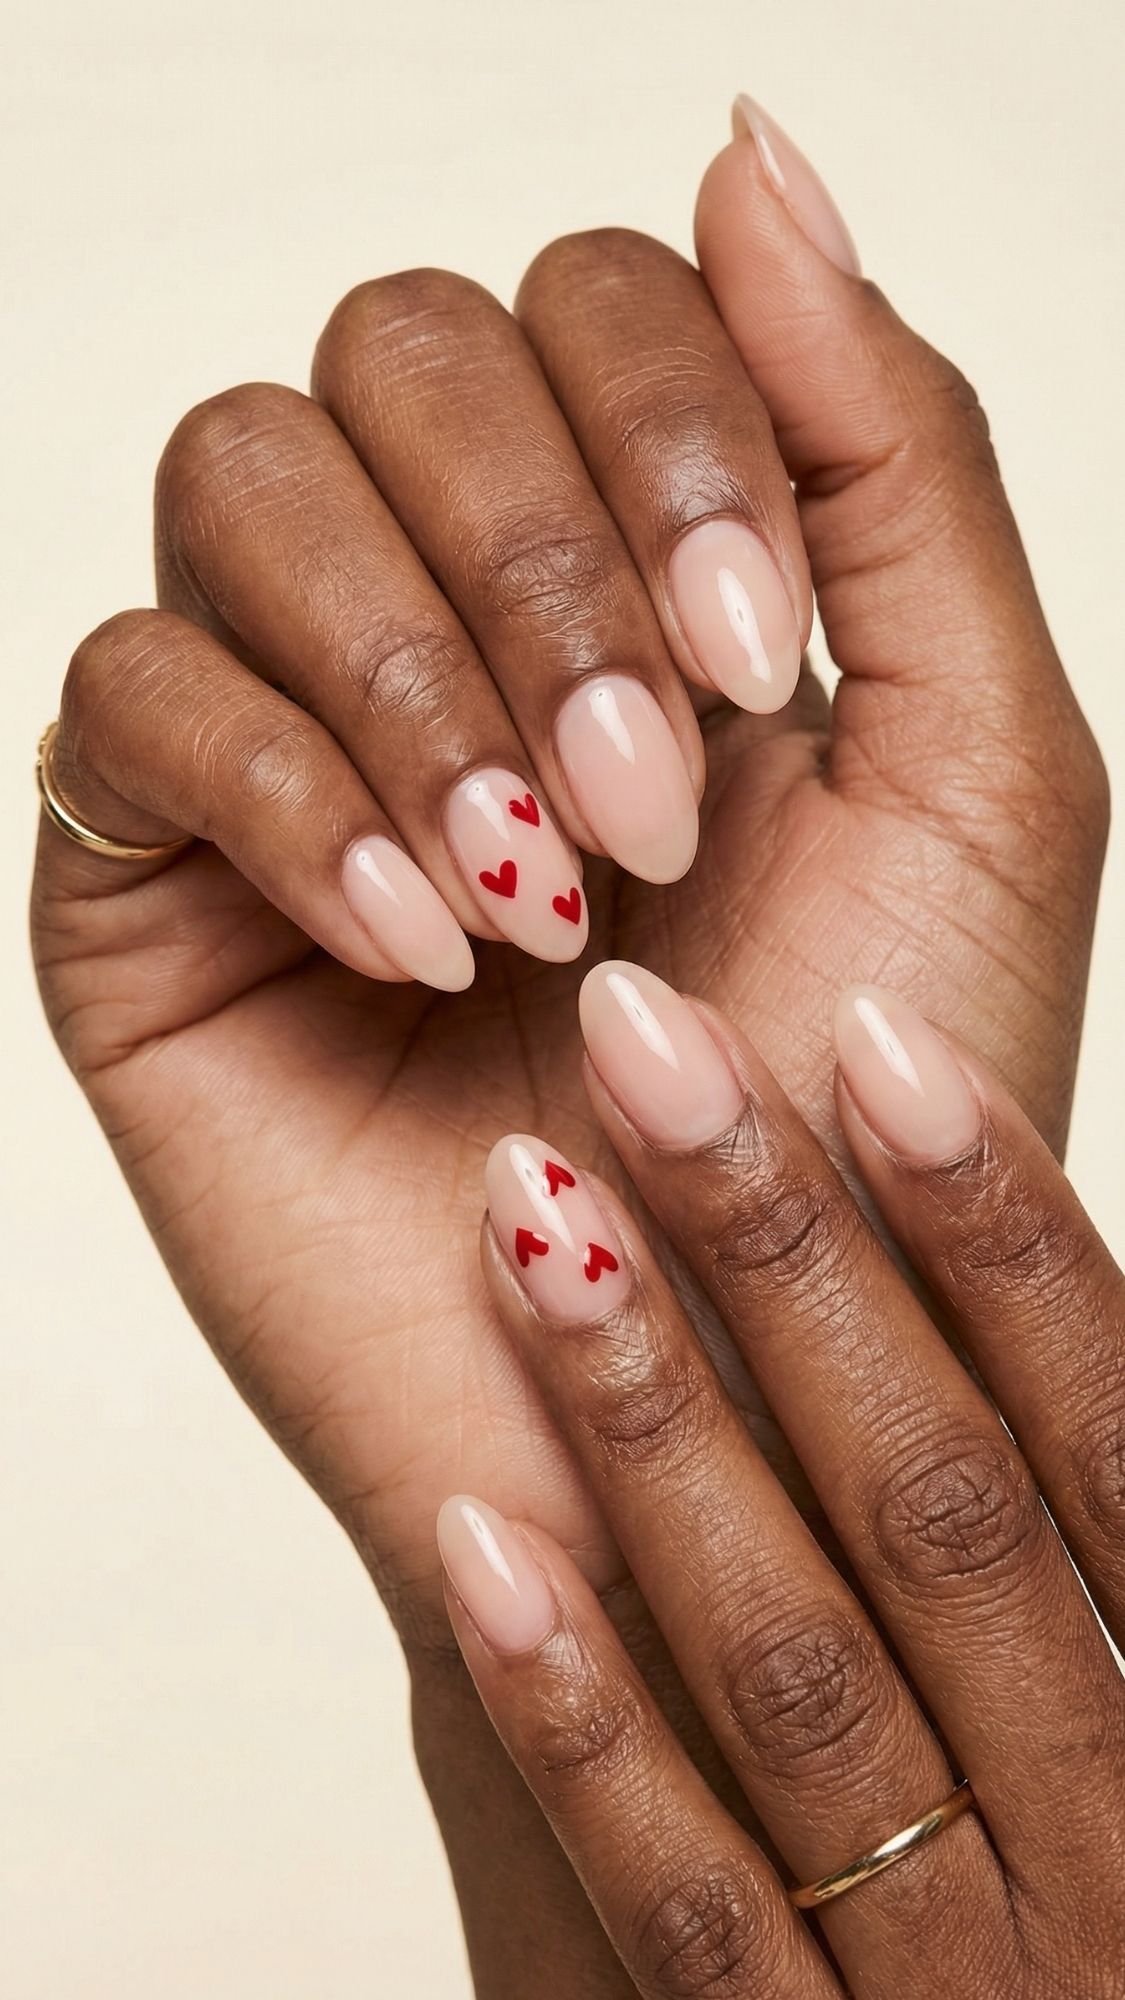
This one looks cute, but it stays classy when the hearts stay tiny and you leave breathing room. I love it for spring events because it looks soft in photos.
- How to get it: Apply a sheer nude base, then add mini red hearts on two to three nails max.
- Pro tip: Build each heart with two dots, then drag down into a point with a toothpick or detail brush.
- Common mistake + fix: Hearts turn into blobs. Use less polish, and clean your tool between hearts so edges stay crisp.
Key Takeaways
- Spring reds look best when you keep designs small and airy.
- Aura and ombré need soft blending, build slowly instead of pressing harder.
- One accent nail keeps florals and hearts chic, not crowded.
Summer Reds
Summer reds need to do two things, look bold in bright light, and still look clean when your hands get a little more “real life” exposure. I always lean into warm reds, glossy finishes, and design details that feel beachy without screaming “vacation souvenir.” Also, quick reality check, summer makes polish chip faster because water, sunscreen, and heat all mess with wear time. So we keep the designs smart and the top coat game strong. Deal?
13) Orange-Red Coral (The “Pool Day” Red)
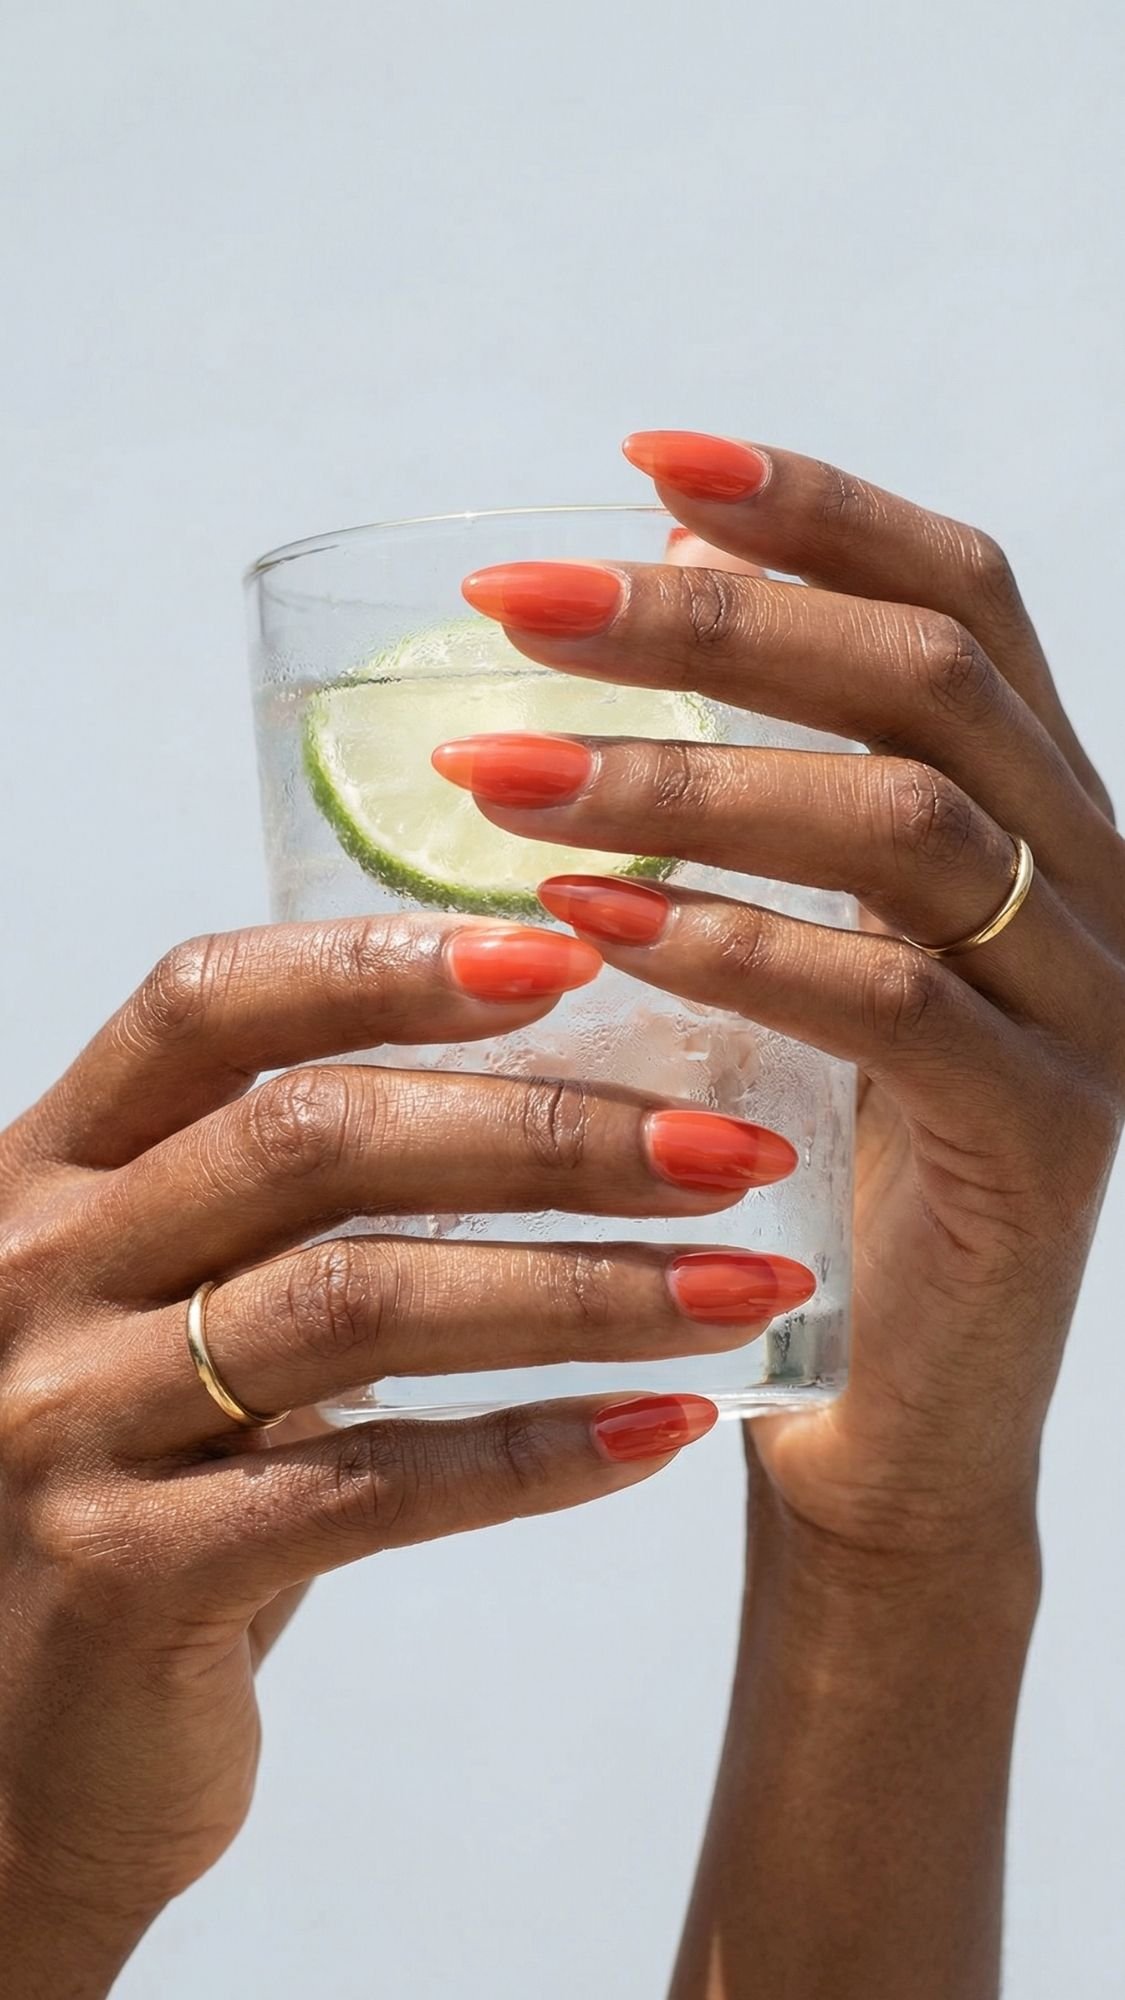
This shade looks like sunshine on your nails. It reads fun, but still polished, especially on short to medium nails.
- How to get it: Pick a coral that leans red, not pink, apply two thin coats, finish glossy.
- Pro tip: If you want your hands to look longer, file into a soft almond and keep the sidewalls slightly tapered.
- Common mistake + fix: The color looks too orange. Layer one thin coat of a true red underneath, then the coral on top to deepen it.
14) Red Chrome Glaze (Glossy, Reflective, “Expensive in the Sun”)
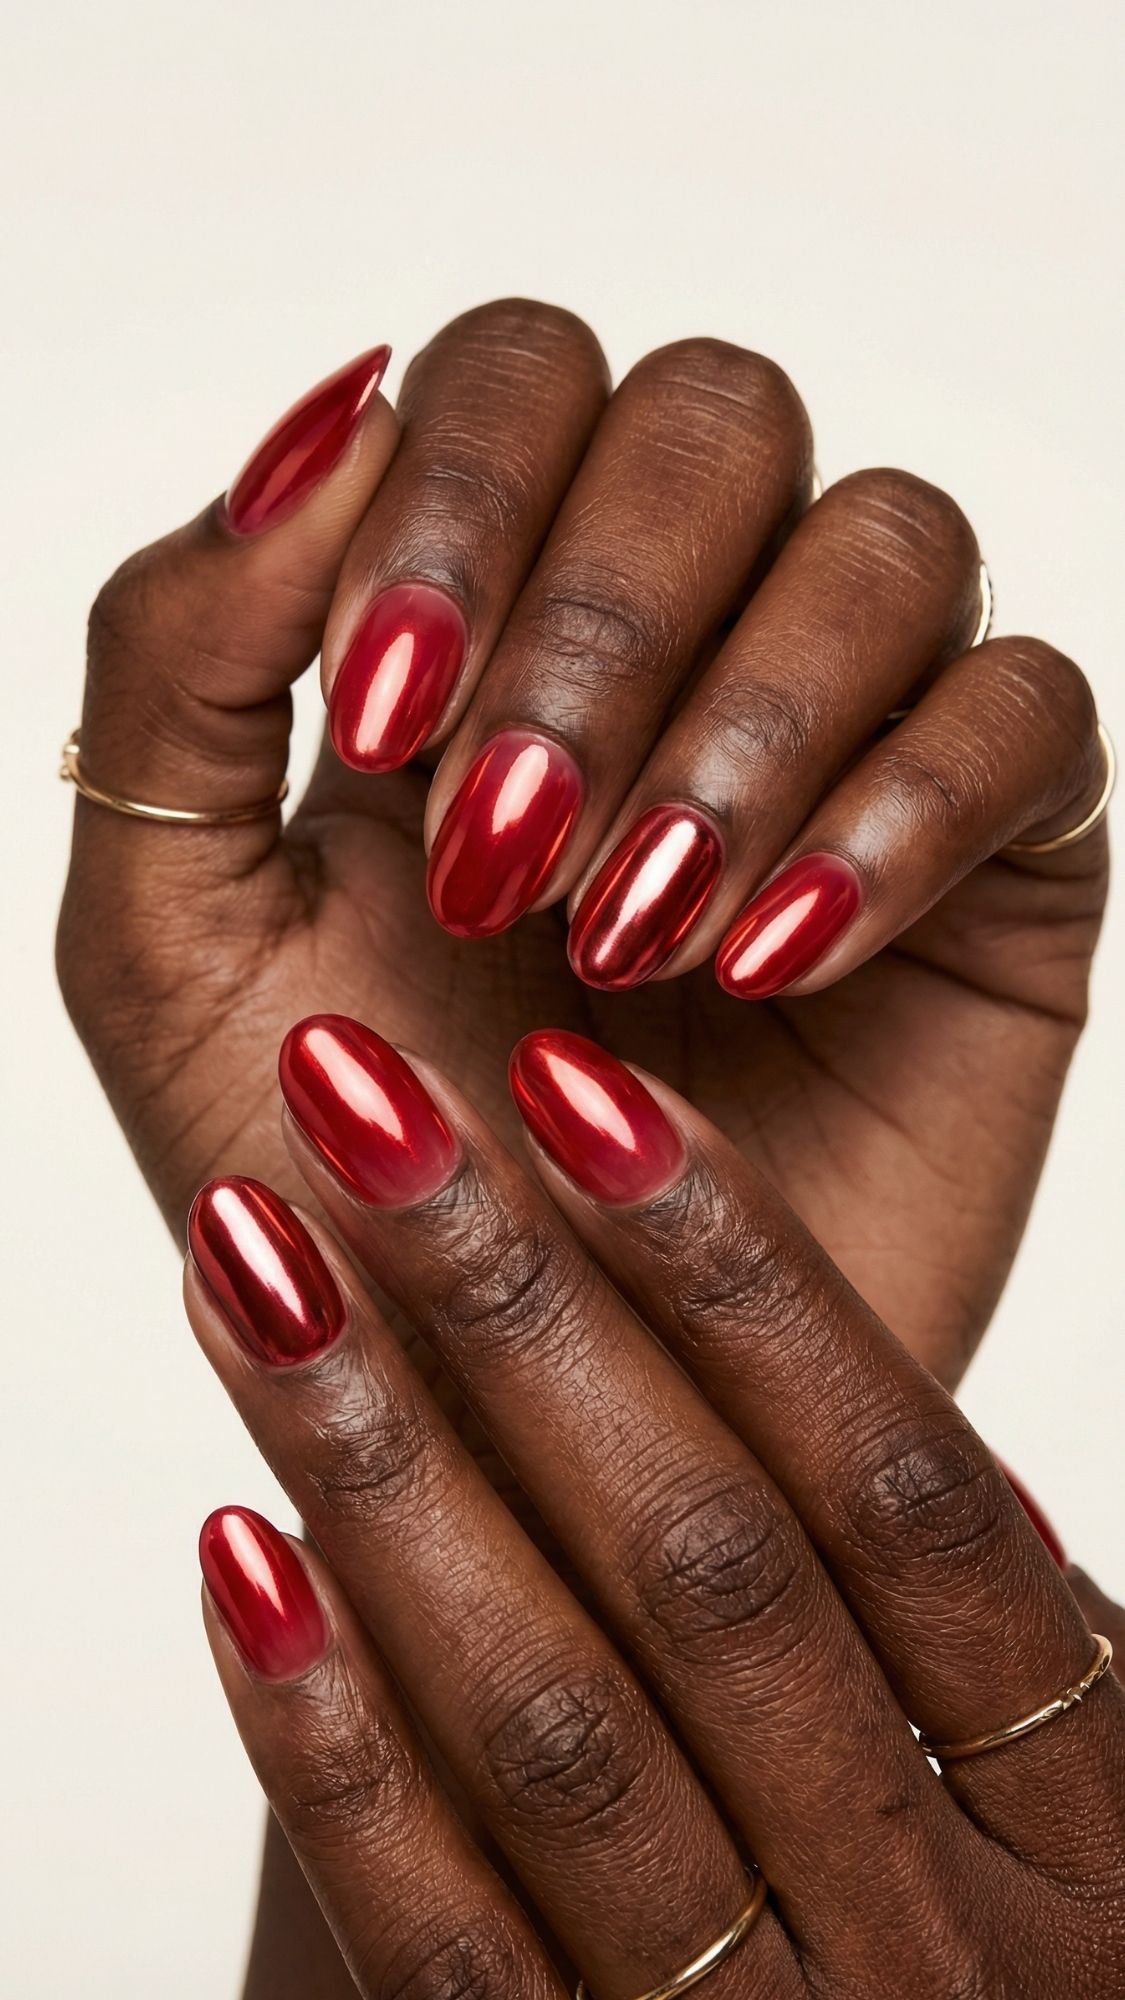
Chrome makes red feel modern and high-impact without adding complicated art. It catches light like jewelry.
- How to get it: Apply a smooth red base, then a chrome glaze effect, then seal with top coat.
- Pro tip: Chrome looks best over a perfectly smooth base, so use a ridge-filling base coat if you need it.
- Common mistake + fix: Chrome looks patchy. Buff lightly, apply thinner layers, and keep the surface smooth before glazing.
15) Red “Glass” Jelly (Translucent, Juicy, Beach-Gloss Finish)
This looks like stained glass candy, sheer but saturated, perfect for summer because it feels light, not heavy.
- How to get it: Use a jelly red polish, apply 2 to 3 thin coats, then a high-gloss top coat.
- Pro tip: Let each coat settle fully, jelly formulas need a minute to level so they look smooth.
- Common mistake + fix: The jelly looks uneven. Use ultra-thin coats and avoid touching the brush back and forth as it sets.
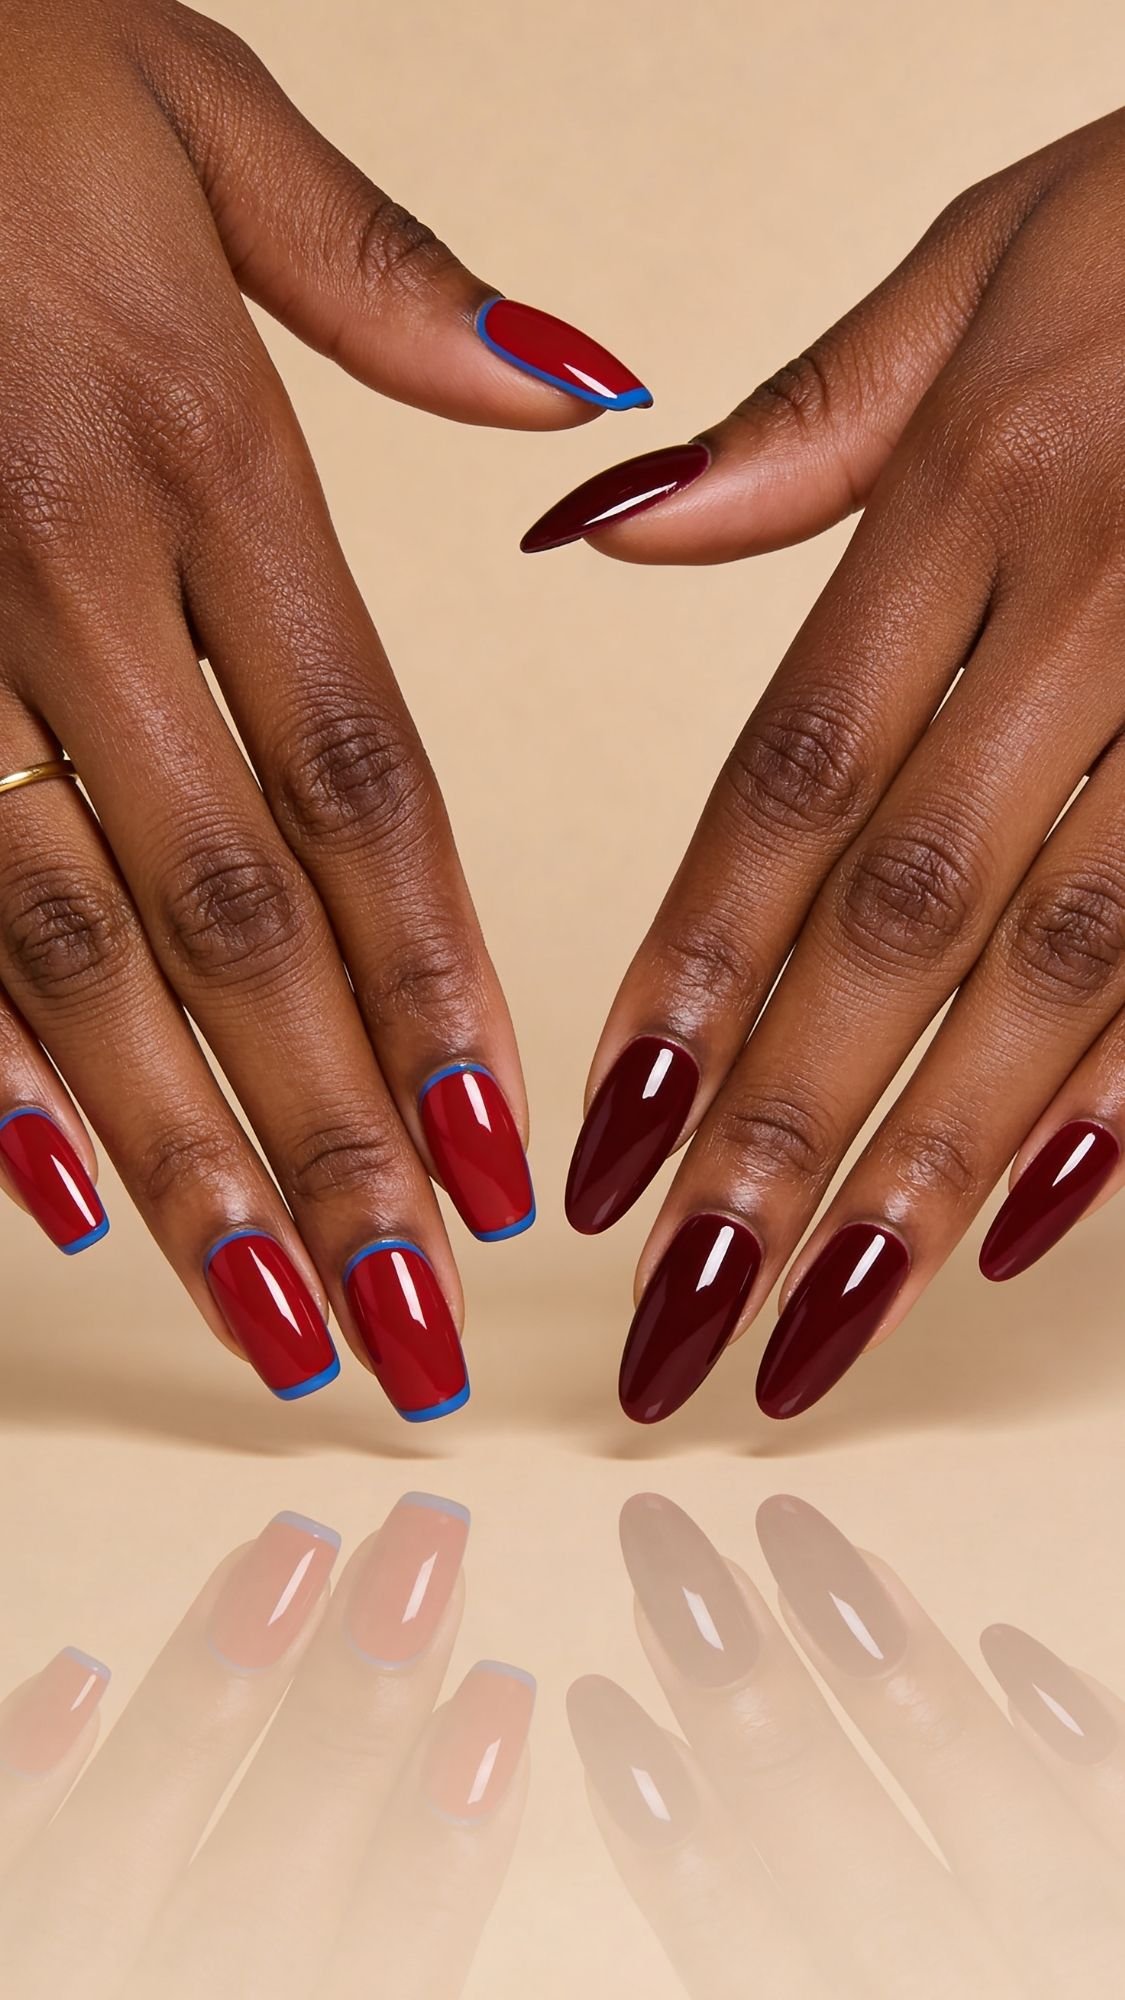
16) Red French Tip with a Thin White Outline (Clean, Graphic, Summery)
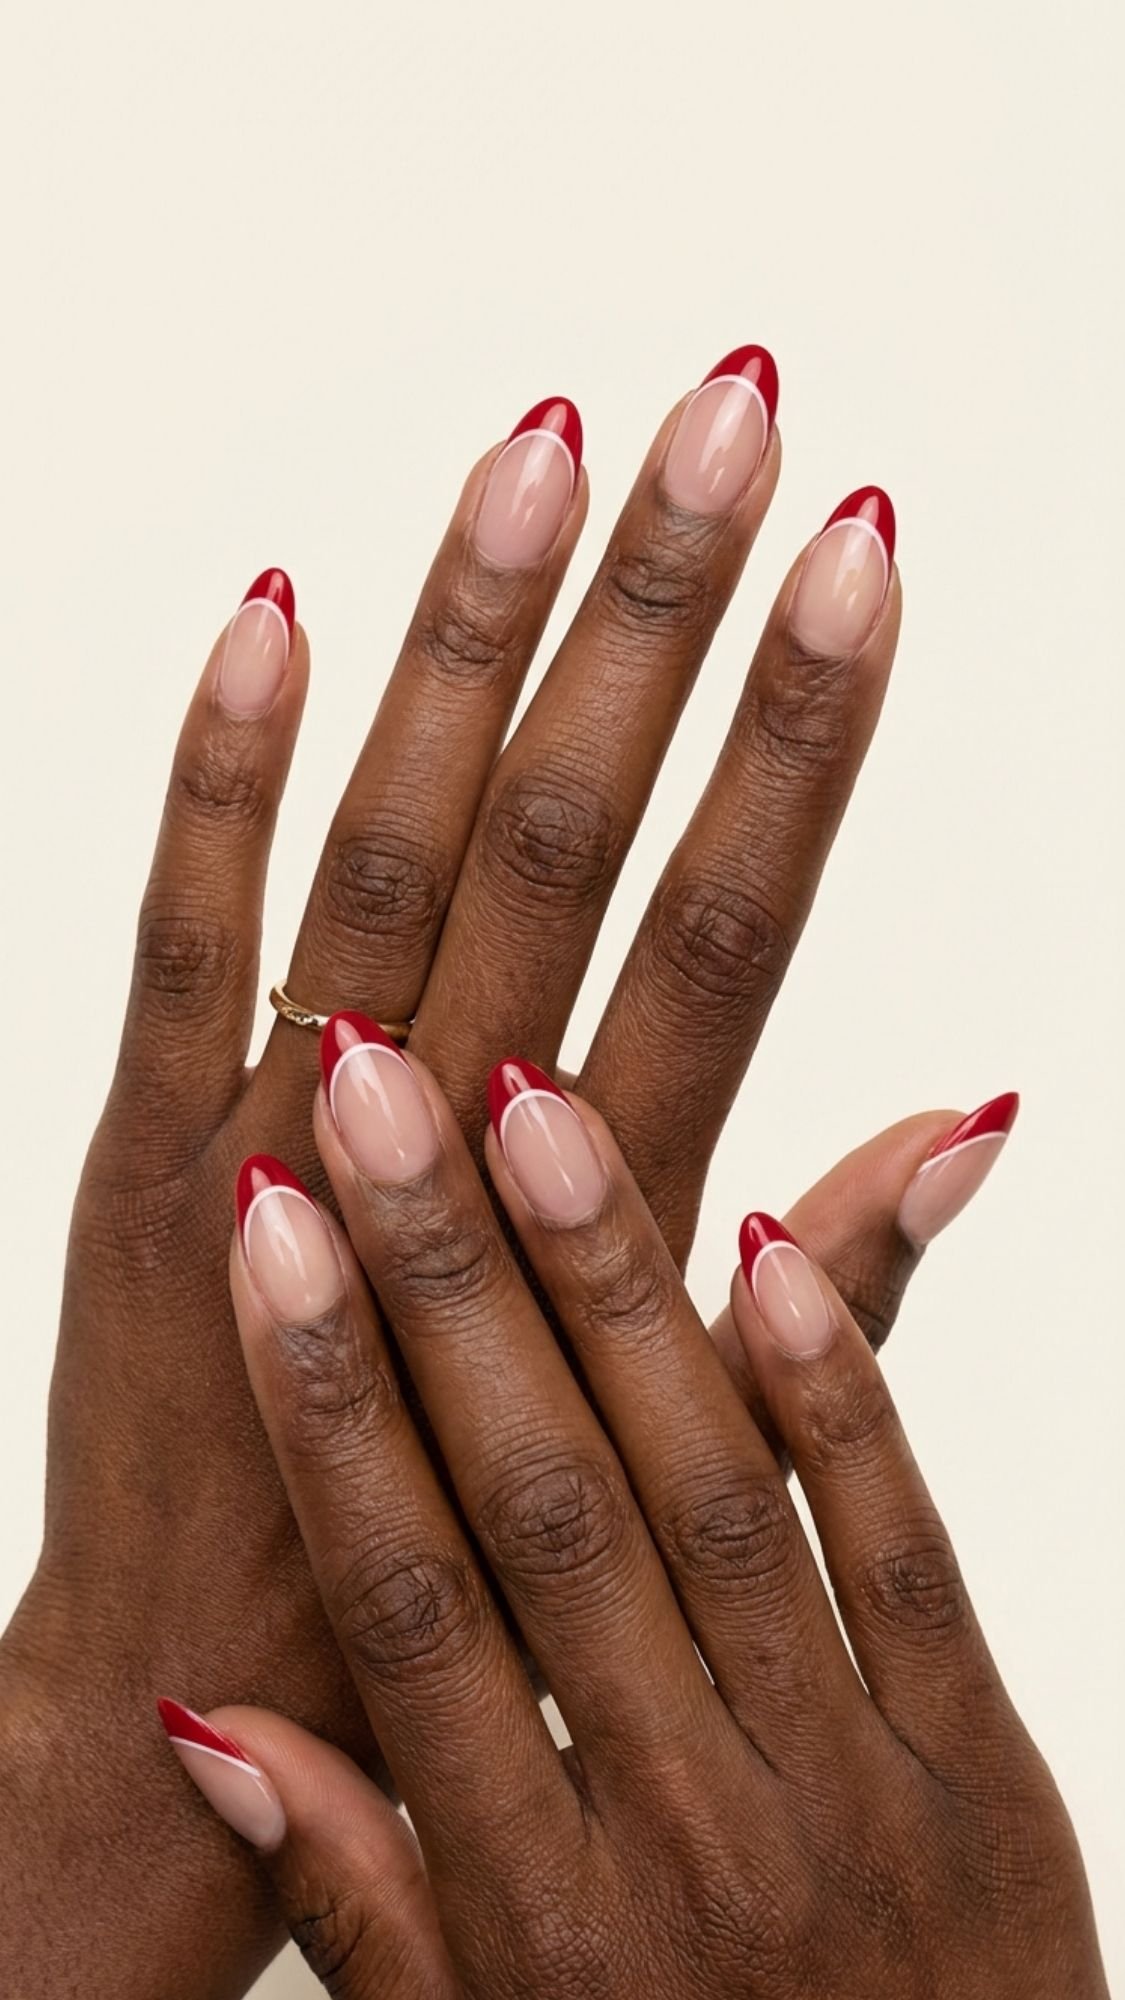
This one looks sharp and fresh, like a crisp swimsuit and a clean tan line, you know what I mean.
- How to get it: Sheer nude base, paint a red tip, then outline the red with a super thin white line.
- Pro tip: Keep the red tip thin, then keep the white line even thinner. The outline should whisper, not shout.
- Common mistake + fix: The outline looks wobbly. Use a striping brush and rest your painting hand on the table for stability.
17) Red Swirl Tips (Sheer Base, Thin Lines, No Chaos)
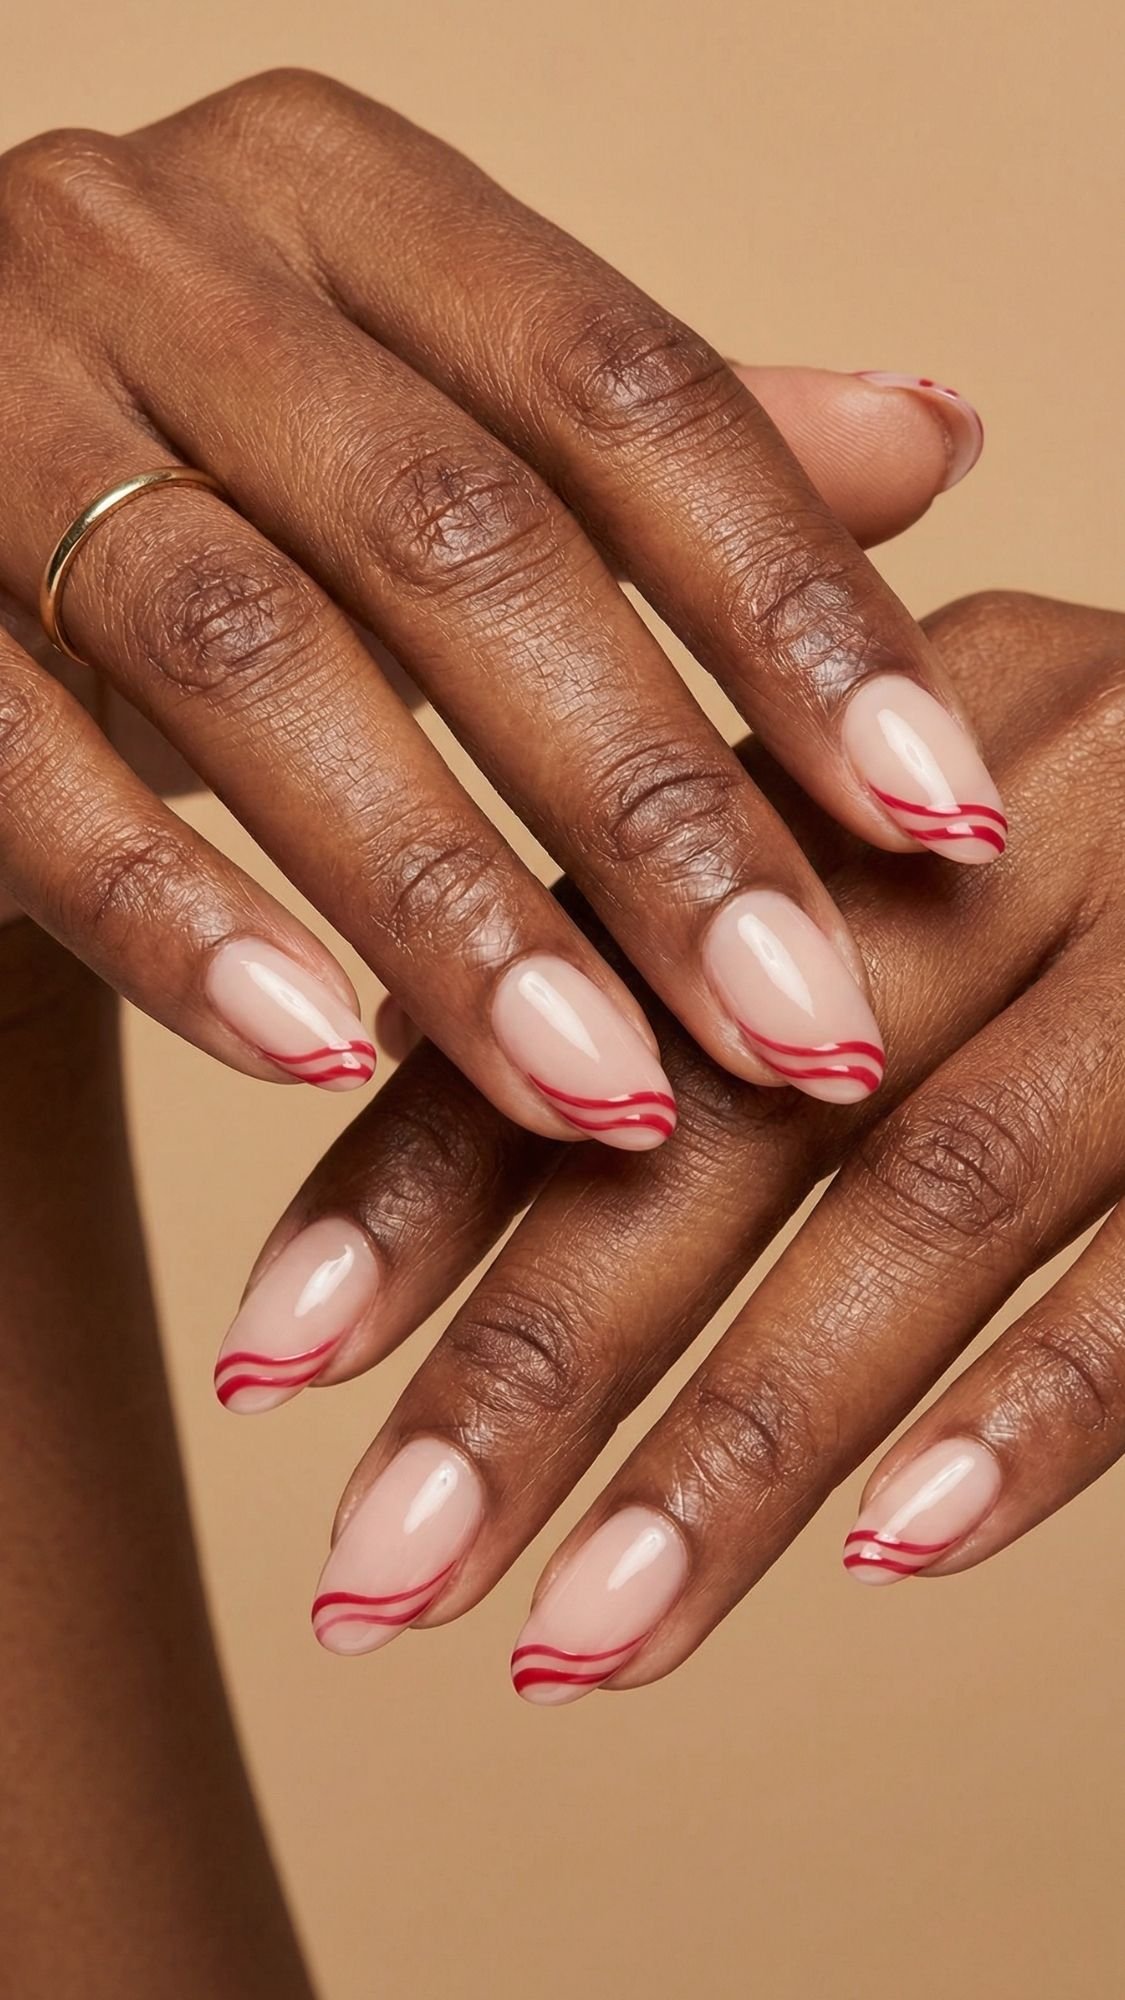
Swirl nails look so cute, but only if the lines stay thin. Thick swirls turn into spaghetti art, and not the cute kind :/
- How to get it: Sheer nude base, then add thin red swirls near the tips using a detail brush.
- Pro tip: I do two to three swirls max per nail, and I leave negative space so the design breathes.
- Common mistake + fix: The swirls look messy. Wipe your brush often, use less polish, and build the line slowly.
18) Red with Micro Gold Foil (Tiny Sparkle, Not Glitter Explosion)

This gives summer glow without full glitter. The foil catches light like jewelry and looks amazing in photos.
- How to get it: Apply a classic red base, then place tiny pieces of gold foil on one or two accent nails, seal well.
- Pro tip: Press foil into a slightly tacky layer, then top coat twice so it feels smooth.
- Common mistake + fix: Foil edges snag. Use a thicker top coat layer and cap the free edge carefully.
Key Takeaways
- Summer reds love warmth and shine, coral and jelly finishes look especially fresh.
- Keep line art thin, swirls and outlines look cleaner with negative space.
- Seal foil and edges well, summer water and heat try to humble your manicure.
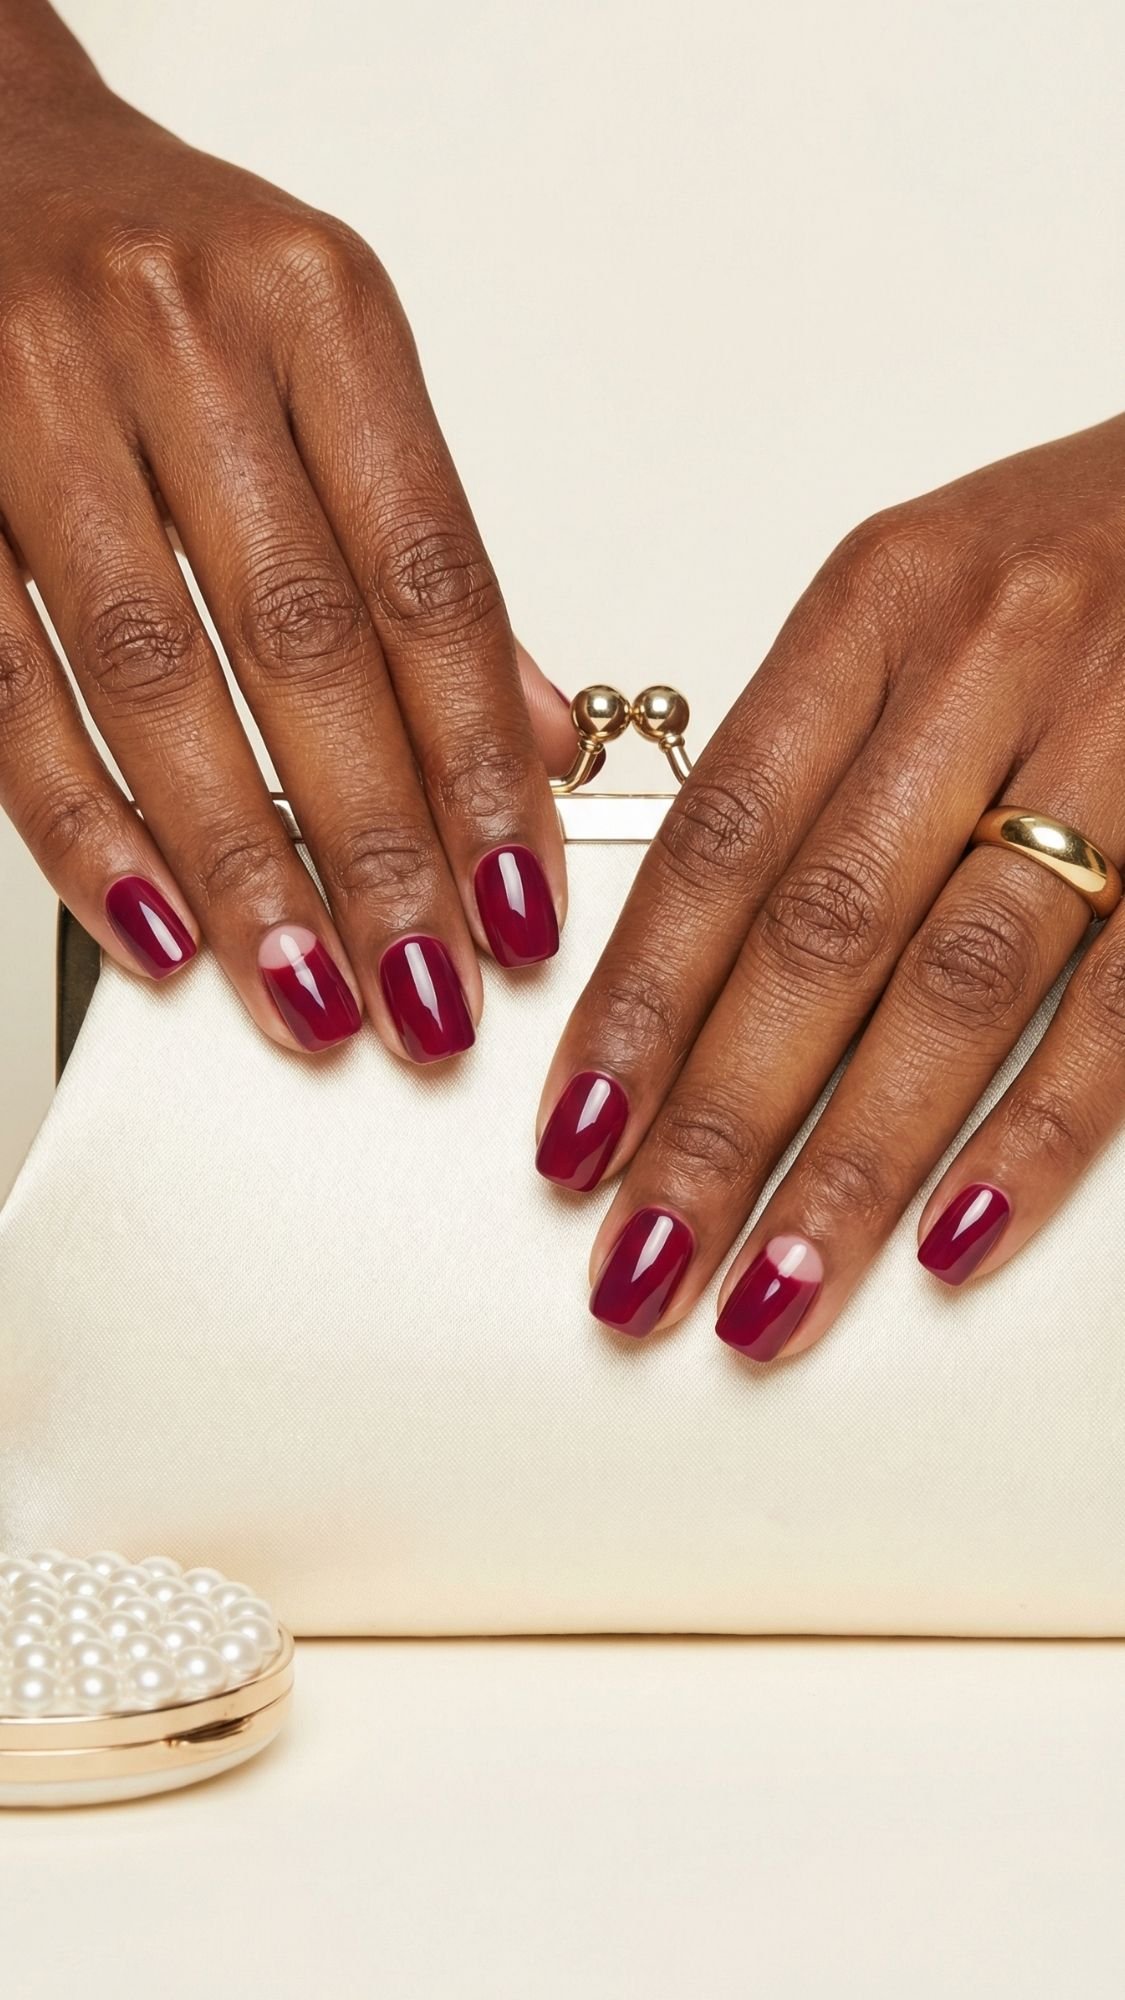
Fall Reds
Fall reds feel richer and moodier, like your nails just put on a cashmere sweater and started romanticizing everything. I love fall manicures because deeper reds look insanely luxe on deeper skin tones, especially with a glossy finish that shows clean shine lines. The key is keeping the color saturated and the design details intentional. Ever notice how a deep red can look expensive, or it can look dull and flat depending on the top coat? Yeah, that’s why we do not skip a good seal.
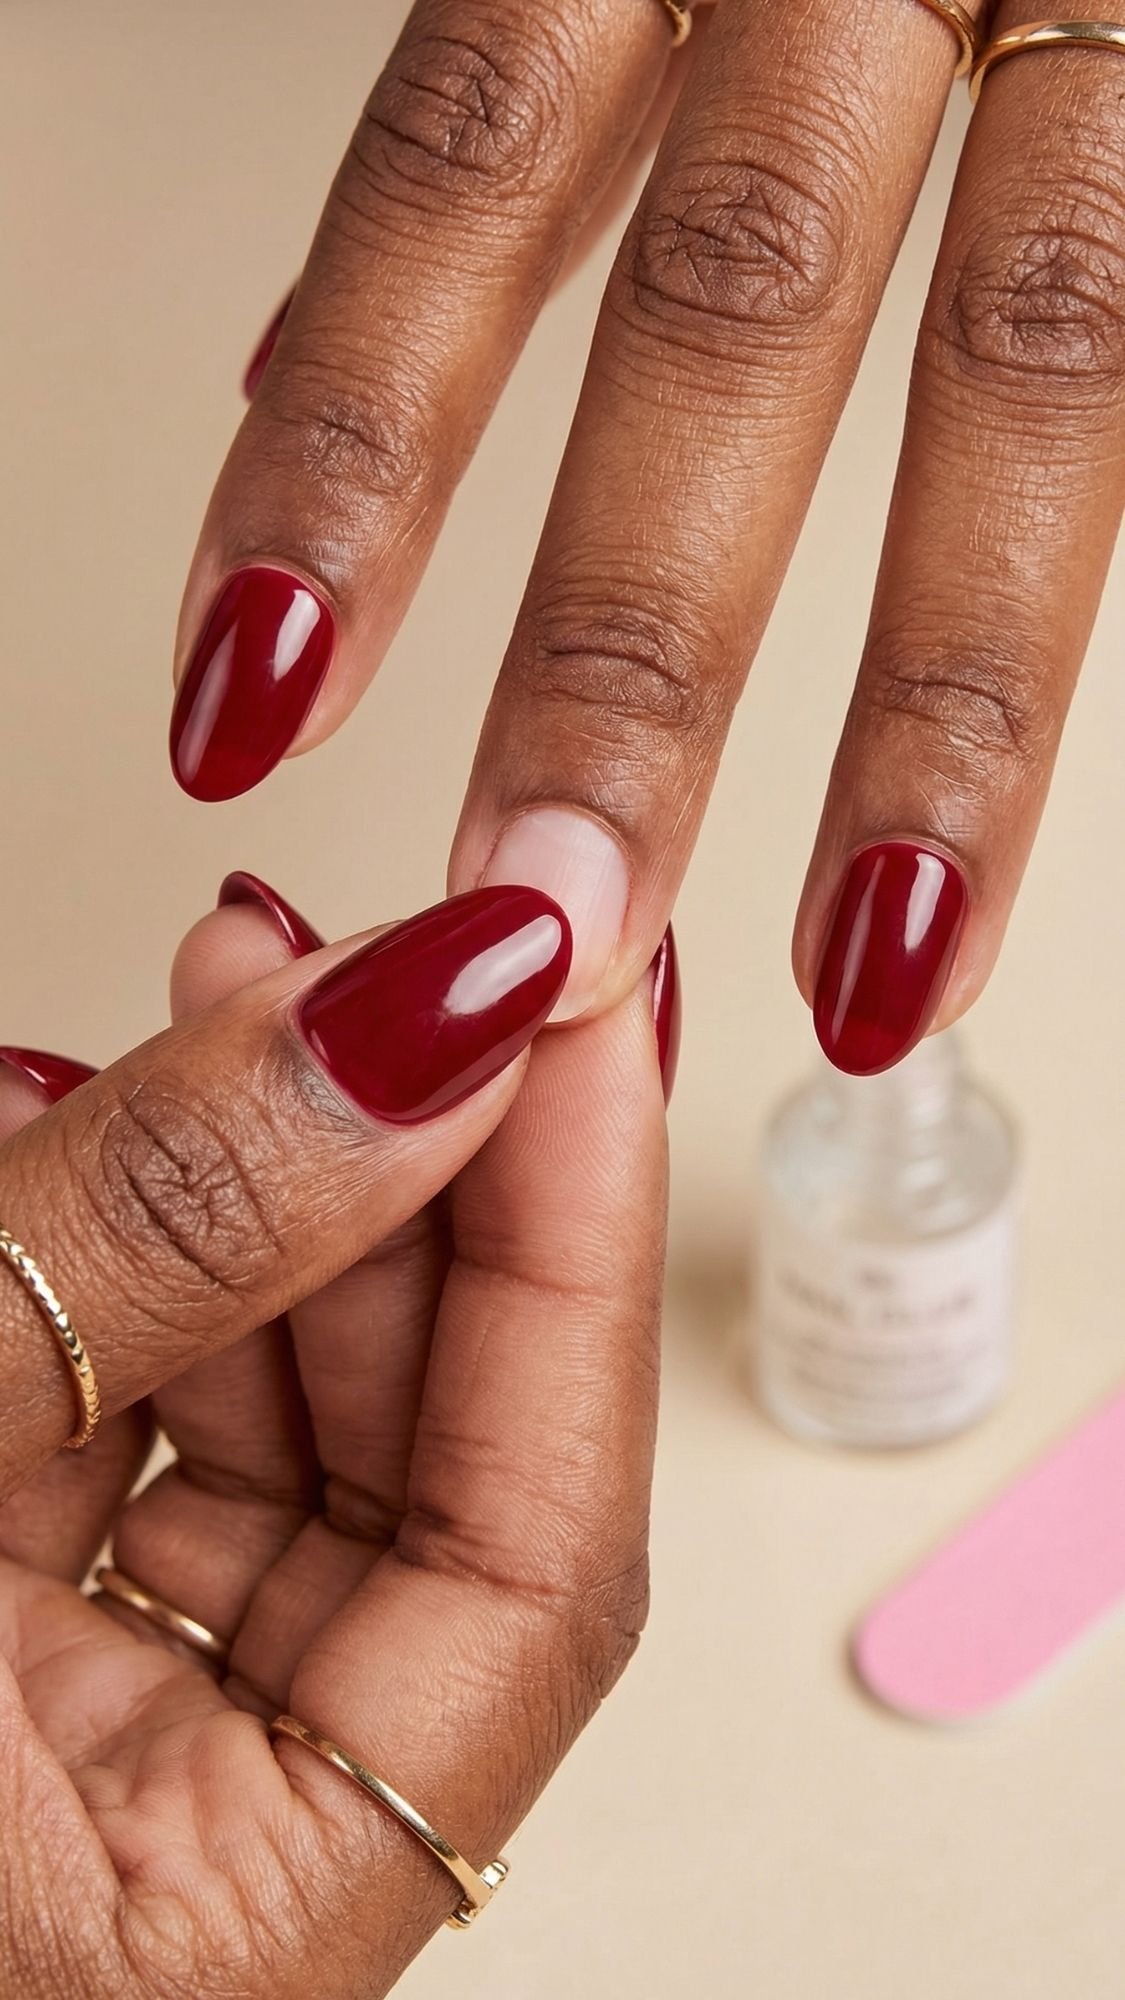
19) Merlot Cream Red (Soft, Wine-Deep, Quiet Luxury)
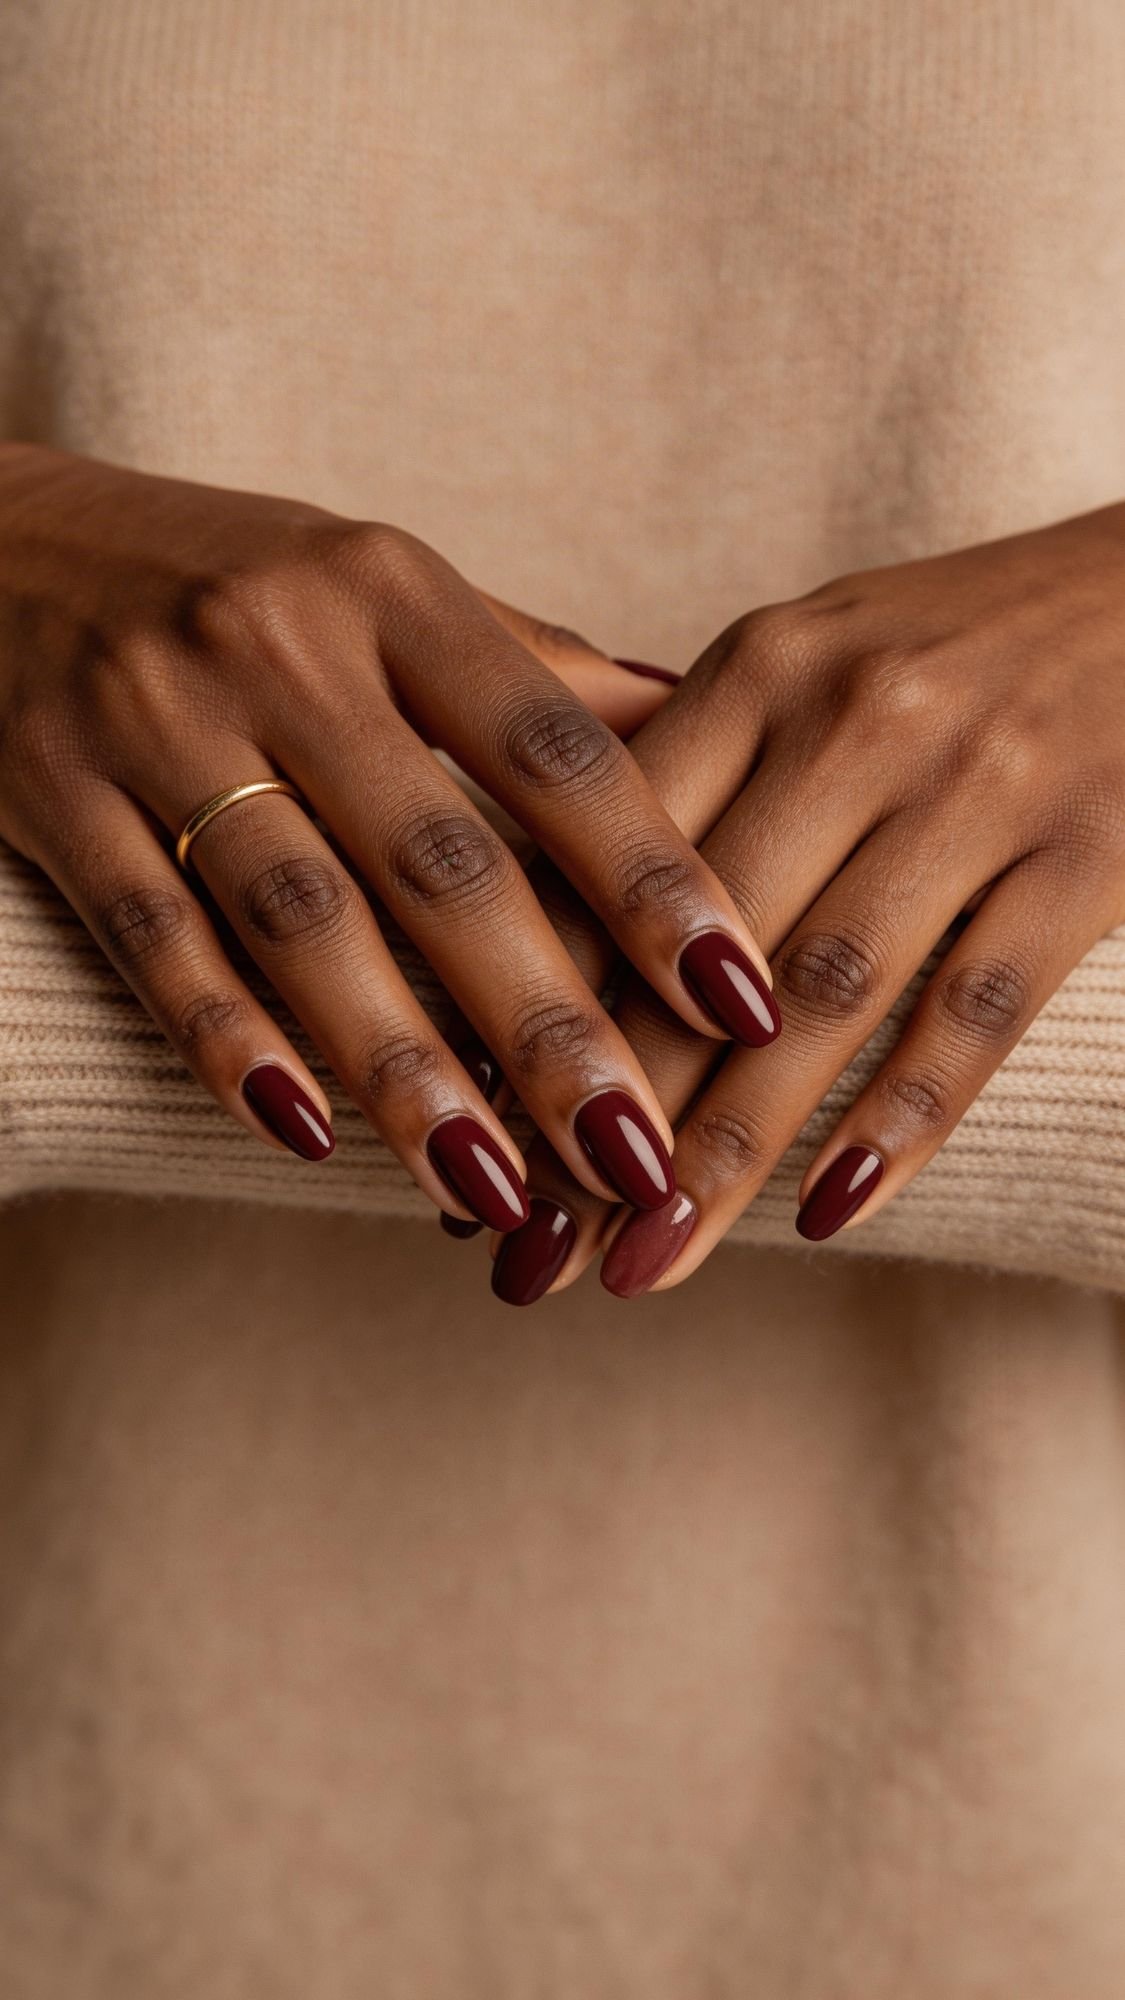
Merlot reads sophisticated without being harsh. It gives you depth like a classic red wine stain, but it still looks smooth and wearable.
- How to get it: Pick a red with a slight brown or berry lean, apply two thin cream coats, finish with a glassy top coat.
- Pro tip: If merlot looks too dark on the first coat, do not panic. Let it dry, then the second coat usually evens out the saturation.
- Common mistake + fix: The shade looks muddy. Use a ridge-filling base coat to keep the color from catching texture and looking uneven.
20) Dark Cherry Aura (Moody Gradient, Soft Spotlight Effect)
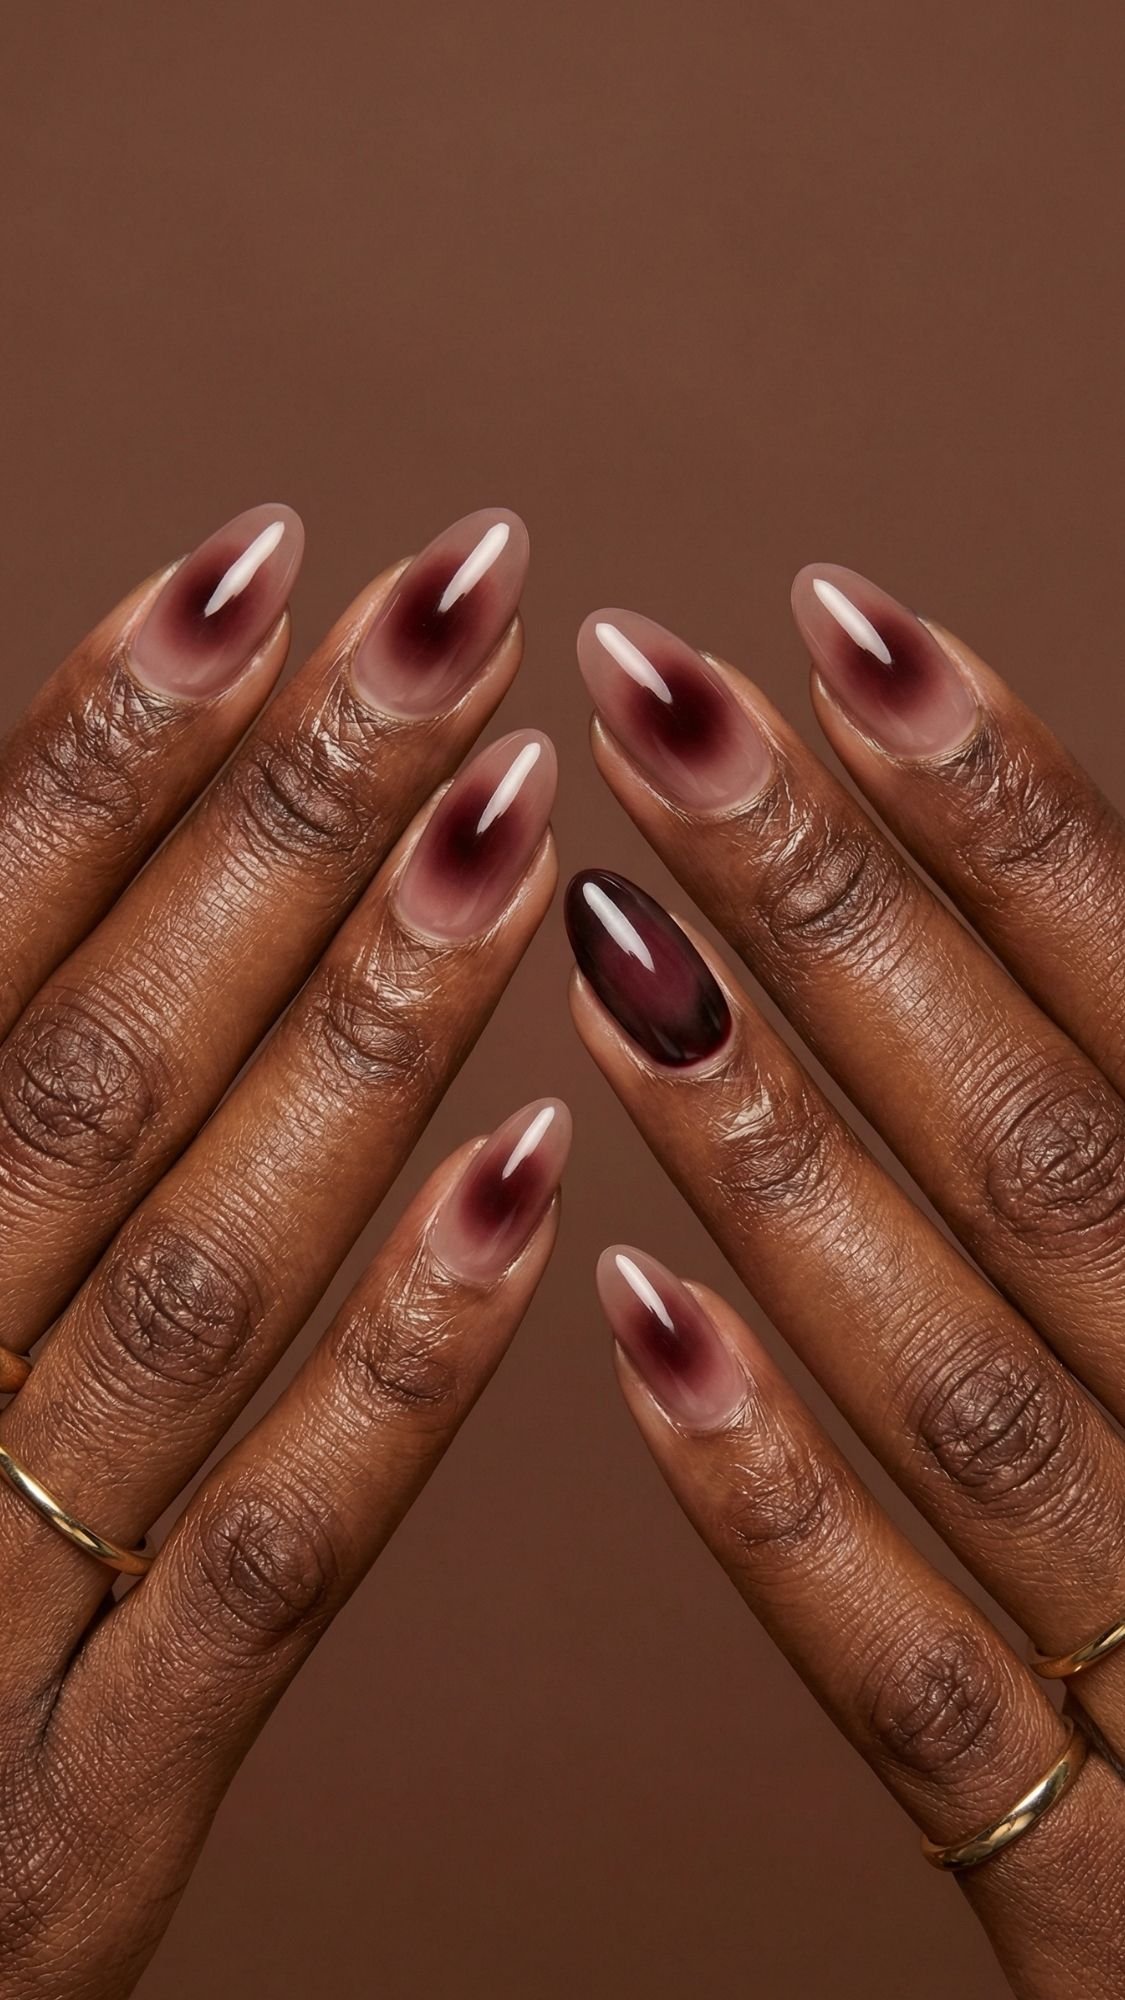
This looks like fall sunset lighting on your nails. It gives you depth without heavy art, and it photographs beautifully.
- How to get it: Start with a sheer nude or smoky milky base, then build a dark cherry glow in the center.
- Pro tip: Use two aura layers, one lighter cherry first, then a deeper cherry on top. That layering makes it look smooth instead of blotchy.
- Common mistake + fix: The center looks like a hard circle. Use a nearly dry sponge and tap lightly around the edges to blur the halo.
21) Tortoise Accent with Deep Red Pairing (Classic Fall Combo)
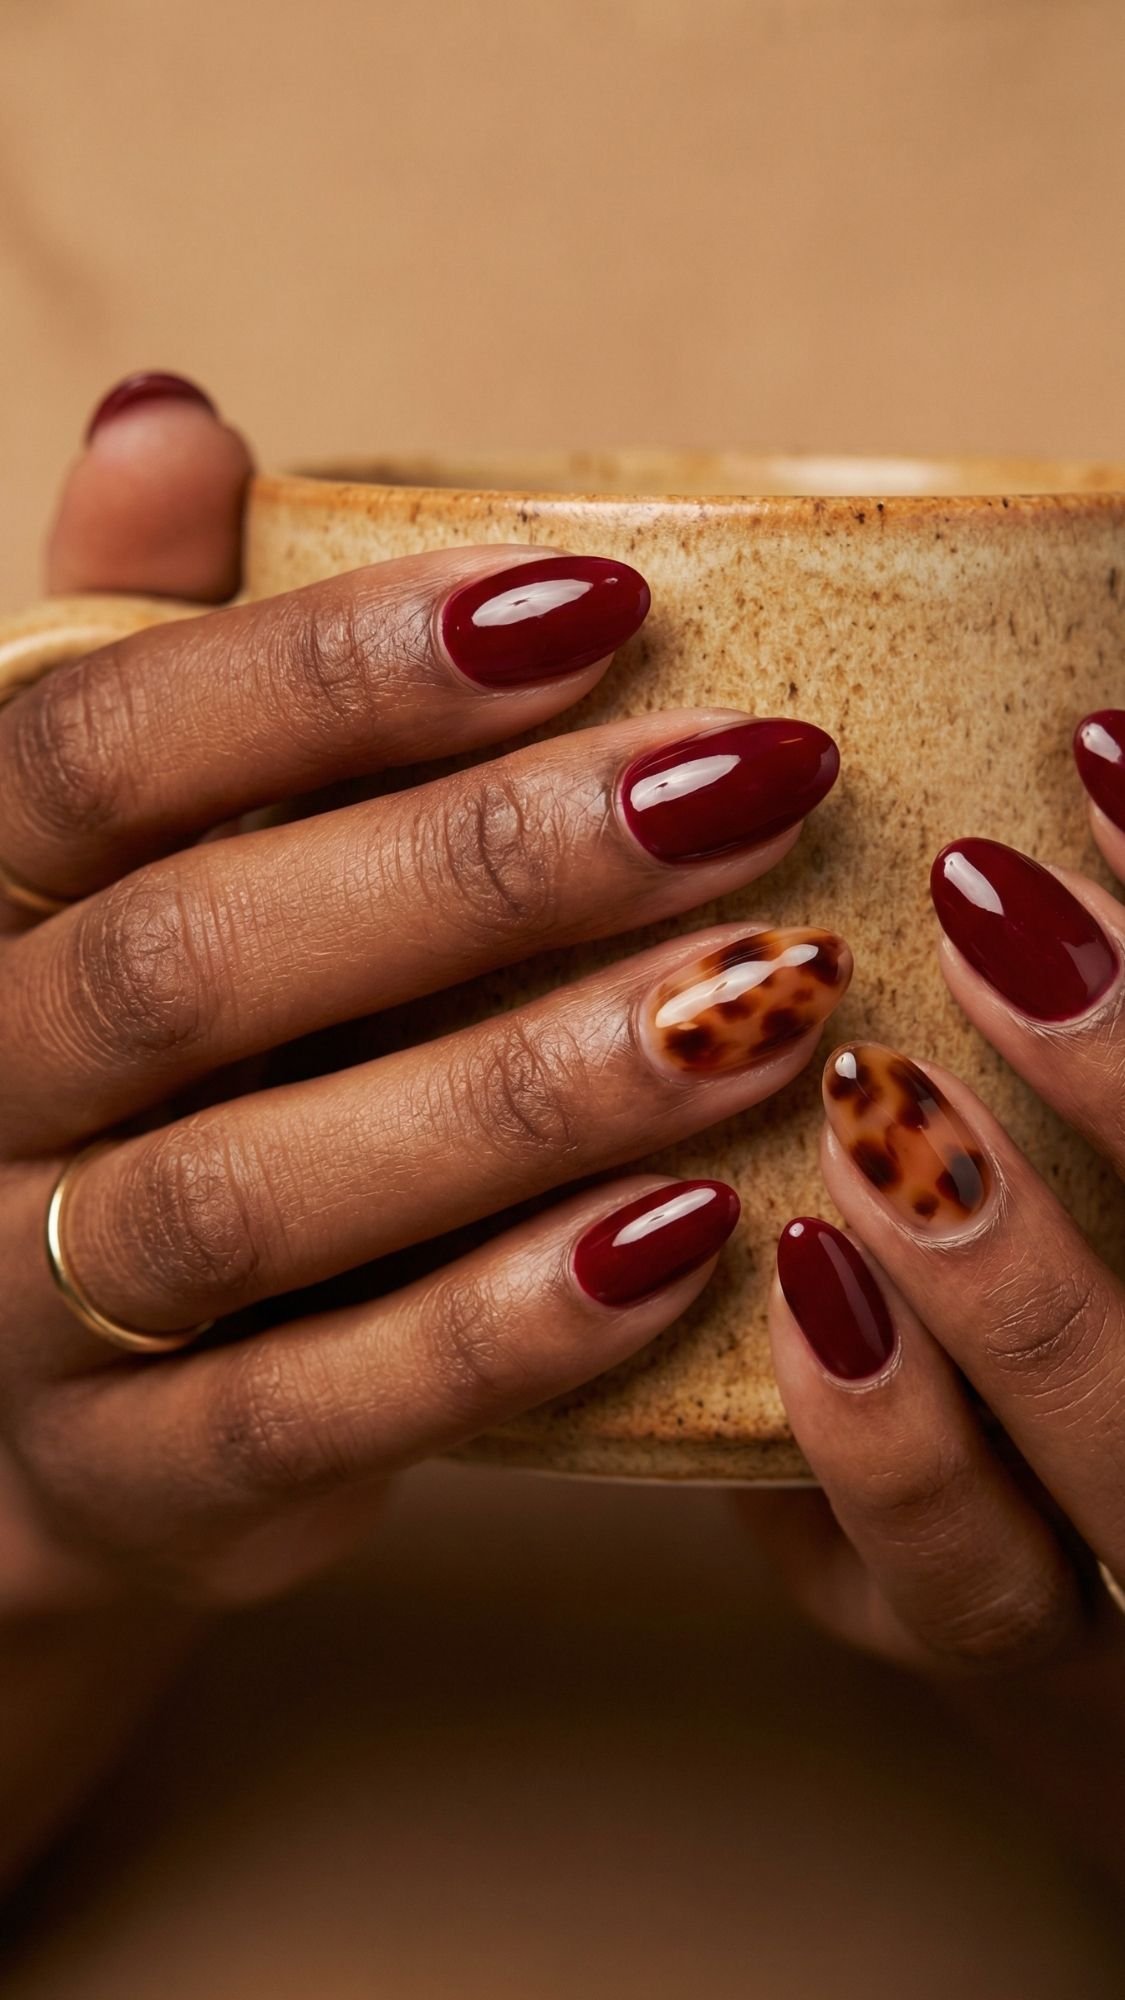
Tortoise plus deep red looks like autumn in the most grown way. Keep tortoise to one or two accent nails so it stays clean.
- How to get it: Paint most nails deep cherry or merlot, then do tortoise on one accent nail using amber, brown, and black swirls.
- Pro tip: I build tortoise in thin, translucent layers. That’s how you get that “real tortoise shell” depth.
- Common mistake + fix: The tortoise looks thick and muddy. Use sheer layers and let each layer dry before adding the next.
22) Red Velvet Nails (Magnetic “Fabric” Effect, So Cozy It’s Rude)
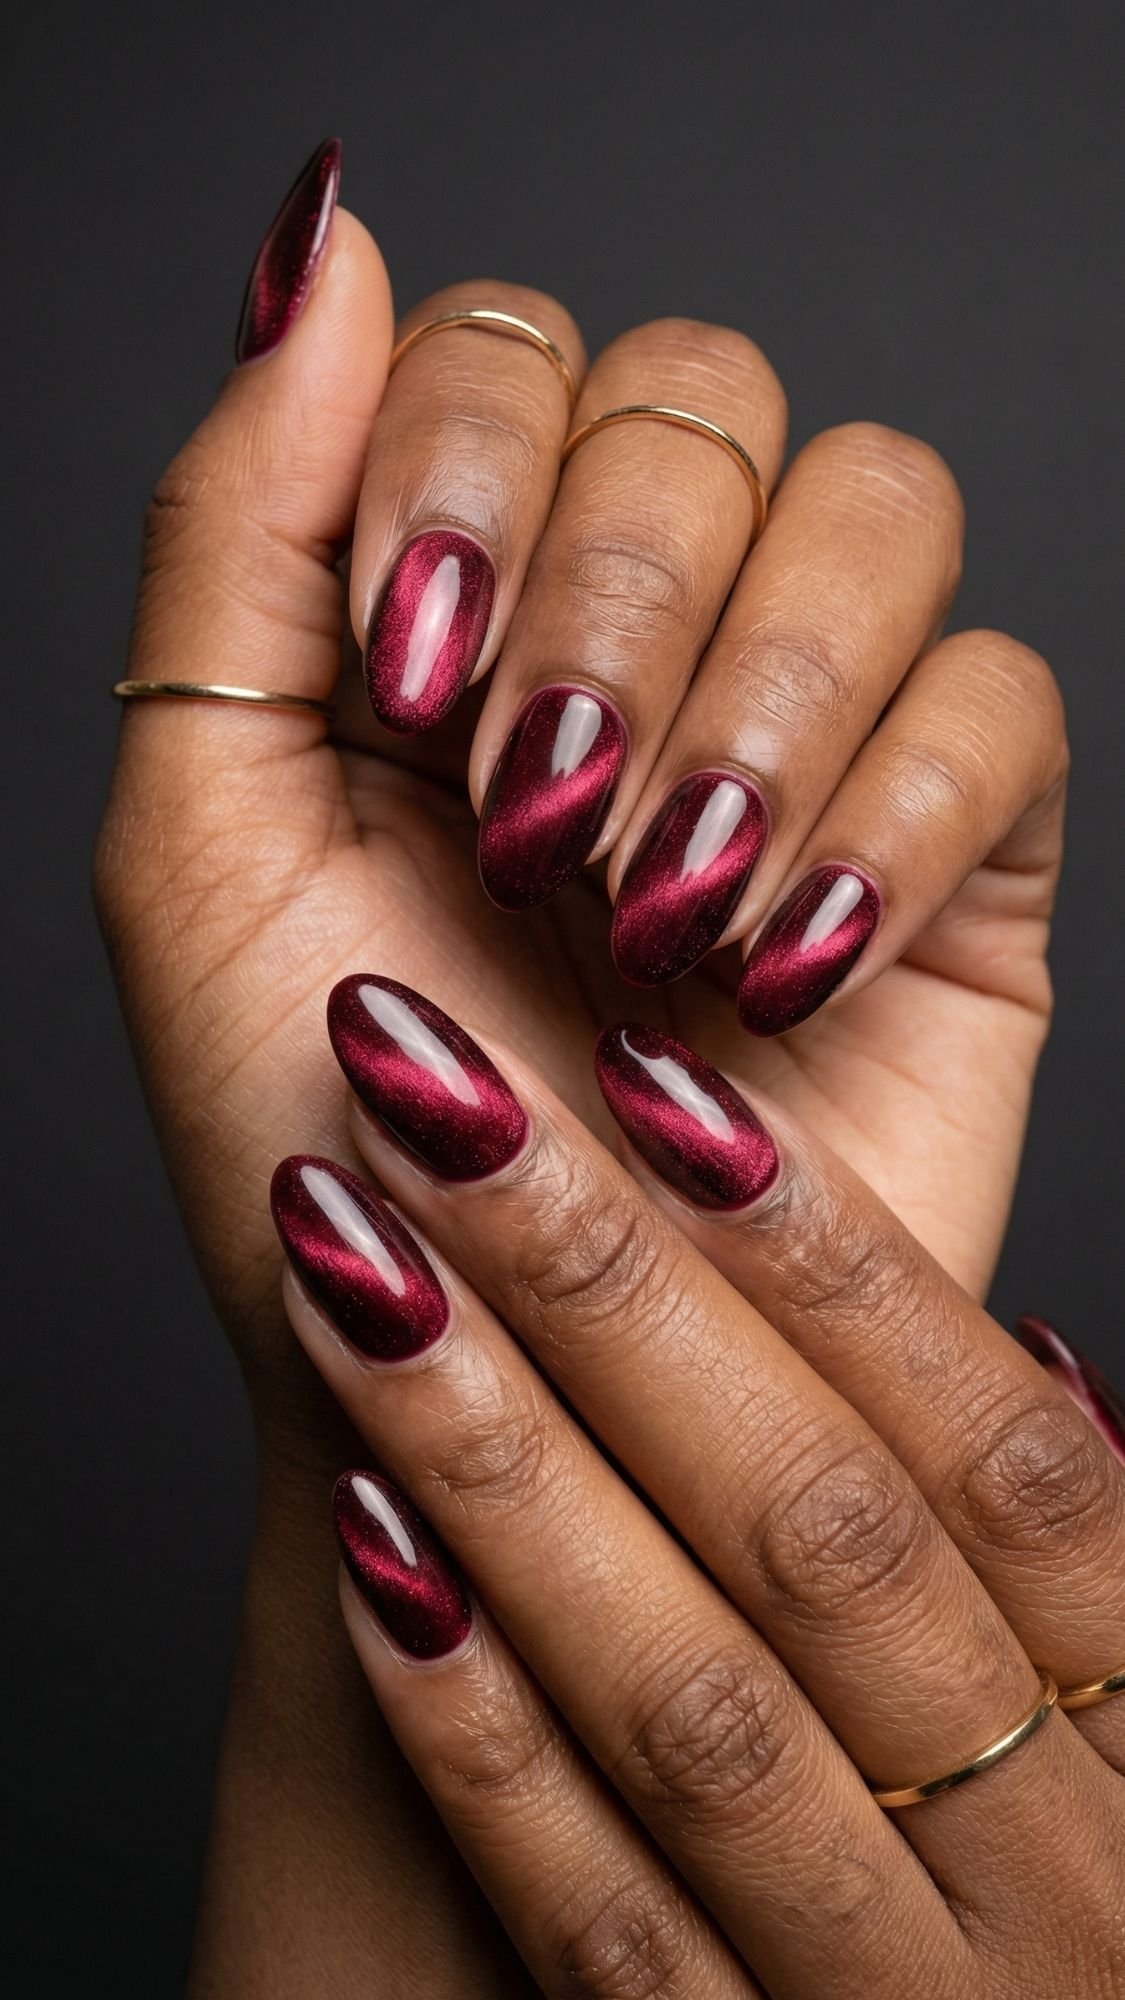
Velvet nails look like soft crushed velvet fabric on your fingertips. The shimmer shifts when you move your hand, which makes it ridiculously photogenic.
- How to get it: Use a magnetic red polish, apply a thin coat, then hold the magnet steady close to the nail for the full set time.
- Pro tip: I magnetize every coat, not just the last one. That gives you stronger depth and a cleaner “velvet stripe.”
- Common mistake + fix: The velvet effect looks weak. Hold the magnet closer, keep it still longer, and do not rush the top coat.
Key Takeaways
- Merlot and dark cherry look ultra-luxe in fall, especially with high shine.
- Aura and tortoise need thin layers, build slowly for clean depth.
- Velvet magnetic polish needs patience, steady magnet time makes the effect pop.
Winter and Holiday Reds
Winter reds hit different. They look richer, glossier, and way more “main character” under indoor lighting. I also love winter designs because you can add one fancy detail and still keep it classy. The trick is restraint, you want sparkle and texture, not a full ornament situation.
23) Ruby Velvet Cat-Eye (Fancy, Dimensional, Light-Catching)
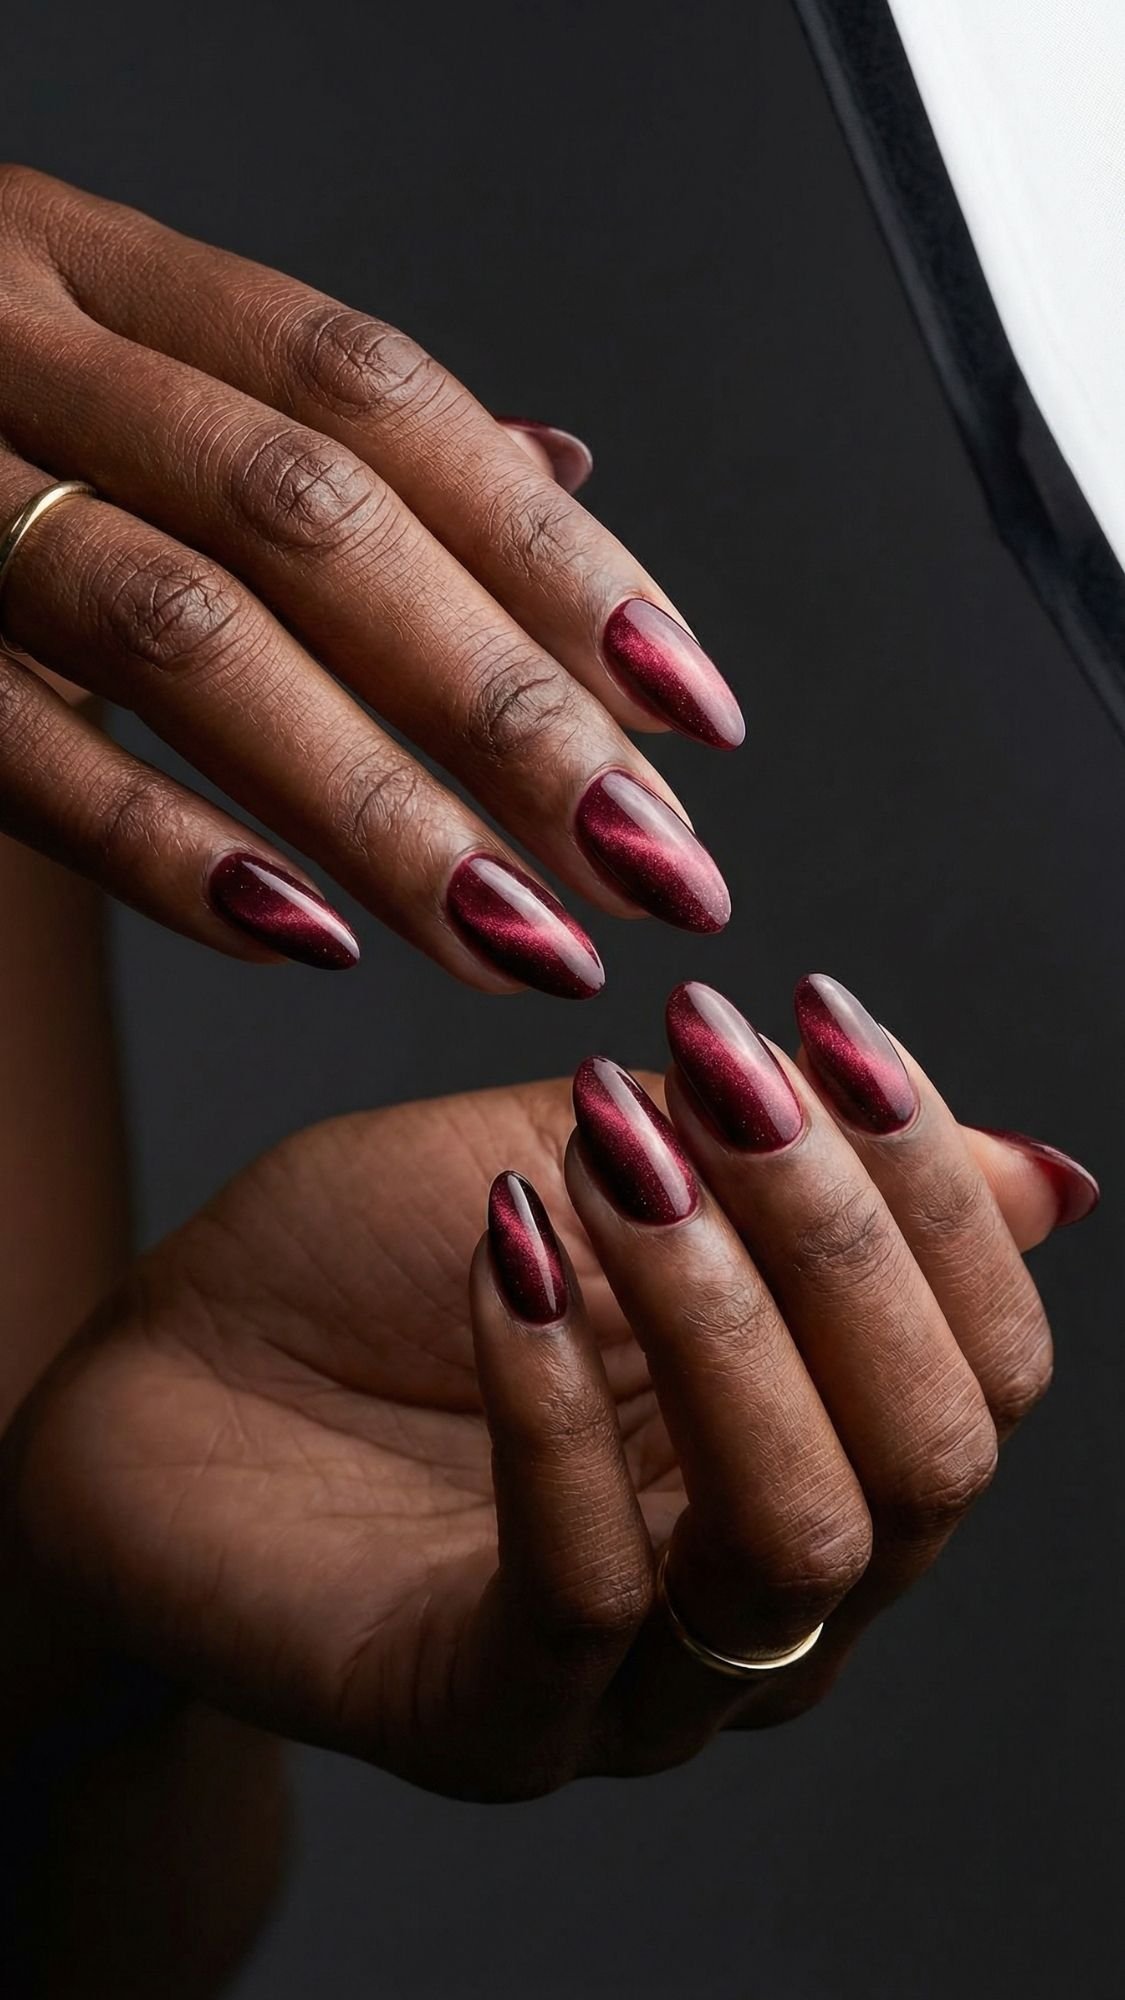
This one looks like red velvet fabric with a moving glow. It’s dramatic in the best way, and it photographs like you walked out of a salon shoot.
- How to get it: Apply a magnetic ruby red polish in thin layers, then hold the magnet close and steady over each nail for the full set time.
- Pro tip: I magnetize every coat, not just the last one. That builds depth so the glow looks “inside” the nail, not sitting on top.
- Common mistake + fix: The cat-eye line looks faint or blurry. Hold the magnet closer, keep it still longer, and do not rush your top coat.
24) Red Ombré with Whisper Glitter Tips (Soft Sparkle, Not Full Glitter)
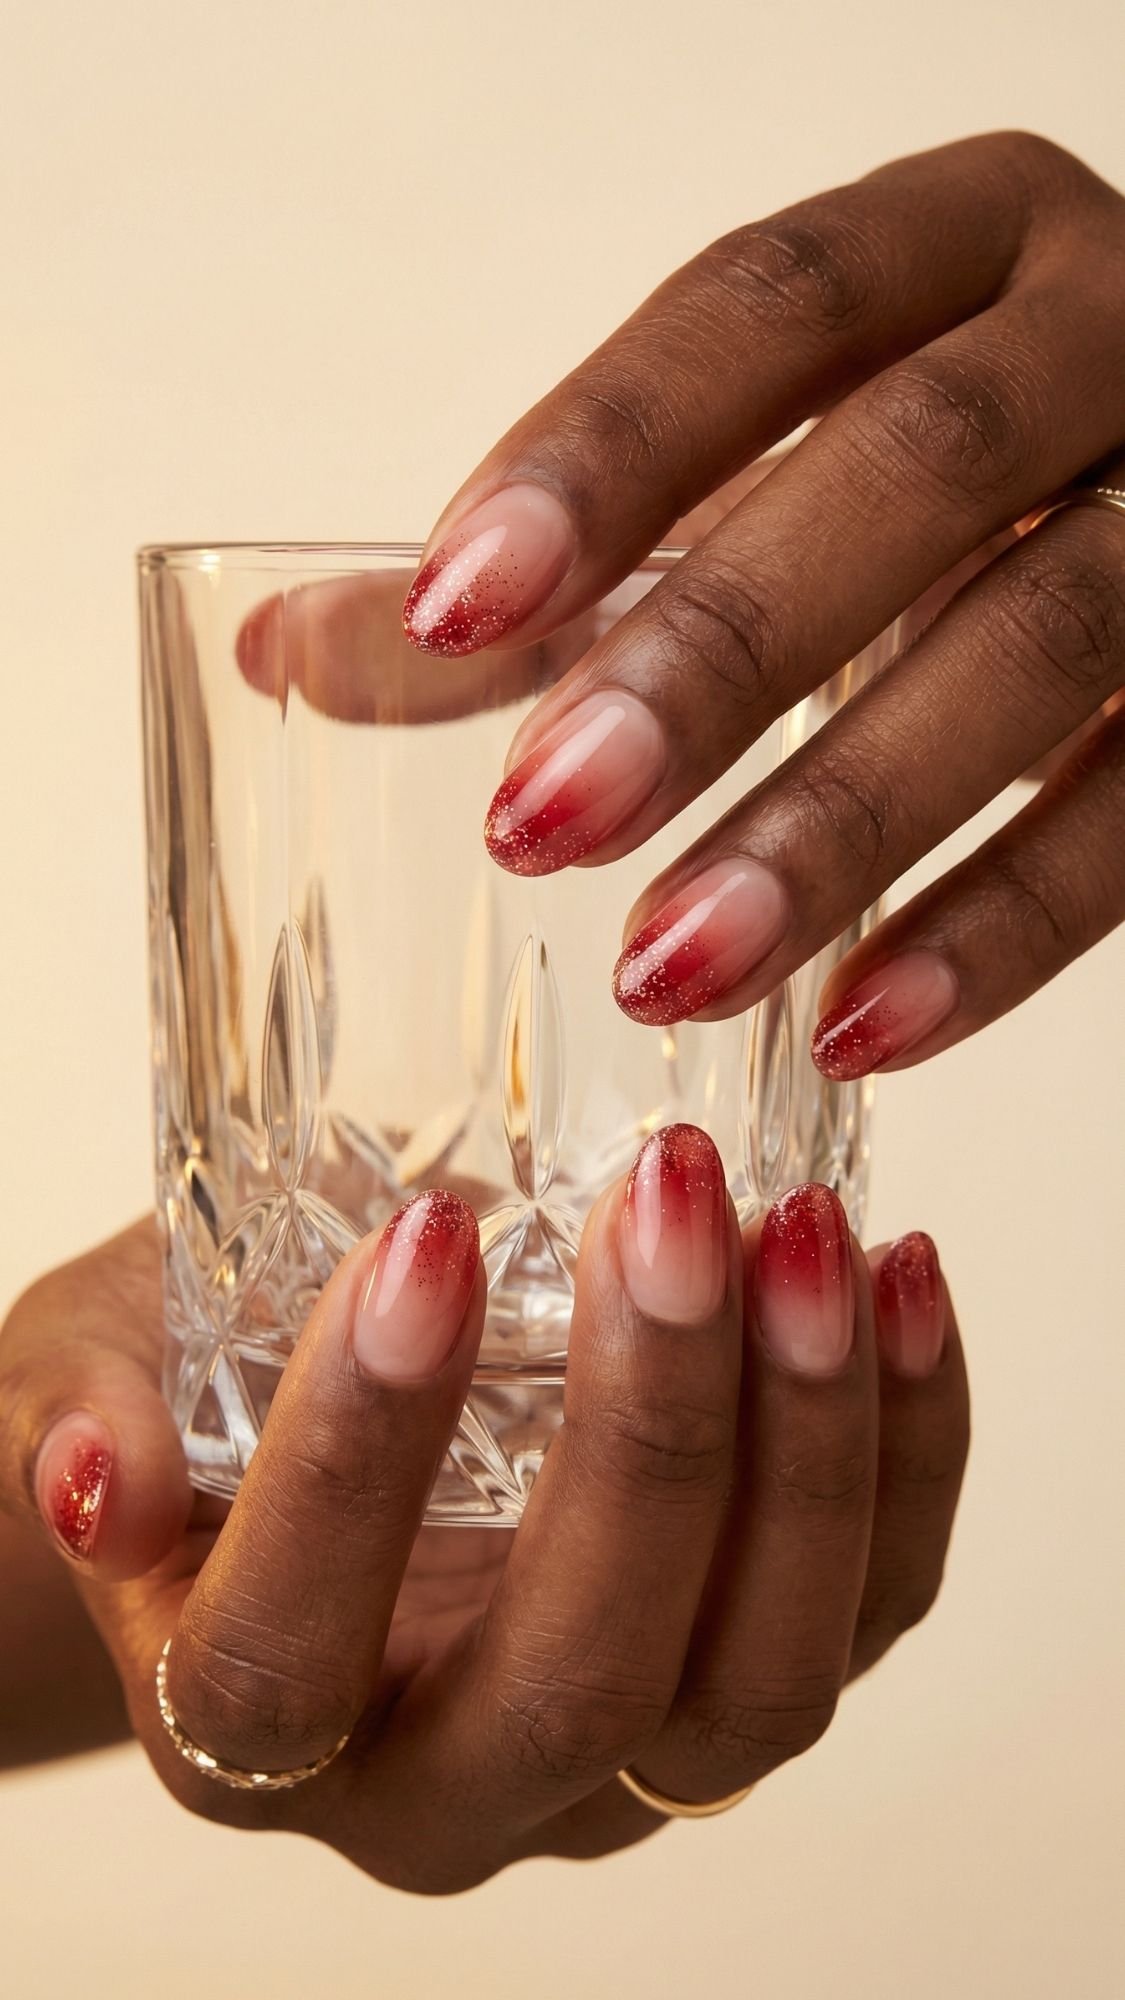
This looks like a candlelit glow at the tips. You get holiday sparkle without the “I spilled glitter on myself” vibe.
- How to get it: Blend red from the tip down into a sheer nude or soft pink base, then tap a micro glitter just at the very edge of the tip.
- Pro tip: I apply glitter with a nearly dry sponge so it lands softly. I keep it concentrated at the free edge so it still grows out clean.
- Common mistake + fix: The ombré looks harsh. Tap the transition area with a clean sponge to blur the edge before top coat.
25) Classic Red with One Tiny Bow or Gem Accent (Minimal, Chic, Holiday-Ready)
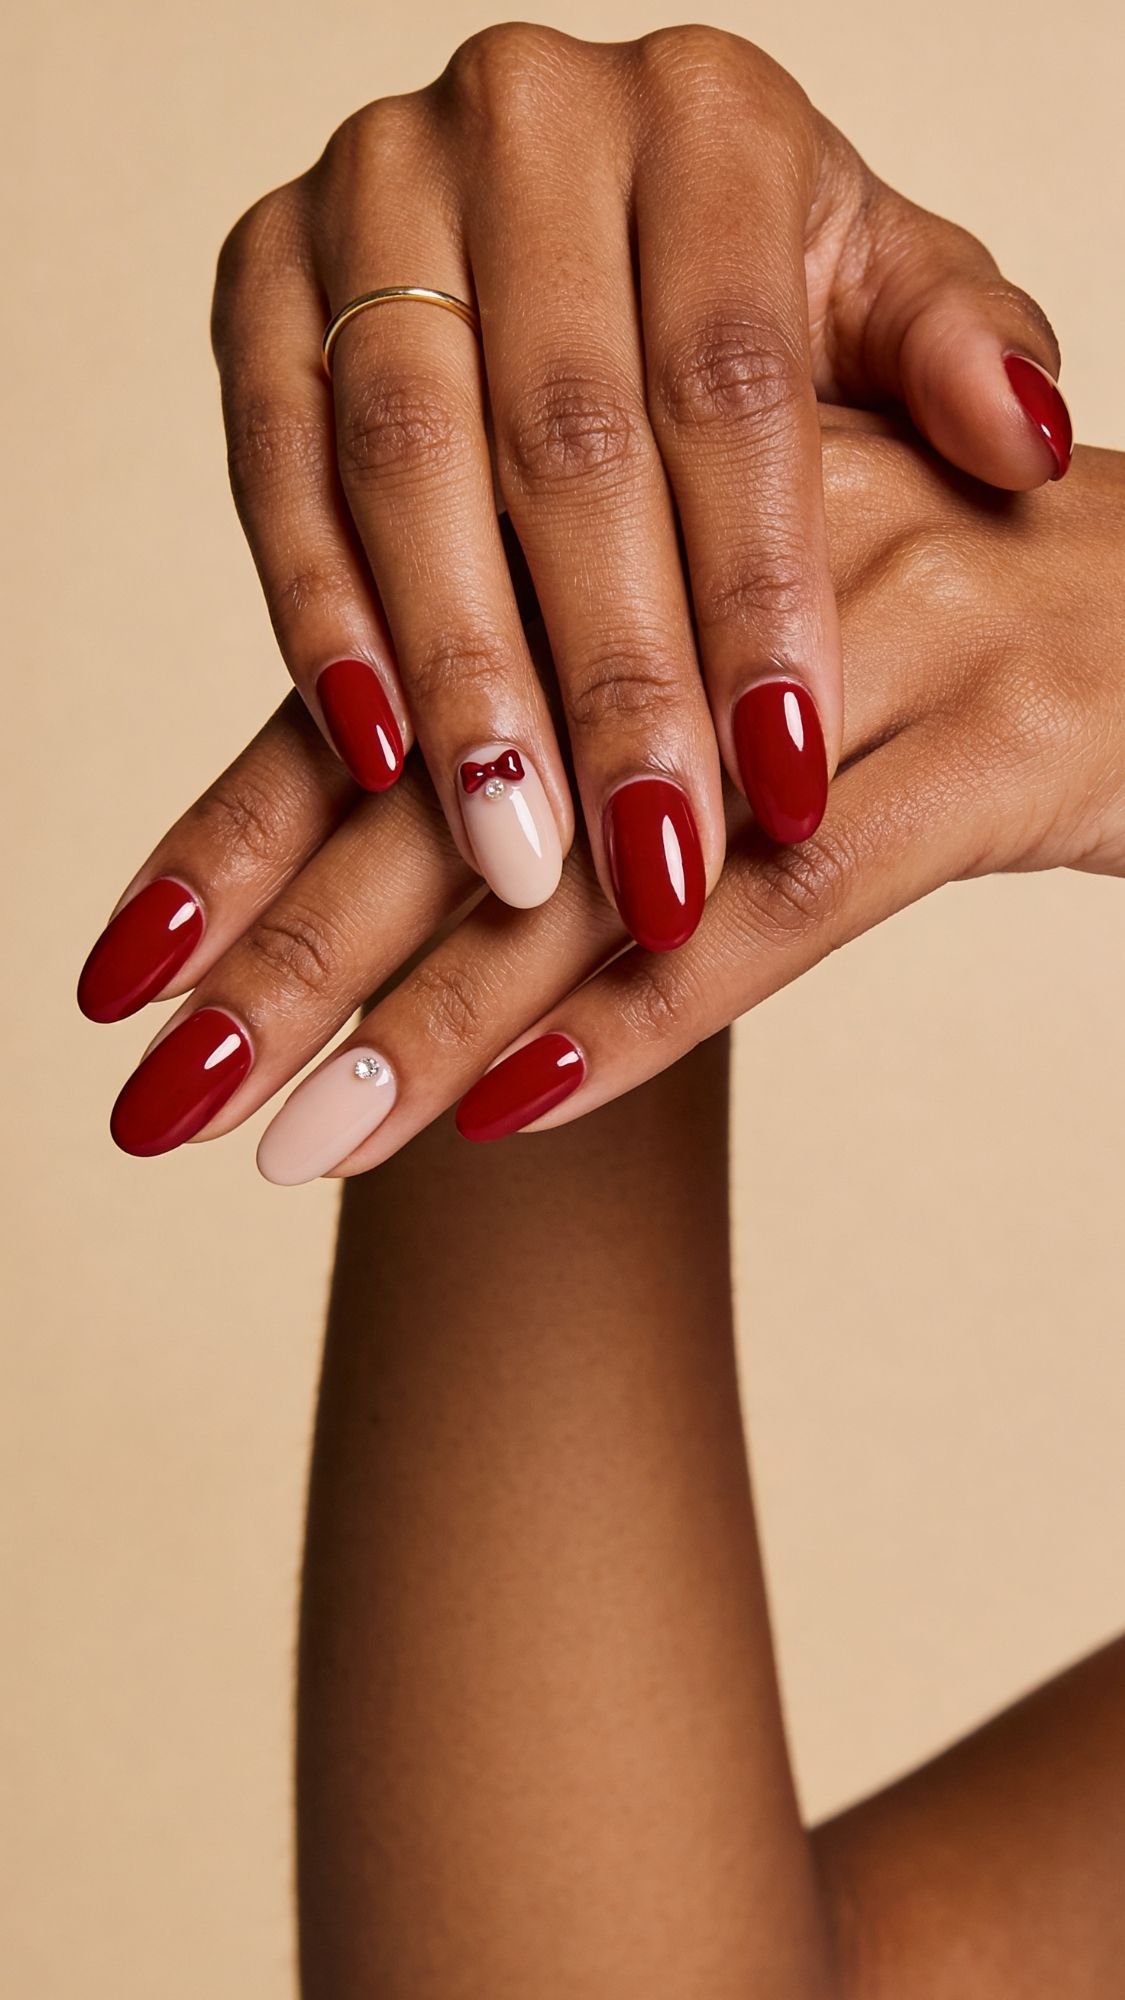
This one gives you “holiday nails” without changing your whole personality. You keep the nails classic red, then add one micro detail that looks intentional.
- How to get it: Paint all nails classic glossy red, then place a tiny bow decal or one small gem near the cuticle on one accent nail only.
- Pro tip: I place the accent slightly off-center near the cuticle, then I seal with two layers of top coat so nothing snags on hair or sweaters.
- Common mistake + fix: The gem catches and pops off. Press it into a slightly tacky layer, seal the edges with top coat, and cap the free edge too.
Key Takeaways
- Magnetic velvet and cat-eye effects need patience, steady magnet time makes the look.
- Keep glitter micro and tip-focused for a classy winter glow.
- One accent detail beats ten, a tiny bow or gem looks more expensive than overload.
Longevity + Maintenance Plan (Day 1 to Day 7)
If you want red nails to stay cute past day two, you need a maintenance plan that fits real life. I do not mean “baby your hands like they’re made of glass.” I mean you make a few small moves that keep the tips sealed and the cuticles hydrated, so the manicure still looks intentional even when it starts growing out.
Day 1: Set the foundation
- Do this: Avoid hot water for the first few hours, keep your hands out of long showers or dish duty if you can.
- Why it matters: Fresh polish keeps curing and hardening after it feels dry.
- Pro tip: I run top coat over the free edge again before bed if I want max wear. That extra seal helps red tips stay crisp.
- Quick rule: If you dent it, it’s not done.
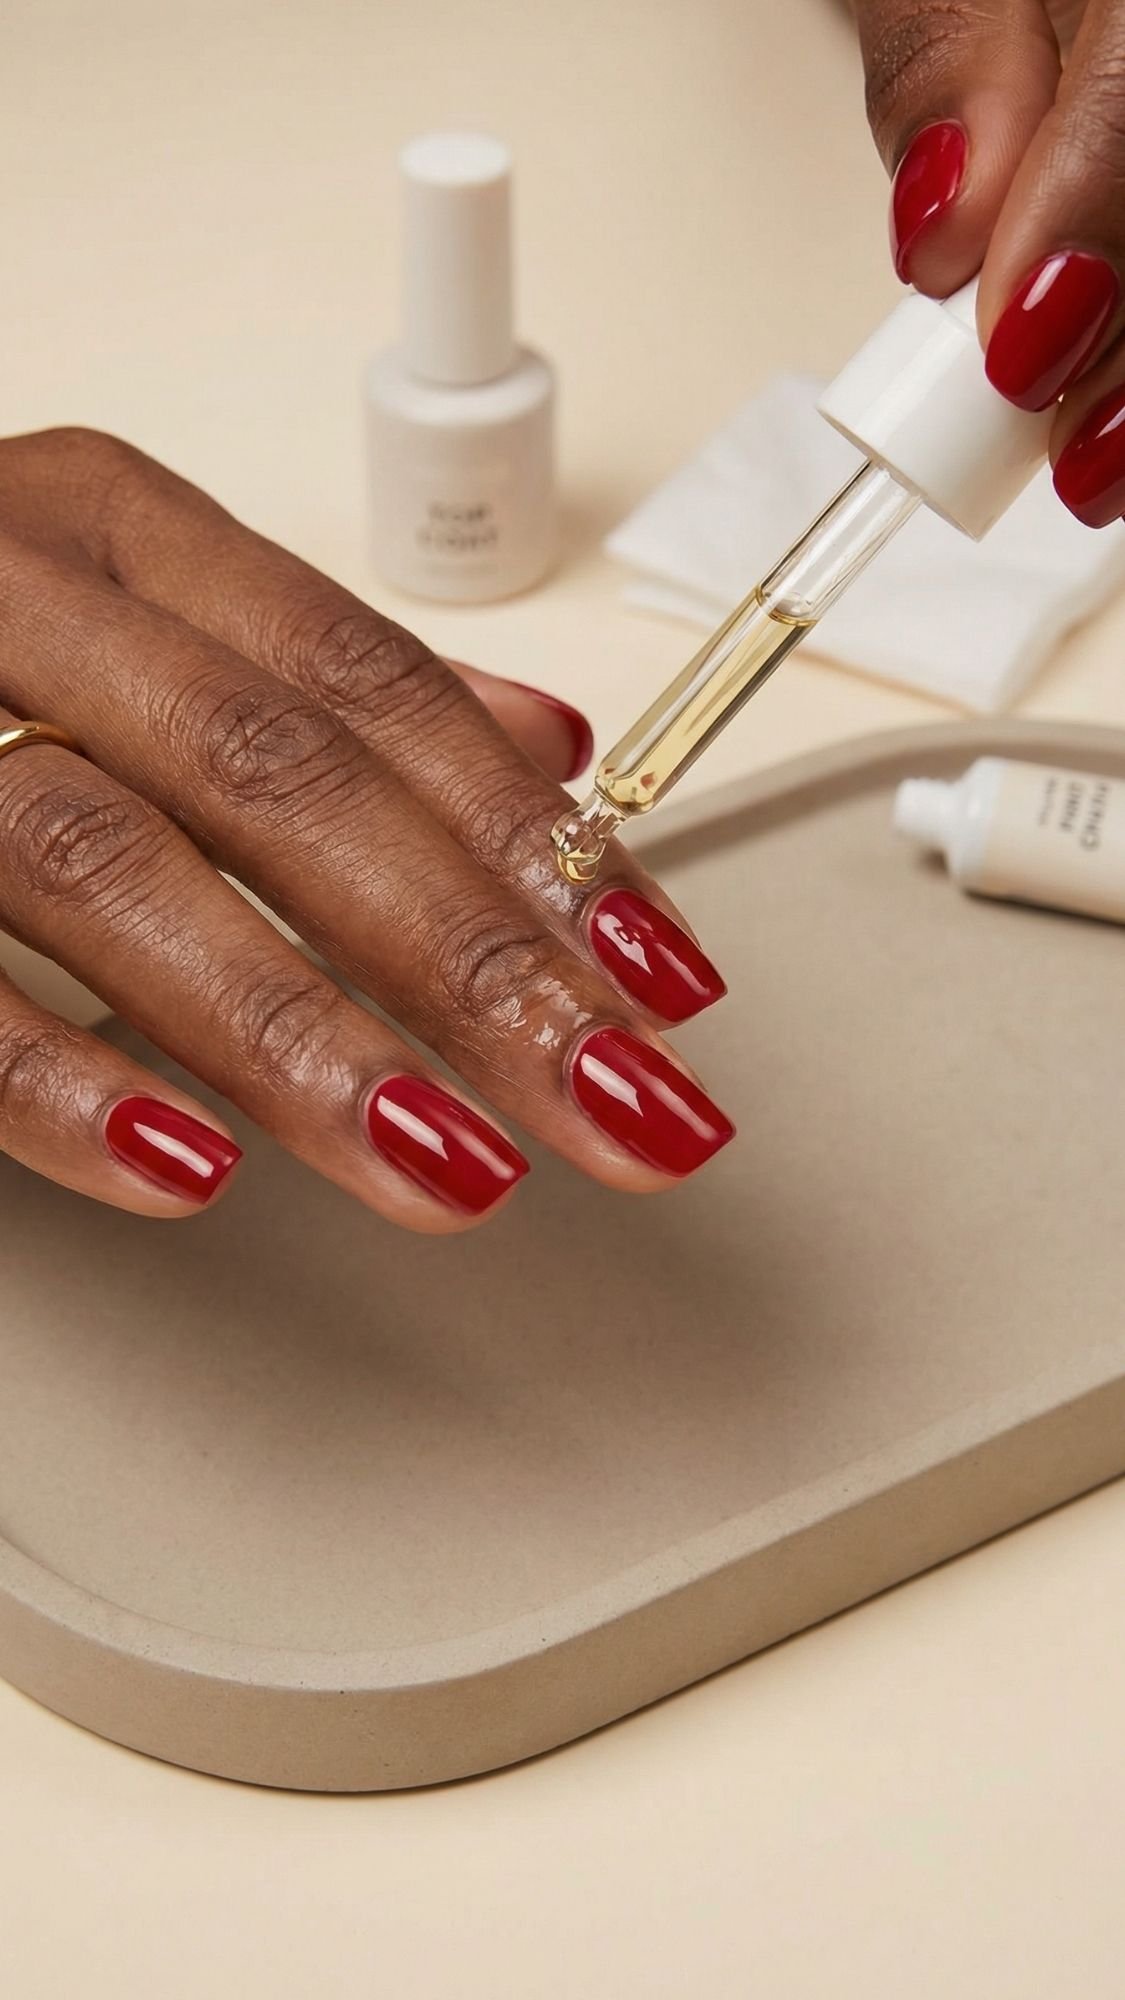
Day 2: Start the cuticle oil habit
- Do this: Apply cuticle oil morning and night, then rub in hand cream.
- Why it matters: Hydrated cuticles make the manicure look fresher, and they reduce snags that lead to peeling at the edges.
- Common mistake + fix: People oil once and quit. Keep it simple, oil lives next to your toothbrush.
Day 3: Reinforce the shine
- Do this: Add one thin layer of top coat.
- Why it matters: Top coat refreshes gloss and adds a new “shell” layer that protects tips from micro chips.
- Pro tip: Cap the free edge again. Red chips love to start there.
Day 4: Glove rule for chores
- Do this: Wear gloves for dishes, cleaning, and hair dye, anything wet or chemical-heavy.
- Why it matters: Water swells nails, then they shrink as they dry, that movement stresses polish.
- Common mistake + fix: People think one rinse “doesn’t count.” It counts. Gloves save manicures.
Day 5: Micro touch-ups, not a full repaint
- If you see a tiny tip chip:
- Lightly smooth the chip edge with a fine file.
- Dab a tiny bit of matching red on the tip only.
- Top coat the whole nail and cap the edge.
- Why it works: You stop the chip from spreading, and you keep the look clean.
Day 6: Prevent snagging and lifting
- Do this: Reapply cuticle oil, and check edges for rough spots.
- Pro tip: If hair catches on a corner, file the corner gently and top coat. Do not pick at it, picking turns one corner into a full peel.
Day 7: Decide, refresh or remove cleanly
- Option A, refresh: Add top coat and keep it going if everything still looks solid.
- Option B, remove: Remove with acetone and lint-free wipes, then oil and moisturize.
- Do not do this: Peel polish off. Peeling takes layers of nail with it, and then your next manicure chips faster.
Quick Fixes Cheat Sheet
- Snagging corner: file lightly, top coat, cap edge.
- Dull shine: one thin top coat, avoid thick layers.
- Tiny chip: spot dab at tip, then full top coat.
- Cuticle dryness: oil first, then cream, twice daily.
Key Takeaways
- Top coat on day 3 makes red last longer.
- Oil keeps the manicure looking fresh, even when it grows out.
- Gloves stop water damage, and water causes most “mystery chipping.”
Troubleshooting (Because Something Always Tries It)
If your red manicure ever looked perfect, then randomly turned on you like a reality show villain, welcome. Most issues come from a small handful of causes, too much product, not enough dry time, or a nail plate that still had oil on it. The good news, you can fix almost all of it without starting over.
1) Polish Pooling at the Cuticle
- What’s happening: You’re placing too much polish too close to the cuticle, and it floods.
- Fix: Wipe one side of the brush, start one millimeter away, then push the bead gently upward without touching skin.
- Pro tip: If it pools, do not panic-swipe. Use a clean, slightly acetone-damp brush to carve a smooth curve.
- Prevent it next time: Do thinner coats, and keep your finger angled slightly downward while painting.
2) Streaky Red (Patchy, Brush Marks, Not Cute)
- What’s happening: Your coat is too thick, or you keep re-brushing as it starts to set.
- Fix: Commit to the 3-stroke rule and stop touching it once it lays down.
- Pro tip: Let coat one look a little sheer. Coat two makes it opaque, coat one just sets the base.
- Prevent it next time: Roll the bottle between your hands instead of shaking, shaking creates bubbles and uneven flow.
3) Bubbling (Tiny Air Bubbles Under the Top Coat)
- What’s happening: You shook the polish, painted in a hot room, used too thick a coat, or you blew on it like it’s a birthday candle.
- Fix: Let the polish rest, apply thinner coats, and paint in a cooler, still-air space.
- Pro tip: If you see bubbles forming, do not keep brushing. You’ll trap them. Let the coat settle, then fix with a thin smoothing layer.
- Prevent it next time: Roll the bottle, don’t shake, and keep your top coat strokes light.
4) Shrinkage (Top Coat Pulls Back From the Tips)
- What’s happening: You waited too long to top coat, or your top coat formula shrinks as it dries.
- Fix: Top coat within the right window, usually 5 to 8 minutes after color, and cap the free edge carefully.
- Pro tip: If your top coat shrinks, apply it slightly past the tip, then cap the free edge to lock it in.
- Prevent it next time: Try a different top coat type, some shrink more than others.
5) Tip Chipping (The Classic Betrayal)
- What’s happening: Your free edge isn’t sealed, your nails flex, or you’re using your nails as tools.
- Fix: File the chip smooth, dab red on the tip only, then top coat the whole nail and cap the edge.
- Pro tip: Seal the tip with base coat and top coat, and refresh top coat on day three.
- Prevent it next time: Wear gloves for dishes, and stop opening cans with your nails, I’m begging 🙂
6) Smudges (The “I Thought It Was Dry” Situation)
- What’s happening: The top layer felt dry, but the polish underneath stayed soft.
- Fix: If the smudge is minor, add top coat to re-level. If it’s deep, let it dry fully, smooth the spot lightly, then reapply polish and top coat.
- Pro tip: Quick-dry drops help if you always smudge. They feel slightly oily and slick for a second, then they set the surface faster.
- Prevent it next time: Give yourself an actual no-touch window, and do thumbs last.
7) Press-Ons Popping Off or Glue Bubbles (If You Use Press-Ons)
- What’s happening: Wrong sizing, oily nail plate, or glue placed unevenly.
- Fix: Size correctly, dehydrate the nail plate, apply glue in a thin even layer, press and hold firmly.
- Pro tip: If you sit between sizes, go smaller and file the sides to fit. A too-large press-on lifts faster.
- Prevent it next time: Seal the edges with top coat, especially near sidewalls.
Key Takeaways
- Most issues come from thick coats, oil, or rushing dry time.
- A cleanup brush fixes 80 percent of “messy red” problems.
- Seal the free edge, tips chip first because they take the most impact.
Strong Nails, Clean Cuticles, No Drama
Red nails look best when the nail plate stays smooth and the cuticles look hydrated. I’ve watched people chase “strong nails” with every hardener on the shelf, then wonder why their nails snap like crackers. What I’ve noticed over the years is simple, hydration and protection beat punishment. You can keep doing red manis back-to-back, but you need a recovery rhythm so your nails don’t thin out or peel.
Strength and hydration basics that actually work
- Cuticle oil, daily
- What to do: Massage oil into cuticles and sidewalls morning and night.
- Why it matters: Oil keeps the skin flexible so it doesn’t split and snag, and it helps the nail plate stay less brittle.
- Pro tip: I rub oil in for 20 seconds per hand. That tiny massage boosts absorption and makes everything look instantly better.
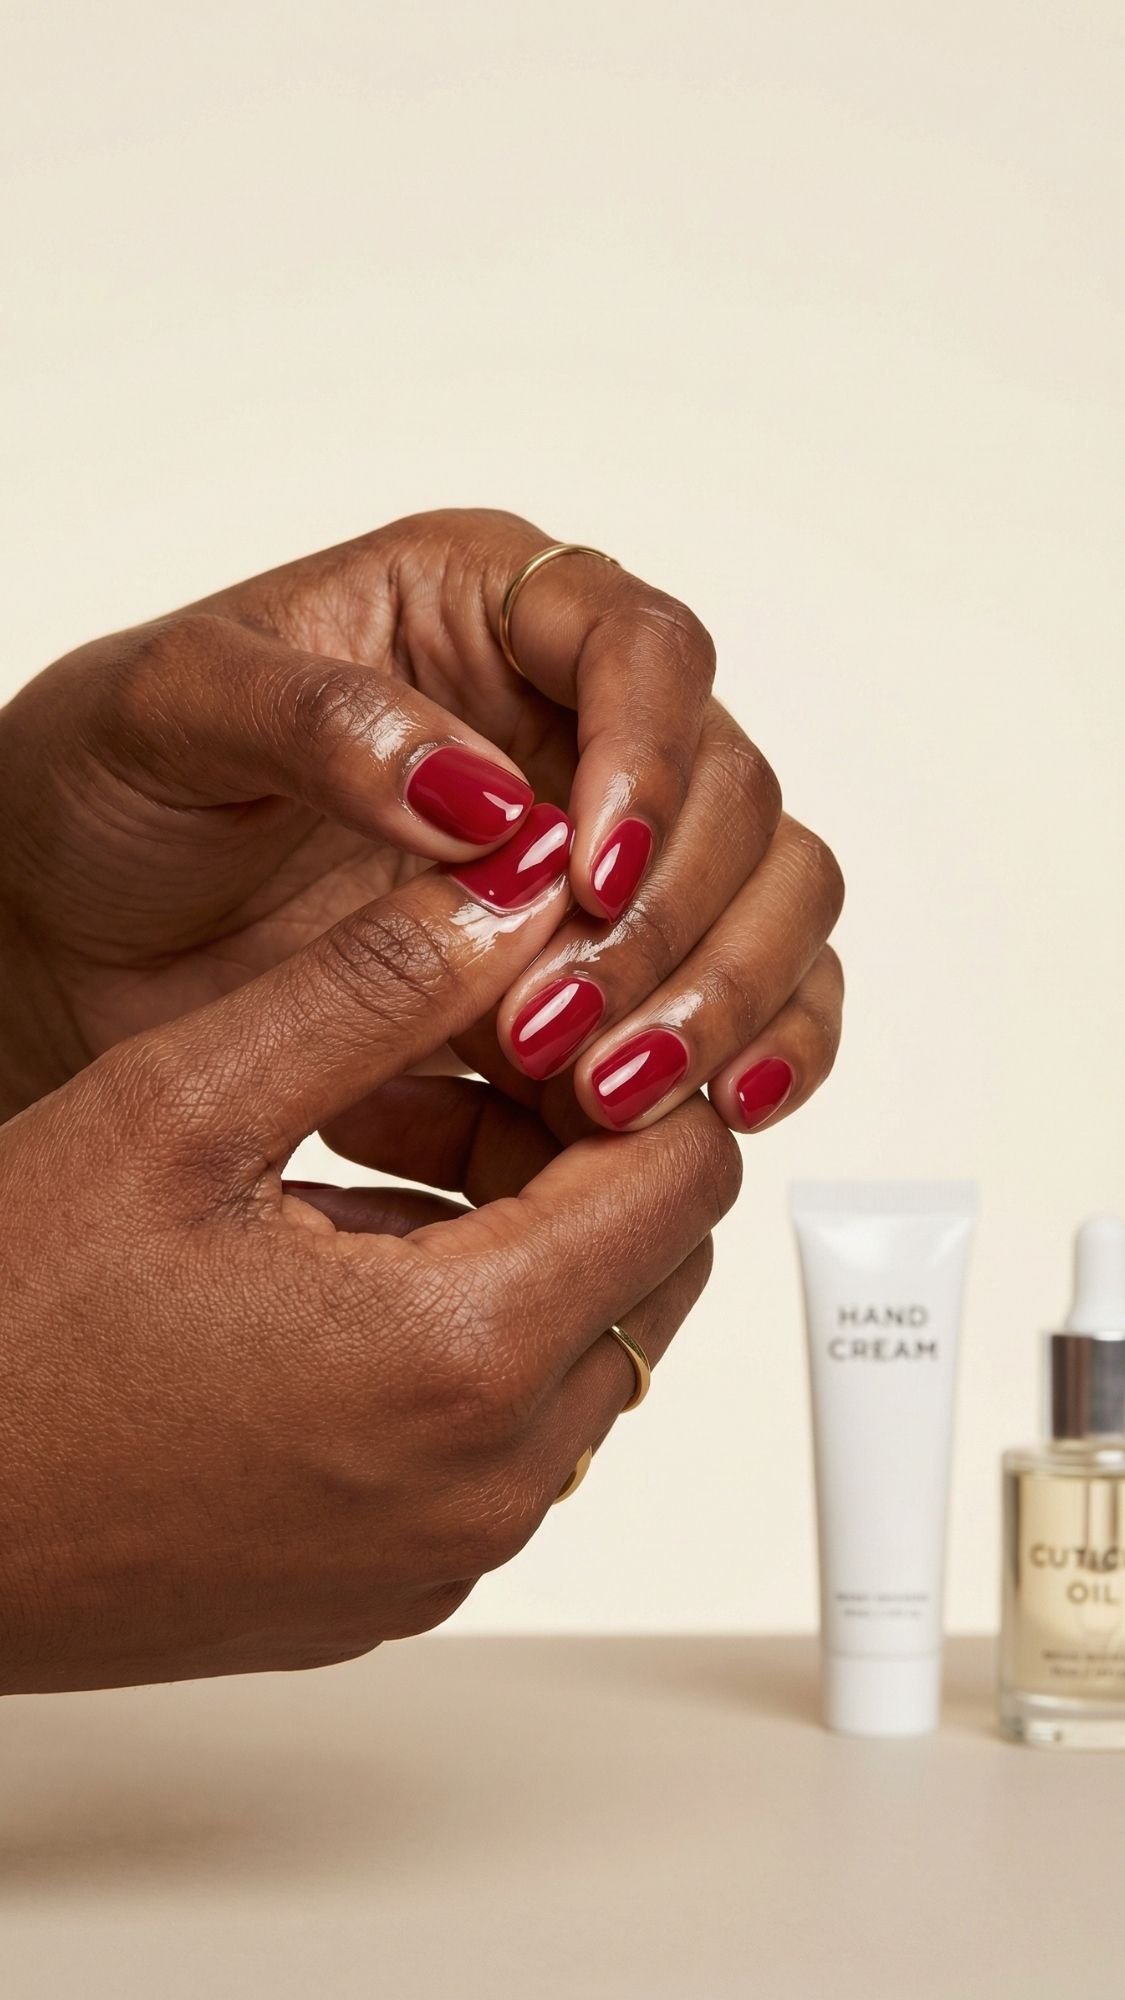
- Hand cream after every hand wash
- What to do: Apply cream while hands are still slightly damp.
- Why it matters: It seals in water so your skin stays soft, not rough and grabby around the nail edges.
- Gloves for chores
- What to do: Wear gloves for dishes and cleaning.
- Why it matters: Water swells the nail, then it shrinks, that stress leads to peeling and polish chips.
Breaks between manis, what helps vs what’s hype
You do not need a two-month nail detox unless your nails feel painful, paper-thin, or peeling badly. Most people just need a short reset where they stop layering product on top of damage.
- What actually helps:
- 3 to 7 days with no polish, just oil and cream.
- A ridge-filling base coat when you return, so you don’t over-buff.
- Gentle filing, no aggressive buffing.
- What’s usually hype:
- Super harsh “strengtheners” used daily for weeks, they can make nails rigid and more likely to snap.
- Peeling polish off as a “quick removal.” That’s not removal, that’s nail sabotage.
- Pro tip: If you love constant color, use a clear base coat and top coat for your break. It still feels polished, but your nails get less pigment and solvent exposure.
Removal best practices (so you stop thinning your nails)
- Regular polish removal:
- What to do: Use acetone or remover on a lint-free wipe, press for a few seconds, then wipe off in clean passes.
- Why it matters: Scrubbing aggressively roughs up the nail plate and irritates skin.
- Pro tip: I remove red from thumbs last, red stains like it pays rent.
- If you wear long-wear systems or gel sometimes:
- Safety note: Avoid skin contact, and never rip or peel off product.
- Pro tip: If product lifts, file the lifted edge smooth and remove properly. Picking causes peeling and thinning fast.
When to see a professional (do not ignore these signs)
DIY is fun, but some things are not a Pinterest problem.
- Pain, swelling, warmth, or throbbing near the nail
- Green, black, or rapidly spreading discoloration
- Lifting with odor
- Pus, bleeding that won’t stop, or skin that looks infected
If you see those, stop products and see a professional. You deserve safe nails, not “let me just cover it with polish” decisions.
Key Takeaways
- Hydration keeps nails flexible, flexible nails chip less and break less.
- Gloves protect nails and polish, water causes most peeling.
- Remove gently, peeling polish ruins the nail plate for your next manicure.
Shade + Shape Guidance (So Your Hands Look Longer and the Red Looks Right)
This is the part nobody wants to think about until they put on a red that somehow looks “off.” Red can pull orange, pink, brown, or even look flat depending on undertone, lighting, and finish. What I’ve noticed over the years is that people blame their skin tone when the real issue is undertone mismatch or the wrong finish. You do not need to overcomplicate it, you just need a simple decision tree.
Pick your red by undertone first
- If you have warm undertones (golden, olive, or you tan easily):
- Best reds: tomato red, chili red, orange-leaning reds, warm cherry
- Why it works: warm reds echo warmth in the skin, so they look bright and healthy.
- If you have cool undertones (pink, red, or you burn easily):
- Best reds: blue-red, cranberry, ruby, classic pin-up red
- Why it works: blue-reds look crisp and bold, they do not turn orange.
- If you have neutral undertones (you can wear gold and silver easily):
- Best reds: true red, cherry red, most jelly reds
- Why it works: neutral undertones handle both warm and cool reds without fighting.
Shade depth tips for deeper skin tones
Deep skin tones look incredible in reds because saturation shows up beautifully, but you want the right depth so it looks rich, not dusty.
- Best picks: deep cherry, ruby, merlot, oxblood
- When to choose bright reds: go for tomato red or true classic red when you want high contrast.
- Finish tip: glossy top coat boosts richness. A dull finish can make even a beautiful red look flat.
Choose your finish based on the vibe
- Cream red: classic, opaque, the easiest “clean” look
- Jelly red: lighter, glassy, “juicy” depth without heaviness
- Chrome red: bold, reflective, modern
- Velvet or magnetic red: dramatic, dimensional, looks expensive in photos
- Micro glitter accents: holiday-ready without going full sparkle
Nail shape guidance that flatters your hands
- Best shapes for short nails:
- Short squoval for clean and practical
- Short oval if you want a softer look and fewer snags
- Best shapes for wide nail beds:
- Oval or almond to visually slim the nail
- Keep sidewalls slightly tapered, avoid super wide square edges
- If you want your hands to look longer:
- Choose oval or almond
- Keep designs vertical and minimal, like micro French tips or thin swirls
- Leave a clean cuticle margin, it keeps the nail bed looking longer
Quick “what should I pick?” cheat
- Want timeless, works with everything: classic cream true red
- Want trendy but still wearable: cherry jelly or red aura
- Want luxe and dramatic: ruby velvet cat-eye
- Want low maintenance grow-out: micro red French or negative space half-moon
Key Takeaways
- Match undertone first, then choose depth and finish.
- Gloss makes reds look richer, especially deeper shades.
- Oval and almond shapes lengthen hands, and thin designs keep it elegant.
Content Creator Notes (Optional, but it makes your pics look 10x better)
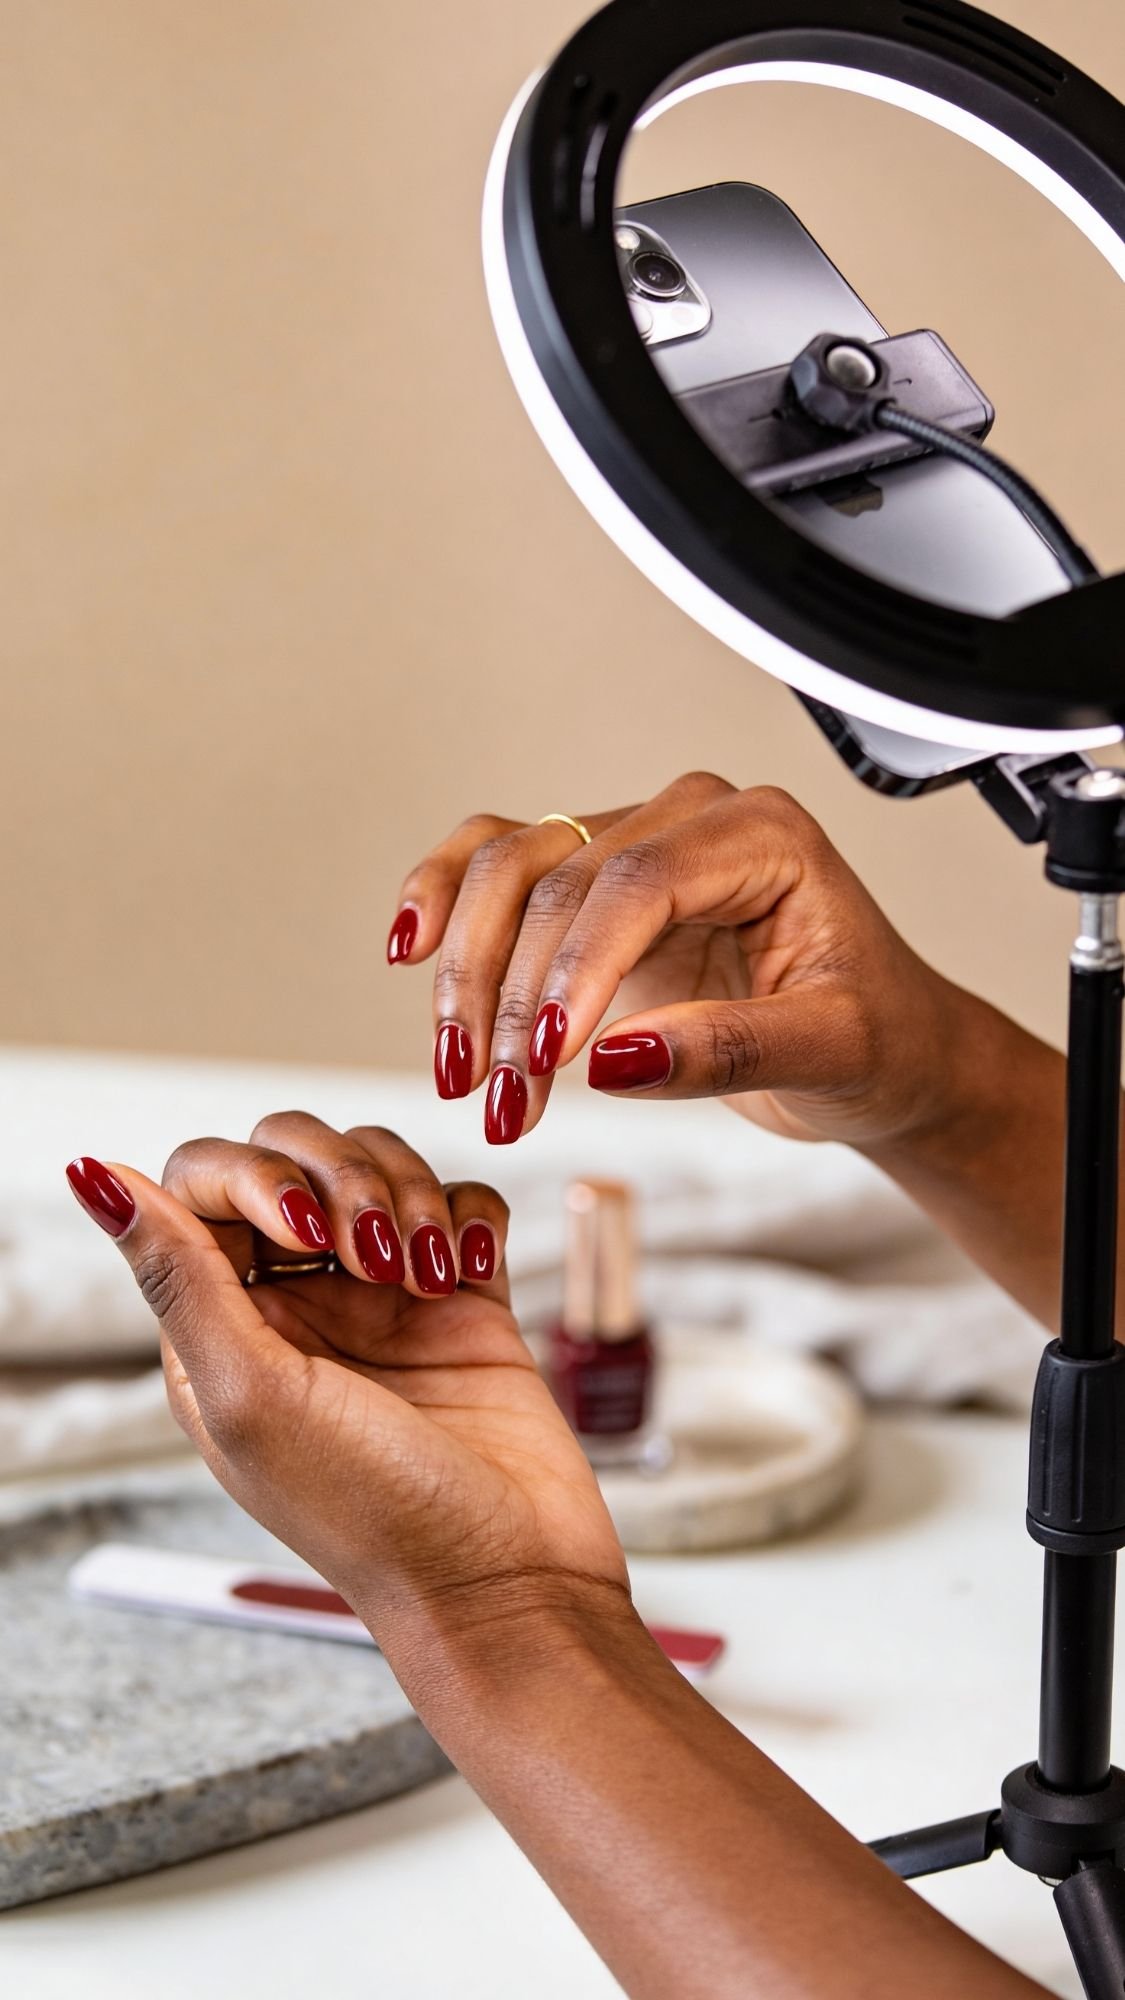
If you plan to pin these, post them, or just want your camera roll to look like a nail inspo board, this section matters. Nail photos fail for one main reason, the camera can’t “read” the design fast enough. So you want clean framing, clean light, and a visible shine line. Ever taken a nail pic and thought, “why do my nails look… blurry and weirdly wide?” Your angle did that.
The best angles for nails (hands look nicer, designs look clearer)
- Go 45 degrees, not straight head-on. A slight angle shows shape, shine, and length without distortion.
- Use a relaxed hand pose. Gently curl fingers or stack hands lightly, tension makes hands look stiff.
- Shoot closer than you think. Crop from mid-forearm to fingertips so the nails fill the frame.
Lighting rules that make reds look rich (not flat)
- Soft daylight wins. Sit near a window, but stay out of direct sun so you don’t get harsh glare.
- Look for the shine line. That clean reflection stripe across the nail tells viewers “glossy and fresh.”
- If you use a ring light: move it slightly off-center so you get one smooth highlight, not a blown-out hotspot.
- Pro tip: I place a white sheet of paper off to the side as a cheap reflector. It softens shadows and makes the red look more even.
Background and props (keep it simple so nails stay the star)
- Best backgrounds: neutral beige, warm gray, soft white, linen, stone trays
- Props that help without stealing attention:
- glass perfume bottle for jelly reds
- coffee mug for fall reds
- minimal jewelry dish for chrome or foil
- Avoid busy prints, they compete with nail art and make Pinterest scroll past.
Quick settings and editing (keep it natural)
- Tap to focus on the nails, not the knuckles.
- Lower exposure slightly if the red looks neon or washed out.
- Do not over-sharpen. It makes skin texture look crunchy and the polish look fake.
- If you edit, adjust brightness and warmth lightly, then stop.
Key Takeaways
- A visible shine line sells the manicure.
- Soft, diffused light makes red look deeper and smoother.
- Tight crops and simple backgrounds get more saves.
Beginner Version (15 to 20 Minutes, Good Nails Fast)
This is for the days you want nice red nails but you do not want to commit to a full production. You can still get a clean, glossy result in under 20 minutes if you keep it simple and you do not rush the drying window like it’s optional.
The simplest routine that still looks polished
- Remove and cleanse
- Wipe off old polish, then swipe nails with alcohol.
- Why it matters: oil kills wear time, especially on bold colors.
- Shape quickly
- File into short squoval or short oval.
- Why it matters: a clean shape makes even basic red look intentional.
- Base coat
- Apply one thin coat.
- Pro tip: cap the free edge once, even in the quick version.
- Two thin coats of red
- Coat one looks a little sheer, that’s fine.
- Coat two makes it opaque and smooth.
- Timing: wait about 2 minutes between coats.
- Top coat
- Apply one glossy top coat and cap the free edge again.
- Pro tip: do thumbs last, thumbs smudge first because they always work overtime.
- Do not touch for 10 minutes
- Yes, I know. But if you touch too early, you’ll dent it and hate everything.
What to buy first vs what can wait (beginner shopping list)
- Buy first:
- base coat
- one flattering red polish
- glossy top coat
- 180 or 240 grit file
- small cleanup brush
- Buy later:
- magnets, chrome, detail brushes, foil, decals
Common mistake + fix
- Mistake: Thick coats to “save time.”
- Fix: Thin coats dry faster and look smoother, thick coats stay soft and dent forever.
Key Takeaways
- Base, two thin coats, top coat, done.
- Cap the free edge, even in the quick routine.
- Hands off for 10 minutes, your future self will thank you.
Save These, They Make Every Red Mani Better
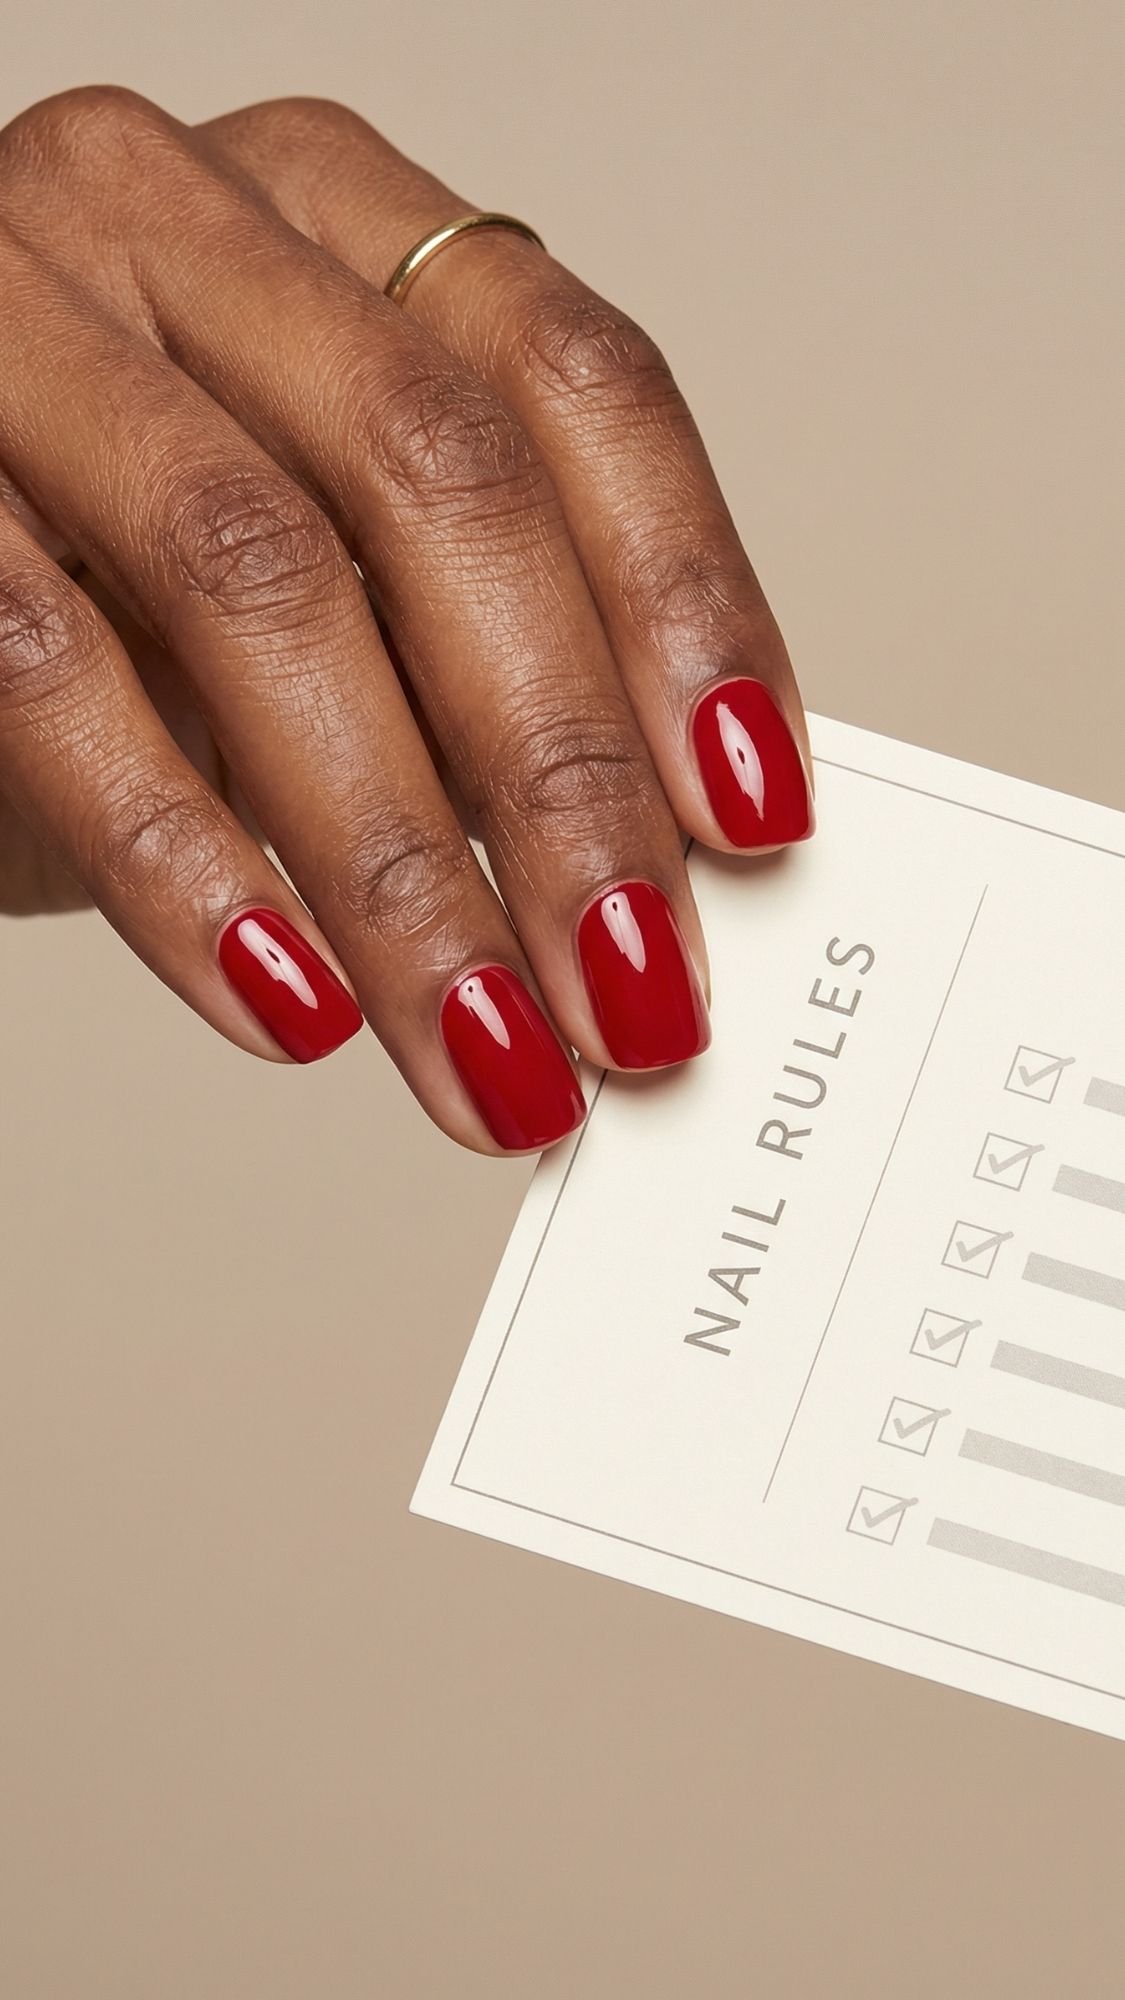
These are the rules I follow even when I’m tired, rushing, or pretending I’m “just doing one coat real quick.” They keep red looking clean and lasting longer without turning nails into a whole lifestyle.
10 quick rules that actually matter
- Thin coats always win. Thick coats feel faster, but they stay soft and dent easily.
- Leave a tiny cuticle gap. That one millimeter makes your manicure look cleaner and last longer.
- Cap the free edge twice, once with base coat and again with top coat.
- Dehydrate last. Cleanse the nail plate right before base coat, then do not touch the nails.
- Stop re-brushing. Lay the polish down, then let it level.
- Top coat on day 3 gives you the “fresh set” look and boosts longevity.
- Gloves for dishes. Water swells nails, then shrinkage stresses polish and causes chips.
- Oil your cuticles daily. Hydrated edges look fresh, and less snagging means less peeling.
- Do thumbs last. They take longer to dry because you use them immediately without thinking.
- Never peel polish off. It removes layers of nail and makes your next manicure chip faster.
Key Takeaways
- Red looks expensive when edges stay clean and glossy.
- Your top coat strategy matters more than the shade.
- Maintenance beats constant repainting.
Fast Fixes, No Guessing
When something goes wrong, you do not need to start over. Use this like a quick troubleshooting map.
If you see this, do this
- Streaks: apply a second thin coat, stop re-brushing as it sets.
- Bubbles: switch to thinner coats, stop shaking bottles, paint in cooler air.
- Shrinkage at tips: top coat within 5 to 8 minutes, cap the free edge.
- Tip chips: smooth edge, dab color on tip only, then full top coat.
- Messy cuticles: use a cleanup brush with a tiny amount of acetone to carve the curve.
- Dull shine: one thin refresher top coat, cap the edge.
Key Takeaways
- Most problems come from rushing or thick coats.
- A cleanup brush is a cheat code for red.
Common Mistakes and Easy Fixes (So You Stop Fighting Your Polish)
If red keeps betraying you, it’s usually one of these. I’m not judging, I’m just naming the enemies.
6 common mistakes
- You skip dehydration, then wonder why it chips fast.
- Fix: cleanse nails right before base coat.
- You paint thick coats, then everything smudges.
- Fix: thin coats, more patience, better result.
- You shake the bottle, then you get bubbles.
- Fix: roll the bottle between your hands.
- You flood the cuticles, then it lifts.
- Fix: start 1 mm away, clean up with a brush.
- You do not cap the edge, then tips chip first.
- Fix: cap base and top coat at the free edge.
- You pick at chips, then the whole nail peels.
- Fix: file and patch the tip, don’t peel.
Key Takeaways
- Most “bad polish” is actually a technique issue.
- Fixes are small, fast, and repeatable.
What Not to Mix (And What to Do Instead)
Mixing the wrong nail steps usually doesn’t cause a dramatic explosion, it just quietly ruins your wear time. Red polish will then expose the mess like it’s tattling. Here are the combos that cause the most “why is this lifting?” issues.
1) Do not oil the nail plate before base coat
- Why it fails: oil blocks adhesion, base coat can’t grip.
- Do this instead: dehydrate the nail plate, then oil cuticles after your top coat fully dries.
- Pro tip: If you want cleaner edges, put balm around the cuticle skin only, not on the nail.
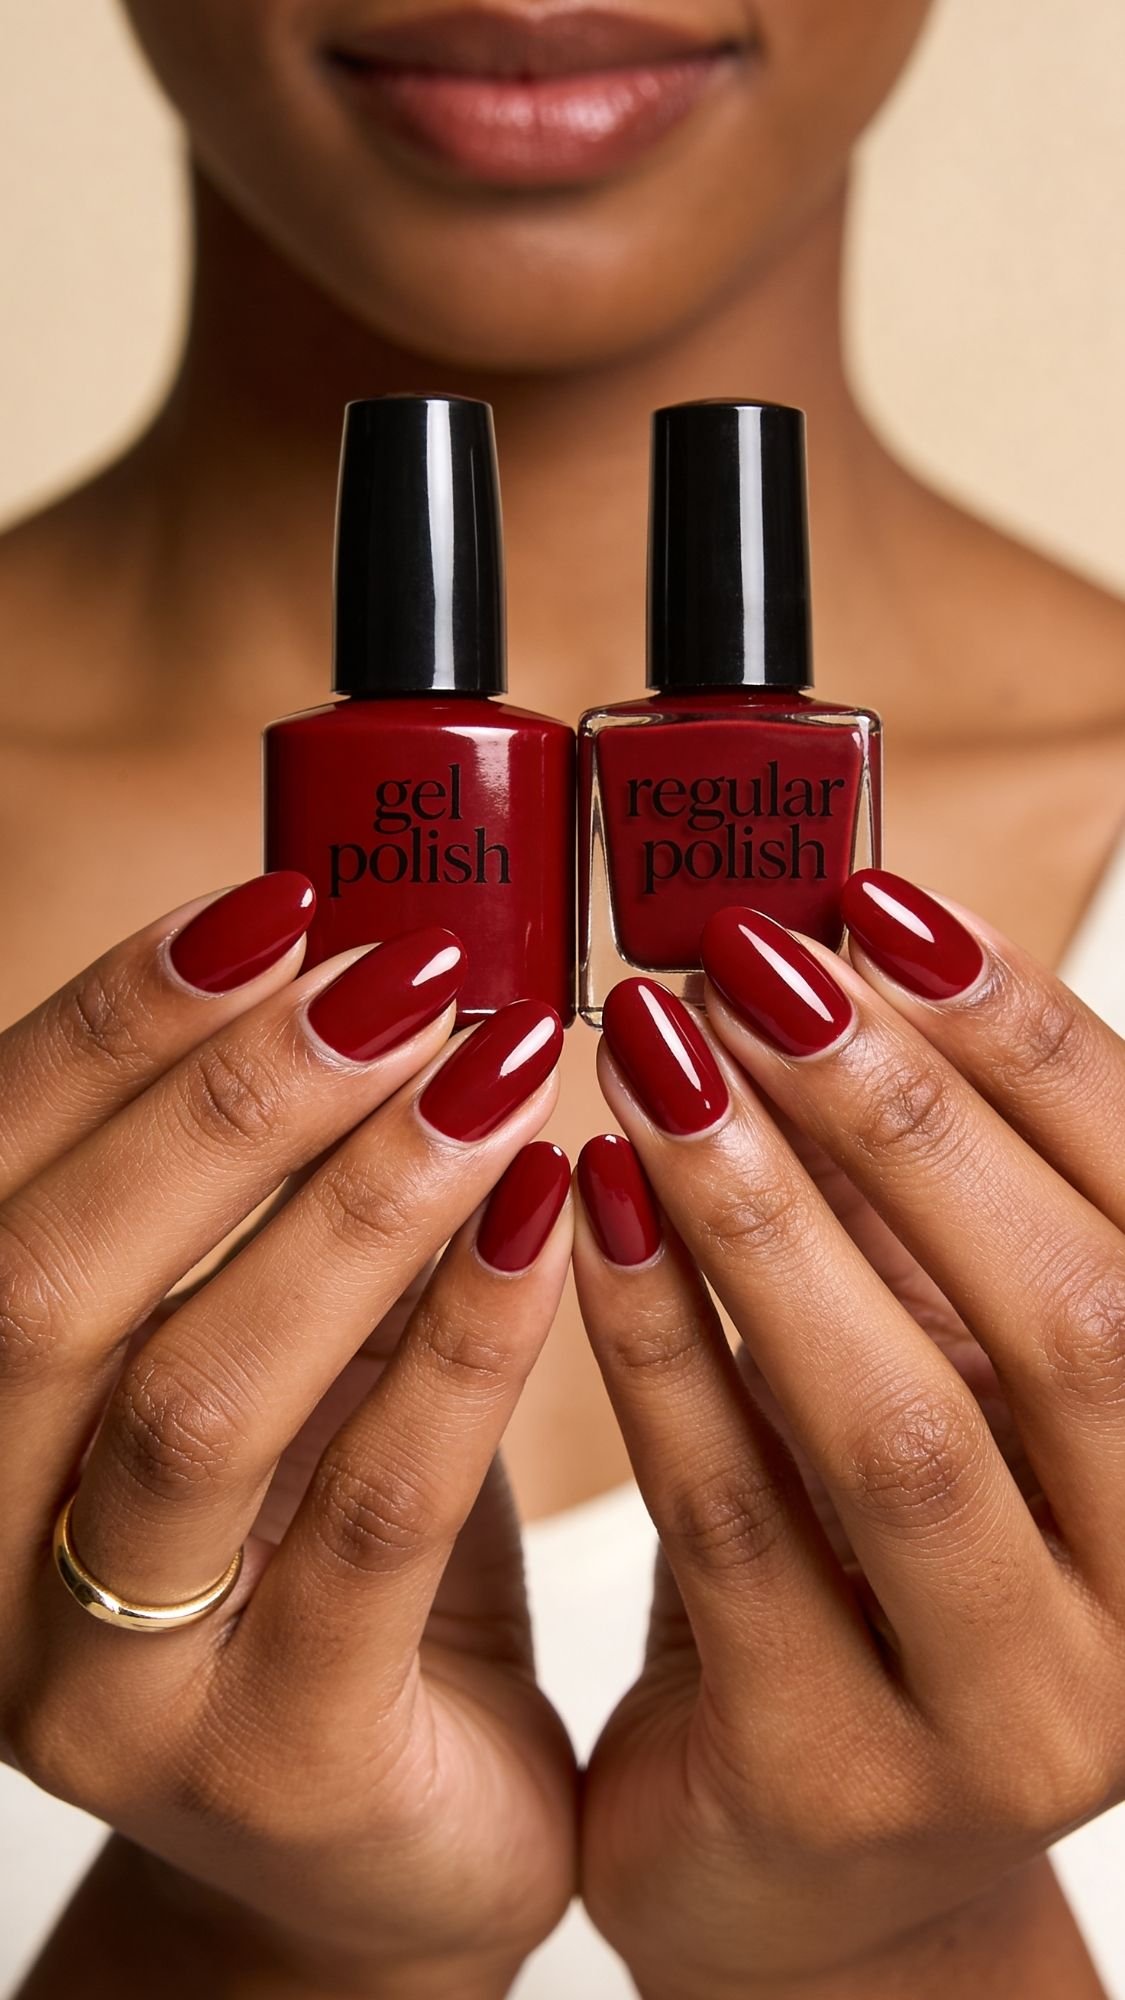
2) Do not stack gel products over regular polish
- Why it fails: gel systems expect specific layers, regular polish can shift and cause lifting.
- Do this instead: choose one lane for the manicure, either regular polish system or gel system, not both.
- Safety note: If you use gel, avoid skin contact and cure properly. Under-curing can increase irritation risk.
3) Do not use a super strong nail hardener daily for weeks
- Why it fails: overly rigid nails snap and peel easier.
- Do this instead: use oil and hand cream daily, and if you use a strengthening base coat, use it as directed, not endlessly.
- Pro tip: If your nails peel, hydration and gentle filing usually help more than “more strength.”
4) Do not top coat too late or too soon
- Why it fails: too soon traps solvent and wrinkles, too late can cause shrinkage.
- Do this instead: top coat about 5 to 8 minutes after your last color coat, then cap the free edge.
- Pro tip: If you always get shrinkage, test a different top coat type and always seal the tip.
What to Buy First vs What Can Wait
If you want a simple kit that covers every red nail idea in this post, this is it. I’m keeping it beginner-friendly and budget-flexible, because you do not need a drawer full of stuff to get clean results.
Buy first (the core kit)
- 180 or 240 grit file
- Cuticle pusher
- Lint-free wipes
- Alcohol or nail cleanser
- Base coat (ridge-filling or sticky)
- One flattering red polish (classic cream or cherry jelly)
- High-gloss top coat
- Small cleanup brush
- Acetone
Buy later (nice-to-haves)
- Dotting tool and striping brush
- Chrome powder or chrome glaze
- Magnet for velvet or cat-eye
- Foil flakes, decals, tiny gems
- Swatch sticks
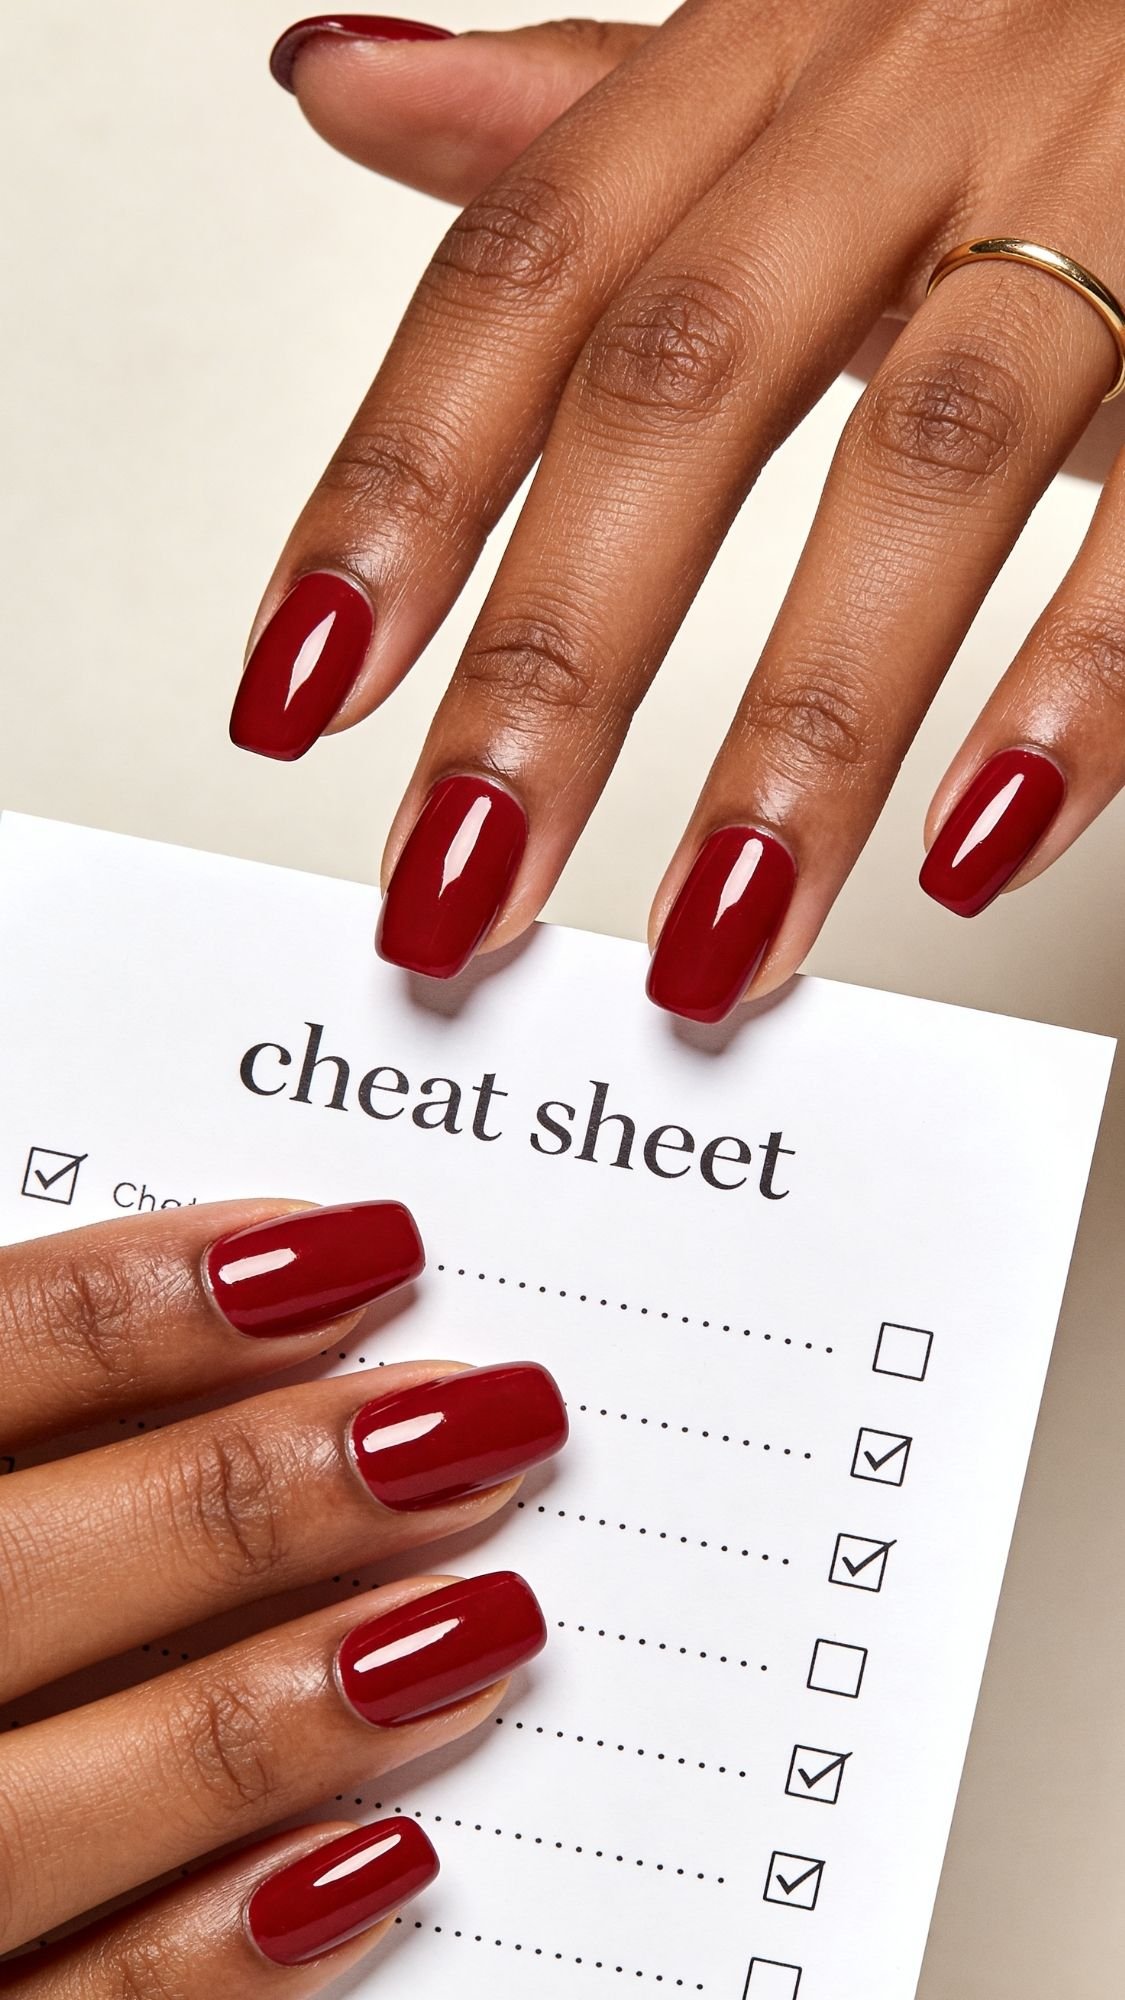
Quick Answers You Can Actually Use
These are the questions I get constantly whenever red nails come up, because red looks simple, but it has a lot of tiny “rules” that make it look clean.
1) How do I stop red polish from staining my nails?
Use a base coat every time. Reds stain more when you skip base coat, and darker cherry tones stain the most. If you still get staining, take a 3 to 7 day break with oil and hand cream, and avoid aggressive buffing. Buffing can make staining look worse because it thins the nail plate.
2) Why does my top coat shrink away from the tips?
That’s shrinkage. It usually happens when you wait too long to top coat, or the top coat formula naturally shrinks as it dries. Top coat within about 5 to 8 minutes after your last color coat, and cap the free edge. If it keeps happening, switch top coats, some shrink more than others.
3) How do I make regular polish last 7 days?
Prep and sealing. Dehydrate the nail plate, use a base coat, apply two thin color coats, then top coat and cap the free edge. On day 3, add one thin refresher top coat. Wear gloves for dishes. Water causes a lot of “mystery chipping.”
4) What red looks best on warm vs cool undertones?
Warm undertones usually look best in tomato reds, chili reds, and warm cherries. Cool undertones usually look best in blue-reds, cranberry, and ruby. Neutral undertones can wear true reds and most cherries easily. If you feel stuck, cherry red is the safest “flatters most people” option.
5) Can I do velvet or cat-eye nails without gel?
Sometimes, yes. There are magnetic polishes that work without a lamp, but the effect can be softer and wear time can be shorter than gel systems. If you want the strongest velvet effect, you usually get it from gel magnetics. If you do gel, avoid skin contact and cure properly to reduce irritation risk.
6) Why does my red polish look streaky even after two coats?
Either the coats are too thick and dragging, or you keep going over the same area as it sets. Use thinner coats, commit to the 3-stroke rule, and stop re-brushing. Some reds also apply better with three very thin coats rather than two thicker ones.
7) How do I remove red polish without turning my fingers pink?
Use acetone on a lint-free wipe, press it on the nail for a few seconds, then wipe off in one direction. Do not scrub in circles, that pushes pigment into the skin. Wash hands after, then oil and moisturize.
8) What should I do if my nails start peeling?
Stop peeling polish off, reduce buffing, keep nails short for a bit, and focus on oil plus hand cream daily. Use gloves for wet chores. If peeling continues or you have pain, discoloration, or lifting, see a professional.
Your Red Nails Can Be Classic and Trendy, You Just Control the Finish
Red nails will always work, but the finish decides the season. Cream reds feel timeless, jelly reds feel fresh, chrome looks bold, and velvet cat-eye looks like you booked a fancy appointment on purpose. If you do the prep, keep coats thin, and seal the edge, your manicure stays glossy longer and chips less. That’s the whole secret, not a magic brand, just smart technique.
If you want the easiest place to start, choose classic cream red with ultra-gloss top coat. If you want the most “saved instantly” look, try red aura or cherry glaze ombré. And if you want winter drama without going full glitter chaos, ruby velvet cat-eye will do the job.