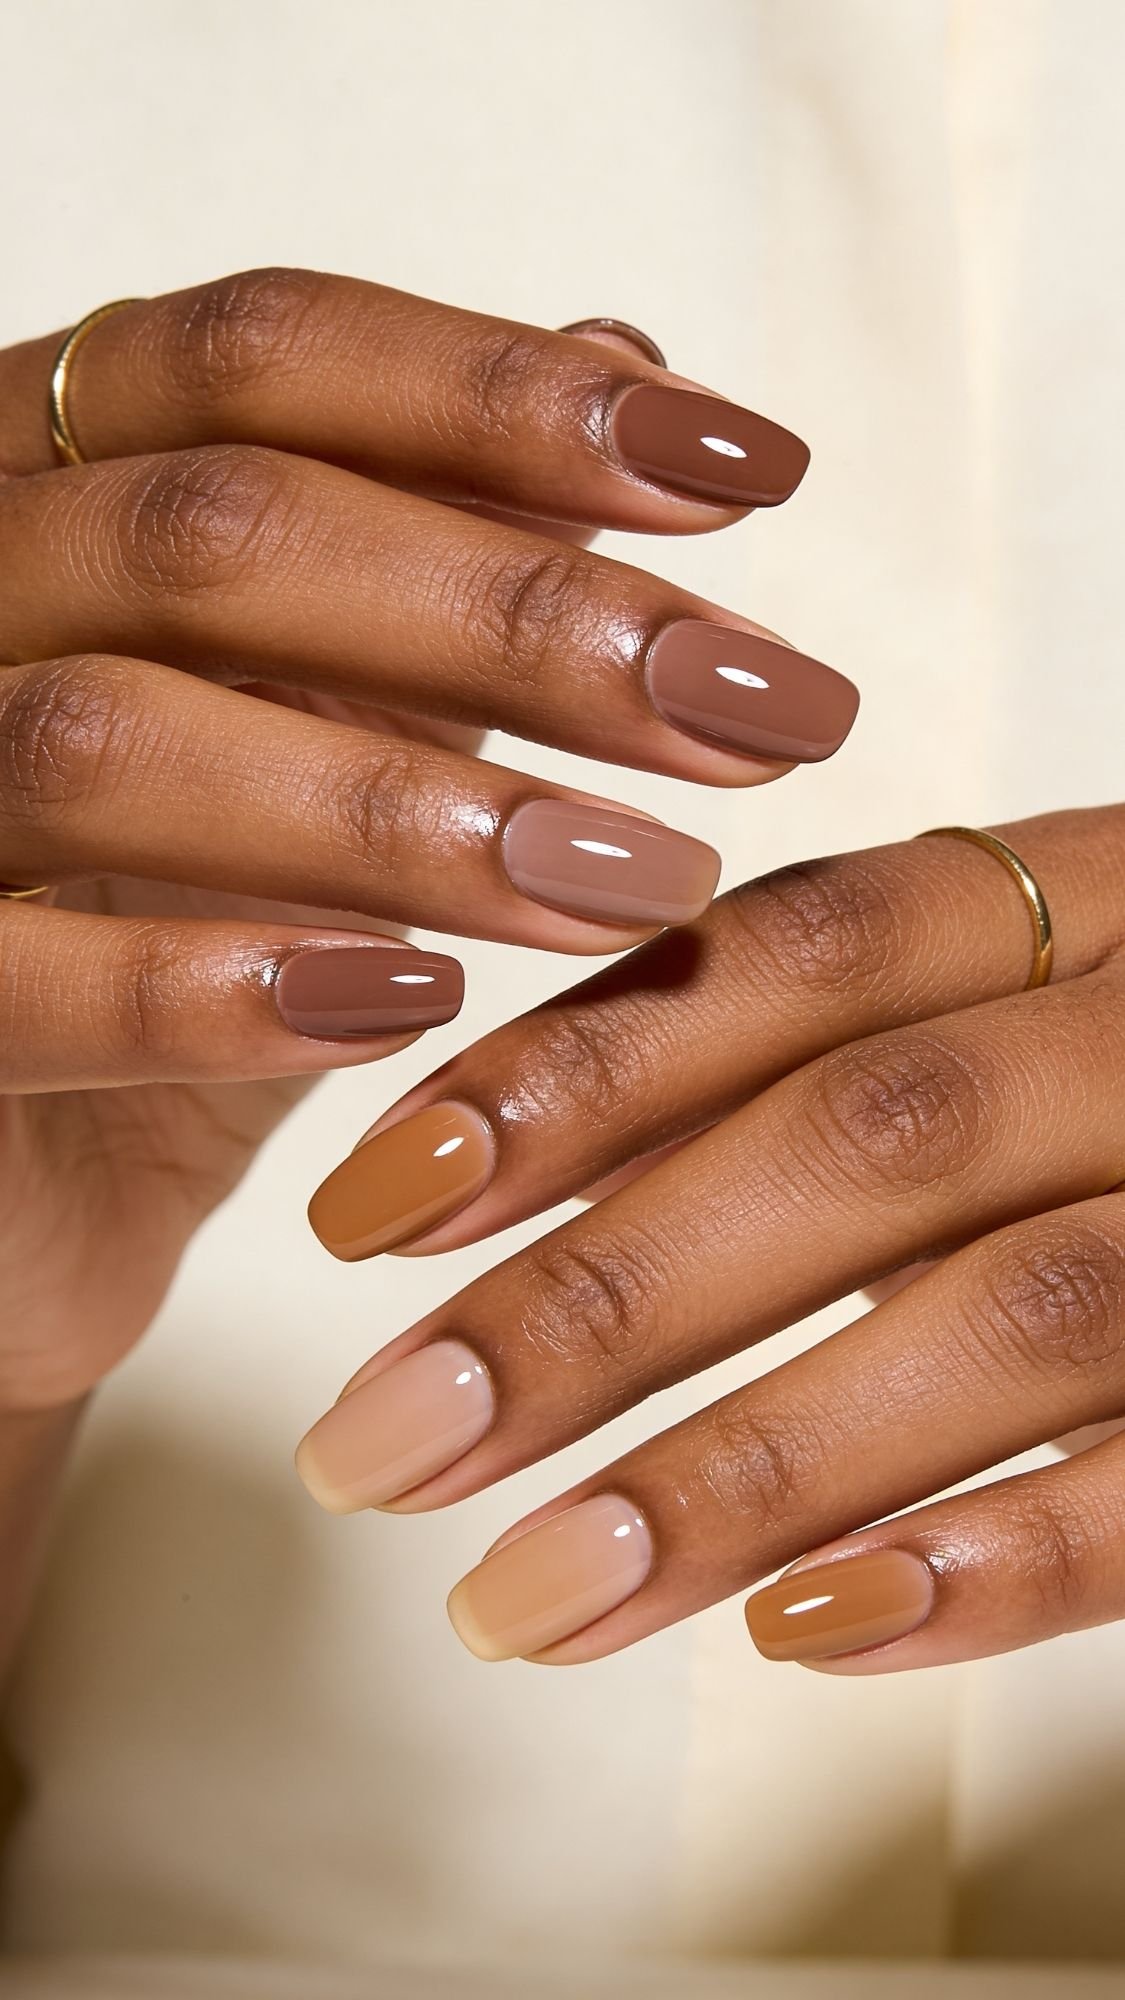
Nude nails look effortless until you try to pick “the” nude and somehow end up with hands that look dusty, gray, or like you borrowed someone else’s polish. Been there. What I’ve noticed over the years is this, nude nails only look expensive when the undertone matches your skin and the finish looks glassy, not streaky. So this post does not toss random beige at you and call it a day.
I’m giving you 25 nude nail ideas that work for spring and summer, plus the prep and technique that make them last. Because a nude manicure should feel like the easiest choice, not a personality test. Ever wondered why one nude looks fresh and another looks… tired? Undertone, thickness, and top coat behavior explain almost everything.
Also, tiny sensory detail that matters, your base coat should feel slightly grabby and tacky, not slick. When your nail plate feels squeaky after you cleanse it, your polish grips better, levels smoother, and chips less. That’s the boring pro stuff that makes the pretty part actually wear well.
Quick Results Snapshot
- What this look solves: A polished, neutral manicure that matches everything and still looks intentionally “done.”
- Who it’s best for: Beginners, short nails, busy schedules, anyone who wants hands to look longer, anyone who rotates neutrals all season.
- Time required: Regular polish 25–40 minutes total, press-ons 15–25 minutes.
- Budget range: $10–$60, depending on drugstore polish vs salon-style base/top and tools.
- Expected timeline: Instant results, better wear after 1–2 tries once you nail your prep rhythm.
- Biggest mistakes people make:
- Using thick coats because they want “full coverage” fast.
- Skipping nail dehydration, then blaming the polish for chipping.
Key Takeaways
- Match undertone first, then choose how light or deep you want your nude.
- Thin coats beat thick coats, every single time.
- Clean edges + glossy top coat = expensive-looking nude, even with budget polish.
Goal + Who It’s For
If you want a nude manicure that reads “clean, glossy, put-together” in spring sunlight and summer selfies, you’re in the right place. I build nude looks around one goal, make the nails look intentional, not invisible. A good nude does two things at once, it matches your vibe, and it makes your hands look smoother and longer. Sounds dramatic for beige polish, but you’ve seen it happen, right?
The exact result you’re chasing
- Glossy natural: sheer, hydrated-looking nails with a glass top coat
- Polished neutral: creamy nude that looks even and streak-free
- Soft detail: micro French, subtle shimmer, or a tiny accent that still feels minimal
Best for
- Beginners who want something hard to mess up
- Short nails that need an elongating effect
- Wide nail beds that look more balanced with the right shape and undertone
- Anyone who wants a mani that matches literally every outfit without thinking
Who should skip, or at least proceed carefully
- If you react to gel products or press-on glue, especially if you’ve had itching or redness before, avoid gel contact on skin and consider regular polish instead.
- If you see pain, swelling, heat, green discoloration, or lifting with a weird smell, skip DIY for now and get a pro opinion. Your nails should never “power through” that.
My undertone shortcut, so your nude never looks ashy
What I’ve noticed over the years is people treat “nude” like one shade, and it just isn’t. I match nude the same way I match foundation, I check undertone first, then depth. Here’s the quick cheat:
- Warm undertones: caramel, honey beige, warm peach, milk tea nudes
- Cool undertones: rosy nude, mauve nude, pink-beige that leans rose
- Neutral undertones: balanced beige, soft taupe, sheer cocoa
If your nude keeps looking chalky, you probably need more warmth or more depth, not more coats. Ever tried adding a single coat of a warmer sheer nude over your “wrong nude” to rescue it? That little layering trick saves a lot of money.
Key Takeaways
- Undertone first, depth second, every time.
- The most flattering nude often looks slightly deeper than your exact skin tone, especially if you want longer-looking fingers.
- If you want “expensive,” prioritize clean edges and shine, not complicated art.
This Is the Difference Maker
If nude nails chip fast or look streaky, your polish usually isn’t the problem. Prep is. Nude shades act like little spotlights, they show every ridge, every dry cuticle edge, every uneven brush stroke. The good news, you can fix most of that in 5–10 minutes, and your manicure instantly looks more expensive.
What I’ve noticed over the years is this, people over-buff and under-clean. They sand their nails thin trying to get them smooth, then they leave tiny oils behind and wonder why polish lifts. You want a smooth surface, yes, but you mostly want a clean, oil-free nail plate that your base coat can grip.
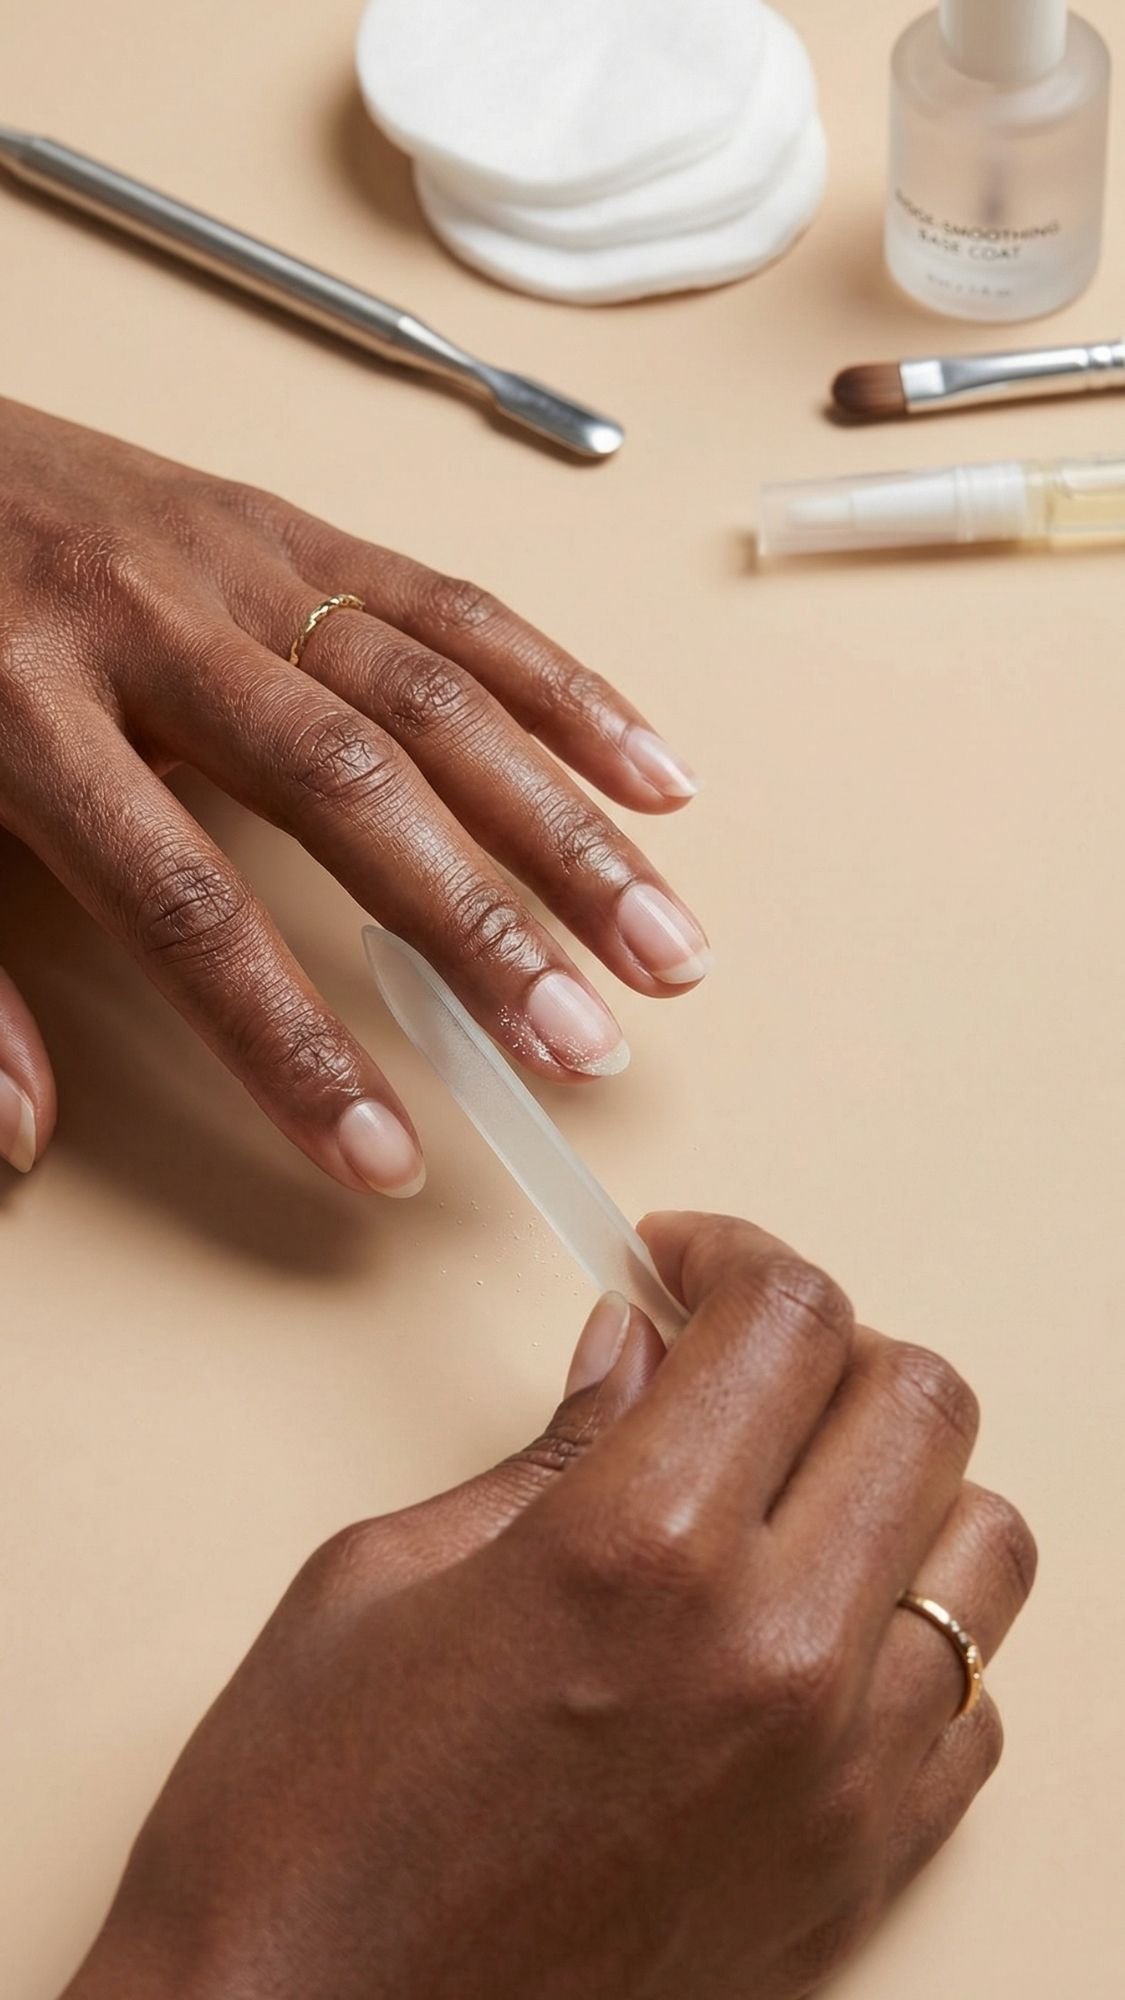
Step-by-step prep that makes nude look flawless
- Remove old product completely. Even “invisible” leftover base coat can make nude apply patchy.
- Shape first. File before you touch cuticles so you don’t undo your work.
- Soften cuticles without soaking. A quick cuticle remover or warm shower timing works better than a full soak.
- Gently push back cuticles. You want a clean line, not trauma.
- Trim only what’s truly dead. If it hurts, it wasn’t dead skin.
- Light buff only if needed. Think “polish the surface,” not “sand the nail.”
- Cleanse and dehydrate. Use alcohol or acetone on a lint-free pad until the nail looks matte.
The pro tip that changes everything
After you dehydrate, do not touch your nails. Your fingertips put oil back on the plate instantly. I know, it’s annoying. I hold my hands like a little T-Rex for a minute and move on. 🙂
Sensory detail to know you did it right
Your nail plate should feel squeaky and slightly dry after cleansing, and your base coat should feel a little grabby as you brush it on. If it feels slick like lotion, something oily is still there.
Common mistakes + easy fixes
- Mistake: Over-buffing to remove ridges. Fix: Switch to a ridge-filling base coat instead. Buff only until the surface looks even.
- Mistake: Flooding cuticles with remover or polish. Fix: Use less product and clean edges with a small brush dipped in acetone.
- Mistake: Soaking hands too long before polish. Fix: Keep nails dry before painting, water makes the nail swell and can cause lifting later.
- Mistake: Oiling cuticles right before painting. Fix: Oil after top coat sets, not before.
Key Takeaways
- Clean beats buff. Dehydration matters more than sanding.
- Nude looks best when cuticles look tidy and the surface looks smooth.
- A ridge-filler base can make sheer nudes look airbrushed.
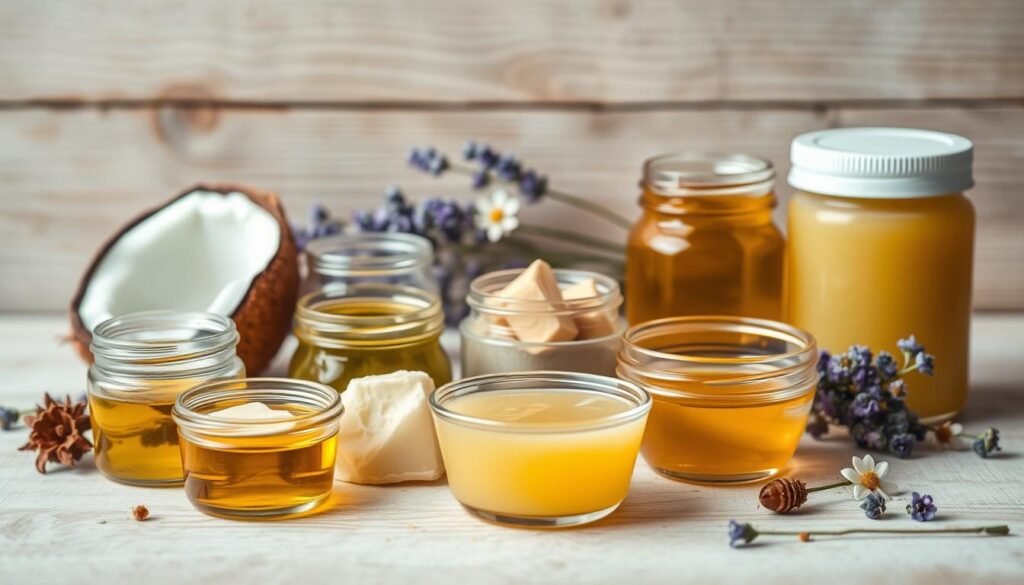
Tools + Products Needed (Must-Haves vs Nice-to-Haves)
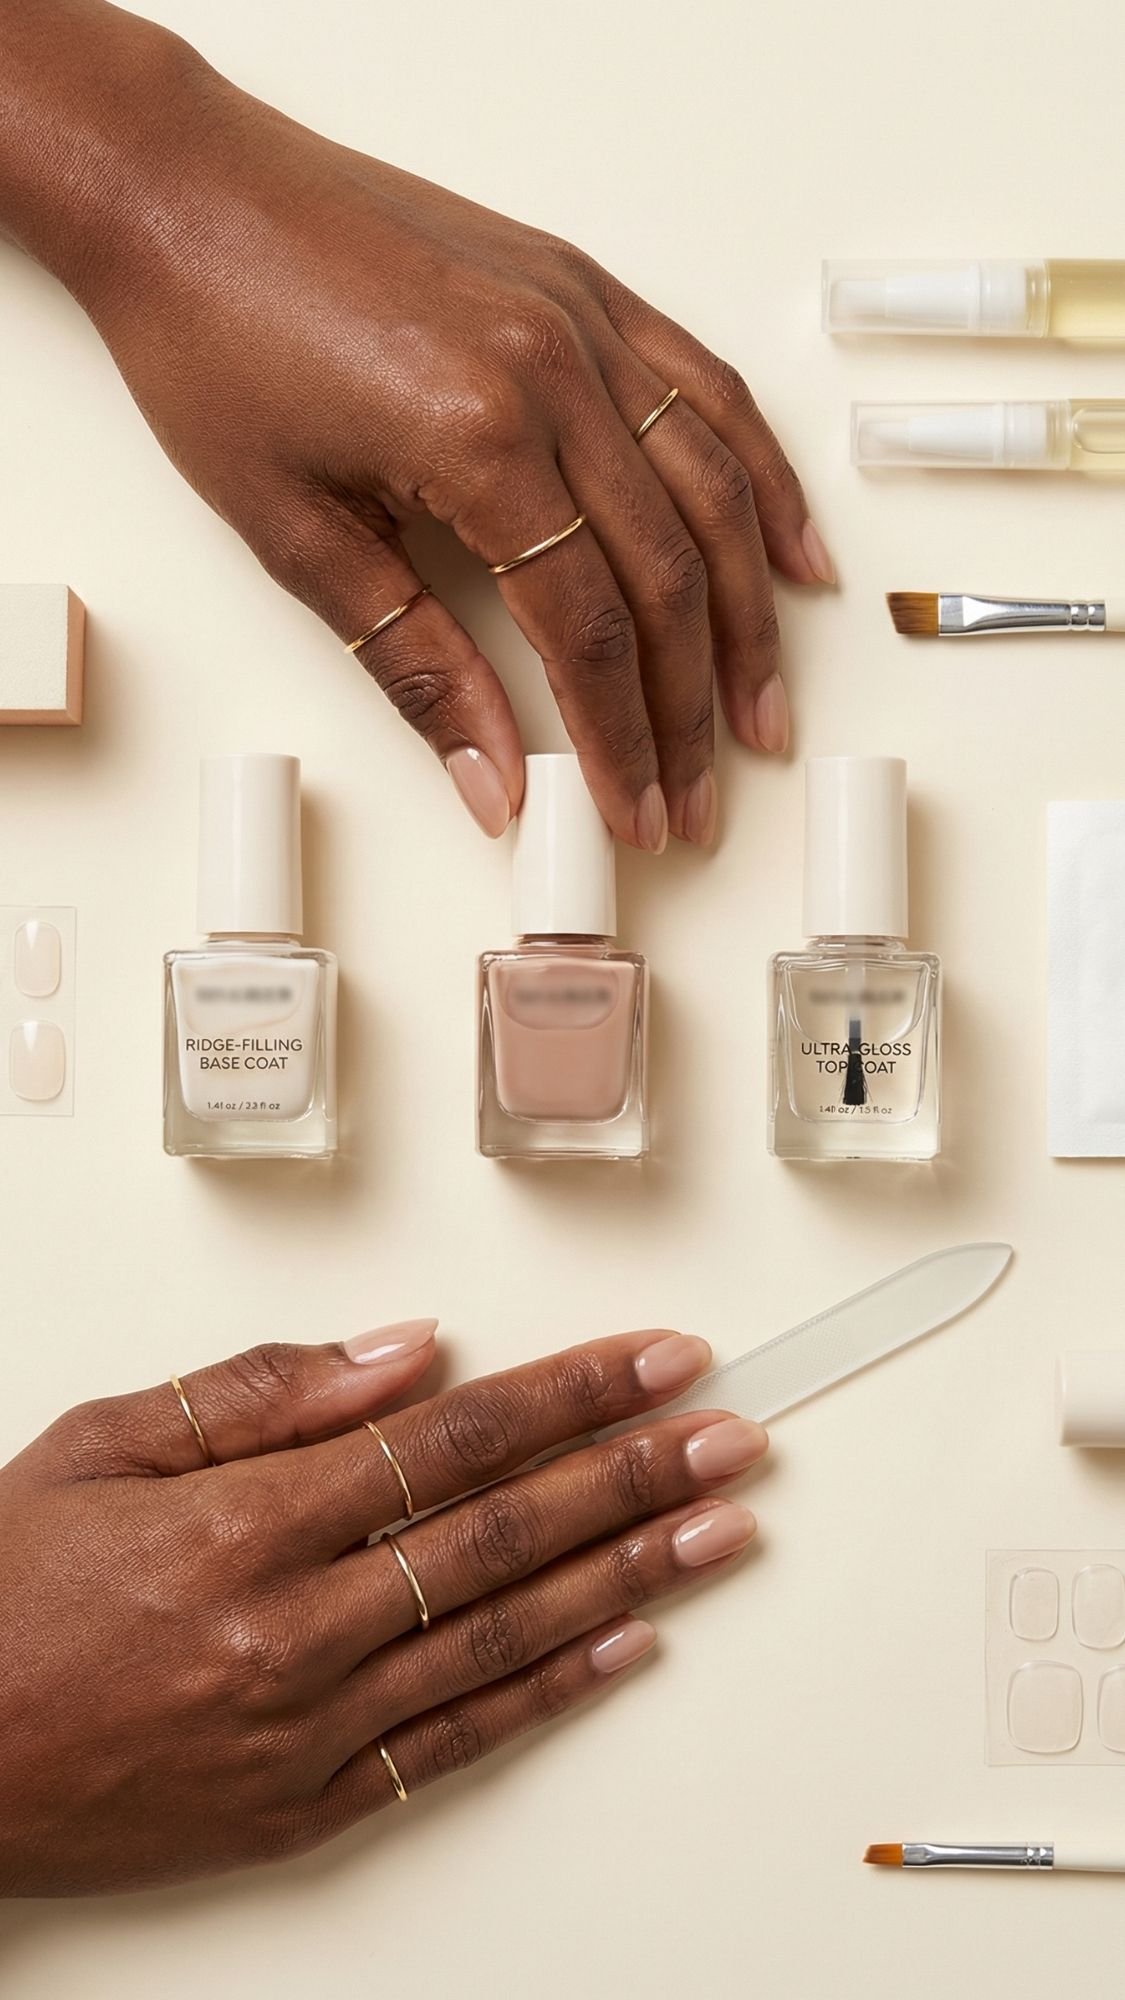
Let’s keep this realistic. You do not need a salon drawer full of gadgets to pull off a glossy nude set. You need a few basics that make application cleaner and wear time longer. Nude nails look simple, but they demand precision, so the right tools matter more than more tools.
Must-haves (non-negotiable if you want a smooth nude)
- File: A glass file gives you the cleanest edge and helps prevent peeling.
- Buffer (optional-light): Only if your surface feels rough. Keep it gentle.
- Cuticle pusher: Metal or sturdy plastic, nothing flimsy.
- Lint-free pads: Cotton can leave fuzz that shows through sheer nude.
- Alcohol or acetone: For dehydration before base coat.
- Base coat: Ridge-filling or sticky base, depending on your nail needs.
- Nude polish: Sheer, milky, creamy, whatever vibe you’re doing.
- Top coat: High-gloss, quick-dry works best for that “expensive” finish.
- Cuticle oil: For aftercare, not prep.
Nice-to-haves (these make you feel like a pro fast)
- Cleanup brush: This is the secret to crisp edges. I prefer a small flat or angled brush.
- Dotting tool: For micro dots or tiny accents without drama.
- Striping brush: For fine lines and micro French tips.
- Nail clips or remover wraps: If you do press-ons or gel-like systems often.
What to look for, so you don’t buy the wrong thing
- Base coat
- If your nails have ridges, grab a ridge-filling base so sheer nudes look smoother.
- If your polish chips fast, pick a grippy, “sticky” base for better adhesion.
- Top coat
- Look for high gloss + quick set.
- If you always get top coat shrinkage, you need a formula that stays flexible and you need to stop flooding the edges.
- Nude polish
- If you hate streaks, pick jelly, sheer, or milky formulas. They level better.
- If you want full coverage, pick a creamy nude and plan on thin layers.
Budget alternatives that still deliver
- Use a drugstore ridge-filler and spend your money on a better top coat. IMO, top coat makes or breaks nude nails because it’s what people actually notice from across the room.
Key Takeaways
- A cleanup brush instantly upgrades nude nails, even if you paint like a chaos goblin.
- Ridge-filler base helps sheer nudes look smooth without over-buffing.
- Your best “investment” product is usually a good glossy top coat.
Step-by-Step Application (Regular Polish Method)
This is the method I trust when I want nude nails to look expensive and last without drama. The trick isn’t fancy. You paint thinner than you think, you give layers time to set, and you seal the edge like you mean it. Nude shades punish rushed work, so we’re not rushing.
1) Base coat, choose it like a grown-up
Pick your base based on what your nails actually do, not what the bottle promises.
- If you see ridges or texture, use a ridge-filling base so your nude doesn’t look streaky.
- If you chip fast, use a grippy, sticky base for better adhesion.
- If your nails peel, avoid aggressive “hardener” formulas every day. They can feel tight and brittle on some nails.
How to apply:
Use one thin coat. Start a hair away from the cuticle, then push the brush gently toward it without flooding.
Common mistake + fix:
Mistake: thick base coat because “it’s clear anyway.”
Fix: thin base. Thick base traps solvents and makes the whole manicure feel soft underneath.
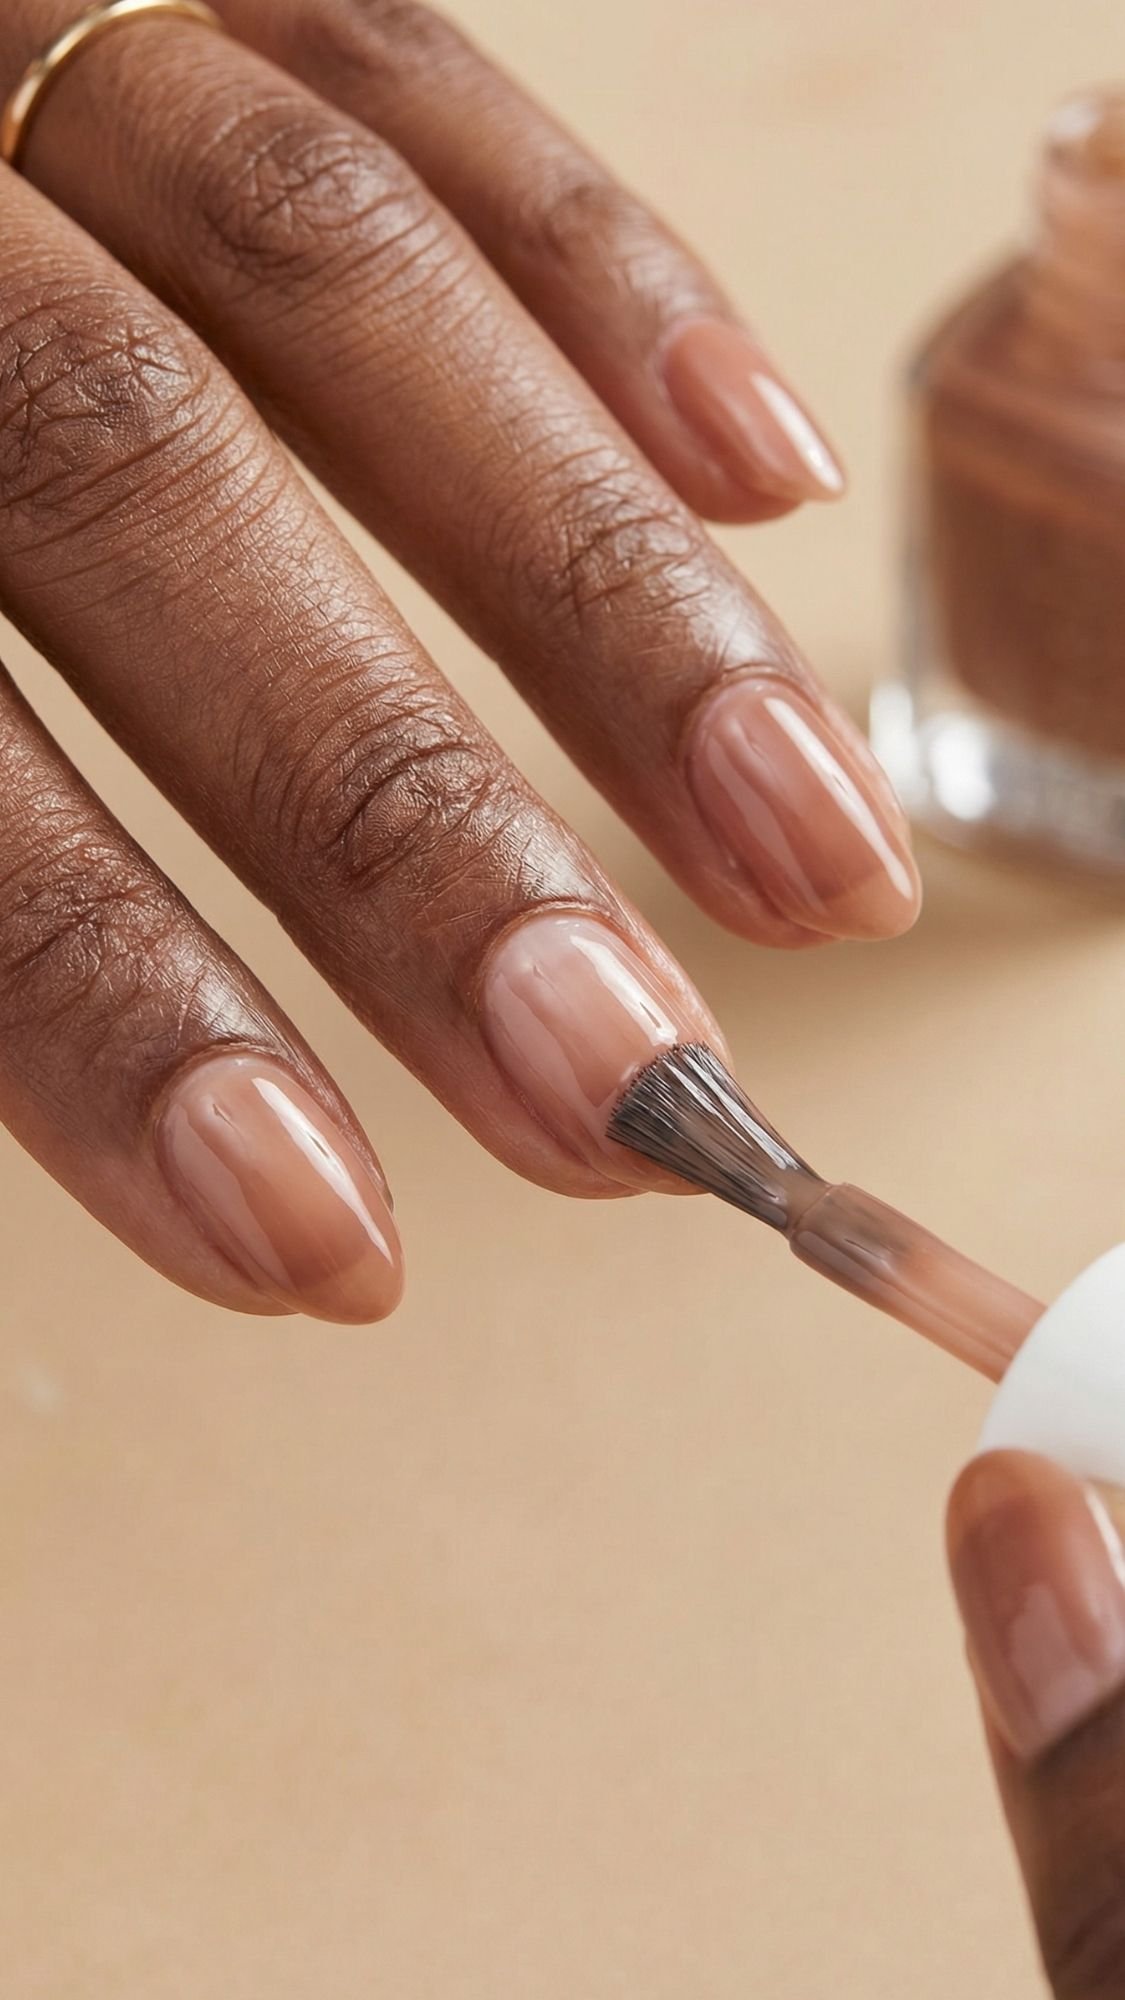
2) Nude polish, thin coats that self-level
Here’s the part where most people sabotage themselves. They want full coverage fast, so they load the brush, then the polish streaks, pools, and takes forever to dry. Instead, I aim for two to three whisper-thin coats. Sheers look better with layers anyway.
How thin is thin?
If the first coat looks slightly see-through and a little uneven, that’s normal. Your second coat evens it out. Your third coat perfects it if you need it.
Application technique that prevents streaks:
- Wipe one side of the brush on the bottle neck, keep product on the other side.
- Place the brush mid-nail, push gently toward the cuticle, then pull straight down.
- Use three strokes max per nail (left, center, right). More strokes create drag marks.
Sensory tell:
A good coat feels smooth and light, not thick and “syrupy.” If it feels gummy as you brush, you waited too long between strokes or your layer got too thick.
Common mistake + fix:
Mistake: going back over semi-dry polish to “fix” it.
Fix: leave it. Let it dry, then correct with the next thin coat.
3) Dry time strategy, touch-dry is not set-dry
Quick-dry top coats help, but you still need a little patience. If you press your nail and it feels soft, it will dent later.
My realistic timing:
- Wait 2–3 minutes between thin color coats.
- After your final color coat, wait 3–5 minutes before top coat.
FYI, humidity makes everything slower. If your polish keeps denting, your layers are too thick or you rushed the top coat.
4) Top coat sealing, the “cap the edge” rule
Top coat makes nude nails look luxe because it creates that clean reflection line. It also locks everything in when you cap the free edge.
How to apply:
- Float a generous top coat over the nail. Do not press hard, or you’ll drag the color.
- Cap the free edge last with the remaining product on the brush.
- Keep top coat slightly away from the cuticle line so it doesn’t flood and shrink back.
Top coat shrinkage fix (the quiet villain):
If your top coat always pulls back at the tips, you probably flood the edges or overwork it. Use fewer strokes and cap last.
5) Sensitive-skin alternative (simple, but important)
If you react easily, stick to regular polish and avoid getting product on skin. When you clean up edges, use a tiny amount of acetone and wash hands after, then oil.
Key Takeaways
- Thin layers win. They dry harder, look smoother, and chip less.
- Use 3 strokes max per nail to avoid streaks.
- Cap the free edge every time, especially with nude.
Step-by-Step Application (Press-On Method)
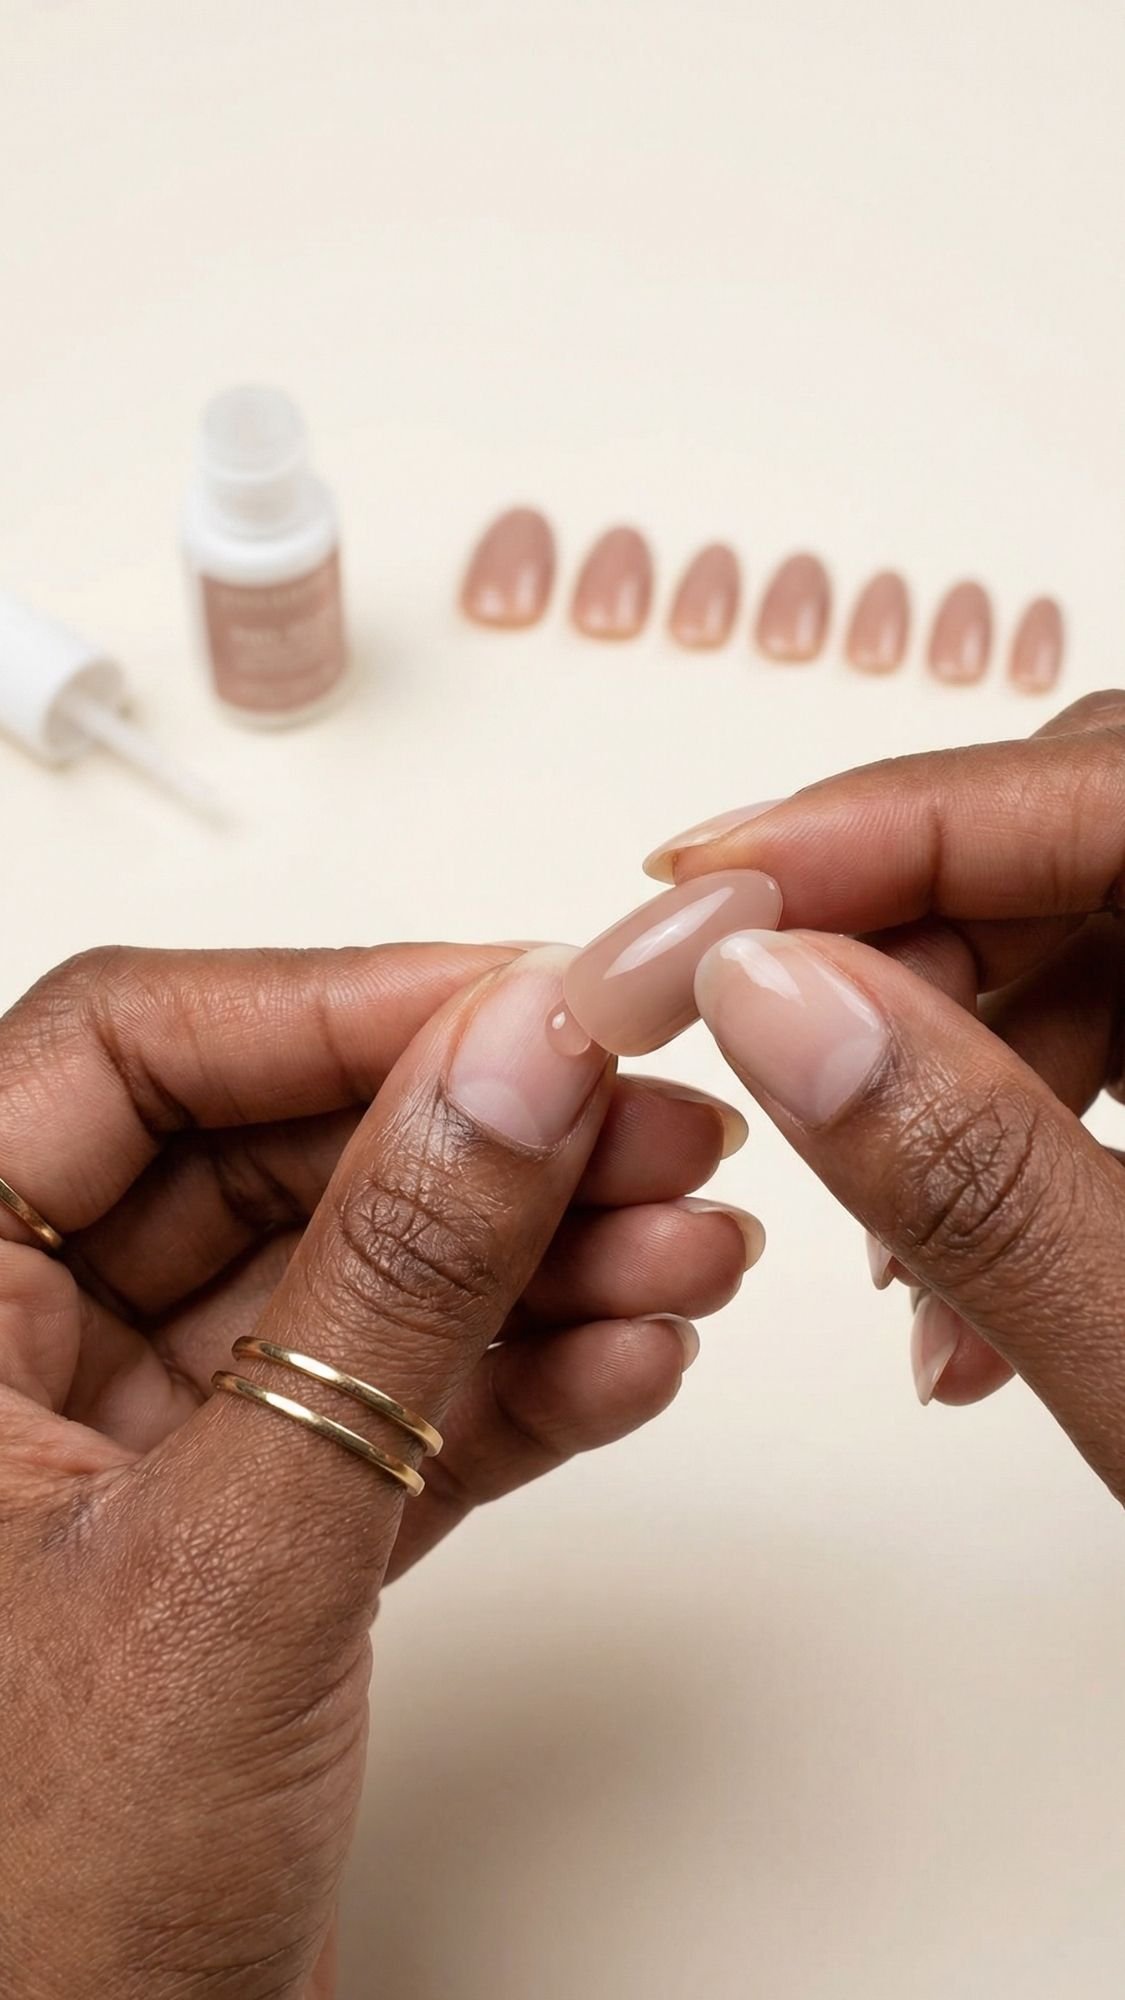
Press-ons can look shockingly real now, but only if you handle two things like a pro, sizing and prep. If a press-on pops off, I almost always trace it back to one of these, the nail was slightly too big, or the natural nail still had oil on it. And yes, that includes “I washed my hands, so I’m good.” Soap residue and lotion say hi.
1) Sizing strategy (this is where longevity starts)
- Lay out tips for each finger before you glue anything.
- If you sit between sizes, choose the smaller size and file the sides slightly to fit.
- Check from every angle. If it sits on your sidewalls, it’s too big and it will lift.
Pro tip:
I match size with the nail angled downward toward the cuticle, because that’s where lifting starts first. If the cuticle edge fits perfectly, everything looks more seamless.
Common mistake + fix:
Mistake: choosing a bigger tip because it “covers better.”
Fix: size down and file. A too-big press-on traps air and lifts faster.
2) Prep your natural nails (oil is the enemy)
- Push back cuticles gently so you don’t glue onto skin.
- Buff lightly only if needed, just enough to remove shine.
- Wipe each nail with alcohol or acetone until it looks matte.
Sensory tell:
When your nail feels slightly dry and squeaky, you’re ready. If it feels slick, wipe again.
3) Adhesion options (glue vs tabs, pick based on your life)
- Glue: best for longer wear, typically 5–10 days if your prep is solid.
- Tabs: best for weekend wear, photo days, or when you want easy removal, usually 1–3 days.
I love tabs for content shoots, because they keep your natural nails happier. But glue wins for trips, chores, and “I forget to be gentle.”
4) Glue placement technique (no bubbles, no mess)
Here’s what I do to avoid glue bubbles and lifting:
- Put a small bead of glue near the cuticle area of the press-on.
- Add a tiny swipe down the center of your natural nail if you want extra hold.
- Angle the press-on at about 45 degrees, place it at the cuticle line first, then press down toward the tip.
- Hold firm pressure 20–30 seconds.
If glue squeezes out, you used too much. You want enough to fill the space, not enough to flood your cuticles.
Common mistake + fix:
Mistake: slamming the press-on straight down from above.
Fix: place cuticle first, roll downward. This pushes air out instead of trapping it.
5) Edge sealing so hair does not catch
This is the tiny detail that makes press-ons feel “real.”
- After application, press along the sidewalls and tip.
- If you feel a tiny ledge, file the edge lightly to blend.
- Add a thin layer of top coat over the press-on if the set allows it, especially at the tip, for a smoother seal.
6) Removal that protects natural nails (no ripping, ever)
If you rip them off, you’ll peel layers of your natural nail plate with it, then every nude polish looks streaky for weeks. Not worth it.
- Soak in warm soapy water for 10–15 minutes.
- Add cuticle oil around edges.
- Gently lift from the sides with a wood stick, never force.
- If it resists, soak longer.
Key Takeaways
- Size down, file to fit. Big tips lift.
- Dehydrate well. Press-ons hate oil.
- Apply cuticle-first, roll down, and hold pressure for 20–30 seconds.
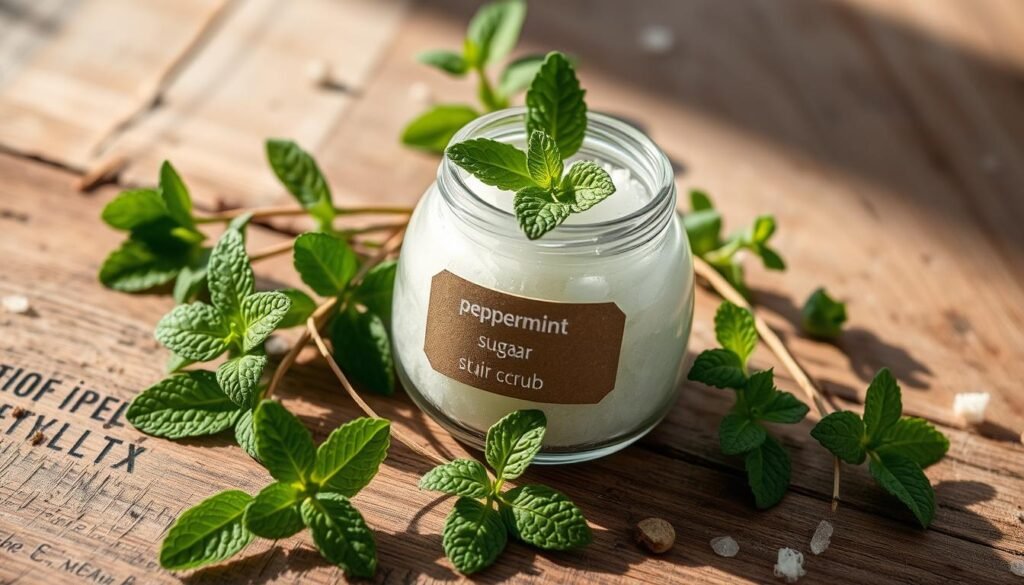
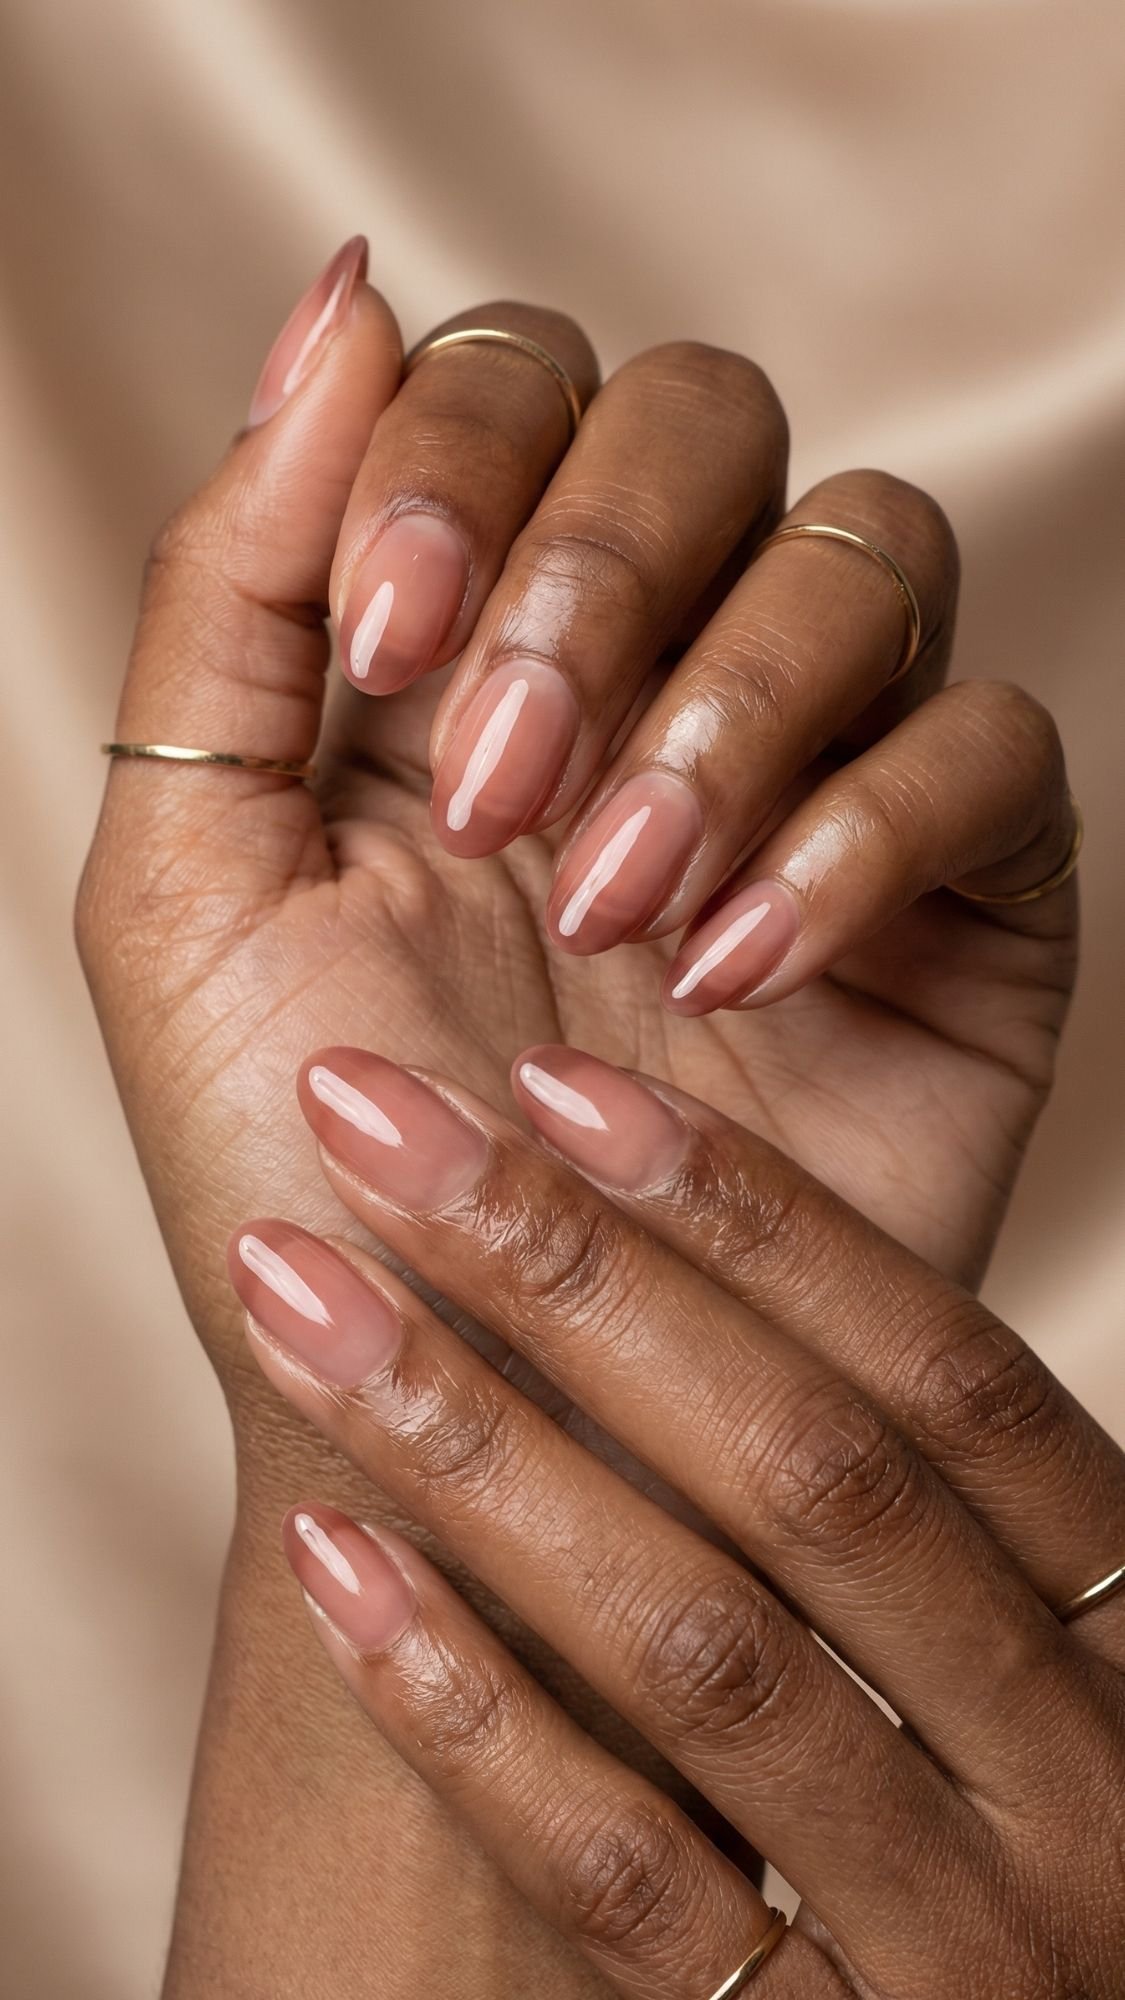
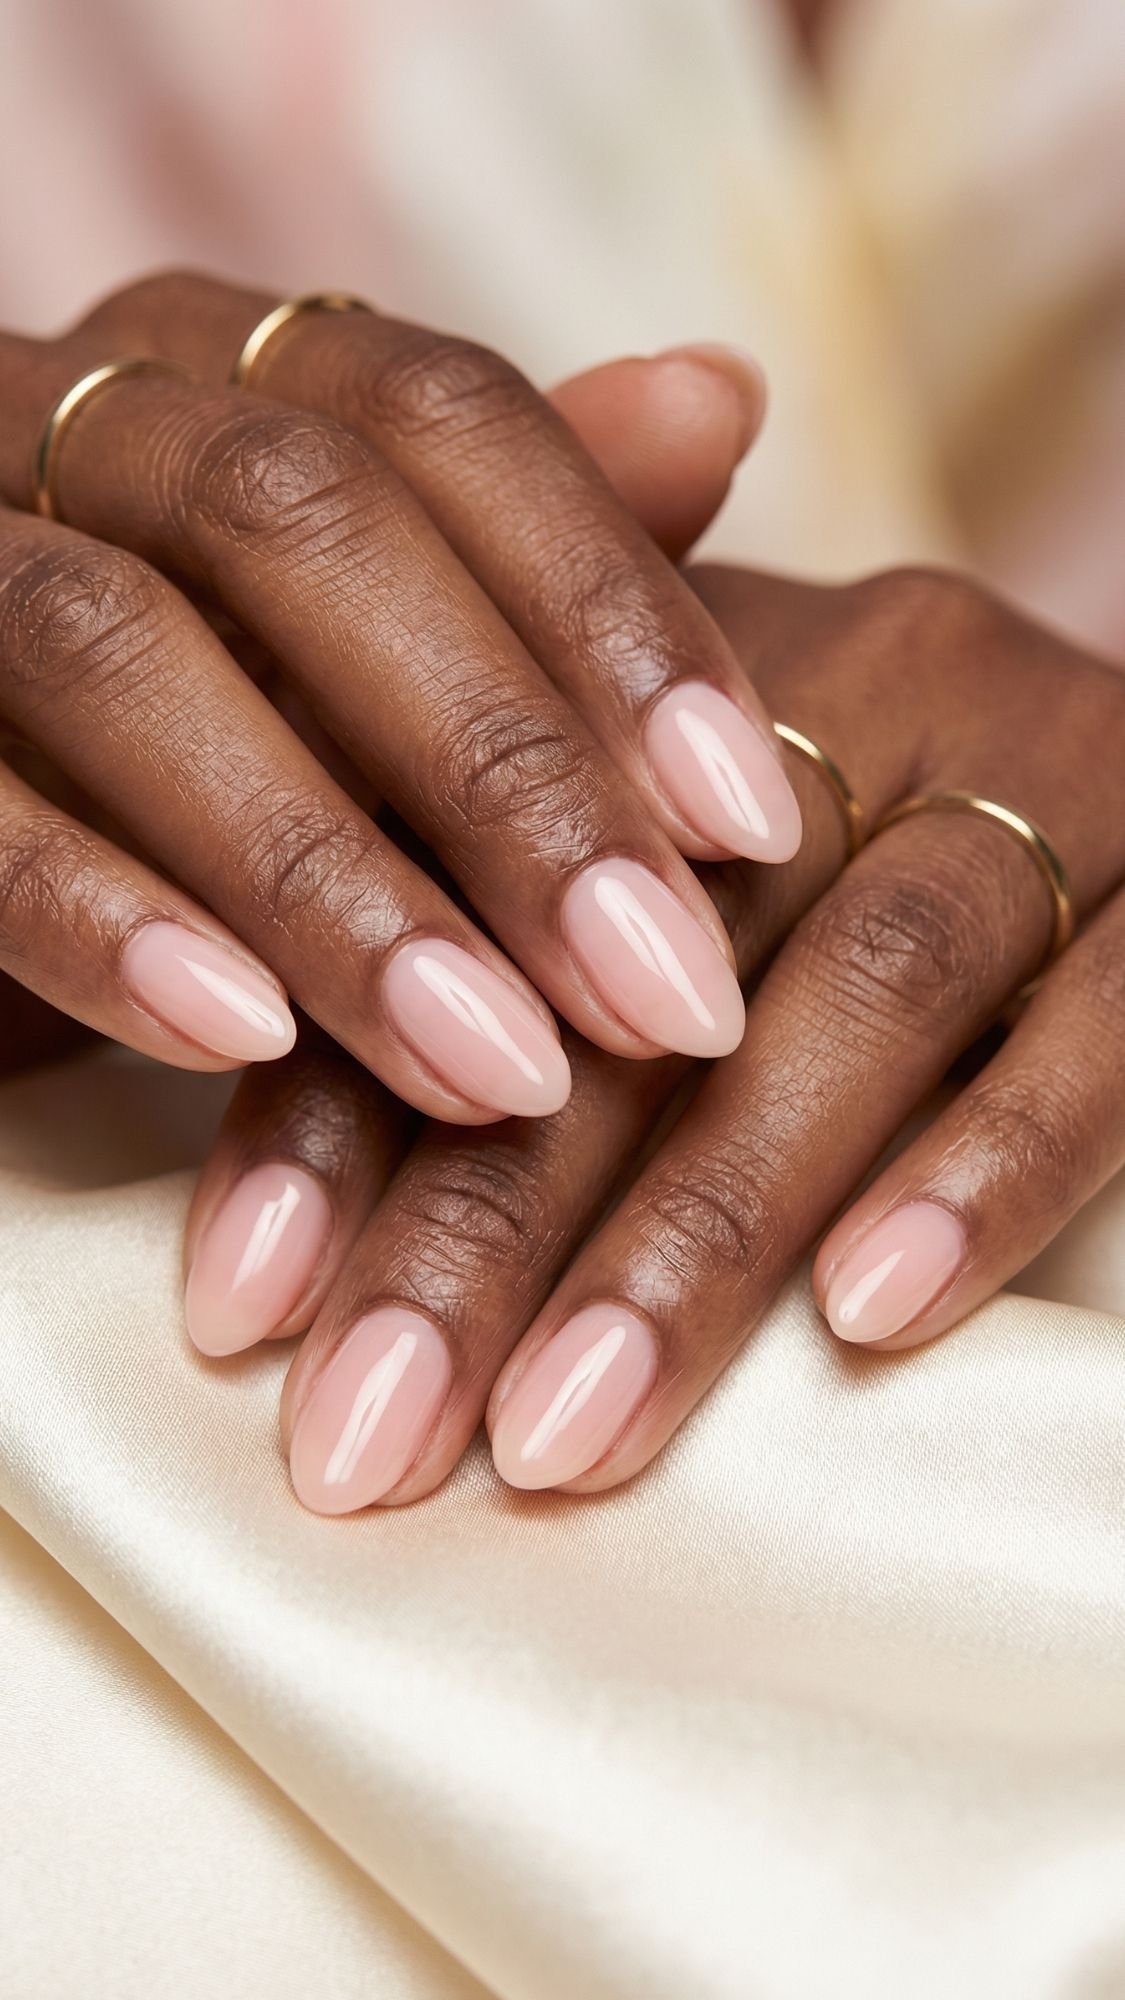
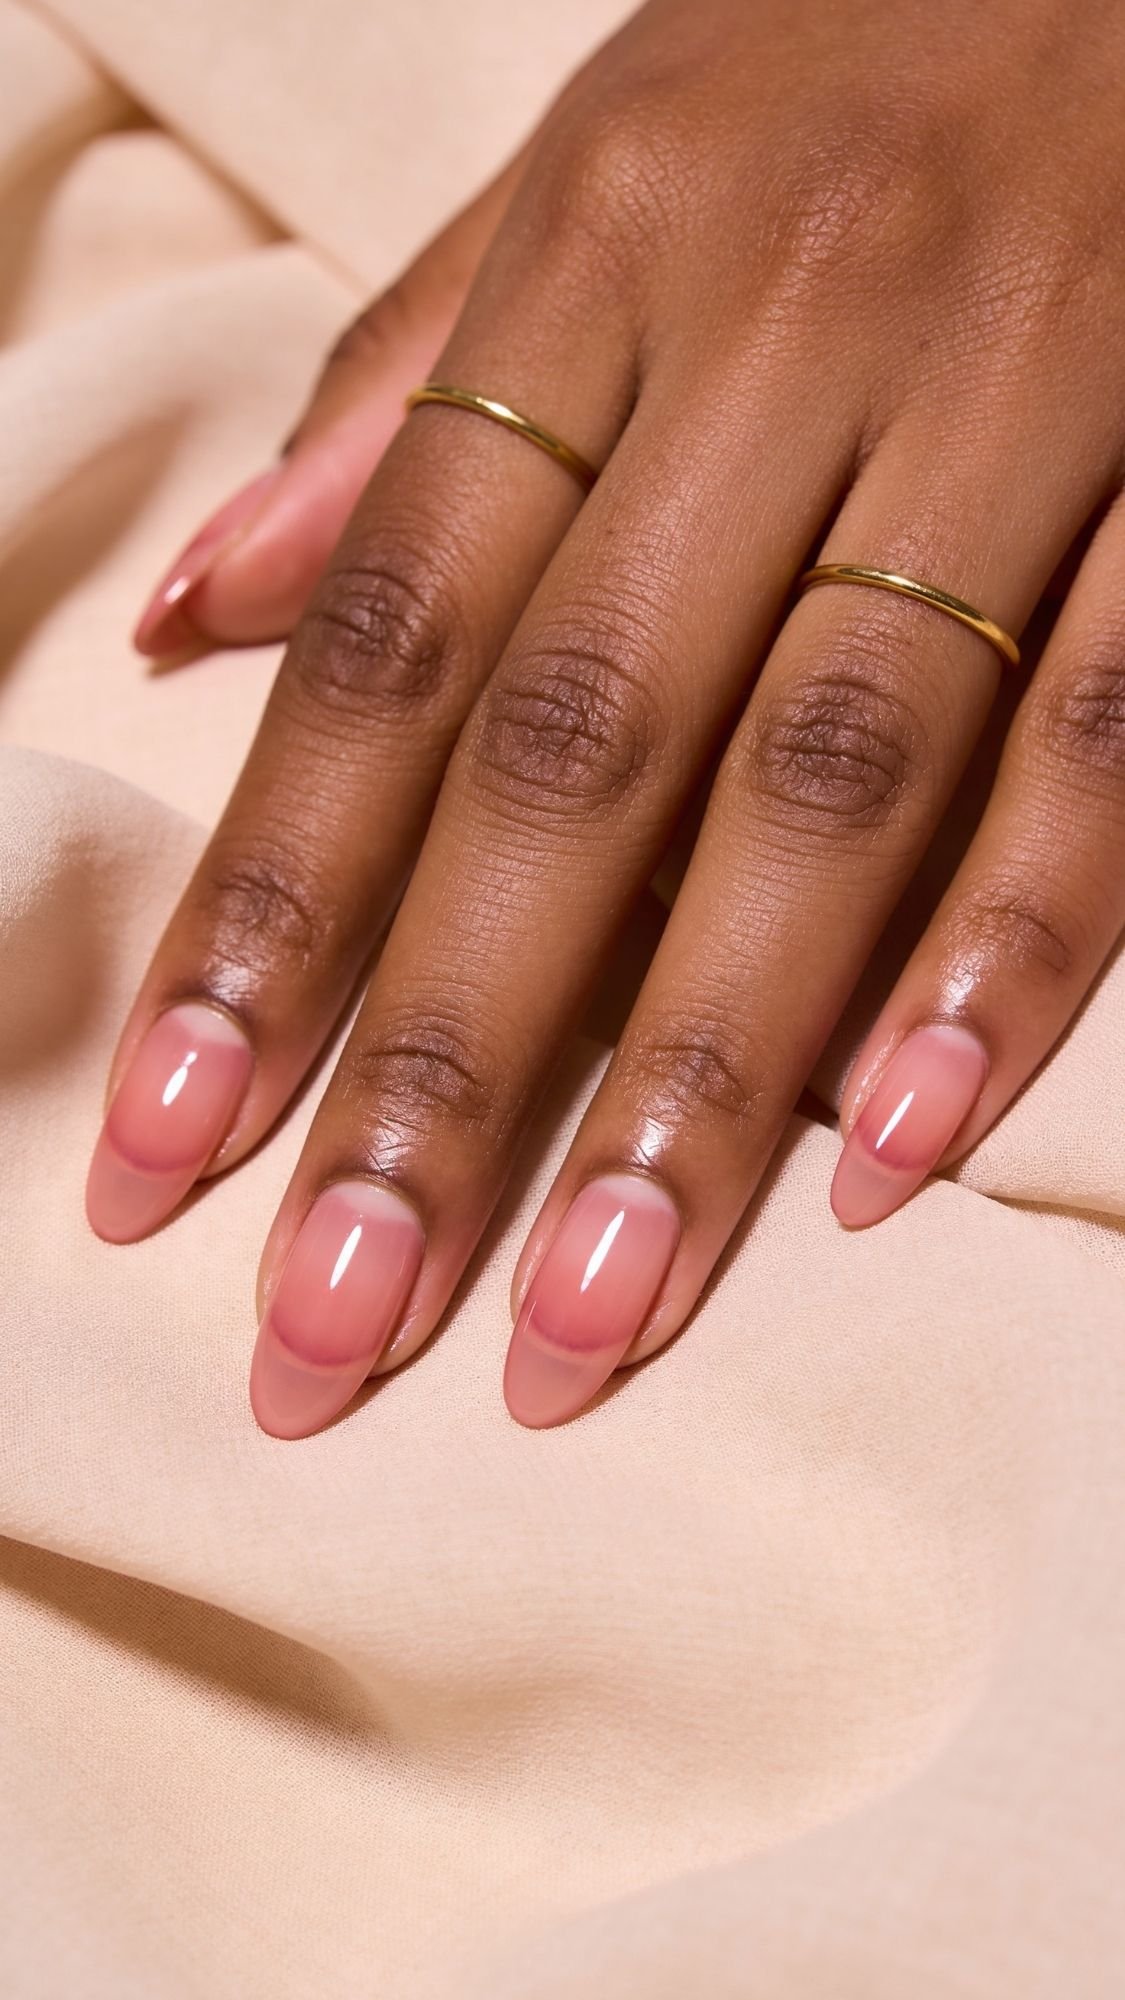
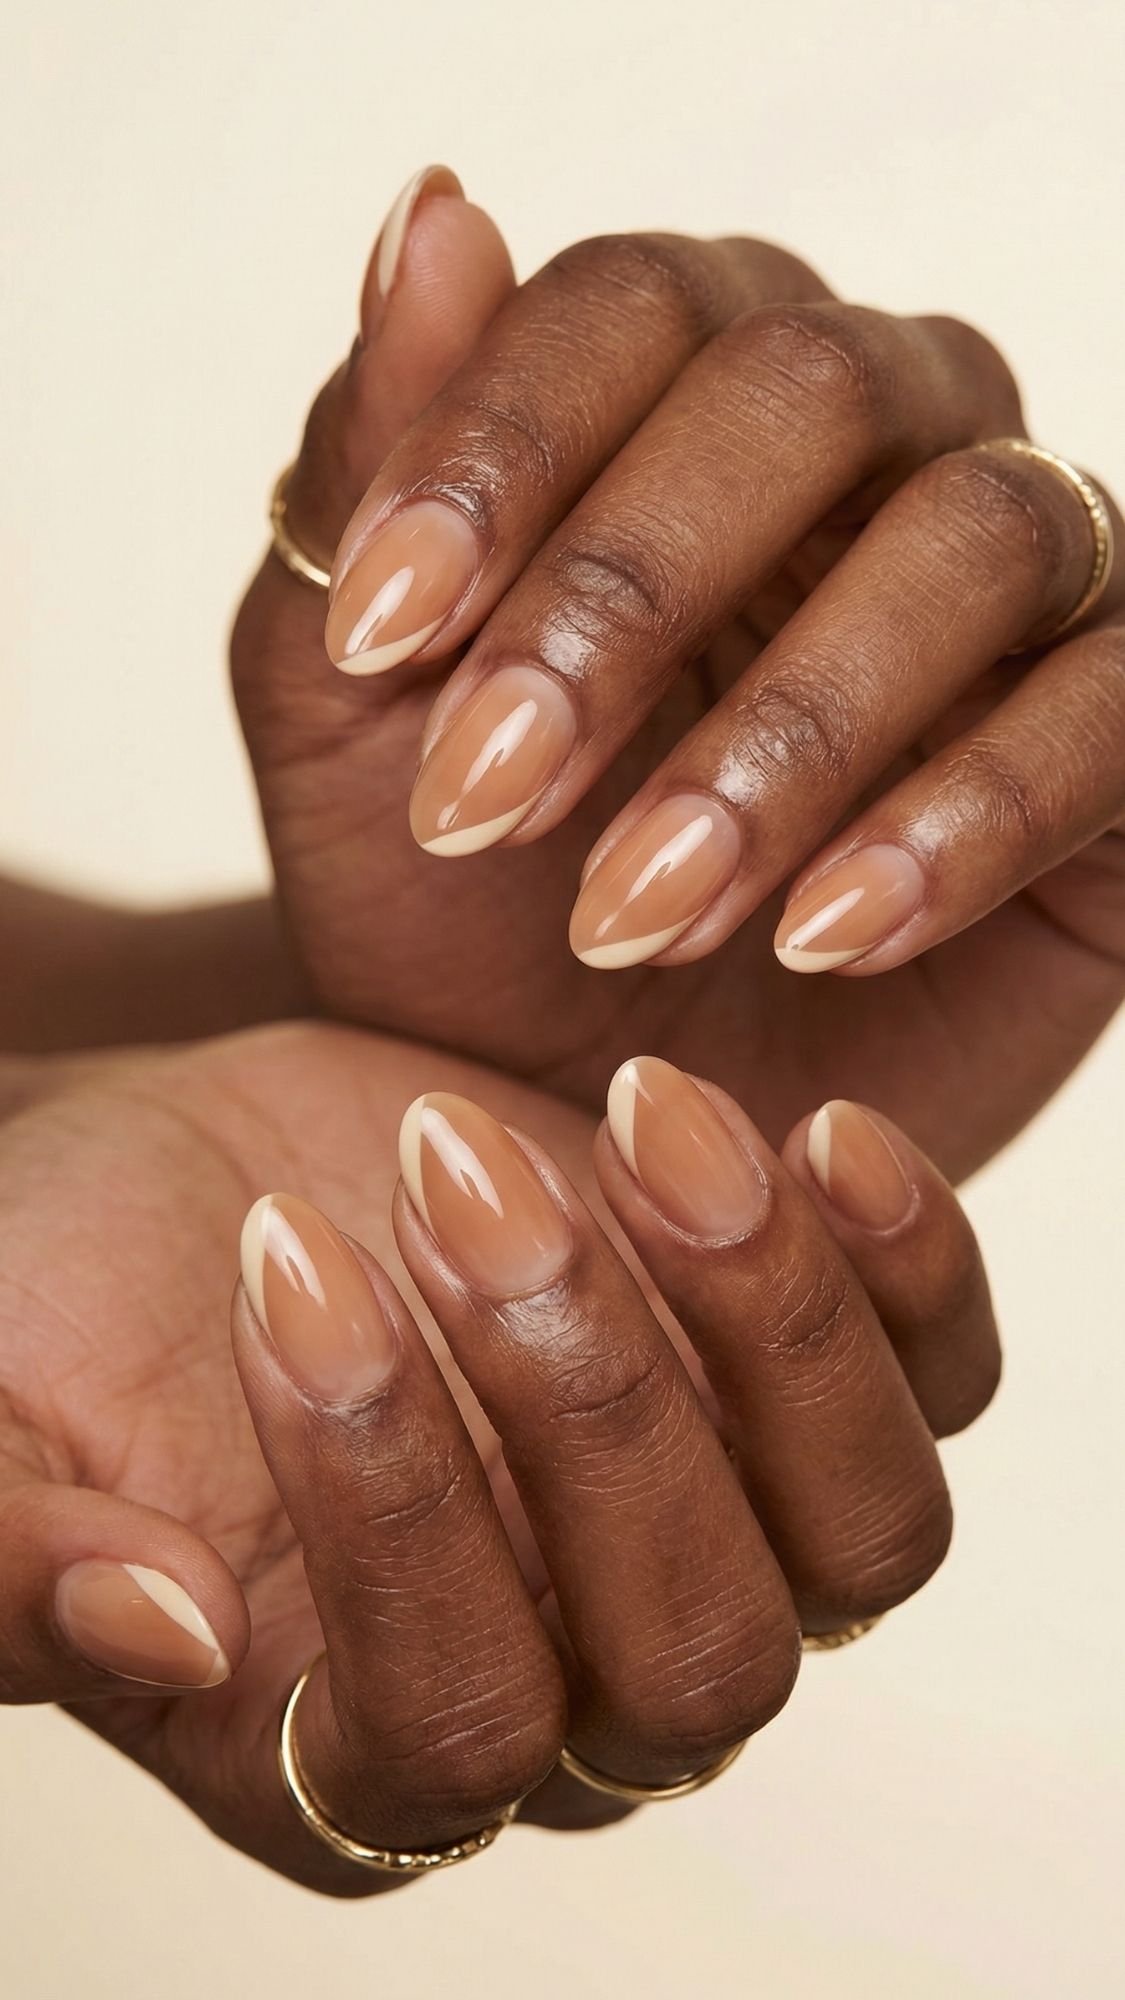
1) Sheer Cocoa Glaze (The “My Nails But Better” Nude)
If you want a nude that looks effortless but still intentional, sheer cocoa glaze wins every time. I love this look for spring and summer because it reads clean in bright daylight, and it never looks chalky on deeper skin tones. What I’ve noticed over the years is this, a slightly deeper sheer nude makes hands look longer, while a too-light nude can pull gray and make cuticles look dry even when they’re not. This look also forgives small streaks because the finish stays translucent, so you get that hydrated, glossy vibe instead of full-coverage pressure.
How to get the look (DIY regular polish)
- Base coat: Use a ridge-filling base if you have texture, or a sticky base if you chip fast.
- Color: Apply 2 thin coats of a sheer cocoa nude. The first coat will look uneven, that’s normal, do not panic.
- Gloss: Apply a high-gloss top coat and cap the free edge.
Pro technique note: I keep the color layer thin enough that I can still see a hint of the natural nail line. That’s what makes it look “real” and expensive.
If you want it at the salon, say this
- “I want a sheer cocoa nude, glossy finish, no full coverage, and a clean cuticle line.”
- “Keep it translucent, like a lip-gloss effect but in cocoa.”
Shade guidance (so it flatters, not fights your undertone)
- Warm undertones: pick cocoa that leans caramel or honey-brown.
- Neutral undertones: pick cocoa that looks balanced, not too red or too gray.
- Cool undertones: choose cocoa with a soft rosy-brown undertone, not straight beige.
Common mistake + fix
- Mistake: You apply thick coats to get opacity, then it streaks and dents.
- Fix: Keep coats thin, let each coat set for a couple minutes, then rely on gloss for the polished look.
Key Takeaways
- Sheer cocoa looks expensive because it mimics healthy nails with a tint.
- Thin coats + high gloss matter more than perfect coverage.
- A slightly deeper nude often looks more flattering on hands than a “true beige.”
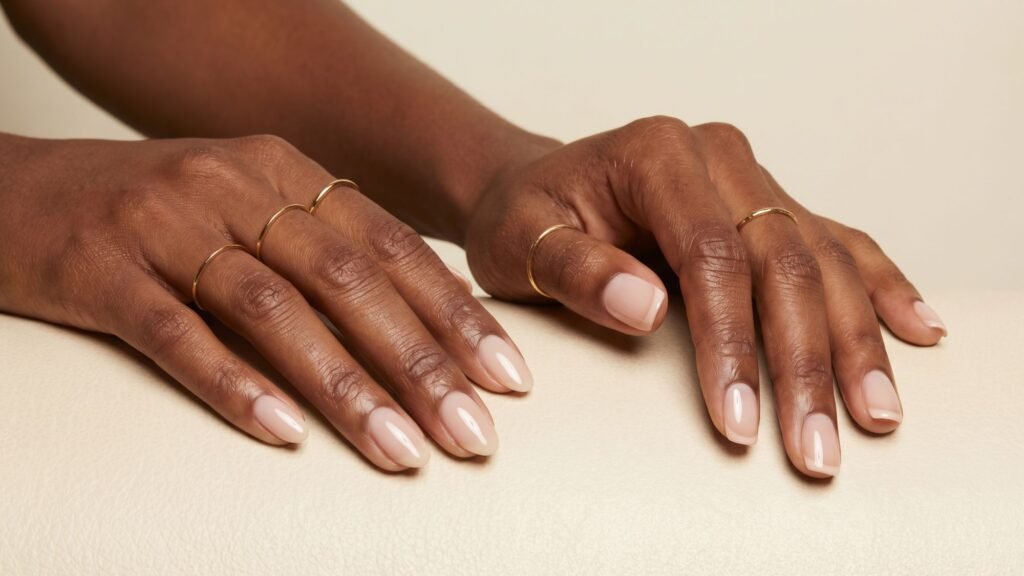
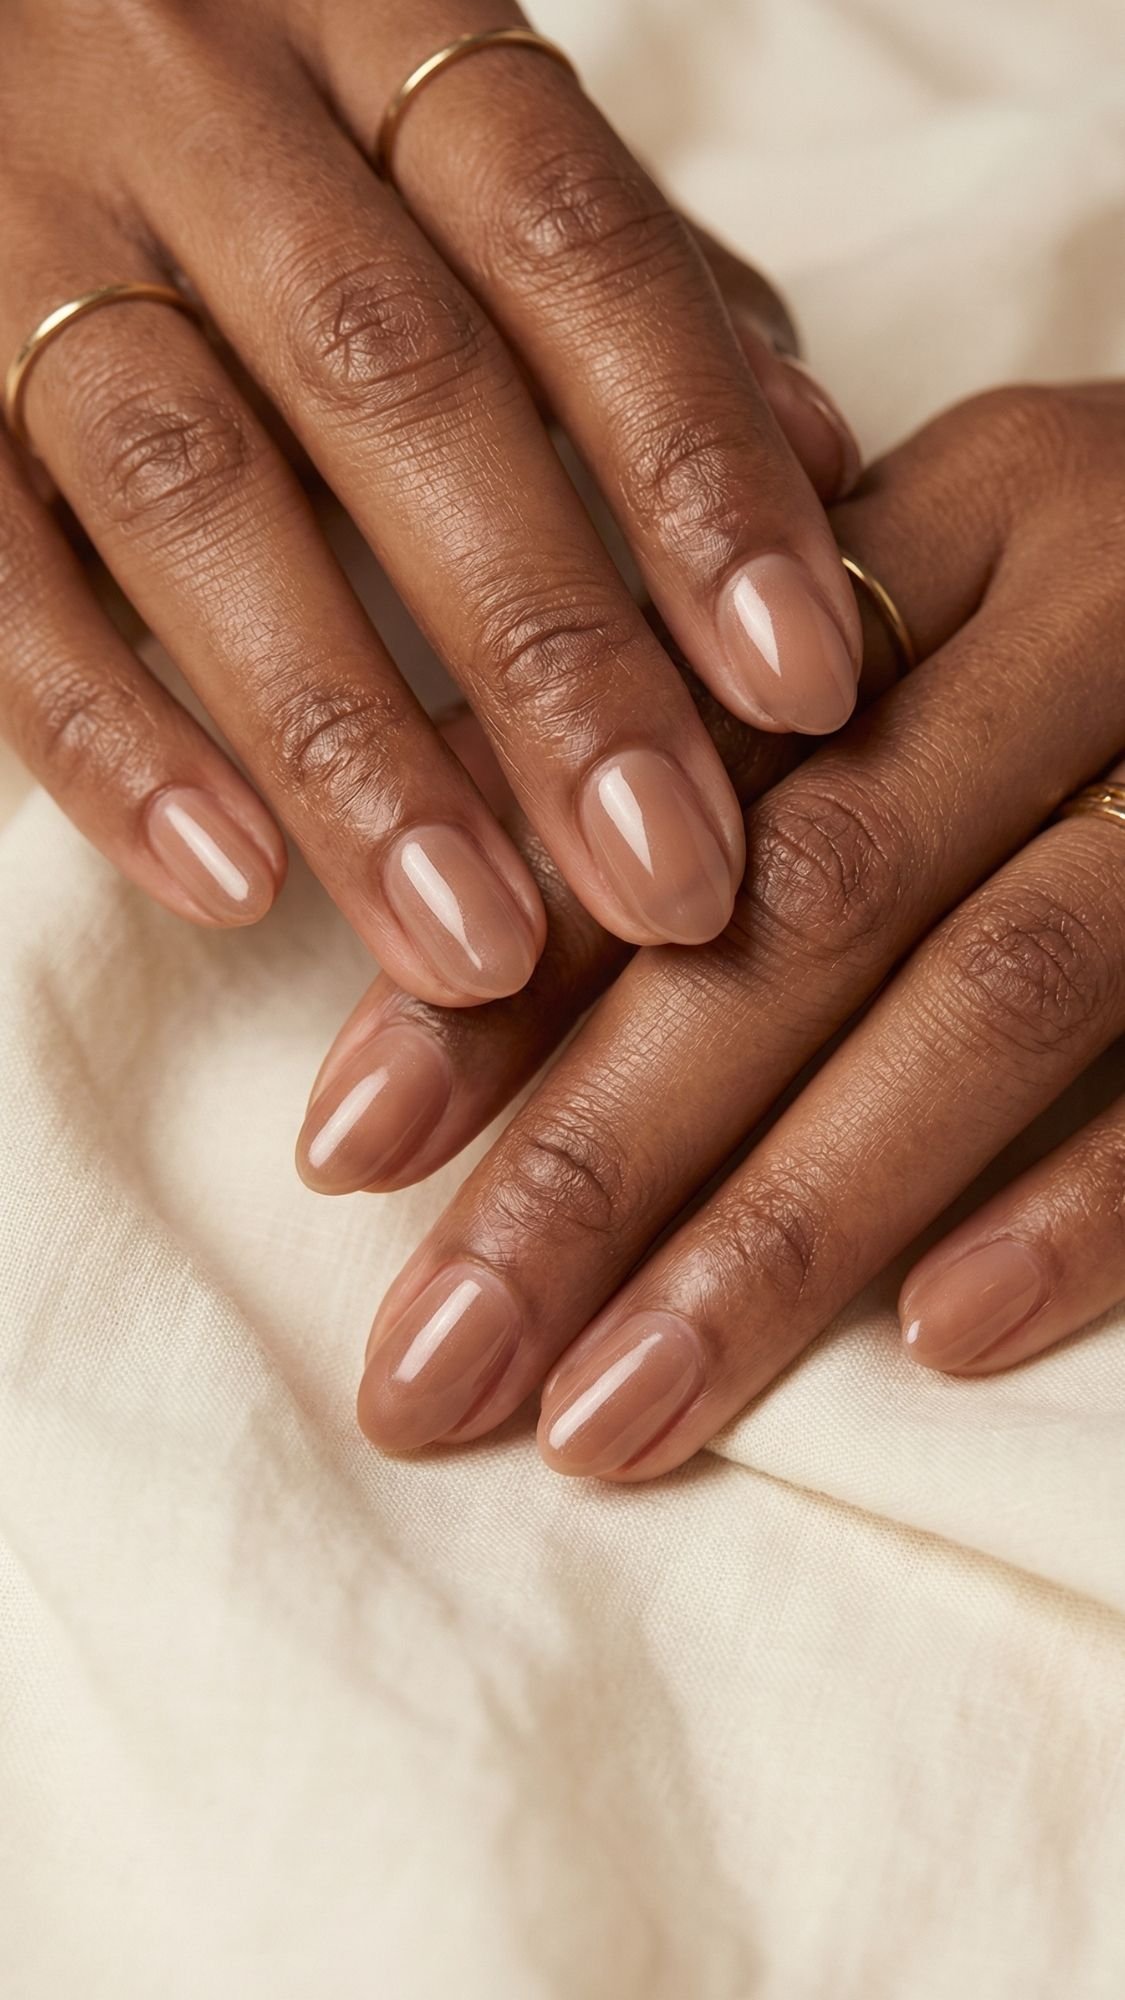
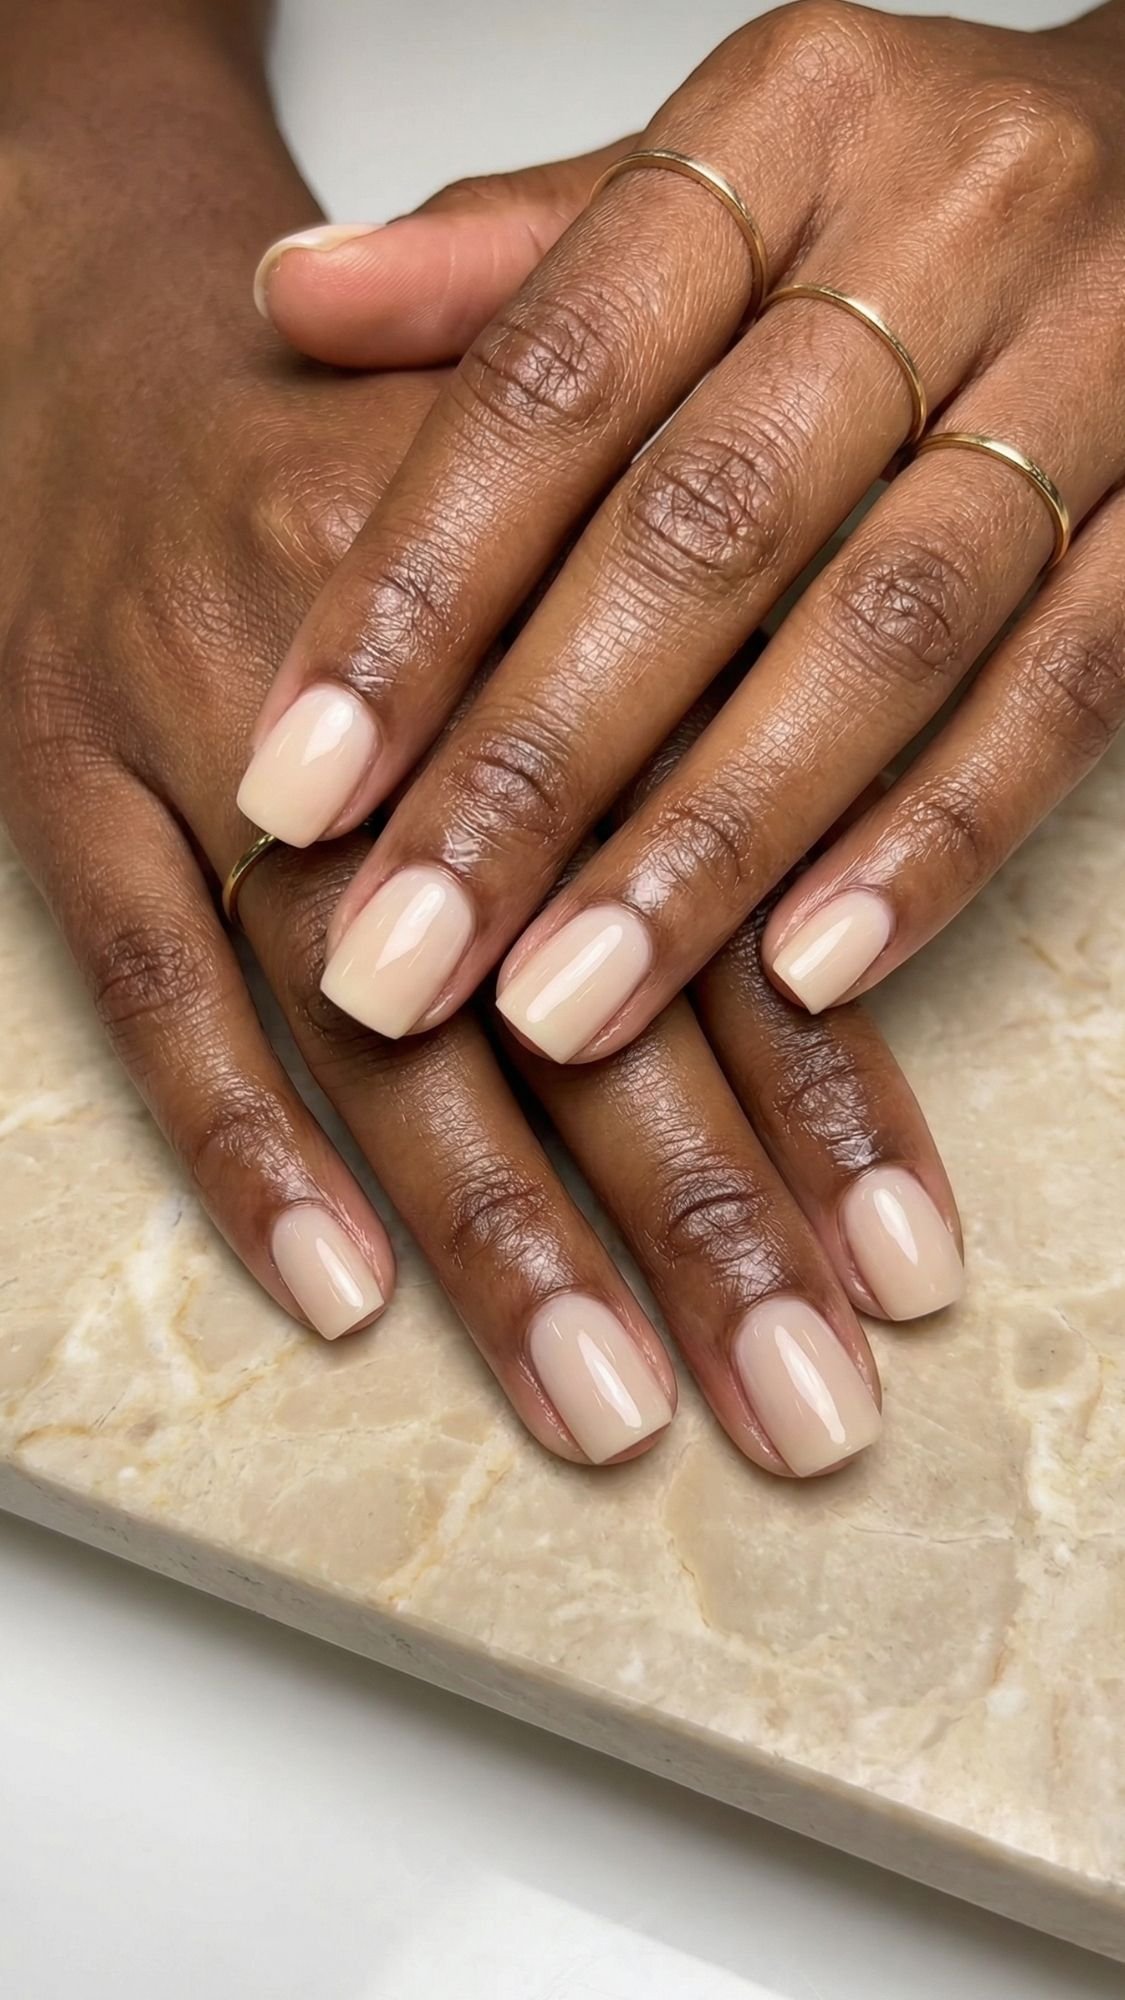
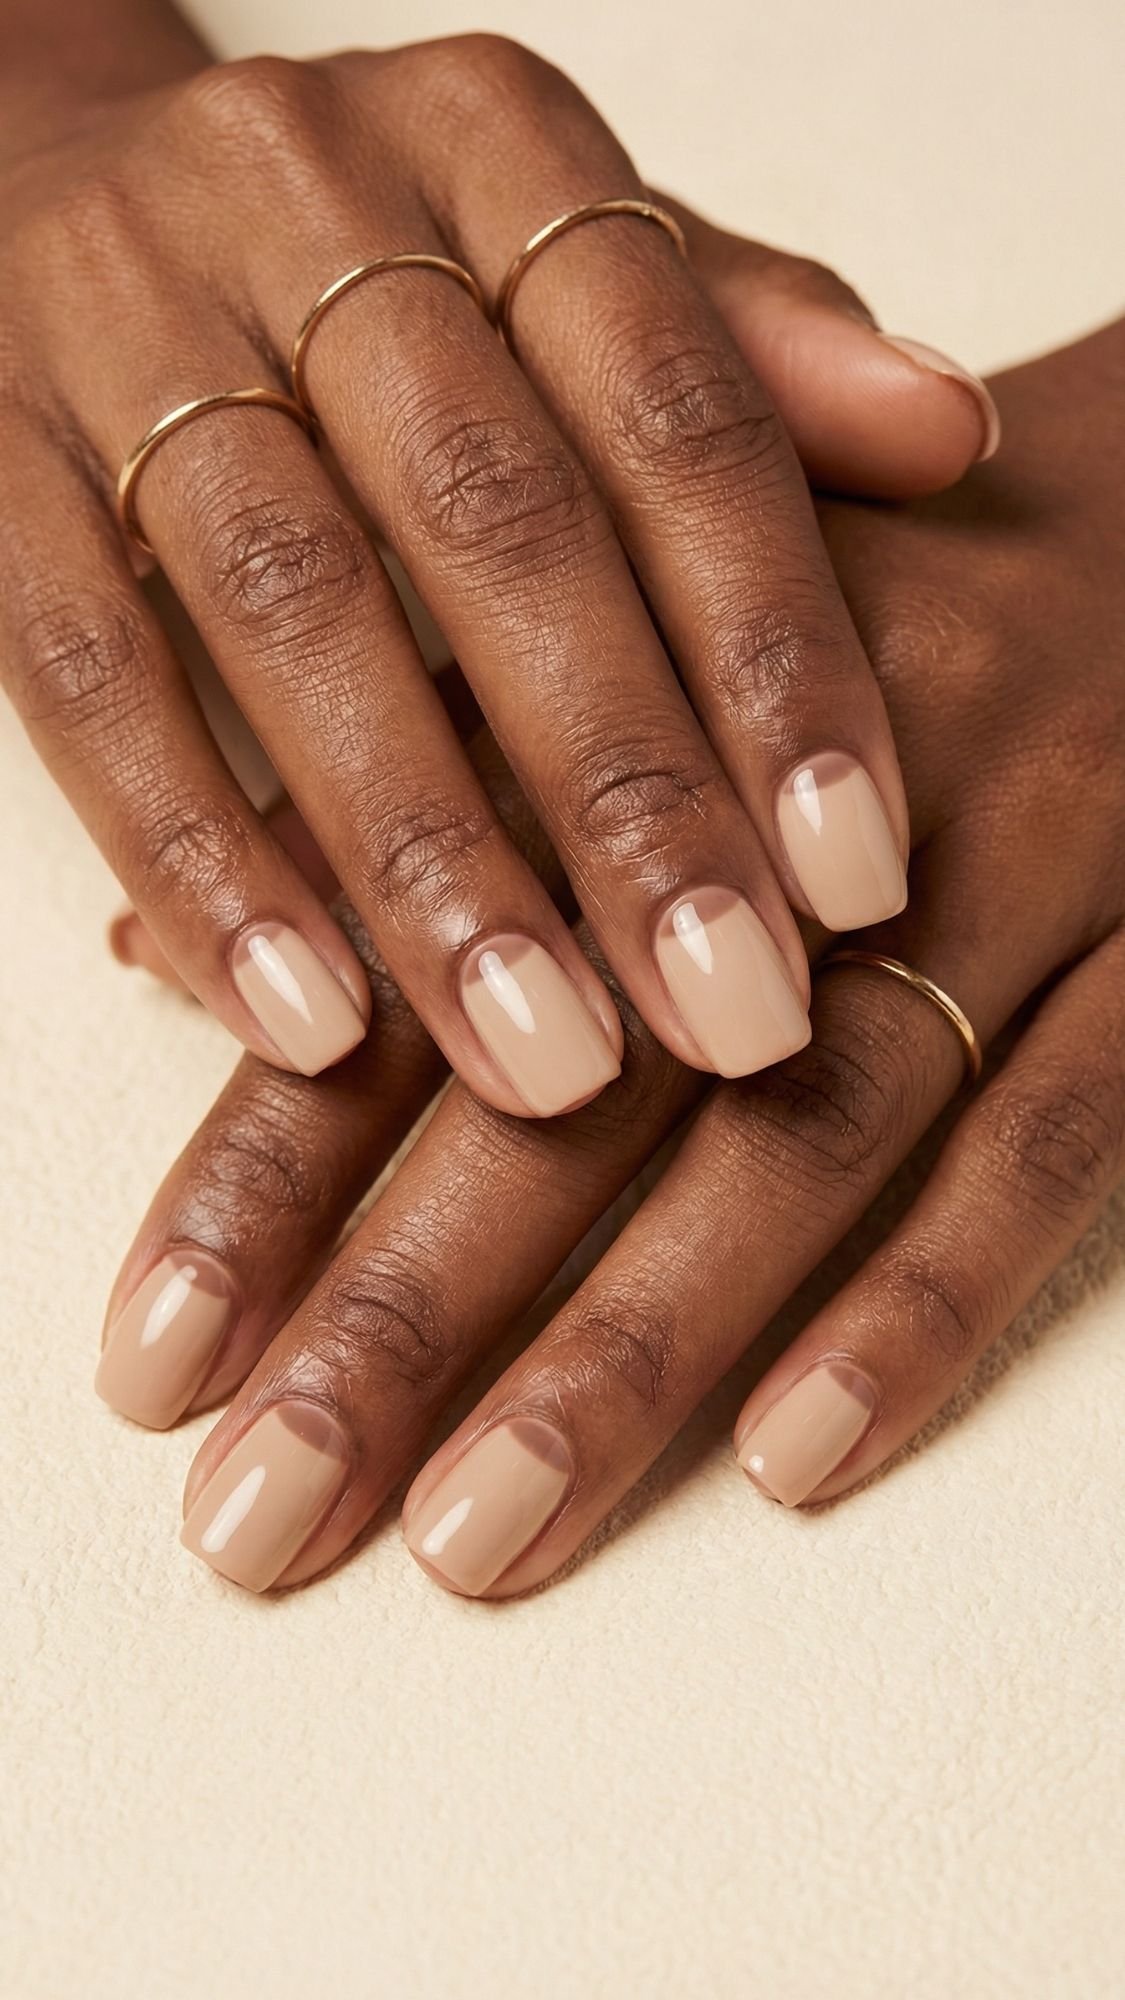
2) Milky Nude “Soap” Finish (Clean, Glossy, Expensive-Looking)
Soap nails look simple, but they require a clean base and a smooth surface, or they turn streaky fast. I love this style for spring and summer because it gives that fresh-from-a-salon look even when you wear a basic outfit and messy bun. What I’ve noticed over the years is this, the best milky nudes look slightly translucent, like you can still sense the natural nail underneath. Full-coverage “milk” can look chalky, especially in direct sunlight, so I aim for milky but not opaque.
How to get the look (DIY regular polish)
- Base coat: Use a ridge-filling base if you see texture, because milk shades highlight ridges.
- Color: Apply 2 thin coats of a milky nude. Let each coat sit for 2–3 minutes so it can level.
- Gloss: Apply a high-gloss top coat and cap the free edge.
Pro technique note: If your milky nude looks too pale on your hands, I layer it over a sheer warm nude first. That tiny warmth keeps the manicure from looking dusty while still staying “clean.”
Shade guidance (so it looks milky, not chalky)
- Deeper skin tones: look for milky caramel, warm beige milk, or sheer cocoa milk.
- Medium skin tones: try milk-tea nude or a creamy beige with warmth.
- Lighter skin tones: try soft ivory-pink milk or sheer milky blush.
If the bottle color looks like white-out, it probably won’t read “soap.” It will read “oops.”
Common mistake + fix
- Mistake: You try to make it opaque in one coat, then it streaks and drags.
- Fix: Use thinner coats and let them level. If it still streaks, switch to a ridge-filler base and keep your brush strokes to three per nail.
Longevity tip
Soap nails look best when cuticles stay hydrated, but oil can kill adhesion, so I oil after everything sets. I apply cuticle oil at night, and in the morning the nails still look glossy and fresh.
Key Takeaways
- Soap nails look luxe because the finish reads smooth and glossy, not thick.
- Milky and slightly sheer beats fully opaque for a cleaner look.
- Ridge-filler base makes a bigger difference here than most people expect.
3) Lipgloss Jelly Nude (Juicy, Sheer, Zero-Stress)
This look gives you that “hydrated nails” vibe, like your manicure drinks water and minds its business. I reach for a jelly nude when I want something soft and glossy that still shows a little natural nail underneath. What I’ve noticed over the years is this, jelly formulas hide streaks better than creamy nudes, because translucency forgives tiny brush marks. You get a plump, juicy finish that looks amazing in spring light and summer sun, especially when you keep the cuticle line clean.
How to get the look (DIY regular polish)
- Base coat: Use a ridge-filler if you see texture, jelly shows ridges more than you think.
- Color: Apply 2 to 4 very thin coats of a jelly nude, stop when it looks “tinted glass,” not opaque paint.
- Gloss: Add a glossy top coat and cap the free edge.
Pro technique note: I prefer more coats that stay thin, instead of fewer thick coats. Thick jelly layers wrinkle or dent easily, because they take longer to set.
Shade guidance (so it flatters your undertone)
- Warm undertones: peachy jelly nude, caramel jelly, warm beige jelly.
- Cool undertones: rosy jelly nude, mauve-leaning nude jelly.
- Neutral undertones: milk-tea jelly nude, balanced beige jelly.
If your jelly nude looks too pink or too orange, you can “correct” it by layering one thin coat of a more neutral sheer nude on top, then sealing with gloss.
Common mistake + fix
- Mistake: You keep brushing over the same spot to even it out, then you get drag marks.
- Fix: Use three strokes per nail, then let the coat settle. Jelly levels as it sits.
Key Takeaways
- Jelly nude looks expensive because it reads tinted, glossy, and smooth, not painted-on.
- Thin layers stack better than thick coats for a glassy finish.
- Undertone matching matters more here because sheers pick up skin tone.
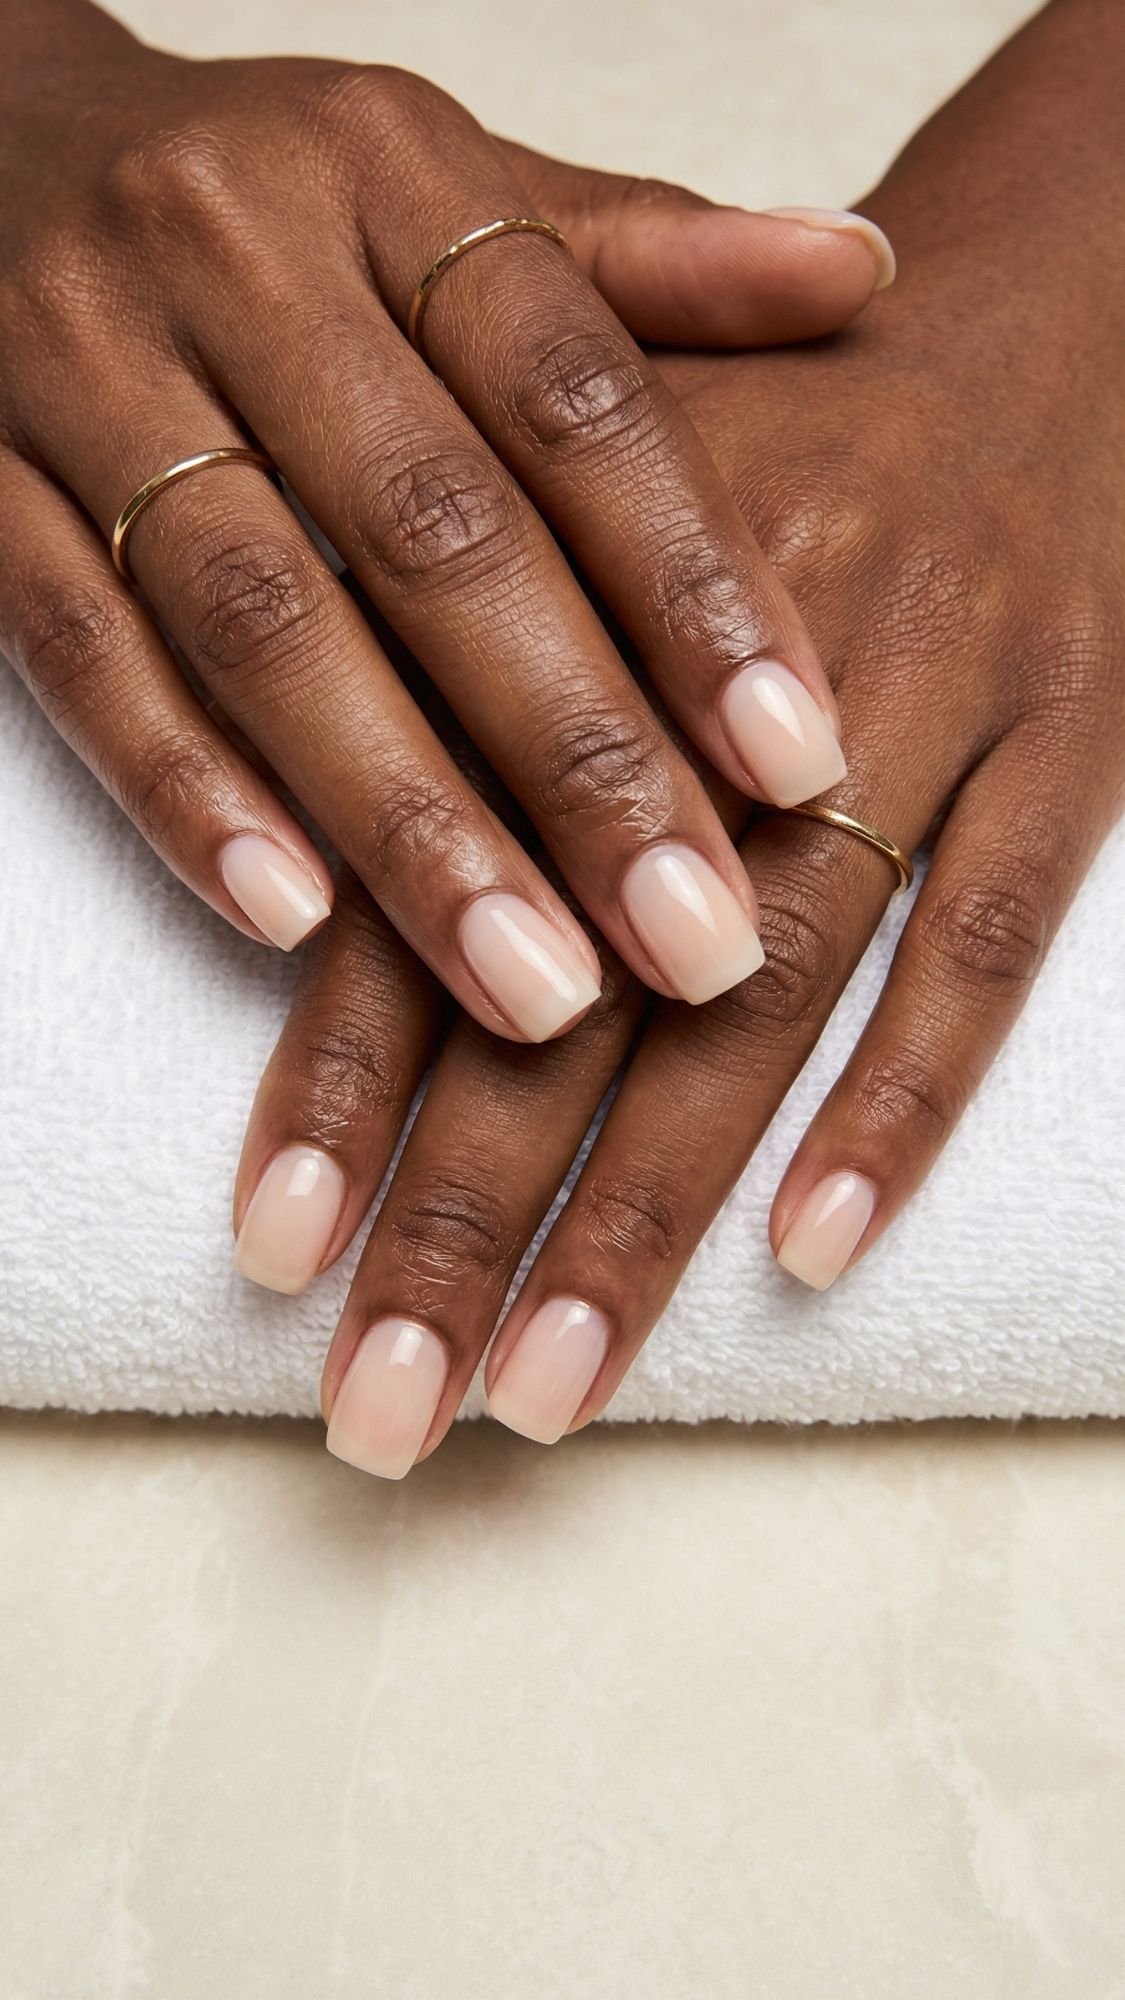
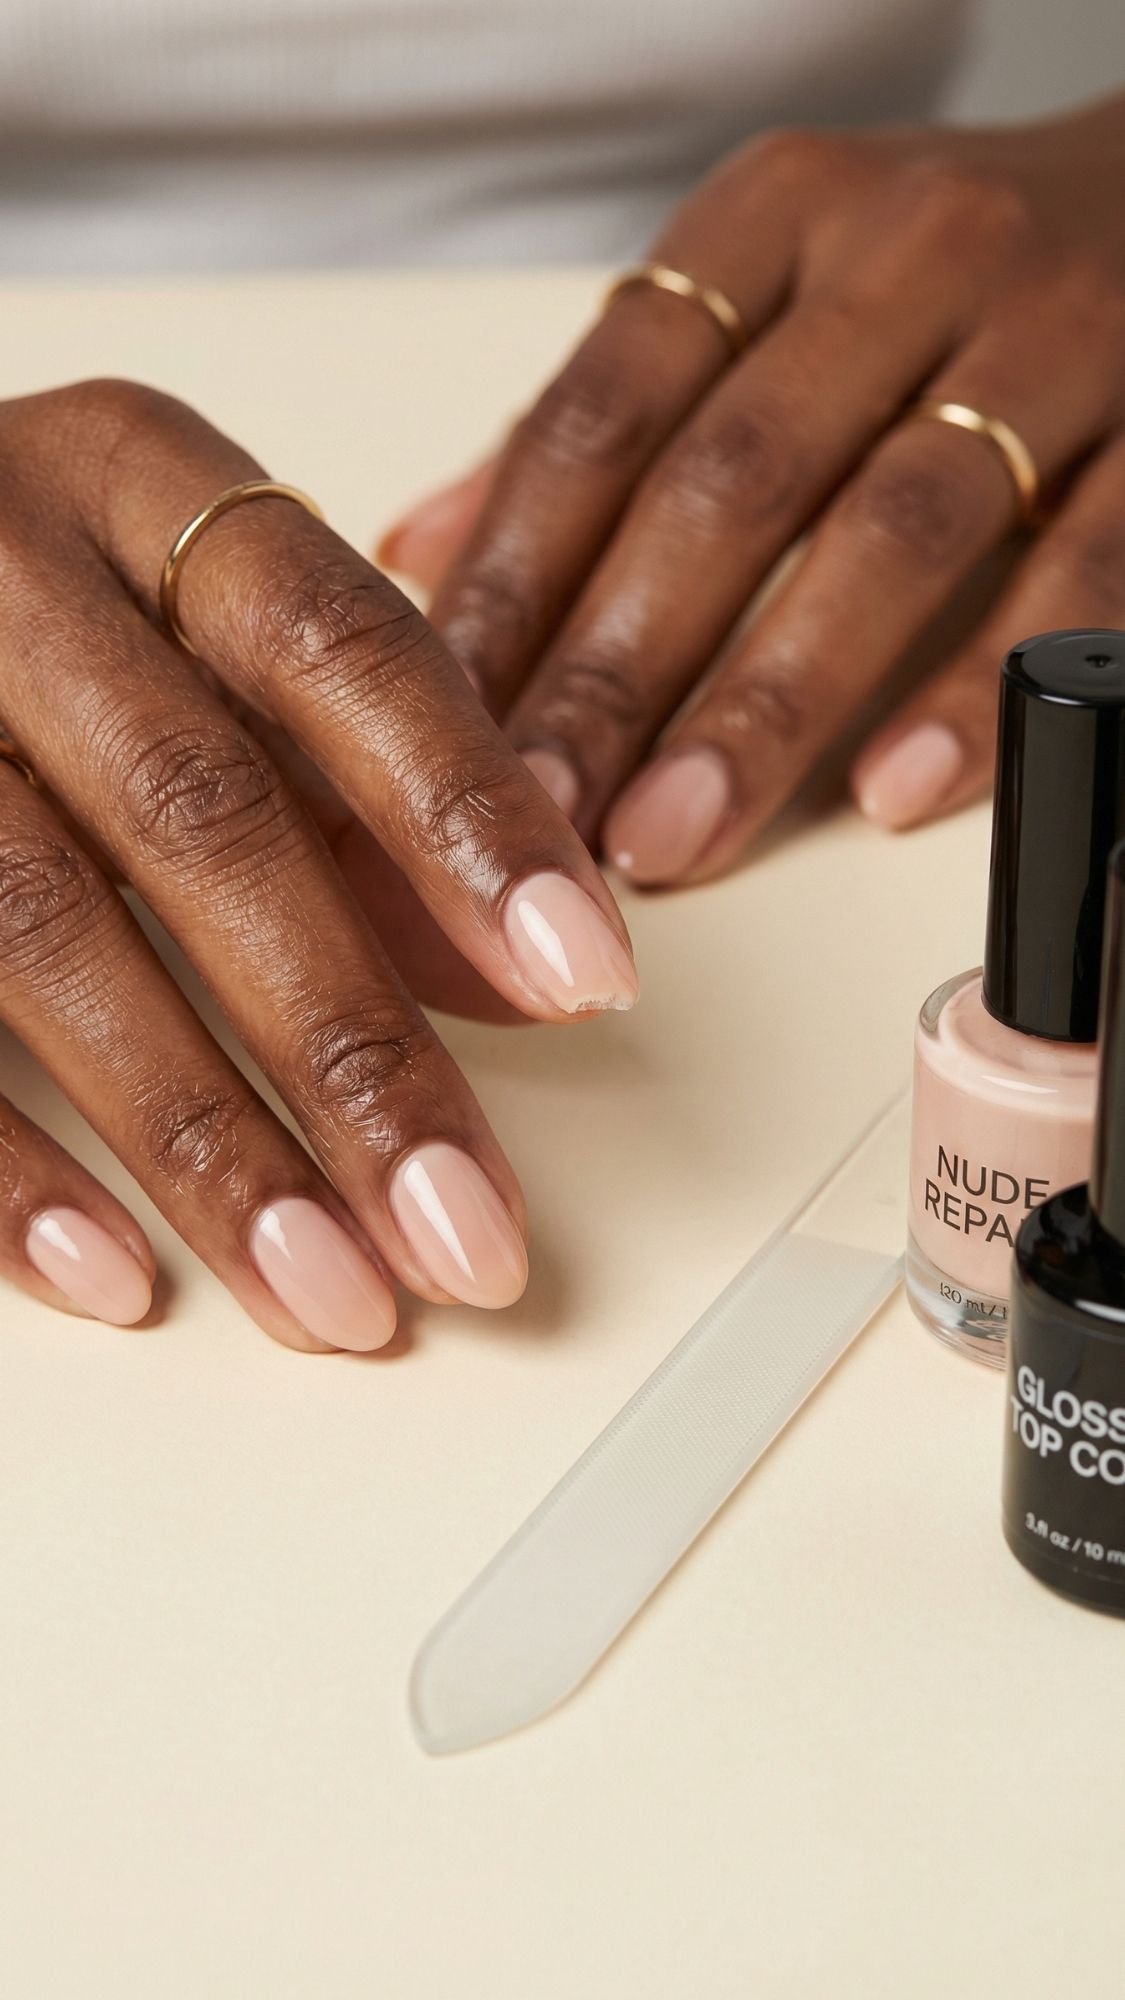
4) Ballet Slipper Nude (Soft Pink, Clean, and Totally Timeless)
Ballet slipper nude gives that delicate, “polished but not trying too hard” vibe, and it looks ridiculously good in spring light. I keep this one in heavy rotation because it pairs with everything, and it makes hands look neat even when life feels chaotic. What I’ve noticed over the years is this, people go too pale and too opaque, then the color turns chalky and the manicure looks flat instead of fresh. The secret is sheer coverage and the right undertone, not a stark pastel pink. Want it to look expensive? You need smooth prep and a glossy top coat that shows a clean reflection line.
How to get the look (DIY regular polish)
- Base coat: Ridge-filler if you have texture, ballet pink shows ridges fast.
- Color: Apply 2–3 thin coats of a sheer ballet pink nude. Let each coat level for 2–3 minutes.
- Gloss: Finish with a high-gloss top coat and cap the free edge.
Pro technique note: If you paint ballet pink and it looks a little too “bright” on your hands, I fix it by layering one thin coat of a sheer warm nude underneath, then I apply the ballet shade on top. That tiny warmth makes the pink look softer and more skin-flattering.
Shade guidance (so it flatters, not fights)
- Deeper skin tones: choose ballet pink that leans rosy, mauve-rose, or warm blush, and keep it sheer. If it looks like baby pink in the bottle, it can turn ashy on the nail.
- Medium skin tones: look for soft blush nude or neutral rosy beige.
- Lighter skin tones: try sheer milky blush or pink-ivory sheer.
Ever notice how the same “ballet pink” looks natural on one person and weirdly stark on another? Undertone explains that 99 percent of the time.
Common mistake + fix
- Mistake: You try to make it opaque so it “shows up,” then it streaks and looks chalky.
- Fix: Keep it sheer, build in thin layers, and let the gloss do the heavy lifting.
Key Takeaways
- Ballet slipper nude looks best when it stays sheer and glossy, not thick and pastel.
- A warm sheer base layer can rescue a too-cool pink instantly.
- Clean cuticles and smooth surface matter more here than almost any other nude.
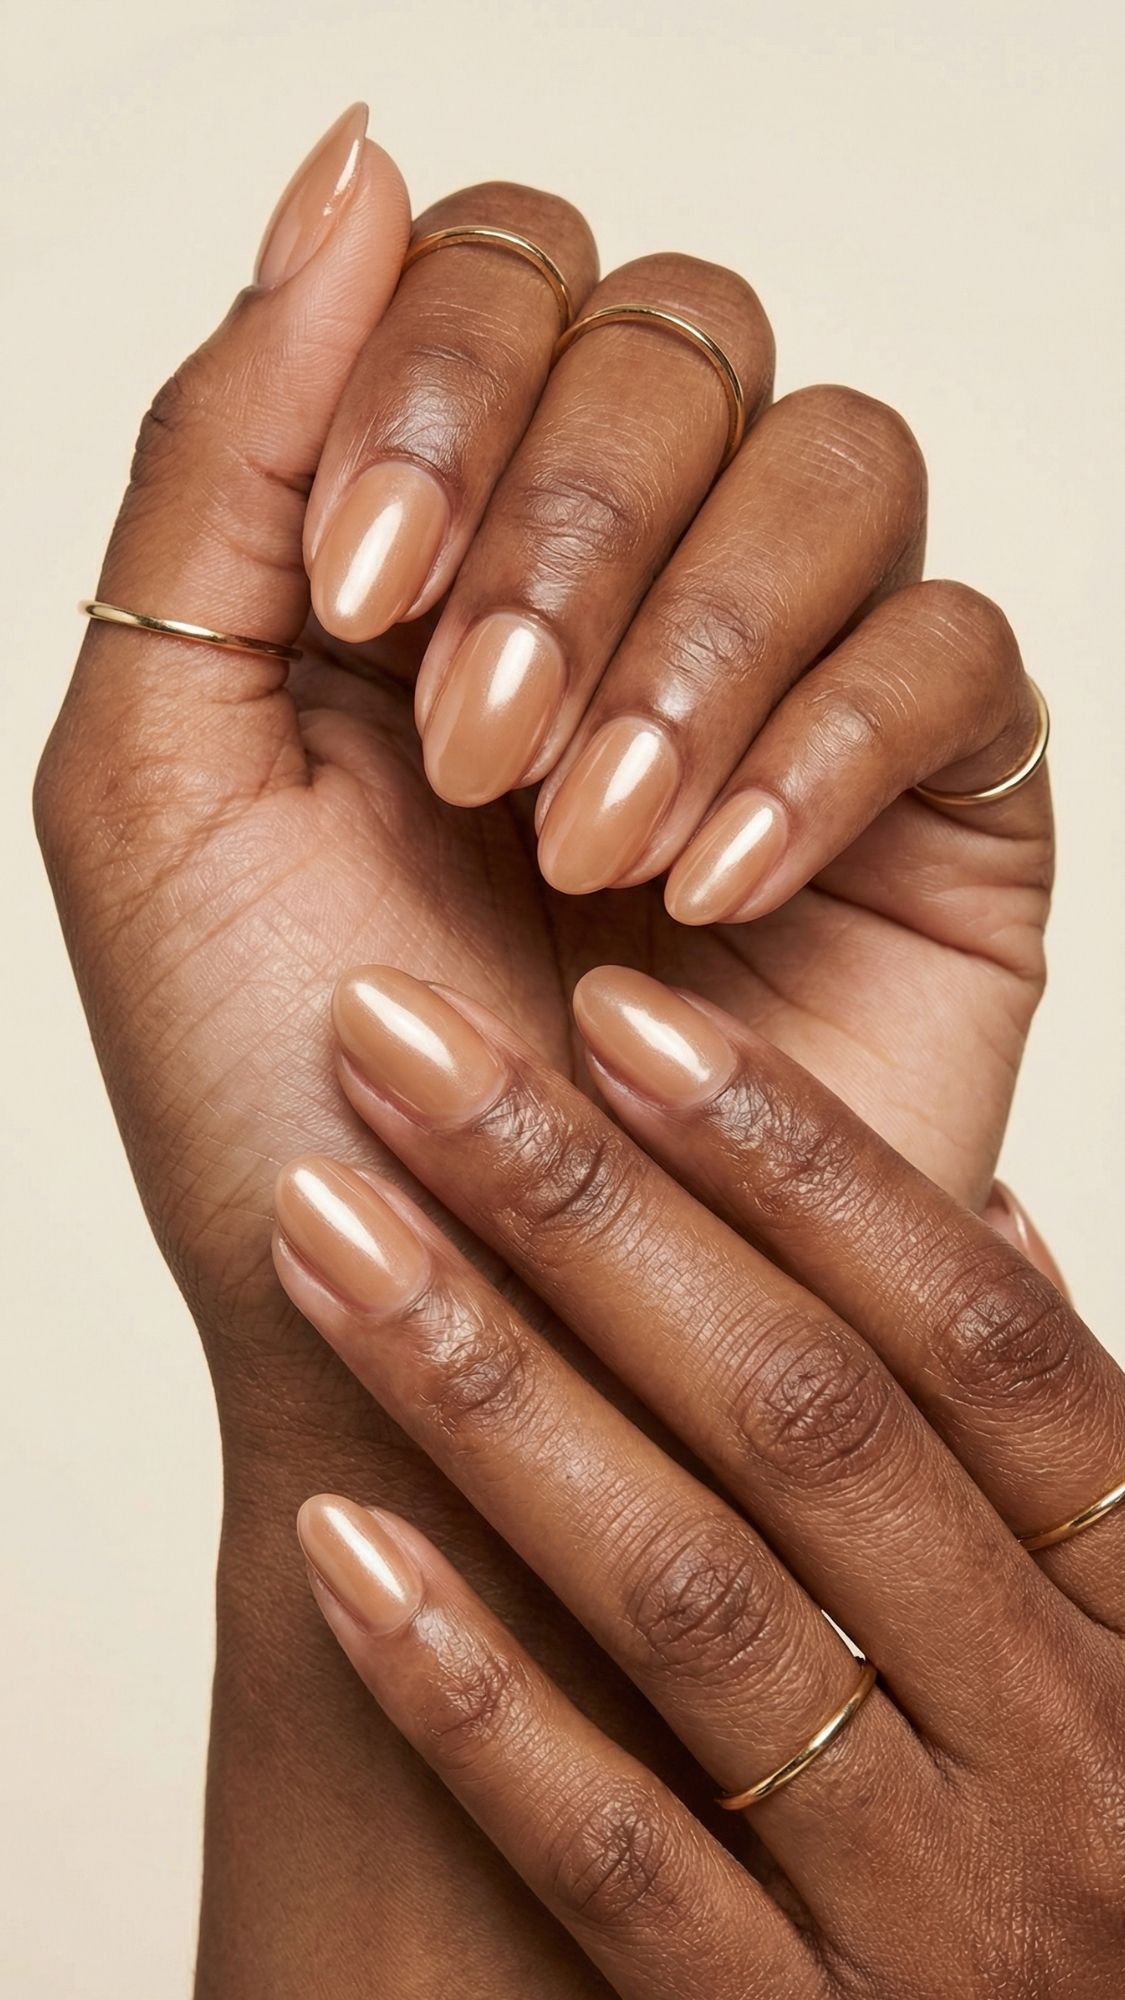
5) Vanilla Gloss Nude (Creamy, Warm, “Expensive Hands” Energy)
Vanilla gloss nude gives you that creamy, softly warm neutral that looks amazing in spring outfits and summer whites. I love this one when you want a nude that reads more “polished” than “barely there,” but still stays natural. What I’ve noticed over the years is this, vanilla nudes look best when they lean warm and slightly creamy, not stark beige. If your nude ever looks flat, vanilla gloss fixes it because the tone adds warmth and the shine adds dimension. Do you ever look at a nude manicure and instantly think, “Oh, that person moisturizes”? Yeah, this one does that.
How to get the look (DIY regular polish)
- Base coat: Use a ridge-filler if you see texture, creamy nudes highlight bumps fast.
- Color: Apply 2 thin coats of a creamy vanilla nude. Keep your strokes light so you don’t drag.
- Gloss: Use a high-gloss top coat, float it on, cap the free edge last.
Sensory detail that helps: When you apply the top coat correctly, it feels like it “glides” for the first few seconds, then it starts to grip slightly as it sets. If it feels stringy or drags, you overworked it or your color layer stayed too soft underneath.
Shade guidance (so vanilla looks flattering, not dull)
- Deeper skin tones: go for vanilla-caramel, honey beige, or warm latte nude, not pale beige.
- Medium skin tones: try milk-tea vanilla or warm beige-cream.
- Lighter skin tones: choose ivory-vanilla with a hint of pink or peach, not straight yellow.
If your vanilla nude pulls yellow, I fix it with one thin coat of a sheer rosy nude underneath. That tiny tweak makes it look more “skin-like.”
Common mistake + fix
- Mistake: You apply creamy nude too thick, then it gets dents and weird texture.
- Fix: Use thin coats, wait 2–3 minutes between them, then seal with a glossy top coat that you do not over-brush.
Key Takeaways
- Vanilla gloss looks luxe because it combines warmth + creaminess + high shine.
- Choose a tone that matches your undertone, or layer a sheer nude to correct it.
- Top coat technique matters a lot here, because creamy nudes show every flaw.
6) Micro French on Sheer Nude (Tiny Tip, Big “Clean Girl” Payoff)

Micro French nails give you that crisp, put-together look without screaming “I spent three hours on nail art.” I love this style for spring and summer because it looks fresh in daylight and still feels neutral enough to match everything. What I’ve noticed over the years is this, most people make the tip too thick, then it starts looking like a throwback French instead of a modern micro tip. You want the line so thin it almost feels like a highlight, not a stripe. Ever looked at someone’s nails and thought, “Those look expensive,” even though the design looks simple? This is that.
Tools you need
- Striping brush or a super thin nail art brush
- Optional: French tip guide stickers if your hands shake
Step-by-step (DIY regular polish)
- Paint your base: sheer nude or milky nude, 2 thin coats.
- Let it set for 3–5 minutes, don’t rush this part.
- Load a tiny amount of white, soft cream, or deeper nude onto a striping brush.
- Paint a whisper-thin line right at the free edge.
- Clean edges with a small brush dipped in acetone.
- Seal with glossy top coat and cap the free edge.
Pro technique note: I brace my painting hand by resting my pinky on the table. That one small move steadies everything. I also paint the tip in two short strokes instead of one long swipe, because long swipes wobble.
Shade guidance (make it flattering on every skin tone)
- Want ultra clean: soft white micro tip on a warm sheer nude.
- Want softer contrast: cream micro tip instead of bright white.
- Want subtle but chic: deeper nude micro tip on a lighter nude base.
Common mistake + fix
- Mistake: You paint the line too thick, then it eats up the nude base and looks harsh. Fix: Use less polish, wipe the brush first, then paint thinner. You can always add, you can’t un-add without cleanup.
Key Takeaways
- Micro French looks modern because the tip stays thin and crisp.
- A cleanup brush makes this look ten times more professional.
- Glossy top coat pulls the whole “expensive” vibe together.
7) French Gloss Nude (Soft Tip, High Shine, Zero Harsh Lines)

French gloss nude gives you the “French tip effect” without the sharp contrast that can feel too bold for spring and summer neutrals. I love this one when you want that clean, elevated look, but you still want it to feel modern and a little softer around the edges. What I’ve noticed over the years is this, a slightly blurred tip looks more expensive than a perfectly stark line, because it mimics the way light naturally fades on the nail. You can wear this with short nails and it still looks intentional, which makes it a great “low effort, high payoff” design.
How to get the look (DIY regular polish)
- Base: Paint a sheer nude or milky nude base, 2 thin coats.
- Tip tint: Use a soft white, cream, or pale nude and paint a very thin tip, then immediately soften it.
- Blur it: Take a tiny makeup sponge or a clean detail brush with the faintest bit of remover, then lightly tap the tip line to create a gentle fade.
- Gloss: Seal with a glossy top coat and cap the free edge.
Pro technique note: I blur the tip while it still feels slightly wet. If I wait until it dries, I risk patchiness. I also keep the fade subtle, because too much blur can turn into “accidental ombre” fast.
Shade options that look best
- Clean and bright: sheer nude base + soft white blurred tip
- Extra soft: milky nude base + cream blurred tip
- Super subtle: warm nude base + slightly deeper nude blurred tip
Common mistake + fix
- Mistake: You over-blur and the tip looks cloudy or uneven. Fix: Keep the sponge almost dry, tap lightly, and stop early. If it goes too far, repaint the tip thinly and blur again with a lighter hand.
Key Takeaways
- French gloss works because it gives shape and definition without harsh lines.
- The blur looks best when you keep it subtle and controlled.
- Glossy top coat makes this design look salon-level, even at home.
8) Nude Ombre “Baby Boomer” (Soft Fade That Makes Hands Look Longer)
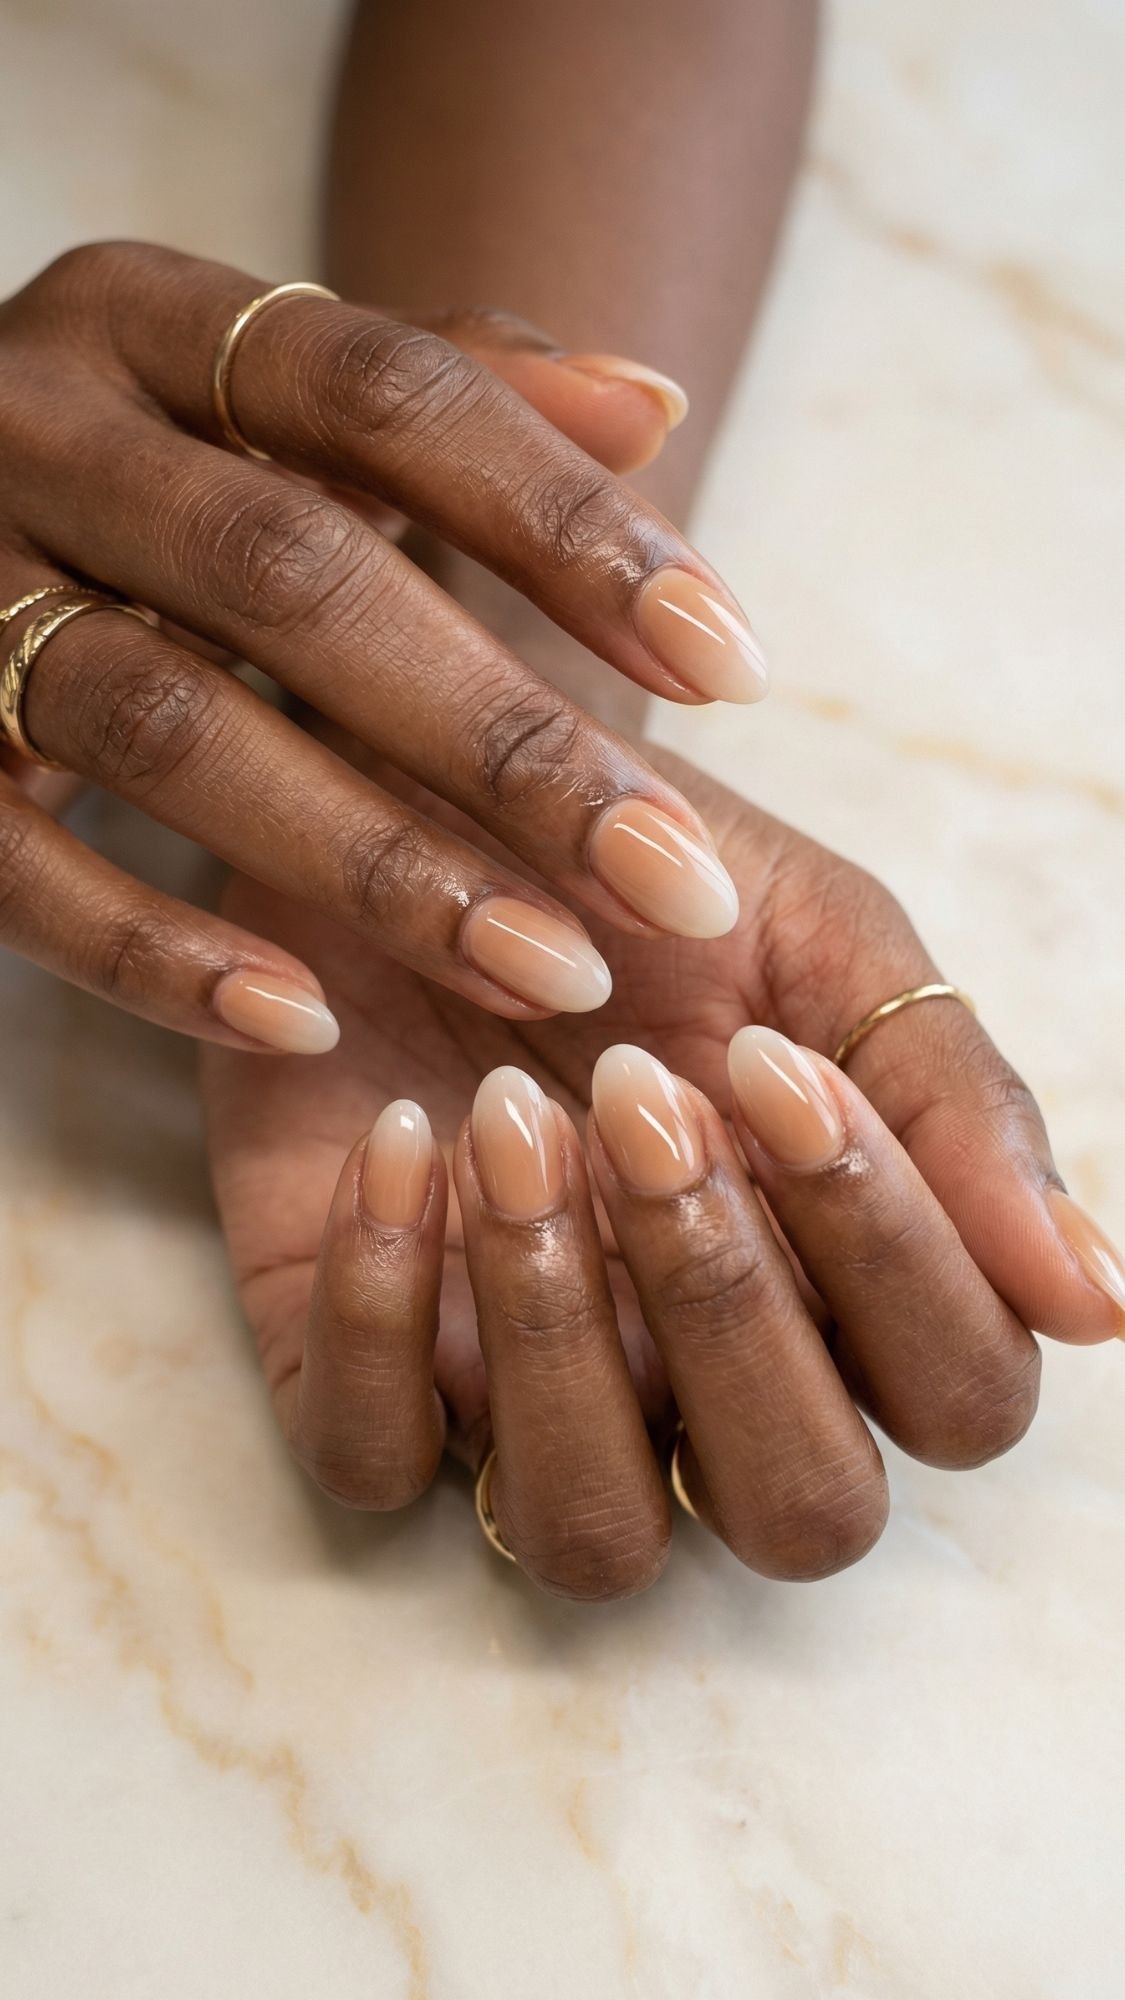
This is one of those designs that instantly makes nails look cleaner, longer, and more polished, even if the rest of your life feels like a pile of laundry. Nude ombre, sometimes called baby boomer, fades from a nude base into a milky tip with no harsh line. What I’ve noticed over the years is this, ombre looks the most expensive when the fade starts lower on the nail and stays soft, not when the white sits only at the very tip like a traditional French. You want a gradient, not a stripe.
Tools you need
- A small makeup sponge (the cheap wedge kind works great)
- Optional: a latex barrier or tape to protect skin from messy sponge work
- Cleanup brush + acetone for edges
Step-by-step (DIY regular polish)
- Base layer: Apply a sheer nude or milky nude, 1–2 thin coats.
- Sponge setup: Paint two stripes on the sponge, nude on the bottom, milky white on the top, slightly overlapping.
- Tap, don’t drag: Dab the sponge onto the nail in light taps. Start with 2–3 taps, then let it settle.
- Build slowly: Repeat 2–3 rounds until the fade looks smooth. Thin layers beat heavy pigment.
- Top coat: Apply glossy top coat to melt the layers together, then cap the free edge.
Pro technique note: The first sponge layer always looks patchy. That’s normal. The top coat is the magic step that smooths everything visually. If you try to “fix” patchiness by pressing harder with the sponge, you create texture. Light taps only.
Shade guidance (make the fade flatter every skin tone)
- Deeper skin tones: choose a nude base that leans caramel or cocoa, then keep the tip milky, not stark white.
- Medium skin tones: warm beige base + soft milky tip looks the most natural.
- Lighter skin tones: sheer blush nude base + milky tip keeps it fresh.
If the tip looks too bright, swap white for a cream or a milky beige. It still reads clean, but it looks softer.
Common mistake + fix
- Mistake: The sponge leaves texture and bumps. Fix: Use less polish on the sponge, tap lightly, let layers dry a bit between rounds, then use a generous glossy top coat to smooth it out.
Key Takeaways
- Ombre looks luxe because the fade creates dimension without harsh lines.
- Tap lightly, build gradually, and let the top coat “blend” visually.
- Softer whites and creams look more natural than stark white for most nude ombres.
9) Peachy Nude Wash (Fresh, Warm, Spring-Summer Glow)
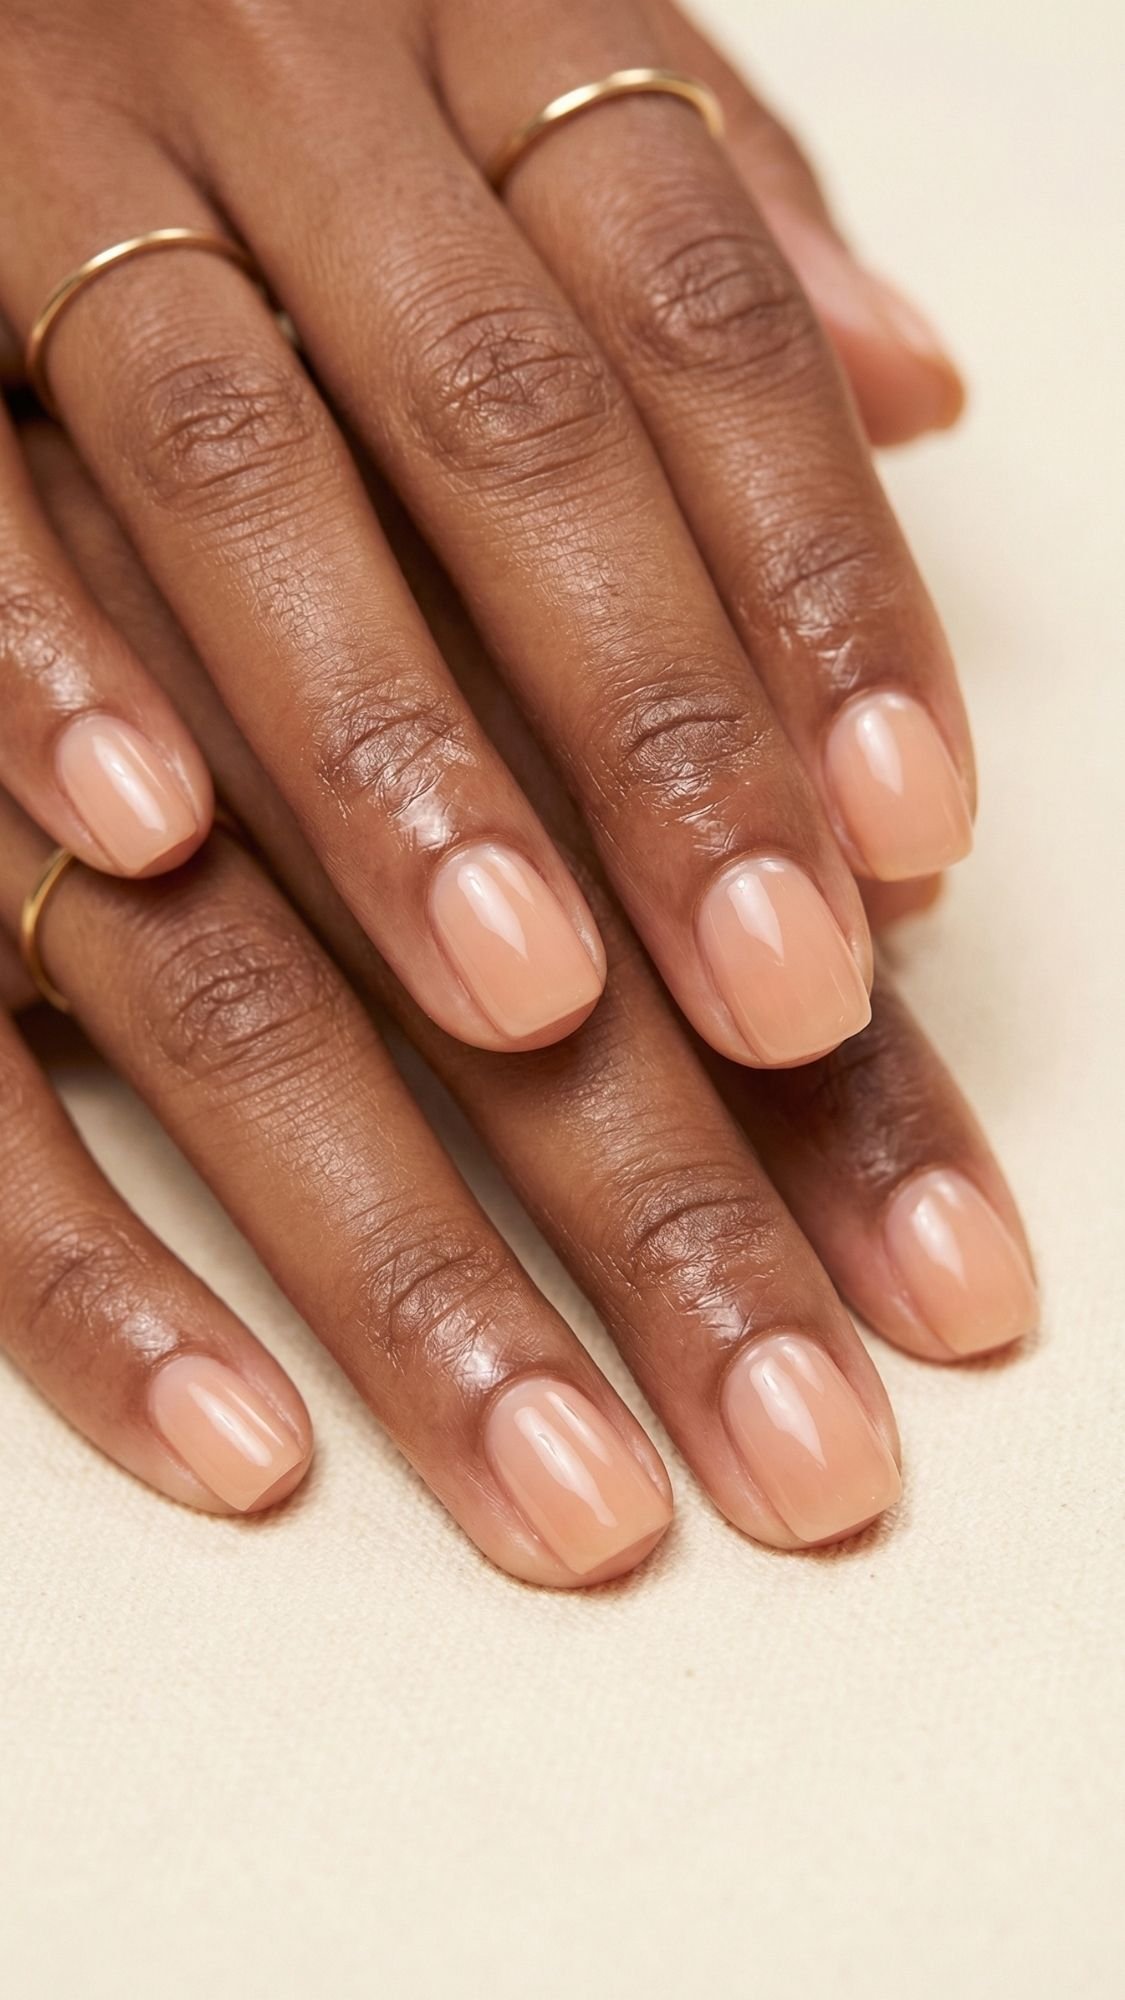
Peachy nude nails give “healthy and awake” energy in the simplest way. I reach for this shade when I want my hands to look warm and soft, especially with gold jewelry and sun-kissed makeup. What I’ve noticed over the years is this, peach nudges your skin tone warmer, so your manicure looks brighter without looking bold. It also hides minor cuticle dryness better than cool beige nudes, because peach does not emphasize gray tones.
How to get the look (DIY regular polish)
- Base coat: Use ridge-filler if you see texture, peach sheers show ridges in bright light.
- Color: Apply 2 thin coats of peachy nude. Keep the first coat sheer, let the second coat even it out.
- Gloss: Add a glossy top coat, then cap the free edge.
Pro technique note: I pick peach nudes that look slightly “creamy-sheer,” not orange. If your peach reads orange on the nail, it usually means the undertone runs too warm for you. I correct it by layering one thin coat of a neutral sheer nude over the peach, then top coat.
Shade guidance (so peach looks flattering on every skin tone)
- Deeper skin tones: try caramel-peach, warm apricot nude, or peachy cocoa sheer. These look sunlit, not chalky.
- Medium skin tones: choose warm beige-peach or soft apricot nude.
- Lighter skin tones: go for sheer peach-pink nude or milky peach blush.
Want an easy rule? If your polish looks like a bright tangerine in the bottle, it probably won’t look like “nude” on the nail.
Common mistake + fix
- Mistake: You apply peach too thick, then it looks streaky and heavy. Fix: Use thinner coats and fewer strokes, then let gloss create the smooth finish.
Key Takeaways
- Peachy nude looks fresh because it adds warmth and softness without looking loud.
- Layering a neutral sheer nude on top can “tone down” a too-bright peach.
- Gloss makes peach look smooth and expensive, matte can make it look flat.
10) Rosewater Sheer Nude (Soft Rosy Tint, “Hydrated Hands” Effect)
Rosewater sheer nude gives you that delicate pinky glow that looks like you just left a fancy nail bar, even if you did it in your kitchen. I love this shade for spring and summer because it reads fresh in natural light and it plays nicely with both silver and gold jewelry. What I’ve noticed over the years is this, rose-toned sheers make cuticles look cleaner and skin look warmer, as long as you keep the coverage translucent. If you push it too opaque, it can start looking like “pink polish,” not nude.
How to get the look (DIY regular polish)
- Base coat: Ridge-filler if you have texture, because rosy sheers can highlight ridges under sunlight.
- Color: Apply 2–3 thin coats of a rosewater sheer nude. Let each coat sit 2–3 minutes so it levels.
- Gloss: Finish with a high-gloss top coat and cap the free edge.
Sensory detail that matters: Rosewater shades look best when the finish feels slick and smooth, not rubbery. If your brush starts to drag and the polish feels tacky while you paint, you used too much product or you went back over semi-set polish.
Shade guidance (so it flatters every skin tone)
- Deeper skin tones: choose rosewater that leans rosy-brown, mauve-rose, or warm berry-nude sheer, not pale baby pink.
- Medium skin tones: go for neutral rosy beige or soft mauve nude sheer.
- Lighter skin tones: try milky rose nude or sheer blush nude.
If your rosewater looks too pink, you can correct it with one thin coat of a neutral sheer beige over it, then top coat. That keeps the rosy glow but pulls it back into nude territory.
Common mistake + fix
- Mistake: You apply thick coats to “even it out,” then it streaks and looks patchy. Fix: Use thinner coats and fewer strokes, and let each layer level before you touch it again.
Key Takeaways
- Rosewater sheer nude looks luxe because it gives a soft tint + high shine without heavy coverage.
- Pick a rosier-brown or mauve-rose version for deeper skin tones to avoid an ashy effect.
- A neutral sheer layer on top can rescue a rose shade that feels too pink.
11) Nude Chrome Glow (Soft “Luminous” Shine, Not Mirror Ball)
Nude chrome glow gives you that light-catching finish that looks insane in sunshine, but still reads neutral. I love this look for spring and summer because it makes even the simplest nude feel intentional. What I’ve noticed over the years is this, most people overdo chrome and end up with a full metallic mirror when they really wanted a soft glow. You want a gentle sheen that looks like light sits on the nail, not like foil.
How to get the look (two ways)
Option A: Chrome powder over a nude base (best glow)
- Base coat + nude: Apply your nude, 2 thin coats, then let it dry fully.
- Top coat for “grip”: Apply a top coat that dries to a slightly tacky finish, not wet.
- Buff chrome: Use an eyeshadow sponge applicator and buff a tiny amount of chrome powder lightly over the nail.
- Seal: Apply top coat again, cap the free edge, then let it set.
Pro technique note: I use less powder than I think I need. Chrome builds fast. If I want a softer glow, I only buff the center of the nail and I keep edges more sheer.
Option B: Pearl or shimmer topper over nude (easiest, most beginner-friendly)
- Paint a sheer or creamy nude.
- Apply one thin layer of a pearl shimmer topper.
- Seal with glossy top coat.
This route gives you the “glazed” vibe without extra tools, and it looks smoother if you hate texture.
Shade guidance (so chrome stays flattering)
- Warm undertones: choose a nude base that leans caramel, honey beige, or warm peach, then use a champagne or warm pearl glow.
- Cool undertones: use a rosy nude base, then a soft pink pearl glow.
- Neutral undertones: pick a balanced beige base, then an opalescent pearl.
If your chrome looks icy or gray on deeper skin, your base likely runs too pale. I fix that by switching to a sheer cocoa or caramel nude, then adding glow on top.
Common mistake + fix
- Mistake: You apply too much powder, then the finish looks streaky or too metallic. Fix: Buff lightly, dust off excess, then seal. You can always add a second whisper layer if you want more shine.
Safety note (quick, but important)
If you use gel top coat with chrome, avoid skin contact. Allergic reactions can happen with repeated exposure. If you ever notice itching, redness, or burning around nails, stop and see a professional.
Key Takeaways
- Nude chrome looks luxe when it reads luminous, not fully metallic.
- A slightly deeper nude base keeps glow from looking ashy on deeper skin tones.
- Less powder, more shine. The top coat does a lot of the visual work.
12) Opalescent Nude Veil (Soft Rainbow Sheen, Still Nude)
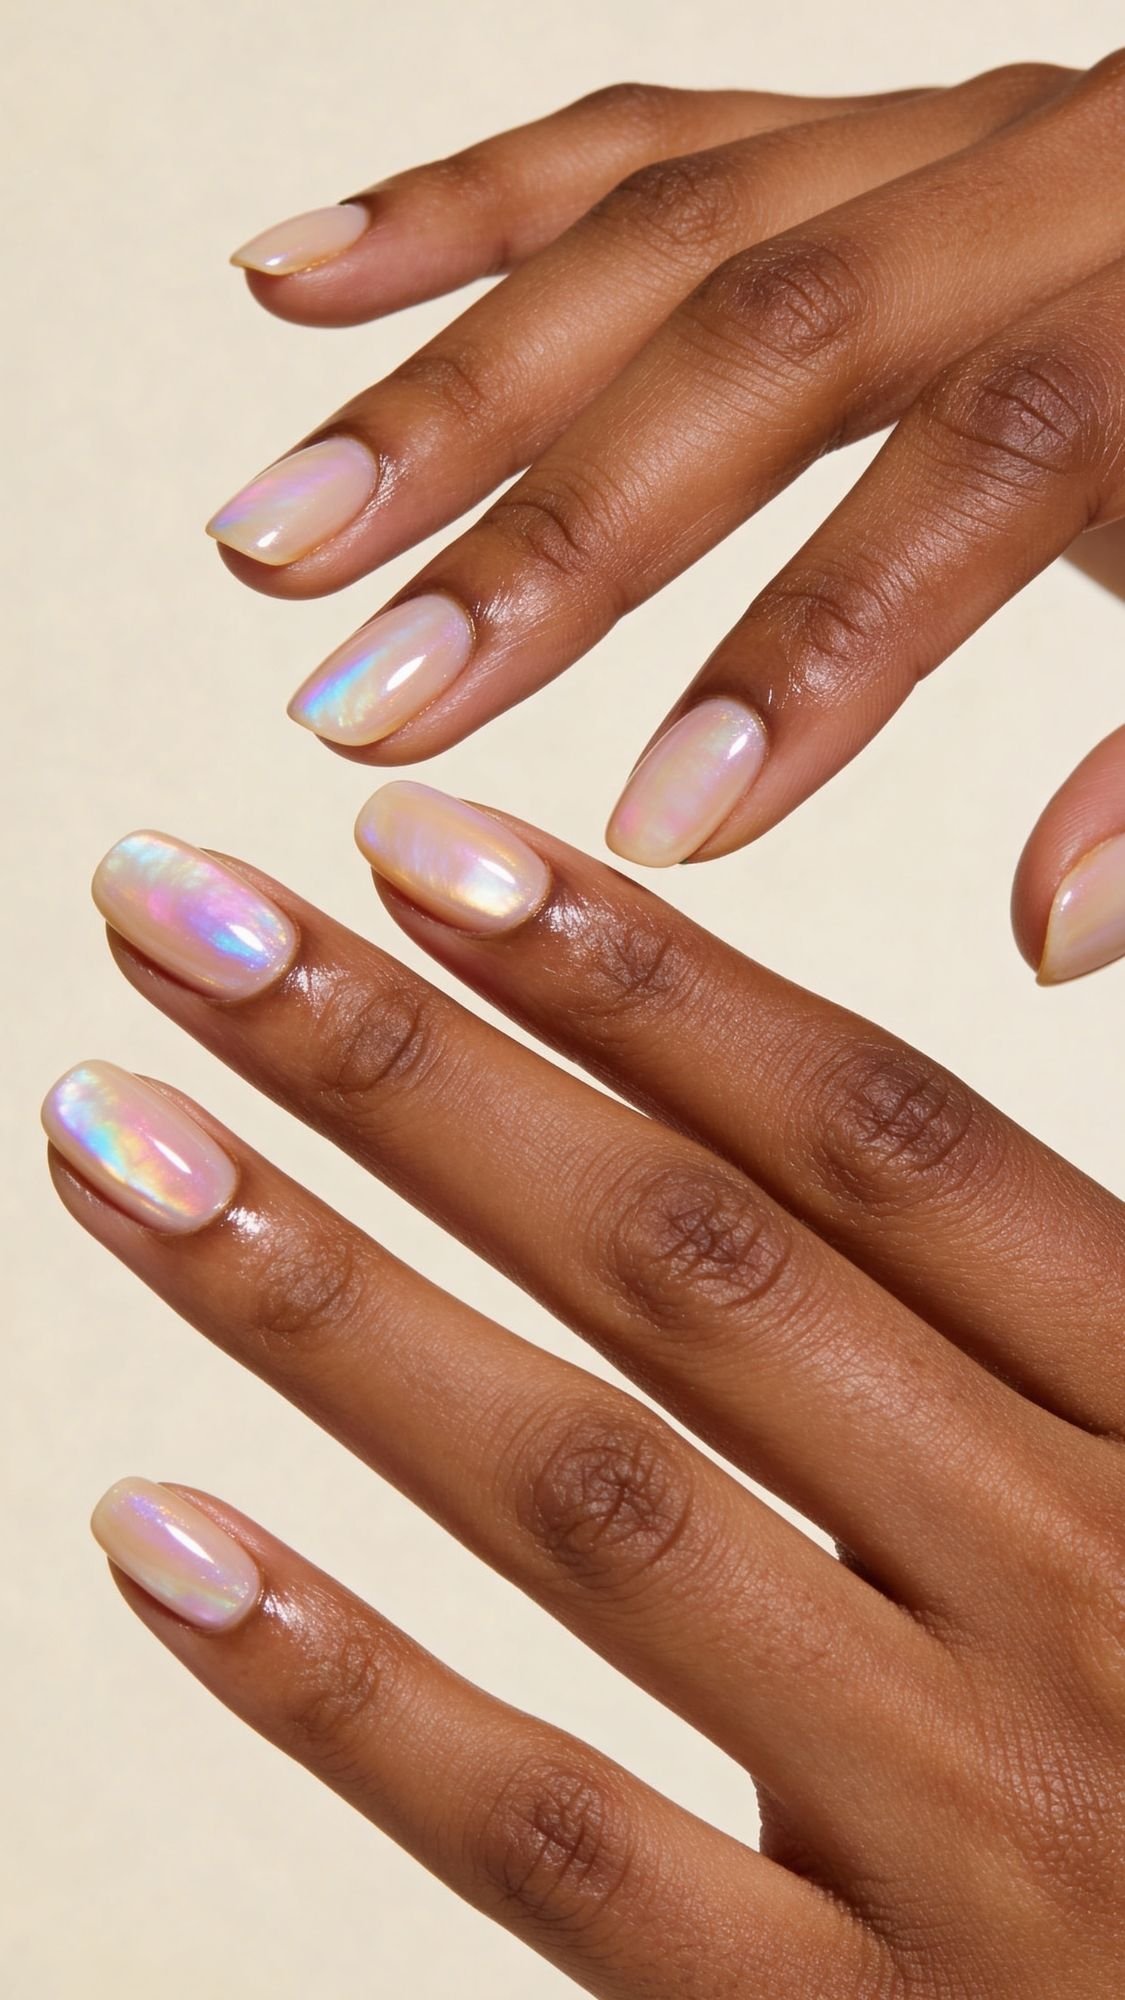
Opalescent nude veil is for the days you want something extra, but you still want it to read neutral. Think “pearl glow,” “soft rainbow,” “light hitting a seashell,” but subtle. I love this for spring and summer because sunlight brings the shimmer to life, and indoors it still looks like a clean nude manicure. What I’ve noticed over the years is this, opalescent toppers look best over a sheer nude, because you get depth. If you slap them over thick, opaque nude, the finish can look flat or a little frosty.
How to get the look (DIY regular polish)
- Base coat: Ridge-filler if you have texture, shimmer highlights bumps.
- Nude base: Apply a sheer nude or milky nude, 2 thin coats.
- Opalescent veil: Apply one very thin coat of an opalescent topper. You want a whisper of shimmer, not chunky glitter.
- Seal: High-gloss top coat, cap the free edge.
Pro technique note: I apply the topper with a light hand and fewer strokes, because opalescent shimmer can bunch up if you over-brush. I also keep shimmer mostly centered on the nail for a smoother, more “lit from within” look.
Shade guidance (so it flatters every skin tone)
- Deeper skin tones: choose an opalescent topper that reflects gold, champagne, or warm pearl, and pair it with a caramel or cocoa sheer nude.
- Medium skin tones: balanced beige nude + pearl-opal topper looks soft and bright.
- Lighter skin tones: milky blush nude + opal topper keeps it airy.
If the shimmer looks icy on you, warm up the base. That one change usually fixes it.
Common mistake + fix
- Mistake: You use too much topper and it looks glittery or uneven. Fix: Wipe most product off the brush, then apply a single thin coat. Add more only if needed after it sets.
Key Takeaways
- Opalescent nude looks best as a veil, not a glitter bomb.
- Sheer nude base creates depth and keeps shimmer flattering.
- Warm bases prevent an icy look on deeper skin tones.
13) Velvet Cat-Eye Nude (That Soft “Lit From Within” Shift)
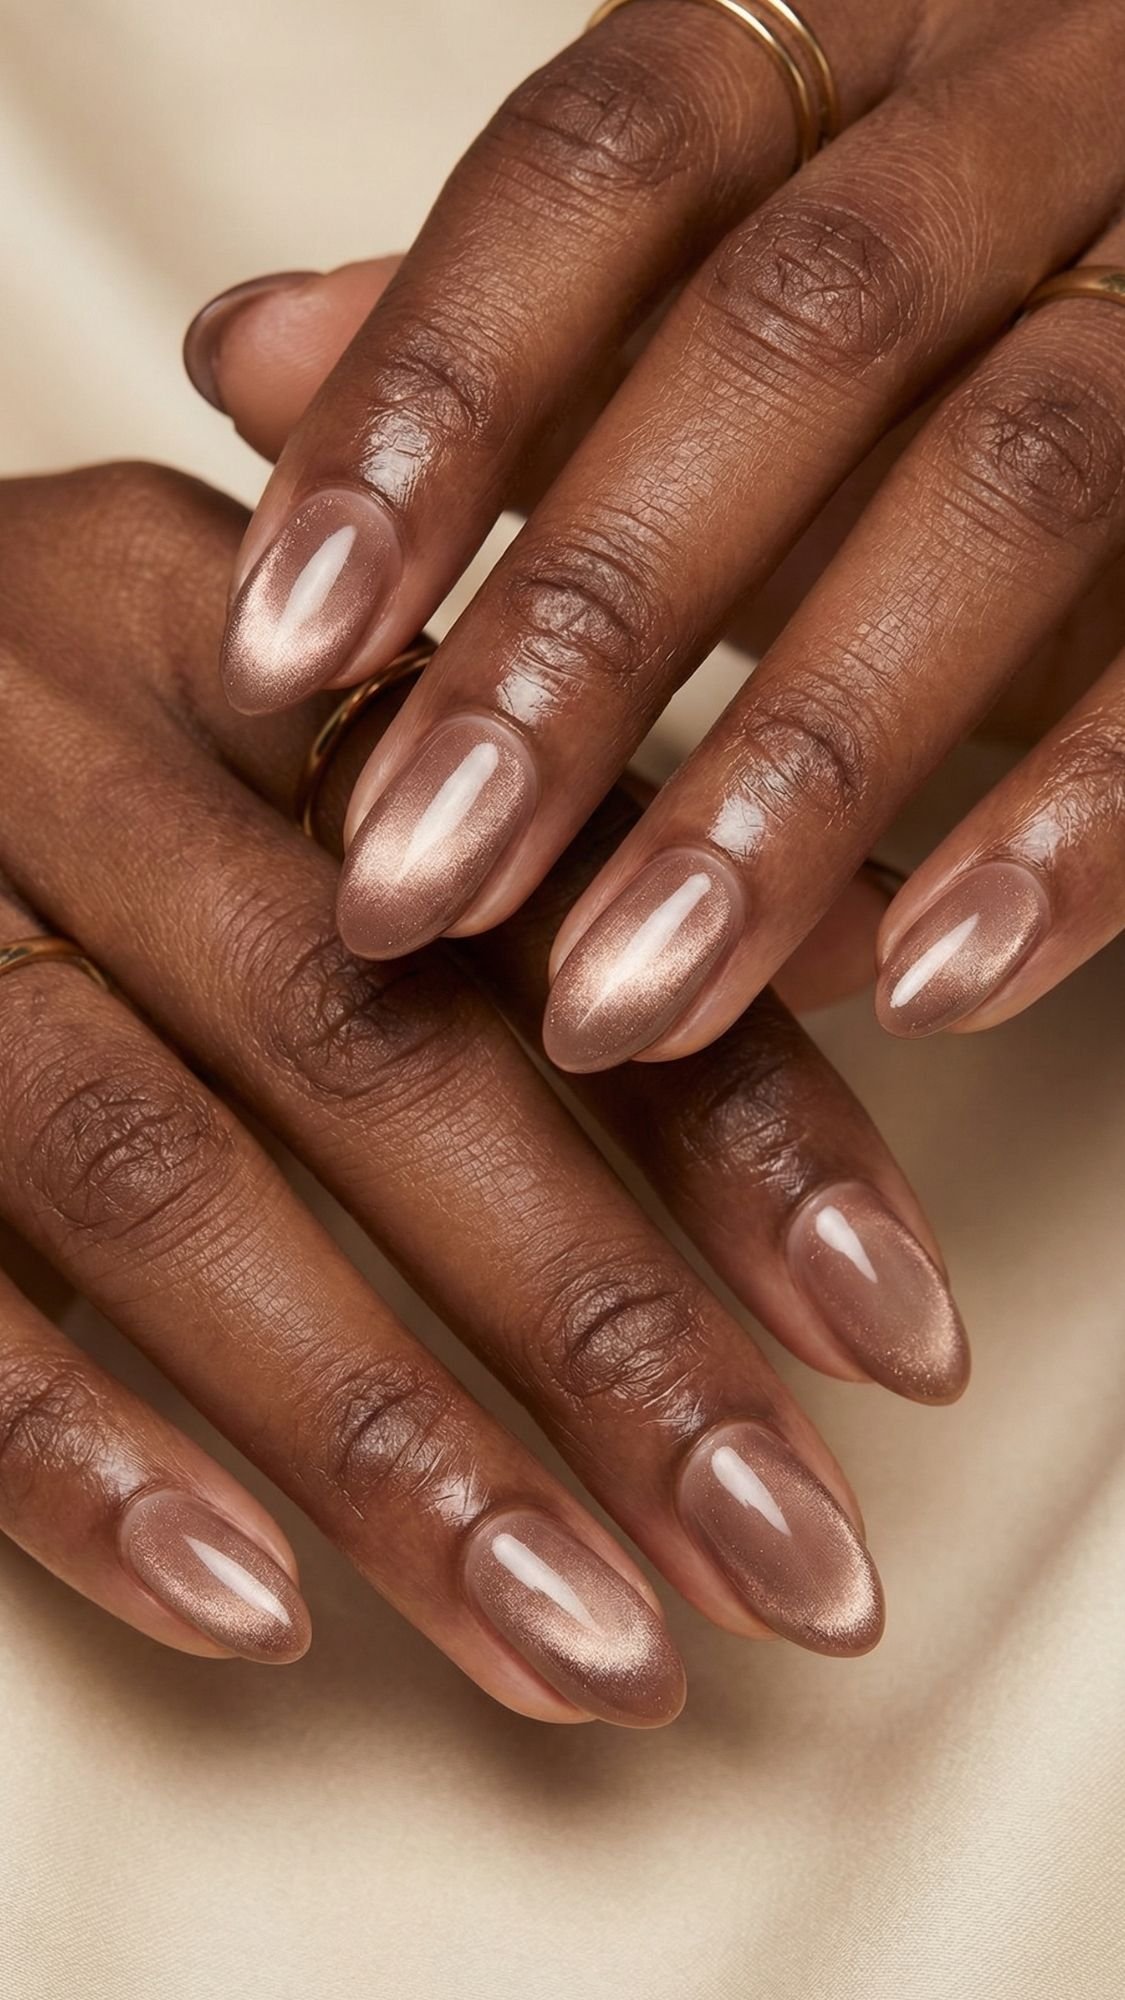
Velvet cat-eye nude gives you that plush, glowy stripe that moves when your hand moves. It looks expensive in photos and even better in sunlight, because the shimmer shifts instead of screaming glitter. What I’ve noticed over the years is this, cat-eye looks most luxe when the base stays nude and the shimmer stays soft, not when it turns into a dark metallic. Think “velvet highlight,” not “chrome mirror.” If you want a nude that still feels interesting for spring and summer, this one hits.
How to get the look (two easy routes)
Option A: Magnetic polish, no lamp (beginner-friendly)
- Base coat: Thin layer, let it set.
- Magnetic nude polish: Apply one thin coat, then a second coat you work one nail at a time.
- Magnet: Hold the magnet close to the nail, about 2 to 5 mm away, for 10 to 20 seconds before it starts to set.
- Top coat: Seal and cap the free edge.
Sensory detail: Magnetic polish often feels a little thicker and “syrupy” than regular shimmer polish. If it feels watery, the effect can look weak. If it feels too thick, you probably used too much and it will dent.
Option B: Cat-eye gel with a lamp (strongest velvet effect)
- Apply gel base and cure.
- Apply cat-eye gel, one nail at a time.
- Hold magnet close for 10 to 20 seconds, then cure immediately.
- Seal with gel top coat and cure.
Safety note: Keep gel off your skin. Repeated skin contact can increase allergy risk. If you ever get itching, redness, or burning around your nails, stop and talk to a professional.
Pro technique note (this is the trick)
I angle the magnet instead of holding it flat. A slight tilt creates that soft “velvet stripe” instead of a harsh line. I also keep the stripe slightly off-center, because it makes fingers look longer and the effect looks more editorial.
Shade guidance (so it stays nude, not muddy)
- Deeper skin tones: cocoa nude base with a warm champagne or bronze velvet shift.
- Medium skin tones: milk-tea nude base with a soft rose-gold or champagne shift.
- Lighter skin tones: beige-pink nude base with a pearl-champagne shift.
If your cat-eye looks gray, your base runs too cool or too light. Switch to a warmer nude base and the whole look changes.
Common mistake + fix
- Mistake: You wave the magnet around and the line looks messy. Fix: Hold it still, count to 15, then move on. Consistency beats creativity here.
- Mistake: You magnetize, then wait too long and it “spreads” back out. Fix: Work one nail at a time and seal or cure right away.
Key Takeaways
- Velvet cat-eye looks luxe when the shift stays soft and satin-like.
- Work one nail at a time, hold the magnet still for 10 to 20 seconds.
- A warmer nude base keeps the effect flattering, especially on deeper skin tones.
14) Nude Aura Nails (Soft Halo Glow, Like Your Nails Have a Filter)

Nude aura nails look like a gentle glow sits right in the center of each nail, kind of like a spotlight but subtle. I love this for spring and summer because it feels airy and modern, and it makes short nails look a little more dimensional without “busy” art. What I’ve noticed over the years is this, aura nails look the most expensive when the halo stays soft and slightly blurred, not when the center looks like a hard circle. You want a diffused glow that melts into the nude base. Ever see aura nails that look like a target? Yeah, we’re avoiding that.
How to get the look (DIY regular polish, no lamp)
- Base: Apply a sheer nude or milky nude base, 2 thin coats.
- Glow color: Pick a slightly deeper nude, soft peach, or rosy nude for the center.
- Blend: Use a tiny makeup sponge or eyeshadow applicator, dab the center color lightly in the middle of the nail.
- Soften edges: Tap outward with a clean part of the sponge so the edges blur into the base.
- Seal: Top coat and cap the free edge.
Pro technique note: I keep the center color sheer, then I build it up in two light rounds. If I try to make the glow strong in one pass, I get patchiness and harsh edges.
Shade combos that always look good
- Caramel nude base + cocoa center glow for deeper skin tones
- Milk-tea nude base + peachy glow for a fresh spring vibe
- Rosy nude base + slightly deeper rosy center for a soft romantic look
Common mistake + fix
- Mistake: The center looks like a stamped circle. Fix: Use less product on the sponge, then tap the edges outward until you lose the hard boundary.
- Mistake: The blend looks chalky. Fix: Switch to a jelly or sheer center shade, then build slowly.
Key Takeaways
- Aura nails look luxe when the glow stays soft and blurred, not sharp.
- Two light rounds blend better than one heavy round.
- A glossy top coat melts the gradient visually and makes it look cleaner.
15) Nude Skittle Set (Five Nudes, One Perfect Palette)
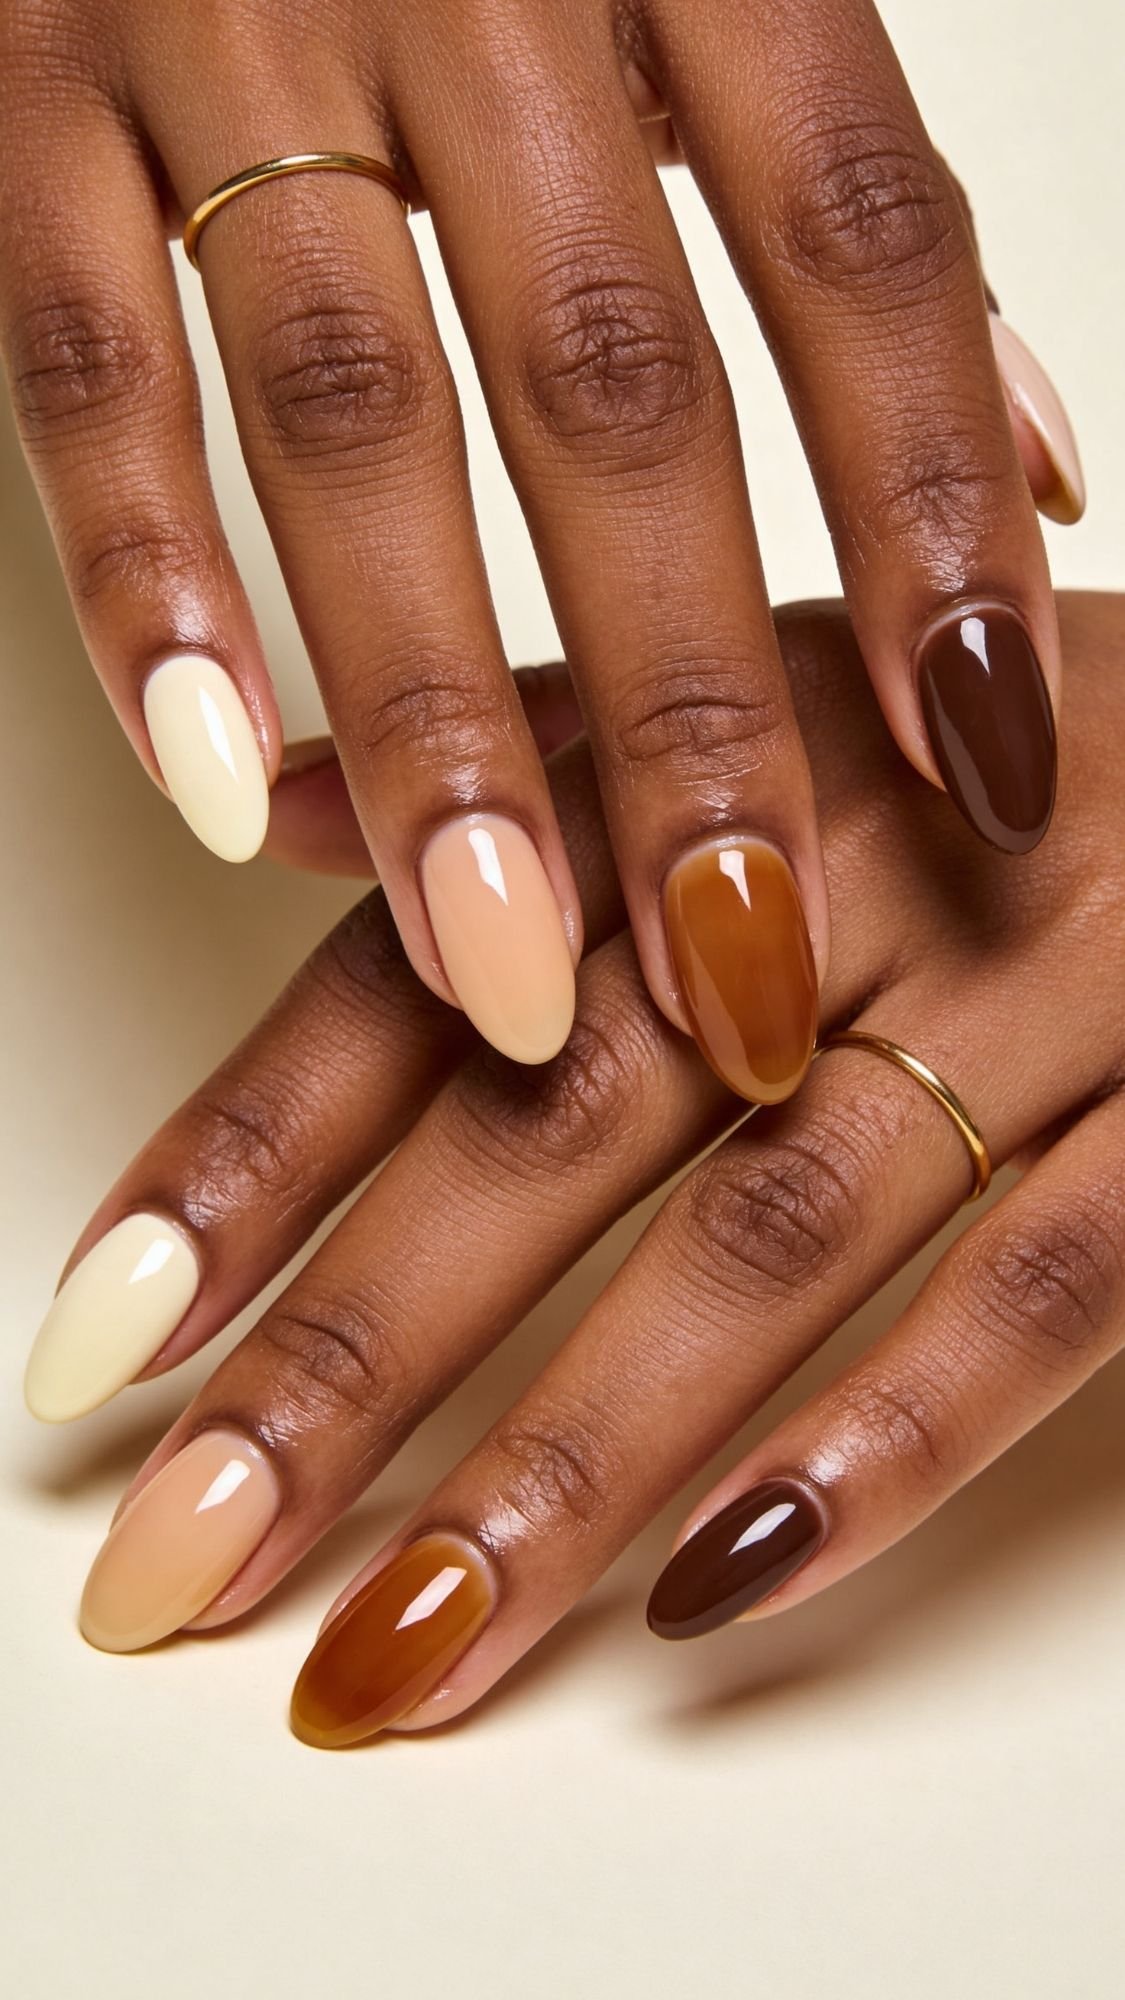
A nude skittle set means each nail gets a slightly different nude, but the whole hand still looks cohesive. I love this for spring and summer because it feels playful without looking loud, and it saves you from the “I can’t pick one nude” spiral. What I’ve noticed over the years is this, skittle sets look chic when all the shades share the same undertone family. If you mix warm caramel, cool pink-beige, and gray-taupe on one hand, your manicure looks accidental instead of curated. Do you want the easiest way to make it look intentional? Keep the finishes the same, then vary only depth.
How to build a skittle set that looks expensive
- Pick one undertone lane, warm, cool, or neutral.
- Choose 5 shades in that lane, from lightest to deepest.
- Keep one finish across all nails, glossy, sheer-gloss, or soft shimmer. Gloss looks the most “expensive” on nude skittles because it unifies everything.
Shade map ideas (so you can copy and paste the vibe)
- Warm skittle: milky caramel, honey beige, warm latte, soft cocoa, deep cocoa sheer
- Cool skittle: rosy nude, mauve nude, pink-beige, taupe-rose, deeper rosy-brown
- Neutral skittle: milk-tea nude, beige nude, balanced tan, soft taupe, sheer cocoa
Pro technique note (this keeps it from looking messy)
I put the lightest shade on the pinky, then I build darker shades toward the thumb. That layout makes the gradient feel natural, and it makes hands look longer. I also keep the “oddest” shade, like the taupe or the mauve, on the middle finger so it reads like a deliberate accent.
Common mistake + fix
- Mistake: You pick five random nudes and they clash. Fix: Match undertone first, then choose depth steps that feel even.
- Mistake: One nail looks streaky and ruins the set. Fix: Use a ridge-filling base under the sheer or milky shades, then keep coats thin.
Key Takeaways
- A skittle set looks polished when you stick to one undertone family.
- Gloss unifies the hand, even when shades differ.
- Arrange shades from light to deep to make the look feel intentional.
16) Nude with Gold Foil “Sand Sparkle” (Tiny Shine, Maximum Luxe)
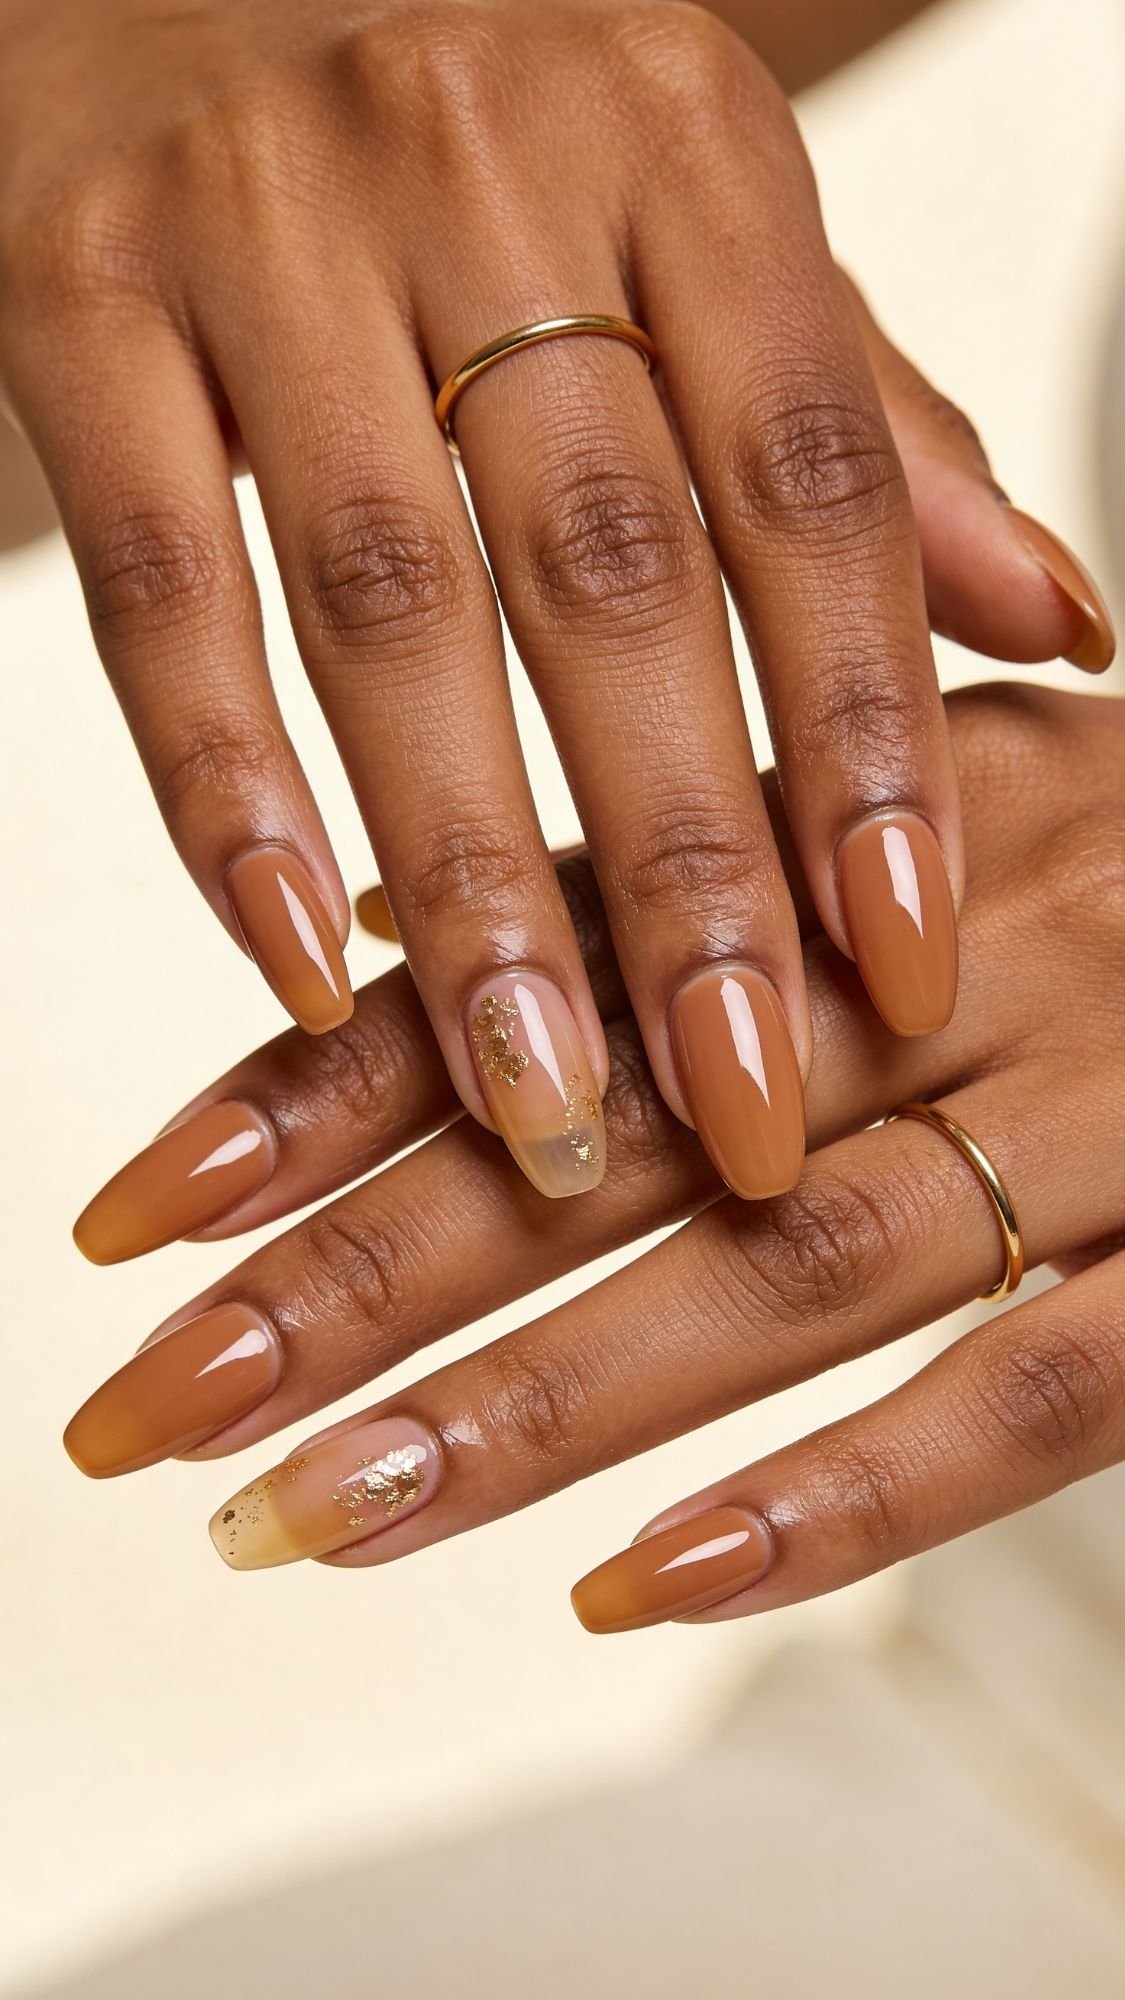
This design gives you that “expensive vacation manicure” vibe without turning your nails into a glitter situation. I love nude with gold foil for spring and summer because it catches sunlight in a soft, scattered way, like jewelry for your nails. What I’ve noticed over the years is this, foil looks chic when you use less than you think you need. If you pack it on, it can look chunky or messy fast, especially on a nude base that shows everything. Do you want the easiest way to keep it classy? Place foil like you place highlighter, strategically, not everywhere.
Tools you need
- Tweezers or a wax pickup tool (even a slightly damp toothpick works in a pinch)
- Gold foil flakes or foil pieces
- A top coat that seals well
Step-by-step (DIY regular polish)
- Paint your nude base, 2 thin coats, then let it set for 3–5 minutes.
- Add a thin layer of top coat or clear polish where you want foil, usually near the cuticle or along one side.
- Drop 1–3 tiny foil pieces onto the tacky area.
- Tap the foil down flat with a finger pad or silicone tool so it does not stick up.
- Seal with a generous glossy top coat, then cap the free edge.
Pro technique note: I keep foil away from the very edge of the nail. Foil at the tip catches hair, snags fabric, and starts lifting first.
Placement ideas that always look intentional
- Cuticle halo: a few flakes near the cuticle, fading upward
- Side sweep: foil along one sidewall for an elongating effect
- One accent nail: foil only on ring fingers, keep the rest plain nude
Shade guidance (so gold looks flattering)
- Deeper skin tones: caramel nude, cocoa nude, warm beige, gold foil looks rich and glowy.
- Cool undertones: choose a rosy nude base so the gold still feels balanced.
- Neutral undertones: milk-tea nude with gold foil reads clean and modern.
Common mistake + fix
- Mistake: Foil sticks up, then top coat cannot seal it, so it lifts. Fix: Press foil flat before sealing, then use a thicker top coat layer to encapsulate it.
- Mistake: You use too much foil and it looks messy. Fix: Use fewer pieces and group them in one area, negative space makes it look curated.
Key Takeaways
- Gold foil looks luxe when it stays sparse and intentional.
- Press foil flat and seal well, or it will snag and lift.
- Keep foil away from the tip if you want this to last.
17) Nude Half-Moon Detail (Subtle Shape Trick That Looks So Editorial)
Half-moon nude nails give you a tiny design moment right near the cuticle, and it instantly looks intentional without feeling loud. I love this for spring and summer because it reads clean, modern, and a little artsy, like you meant to do it, not like you got bored mid-manicure. What I’ve noticed over the years is this, half-moon designs look the most flattering when the curve mirrors your natural cuticle shape. If the half-moon sits too high or too sharp, it looks off. Do you want a sneaky bonus? This design can make nails look longer because it draws the eye upward.
Tools you need
- Dotting tool or small detail brush
- Optional: round sticker guides (like tiny reinforcement rings) for clean curves
Step-by-step (DIY regular polish)
- Paint your nude base, 2 thin coats, then let it set.
- Decide your half-moon placement: right at the cuticle, following the natural curve.
- Use a dotting tool or detail brush to paint a curved half-moon in:
- a slightly deeper nude, or
- a milky lighter nude, or
- a soft metallic nude for a tiny glow
- Let it dry, then seal with glossy top coat and cap the free edge.
Pro technique note: I prefer tone-on-tone half-moons for nude manis, meaning the half-moon shade stays in the same nude family. It looks expensive and subtle, not like a color-block design.
Shade pairings that always work
- Sheer caramel base + cocoa half-moon
- Milky nude base + creamy beige half-moon
- Rosy nude base + mauve-nude half-moon
Common mistake + fix
- Mistake: The curve looks uneven between nails. Fix: Use a small sticker guide, or draw a tiny dot in the center first, then connect the curve from both sides.
- Mistake: Polish floods the cuticle area. Fix: Use less product on the brush, and start the curve slightly away from the skin, then refine with cleanup brush.
Key Takeaways
- Half-moon detail looks chic because it’s minimal, structured, and clean.
- Tone-on-tone keeps it nude and wearable for everyday.
- Matching the cuticle curve makes the design look professional.
18) Nude “Clean Outline” Edges (The Sneaky Trick That Makes Nails Look Sharp)
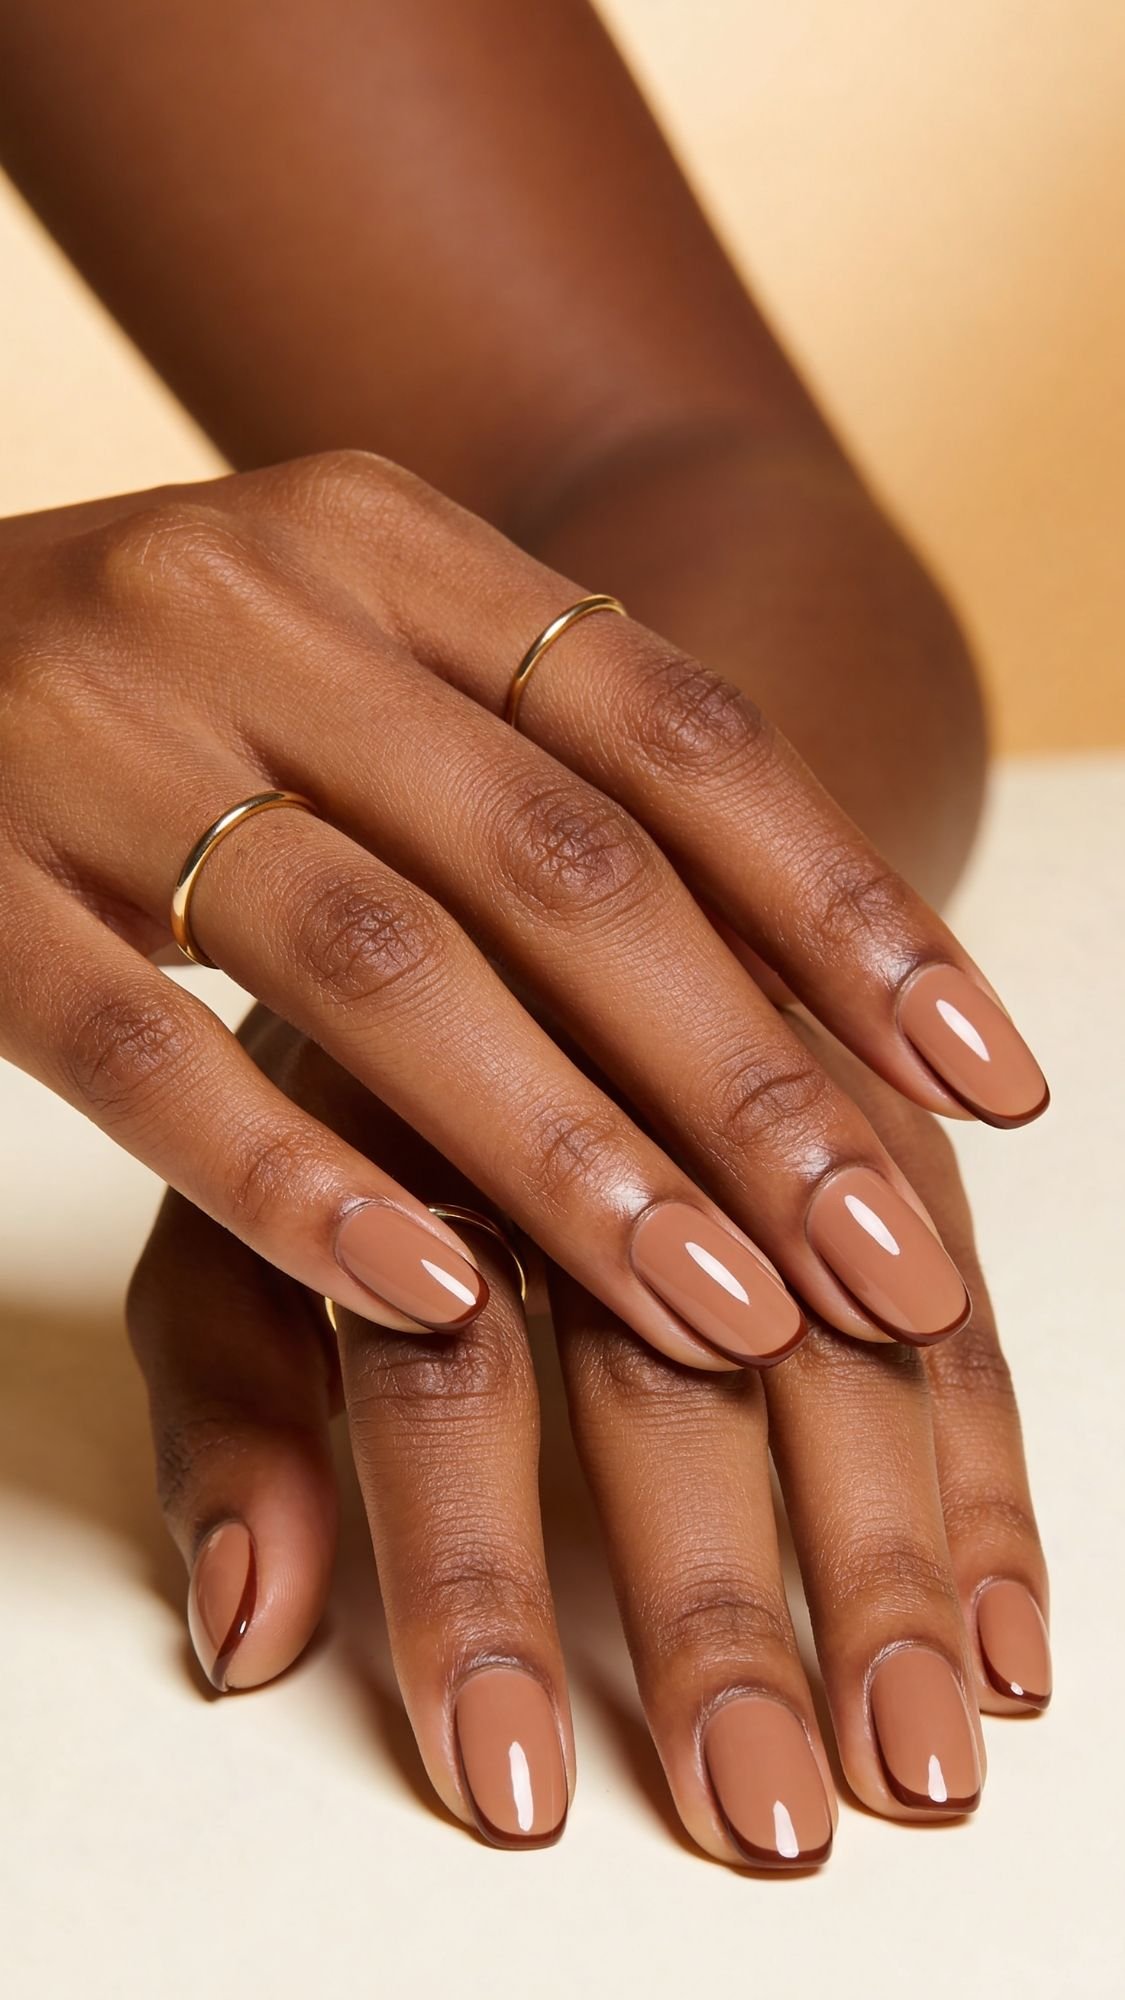
Clean outline nude nails are one of my favorite low-key “editorial” tricks. You outline parts of the nail with a slightly deeper nude, and suddenly your manicure looks intentional and ultra polished. I love this for spring and summer because it feels minimal, it photographs beautifully, and it makes even short nails look more defined. What I’ve noticed over the years is this, outline designs only look expensive when the lines stay thin and clean. If the outline gets thick, it starts looking cartoonish. So we go delicate.
Tools you need
- A striping brush or ultra-thin detail brush
- A slightly deeper nude polish than your base
- Cleanup brush + acetone (this matters)
Step-by-step (DIY regular polish)
- Paint your nude base, 2 thin coats, and let it set.
- Pick your outline shade: usually one to two shades deeper than the base, same undertone family.
- Use a striping brush to draw:
- a thin line along one side of the nail, or
- a thin line around the tip edge, or
- a partial outline that frames only the upper half
- Clean edges with a small cleanup brush dipped in acetone.
- Seal with glossy top coat and cap the free edge.
Pro technique note: I outline only one sidewall, not both, because it creates an elongating shadow effect. It’s like contouring, but for nails. Subtle, but it works.
Outline ideas that look the most wearable
- Side contour: one thin line along the side of each nail
- Tip frame: outline only the tip edge for a sharper shape
- Accent outline: outline only two nails, keep the rest plain nude
Common mistake + fix
- Mistake: The line wobbles and looks uneven. Fix: Rest your painting hand on the table, brace with your pinky, and use a brush with minimal polish. Less product gives you more control.
- Mistake: The outline looks too dark or harsh. Fix: Swap to a shade closer to your base, or use a sheer nude as the outline so it feels softer.
Key Takeaways
- Clean outline edges add definition with almost no effort.
- Thin lines look luxe, thick lines look messy.
- A slightly deeper nude outline can make fingers look longer.
19) Nude Marble Swirl (Soft, Airy, Not “Busy”)
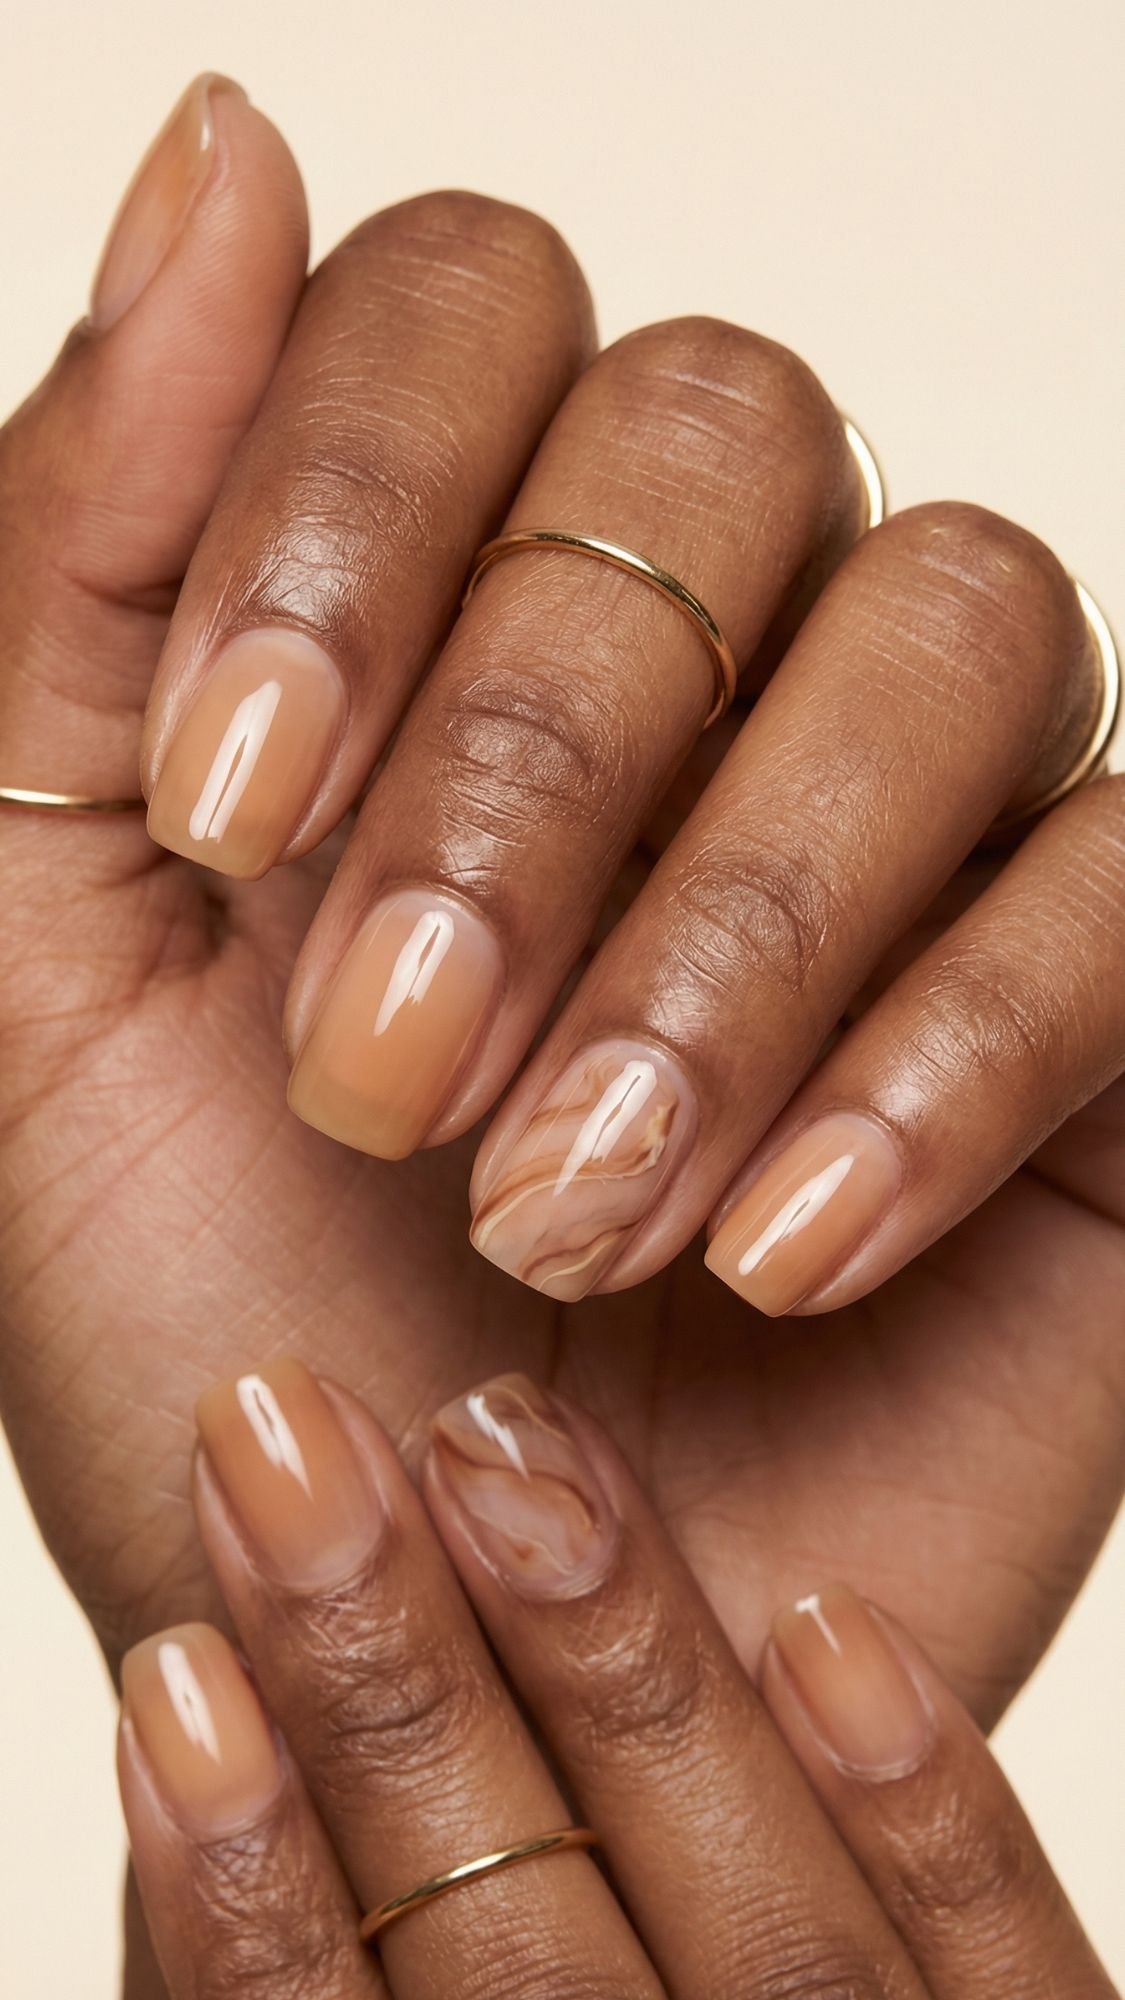
Nude marble swirl gives you that little design moment that still feels neutral and wearable. I love this for spring and summer because it looks light and modern, not heavy. What I’ve noticed over the years is this, marble looks expensive when the lines stay thin and the negative space stays open. If you overpack the swirl or use too many colors, it starts looking like a coffee spill. We want “soft stone,” not “oops.”
Tools you need
- A thin nail art brush or toothpick
- Two nude tones (one base nude, one slightly deeper)
- Optional: a milky white or cream for a third whisper tone
- Top coat for blending
Step-by-step (easy regular polish marble)
- Paint your nude base, 2 thin coats, and let it get tacky, not fully hard.
- On one or two accent nails, add tiny dots or short strokes of a deeper nude and a whisper of milky cream.
- Use a thin brush or toothpick to lightly drag and swirl the dots into thin marble lines.
- Add a glossy top coat to soften the lines and smooth the surface.
Pro technique note: I do marble on 1–2 nails per hand, max. Nude marble looks more editorial when it stays minimal. I also keep the swirl toward one side, so it elongates the nail instead of chopping it visually.
Marble combos that stay nude and flattering
- Caramel base + cocoa swirl + cream whisper
- Milky nude base + beige swirl + soft white whisper
- Rosy nude base + mauve swirl + cream whisper
Common mistake + fix
- Mistake: The swirl looks muddy and thick. Fix: Use less polish, make thinner lines, and stop sooner. Marble looks better when you leave space.
- Mistake: The design looks raised or textured. Fix: Use a leveling top coat and float it on. Do not press hard or you will drag the design.
Key Takeaways
- Nude marble looks luxe when it stays light, airy, and minimal.
- One or two accent nails keeps it chic.
- Top coat “melts” the swirl and makes it look smoother.
20) Nude with Tiny White Dots (Minimal, Cute, and Impossible to Mess Up)
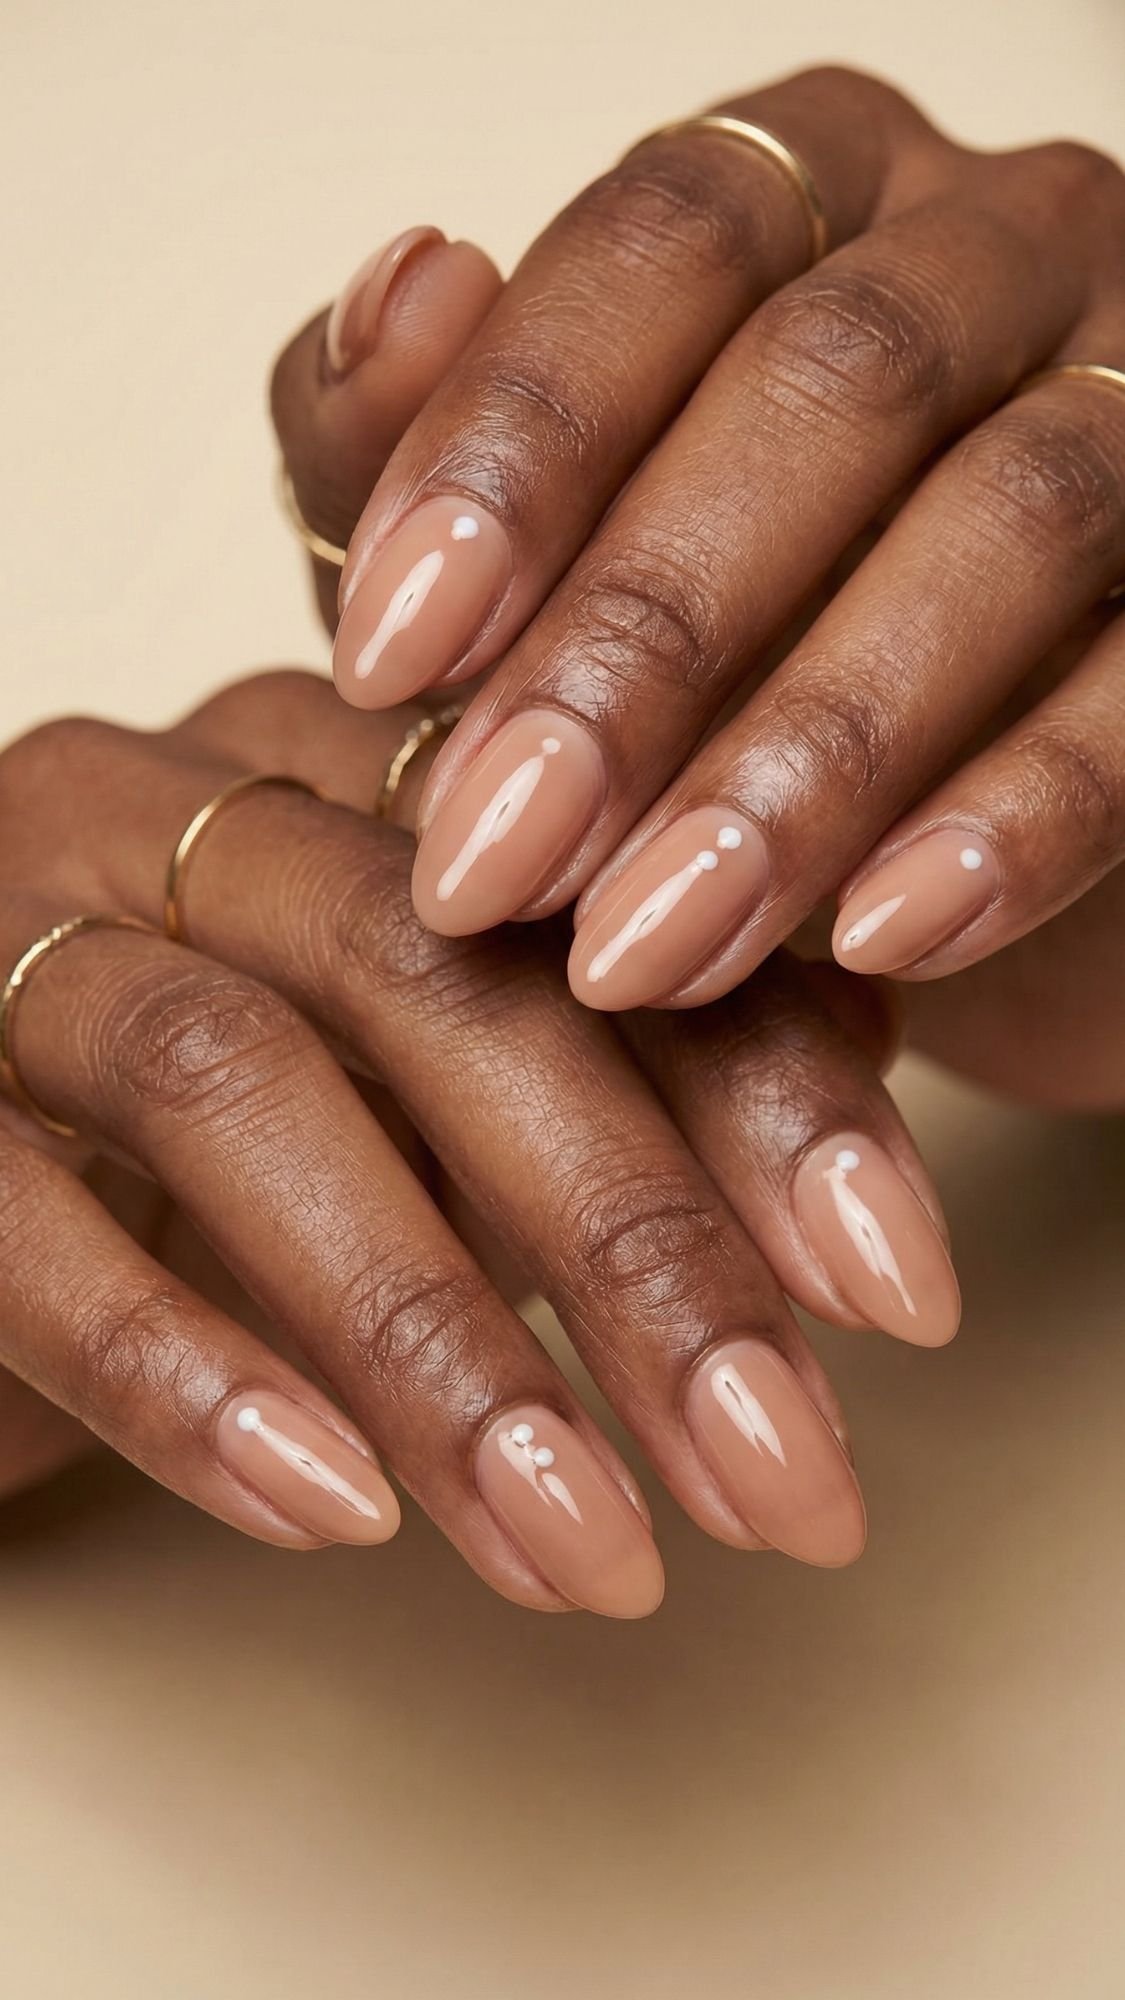
Tiny white dots on a nude base look clean, playful, and a little artsy without trying too hard. I love this for spring and summer because it reads fresh, and it still matches everything. What I’ve noticed over the years is this, dots look chic when they’re small and spaced out. If the dots get too big or too many, the design starts feeling busy. This is one of those nail looks that makes people ask, “Where did you get those done?” even when you did it at home.
Tools you need
- Dotting tool, bobby pin, or the blunt end of a hair pin
- White polish or soft cream polish
- Cleanup brush (optional, but helpful)
Step-by-step (DIY regular polish)
- Paint your nude base, 2 thin coats, and let it dry enough that it won’t smudge.
- Dip your dotting tool into white polish, then wipe off excess so the dot stays small.
- Add dots in one of these patterns:
- One dot per nail near the cuticle, super minimal
- Two dots diagonally across the nail
- Cluster of three on accent nails only
- Seal with glossy top coat and cap the free edge.
Pro technique note: I test dot size on a piece of foil first. If the dot looks like a blob, I wipe the tool and try again. Control matters more than speed here.
Design variations that stay classy
- Use cream instead of bright white for a softer look.
- Put dots only on two accent nails and leave the rest plain nude.
- Place dots slightly off-center to elongate the nail.
Common mistake + fix
- Mistake: The dots smear when you top coat. Fix: Let the dots dry longer, then float top coat lightly without dragging.
- Mistake: Dots come out too big. Fix: Use less polish on the tool, and touch the nail gently, no pressure.
Key Takeaways
- Tiny dots look best when they stay small, spaced, and intentional.
- Cream dots feel softer than bright white.
- Float your top coat to avoid dragging the dots.
21) Nude Floral Micro Art (One Tiny Flower, Big “Soft Girl” Energy)
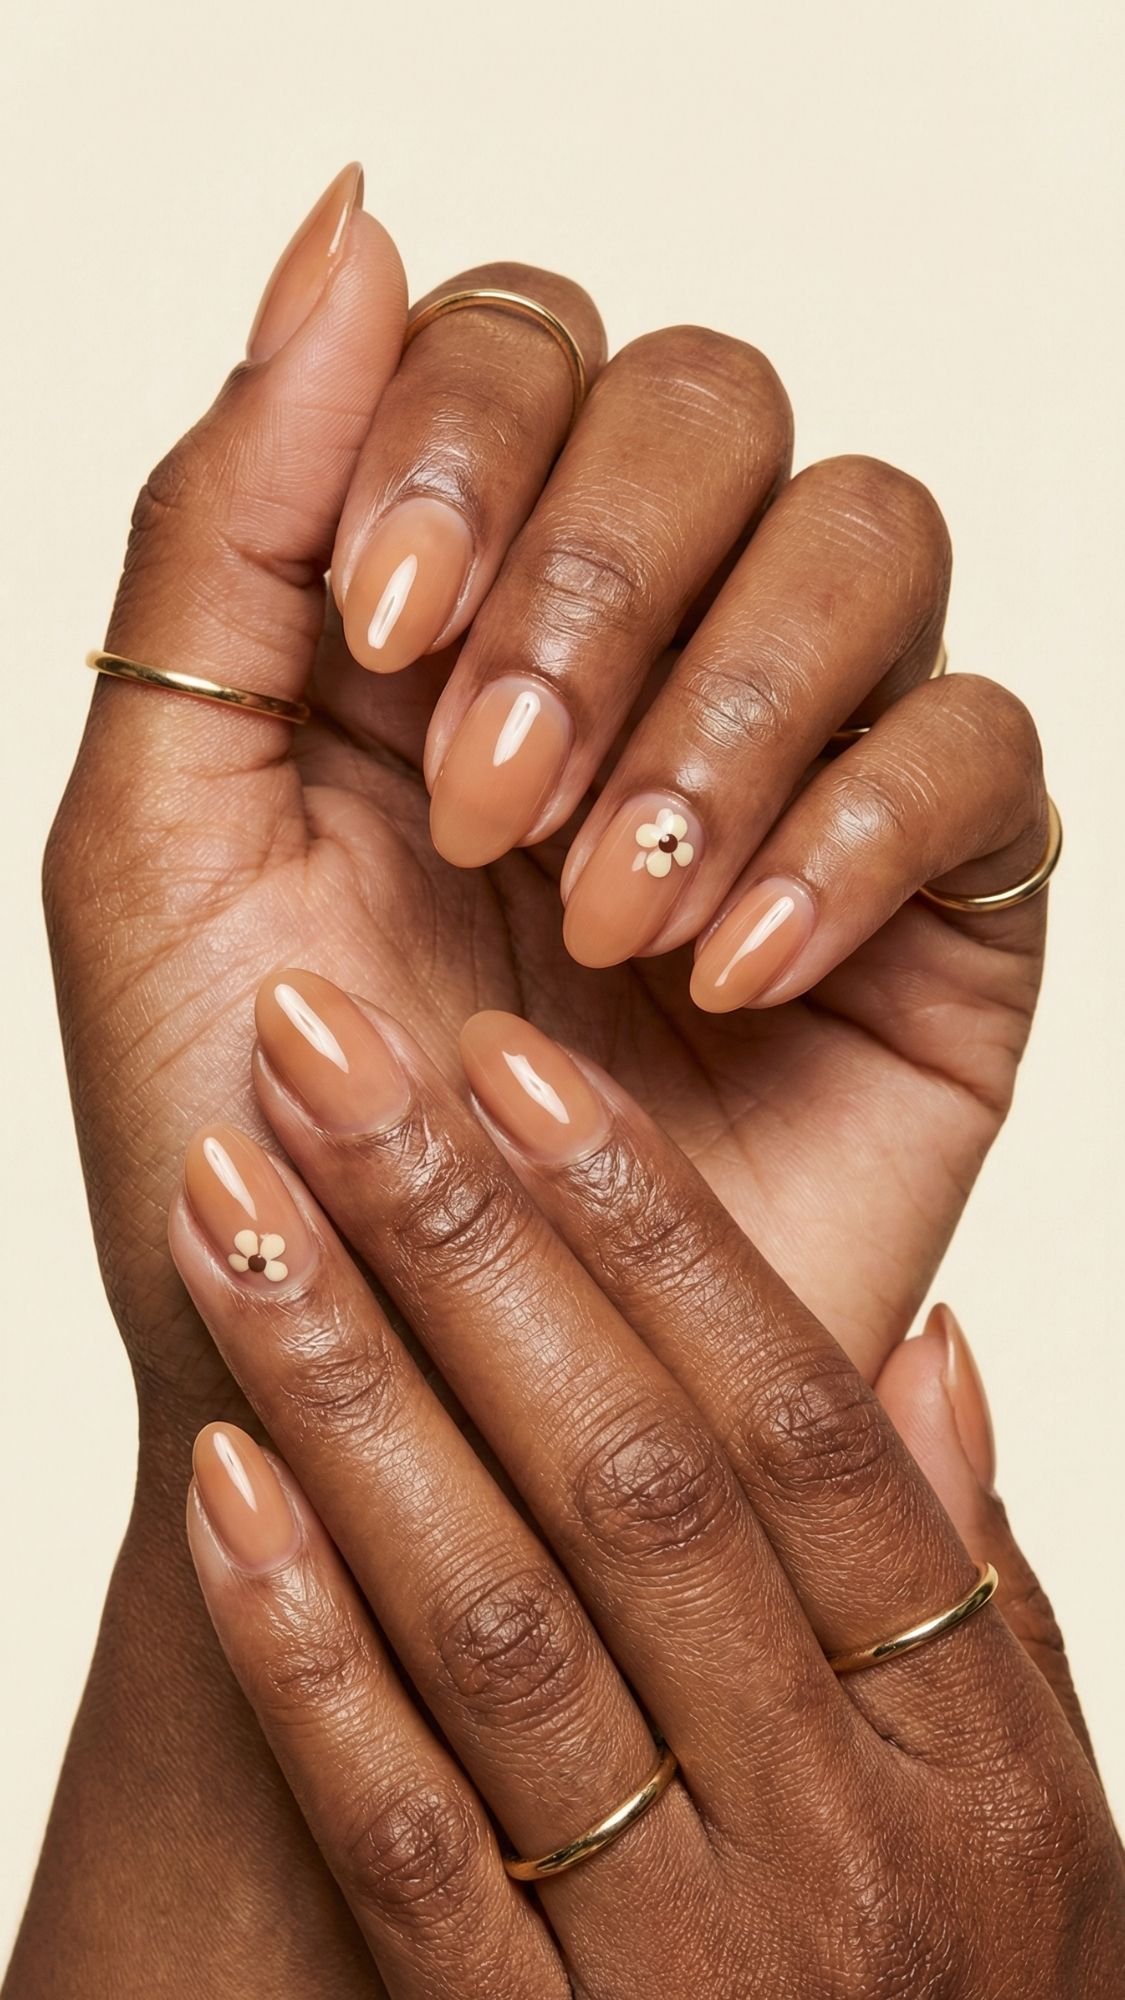
Micro florals on a nude base look sweet, clean, and intentional, without turning your nails into a whole scrapbook. I love this for spring and summer because it feels seasonal, but it still stays neutral and wearable. What I’ve noticed over the years is this, one tiny flower looks more expensive than five big ones, because it reads like a detail, not a theme. Do you want the secret to making it look salon-level? Keep the petals small, keep the placement consistent, and keep most nails plain nude.
Tools you need
- Dotting tool, toothpick, or bobby pin
- A thin detail brush (optional but helpful)
- White or cream polish for petals
- A soft green, warm brown, or deeper nude for a tiny stem (optional)
Step-by-step (easy, regular polish)
- Paint your nude base, 2 thin coats, then let it dry enough that you can touch the side of a nail without smudging.
- Add one small dot where you want the flower, near the cuticle corner or the side of the nail looks the most chic.
- Make petals by tapping 4–5 micro dots around the center dot, keep them tight.
- Add a tiny center dot in a deeper nude, warm brown, or soft gold if you want contrast.
- Seal with glossy top coat and cap the free edge.
Pro technique note: I build petals with a tool that feels almost dry, because too much polish makes petals blob together. I also keep the flower on one or two accent nails per hand, then I leave the rest plain nude so the whole set stays elevated.
Shade guidance (so it flatters every skin tone)
- Deeper skin tones: caramel or cocoa nude base, cream petals look softer than bright white.
- Medium skin tones: milk-tea nude base, white or cream petals both work.
- Lighter skin tones: sheer blush nude base, cream petals keep it delicate.
Common mistake + fix
- Mistake: The flower looks like a blob. Fix: Use less polish on the dotting tool, and make smaller petals closer together.
- Mistake: Top coat drags the design. Fix: Let the flower dry longer, then float top coat gently instead of brushing hard.
Key Takeaways
- Micro florals look luxe when they stay tiny and minimal.
- Accent nails keep the set clean and modern.
- Cream petals read softer and more expensive than stark white for many nude bases.
22) Nude Glazed “Donut” Shine (The Glossy Pearl Topper Moment)
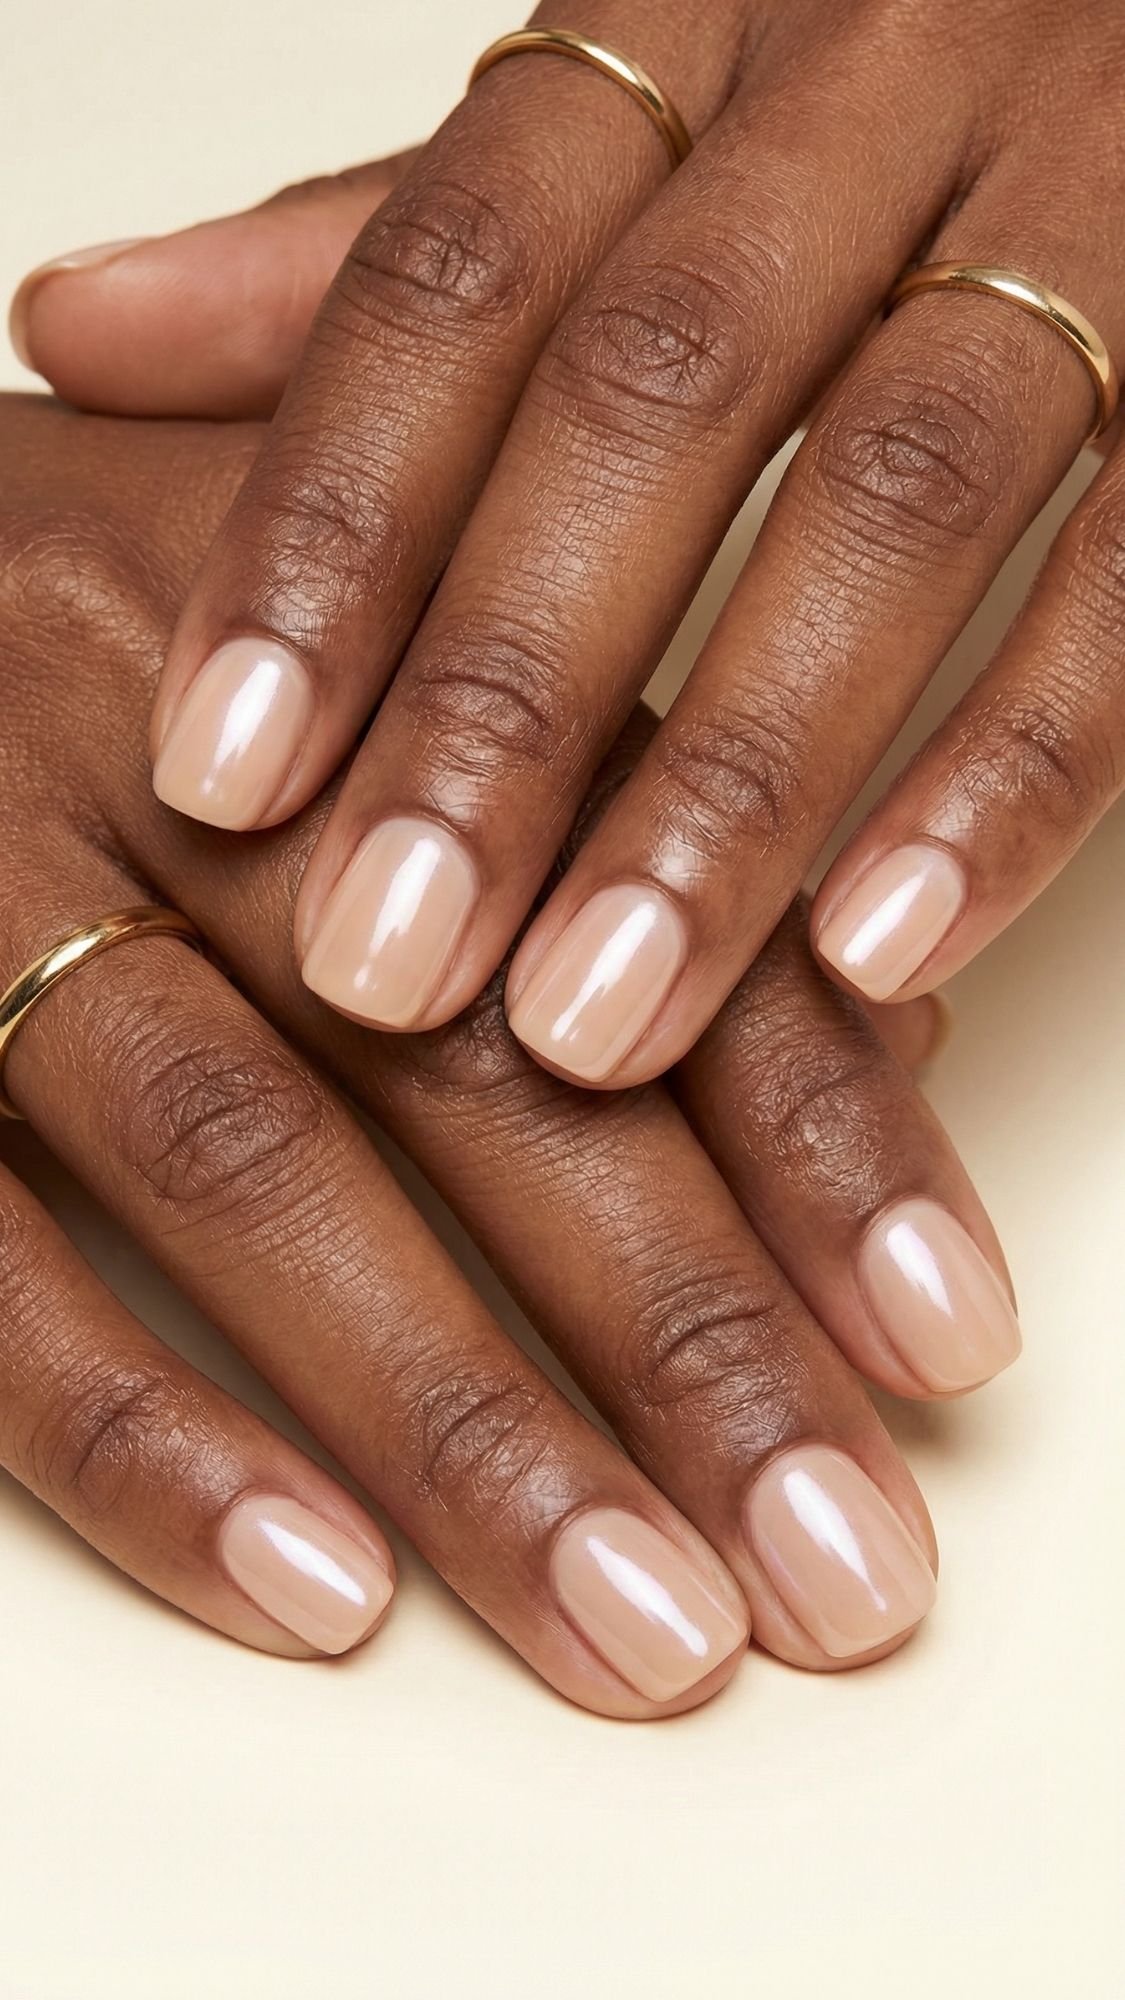
Glazed nude nails give you that soft, pearly glow that looks like light lives on your nails. I love this for spring and summer because it catches sun in a subtle way and still reads neutral from a distance. What I’ve noticed over the years is this, glazed looks best when the glow stays sheer and smooth, not chunky and sparkly. If your topper has obvious glitter, it stops looking “glazed” and starts looking like shimmer polish. We want a glaze, not confetti.
How to get the look (DIY regular polish)
- Base coat: Ridge-filler if you need it.
- Nude base: Apply a sheer nude, milky nude, or creamy nude, 2 thin coats.
- Glaze layer: Apply one very thin coat of a pearl topper or an opalescent shimmer that looks smooth.
- Seal: Add a glossy top coat and cap the free edge.
Pro technique note: I apply the glaze layer with fewer strokes than normal. If I over-brush, shimmer can clump or leave streaks. I also keep the topper mostly centered on the nail, then I let top coat spread it out visually.
Best base shades for a glazed nude effect
- Deeper skin tones: caramel nude, cocoa sheer, warm beige, then a champagne pearl glaze
- Medium skin tones: milk-tea nude or peach nude with a pearl glaze
- Lighter skin tones: milky blush nude with a soft opal glaze
If the glaze looks icy on you, your base is too pale or too cool. Warm the base, and the whole look turns flattering instantly.
Common mistake + fix
- Mistake: The glaze looks streaky or textured. Fix: Use less topper, apply in one thin coat, and float top coat to smooth it out.
- Mistake: It looks too white or frosty. Fix: Switch to a warmer nude base or a champagne-toned glaze instead of a blue-white pearl.
Key Takeaways
- Glazed nude nails look luxe because the shine reads soft and pearly, not glittery.
- One thin glaze layer is enough. Too much looks textured.
- Warm base + champagne pearl keeps the glow flattering on deeper skin tones.
23) Nude Negative Space Side French (Slim, Modern, Finger-Extending)
Side French on a nude base is such a cheat code for making nails look longer. Instead of a straight tip, you place a thin diagonal or side swipe of color near the edge, and it creates this sleek, editorial vibe. I love this for spring and summer because it feels airy and minimal, and it’s way more interesting than plain nude without being loud. What I’ve noticed over the years is this, side French looks the most flattering when the line stays thin and sits slightly off-center. Thick side tips can make the nail look wider, which is the opposite of what most people want.
Tools you need
- Striping brush or thin detail brush
- Optional: a small piece of tape for a cleaner diagonal edge
Step-by-step (DIY regular polish)
- Paint your nude base, 2 thin coats, and let it set.
- Choose your side French color:
- soft white or cream for contrast
- deeper nude for subtle definition
- champagne shimmer for a soft glow
- Paint a thin diagonal swipe starting near the sidewall, moving toward the tip.
- Clean the line with a cleanup brush dipped in acetone.
- Seal with glossy top coat and cap the free edge.
Pro technique note: I angle the side tip upward toward the center, not across. That angle visually elongates the nail. I also keep the thickest part of the swipe near the very edge, then taper it as it moves inward.
Shade guidance (keep it nude, keep it chic)
- Deeper skin tones: caramel nude base + cream side French or cocoa side French
- Medium skin tones: milk-tea nude base + soft white or beige side French
- Lighter skin tones: sheer blush nude base + soft white side French
If you want it extra subtle, do a side French in a deeper nude instead of white. It looks like contouring for your nails, and it photographs beautifully.
Common mistake + fix
- Mistake: The diagonal looks uneven across nails. Fix: Use tape as a guide or mark a tiny dot where the line should end on each nail first.
- Mistake: The line looks too thick and heavy. Fix: Wipe your brush more, then repaint thinner. Thin lines always look cleaner.
Key Takeaways
- Side French looks modern because it uses negative space and slim lines.
- Off-center placement can make nails look longer.
- A deeper nude side French gives subtle definition without contrast.
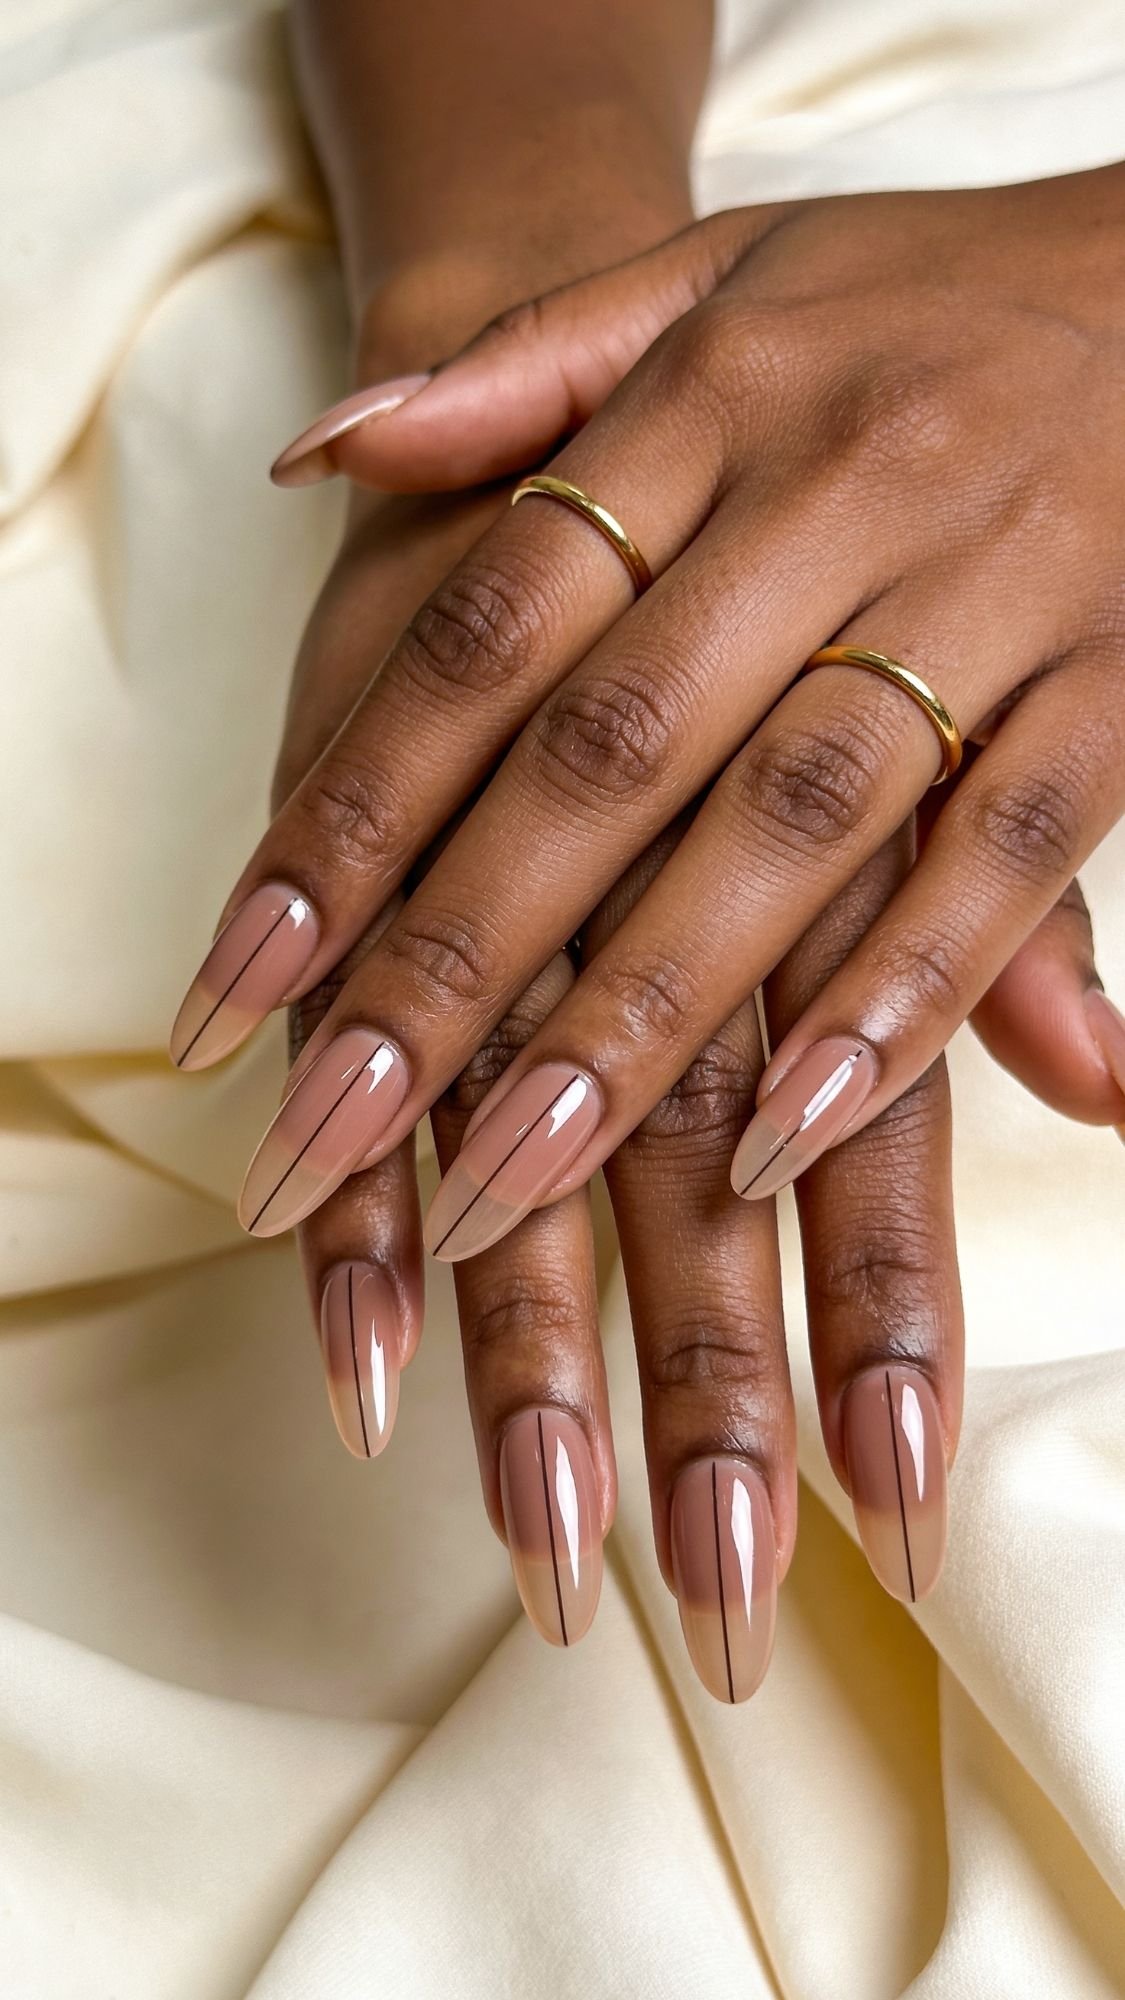
24) Nude with Delicate Fine-Line Detail (Minimal Art, Maximum “I Have Taste”)
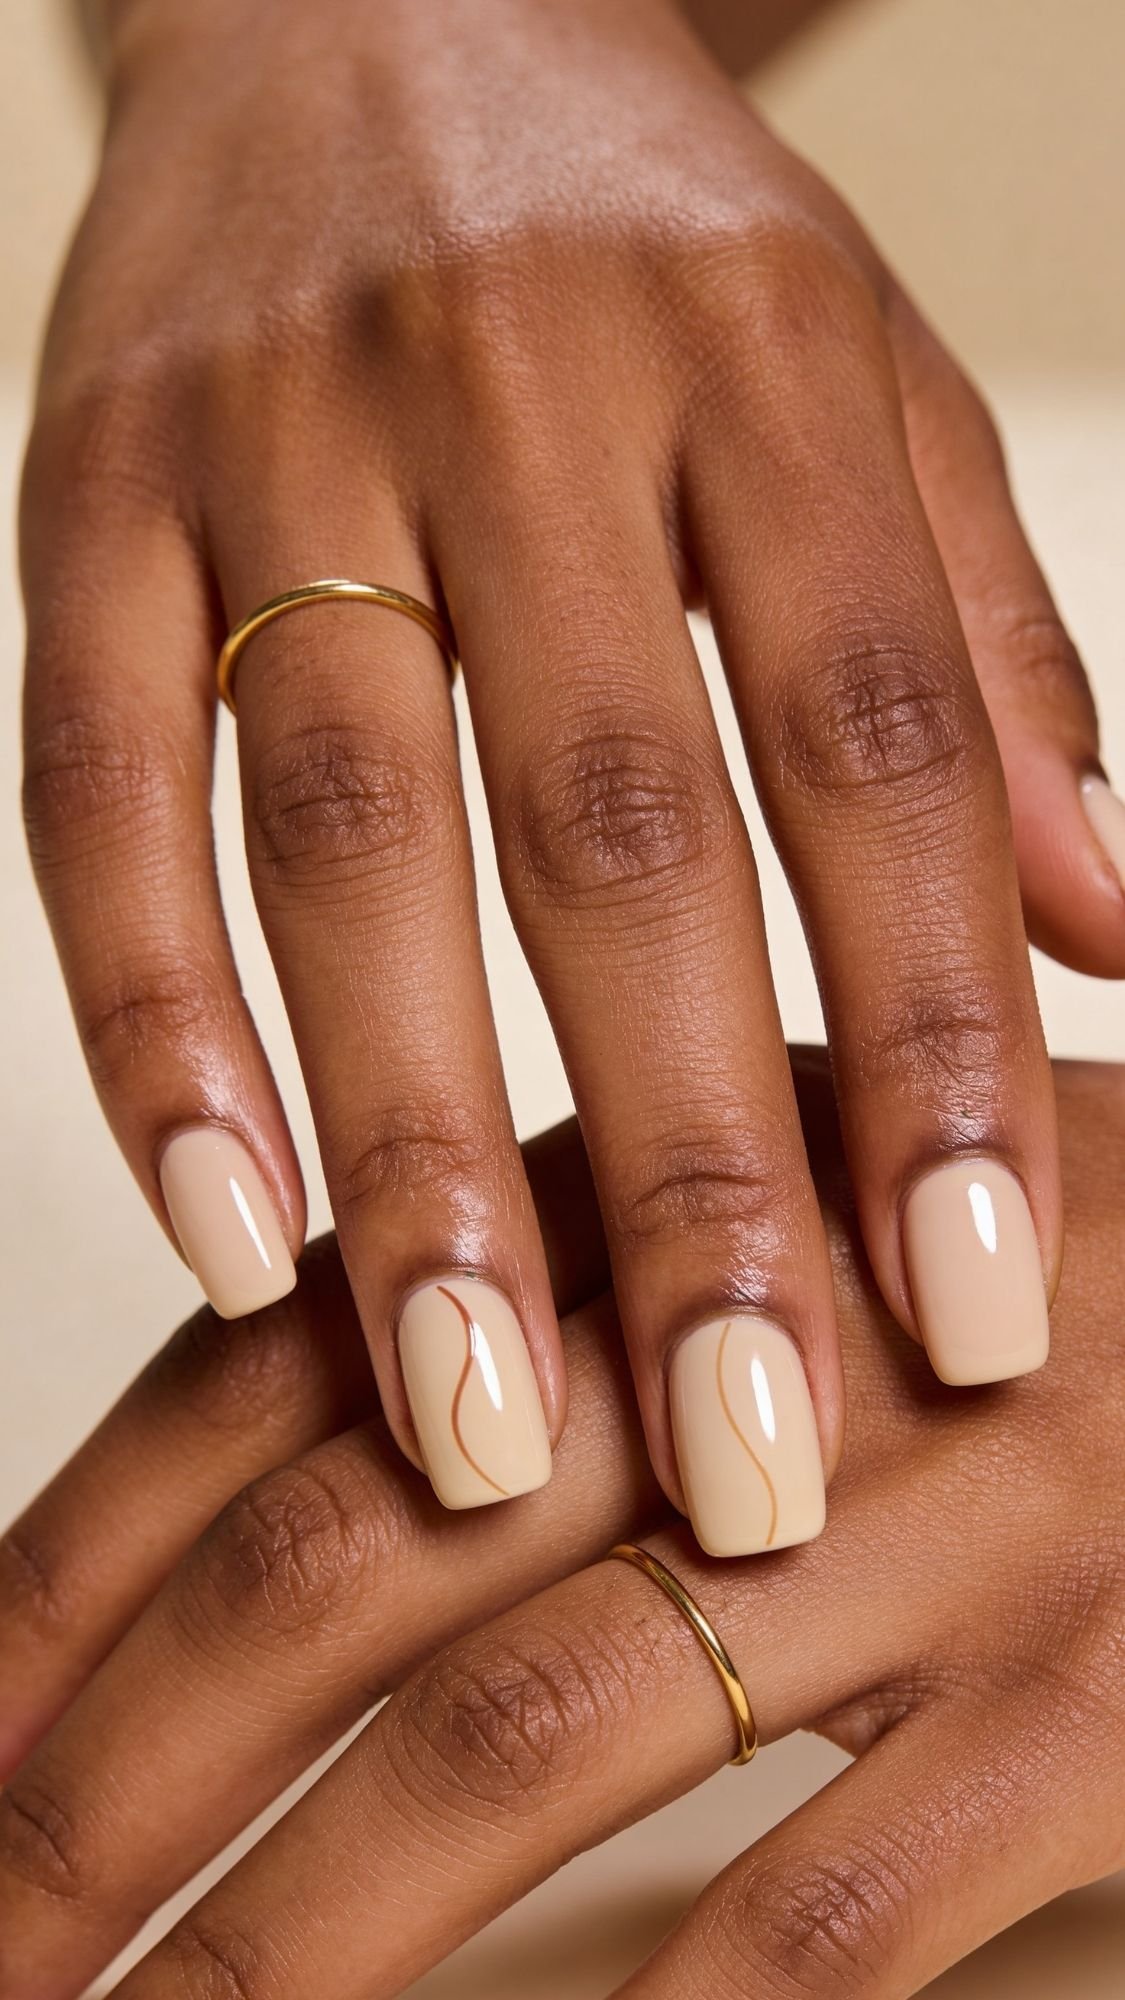
Fine-line detail on nude nails is for when you want something subtle but elevated. A single thin curve, a tiny abstract swoop, or one line near the cuticle instantly makes the manicure look intentional. I love this for spring and summer because it feels airy, modern, and it pairs with everything. What I’ve noticed over the years is this, fine-line nail art only looks expensive when the lines stay truly fine. The moment the line gets thick or wobbly, it starts looking messy. So we use less product, we steady our hand, and we keep the design simple.
Tools you need
- Striping brush or ultra-fine nail art brush
- A detail color: soft white, cream, deeper nude, or warm metallic nude
- Cleanup brush + acetone
Step-by-step (DIY regular polish)
- Paint your nude base, 2 thin coats, and let it set.
- Choose one simple line concept:
- a tiny curve near the cuticle
- one vertical line down the center
- a thin diagonal across the upper third
- Wipe most polish off the striping brush, you want it almost dry.
- Draw the line in one controlled motion. If you hesitate, the line wobbles.
- Clean up with a cleanup brush, then seal with glossy top coat and cap the free edge.
Pro technique note: I brace my hand by planting my pinky on the table, then I move my whole hand, not just my fingers. That makes the line smoother. I also choose a line color that’s only slightly higher contrast than the nude base, because it looks more editorial and less harsh.
Fine-line ideas that stay neutral and wearable
- Nude base + deeper nude line (soft contour effect)
- Nude base + cream line (clean minimal contrast)
- Nude base + champagne metallic line (tiny glow for summer light)
- Accent-only: lines on 2 nails, keep the rest plain nude
Common mistake + fix
- Mistake: The line looks thick and uneven. Fix: Remove more polish from the brush, then redraw thinner. Less product equals more control.
- Mistake: Top coat smears the line. Fix: Let the line dry longer, then float top coat gently without dragging.
Key Takeaways
- Fine-line details look luxe because they’re subtle and precise.
- Use a nearly dry brush for the cleanest, thinnest lines.
- Keep contrast soft for a more expensive-looking nude set.
25) Nude “Weekend in Linen” Matte-Satin (Soft Focus, Not Chalky)
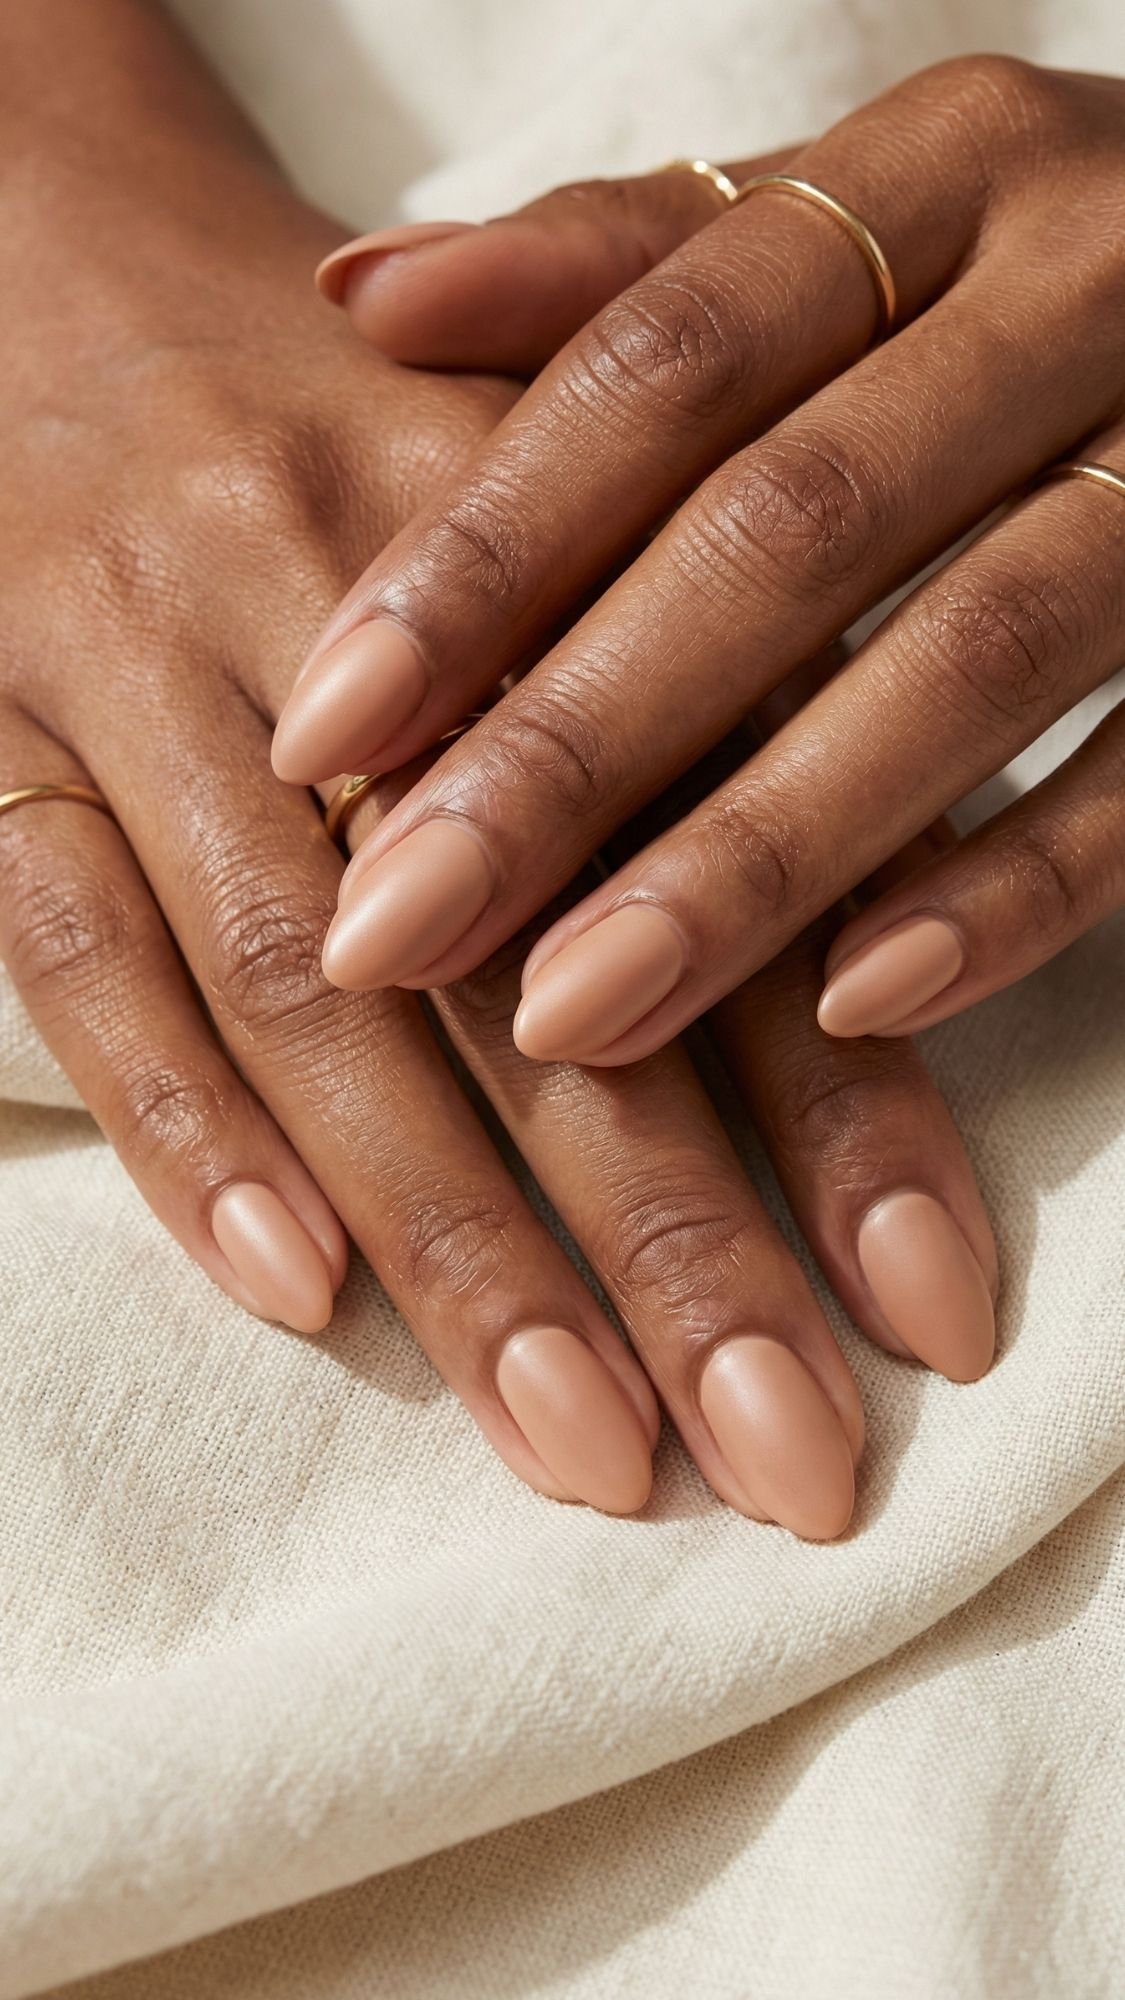
This one is for the days you want nude nails to look modern and calm, like everything in your life is color-coordinated and you definitely drink water. A matte-satin nude looks like a soft filter over your nails. I love this for spring and summer because it feels airy and editorial, especially with neutral outfits. What I’ve noticed over the years is this, true matte can make nude look dry or chalky, so I aim for satin, not flat. Satin keeps a tiny bit of glow so your hands still look healthy.
How to get the look (DIY regular polish)
- Paint your nude base, 2 thin coats, and let it dry fully.
- Apply a matte top coat, but choose one that dries more satin than powdery if you can.
- If the finish looks too flat, add one drop of glossy top coat to the center of each nail and gently spread it thin. You get a satin finish that looks intentional, not dusty.
Pro technique note: Matte top coats show texture more than glossy ones. If your nails have ridges, I always use a ridge-filling base first. Otherwise matte highlights every little bump like it’s trying to start drama.
Best nude shades for a matte-satin finish
- Deeper skin tones: warm cocoa nude, caramel nude, latte nude, these look rich in satin.
- Medium skin tones: milk-tea nude, warm beige nude, soft peach nude.
- Lighter skin tones: blush nude, beige-pink nude, ivory-beige nude.
Common mistake + fix
- Mistake: Matte makes the nude look ashy or dry. Fix: Switch to a warmer nude base, use ridge-filler, or do the satin hack with a tiny touch of gloss in the center.
- Mistake: Matte finish chips faster at the tips. Fix: Cap the free edge with your color and your top coat. Yes, even matte. It still matters.
Key Takeaways
- Matte-satin nude looks modern when it stays soft and smooth, not chalky.
- Ridge-filler base helps matte look cleaner.
- A tiny touch of gloss can turn flat matte into a more flattering satin finish.
Longevity + Maintenance Plan (Day 1 to Day 7, So Your Nude Stays Fresh)

Nude nails look their best when they stay glossy and clean at the edges, and that comes down to tiny habits, not “stronger polish.” What I’ve noticed over the years is this, most chips start at the free edge, and most dullness comes from handwashing and sanitizer drying out the top coat and cuticle area. You can keep a nude manicure looking brand new with a few quick resets that take less time than scrolling. Also, polish keeps hardening for hours, so the first day matters more than people think.
Day 1 (Right after you finish)
- Avoid hot showers, dishwater, and long baths for the first few hours.
- Treat your nails like they still “set” even if they feel dry.
- If you need to do something messy, wear gloves. Yes, it feels dramatic. It works.
- Wait until everything fully sets, then apply cuticle oil before bed.
Pro detail: Your manicure feels dry fast, but it reaches a harder, more dent-resistant finish later. I notice the biggest dents when people “test” their nails too soon.
Day 2 (Lock in the shine)
- Apply cuticle oil after your last handwash of the night.
- Use hand cream, but keep it off the nail plate if you plan to re-top soon.
- If you wear press-ons, press down along the edges after showering to check for any lifting corners.
Day 3 or Day 4 (The glossy reset)
This is the move that makes people think you got your nails redone.
- Lightly wipe nails with a dry lint-free pad to remove any lotion film.
- Apply one fresh layer of top coat, then cap the free edge.
- Let it set, then oil your cuticles later, not immediately.
Pro technique note: I re-top midweek on nudes because it brings back the crisp reflection line that makes the manicure look expensive.
Day 5 to Day 7 (Maintain, don’t panic)
- File any snag immediately with a gentle file, one snag turns into a chip.
- If you see a tiny chip, smooth it, add a dot of polish just on the chip, then top coat.
- Keep oiling cuticles at night, it makes the whole manicure look cleaner.
Quick rules that save nude nails
- Put gloves on for dishes and cleaning, harsh water and detergents eat top coat.
- Avoid using nails as tools, open tabs with a coin or key instead.
- Keep a mini file in your bag, because life loves to test fresh manis.
Key Takeaways
- Re-top on day 3 or 4 if you want that “fresh” look all week.
- Cap the free edge every time you top coat, that prevents most chips.
- Oil at night for pretty cuticles, but keep nail plates clean if you plan to re-top.
Troubleshooting (Because Nude Nails Show Everything)
Nude nails look gorgeous, but they also expose every tiny issue like they work for the police. When something goes wrong, I fix it fast with the same few checks, product thickness, nail cleanliness, dry time, and edge sealing. If you can diagnose the “why,” you can fix it without starting over.
Quick diagnosis rule
- If it looks bumpy, you used too much product or you shook the bottle.
- If it looks streaky, your coats went too thick or your base texture showed through.
- If it chips at the tip, you skipped capping the free edge or you touched water too soon.
- If it shrinks back, your top coat got overworked or flooded the edges.
1) Streaks in sheer or milky nudes
Why it happens: Sheer formulas show ridges and brush pressure marks, and creamy nudes drag if you over-brush.
Fix it:
- Use a ridge-filling base coat.
- Paint thinner coats, and keep it to three strokes per nail.
- Let each coat sit 2–3 minutes so it can level.
- If it still streaks, switch to a jelly nude. Jellies forgive more.
Pro tip: I wipe one side of the brush almost clean. I paint with the loaded side, then I stop touching it.
2) Polish pooling at the cuticle
Why it happens: You loaded too much polish, or you placed the brush too close to the cuticle.
Fix it:
- Start the brush mid-nail, then push gently toward the cuticle.
- Use less product, wipe the brush first.
- Clean edges with a small brush dipped in acetone.
Pro tip: I keep a tiny dry space at the cuticle line, then I let top coat visually “fill” the gap. It looks cleaner and chips less.
3) Bubbles in polish
Why it happens: You shook the bottle, used thick coats, or painted in a breeze.
Fix it:
- Roll the bottle between your palms instead of shaking.
- Paint thinner coats, and avoid fans blowing directly on nails.
- If you see bubbles before it dries, stop touching it. Let it dry, then smooth it with a fresh top coat.
Sensory tell: If your polish looks foamy on the brush, you introduced air. Rolling fixes it.
4) Top coat shrinkage (the tip exposure problem)
Why it happens: You flooded the edges or overworked quick-dry top coat, then it pulled back as it set.
Fix it:
- Float top coat on with fewer strokes, do not press hard.
- Cap the free edge last with the remaining product on the brush.
- Avoid dragging top coat back and forth like paint. One pass, then leave it alone.
Pro tip: I keep top coat slightly away from the cuticle. Flooding the cuticle area triggers shrinkage faster.
5) Chipping at the tips within 24–48 hours
Why it happens: Oil on the nail plate, thick coats that stay soft, or no free-edge seal.
Fix it:
- Wipe nails with alcohol or acetone before base coat until they look matte.
- Use thin coats, wait 2–3 minutes between coats.
- Cap the free edge on color and top coat.
- Re-top on day 3 or 4 for a reset.
Pro tip: If you chip only on index and thumb, your nails do “tool work.” Open things with a key, not your nail.
6) Dents and smudges
Why it happens: Your layers did not fully set, or you used thick coats.
Fix it:
- Switch to thinner coats and add a quick-dry top coat.
- Give your manicure a solid hour before showering or bed if you can.
- If you dent it, smooth it by adding a thin top coat once it dries.
Pro tip: If your nail feels dry but slightly soft when you press it, it will dent later. Trust the “soft press” test.
7) Press-ons popping off
Why it happens: Wrong size, oil on nails, or not enough pressure time.
Fix it:
- Size down if you sit between sizes, file to fit.
- Dehydrate nails with alcohol or acetone.
- Apply cuticle-first, roll down, then hold for 20–30 seconds.
- Seal edges with a thin top coat if the press-on material allows it.
Pro tip: If hair catches at the edges, you already have lifting. File and reseal before it pops.
8) Glue bubbles under press-ons
Why it happens: Too much glue, or you slammed the tip down from above and trapped air.
Fix it:
- Use less glue, then place cuticle-first and roll downward.
- Hold steady pressure longer.
- If you already have bubbles, remove the nail gently and reapply. Bubbles weaken the hold.
Key Takeaways
- Thin coats solve most nude nail problems.
- Clean, matte nail plates give you better adhesion.
- Capping the free edge prevents most chips and shrinkage.
- Less brushing looks smoother, even when it feels wrong.
Nail Health + Recovery (So Your Natural Nails Stay Pretty Under the Nude)
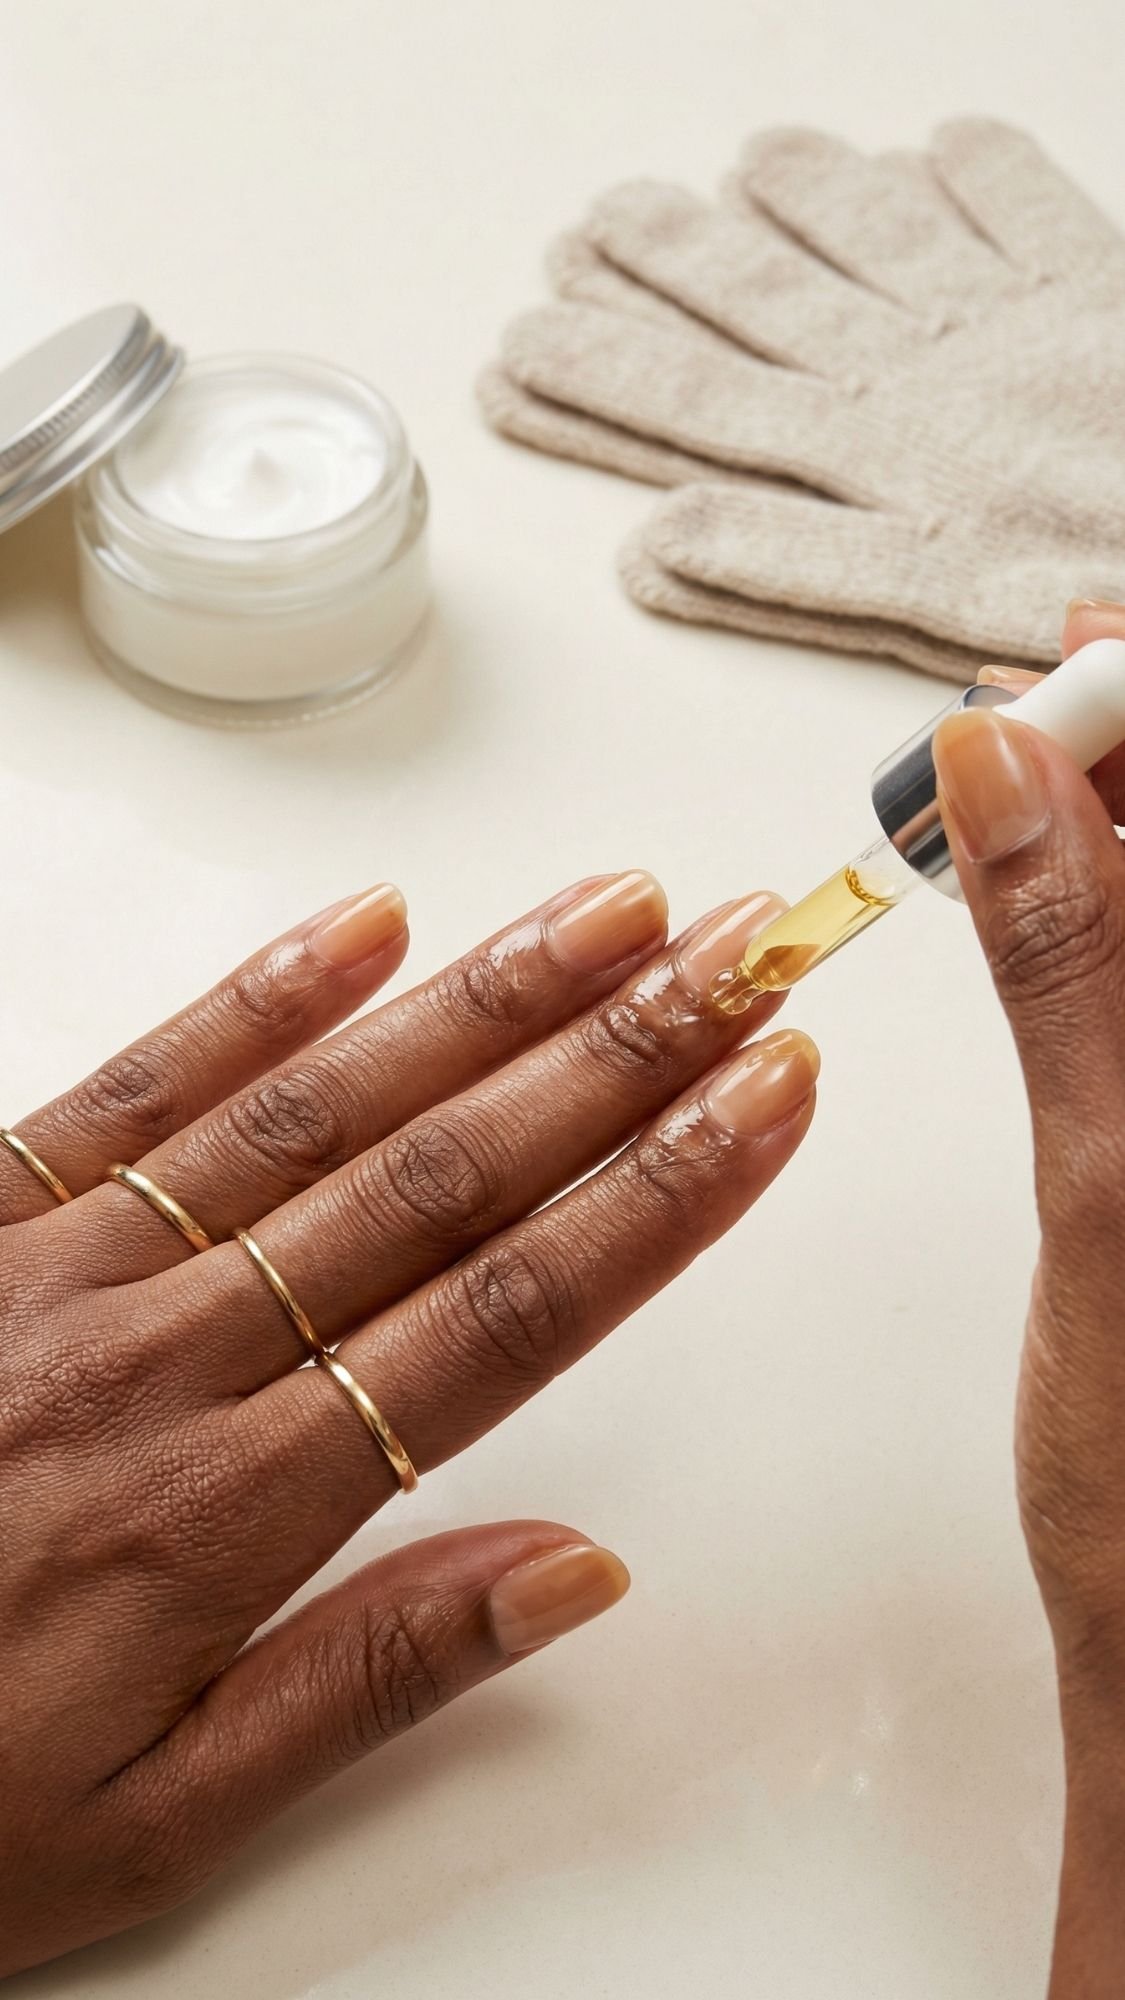
Nude nails look best when your natural nails stay healthy, because sheer shades show everything. What I’ve noticed over the years is this, most nail damage comes from removal, not from the manicure itself. Peeling polish off, ripping press-ons, aggressive buffing, and over-soaking in acetone can thin the nail plate fast. Then every nude looks streaky for weeks, because the nail surface turns uneven. The goal here is simple, keep nails hydrated, protect them from friction, and remove product gently.
The basics that actually help (not hype)
- Cuticle oil daily: once at night minimum. It keeps the cuticle line smooth and makes any nude mani look cleaner.
- Hand cream after washing: focus on knuckles and around nails. Dry skin makes nude look dull.
- Gloves for chores: dish soap and cleaners destroy top coat and dry the skin fast.
- Gentle filing only: one direction if your nails peel easily, back-and-forth can fray weak edges.
Pro detail: Cuticle oil does not “make nails grow faster,” but it makes the cuticle area flexible, so you get fewer hangnails and less peeling at the base. That alone makes your manicure look 10 times better.
Breaks between sets, what’s real and what’s not
- If you wear press-ons or long-wear systems back-to-back, take a 2–5 day break every few weeks.
- During breaks, wear a ridge-filling base or a sheer strengthening base if your nails feel soft.
- Skip harsh “hardener” daily use if your nails feel tight and brittle. Brittle nails snap.
The 5-minute recovery routine (my go-to)
- Remove product gently.
- Lightly smooth snags with a file.
- Apply cuticle oil, then massage it in for 30 seconds per hand.
- Apply hand cream.
- If nails feel dry, add a tiny layer of ridge-filler base for protection.
What to avoid if you want strong nails
- Peeling polish off, even “just one corner.”
- Using your nails as tools.
- Heavy buffing every week.
- Long acetone soaks without oil afterward.
When to see a professional (do not DIY this)
Go get help if you notice:
- pain, swelling, or heat around nails
- green discoloration
- lifting with a bad smell
- sudden dark streaks or bleeding under the nail
- persistent itching or rash around nails, especially after gel or glue
Key Takeaways
- Removal causes most damage, not the nude manicure itself.
- Cuticle oil at night keeps nails and skin looking healthier fast.
- Gentle breaks and hydration make your nudes apply smoother over time.
This Is How Nude Starts Looking Like “You, But Polished”
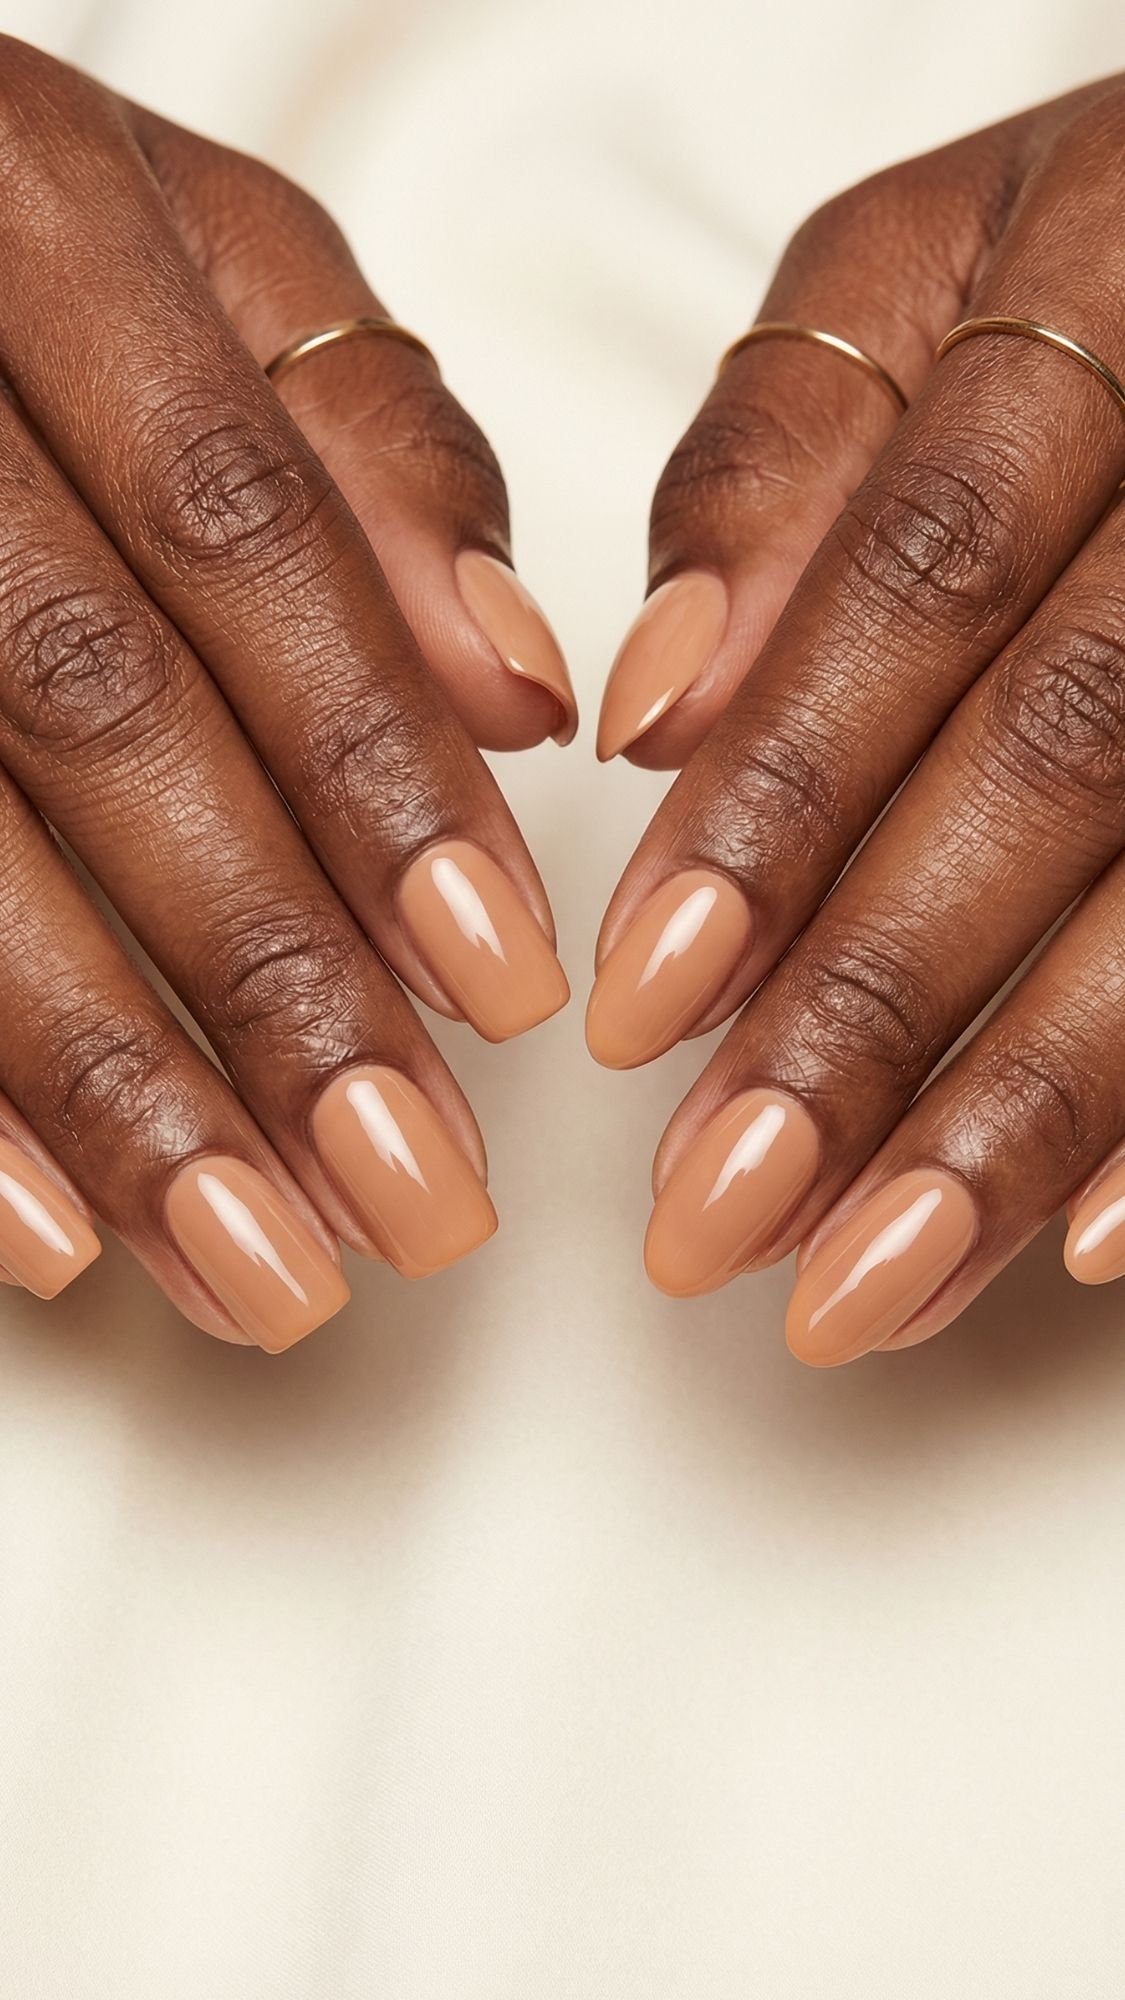
Nude nails get 10 times more flattering when you pick the right shape and the right undertone. What I’ve noticed over the years is this, most people blame the polish when the real issue is shape. A perfect nude shade can still look off if the shape fights your nail bed. And a “wrong” nude can look right if you adjust depth and finish. Ready for the easiest glow-up? Match undertone, then pick a shape that elongates.
Best shapes for short nails (easy, flattering, low maintenance)
- Squoval (square-oval): clean, modern, very beginner-friendly
- Short almond: the best “longer fingers” illusion without needing length
- Oval: soft, classic, great if your nails break easily
Pro technique note: Short almond looks best when the sides taper gently, not sharply. Sharp taper can make the nail look narrow and fragile.
Best shapes for wide nail beds (the balance trick)
- Almond or oval: visually slim the nail bed
- Soft coffin (only if you have a little length): can work, but keep corners softened
- Avoid very wide squares if you want a slimmer look, they can emphasize width
If you want your hands to look longer (quick, reliable tricks)
- Choose a nude that’s slightly deeper than your exact skin tone.
- Keep the cuticle line clean and rounded, no jagged edges.
- Try a side French or side outline design, it creates a slimming effect.
- Use glossy top coat for that clean reflection line.
The undertone matching cheat sheet (save this)
This is the part people skip, then wonder why their nude looks ashy.
- Warm undertones: Look for caramel, honey beige, warm latte, soft peach nude Avoid: very cool beige or gray-taupe nudes
- Cool undertones: Look for rosy nude, mauve nude, pink-beige that leans rose Avoid: yellow-beige nudes that turn sallow
- Neutral undertones: Look for milk-tea nude, balanced beige, soft taupe, sheer cocoa Avoid: extremes, super yellow or super pink
Depth matters as much as undertone
- If your nude looks chalky or dusty, it’s too light or too cool for you. Go deeper or warmer.
- If your nude looks orange, it’s too warm. Add a neutral sheer layer on top.
- If your nude looks gray, it’s too cool. Switch to caramel or rosy-brown depending on your undertone.
Key Takeaways
- Shape can make a nude look better even before you change color.
- Slightly deeper nude often looks more flattering and elongating.
- Undertone matching prevents the “ashy nude” problem.
Good Nude Nails in 15–20 Minutes
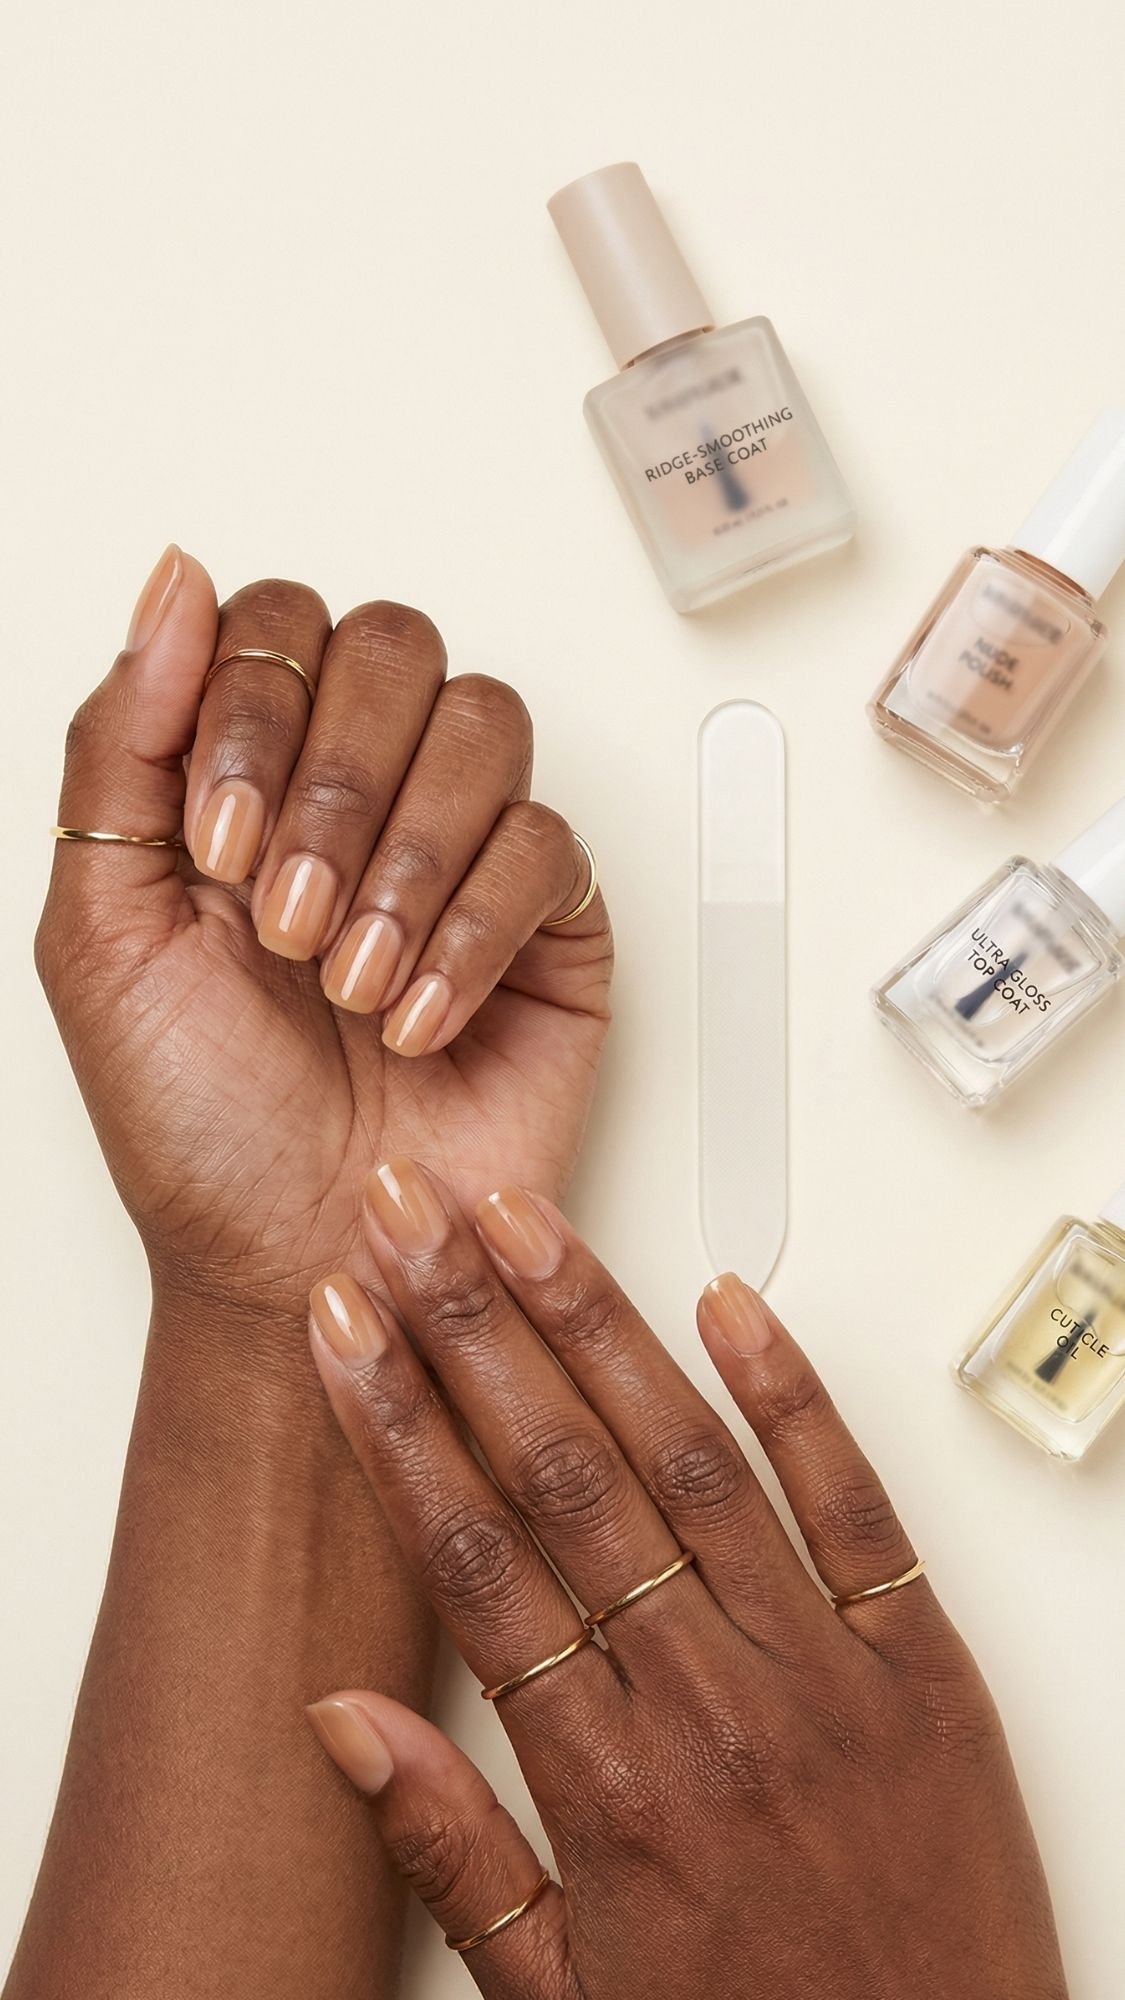
This is the simplest version for days when you want your nails to look clean and polished, but you do not want a whole production. What I’ve noticed over the years is this, beginners get better results when they do fewer steps well, instead of trying to do everything. So this routine focuses on clean prep, thin layers, and shine.
The 15–20 minute routine
- Remove old product: quick swipe, no residue.
- Shape: file for 30–60 seconds total. Pick squoval or short almond.
- Cuticle quick tidy: push back gently. Do not over-trim.
- Cleanse: wipe nails with alcohol or acetone until they look matte.
- Base coat: one thin layer.
- Nude polish: one to two thin layers of a forgiving nude:
- sheer cocoa
- jelly nude
- milky nude that is slightly sheer
- Top coat: one generous glossy layer, then cap the free edge.
- Aftercare: wait until set, then oil cuticles before bed.
The “I mess up every time” beginner picks
- Jelly nude because it hides streaks better.
- Sheer cocoa because it flatters deeper skin tones and still looks intentional.
- Milky nude only if you use a ridge-filling base.
Key Takeaways
- Clean nails + thin coats + glossy top coat = a manicure that looks more expensive than it was.
- Do not rush dry time, even in the beginner version.
- Cap the free edge, it prevents most chips.
Beauty Rules of Thumb (Nude Nails Edition)
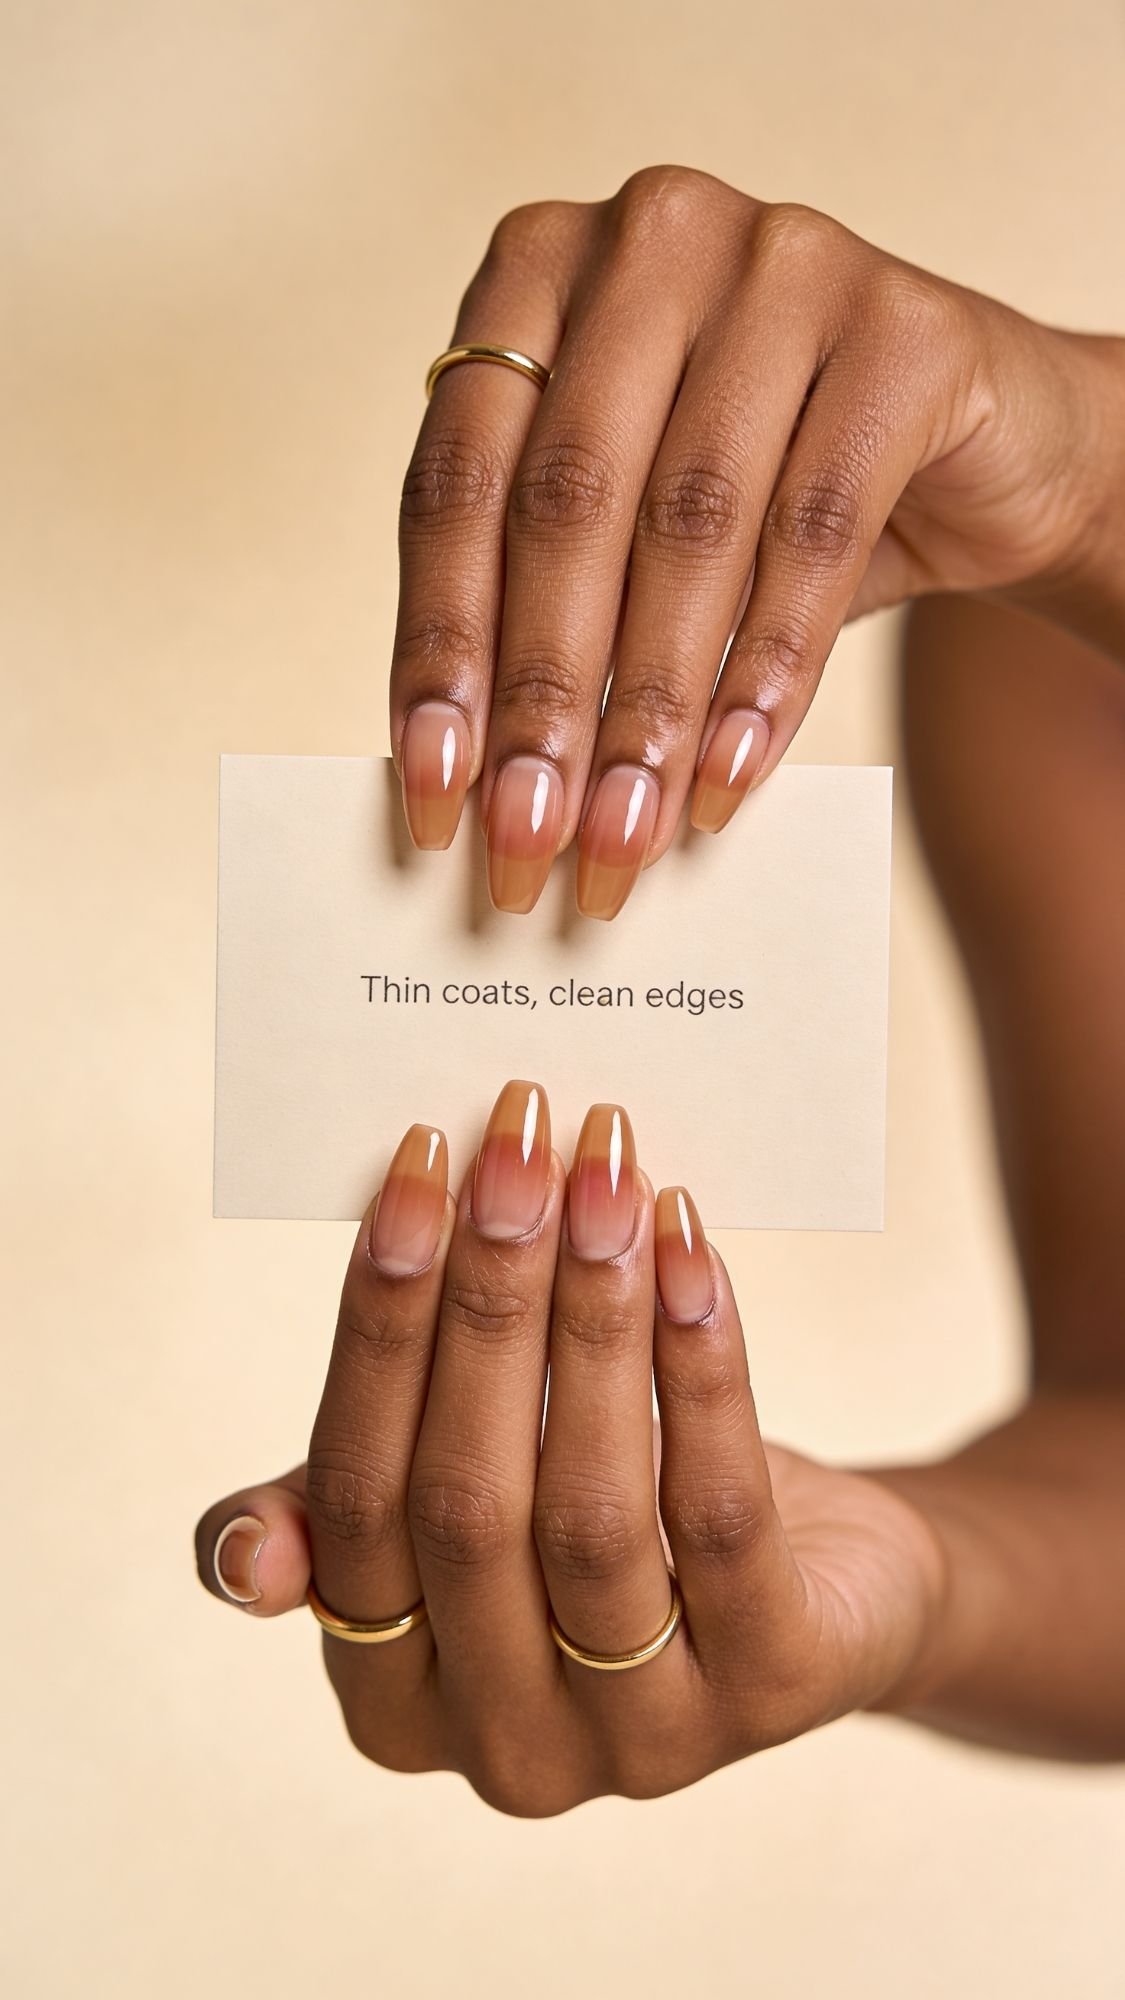
These are the little “pro rules” I follow because they prevent 90 percent of nude nail problems. What I’ve noticed over the years is this, nude nails don’t fail because the idea is bad, they fail because people rush the boring parts. These rules keep your manicure looking clean, glossy, and expensive, even if you used a $6 polish.
10 rules that make nude nails look instantly better
- Match undertone first, then depth. Nude is not one color.
- Go slightly deeper than your exact skin tone if you want longer-looking hands.
- Thin coats always win. Thick coats dent, streak, and chip faster.
- Three strokes max per nail for smoother application.
- Clean beats buff. Dehydrate your nail plate, do not over-sand it.
- Cap the free edge on color and top coat, every time.
- Gloss unifies everything. If your nude looks “meh,” top coat often fixes it.
- Oil after, not before. Oil before polish kills adhesion.
- Re-top midweek (day 3 or 4) if you want that fresh-salon shine.
- Use a cleanup brush if you want crisp edges. Messy edges make nude look cheap fast.
Tiny mindset shift that helps
If your nude looks streaky on coat one, you’re probably doing it right. Sheers need layering. Let the process work instead of fighting it.
Key Takeaways
- Prep and thin coats matter more than the brand.
- Gloss and clean edges create the “expensive” look.
- Midweek re-top makes nude nails last longer and look fresher.
Ingredient or Technique Cheat Sheet (Simple, Scannable, Saves Your Manicure)
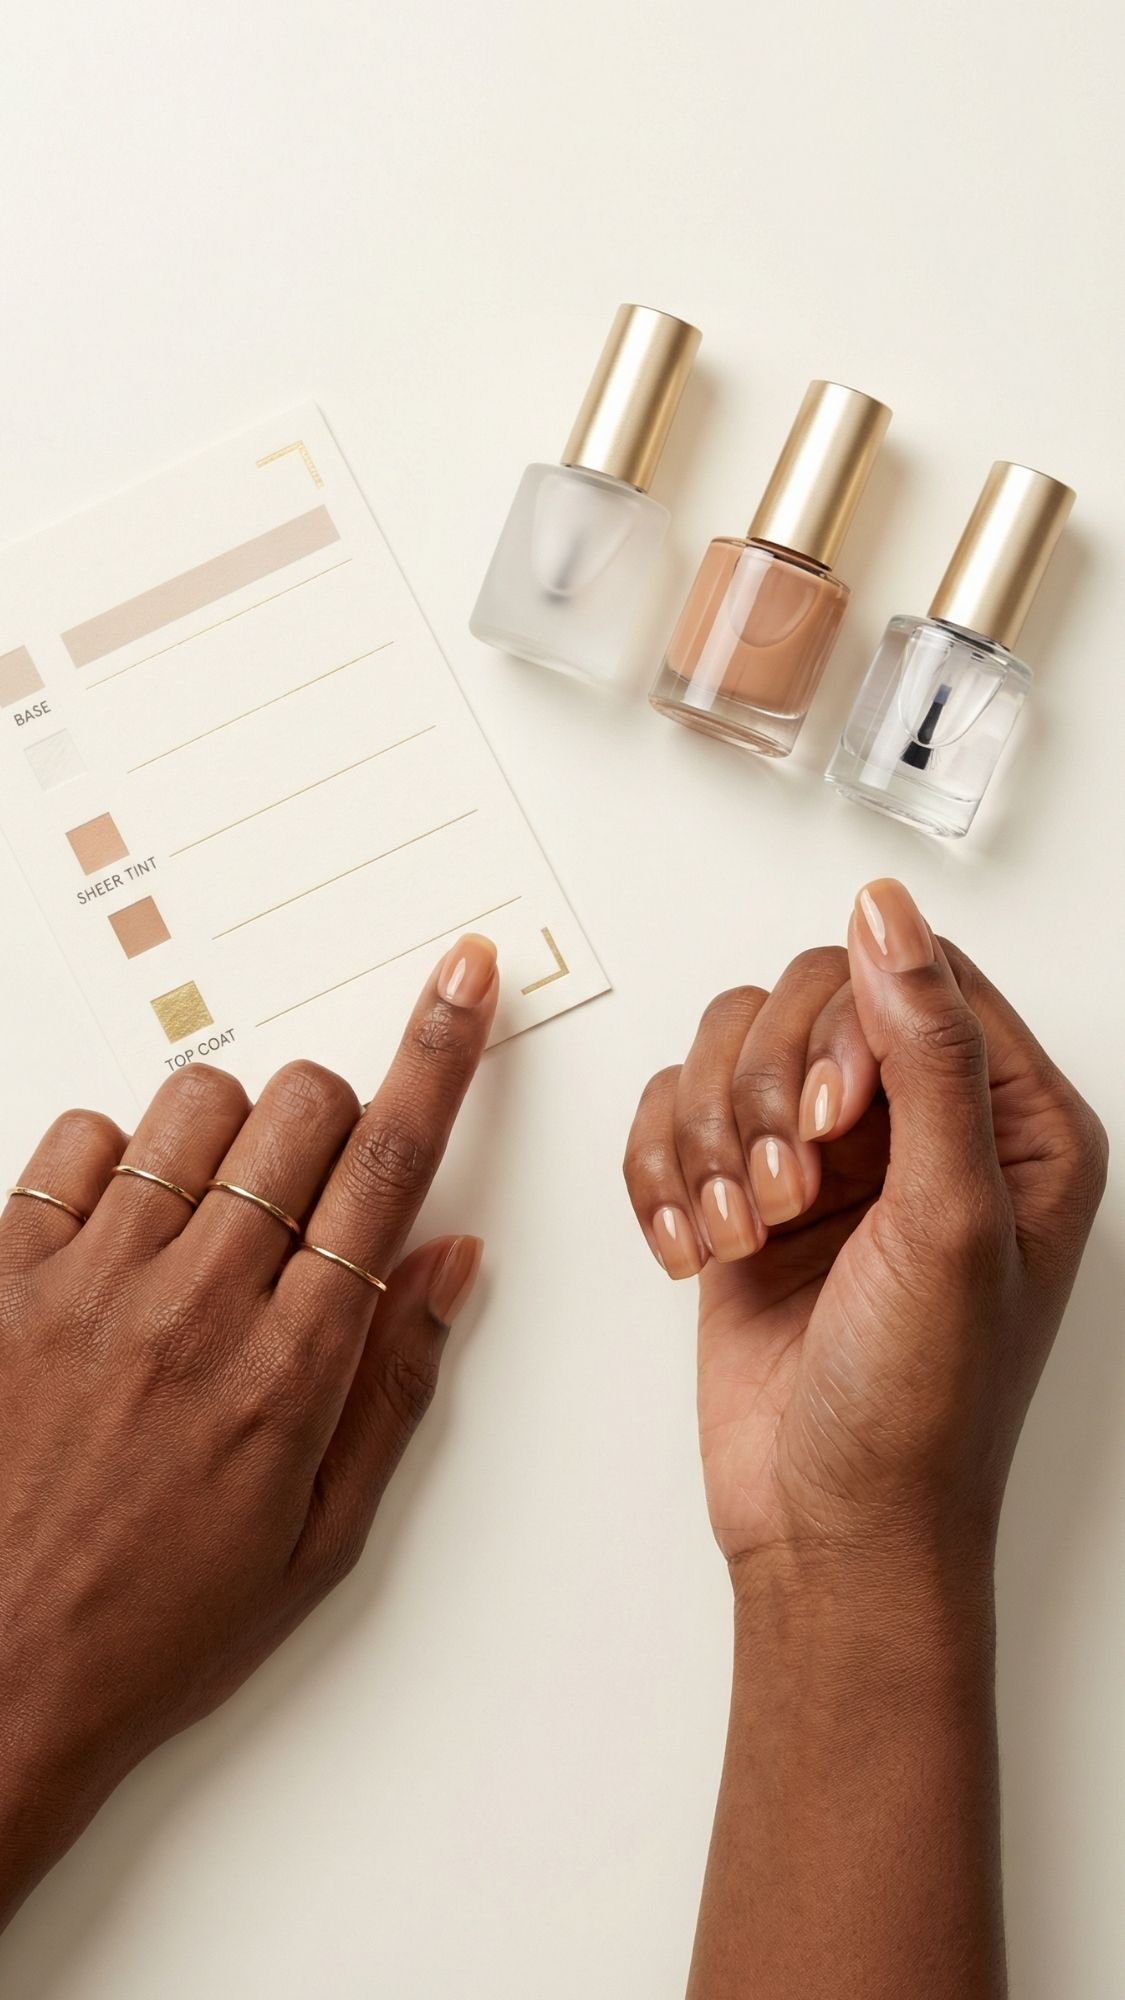
This is your quick-reference guide for when you do not want to reread the whole post. I built it around what actually changes results, base coat type, coat thickness, dry time, and sealing. Nude nails behave differently depending on formula, so this cheat sheet keeps you from guessing.
Base coat cheat codes
- Ridge-filling base coat: Best for: ridges, sheer nudes, milky nudes Why it matters: smooths the surface so nude looks more even Pro tip: use one thin coat only, thick ridge-filler can dent
- Sticky or grippy base coat: Best for: chipping, short nails, people who wash hands a lot Why it matters: helps polish cling to the nail plate Pro tip: cap the free edge after base coat too
- Strengthening base coat: Best for: soft nails that bend Why it matters: can add support, but not a magic fix Pro tip: if nails feel brittle, do not overuse hardeners
Nude formula guide (what to choose for your skill level)
- Jelly nude: easiest, hides streaks, builds like tinted glass
- Sheer nude: forgiving if you keep coats thin, great for “your nails but better”
- Milky nude: looks super clean, but shows ridges and streaks, use ridge-filler
- Creamy nude: looks polished and opaque, but punishes thick coats
Top coat guide
- Quick-dry glossy top coat: best for shine and fewer dents Watch for: shrinkage if you flood edges or overwork it
- Gel-like glossy top coat (no lamp): thicker shine, smoother look Watch for: longer set time, do not poke it
- Matte top coat: modern soft focus Watch for: can look chalky if the base nude is too pale or cool
Technique cheat codes (these fix most problems)
- Three-stroke rule: left, center, right, then stop
- Float top coat: light pressure, fewer strokes, no scrubbing
- Cap the free edge: do it on color and top coat, prevents chips
- Dehydrate first: alcohol or acetone wipe until nails look matte
- Oil after: oil before polish causes lifting and chipping
“If this happens, do this”
- Streaks: ridge-filler base + thinner coats + fewer strokes
- Bubbles: stop shaking bottles, roll them instead
- Shrinkage: float top coat, cap edge last, do not overwork
- Chips: clean nail plate better, cap the edge, re-top midweek
- Press-ons pop off: size down, dehydrate, hold 20–30 seconds
Key Takeaways
- Base coat choice matters more than most people think.
- Jelly and sheer nudes forgive beginners the most.
- Top coat technique can rescue an average nude and make it look luxe.
Common Mistakes and Easy Fixes (So Your Nude Doesn’t Turn Into a Mess)
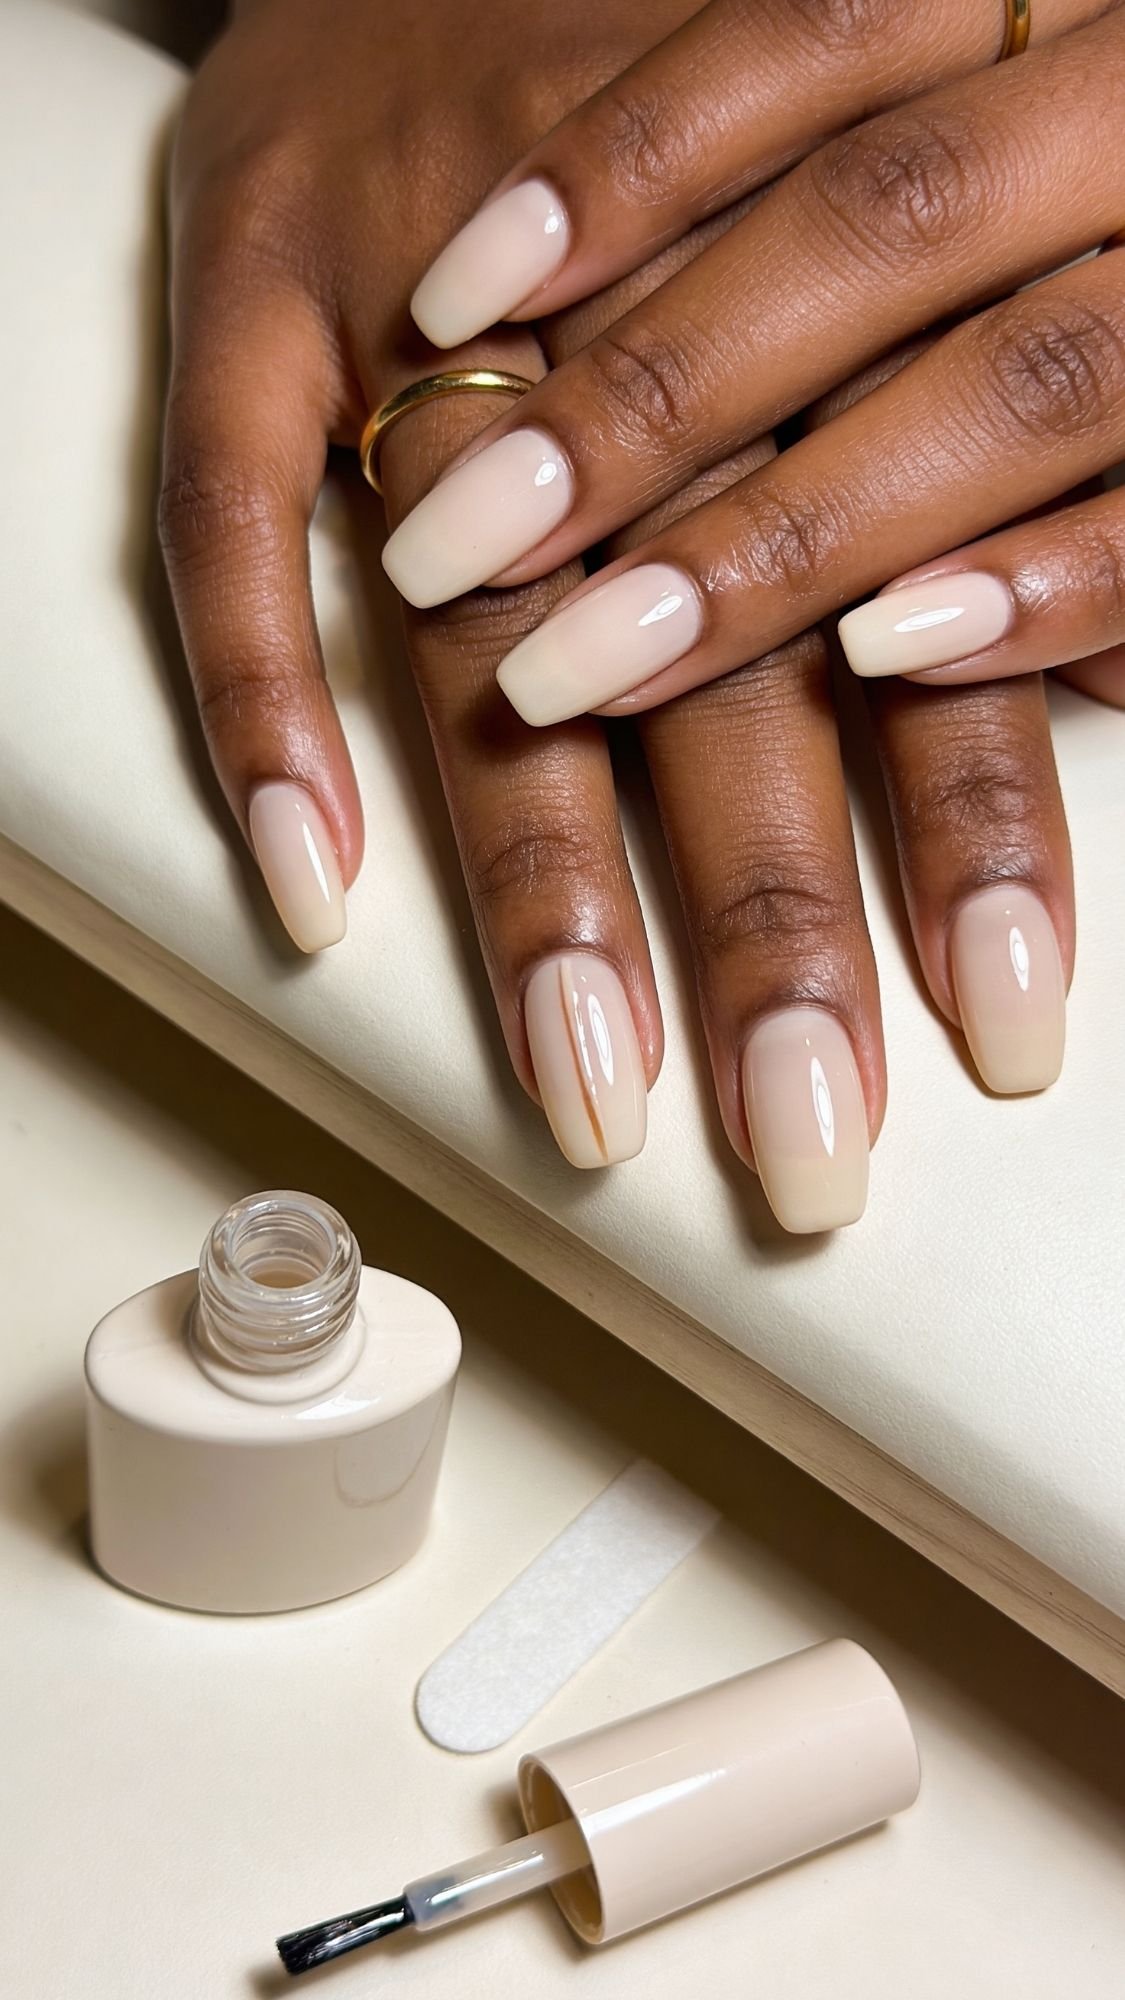
Nude nails should feel easy, but they can go sideways fast because neutrals show everything. What I’ve noticed over the years is this, most mistakes come from rushing and using too much product. The fixes are usually simple. You just need to know what to correct first.
1) You pick a nude that looks ashy or gray
Why it happens: The shade is too cool or too light for your undertone.
Fix: Go slightly deeper or slightly warmer. If you already own the polish, layer a warm sheer nude underneath or on top to adjust.
2) Your nude polish streaks
Why it happens: Ridges, thick coats, or too many brush strokes.
Fix:
- Use a ridge-filling base
- Use thinner coats
- Follow the three-stroke rule
3) Your polish bubbles
Why it happens: Shaking the bottle, thick layers, or airflow.
Fix: Roll the bottle, paint thinner, avoid fans or vents blowing on nails.
4) Your top coat shrinks back at the tips
Why it happens: You flooded edges or overworked quick-dry top coat.
Fix: Float top coat on, use fewer strokes, cap the free edge last.
5) Your manicure chips in a day
Why it happens: Oil on the nail plate, water exposure too soon, no edge seal.
Fix: Dehydrate nails properly, cap edges, avoid hot water for a few hours, re-top on day 3 or 4.
6) Your manicure dents and smudges
Why it happens: Layers are still soft under the surface.
Fix: Use thinner coats and give it more set time. Quick-dry top coat helps, but it is not magic.
7) Press-ons lift or pop off
Why it happens: Wrong size, oil, or not enough pressure time.
Fix: Size down and file, dehydrate nails, apply cuticle-first, hold 20–30 seconds.
8) Your cuticles look messy even with nude polish
Why it happens: Dry skin and uneven cleanup.
Fix: Push back gently, clean edges with a brush, oil at night for smoother cuticle lines.
Key Takeaways
- Fix undertone first if nude looks “off.”
- Thin coats and clean nails solve most streaking and chipping.
- Top coat technique controls shrinkage and shine.
Nails Edition, The Stuff That Quietly Wrecks Your Results
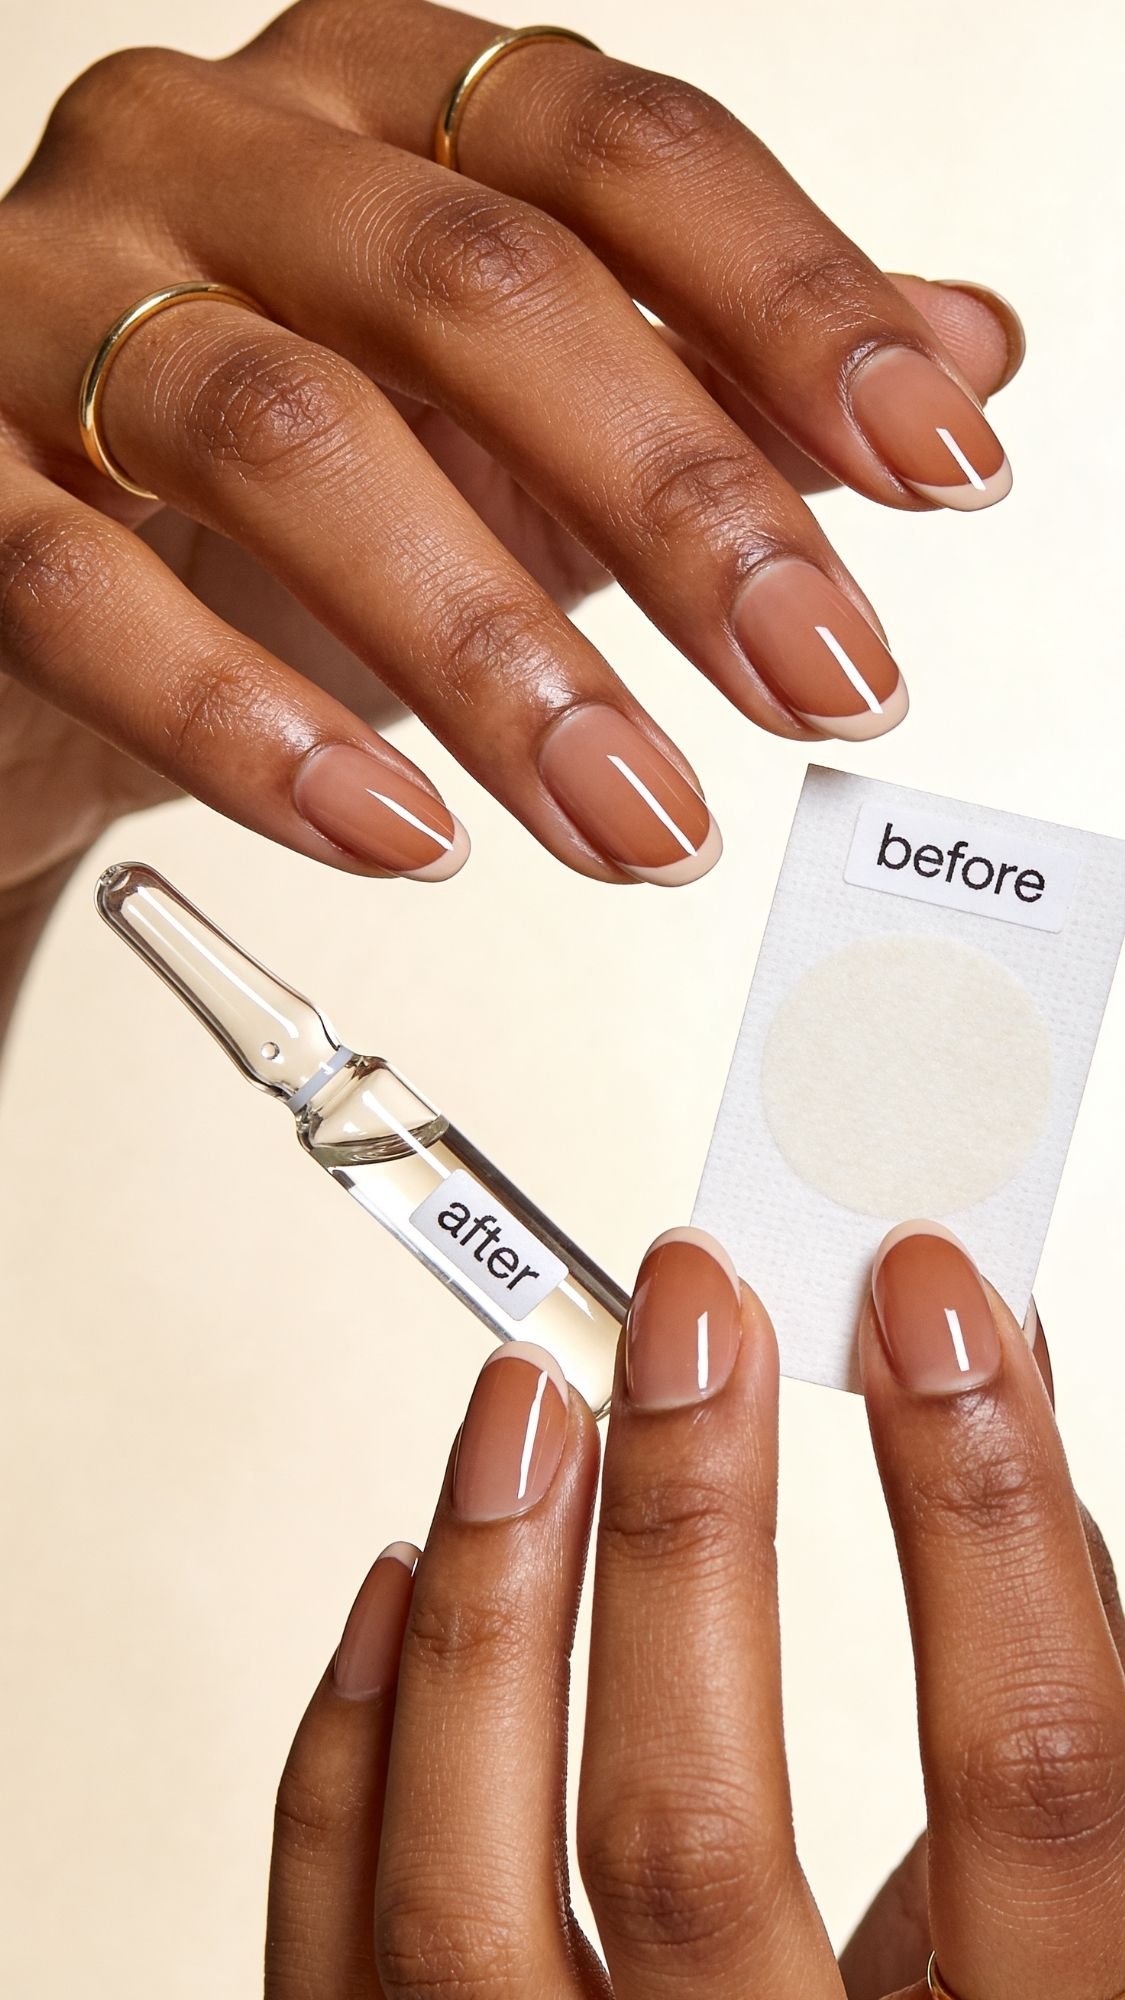
Nails do not have “ingredient conflicts” the way skincare does, but certain combos still cause irritation, lifting, and breakage. What I’ve noticed over the years is this, most nail failures come from oil + polish, water + fresh polish, or skin contact + stronger products. If you avoid these combos, your nude manicure instantly lasts longer and looks cleaner.
1) Cuticle oil or hand lotion right before polish
Why it’s a problem: Oil blocks adhesion, polish slides, chips faster.
Do this instead: Dehydrate nails first, then oil after everything sets, ideally at night.
2) Water-heavy prep right before painting
Why it’s a problem: Nails absorb water and swell, then shrink as they dry, which can cause lifting and early chips.
Do this instead: Keep nails dry before painting. If you shower, wait a bit, then cleanse and dehydrate.
3) Peeling or popping off product as “removal”
Why it’s a problem: It takes layers of your nail plate with it, then nude looks streaky for weeks.
Do this instead: Use gentle removal, soak time, and oil. No ripping, ever.
4) Gel product touching skin (or under-curing)
Why it’s a problem: Skin contact can increase allergy risk, and under-cured gel can trigger irritation.
Do this instead: Keep gel off skin, cure properly, and stop if you notice itching, redness, or burning around nails.
5) Strong remover with no aftercare
Why it’s a problem: Acetone dries skin and nails fast, and dry cuticles make nude look dull.
Do this instead: Use acetone when needed, then wash hands and apply cuticle oil and hand cream after.
6) Too many heavy “hardener” layers back-to-back
Why it’s a problem: Some nails get brittle and snap when they feel overly rigid.
Do this instead: Rotate with a ridge-filler base or a gentle protective base between weeks.
Key Takeaways
- Oil before polish is the fastest way to ruin nude longevity.
- Water before painting increases chips and lifting.
- Skin contact with stronger products can cause irritation, avoid it.
What to Buy First vs What Can Wait
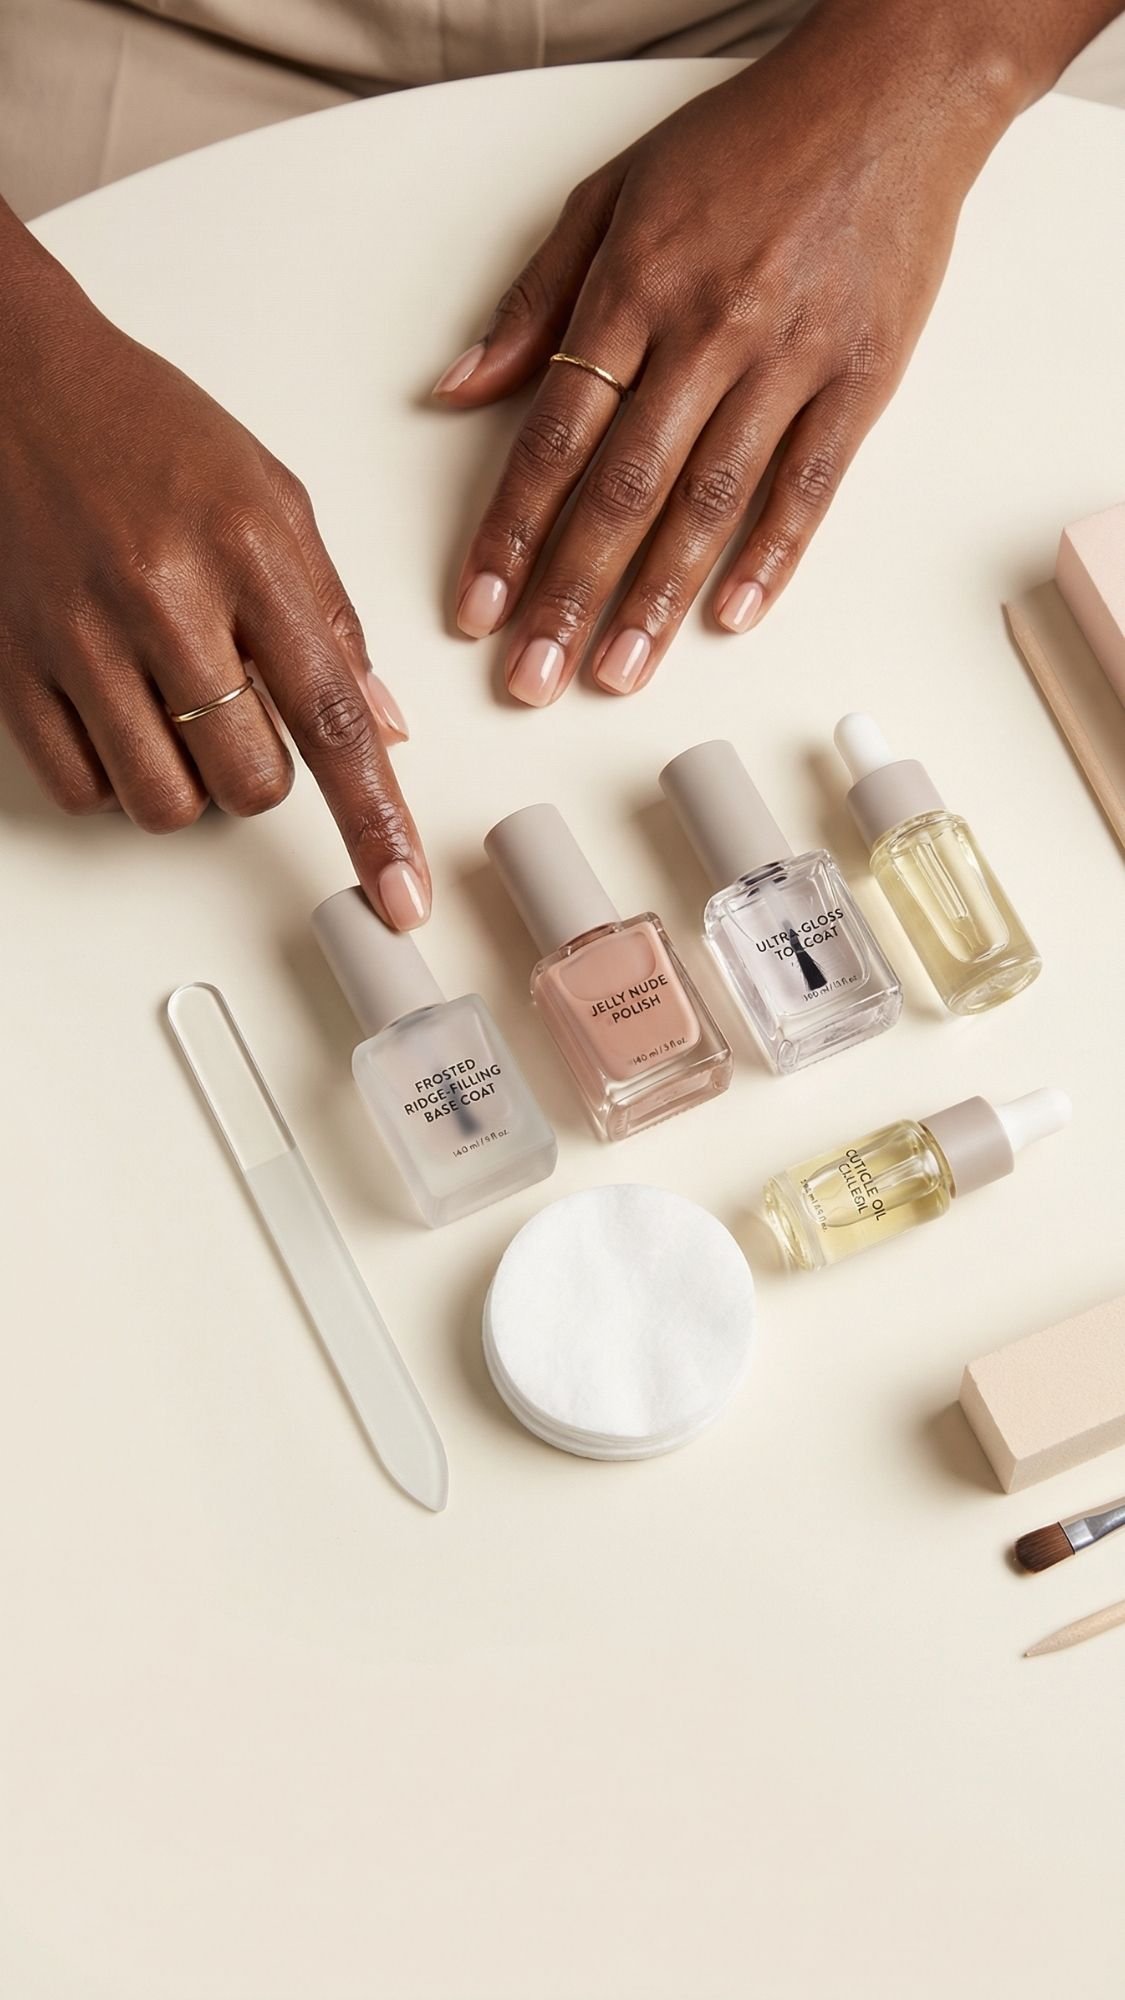
If you’re building your nude nail routine from scratch, you don’t need to buy everything at once. What I’ve noticed over the years is this, the best results come from one good base, one forgiving nude, and one glossy top coat. Tools matter, but you can keep it minimal and still get a manicure that looks clean and expensive.
Buy first (the essentials)
- Glass nail file Why: cleaner edges, less peeling, easier shaping
- Ridge-filling base coat (or sticky base if you chip fast) Why: makes nude look smoother, helps longevity
- One forgiving nude polish (choose one):
- Sheer cocoa (flattering and easy)
- Jelly nude (hides streaks)
- Slightly sheer milky nude (clean look, best with ridge-filler)
- High-gloss top coat Why: creates the “expensive” shine and protects the manicure
- Lint-free pads + alcohol Why: dehydration improves adhesion
- Cuticle oil Why: cleaner cuticles, healthier look, better “finished” effect
Buy next (nice-to-haves that level you up fast)
- Cleanup brush + acetone Why: sharp edges make nude look pro
- Dotting tool Why: tiny dots and micro florals become easy
- Striping brush Why: micro French, side French, fine lines
- Matte top coat Why: gives you that soft satin nude option
Buy later (only if you love nail art)
- Chrome powder
- Foil flakes
- Decals and stickers
- Magnetic polish + magnet
Key Takeaways
- Start with base, one nude, and top coat. That’s your core trio.
- A cleanup brush is the fastest “pro upgrade.”
- One good glossy top coat makes almost any nude look better.
Quick Answers People Actually Google

1) How do I pick a nude nail color that won’t look ashy on deeper skin?
Choose a nude that matches your undertone and goes slightly deeper than your exact skin tone. Look for caramel, cocoa sheer, warm latte, rosy-brown, and avoid pale beige that looks like white-out in the bottle. If you already own a too-light nude, layer a warm sheer nude underneath or switch to a glossy sheer cocoa that blends better.
2) Why does my nude polish streak even when I apply carefully?
Nude streaks usually come from ridges + thick coats + too many strokes. Use a ridge-filling base, paint thinner coats, and stick to three strokes per nail. Jelly and sheer nudes also self-level better than thick creamy nudes.
3) How do I stop top coat shrinkage on nude nails?
Float the top coat on with light pressure, use fewer strokes, and cap the free edge last. Avoid flooding the cuticle line. Quick-dry top coats shrink more when you overwork them.
4) How long should I wait between coats, realistically?
For thin coats, wait about 2–3 minutes between color coats, then 3–5 minutes before top coat. If your polish dents easily, you likely used thick coats, or humidity slowed drying.
5) What nude nail shape makes fingers look longer?
Short almond and oval create the best elongation. Side French, side outline, and ombre also help because they pull the eye upward and inward.
6) Can I get “soap nails” with regular polish at home?
Yes. Use a ridge-filling base, a slightly sheer milky nude, then a high-gloss top coat. Keep coats thin and clean up the cuticle line. Soap nails look luxe because the finish looks smooth and glossy, not thick.
7) Glue vs tabs for press-ons, what should I choose for vacation?
Use glue for longer wear and water exposure. Use tabs for short trips, photos, and easy removal. If you plan to swim or do lots of dishes, glue performs better.
8) How do I remove press-ons without peeling my nails?
Soak in warm soapy water for 10–15 minutes, add cuticle oil, then lift gently from the sides with a wood stick. If it resists, soak longer. Do not rip them off, that’s how nails get thin and uneven.
9) Why do my nude nails chip fast even with good polish?
Most chips happen when the nail plate still has oil, or when you skip capping the free edge. Dehydrate nails properly before base coat, cap the edge on color and top coat, and avoid hot water for a few hours after finishing.
10) What’s the easiest nude nail look for beginners?
Sheer cocoa glaze, jelly nude, or a simple glossy milky nude with ridge-filler base. These look clean even if your technique is not perfect yet.
Nude Nails That Actually Look Good, Not Just “Neutral”

Nude nails should feel like the easiest choice in your rotation, and now you’ve got the playbook to make them look expensive on purpose. If you remember nothing else, remember this, undertone first, thin coats always, and glossy top coat plus capped edges equals longevity. That combo fixes most streaks, most chips, and most “why does this nude look off on me” moments.
Pick three favorites from the 25 ideas and rotate them all spring and summer. I usually keep one “your nails but better” option (sheer cocoa or jelly nude), one “clean girl” option (micro French or soap nails), and one “fun but still nude” option (glazed, aura, or velvet cat-eye). That way you never get bored, but you also never panic-match your nails to your outfit again. Because honestly, who has the time? :/
Key Takeaways
- Choose nude like foundation: undertone first, depth second.
- Thin layers dry harder and look smoother than thick coats.
- Re-top on day 3 or 4 to keep nude looking fresh and glossy.
- Healthy cuticles make every nude manicure look cleaner.