Easter isn’t just for the kids anymore. For those of us who live for a fresh set, it’s the unofficial kickoff for spring style. After years of testing every pastel and glitter under the sun, I’ve seen some true nail tragedies. I’m talking about streaky yellows that look like highlighter fluid and “sparkle” that chips before the first egg is even found. If you want a manicure that actually survives the holiday brunch and looks elite in every photo, you’re in the right place.
What I’ve noticed over the years is that people often settle for “flat” colors because they’re afraid of looking too juvenile. IMO, the secret isn’t just the color. It’s the dimensional finish that makes people grab your hand to get a closer look. The best professional base coats have a slightly sweet, chemical-meets-floral scent and feel just a tiny bit tacky for thirty seconds before they set. This “grip” is what we are looking for. Let’s get you that high-value sparkle.
Quick Results Snapshot
- What this look solves: Drab winter hands and “basic” holiday styling that chips too fast.
- Who it’s best for: Everyone from short-nail minimalists to acrylic maximalists.
- Time required: 45 minutes for basic styles, up to 2 hours for 3D art.
- Budget range: $15 (DIY) to $120 (Salon 3D art).
- Expected timeline: Instant results that last 7 to 21 days depending on the method.
- Biggest mistake people make: Applying thick layers that never fully cure and skipping the edge “cap.”
Nail Prep (The Difference Maker)
Listen, if your manicure starts lifting by Monday morning, do not blame the polish brand. In my time of doing this, I have realized that prep is 90% of the battle. If your nail plate is not bone dry and smooth, even the most expensive gel will pop off like a cheap sticker. The secret is treating your nails like a canvas that needs a deep clean before the first drop of paint touches it. Let’s walk through the steps that separate the amateurs from the influencers.
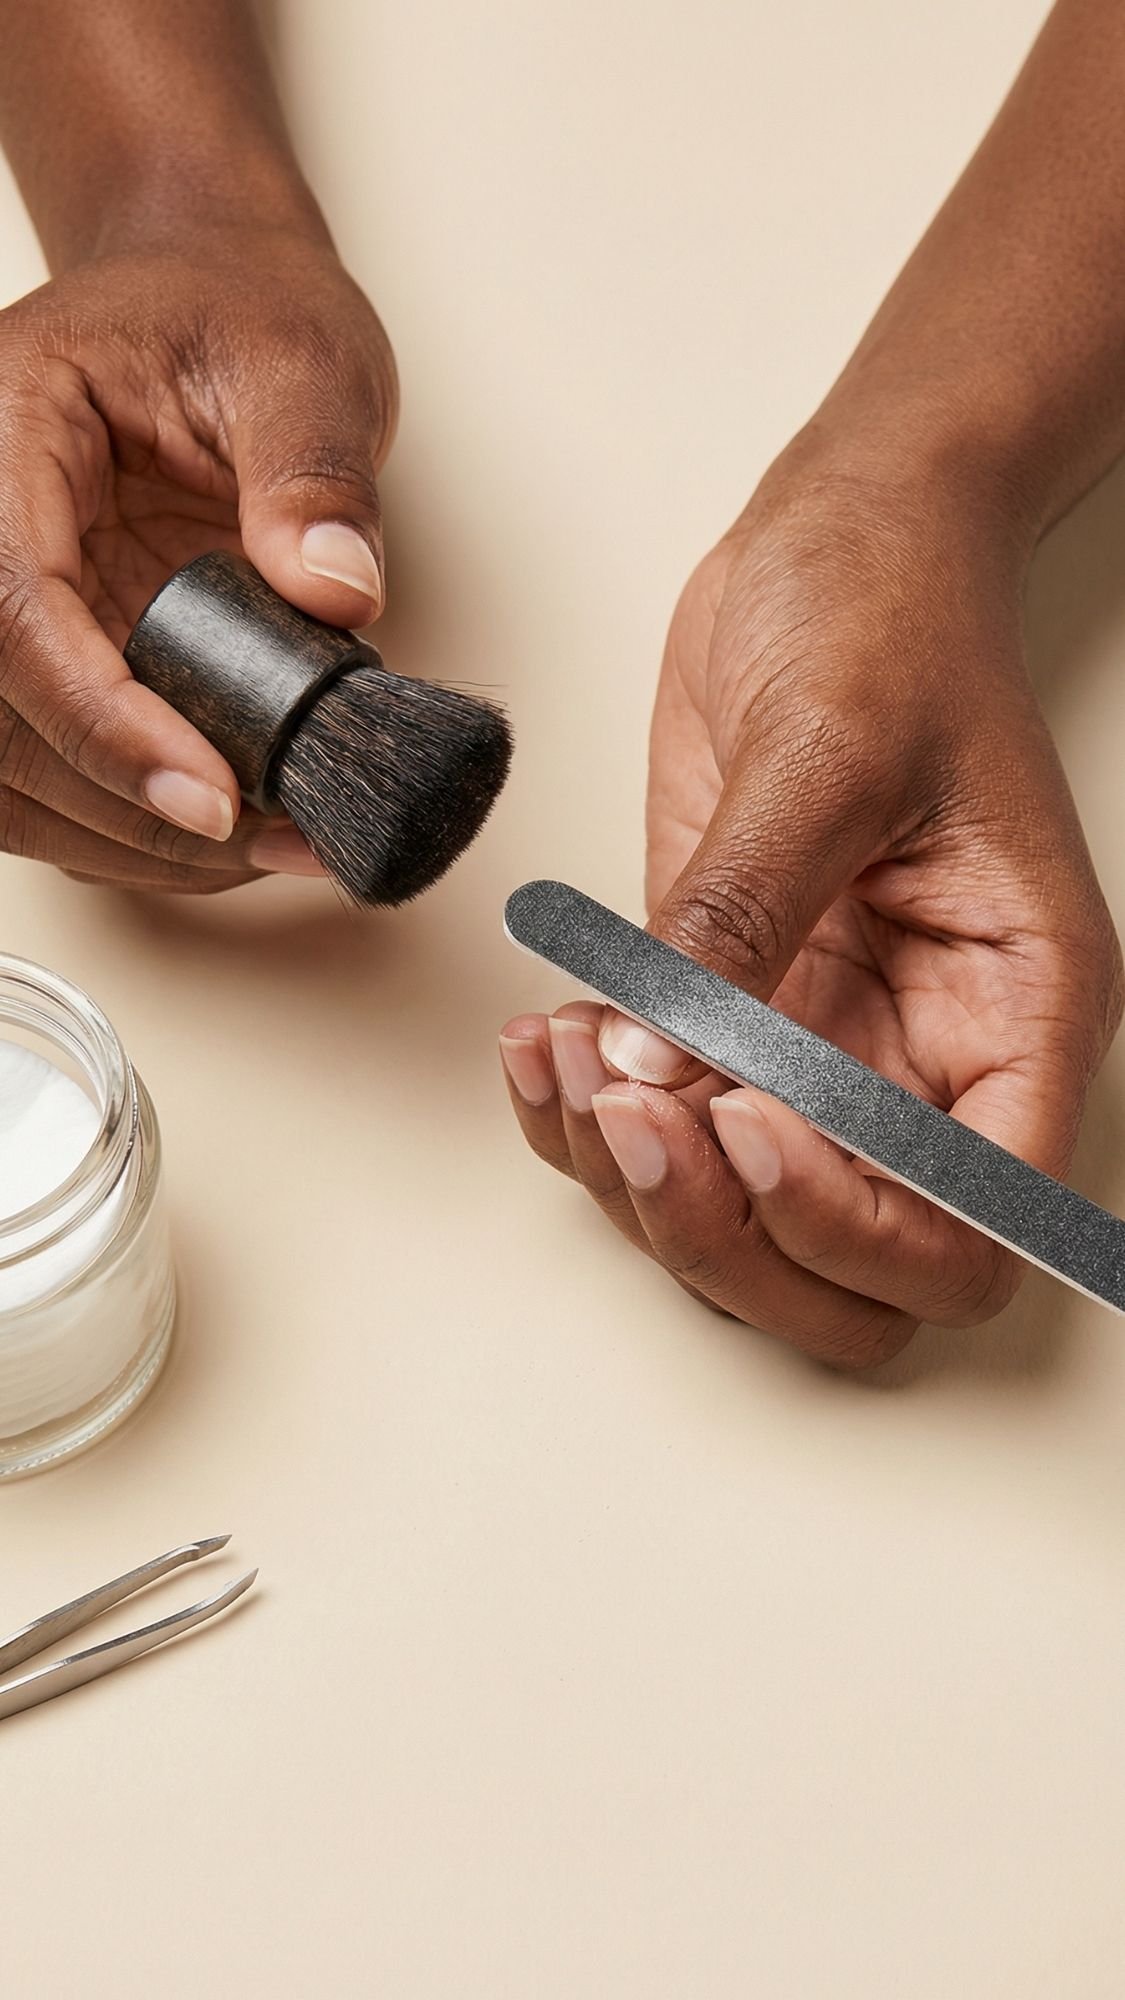
Step 1: Clean Slate and Shape
First, you need to remove every single trace of old product. I see so many people trying to paint over “mostly removed” base coat, and it is a recipe for a lumpy finish. Use a 180-grit file to shape your nails. Please, for the love of all things sparkly, stop “sawing” the file back and forth. This creates micro-shatters in your nail plate that lead to peeling. Move the file in one direction only to keep the edge sealed and strong.
Step 2: Gentle Cuticle Work
The mistake most people make with this technique is getting too aggressive with the nippers. You should never, ever cut your live cuticle tissue. Instead, use a high-quality cuticle remover liquid and a glass cuticle pusher. Glass is much gentler than metal and actually exfoliates the dead “pterygium” skin off the nail plate. If that skin stays on the nail, your polish will bond to the skin instead of the nail, and it will lift within forty-eight hours.
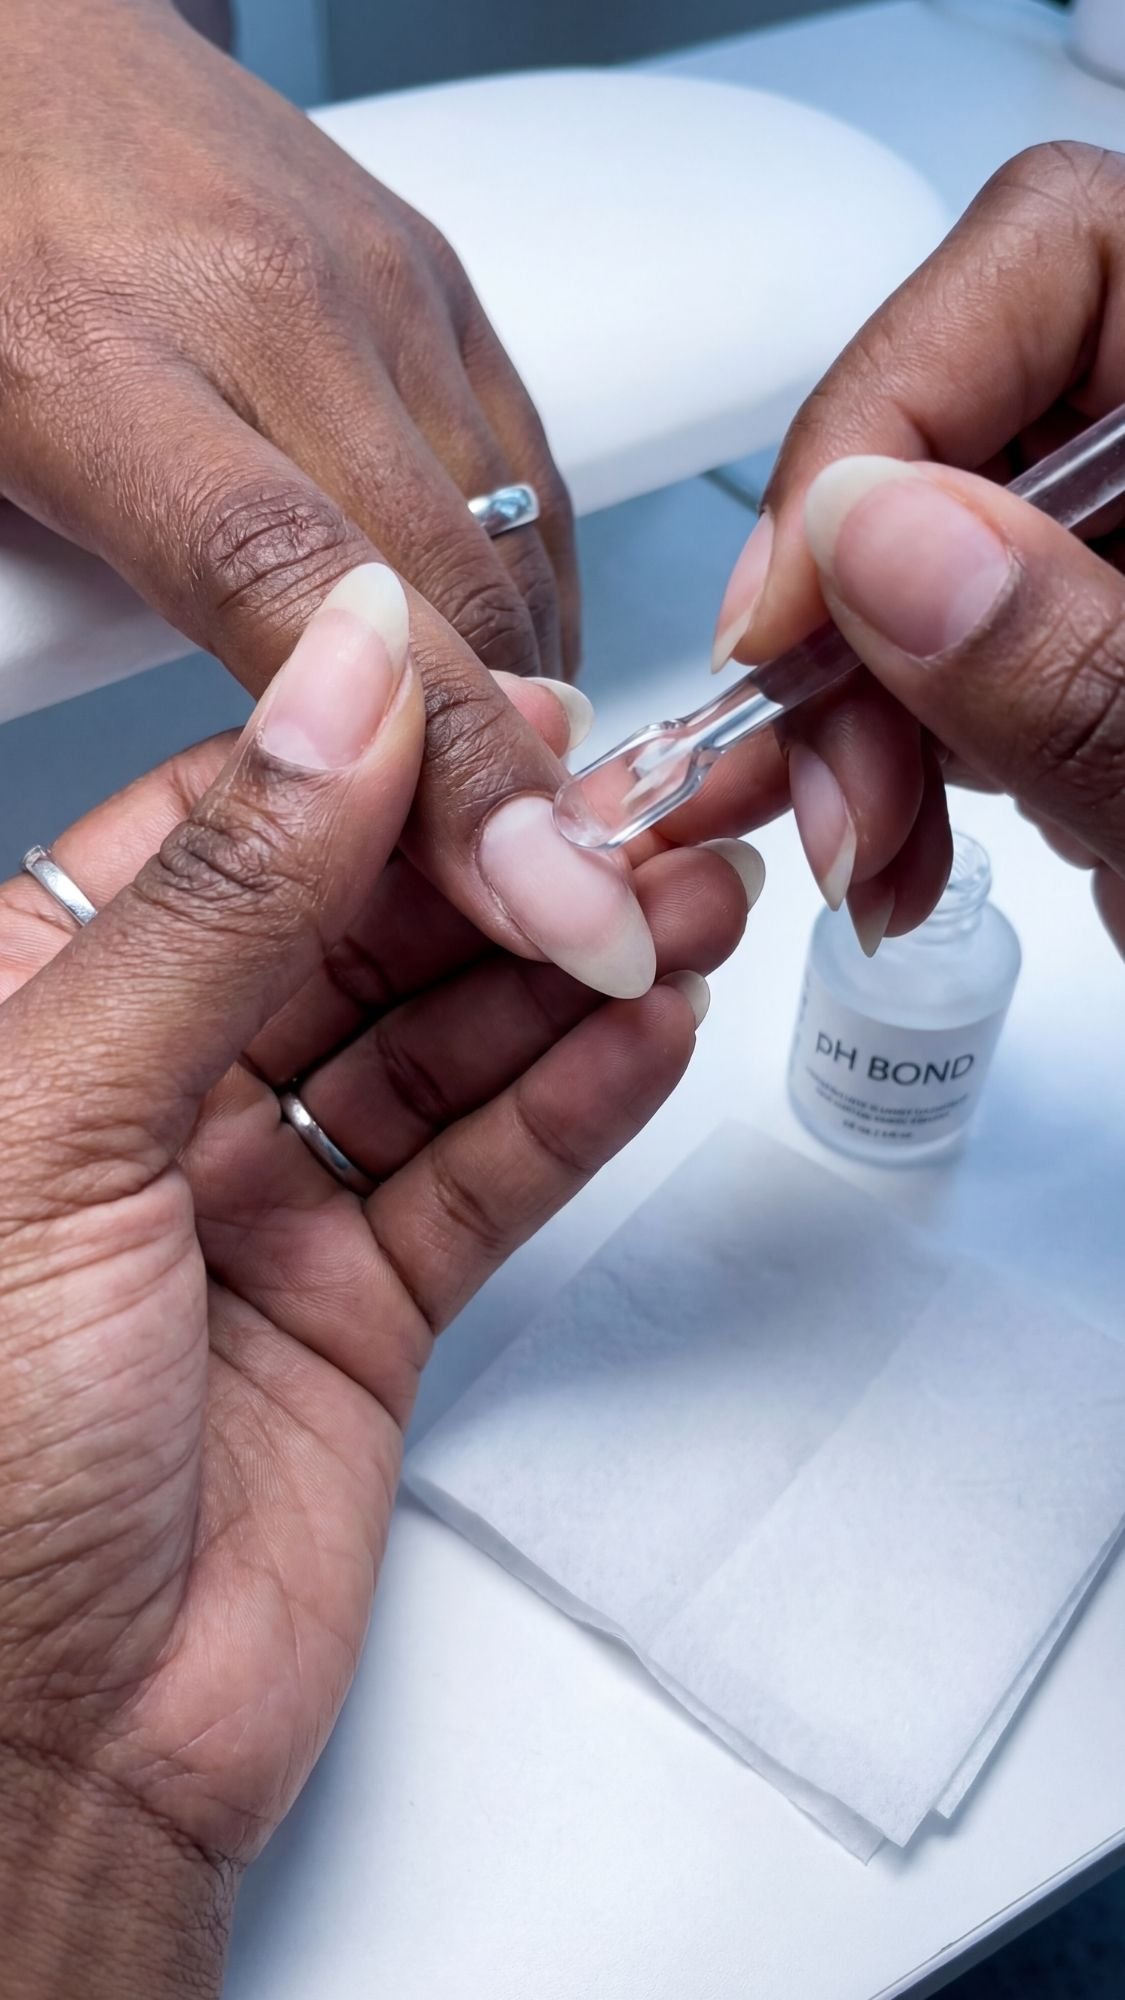
Step 3: Buff and Dehydrate
Take a 240-grit buffer and very lightly remove the shine from your nails. You are not trying to thin the nail out, you are just creating a “grippy” texture. Once you buff, do not touch your nails with your fingers! Your skin has natural oils that will ruin the bond. Wipe each nail down with 90% isopropyl alcohol or a professional pH bond. The nail should look slightly “chalky” or matte. This is the “proof” that the surface is ready for the base coat.
Pro Prep Tip: The “Water Rule”
What I have noticed over the years is that nails are like sponges. If you shower or wash dishes right before your mani, your nails soak up water and expand. When they dry later, they shrink, and your polish stays the same size, causing it to crack or pop off. Wait at least one hour after your hands have been in water before you start your prep routine.
Common Mistake + Easy Fix
- The Mistake: Using a “2-in-1” shampoo or heavy lotion right before painting.
- The Fix: If you accidentally touched your hair or applied lotion, re-scrub your nails with a lint-free wipe and pure acetone. This “resets” the surface so your base coat can actually do its job.
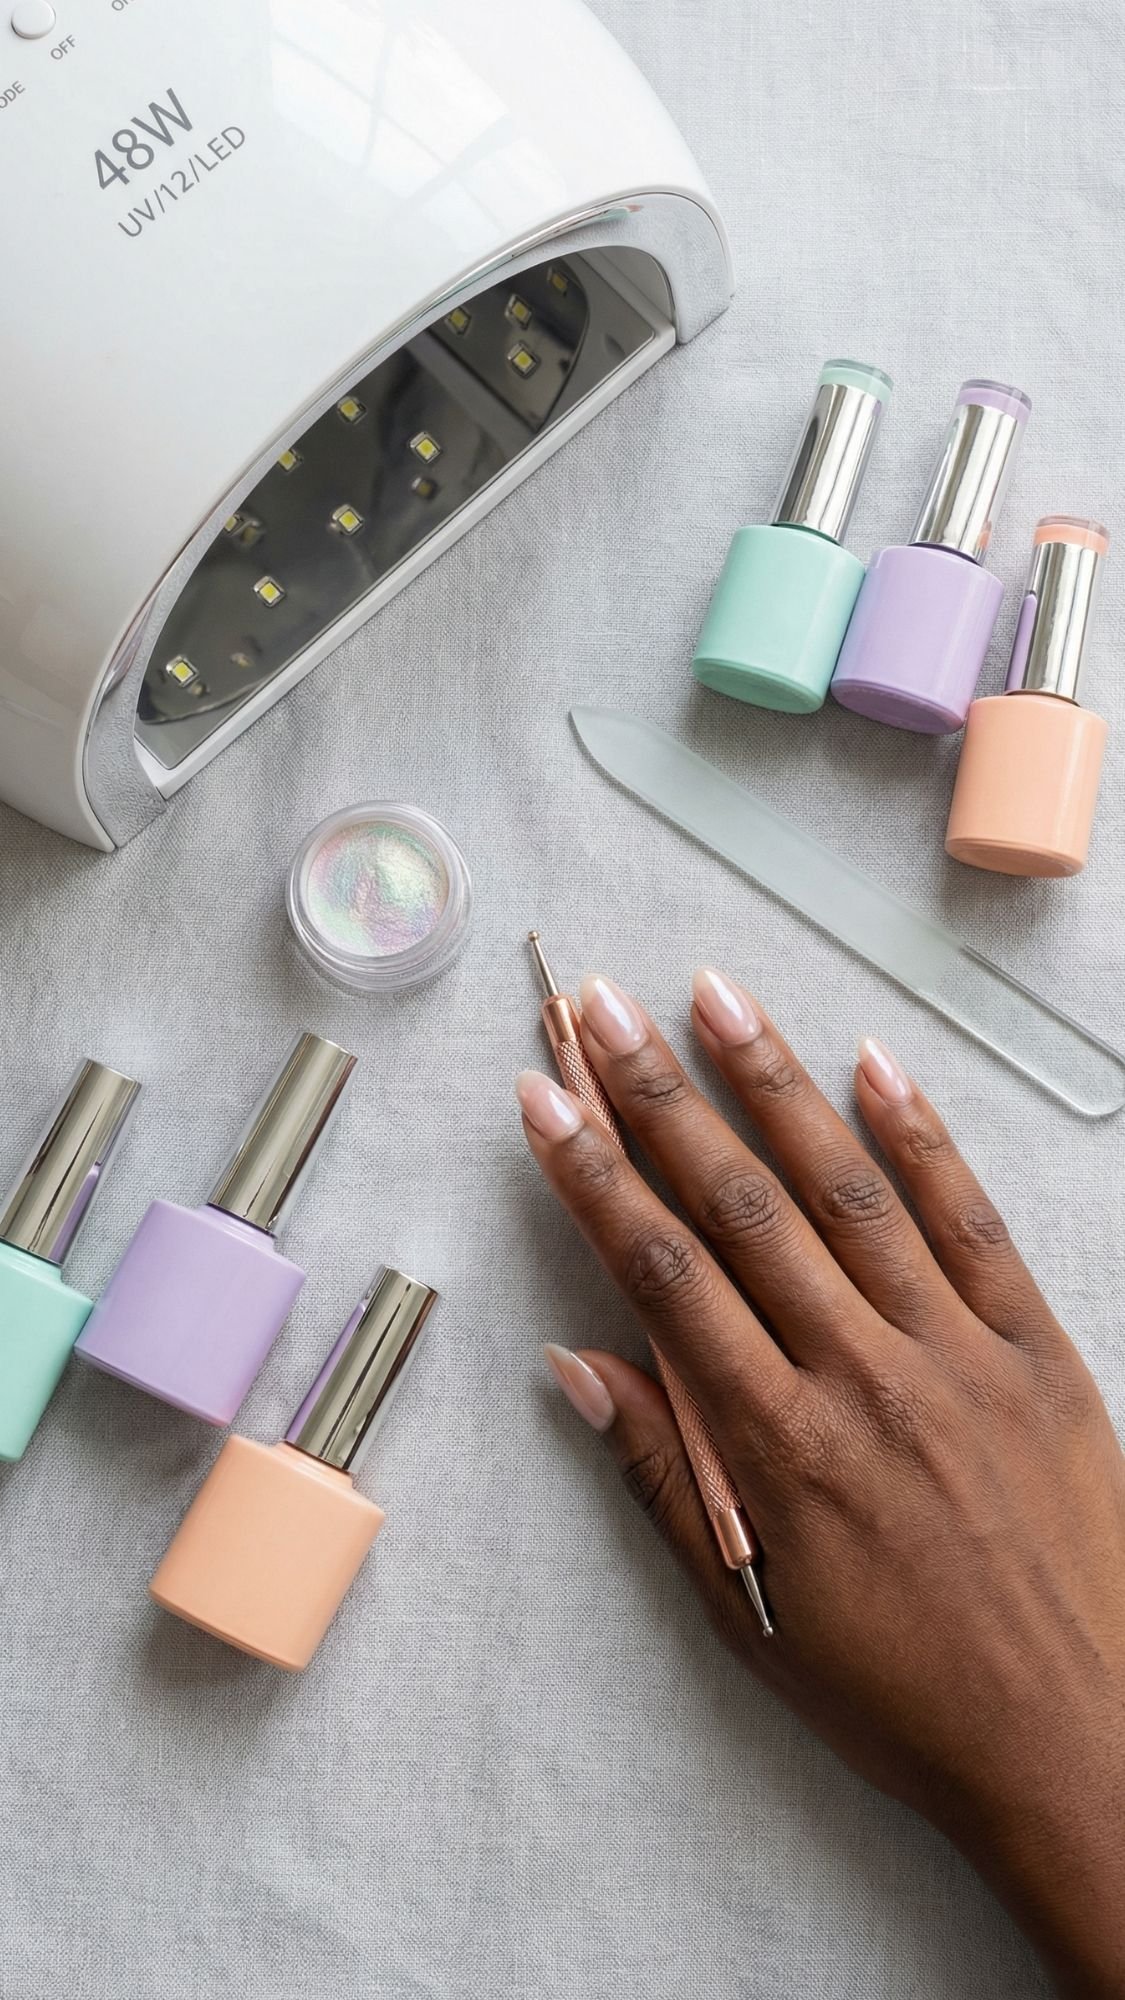
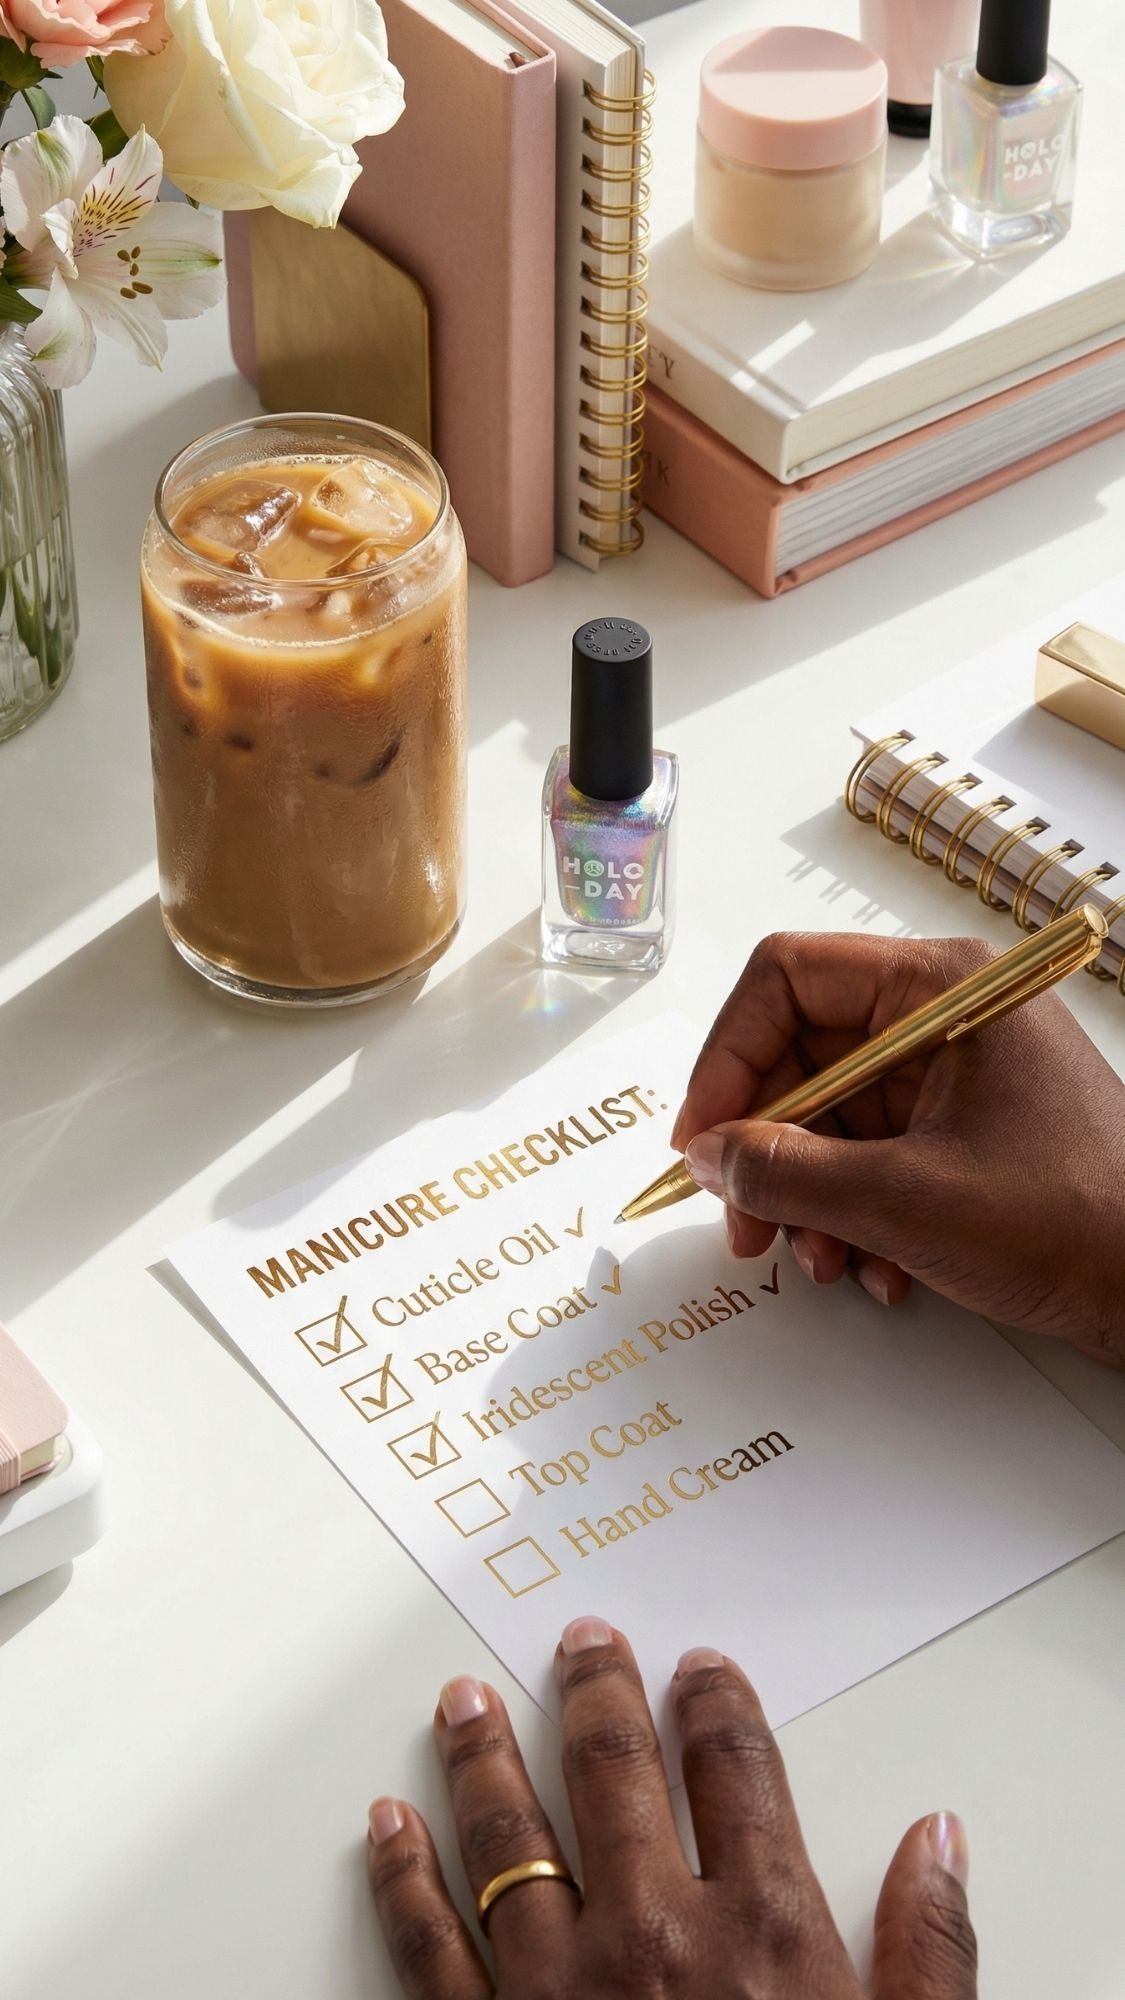
Tools + Products Needed
Listen, I love a bargain as much as the next girl, but your “bargain” kit might be why your nails look like a craft project gone wrong. When it comes to sparkle, quality really does matter. You do not need to spend five hundred dollars, but you do need the right formulas to get that high-end look. I have wasted plenty of money over the last decade so you do not have to. Here is what you actually need in your kit.
The Essentials (The “Must-Haves”)
- A High-Quality Base Coat: Look for “Sticky” or “Rubber” bases. These act like double-sided tape for your polish.
- The “Perfect” Pastel Polish: Choose brands with high pigment density. If it looks translucent in the bottle, it will be streaky on your nail.
- The No-Wipe Top Coat: If you are doing chrome or 3D art, a no-wipe top coat is your best friend. It should feel like a thick, honey-like glaze that levels itself out instantly.
- 90% Isopropyl Alcohol: This is the only thing that truly removes the surface oils without leaving a residue.
- Glass Nail File: These last forever and prevent your nails from peeling at the tips.
The “Extra” List (The Nice-to-Haves)
- A Strong Dual-Pole Magnet: If you want that velvet look, those tiny magnets that come with the polish usually do not cut it. Get a heavy-duty one.
- Iridescent Chrome Powder: This is the “magic dust” that turns a boring pastel into a “glazed” masterpiece.
- Tiny Dotting Tools: You can use a toothpick in a pinch, but a set of dotting tools costs five dollars and makes 3D flowers so much easier.
| Item | Save (Drugstore) | Splurge (Pro) | Why? |
|---|---|---|---|
| Color Polish | Sally Hansen / Essie | OPI / Mooncat | Pro colors usually have better “self-leveling” properties. |
| Nail File | Emery Boards | Glass File | Emery boards can shred natural nails. Glass seals them. |
| Top Coat | Revlon Quick Dry | Seche Vite / Gelish | A pro top coat provides that “glass” shine that lasts 10 days. |
Pro-Tip: The Lamp Reality Check
If you are using gel, please stop using those tiny, ten-dollar “mini” lamps. The mistake most people make is assuming if the polish feels hard, it is cured. In reality, under-cured gel can lead to severe skin allergies over time. Invest in a lamp with at least 48 watts and a mirrored bottom. This ensures the light hits your nails from every angle, even the “hidden” edges.
Common Mistake + Easy Fix
- The Mistake: Using a top coat that is too thin, which causes glitters to feel “scratchy” or “bumpy.”
- The Fix: Apply a “glitter grabber” clear coat or a thick “Plumping” top coat. It fills in the gaps between the sparkle pieces for a smooth, glass finish.
Step-by-Step Application: Choosing Your Magic
Now that we have prepped the canvas, it is time for the fun part. In my experience, the difference between a manicure that looks “homemade” and one that looks “high-end” comes down to the layering. Since most of our 16 designs rely on dimension, I am going to walk you through the two most reliable methods right now. Whether you are a gel devotee or a press-on queen, these steps are non-negotiable for that professional finish.
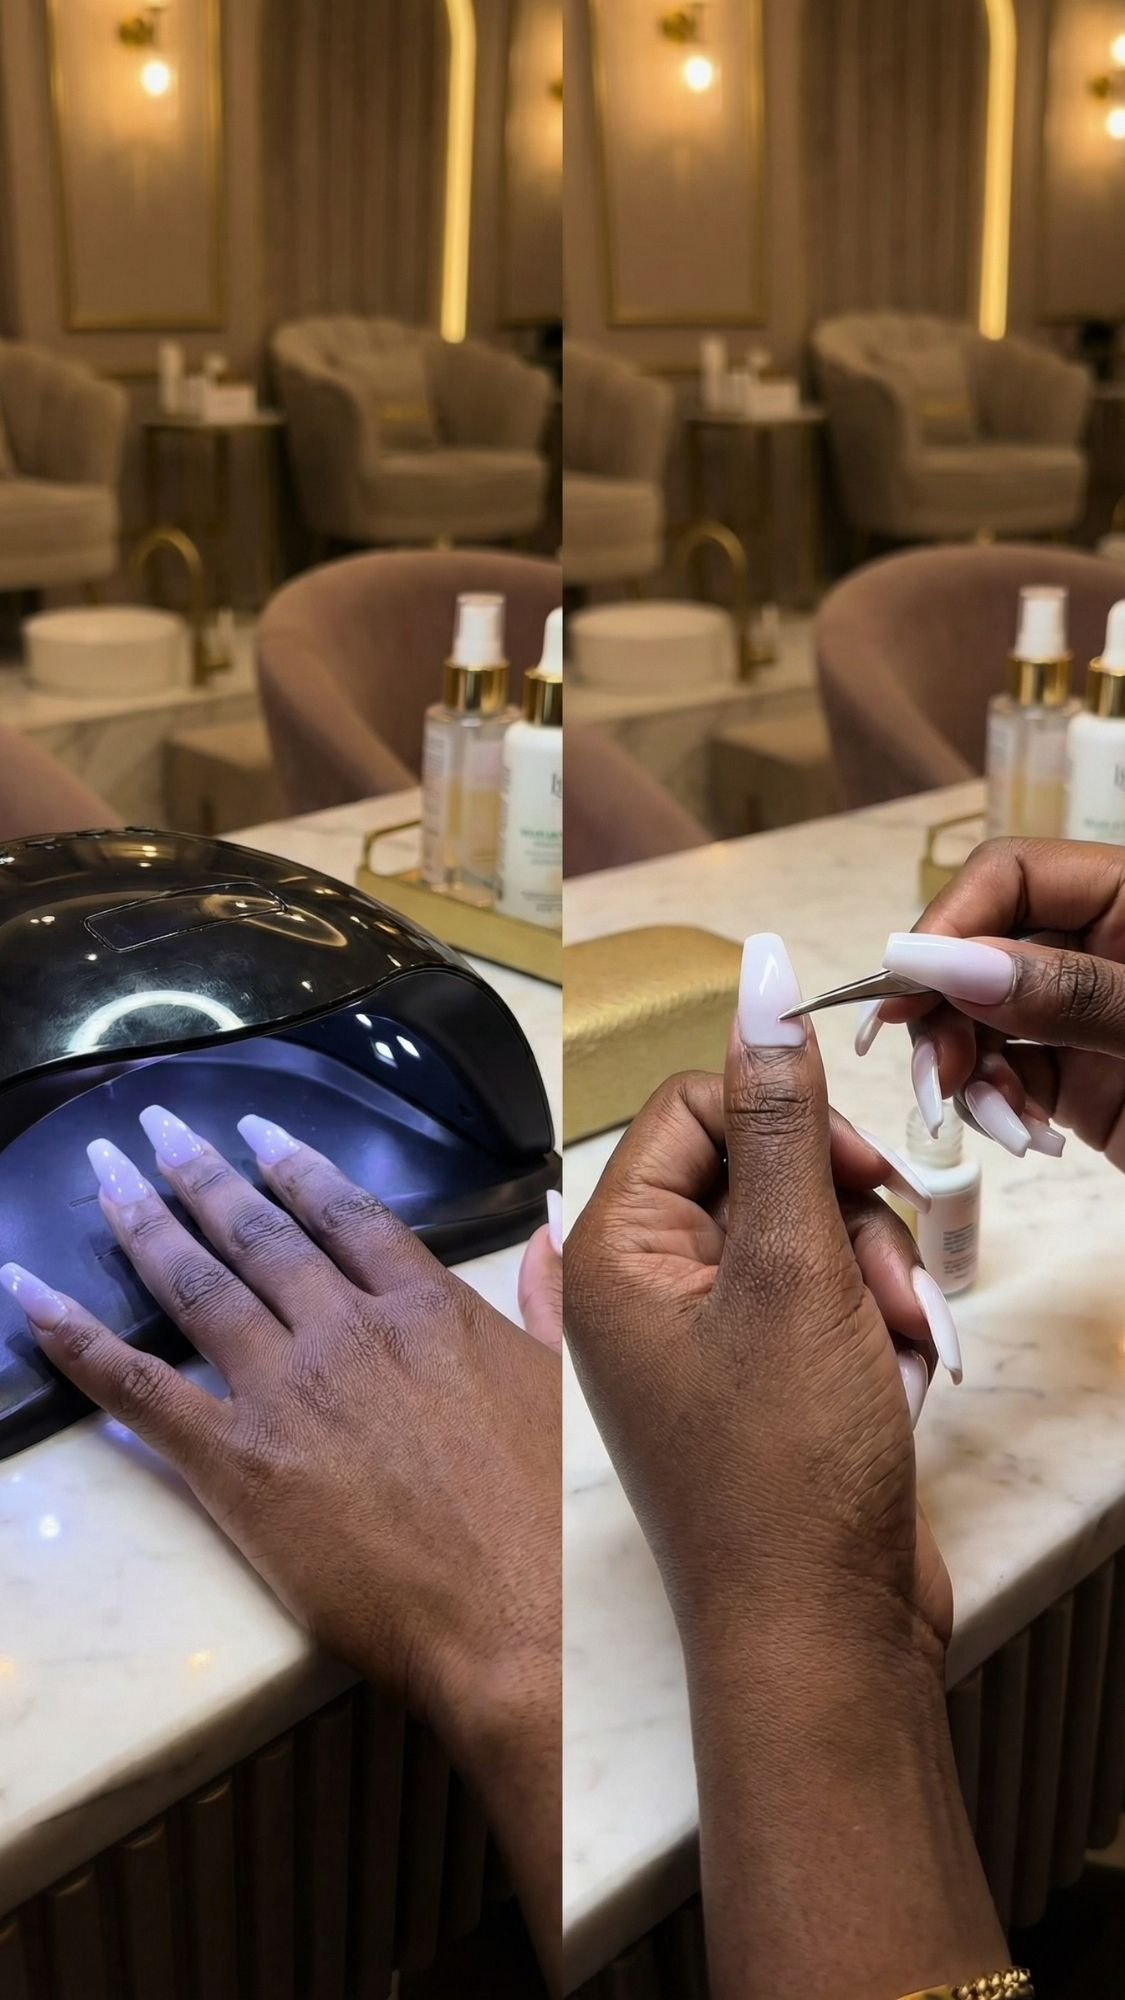
Method A: The Gel With Lamp (The Pro Standard)
This is my personal favorite because it allows for “capping” and complex art like the Velvet look.
- The Base Layer: Apply a thin layer of base coat. What I have noticed over the years is that most people use too much. You want just enough to make the nail look wet. Cure for 60 seconds.
- Color Application: Apply your pastel shade in two or three ultra-thin coats. If you see streaks, do not keep brushing. Most modern gels are “self-leveling,” so give it ten seconds to sit before you put it under the lamp.
- The Clean-up Secret: Before you cure each layer, take a tiny brush dipped in alcohol and run it around your cuticle. Once you cure a mistake, it is there for life, or at least until you file it off.
- The Free Edge Cap: This is the most important step. Run your brush along the very edge of the nail tip for every single layer. This “wraps” the polish and prevents the shrinkage that leads to chipping.
Method B: The Press-On Method (The 15-Minute Glam)
If you are short on time but want that $100 look, press-ons are the answer.
- The Sizing Strategy: This is where most people fail. You must size your nails before you start. If a tip is slightly too big, it will rub against your skin and pop off. Always go for the smaller size if you are between two options.
- Glue Placement Technique: Do not just put a dot in the center. Apply a small amount of glue to your natural nail and a thin layer to the back of the press-on. This creates a “double-sided” bond that prevents air bubbles.
- The Press + Hold: Align the nail at the cuticle first, then roll it down toward the tip. Hold it with firm, even pressure for a full thirty seconds. If you let go too soon, you will get bubbles that cause the nail to lift within days.
- Edge Sealing: Once they are on, apply a tiny bit of top coat to the very edge where the press-on meets your cuticle. This prevents your hair from snagging under the nail when you shower.
Pro-Tip: The Sensory Check
When you are using a high-quality gel top coat, it should feel “cushiony” as you apply it. It has a slight, clean scent that reminds me of a fresh spa. If it feels watery or smells overly like vinegar, it is likely an old formula or low-quality resin that won’t give you that glass-like sparkle we want for Easter.
Common Mistake + Easy Fix
- The Mistake: Getting gel on the skin and curing it. This causes lifting and can lead to skin sensitivities.
- The Fix: Use a wooden “orange stick” or a clean-up brush to remove every trace of product from the skin before your hand goes into the lamp. If it touches the skin, it’s an automatic “redo” for that nail.
The 16 Designs: Easter Sparkle Reimagined
Now we get to the heart of the matter. Forget those flat, chalky pastels from five years ago. We are here for the light-catchers and the conversation starters. I have curated these sixteen looks to ensure there is something for every vibe, from “Church Brunch” to “Cocktails with the Girls.” Each of these designs uses the principles of depth and texture I have mentioned, so they look just as good in person as they do under a ring light.
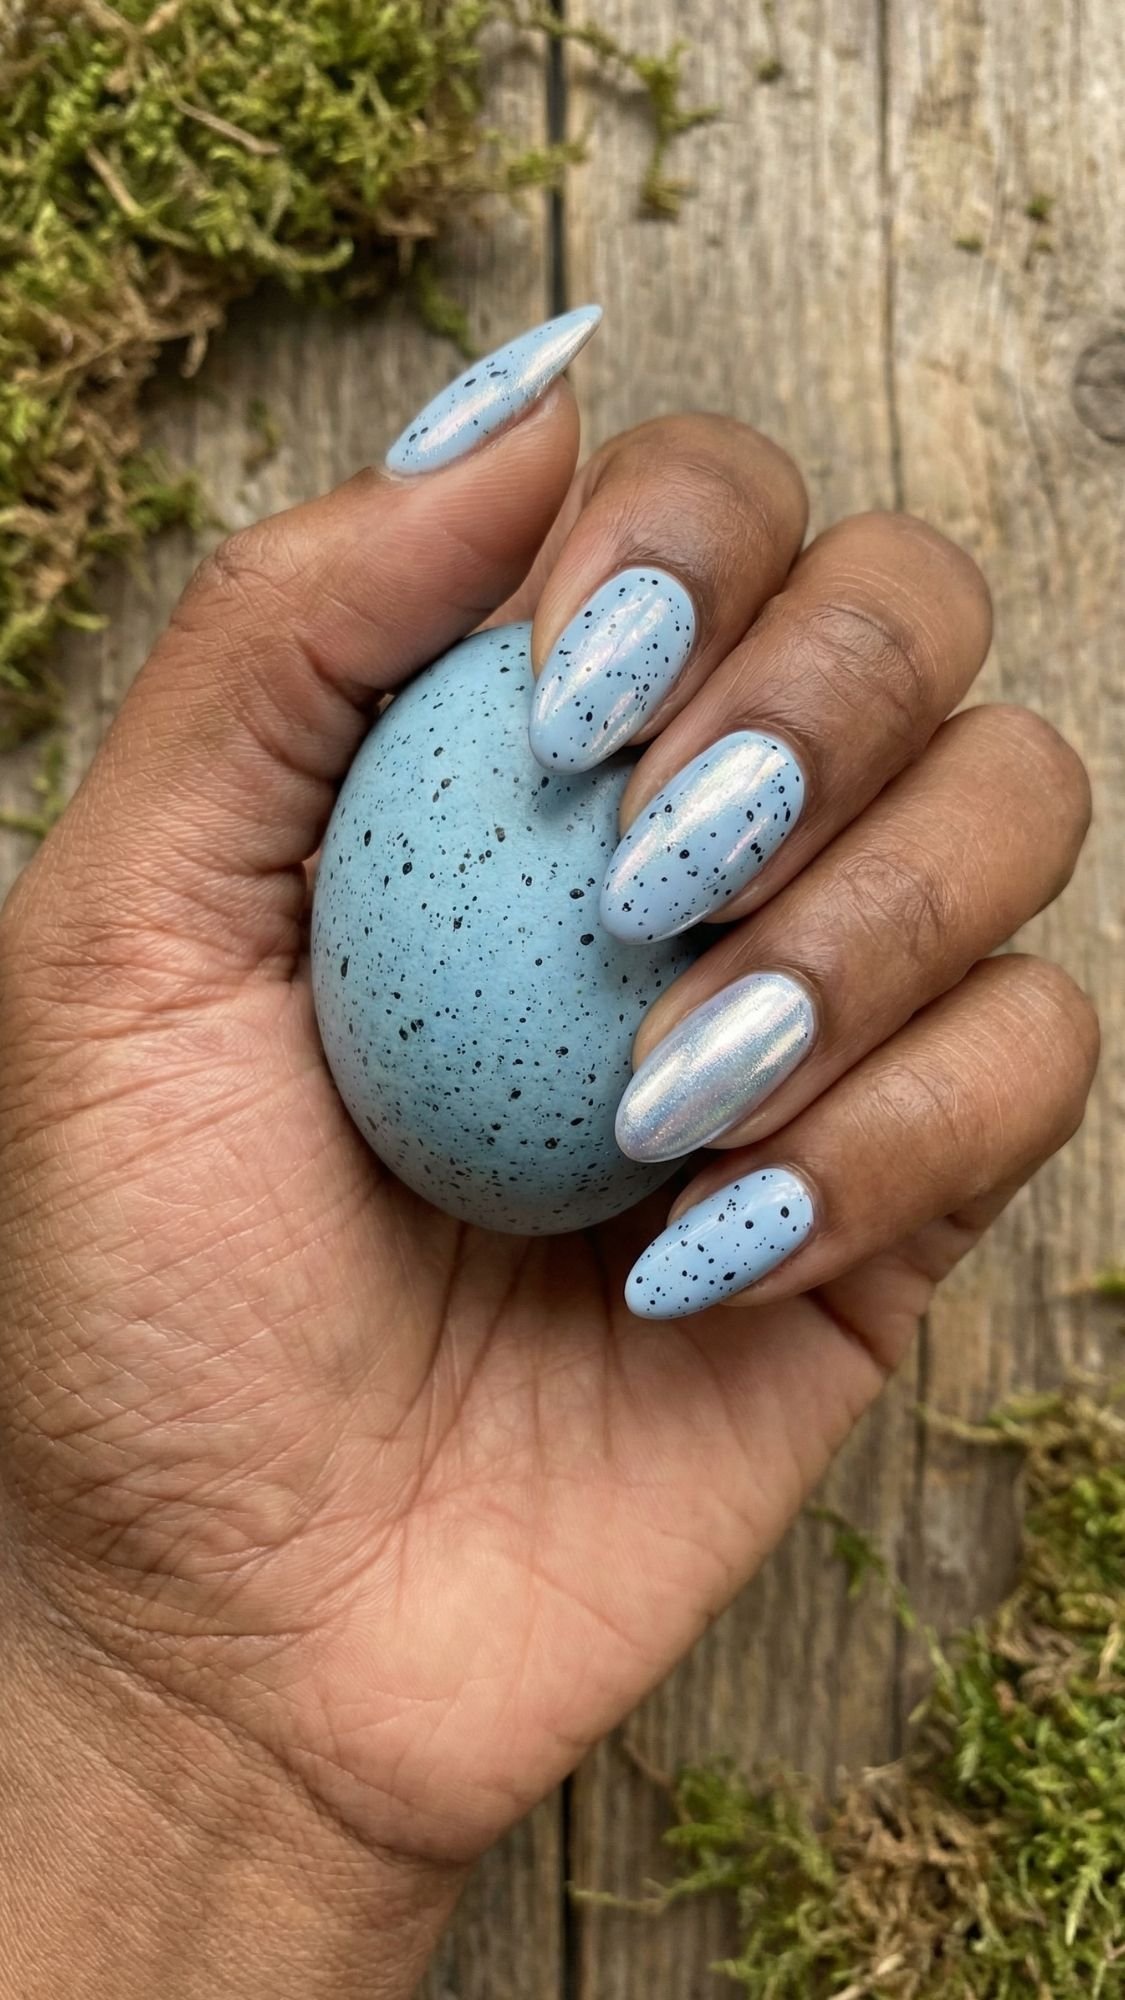
1. The “Golden Egg” Speckled Chrome
This is the “Rich Auntie” version of the classic speckled egg. We are starting with a duck-egg blue base, adding black matte speckles, and finishing with a high-shine silver chrome glaze. What I have noticed about chrome over the years is that it completely transforms the “mood” of a pastel. It moves it from “nursery” to “high fashion” instantly.
- Pro Tip: Use a fan brush for the speckles. It gives a more organic, random pattern than a dotting tool.
- Common Mistake: Rubbing chrome onto a tacky layer. Fix: Ensure your top coat is a “No-Wipe” formula and fully cured for 60 seconds. If it’s even a little sticky, the chrome will look “glittery” instead of like a mirror.

2. Lavender Velvet (Magnetic Cat-Eye)
If you want nails that look like they are literally moving, this is your set. Magnetic “Velvet” polish uses a special magnet to pull shimmer to the surface. It creates a “squishy” optical illusion that looks exactly like expensive lavender velvet fabric. IMO, this is the most sophisticated way to wear purple this season.
- Pro Tip: Hold the magnet at the base of the nail for a full 10 seconds, then the sides. This “pulls” the shimmer into a central glow.
- Common Mistake: Moving the magnet too much. Fix: Keep your hand steady. If the design gets “blurry,” just brush over it to reset the particles and try again.
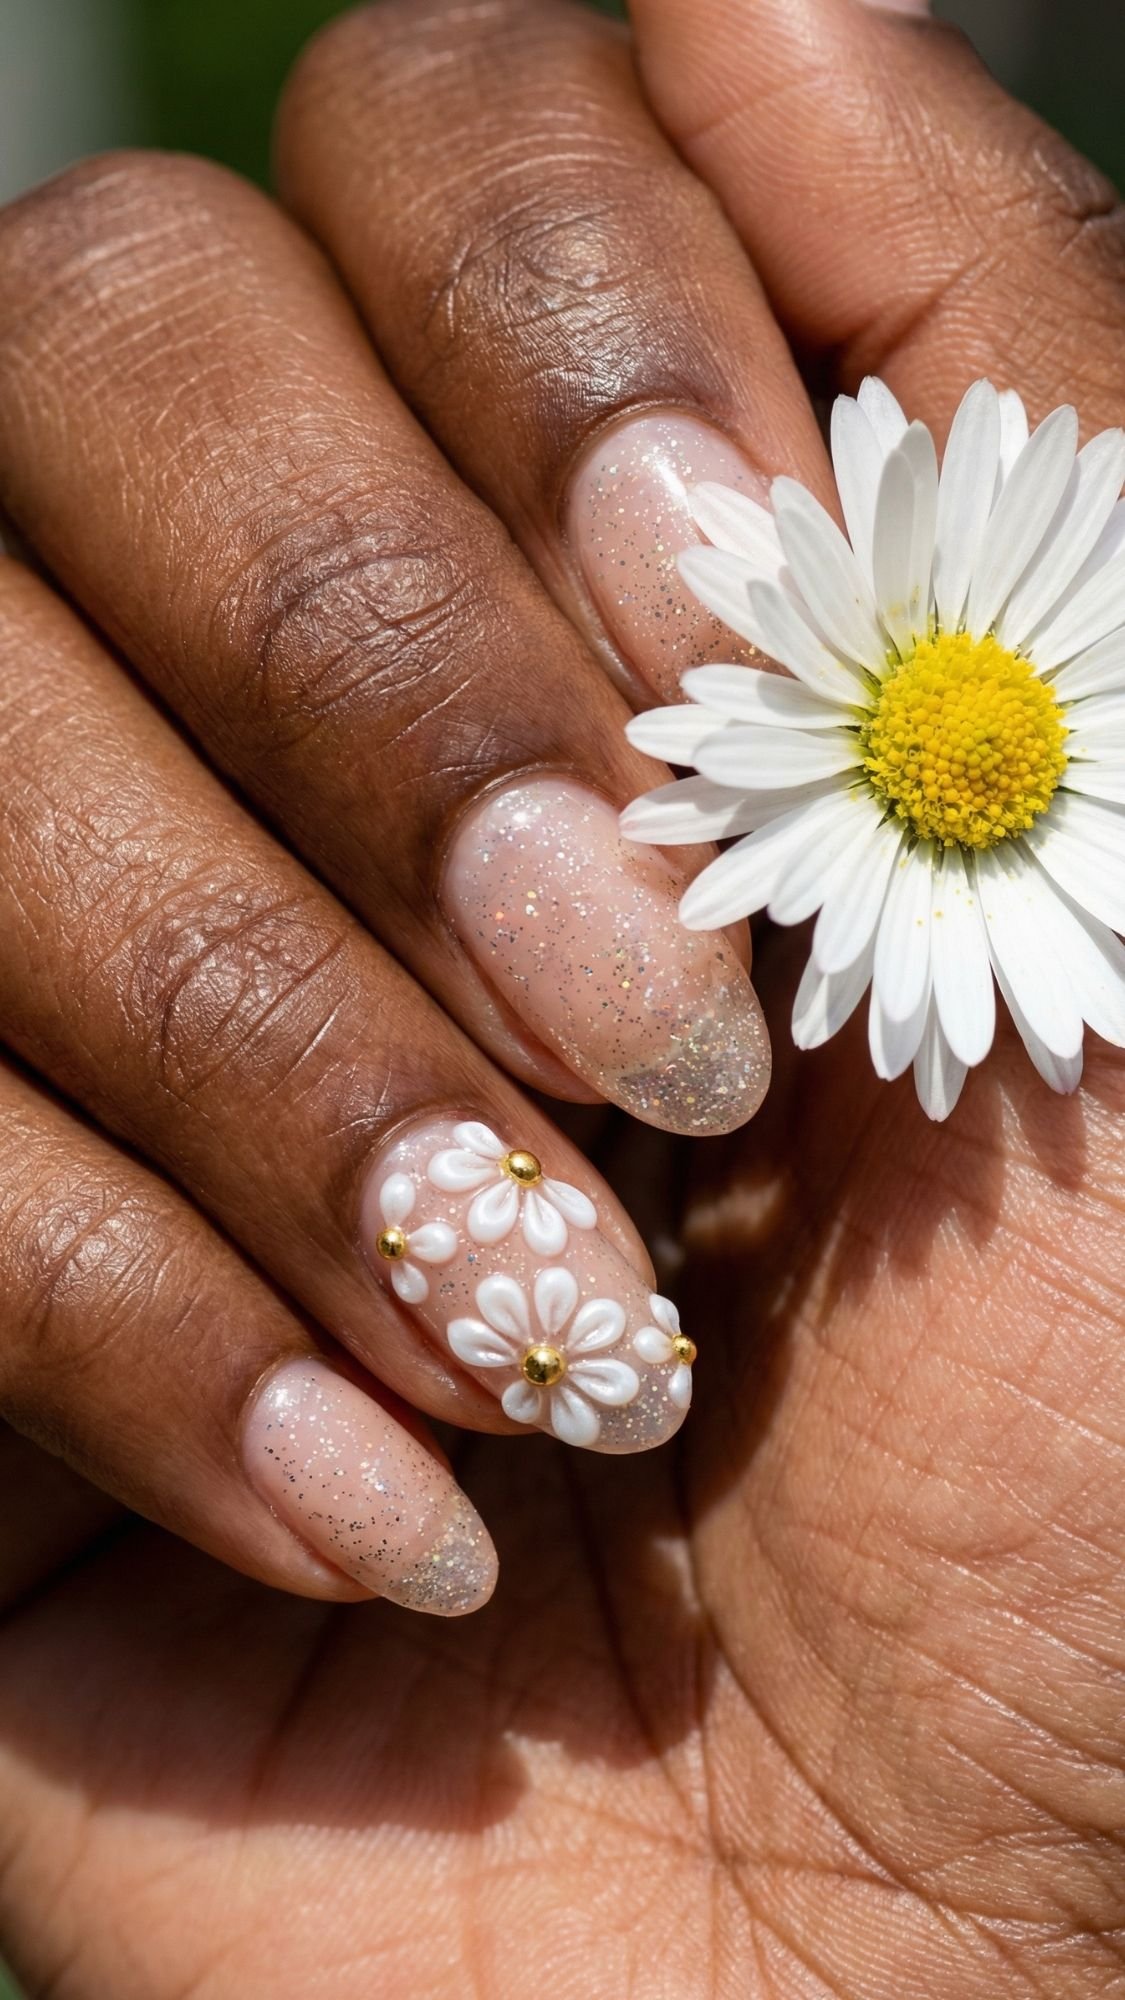
3. 3D Pearl Daisy Accents
Texture is the biggest trend of 2026. Instead of flat floral stickers, we are using builder gel to create raised petals. These look like tiny porcelain sculptures on your fingertips. I love pairing these with a sheer, sparkly nude base to let the flowers really pop.
- Pro Tip: Use a “Gem Gel” or a very thick top coat for the petals. It needs to hold its shape without running before you get it into the lamp.
- Common Mistake: Making the flowers too big. Fix: Keep them toward the tip or the side of the nail to avoid making your fingers look “bulky.”
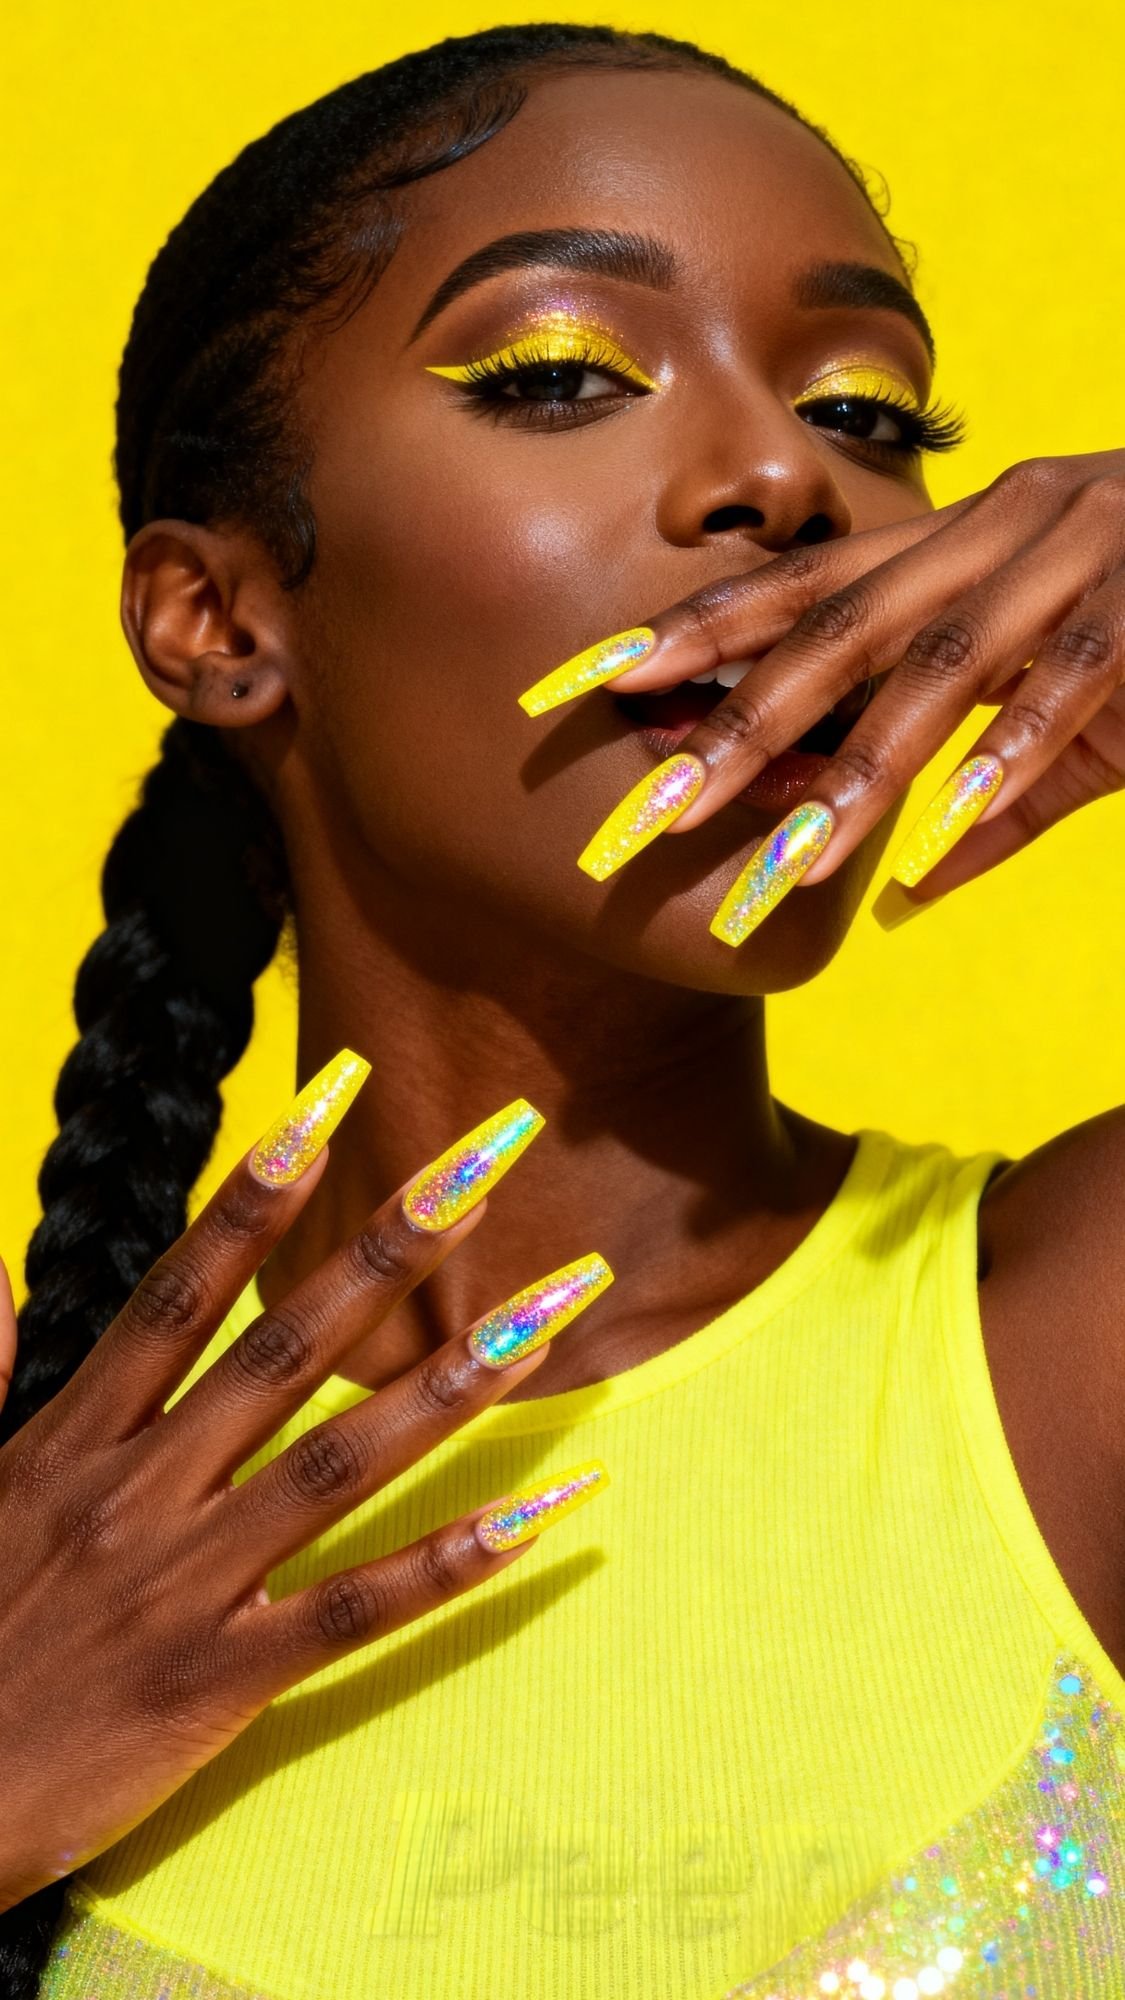
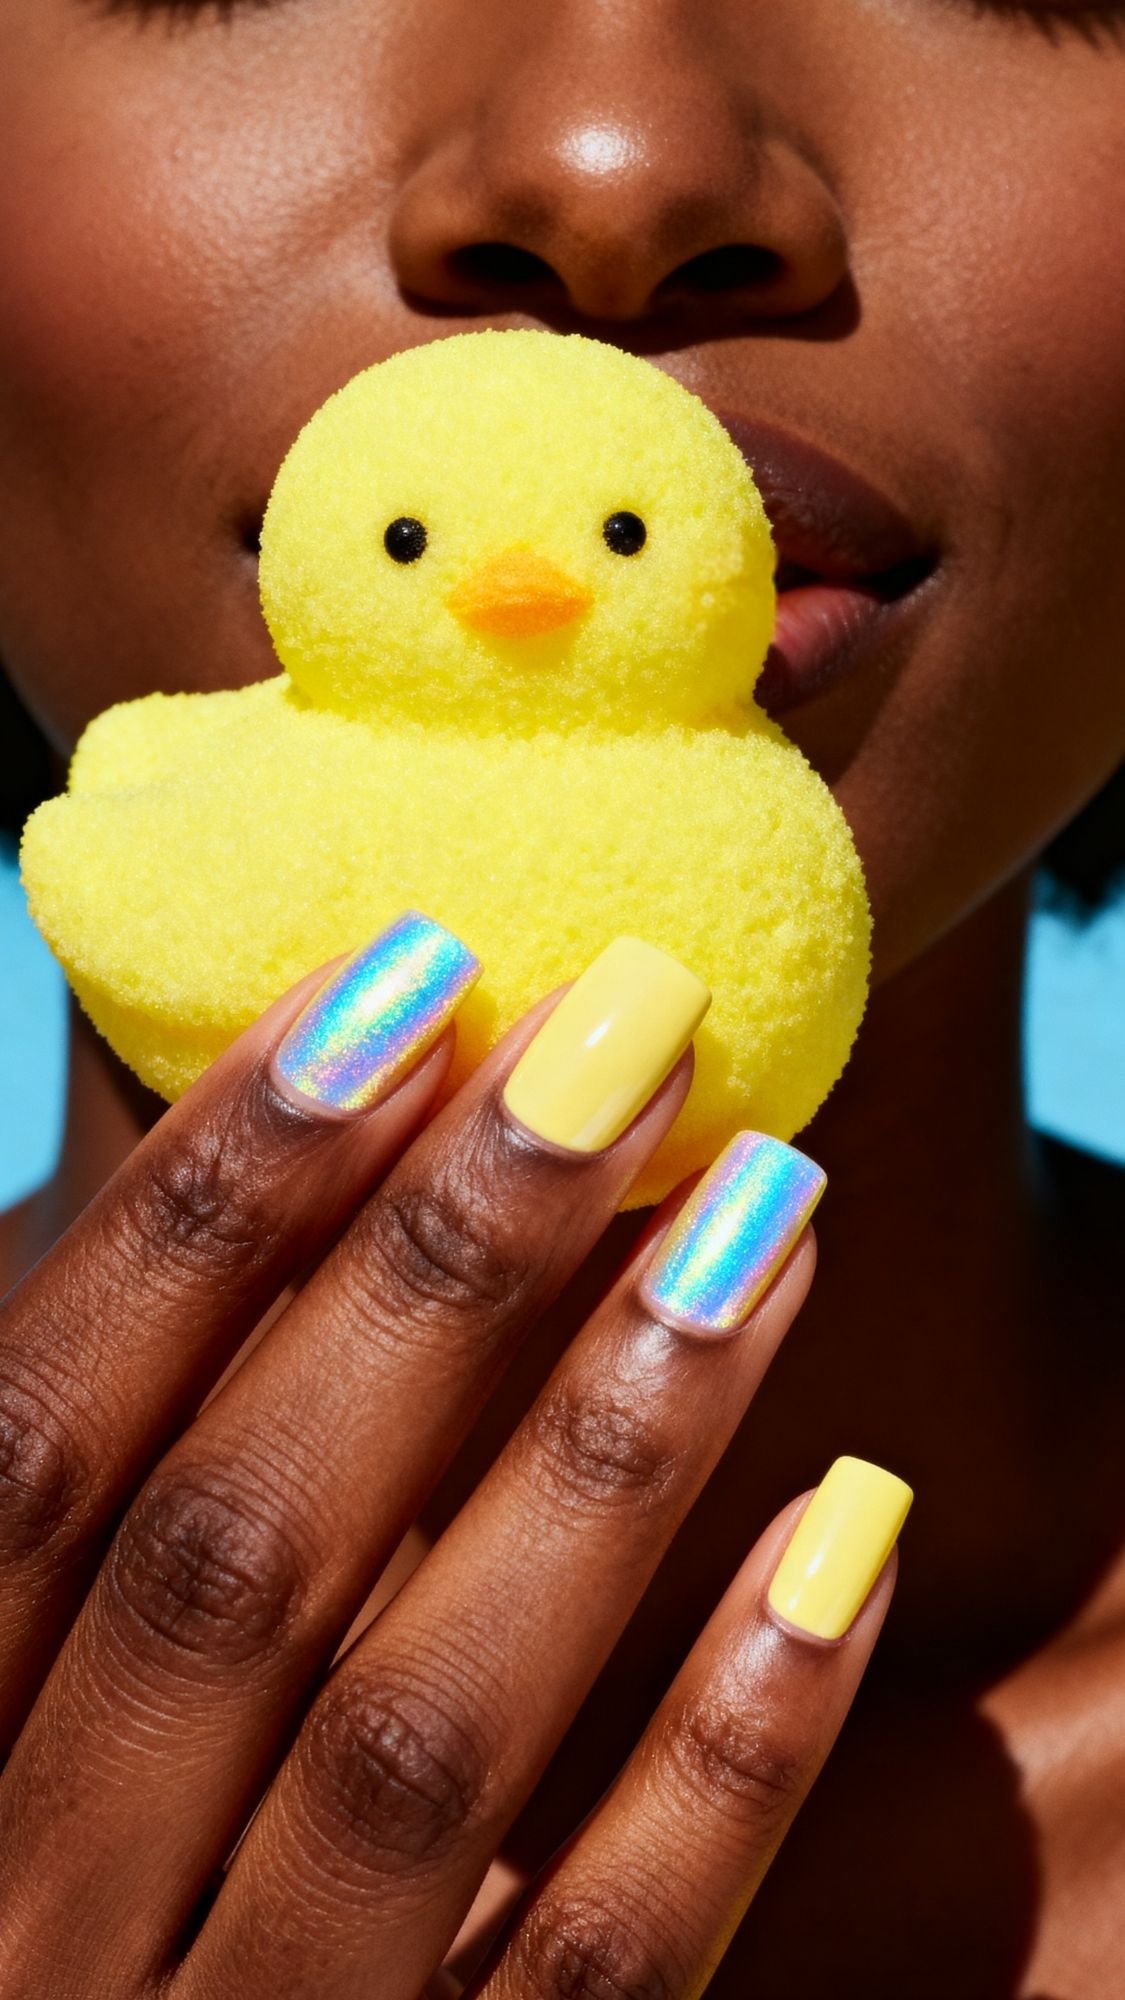
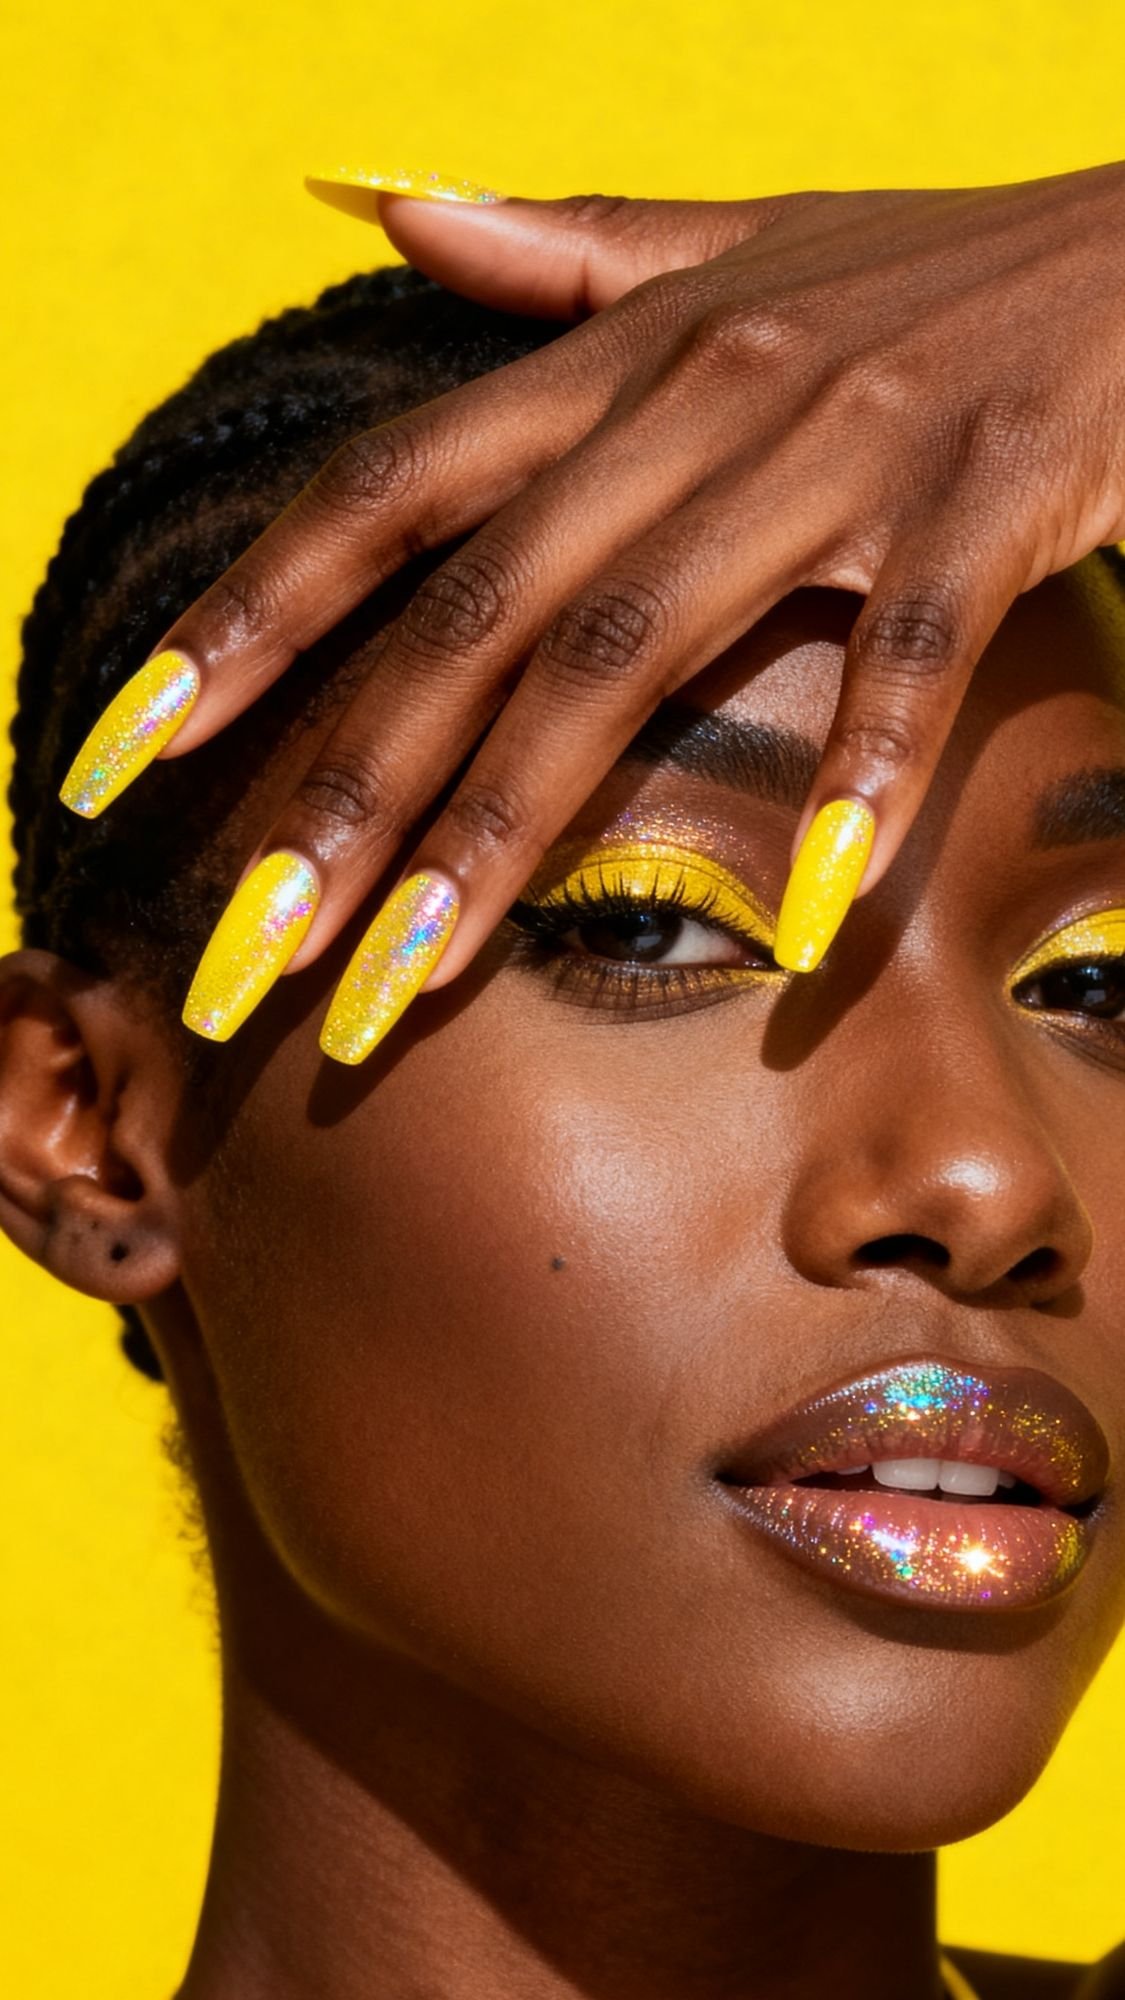
4. Holographic “Peep” Yellow
Yellow polish is notoriously difficult to pull off because it can look streaky or “sickly” against certain undertones. The fix? A heavy holographic finish. The rainbow “fire” in the glitter balances the yellow pigment, making it look bright and celebratory rather than flat.
- Pro Tip: Apply a “blurring” base coat first if your natural nails have any staining. It makes the yellow look much cleaner.
- Common Mistake: Applying too many layers. Fix: Use a yellow that is opaque in two coats so the holo top coat doesn’t make the nail too thick.
5. Rose Gold Micro-French
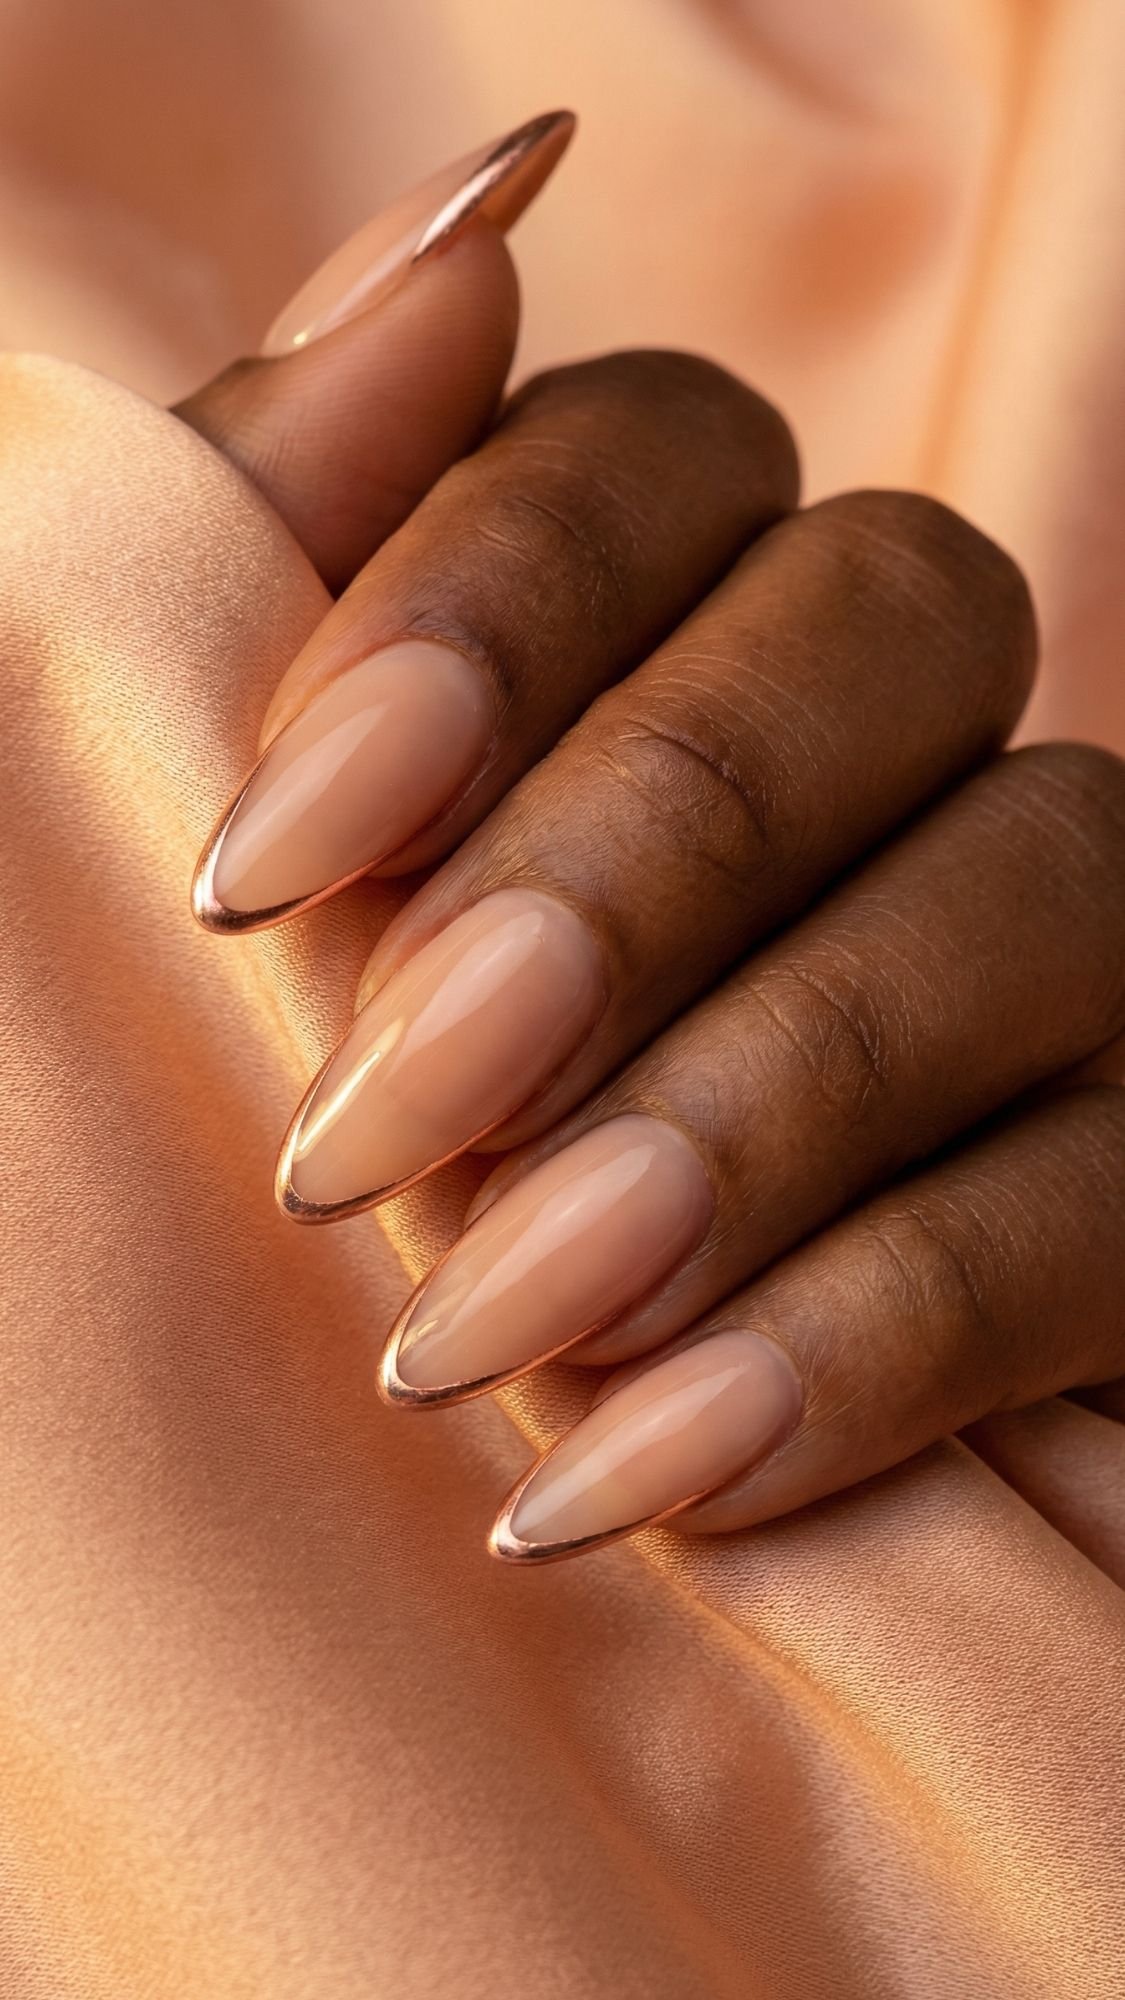
This design is for the minimalist who wants to participate in the holiday without looking like a walking Easter basket. What I have noticed about the micro-French trend is that it actually makes your nail beds look longer and more elegant. Instead of the thick, chunky white tips from the early 2000s, we are using a razor-thin line of metallic rose gold. It is subtle, but it catches the light every time you move your hands to reach for a deviled egg.
- Pro Tip: Use a long, thin striping brush rather than the brush that comes in the bottle. It gives you way more control over that “micro” line.
- Common Mistake: Making the line too thick at the corners. Fix: Start from the outer edge and pull toward the center, lifting the brush slightly as you go to keep the line sharp.
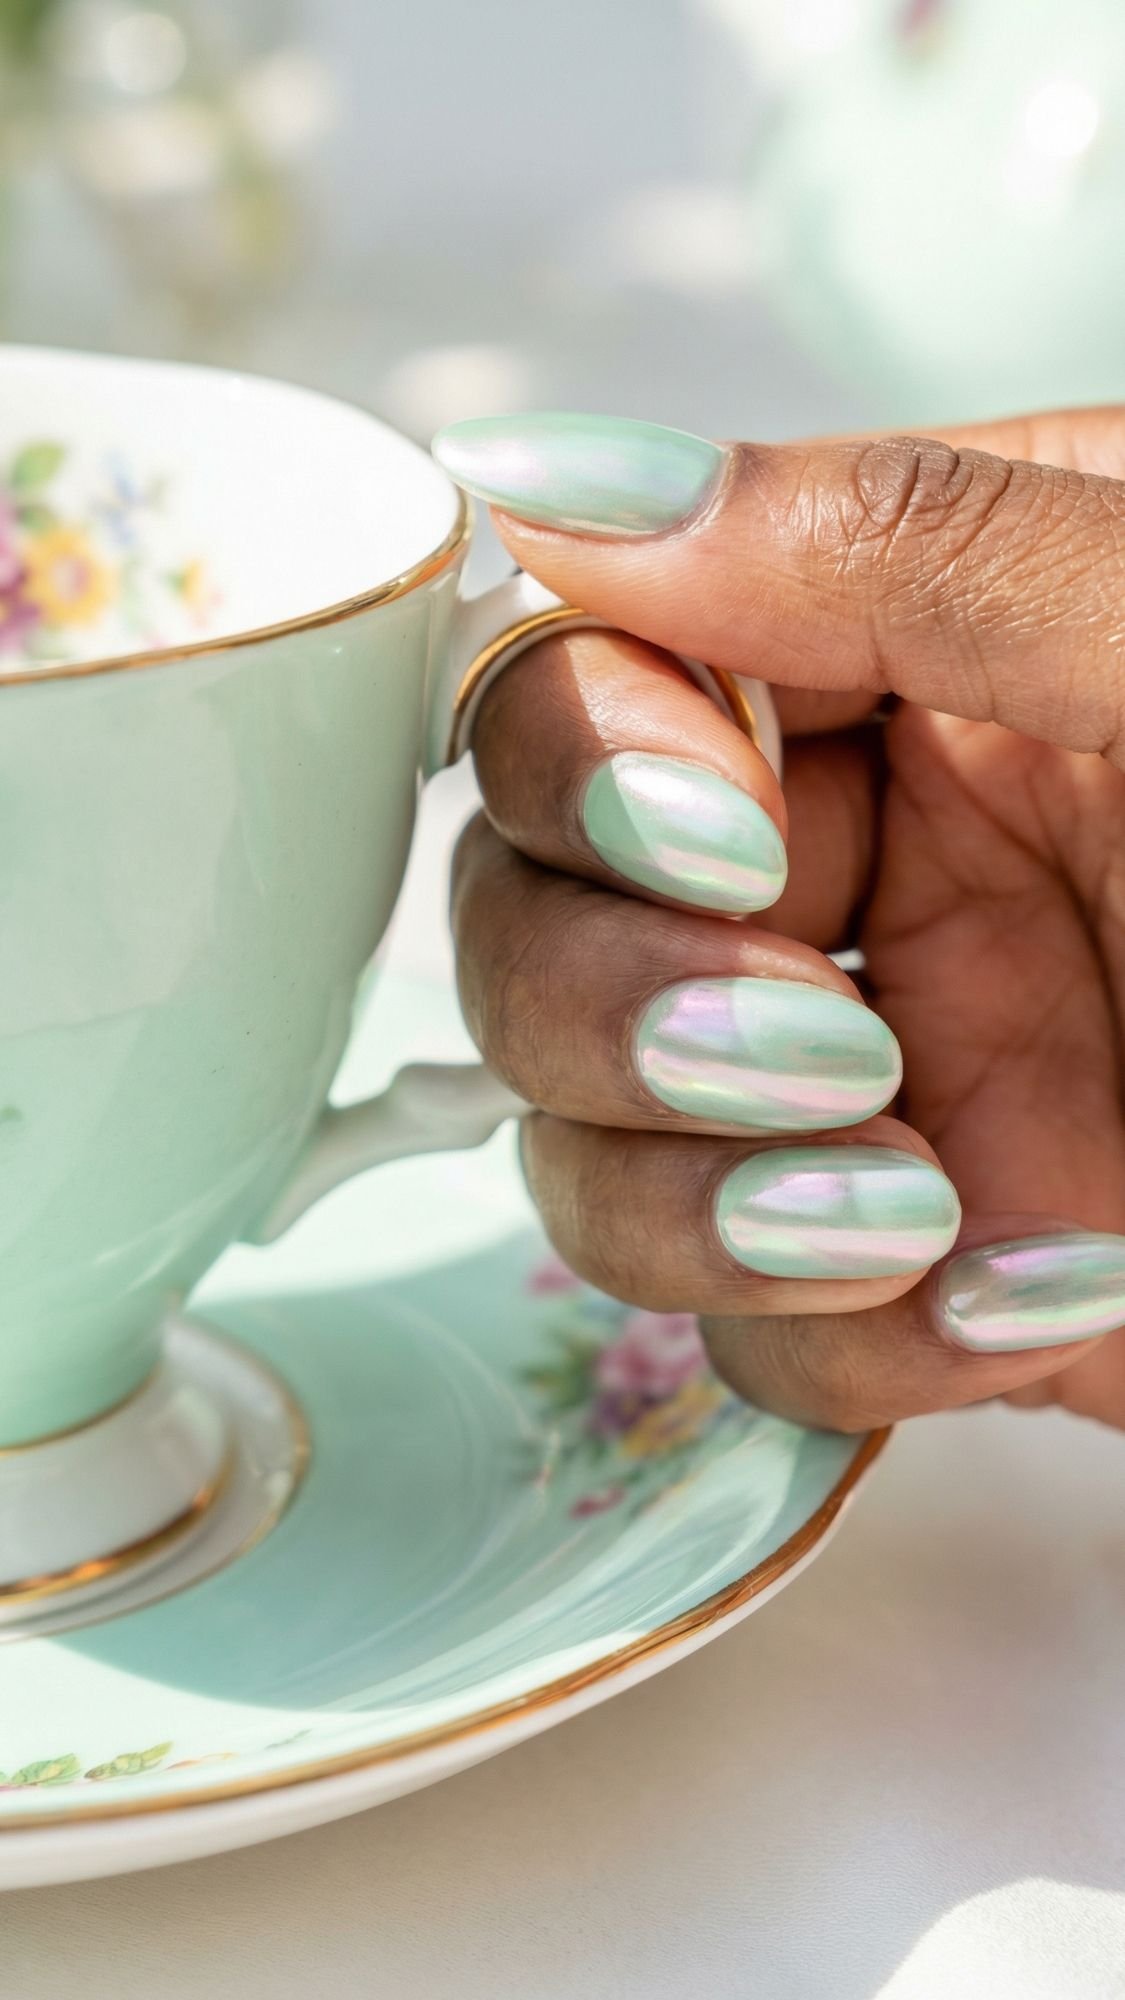
6. Mint Glazed Donut
Hailey Bieber may have started the glazed trend, but for Easter, we are making it minty fresh. This look relies on a sheer mint green polish topped with a white-pearl chrome powder. The result is a “glow from within” effect that looks incredible on deeper skin tones. The mistake most people make is using a mint that is too opaque. You want it to be slightly see-through so the chrome can do the heavy lifting and create that iridescent sheen.
- Pro Tip: Apply the chrome powder while the no-wipe top coat is still warm from the lamp. This helps the powder “melt” into the surface for a mirror finish.
- Common Mistake: Using too much powder. Fix: You only need a tiny amount. If you over-apply, it will look like glitter rather than a smooth, glazed pearl.
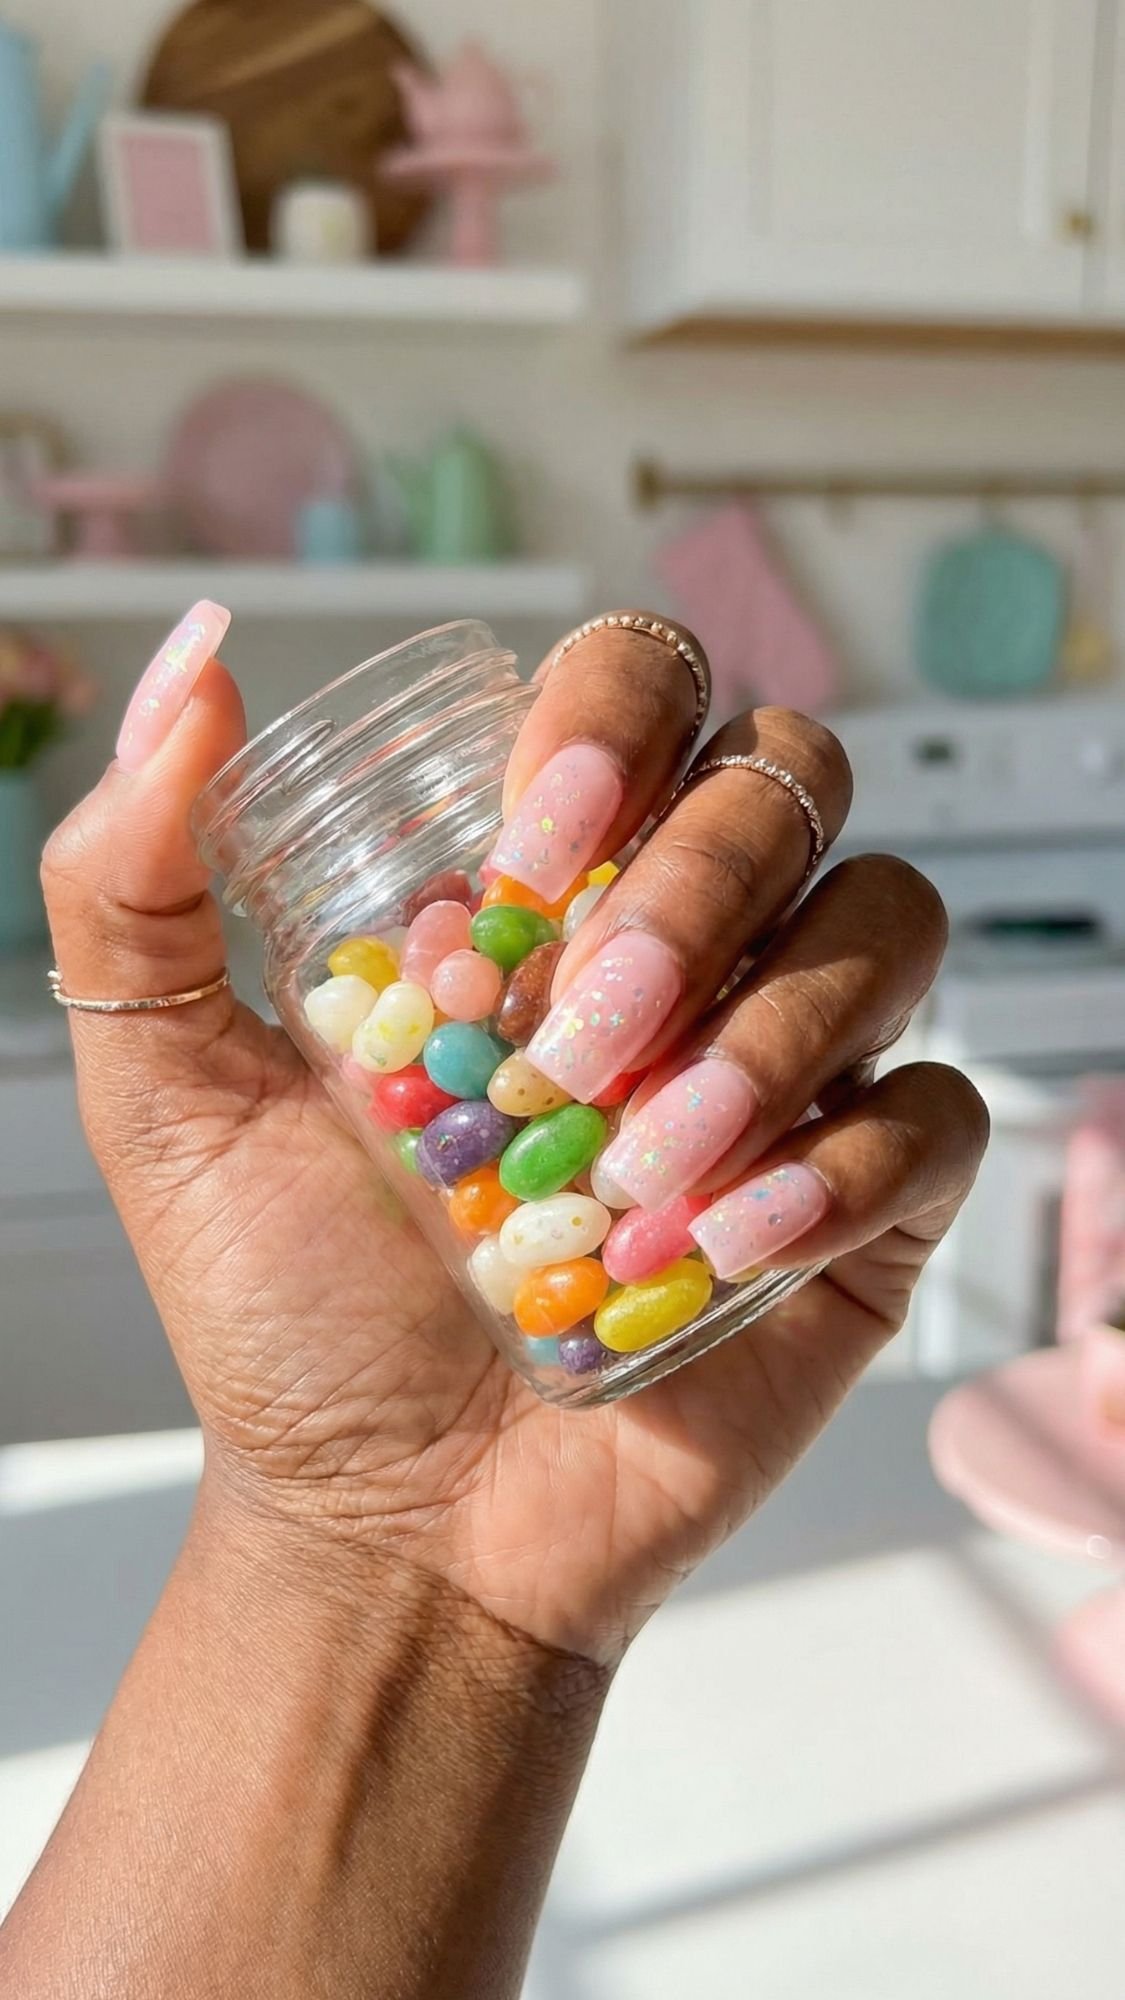
7. Iridescent Jelly Nails
Jelly nails are back, and they are perfect for that “squishy,” candy-like Easter vibe. We are layering a sheer pink jelly polish with iridescent flakes sandwiched in between the layers. This “depth layering” is a pro secret I have used for years to make a manicure look three-dimensional. It looks like a literal piece of hard candy on your fingertips. It is playful, trendy, and catches every bit of sunlight during an outdoor brunch.
- Pro Tip: Apply one coat of jelly, then the flakes, then a second coat of jelly. This “encapsulates” the sparkle so it looks like it is floating inside the nail.
- Common Mistake: Using flakes that are too large for short nails. Fix: Use a pair of tweezers to break up the iridescent flakes into smaller pieces before placing them.
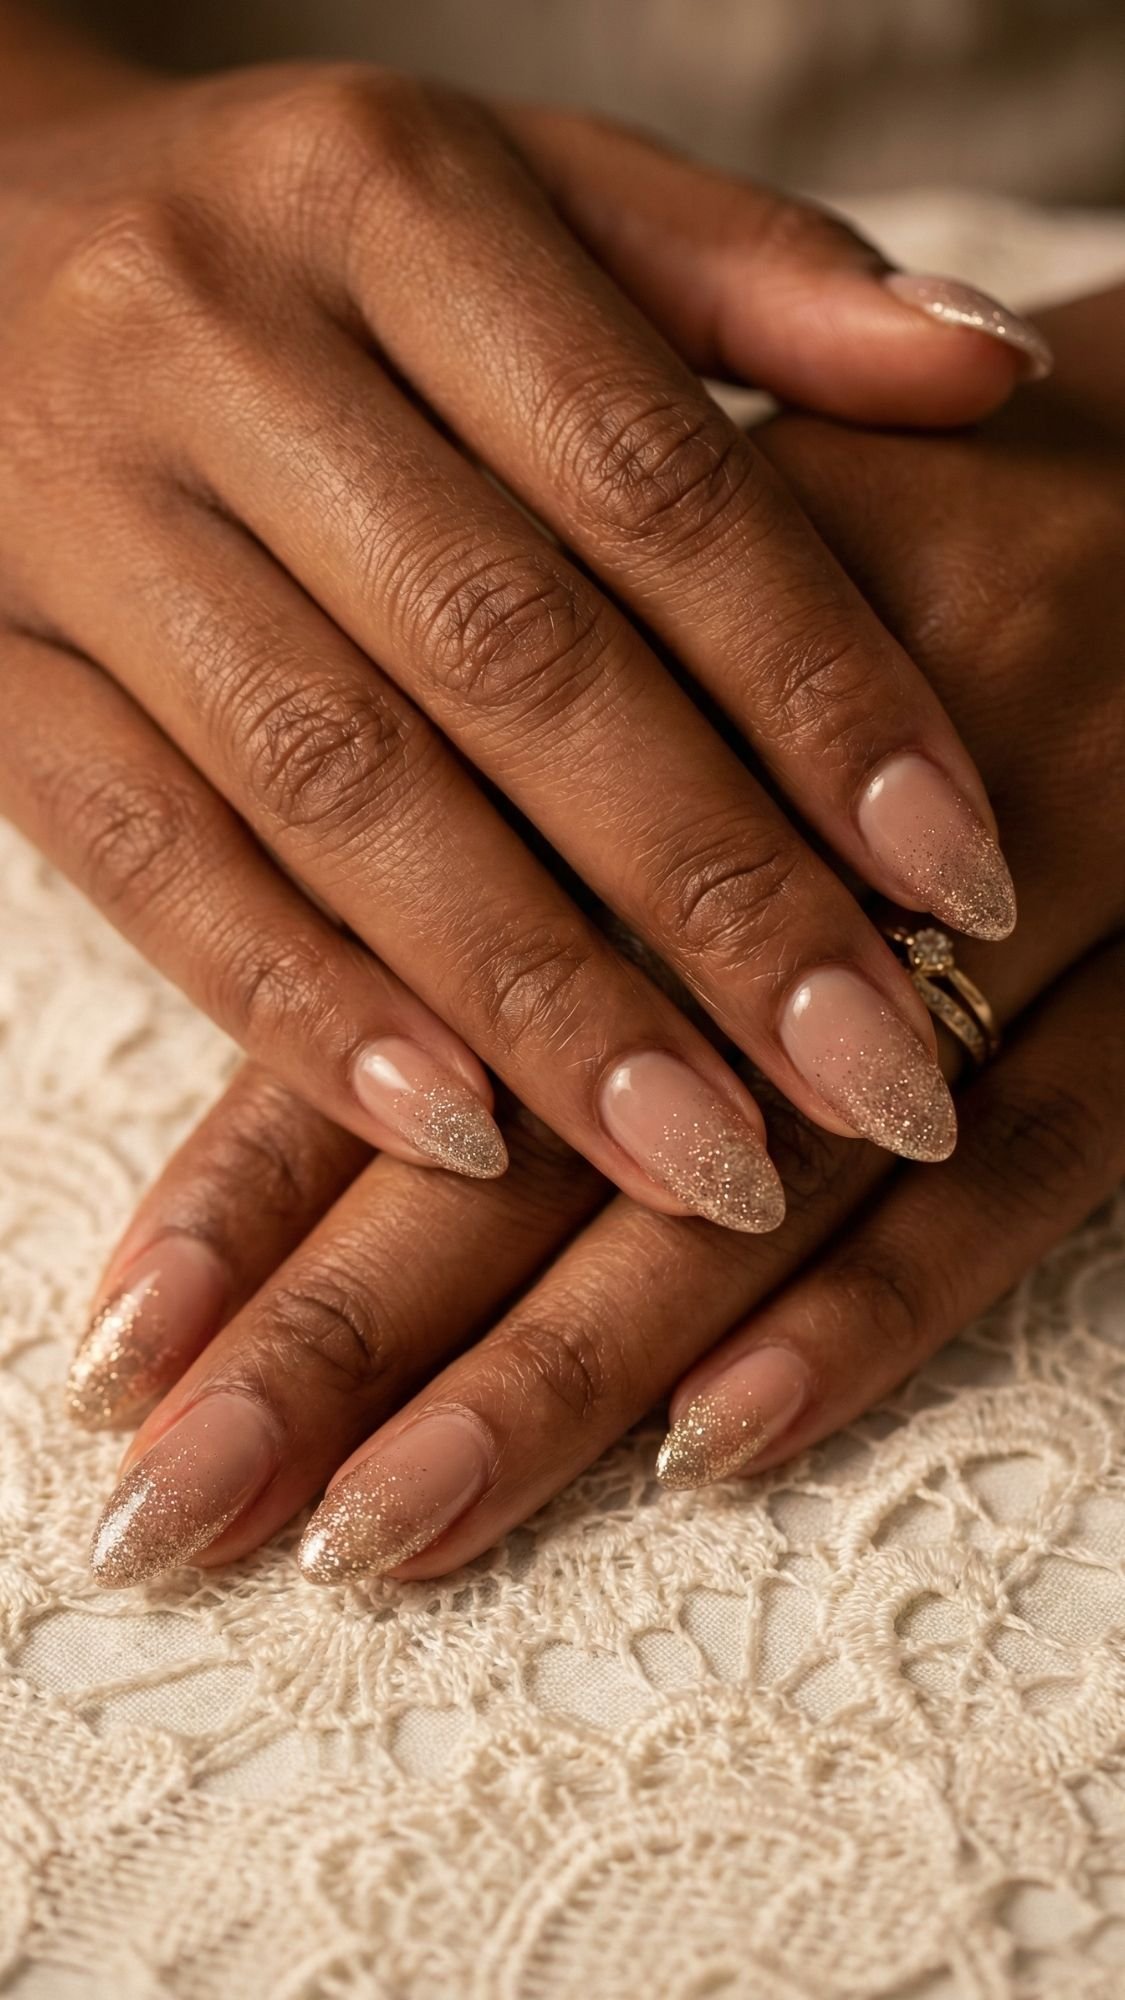
8. Champagne Shimmer Tips
If you want something that transitions perfectly from Easter Sunday to the office on Monday morning, this is it. It is a soft mocha or nude base with a gradient of champagne glitter concentrated at the tips. I love this look because it is incredibly low-maintenance. When your nails start to grow out, the nude base blends in perfectly with your natural nail. This little hack usually gives my clients an extra week of wear before they need a fill or a soak-off.
- Pro Tip: Use a makeup sponge to dab the glitter onto the tips. This creates a much smoother “fade” than using a brush.
- Common Mistake: Using a glitter that is too chunky. Fix: Look for “micro-glitter” or “pixie dust” formulas for a more sophisticated, expensive-looking finish.
9. Iridescent Peep Yellow
Yellow is notoriously the “hardest” color to get right in the nail world. Most of them look like you’ve been peeling oranges for three hours. The trick to making this look chic for Easter is choosing a soft, buttery yellow and topping it with a “blue-shift” iridescent shimmer. The cool blue reflection cancels out any sickly undertones in the yellow, giving you a finish that literally glows.
- Pro Tip: Use a “blurring” base coat before your yellow. It hides the natural “smile line” of your nail so the color looks solid and expensive.
- Common Mistake: Applying thick coats to get opacity. Fix: Yellow is thick by nature. Apply three paper-thin coats and let each one level out for ten seconds before you dry it.
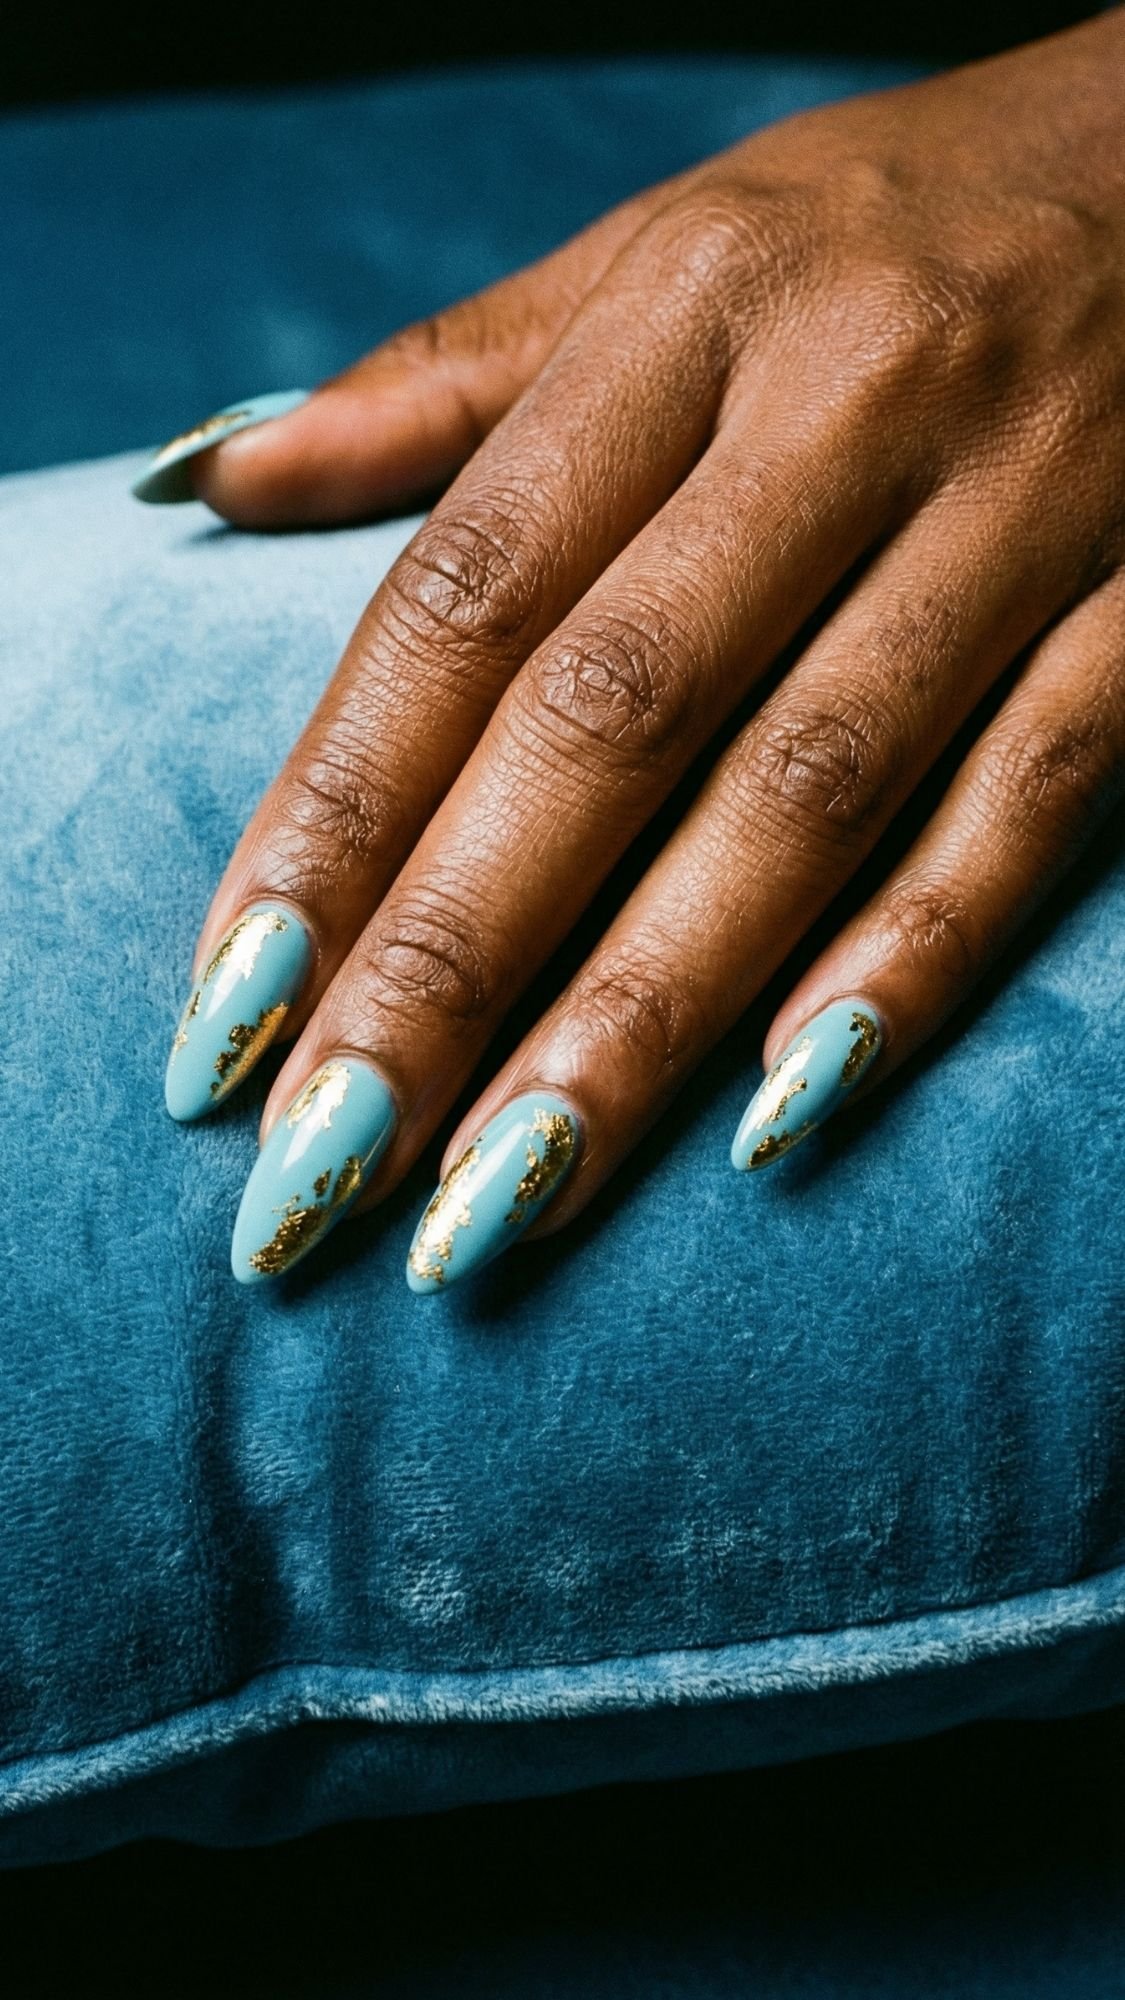
10. Robin’s Egg Blue with Gold Leaf
This is a classic for a reason, but we are making it 2026-ready with real gold leaf. Instead of a flat blue, use a shade with a hint of teal. The gold leaf adds a “regal” touch that feels much more sophisticated than simple glitter. I love this for a more formal holiday dinner where you want to look polished but still festive.
- Pro Tip: Do not use tweezers to apply gold leaf. Use a dry, fluffy eyeshadow brush to “pick up” the flakes and press them into the tacky layer of your polish.
- Common Mistake: Trying to make the gold look perfect. Fix: This look should be “organic.” Let the flakes tear and overlap. It looks much more high-fashion when it’s slightly irregular.

11. Coquette Bows & Glitter
The “coquette” aesthetic is dominating my feed right now. It is all about hyper-feminine details like bows and pearls. For this look, we are using a fine silver glitter base and painting a tiny white bow on the accent nails. It is dainty, sweet, and perfect for an Easter Sunday outfit.
- Pro Tip: Use a tiny striping brush for the bow. If you mess up, use a clean brush dipped in alcohol to “carve” the shape back to perfection before you cure it.
- Common Mistake: Making the bow too big. Fix: Keep the bow small and centered. If it’s too large, it can make the nail look cluttered and lose that “dainty” vibe.
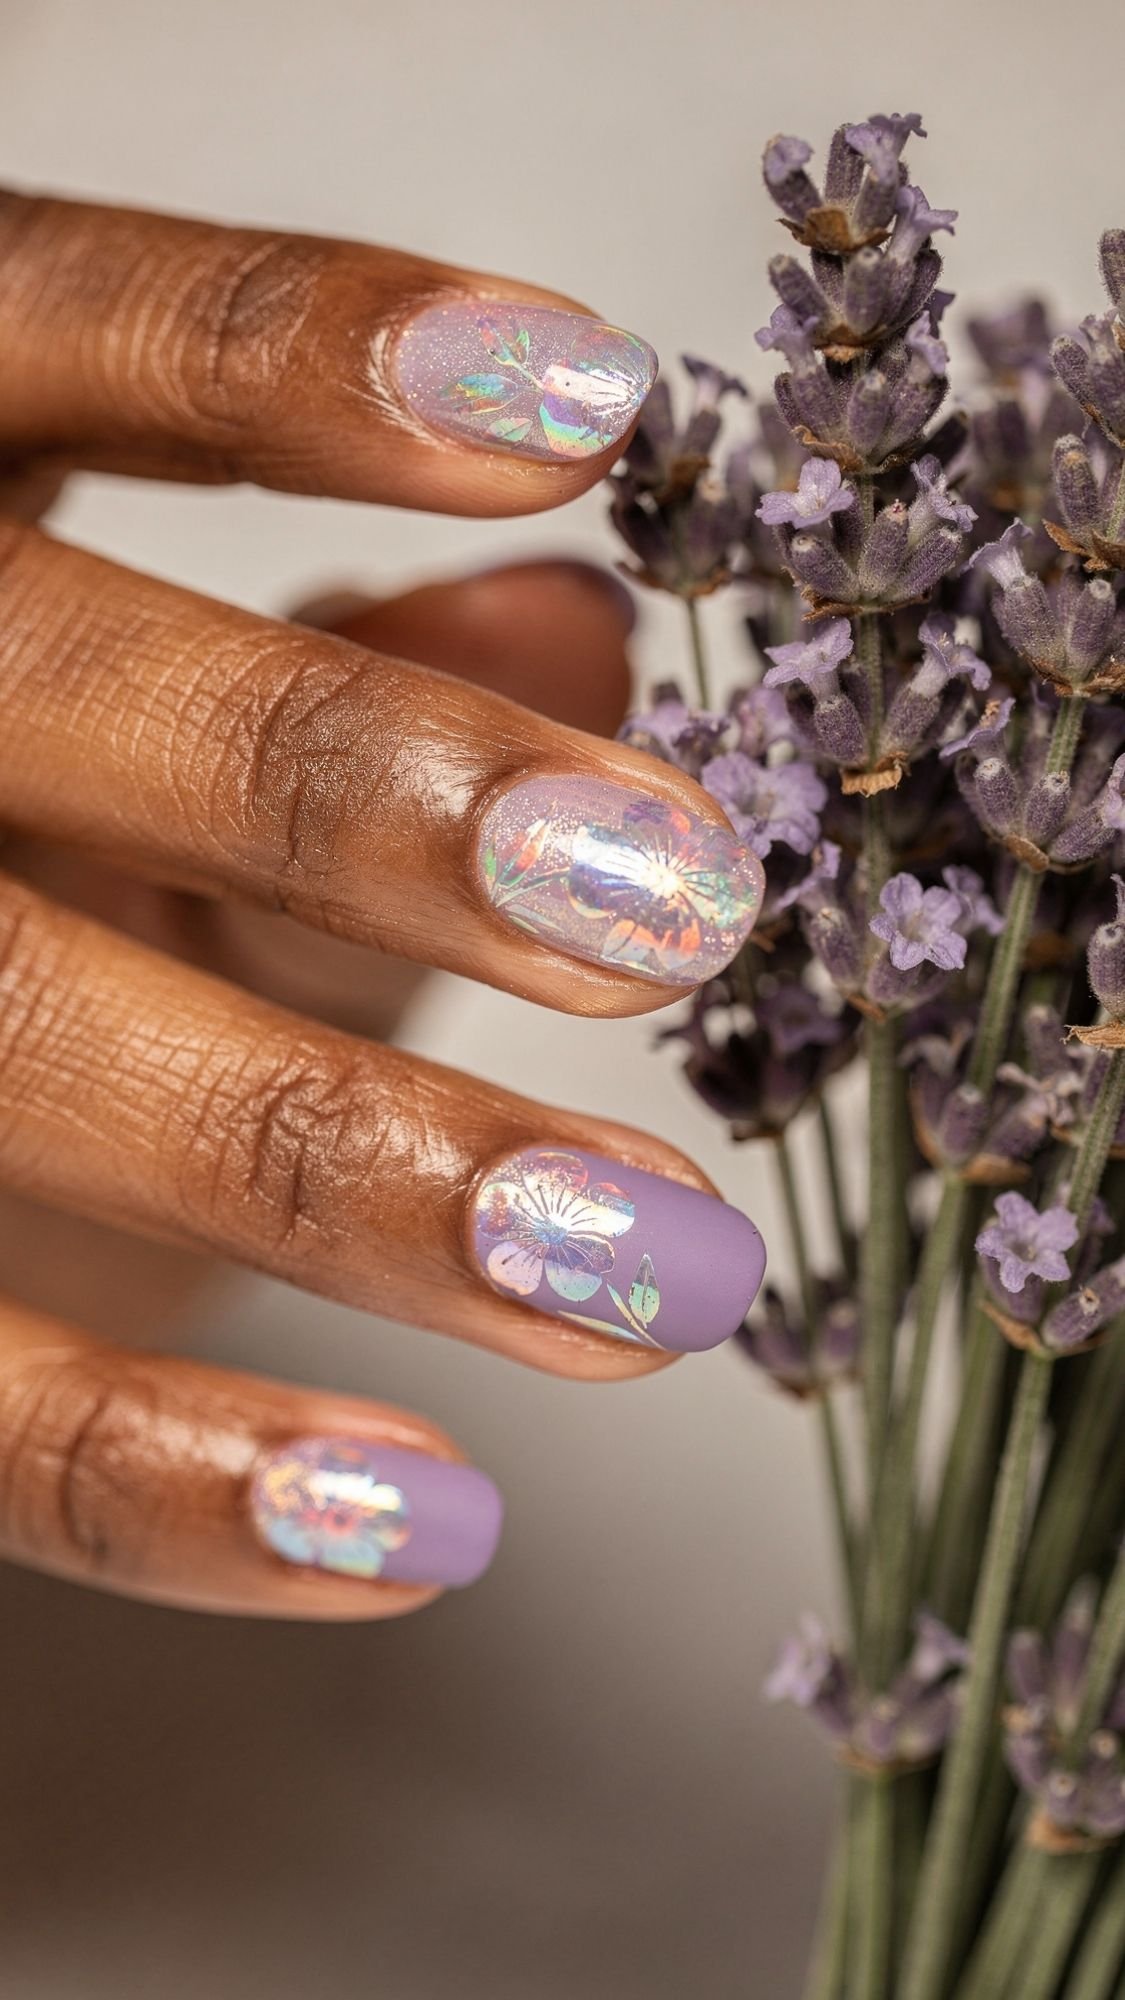
12. Holographic Floral Sprigs
If you want a look that says “spring has sprung,” this is the one. We are using a matte lavender base and adding holographic floral stamps or stickers. The contrast between the “flat” matte purple and the “rainbow” sparkle of the flowers is a total showstopper. FYI, this is the design that always gets the most “where did you get those done?” questions.
- Pro Tip: Apply a matte top coat over your color first. Then, apply your holographic art. This ensures the sparkle of the flowers really stands out against the dull background.
- Common Mistake: Forgetting to seal the edges of your floral stickers. Fix: Use a tiny bit of base coat over the sticker before your final top coat to “melt” the edges into the nail.
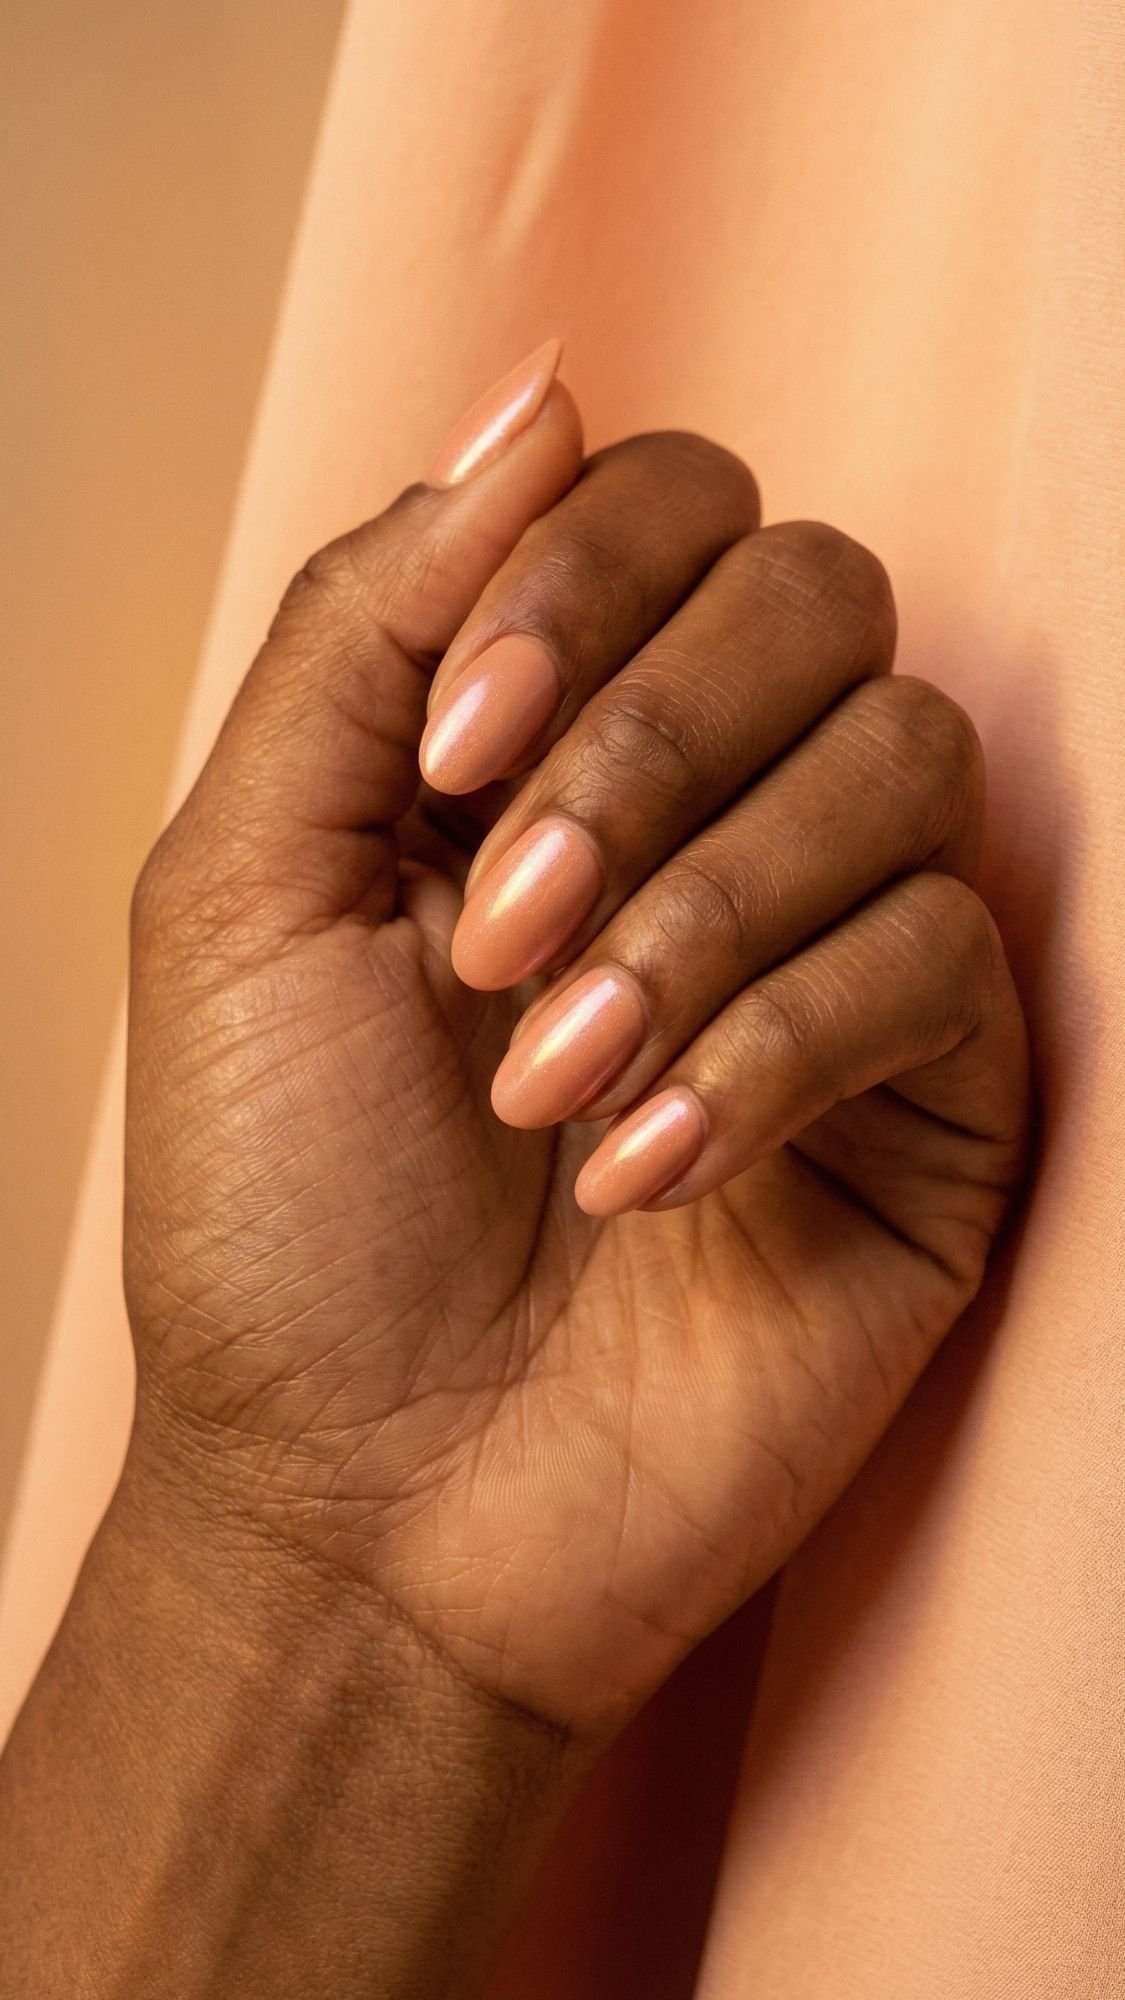
13. Muted Peach Glow
Peach was recently the color of the year for a reason, it is universally flattering and feels like a warm hug for your hands. For Easter 2026, we are skipping the neon peach and going for a “muted” tone with an internal glow. This look uses a polish that has micro-shimmer suspended inside the pigment rather than sitting on top. What I have noticed over the years is that this specific finish makes your skin look incredibly hydrated and healthy. It is the “skincare for your nails” look that everyone is obsessed with right now.
- Pro Tip: If you can’t find a “glow” peach, mix a drop of your favorite gold highlighter into a sheer peach polish. It creates that “lit from within” effect perfectly.
- Common Mistake: Using a peach that is too white-based. Fix: Look for a “jelly” or “creme-jelly” hybrid. If the color looks like chalk, it will make your cuticles look dry.
14. Silver Foil Abstract
This is for the girl who wants to look like she just walked out of a contemporary art gallery. We are using random swipes of pastel mint and lilac, then topping them with jagged pieces of silver foil. No two nails look the same, which is exactly the point. The mistake most people make with abstract art is trying to be too perfect. In my experience, the best designs happen when you stop thinking and just let the brush go where it wants. It is edgy, modern, and looks incredible with a minimalist Easter outfit.
- Pro Tip: Use a dry brush technique. Wipe almost all the polish off your brush until it’s nearly dry, then “swipe” it across the nail for a textured, painterly look.
- Common Mistake: Applying the foil while the polish is too wet. Fix: Wait until the polish is “tacky” but not wet. If it’s too wet, the foil will just sink in and lose its shine.
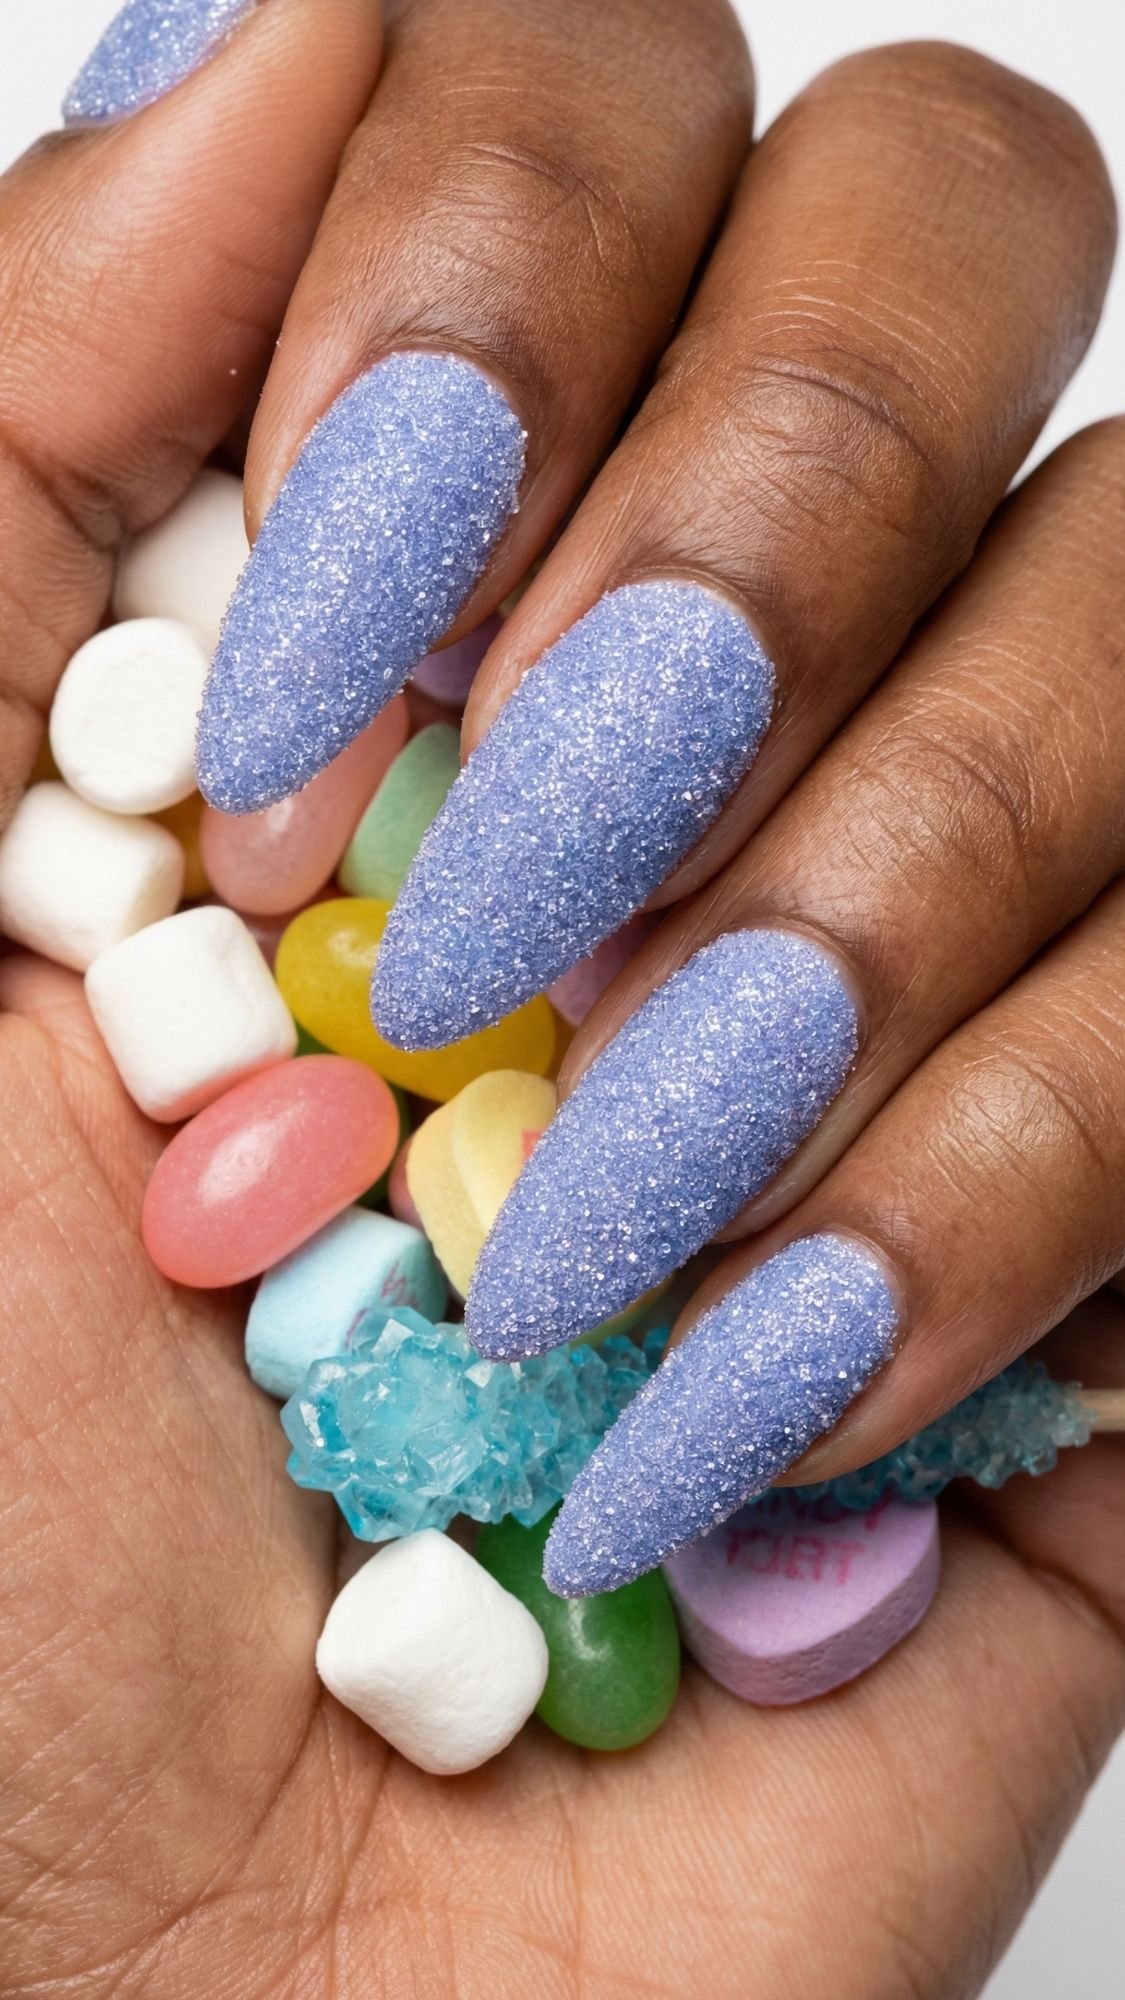
15. Periwinkle Pixie Dust
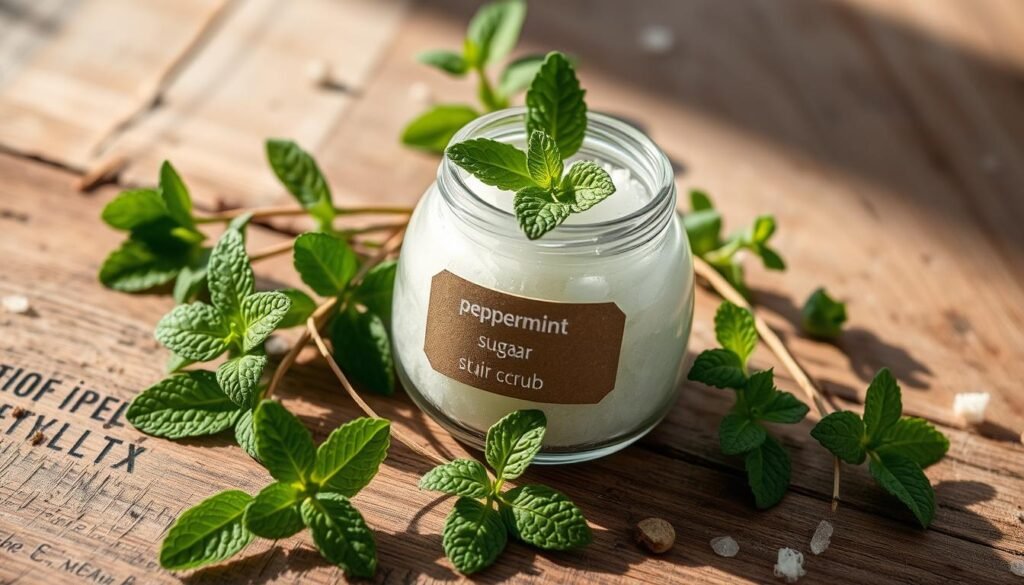
Periwinkle is that perfect bridge between spring blue and summer purple. To give it that Easter “sparkle,” we are using a “sugar” effect. This involves dusting fine, iridescent glitter over a wet top coat and curing it without a second top coat on top. This creates a textured, “sugared” finish that looks like a luxury candy. It is tactile, sparkly, and definitely a conversation starter.
- Pro Tip: Use a “flash cure” for five seconds right after dusting the glitter to lock it in place before you do the full cure. This prevents the glitter from shifting.
- Common Mistake: Wiping the nail too soon. Fix: Let the nail cool down after the lamp before you brush off the excess glitter. If you brush too early, you’ll ruin the texture.
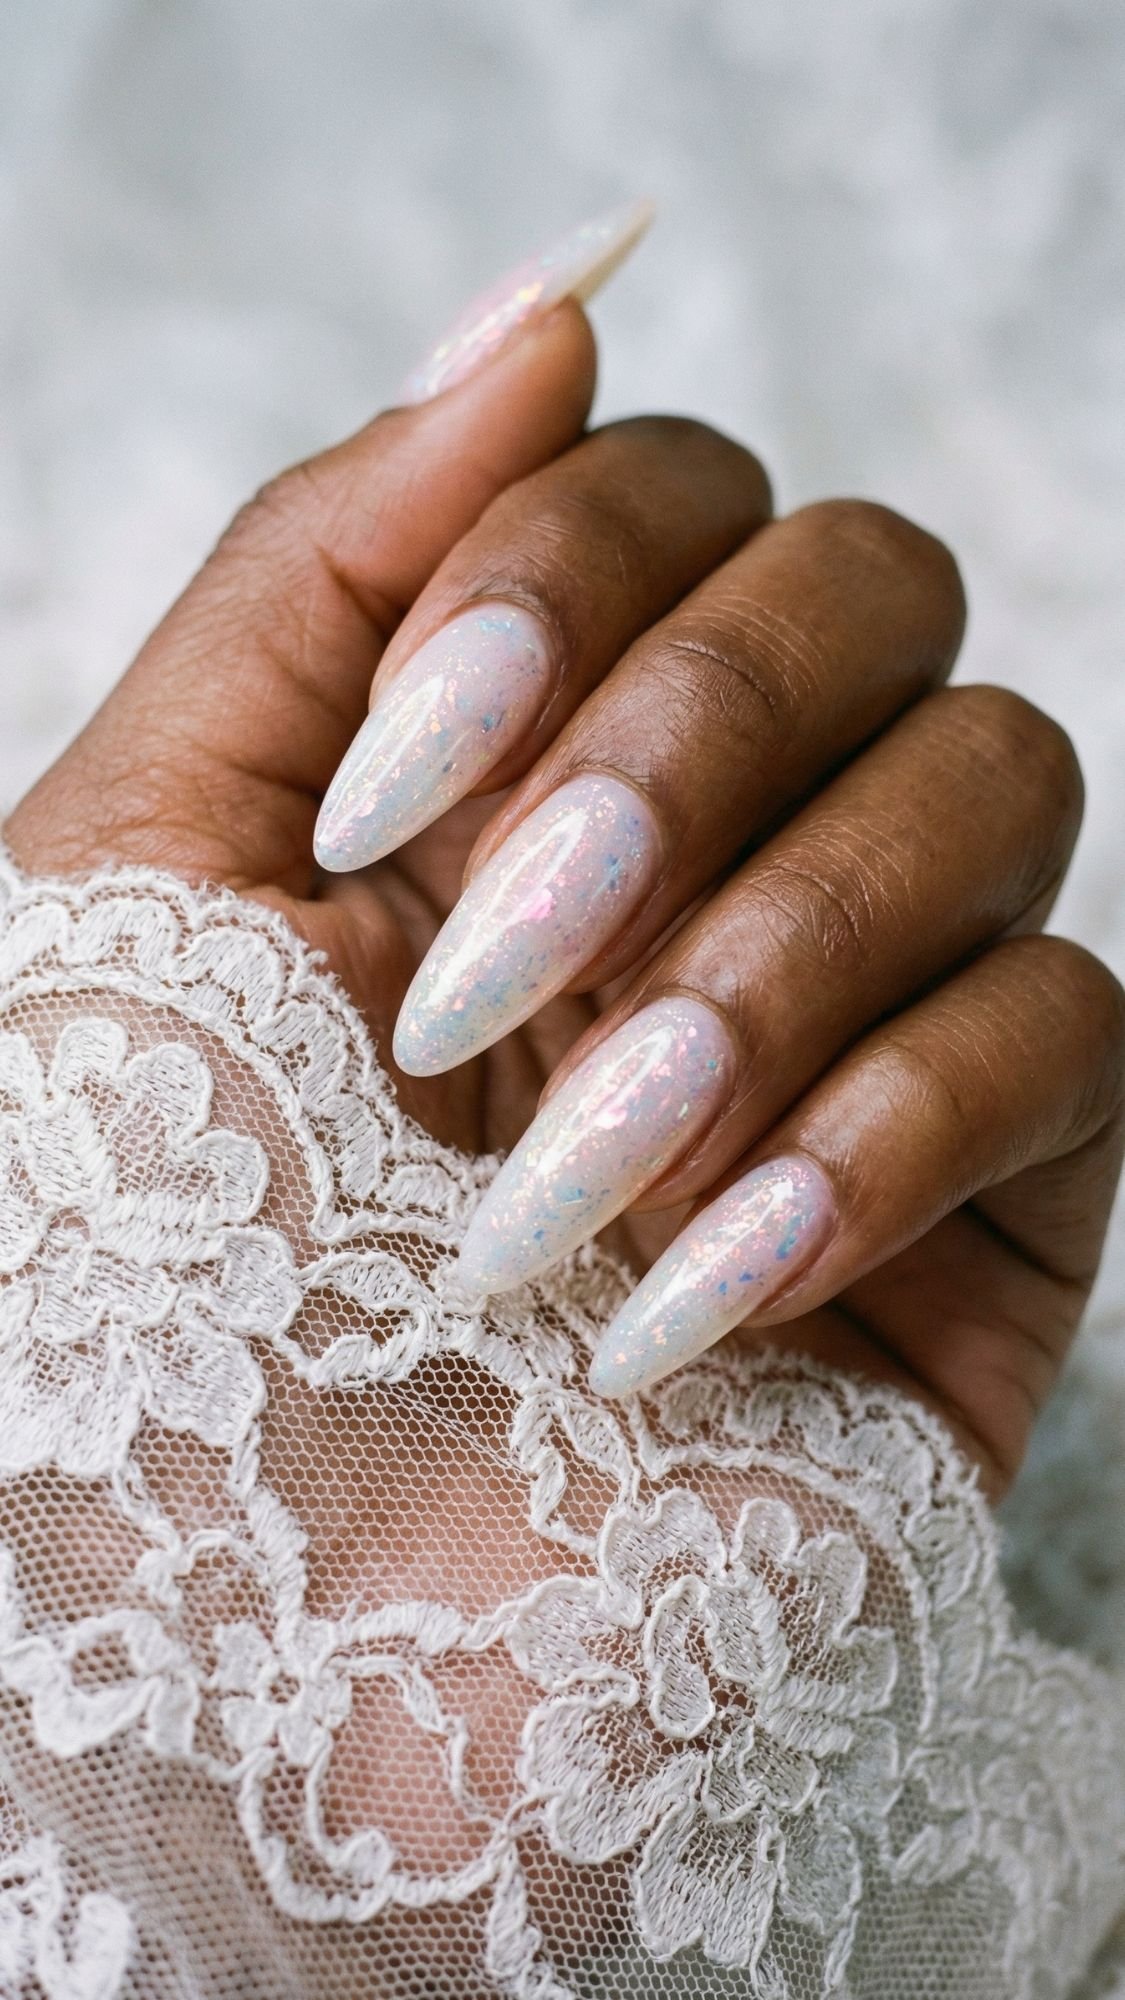
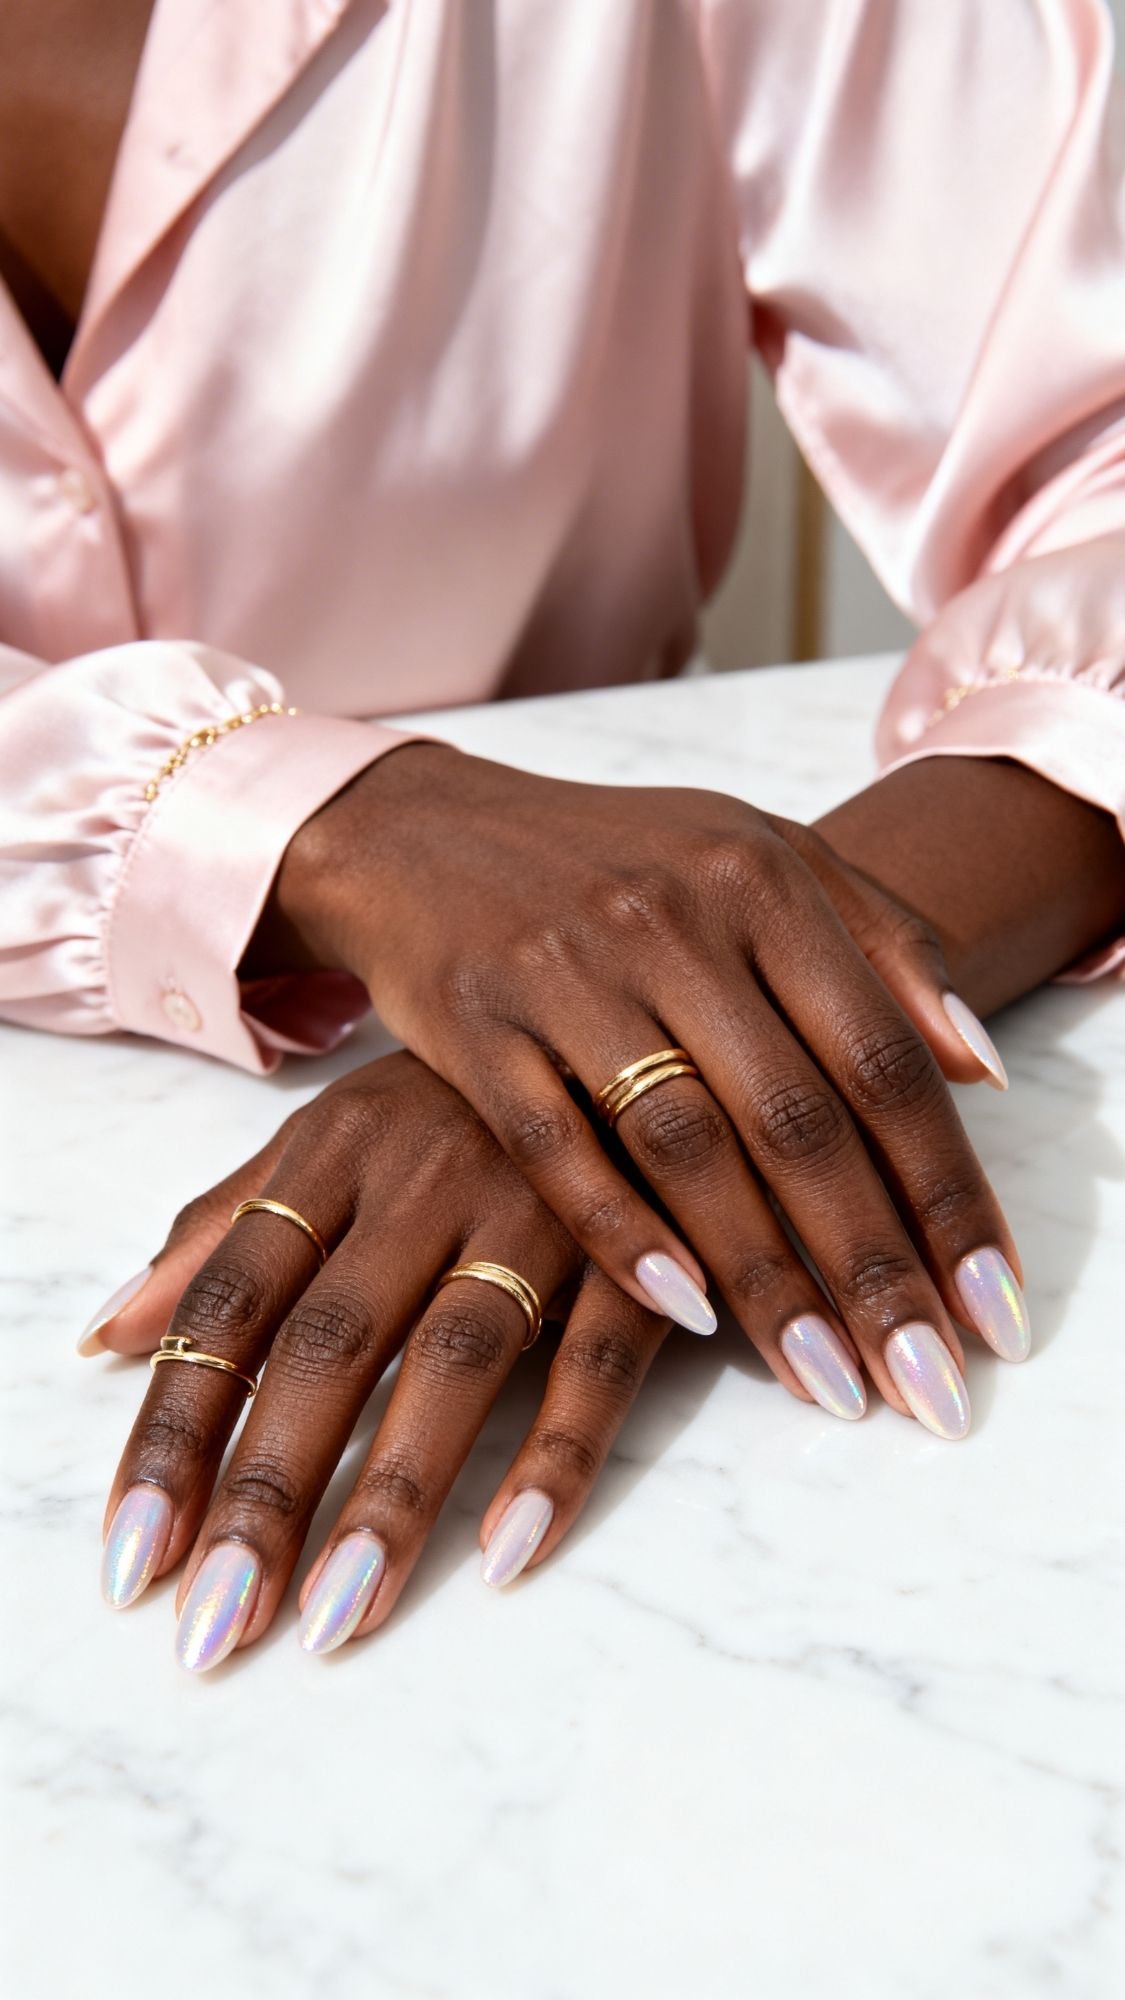
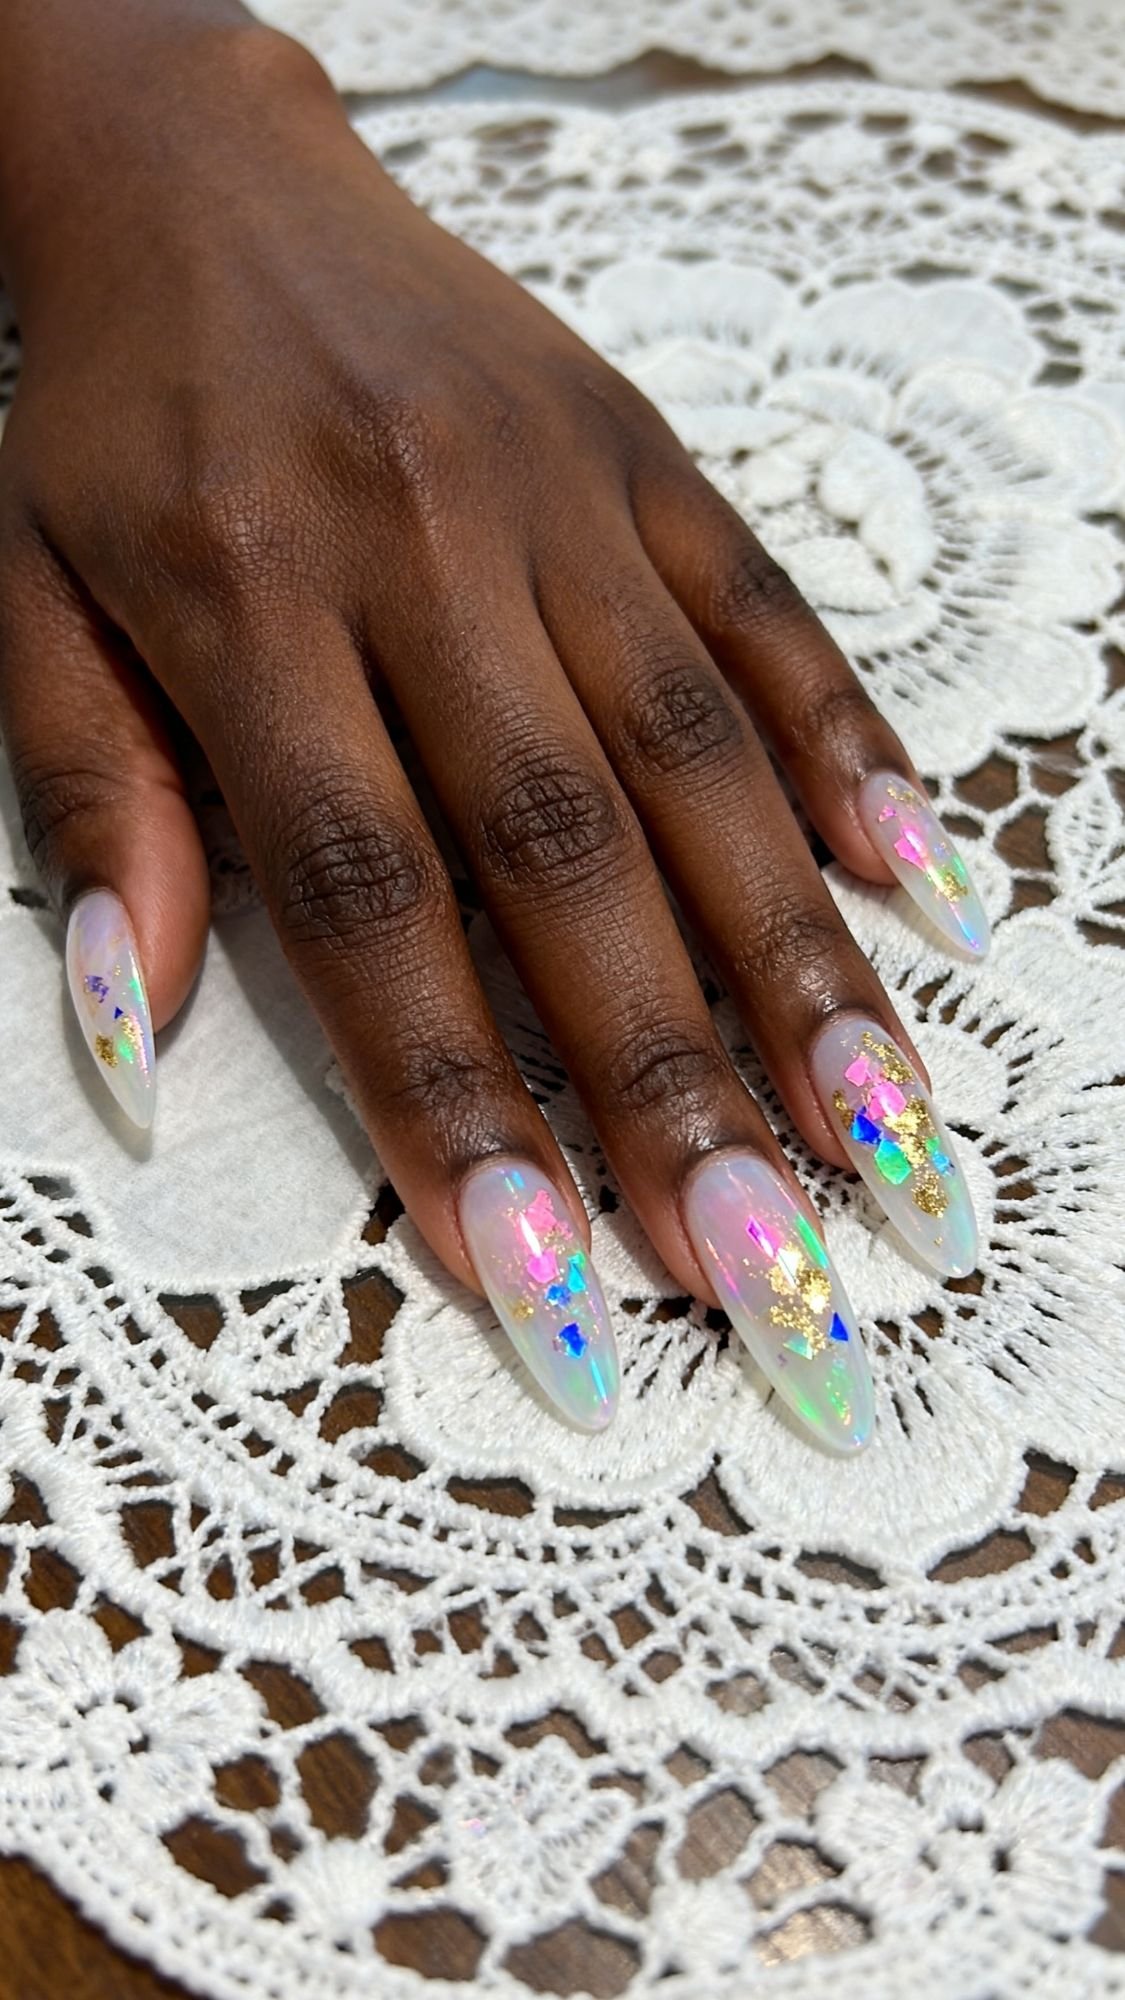
16. Soft White Opal Shimmer
If you want the most “expensive” looking nails on this list, this is the winner. This look mimics the natural fire of an opal stone. We use a milky white base and layer in iridescent “flakes” that reflect pink, green, and gold. It is the ultimate “clean girl” aesthetic with a holiday twist. I love this for anyone who wants their hands to look elongated and delicate. It goes with every single outfit in your closet, period.
- Pro Tip: Use a “sponge” to apply the opal flakes. It allows you to lay them flat so they don’t create any bumps in your final top coat.
- Common Mistake: Using a stark, “Tipper-Ex” white. Fix: Use a sheer, milky white. You want to see a little bit of the natural nail through the polish for that true opal depth.
Longevity + Maintenance: Making the Magic Last
You’ve put in the work, so let’s make sure this set actually makes it to next Sunday. In my experience, the first forty-eight hours are the most critical for any manicure. What I have noticed over the years is that people treat their nails like tools rather than jewels. If you are using your nails to pry open soda cans or scrape off stickers, you are asking for a chip. Here is my pro-approved schedule to keep that sparkle looking fresh for two weeks or more.
- Day 1 to 3: Focus on hydration. Your nails and cuticles are thirsty after all that prep. Apply a drop of cuticle oil to every nail twice a day. This keeps the polish flexible. If the polish gets too dry, it becomes brittle and “snaps” off the nail.
- Day 4: The “Re-Top” strategy. If you are using regular polish, apply a very thin layer of your high-shine top coat. This fills in any micro-scratches and restores that “day one” gloss. Don’t forget to cap the free edge again!
- Day 7: Check for lifting. If you see a tiny corner of a press-on or gel lifting, do not pull it! Pulling will tear your natural nail layers. Instead, use a tiny dot of nail glue for press-ons or file down the lifted gel and seal it with a fresh top coat.
- Day 10 and Beyond: This is usually when the “growth gap” at the cuticle starts to show. IMO, the best way to hide this is by adding a tiny bit of glitter to the base of the nail. It creates an intentional “reverse French” look and buys you another five days.
Troubleshooting: The “Oh No” Fixes
Even the pros have “nail fails” sometimes. The difference is we know how to hide them. Here are the five most common issues my followers run into and exactly how to fix them without starting over.
- Polish Pooling: This happens when you have too much product on your brush and it runs into the cuticle. The Fix: Take a clean-up brush dipped in acetone or alcohol and “carve” the polish away from the skin before it dries or cures. If it’s already dry, use a fine-grit file to gently remove the excess.
- Bubbling: Those annoying little bumps are usually caused by shaking the bottle or painting in a drafty room. The Fix: If you see bubbles, wait for the layer to dry and lightly buff them out with a 240-grit buffer. Apply your next coat ultra-thinly to smooth it over.
- Shrinkage: If your gel looks like it pulled away from the tips, your nail wasn’t clean enough. The Fix: Next time, scrub harder with alcohol. For now, you can hide the gap with a thin line of metallic or glitter polish along the tip (a “cheat” French tip).
- Press-Ons Popping Off: This usually means there was an air bubble in the glue. The Fix: File away any dried glue from your natural nail, dehydrate again with alcohol, and re-apply. Make sure you hold it for a full thirty seconds this time.
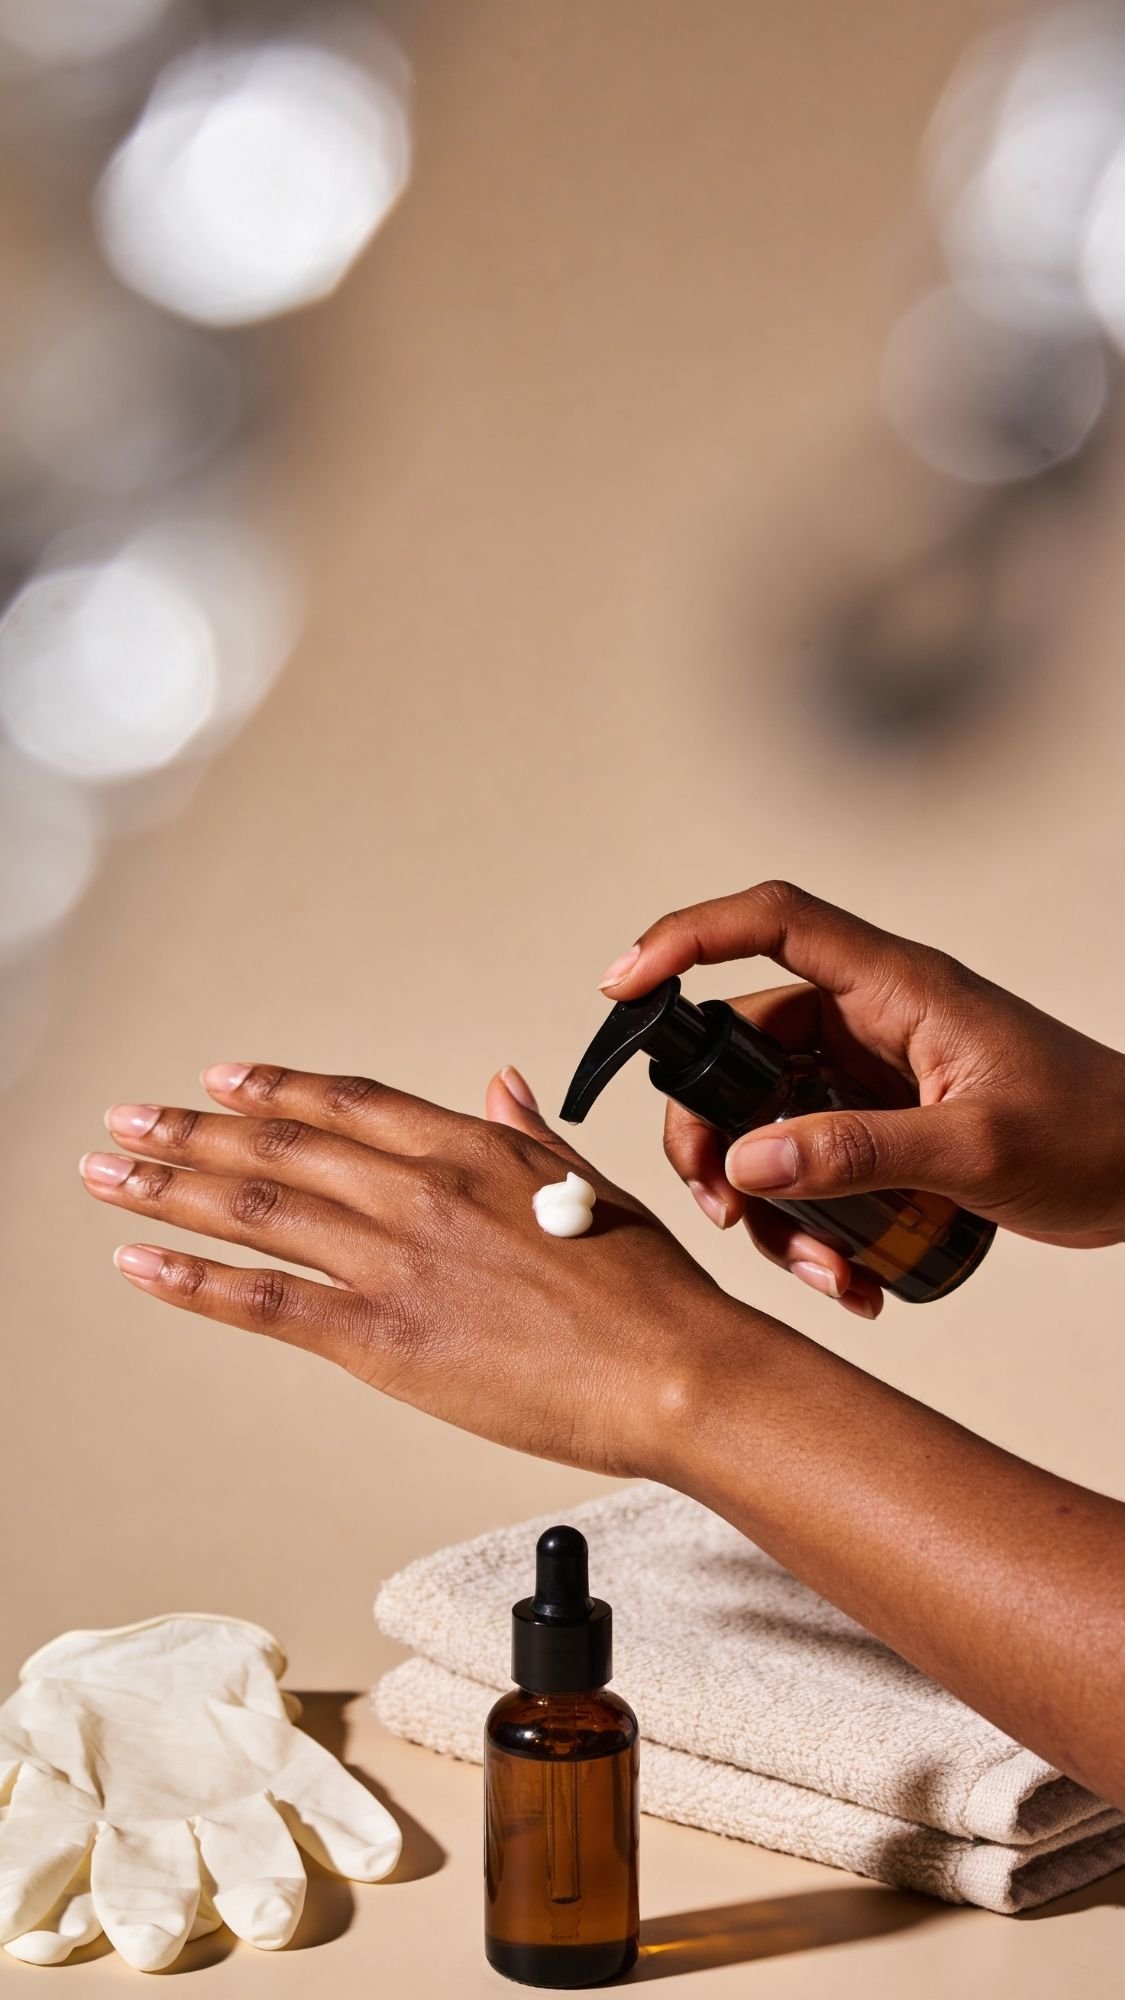
- Rough Cuticles: If your cuticles look white and “crunchy” in photos, you’re likely over-filing. The Fix: Stop filing near the skin! Apply a thick layer of hand cream, put on cotton gloves, and sleep in them. You’ll wake up with “hand model” skin.
Nail Health + Recovery: The “Breather”
Let’s be real for a second. Constant gel and press-ons can leave your nails feeling a bit “tired.” I always recommend a “recovery week” after a big holiday set. What I have noticed about nail health is that most “strengthening” polishes actually make nails too hard, which leads to snapping. You want your nails to be like a young tree branch—strong but flexible.
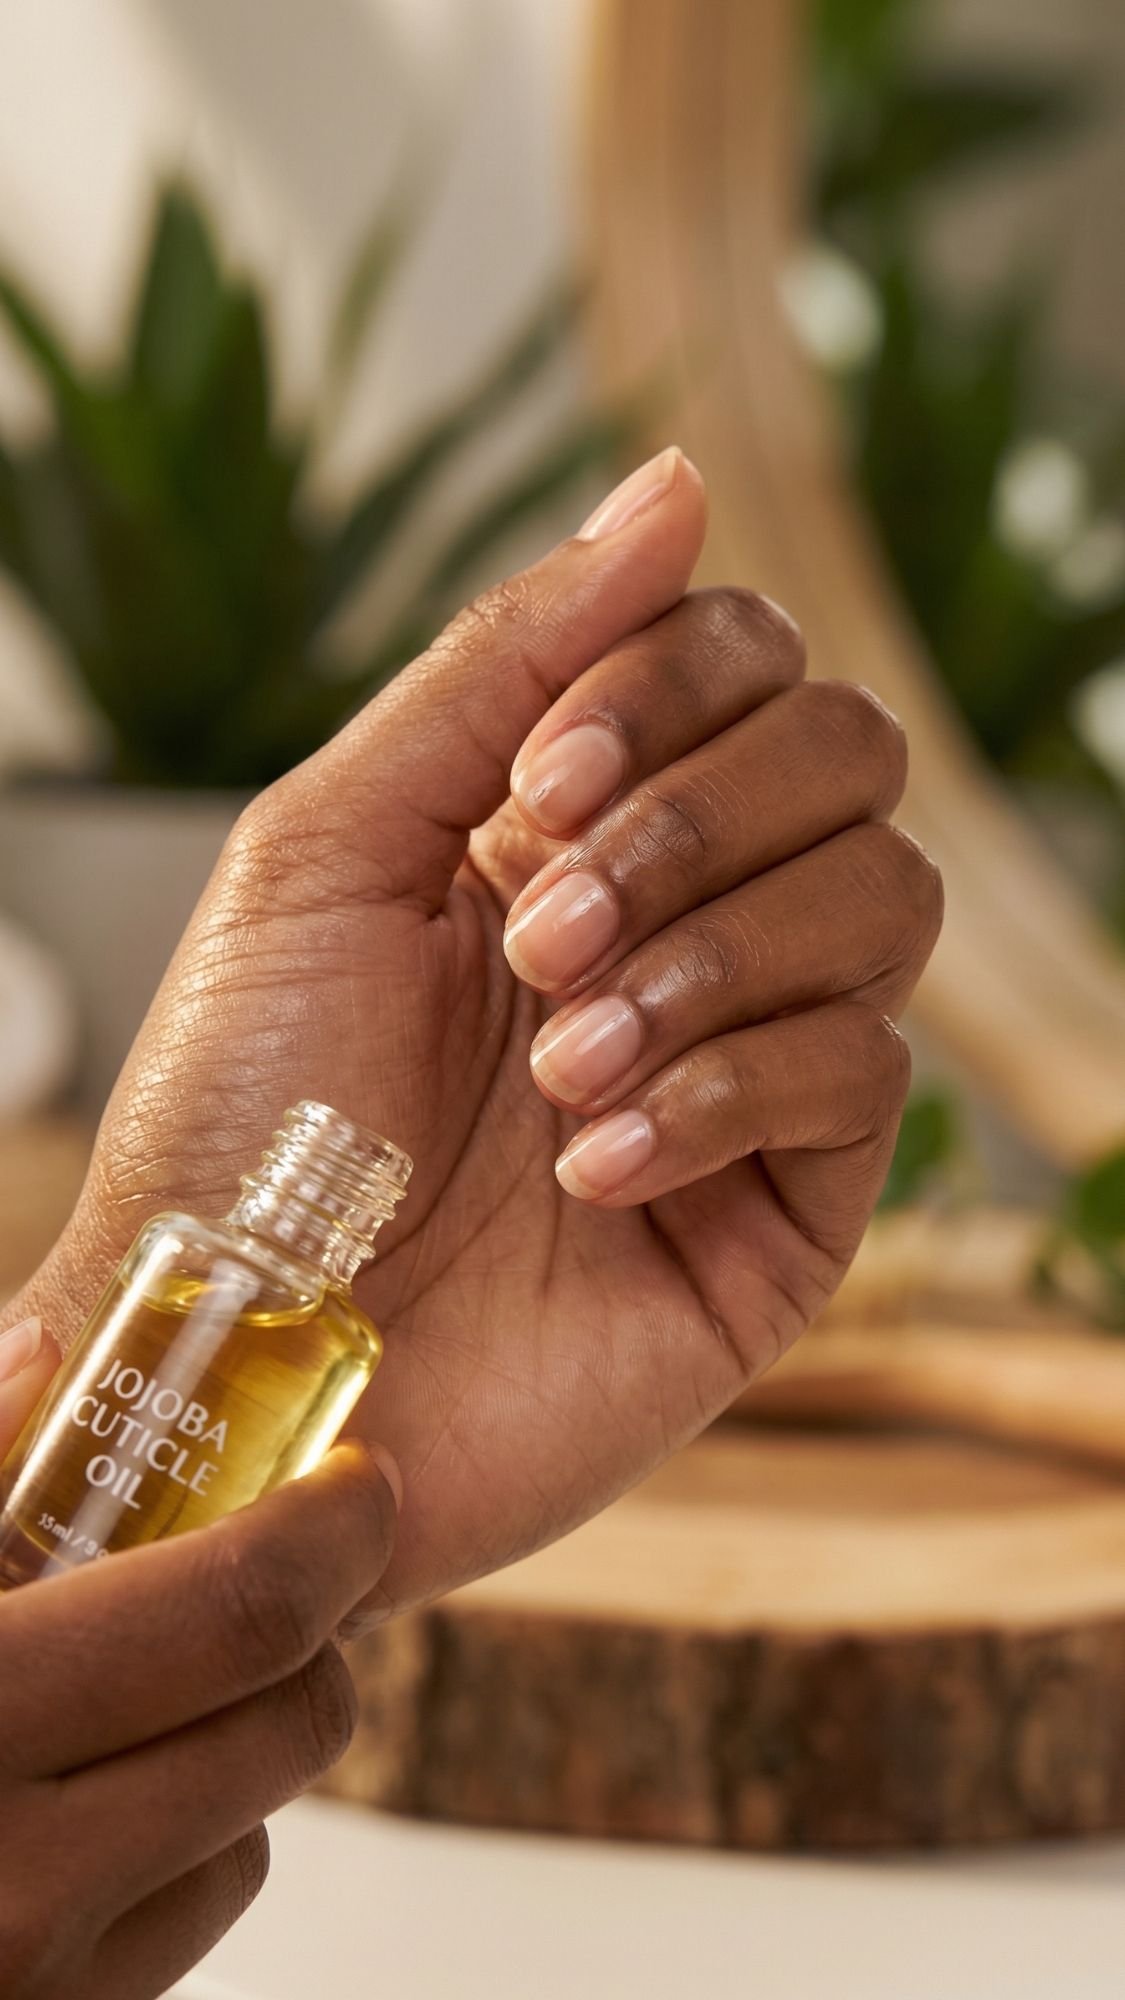
Focus on a jojoba-based oil routine. Jojoba is one of the only oils that is molecularly small enough to actually penetrate the nail plate and the layers of your skin. While you’re on your break, keep your nails short. This prevents the “leverage” that causes painful breaks. If you see white “granulation” spots, it’s a sign of surface dehydration. Slather them in balm and give them a rest. Your future self will thank you when it’s time for your next summer set.

Shade + Shape Guidance: Finding Your Perfect Match
Picking a color is only half the battle. If the shape doesn’t match your hand, even the most expensive sparkle will look “off.” In my ten years of doing this, I have realized that the right shape can literally reshape the look of your entire hand. If you want your fingers to look longer and slimmer, you need to be strategic. Here is how I help my clients choose their perfect holiday combo.
- For Short Nail Beds: If your natural nails are small, stay away from square shapes. Square tips “box in” the nail and make your fingers look shorter. Instead, go for a soft oval or a round shape. This mimics the natural curve of the cuticle and draws the eye upward, creating the illusion of length.
- For Wide Nail Beds: If you have wider nails, almond and coffin shapes are your best friends. These shapes taper at the tip, which narrows the appearance of the nail plate. It is an instant “slimming” effect for your hands.
- Deep Skin Tones: High-contrast pastels like mint green, butter yellow, and sky blue look absolutely elite on deeper skin. The pigment pops against the warmth of your skin, especially when you add a silver or pearl chrome finish.
- Fair to Medium Skin Tones: Lavender, peach, and rose gold are stunning on lighter tones. These shades harmonize with the cool or neutral undertones of your skin without looking “washed out.”
Pro-Tip: The “Ring” Rule
What I have noticed is that people often forget about their jewelry. If you wear a lot of gold rings, go for warmer sparkles like champagne or rose gold. If you are a silver girl, the “Golden Egg” chrome or the holographic periwinkle will look much more cohesive. It is these tiny details that make a manicure look like a planned “outfit” rather than an afterthought.
Sparkle in 20 Minutes
I get it. Sometimes you have an hour before brunch and you still haven’t even picked out your dress. You don’t have time for 3D daisies or magnetic velvet. You just need “good nails” and you need them now. This is the routine I use when I’m in a rush but still want to look like an influencer.
- Prep (5 Minutes): Quickly wipe each nail with alcohol. Do not skip this! Even if you do nothing else, removing the oil ensures you don’t have a “pop off” in the middle of dinner.
- The Base (2 Minutes): Skip the separate base coat if you have to. Use a “1-step” gel or a high-pigment regular polish that claims to be a base and color in one.
- The Secret Weapon (5 Minutes): Apply two thin coats of a sheer, iridescent shimmer. These “unicorn” polishes are very forgiving. Because they are sheer, you don’t have to worry about perfect lines near the cuticle.
- The Set (8 Minutes): Use a “Quick Dry” top coat or a fast-acting UV lamp. Apply one coat and immediately oil your cuticles. The oil actually protects the polish from smudging while it finishes setting.
Your Sparkle Cheat Sheet
We’ve covered a lot of ground, but I know you’re busy. You’ve got eggs to hide and outfits to steam. Here is the “TL;DR” version of everything we just talked about. These are the golden rules I live by to ensure my sets look professional every single time.
Beauty Rules of Thumb
- The “3-Stroke” Rule: One swipe down the center, one on the left, one on the right. If you keep brushing, you will create streaks.
- Cold Water Hack: If you’re using regular polish, dip your hands in a bowl of ice water for two minutes once they are touch-dry. It helps the inner layers set faster.
- Sunscreen is Essential: If you are using a UV lamp, apply SPF 50 to your hands twenty minutes before you start. Your skin will thank you in twenty years.
- Caps Save Lives: Always, always run your brush along the very edge of the nail to seal the polish.
- Check Your Lighting: Always paint your nails in natural light or under a daylight bulb. Incandescent yellow bulbs hide streaks that will look terrible once you step outside.
Ingredient & Technique Cheat Sheet
- Jojoba Oil: The only oil that actually penetrates the nail. Use it daily.
- 90% Alcohol: The gold standard for dehydration. Don’t use 70%, it has too much water.
- No-Wipe Top Coat: Essential for chrome. If it has a “sticky” layer, the chrome won’t shine.
- Sponge Dabbing: Use this for glitters and gradients. It gives a smoother finish than a brush.
- Flash Curing: Curing for just 5-10 seconds to “freeze” a design element before moving to the next nail.
The “Buy This First” List
- A Glass Nail File: It’s a one-time purchase that changes your nail health forever.
- A Long-Wear Top Coat: Spend the extra five dollars here. It’s the difference between a 3-day and a 7-day mani.
- A “Unicorn” or Iridescent Topper: This is the easiest way to make any cheap polish look high-end.
- A Professional Clean-up Brush: A tiny, angled brush from the art store works wonders for fixing mistakes.
FAQ: Everything You’re Still Wondering
How long do these designs actually last? If you follow my prep steps, a gel set should last 14 to 21 days. Regular polish will give you about 5 to 7 days. Press-ons depend on the glue, but usually last 10 days if you don’t use your nails as tools.
Are 3D designs annoying to wear? Honestly, they can be a bit “catchy” on hair and sweaters at first. What I have noticed is that if you seal the base of the 3D element with a bit of top coat, it smooths out the edges so they don’t snag.
Can I mix regular polish with gel? Proceed with caution! You can put gel top coat over completely dry regular polish (wait at least 24 hours), but never mix wet layers. It will cause the polish to “crinkle” and peel off.
How do I make my hands look younger in photos? Hydrate! Slather your hands in oil and use a “soft” camera angle. Also, oval and almond shapes elongate the fingers, which gives a more youthful look.
What if I hate the design halfway through? If it’s gel and you haven’t cured it, wipe it off with alcohol and start over. If it’s regular polish, use a non-acetone remover so you don’t destroy your base layer.
Your Easter Sparkle Awaits
So, are you ready to be the girl with the most talked-about nails at brunch? After ten years in this industry, I can tell you that a great manicure is more than just a color choice. It is a mood booster and a major confidence play. Easter 2026 is all about embracing that dimensional, high-shine aesthetic that makes you feel like the main character. Whether you went full maximalist with 3D daisies or kept it chic with a micro-French, I hope these tips help you skip the “nail fail” stage and go straight to the “hand model” results.
What I have noticed over the years is that the best manicures happen when you actually enjoy the process. Put on a podcast, pour a glass of something sparkling, and take your time with that prep. You are not just painting your nails. You are practicing a bit of high-value self-care. I can’t wait to see which of these sixteen looks you choose to rock this holiday. Tag me in your nail selfies because I need to see that sparkle in the wild! 🙂