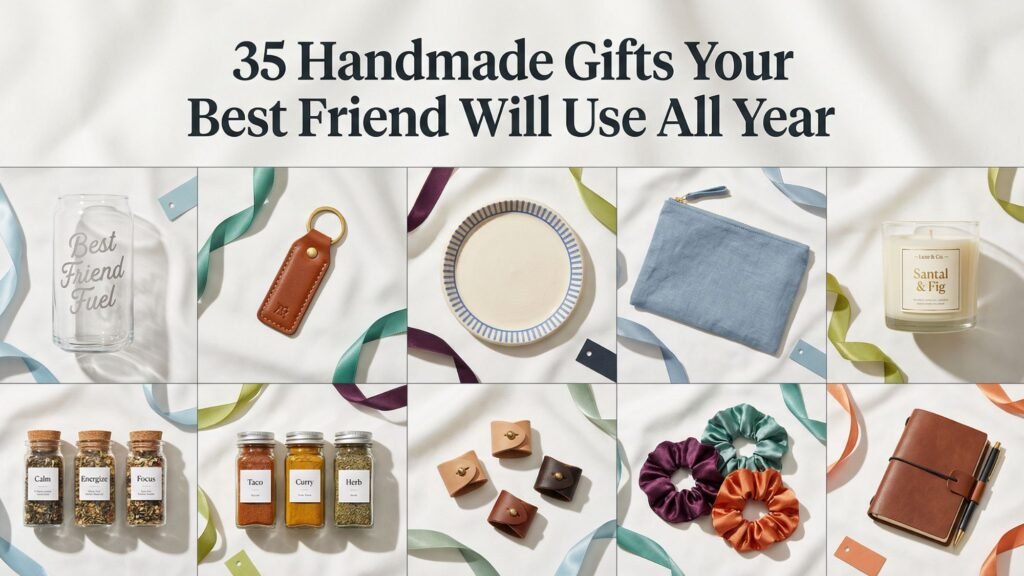
Let’s Talk Gifts They’ll Actually Use All Year
You know that moment when you give your best friend a gift and they go, “Oh my gosh I love it,” and then it quietly vanishes into a drawer forever? Yeah, we’re not doing that here. We’re making handmade gifts that earn a permanent spot in their daily life, like the stuff they grab on a random Tuesday, not just on their birthday.
I’ve been making DIY gifts for years, and the pattern stays the same every time. Function wins. A gift can look adorable, but if it doesn’t solve a real-life need, it won’t last. So this list leans hard into practical, reusable, and “why didn’t I have this sooner” projects.
Here’s how I’ll format each gift so you can actually make it without opening 14 tabs:
- Why they’ll use it all year
- Materials list
- Simple steps
- Pro tips (the little details that make it look expensive)
- Personalization ideas
- Placeholders for your photos or quick videos
The Secret That Makes Handmade Gifts Last (And Look Expensive)
Let me save you from the number one heartbreak moment in gifting. You spend hours making something cute, then your best friend uses it twice and says, “Ugh, it started peeling,” or “It got weird after I washed it,” or the classic, “I don’t know what happened.” Sure. Mysterious. Totally not physics and prep work. 🙂
Here’s the secret I swear by after years of making gifts that actually hold up:
Prep the surface like you mean it, and respect cure time.
Most DIY fails come from one of two things:
- You put pretty stuff on top of a dirty surface. Oils, dust, lotion residue, and even invisible kitchen film will ruin adhesion.
- You rushed the cure. Dry to the touch does not mean ready for real life.
What I Do Every Single Time (Quick Routine)
- Non-porous surfaces (glass, acrylic, metal): wipe with 90%+ isopropyl alcohol using a lint-free cloth. Let it fully air-dry.
- Wood: sand lightly, wipe off dust, then finish or glue on a clean surface.
- Painted items: let paint dry fully, then give it time to cure before sealing.
- Vinyl decals: burnish hard, then wait 24 to 48 hours before washing.
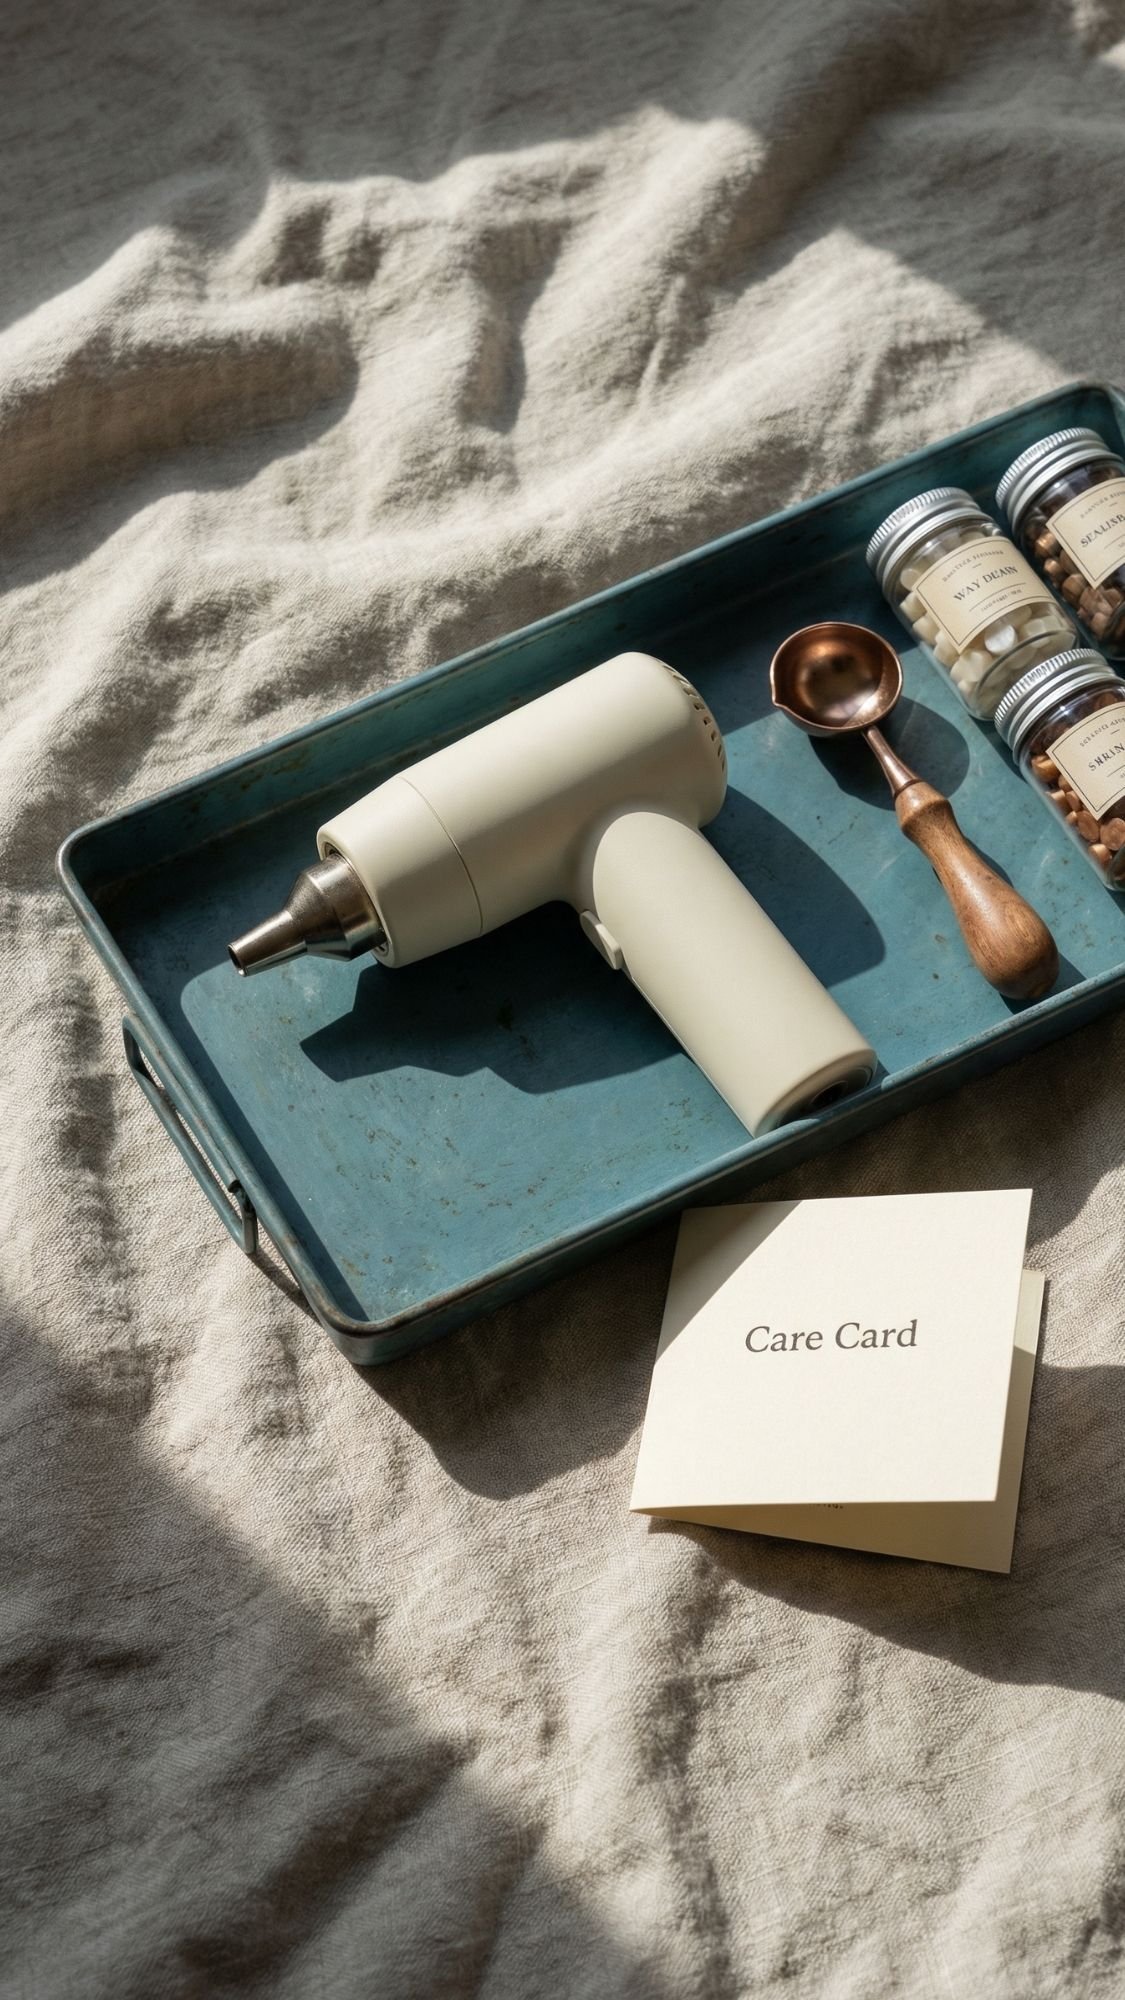
The Tiny “Luxury Move” Most People Skip
I include a mini care card with every handmade gift. It’s not extra work, it’s protection for your time. When people know how to wash it, cure it, or store it, they actually keep using it.
Care card basics to include:
- How to clean it
- What to avoid
- How long it needs to “set” before heavy use
- How to refresh it later
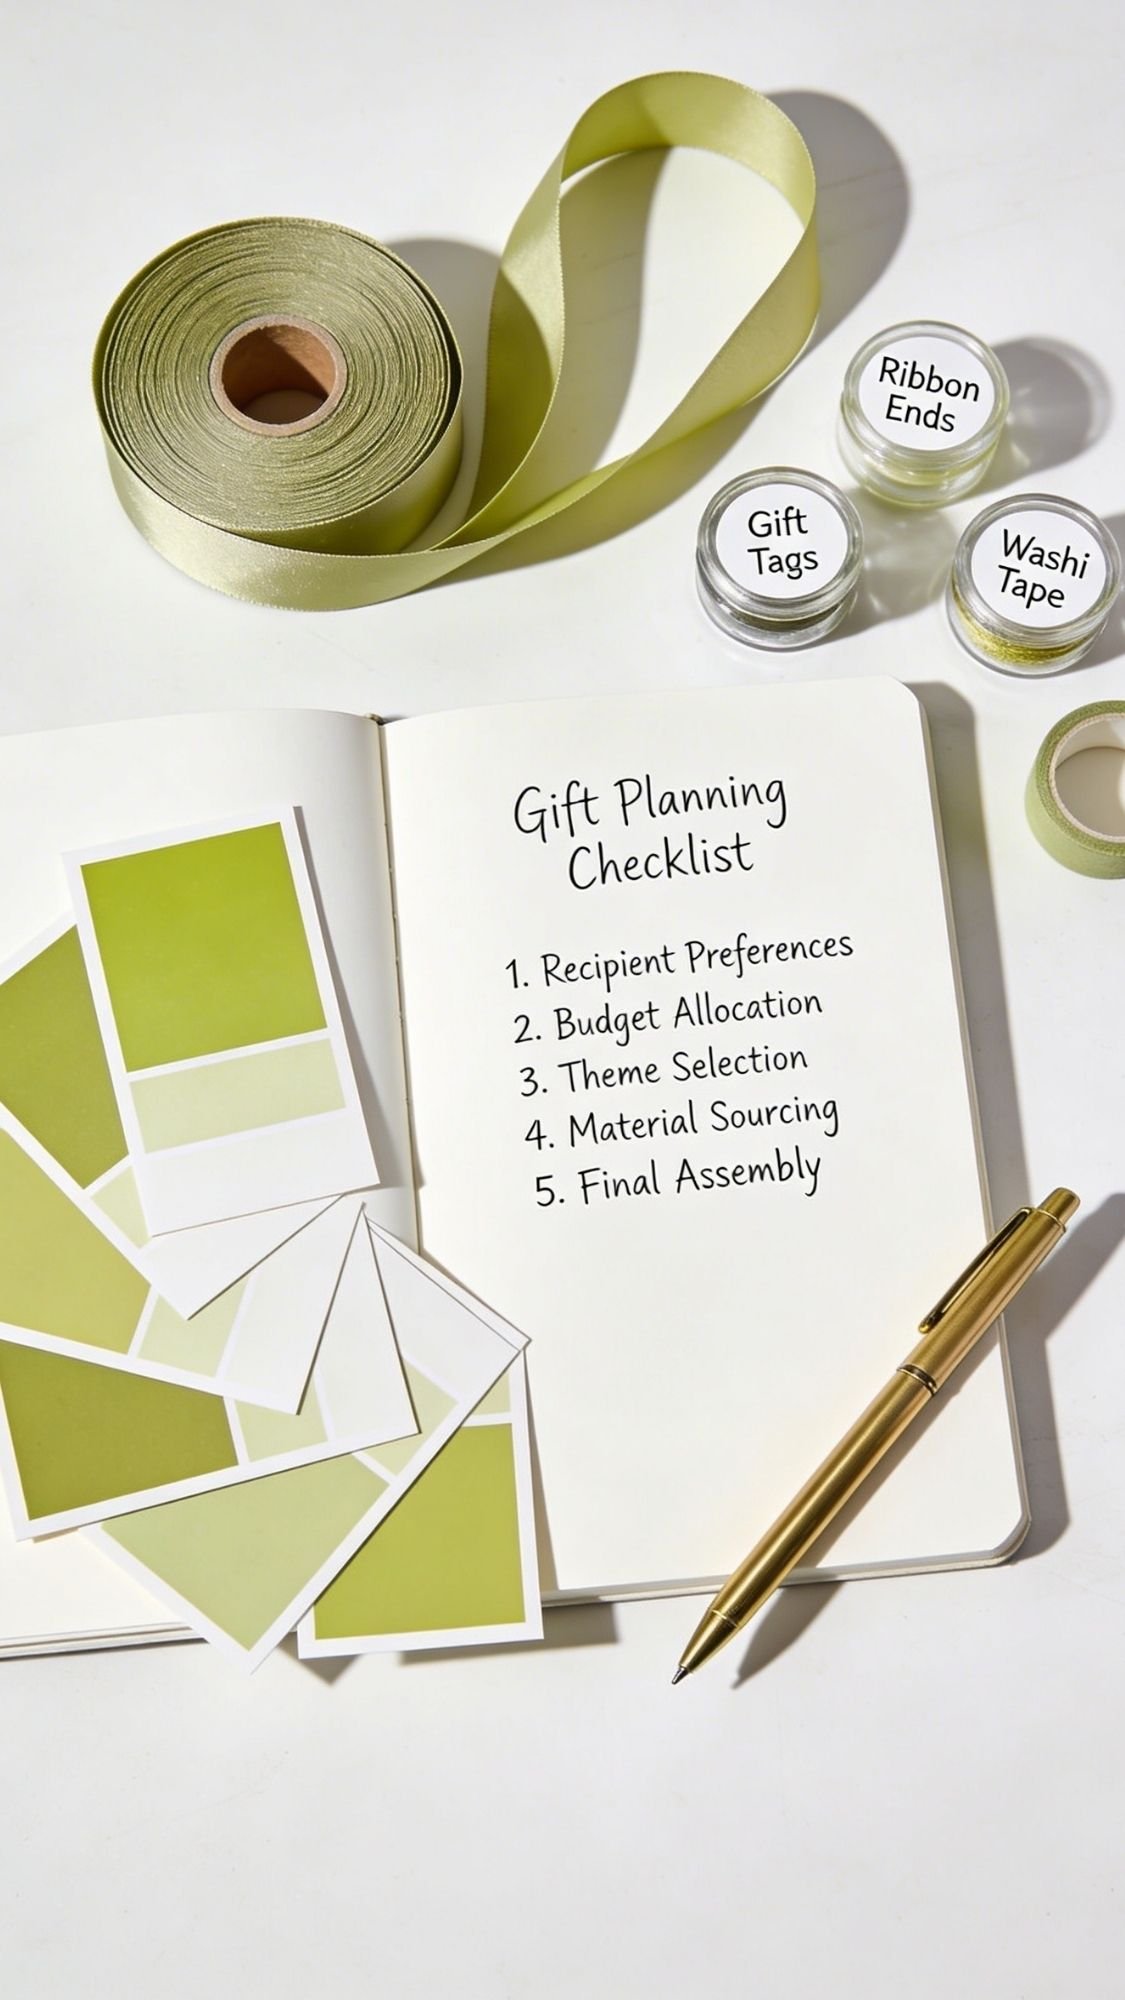
How To Pick The Right Gift For Your Best Friend (So They Actually Use It)
Before you start making anything, do yourself a favor and choose a gift that fits into their real life. Not their fantasy life. Not the version of them who wakes up early and journals with a matcha latte. Their actual day-to-day. Because usefulness is what turns “aw cute” into “I use this constantly.”
Ask yourself this quick set of questions and you’ll land on the right idea fast.
The 60-Second Best Friend Gift Checklist
- What do they reach for every day?
- Coffee or tea stuff
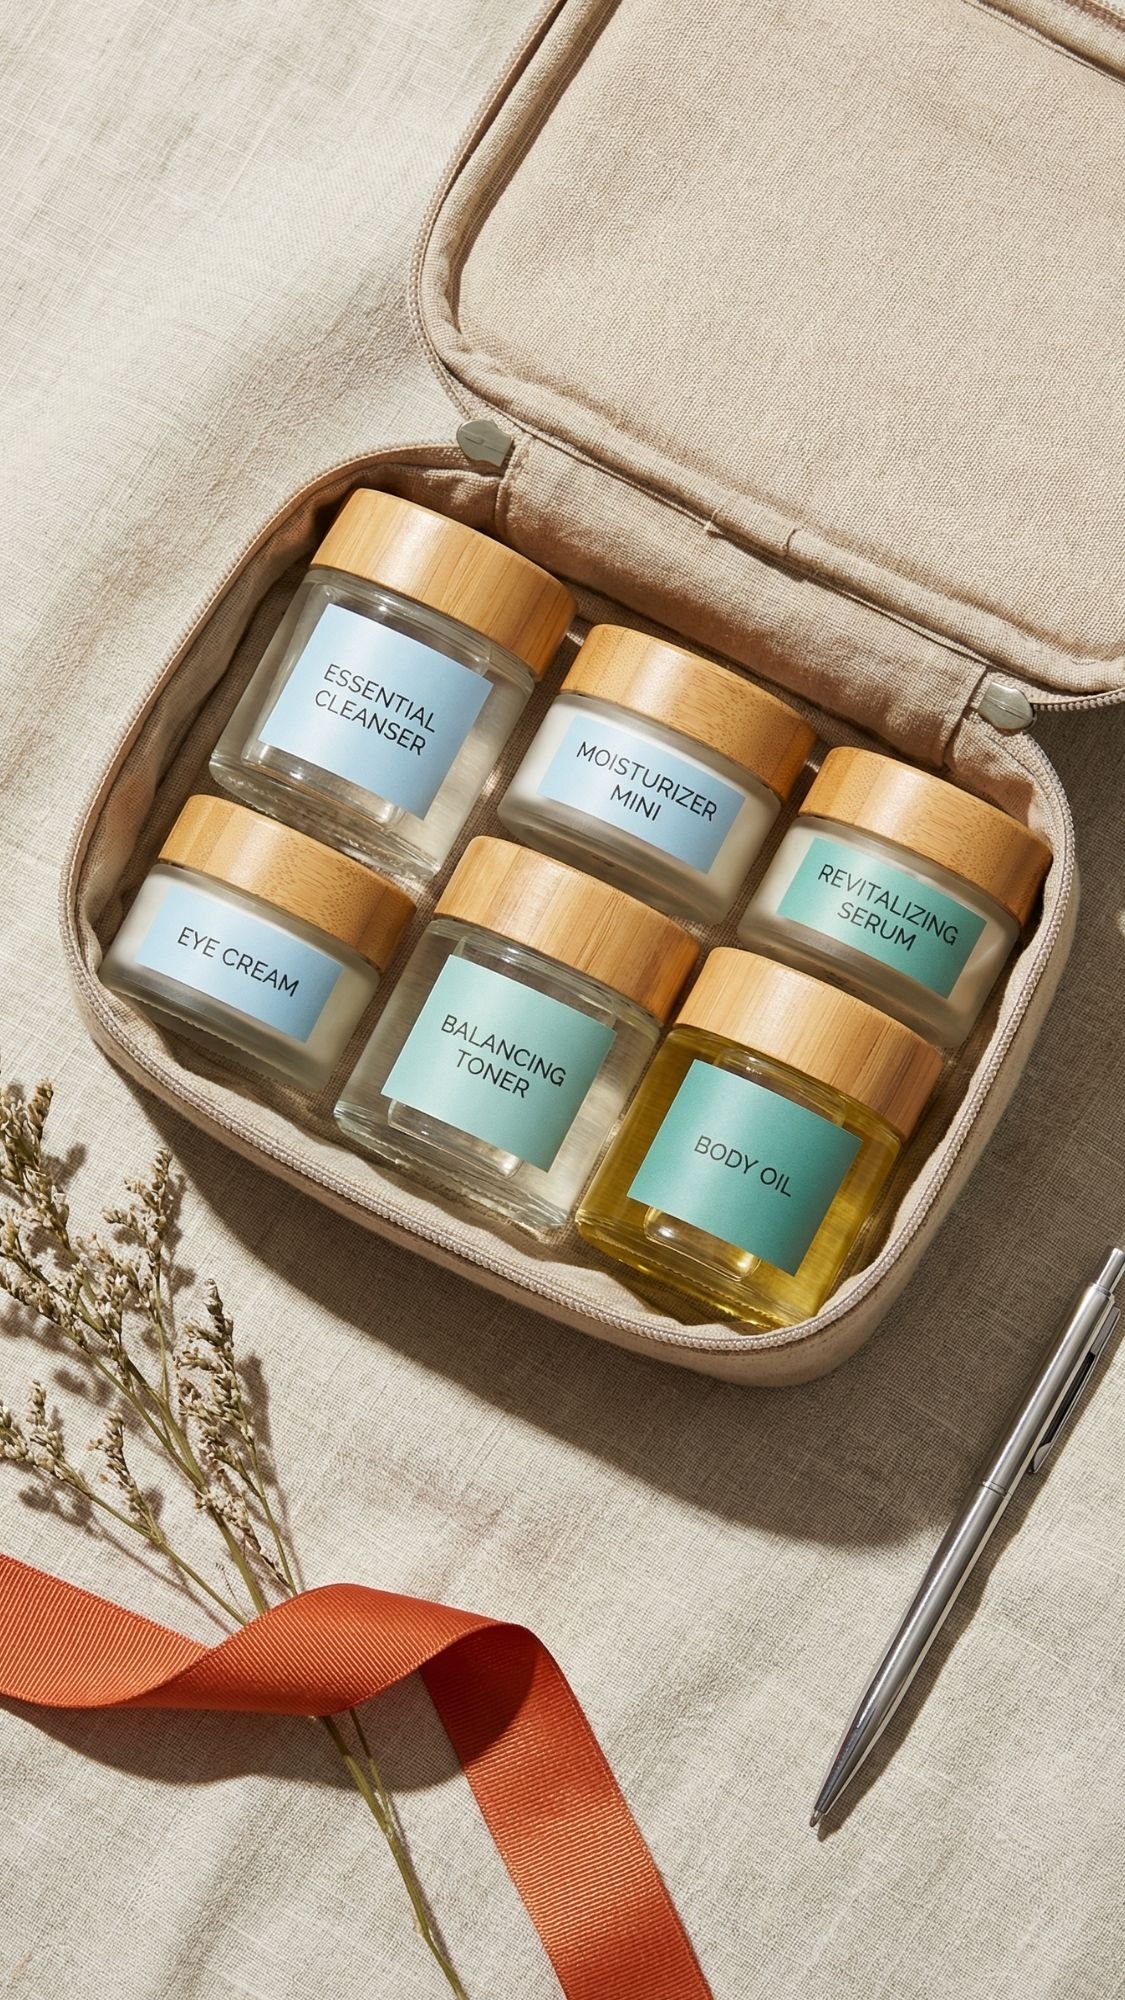
- Skincare and “purse essentials”
- Cooking and pantry things
- Desk life and organization
- Cozy evenings and self-care
- Travel or “always in the car” habits
- Where will the gift live?
- Kitchen counter, bathroom sink, desk, nightstand, car, work bag
- What tiny annoyance can you solve?
- Lost keys, tangled cords, messy counters, dry hands, leaking products, “where did I put that” chaos
Ever notice how the gifts people keep are the ones that fix a tiny daily problem? That’s the whole game.
My “If They Won’t Use It, Don’t Make It” Rule
I only make gifts that hit at least one of these:
- It saves them time
- It makes something easier
- It replaces something they buy often
- It organizes a mess they hate
- It adds comfort to a daily routine
If it checks two boxes, you’ve basically won. If it checks none, it’s probably going to live in a drawer next to the scented sachet they never asked for. Harsh, but true.
Quick Gift Pairing Ideas (So You Don’t Overthink It)
- Coffee friend: glass can cup + coaster set + simple syrup
- Skincare friend: lotion bar tin + reusable cotton rounds
- Organized friend: cable wraps + zip pouch
- Cozy friend: candle + mug cozy + tea blend
- Plant friend: painted pot + propagation station
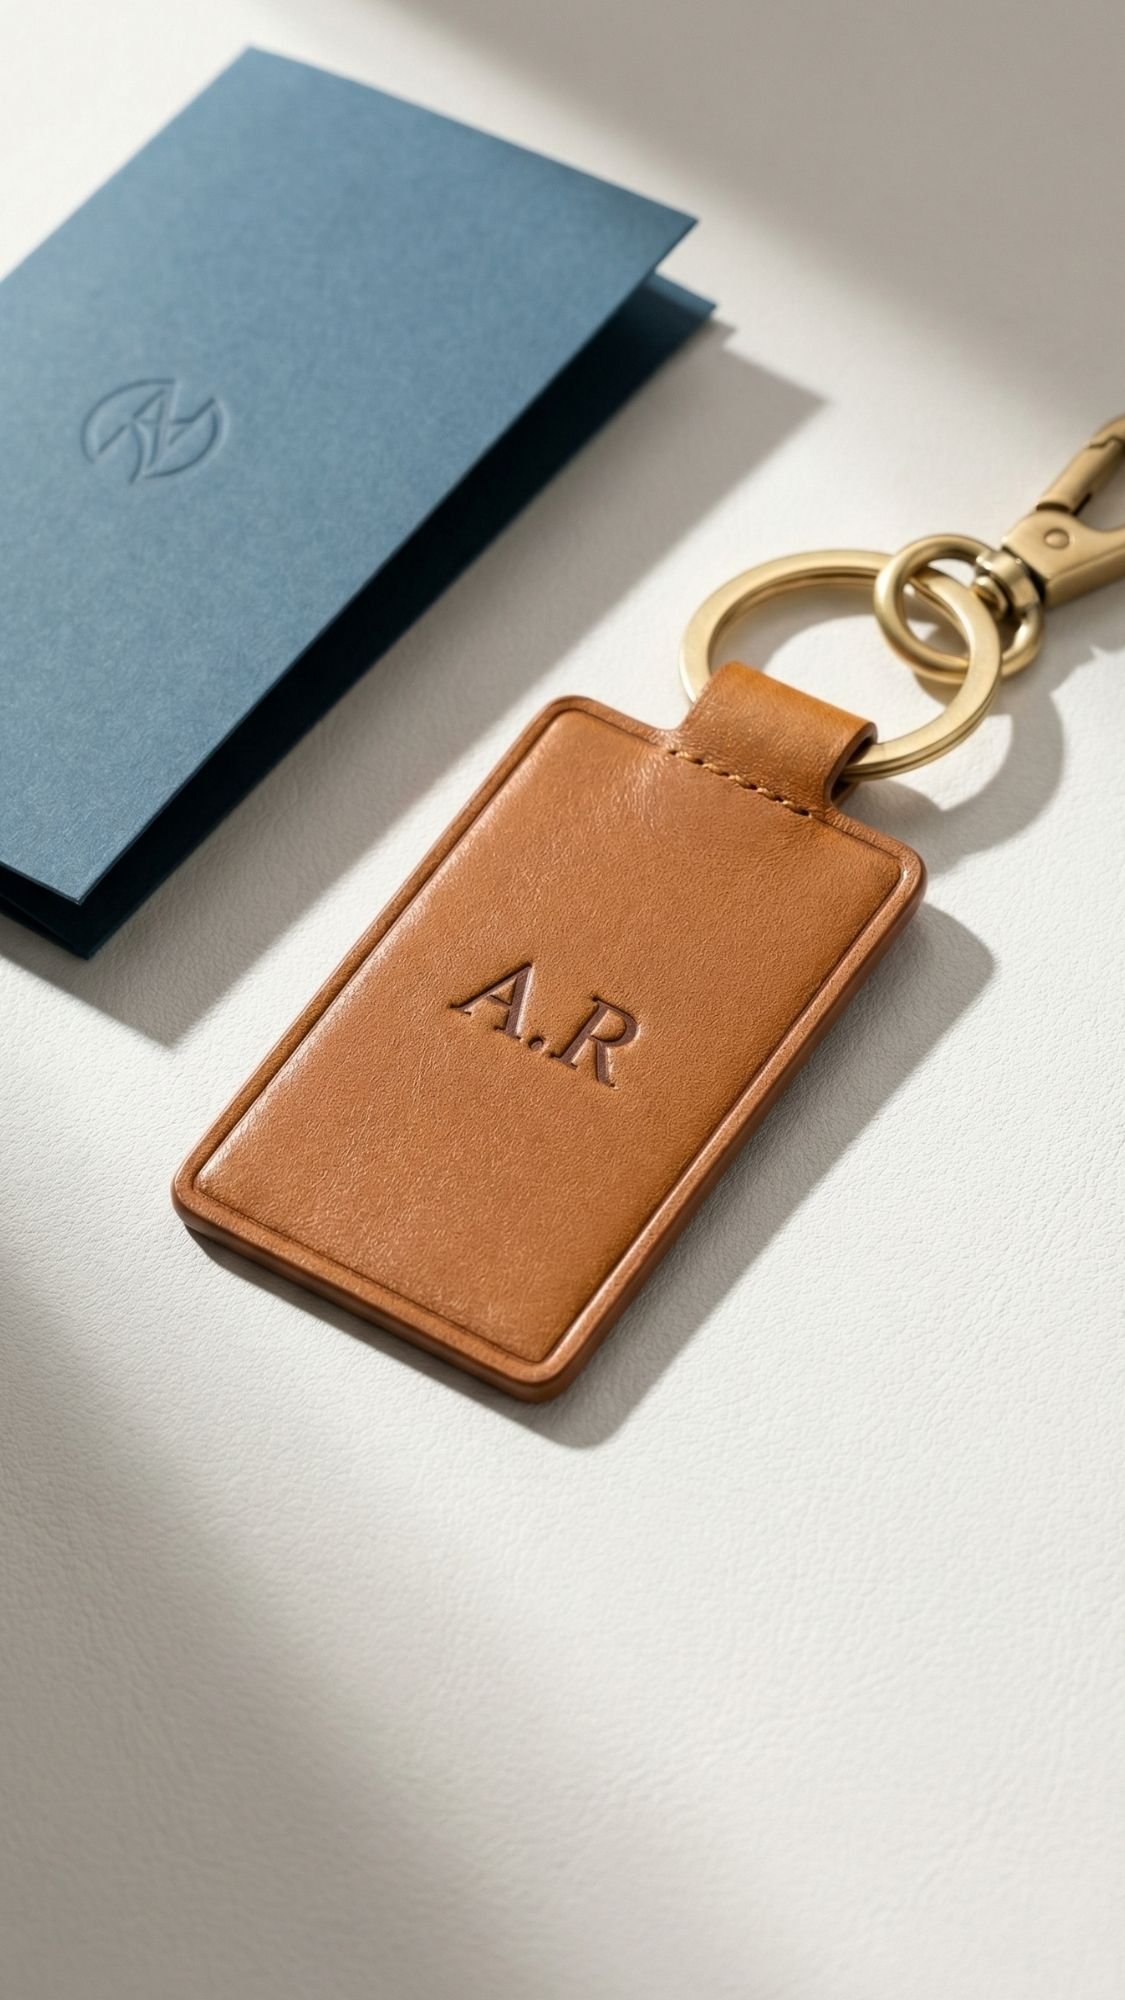
1) Personalized Leather Key Fob: The Daily Driver Gift
This is one of my go-to gifts because it’s not “cute and useless.” It’s cute and unavoidable. Your best friend uses their keys every single day, so this gift instantly becomes part of their routine. Also, it looks way more expensive than it is, which is always a win.
Why They’ll Use It All Year
- They grab it daily, even when they’re half-asleep and late.
- It makes keys easier to find in a bag.
- It holds up for years if you finish it correctly.
Materials
- Pre-cut leather strip or scrap leather (about 1 inch wide, 5 to 6 inches long)
- Key ring
- Rivet set or Chicago screw
- Hole punch (leather punch or an awl)
- Edge beveler (optional but makes it look pro)
- Burnishing tool or even a smooth wooden spoon handle
- Leather conditioner
- Letter stamps (optional for initials)
How To Make It (Simple Steps)
- Cut your leather strip and round the corners so it won’t curl or crack later.
- Punch the hole for your hardware, then test-fit the ring before you commit.
- If you want initials, stamp them now while the leather sits flat.
- Bevel the edges (optional), then burnish until the edges look smooth and slightly glossy.
- Attach hardware with a rivet or Chicago screw, then tighten firmly.
- Condition the leather lightly, let it absorb, then buff.
Pro Tips (So It Looks Store-Bought)
- Stamp first, condition after. Conditioner can soften the leather and make stamping mushy.
- Burnish the edges. This one step takes it from “DIY craft night” to “boutique find.”
- If you use a Chicago screw, add a tiny dot of threadlocker so it won’t loosen over time.
- Keep the hardware color consistent. Gold with gold, silver with silver. Mixing metals makes it look accidental.
Personalization Ideas
- Initials, nickname, or a tiny stamped heart
- A subtle symbol that means something to you both
- A short inside joke on the back (just keep it short so it stays readable)
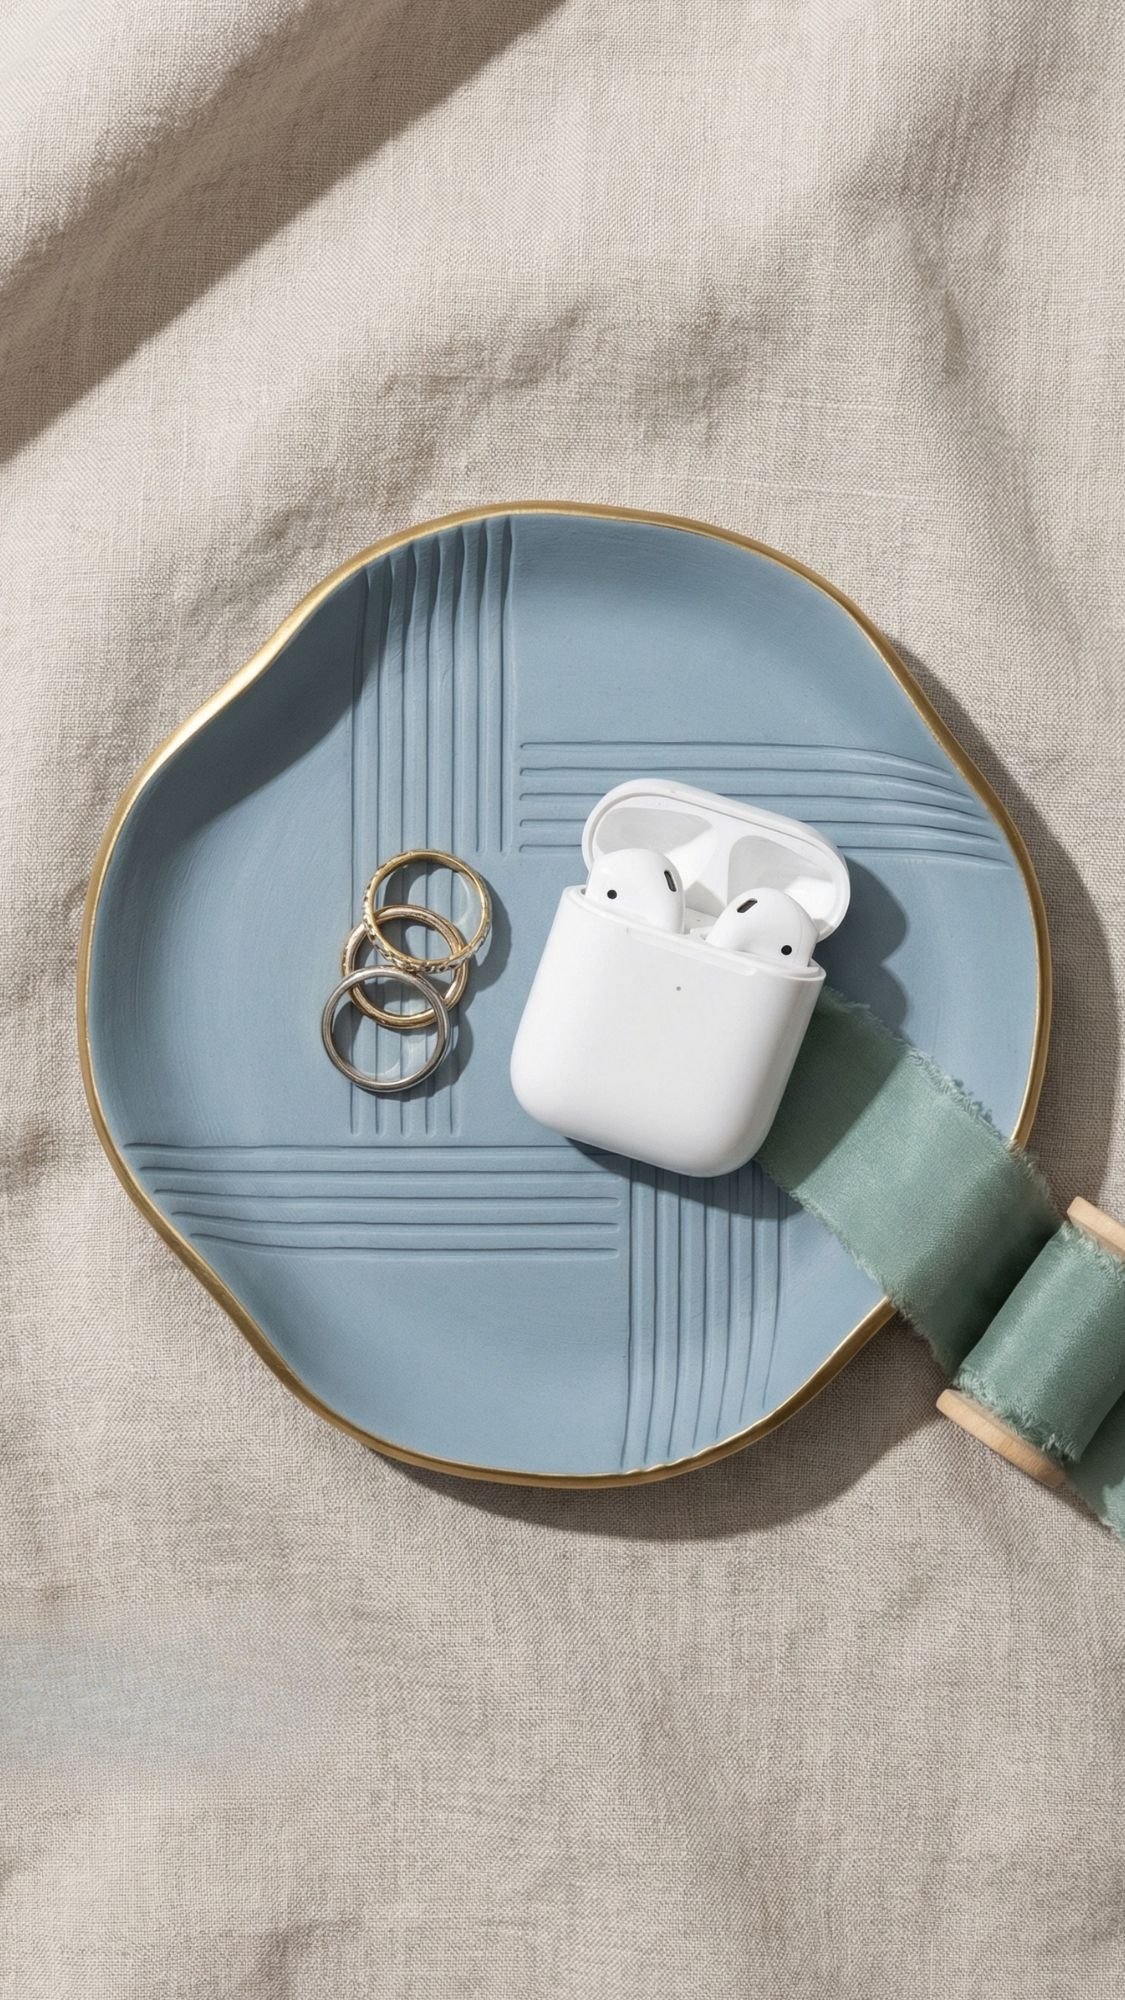
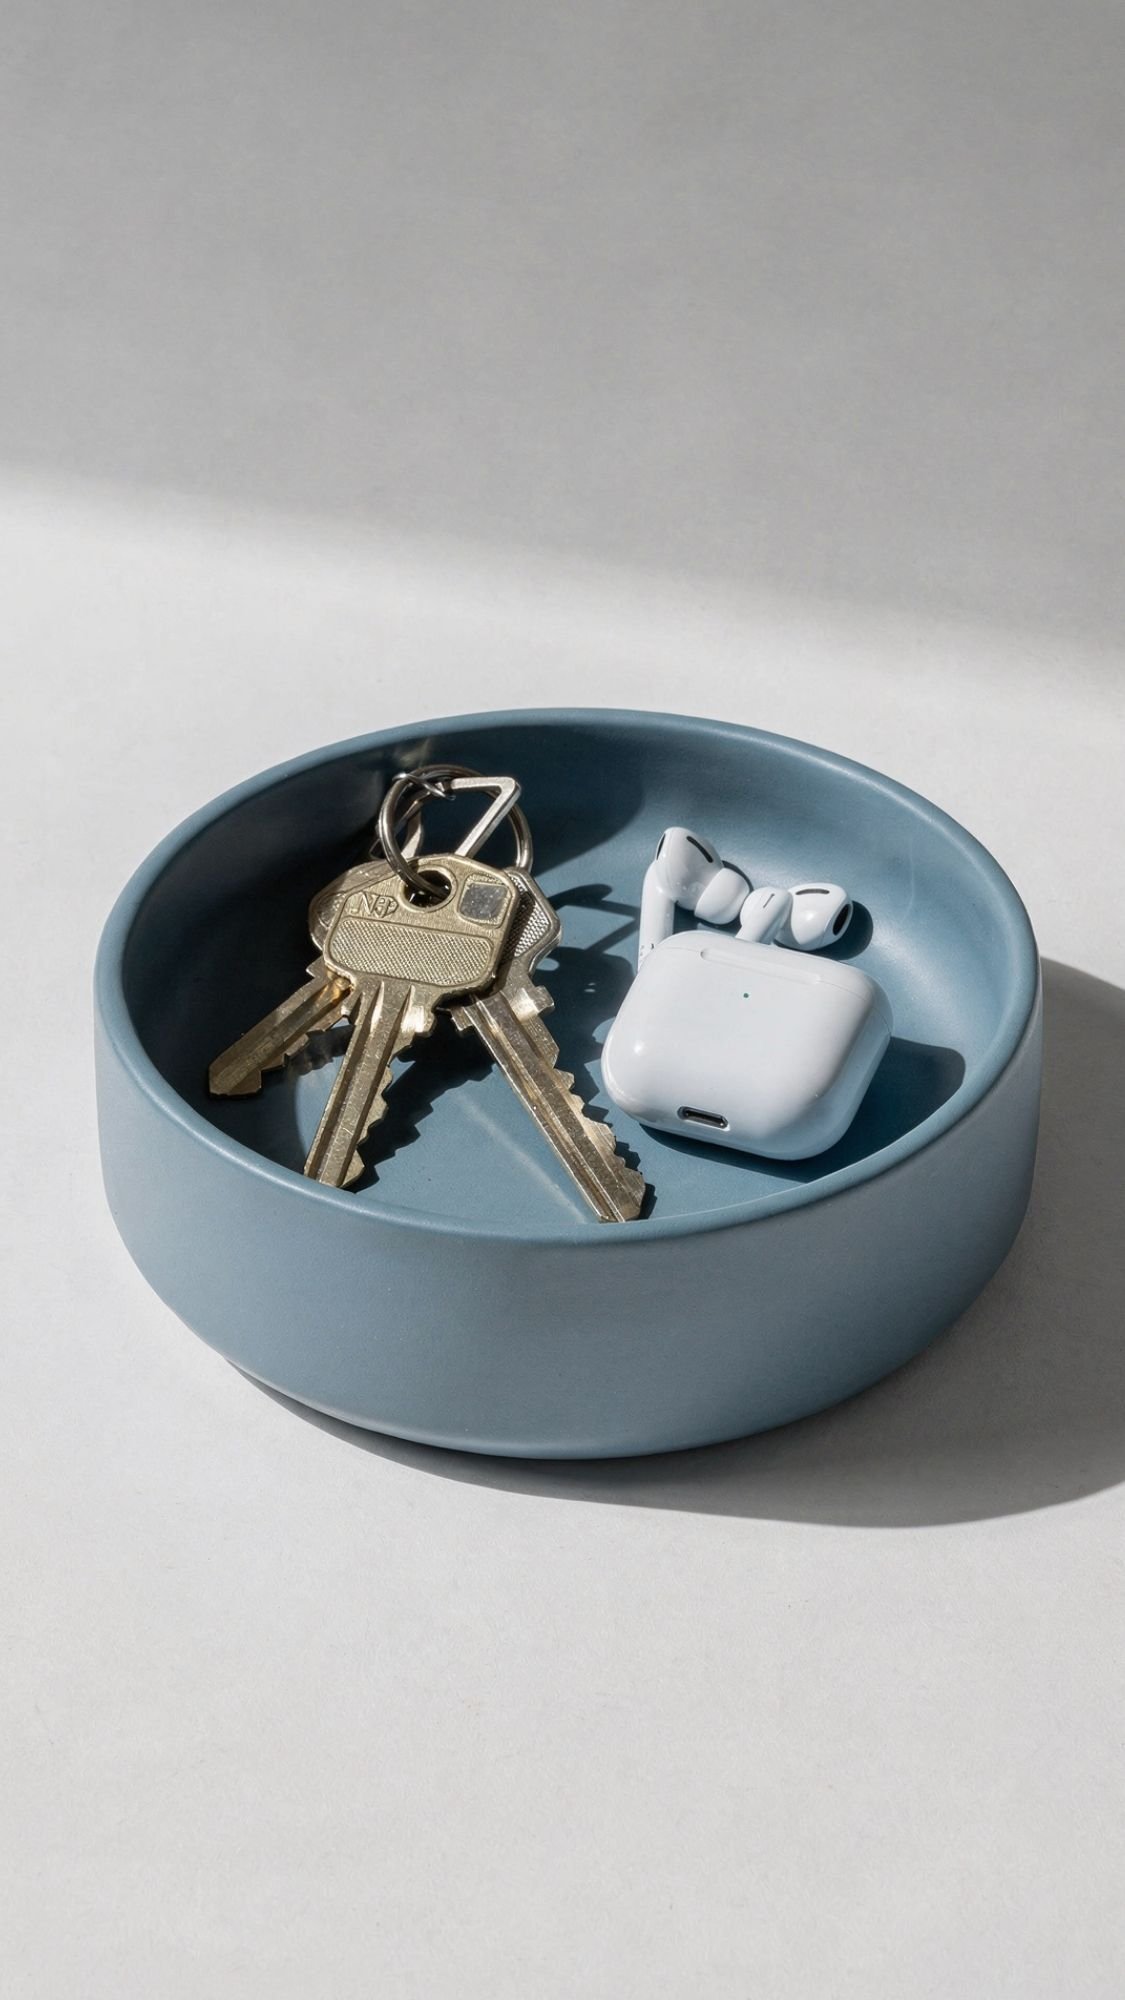
2) Air-Dry Clay Catchall Tray: For Rings, Keys, And All The Tiny Chaos
If your best friend always takes off their rings and then immediately forgets where they put them, this gift saves the day. I love a catchall tray because it looks like decor, but it also works like a little daily assistant. Plus, you can make it feel super high-end with the right shape, sanding, and seal. Ever notice how the smallest “set it here” item ends up being the most used thing in the house?
Why They’ll Use It All Year
- They drop rings, keys, earbuds, and hair ties in it daily.
- It keeps nightstands and counters from turning into a clutter museum.
- It looks expensive when you smooth the edges and seal it properly.
Materials
- Air-dry clay (DAS or Crayola work great for beginners)
- Acrylic roller or a smooth bottle
- Two dowels or paint stir sticks (to roll an even thickness)
- Craft knife or clay cutter
- Bowl (to shape the tray)
- Fine grit sandpaper (220 to 400)
- Acrylic paint or gilding wax (optional)
- Sealer (water-based varnish or clear spray sealer)
- Felt dots for the bottom (optional but classy)
How To Make It (Simple Steps)
- Roll the clay to an even thickness, use dowels as guides so you don’t end up with thin floppy edges.
- Cut your shape, I love an oval, scallop, or soft rectangle for a modern look.
- Place the clay over an upside-down bowl, then gently press to form the curve.
- Let it dry slowly, then flip it after a few hours so it dries evenly.
- Sand the edges and surface until it feels smooth to the touch.
- Paint or add metallic accents if you want, then seal the whole tray, including the underside.
Pro Tips (This Is Where It Stops Looking “Crafty”)
- Dry it slow. Fast drying causes warping and cracks, especially if your room runs dry in winter.
- Rotate while drying. I flip and rotate the tray a few times so the moisture leaves evenly.
- Sand, then seal. Sanding fixes the “homemade” look, sealing makes it usable.
- If you add gold accents, use them sparingly. A thin rim looks luxe, a full gold slab can look like a middle school art project. You know what I mean.
Personalization Ideas
- Press their initials into the back corner with letter stamps.
- Add a tiny embossed symbol that matches their vibe, like a star, flower, or heart.
- Match the palette to their space:
- Modern: Cool Blue + Cloud Dancer + thin brass lines
- Boho: Patina tones + Washed Linen neutrals
- Glam: Plum Noir + Persimmon + gold edge
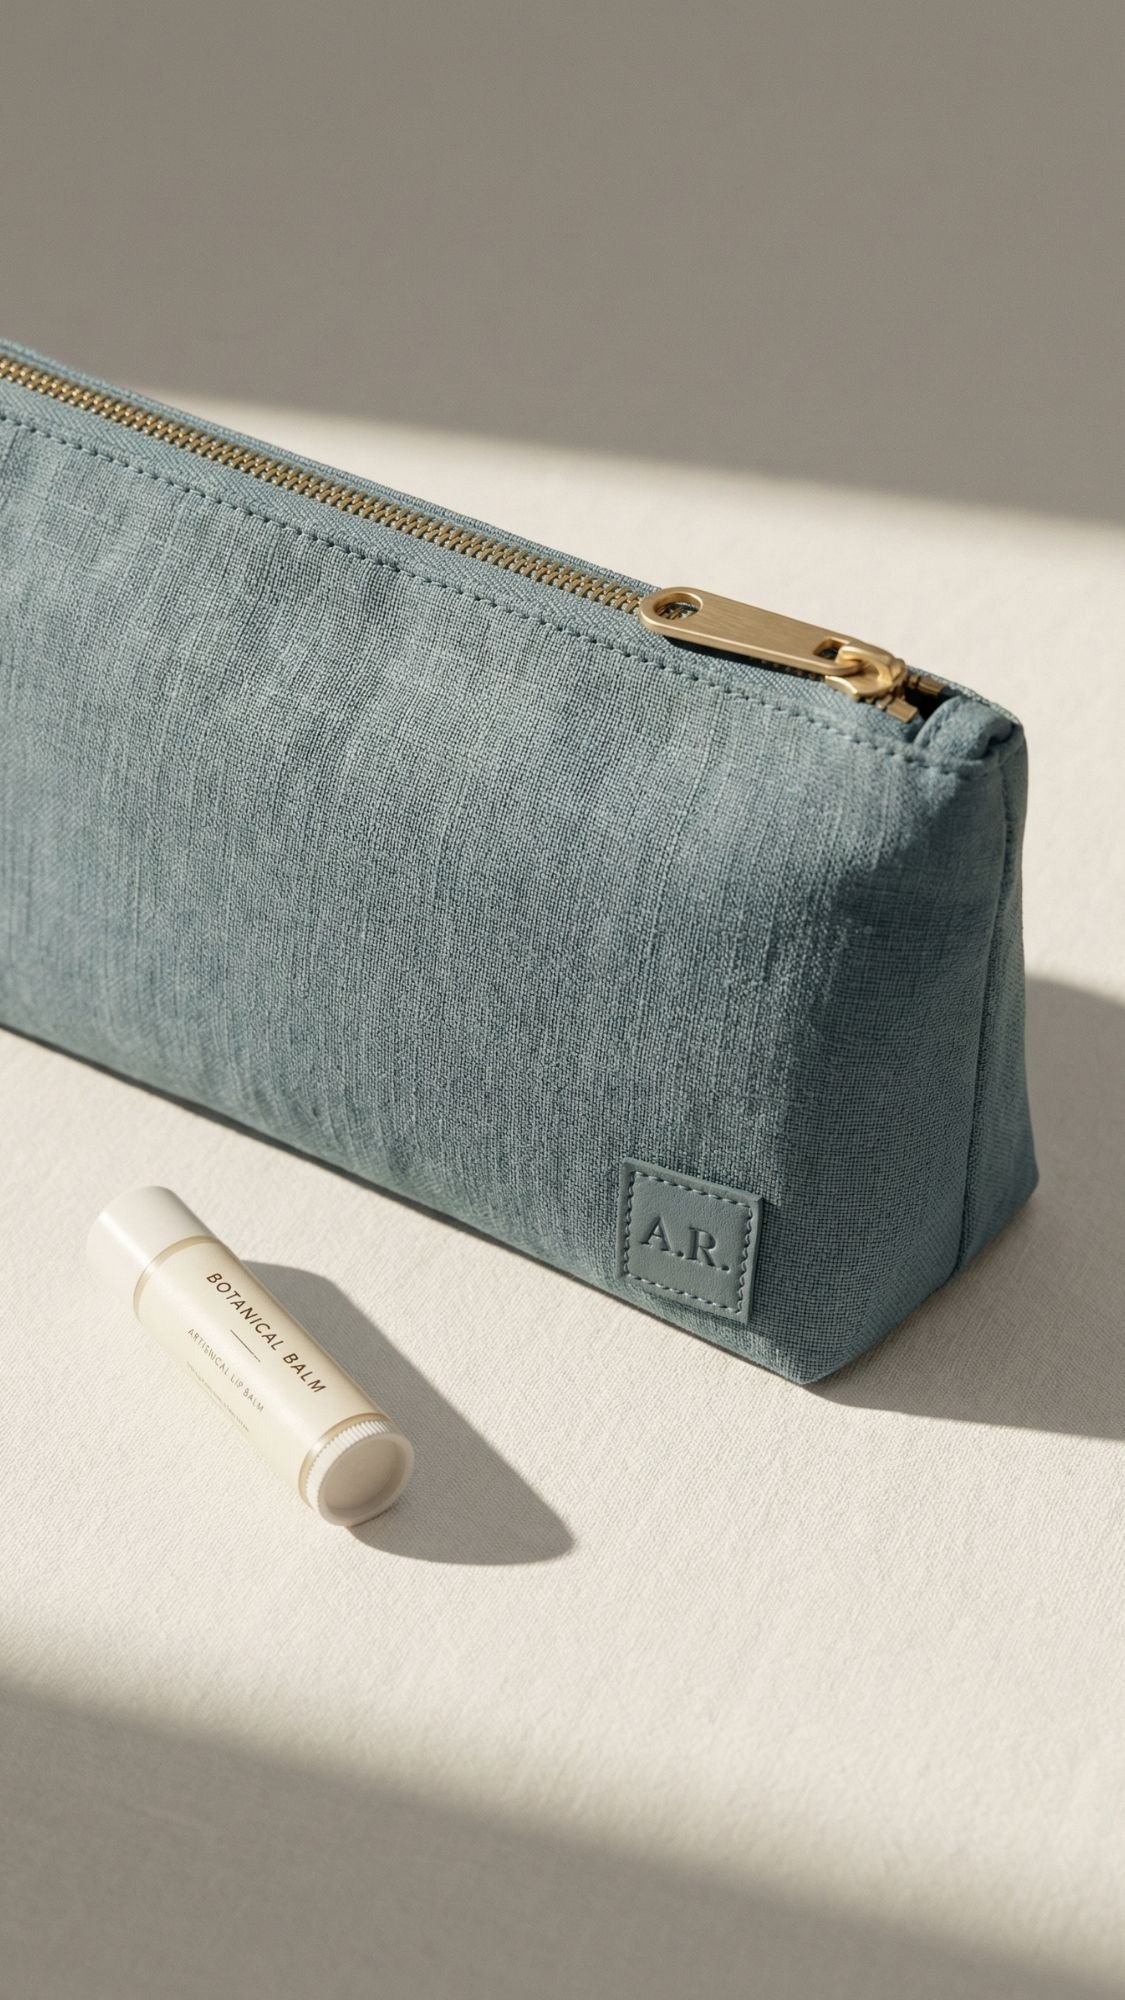
3) Washed Linen Zipper Pouch: Makeup, Tech, Or The “Random Bag Stuff” Catch-All
This gift hits that sweet spot where it looks boutique, but it works like an everyday workhorse. Your best friend can toss it in a tote, keep it in the car, or use it as a travel pouch. And FYI, washed linen instantly reads elevated, even if you keep the design super simple.
Why They’ll Use It All Year
- It corrals all the tiny essentials that normally float around a bag like loose confetti.
- It works for makeup, chargers, pens, meds, receipts, you name it.
- It washes well, and it actually gets better with use.
Materials
- Washed linen fabric (fat quarter works, or scraps)
- Zipper (7 to 9 inch zipper works great for a medium pouch)
- Thread (polyester holds up best for daily wear)
- Interfacing (optional, but I love it for structure)
- Sewing clips or pins
- Scissors or rotary cutter
- Iron and ironing board
- Sewing machine (hand-sewing works, but it takes longer)
How To Make It (Simple Steps)
- Cut two outer rectangles and two lining rectangles (start around 8 x 10 inches for a roomy pouch).
- Press interfacing onto the outer fabric if you want it to stand up nicely.
- Sew the zipper between outer fabric and lining on both sides, then topstitch for a clean finish.
- Open the zipper halfway (do not forget this, or you will regret everything).
- Match outer pieces right sides together, match lining pieces right sides together, then clip.
- Sew around the edges, leave a turning gap in the lining.
- Box the corners if you want depth, then turn right side out.
- Stitch the lining gap closed, push lining inside, press, done.
Pro Tips (These Make It Look Store-Bought)
- Use a longer stitch length for topstitching. It looks cleaner on linen and it reduces puckering.
- Press every seam. Linen behaves when you press it, and it sulks when you skip it.
- If the zipper waves, you stretched the fabric. Slow down and let the feed dogs do the work.
- Add interfacing if they carry sharp items like chargers or keys. It prevents that sad saggy pouch look.
Personalization Ideas
- Add a small monogram patch on the lower right corner.
- Stitch a contrast zipper tab in Persimmon or Cool Blue.
- Sew in a woven label with a cute phrase, or an inside joke, but keep it subtle.
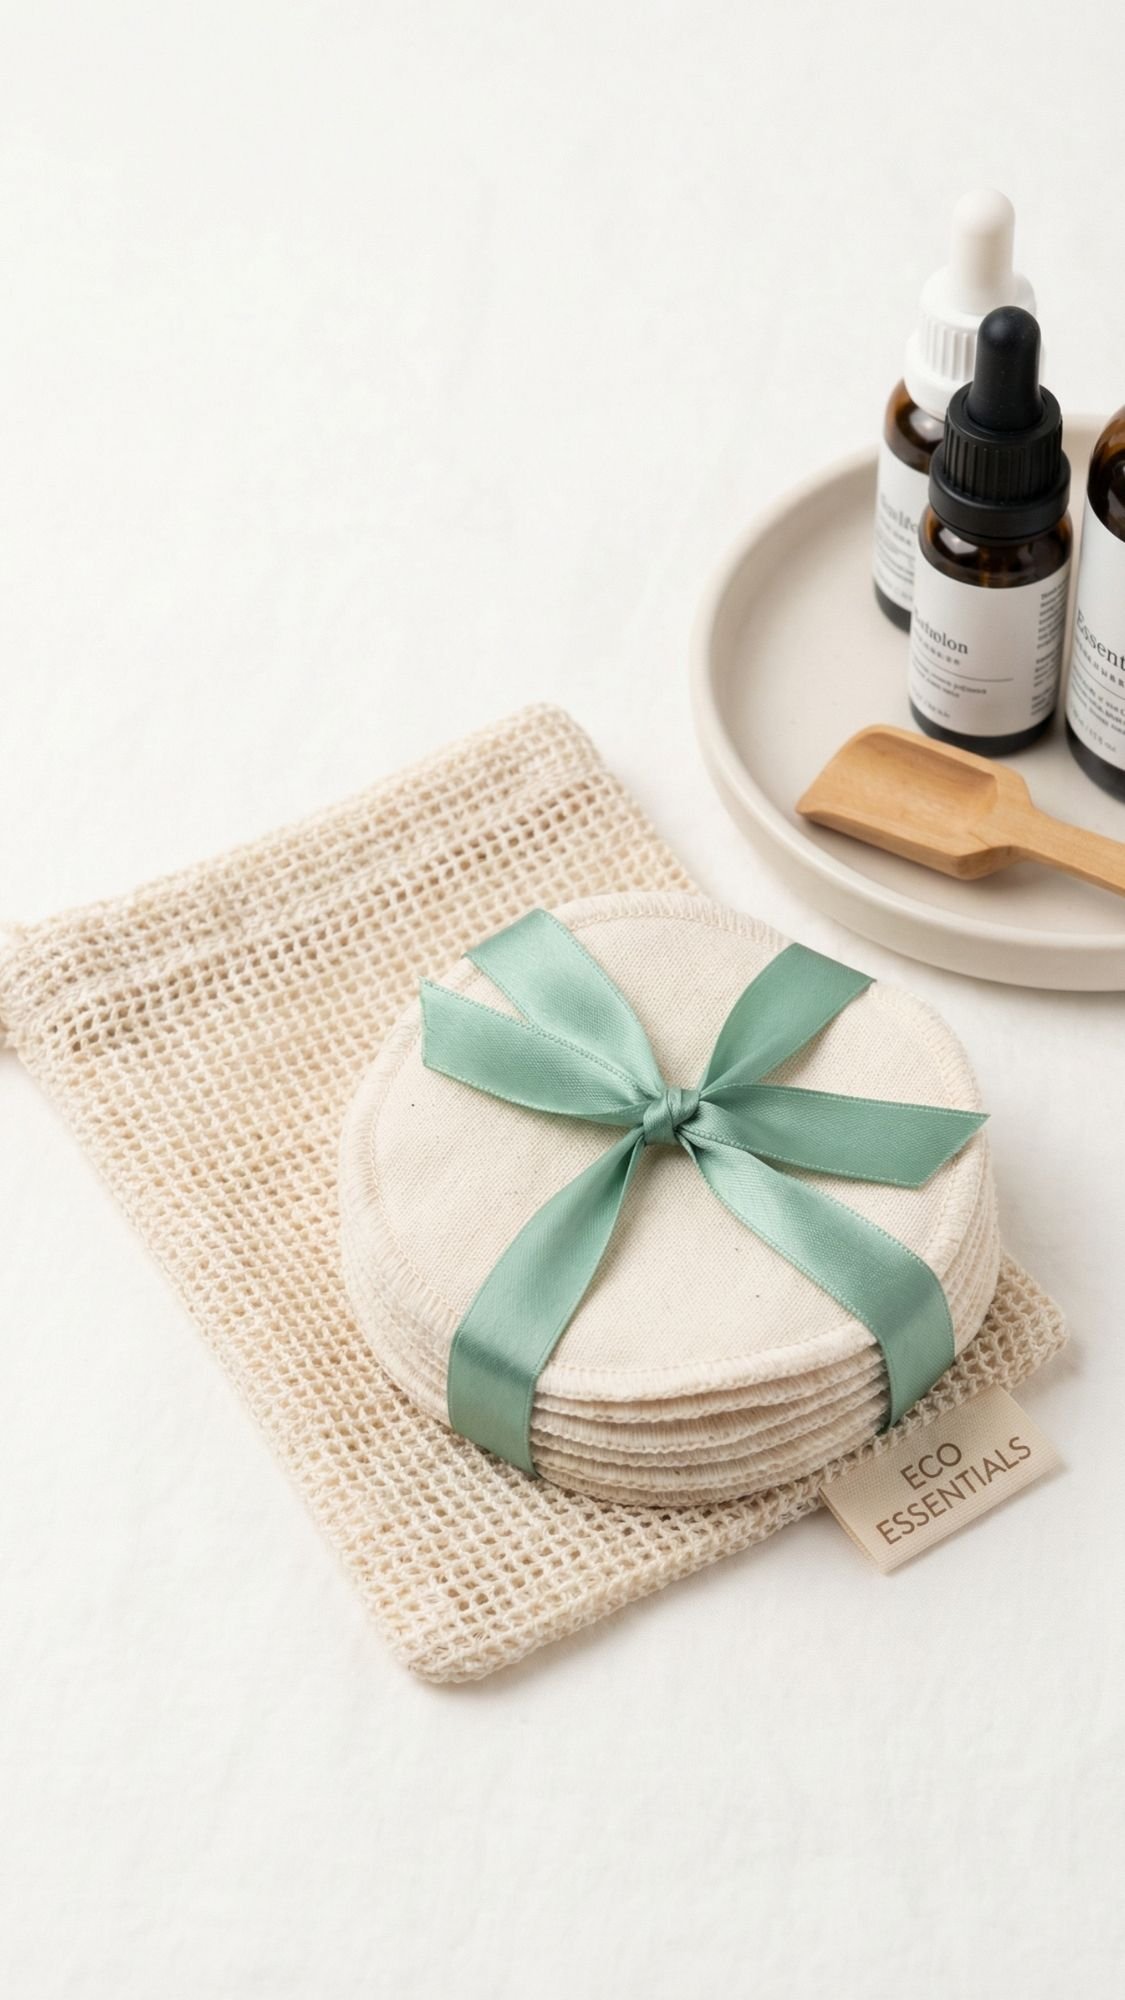
4) Reusable Cotton Rounds + Mesh Wash Bag: The “I Use These Every Day” Bathroom Gift
This is one of those gifts that feels simple until you realize how often people actually use it. If your best friend removes makeup, applies toner, wipes off a mask, or just likes feeling put-together, reusable cotton rounds become a daily habit fast. And honestly, they make a bathroom look more intentional too. Functional and cute, what a concept.
Why They’ll Use It All Year
- They reach for them every morning or night, no special occasion required.
- They replace disposable cotton pads, which people buy constantly.
- They feel soft and luxe when you use the right fabric.
Materials
- Cotton flannel, bamboo terry, or old cotton towel fabric (soft matters here)
- Coordinating thread
- Scissors or rotary cutter
- Sewing machine (or hand stitch if needed)
- Turning tool or chopstick (optional)
- Mesh wash bag (so they don’t disappear into the laundry abyss)
- Fabric marker or small tag (optional for “this side is for makeup”)
How To Make It (Simple Steps)
- Cut circles, about 3 to 3.5 inches wide. A jar lid works as a template.
- Place two circles right sides together, then sew around the edge.
- Leave a small opening, turn it right side out, then press.
- Topstitch around the edge to close the opening and make it look clean.
- Make a stack of 12 to 20, then bundle with the mesh wash bag.
Pro Tips (So They Wash Well And Stay Nice)
- Pre-wash your fabric. Fabric shrinkage ruins the “smooth and flat” look.
- Use a slightly longer stitch length on terry, it prevents bunching.
- If edges curl after washing, press them and add a wider topstitch next time.
- Make two textures: one side flannel for toner, one side terry for makeup removal. This little upgrade makes them feel fancy.
Personalization Ideas
- Stitch in their favorite palette:
- Clean modern: Cloud Dancer + Cool Blue stitching
- Soft boho: Washed Linen + neutral thread
- Glam: Plum Noir edge stitching with a Persimmon ribbon tie
- Add a tiny tag that says “Face” or “Skincare” so they don’t use it for nail polish by accident.
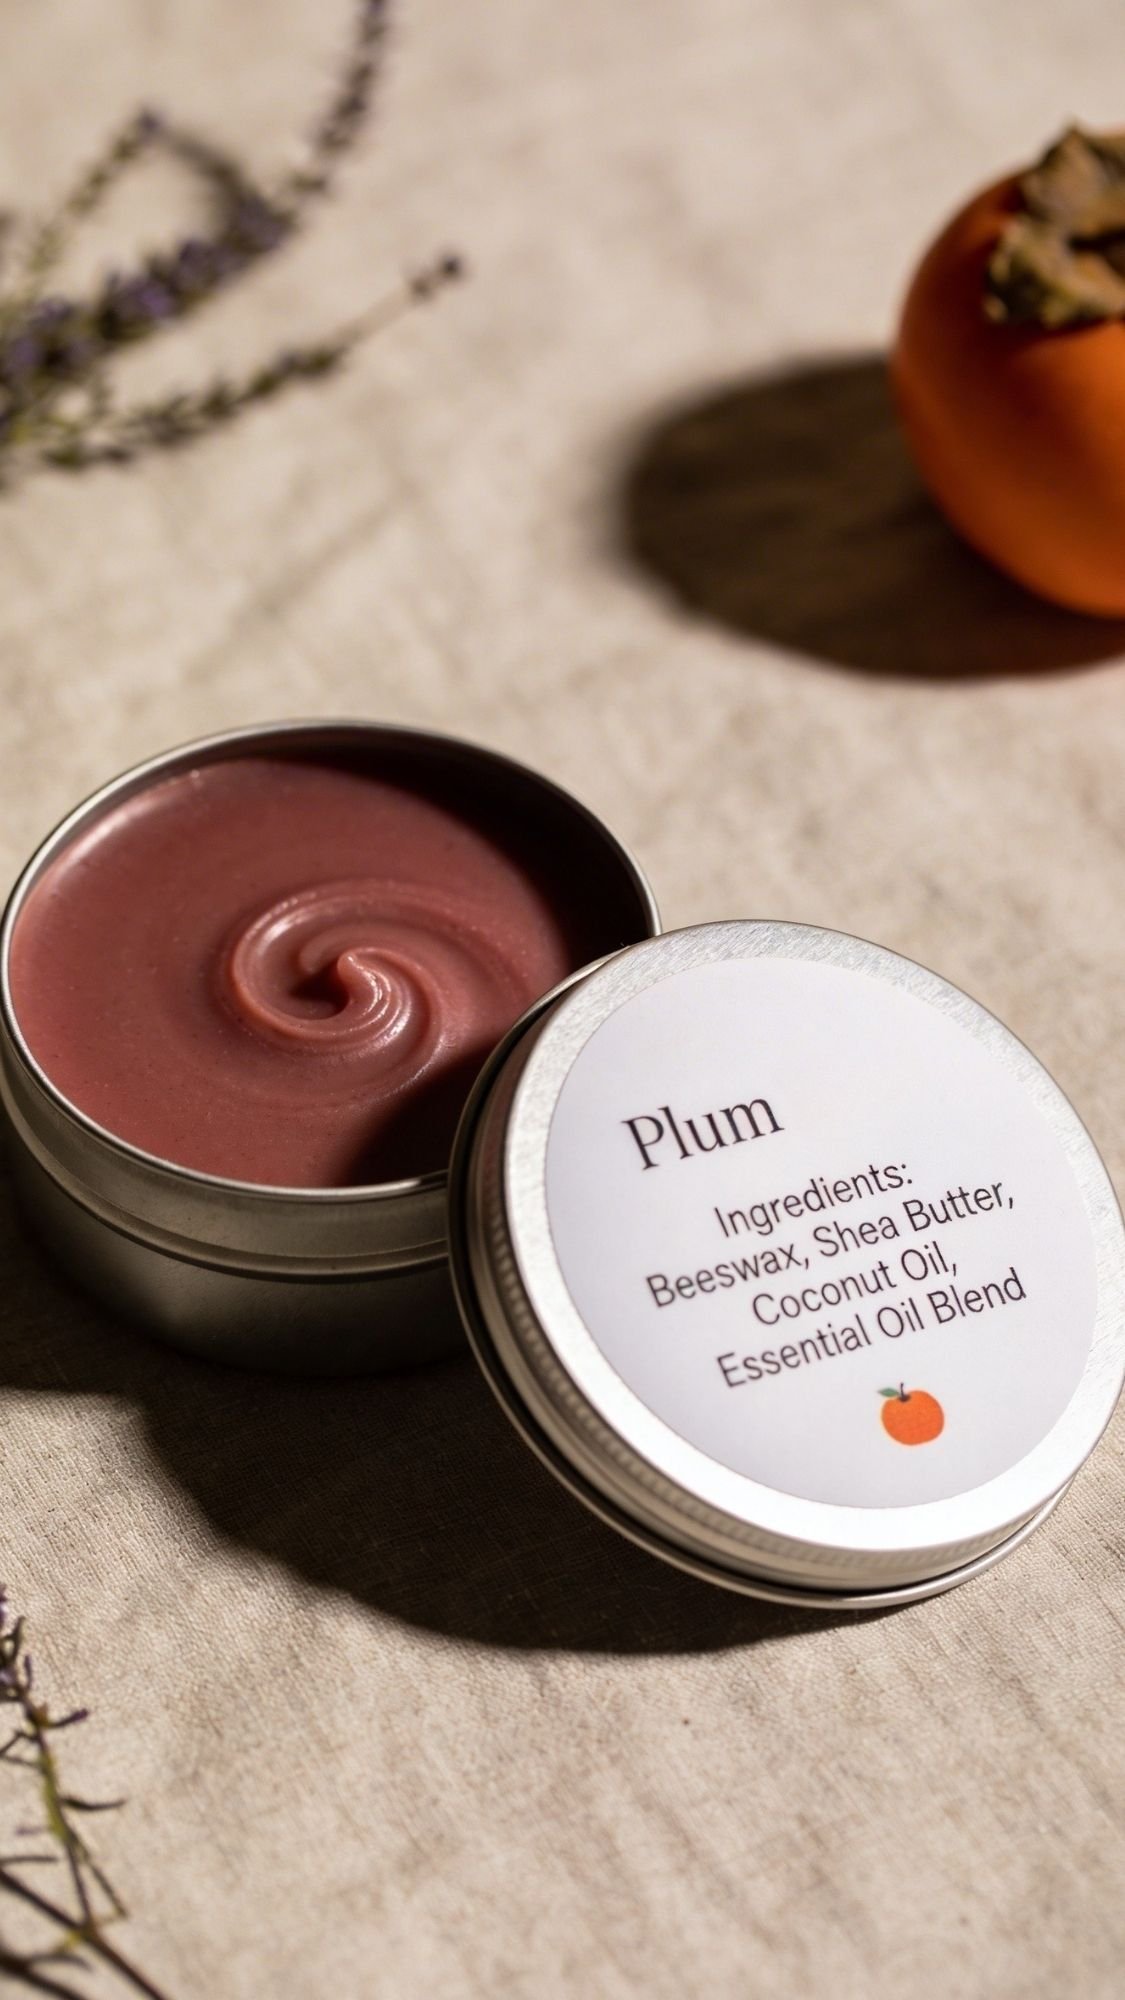
5) Solid Lotion Bar In A Tin: No Leaks, No Mess, Pure Bestie Energy
This one gives “thoughtful” and “useful” at the same time, which is basically the holy grail. A solid lotion bar is perfect for winter hands, travel, dry elbows, and that one friend who always keeps a mini self-care item in their bag. Also, it doesn’t leak. Ever had a lotion bottle explode in a purse? It turns into a soap opera fast.
Why They’ll Use It All Year
- It works in every season, especially winter and dry indoor heat.
- It travels easily, no liquid rules, no spills.
- It feels fancy, but it’s simple to make once you nail the ratio.
Materials
- Beeswax pastilles
- Shea butter
- Cocoa butter (or mango butter if you want it lighter)
- Skin-safe fragrance oil or essential oil (optional)
- Small metal tins with lids
- Double boiler setup (or heat-safe bowl over a pot)
- Kitchen scale (highly recommended for consistency)
- Stir stick or silicone spatula
- Optional: vitamin E oil for skin feel
How To Make It (Simple Steps)
- Weigh your ingredients. This matters more than vibes, trust me.
- Melt beeswax, shea, and cocoa butter gently using a double boiler.
- Remove from heat, stir until smooth, then add fragrance if you use it.
- Pour into tins carefully, tap once to release trapped air.
- Let bars cool undisturbed until firm.
Pro Tips (So It Sets Smooth And Doesn’t Crack)
- Cool it slowly. Fast cooling can cause cracking or a grainy texture in butters.
- Keep essential oils low. Too much turns “spa” into “why does my skin feel spicy.”
- If you want a smooth top, pour at a steady pace and don’t stir while it cools.
- Label the tin with a simple line like: “Warm in hands, then rub on dry spots.” People love directions.
Personalization Ideas
- Make two versions:
- “Day Bar” with a bright citrus scent
- “Night Bar” with lavender or vanilla
- Use a label in Plum Noir with a tiny Persimmon accent for a luxe vibe.
- Add a mini wooden scoop or a tiny cloth wrap so it feels extra giftable.
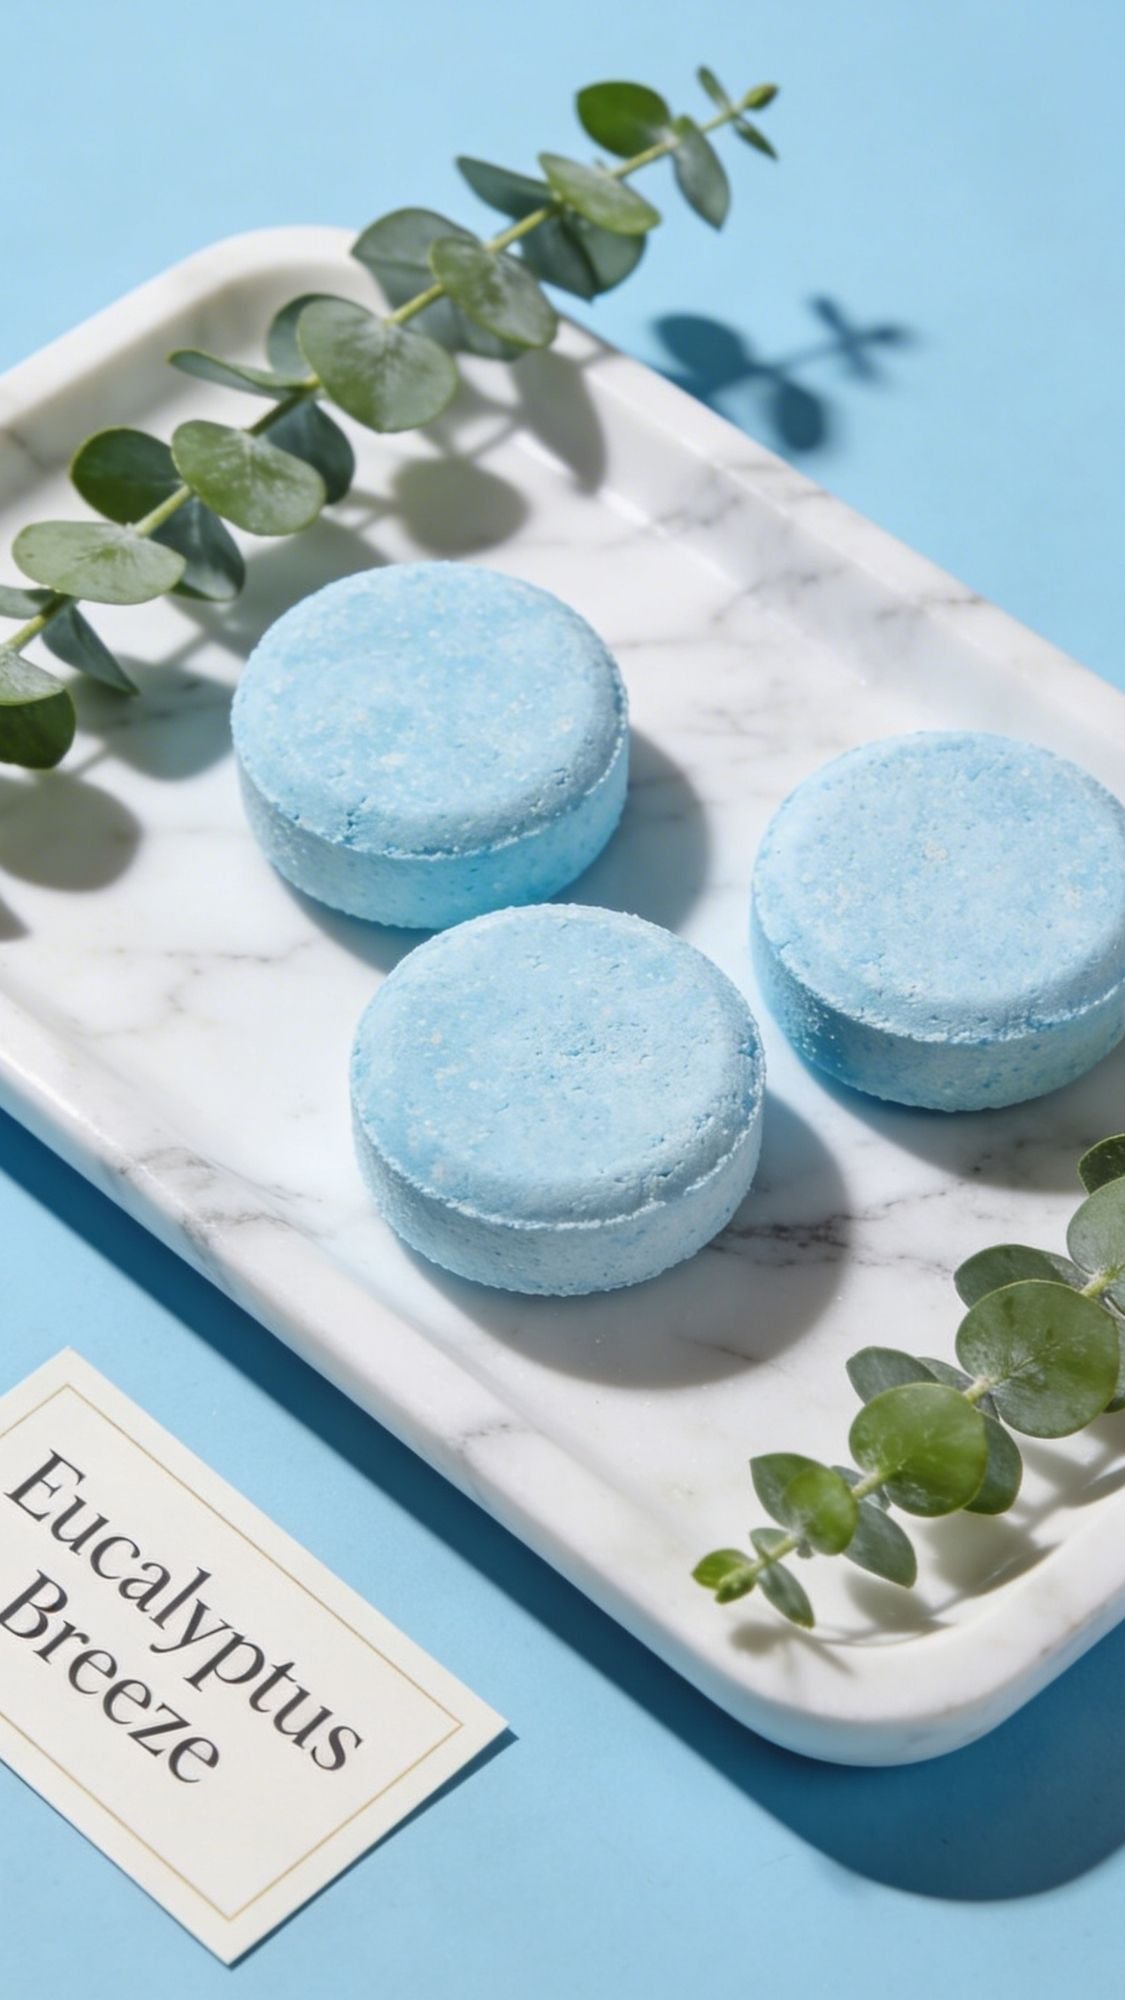
6) Shower Steamers: Self-Care That Doesn’t Require A Bathtub
Not everyone has the time, patience, or emotional bandwidth for a full bath. Shower steamers are for the friend who wants the spa vibe without marinating in water for an hour. They toss one on the shower floor, turn on the water, and suddenly their bathroom smells like they have their life together. It’s a simple gift, but it feels fancy.
Why They’ll Use It All Year
- Great for stress, congestion, and “I need a reset” days.
- Works in any season, especially winter sniffle season.
- Easy to store, easy to grab, easy to love.
Materials
- Baking soda
- Citric acid
- Cornstarch (helps bind and slows fizzing a bit)
- Essential oils (peppermint, eucalyptus, lavender, or blends)
- Witch hazel or water in a spray bottle (witch hazel helps reduce premature fizzing)
- Silicone mold (muffin mold, round molds, or even mini soap molds)
- Gloves and a mask (citric acid dust can be annoying)
- Airtight container for storage
How To Make It (Simple Steps)
- Mix baking soda, citric acid, and cornstarch in a bowl until fully blended.
- Add essential oils, stir well so the scent disperses evenly.
- Spritz with witch hazel slowly while mixing until the texture feels like damp sand.
- Press firmly into molds, pack it tight so it holds shape.
- Let dry 24 to 48 hours, then unmold and store airtight.
Pro Tips (Because Steamers Can Be Dramatic)
- Spritz slowly. Too much liquid triggers fizzing and ruins the batch.
- If your mix crumbles when unmolding, you didn’t pack it tightly enough or it stayed too dry.
- If your steamers “melt” in storage, humidity got them. Airtight container fixes a lot.
- Keep essential oils at safe levels. Stronger is not always better, especially for sensitive skin and airways.
Personalization Ideas
- Make a mini trio:
- “Wake Up” with peppermint + eucalyptus
- “Unwind” with lavender
- “Breathe Easy” with eucalyptus + a tiny hint of lemon
- Wrap individually in wax paper, then stack in a clear jar with a cute label.
- Add a tiny instruction card: “Place on shower floor, not in direct stream.”
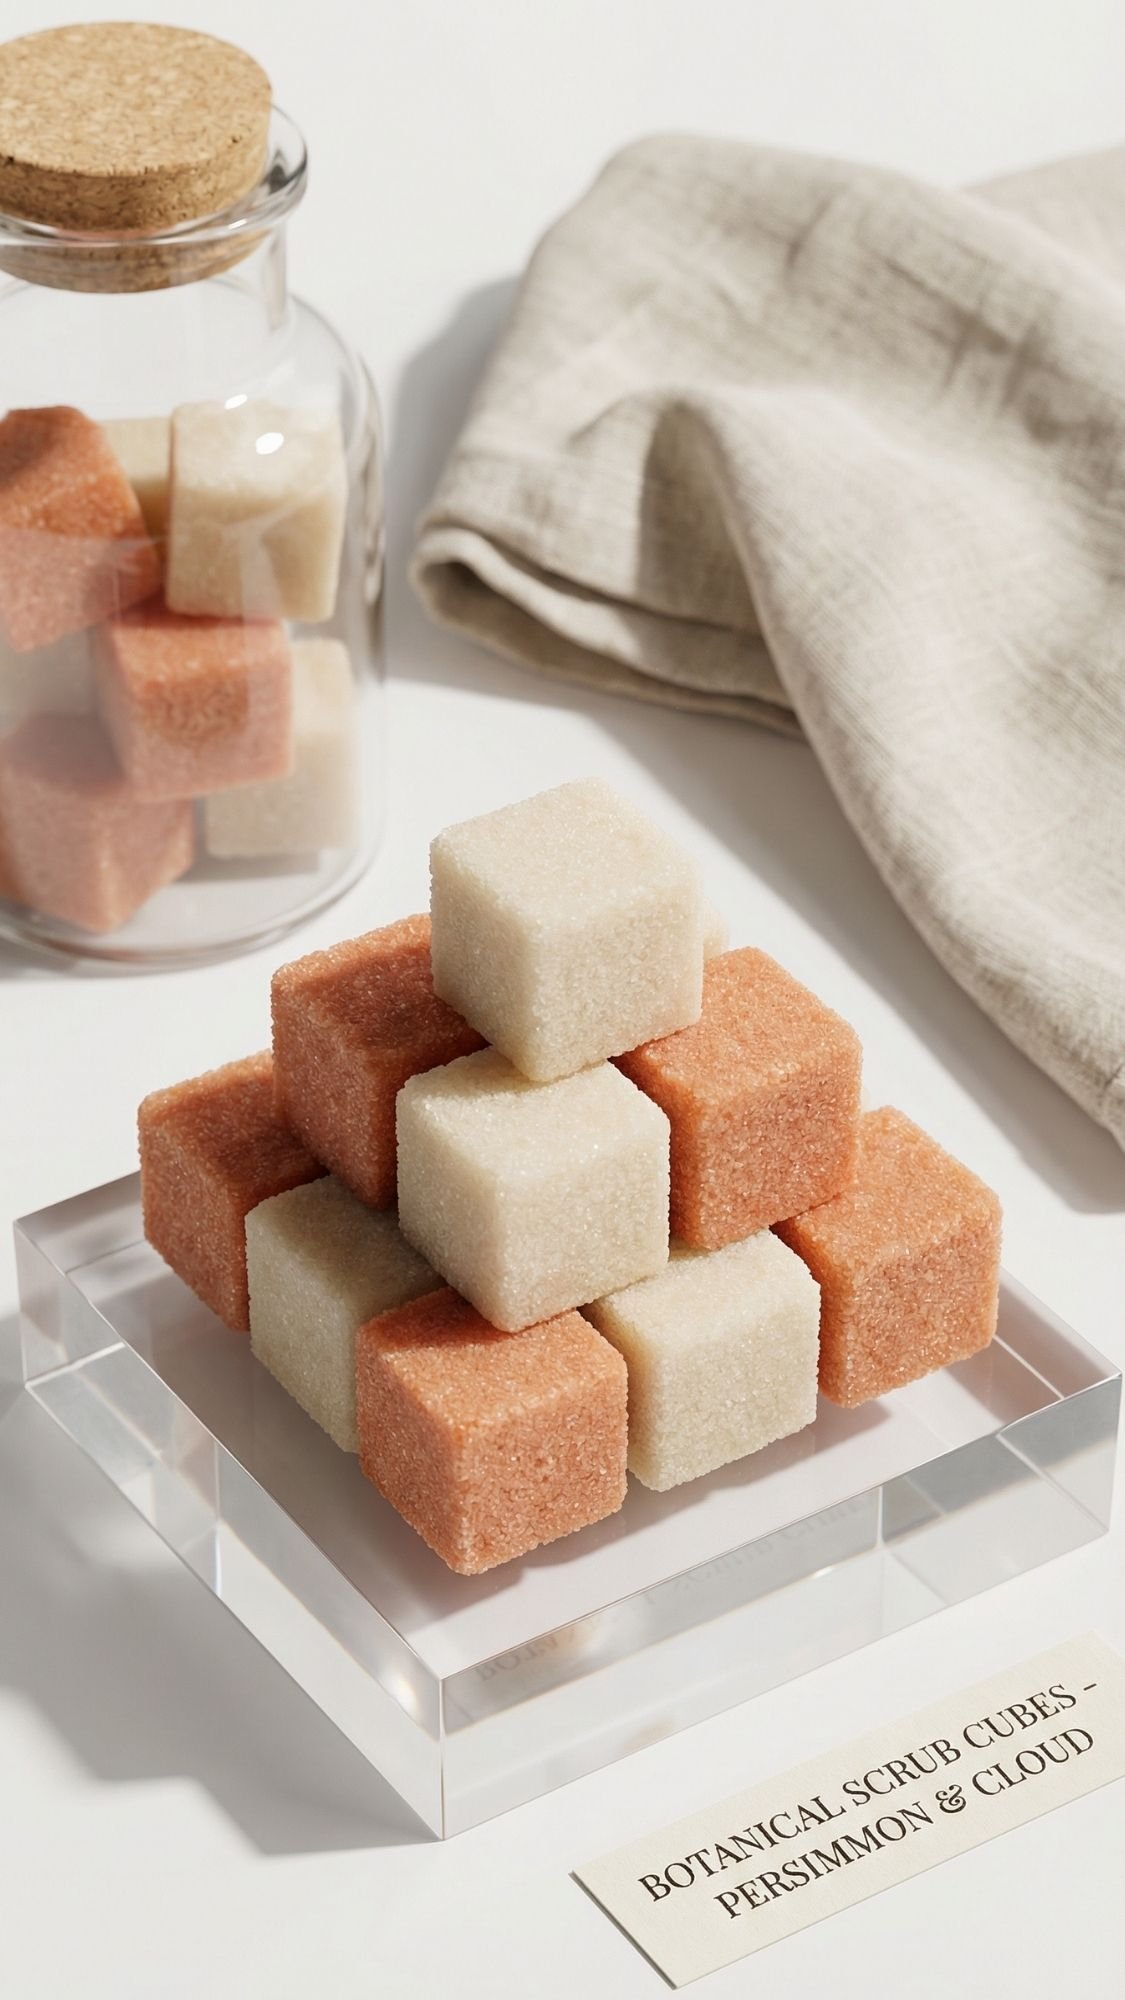
7) Sugar Scrub Cubes: No Scooping, No Slime Jar, No Drama
Sugar scrubs are amazing in theory, but the classic jar scrub turns into a gross science experiment if water gets in it. Sugar scrub cubes fix that. They’re single-use-ish, cleaner, easier, and they feel like a fancy shower treat. Your best friend grabs one, uses it, and the rest stay pristine. Genius, honestly.
Why They’ll Use It All Year
- They work year-round, especially for dry winter skin and summer rough elbows.
- They keep the shower tidy. No wet fingers dipping into a jar.
- They make an easy “grab one” routine, which means people actually use them.
Materials
- White sugar (fine grain works best)
- Melt-and-pour soap base (clear or goat milk)
- A small amount of coconut oil or sweet almond oil
- Skin-safe fragrance oil or essential oil (optional)
- Silicone mold (cube or mini muffin molds work great)
- Microwave-safe measuring cup or double boiler
- Mixing spoon
- Optional: mica powder for subtle color
How To Make It (Simple Steps)
- Cut soap base into chunks and melt gently.
- Stir in oil and fragrance. Keep it light, you don’t need a perfume bomb.
- Add sugar and mix until it looks like wet sand, not soup.
- Press firmly into silicone molds, pack it in so cubes hold together.
- Let cool fully, unmold, then store in an airtight container.
Pro Tips (So They Don’t Sweat, Crumble, Or Turn Weird)
- Go easy on the oil. Too much oil makes cubes sweat, get soft, and feel greasy.
- If the mix feels too runny, wait 30 seconds. Soap base cools fast and thickens.
- Press the mixture into molds, don’t just spoon it in. Packing prevents crumbling.
- Store airtight. Humidity makes sugar pull moisture from the air, and nobody wants soggy scrub cubes.
Personalization Ideas
- Make a mini set of scents:
- “Coffee” with a warm vanilla note
- “Citrus” with lemon or grapefruit vibes
- “Spa” with eucalyptus and mint
- Wrap cubes in wax paper and tuck them in a linen pouch from Gift #3.
- Add a label that says: “Use 1 cube per shower, keep container closed.”
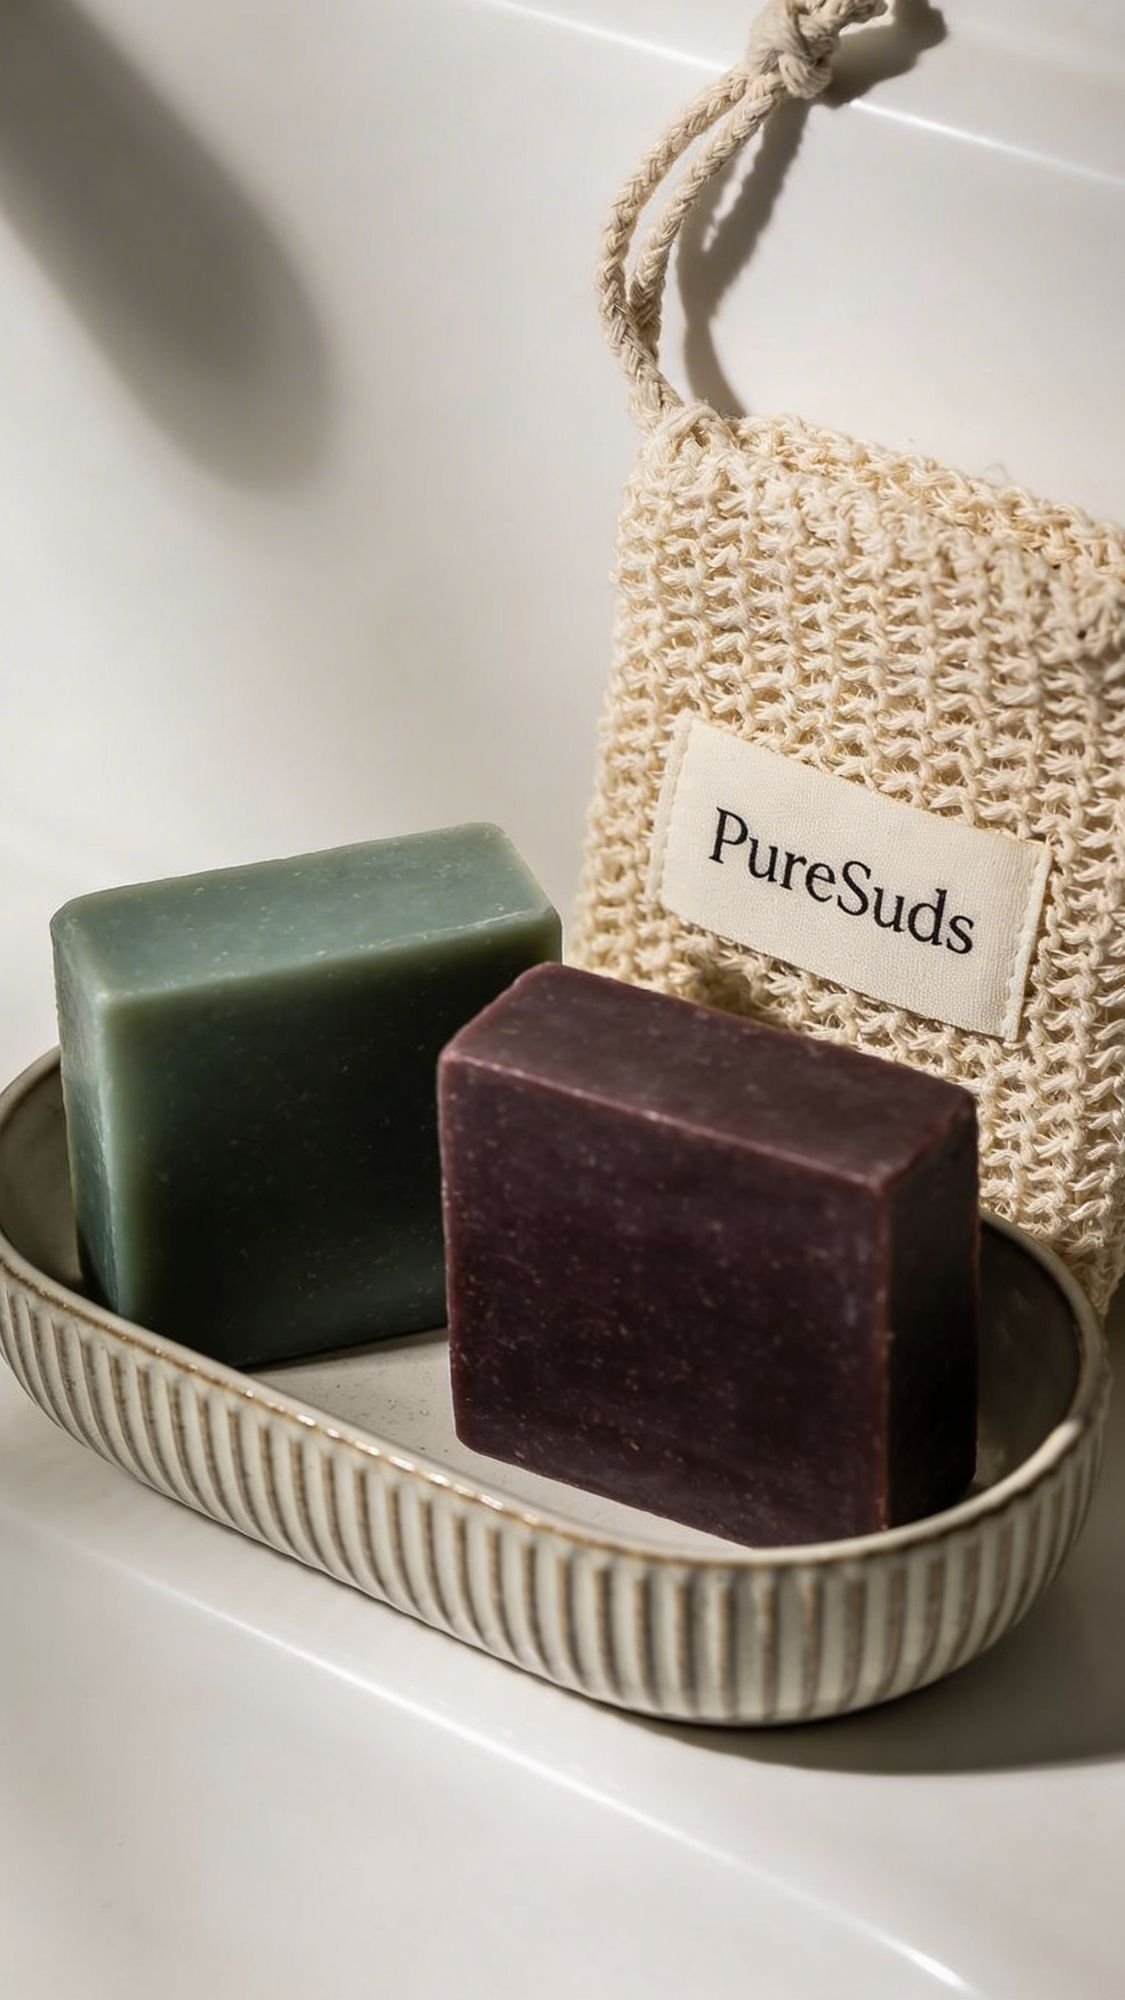
8) Handmade Bar Soap + Soap Saver Bag: The Gift That Actually Gets Finished
Bar soap is one of those gifts that people always use eventually. Pair it with a soap saver bag and suddenly it becomes a “why didn’t I do this sooner” situation. The bag helps the soap last longer, makes it easier to hold, and you can use the last tiny scraps without them sliding down the drain like a sad little goodbye.
Why They’ll Use It All Year
- Soap fits every season, and everyone needs it.
- The saver bag makes the bar last longer and feel more luxe in use.
- It’s easy to restock, and it feels like a fancy upgrade.
Materials
Option A, beginner friendly:
- Melt-and-pour soap base
- Soap-safe fragrance oil (optional)
- Soap colorant or mica (optional)
- Silicone soap mold
- Rubbing alcohol in a spray bottle (for bubbles)
Option B, more advanced:
- Cold process soap supplies (lye, oils, scale, safety gear)
Plus the pairing:
- Soap saver bag (sisal or cotton)
- Simple label or care card
How To Make It (Simple Steps)
Melt-and-pour version:
- Cut soap base into cubes, melt gently.
- Add fragrance and color, stir slowly.
- Pour into mold, spritz top with alcohol to pop bubbles.
- Let set fully, then unmold.
Pairing step:
5. Slide the bar into a soap saver bag.
6. Add a tag that explains how to use it and how to dry it between uses.
Pro Tips (So It Feels Boutique, Not Craft Fair)
- Don’t overload fragrance. Too much can cause sweating or softness.
- If you want clean layers, let each layer cool slightly before pouring the next.
- Use a soap dish that drains. Even the best soap gets gross if it sits in water.
- If you cold-process, label the cure time clearly. People need to know when it’s ready.
Personalization Ideas
- Match their vibe:
- Clean modern: Cloud Dancer base with a thin Cool Blue swirl
- Boho: Patina-toned soap with a natural texture top
- Glam: Plum Noir bar with a tiny gold mica shimmer line
- Add a name label on the saver bag, or a little stitched tag.
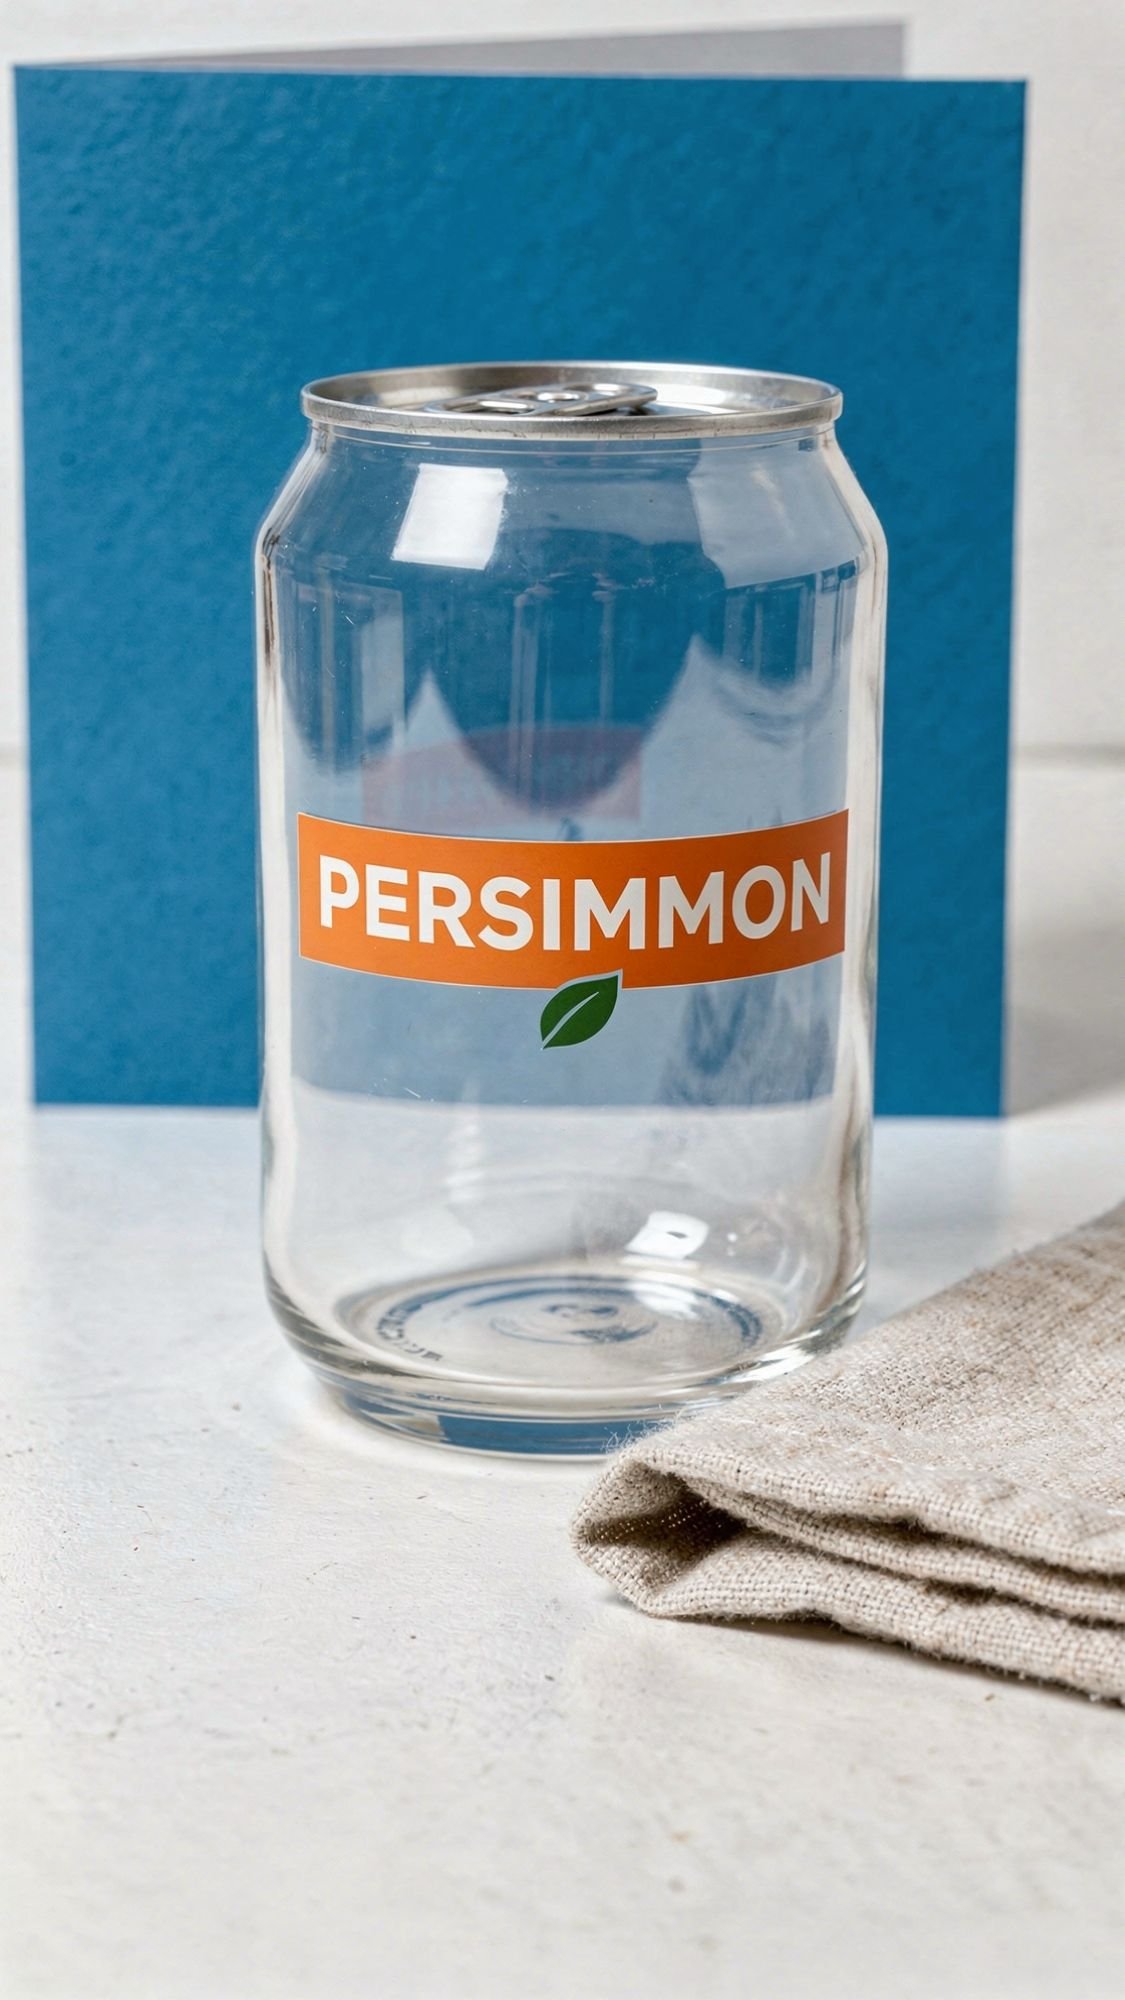
9) Glass Can Cup With A Vinyl Decal: The “Always Cup” Gift
This is the gift that turns into their personality. Like suddenly they’re taking it to work, to errands, to the couch. If your best friend already carries a drink around all day, this one becomes a daily favorite fast. The key is doing the vinyl right so it doesn’t peel after two washes and break your heart.
Why They’ll Use It All Year
- It’s practical, it’s cute, and it replaces a boring cup they already use.
- It works for iced coffee, iced tea, water, smoothies, all seasons.
- You can personalize it in a way that feels custom but not cheesy.
Materials
- Glass can cup (16 oz is the classic size)
- Bamboo lid and straw (optional but popular)
- Permanent adhesive vinyl
- Transfer tape
- Scraper tool or old gift card
- 90%+ isopropyl alcohol
- Lint-free cloth
- Optional: measuring tape or ruler for centering
How To Make It (Simple Steps)
- Wash the cup, then wipe the outside with isopropyl alcohol. Let it air-dry fully.
- Cut your decal and weed it carefully.
- Apply transfer tape, burnish the decal onto the tape, then peel backing slowly.
- Align the decal on the cup. Start in the center, then smooth outward to avoid bubbles.
- Burnish hard. Like, commit to it.
- Peel transfer tape back slowly at a sharp angle.
- Let the decal cure 24 to 48 hours before washing.
Pro Tips (So The Vinyl Actually Stays Put)
- Clean first, always. Hand lotion, kitchen grease, and dust kill adhesion.
- Warm the glass slightly with a hair dryer before applying vinyl if your room is cold. Not hot, just warm.
- If you get a bubble, prick it with a pin and burnish again.
- Hand wash for the longest life. Dishwashers can loosen edges over time, even with permanent vinyl.
Personalization Ideas
- Their nickname in a clean script
- A tiny icon that matches their vibe, like a star, heart, or mini flower
- A short phrase that sounds like them, not like a generic tumbler aisle quote
- Color palette ideas:
- Modern: Cool Blue decal on Cloud Dancer styling
- Bold: Persimmon decal with Jade accent icon
- Moody: Plum Noir decal with a thin gold outline
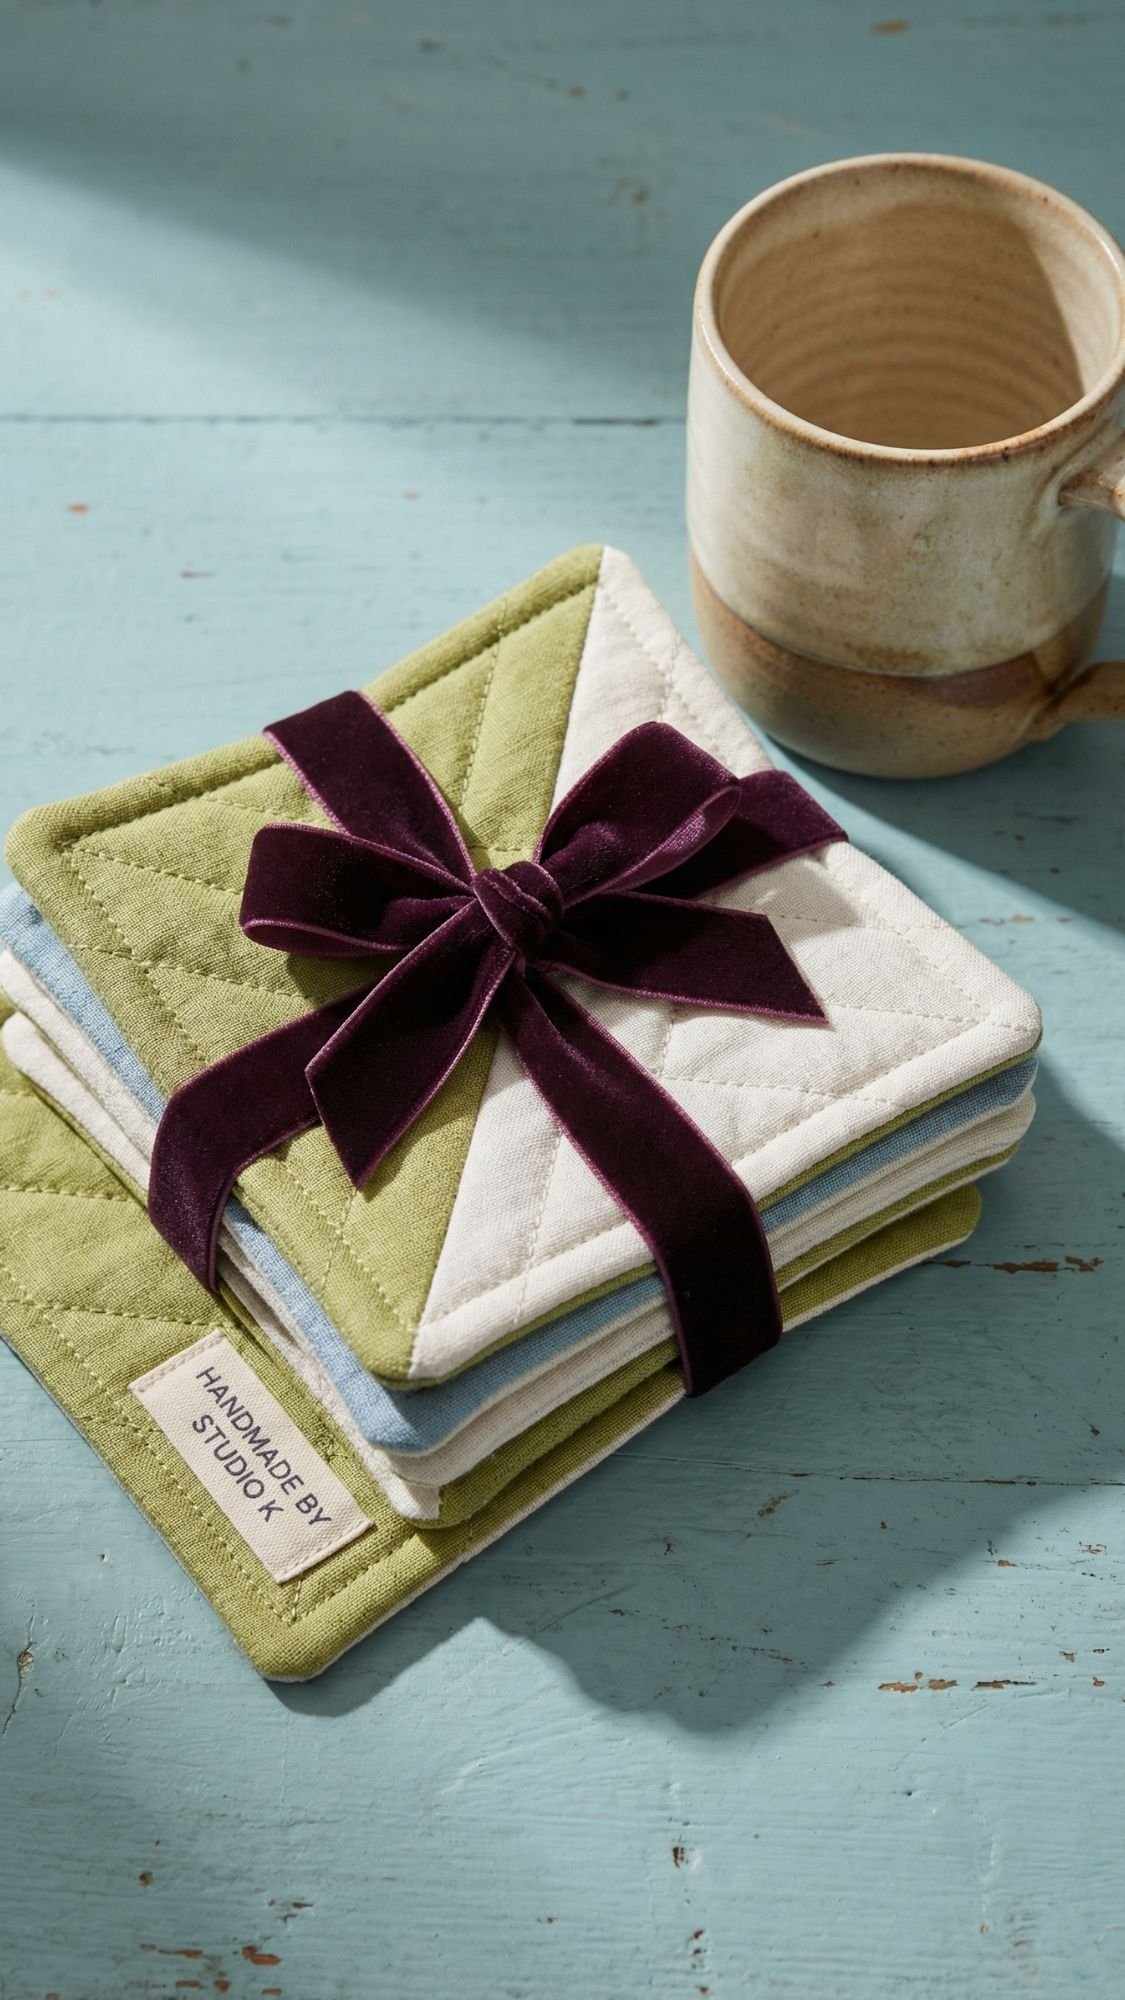
10) Set Of Fabric Coasters: Because Water Rings Start Wars
Fabric coasters sound basic until you realize people use them constantly. Like, every single drink needs a landing spot. And if your best friend owns a coffee table, nightstand, desk, or basically any surface they don’t want ruined, these get used all year. Plus, you can make them match their style so they feel intentional, not like a random coaster pile.
Why They’ll Use It All Year
- They prevent water rings, heat marks, and the slow destruction of furniture.
- They work in every season, hot mugs and cold glasses.
- They wash easily if you pick the right fabric and stitching.
Materials
- Cotton canvas, denim, or washed linen (something sturdy)
- Quilted batting or felt (thin is better than bulky)
- Thread
- Scissors or rotary cutter
- Ruler or quilting square
- Sewing clips or pins
- Sewing machine
- Optional: bias tape for edging, or fabric marker for a neat label tag
How To Make It (Simple Steps)
- Cut two squares per coaster, start with 4 x 4 inches or 4.5 x 4.5 for a bigger feel.
- Cut batting slightly smaller so seams don’t get bulky.
- Layer: outer fabric right side up, batting, backing fabric right side down.
- Sew around the edges, leave a small gap to turn.
- Turn right side out, press flat, then topstitch all the way around.
- Quilt a simple grid if you want extra structure and a high-end look.
Pro Tips (So They Don’t Warp Or Look Homemade)
- Quilt them. Even a quick straight-line grid keeps batting from shifting after washing.
- Use a slightly longer stitch length for topstitching so it looks clean.
- Pressing matters. Pressing is half the “professional” look, even though nobody wants to admit it.
- If your corners look lumpy, trim and notch before turning.
Personalization Ideas
- Make a set in their favorite palette:
- Modern: Cloud Dancer base with Cool Blue stitching
- Boho: Washed Linen textures with warm neutral backing
- Glam: Plum Noir coasters with Persimmon edging
- Add a tiny strap to bundle the set neatly, like a little coaster belt.
- Stitch a tiny tag with their initials.

11) Crochet Mug Cozy: Cute, Useful, And Weirdly Addictive To Make
A mug cozy is the kind of gift that feels small, but gets used constantly. Your best friend can slip it on their mug at home, at work, or during their “I’m freezing but refuse to turn the heat up” era. It also stops your hands from roasting when you grab a hot mug, which is a very real problem. And if you pick cotton yarn, it holds up through actual life, not just the photo moment.
Why They’ll Use It All Year
- It makes hot drinks easier to hold, and it’s comfy in cold months.
- It works for iced drinks too, no sweaty hands.
- It’s washable and reusable, so it becomes part of their routine.
Materials
- Cotton yarn (worsted weight is easiest)
- Crochet hook (size 4.5 to 5.5 mm usually works, depending on yarn)
- Button (optional, but cute and functional)
- Yarn needle
- Scissors
- Measuring tape
How To Make It (Simple Steps)
- Measure around the mug, then crochet a rectangle that fits that width.
- Make sure it stretches slightly, snug fits stay put.
- Sew the rectangle into a loop, or crochet the edges together.
- Add a button and a loop closure if you want it removable.
- Weave in ends like you mean it. Loose ends scream “unfinished.”
Pro Tips (So It Fits And Doesn’t Slide)
- Use cotton. Acrylic yarn pills, stretches weirdly, and can look fuzzy fast.
- Keep stitches tight. Loose stitches snag and stretch over time.
- If it slides down the mug, make it shorter and snugger. Mug cozies need grip.
- Use a button closure if your best friend uses different mug sizes. It gives flexibility.
Personalization Ideas
- Add a tiny heart stitch or stripe in their favorite color.
- Stitch a small tag with their initials on the inside.
- Palette ideas:
- Minimal: Cloud Dancer cotton with a Cool Blue border
- Fresh: Jade with a tiny Persimmon accent stripe
- Moody: Plum Noir with a brass button
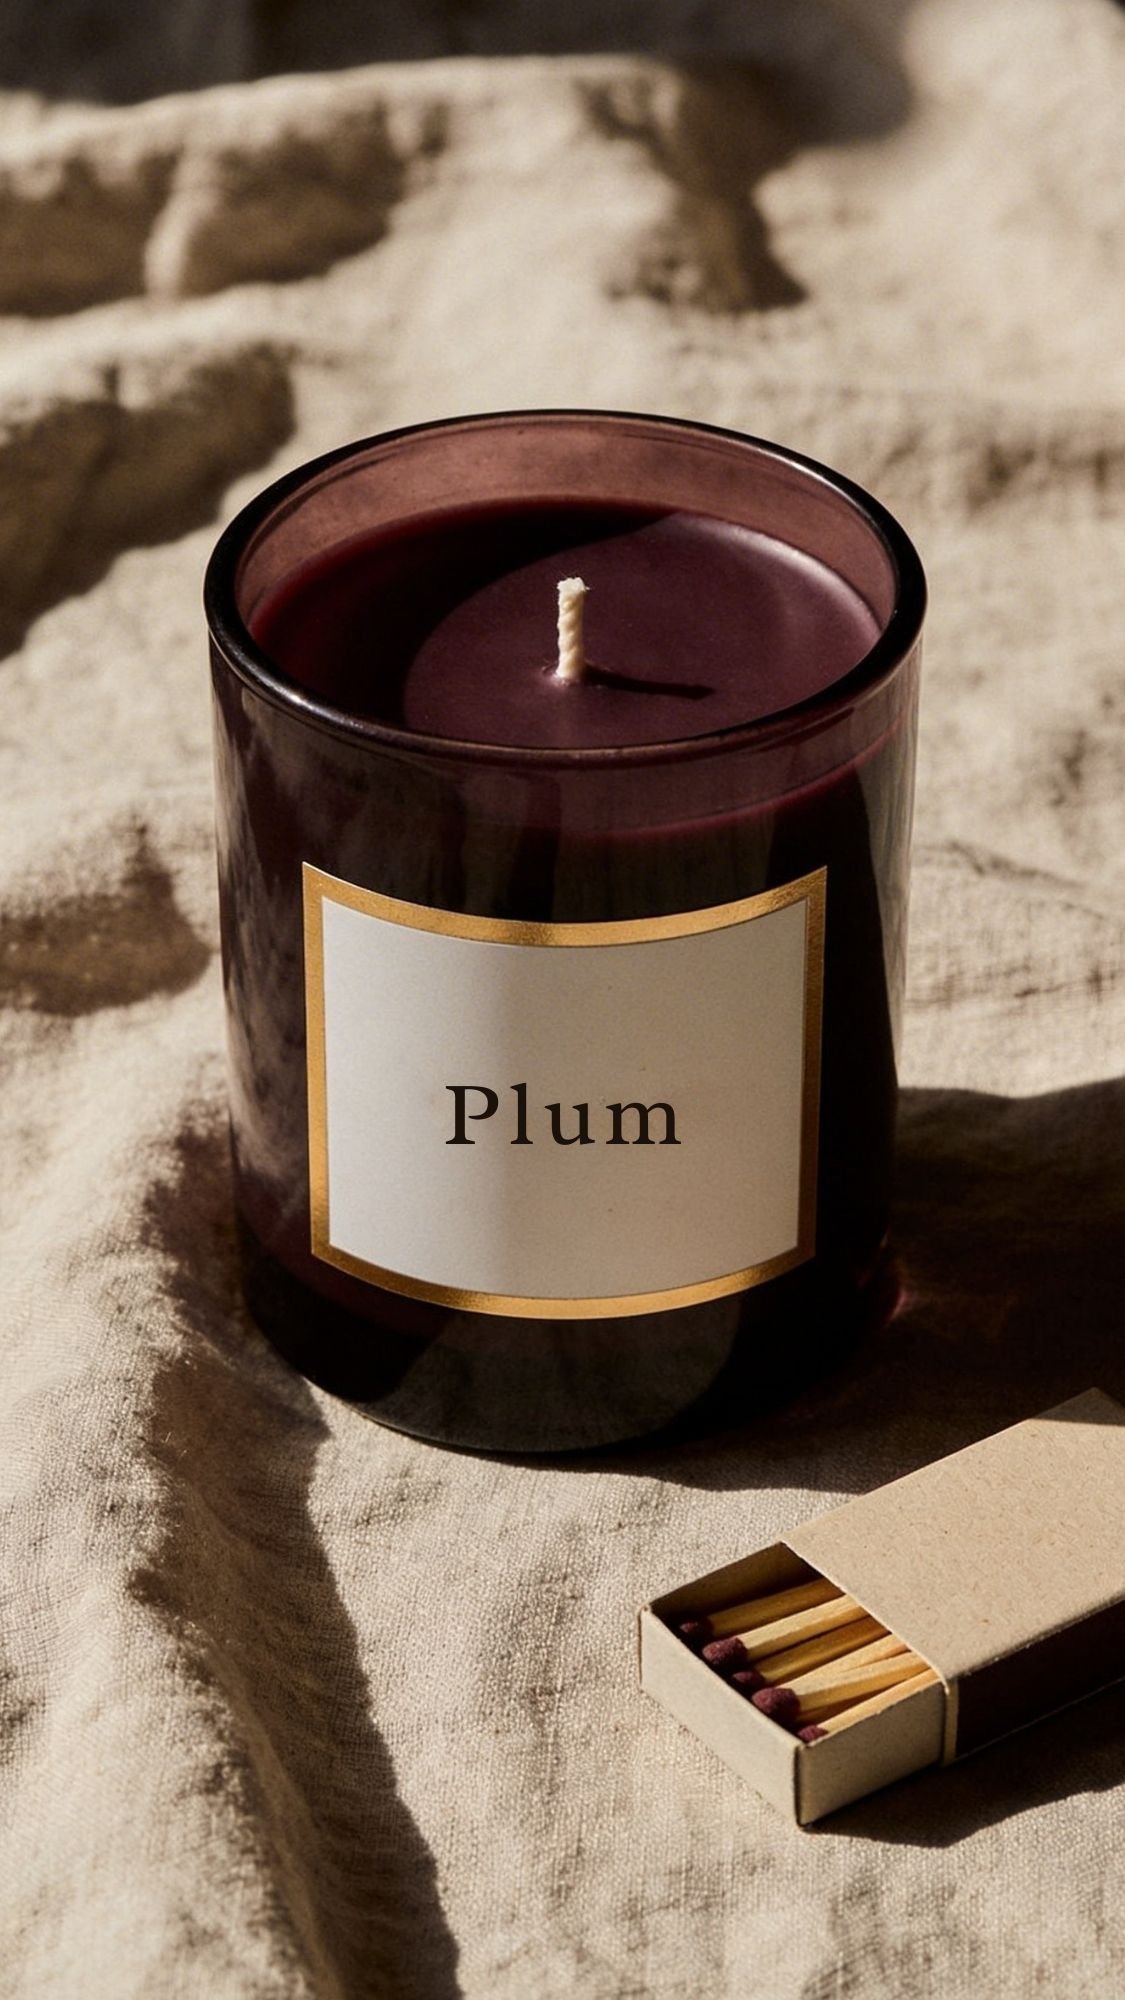
12) Handmade Candle With A Clean Burn: No Tunneling, No Sad Wax Hole
Candles make a perfect gift because they fit every season. But if you’ve ever made a candle that tunnels like it’s digging to freedom, you know the struggle. The good news: you can avoid most candle drama by choosing the right wick, centering it properly, and letting the candle cure before gifting. This is one of those projects where tiny details make it feel high-end.
Why They’ll Use It All Year
- It’s cozy in winter, fresh in spring, calming all year.
- It feels luxe and personal with the right scent and label.
- A well-made candle lasts weeks, sometimes months.
Materials
- Soy wax (or a soy blend)
- Candle-safe fragrance oil
- Cotton or wooden wick (cotton is easier for consistent results)
- Candle jar (8 to 10 oz is a great gifting size)
- Wick stickers or hot glue
- Wick centering tool (or two chopsticks and a rubber band)
- Thermometer (a simple digital one works great)
- Pour pitcher or heat-safe measuring cup
- Scale for measuring wax and fragrance
- Optional: dye or mica made for candles only
How To Make It (Simple Steps)
- Measure wax by weight, then melt it slowly.
- Secure the wick dead center in the jar and keep it upright.
- Let wax cool to the recommended pour temperature for your wax type.
- Add fragrance oil, stir gently for a full minute so it blends evenly.
- Pour into the jar slowly, then leave it alone. No poking, no moving, no chaos.
- Let it set, then trim wick to about a quarter inch.
- Cure before gifting, usually 7 to 14 days for the best scent throw.
Pro Tips (The Stuff That Makes It Burn Like A Store Candle)
- Wick size matters more than anything. Too small causes tunneling, too large causes soot and a wild flame.
- Stir fragrance gently. Aggressive stirring creates air bubbles and surface issues.
- First burn matters. Tell your best friend to let it burn until the melt pool reaches the edges. That prevents tunneling later.
- Keep labels simple and clean. A luxe candle label looks like a brand, not a scrapbook.
Personalization Ideas
- Name the candle after an inside joke, a shared trip, or a vibe:
- “Late Night Chats”
- “Sunday Reset”
- “Text Me When You Get Home”
- Match the label palette to trends:
- Plum Noir label with a tiny Persimmon accent
- Cloud Dancer minimal label with Cool Blue type
- Add a tiny care card:
- Trim wick before each burn
- Burn 2 to 3 hours max per session
- Keep away from drafts
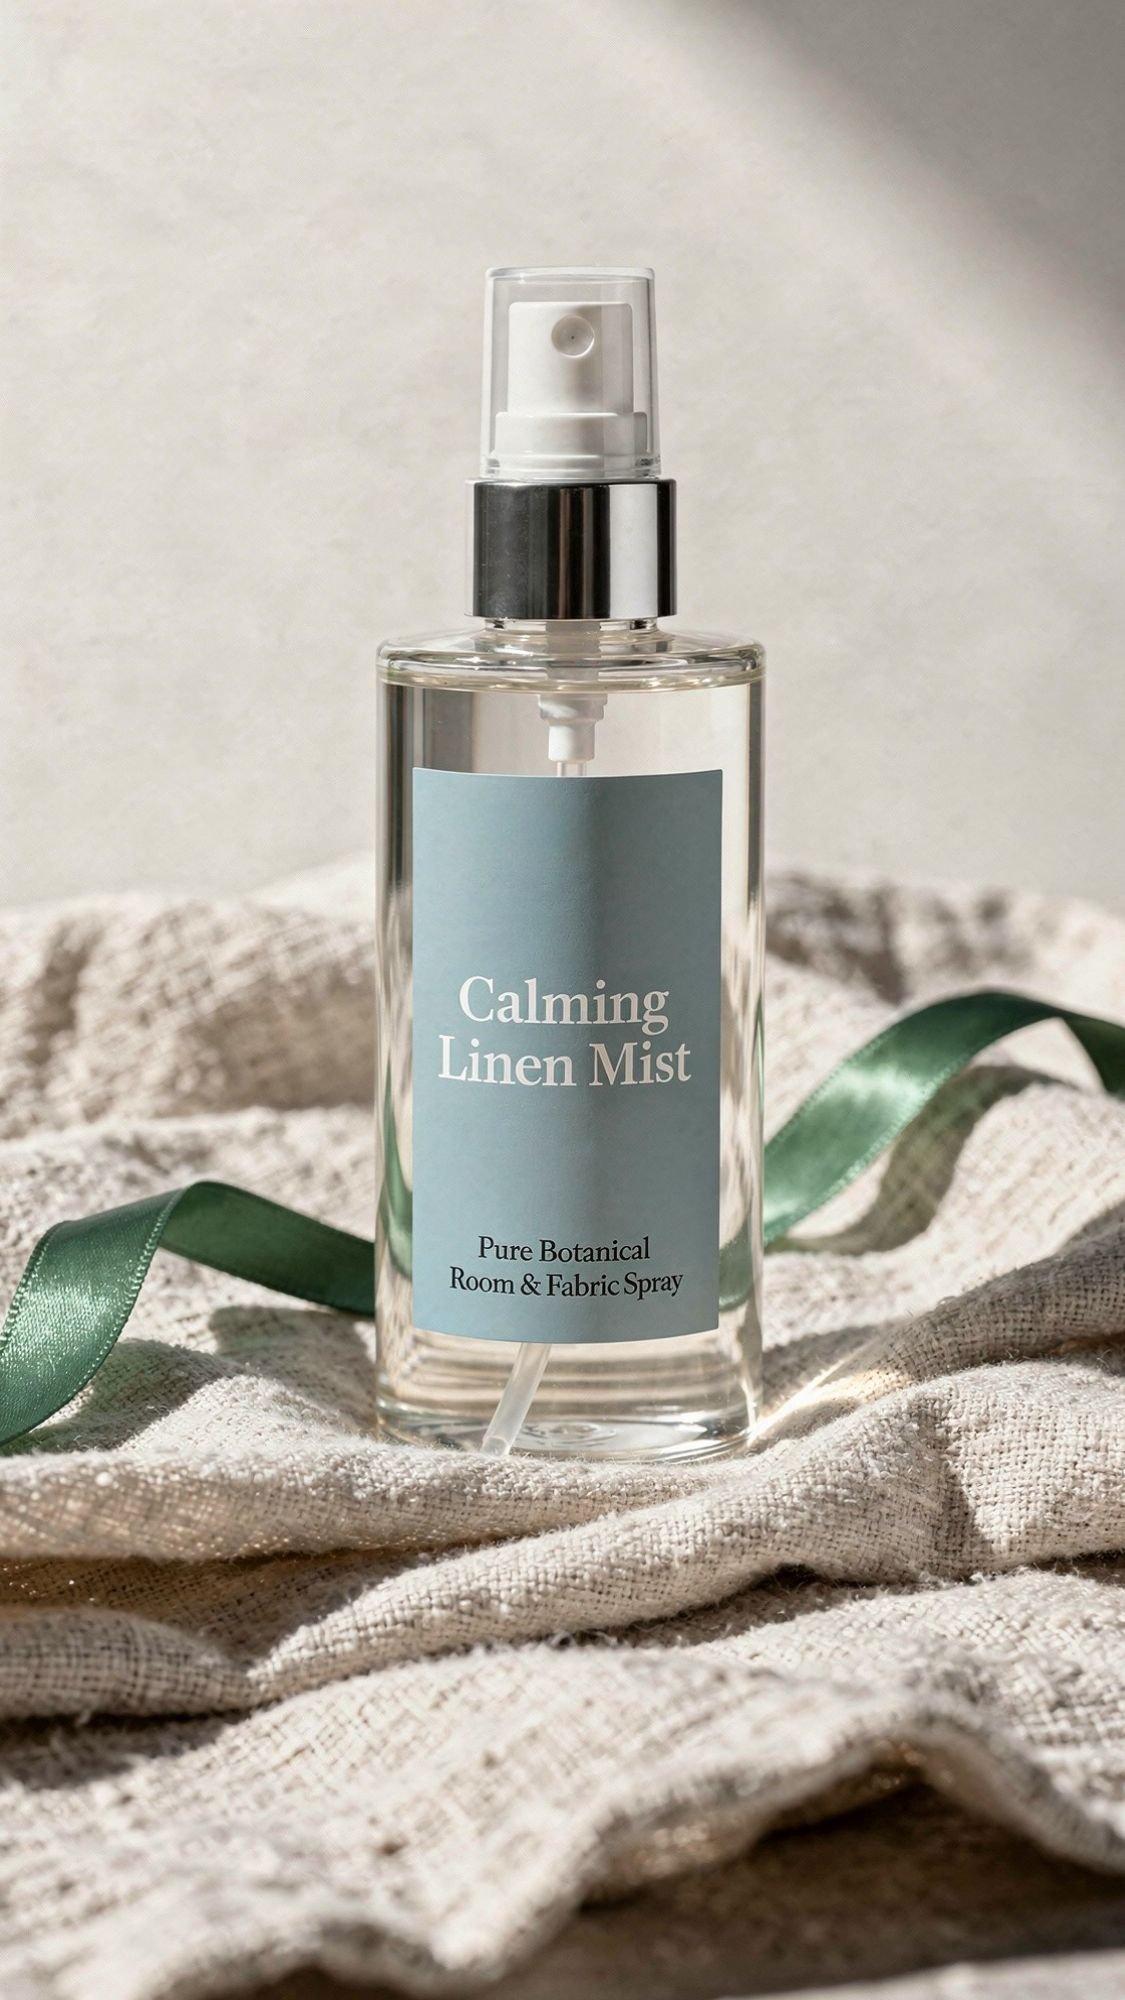
13) Room + Linen Spray: Fresh Sheets Energy On Demand
This gift makes people feel like they have their life together, even if they absolutely do not. A room and linen spray is easy to use, easy to store, and gets used constantly because it solves a real problem: stuff starts smelling like life. Couches, bedding, gym bags, even the car. It’s also one of the easiest ways to make a “small gift” feel luxe because the packaging does half the work.
Why They’ll Use It All Year
- They can refresh bedding, towels, and the couch whenever it needs help.
- It makes a room feel cleaner without doing actual cleaning, which is honestly iconic.
- It works in every season, crisp scents in spring, cozy scents in winter.
Materials
- Distilled water
- High-proof alcohol (like vodka) or a solubilizer made for fragrance (helps oils mix properly)
- Skin-safe fragrance oil or essential oil blend
- Fine mist spray bottle (glass looks premium)
- Funnel
- Labels (waterproof label paper recommended)
- Optional: a small tag that says “Shake before use”
How To Make It (Simple Steps)
- Add fragrance to your bottle first.
- Add alcohol or solubilizer, then swirl to combine.
- Fill the rest with distilled water, leaving a little room at the top.
- Cap, shake well, and test on fabric in a hidden area first.
- Apply label and include care instructions.
Pro Tips (So It Doesn’t Separate Or Stain Fabric)
- If the scent floats on top, it’s not mixed well. Alcohol or solubilizer fixes that.
- Always test on light fabrics. Some oils can spot or stain.
- Use a fine mist sprayer. A heavy spray makes fabric damp and can leave marks.
- Label the bottle with a quick use note: “Mist from 12 inches away.” People spray too close and then blame the spray.
Personalization Ideas
- Make a scent trio:
- “Clean Sheets” with light cotton or linen notes
- “Spa Day” with eucalyptus and mint
- “Cozy Night” with vanilla or soft amber
- Add a matching color palette label:
- Cloud Dancer label with Cool Blue text
- Patina Blue label with minimal black type
- Plum Noir label with Persimmon accent line
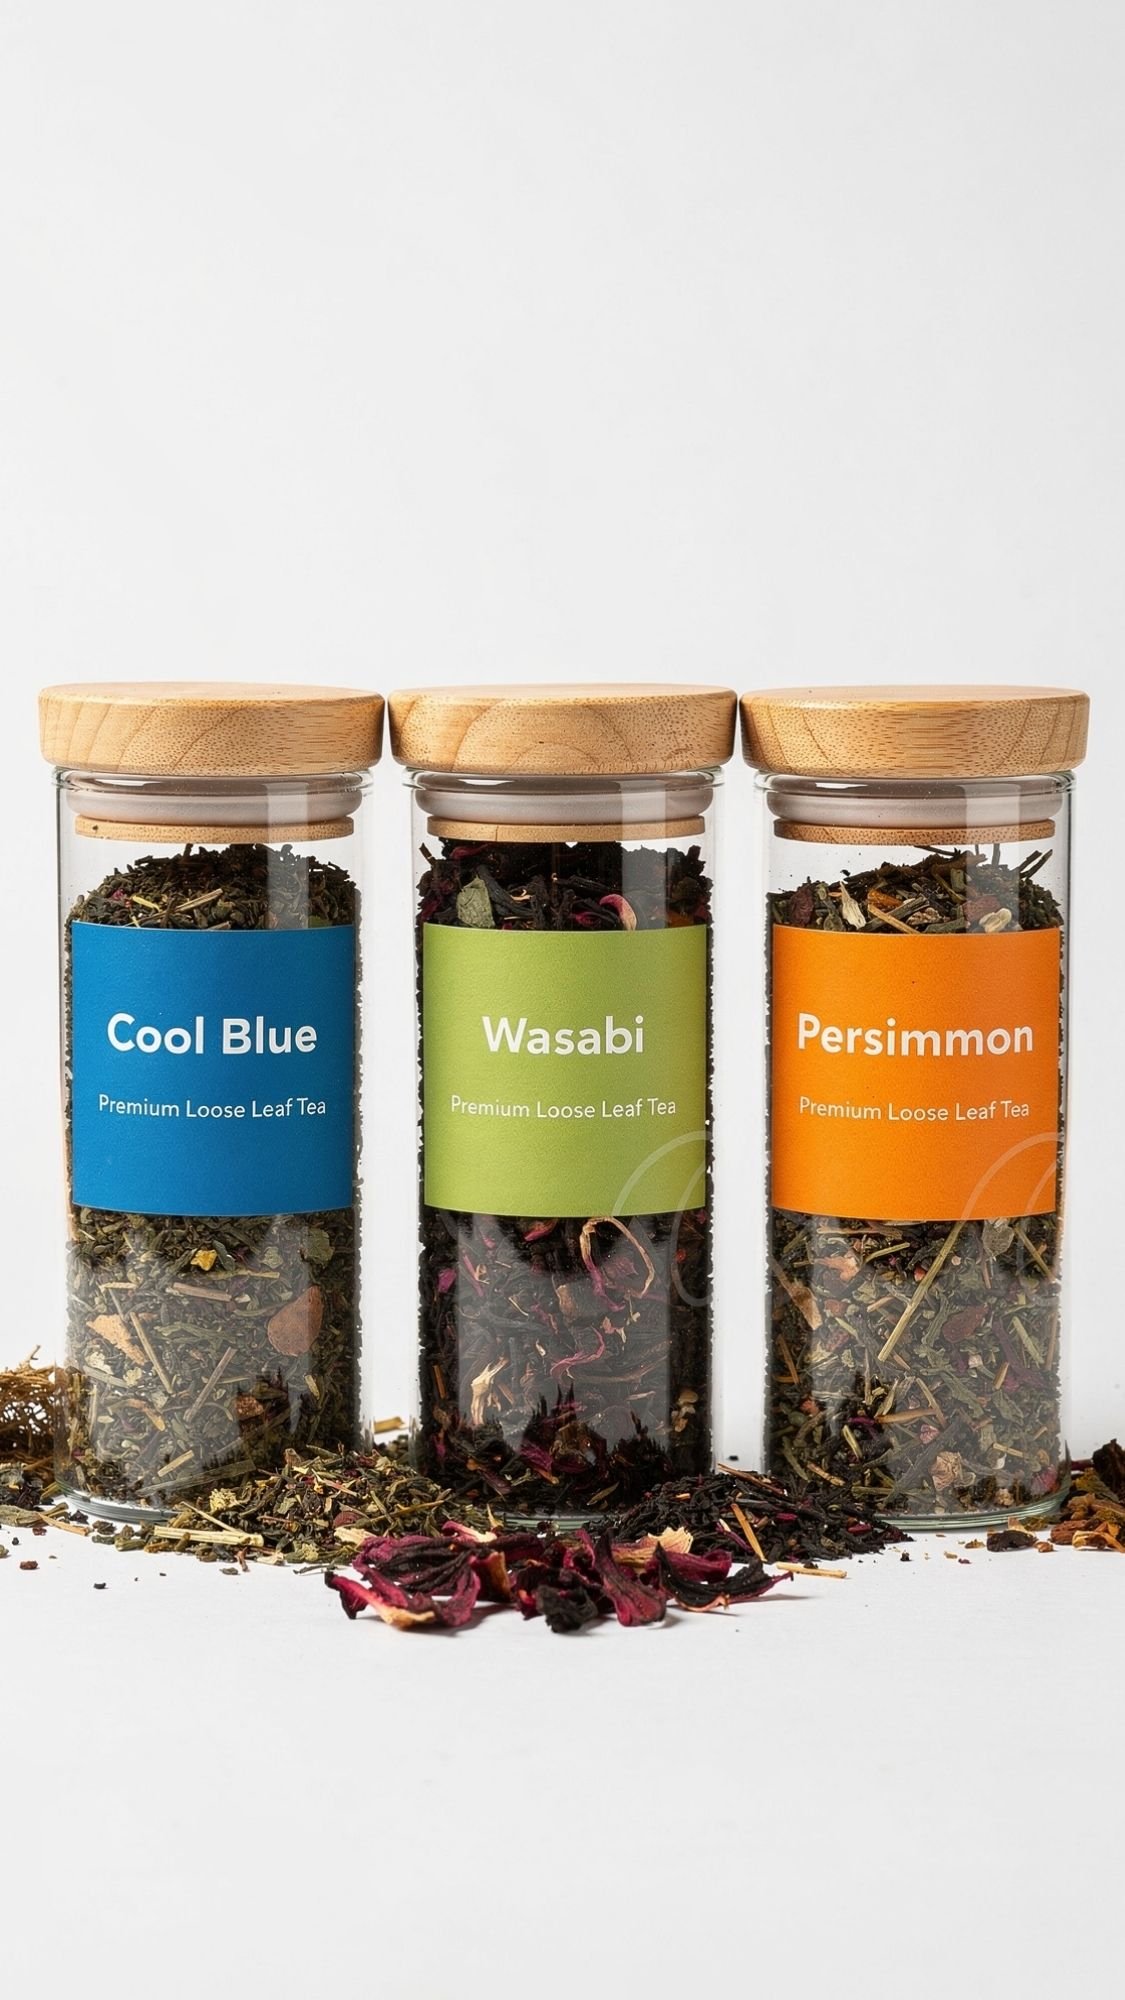
14) Herbal Tea Blend Trio: Cozy, Useful, And Shockingly Easy To Use Up
If your best friend even slightly likes tea, this gift becomes a repeat-use situation fast. They can drink it when they feel stressed, when they feel stuffed, or when they just want a warm drink that isn’t their fifth coffee. Also, a trio set feels intentional. You didn’t just hand them a jar of leaves and hope for the best, you gave them options. Who doesn’t love options?
Why They’ll Use It All Year
- They can drink it hot in winter, iced in summer, and cozy year-round.
- It supports real-life moments, like “I need to chill” or “my stomach hates me today.”
- It stores neatly, and the jars look cute on a counter.
Materials
- Loose-leaf herbs (buy from a reputable source)
- Chamomile, peppermint, lemon balm, hibiscus, ginger pieces, lavender buds, rooibos, dried orange peel
- Small glass jars or tea tins (3 to 6 oz)
- A small funnel or scoop
- Labels (waterproof looks best)
- Optional: empty tea bags, if your friend hates loose leaf
- Optional: a mini spoon or tea infuser
How To Make It (Simple Steps)
- Pick three blends with clear “jobs,” so your friend reaches for them automatically.
- Mix each blend in a bowl, then portion into jars with a funnel.
- Label each jar with:
- Blend name
- Ingredients
- Steep time
- Hot vs iced directions
- Add a small steeping card and a note about storage.
Pro Tips (So It Tastes Good, Not Like Sad Hot Water)
- Write the steep time on the label. People skip using loose tea when they feel unsure.
- Store herbs away from heat and sunlight. Light steals flavor over time.
- Keep blends simple. When you mix 12 ingredients, everything tastes like confusion.
- Add a “strong brew” tip on the card for iced tea. Tea tastes weak over ice if you brew it normally.
Tea Trio Ideas (Simple, Giftable, Always Used)
- Calm Down Blend
- Chamomile + lemon balm + a pinch of lavender
- Fresh Start Blend
- Peppermint + dried orange peel + rooibos
- Digest This Please Blend
- Peppermint + ginger pieces + a tiny bit of fennel
Personalization Ideas
- Name them after your friendship:
- “Call Me Later”
- “We Got This”
- “Emergency Reset”
- Match labels to trending palettes:
- Cloud Dancer base label with Cool Blue text
- Plum Noir label with a Persimmon accent dot
- Add a tiny infuser and turn it into a complete kit.
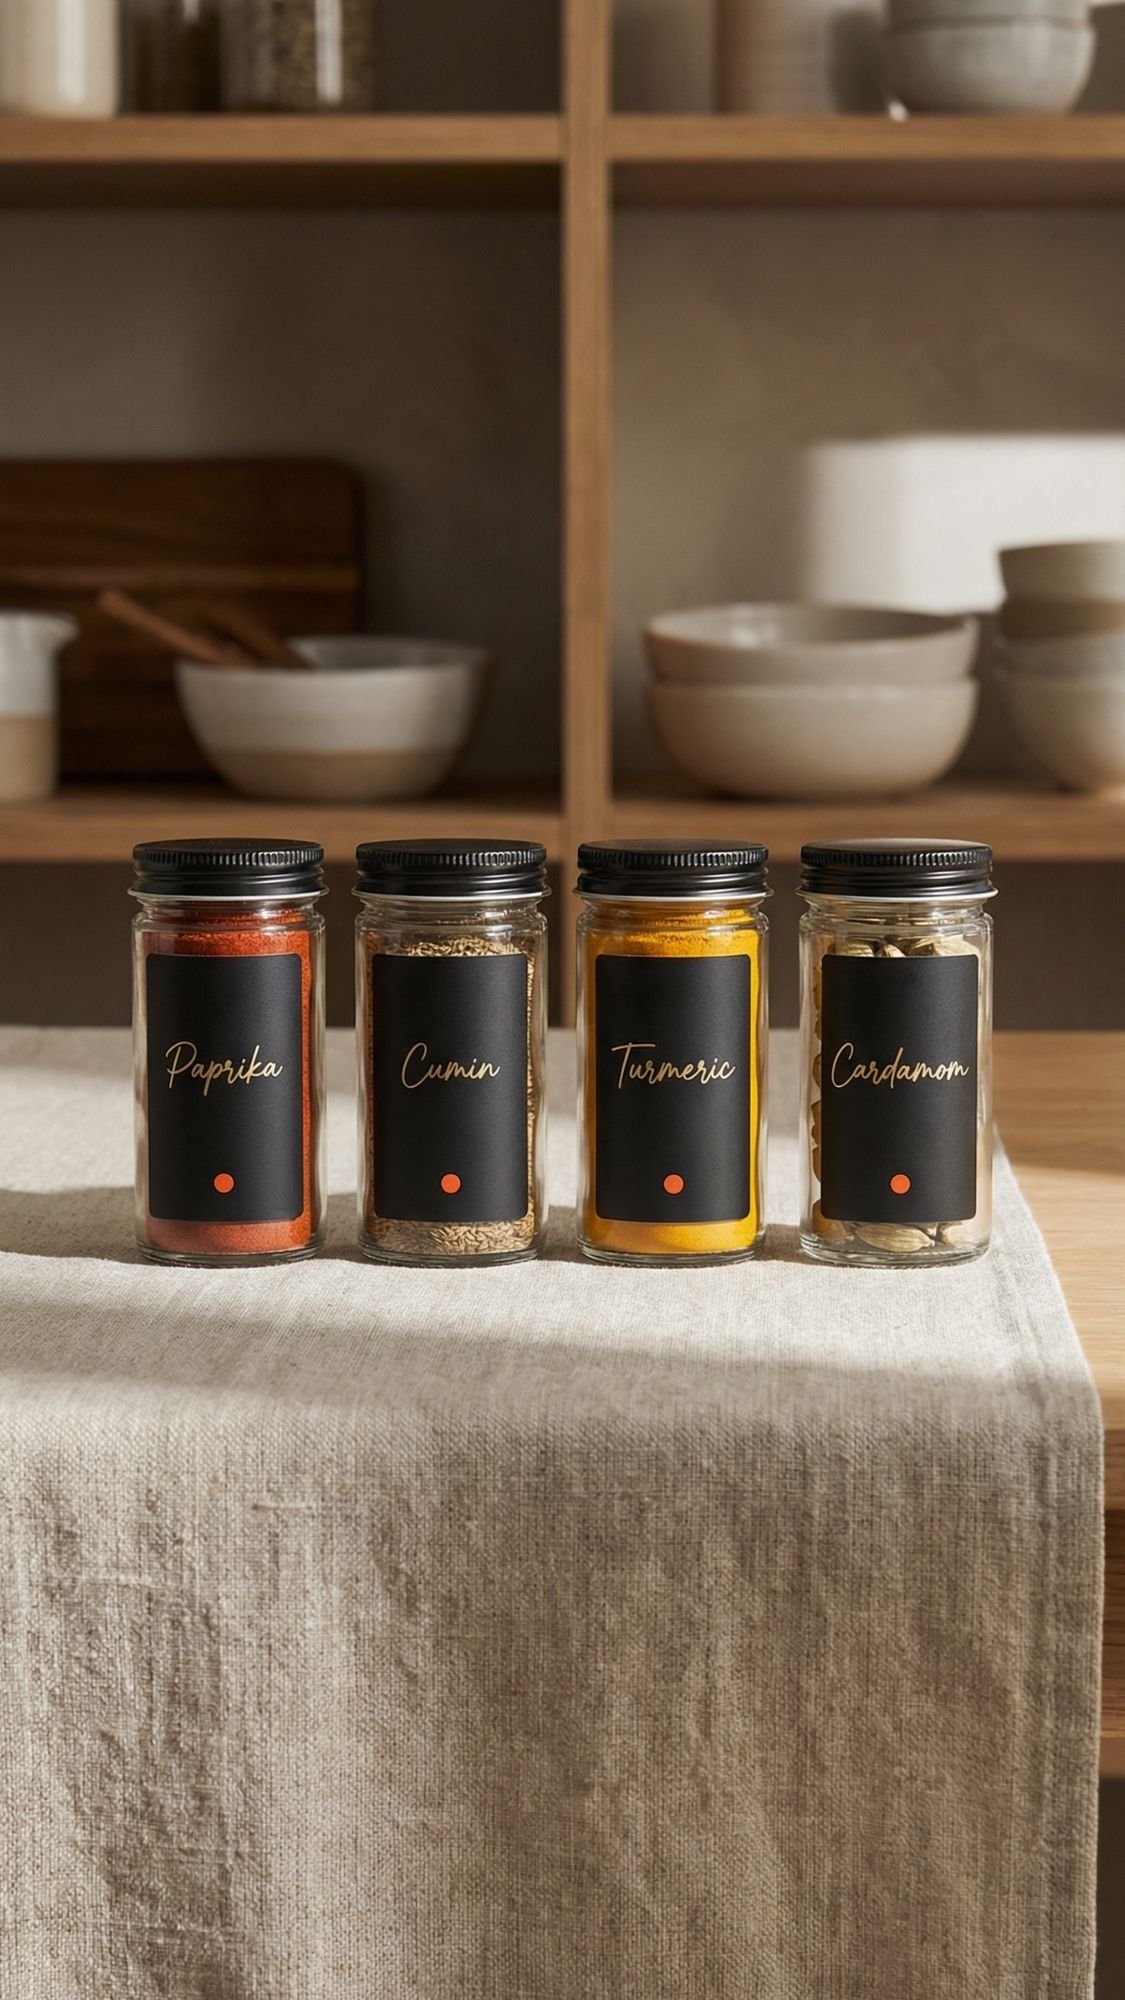
15) Infused Salt Or Spice Blend Set: The “I Use This Weekly” Kitchen Gift
If your best friend cooks at all, spice blends become a forever gift. Like, they won’t “save it for a special occasion.” They’ll reach for it mid-week when they’re tired and dinner needs help. And the best part? You can make it look super luxe with tiny jars, clean labels, and a little “what to use this on” card. Honestly, that card is the difference between “cute jar” and “I’m obsessed with this.”
Why They’ll Use It All Year
- It makes weeknight cooking easier, which means it gets used.
- It upgrades basic meals without extra effort.
- It stores well and looks cute on a counter or spice rack.
Materials
- Sea salt or kosher salt (start with good salt, it matters)
- Dried herbs and spices (fully dry, no fresh stuff here)
- Garlic powder, smoked paprika, dried oregano, thyme, rosemary, chili flakes, black pepper, lemon peel
- Small jars with shaker tops or cork lids
- Funnel
- Labels (waterproof is best)
- Optional: mini scoop
- Optional: tiny silica packet for humidity control (not inside food, just for the storage box)
How To Make It (Simple Steps)
- Choose 3 to 4 blends with clear uses.
- Mix each blend in a bowl, then funnel into jars.
- Label each jar with:
- Name
- Ingredients
- Best uses
- Add a little pairing card with quick suggestions.
Pro Tips (So It Doesn’t Clump Or Taste Flat)
- Dry herbs must be fully dry. Any moisture makes clumping happen.
- Use a funnel so jars stay clean. Messy jar threads make lids stick.
- Keep salt blends simple. Too many herbs can taste muddy.
- If you want a lemony vibe, use dried lemon peel or true lemon granules, not fresh zest.
Spice Set Ideas That Get Used Constantly
- Garlic Herb Salt
- Sea salt + garlic powder + oregano + black pepper
- Best on roasted veggies, eggs, pasta
- Smoky BBQ Blend
- Smoked paprika + brown sugar + chili + salt
- Best on chicken, potatoes, corn
- Lemon Pepper Salt
- Salt + cracked black pepper + dried lemon peel
- Best on fish, salads, asparagus
- Everything-ish Blend
- Sesame seeds + garlic + onion + salt
- Best on avocado toast, eggs, veggies
Personalization Ideas
- Name blends after inside jokes or shared memories.
- Match the jars to their kitchen vibe:
- Modern: clear jars, minimal black label
- Cozy: amber jars, cream labels
- Glam: clear jars with Plum Noir labels and a tiny gold line
- Add a mini recipe card like: “My favorite lazy dinner using this blend.”
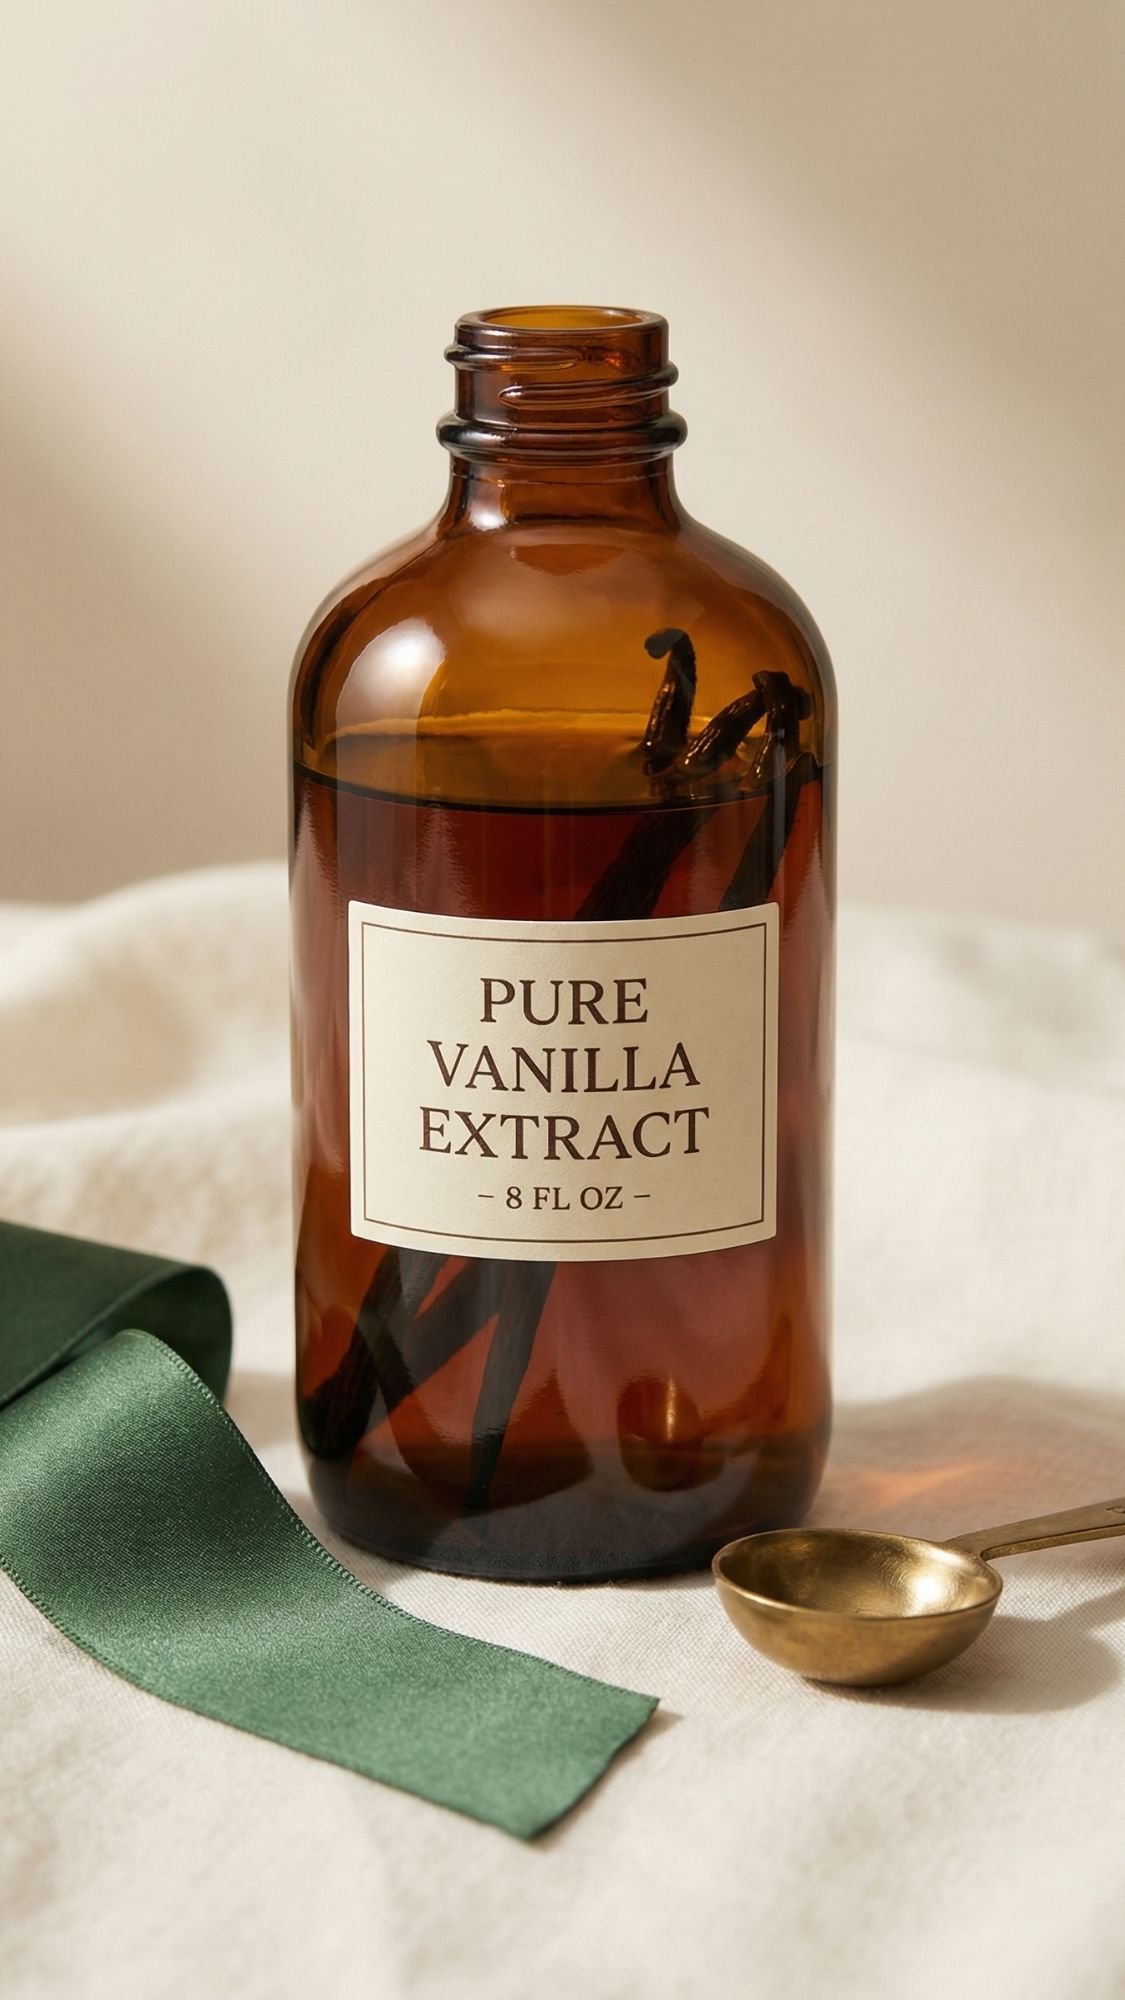
16) Homemade Vanilla Extract: The Slow Gift That Pays Off All Year
This gift is basically a flex. It’s simple, but it feels thoughtful and kind of fancy because people know it takes time. Your best friend can use it for baking, coffee, pancakes, holiday desserts, and those random “I’m making cookies at midnight” moments. And once they start using homemade vanilla, store-bought starts tasting a little… sad. Sorry, not sorry.
Why They’ll Use It All Year
- It works in baking, coffee, oatmeal, and homemade syrup.
- It lasts a long time and keeps improving as it sits.
- It feels premium because it’s not an instant-gratification gift.
Materials
- Vanilla beans (grade B works great for extract, usually more affordable)
- Alcohol: vodka for a clean vanilla flavor, bourbon for a warmer vibe
- Glass bottle or jar with a tight lid (8 oz is a great gifting size)
- Small funnel
- Labels
- Optional: tiny tag that says “Shake weekly”
How To Make It (Simple Steps)
- Split vanilla beans lengthwise so the inside seeds can infuse.
- Place beans in the bottle. For an 8 oz bottle, use about 5 to 7 beans depending on thickness.
- Pour alcohol over beans until fully submerged.
- Seal tightly, label with the start date, and store in a cool, dark spot.
- Shake once a week for the first month, then whenever you remember.
Pro Tips (So It’s Strong And Doesn’t Get Weird)
- Use a tight-sealing bottle. Evaporation sneaks up over months.
- Keep beans fully submerged. If they float above the alcohol line, trim them down.
- The flavor gets better after 8 weeks, but it really shines at 6 months.
- If you want it extra strong, add one more bean than you think you need. Nobody complains about bold vanilla.
Personalization Ideas
- Add a matching recipe card:
- Vanilla sugar instructions
- Simple pancake recipe
- “Bestie cookies” recipe you always make together
- Label it with a name:
- “Best Friend Vanilla”
- “Cookies Fix Extract”
- “Holiday Magic”
- Bundle it with a small whisk or measuring spoons for a full kit vibe.
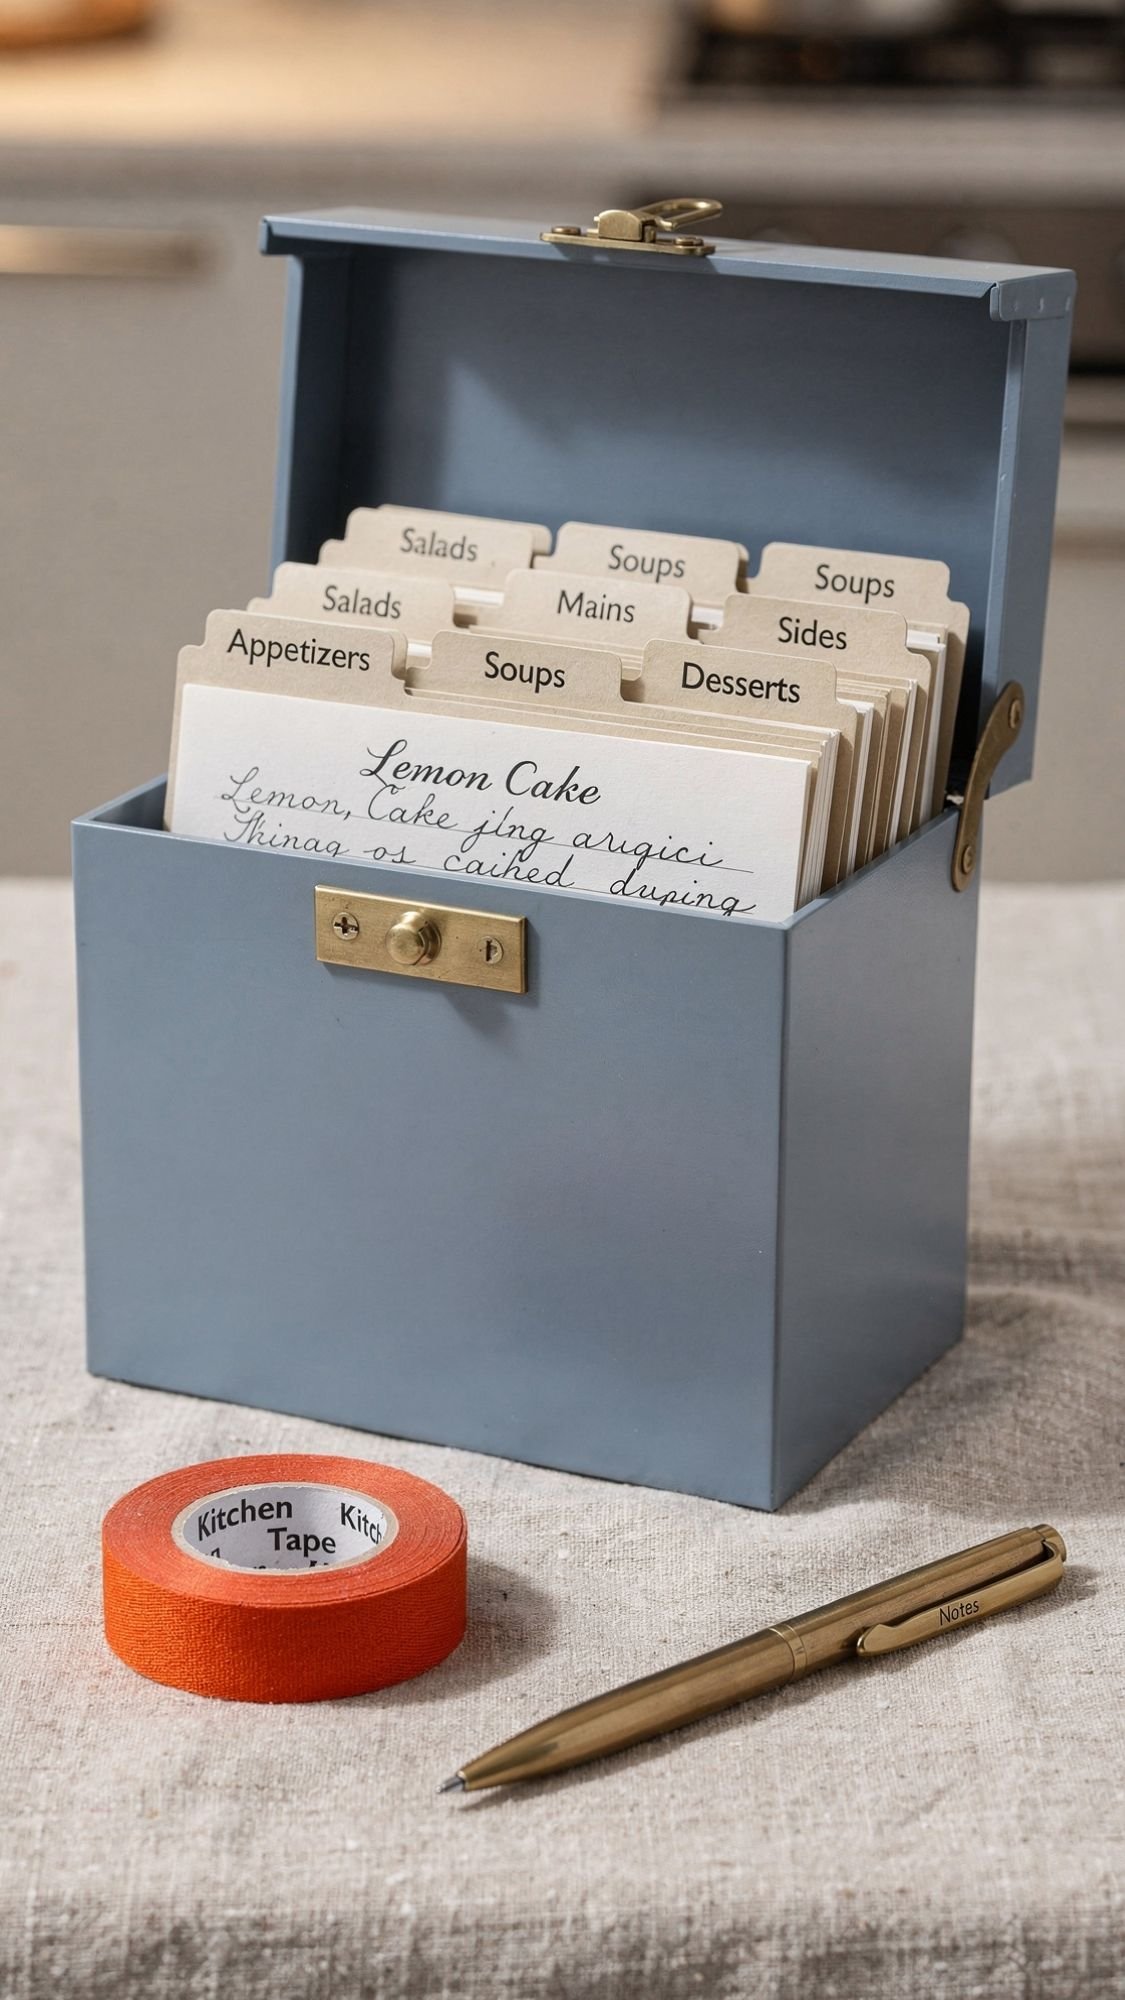
17) Recipe Card Box + Custom Divider Tabs: Nostalgia That Actually Gets Used
This one has serious “grandma wrote it down for me” energy, but in a modern, best-friend way. A recipe box is practical because it lives in the kitchen, and it’s personal because you can fill it with recipes that mean something. Also, people love anything that helps them stop scrolling for recipes while flour explodes everywhere.
Why They’ll Use It All Year
- It makes meal planning and cooking easier.
- It keeps their favorite recipes in one place, no Wi-Fi required.
- It becomes more valuable over time as they add to it.
Materials
- Recipe box (wood, acrylic, or sturdy cardstock box)
- Index cards (4 x 6 works great)
- Divider tabs (blank or printable)
- Labels or a label maker (optional but looks clean)
- Pens or fine-tip markers (smudge-proof is best)
- Optional: clear card sleeves or laminating sheets for messy recipes
How To Make It (Simple Steps)
- Pick categories that match how your best friend actually cooks:
- Weeknight, Snacks, Sweets, Drinks, Meal Prep, Comfort Food
- Create divider tabs, keep them readable and consistent.
- Decorate the box if needed, or keep it minimal for a modern look.
- Add 5 to 10 starter cards that you know they’ll use.
- Include one “blank stack” so they can keep building it.
Pro Tips (So It Doesn’t Become A Cute Unused Box)
- Write the “why” on your recipes. Like “make this when you feel stressed” or “this was our road trip snack.” People love context.
- Protect the top 3 recipes with sleeves or lamination. Splatter happens.
- Keep the tabs simple. Fancy fonts look cute until you can’t read “Sauces” from across the counter.
- Add a small “go-to grocery list” card. It makes the box more functional immediately.
Personalization Ideas
- Add a divider called “Shae’s Favorites” or “Bestie Classics.”
- Include an “Emergency Dinner” card with a 10-minute meal.
- Write one recipe in your handwriting. I know it’s extra, but it hits emotionally.

18) Pen Pal Starter Kit: Because Analog Is Cool Again, Apparently
This gift feels personal without being complicated. A pen pal kit is perfect for the best friend who loves journaling, stationery, scrapbooking, or just being a little nostalgic. It also works for the friend who says they miss writing letters but never actually starts, because you’re basically removing every excuse. Like, “Here. I gave you the whole setup. Go be romantic about paper now.”
Why They’ll Use It All Year
- They can use it for letters, thank-you notes, journaling, and gift tags.
- It makes everyday moments feel special, and people love that.
- It’s refillable. They’ll keep using the pouch long after the first supplies run out.
Materials
- Pretty stationery set (blank or lightly lined)
- Envelopes that fit
- A set of stamps or a stamp holder card (optional)
- Stickers or washi tape (one or two designs, not 47)
- A good pen (gel pen or felt tip)
- Optional: wax seal kit, sealing wax beads, mini spoon
- Optional: address book card, so they don’t lose addresses
- A pouch or small box to hold everything (linen pouch works great)
How To Make It (Simple Steps)
- Pick a cohesive color story. It looks premium when everything matches.
- Build the kit like a mini experience:
- Paper
- Envelopes
- Pen
- Decoration (stickers or washi)
- Stamps (if you include them)
- Add a “first letter prompt” card so they don’t sit there staring at a blank page forever.
Pro Tips (So They Actually Use It, Not Just Admire It)
- Include prompts. Prompts are the secret weapon for follow-through.
- Keep supplies minimal but good quality. A few nice items beat a clutter kit.
- Choose one pen that writes smoothly. Scratchy pens kill the vibe instantly.
- If you include wax seals, add a tiny note: melt slowly and let it cool before touching. People always poke it too soon.
First Letter Prompt Ideas (Steal These)
- What’s one thing you’re excited about right now?
- What’s a tiny win you had this week?
- What’s a comfort show you always rewatch?
- What’s a memory of us that still makes you laugh?
Personalization Ideas
- Add monogram stickers with their initials.
- Include one letter already written by you. This makes them way more likely to respond.
- Add a playlist QR code card. It’s cheesy in the best way.
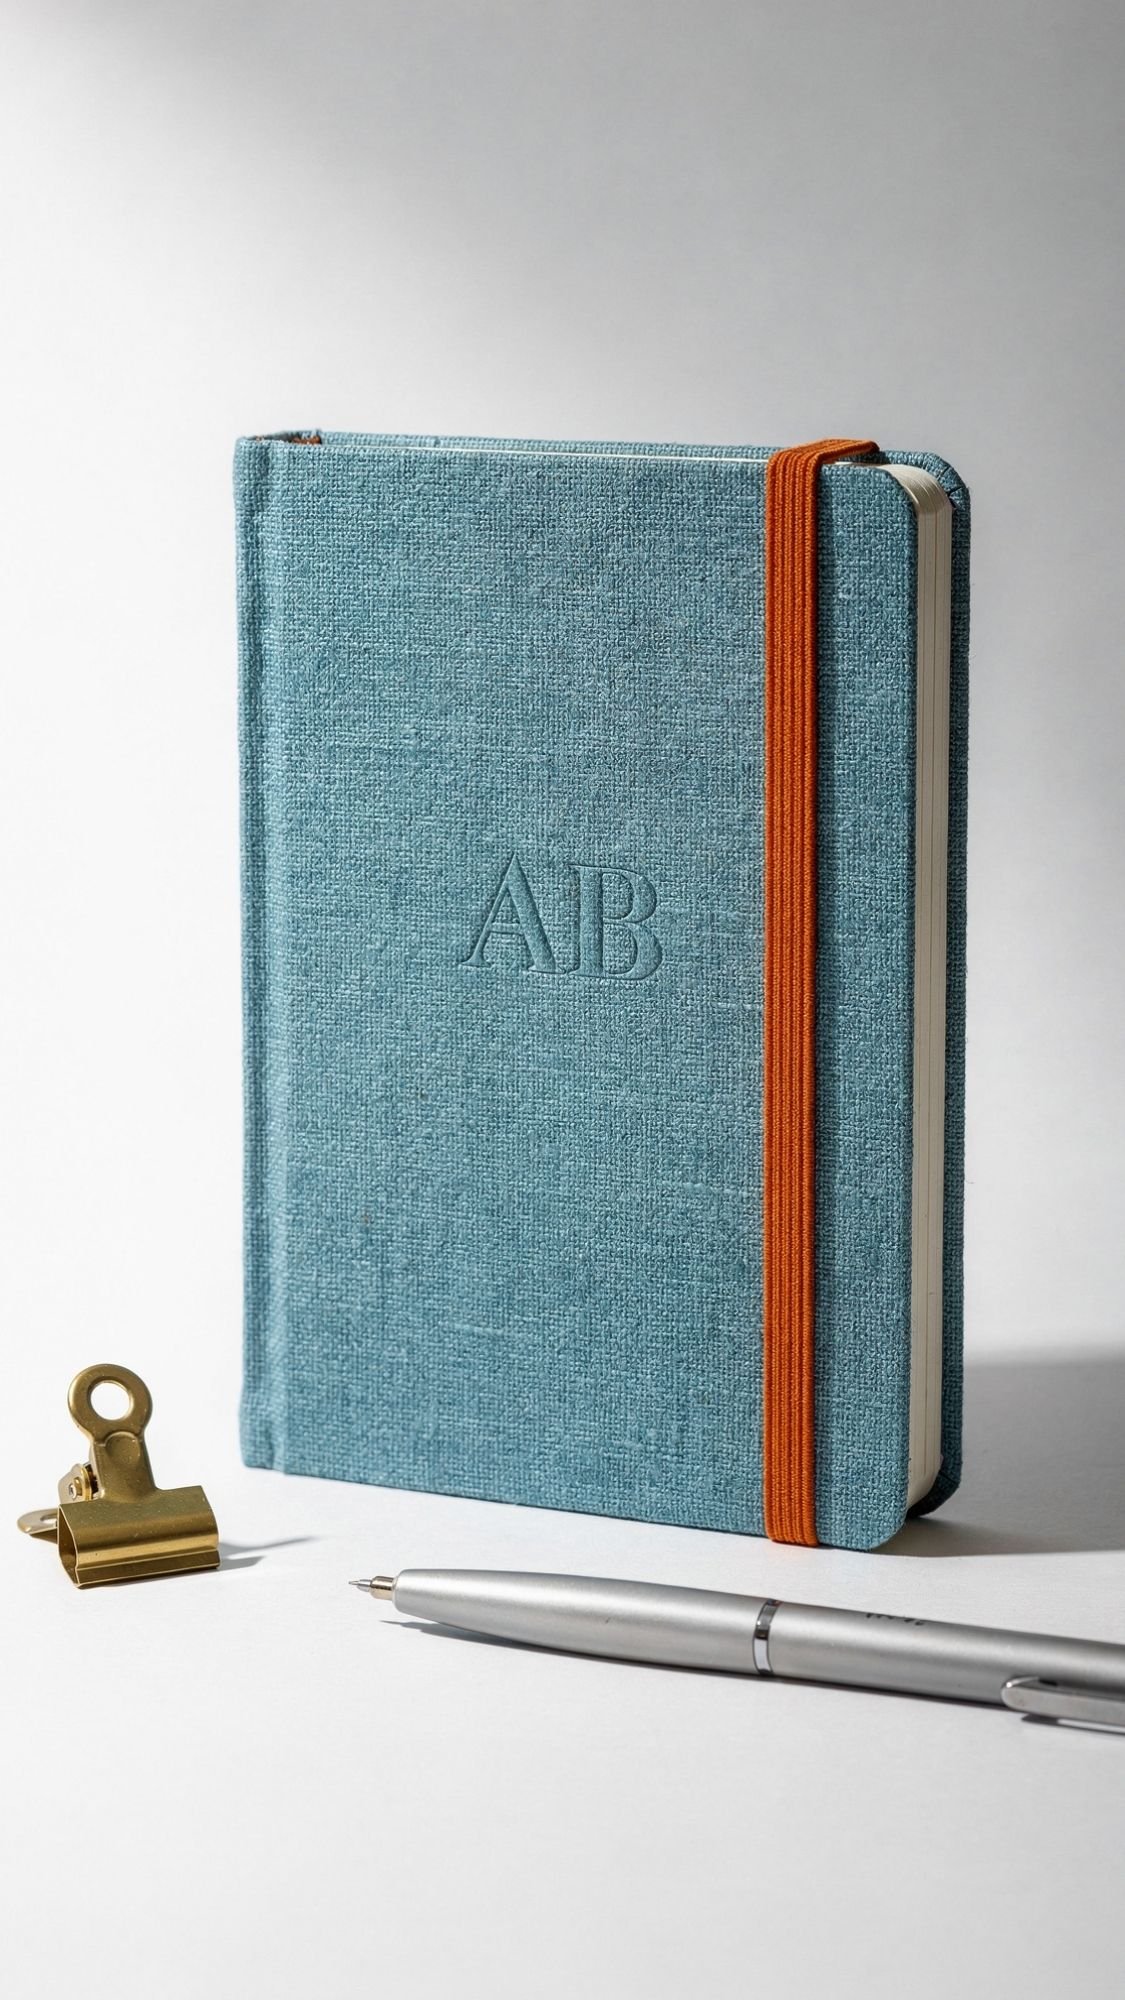
19) Handbound Mini Journal: Pocket-Sized, Gets Used, Feels Extra Thoughtful
A handbound journal hits different because it’s not just “a notebook.” It’s something you made with intention, and your best friend will feel that. This is a great gift for the friend who lists everything, journals, sketches, plans, or just likes having a cute little notebook in their bag. Also, mini journals are way less intimidating than big ones, so people actually use them instead of “saving them.”
Why They’ll Use It All Year
- It fits in a purse, tote, or desk drawer easily.
- It works for to-do lists, notes, journaling, and doodles.
- It feels personal and custom, not store-shelf generic.
Materials
- Paper for pages (printer paper works, nicer paper feels more luxe)
- Book board or thick cardstock for covers
- Fabric or paper to wrap the cover (linen looks high-end)
- Glue (bookbinding glue or PVA)
- Waxed thread
- Bookbinding needle
- Bone folder (optional but makes folds crisp)
- Craft knife and ruler
- Optional: elastic cord for a closure band
How To Make It (Simple Steps)
- Cut and fold paper into small “signatures,” usually 3 to 5 sheets per signature.
- Stack signatures and punch sewing holes evenly along the spine.
- Sew the signatures together using a simple pamphlet stitch or a basic stitch binding.
- Cut and wrap cover boards with fabric or paper, glue neatly, press flat while drying.
- Attach the text block to the cover.
- Add an elastic closure if you want it to feel like a fancy little travel journal.
Pro Tips (So It Looks Clean, Not Crooked)
- Measure your hole spacing. Crooked holes make the whole book look off.
- Use thin, even glue layers. Thick glue warps covers.
- Press the cover while glue dries. A heavy book works as a press.
- Waxed thread behaves better than regular thread, and it holds up longer.
Personalization Ideas
- Deboss or stamp initials on the cover.
- Add a tiny inner pocket for receipts or notes.
- Match the cover palette to their vibe:
- Modern: Cloud Dancer linen with Cool Blue elastic
- Boho: Washed Linen with natural thread
- Glam: Patina Blue cover with Plum Noir initials
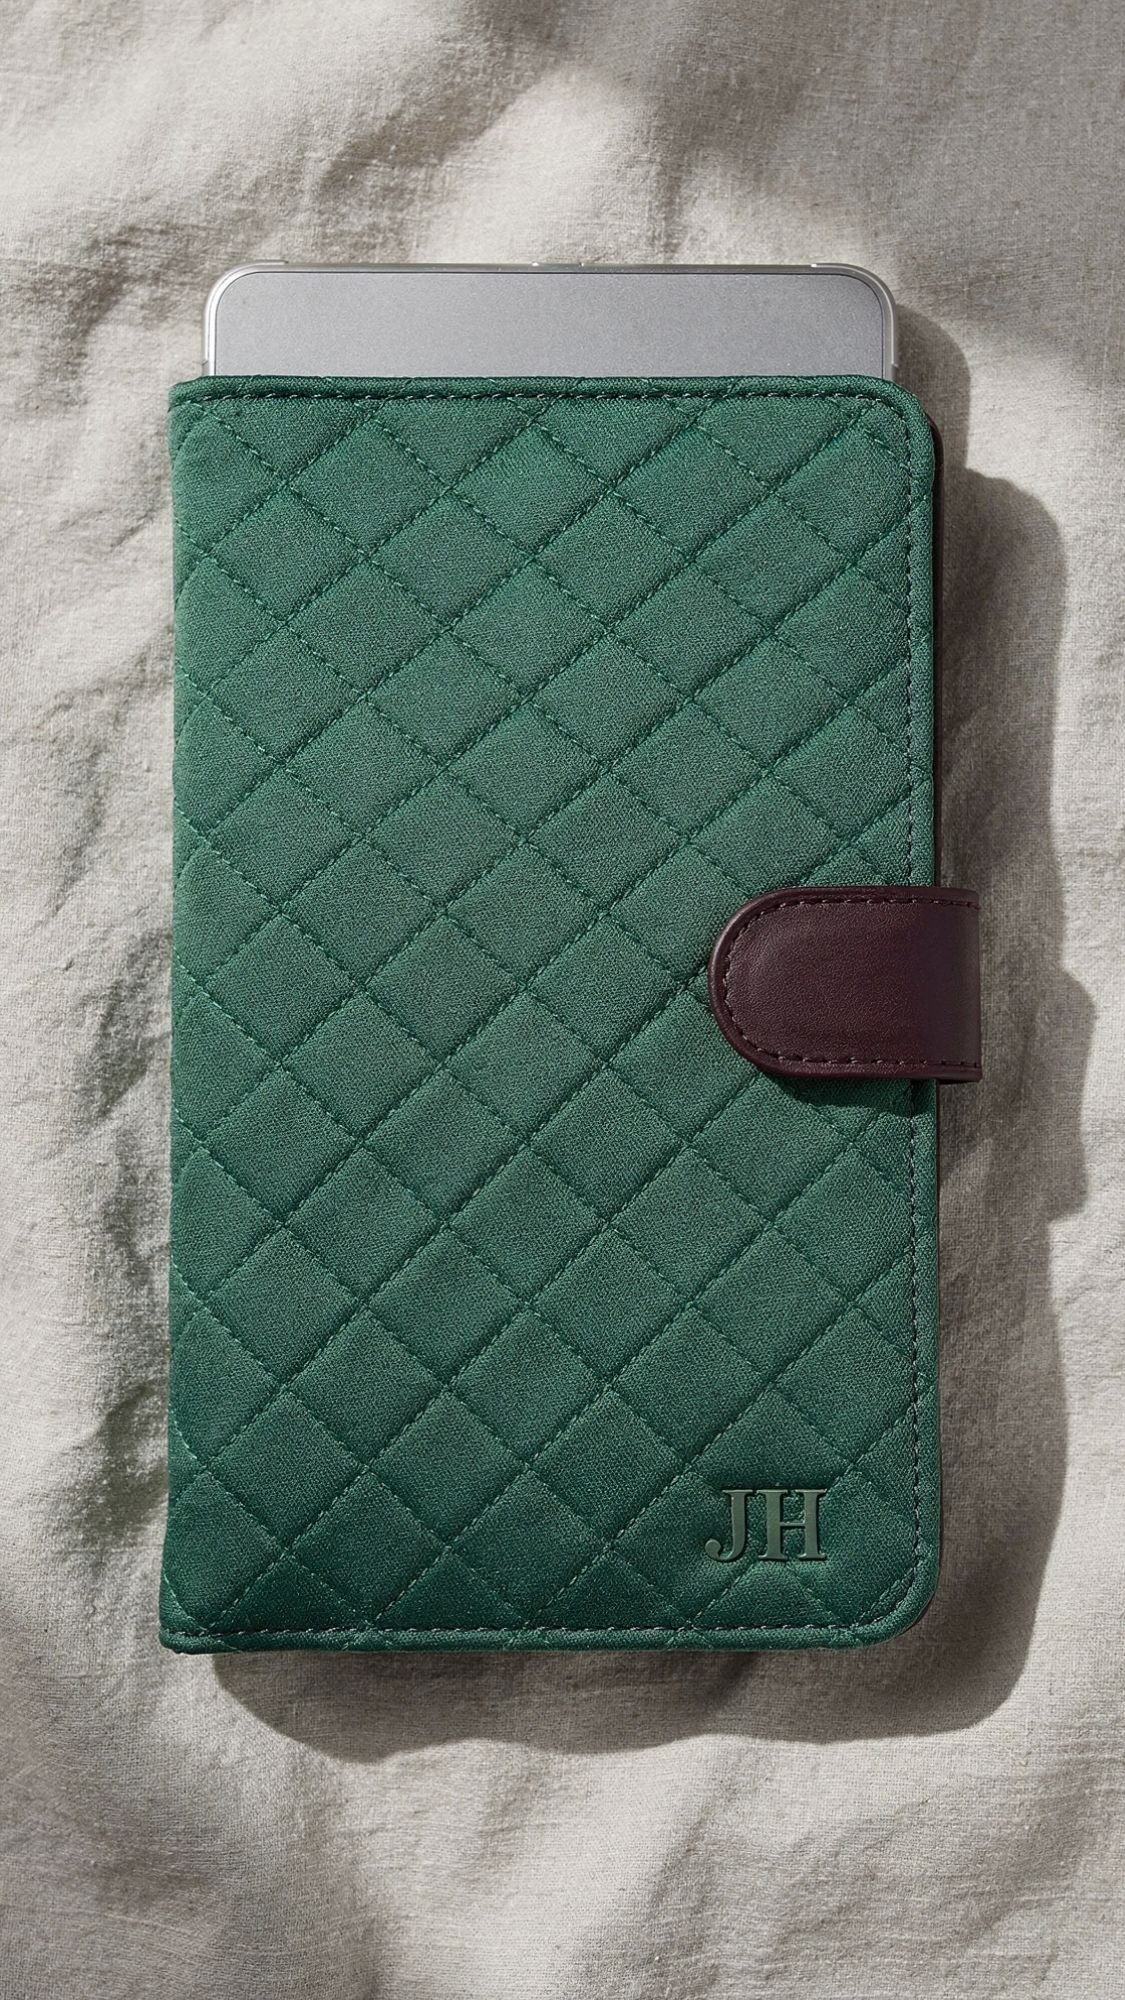
20) Kindle Or Book Sleeve: Protection + Style + Actually Useful
If your best friend reads even a little, a padded book or Kindle sleeve is a ridiculously good gift because it protects something they already use. It’s like gifting peace of mind. No bent corners, no scratched screens, no “my book got wrecked in my bag” sadness. And you can make it look high-end with quilting, clean seams, and a closure that feels intentional.
Why They’ll Use It All Year
- It protects their Kindle, tablet, or current book from bag damage.
- It’s lightweight, portable, and always useful.
- It makes their reading habit feel a little more special.
Materials
- Outer fabric (quilting cotton, canvas, or washed linen)
- Lining fabric (cotton works well)
- Batting (thin quilting batting is perfect)
- Thread
- Sewing machine
- Scissors or rotary cutter
- Ruler
- Clips or pins
- Optional: snap, button, Velcro, or elastic closure
- Optional: bias tape for a super clean edge finish
How To Make It (Simple Steps)
- Measure the device or book:
- Add about 1 inch width and 1 inch height for seam allowance and ease.
- Cut outer and lining pieces, plus batting.
- Quilt the outer fabric to the batting first if you want that structured luxe look.
- Sew outer and lining pieces right sides together, leaving a turning gap.
- Turn right side out, press, and topstitch.
- Add a closure, snap, button loop, or elastic band.
Pro Tips (So It Fits And Doesn’t Annoy Them)
- Add a little ease. Too tight feels frustrating and makes the sleeve wear faster.
- Quilt it. Quilting stops batting from shifting and it looks more expensive instantly.
- If you use Velcro, choose soft Velcro so it doesn’t snag fabric in their bag.
- Add an inner pocket for a charger or bookmark. It’s a small touch that feels thoughtful.
Personalization Ideas
- Choose fabric that matches their vibe:
- Modern: Cloud Dancer + Cool Blue piping
- Cozy: Washed Linen textures with neutral quilting
- Glam: Plum Noir outer with Persimmon lining
- Add an embroidered monogram on the inside flap so it feels subtle and premium.
- Add a tiny woven label like “Read More” or their nickname.

21) Scrunchie Set: The Gift That Never Stops Being Useful
Scrunchies are one of those sneaky-perfect gifts because your best friend will use them constantly, even if they swear they “already have a bunch.” Somehow they still lose them like socks, so yes, they need more. This also makes a great scrap-buster project, which means you can make a set that looks curated without spending much. Want it to feel boutique? Pick 3 fabrics that look intentional together, not like you grabbed whatever was closest to the scissors.
Why They’ll Use It All Year
- They wear them for messy buns, ponytails, and wrist storage when they “take it out for a second.”
- They work in every season, especially with fabric swaps.
- They keep hair gentler than tight elastics.
Materials
- Fabric (cotton, linen, satin, velvet, or jersey knit)
- 1/4 inch to 3/8 inch elastic
- Thread
- Safety pin or bodkin (for threading elastic)
- Scissors or rotary cutter
- Sewing machine (or hand sew the final seam)
How To Make It (Simple Steps)
- Cut a rectangle, about 3.5 x 18 inches for a standard scrunchie.
- Fold right sides together, then sew the long edge to make a tube.
- Turn the tube right side out.
- Thread elastic through, tie or sew elastic ends securely.
- Tuck raw ends in, then stitch the opening closed neatly.
Pro Tips (So They Look Clean And Feel Comfy)
- Use velvet or satin for “glam,” and linen or cotton for “everyday.” Fabric changes the whole vibe.
- Sew the elastic ends together securely, a weak join snaps later and ruins the gift.
- Press the fabric tube before you close it, it helps everything sit smoother.
- If you want them to look expensive, keep stitching straight and tight, sloppy seams show fast on satin.
Personalization Ideas
- Build a mini set:
- One neutral, one bold, one texture (like velvet)
- Match their style:
- Modern: Cloud Dancer cotton, Cool Blue stripe, Jade solid
- Boho: Washed Linen neutrals with texture
- Glam: Persimmon velvet, Plum Noir satin, gold-edged tag
- Add a tiny tag with initials or a simple symbol.
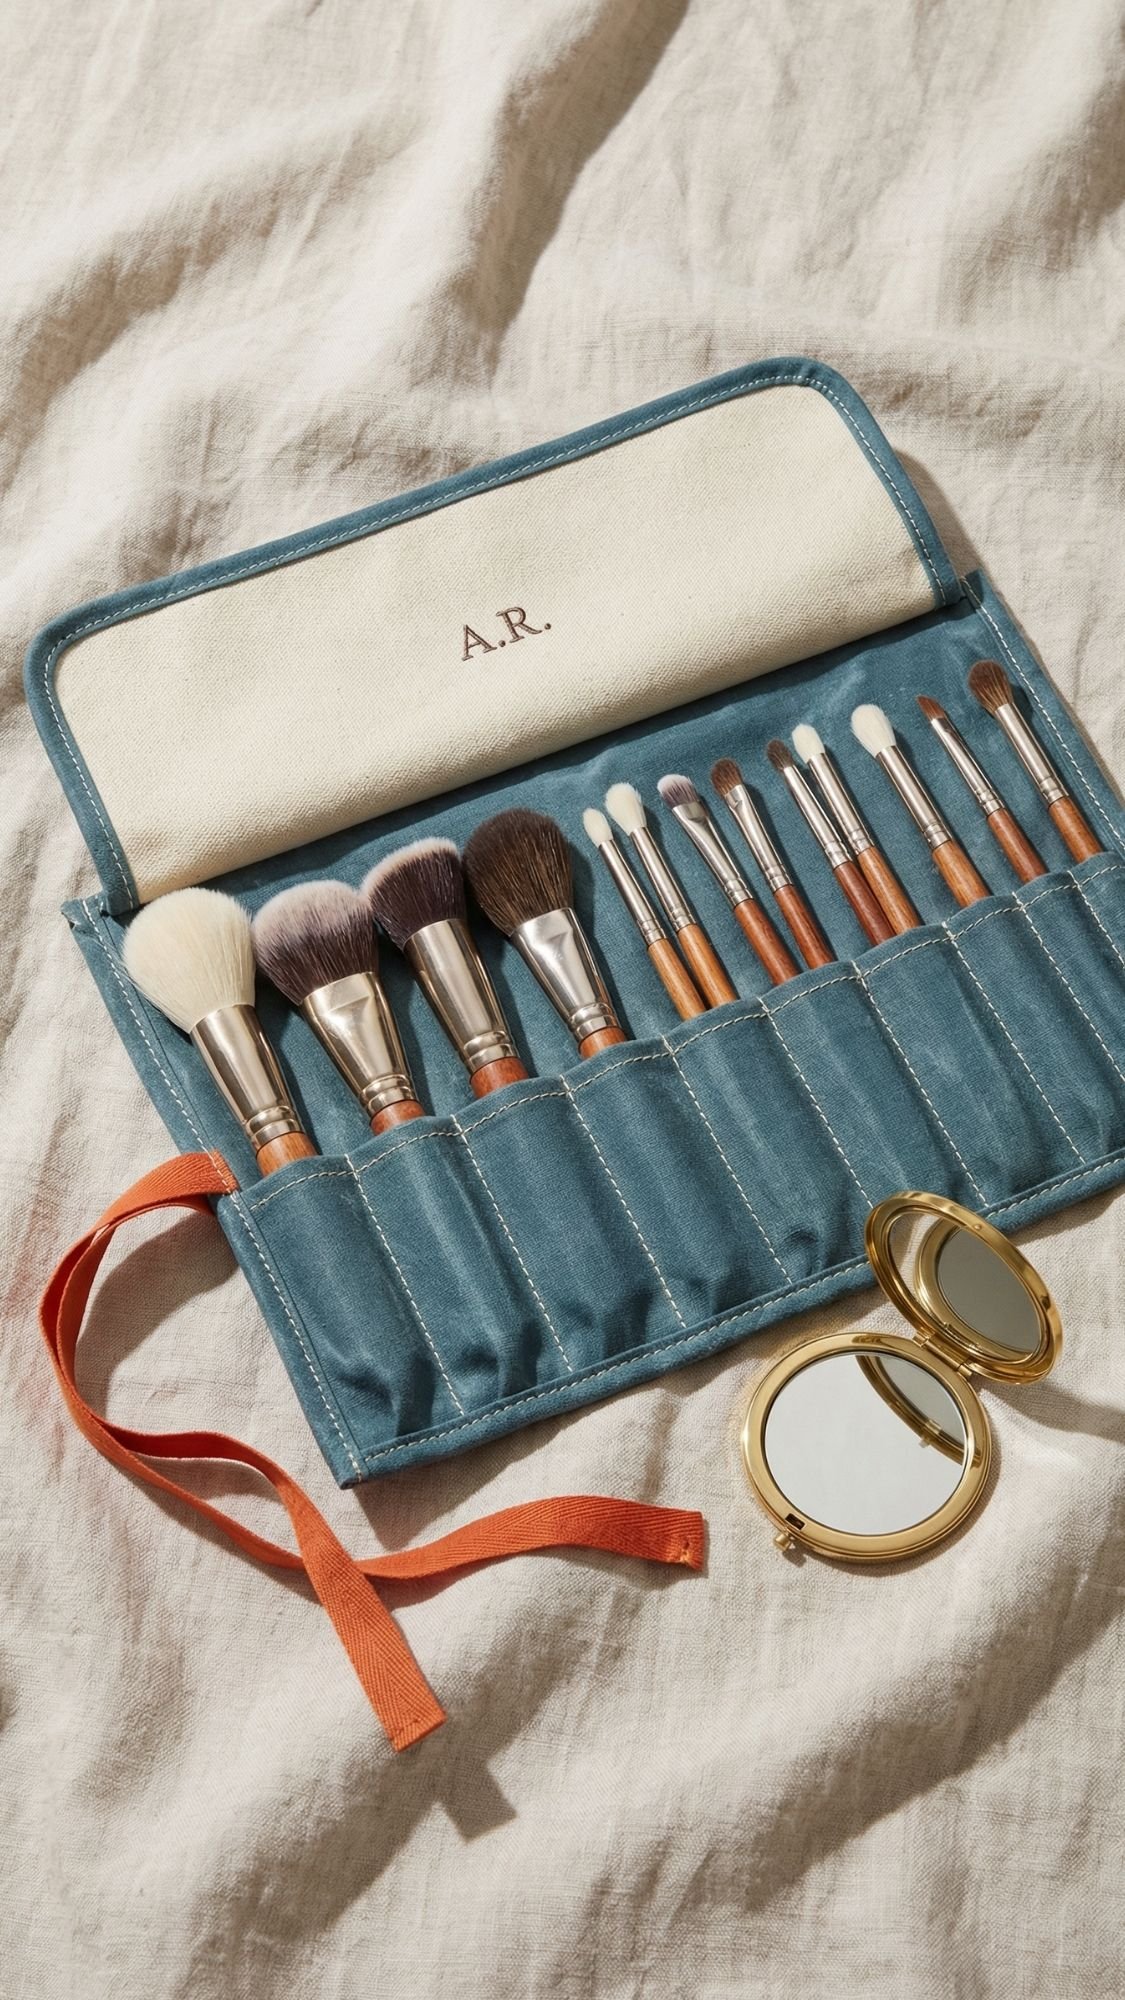
22) Makeup Brush Roll: Organized, Travel-Ready, And Weirdly Satisfying
If your best friend has makeup brushes rolling around in a bag like loose pencils, this gift feels like a rescue mission. A brush roll keeps brushes clean, keeps bristles from getting crushed, and makes getting ready faster. It also looks insanely luxe when you choose a sturdy fabric and add clean topstitching. Ever notice how organized tools make routines feel calmer?
Why They’ll Use It All Year
- They store brushes neatly at home, and they travel without wrecking bristles.
- They keep makeup bags cleaner, no powder dust explosion.
- They roll it up, tie it, and go. Easy wins.
Materials
- Outer fabric: canvas, denim, or washed linen (sturdy works best)
- Lining fabric: quilting cotton
- Interfacing (optional, but it helps the roll hold shape)
- Bias tape or binding tape (optional for a super clean edge)
- Ribbon tie or twill tape
- Thread
- Scissors or rotary cutter
- Ruler and fabric marker
- Sewing machine
- Optional: elastic for holding brushes snugly
How To Make It (Simple Steps)
- Measure your longest brush, then add about 1 inch so the flap covers the tops.
- Cut two rectangles, one outer and one lining. Start around 10 x 14 inches for a basic roll.
- Cut a pocket panel, about 6 x 14 inches, then hem the top edge.
- Sew the pocket panel to the base, then stitch vertical lines to create brush slots.
- Add a top flap (or fold the top down) to cover brush heads.
- Attach ties, then sew outer and lining right sides together.
- Turn, press, and topstitch for a clean finish.
Pro Tips (So It Looks Boutique, Not Homemade)
- Add a flap. Brush heads stay cleaner and keep their shape longer.
- Use interfacing where you stitch pockets. It prevents puckering and keeps slots neat.
- Keep stitch lines straight and evenly spaced. Crooked slots make the whole thing look off.
- Make one slot wider for fluffy brushes. Not every brush lives the same life.
Personalization Ideas
- Add their initials on the inside flap so it feels subtle and expensive.
- Choose a palette that matches their vibe:
- Modern: Cloud Dancer lining, Cool Blue exterior
- Boho: Washed Linen textures, neutral tie
- Glam: Plum Noir exterior, Persimmon tie
- Add a tiny hidden pocket for a brow pencil or spoolie.

23) Reusable Snack Bags: Eco, Practical, And They Get Used Constantly
This is one of those gifts your best friend will accidentally use every day. Snacks, sandwiches, fruit, little pantry items, travel stuff, even “I’m throwing this in my bag so it doesn’t leak” moments. Reusable snack bags feel like a small lifestyle upgrade, and they also make a cute add-on to a bigger gift set.
Why They’ll Use It All Year
- They use them for lunches, road trips, kids snacks, desk snacks, all snacks.
- They reduce waste without being preachy about it.
- They wipe clean, and that’s the real reason people keep using them.
Materials
- Laminated cotton fabric or food-safe PUL fabric (wipeable lining matters)
- Coordinating thread
- Clips or pins (clips work better on laminated fabric)
- Sewing machine needle for thicker fabric (like a 90/14)
- Soft Velcro or snaps for closure
- Scissors or rotary cutter
- Optional: bias tape for clean edges
How To Make It (Simple Steps)
- Cut rectangles for your bag size:
- Small: 6 x 8 inches
- Medium: 7 x 9 inches
- Large: 8 x 10 inches
- Place right sides together, sew around edges, leaving a turning gap.
- Turn right side out, press gently with a pressing cloth (low heat).
- Topstitch all around to close the gap and strengthen seams.
- Add closure: Velcro strips or snaps.
- Test by folding and closing the bag, adjust Velcro placement if needed.
Pro Tips (So They Don’t Turn Into A Sticky Mess)
- Use soft Velcro. Scratchy Velcro snags everything in the laundry.
- Don’t iron laminated fabric directly. It can melt or warp. Low heat and a pressing cloth only.
- Wipe clean with mild soap, and air dry. Dishwashers can shorten life.
- Change needles often. Laminated fabrics dull needles faster.
Personalization Ideas
- Make a set of 3 sizes and label them:
- “Snack”
- “Sandwich”
- “Travel”
- Use a cohesive palette:
- Modern: Cloud Dancer base print with Cool Blue accents
- Boho: Washed Linen tones with minimal patterns
- Pop: Wasabi and Persimmon prints
- Add a tiny inner note tag like “Refill me :)” but keep it subtle.

24) Wooden Phone Stand: Desk Essential, Looks Minimal, Gets Used Daily
This is the kind of gift people don’t think to buy for themselves, but they use it constantly once they have it. Work calls, watching a recipe while cooking, holding a phone on a nightstand, scrolling while pretending they’re not scrolling. A simple wooden phone stand becomes a daily desk staple, and it looks high-end if you sand it properly and choose a clean finish.
Why They’ll Use It All Year
- It makes video calls and watching videos easier, hands-free.
- It keeps their phone visible without taking over the desk.
- It looks sleek and intentional, not cluttery.
Materials
- Small wood board (about 3/4 inch thick works well)
- Saw (hand saw or miter saw)
- Sandpaper (120, 220, 320 grit)
- Wood glue (if you build a two-piece version)
- Wood finish: wipe-on poly, hardwax oil, or a clear satin topcoat
- Ruler and pencil
- Optional: wood burner or engraving tool for initials
- Optional: non-slip pad or cork for the base
How To Make It (Simple Steps)
- Cut a base piece, about 3.5 x 5 inches, and a back support piece if you want an angled stand.
- Mark and cut a slot where the phone will sit, angle the slot slightly back.
- Sand everything smooth, especially edges and corners.
- Apply finish, let it dry, then add a second coat if needed.
- Add a non-slip pad to the bottom so it doesn’t slide around.
Pro Tips (So It Doesn’t Look Like A Chunk Of Wood)
- Sand the edges extra. Sharp corners scream “unfinished.”
- Use a satin finish. Gloss shows fingerprints and looks plasticky fast.
- Test the slot width before finishing. Phone cases vary a lot.
- If you want it super clean, do a single-piece stand with a routed slot instead of gluing parts.
Personalization Ideas
- Burn or engrave initials on the front lip.
- Add a tiny symbol, like a star or heart, instead of a big monogram.
- Stain it in a trendy tone:
- Patina blue stain vibe
- Natural wood with Cloud Dancer styling in photos
- Dark walnut look for a moody desk
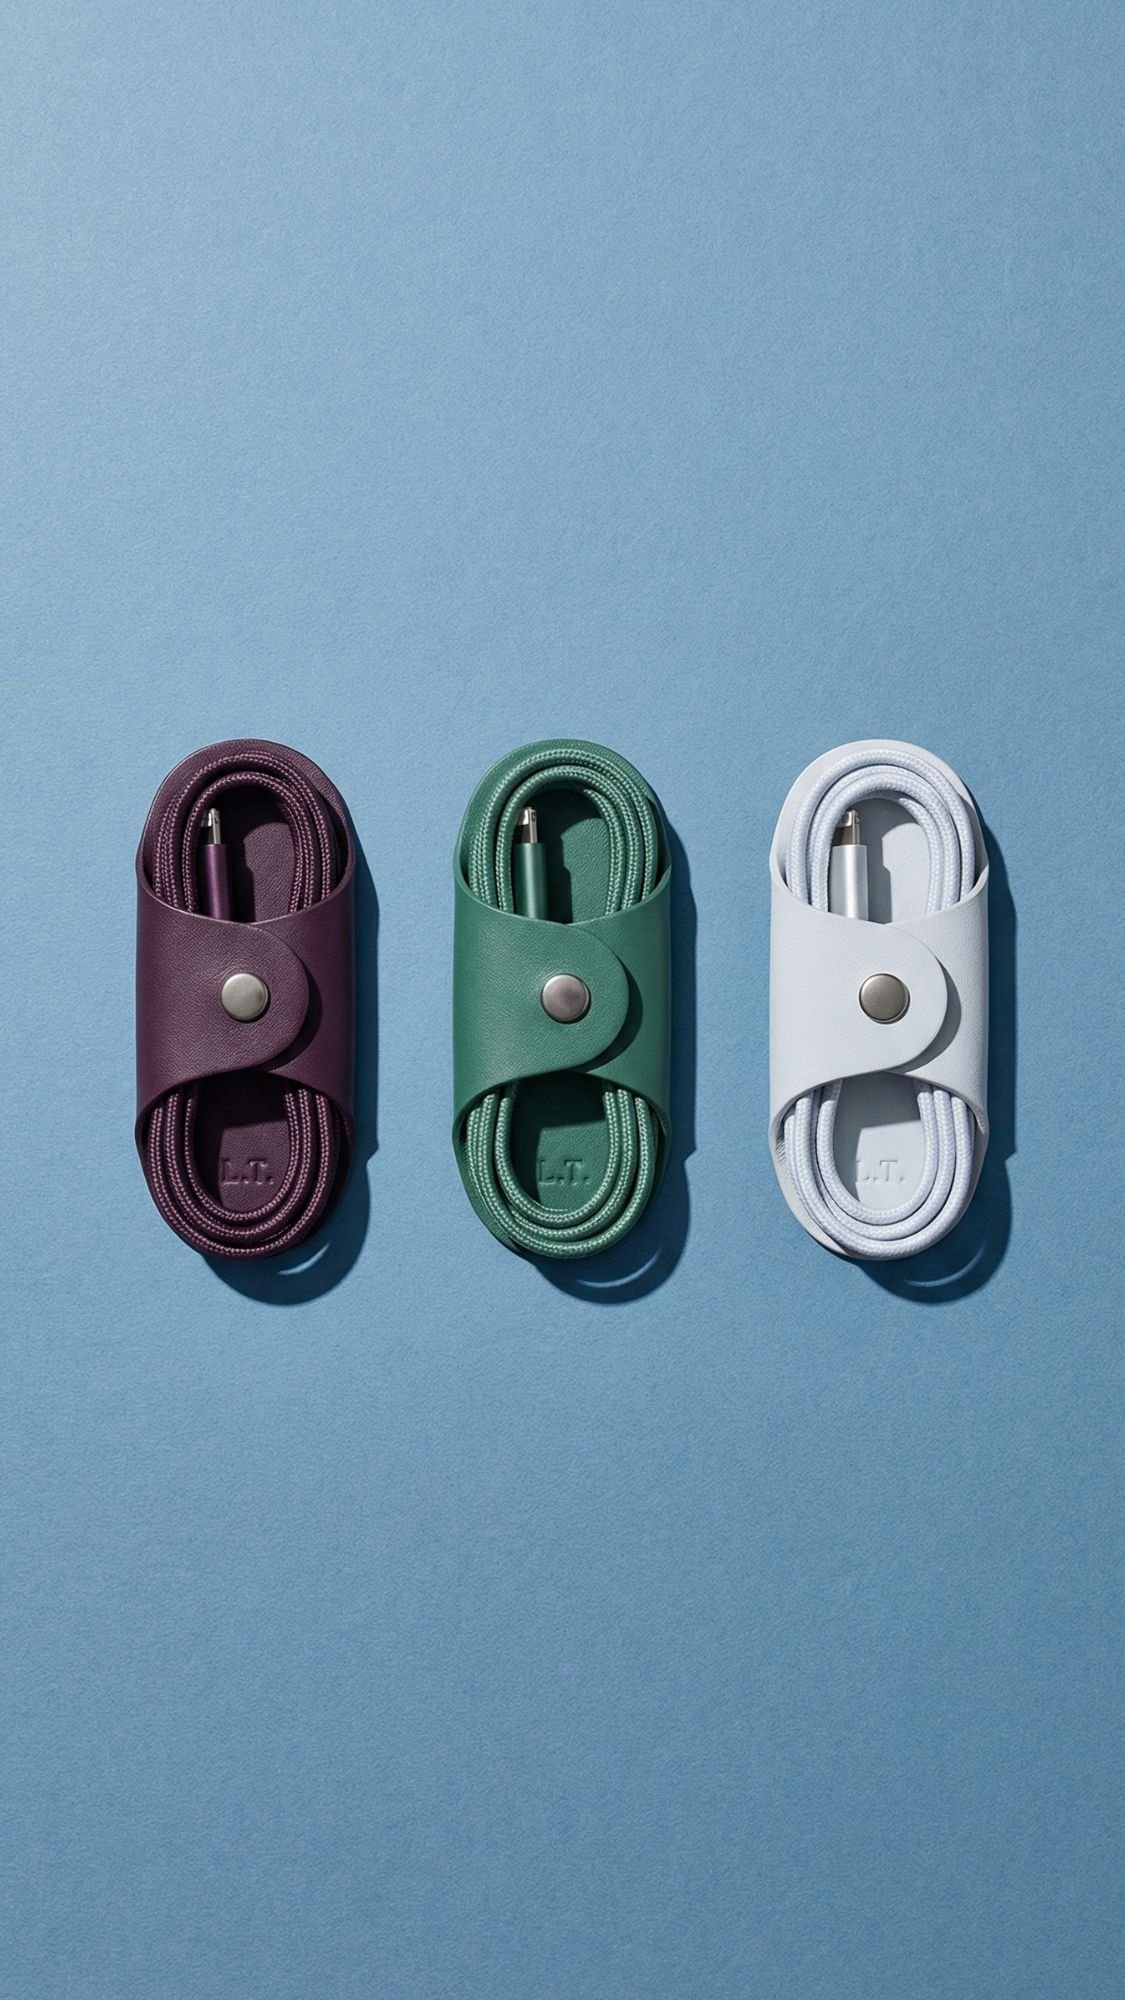
25) Felt Or Leather Cable Wrap Set: Tangle Killer Gift, Tiny But Mighty
This is the kind of gift that makes your best friend go, “Oh. I actually needed this.” Cable wraps fix the daily mess of cords in a bag, on a desk, in a car, in a drawer, and somehow in every hoodie pocket. They’re small, fast to make, and ridiculously useful. Also, a matching set looks fancy, even though it takes like five minutes each. Love that for us.
Why They’ll Use It All Year
- They keep chargers and cords from turning into a knot monster.
- They make travel and work bags look more organized.
- They’re one of those “daily annoyance solved” gifts.
Materials
Choose one:
- Felt (stiff craft felt or wool felt)
- Thin leather or faux leather
Hardware options:
- Snaps (best for longevity)
- Velcro dots (quick and easy)
- Button + elastic loop (cute and adjustable)
Tools:
- Scissors or rotary cutter
- Ruler
- Leather hole punch (if using snaps or leather)
- Snap setter (if using snaps)
- Optional: corner rounder punch for a clean shape
How To Make It (Simple Steps)
- Cut wrap shapes, about 1.25 x 5.5 inches for a standard cable wrap.
- Round corners so edges don’t catch on bags.
- Mark snap placement, then punch holes.
- Set snaps firmly.
- Wrap around a cord and test the closure.
Pro Tips (So They Don’t Pop Open Or Look Cheap)
- Snaps beat Velcro for long-term use. Velcro collects lint like it’s a hobby.
- Round your corners. Straight corners curl and fray faster.
- If you use leather, condition it lightly after cutting for a smooth finished look.
- Make one wrap slightly longer for thicker cords. People forget how chunky laptop chargers are.
Personalization Ideas
- Color code them:
- Cool Blue for phone charger
- Jade for headphones
- Plum Noir for laptop cable
- Add initials with a small stamp or tiny label, but keep it minimal.
- Make a set of 5 and store it in a mini pouch, boom, premium gift.
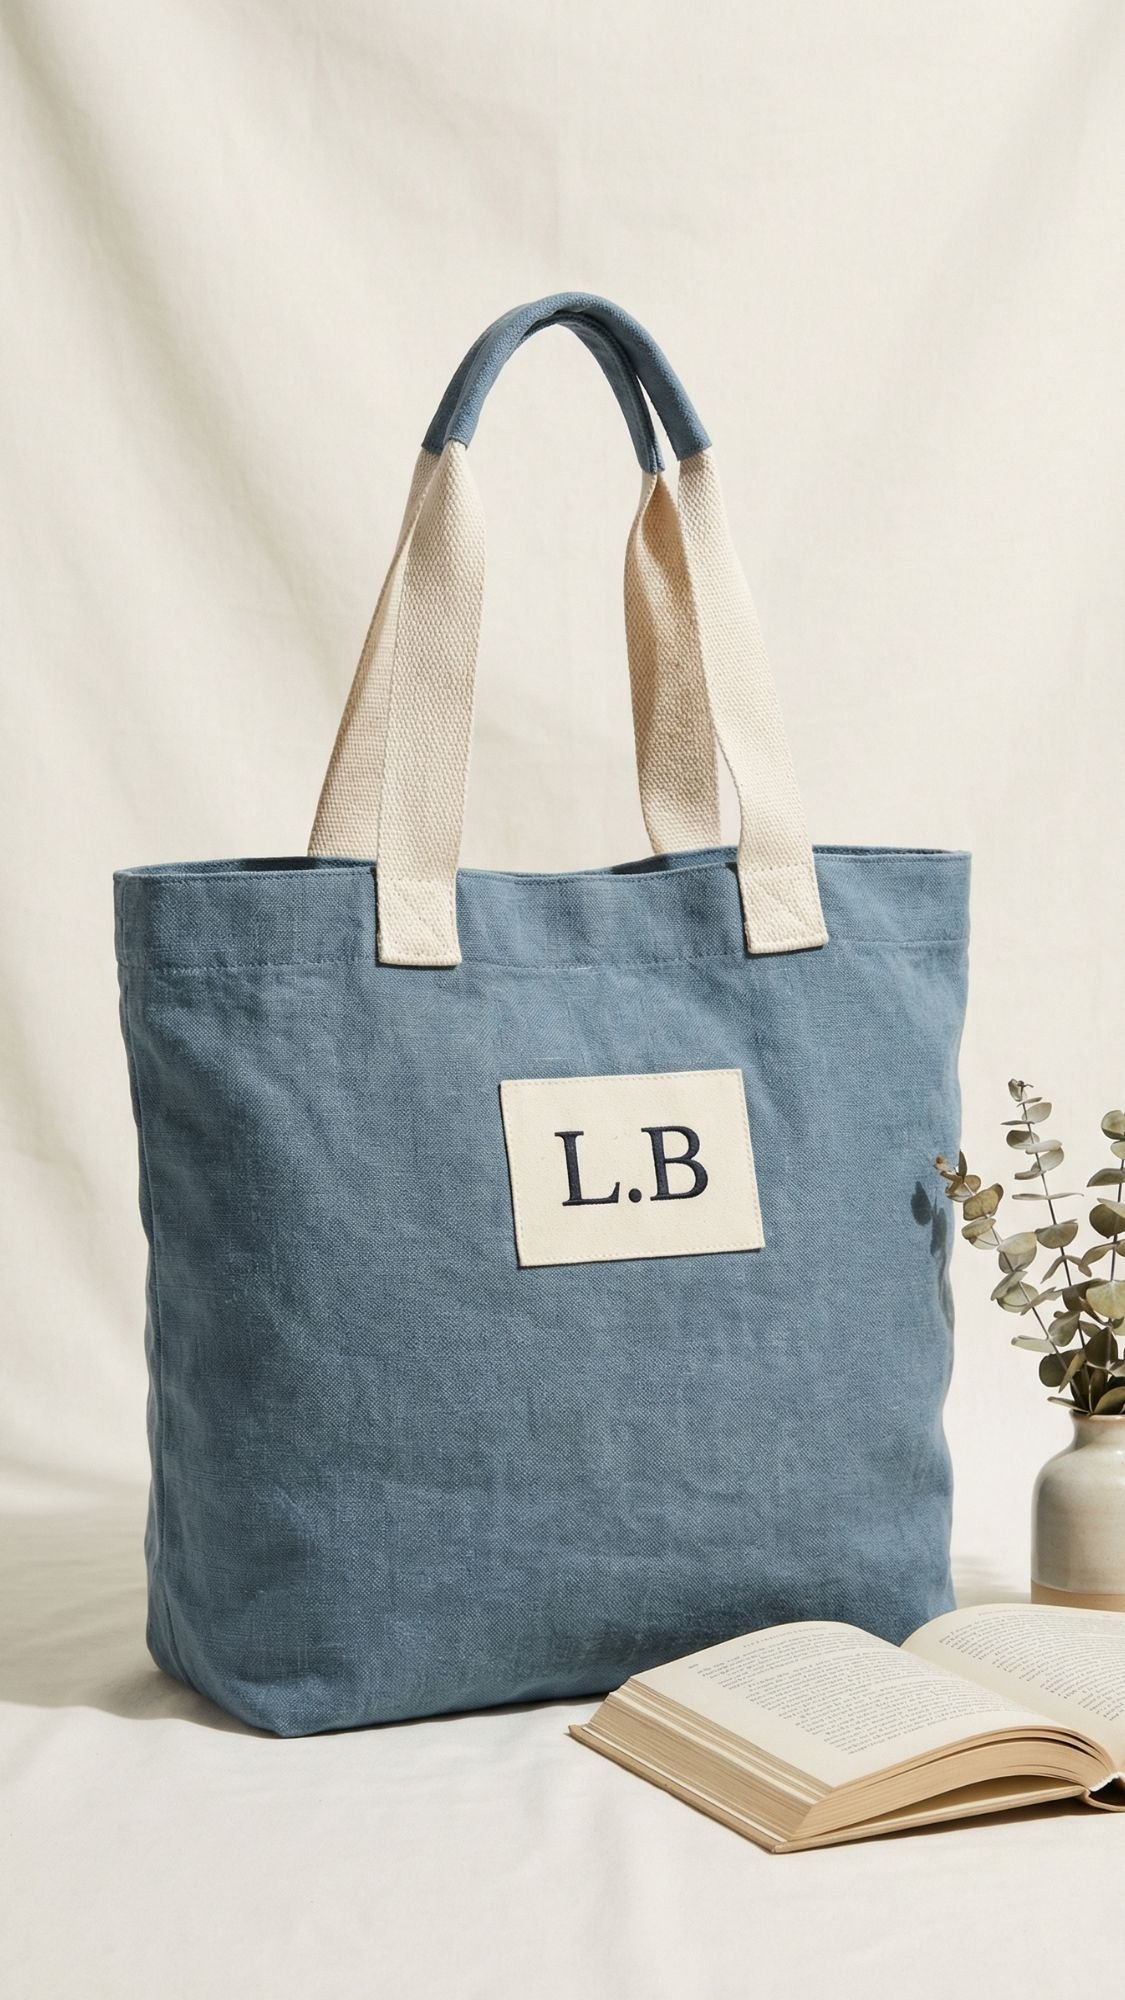
26) Fabric Tote Bag: The All-Year Errand Hero
A tote bag is one of the most-used handmade gifts you can make because it solves a daily need. Grocery runs, library trips, gym days, farmers markets, “I need to carry three random things” moments. Your best friend will actually grab this on autopilot, especially if you make it sturdy and add one or two details that feel intentional, like a pocket or reinforced straps.
Why They’ll Use It All Year
- It replaces flimsy bags and becomes their go-to errand tote.
- It works year-round, in every season, for every kind of day.
- It looks boutique if the straps and seams are reinforced properly.
Materials
- Canvas, denim, or washed linen (sturdy fabric works best)
- Webbing for straps, or self-made fabric straps
- Thread (heavy-duty thread is worth it here)
- Scissors or rotary cutter
- Ruler and fabric marker
- Sewing machine
- Optional: interfacing for extra structure
- Optional: pocket fabric
- Optional: magnetic snap or button closure
How To Make It (Simple Steps)
- Cut two large rectangles for the body. A great basic size is about 16 x 18 inches.
- Sew the side seams and bottom seam, then box the corners for depth.
- Add a pocket to one side before you close the bag, it’s easier.
- Hem the top edge cleanly, or add a facing for a more polished finish.
- Attach straps with reinforced stitching, think box stitch with an X.
Pro Tips (So It Survives Real Life)
- Reinforce straps. Straps are where tote bags fail. I double stitch and add a box-X stitch.
- Use webbing for strength if your best friend carries heavy stuff.
- Press seams as you go. It makes the tote look crisp and professional.
- Add a flat bottom, boxed corners make the bag stand up and hold more.
Personalization Ideas
- Add a monogram patch centered on the front, keep it clean and subtle.
- Use a palette that feels current:
- Patina Blue tote with Cloud Dancer pocket lining
- Natural washed linen tote with Cool Blue label
- Plum Noir tote with a Persimmon accent strap
- Add a key clip inside so keys don’t sink to the bottom.
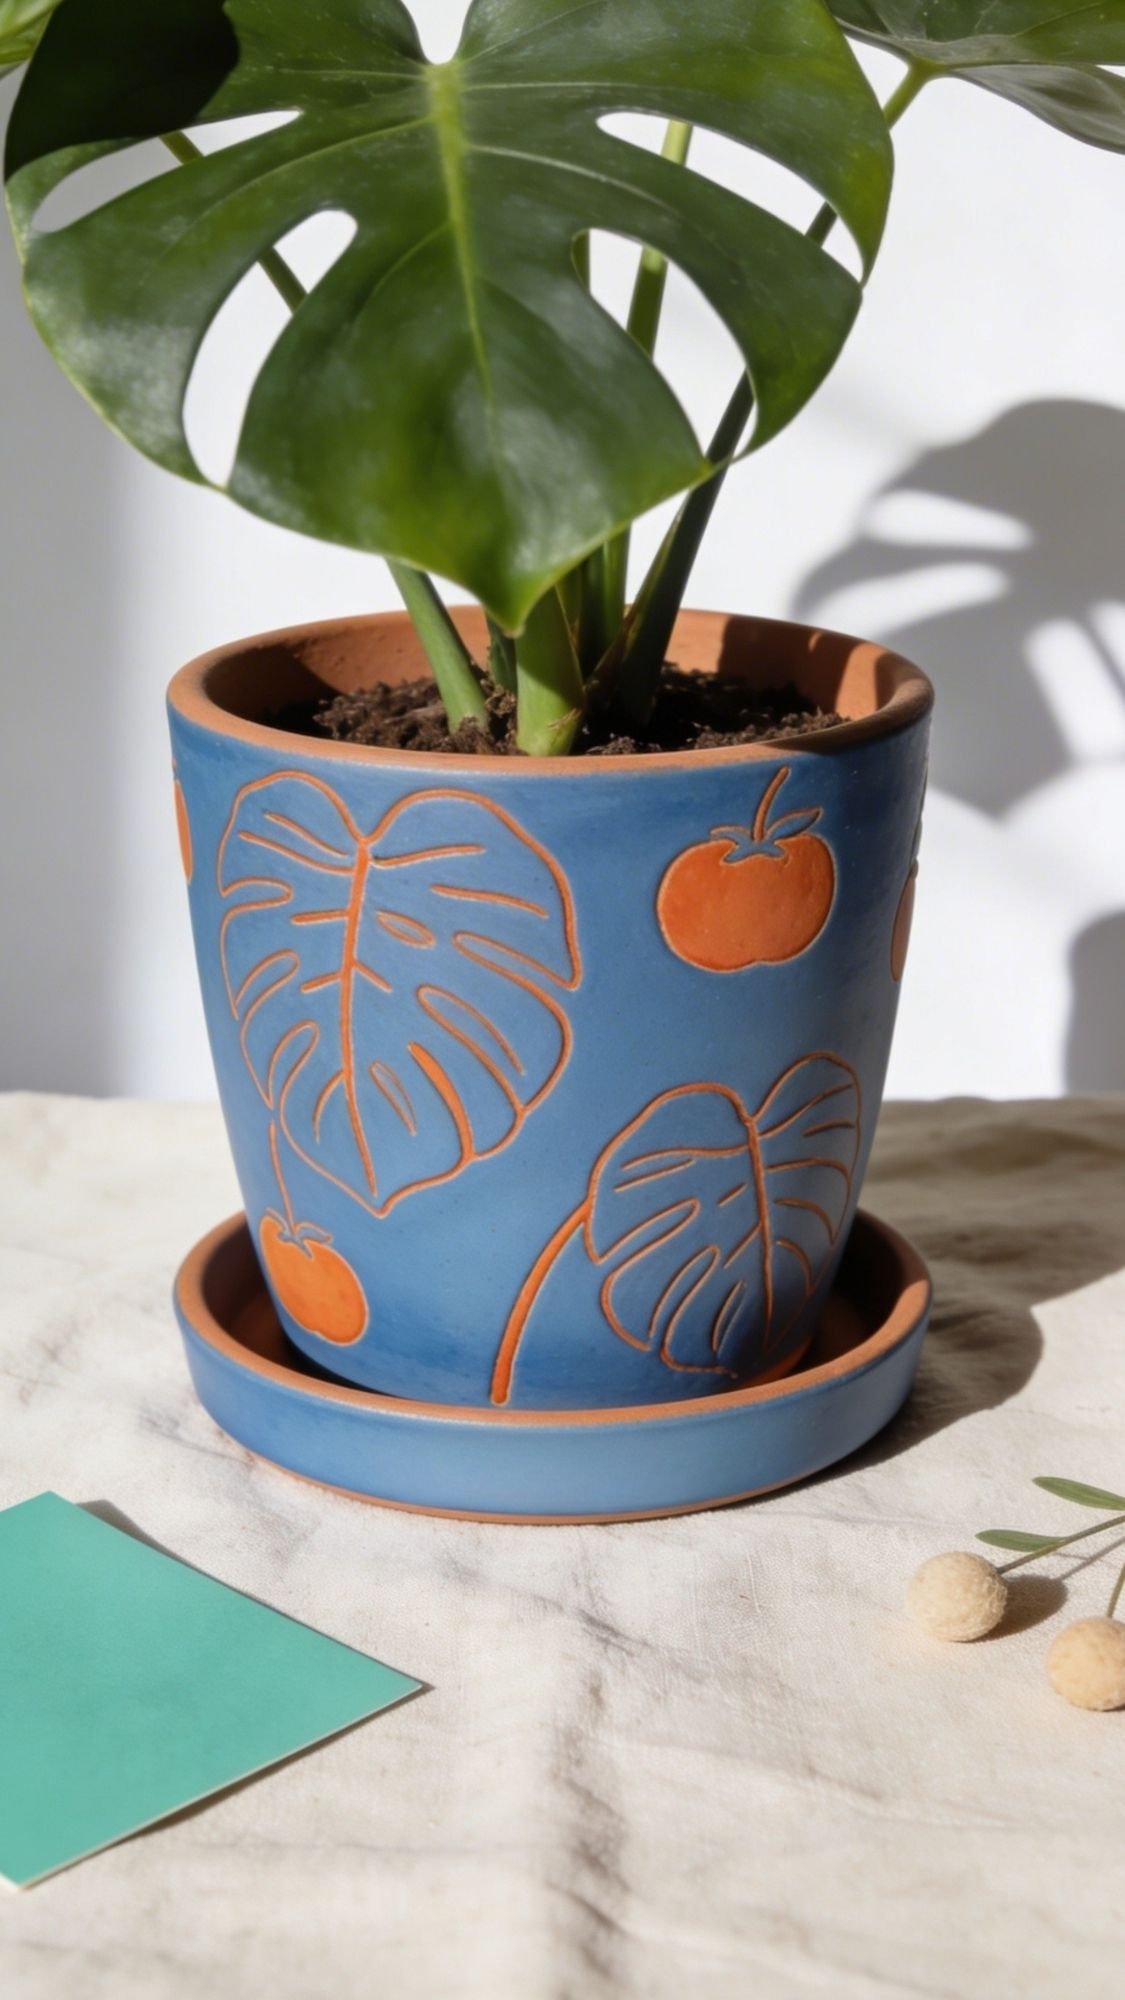
27) Hand-Painted Plant Pot + Drainage Tray: Cute Decor That Gets Used
Plant people always need another pot. Even when they say they don’t. Even when their windowsill already looks like a jungle. A hand-painted plant pot feels personal, looks like decor, and gets used all year because plants don’t take seasons off. The real difference between “DIY pot” and “this looks like a boutique find” comes down to paint choice and sealing. That’s it.
Why They’ll Use It All Year
- It upgrades their plant shelf instantly.
- It’s functional decor. The best kind.
- It makes plant care easier when you add a proper drainage tray.
Materials
- Terracotta pot (clean and dry)
- Drainage tray or saucer (matching size)
- Acrylic paint (multi-surface works best)
- Paint brushes (one flat, one detail)
- Painter’s tape (for crisp lines)
- Sandpaper (optional for smoothing)
- Sealer (water-based varnish or outdoor-rated clear sealer)
- Optional: primer made for terracotta
- Optional: felt pads for the tray base
How To Make It (Simple Steps)
- Wipe the pot clean, remove dust, let it dry fully.
- Tape off your design if you want clean lines, stripes, or geometric shapes.
- Paint thin coats, letting each coat dry before the next.
- Remove tape carefully once paint feels set.
- Seal the pot, including the outside and the inside rim where water splashes.
- Seal the tray too, then let everything cure fully before planting.
Pro Tips (So Paint Doesn’t Chip And Break Your Heart)
- Paint thin coats. Thick paint chips faster.
- Seal the inside rim. People skip this and then wonder why it looks rough in a month.
- Let the sealer cure. Dry to the touch isn’t the same as “ready for wet soil.”
- If you want extra durability, prime first. Terracotta is thirsty and can soak up paint unevenly.
Personalization Ideas
- Match their decor style:
- Modern: Cool Blue base with thin brass line accents
- Boho: Patina tones with textured brush strokes
- Glam: Plum Noir pot with a Persimmon detail stripe
- Add their plant’s name on the tray in small, clean lettering.
- Paint a tiny symbol on the back, like a heart or a star, something subtle.
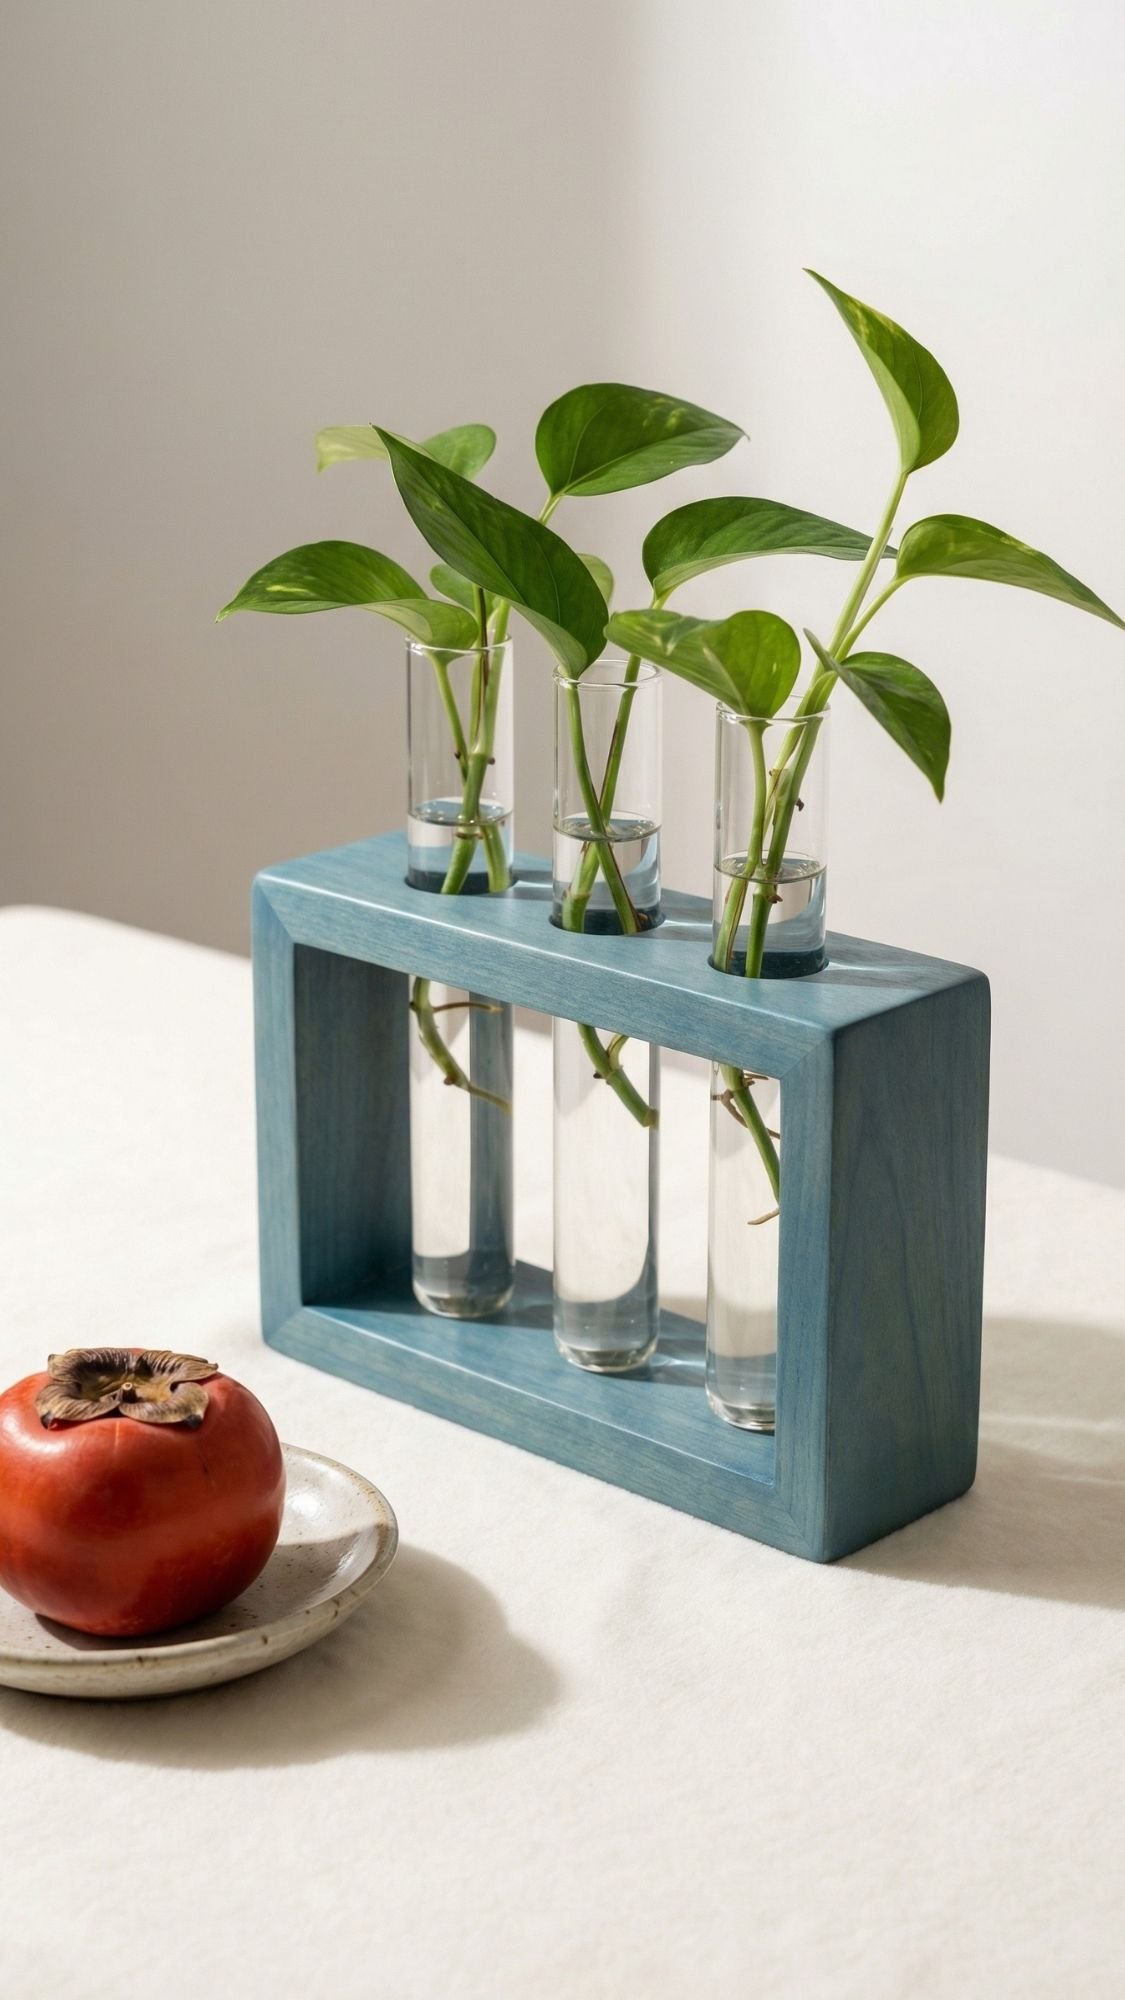
28) Mini Propagation Station: Pretty, Useful, And Kind Of Addicting To Watch
If your best friend loves plants, they probably already propagate cuttings in random jars. A propagation station takes that habit and makes it look intentional, like a little science display. It’s functional decor, it’s reusable forever, and it feels high-end when you finish the wood properly and keep the design clean. Also, watching roots grow is weirdly satisfying. Why are we like this?
Why They’ll Use It All Year
- They can propagate cuttings year-round, indoors.
- It doubles as decor, especially on a windowsill or desk.
- It encourages them to actually keep plant cuttings alive instead of forgetting them in a mug.
Materials
- Wood base (about 1 inch thick, 2.5 to 3 inches wide, 6 to 10 inches long)
- Test tubes or small propagation tubes
- Drill + drill bit sized to your tubes (measure first)
- Sandpaper (120, 220, 320 grit)
- Finish: hardwax oil, wipe-on poly, or clear satin topcoat
- Pencil and ruler
- Optional: wood stain
- Optional: engraving tool or wood burner for initials
- Optional: felt pads for the bottom
How To Make It (Simple Steps)
- Measure the tube diameter and pick a drill bit slightly larger for a snug fit.
- Mark evenly spaced holes on the wood base.
- Drill straight down, keep depth consistent.
- Sand everything smooth, including edges.
- Apply finish, let dry, then add a second coat if needed.
- Insert tubes, add water, then add cuttings.
Pro Tips (So It Looks Clean And Doesn’t Crack)
- Test tube fit matters. Too tight can crack glass, too loose looks sloppy.
- Sand the edges until they feel silky. Sharp corners ruin the “boutique” vibe.
- Use a satin finish. It looks modern and hides fingerprints.
- If you stain the wood, let it dry completely before sealing. Trapped moisture causes weird tacky spots.
Personalization Ideas
- Engrave initials on the back edge so it’s subtle.
- Match their decor palette:
- Modern: natural wood with Cloud Dancer styling
- Moody: dark stain with Plum Noir accents
- Fresh: Patina Blue stain vibe with Cool Blue props in photos
- Add a tiny label card that says “Root Club” or their plant name, but keep it minimal.
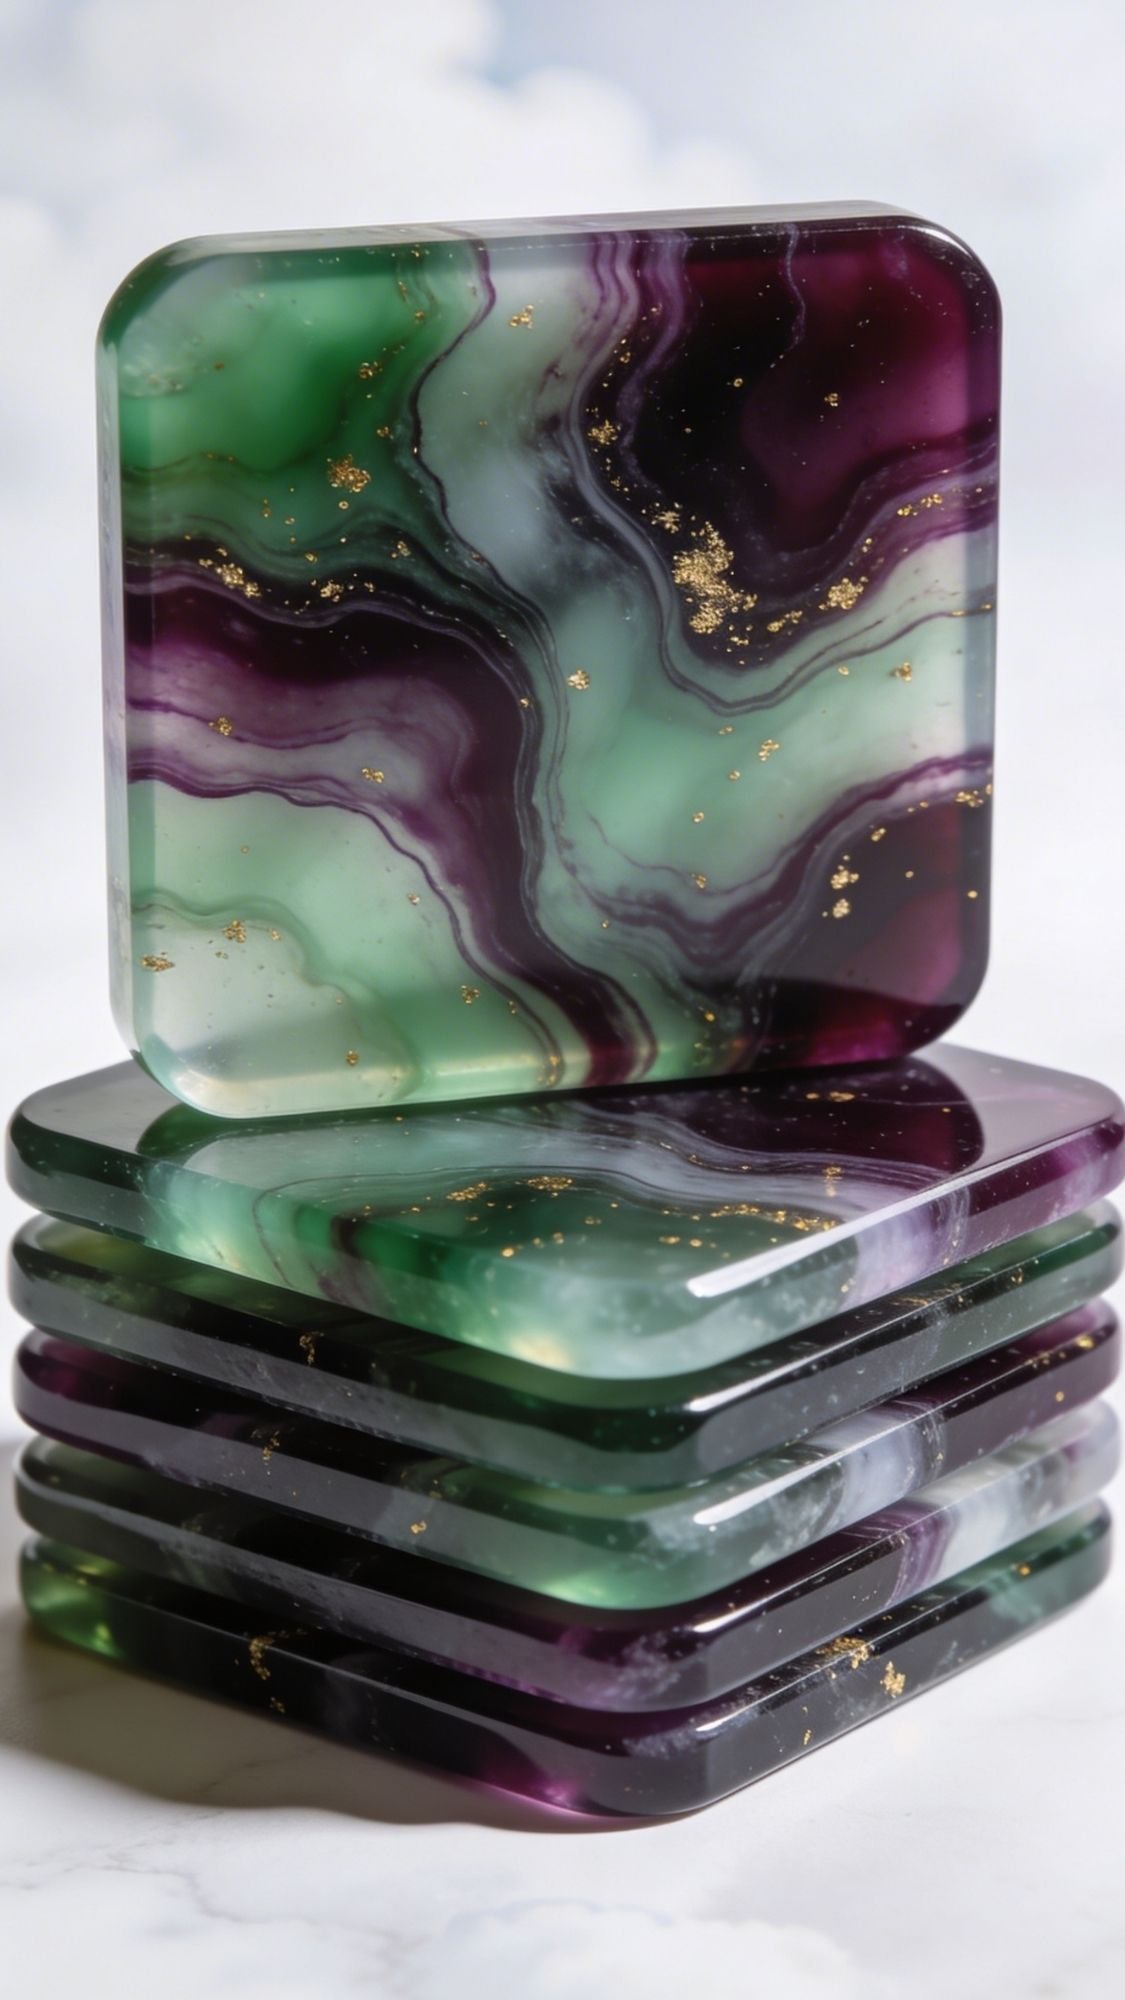
29) Resin Coaster Set: When You Want “Luxury Gift” Energy
This is the “wow” gift. Resin coasters look expensive, feel heavy in a good way, and your best friend will use them constantly because coasters are always in rotation. That said, resin can be dramatic. Bubbles, sticky spots, weird soft cures, the whole experience can feel like it has opinions. The trick is controlling temperature, mixing correctly, and not rushing the cure.
Why They’ll Use It All Year
- Coasters get used daily, hot drinks, cold drinks, everything.
- Resin holds up well when it cures properly.
- The finish looks boutique and high-end with minimal design.
Materials
- Epoxy resin kit (measure by volume or weight as directed, don’t freestyle it)
- Silicone coaster mold
- Mica powder or resin pigment (use resin-safe colorants)
- Mixing cups and stir sticks
- Gloves
- Heat gun or torch (heat gun is safer for beginners)
- Level surface
- Optional: gold foil flakes or metallic accents (use sparingly)
How To Make It (Simple Steps)
- Warm the resin bottles in a lukewarm water bath for 5 to 10 minutes to reduce bubbles.
- Measure resin and hardener exactly according to the kit instructions.
- Mix slowly but thoroughly, scrape sides and bottom, usually 3 to 5 minutes.
- Let it sit a minute, then pour into mold slowly.
- Add color swirls or accents, then pop bubbles gently with a heat gun.
- Cover to keep dust off, then let cure undisturbed.
Pro Tips (To Avoid The Classic Resin Problems)
- Mix longer, not faster. Fast mixing whips in air.
- Keep your room warm and steady. Cold temps cause thick resin and bubbles.
- Use a level surface or your coasters will cure with a tilt.
- If you add gold flakes, add them last and press lightly so they don’t float to the top like a raft.
Personalization Ideas
- Color stories that feel trendy and luxe:
- Jade + Plum Noir swirl with subtle gold flecks
- Cool Blue with Cloud Dancer negative space
- Persimmon accent line with a neutral base
- Add a matching holder or tie them with a ribbon strap like Gift #10.
- Include a tiny care card: no dishwasher, no soaking, wipe clean.
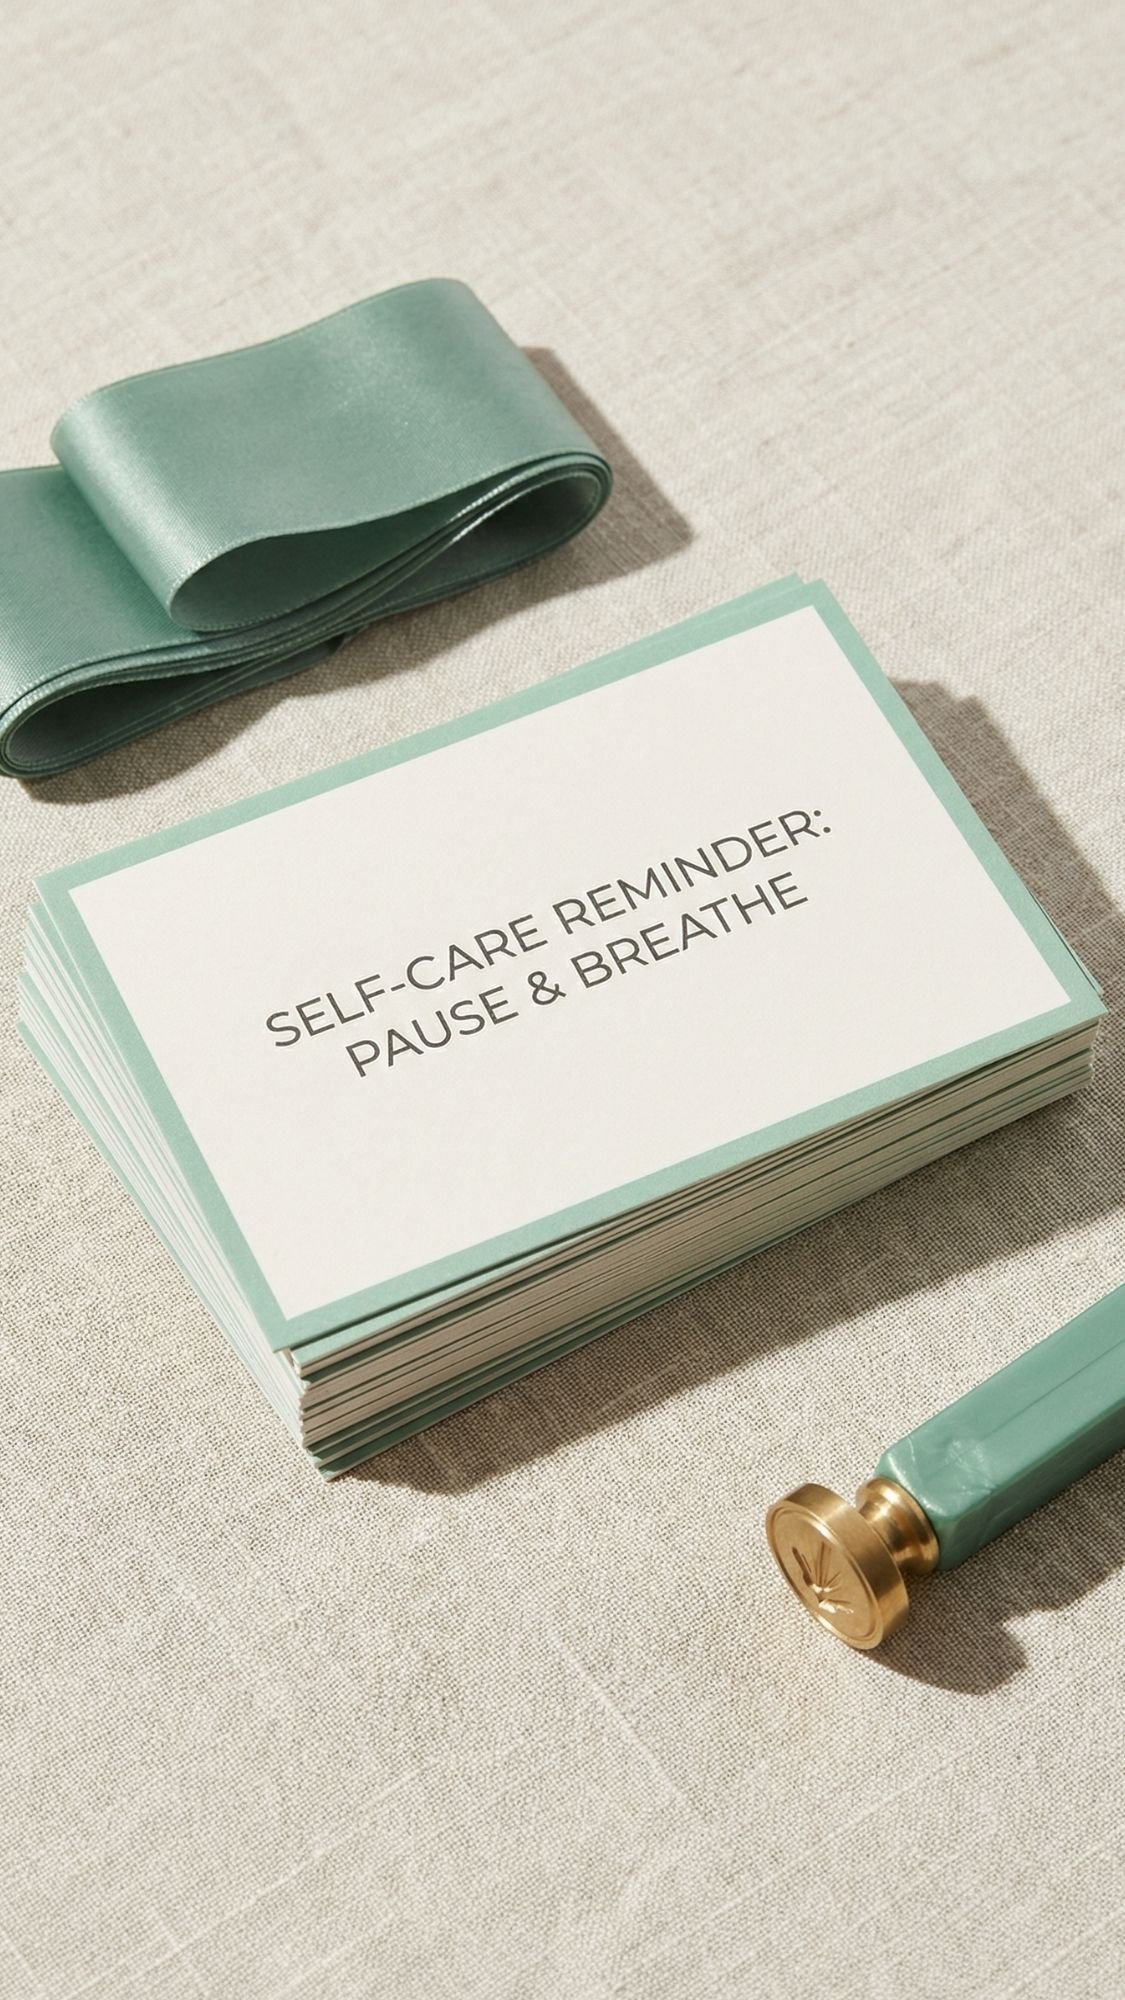
30) Custom Care Cards: Tiny Add-On, Massive Value, Makes Every Gift Last Longer
This is the sneaky “pro crafter” move that makes your handmade gifts feel truly premium. A care card doesn’t sound exciting, but it’s the difference between your gift being used for a year vs getting ruined in a week. People don’t always know how to wash vinyl, how long a candle should cure, or why paint needs time before getting wet. So you tell them. Politely. On a tiny cute card. Done.
Why They’ll Use It All Year
- It helps them keep the gift looking good, so they keep using it.
- It reduces follow-up texts like “uhh is this dishwasher safe?”
- It makes your gift feel like a legit product, not just a craft.
Materials
- Cardstock (thicker looks more luxe)
- Printer or a neat pen
- Corner rounder punch (optional but cute)
- Waterproof coating or laminate sheet (optional for durability)
- Small hole punch + string (optional to attach to gifts)
- Optional: QR code linking to your tutorial or a short video
How To Make It (Simple Steps)
- Pick a clean format, keep it short, no one wants a care novel.
- Create a mini template you can reuse across projects.
- Print, cut, round corners, and attach to the gift.
- Add a QR code if you have a video tutorial or quick “how to care” reel.
Pro Tips (So They Look High-End And Actually Get Read)
- Use simple headings: Care, Clean, Avoid, Refresh.
- Keep it to 4 to 6 bullet points max.
- Match the card palette to the gift. It feels cohesive and intentional.
- Add a line that feels friendly, like “Text me if it acts up,” so it feels personal.
Care Card Ideas Readers Can Copy
- For vinyl cups:
- Hand wash only, avoid soaking, wait 48 hours before first wash
- For fabric items:
- Cold wash, air dry, press on low heat
- For candles:
- Trim wick, burn 2 to 3 hours max, avoid drafts
- For clay or painted items:
- Wipe clean, avoid soaking, let cure fully before heavy use
Personalization Ideas
- Add your best friend’s name in tiny text.
- Add a little inside joke line at the bottom.
- Use a clean logo-style mark if you have one, super subtle.
31) Handmade Key Bowl: Wood Or Clay, Either Way It Saves Their Sanity
This is one of those gifts that feels small but changes a daily routine. A key bowl gives your best friend a “home base” for the stuff that always vanishes, keys, rings, earbuds, loose change, hair clips. And when you finish it right, it looks like a high-end catchall from a boutique, not a DIY project. That’s the goal.
You can go two routes here depending on what you like making. Clay feels modern and artsy, wood feels classic and polished. Both get used constantly.
Why They’ll Use It All Year
- It prevents the daily “where are my keys” spiral.
- It keeps counters and nightstands from getting cluttered.
- It looks like decor while doing real work.
Option A: Clay Key Bowl Materials
- Air-dry clay or oven-bake clay
- Bowl to shape it
- Sandpaper (220 to 400 grit)
- Paint or gilding wax (optional)
- Sealer (water-based varnish or clear spray sealer)
- Felt dots (optional)
Option B: Wood Key Bowl Materials
- Small wooden bowl blank or pre-turned bowl
- Sandpaper (120 to 320 grit)
- Wood stain (optional)
- Satin finish (hardwax oil or wipe-on poly)
- Soft cloth for buffing
How To Make It (Simple Steps)
Clay version:
- Roll clay evenly and form into a shallow bowl shape.
- Dry slowly, then sand smooth.
- Paint if you want, then seal inside and out.
Wood version:
- Sand until smooth, especially the rim.
- Stain if desired, let it dry fully.
- Apply a satin finish, let cure, then buff.
Pro Tips (So It Looks Luxe, Not Rough)
- Satin finish hides fingerprints better than gloss. Gloss shows every smudge.
- Seal the underside too. Moisture can sneak in from the bottom over time.
- Sand the rim extra. A smooth rim is what people touch constantly.
- If you use gold accents, do a thin rim line, not a full gold interior. Subtle looks expensive.
Personalization Ideas
- Add a tiny symbol inside the bowl, like a star or heart, very minimal.
- Match your colors to their space:
- Modern: Cool Blue bowl with Cloud Dancer styling
- Boho: natural texture with Washed Linen tones
- Glam: Plum Noir bowl with a thin Persimmon line

32) Car Organizer Caddy: Because Car Clutter Is A Lifestyle
This gift is for the best friend whose car is basically a second home. Receipts, lip balm, sunglasses, chargers, hand sanitizer, gum, random pens, that one hair clip that disappears for months. A small organizer caddy keeps the chaos contained, and it’s genuinely used all year because cars stay messy unless you give stuff a designated spot.
Also, it feels like a “grown-up” gift in the best way. Practical, not boring. That’s the sweet spot.
Why They’ll Use It All Year
- It stops essentials from rolling under seats into the abyss.
- It keeps the car looking cleaner with almost zero effort.
- It makes it easier to find stuff quickly, which reduces stress.
Materials
- Sturdy fabric: canvas, denim, or heavy cotton
- Interfacing or foam stabilizer (for structure)
- Thread (heavy-duty if possible)
- Elastic (for tight pockets)
- Scissors or rotary cutter
- Ruler and fabric marker
- Sewing machine
- Optional: snaps or straps for attaching to the console or seat
- Optional: wipeable lining for easy cleaning
How To Make It (Simple Steps)
- Decide where it will sit, center console, passenger seat, backseat pocket, trunk.
- Cut a base piece and side panels, then reinforce with interfacing.
- Sew pockets onto the inside walls:
- One tall pocket for a bottle
- One medium pocket for sanitizer
- One small pocket for lip balm or change
- Add elastic at pocket tops if you want a snug hold.
- Assemble the caddy, topstitch the seams, then add straps if needed.
Pro Tips (So It Holds Up In A Real Car)
- Use heavy-duty thread for straps and seams. Cars are rough on fabric.
- Add a wipeable lining. Spills happen, and crumbs are basically guaranteed.
- Reinforce corners, that’s where stress hits when it’s full.
- If it tips over, widen the base. A stable base matters more than fancy pockets.
Personalization Ideas
- Add a label patch like “Road Kit” or “Car Stuff,” small and clean.
- Color palette ideas:
- Modern: Plum Noir canvas with minimal label
- Fresh: Patina Blue with Cloud Dancer lining
- Pop: Persimmon label tab for contrast
- Add a small hook for keys or a mini trash bag loop.
33) Refillable “On-The-Go” Kit: Tiny Pouch, Big Daily Use
This gift is small but powerful. It’s basically a portable “life happens” kit, and your best friend will keep it in their bag, car, desk, or suitcase all year. The key is making it look curated, not like you dumped random mini items into a pouch and called it a day. When you label it cleanly and include a refill note, it feels premium and intentional.
Why They’ll Use It All Year
- It saves them in little everyday emergencies.
- It’s easy to toss into any bag without adding bulk.
- It’s refillable, so it stays useful long after gifting.
Materials
- Small pouch (linen zipper pouch is perfect, or a small cosmetic bag)
- Mini refill containers (lip balm tin, tiny pump bottle, mini jar)
- Labels (waterproof label paper or vinyl labels)
- Mini essentials, pick based on your friend:
- Lip balm
- Mini hand cream
- Bandaids
- Hair ties and bobby pins
- Mini sanitizer
- Stain wipe
- Breath mints or gum
- Optional: tiny card with refill instructions
How To Make It (Simple Steps)
- Choose a theme: purse kit, travel kit, desk kit, or car kit.
- Fill containers neatly and label everything clearly.
- Arrange items in the pouch so it looks organized, not crammed.
- Add a small refill note that says what to replace and when.
Pro Tips (So It Feels Luxe, Not Random)
- Label everything. Mystery liquids get tossed, labeled ones get used.
- Choose matching containers. Mixed packaging looks chaotic fast.
- Add one “unexpected but useful” item, like a stain wipe or blister bandage.
- Keep it light. Too many items makes it bulky and they won’t carry it.
Personalization Ideas
- Make it match their vibe:
- Minimal: Cloud Dancer labels with Cool Blue text
- Bold: Persimmon label accents with Jade containers
- Moody: Plum Noir labels with clean white text
- Add initials on the pouch.
- Add a tiny tag: “Refill me when I’m low :)” and yes, that little smile makes it feel friendly.
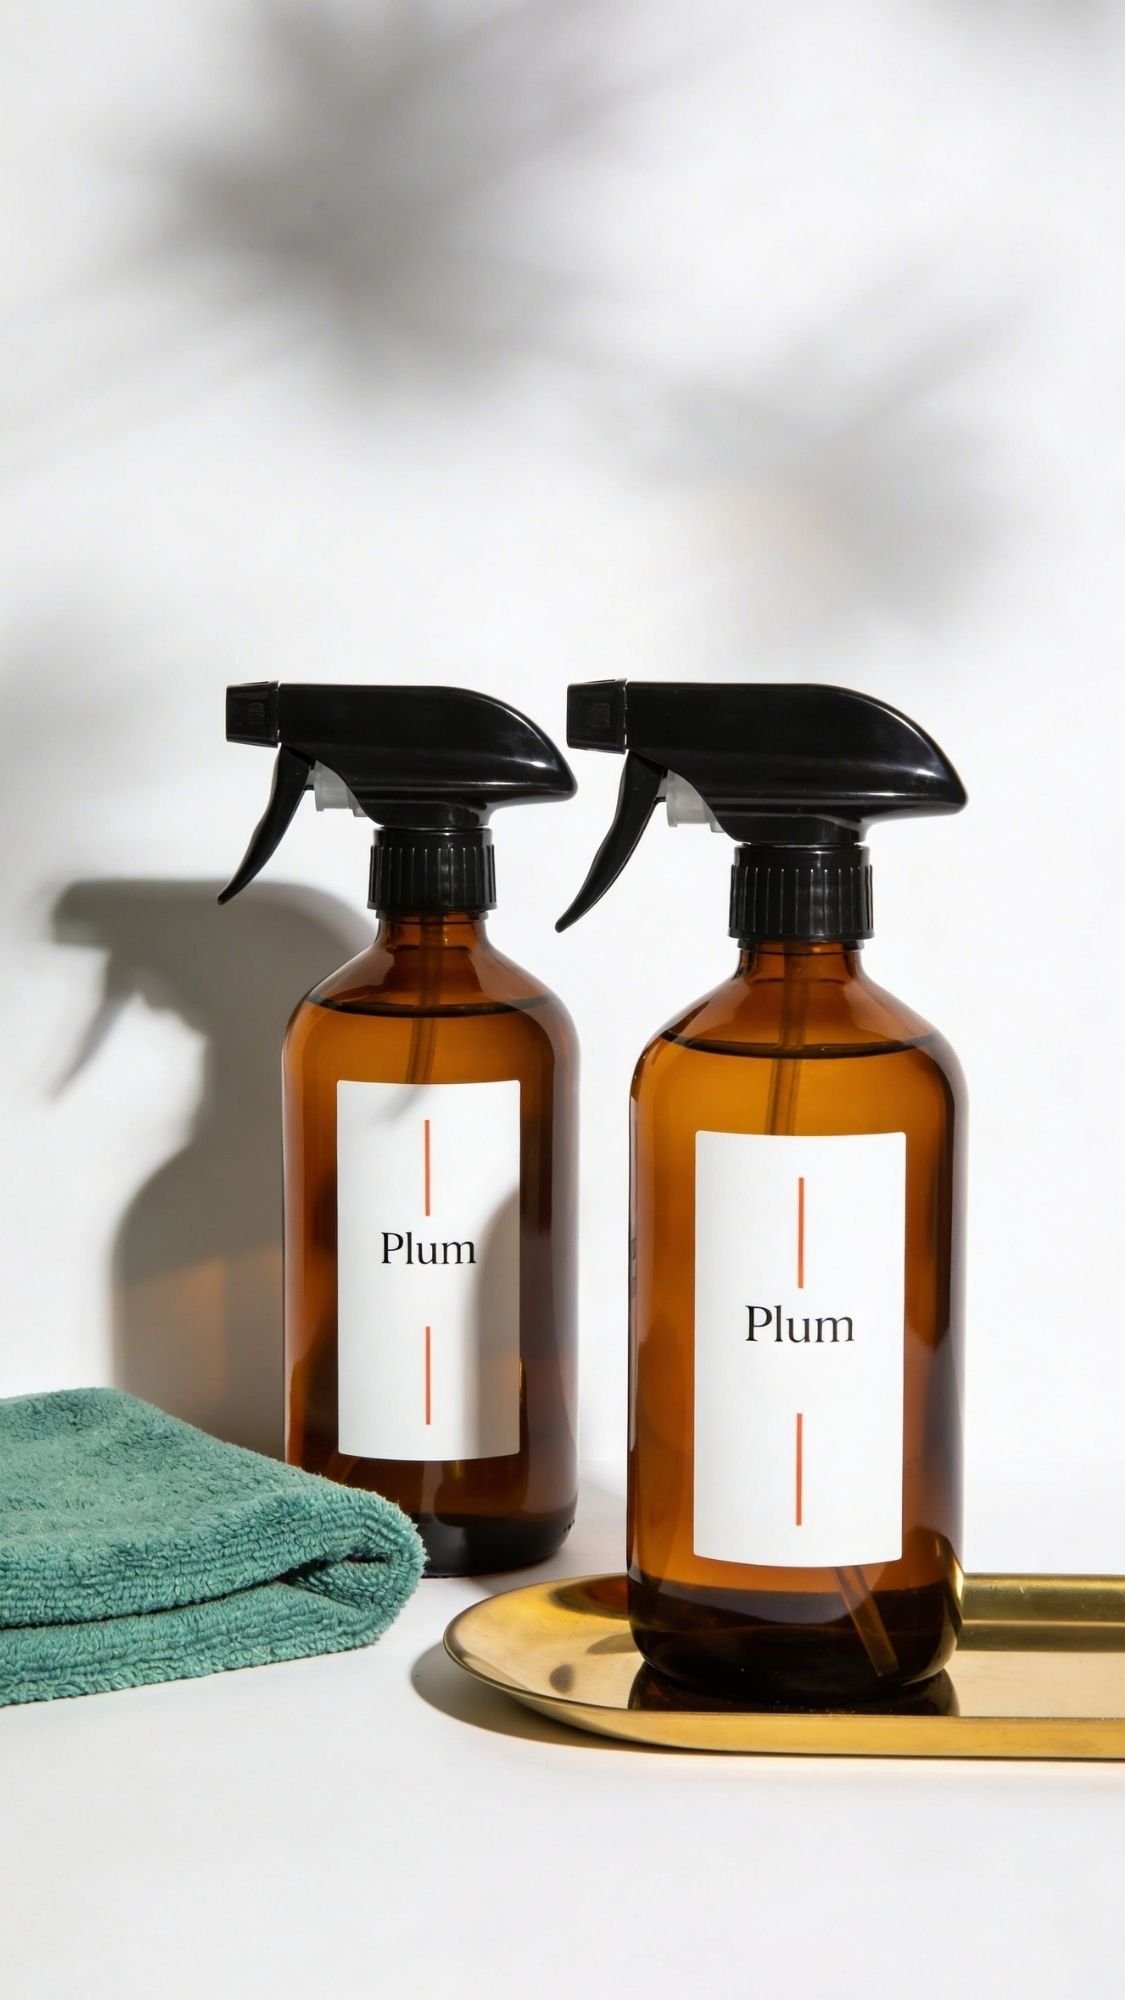
34) “Sunday Reset” Cleaning Spray Labels + Glass Bottles: The Aesthetic Adult Gift
This is for the best friend who loves an organized home, or the friend who wants an organized home but needs a little push. Pretty cleaning bottles make people more likely to actually clean. It’s annoying, but it’s true. When the bottles look cute, they stop hiding them under the sink and start leaving them out, which means they get used. That’s the whole hack.
Also, you’re not really gifting “cleaning supplies.” You’re gifting a system. And yes, it feels way more premium than it sounds.
Why They’ll Use It All Year
- They’ll grab it weekly, especially if it sits out and looks nice.
- It makes routines easier. No more mystery spray bottles.
- Glass bottles last forever. They refill instead of rebuying.
Materials
- Amber glass spray bottles (16 oz looks great)
- Waterproof label paper or vinyl labels
- Printer or label maker
- Ruler or label alignment tool (optional)
- Optional: matching funnel for refills
- Optional: small recipe card with cleaner formulas
How To Make It (Simple Steps)
- Choose 2 to 3 bottle types:
- All-purpose
- Glass and mirror
- Bathroom
- Design labels with clean names, large readable text.
- Apply labels straight, press firmly, smooth out edges.
- Add a simple recipe card, or keep it “fill with your favorite cleaner.”
- Bundle bottles with a microfiber cloth tied with ribbon.
Pro Tips (So The Labels Don’t Peel Or Look Crooked)
- Wipe bottles with alcohol first. Oil from hands can cause label edges to lift.
- Apply labels slowly from center outward to avoid bubbles.
- Use waterproof label stock. Kitchen steam and bathroom humidity will ruin cheap paper.
- Keep label designs minimal. Too much text looks cluttered and is harder to read from a distance.
Personalization Ideas
- Match their style:
- Modern: Cloud Dancer labels, Cool Blue text
- Moody: Plum Noir labels, white text, thin Persimmon accent line
- Fresh: Patina Blue label accents with a simple icon
- Add a tiny “Sunday Reset” tag tied around the bottle neck.
- Include one “refill reminder” card so they keep the system going.
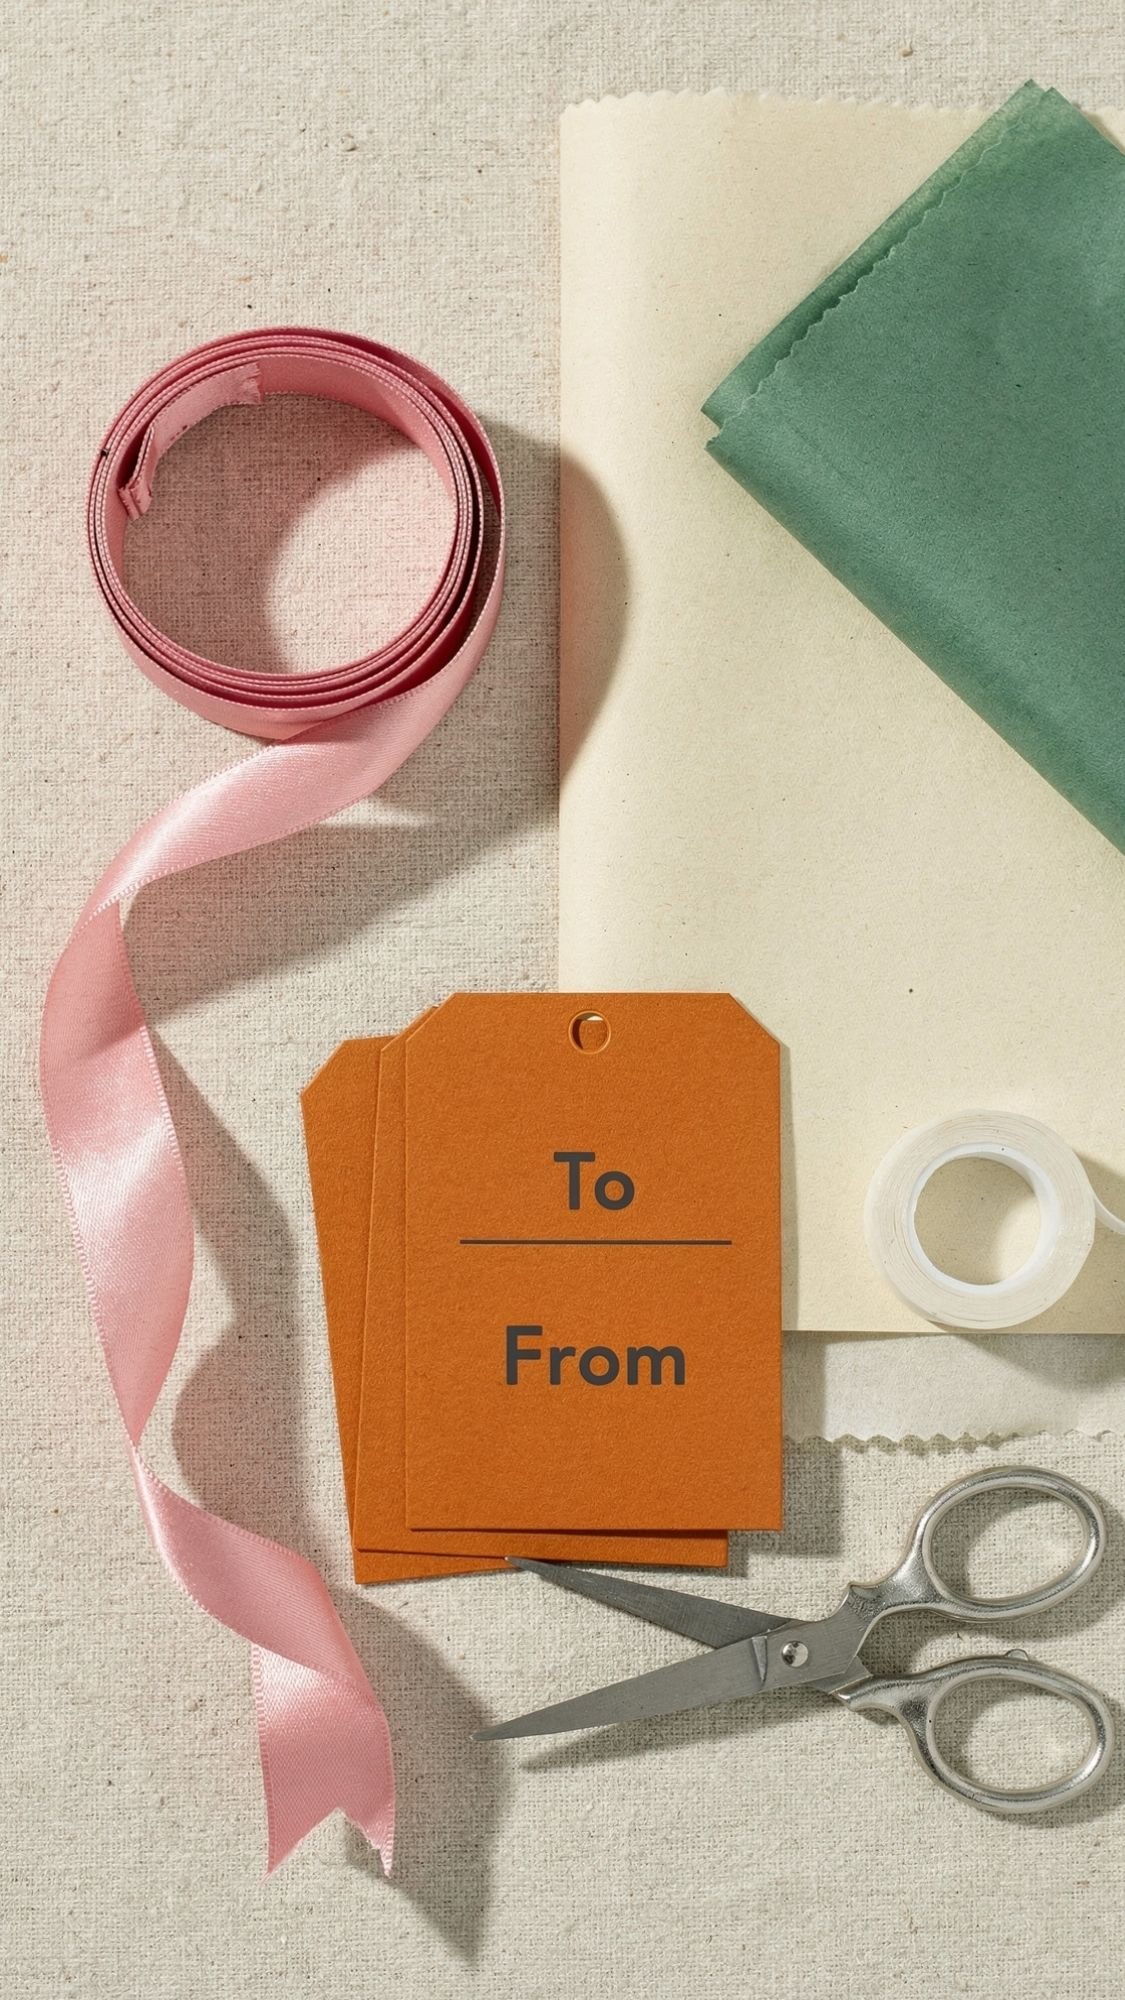
35) Coquette “Bowcore” Gift Wrap Upgrade Kit: Because Presentation Is Half The Gift
Okay, this one is sneaky. It’s not a “thing” your best friend uses like a tote bag, but it’s a kit they’ll reach for all year, birthdays, holidays, thank-you gifts, last-minute “I forgot” moments. The trick is making it feel curated and luxe, not like you threw random ribbon into a bag.
And yes, bowcore is still going strong. People love a pretty bow. People will always love a pretty bow. We’re simple creatures.
Why They’ll Use It All Year
- It makes every gift they give look expensive.
- They’ll reuse ribbon, tags, and wrap constantly.
- It turns “last-minute wrapping” into “wow you’re so put together.”
Materials
- 2 to 3 ribbon types:
- Satin ribbon (classic, luxe)
- Velvet ribbon (glam)
- Sheer ribbon (soft and airy)
- 2 wrapping paper sheets or rolls (cohesive palette)
- Tissue paper (Wasabi or Cloud Dancer looks fresh)
- Gift tags (blank or printable)
- Double-sided tape (this is the pro move)
- Mini scissors
- Optional: wax seal stickers (easy and cute)
- Optional: small pouch or box to store everything
How To Make It (Simple Steps)
- Pick one color story and stick to it.
- Cut ribbon lengths and roll them neatly onto small cards.
- Add a tag set and a small tape strip card (so tape doesn’t vanish).
- Include a simple “how to tie the bow” card.
- Pack it neatly in a pouch or small gift box.
Pro Tips (So The Bows Don’t Look Sad)
- Wired ribbon saves beginners. It holds shape and looks full.
- Use double-sided tape for clean edges, no visible tape, no peeling corners.
- Keep tag fonts simple and readable. Tiny script looks cute until you’re squinting.
- If you want luxury vibes, choose fewer items but better quality.
Personalization Ideas
- Create 3 style versions:
- Modern: Cloud Dancer + Cool Blue + thin brass tag accents
- Boho: Washed Linen tones + natural twine + minimal kraft tags
- Glam: Plum Noir + Persimmon + velvet ribbon + gold wax seal stickers
- Add a mini “gift wrapping cheat sheet” with:
- Bow types
- How much ribbon per box size
- Quick fixes for wrinkled paper
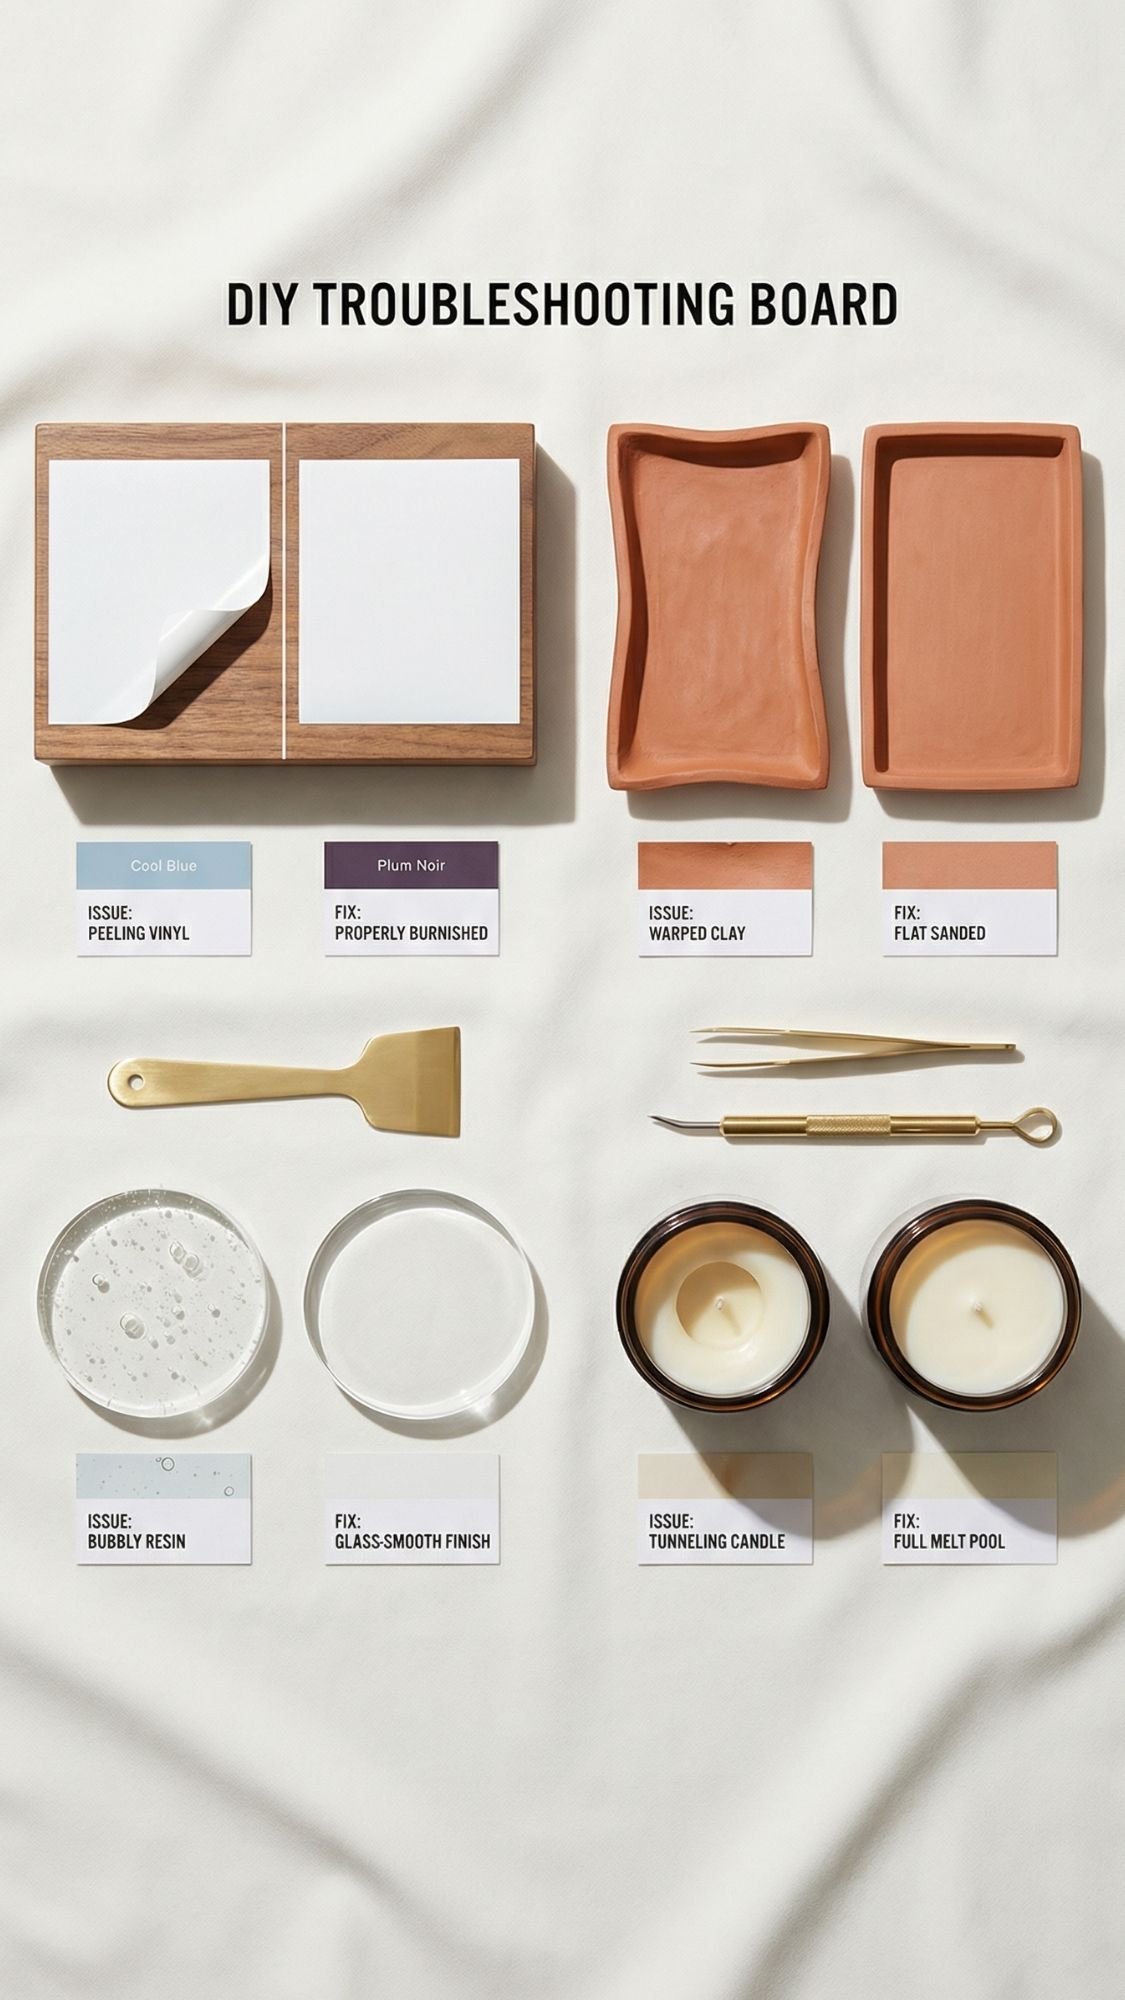
Because DIY Is Fun Until It Isn’t
If you’ve ever stared at a peeling decal like, “But I followed the steps??”, welcome. DIY projects don’t fail because you’re bad at crafting. They fail because materials have opinions and humidity likes to humble us. Let’s fix the most common issues fast.
1) Paint Peels Or Chips
- Symptom: Paint flakes off when touched or after a few days.
- Likely cause: You painted on a dusty surface, you used thick coats, or you skipped sealer.
- Fix: Lightly sand the peeling area, wipe clean, repaint in thin coats, then seal.
- Prevention next time: Clean first, paint thin coats, seal after full dry time, let the sealer cure before use.
2) Vinyl Decal Lifts At The Edges
- Symptom: Edges curl up, especially after washing.
- Likely cause: Oils on the surface, not enough burnishing, or you washed too soon.
- Fix: Warm the vinyl slightly with a hair dryer, press down firmly, then burnish hard. If it keeps lifting, replace the decal after cleaning with alcohol.
- Prevention next time: Wipe with 90%+ isopropyl alcohol, apply slowly, burnish firmly, wait 24 to 48 hours before washing.
3) Vinyl Bubbles Under The Decal
- Symptom: Tiny bubbles show up under vinyl after application.
- Likely cause: You trapped air during application or stretched the vinyl on a curve.
- Fix: Prick the bubble with a pin, then burnish from the center outward until flat.
- Prevention next time: Apply from the middle out, go slower on curves, use steady pressure with a scraper.
4) Clay Tray Warps While Drying
- Symptom: Tray edges curl up or the base becomes uneven.
- Likely cause: Uneven thickness or drying too fast on one side.
- Fix: Flip the piece during drying, gently weigh it down with parchment and a flat book if needed, sand flat once fully dry, then seal.
- Prevention next time: Roll clay evenly using guides, rotate during drying, dry away from direct heat or sun.
5) Resin Has Bubbles Or Pits
- Symptom: Tiny bubbles, pinholes, or crater-looking spots on the surface.
- Likely cause: Cold resin, mixing too fast, or pouring from too high.
- Fix: Use a heat gun briefly to pop bubbles, then cover and let cure on a level surface. If it’s already cured with pits, sand and add a thin clear top coat.
- Prevention next time: Warm resin bottles in a lukewarm water bath, mix slowly, pour low and steady, cover to keep dust off.
6) Resin Stays Sticky Or Soft
- Symptom: It never fully hardens or it feels tacky days later.
- Likely cause: Incorrect measuring, under-mixing, or a cold curing environment.
- Fix: If it’s slightly tacky, move it to a warmer area for 24 to 48 hours. If it’s truly uncured, scrape it out, clean the mold, and remake with exact measurements.
- Prevention next time: Measure exactly as the kit directs, mix thoroughly while scraping sides and bottom, keep room temp steady.
7) Candle Tunnels
- Symptom: Wax melts in the center only, leaving a tall ring around the edges.
- Likely cause: Wick too small, first burn too short, or drafty air.
- Fix: Wrap foil around the top edge (like a little collar), then burn until the melt pool reaches the edges. Trim wick properly and avoid drafts.
- Prevention next time: Match wick size to jar diameter, instruct a long first burn, keep candle away from fans and vents.
8) Pouch Zipper Waves Or Looks Wavy
- Symptom: The zipper area ripples or won’t lay flat.
- Likely cause: You stretched fabric while sewing or skipped pressing and topstitching.
- Fix: Press the seam flat, then topstitch slowly. If it’s severe, unpick and resew with clips and steady feed.
- Prevention next time: Use interfacing near the zipper, clip instead of tugging, press after every seam, sew slowly.
9) Weak Glue Bond On Wood Or Fabric
- Symptom: Pieces pop apart, especially at corners or high-stress spots.
- Likely cause: Dusty surface, wrong glue for the material, not enough clamp time.
- Fix: Remove old glue, sand lightly, clean, then re-glue with the right adhesive and clamp fully.
- Prevention next time: Dry-fit first, clean surfaces, use the correct glue, clamp longer than you think you need.
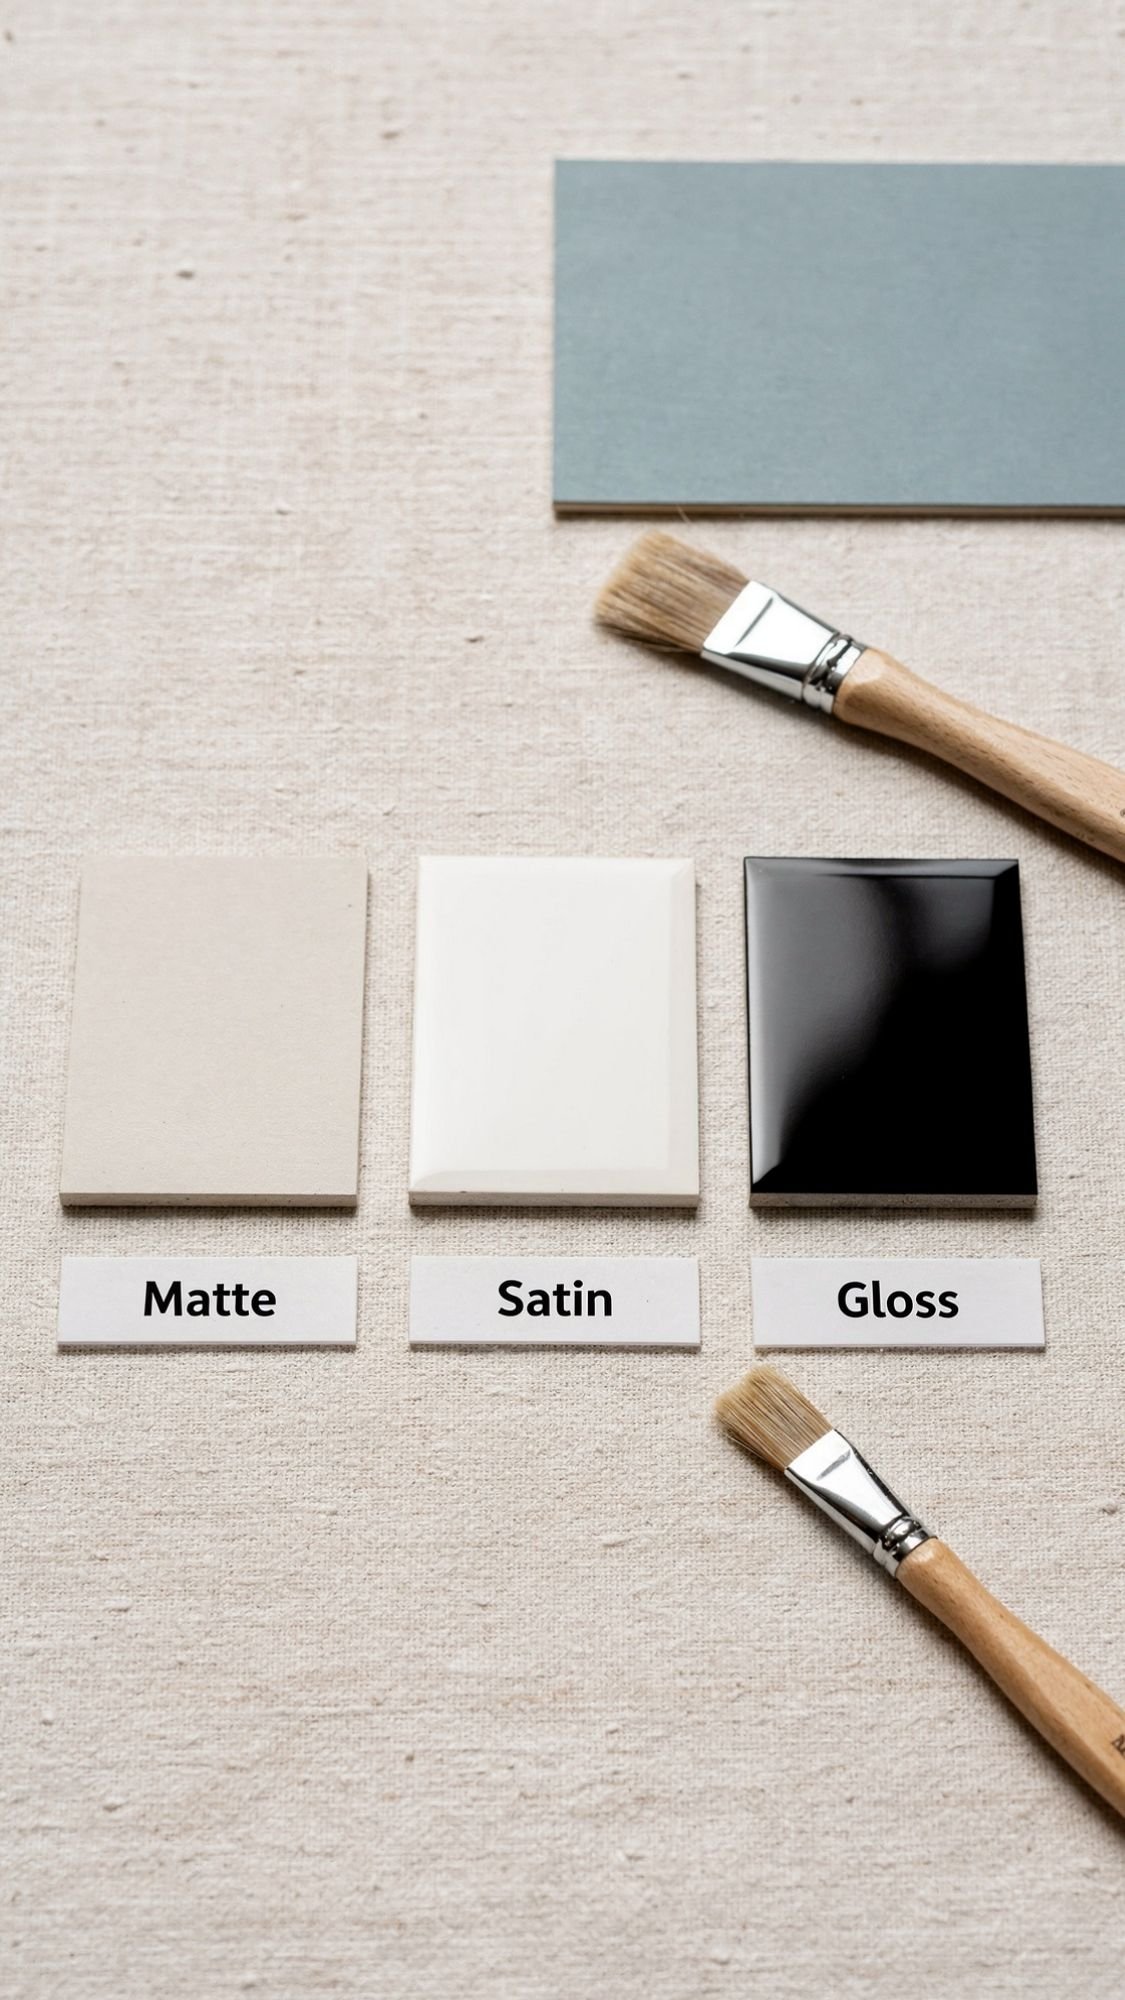
The Part That Makes Your Gift Look Expensive In A Year
This is the part most people rush, then they act confused when the gift looks tired after a month. Finishing is what makes handmade gifts hold up to real life. Water, friction, hand oils, heat, constant use, all of that shows up fast. So we’re going to finish like we’re selling these in a boutique, not handing them out at a school fundraiser.
Dry Time vs Cure Time (Plain Language, No Weird Jargon)
- Dry time means it feels dry to the touch. You can lightly handle it.
- Cure time means it fully hardens and holds up to real use. Washing, heat, friction, and moisture won’t mess it up as easily.
If you only remember one thing, remember this: a project can feel dry and still be fragile.
What I Use For A “Professional” Finish
Use the right finish for the surface, then let it cure fully.
For clay trays, painted pots, and key bowls
- Best finishes:
- Water-based varnish for indoor pieces
- Clear spray sealer for quick, even coverage
- Pro moves:
- Seal the top and the underside.
- Seal edges and rims, those get the most wear.
- Typical timing:
- Dry: a few hours
- Cure: 24 to 72 hours depending on product and humidity
For wood (phone stand, propagation base, wood bowl)
- Best finishes:
- Hardwax oil for a smooth, modern feel
- Wipe-on poly for durability
- Pro moves:
- Sand up to 220 or 320 grit for a silky finish.
- Apply thin coats and buff between coats.
- Typical timing:
- Dry: overnight
- Cure: 3 to 7 days for full toughness
For vinyl decals on glass
- Best “finish” is actually time:
- Burnish well, then let it sit.
- Typical timing:
- Dry: immediately
- Cure: 24 to 48 hours before washing
For fabric gifts (totes, pouches, brush rolls)
- Finishing is about clean seams and strength:
- Topstitching
- Reinforcing stress points
- Pressing seams
- Typical timing:
- Use: immediately
- Wash: after 24 hours, or once stitches settle
For candles
- Candles need cure time for scent throw:
- Cure: 7 to 14 days for most soy wax candles
- Also:
- Trim wick to about a quarter inch before each burn
- First burn should reach full melt pool
Care Instructions Readers Can Follow (And You Can Put On A Care Card)
Clay and painted items
- Wipe clean with a damp cloth
- Avoid soaking or leaving in standing water
- If it looks dull after months, add a fresh thin seal coat
Wood items
- Wipe with a soft cloth
- Avoid soaking
- Refresh with a tiny bit of hardwax oil if it looks dry
Vinyl cups
- Hand wash
- Avoid soaking
- Avoid the dishwasher if you want the decal to last
Fabric items
- Cold wash or gentle wash
- Air dry when possible
- Press lightly to reshape
Candles
- Trim wick every time
- Burn 2 to 3 hours max per session
- Keep away from drafts
How Long It Lasts, And How To Refresh It
- Vinyl cups: months to years with hand washing, replace decal if edges lift.
- Sealed clay: lasts a long time if kept dry, refresh with a new seal coat when it looks dull.
- Wood: lasts years, refresh with oil or buffing.
- Fabric: lasts years, repair seams if stress points loosen.
- Candles: lasts weeks to months depending on burn time, keep wick trimmed to avoid soot.
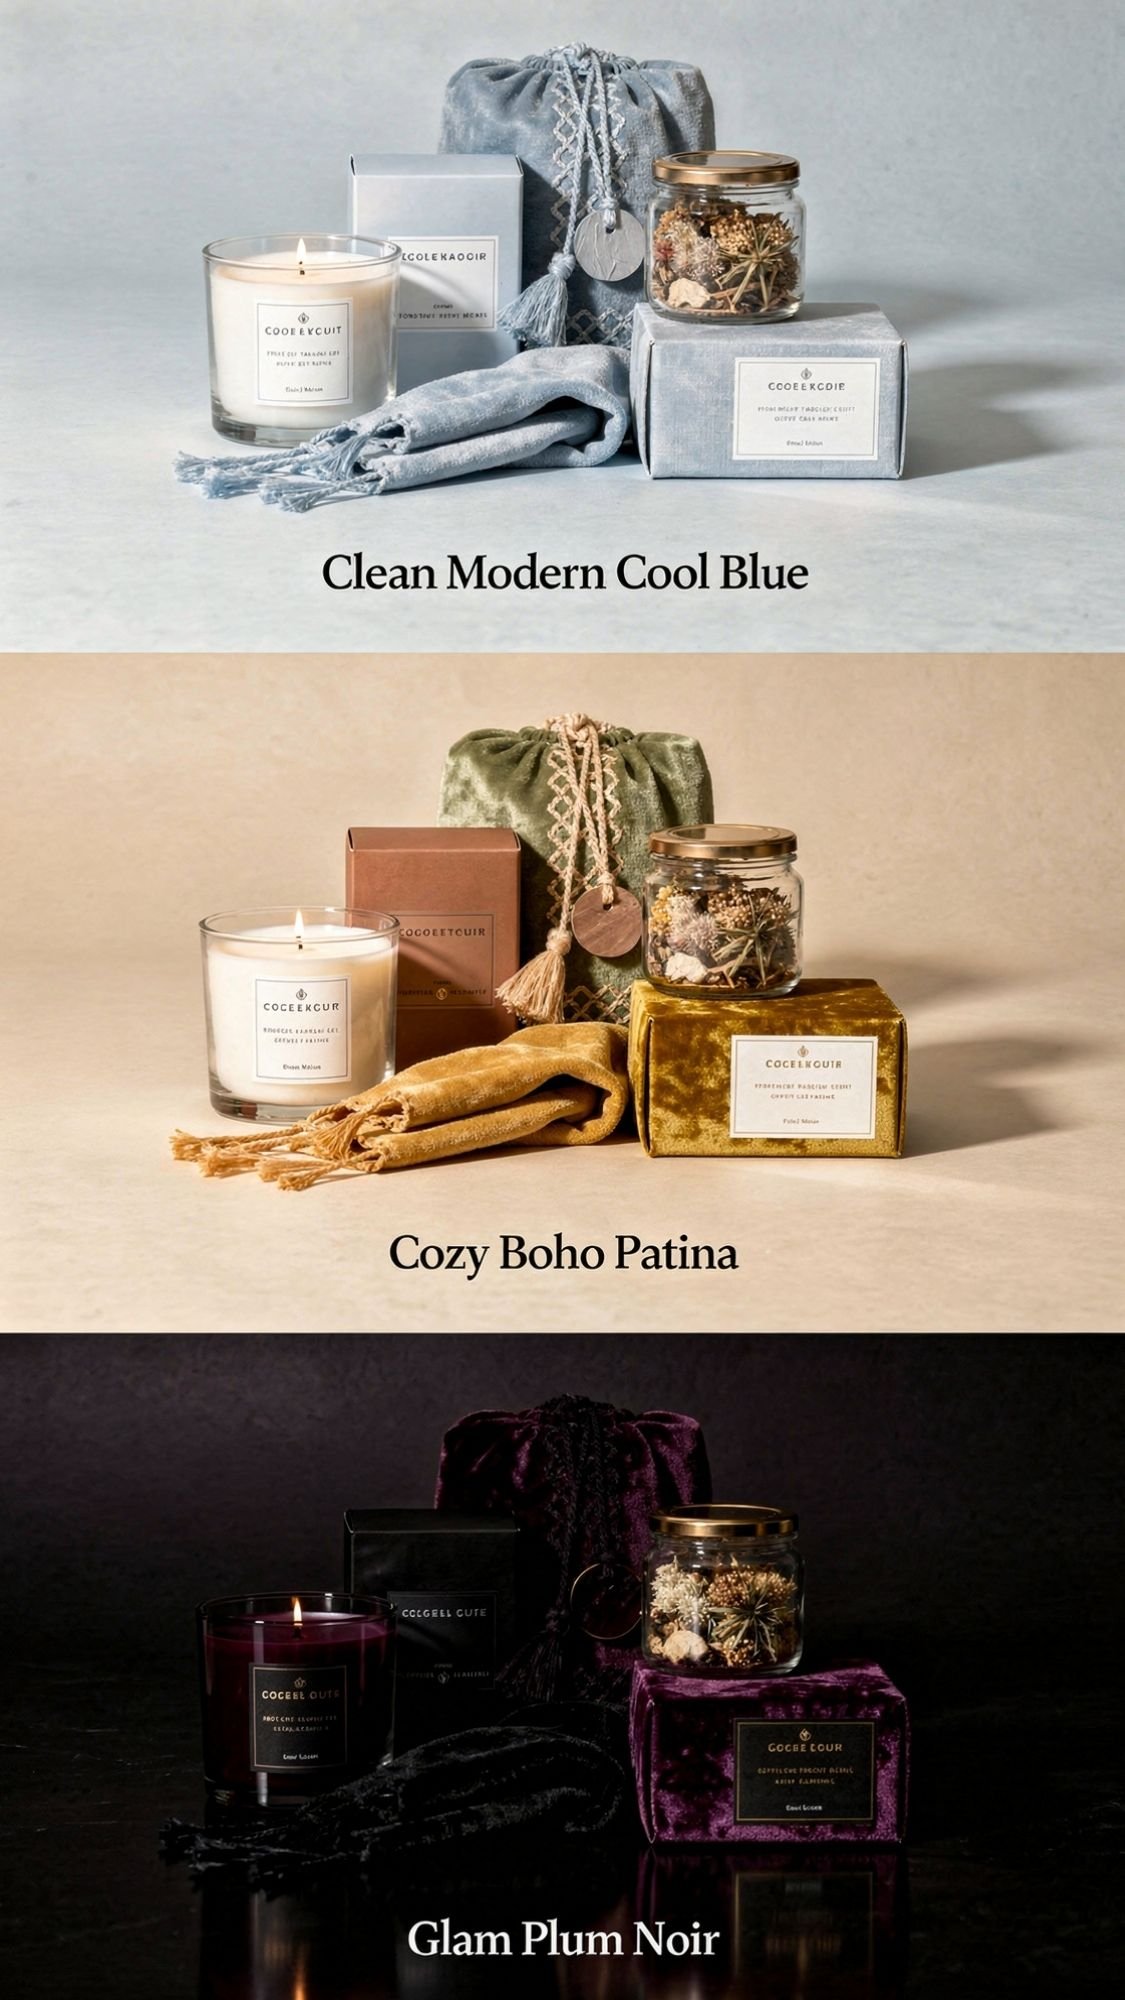
3 Easy Ways To Make Any Gift Feel Like Them
You can make the same project look totally different just by swapping finishes, colors, and one small detail. Ever notice how a “simple” pouch looks designer when the zipper and label match the vibe? That’s what we’re doing here. Pick one of these three directions and apply it to any gift in the list, trays, pouches, labels, coasters, the whole thing.
Variation 1: Clean Modern Minimal
- Style swaps: straight lines, simple shapes, no busy patterns, lots of negative space.
- Color palette ideas: Cloud Dancer + Cool Blue + a tiny brass accent.
- Personalization: small initials on the back corner, or a tiny icon only.
- Material upgrades: washed linen, matte labels, satin finish on wood, clear glass bottles with crisp typography.
Variation 2: Cozy Boho Natural
- Style swaps: warm neutrals, texture on texture, soft curves, natural fibers.
- Color palette ideas: Washed Linen + Patina tones + a muted Jade accent.
- Personalization: hand-lettered name tag, small woven label, simple stitched detail.
- Material upgrades: cotton webbing straps, wool felt cable wraps, sisal soap bags, kraft tags with clean black ink.
Variation 3: Glam Bold And Polished
- Style swaps: high contrast, sleek finishes, metallic details used sparingly.
- Color palette ideas: Plum Noir + Persimmon + gold accents.
- Personalization: monogram patch, debossed initials, clean label with a “signature” name.
- Material upgrades: velvet ribbon, satin scrunchies, gold hardware on pouches, foil label accents, glossy resin coasters with a perfect edge.

The Stuff People Always Ask Right After They Start
1) What are the best handmade gifts for a best friend that they’ll actually use?
Go for daily-use gifts like key fobs, zipper pouches, glass can cups, coasters, tote bags, and on-the-go kits. If the gift solves a small everyday problem, they’ll keep using it.
2) How do I make handmade gifts look expensive instead of “crafty”?
Focus on three things: clean edges, cohesive color palettes, and proper finishing. Sand and seal hard surfaces, topstitch and press fabric projects, and use minimal labels with readable text.
3) How long should I wait before gifting a handmade candle?
Let most soy candles cure 7 to 14 days for the best scent throw. You can gift earlier, but the scent usually improves after curing.
4) Why is my vinyl decal peeling off a glass cup?
You usually skipped one of these: alcohol wipe, strong burnishing, or cure time. Clean with 90%+ isopropyl alcohol, apply slowly, burnish hard, then wait 24 to 48 hours before washing.
5) What’s the easiest handmade gift for beginners?
Try a care card set, cable wraps, linen spray, spice blends, or scrunchies. They use simple tools and still look high-end with clean labels and cohesive styling.
6) How do I keep air-dry clay gifts from cracking or warping?
Roll clay evenly, dry it slowly, and rotate or flip it during drying. After drying, sand smooth and seal fully, including the underside.
7) What sealers work best for painted pots and clay trays?
Use a water-based varnish or a clear spray sealer made for craft surfaces. Seal inside rims and edges, and let it cure fully before use near water.
8) How do I stop resin coasters from getting bubbles?
Warm resin bottles slightly, mix slowly but thoroughly, pour low and steady, then use a heat gun briefly. Keep the piece covered while it cures to avoid dust.
9) What handmade gifts work for long-distance best friends?
Go for easy-to-ship items like a pen pal kit, tea trio, spice blends, care cards, scrunchies, or a mini journal. Add a small note or “open first” card for extra impact.
10) How do I price or budget handmade gifts so I don’t overspend?
Pick one “hero” material, then keep everything else simple. For example, spend on washed linen or nice glass bottles, then use minimal labels and clean finishing to make it look luxe.
11) How do I package handmade gifts so they feel like a boutique purchase?
Use a cohesive palette, add a ribbon, include a small tag, and always add a care card. People remember presentation. Also, clean packaging makes handmade gifts feel intentional.
12) What’s the best way to make personalized gifts without it looking cheesy?
Keep it subtle: initials on the back corner, a tiny icon, a small label, or a hidden note inside. Big quotes and giant names can feel like a novelty item fast.
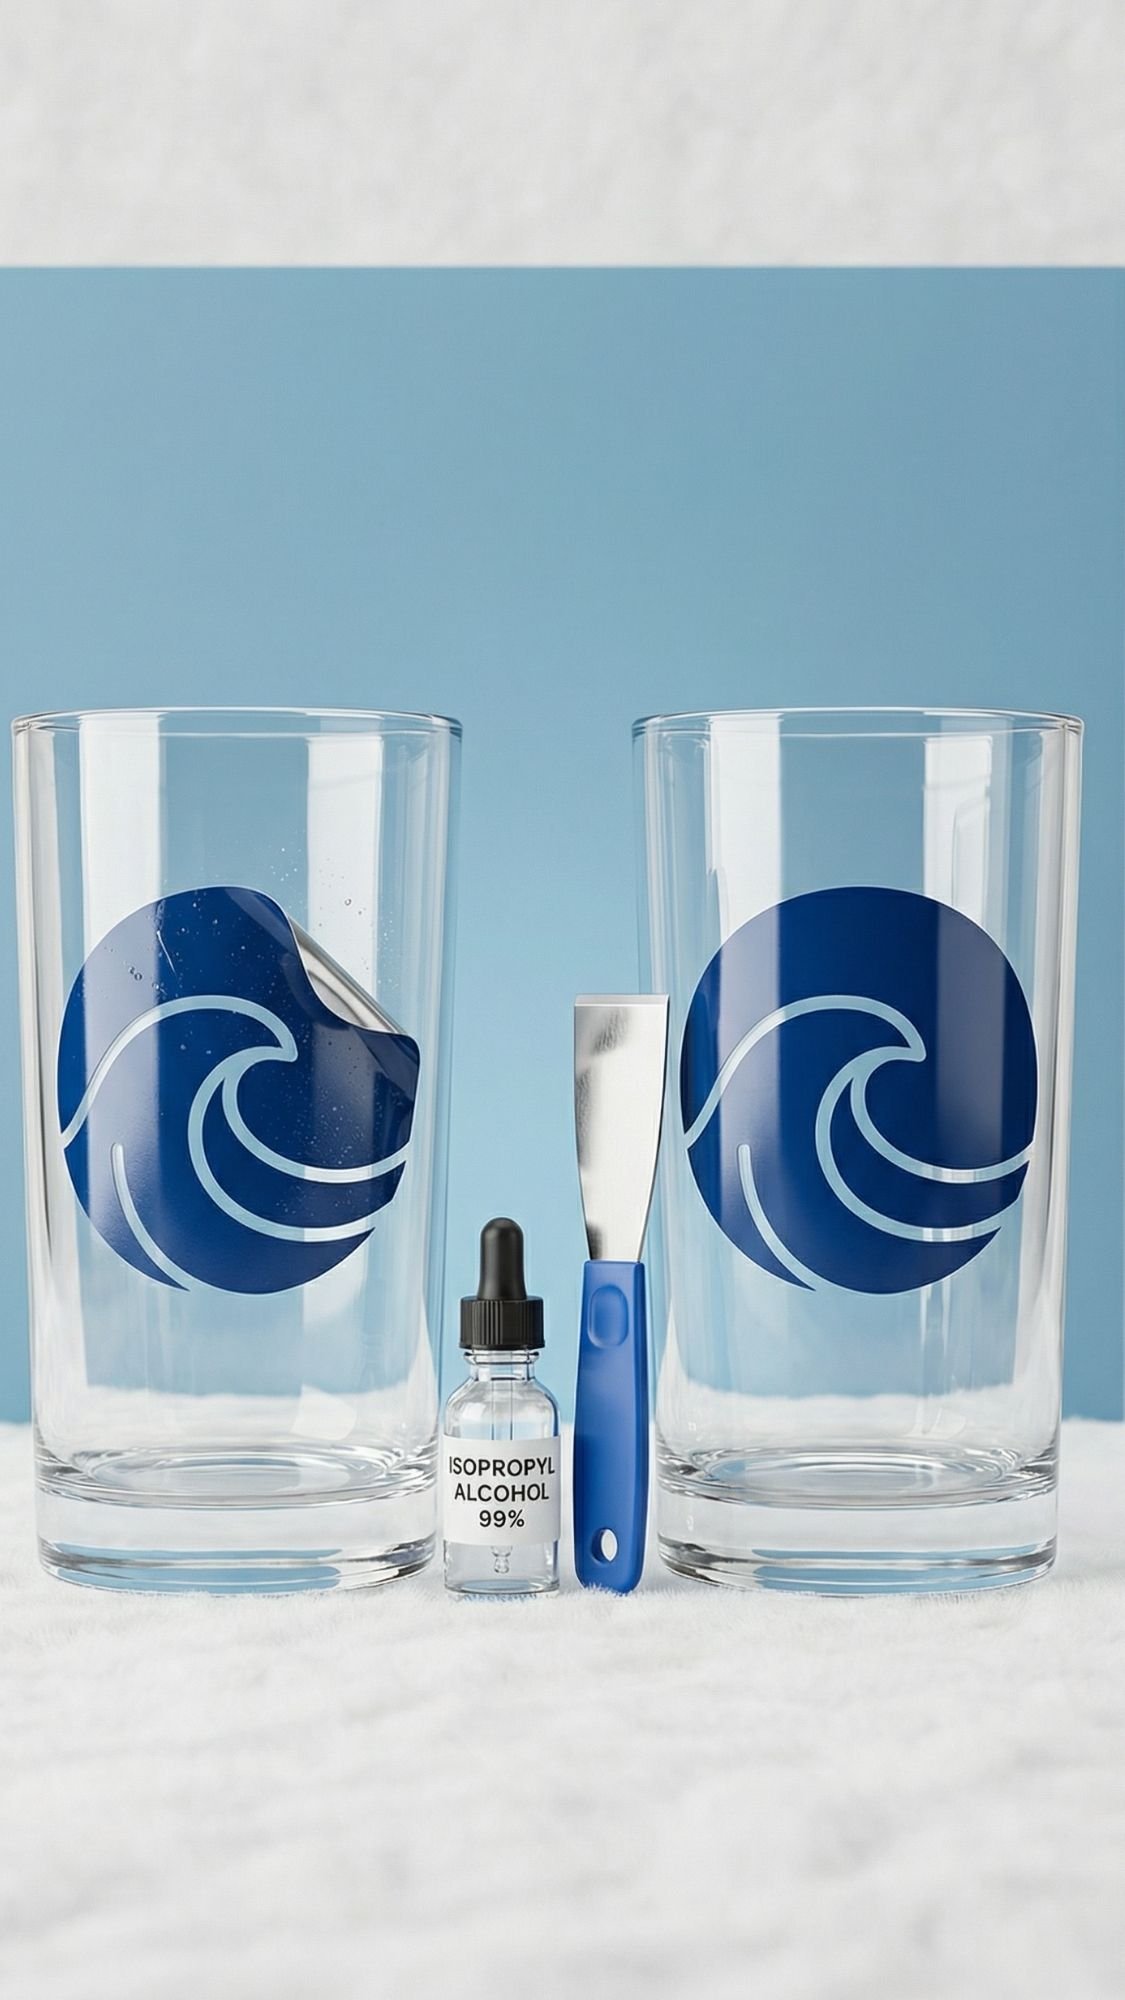
Because I’ve Definitely Messed This Up Before
One time I made a gorgeous glass can cup for a friend, perfect decal, clean layout, super “boutique” looking. I felt smug about it too, like I had unlocked the DIY gods. Then my friend texted me a week later, “I think the decal is peeling?” My soul left my body.
Here’s what happened. I rushed the prep because the cup looked clean. I skipped the alcohol wipe, applied the vinyl, burnished it for maybe five seconds, then wrapped it up like a champion. The decal looked perfect at first. Then the real world showed up. Hand lotion, dish soap, water, regular use. The edges lifted.
How I fixed it:
- I told her to stop washing it for a day so it could dry out fully.
- I removed the decal completely, then wiped the cup down with 90%+ isopropyl alcohol until it squeaked.
- I reapplied a fresh decal and burnished like I meant it.
- I told her to wait 48 hours before washing, then hand wash only.
What I learned the hard way:
- “Looks clean” is not the same as “clean enough for adhesion.”
- Burnishing matters. Quick taps don’t count.
- Cure time protects your work. Dry is not done.
If you’re making vinyl gifts, treat prep like it’s part of the craft. Because it is.
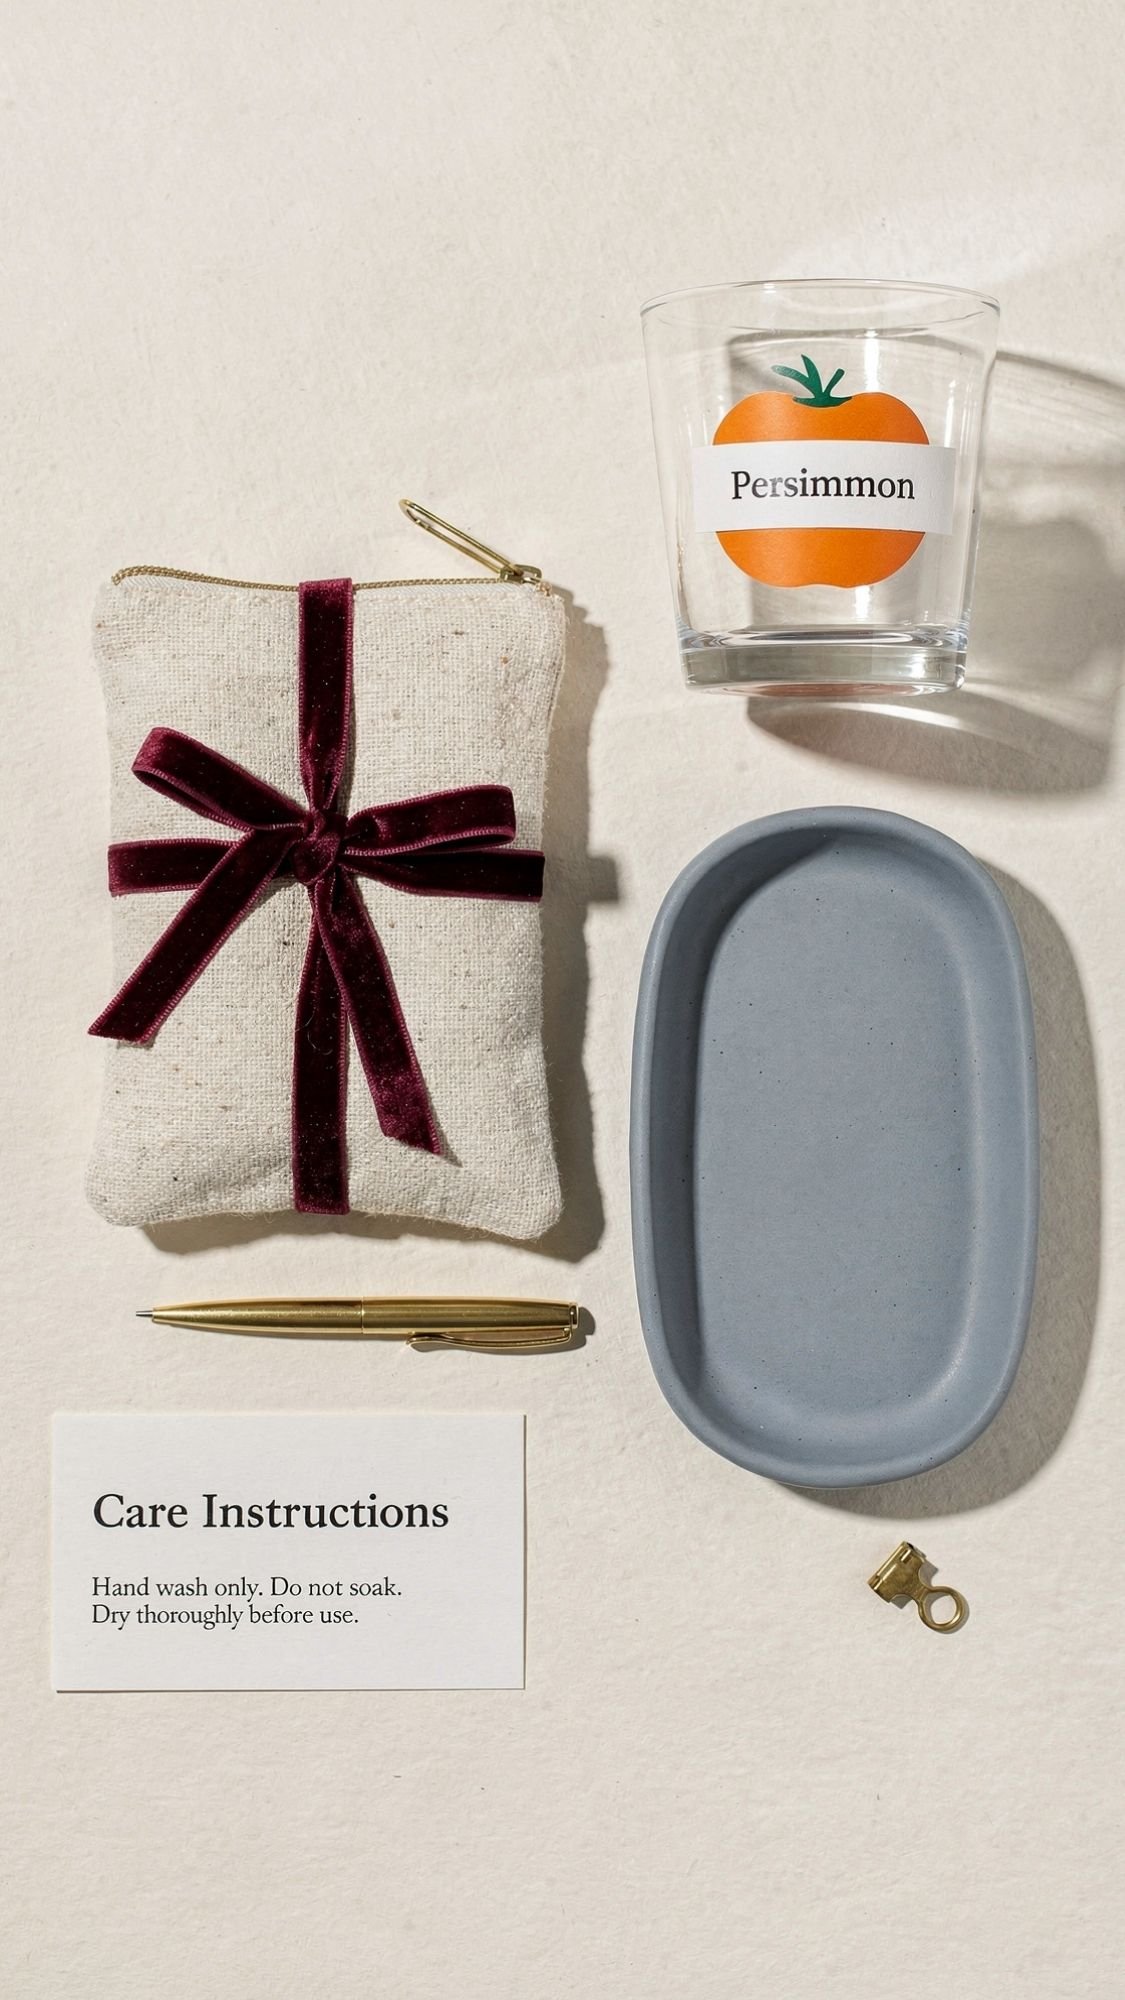
Your Best Friend Is Going To Use This Stuff, Promise
If you take nothing else from this list, take this. The gifts your best friend uses all year do two things. They solve a tiny daily problem, and they hold up to real life. You don’t need to make the fanciest project on the planet. You just need to make something functional, finish it properly, and give it a little care guidance so it stays nice.
Pick one gift that matches their daily routine. Add one small personalization. Then do the boring grown-up part, sanding, sealing, burnishing, cure time. That’s what makes it feel boutique instead of “cute for a week.”
And if you want to be extra in the best way, bundle two small gifts together. A pouch plus an on-the-go kit. A candle plus coasters. A glass cup plus a care card. Those pairings feel like you really know them, because you do.

