
Your Best Friend Deserves Better Than A Gift Card (Sorry, Not Sorry)
Best friend birthdays come with pressure. You can’t just grab a random candle and call it love. You want something that feels personal, looks cute in a photo, and actually gets used after the “omg stoppp” moment. That’s exactly why I put this list together.
I’ve been making DIY gifts for years, and here’s the honest truth, the idea matters, but the finish matters more. A simple project with clean details looks boutique. A fancy project with messy edges looks like a school assignment, and we’re not doing that. Ever spent an hour crafting just to realize the glue won’t stick or the vinyl lifts at the corners? Yeah, same. This post fixes that.
You’re getting 27 easy handmade birthday gifts for your best friend, plus the real-world stuff most tutorials skip: what to seal, when to cure, how to package it like it came from a chic little shop, and how to fix the annoying mistakes fast. Because nothing kills crafting joy like sticky sealer and crooked decals.
Pick The Right Gift In 30 Seconds
Before you commit to glitter, glue, or emotional damage via scrapbook, pick the lane. The easiest way to make your best friend feel seen is to match the gift to how she actually lives. Not how you wish she lived. If she never journals, don’t make her a journal. If she drinks iced coffee like it’s a personality trait, the glass can cup wins. Simple.
Here’s my quick cheat sheet when I’m stuck:
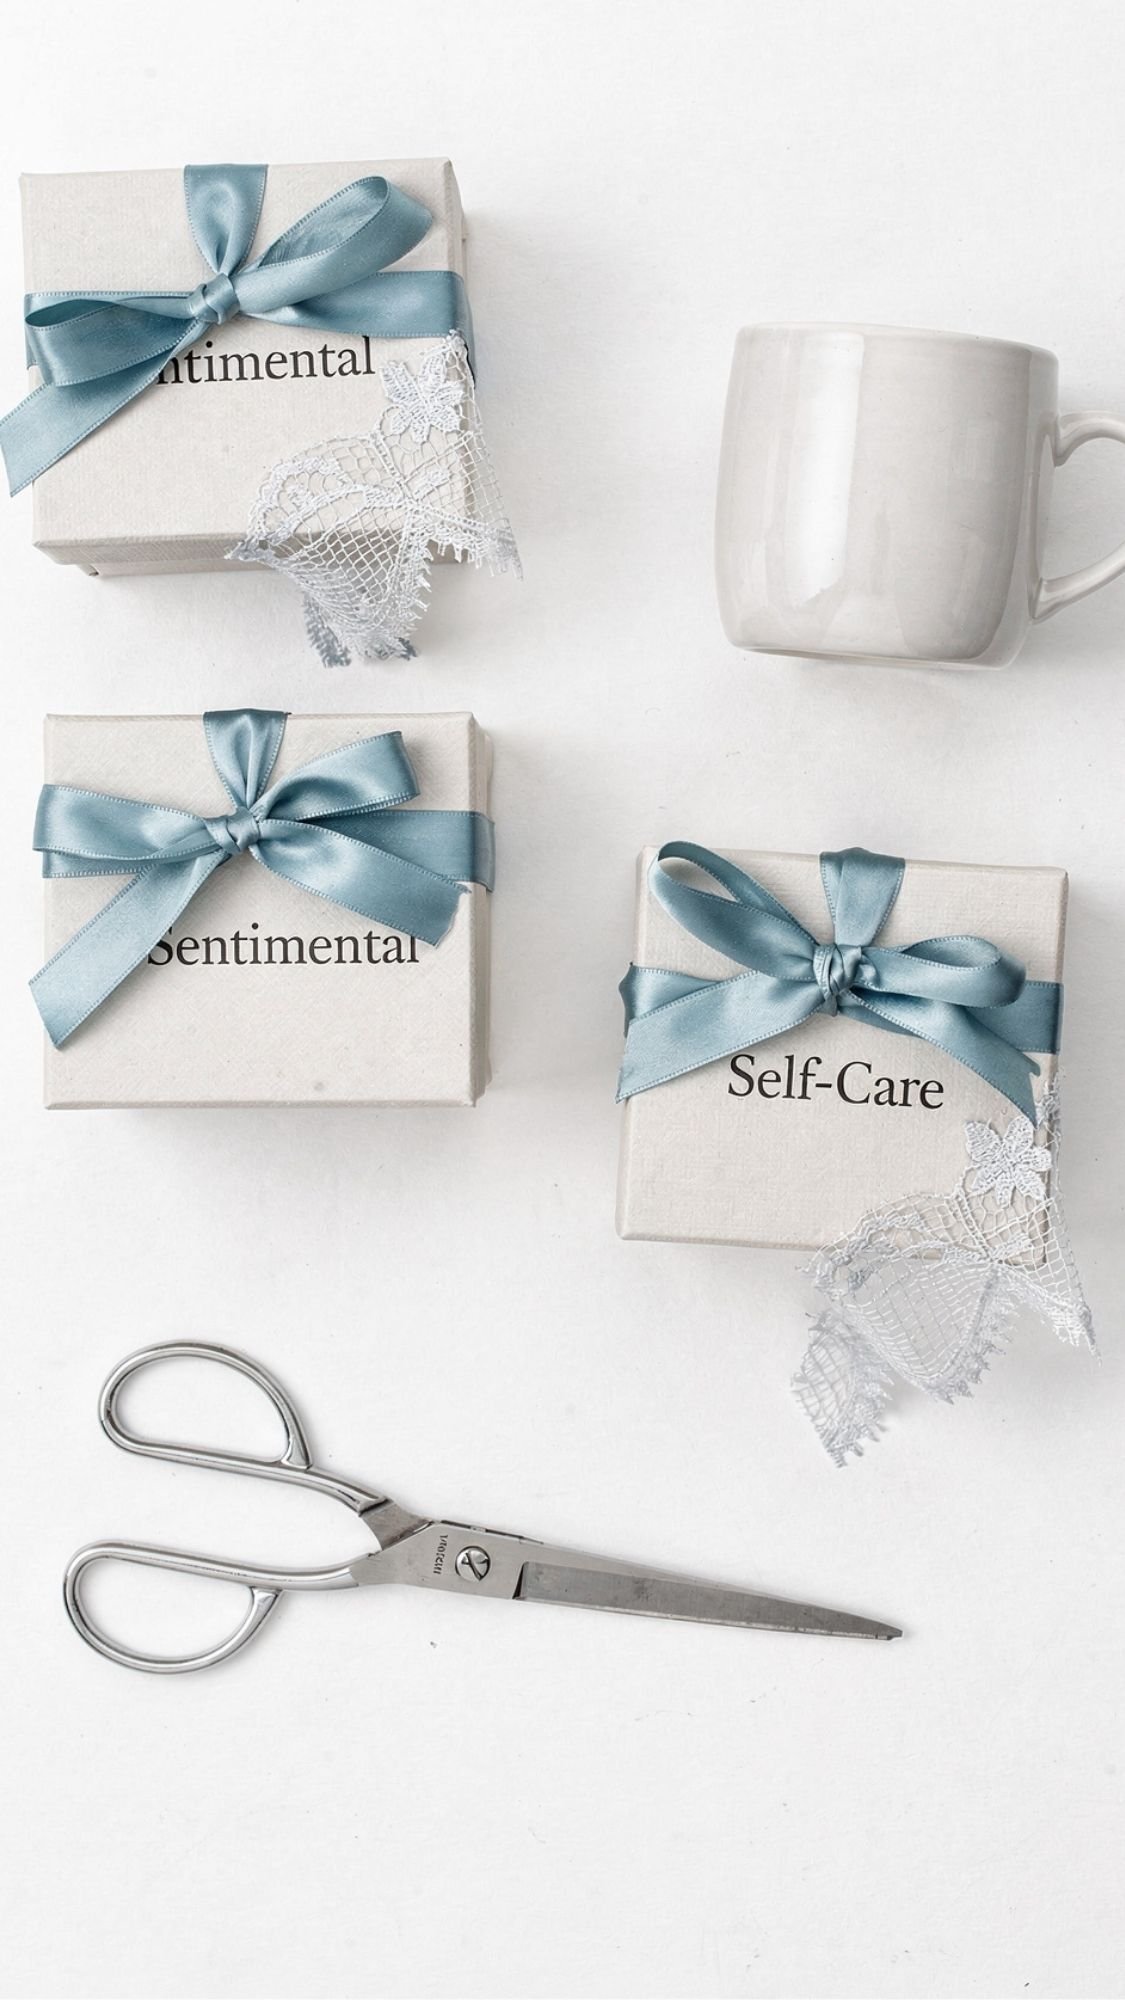
- Sentimental bestie: photo + words
- Think mini scrapbook, memory jar, “open when” letters, playlist plaque.
- Practical bestie: stuff she uses daily
- Think mug, tote, keychain, desk kit, coasters, makeup bag.
- Self-care bestie: cozy and comforting
- Think candle, sugar scrub, bath soak duo, rollerball perfumes.
- Trendy bestie: accessory-core and packaging that looks expensive
- Think bag charms, phone charms, lace ribbon, clean labels, color pops like Persimmon or Jade.
Mini “Decide Fast” Checklist
- What does she use every day without thinking?
- What color does she wear on repeat?
- What tiny thing does she always complain she needs?
- Would she rather cry happy tears or get something useful? (Both is the goal, but still.)
The Pro Secret That Makes DIY Gifts Look Store-Bought
Here’s the truth, a “simple” DIY looks expensive when the finish looks intentional. That means clean edges, consistent color, and a seal job that doesn’t stay tacky like it hates you. Ever seen a cute project get ruined by one peeling corner or one sticky topcoat? Yeah, that’s why I obsess over this part.
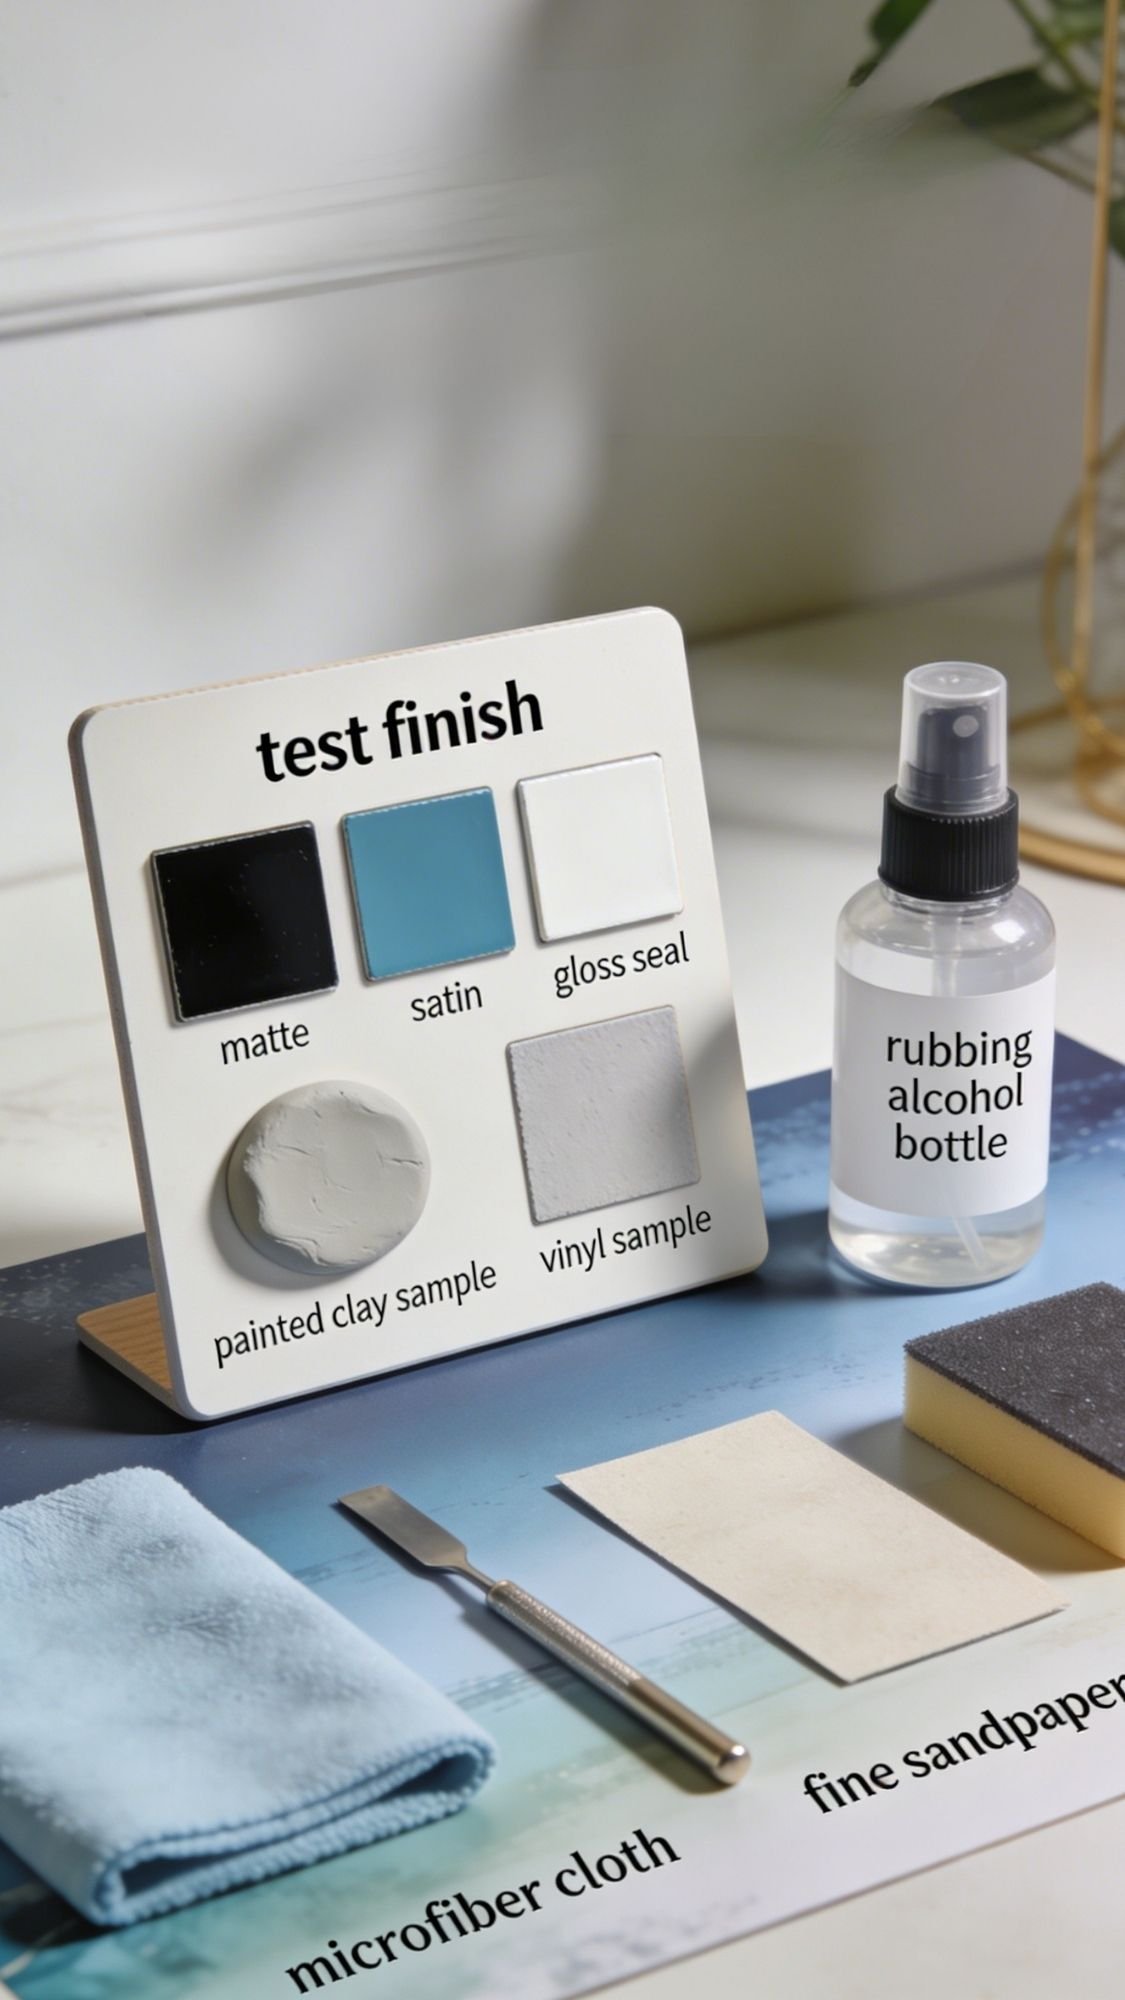
I always do a 5-minute test finish on scrap first, and I match my sealer to the surface.
Why This Works
- Paint, vinyl, and sealers react differently depending on humidity, surface texture, and product type.
- A tiny test patch saves you from the classic “why is this still sticky” meltdown.
- Your gift ends up looking boutique, not “I made this at 1am and prayed.”
My Go-To “Finish Like A Pro” Routine
- Clean first (especially glass, acrylic, and ceramics). I use rubbing alcohol.
- Test the finish on scrap or the bottom/back of the item.
- Seal in thin coats, not thick coats. Thick coats cause streaks, bubbles, and tackiness.
- Let it cure before gifting. Dry means “touchable.” Cure means “actually durable.”
Tool Picks I Trust After Years Of Crafting
- Microfiber cloth + rubbing alcohol for prep
- Burnishing tool or old gift card for vinyl decals
- Fine grit sandpaper (220–320) for smoothing wood and clay edges
- Acrylic spray sealer for painted clay, decor pieces, and light-use items
- Water-based polycrylic for coasters, trays, and anything that needs more protection
Pro-Tip: If you want one “quiet luxury” trick that always works, stick to one main color + one accent. That’s why palettes like Cool Blue, Jade, Plum Noir, Wasabi, Persimmon photograph so well together. Your gift looks curated instead of chaotic.
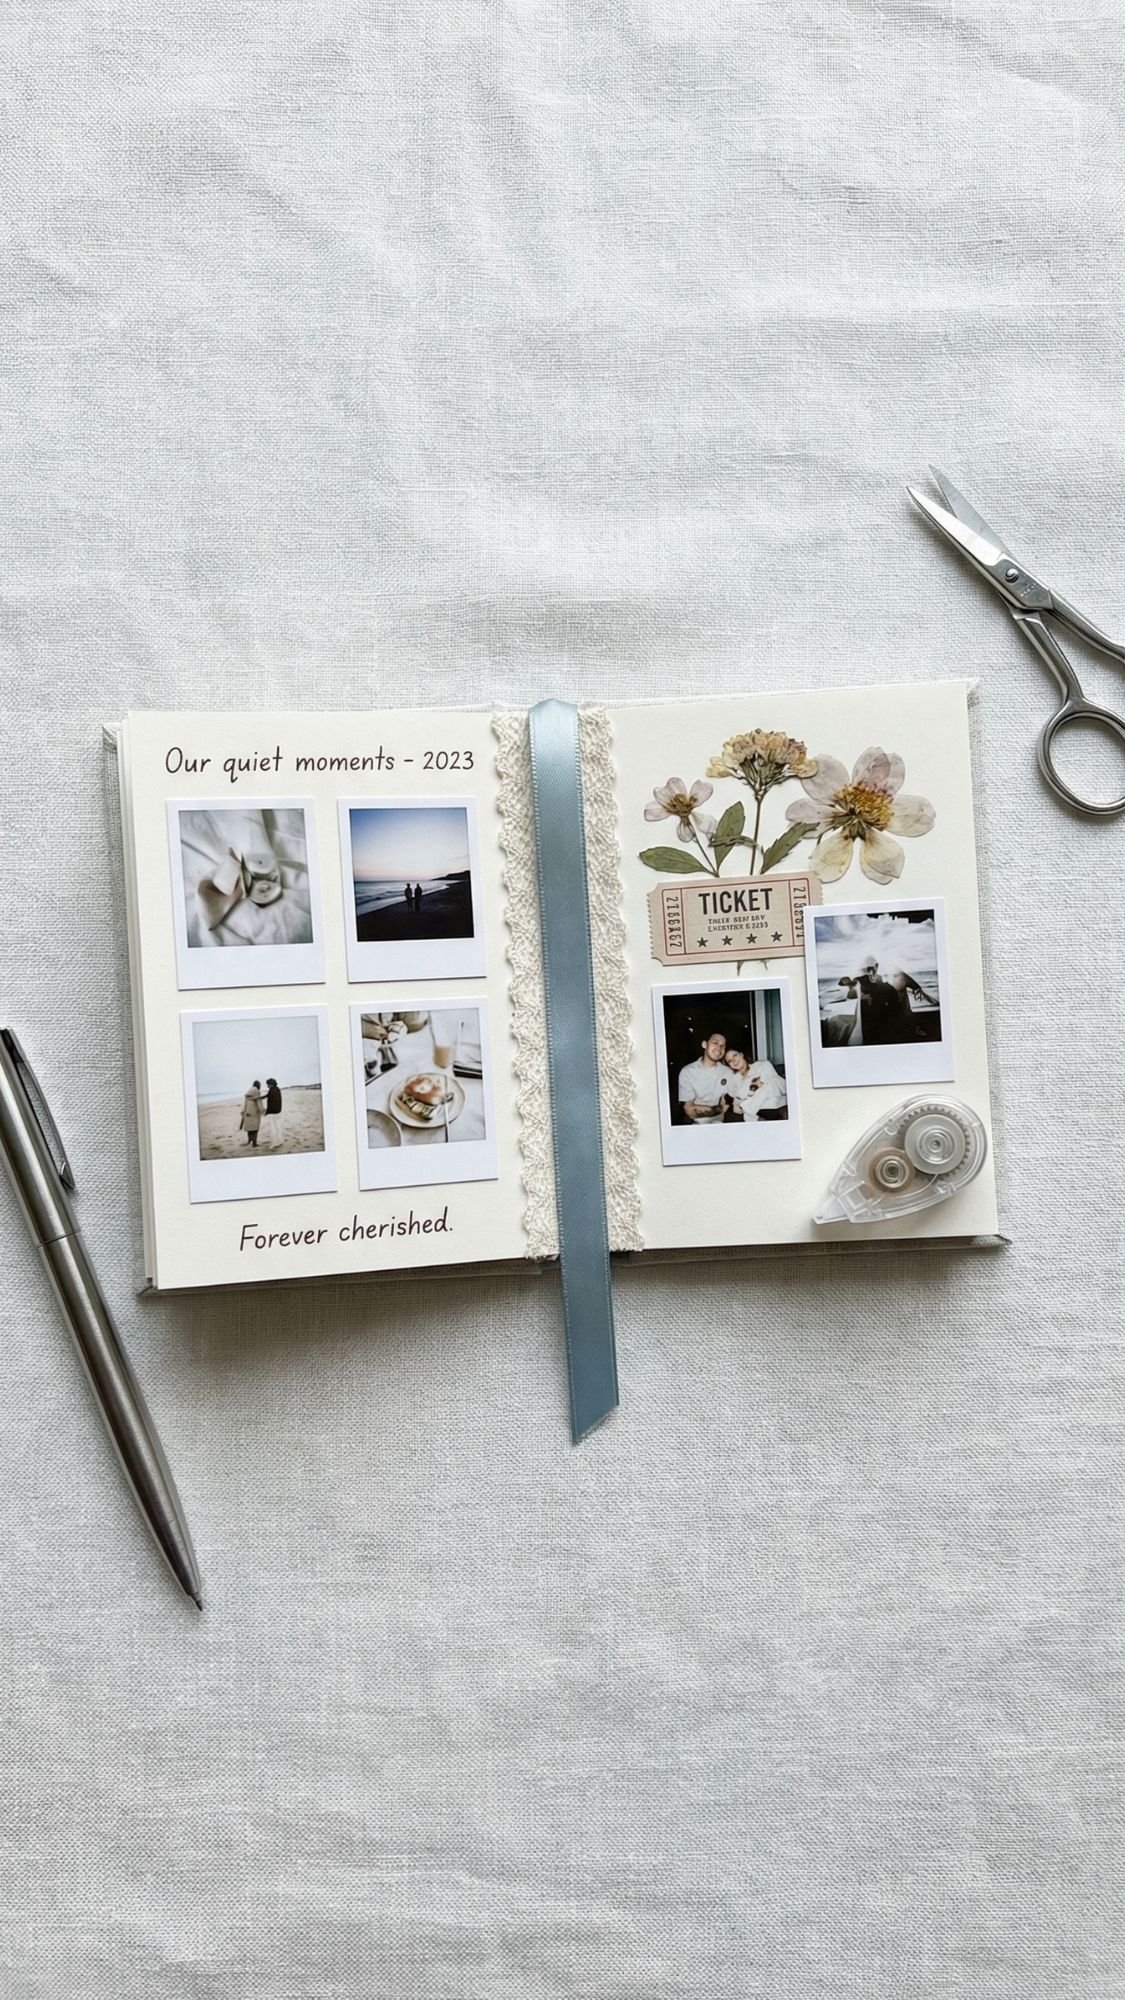
1) Mini Bestie Scrapbook Flip Book (Tiny, Emotional, Slightly Dangerous)
If you want a gift that hits her right in the feelings, this is the one. It’s small, it’s personal, and it basically guarantees the “stoppp I’m gonna cry” reaction. Also, she can actually flip through it anytime, which makes it way more “keepsake” than a random photo print shoved in a drawer.
Why She’ll Love It
- You hand her a highlight reel of your friendship, in a format she’ll keep.
- You can make it funny, sweet, or unhinged, depending on your brand.
- It costs little, but it looks like you planned it weeks ago. Love that for you.
What You’ll Need
- Mini blank scrapbook, or index cards + binder ring
- Printed photos (2×3 or wallet size works best)
- Double-sided tape (skip wet glue if you want clean pages)
- Pen, marker, or paint pen for titles
- Optional upgrades: lace trim, tiny bow, mini stickers (keep it minimal)
How To Make It
- Pick 12–20 photos and lay them out in order (chronological or vibes-only, both work).
- Add short captions that sound like you. Think: one sentence max.
- Stick photos down with double-sided tape, press firmly.
- Add 2–3 “pause pages” like:
- “Your best era: ongoing”
- “Next adventure: TBD”
- “Proof we’re iconic”
- Close the book and press it under a heavy book for 30–60 minutes so it lays flat.
Pro Tips That Make It Look Boutique
- Stick to one ink color for captions so it looks intentional.
- Print photos with a thin white border. It instantly looks cleaner.
- If you want that soft luxe vibe, use a Cloud Dancer neutral background page with a Cool Blue or Jade accent ribbon.
Quick Fixes If Something Goes Wrong
- Pages warp: you used wet glue or too much adhesive. Switch to tape and press overnight.
- Photos peel up: you touched the photo paper with oily fingers. Wipe lightly and re-tape.
- It looks cluttered: remove half the stickers. I know that hurts, but it works.
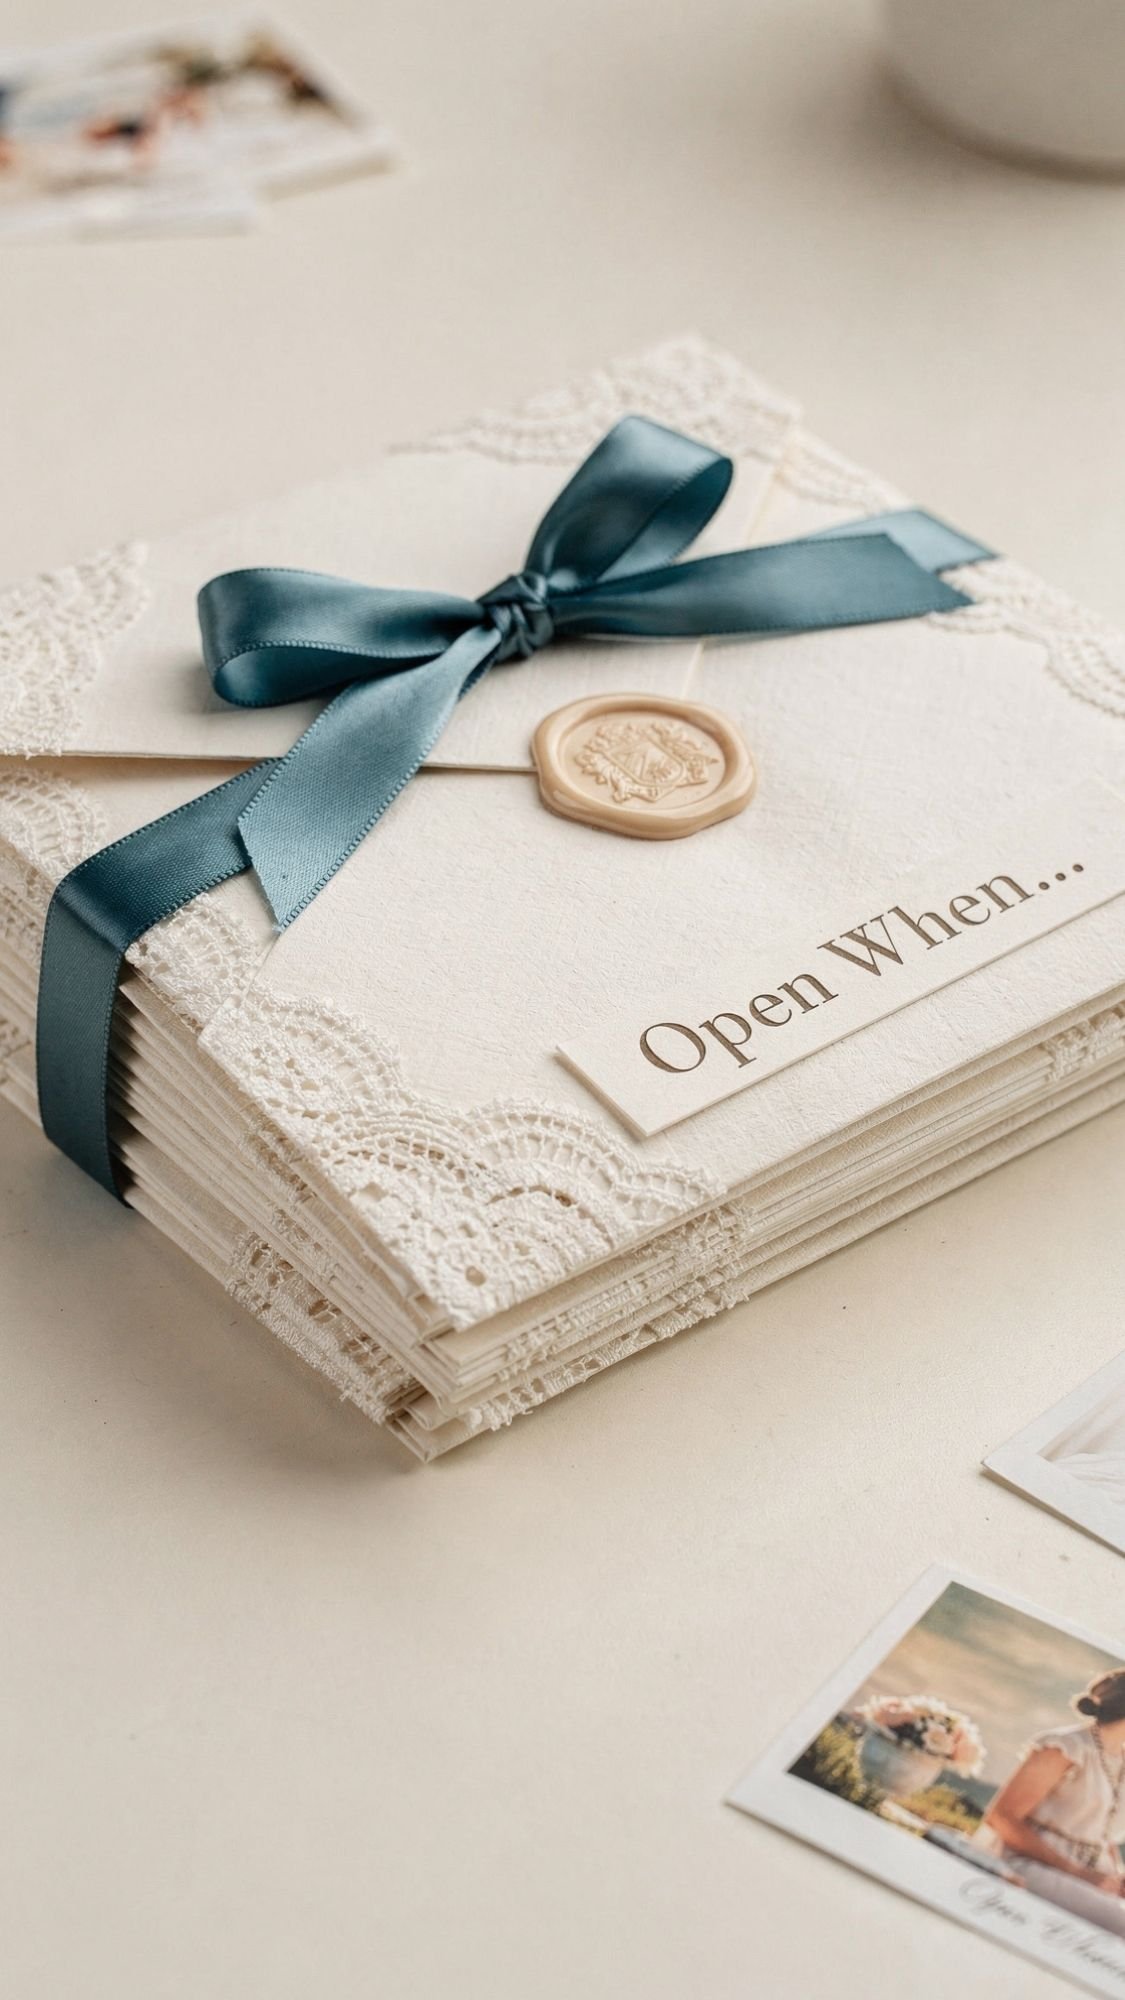
2) “Open When” Letters Bundle (Snail Mail Vibes, Bestie Edition)
This one feels ridiculously personal without being complicated. You basically hand her a little stack of future comfort, like emotional takeout she can open on demand. Who doesn’t want that?
Why She’ll Love It
- She gets multiple mini gifts in one bundle, and that always hits.
- It works for long-distance besties too.
- It feels custom, even if you make it in one evening with a good playlist.
What You’ll Need
- 6–12 envelopes (mix sizes if you want it extra cute)
- Cardstock or note cards
- Pens that dry fast (gel pens can smear, just saying)
- Stickers or washi tape (use sparingly so it stays readable)
- Ribbon or twine, lace ribbon looks super on-trend
- Optional upgrades: wax seal, mini photo prints, stamp set
How To Make It
- Pick your “Open When” prompts. I like 8–12 because it feels generous.
- Write each note like you’re texting her, just on paper.
- Add one tiny surprise inside a few envelopes, like:
- a tea bag
- a mini photo
- a folded “coupon” for coffee on you
- Decorate the envelopes, keep the front clean and readable.
- Stack them neatly and tie them with ribbon, then add a cute tag.
“Open When” Prompts That Actually Land
- Open when you miss me
- Open when you need hype
- Open when you feel stuck
- Open when you can’t sleep
- Open when you need a laugh
- Open when you need a reminder of who you are
- Open when it’s your birthday week, because obviously
- Open when you need a plan for today
Pro Tips That Make It Look Boutique
- Stick to one color palette across the whole bundle. Try Patina Blue + Cloud Dancer with a little Persimmon pop for the tag.
- Write envelope titles with a consistent style, like all caps or all cursive, not both.
- Slide each note into the envelope only after ink fully dries. Smudges ruin the vibe fast.
Quick Fixes If Something Goes Wrong
- Ink smears: switch to a fast-dry pen, and let each card dry 5–10 minutes before stacking.
- Envelopes won’t stay closed: use a glue dot or a small wax seal on the flap.
- It looks messy: remove extra stickers and align your envelopes, clean lines look expensive.
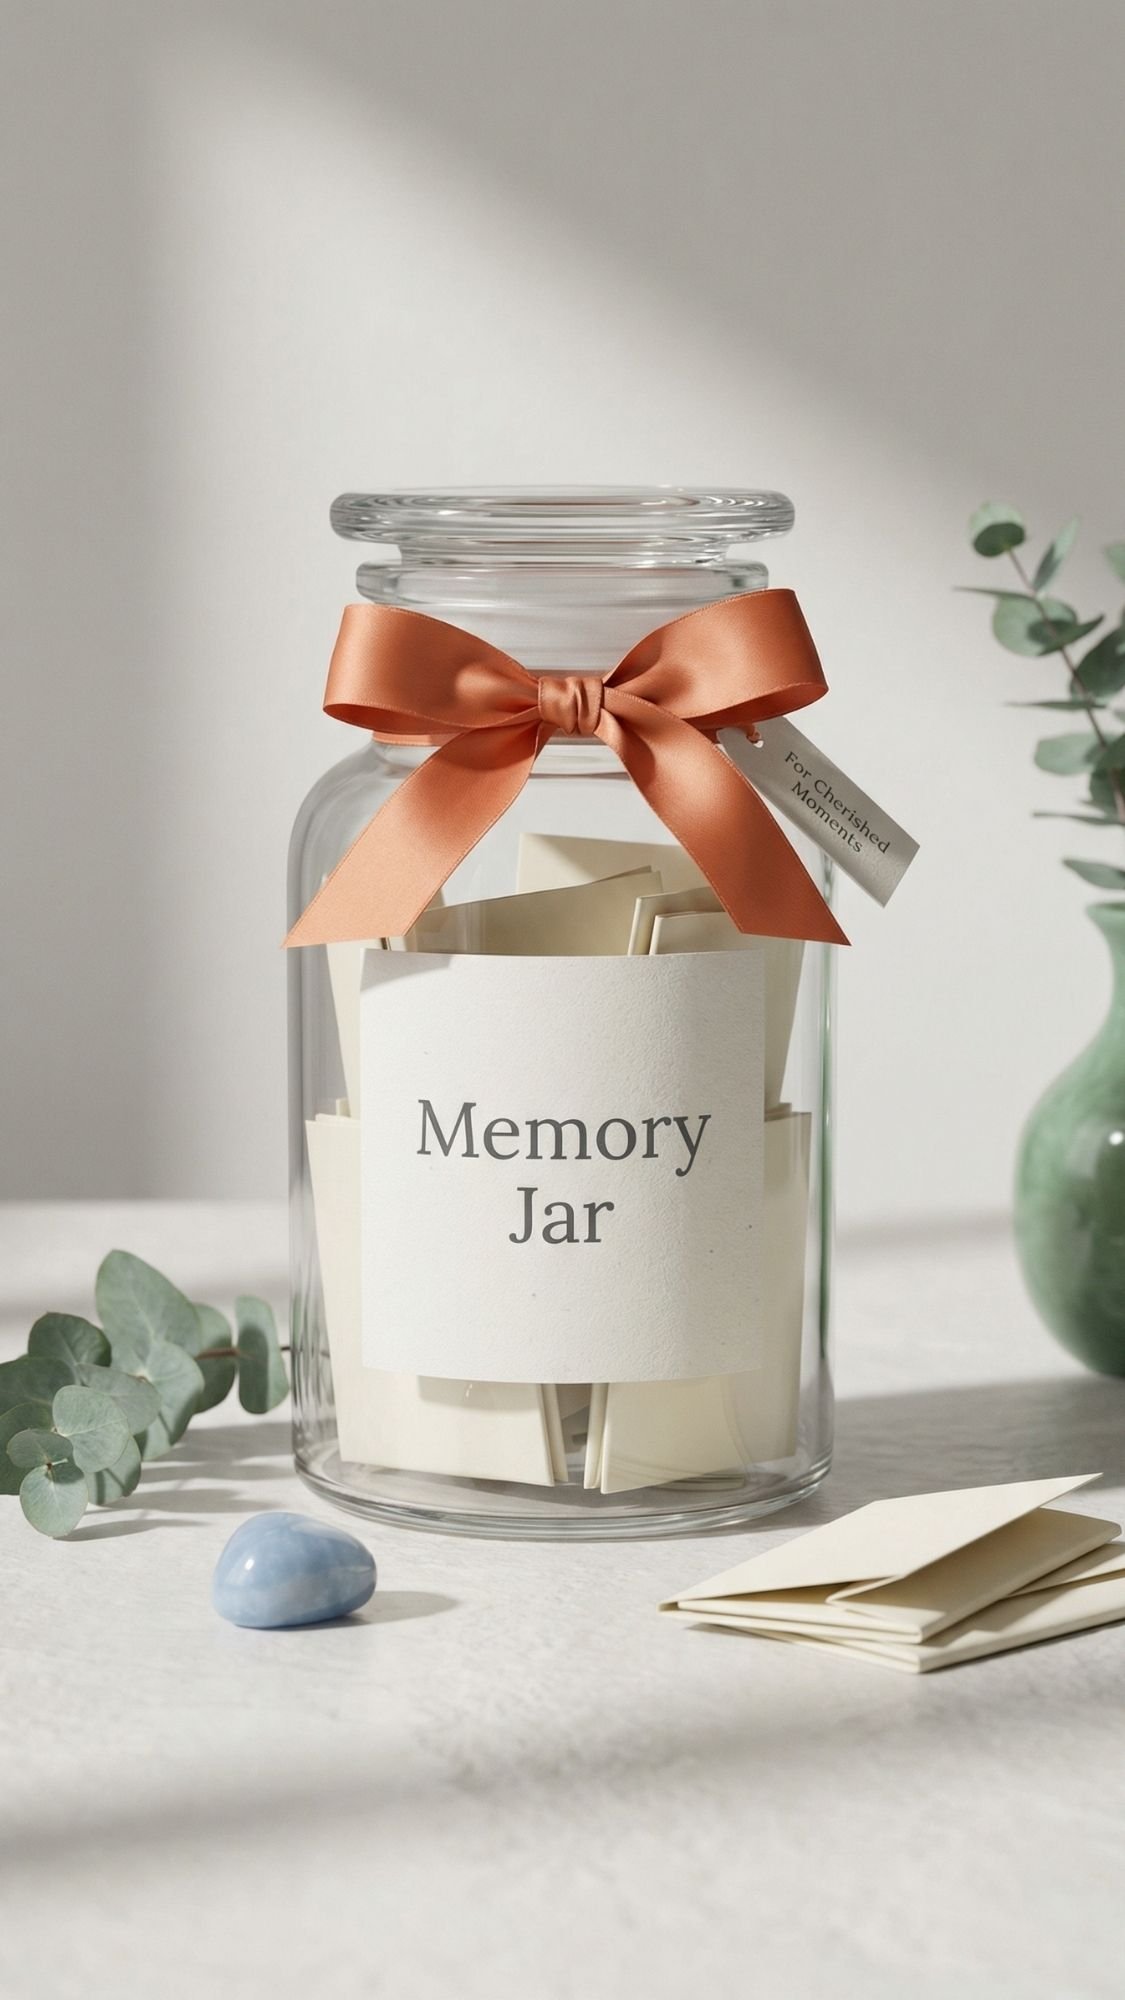
3) Memory Jar With “Read Me When” Slips (Low Effort, High Emotion)
This gift looks simple, but it hits hard in the best way. She can grab a slip on a rough day and instantly feel supported, or laugh, or both. Also, it’s one of the easiest ways to turn your inside jokes into something she keeps on her nightstand instead of losing in her camera roll. Ever notice how the smallest gifts end up being the most replayed? This is that.
Why She’ll Love It
- She gets a mini surprise every time she opens it.
- You can make it sentimental, funny, or chaotic, depending on the slips.
- You can keep adding slips later, which feels extra thoughtful.
What You’ll Need
- A jar with a lid (mason jar, apothecary jar, anything cute)
- Paper strips or cardstock, cut evenly
- A pen that won’t smear
- Optional upgrades:
- Paint pen for the lid
- Vinyl label
- Mini photo prints
- Ribbon in Persimmon or Patina Blue for a luxe pop
How To Make It
- Cut 30–60 paper strips, keep them the same size so it looks tidy.
- Write your messages, then fold them the same way each time.
- Add a few “coupon” slips, like coffee on you, movie night, thrift trip.
- Label the jar cleanly, keep it readable and minimal.
- Tie a ribbon around the neck, then add a tiny tag if you want.
Slip Ideas That Don’t Feel Cheesy
- “Read me when you feel stuck” with 3 things she can do in 10 minutes
- “Read me when you need hype” with your best compliments for her
- “Read me when you need a laugh” with your funniest shared memory
- “Read me when you need a plan” with a mini checklist and a snack reminder
- “Read me when you forget who you are” with a short pep talk
Pro Tips That Make It Look Boutique
- Write in one ink color, and keep the slips uniform. Clean repetition looks expensive.
- Add 5–10 slips in a different color paper to create a “special” category.
- If you use vinyl on glass, clean the jar first with rubbing alcohol and let it dry fully.
Quick Fixes If Something Goes Wrong
- Label lifts or bubbles: you skipped cleaning, or you trapped air. Re-clean, reapply, then burnish from center outward.
- Ink smears: let slips dry before folding, especially if you use gel pens.
- Jar looks messy: fold slips tighter and fill only 80 percent. Empty space makes it look curated.
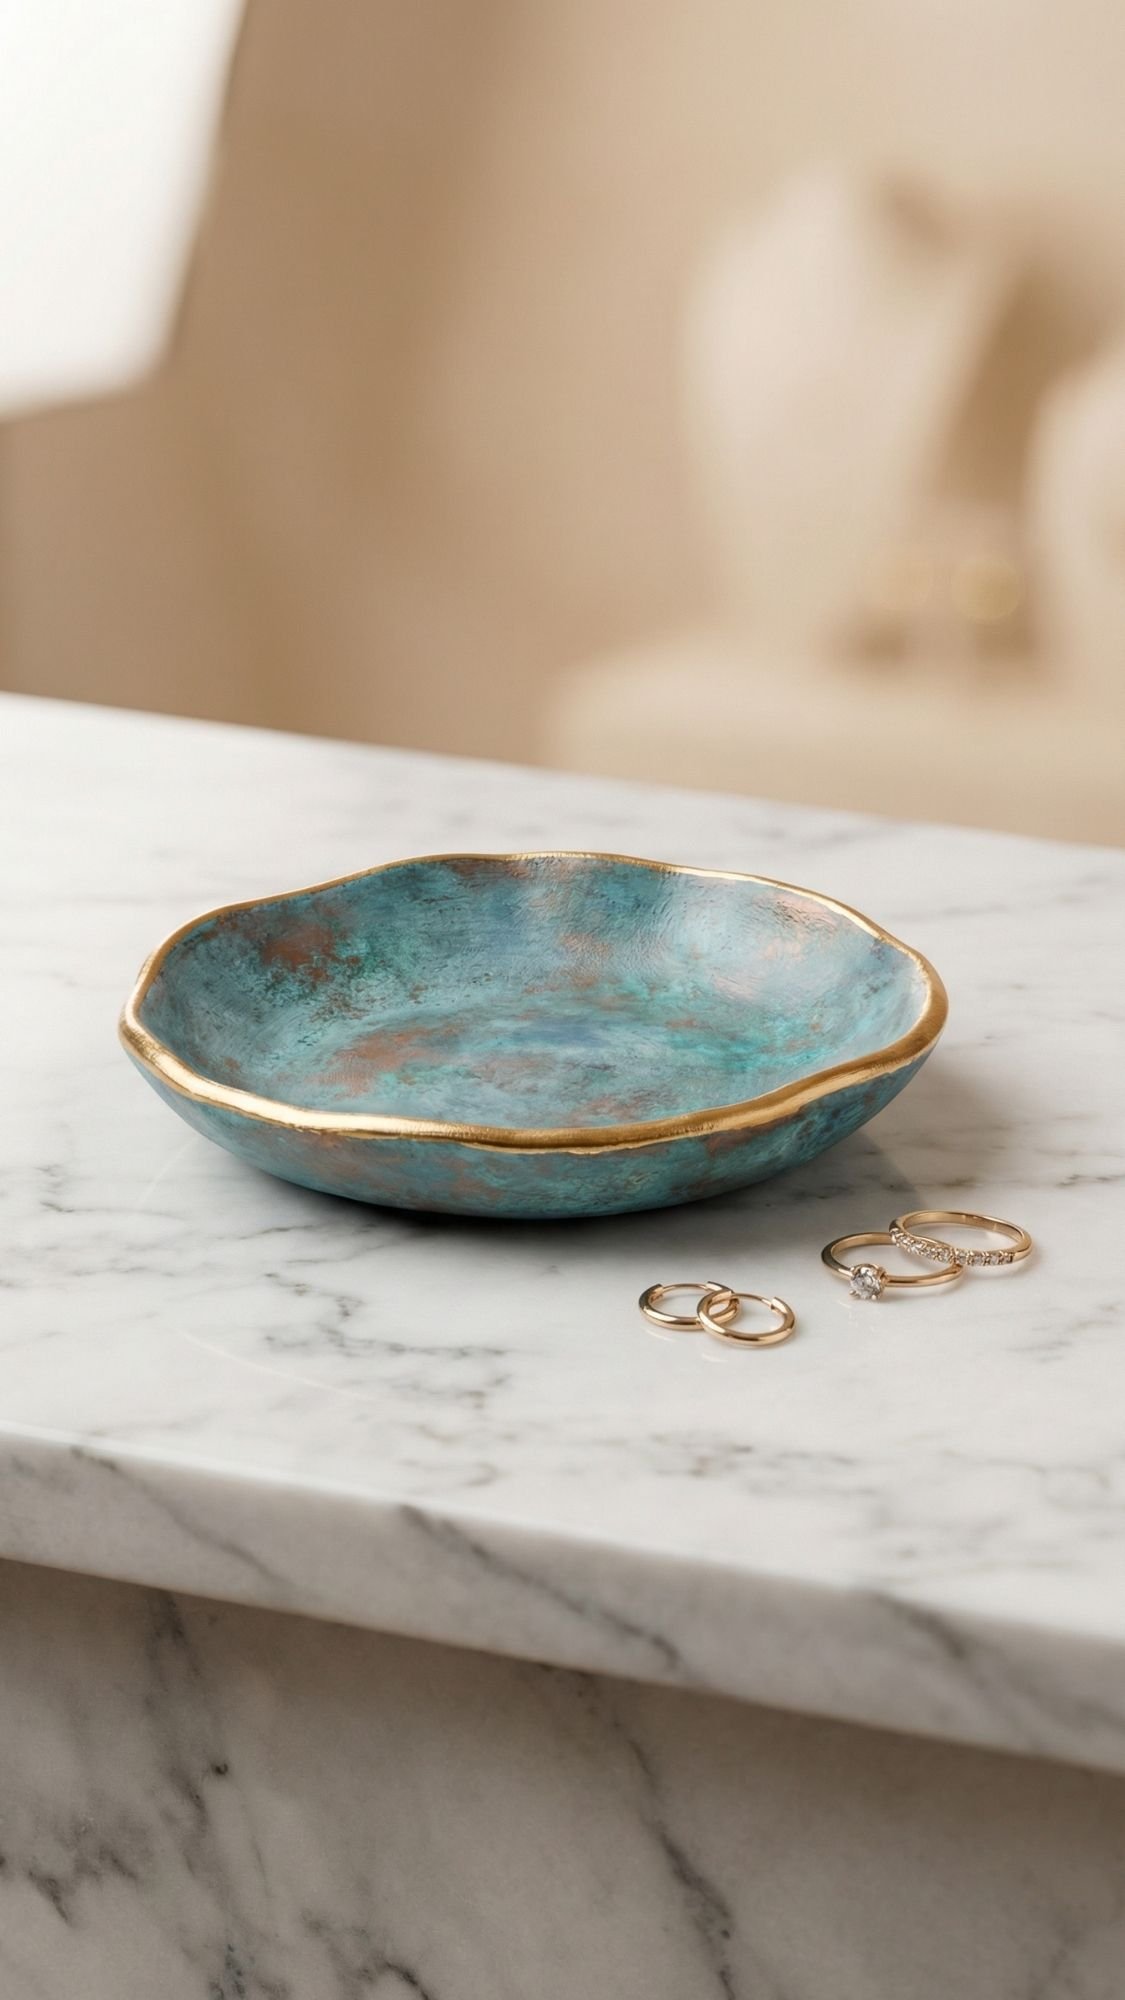
4) Air-Dry Clay Trinket Dish (The Patina Blue Moment)
This gift stays on her dresser or bathroom counter, which means she sees it every day. That’s the secret sauce. Plus, air-dry clay looks boutique with almost zero equipment, as long as you keep the edges smooth and the finish sealed. Ever seen a trinket dish that looks cute online but feels chalky and fragile in real life? We’re avoiding that.
Why She’ll Love It
- It’s useful for rings, earrings, hairpins, random little life clutter.
- It looks custom, even if you keep the design minimal.
- You can match it to her vibe, modern, boho, glam, whatever.
What You’ll Need
- Air-dry clay
- Rolling pin (or a smooth bottle)
- Two guide sticks (popsicle sticks work) to keep thickness even
- Craft knife or round cutter
- Small bowl for shaping
- Sandpaper (220–320 grit)
- Acrylic paint or paint pens
- Clear sealer (spray sealer works great for this)
How To Make It
- Lay down parchment paper so the clay doesn’t stick to your surface.
- Roll clay to about 1/4 inch thick. Use guide sticks so you don’t accidentally go paper-thin.
- Cut a circle, then gently lift it and press it into a bowl for shape.
- Smooth the rim with a damp finger, then let it dry slowly for 24–48 hours.
- Sand edges smooth, then paint in thin coats.
- Seal with light, even coats, and let it cure fully before gifting.
Pro Tips That Make It Look Store-Bought
- Sand the rim until it feels like ceramic. This step does all the heavy lifting.
- Paint the underside too. It looks finished instead of half-done.
- Color ideas that photograph like a dream:
- Patina Blue with a thin gold rim
- Cloud Dancer white with a Jade accent stripe
- Plum Noir with a matte finish for glam
Quick Fixes If Something Goes Wrong
- Dish warps: you dried it unevenly or too fast. Flip it halfway through drying and keep it out of direct heat.
- Cracks appear: clay dried too fast or you rolled too thin. Fill cracks with clay paste, let dry, then sand smooth.
- Paint looks streaky: you used thick coats. Do 2–3 thin coats instead.
- Sealer feels tacky: humidity or heavy coats did it. Add airflow and wait longer, then do one light final coat.
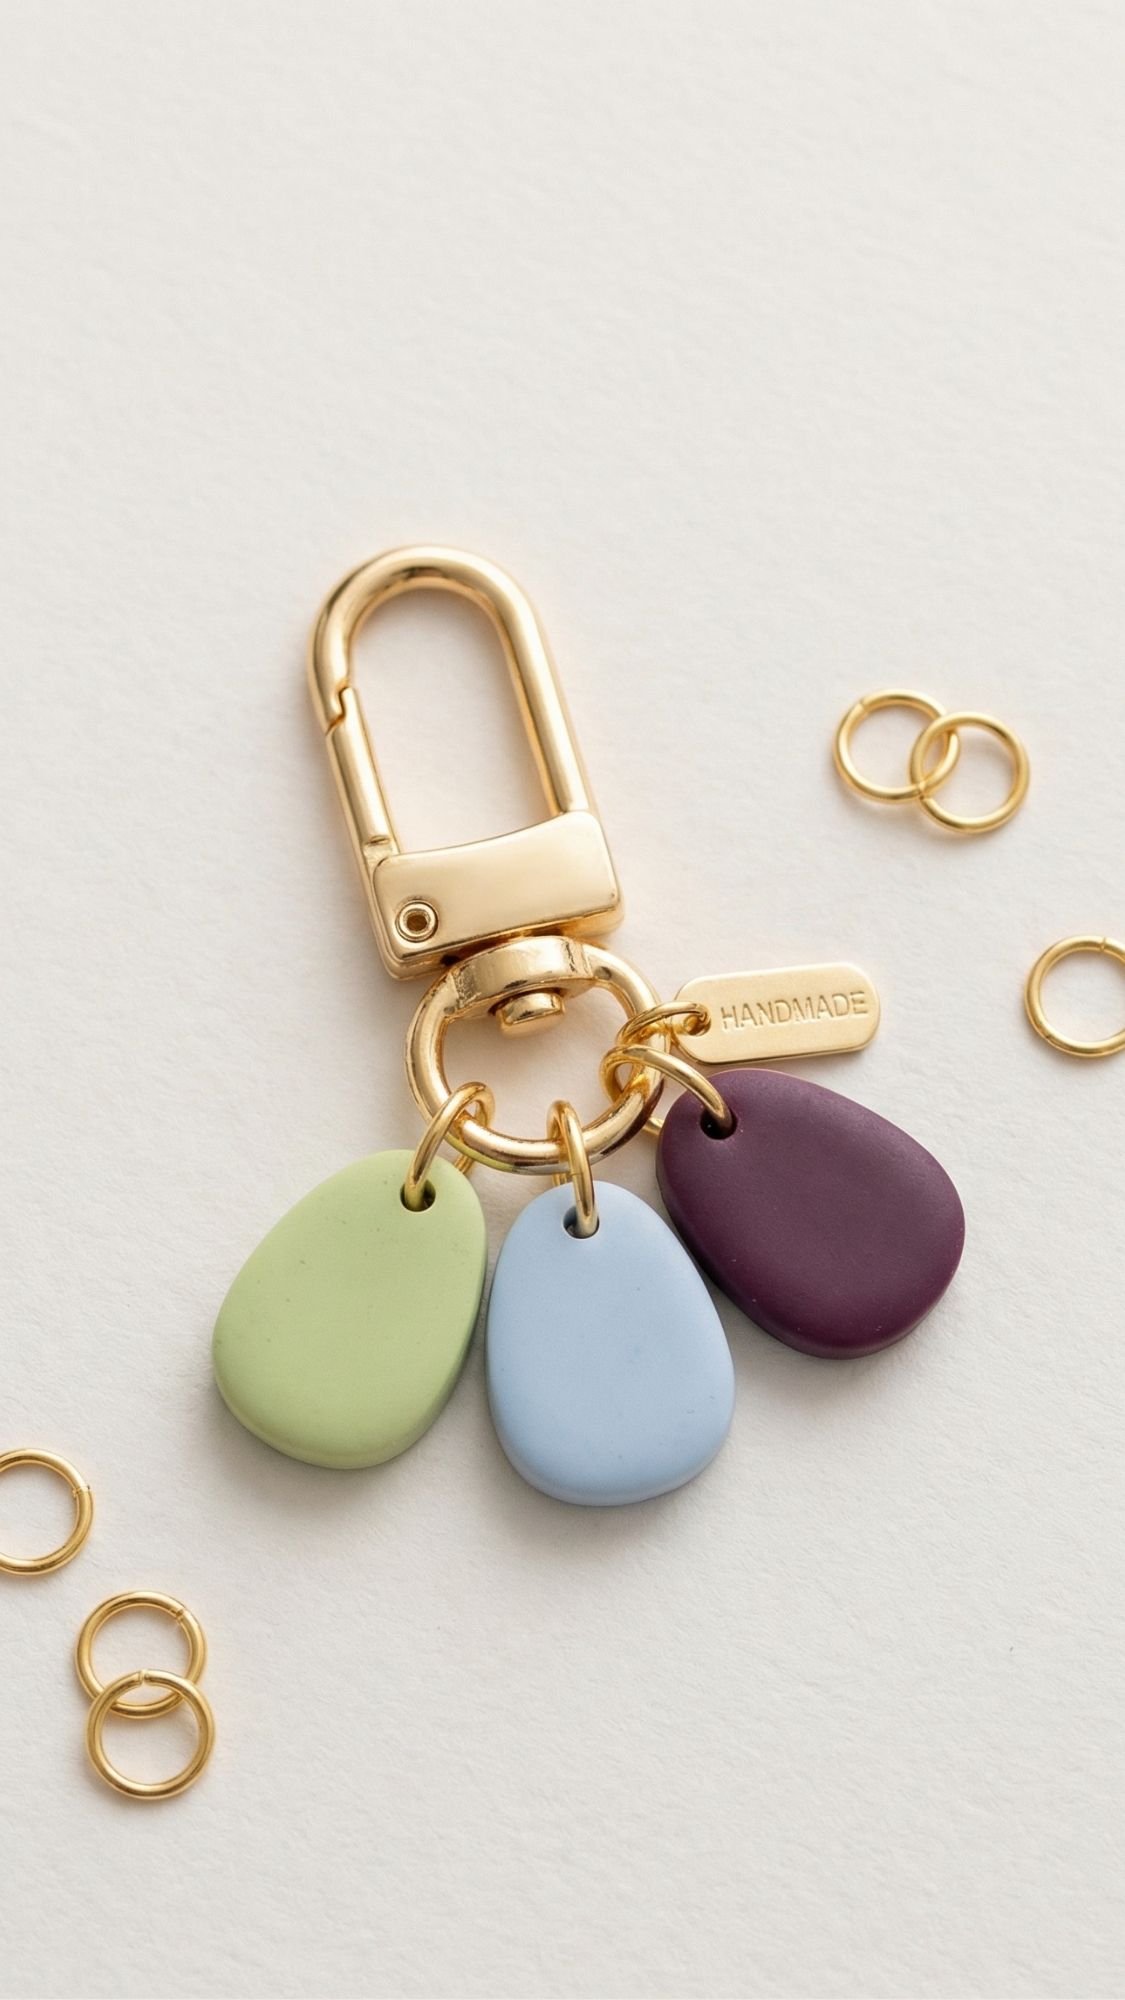
5) Polymer Clay Charm Keychain (Small Gift, Big “She’ll Use It” Energy)
If your bestie loves keys, bags, backpacks, or basically anything she can clip a charm onto, this is a win. Polymer clay also gives you that clean, glossy “store-bought” vibe when you sand the edges and keep the shapes simple. The trick is making it look intentional, not like a mystery blob with hardware.
Why She’ll Love It
- It’s personal without being overly sentimental.
- She can use it daily, keys, purse, zipper pull, even a phone wristlet.
- You can match it to her style with color, initials, and tiny symbols.
What You’ll Need
- Polymer clay (any brand you like)
- Craft knife or clay blade
- Toothpick or skewer (for holes)
- Jump rings + key ring clasp
- Baking sheet or ceramic tile
- Sandpaper (400–800 grit) for smoothing edges
- Optional upgrades: gold leaf flakes, tiny stamp letters, gloss glaze
How To Make It
- Condition the clay until it feels soft and smooth.
- Roll and shape charms, keep them simple:
- Initial disc
- Tiny heart
- Little star, flower, or abstract shape
- Poke holes with a toothpick, keep holes centered and clean.
- Bake on a tile using the package temp and timing.
- Let it cool completely, then sand edges lightly.
- Add glaze if you want shine, then assemble hardware with jump rings.
Pro Tips That Make It Look Boutique
- Use a Pinterest-y 2026 palette combo:
- Wasabi + Cool Blue with gold hardware
- Plum Noir + Cloud Dancer for sleek minimal glam
- Jade + Patina Blue for that vintage-luxe vibe
- Make one “statement charm” and two smaller charms. Odd numbers look designed on purpose.
- Sand the edges. I know it’s boring. It’s also the difference between “cute handmade” and “I would pay for this.”
Quick Fixes If Something Goes Wrong
- Charm cracks after baking: you baked too hot or too long. Lower the temp slightly next time, and keep pieces at an even thickness.
- Holes look messy: you poked after shaping got soft. Chill the charm 5 minutes first, then poke.
- Edges look rough: sand after cooling, then add a thin glaze coat.
- Hardware pulls through: hole is too close to the edge. Redo with more space or add a metal eye pin.
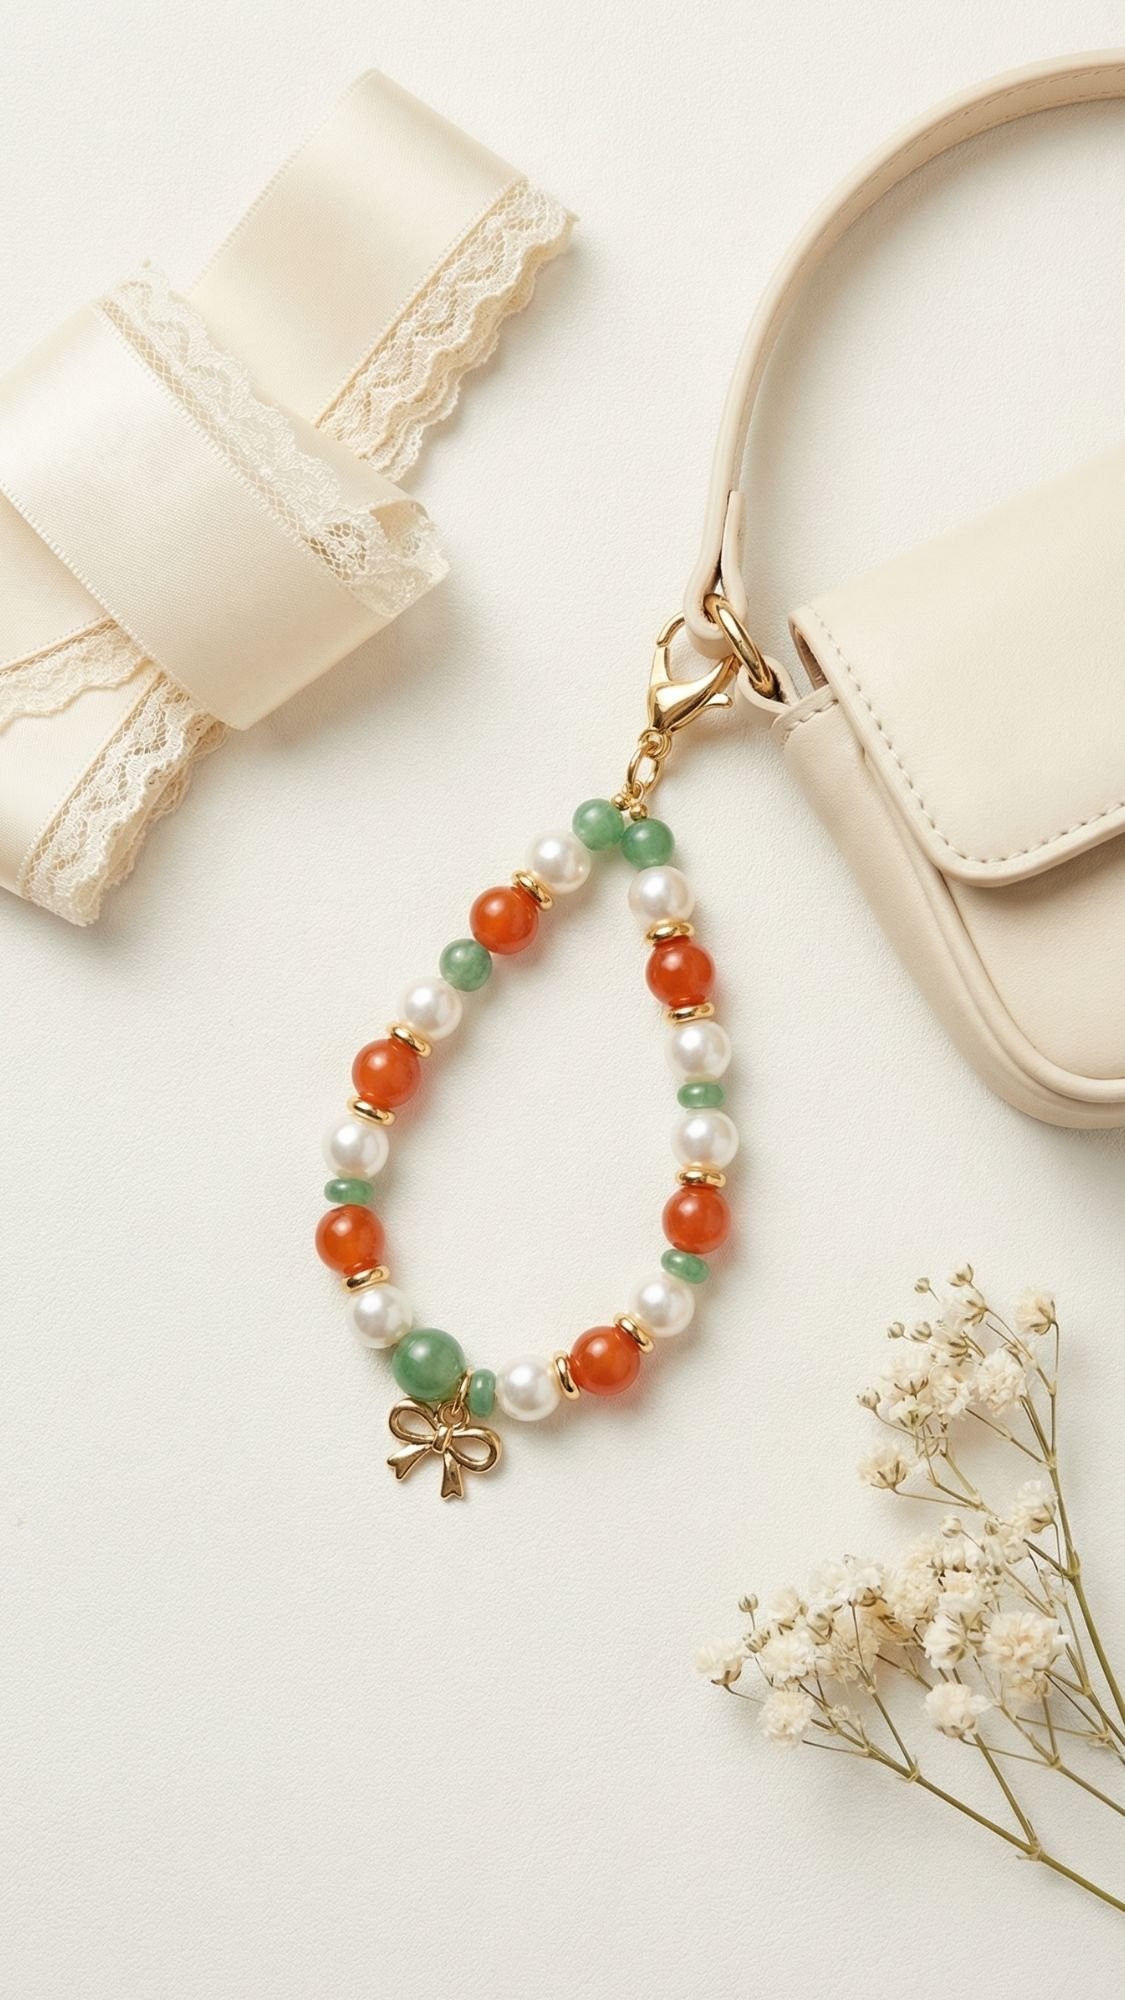
6) Beaded Phone Charm (Or Bag Charm) That Looks Boutique
This is one of those gifts that looks like it came from a trendy little shop, but you can make it in under an hour once you get the hang of it. It’s also super customizable without turning into a complicated project. If your best friend loves accessories, she’ll clip this on immediately and then take 12 photos of it. That’s not even a guess, that’s science.
Why She’ll Love It
- It’s cute, practical, and instantly usable.
- You can match it to her aesthetic in 2 seconds with bead colors.
- It gives “designer bag charm energy” without the designer price tag.
What You’ll Need
- Beads (mix sizes for a higher-end look)
- Letter beads for initials or a short word
- Stretch cord or beading wire (wire looks more polished)
- Lobster clasp or phone charm loop
- Crimp beads (if using wire)
- Small pliers
- Optional upgrades: one pearl bead, one metallic bead, tiny bow charm
How To Make It
- Decide if it’s a phone charm (lighter) or a bag charm (slightly sturdier).
- Plan the bead pattern before stringing. It keeps you from ripping it apart halfway through.
- String beads, then add the letters in the center.
- Secure:
- Stretch cord: double knot + tiny dab of clear glue
- Wire: crimp bead + clasp
- Clip it to her phone case loop, zipper, or purse strap.
Pro Tips That Make It Look Expensive
- Use one “luxury bead” to upgrade the whole charm:
- pearl, gold spacer, crystal, or a tiny bow charm
- Keep words short. Think: BFF, initials, or one nickname.
- Best color combos for a 2026 feel:
- Patina Blue + Cloud Dancer + pearl
- Jade + Cool Blue + gold
- Persimmon + Cloud Dancer + metallic accents
- Make the pattern symmetrical. Symmetry reads as “store-bought.”
Quick Fixes If Something Goes Wrong
- Cord frays while threading: seal the end with a tiny dab of clear glue, let it dry, then thread.
- Knot slips: use a surgeon’s knot, then add a micro dab of glue.
- Charm feels flimsy: switch to beading wire and crimp beads.
- Letters look cheap: keep them minimal and surround them with nicer spacers.
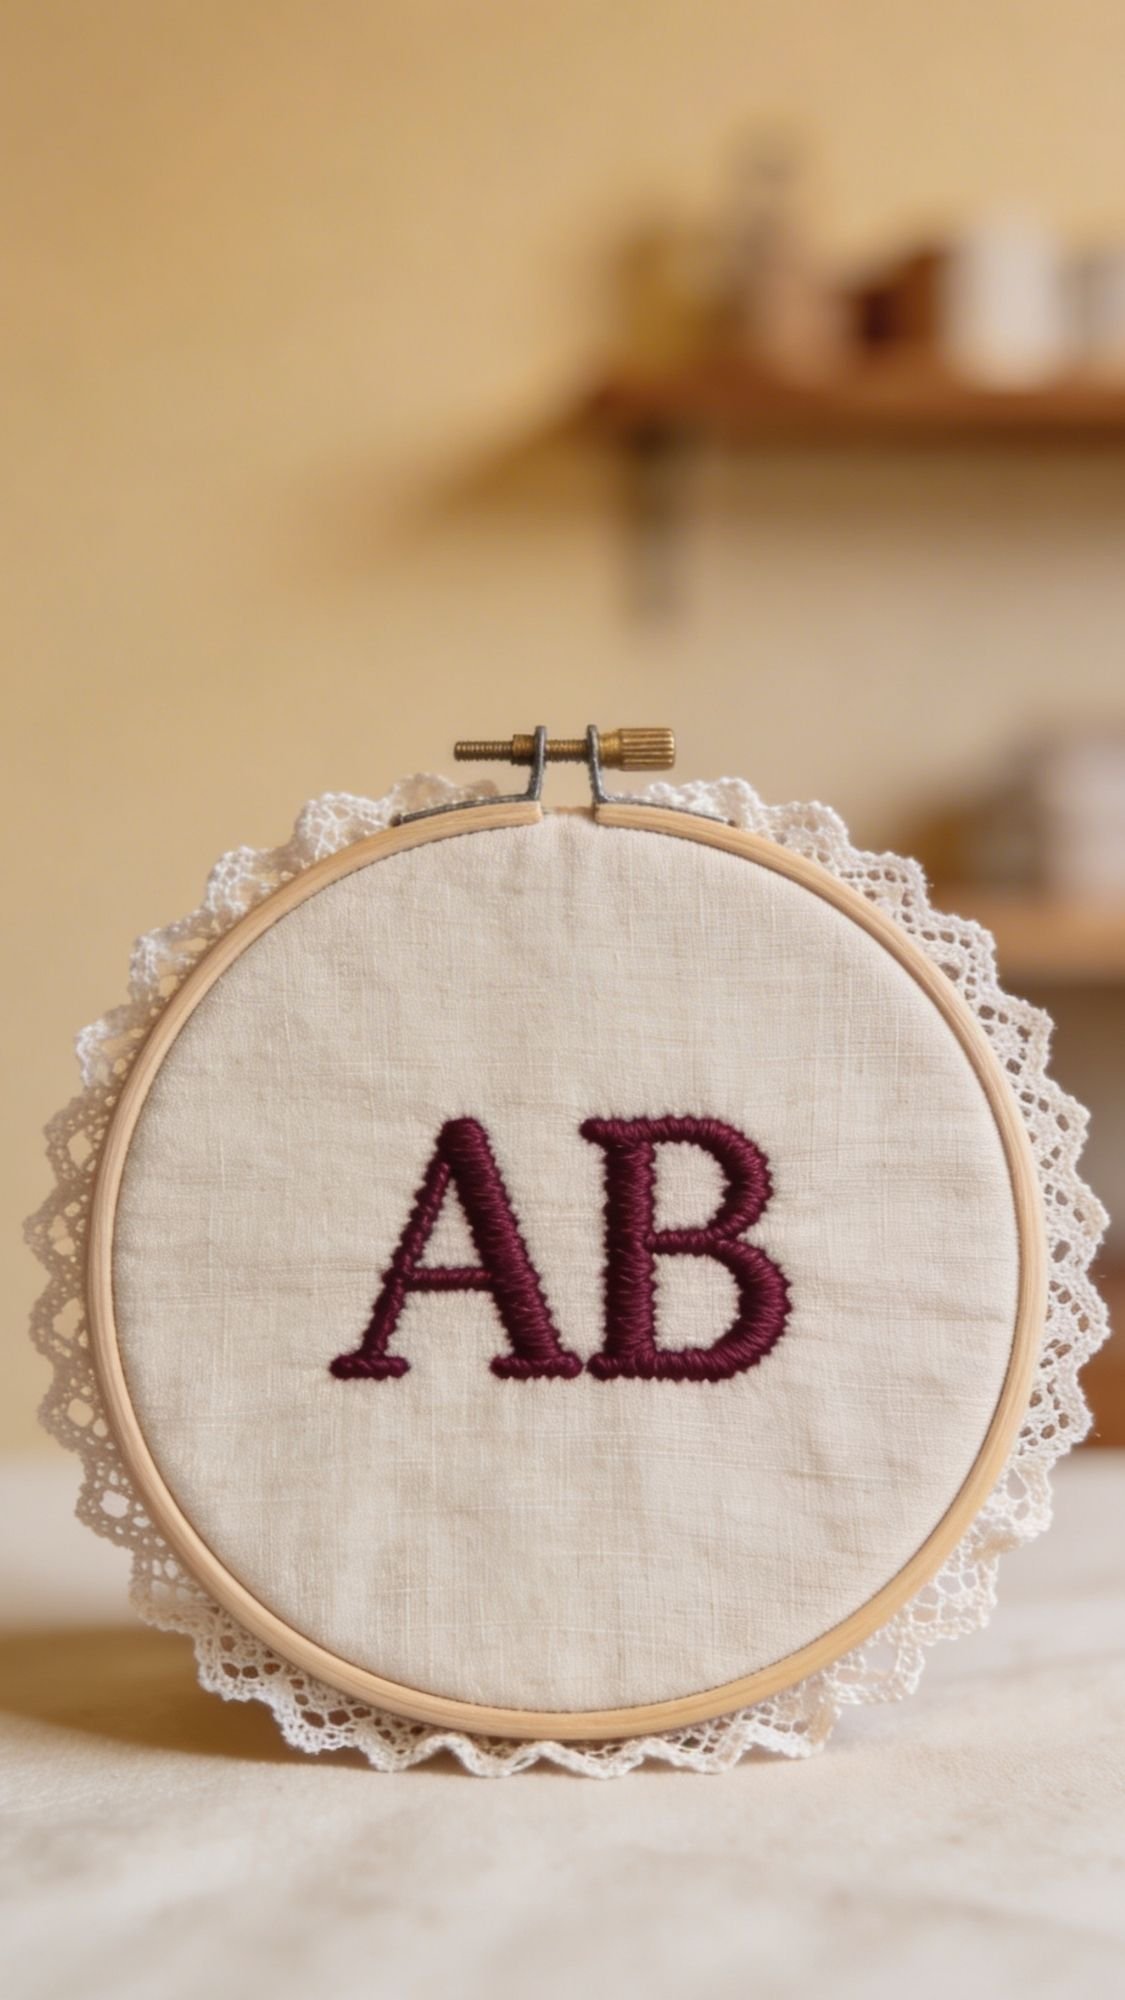
7) Embroidered Initial Hoop (Wall Art She’ll Actually Hang)
This one feels personal without needing a ton of supplies. Plus, it gives that sweet “I made this specifically for you” energy, which hits way harder than another random decor item. And if your friend loves clean, cozy aesthetics, a simple monogram hoop looks surprisingly high-end when you keep the stitching neat.
Why She’ll Love It
- It’s a keepsake, but not overly mushy.
- It works for dorms, apartments, offices, and gallery walls.
- You can customize it in a modern way or a super soft, romantic way.
What You’ll Need
- Embroidery hoop (6–8 inch is a good size)
- Cotton or linen fabric
- Embroidery floss
- Needle, small scissors
- Transfer pen or pencil
- Optional upgrades: lace trim, tiny bow, metallic thread for one accent stitch
How To Make It
- Iron your fabric first. Wrinkles make everything harder for no reason.
- Pull the fabric tight in the hoop, like a drum. Tight fabric = cleaner stitches.
- Draw or transfer the initial in the center.
- Stitch the initial using a simple stitch:
- Satin stitch for bold filled letters
- Backstitch for thin clean outlines
- Add one small detail if you want, a tiny bow, mini florals, or a simple border.
- Trim fabric on the back and secure with glue or a running stitch to finish it neatly.
Pro Tips That Make It Look Boutique
- Keep the design minimal. One initial plus one small accent looks intentional.
- Use 2–3 thread colors max. This keeps it chic, not chaotic.
- Cute color combos:
- Plum Noir thread on Cloud Dancer fabric for clean glam
- Patina Blue thread with a lace edge for soft vintage
- Jade initial with a tiny Persimmon bow for a fun pop
- If stitches start looking puffy, you’re pulling too tight. Relax your tension a bit.
Quick Fixes If Something Goes Wrong
- Fabric puckers: loosen your stitch tension, and tighten the hoop again.
- Initial looks crooked: mark the center of the hoop first, then align the letter.
- Thread tangles constantly: cut shorter thread lengths. Long thread loves drama.
- Back looks messy: cover the back with a felt circle. It instantly looks finished.
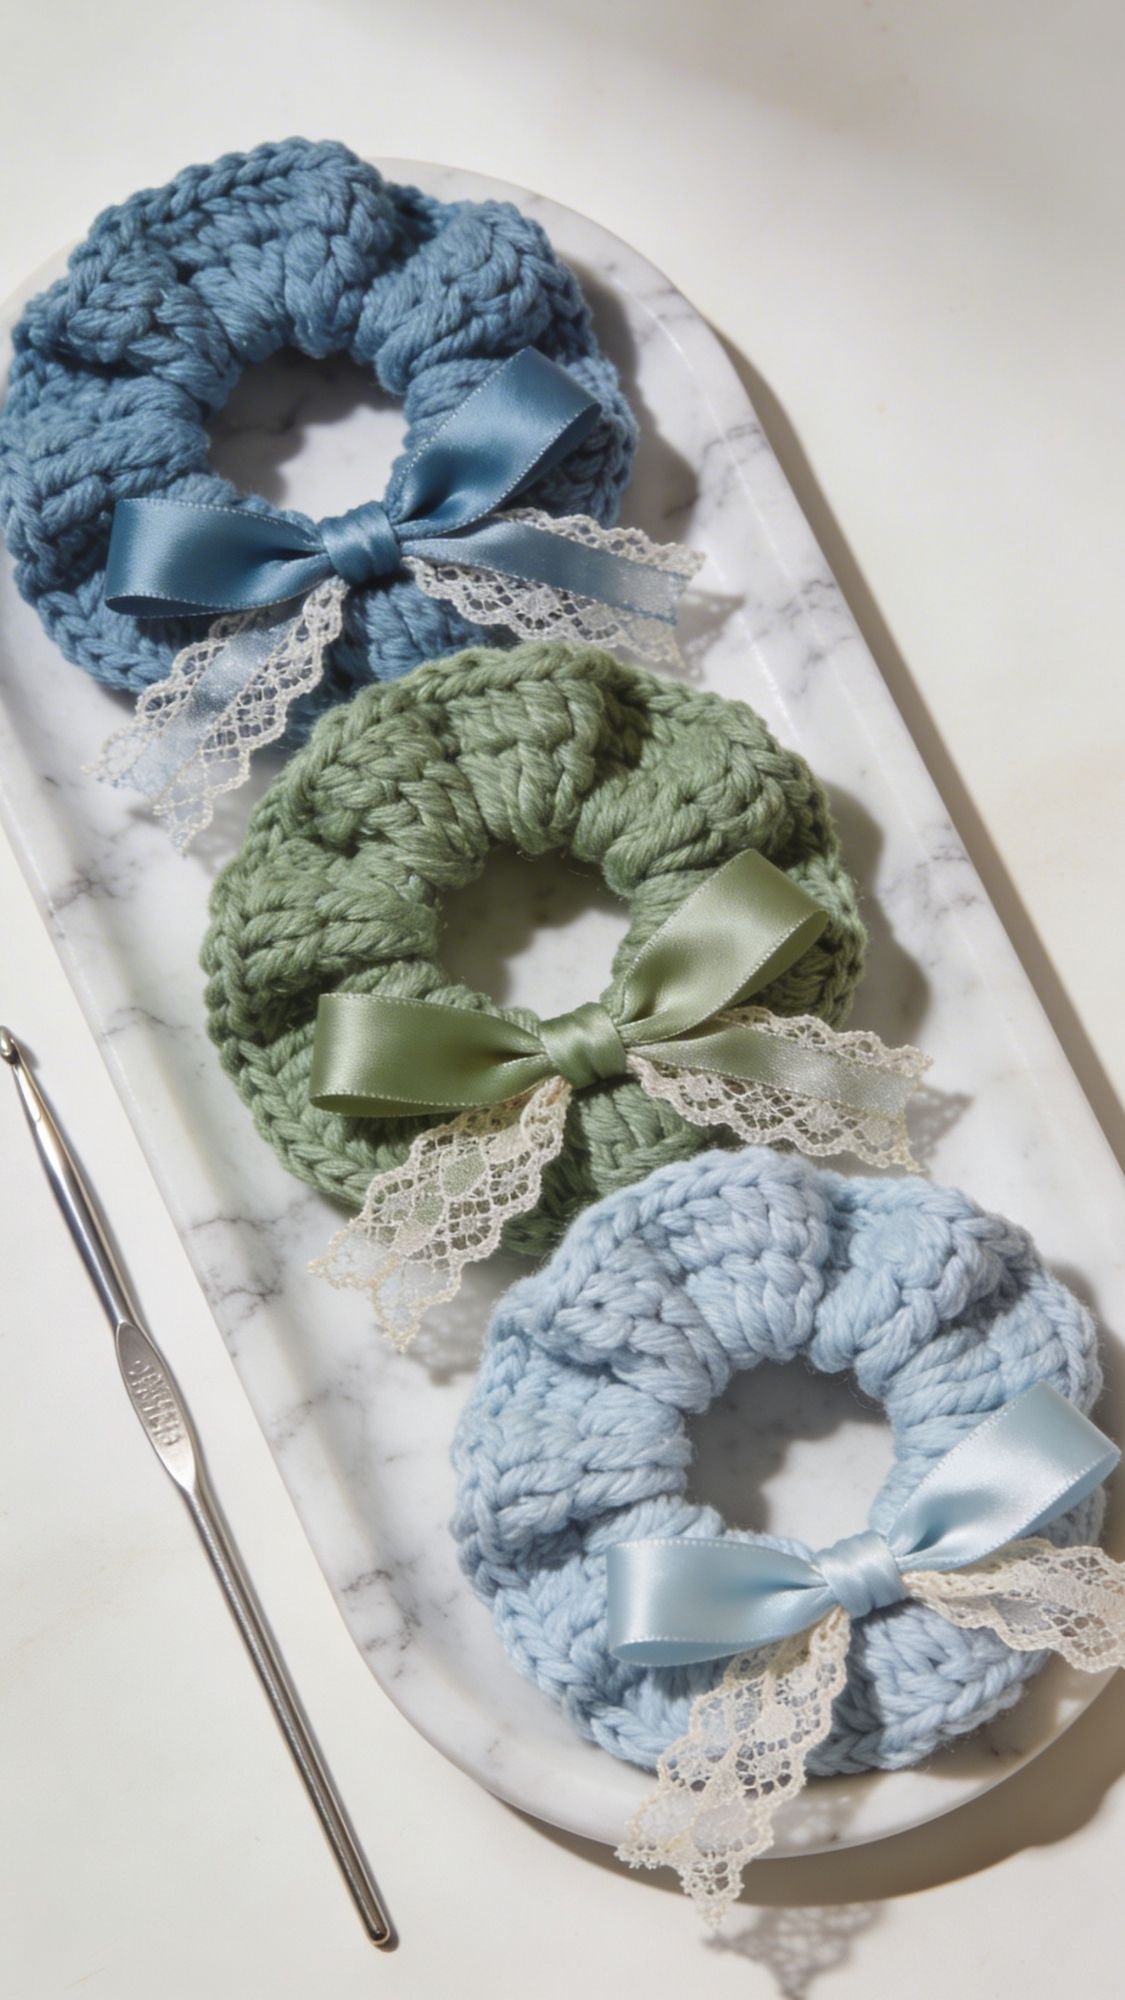
8) Crochet Scrunchie Set (Fast, Useful, Cute, No Notes)
Scrunchies are the kind of gift that looks small until your friend uses one daily and suddenly you’re her favorite person again. Also, they photograph so well, especially when you bundle three textures together like it’s a curated set. If you’ve ever tried to gift just one scrunchie, you know it feels a little “I ran out of time.” A set fixes that immediately.
Why She’ll Love It
- She’ll use them constantly, hair, wrist, bag strap, you name it.
- You can match the colors to her wardrobe.
- It feels like a boutique pack when you bundle it nicely.
What You’ll Need
- Scrunchie elastic, or a basic hair elastic
- Yarn
- Velvet yarn for luxe
- Cotton for everyday
- Fuzzy yarn for cozy
- Crochet hook (size depends on yarn, but medium usually works)
- Yarn needle, scissors
- Optional upgrades: tiny tag, satin ribbon, lace detail for packaging
How To Make It
- Wrap yarn around the elastic with single crochet stitches until it’s fully covered.
- Keep stitches consistent, don’t yank the yarn tight.
- Join the end cleanly and weave in the tail securely.
- Repeat for 3 scrunchies with different textures.
Pro Tips That Make It Look Boutique
- Do a three-pack that feels intentional:
- 1 velvet, 1 cotton, 1 fuzzy
- Keep the palette coordinated:
- Cool Blue + Cloud Dancer + Patina Blue
- Jade + Cloud Dancer + a tiny Persimmon accent ribbon
- Add a tiny paper tag that says “Handmade For You” and tie the set with a satin bow.
Quick Fixes If Something Goes Wrong
- Stitches look uneven: go down one hook size, and slow down a bit.
- Scrunchie looks stiff: you stitched too tight. Loosen tension and try again.
- Ends pop out: weave the yarn tail in twice, then knot discreetly.
- Set looks messy: steam lightly and arrange them as a stacked bundle before gifting.
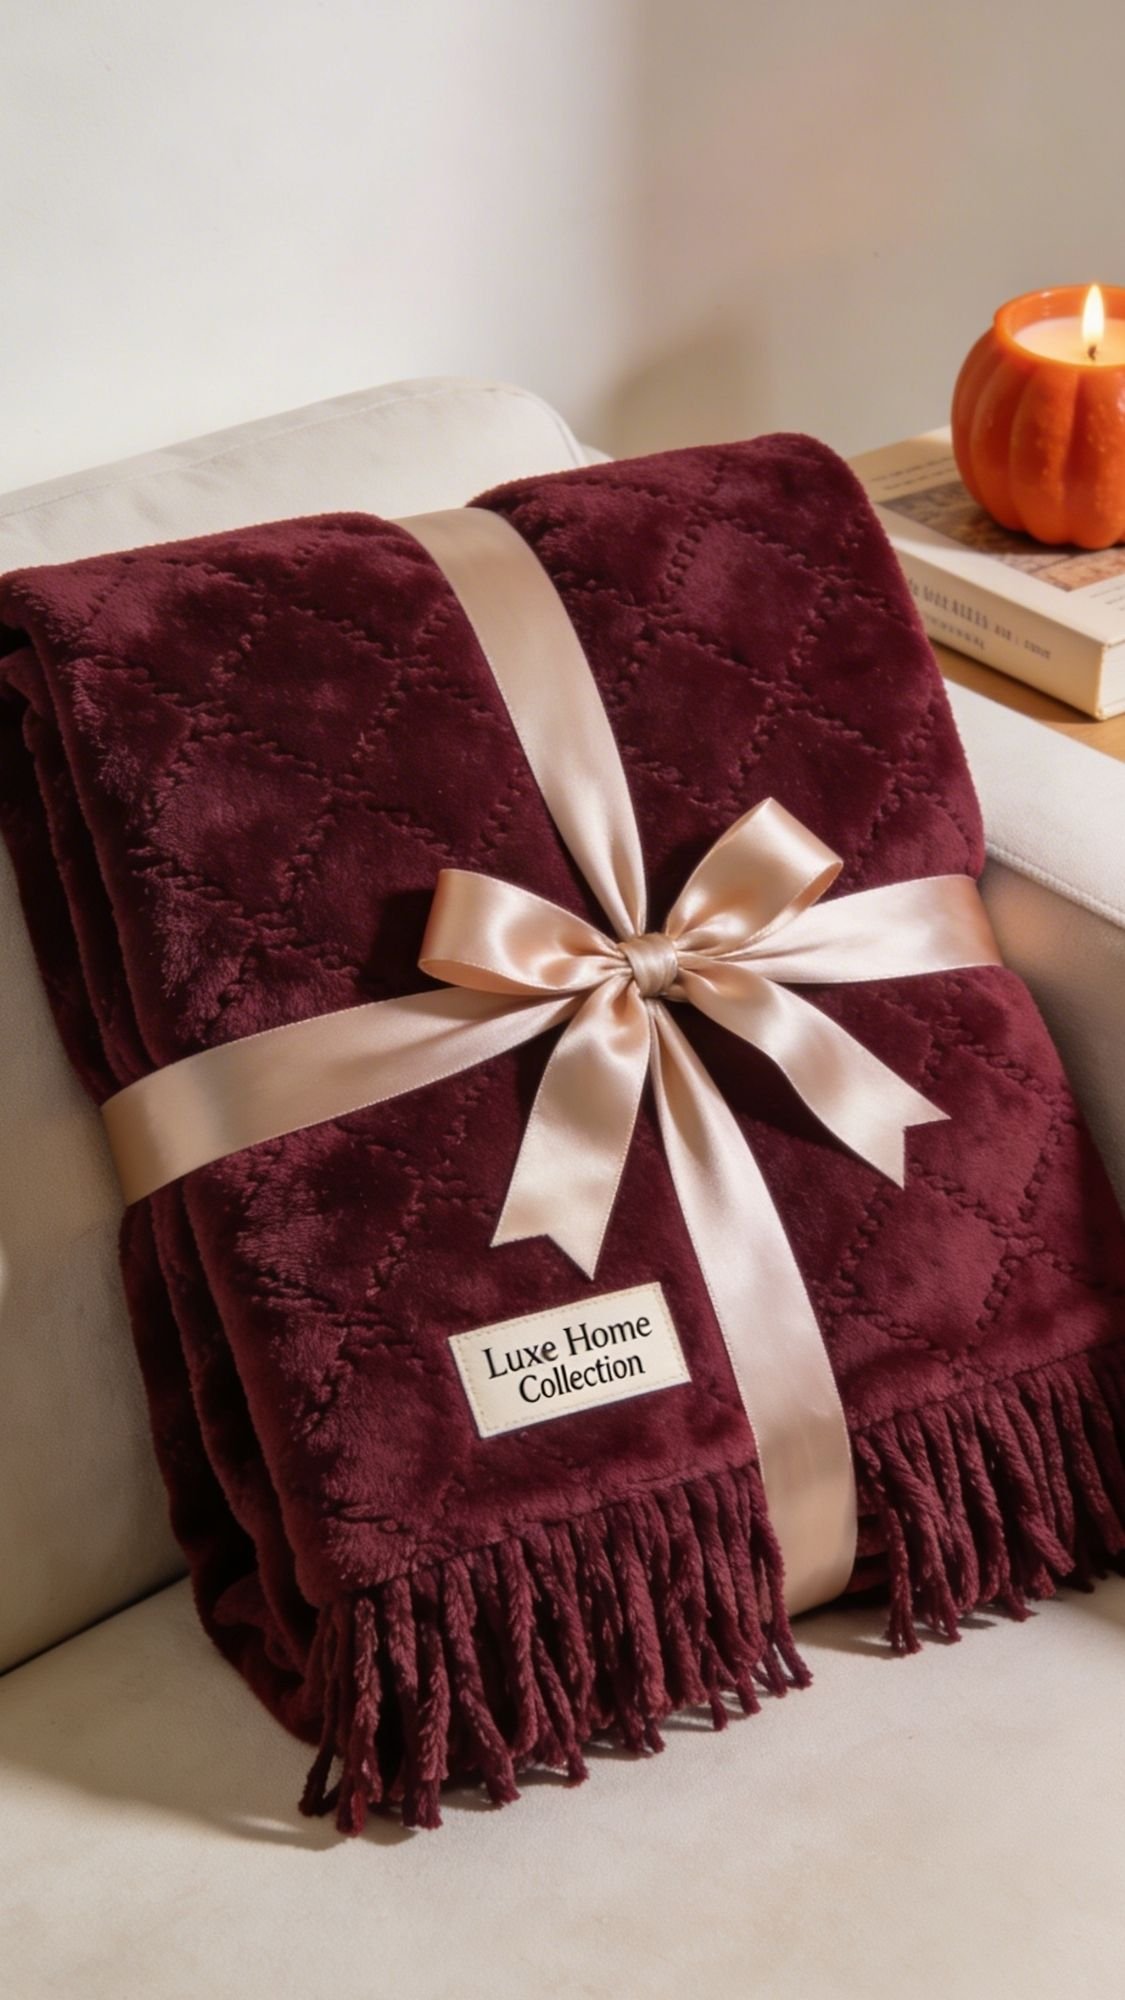
9) No-Sew Fleece Throw (Yes, It Counts, And It’s So Cozy)
This is the gift you make for the friend who loves being comfy more than being impressed by complicated crafts. It’s warm, it’s useful, and it feels like a hug in blanket form. Also, no-sew projects are underrated. If anyone side-eyes it, they can go be cold somewhere else.
Why She’ll Love It
- It’s cozy instantly, no “special occasion only” energy.
- You can customize it to her colors and vibe.
- It’s beginner-friendly and still looks giftable.
What You’ll Need
- Two coordinating fleece pieces (or one thick fleece if you want it lighter)
- Fabric scissors or rotary cutter
- Ruler or measuring tape
- Optional upgrades:
- Iron-on monogram patch
- Small tag that says “Made For Cozy Nights”
- Ribbon wrap for gifting
How To Make It
- Lay both fleece pieces together, trim edges so they match.
- Cut a square out of each corner (about 4–5 inches).
- Cut fringe strips around all sides, about 1 inch wide.
- Tie the fringe into tight, even knots all the way around.
- Trim any uneven fringe so it looks clean.
Pro Tips That Make It Look Boutique
- Pick fleece that looks elevated, like:
- subtle plaid
- neutral textures
- soft tonal patterns
- Keep knots consistent. Uneven knots scream “rushed.”
- Add a Cloud Dancer ribbon wrap with a Plum Noir tag for a clean luxe finish.
- If you add a patch, press it on a flat area, then stitch the corners down so it stays put.
Quick Fixes If Something Goes Wrong
- Blanket sheds everywhere: wash once on gentle, then air dry.
- Fringe looks messy: trim fringe ends evenly and re-tie any loose knots.
- Corners curl: you cut the fringe too short. Next time, cut longer strips and tie tighter.
- Patch peels: you didn’t heat it long enough. Re-press with parchment, then add a few hand stitches.
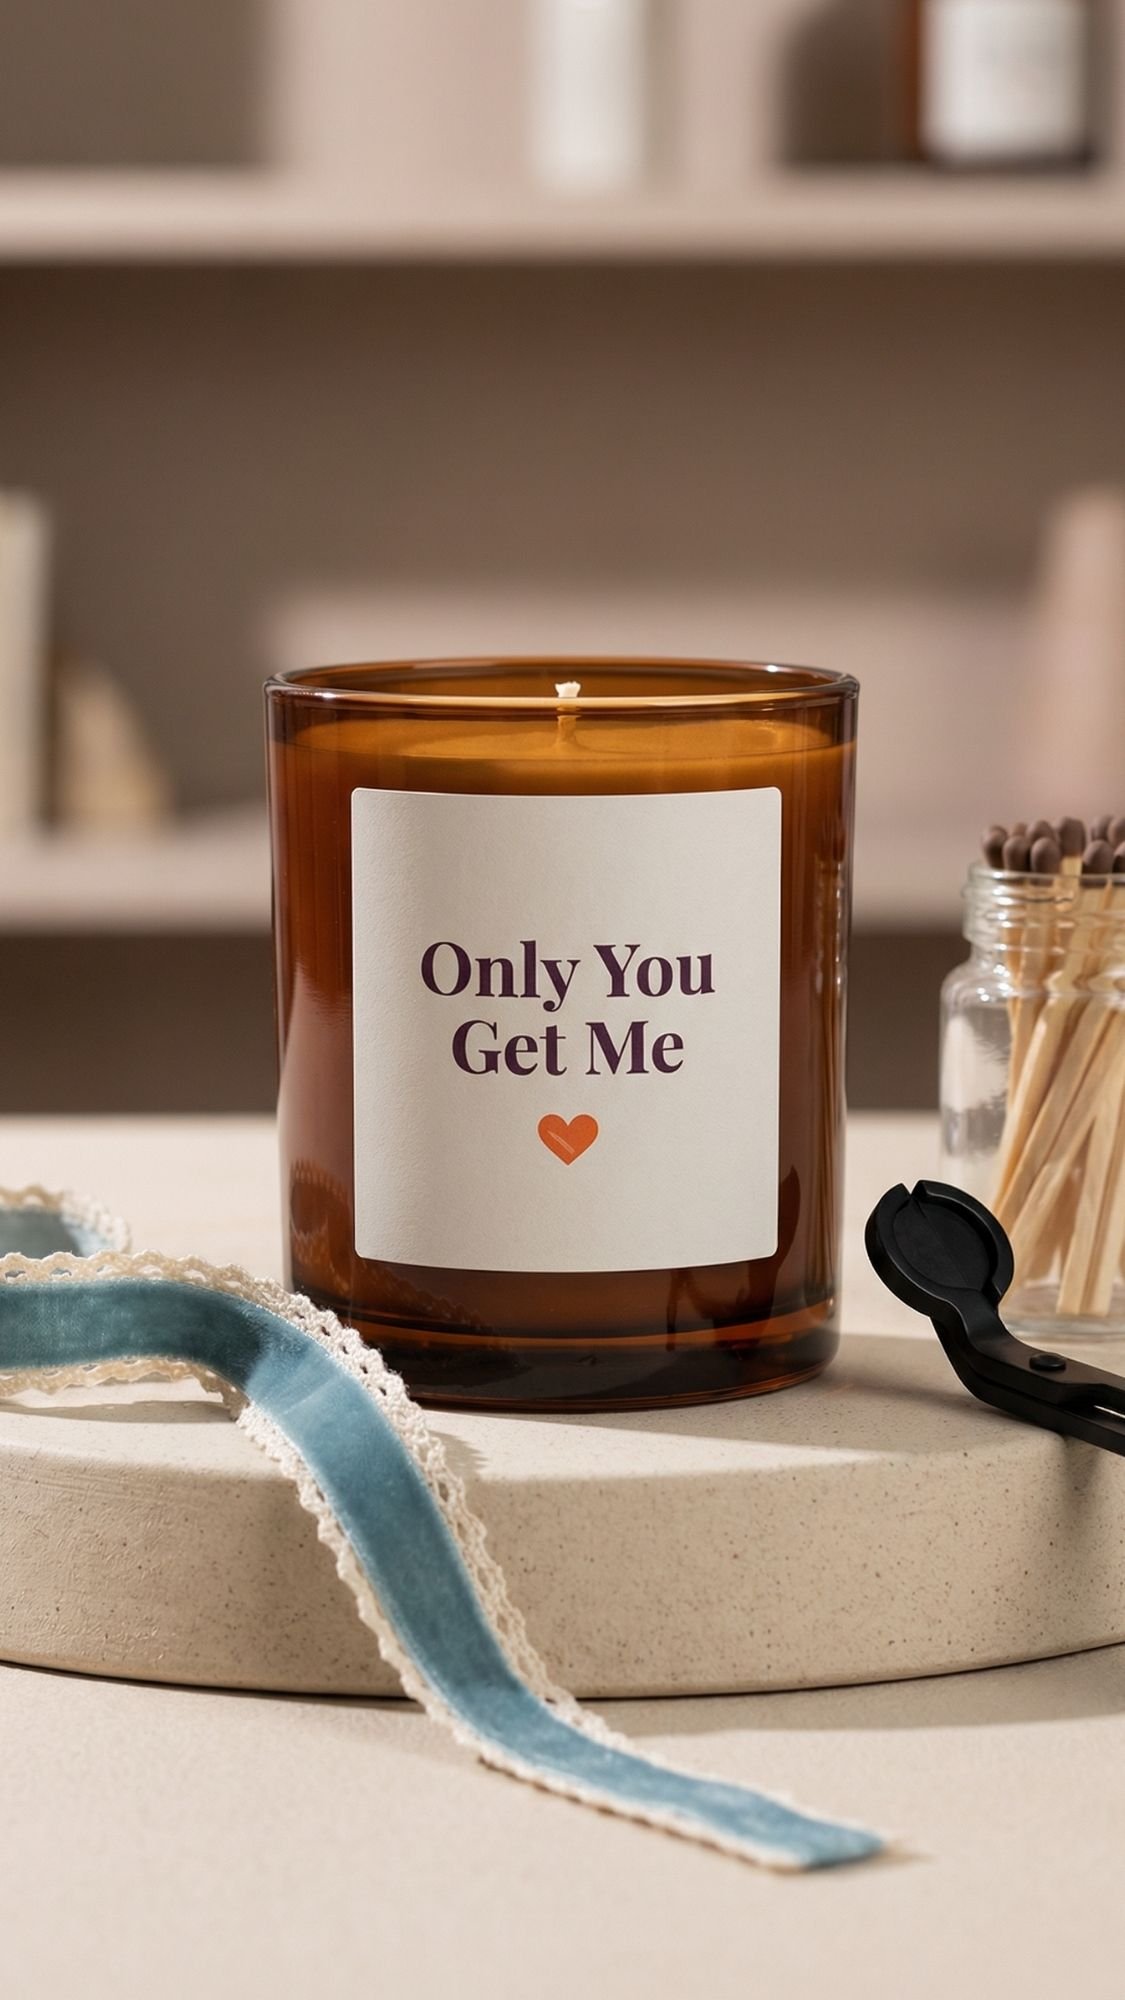
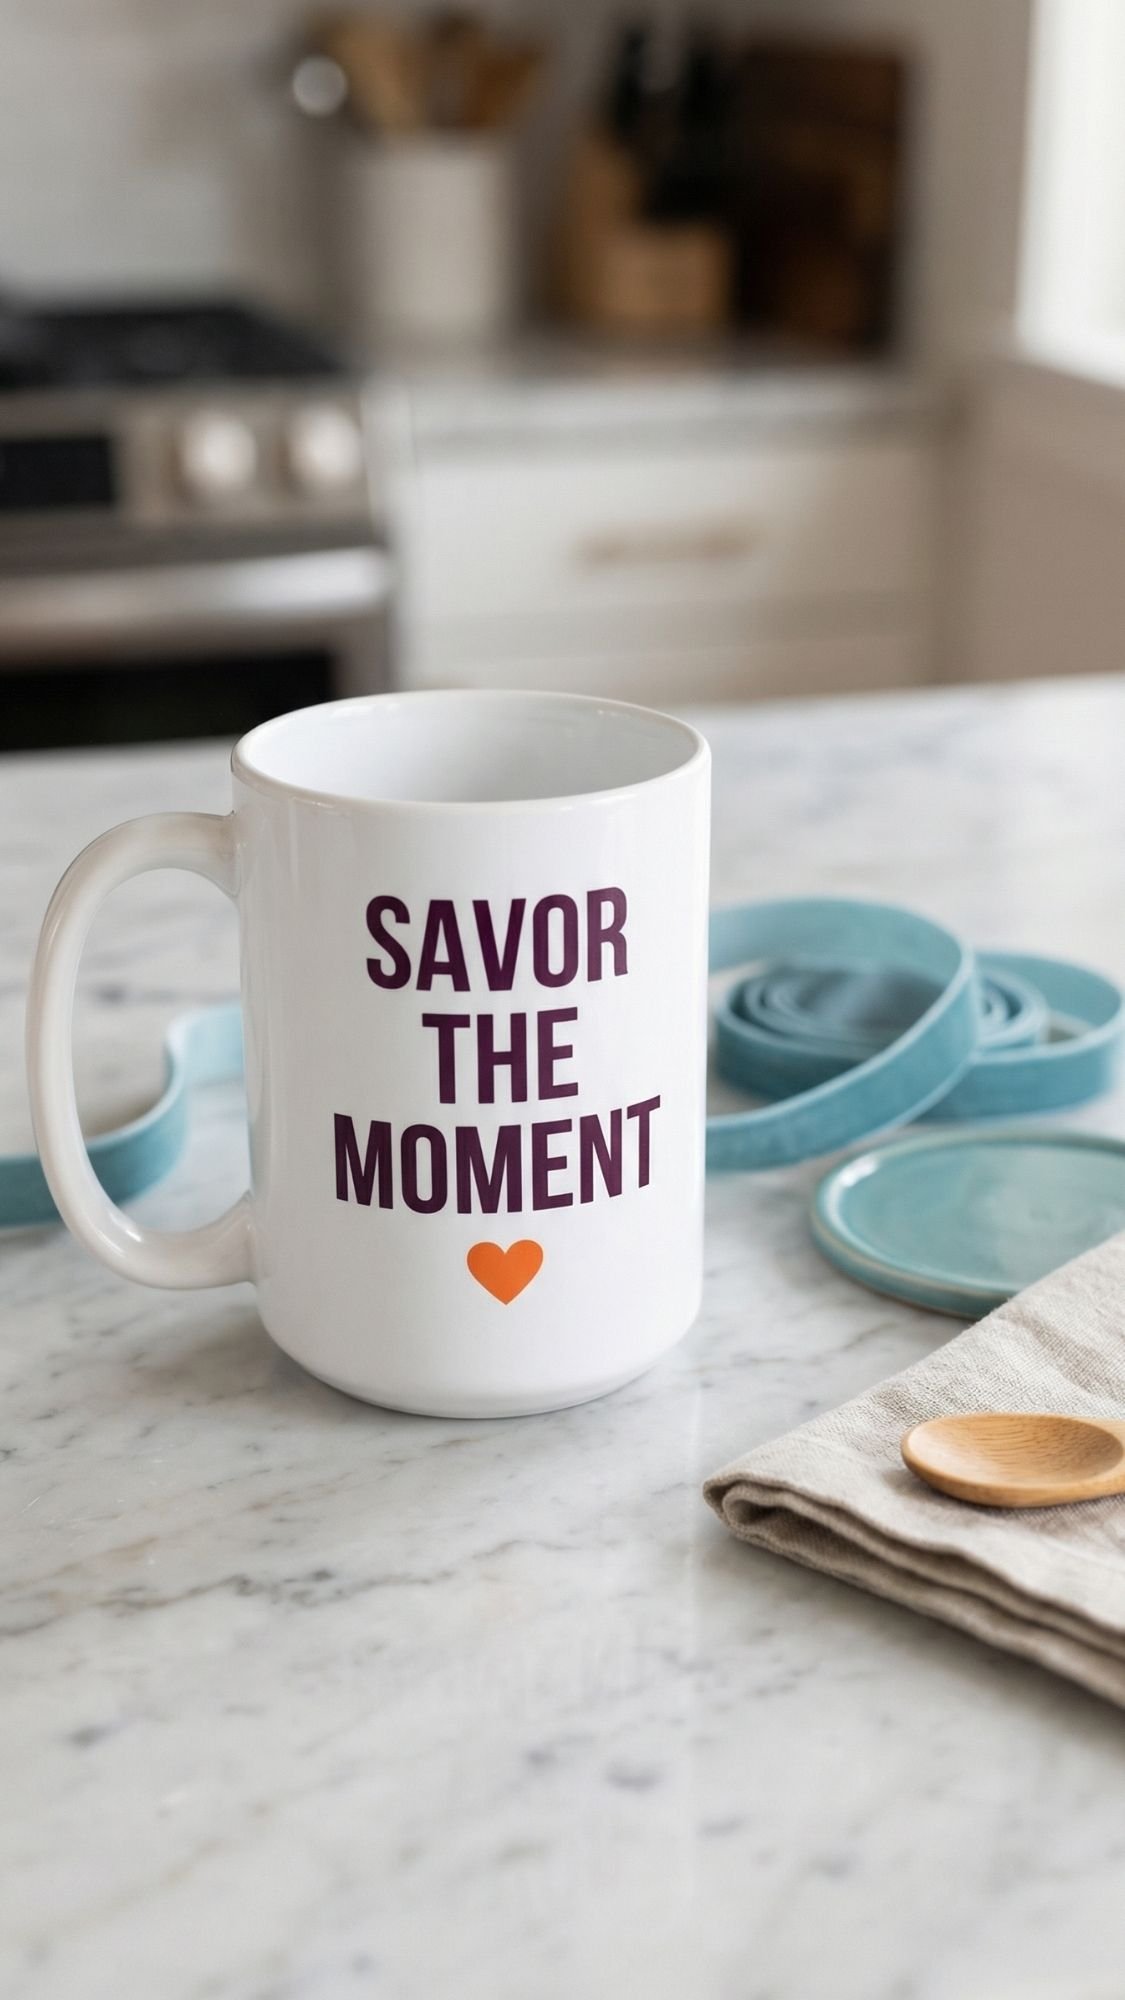
10) Custom Candle With A “Only You Get Me” Label (Easy, But Looks Expensive)
A candle is a classic gift, but the label is what makes it feel personal. You’re basically taking something ordinary and turning it into “I bought this from a cute boutique and it cost more than I’ll admit.” And if you add a simple care card, it goes from cute to legitimately thoughtful.
Why She’ll Love It
- It feels cozy and personal without being complicated.
- She’ll light it and think of you, which is the whole point.
- It’s a great last-minute option that still looks intentional.
What You’ll Need
- A plain candle in a jar (or an empty jar + candle wax if you’re pouring your own)
- Printable label paper or sticker paper
- Scissors or paper cutter
- Rubbing alcohol + microfiber cloth (for cleaning the jar)
- Optional upgrades:
- Ribbon or lace detail around the lid
- Wax seal on the gift tag
- Matching matches in a cute jar
How To Make It
- Clean the candle jar with rubbing alcohol, let it dry fully.
- Design a simple label. Keep it readable.
- “Only You Get Me”
- “Bestie Energy”
- “Burn This When You Miss Me”
- Print and cut the label cleanly. Straight edges matter here.
- Apply slowly from the center outward, then burnish with a card.
- Add a small care tag, and tie the candle with ribbon if you want it extra giftable.
Pro Tips That Make It Look Boutique
- Use a minimal label style with one accent color:
- Patina Blue label on a Cloud Dancer jar moment
- Plum Noir text with a tiny Persimmon heart
- Matte labels look more expensive than glossy most of the time.
- Put the label perfectly centered. Yes, this is the annoying part. Yes, it’s worth it.
Candle Care Card (Include This On A Tag)
- Trim wick to about 1/4 inch before each burn.
- Burn long enough to melt the top layer evenly.
- Let it cool fully before moving.
- Keep away from drafts so it burns evenly.
Quick Fixes If Something Goes Wrong
- Label bubbles: you trapped air. Peel gently, reapply, and burnish slowly.
- Label won’t stick: jar has oils or dust. Re-clean with alcohol, then try again.
- Label looks crooked: lightly remove before it fully bonds, then re-place using a ruler line.
- Jar looks cloudy after cleaning: wipe with a dry microfiber cloth right after alcohol.
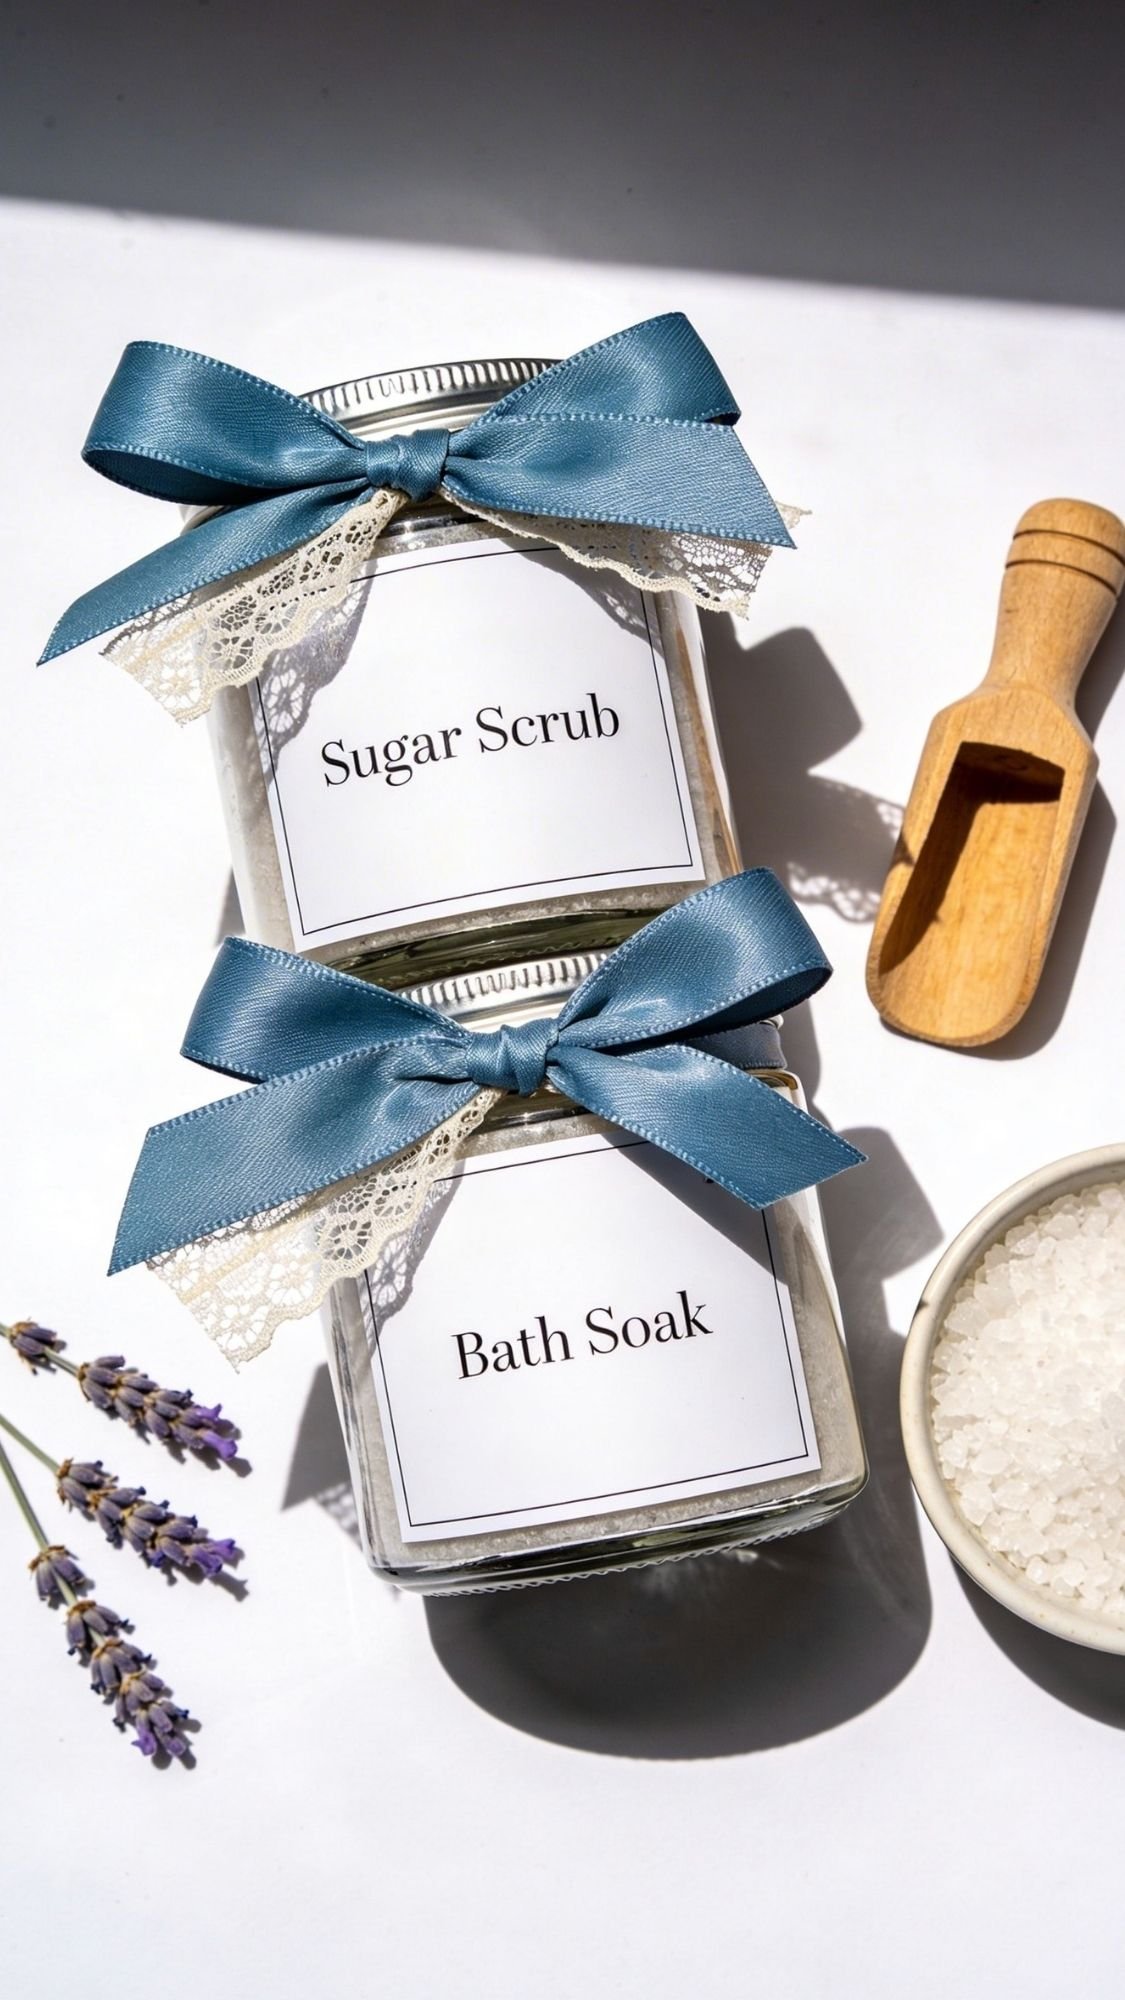
11) Sugar Scrub + Bath Soak Duo (Spa Night In A Jar)
This is the kind of gift that feels like you planned a whole self-care night for her. Also, it looks so pretty packaged as a duo. The trick is keeping it clean, labeled, and not oily-messy. Nobody wants a “luxury scrub” that leaks all over the gift bag. :/
Why She’ll Love It
- It feels thoughtful and pampering without being expensive.
- It’s easy to customize for scent and skin sensitivity.
- It makes a cute “open and use tonight” gift.
What You’ll Need
For the sugar scrub
- Sugar (white or brown)
- Carrier oil (coconut, jojoba, sweet almond)
- Optional: a little honey or vitamin E oil
- Optional: essential oil or fragrance oil
- Small jar with lid
For the bath soak
- Epsom salt
- Baking soda (optional for a softer feel)
- Optional: dried lavender or rose petals
- Optional: essential oil (use lightly)
- Second jar with lid
Packaging
- Two matching jars, or one tall jar and one short jar
- Labels + pen
- Ribbon, lace ribbon works beautifully here
- Mini scoop or spoon (makes it feel more premium)
How To Make It
Sugar Scrub
- Mix sugar with oil slowly, start with less oil than you think.
- Stir until it looks like damp sand, not soup.
- Add scent lightly, then stir again.
- Spoon into jar, wipe rim clean before closing.
Bath Soak
- Mix Epsom salt with baking soda if using.
- Add dried botanicals sparingly, too much looks messy and can clog drains.
- Add scent lightly, stir well.
- Spoon into jar, wipe rim clean before closing.
Pro Tips That Make It Look Boutique
- Keep it minimal. A clean label and a pretty ribbon beat over-decorating.
- Use a coordinated palette:
- Cloud Dancer labels + Patina Blue ribbon
- Add a tiny Jade accent tag for a modern pop
- Include a tiny “how to use” card:
- Scrub: use 1–2 times a week
- Soak: 1/2 cup in warm water, soak 15–20 minutes
Quick Fixes If Something Goes Wrong
- Scrub separates: you added too much oil. Stir again, then add a tablespoon of sugar to thicken.
- Soak clumps: moisture got in. Break up clumps and store with a tight lid, keep away from steam.
- Botanicals look messy: use less, or put them only on top for a clean layered look.
- Label won’t stick: wipe jar with rubbing alcohol first, then apply.
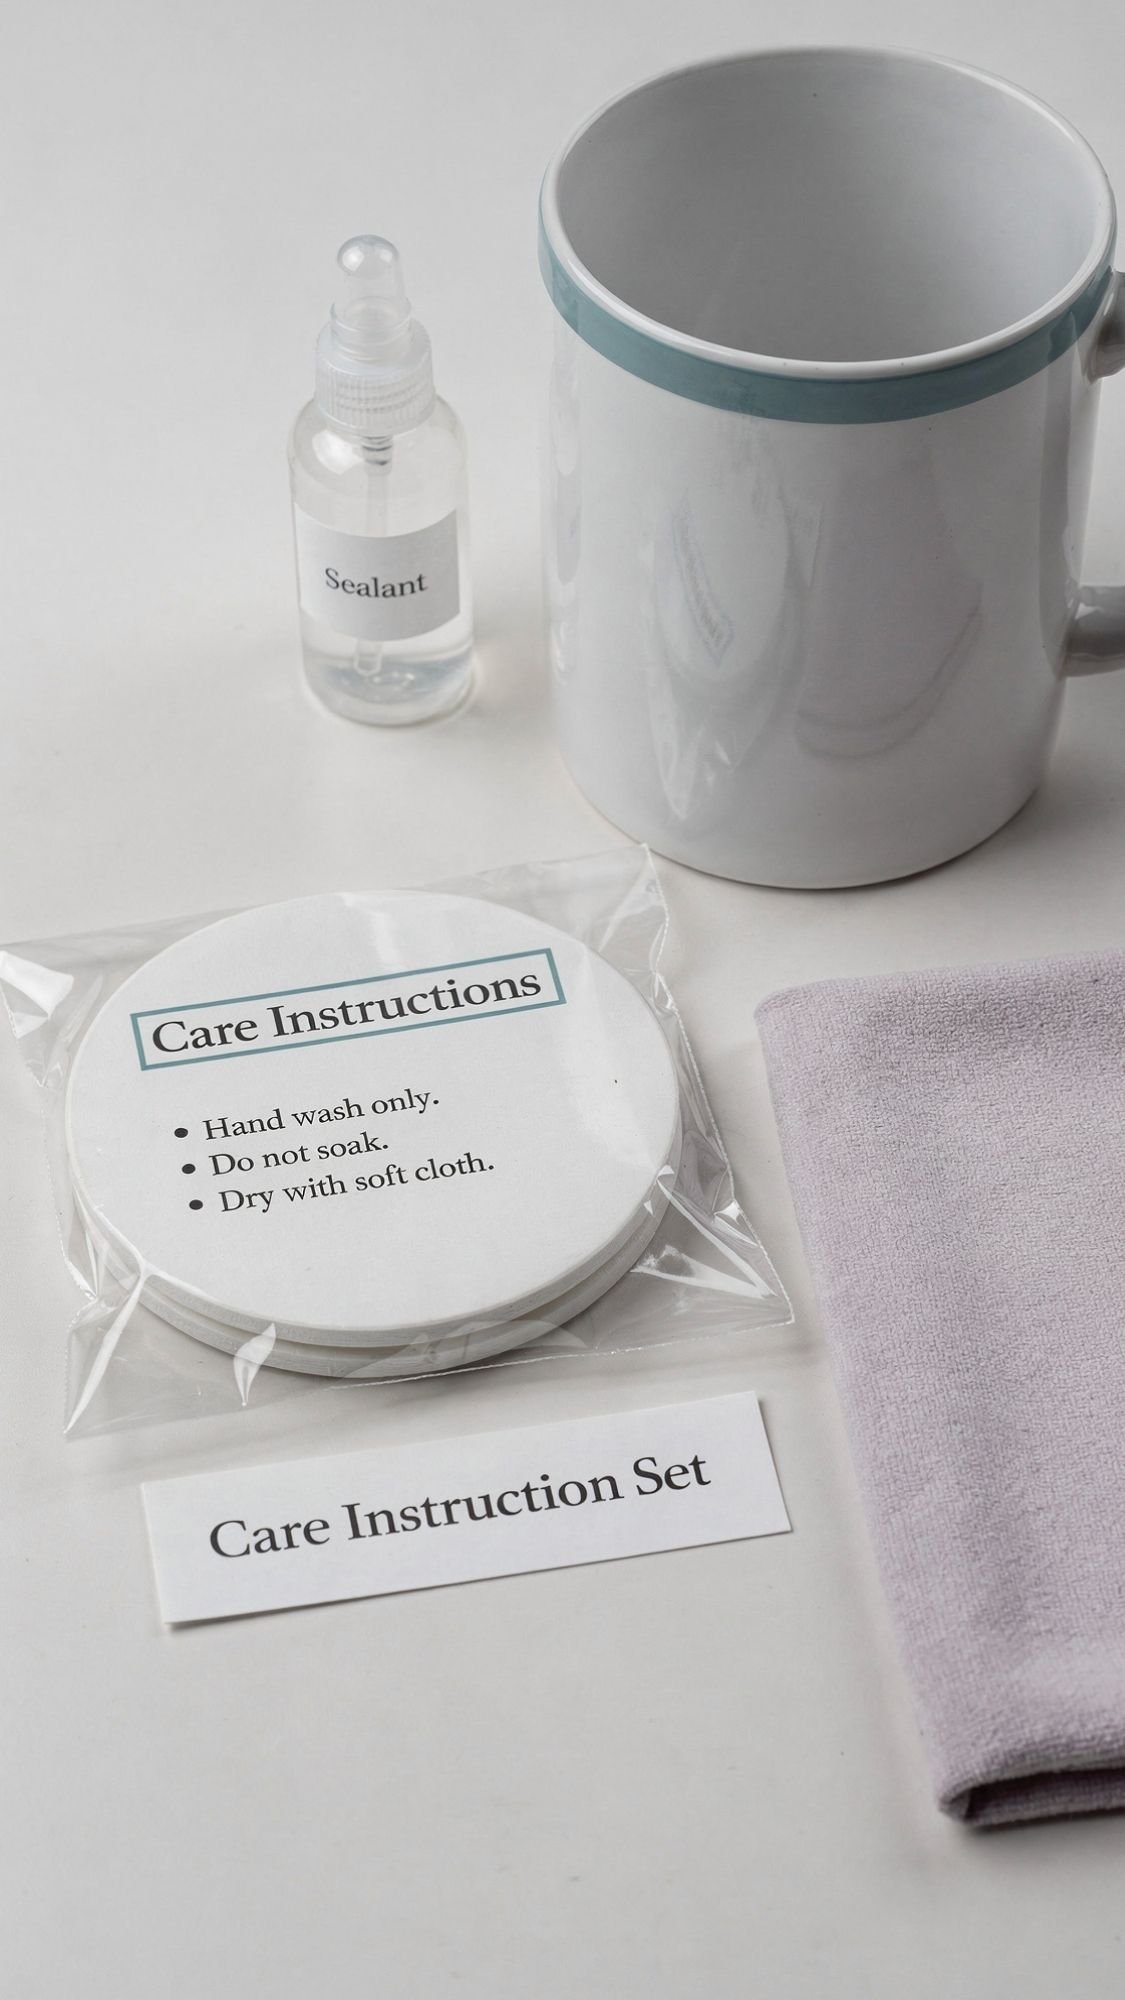
12) Personalized Mug Decal (Cricut Or Hand-Cut Vinyl, Still Cute Either Way)
This is one of the easiest “wow” gifts because it’s practical and personal at the same time. Your best friend will use a mug constantly, and every time she does, she’ll get a tiny reminder that you’re the best. Also, mugs photograph well, which matters because let’s be real, she’s posting it.
Why She’ll Love It
- It’s useful daily, not just “display only.”
- Personalization makes it feel custom and thoughtful.
- You can match her humor, nickname, or aesthetic.
What You’ll Need
- Plain mug (smooth surface works best)
- Permanent adhesive vinyl (or printable vinyl)
- Transfer tape (if using cut vinyl)
- Scraper or old gift card (for burnishing)
- Rubbing alcohol + lint-free cloth
- Optional upgrades:
- A matching coaster
- A cute tea sachet tied to the handle
- A clean gift tag with care instructions
How To Make It
- Wash and dry the mug, then wipe it down with rubbing alcohol. Let it dry fully.
- Cut your design:
- Cricut: easy, clean edges
- Hand-cut: keep it simple like initials or a short phrase
- Apply transfer tape, then position the decal.
- Press from the center outward, then burnish firmly.
- Peel transfer tape slowly at a sharp angle.
- Let the vinyl set for 24–48 hours before washing.
Pro Tips That Make It Look Boutique
- Keep text short. Two to four words looks cleaner than a paragraph.
- Place decal slightly off-center, not dead middle, it looks more designed.
- Color combos that look expensive:
- Plum Noir vinyl on a Cloud Dancer mug
- Patina Blue vinyl with a tiny Persimmon accent
- Jade vinyl for a fresh modern look
- Add a mini care card, it’s a small touch that screams “pro.”
Care Instructions To Include (So It Actually Lasts)
- Hand wash for the first 72 hours.
- Avoid soaking.
- Do not scrub directly over the decal.
- Skip the dishwasher if you want it to stay perfect long-term.
Quick Fixes If Something Goes Wrong
- Vinyl won’t stick: you didn’t degrease. Clean with alcohol again, dry, reapply.
- Bubbles under vinyl: lift carefully, reapply, and burnish from center out.
- Edges lifting: warm gently with a heat tool, then press down and burnish.
- Decal looks crooked: lightly peel before it fully bonds, then reposition using a ruler line.
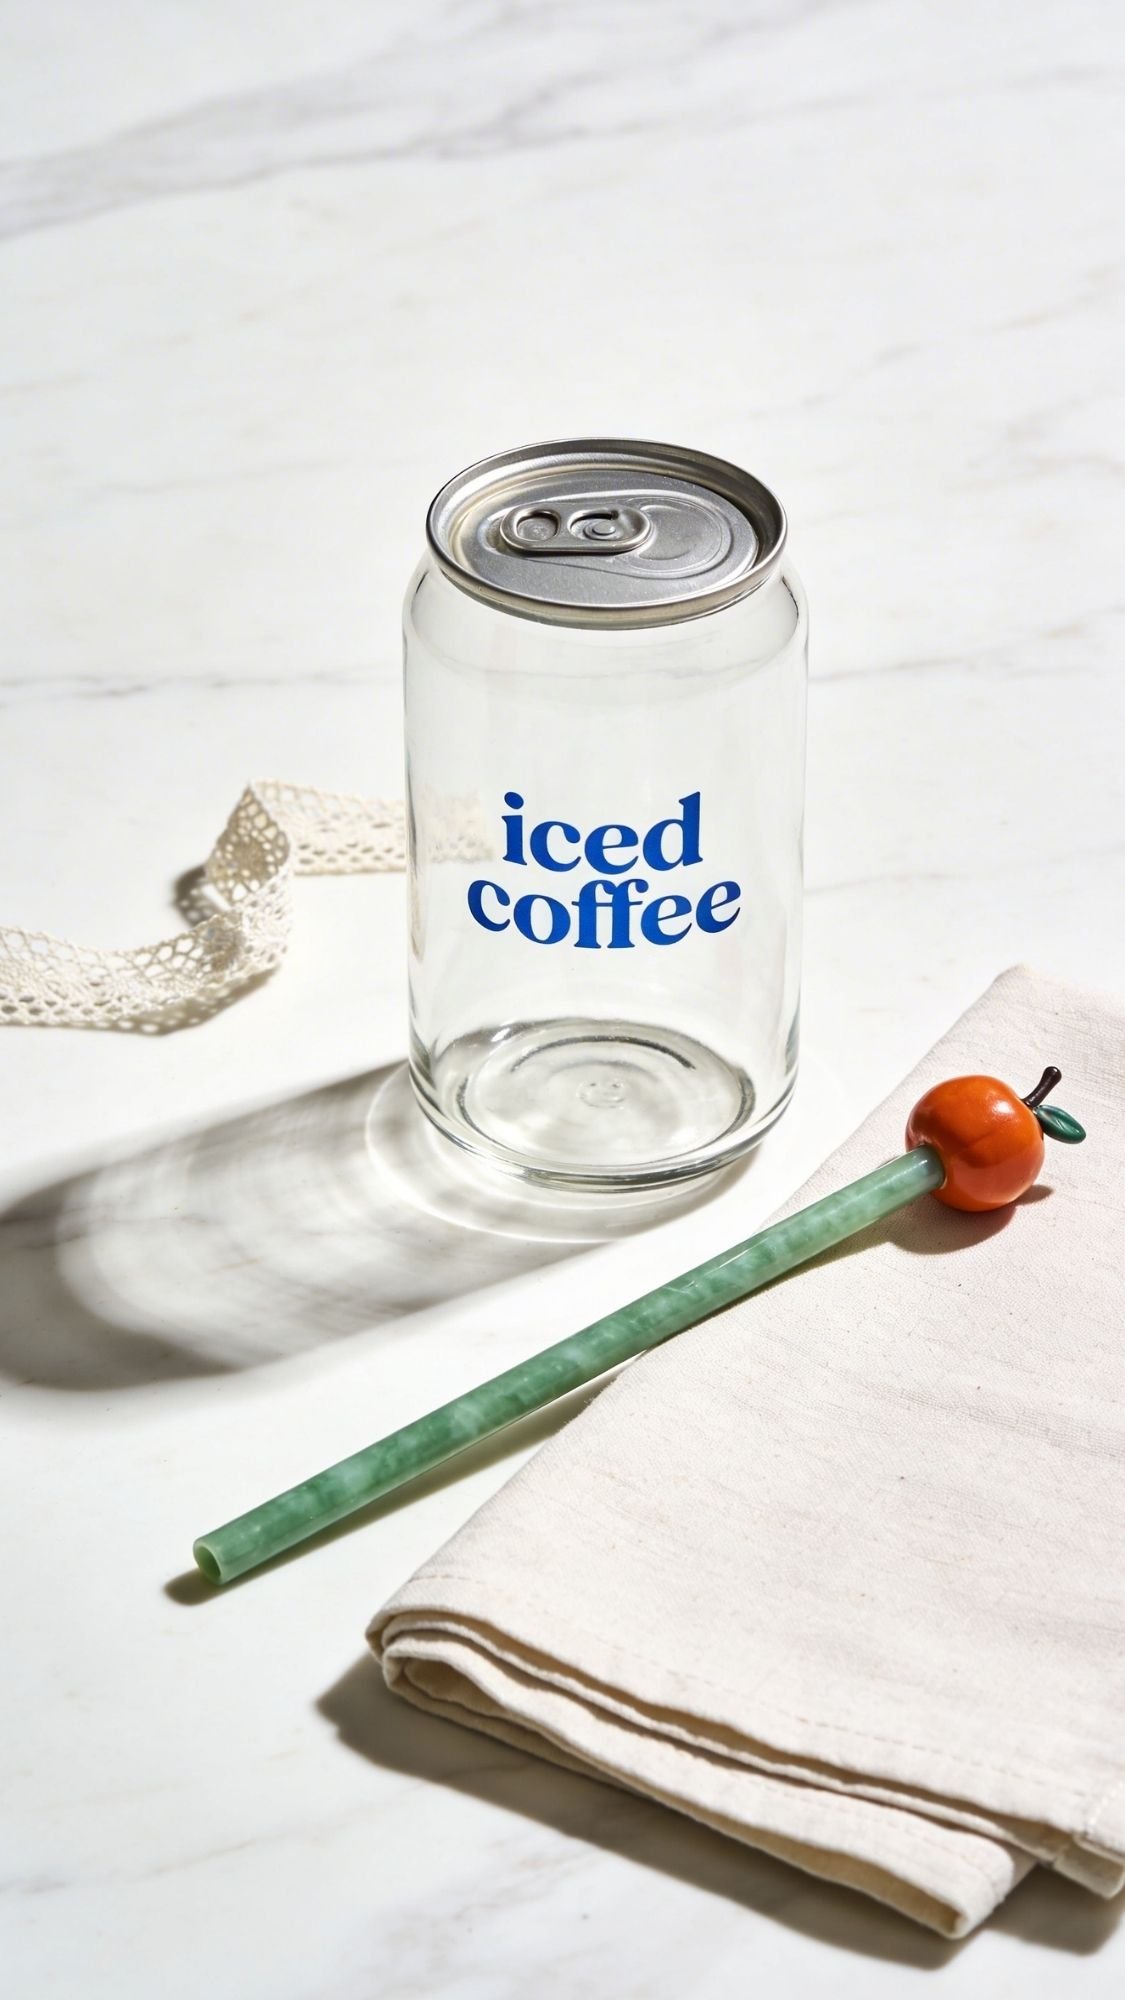
13) Glass Can Cup With Iced Coffee Design (Because She’s Definitely That Girl)
If your best friend runs on iced coffee and vibes, a glass can cup is basically a personality gift. It looks trendy, it’s useful, and it feels custom with one clean decal. The only thing that ruins these is rushing the vinyl or skipping the cure time, so we’re going to do it the “it’ll last” way.
Why She’ll Love It
- She’ll use it constantly, and she’ll show it off.
- It feels like a boutique cup without boutique pricing.
- You can personalize it with her name, a nickname, or a tiny icon.
What You’ll Need
- Glass can cup (smooth glass is easiest)
- Permanent vinyl (or UV DTF wrap if you use that style)
- Transfer tape (for cut vinyl)
- Scraper or old gift card
- Rubbing alcohol + lint-free cloth
- Optional upgrades:
- Matching reusable straw
- Straw topper or straw charm
- A simple “care card” tag tied on with ribbon
How To Make It
- Wash the glass, dry it, then wipe with rubbing alcohol. Let it fully dry.
- Apply the vinyl decal:
- Center it using a piece of tape as a guide line.
- Press from the center outward to avoid bubbles.
- Burnish firmly. Like, really firmly.
- Peel the transfer tape slowly, at a sharp angle.
- Let the decal set 24–48 hours before washing.
Pro Tips That Make It Look Boutique
- Keep the design minimal:
- “iced coffee club”
- a tiny coffee icon
- her name in a clean font
- Color combos that look high-end:
- Cool Blue decal on clear glass with a Jade straw
- Plum Noir decal with a Persimmon straw charm pop
- Add a straw charm, it’s small but it makes it feel like a full set.
Care Instructions That Keep It Looking New
- Hand wash only for at least 72 hours after applying.
- Avoid soaking.
- Don’t scrub directly over the decal.
- No dishwasher if you want it flawless long-term.
Quick Fixes If Something Goes Wrong
- Edges lift: warm gently with a heat tool, press down, burnish.
- Bubbles appear: lift carefully if possible, then smooth back down. If it’s tiny, pop with a pin and burnish.
- Vinyl won’t stick: glass wasn’t clean. Re-clean with alcohol and let it fully dry.
- Decal wrinkles: you stretched vinyl. Next time, apply slower and don’t tug.
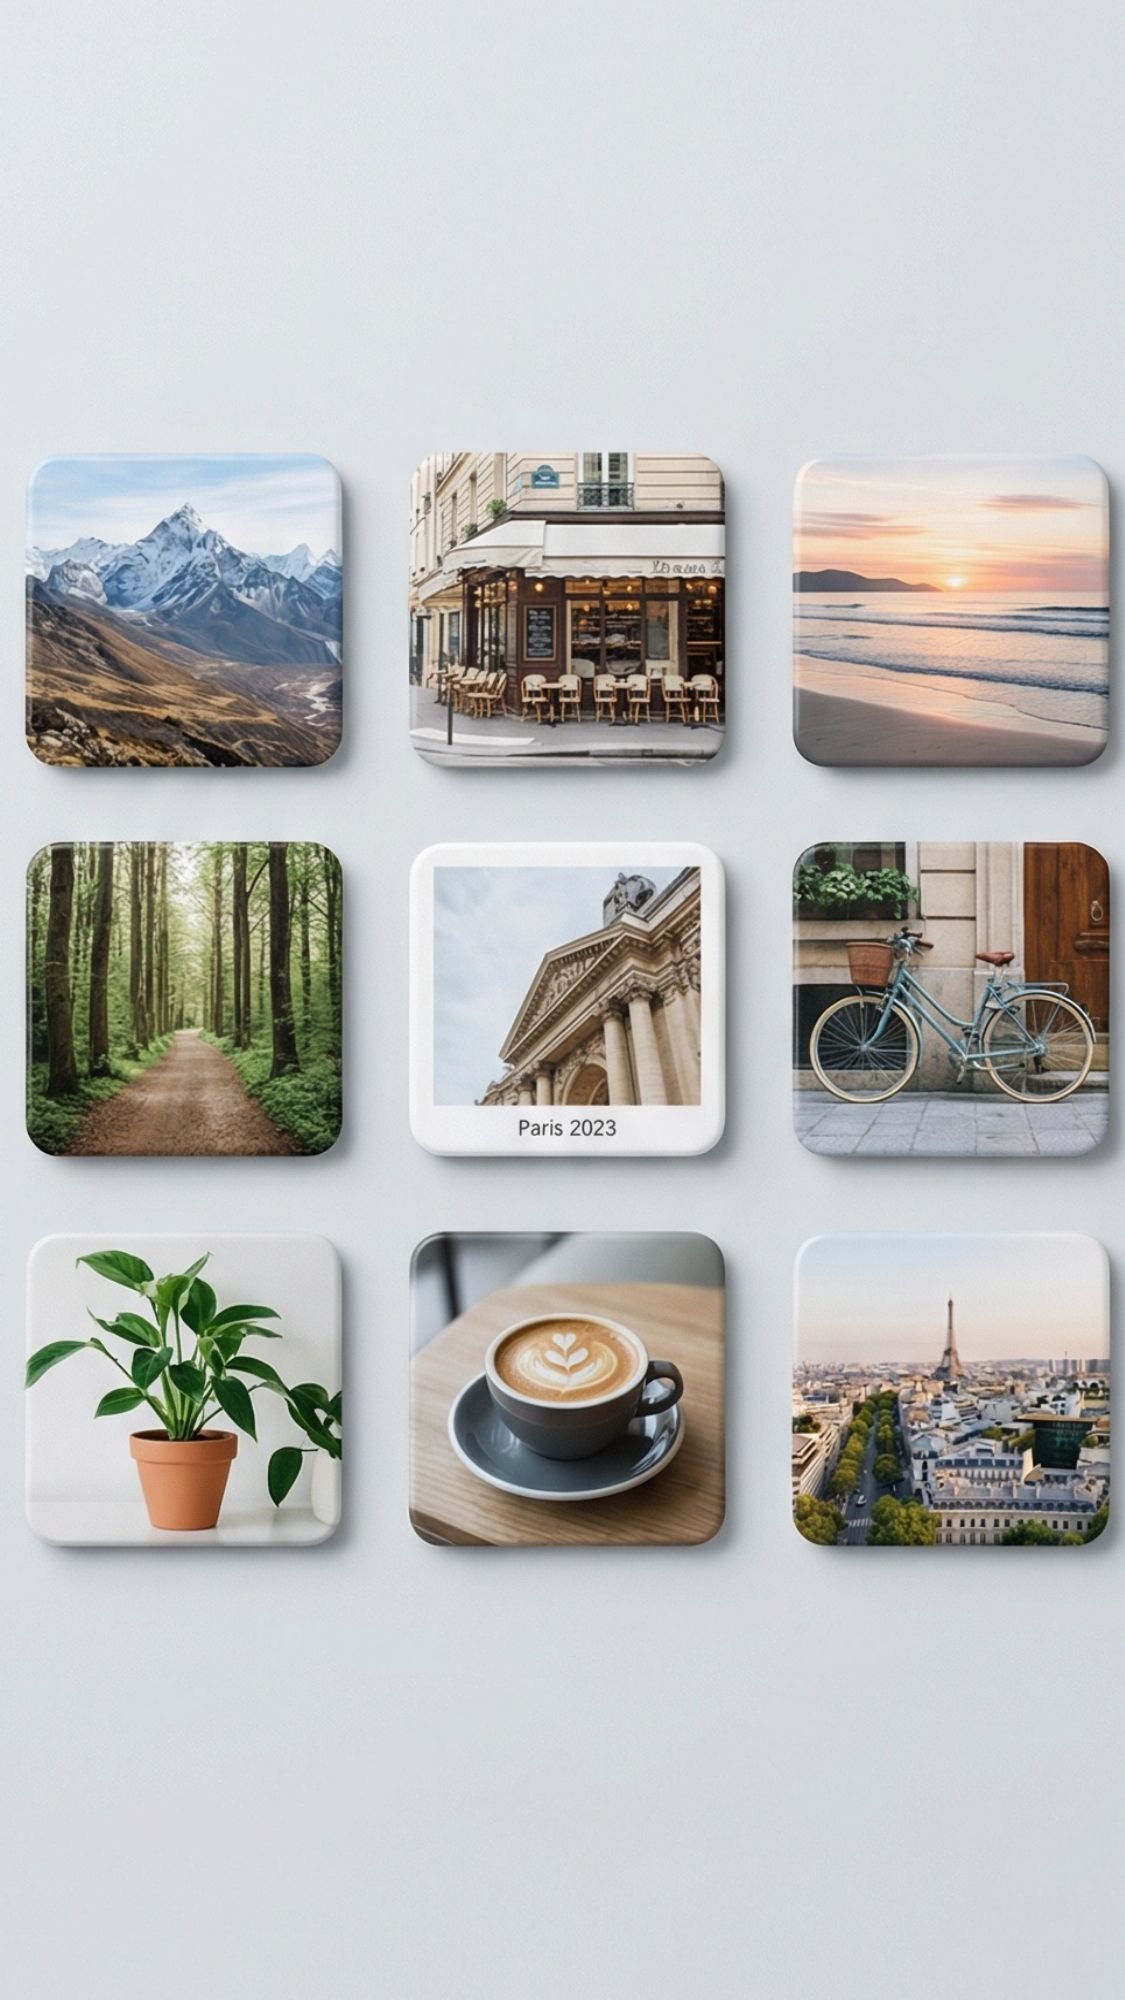
14) Photo Magnet Set (Fridge Fame, But Make It Cute)
This is such an underrated best friend gift because it’s useful and sentimental at the same time. She gets to see your favorite memories every day without having to scroll her camera roll like a gremlin. Also, you can make this look super polished if you keep the magnets uniform and the edges clean.
Why She’ll Love It
- It’s personal, but still practical.
- It’s easy to display, no frame needed.
- It feels like a set, which always looks more expensive.
What You’ll Need
- 6–12 printed photos (2×3 or 2×2 works great)
- Magnet sheets or adhesive magnet dots
- Scissors or paper trimmer
- Laminating sheets, clear contact paper, or photo sleeves (optional but worth it)
- Corner rounder (optional, but it makes everything look pro)
- Optional upgrades:
- A small storage envelope or mini box
- A label that says “Best Memories” or “Fridge Favorites”
- A matching mini note that explains the photo choices
How To Make It
- Pick 6–12 photos and print them all the same size.
- Trim clean edges with a paper trimmer for a tidy finish.
- Optional but recommended, laminate the photos or cover with clear film.
- Attach magnet backing:
- Magnet sheet: cut to size, stick to the back
- Magnet dots: place one on each corner for stability
- Press flat under a heavy book for 10 minutes so everything bonds evenly.
Pro Tips That Make It Look Boutique
- Choose photos that look cohesive:
- same vibe, similar lighting, or a mini “timeline”
- Round the corners. It stops peeling and looks finished.
- Make one “feature magnet” with a short caption:
- “Best day ever”
- “Proof we’re iconic”
- Pack them in a mini envelope tied with Patina Blue ribbon. Super cute, super giftable.
Quick Fixes If Something Goes Wrong
- Corners peel: round corners and seal the front with laminate or clear film.
- Magnets slide down the fridge: use stronger magnet backing or add a second dot.
- Photos curl: press under a heavy book after attaching the backing.
- Lamination bubbles: smooth from center outward, and trim edges cleanly.
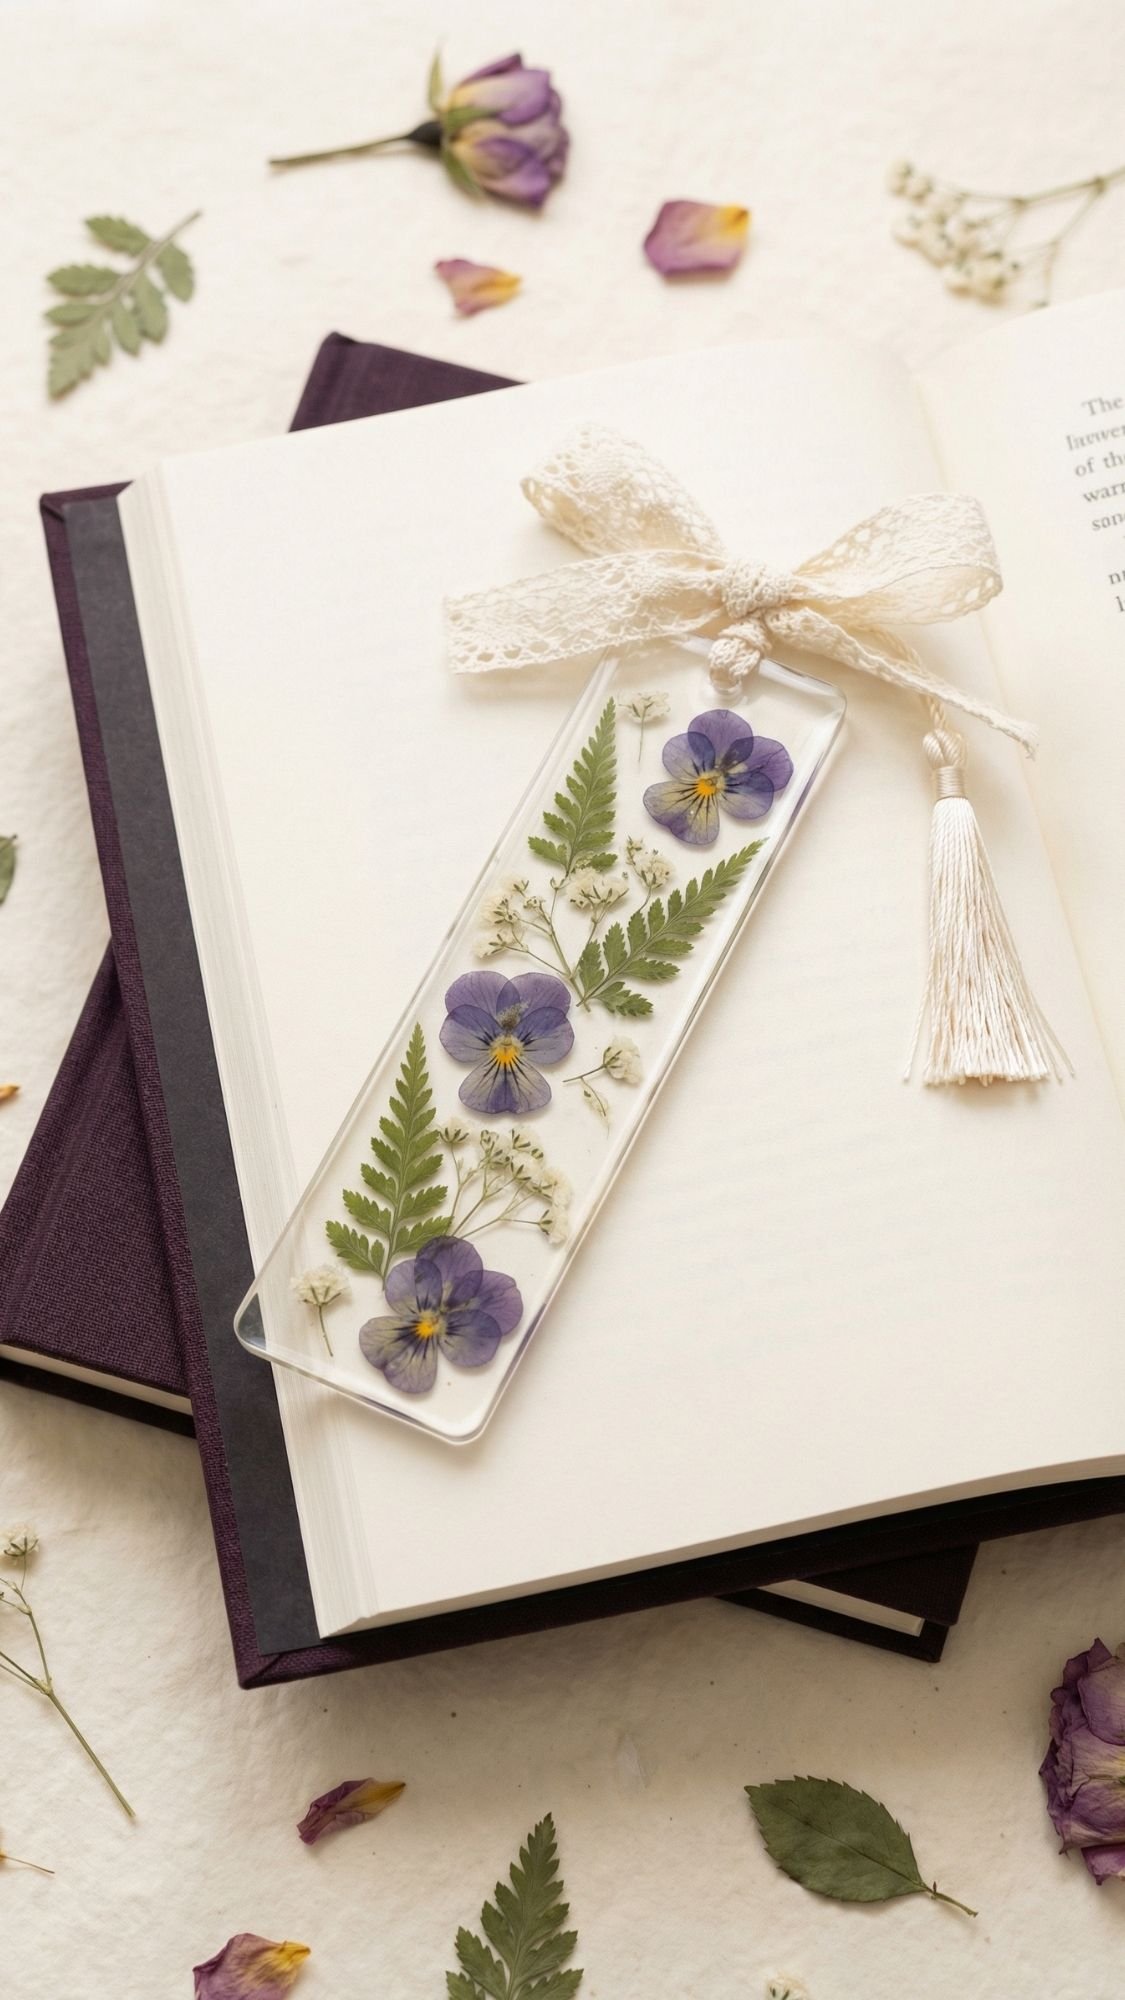
15) Pressed Flower Bookmark (Sweet, Pretty, Actually Useful)
This is one of those gifts that feels delicate and thoughtful, but it’s still easy to make. It’s perfect for the bestie who reads, journals, or just loves pretty things. And if you package it right, it looks like something you’d find at a fancy little stationery shop.
Why She’ll Love It
- It feels handmade and special without being overly complicated.
- She can use it daily, book, planner, journal, whatever.
- It looks expensive when you keep it clean and minimal.
What You’ll Need
- Pressed flowers (store-bought or DIY)
- Cardstock backing (optional, for a cleaner look)
- Laminating sheets or clear self-adhesive film
- Scissors or paper trimmer
- Hole punch
- Ribbon, lace ribbon, or a tassel
- Optional upgrades:
- Gold foil edge, or metallic paint pen border
- A mini matching note card set
How To Make It
- Arrange your pressed flowers first before you commit. Move them around until it looks balanced.
- Sandwich them between laminating sheets or clear film.
- Smooth from the center outward to avoid bubbles.
- Trim into a clean bookmark shape, rounded corners look extra polished.
- Punch a hole at the top, add ribbon or tassel.
- If you want, add a thin border with a metallic paint pen.
Pro Tips That Make It Look Boutique
- Use 2–4 flowers max. Too many looks cluttered.
- Stick to one palette:
- soft neutrals with Cloud Dancer
- cool tones with Cool Blue
- moody romantic with Plum Noir ribbon
- Add lace ribbon or a satin bow, and it instantly looks gift-shop worthy.
- If the flowers are thick, press the bookmark under a heavy book after sealing.
Quick Fixes If Something Goes Wrong
- Flowers brown: they weren’t fully dried. Next time, press longer and change paper during pressing.
- Bubbles under laminate: lift and smooth again, or prick a tiny bubble with a pin and burnish flat.
- Edges peel: trim a tiny bit closer to the sealed edge, or seal again with clear film.
- Bookmark warps: use thicker laminate or add a cardstock backing.
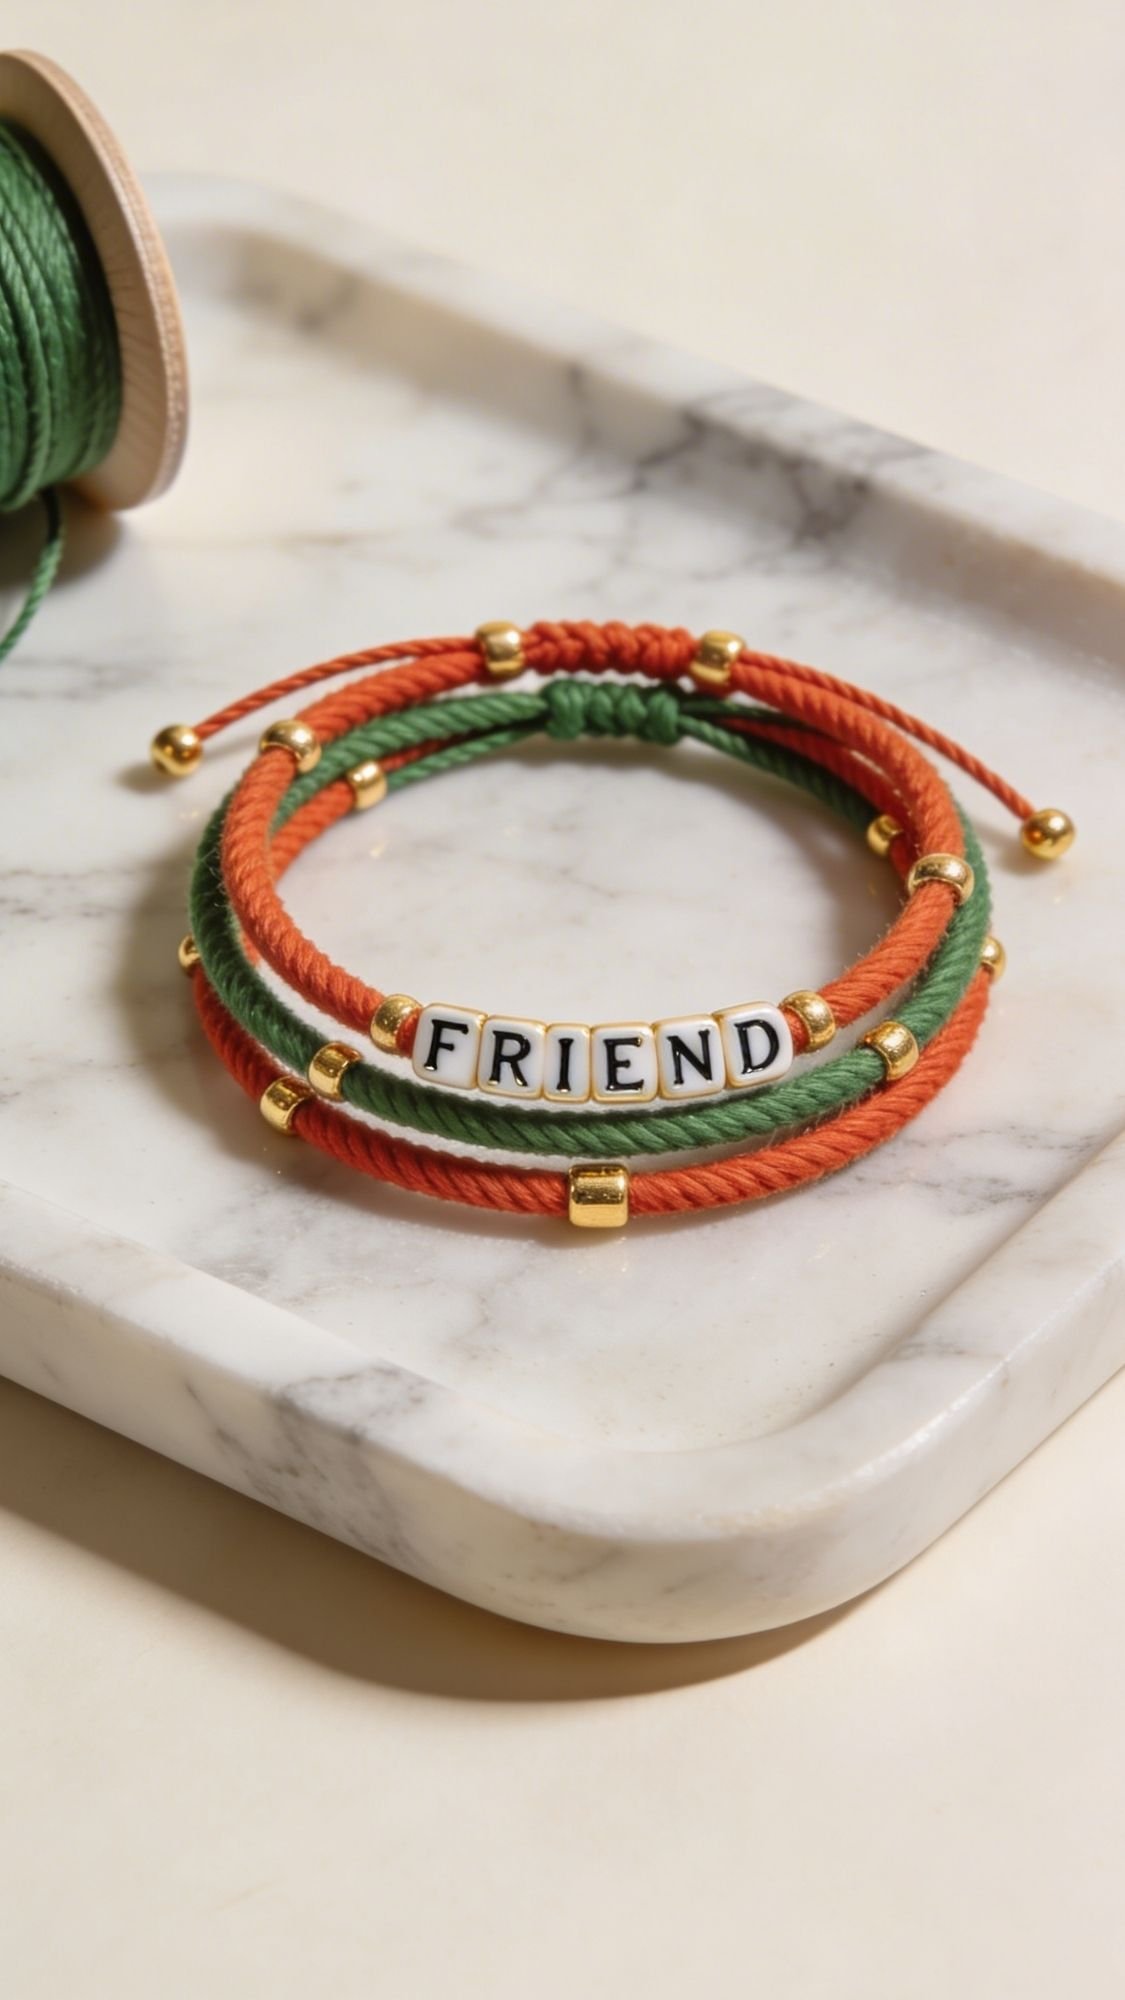
16) Friendship Bracelet Stack (Modern, Not Summer Camp)
Friendship bracelets are back, but we’re not doing the neon plastic pony bead thing unless that’s your friend’s whole personality. A clean bracelet stack looks elevated when you use a tighter palette, nicer cord, and one “special” bead. It’s also a great gift because it feels symbolic without being overly serious. Like, yes I love you, but I’m still going to roast you, you know?
Why She’ll Love It
- She can wear it daily, stack it, or tie it on her bag.
- It feels meaningful without being too intense.
- It’s easy to size, you don’t need perfect measurements.
What You’ll Need
- Embroidery floss, waxed cord, or nylon cord
- Beads (letter beads, pearls, gold spacers, tiny charms)
- Scissors
- Tape or clip board to hold it while you tie
- Optional upgrades:
- Jewelry clasp kit for a more “real jewelry” finish
- Tiny bow charm or heart charm
How To Make It
- Pick 2–3 colors that go together and cut your strands.
- Tape the top down so it stays steady.
- Braid, knot, or do simple macramé knots.
- Add beads in the center, then continue knotting.
- Finish with an adjustable knot or attach a clasp.
Pro Tips That Make It Look Boutique
- Keep the palette cohesive. Try:
- Cloud Dancer + Jade + gold
- Patina Blue + Cool Blue + pearl
- Plum Noir + Persimmon + metallic spacers
- Add one “hero” bracelet with letters, then two simpler ones to stack.
- If you want it to feel expensive, swap one bracelet for a thin chain bracelet you customize with a charm.
Quick Fixes If Something Goes Wrong
- Knots slip: use waxed cord or add a tiny dab of clear glue to the final knot.
- Bracelet feels scratchy: pick softer cord, or use embroidery floss for the ones that touch skin.
- Beads fall off: you didn’t secure the bead on both sides. Knot tightly on each side.
- Size is weird: use an adjustable sliding knot so it fits every wrist.
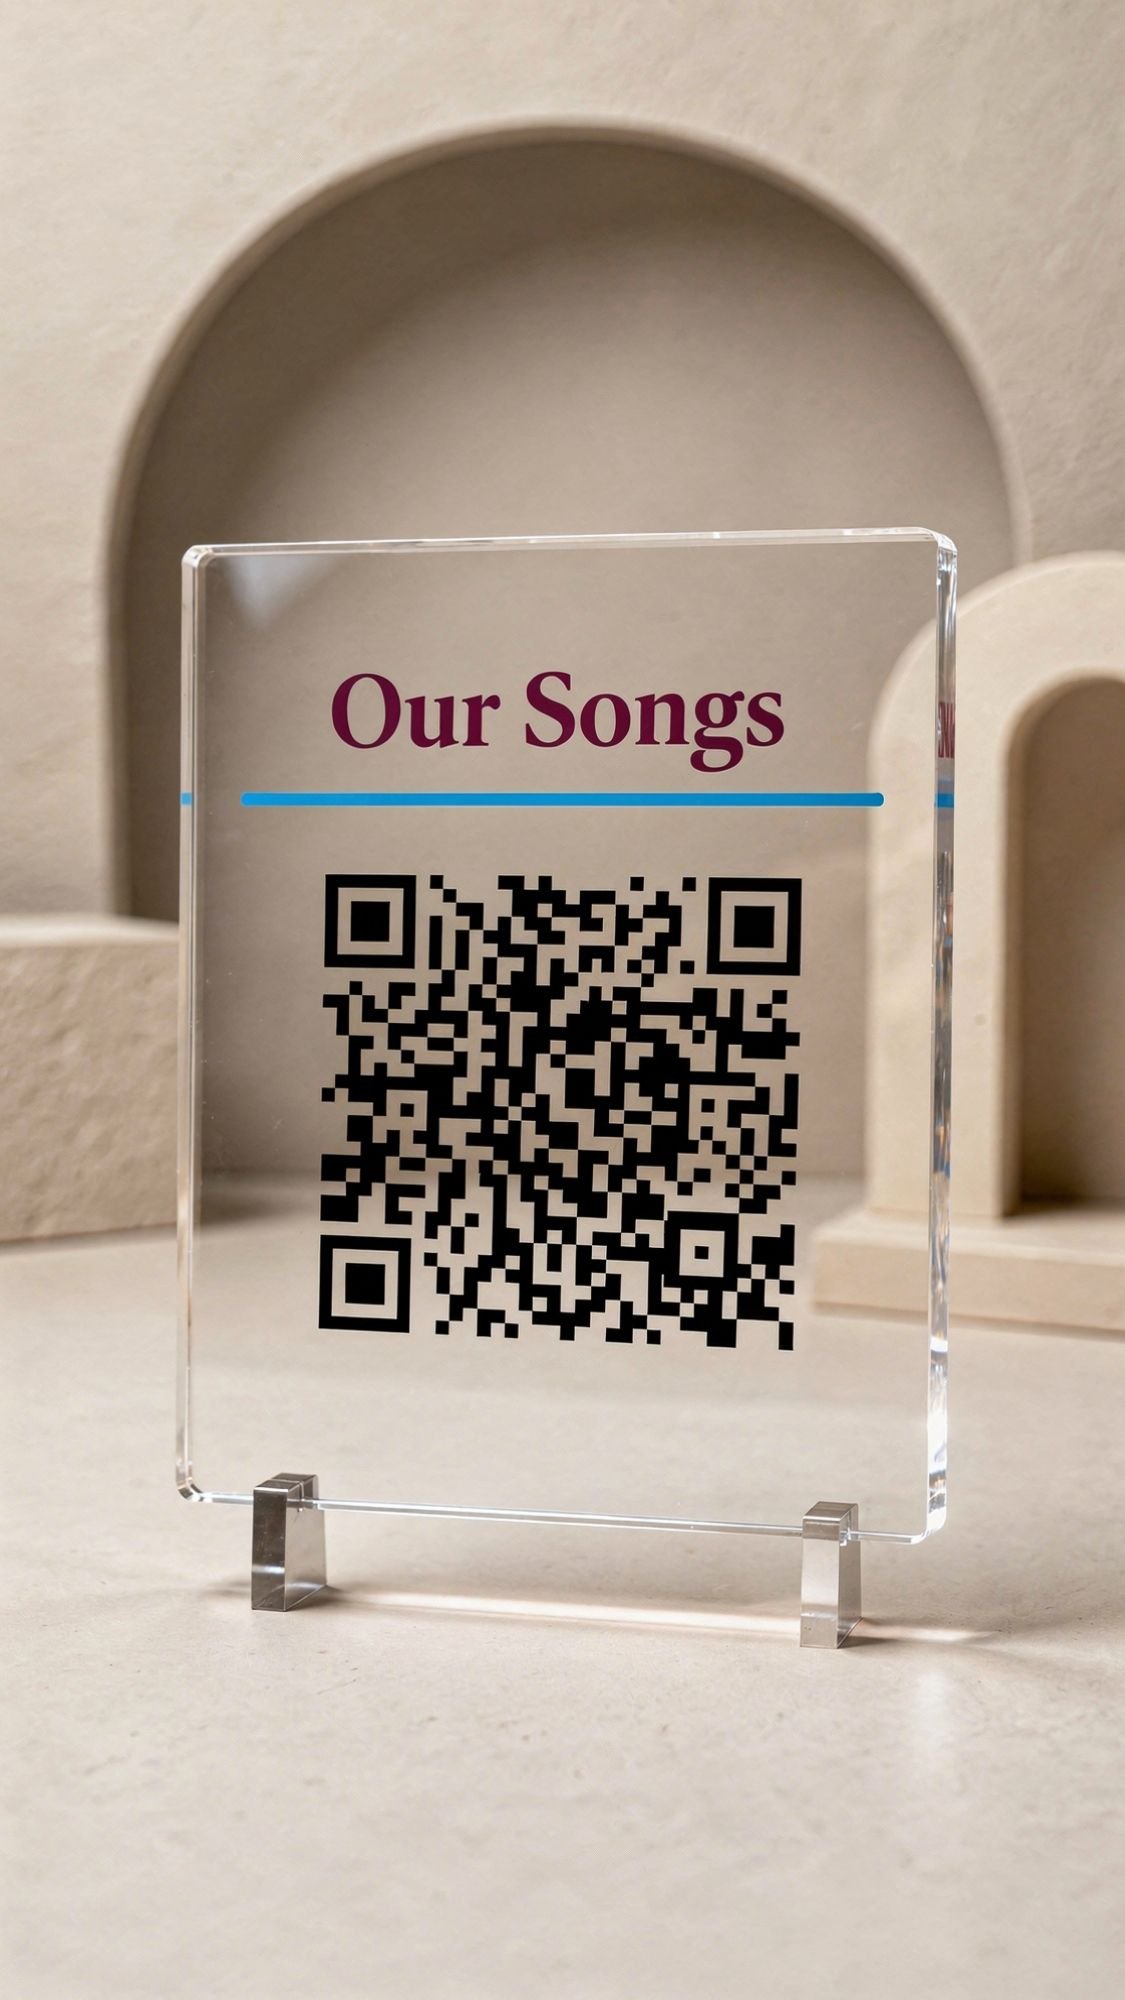
17) “Bestie Playlist” Plaque (The Gift That Makes Her Emotional In 3 Seconds)
If your best friend is the type who attaches memories to songs, this one hits instantly. You’re basically gifting her a soundtrack. And yes, it looks modern and cute on a shelf, but the real value is that it triggers all the feelings without you having to write a novel. Efficient and devastating, love that.
Why She’ll Love It
- It’s personal without being messy or overly handmade-looking.
- It works for best friends who live far away too.
- It becomes a cute decor piece that actually means something.
What You’ll Need
- Small acrylic plaque or clear frame (tabletop size)
- Printed playlist code graphic (or a design you create)
- Vinyl for text, or a clean print insert
- Rubbing alcohol + lint-free cloth
- Optional upgrades:
- Mini stand for the plaque
- A small matching tag with “our songs”
- A color accent backing card behind the acrylic
How To Make It
- Pick a playlist that’s truly “you two.” Not random trendy songs.
- Create a clean code-style graphic for it, keep it simple.
- Clean the acrylic with alcohol, let it dry fully.
- Add your design:
- Print insert behind acrylic for the cleanest look
- Or apply vinyl directly if you want the floating effect
- Add a short title line like:
- “Our Songs”
- “Bestie Soundtrack”
- “Play This When You Miss Me”
- Let everything sit flat for a few hours before gifting, so nothing shifts.
Pro Tips That Make It Look Boutique
- Keep the text minimal and clean. One title line is enough.
- Use a strong color accent behind it for a modern look:
- Cool Blue backing with Plum Noir text
- Cloud Dancer backing with Patina Blue accents
- If you apply vinyl, burnish firmly and peel transfer tape slowly.
- Make sure any tiny text stays readable. Tiny unreadable text ruins the whole “premium” vibe.
Quick Fixes If Something Goes Wrong
- Acrylic looks cloudy: you used a rough cloth. Buff with microfiber.
- Vinyl won’t stick: acrylic wasn’t clean. Re-clean with alcohol, dry, reapply.
- It looks crooked: use a ruler line on the backing paper as a placement guide.
- Tiny text looks jagged: switch to print insert instead of vinyl for small fonts.
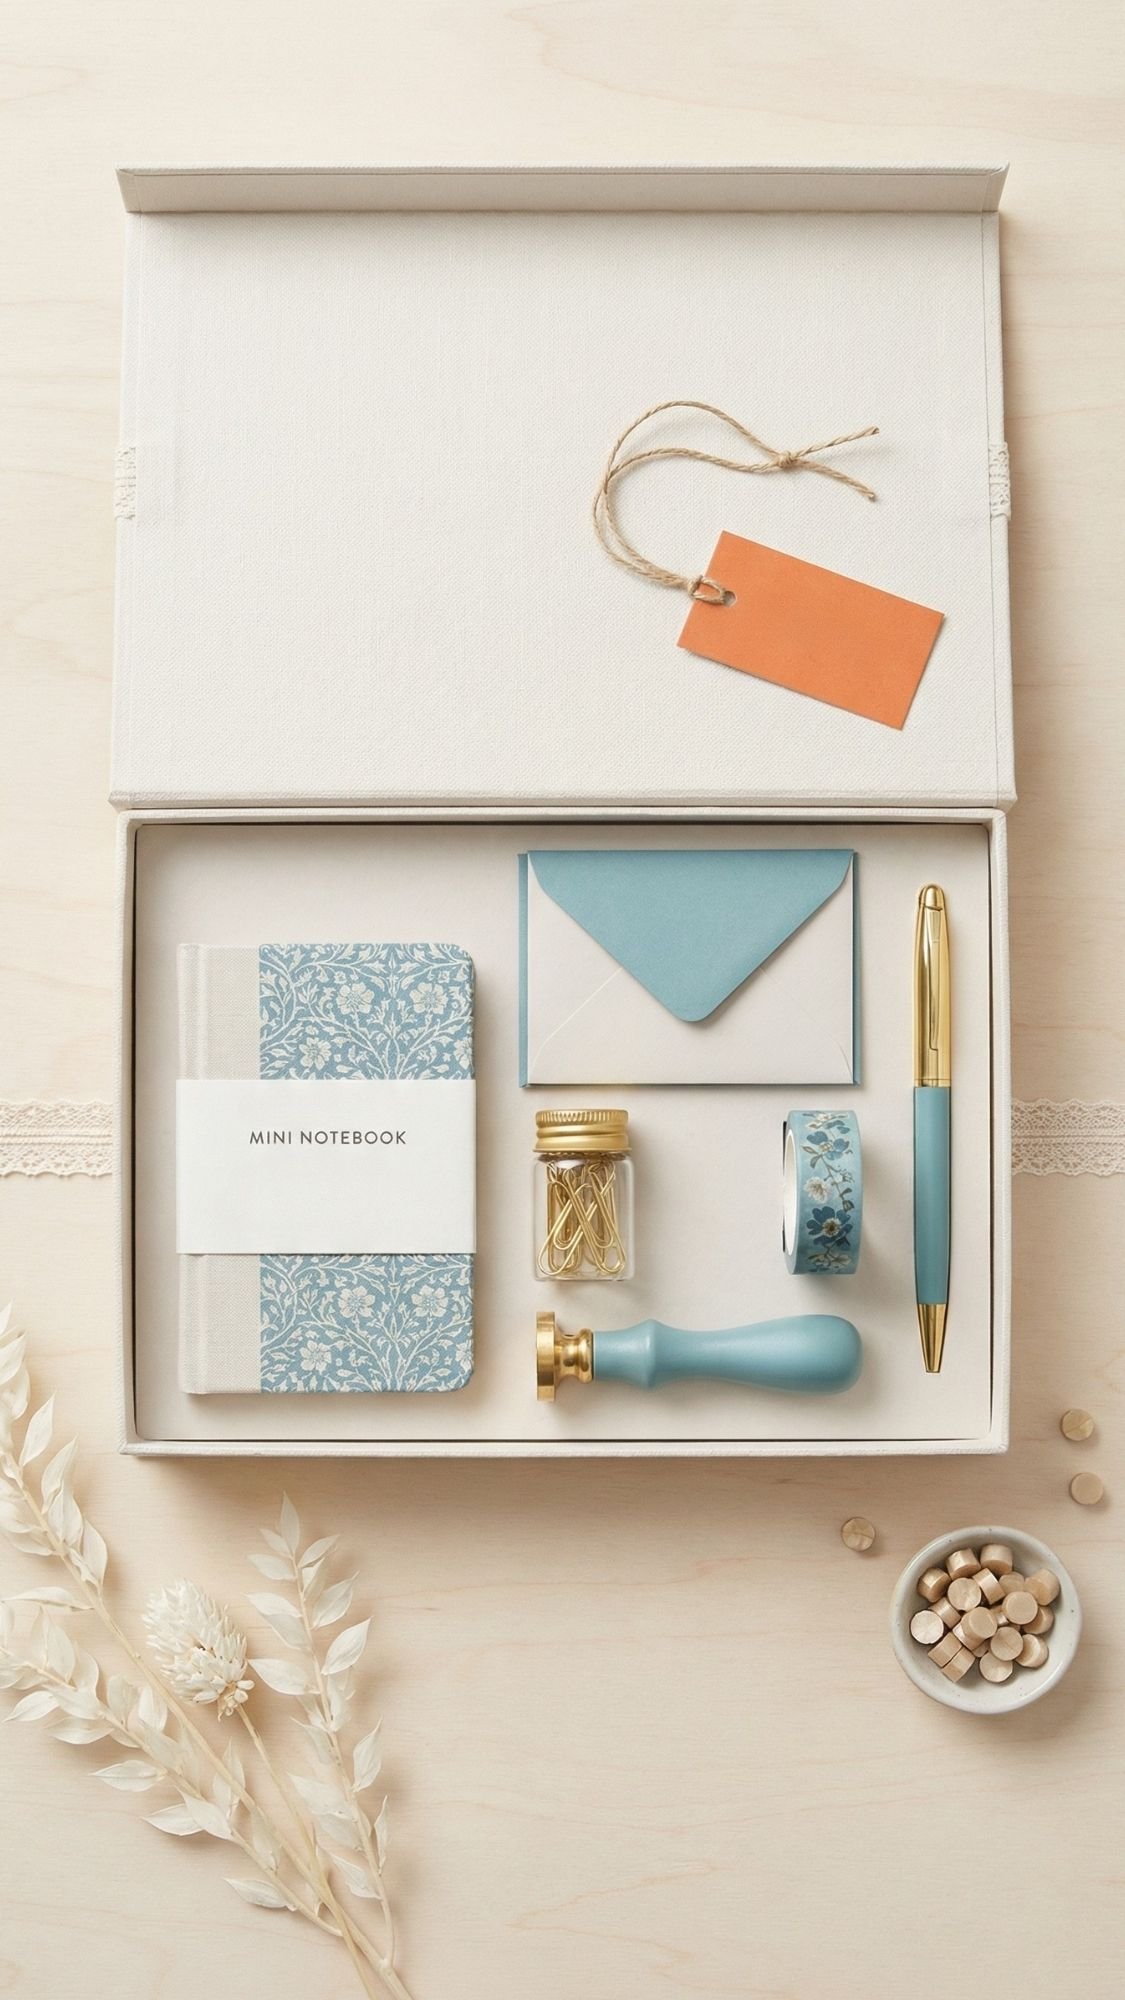
18) Desk “Pen Pal” Stationery Kit (Cute, Useful, And Very 2026)
This is such a smart best friend gift because it feels curated, like you built her a little “write cute notes again” starter kit. And since pen pal and snail mail vibes are trending hard right now, this one feels fresh instead of random. It’s also easy to make look luxury if you stick to a clean palette and don’t overstuff it.
Why She’ll Love It
- It’s practical, she’ll actually use it.
- It feels like a whole experience, not just one item.
- It works for long-distance besties, journaling besties, and “I love cute paper” besties.
What You’ll Need
Pick 5–8 items so it feels curated, not chaotic.
- Mini notebook or notepad
- Cute pen or gel pen
- Envelope set
- Sticker sheet or washi tape roll
- Stamp set or a few pretty stamps
- Small card pack, like blank note cards
- Optional upgrades:
- Wax seal kit, even just one stamp + a few wax beads
- Paper clips or binder clips in gold
- A tiny address book insert
- Lace ribbon for wrapping, because it looks expensive
How To Make It
- Choose a color palette first, then buy or pull supplies that match.
- Arrange everything in a small box or pouch.
- Add one “personal touch” card with:
- her name
- a short note
- your promise to write her back
- Wrap it neatly with ribbon, then add a tag like “Write Me Back” or “Pen Pal Kit.”
Pro Tips That Make It Look Boutique
- Keep it cohesive:
- Cloud Dancer + Patina Blue + gold
- Add one accent color, like Persimmon for the tag
- Put small items in a mini pouch inside the box so it feels organized.
- If you add wax seal stuff, include a tiny instruction card, so she doesn’t feel intimidated.
Quick Fixes If Something Goes Wrong
- Kit looks cluttered: remove 2 items and add tissue paper filler. Space looks premium.
- Stickers won’t stick: dust got on them. Store flat and press them down firmly.
- Box looks cheap: wrap the box in neutral paper and add a clean label.
- Supplies feel random: tighten the palette. Matching colors makes it look intentional instantly.
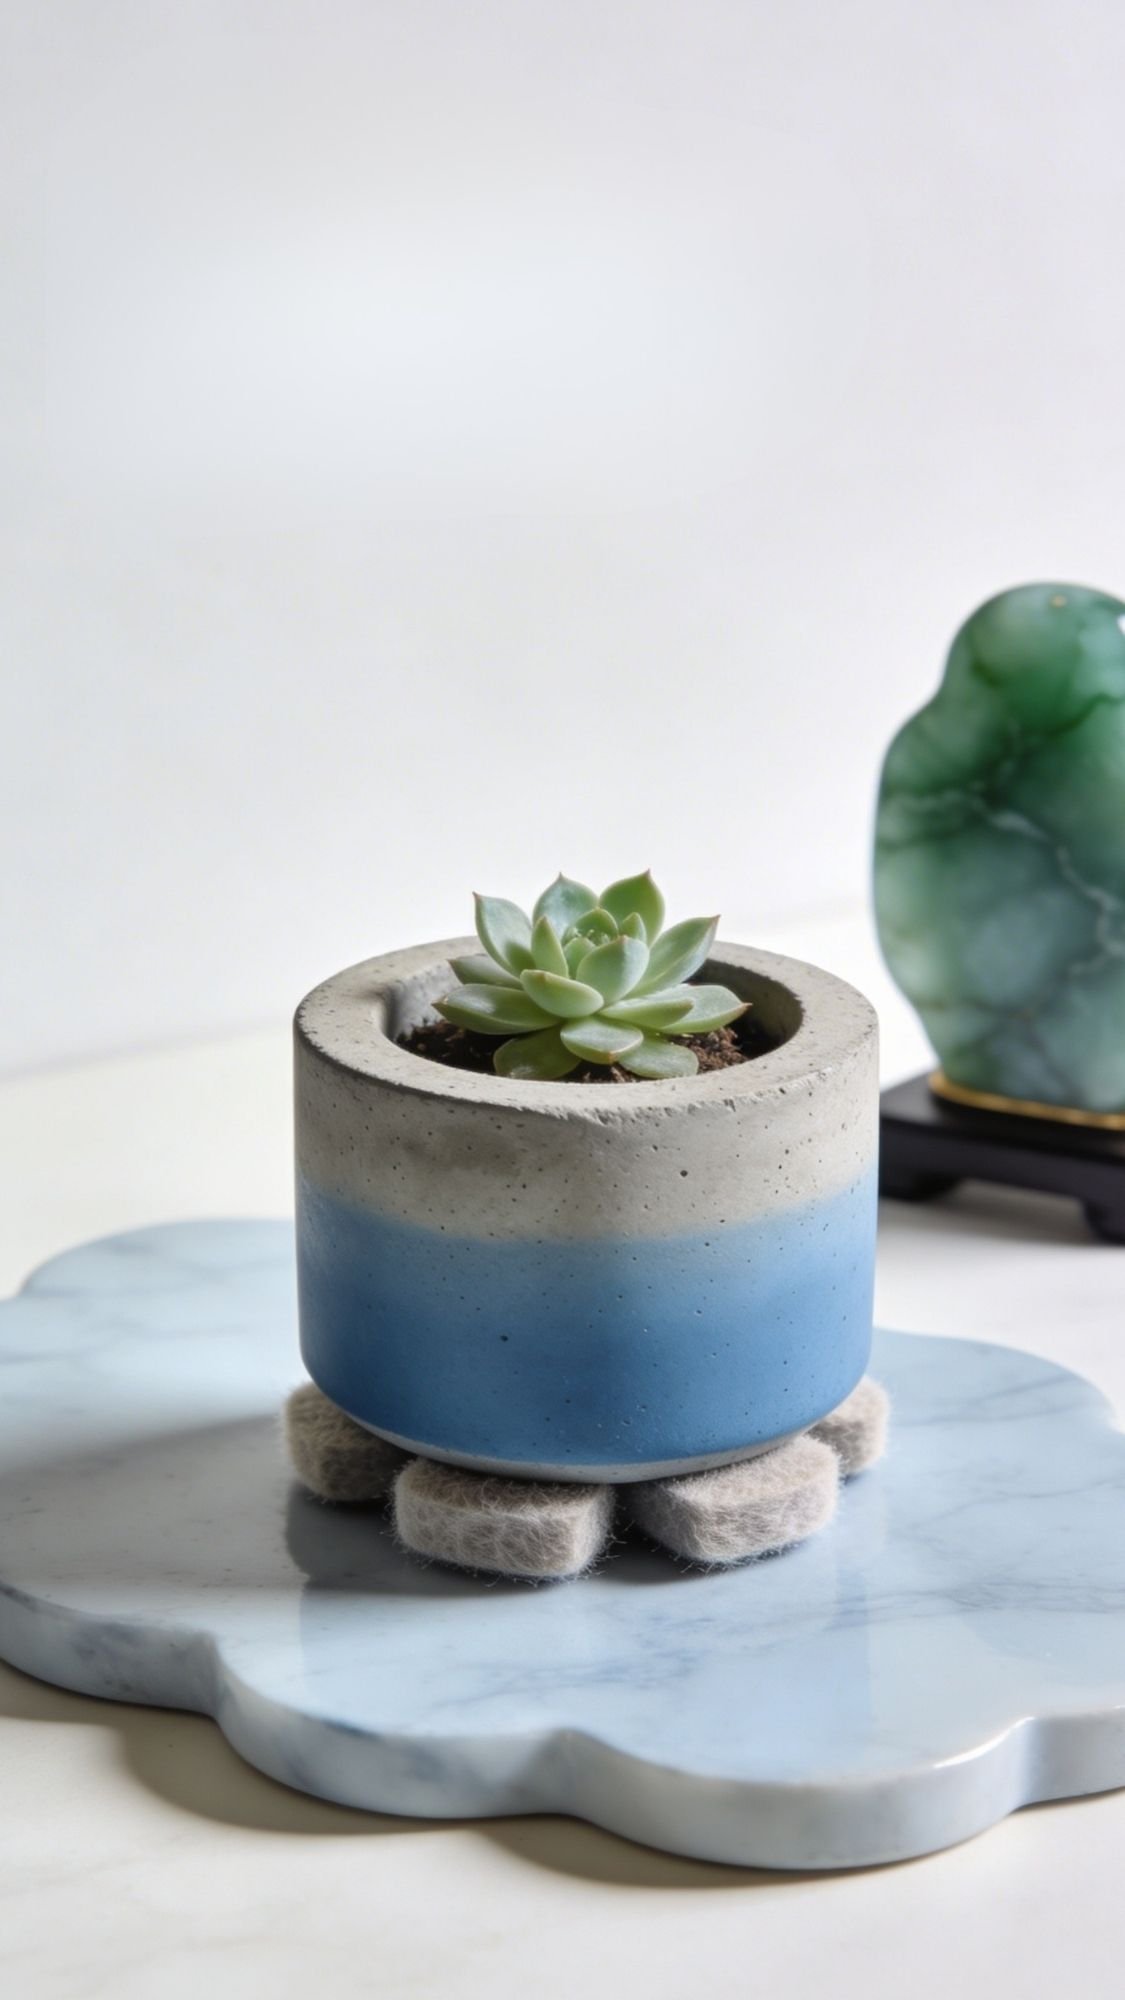
19) Concrete Mini Planter (Modern, Clean, And Surprisingly Easy)
This is one of those projects that looks like you bought it from a design shop. Concrete feels expensive by default, like it belongs in a minimalist apartment with a fancy candle and a speaker that costs too much. The key is keeping the shape simple and sealing it so it doesn’t shed dust or stain.
Why She’ll Love It
- It’s a cute decor piece that doesn’t feel cluttery.
- It looks modern and intentional.
- You can pair it with a tiny plant for a complete gift.
What You’ll Need
- Quick-set concrete mix
- Water + mixing cup
- Small silicone mold (or a plastic cup you can cut away)
- Disposable gloves
- Sandpaper (220–400 grit)
- Clear sealer (matte looks most high-end)
- Optional upgrades:
- Acrylic paint for a color dip
- Felt pads for the bottom
- Tiny plant + care card
How To Make It
- Mix concrete until it looks like thick pancake batter. Not watery.
- Pour into the mold and tap the sides to release bubbles.
- Let it set fully. Follow your mix’s timing.
- Remove from mold, then let it cure longer for strength.
- Sand edges and the base so it feels smooth and finished.
- Seal the inside and outside in thin coats.
- Add felt pads to protect surfaces.
Pro Tips That Make It Look Boutique
- Keep the design simple and clean:
- smooth cylinder
- soft rounded square
- Add a modern color dip:
- Cool Blue lower third with a matte finish
- Patina Blue for a soft vintage-luxe vibe
- Seal the inside especially if you’ll water a plant in it.
- If you want it extra polished, line the inside with a small plastic nursery pot so it stays tidy.
Quick Fixes If Something Goes Wrong
- Planter chips: sand lightly, then seal again. Small chips disappear after sealing.
- Air bubbles create holes: you didn’t tap enough. Next time, tap the mold for 30–60 seconds.
- It feels dusty: you skipped sealer. Seal it and let it cure fully.
- Paint peels: you didn’t seal first. Seal concrete, let dry, then paint, then seal again.
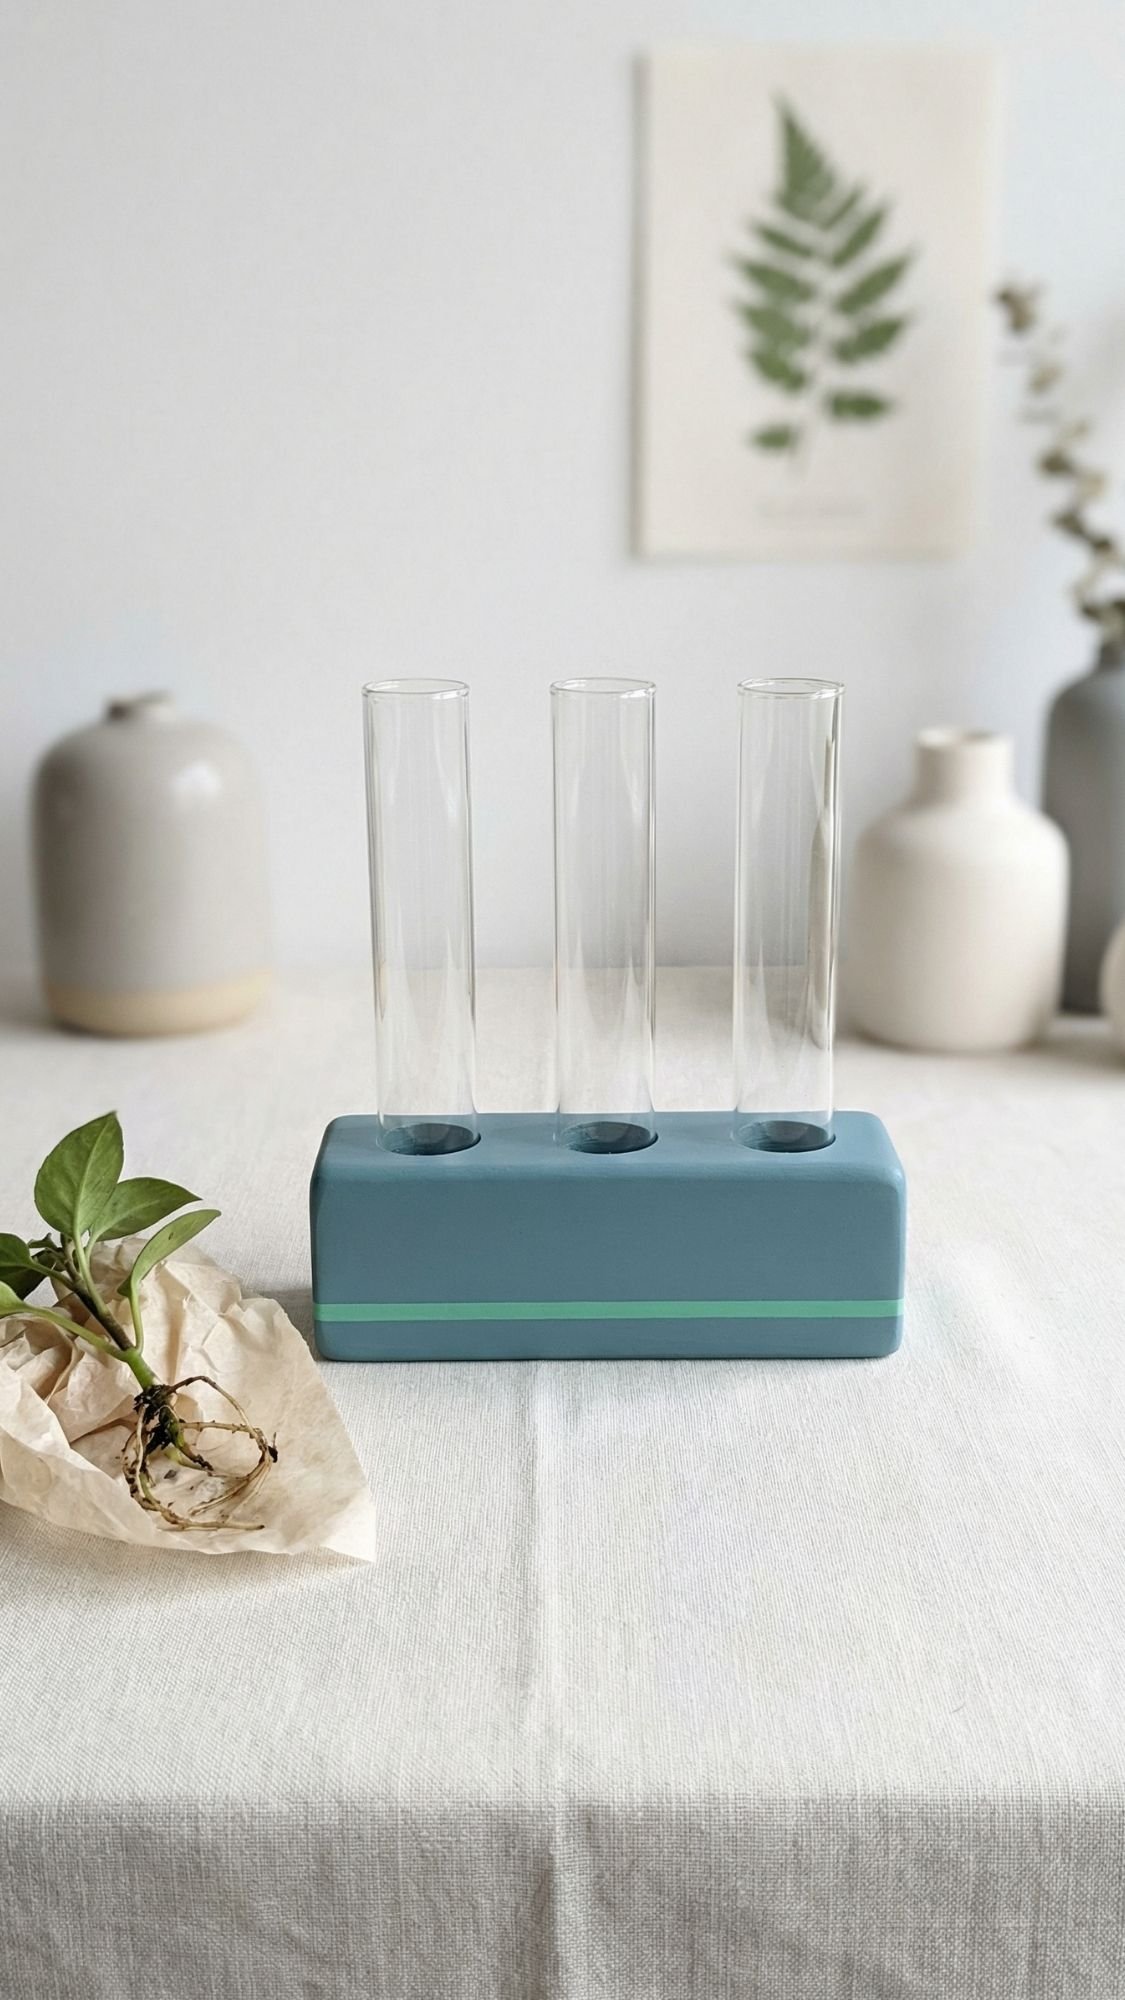
20) Propagation Station (Science Girl Gift, But Make It Chic)
This is the gift for the friend who loves plants, aesthetics, and watching tiny roots grow like it’s a hobby. It looks modern, it feels thoughtful, and it works as decor even before she sticks a cutting in it. The secret is finishing the wood properly so it doesn’t look rough or thirsty.
Why She’ll Love It
- It’s decor plus a functional plant tool.
- It feels modern and high-end.
- You can pair it with a real cutting for bonus points.
What You’ll Need
- Small wood block (pre-cut craft wood works)
- 2–3 mini glass tubes or bud vases
- Drill with a bit sized to your tubes (or buy a pre-made holder and customize)
- Sandpaper (220–320 grit)
- Wood stain or paint (optional)
- Clear finish, water-based polycrylic is great
- Optional upgrades:
- Felt feet
- A tiny plant care card
- A small ribbon wrap for gifting
How To Make It
- Measure your glass tubes and mark hole placement evenly.
- Drill holes slowly and keep the drill straight.
- Sand the wood until it feels smooth, especially the edges.
- Paint or stain if you want color.
- Seal with thin coats, let it cure fully.
- Insert tubes and add felt feet on the bottom.
Pro Tips That Make It Look Boutique
- Keep the spacing symmetrical. Symmetry reads expensive.
- For a 2026 palette moment:
- Natural wood base with Jade accent paint stripe
- Matte Patina Blue base with clear tubes
- Seal the wood before gifting, even if you don’t stain or paint. It prevents water marks.
- Pair it with a cutting in a tiny wrap, like “I grew you a plant baby.” It’s cute, deal with it.
Quick Fixes If Something Goes Wrong
- Tubes wobble: holes are slightly too big. Add a thin adhesive felt strip inside the hole, then reinsert.
- Holes are crooked: sand the top edge slightly to visually level it, and keep tubes the same height.
- Finish looks streaky: you used thick coats. Sand lightly, then apply thin coats.
- Wood feels rough: sand more, then seal again. Don’t skip this step.
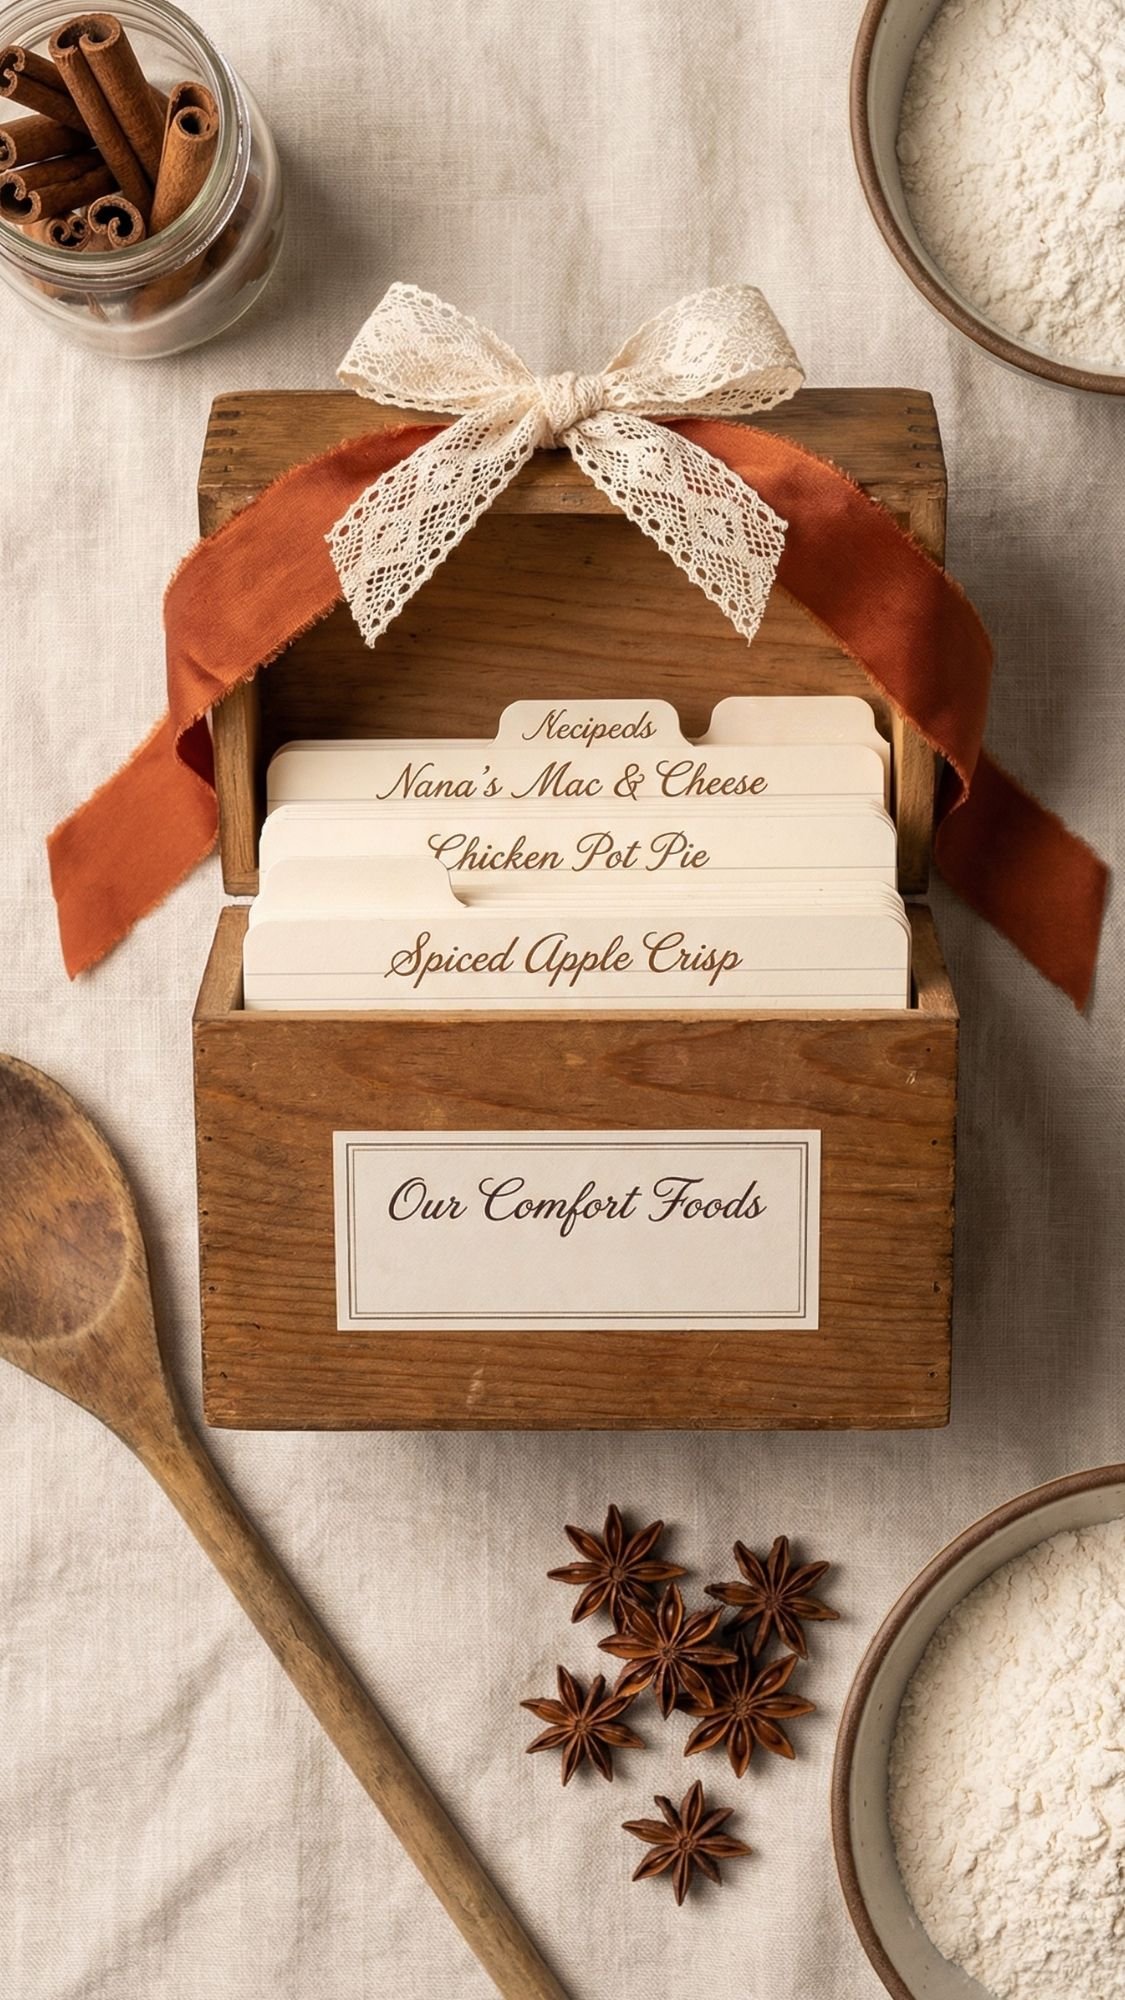
21) Recipe Card Box: “Our Comfort Foods” (Sentimental, But Also Delicious)
This one feels weirdly intimate in the best way. You’re not just giving her a thing, you’re giving her a little piece of your friendship routine. The meals you always get together, the snacks you eat when you’re stressed, the “we made this at 2am” chaos recipes. It’s cozy, personal, and actually useful.
Why She’ll Love It
- It’s nostalgic without being overly emotional.
- She’ll use it, especially if she cooks even a little.
- You can keep adding recipes later, which makes it a gift that grows.
What You’ll Need
- Small recipe card box (or a cute index card box)
- Index cards (4×6 is classic)
- Pens that don’t smear
- Divider tabs (optional)
- Stickers or washi tape (optional, keep it minimal)
- Optional upgrades:
- A printed label for the front of the box
- A tiny wooden spoon charm tied to the box
- Laminating sheets for cards she’ll use often
How To Make It
- Pick 10 recipes to start. Don’t overthink it. “Comfort foods” counts.
- Write each recipe clearly:
- Ingredients
- Steps
- Time estimate
- One tip you learned the hard way
- Add 3 divider tabs like:
- “Quick”
- “Cozy”
- “Chaotic but worth it”
- Add a note card in front that says:
- “Call me when you make the first one.”
Pro Tips That Make It Look Boutique
- Write in one ink color and keep your layout consistent.
- Add one small doodle or icon per recipe, max.
- Make a clean label for the box:
- Cloud Dancer label with Plum Noir text
- Add a Persimmon accent line for a tiny pop
- Include one “signature” recipe you both love. That’s the heart of the gift.
Quick Fixes If Something Goes Wrong
- Ink feathers on cards: you used thin paper. Switch to heavier cardstock cards.
- Cards curl: press them under a heavy book overnight.
- Box looks boring: wrap the box in neutral paper and add a clean label.
- Recipes feel random: tie them to memories, then it makes sense instantly.
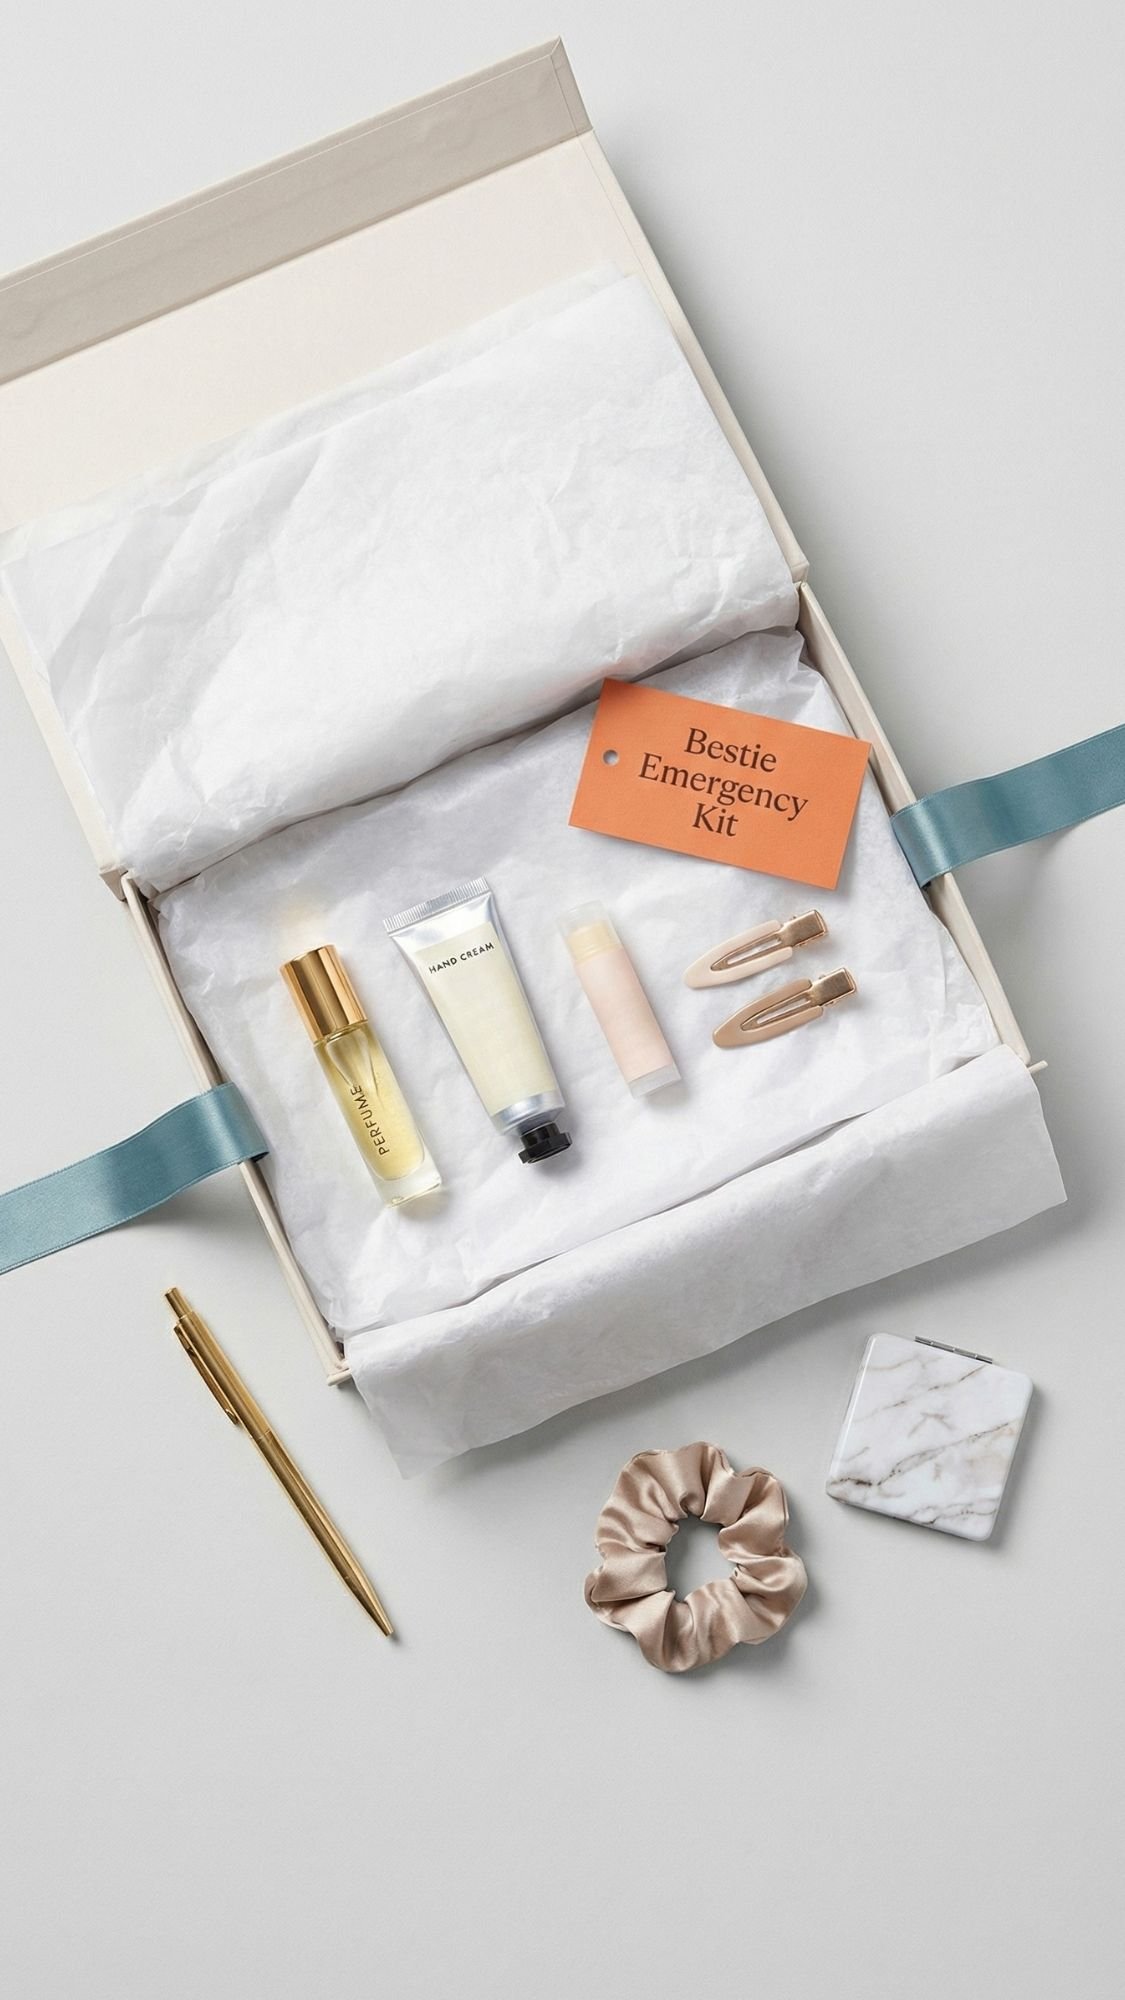
22) “Bestie Emergency Kit” Gift Box (Tiny Things, Big Love)
This is the gift for the friend who always has a random item you need, and somehow saves the day like it’s her side hustle. You’re basically returning the favor with a box of “I got you” essentials. And because it’s a curated set, it looks expensive even when the items are small. Funny how that works, right?
Why She’ll Love It
- It’s practical and thoughtful at the same time.
- She’ll keep it in her car, bag, or desk.
- It feels like you really know her, because you do.
What You’ll Need
Pick 6–10 items max so it stays curated.
- Lip balm
- Mini hand cream
- Hair ties + bobby pins
- Mini deodorant
- Mini perfume or rollerball
- Travel tissues
- Bandages
- A snack or gum
- Optional upgrades:
- Mini stain remover pen
- Tiny mirror
- Cute keychain pill case (for vitamins, not medical advice, obviously)
Packaging
- Small box or pouch
- Tissue paper or crinkle filler
- Ribbon or lace ribbon
- A tag with a short note
How To Make It
- Choose your box size first, then shop your items to fit it.
- Line the box with tissue paper, then arrange items neatly.
- Add one small personal note on top:
- “For when life gets annoying.”
- “Emergency kit because you’re iconic.”
- Close and wrap with ribbon, add a clean label or tag.
Pro Tips That Make It Look Boutique
- Make it cohesive with a palette:
- Cloud Dancer tissue + Patina Blue ribbon
- Add one Persimmon pop item, like gum or a mini lotion
- Use travel sizes that look sleek, not random bulky freebies.
- Arrange by height, taller items in back, shorter items in front. It photographs better.
Quick Fixes If Something Goes Wrong
- It looks cluttered: remove 2 items and add filler to create spacing.
- Box feels cheap: wrap the outside in neutral paper and add a clean label.
- Items shift around: tuck filler between items so they stay in place.
- It looks too generic: add one inside joke item, like her favorite snack.
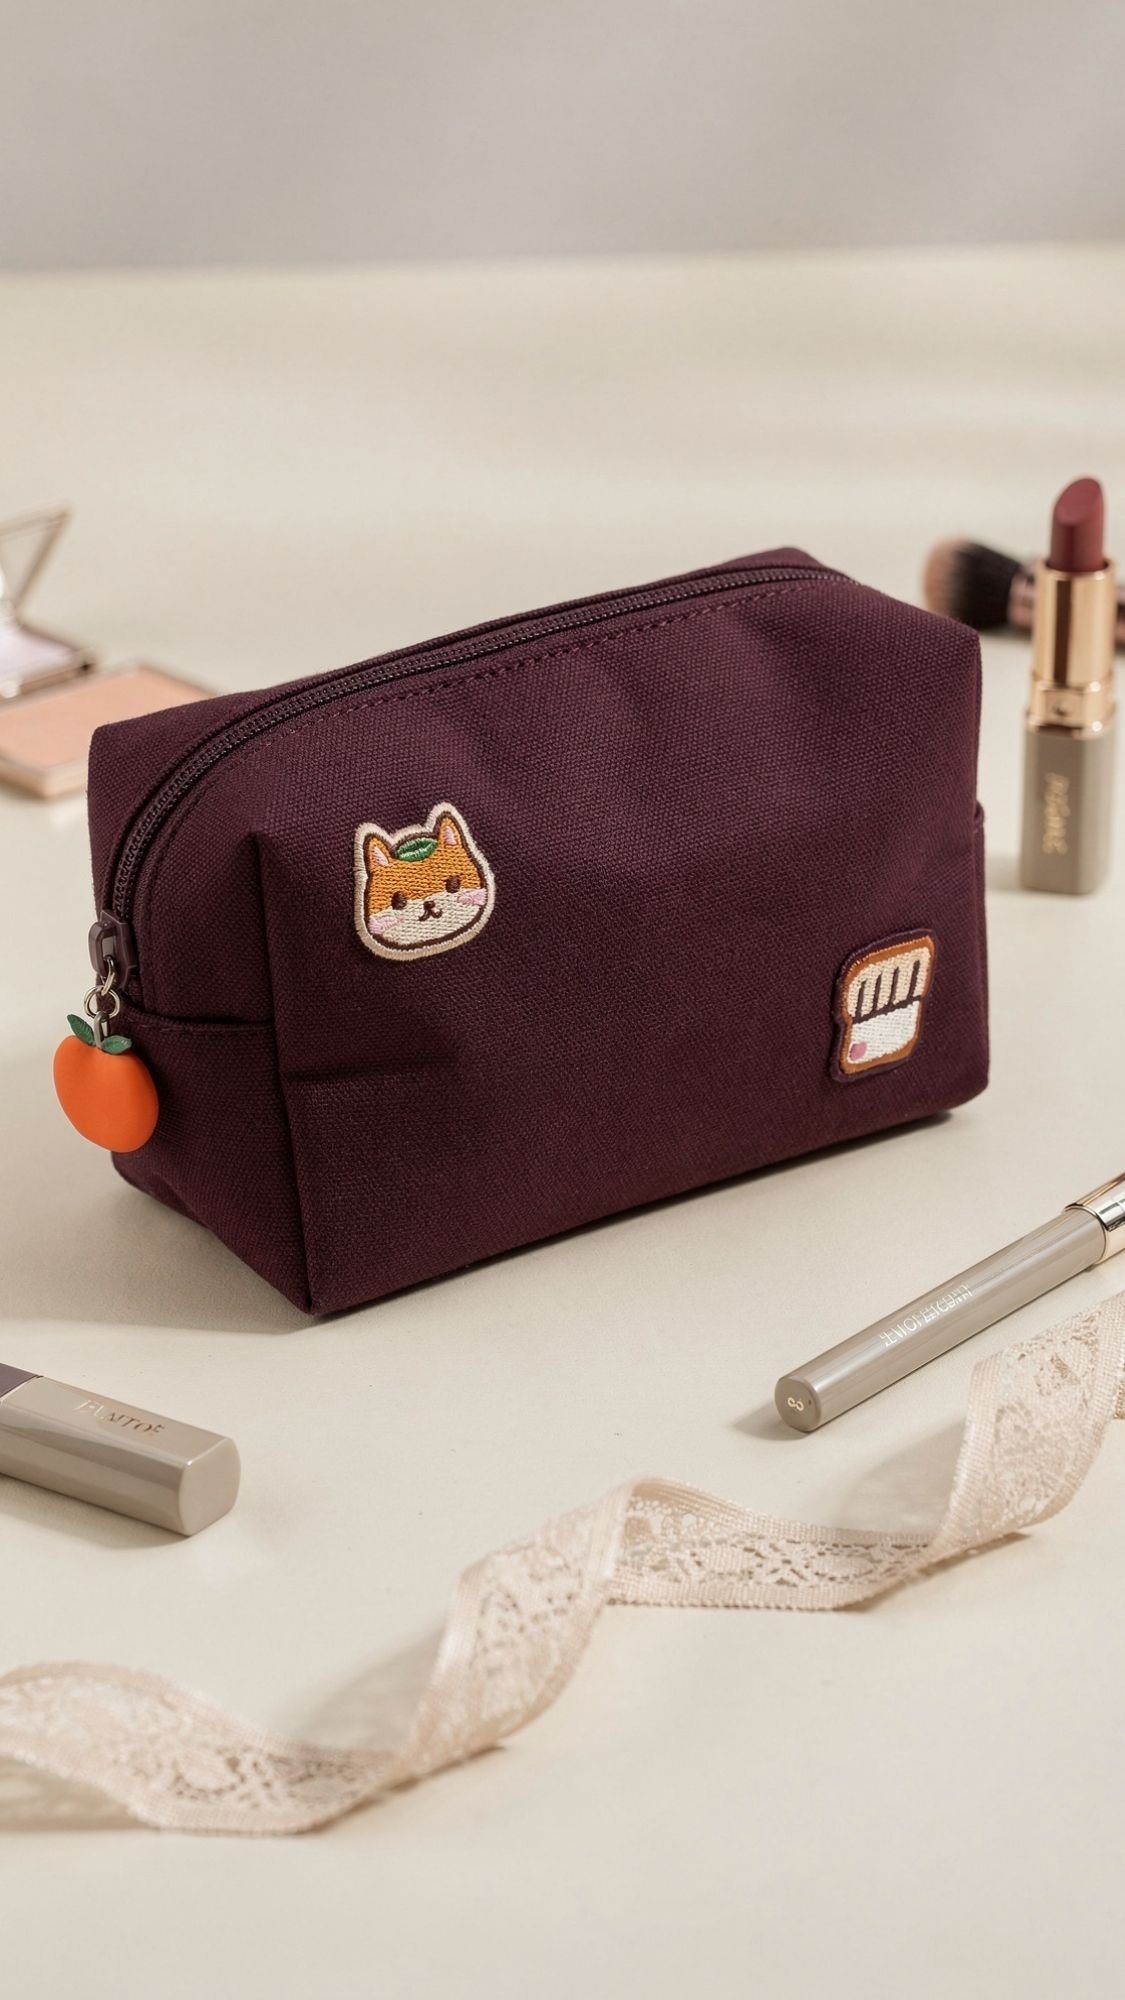
23) DIY Makeup Bag With Patches (Cute, Custom, And Actually Useful)
This one is perfect if your best friend loves organization, makeup, travel, or just having a designated pouch for her chaotic little life items. You can keep it simple with one monogram patch, or go full personality mode with a few cute icons. The only rule is you need to make it durable, because makeup bags get tossed around like they owe people money.
Why She’ll Love It
- She’ll use it constantly, travel, purse, gym bag, desk.
- It feels customized in a fun, visible way.
- It’s easy to tailor to her style without needing advanced skills.
What You’ll Need
- Plain makeup bag (canvas or nylon works best)
- Iron-on patches or heat transfer vinyl
- Iron or heat press
- Parchment paper or pressing sheet
- Optional upgrades:
- Needle and thread to stitch patch corners down
- Keychain clip or zipper charm
- Matching mini mirror or lip balm inside
How To Make It
- Lay the bag flat and decide placement first. Don’t wing it.
- Pre-press the bag for 5 seconds to remove wrinkles and moisture.
- Place patch, cover with parchment, then press firmly.
- Let it cool completely before moving it.
- For extra durability, stitch the corners of the patch down by hand.
Pro Tips That Make It Look Boutique
- Use 1–3 patches max. More than that starts to look like a sticker bomb.
- Make the placement intentional:
- one centered monogram
- or two small patches spaced cleanly
- Add a tiny zipper charm in a matching color:
- Plum Noir bag + Persimmon charm pop
- Cloud Dancer bag + Jade patch accents
- If you want it to look expensive, choose patches that look embroidered, not plasticky.
Quick Fixes If Something Goes Wrong
- Patch peels up: you under-heated. Re-press with parchment, then stitch corners.
- Patch looks wrinkled: bag wasn’t flat. Re-press on a hard surface, not an ironing board.
- Bag fabric scorches: heat was too high or press was too long. Lower temp next time and keep parchment on top.
- Placement feels off: test placement with painter’s tape before pressing.
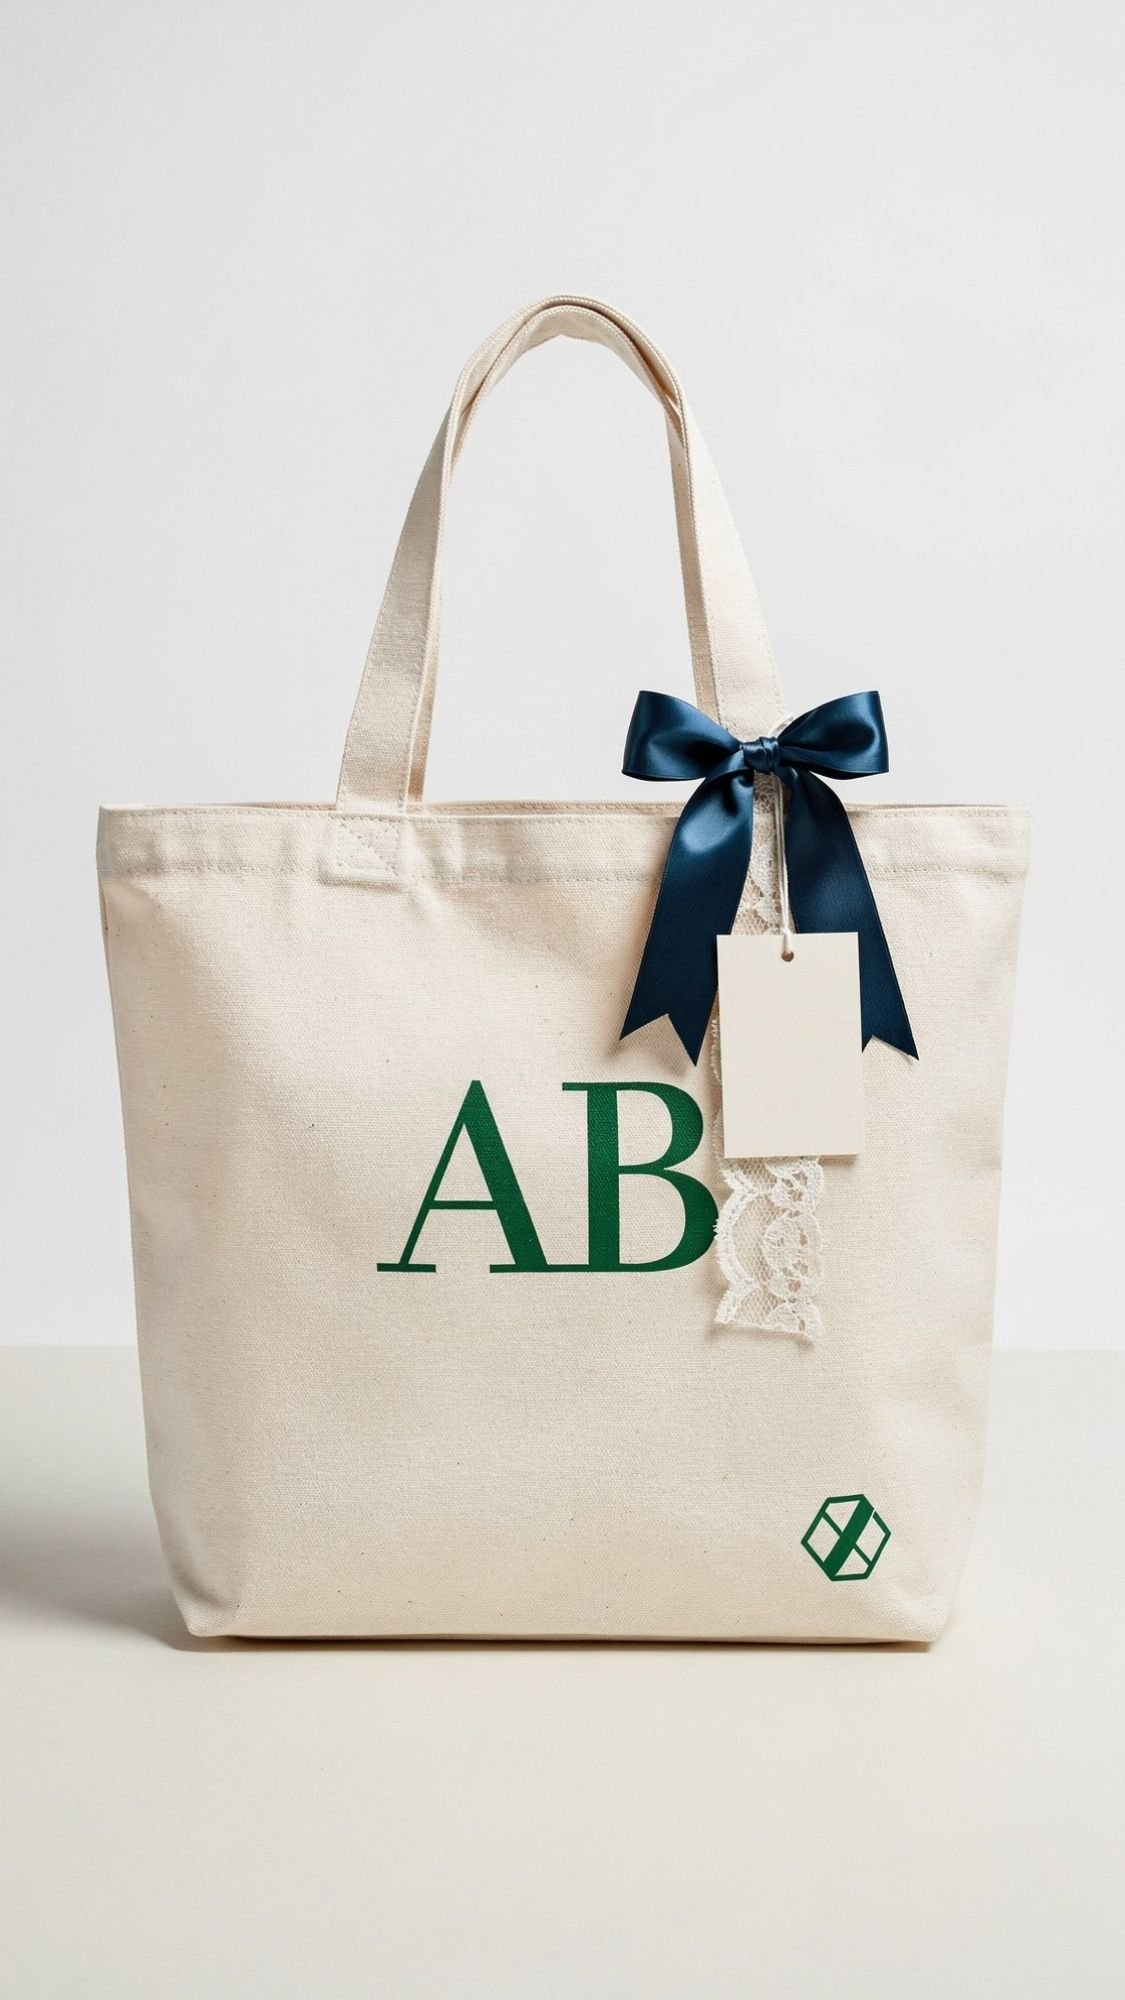
24) Personalized Tote Bag (Heat Transfer Vinyl, Clean And Classic)
A tote bag is one of the most-used gifts you can make. Your best friend can throw it in the car, use it for errands, carry snacks, haul random life items, it’s endlessly practical. The trick is making the design look crisp, not cracked and crooked. We’re going for “cute boutique tote,” not “my iron betrayed me.”
Why She’ll Love It
- She’ll use it all the time.
- It feels custom without being too precious.
- It works for any style, minimal, boho, glam, whatever.
What You’ll Need
- Canvas tote bag (smooth and sturdy)
- Heat transfer vinyl (HTV)
- Cutting machine or scissors (if hand-cutting a simple shape)
- Iron or heat press
- Parchment paper or teflon sheet
- Lint roller (seriously, don’t skip this)
- Optional upgrades:
- Inside pocket (iron-on or sew-in)
- Matching keychain charm
- A small tag tied to the handle with care instructions
How To Make It
- Lint roll the tote. HTV hates fuzz.
- Pre-press the tote for 5 seconds to remove moisture and wrinkles.
- Place your HTV design where you want it:
- I like slightly higher than center so it looks intentional.
- Press with firm, even pressure for the recommended time.
- Let it cool as directed, then peel carrier sheet.
- Press again for 5 seconds with parchment on top to lock it in.
Pro Tips That Make It Look Boutique
- Keep the design simple:
- monogram
- her nickname
- a small icon plus initials
- Color combos that look expensive:
- Jade HTV on natural canvas
- Plum Noir HTV with a tiny Persimmon accent
- Patina Blue HTV for a soft vintage-luxe vibe
- Add a small detail on one handle, like a tiny letter or icon. It feels designer.
Care Instructions To Include
- Wait 24 hours before washing.
- Turn inside out to wash.
- Cold water, gentle cycle, air dry if possible.
- Don’t iron directly on the vinyl.
Quick Fixes If Something Goes Wrong
- HTV cracks: you over-pressed or bent it too soon. Press less time and let it cool flat before handling.
- HTV lifts at edges: re-press with parchment and firm pressure.
- Design looks crooked: use a ruler and a fold crease guide before pressing.
- Vinyl won’t stick: you didn’t pre-press or your heat wasn’t consistent. Pre-press, then press again.
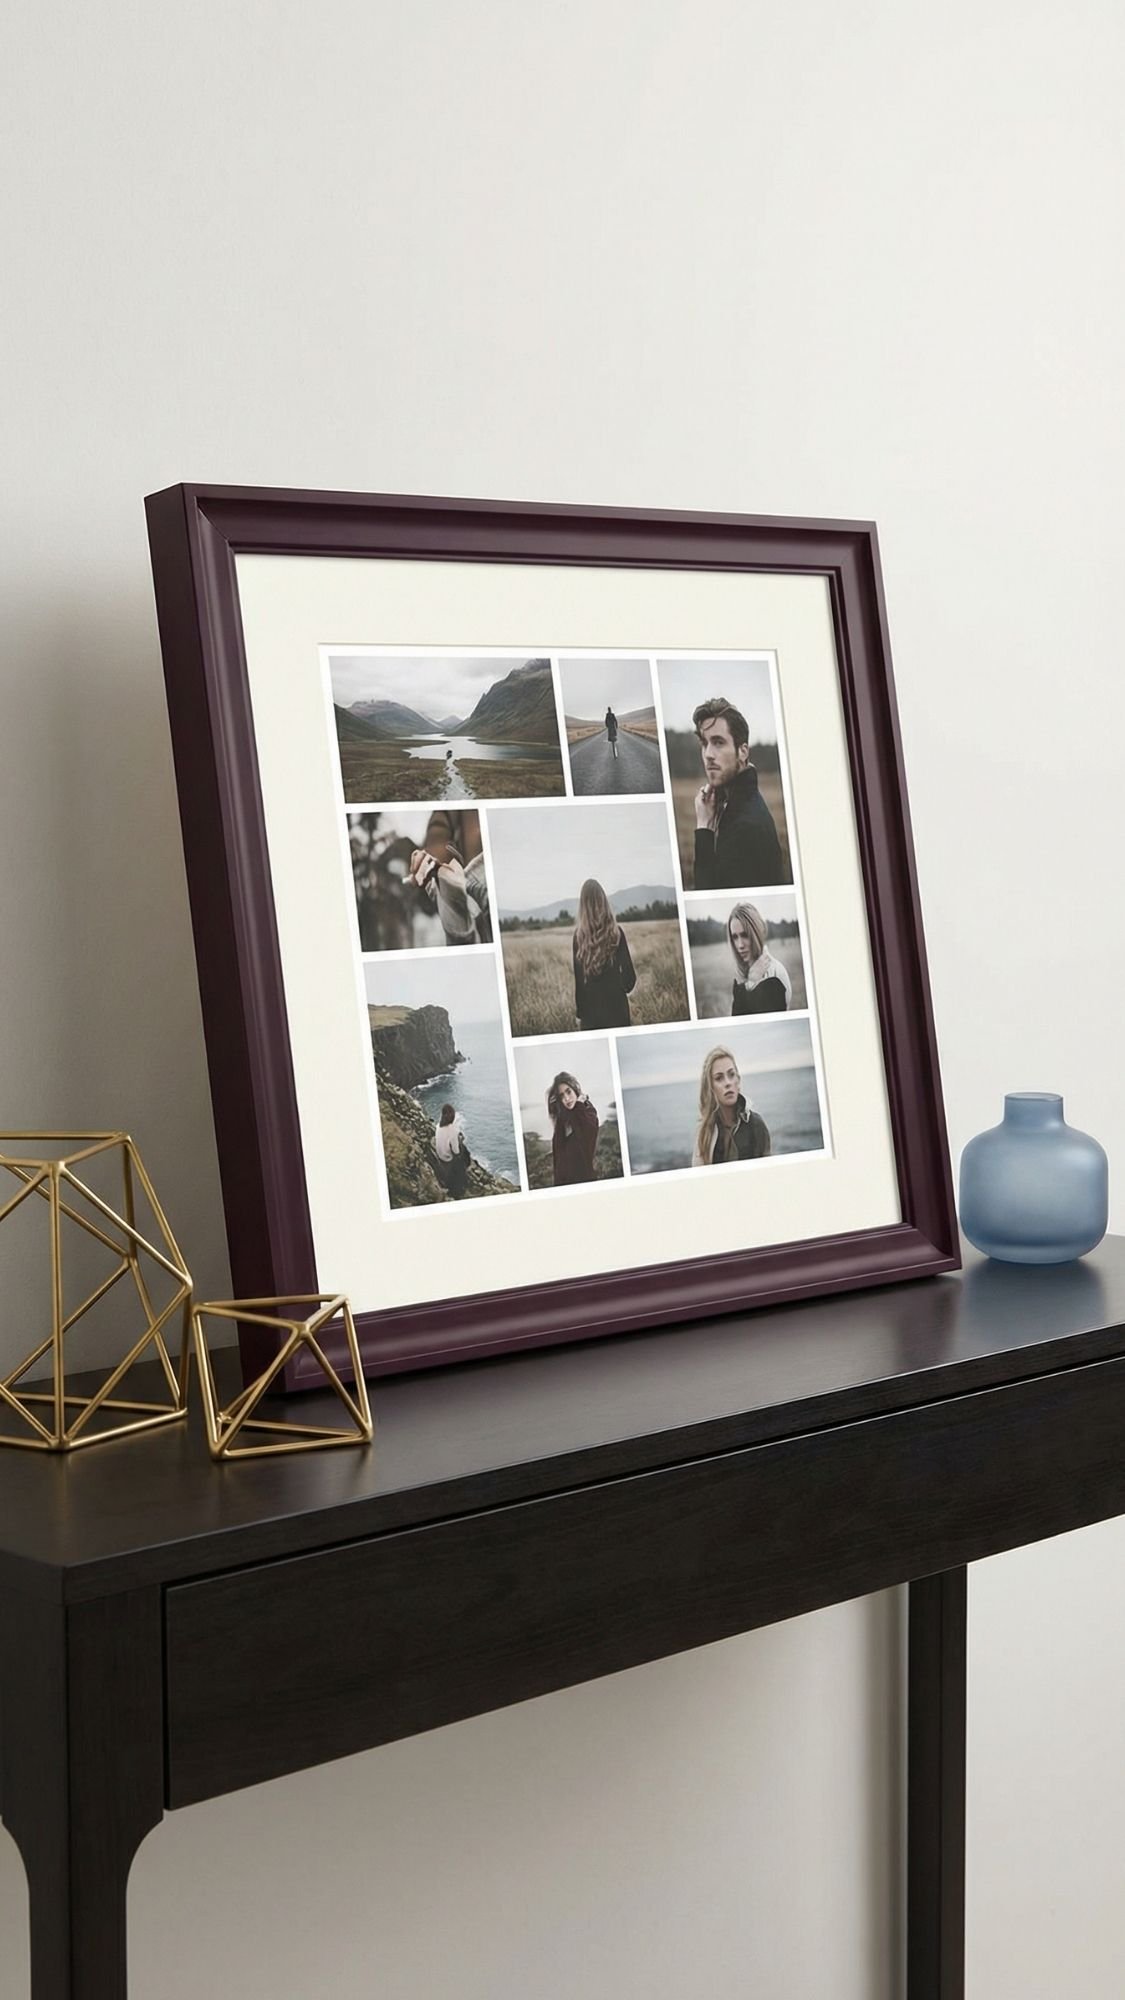
25) Thrifted Frame Glow-Up + Collage Print (The “I Found This For You” Energy)
This gift feels insanely thoughtful because it’s part DIY, part treasure hunt. You take a thrifted frame, clean it up, paint or refinish it, then add a collage print that’s basically a mini friendship museum. It can look modern, vintage, or glam depending on the finish, and it’s one of the easiest ways to make something look expensive.
Why She’ll Love It
- It’s sentimental and decor in one.
- It looks custom and intentional.
- It fits her space, dorm, apartment, office, anywhere.
What You’ll Need
- Thrifted frame (solid wood or sturdy plastic works)
- Sandpaper (220 grit)
- Cleaner or rubbing alcohol
- Primer (if painting)
- Paint or stain
- Printed collage or photo print
- Clear sealer (optional but helpful)
- Optional upgrades:
- Matte board insert for a polished finish
- Gold paint pen for tiny detail
- Felt pads for the back corners
How To Make It
- Clean the frame thoroughly. Thrift grime is real.
- Lightly sand to scuff the surface.
- Prime if needed, then paint or stain in thin coats.
- Let it dry fully, then seal if you want extra protection.
- Add your collage print:
- Keep it clean and readable.
- Stick to 6–12 photos so it doesn’t feel cluttered.
- Add felt pads to protect her wall or furniture.
Pro Tips That Make It Look Boutique
- Choose a finish that matches her vibe:
- Plum Noir frame for modern glam
- Patina Blue for soft vintage
- Natural wood with a Cloud Dancer matte insert for clean minimal
- Add a matte board. It instantly upgrades the look.
- If you paint, use a foam roller for the smoothest finish.
Quick Fixes If Something Goes Wrong
- Paint fish-eyes or won’t stick: frame had oils or residue. Clean again, sand lightly, prime, repaint.
- Brush strokes show: use thinner coats or a foam roller. Sand lightly between coats if needed.
- Print looks crooked: use a ruler line and tape corners lightly before securing.
- Frame looks too shiny: seal with a matte clear coat to tone it down.
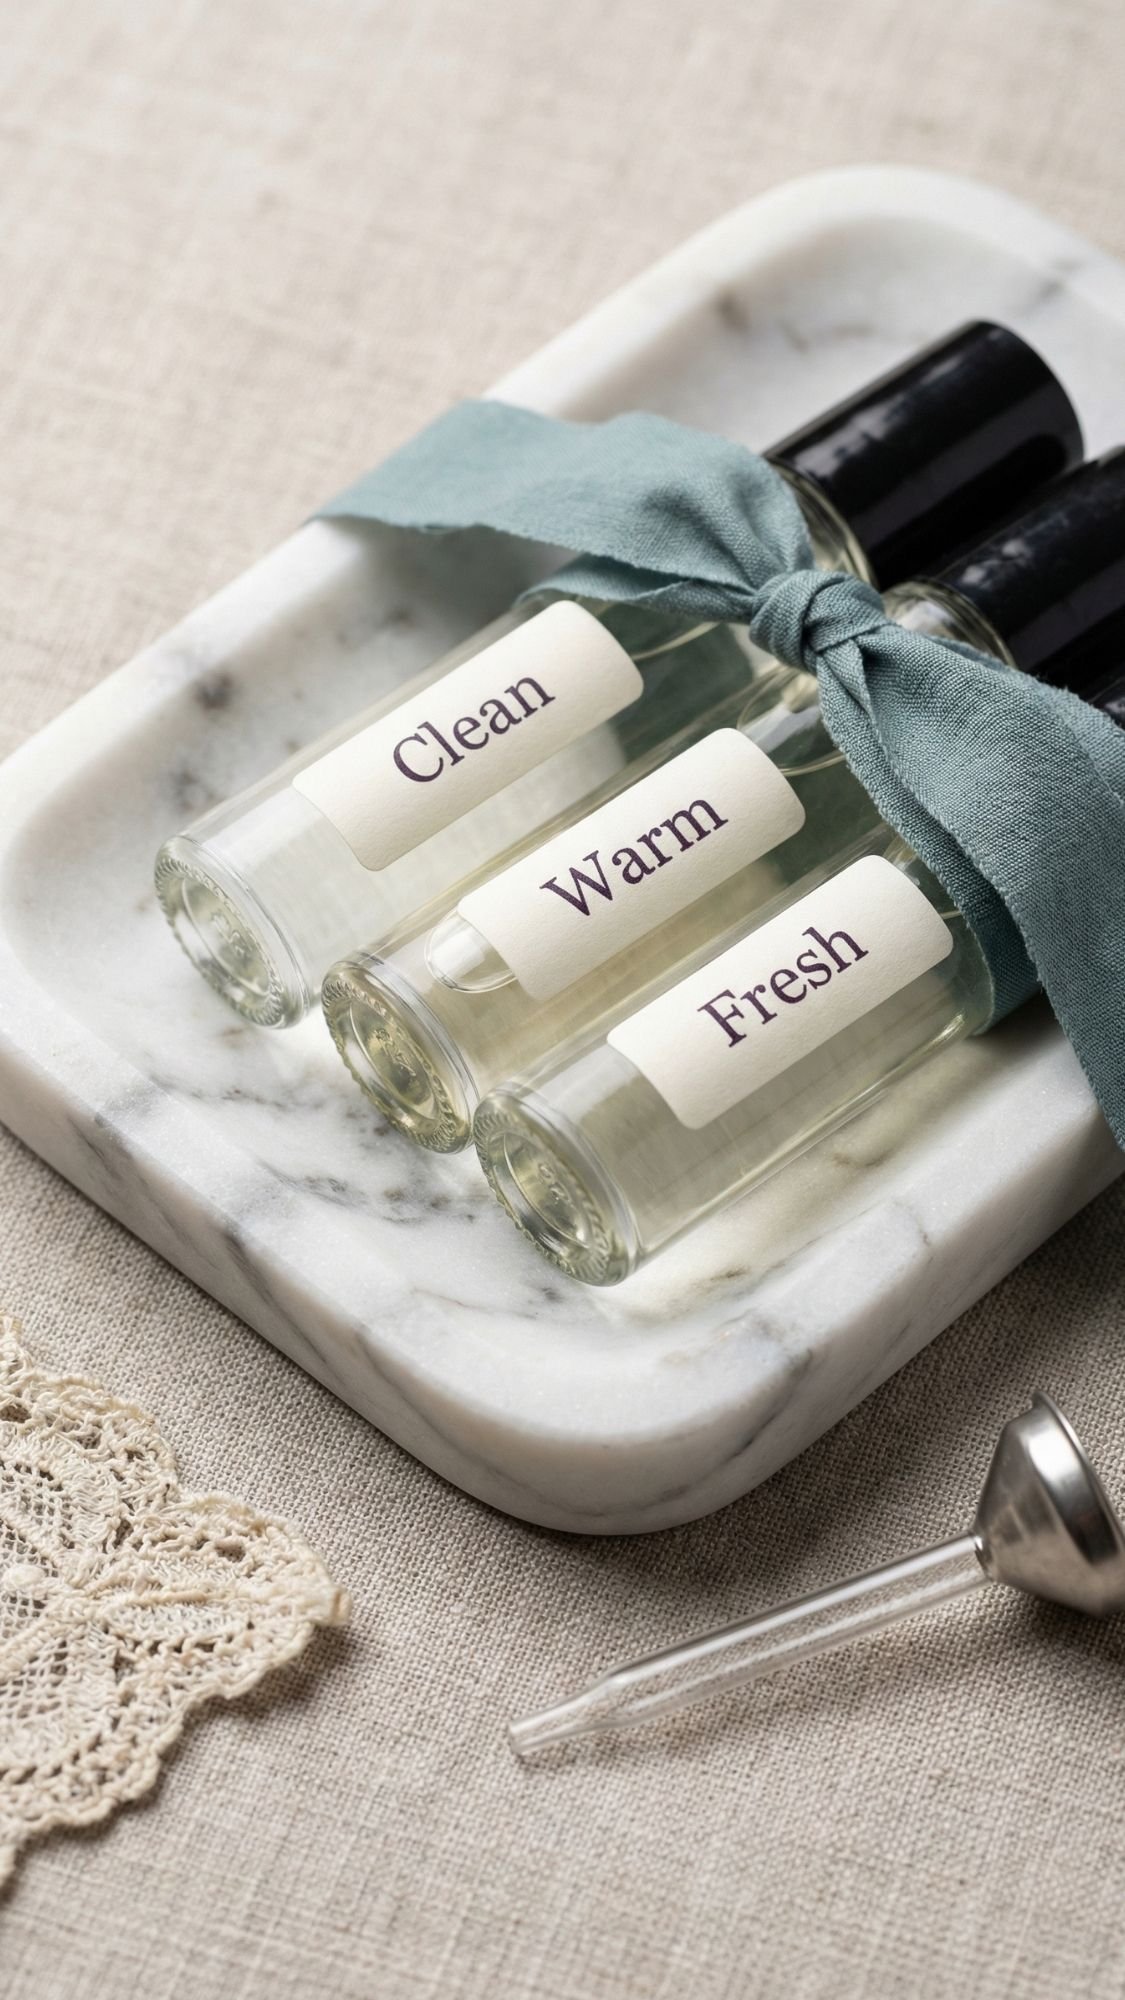
26) Scent Layering Rollerball Trio (Tiny Luxury, Big Bestie Energy)
This one feels fancy. Like, “she definitely shops at cool places” fancy. A little set of rollerball perfumes looks boutique, travels well, and feels super personal when you pick scent vibes that match her. The key is letting the blend rest so it smells smooth, not sharp and chaotic.
Why She’ll Love It
- It feels luxurious but still simple to make.
- She can toss one in her bag, desk, or car.
- A trio feels like a curated set instead of a single random item.
What You’ll Need
- 3 rollerball bottles
- Carrier oil (jojoba or fractionated coconut oil works well)
- Fragrance oil or essential oils
- Small funnel or dropper
- Labels (keep them clean and readable)
- Optional upgrades:
- A small tray or pouch to hold the trio
- A “layering combos” card
- A ribbon wrap in Patina Blue for a boutique feel
How To Make It
- Decide your three scent “moods.” I like:
- Clean: soft musk vibe
- Warm: vanilla, amber
- Fresh: citrus, mint
- Add fragrance to each bottle first, then top with carrier oil.
- Roll the bottle between your hands to mix, don’t shake hard.
- Label each one clearly.
- Let the set rest for 48 hours so the scent mellows and blends.
Pro Tips That Make It Look Boutique
- Keep labels minimal:
- “Clean”
- “Warm”
- “Fresh”
- Add a tiny card with combos:
- Clean + Warm for cozy
- Fresh + Clean for daytime
- Warm + Fresh for something more fun
- Put the trio in a small pouch or on a mini tray, it instantly looks premium.
- If you want that 2026 palette styling, use Cloud Dancer labels with Patina Blue accents and one Plum Noir detail line.
Quick Fixes If Something Goes Wrong
- Smell is harsh or too strong: add more carrier oil and let it rest longer.
- Scent fades fast: increase fragrance slightly next time, but go slow so it doesn’t irritate skin.
- Leakage: tighten caps and store upright, especially in packaging.
- Label won’t stick: wipe bottles with rubbing alcohol first.
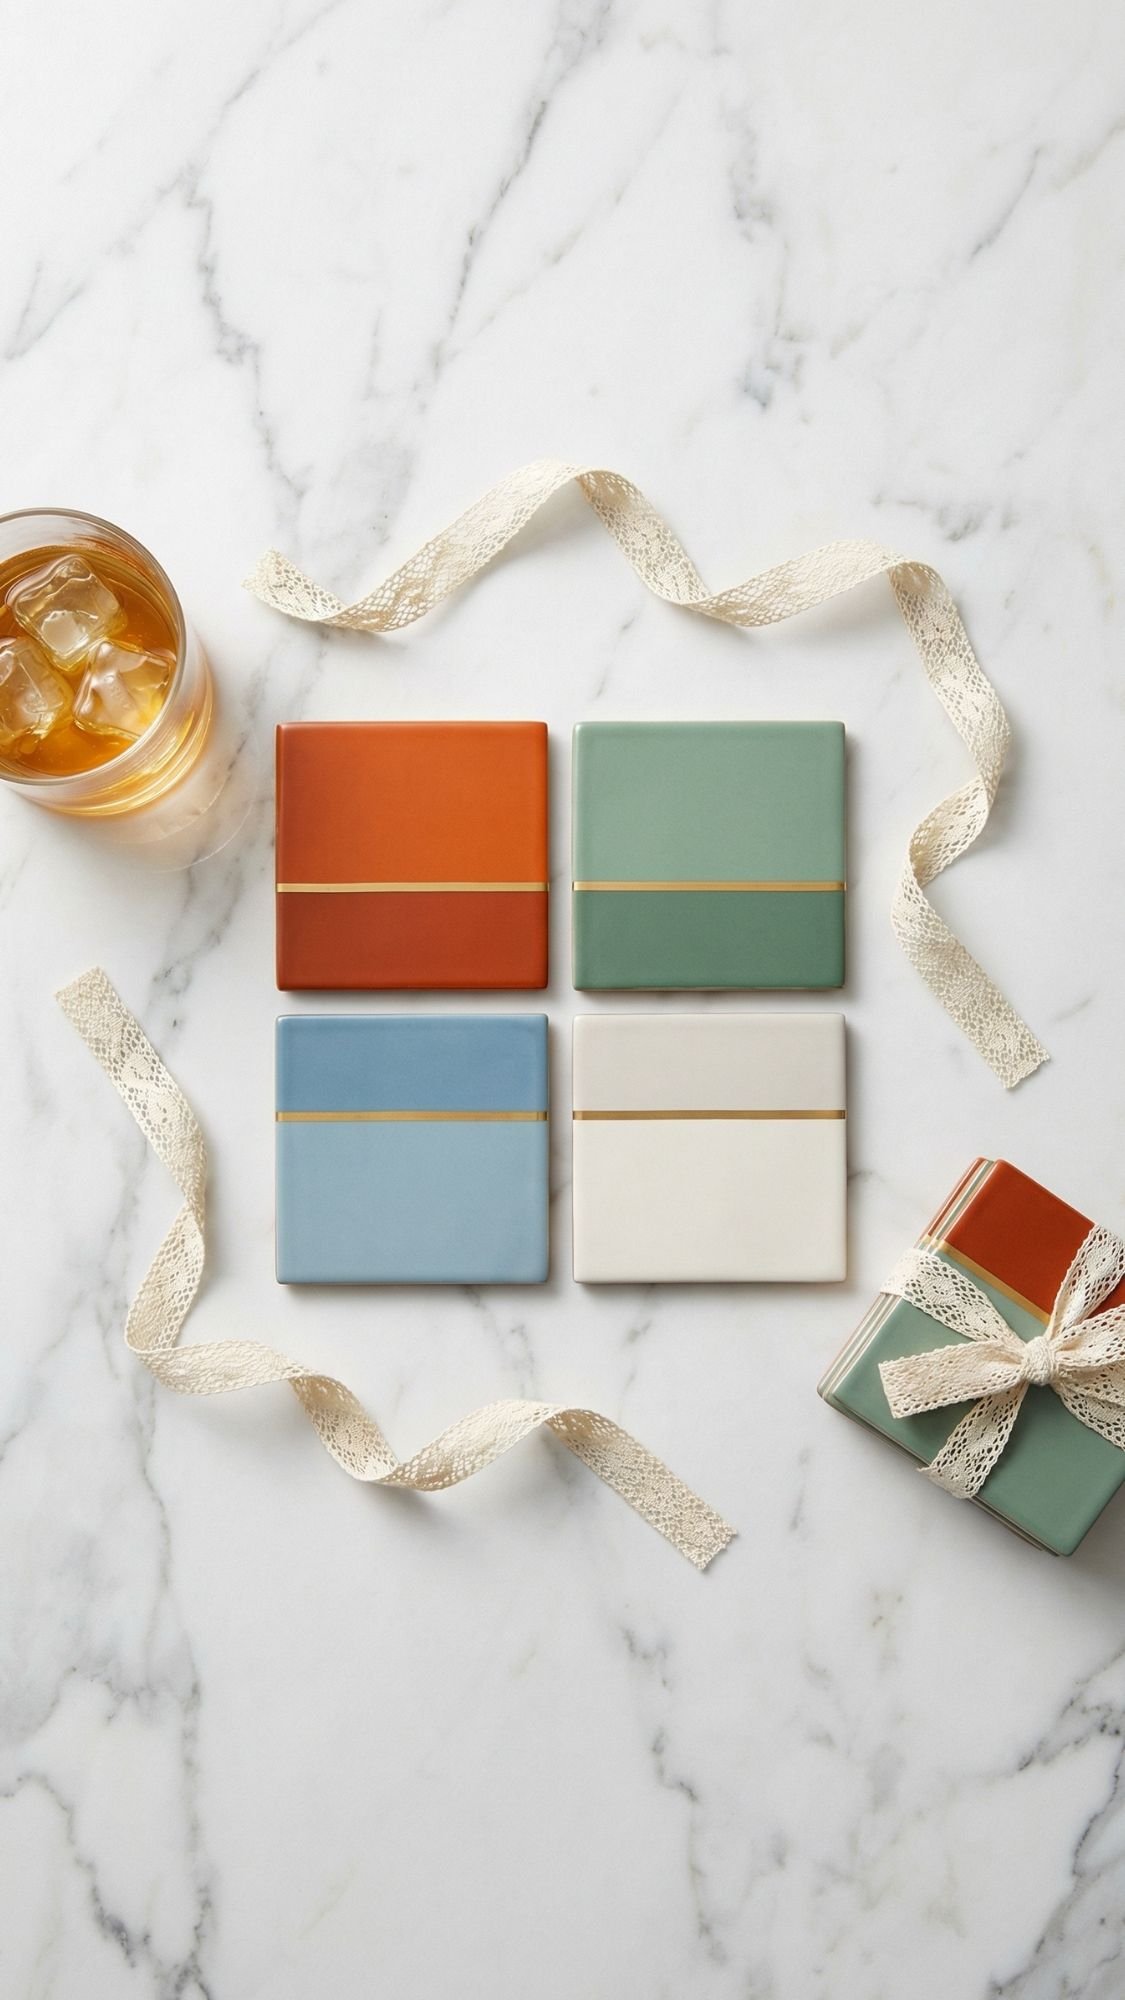
27) Luxe Coaster Set (Painted Wood Or Tile, Sealed Like A Pro)
This is the kind of gift that looks like home decor from a cool boutique, but it’s actually very doable. Coasters are practical, they photograph well, and they feel “grown-up gift” without being boring. The big thing here is sealing correctly, because nobody wants water rings, peeling paint, or that weird tacky finish that never fully dries. Ever made coasters and then regretted everything after the first drink? Same, once. Not again.
Why She’ll Love It
- She can use them daily, coffee, wine, iced drinks, all of it.
- A set feels generous and finished.
- You can match her style, modern, boho, glam, minimalist.
What You’ll Need
Choose your base:
- Wood coaster blanks or ceramic tiles
- Sandpaper (220 grit for wood)
- Acrylic paint or paint pens
- Painter’s tape (for clean lines)
- Clear sealer:
- Water-based polycrylic for durability
- Spray sealer for light-use decorative sets
- Optional upgrades:
- Cork backing or felt pads
- Gold paint pen detail line
- Small coaster holder or ribbon wrap
How To Make It
- Prep the surface:
- Wood: sand lightly and wipe clean.
- Tile: wipe with rubbing alcohol and dry fully.
- Tape your design. Clean lines make it look expensive.
- Paint in thin layers. Let each layer dry before the next.
- Remove tape carefully once paint sets, but before it fully hardens.
- Seal in thin coats. Let it dry between coats.
- Add cork or felt backing so it doesn’t scratch her table.
Pro Tips That Make It Look Boutique
- Use a tight palette. Here are three that look high-end:
- Cloud Dancer + Cool Blue + black
- Patina Blue + Jade + pearl white
- Plum Noir + Persimmon + gold accents
- A thin metallic border line makes coasters look designer instantly.
- Seal the edges too. Water finds edges first, like it has a mission.
Finishing Notes: Dry Time Vs Cure Time (Plain Language)
- Dry time: it feels dry to the touch.
- Cure time: it becomes hard and durable. This takes longer.
- For most sealers, let coasters cure at least 24–72 hours before gifting if you can. If you rush this, the finish can dent or stick. Nobody wants that.
Quick Fixes If Something Goes Wrong
- Sealer stays tacky: humidity or thick coats. Add airflow, wait longer, then do one final thin coat.
- Paint bleeds under tape: tape wasn’t burnished. Touch up edges with a small brush, and burnish tape next time.
- Uneven finish: sand lightly once fully dry, then add a thin sealing coat.
- Water rings appear: you didn’t seal enough. Add another coat and let it cure longer.
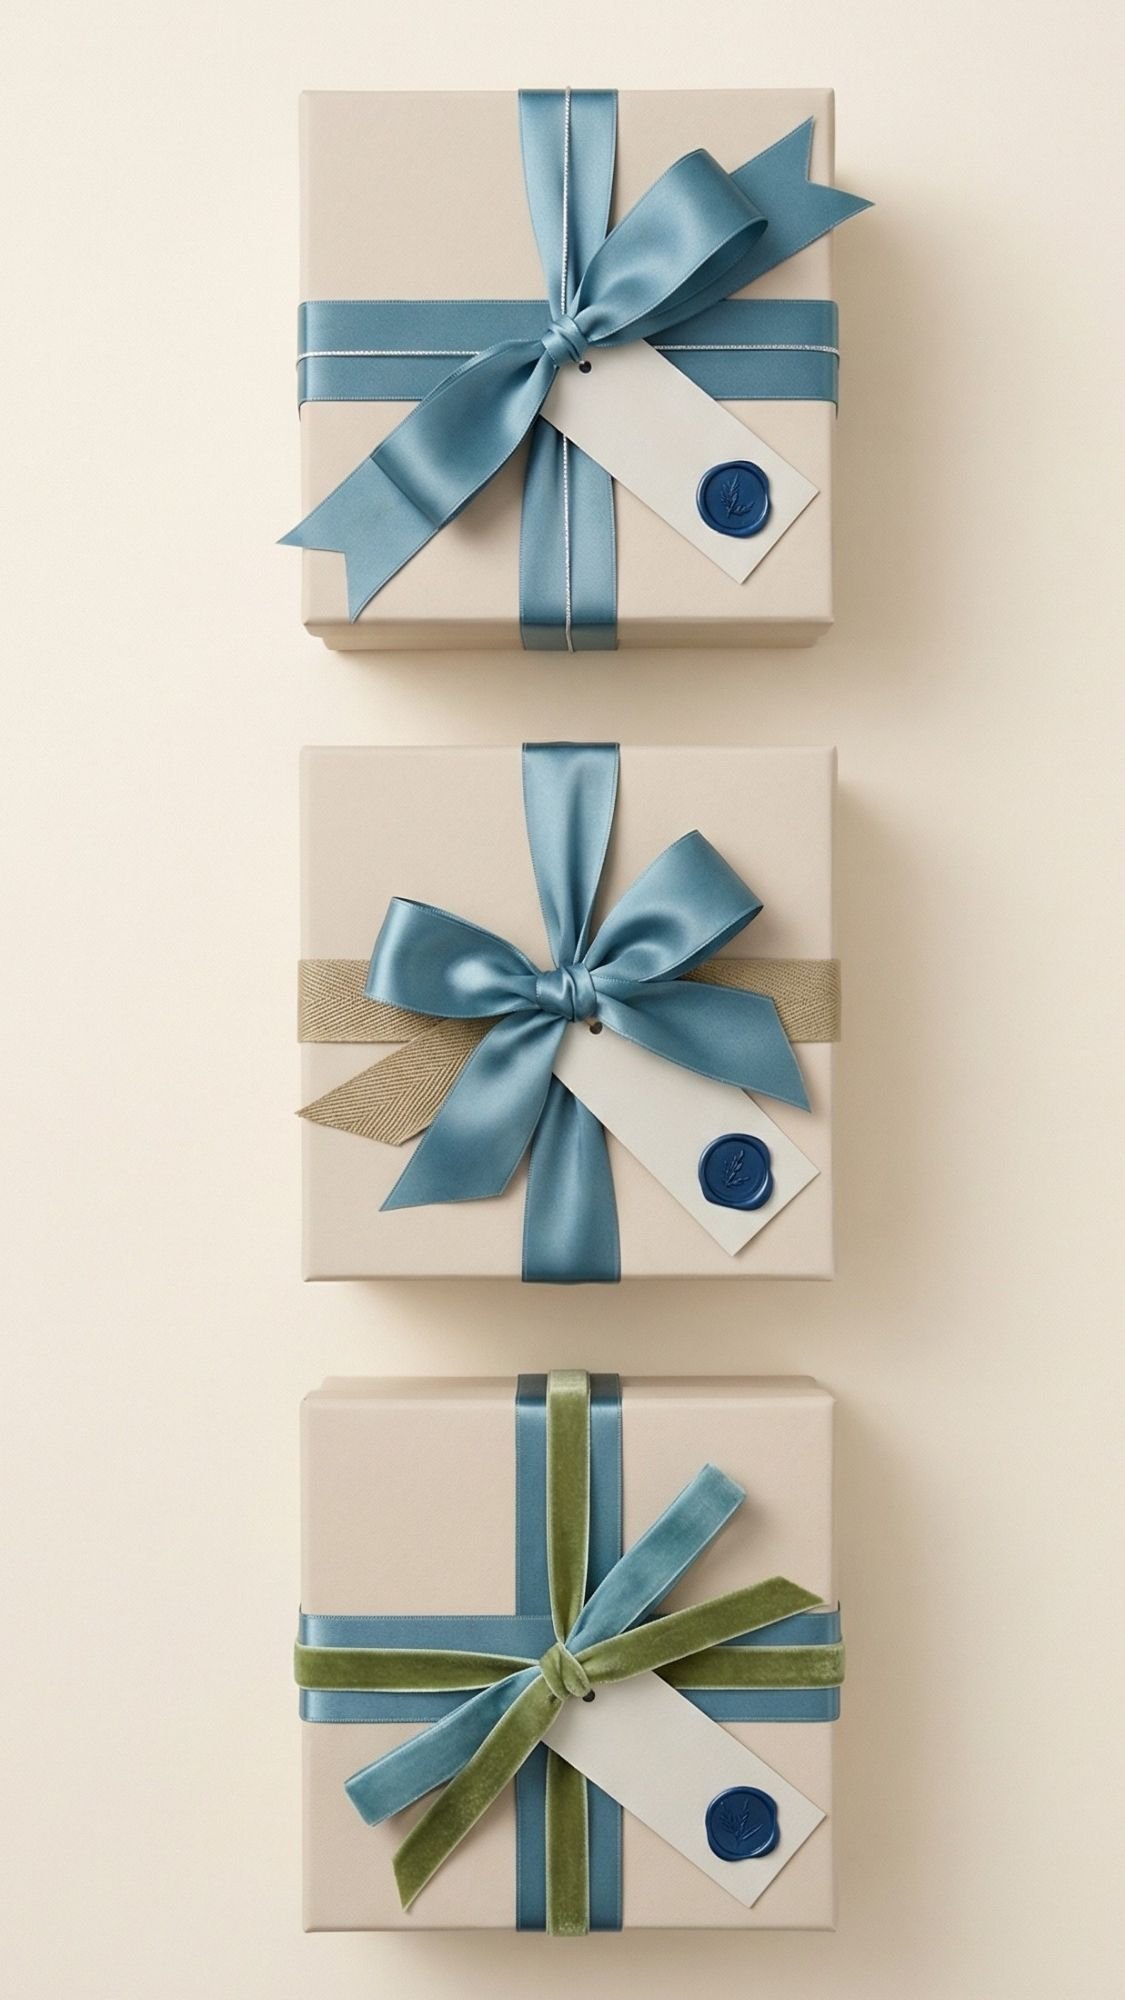
Gift Wrap That Makes Everything Look 3x More Expensive
You can make the simplest DIY gift look boutique with the right wrap. And you can also make a gorgeous handmade gift look… questionable… with wrinkly tissue and a bow that looks like it fought back. Packaging matters. It’s the first impression, and your bestie will absolutely judge you with love.
My “Always Works” Gift Wrap Formula
- One neutral base: Cloud Dancer white, kraft, soft beige, or matte black
- One accent color: Patina Blue, Cool Blue, Jade, Plum Noir, or Persimmon
- One texture: lace ribbon, satin ribbon, velvet ribbon, or wax seal
- One clean tag: short message, readable, no clutter
Easy Upgrades That Look Luxury
- Swap shiny gift wrap for matte paper or a simple box.
- Use lace ribbon + satin bow together, but keep it minimal.
- Add a tiny wax seal on the tag, not the whole box, unless you want to fight it later.
- Put your gift inside a box with filler so it doesn’t rattle around like loose change.
How I Keep It From Looking “Craft Fair”
- I match the ribbon to one detail in the gift. One matching element makes it feel intentional.
- I keep tags short:
- “Made for you”
- “Bestie birthday”
- “Open first”
- I avoid overcrowding. Too many stickers makes it look messy fast.
Quick Fixes If Wrapping Goes Sideways
- Bow looks limp: use wire-edged ribbon or double layer satin.
- Tag looks cheap: print it on thicker cardstock and punch clean edges.
- Box looks boring: wrap the box itself in neutral paper and add one accent ribbon.
- Everything slides around: add crinkle filler or tissue padding so it stays in place.
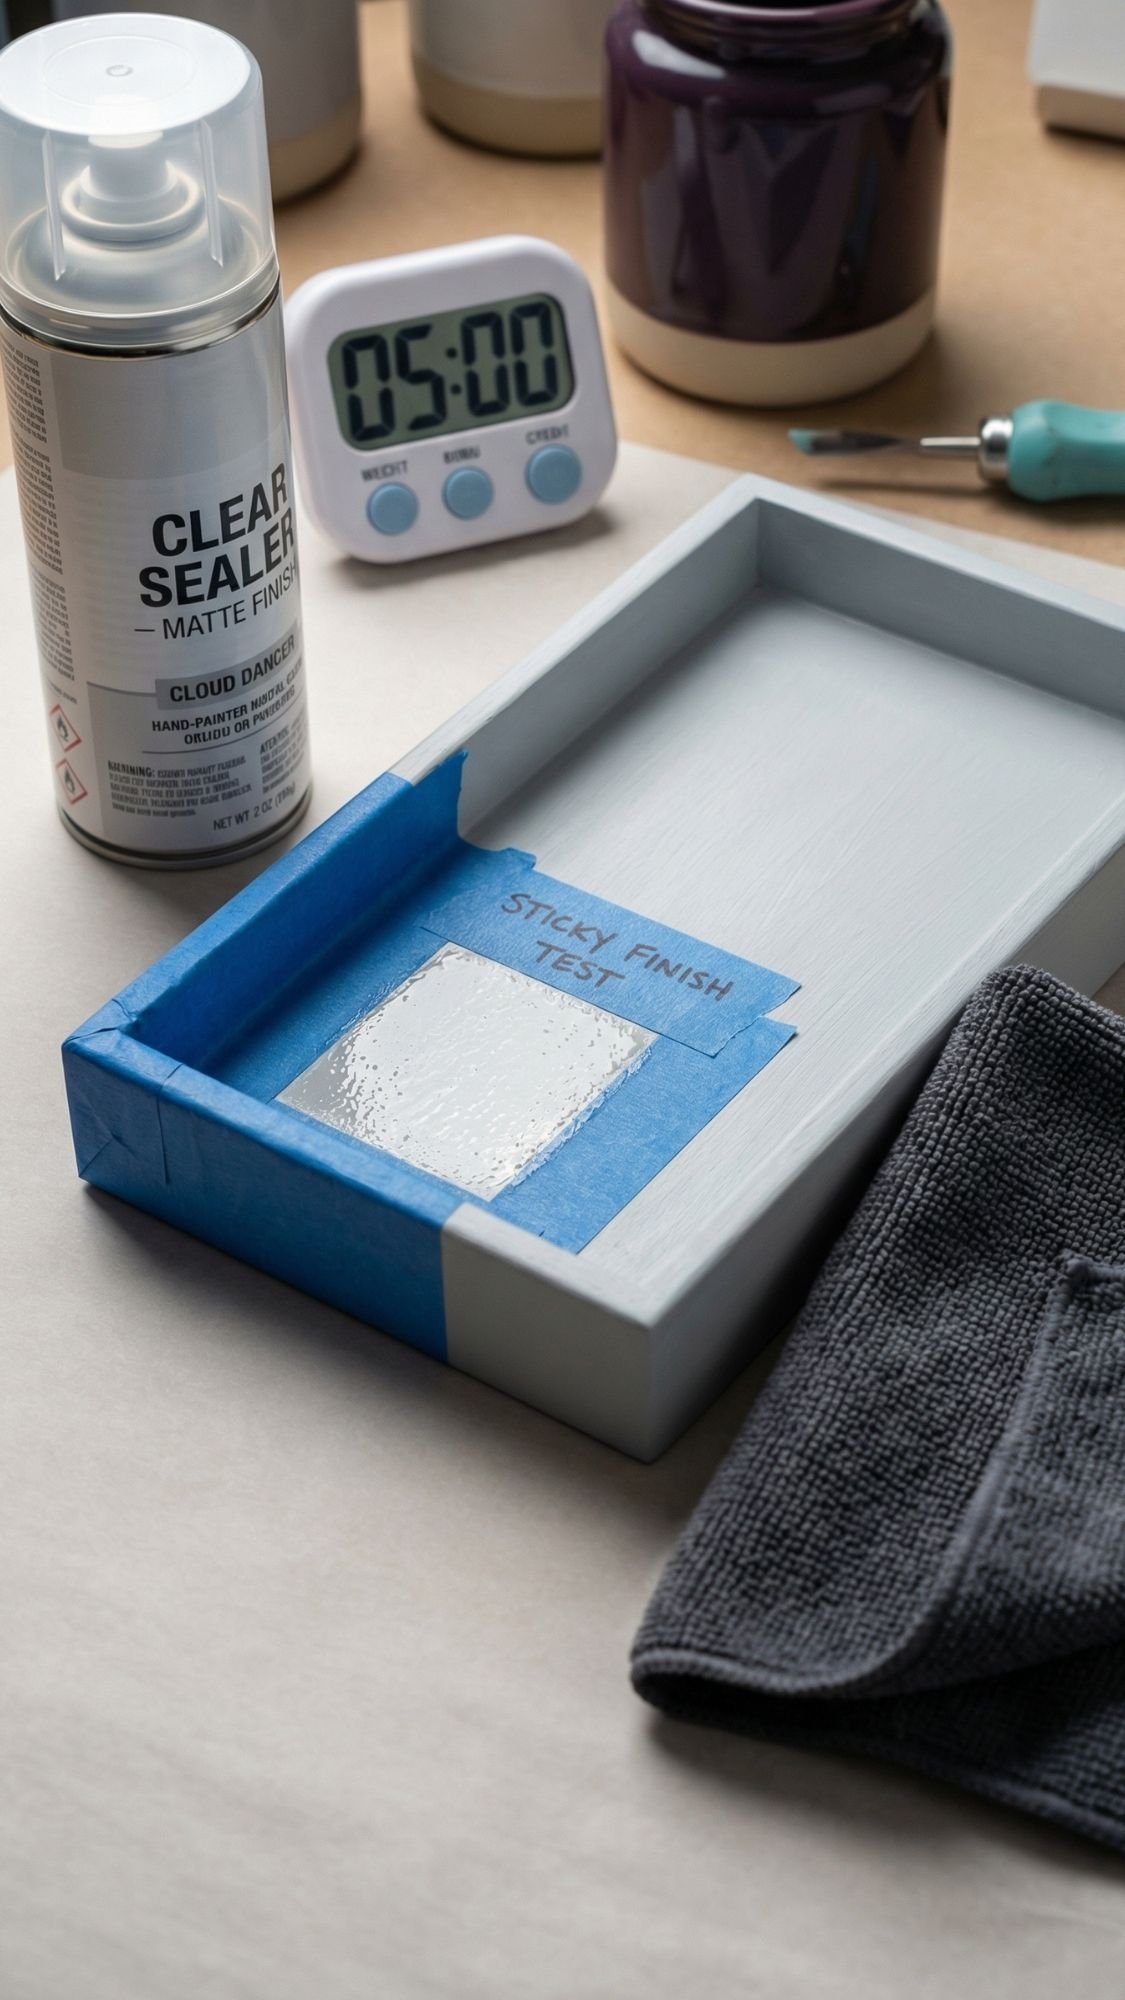
The Night I Thought I Ruined A Gift (And How I Saved It)
Okay, confession time. I once made a painted gift piece that looked perfect… and then I sealed it too soon because I got impatient and wanted it done. The next day, the finish felt tacky, like it never fully dried, and it grabbed lint like it was magnetized. I panicked, obviously. I also considered pretending it was a “soft-touch finish” and hoping nobody noticed. That plan was not solid.
Here’s what actually happened. The paint wasn’t fully cured, and I slapped on a sealer in thicker coats than I should have. Humidity was also doing its thing, and the combo turned the finish into a sticky mess. If you’ve ever touched a project and immediately regretted every decision you’ve made, you get it.
How I Fixed It
- I moved the piece into a warm, dry room with airflow. I didn’t leave it in a steamy kitchen or near a humid window.
- I waited. Annoying, yes. Necessary, also yes.
- I lightly wiped the tacky surface with a clean microfiber cloth. I didn’t scrub, I didn’t dig in, I just removed the gummy top layer that hadn’t set right.
- Once it felt stable, I added one thin coat of a compatible sealer and let it cure properly.
The Lesson I Learned The Hard Way
- Dry time means the surface feels dry. Cure time means it’s actually hardened and durable.
- If you seal too early, you trap moisture and you create tacky sadness.
- Thin coats always win. Thick coats always cause drama. Why do we forget this? No clue.
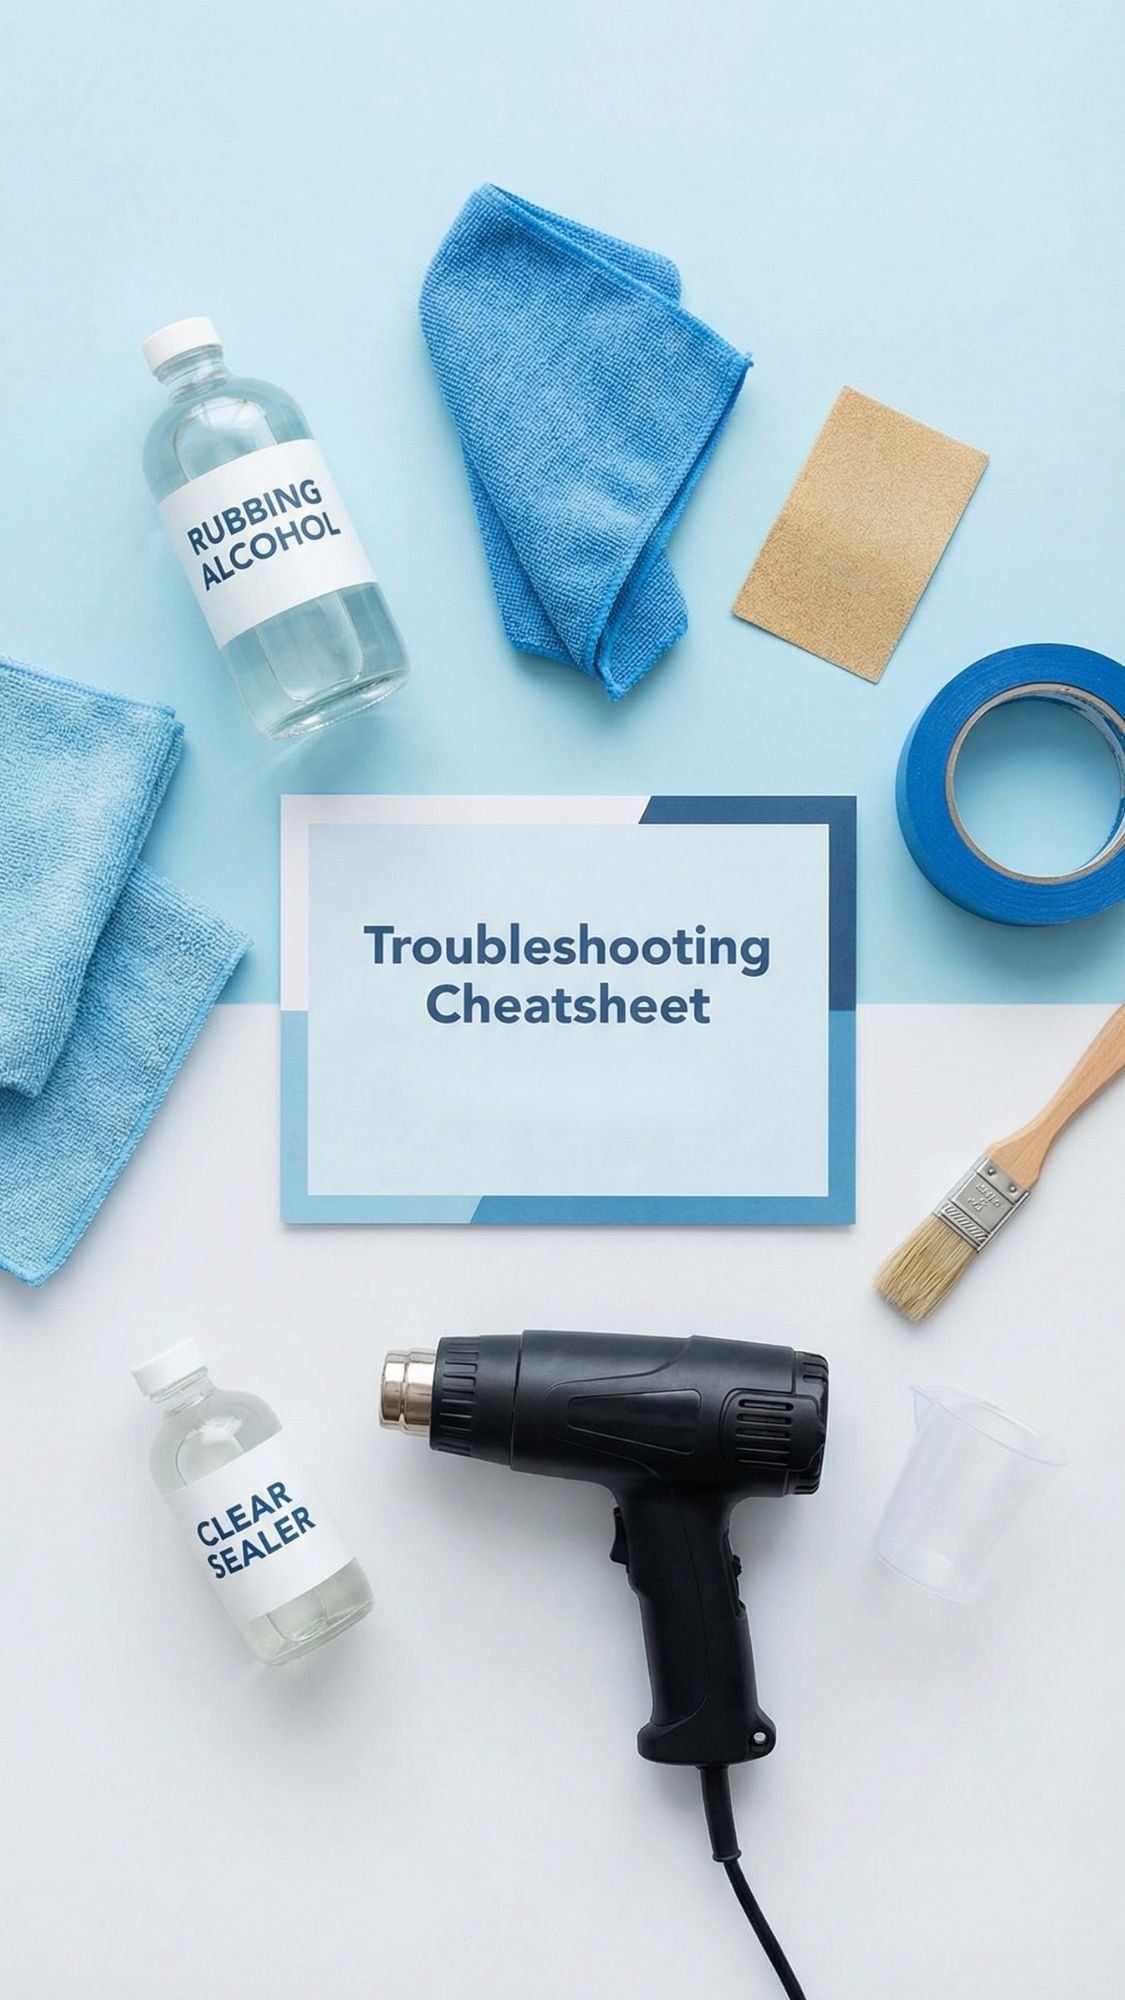
Fix The Annoying Stuff Fast (8 Common Issues + Real Fixes)
Let’s be honest, most DIY tutorials skip the messy parts. Then you’re standing there at midnight, staring at peeling vinyl, bubbled resin, or warpy clay like “cool cool cool… now what?” This section is the now what. Save it, screenshot it, tattoo it on your crafting brain.
1) Paint Peeling Off Wood
- Symptom: Paint scratches or peels off with a fingernail.
- Likely cause: You didn’t sand or prime, or the wood had residue.
- Fix: Sand back the loose paint, clean dust, prime, repaint in thin coats.
- Prevention next time: Scuff sand first, wipe clean, then prime before paint.
2) Vinyl Won’t Stick At All
- Symptom: Decal slides, lifts, or won’t adhere.
- Likely cause: Oils, dust, or you touched the surface a lot while positioning.
- Fix: Clean with rubbing alcohol, let dry fully, reapply and burnish firmly.
- Prevention next time: Degrease first and avoid touching the application area.
3) Vinyl Edges Lift After A Day Or Two
- Symptom: Corners start lifting on cups, jars, or curved surfaces.
- Likely cause: You stretched vinyl around a curve, or it didn’t cure long enough.
- Fix: Warm gently with a heat tool, press down, burnish hard, then let it rest 24–48 hours.
- Prevention next time: Use smaller decals on curves, don’t tug vinyl during placement.
4) Tape Bleed In Painted Designs
- Symptom: Paint creeps under tape and ruins your crisp lines.
- Likely cause: Tape wasn’t burnished, or paint was too wet.
- Fix: Let it dry, then touch up with a tiny angled brush. For future lines, seal tape edge with a base coat first.
- Prevention next time: Burnish tape edges and use thin paint layers.
5) Air-Dry Clay Warps
- Symptom: Dish dries unevenly and curls.
- Likely cause: Clay thickness is uneven, or it dried too fast on one side.
- Fix: Dry on a flat surface, flip halfway through, and weight edges lightly if needed.
- Prevention next time: Use guide sticks for even thickness and dry slowly.
6) Air-Dry Clay Cracks
- Symptom: Cracks show up during drying or after.
- Likely cause: Too thin, too fast drying, or clay was overworked.
- Fix: Fill cracks with clay paste, let dry, sand smooth, repaint, reseal.
- Prevention next time: Keep pieces thicker and dry away from heat sources.
7) Resin Bubbles
- Symptom: Tiny bubbles trapped in resin.
- Likely cause: Resin was cold, mixed too fast, or poured too thick.
- Fix: Warm resin bottles in lukewarm water first, stir slowly, pour in thin layers, pop bubbles with gentle heat.
- Prevention next time: Mix slowly and use thin pours. Cold resin equals bubbles.
8) Sealer Stays Tacky
- Symptom: Finish feels sticky even after “drying.”
- Likely cause: Thick coats, humidity, or incompatible sealer over paint.
- Fix: Add airflow and time, wipe lightly if gummy, then apply one thin compatible coat once stable.
- Prevention next time: Test finish on scrap, apply thin coats, and respect cure time.
Make It Look Professional (And Actually Last)
This is the part people skip, and then they wonder why the vinyl peels, the paint scratches, or the “cute” trinket dish turns into a chalky mess after two weeks. You don’t need fancy products, you just need the right finish for the right surface and enough cure time. Ever touched a project that felt dry, then left a fingerprint anyway? That’s because dry and cured are not the same thing.
Dry Time Vs Cure Time (Plain Language)
- Dry time: The surface feels dry to the touch. You can handle it gently.
- Cure time: The finish hardens fully. It resists scratches, water, and stickiness.
If you only remember one thing, remember this: dry means “touchable,” cure means “durable.”
My Go-To Finishing Rules (That Save Gifts)
- Apply sealers in thin coats. Thick coats cause streaks, bubbles, and tackiness.
- Let layers dry fully before adding the next coat.
- Give projects airflow while they cure. Don’t trap them in a closed box too soon.
- Always seal edges and corners, that’s where wear starts first.
Best Finish Options By Project Type
Painted wood, trays, coasters
- Use a durable clear finish, water-based polycrylic works great.
- Let it cure at least 24–72 hours before heavy use.
Air-dry clay decor
- Use acrylic spray sealer in light coats.
- Seal the underside too, it helps stability and moisture resistance.
Vinyl on glass or mugs
- Vinyl needs time to bond, let it sit 24–48 hours before washing.
- Hand wash for the first 72 hours if you can.
- Avoid soaking and avoid scrubbing over the decal.
Paper crafts, scrapbooks
- Skip wet glue for main attachments. Use tape for clean pages.
- Press finished pages under a heavy book so everything lays flat.
Simple Care Cards You Can Add To Gifts
These make you look like a pro, and they keep your gift from getting destroyed.
- “Hand wash only for 72 hours.”
- “Avoid soaking.”
- “Do not scrub directly on vinyl.”
- “Keep out of high heat.”
- “Wipe clean with a damp cloth.”
How Long It Lasts (And How To Refresh It)
- Most sealed decor pieces last months to years with gentle care.
- If something looks dull later, wipe it clean and add a fresh thin sealer coat if the surface allows.
- For vinyl, replace the decal if it wears down. It’s easy to reapply when the surface is clean.
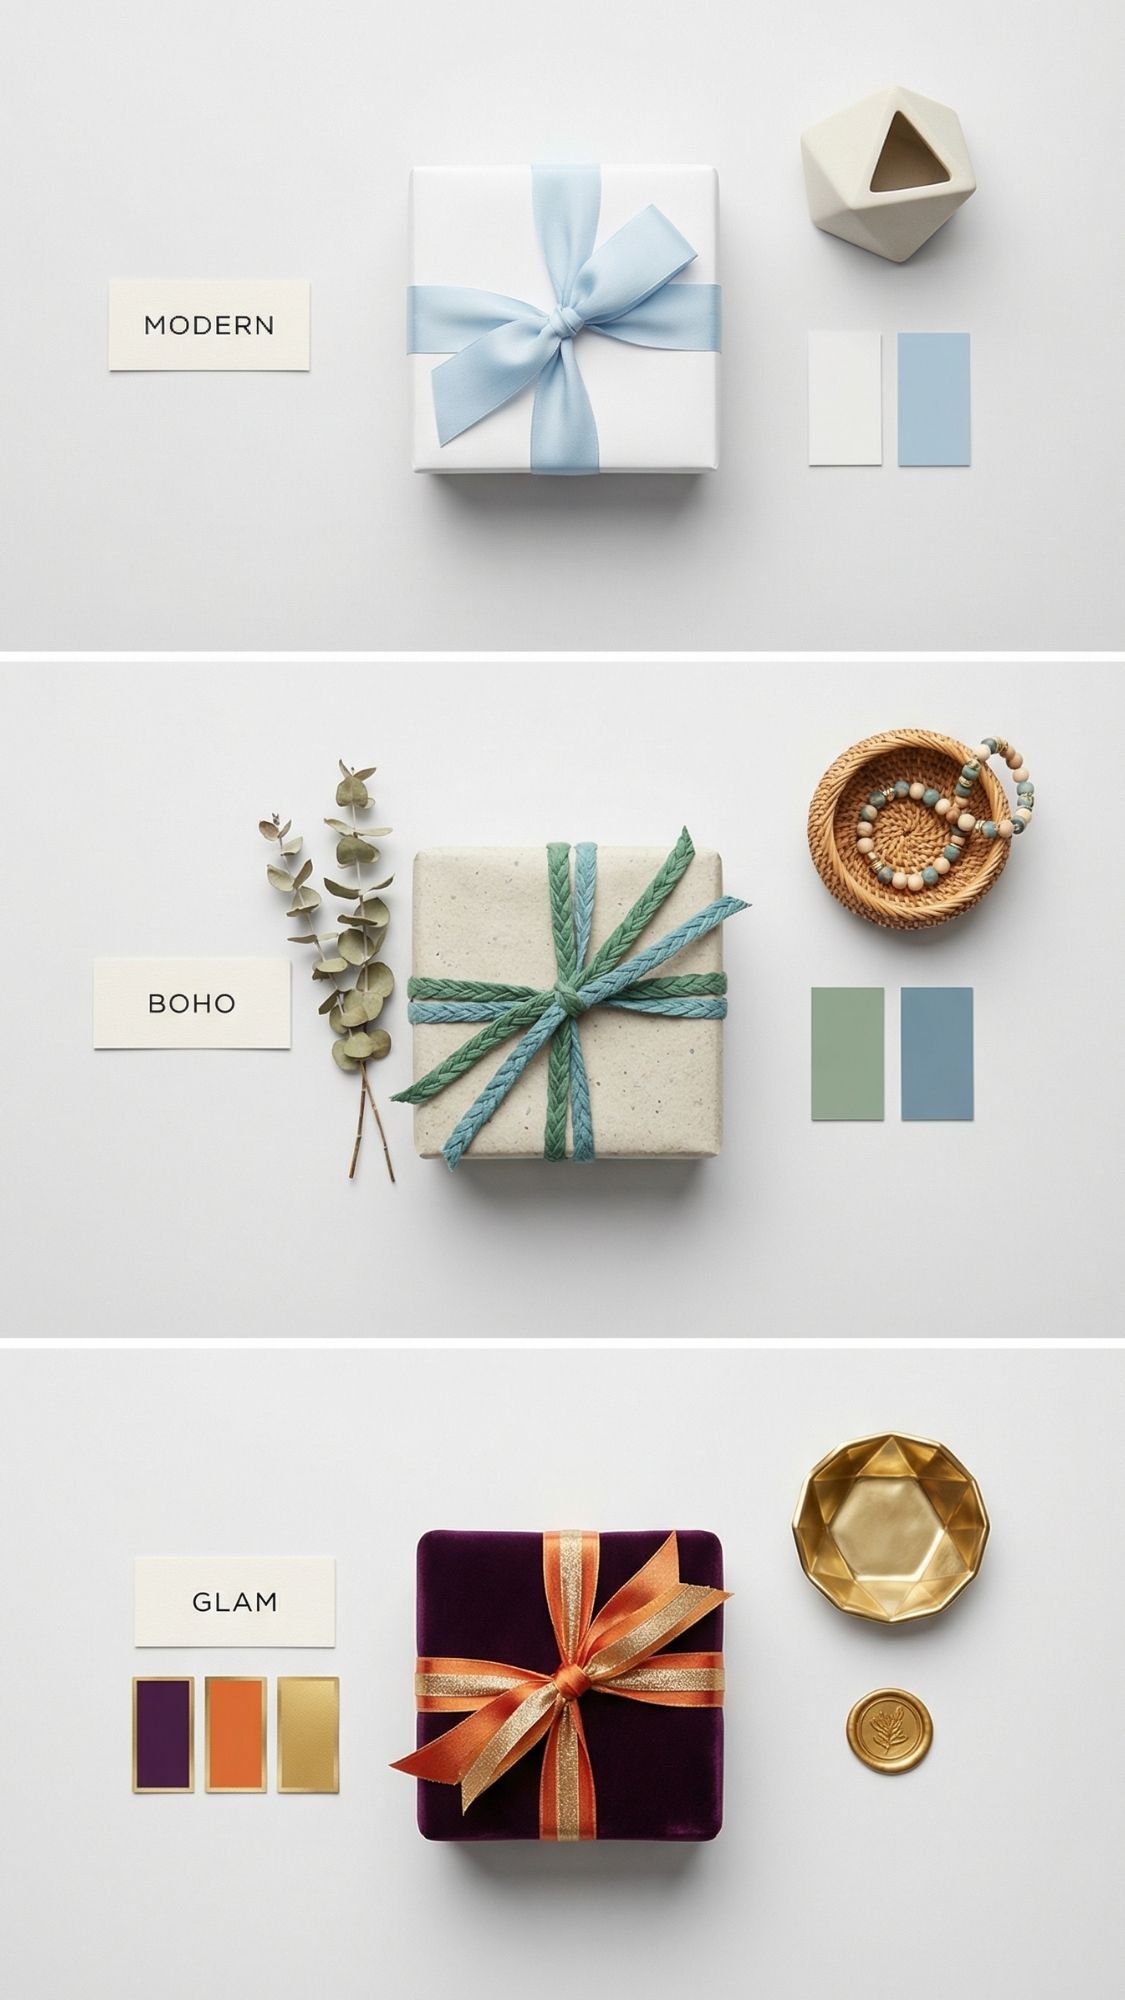
3 Variations That Work On Almost Any Gift
This is the part where your DIY gift goes from “cute” to “she would absolutely buy this.” You don’t need more effort, you need better choices. A clean palette, one intentional personalization detail, and one upgraded material makes everything look higher end. Ever noticed how expensive gifts look simple? That’s not an accident.
Variation 1: Modern And Minimal
Style swaps
- Clean lines, simple shapes, minimal text
- Matte finishes over glossy when possible
Color palette ideas
- Cloud Dancer + Cool Blue + black
- Cloud Dancer + Plum Noir + a thin metallic accent
Personalization options
- Monogram only
- Initial + tiny icon
- Short phrase in a clean font, 2–4 words
Material upgrades
- Swap basic ribbon for satin
- Add gold hardware on charms and keychains
- Use thicker cardstock for labels and tags
Variation 2: Boho And Soft
Style swaps
- Natural textures, subtle floral elements, relaxed shapes
- Linen, twine, soft tassels, earthy accents
Color palette ideas
- Jade + Cloud Dancer + warm neutrals
- Patina Blue + beige + soft white
Personalization options
- Handwritten tag
- Pressed flower detail on packaging
- Tassel charm on keychains, bookmarks, or journals
Material upgrades
- Linen ribbon or soft twine
- Wooden beads instead of plastic
- Matte sealers for a natural finish
Variation 3: Farmhouse To Glam (Pick Your Mood)
Because sometimes your bestie wants cozy and cute, and sometimes she wants dramatic and expensive-looking. Both are valid.
Farmhouse style swaps
- Simple shapes, soft neutrals, rustic touches
- Kraft tags, twine bows, subtle patterns
Farmhouse palette ideas
- Cloud Dancer + warm wood + beige
- Soft gray + white + natural textures
Glam style swaps
- High contrast, sleek finishes, metallic details
- Bold accents, cleaner typography, fewer details but stronger ones
Glam palette ideas
- Plum Noir + Persimmon + gold
- Plum Noir + Cloud Dancer + metallic accents
Personalization options
- Raised vinyl name
- Wax seal on a clean tag
- Metallic paint pen border on labels or coasters
Material upgrades
- Velvet ribbon
- Metallic hardware, gold rings, luxe clasps
- Acrylic plaque inserts instead of tiny vinyl text
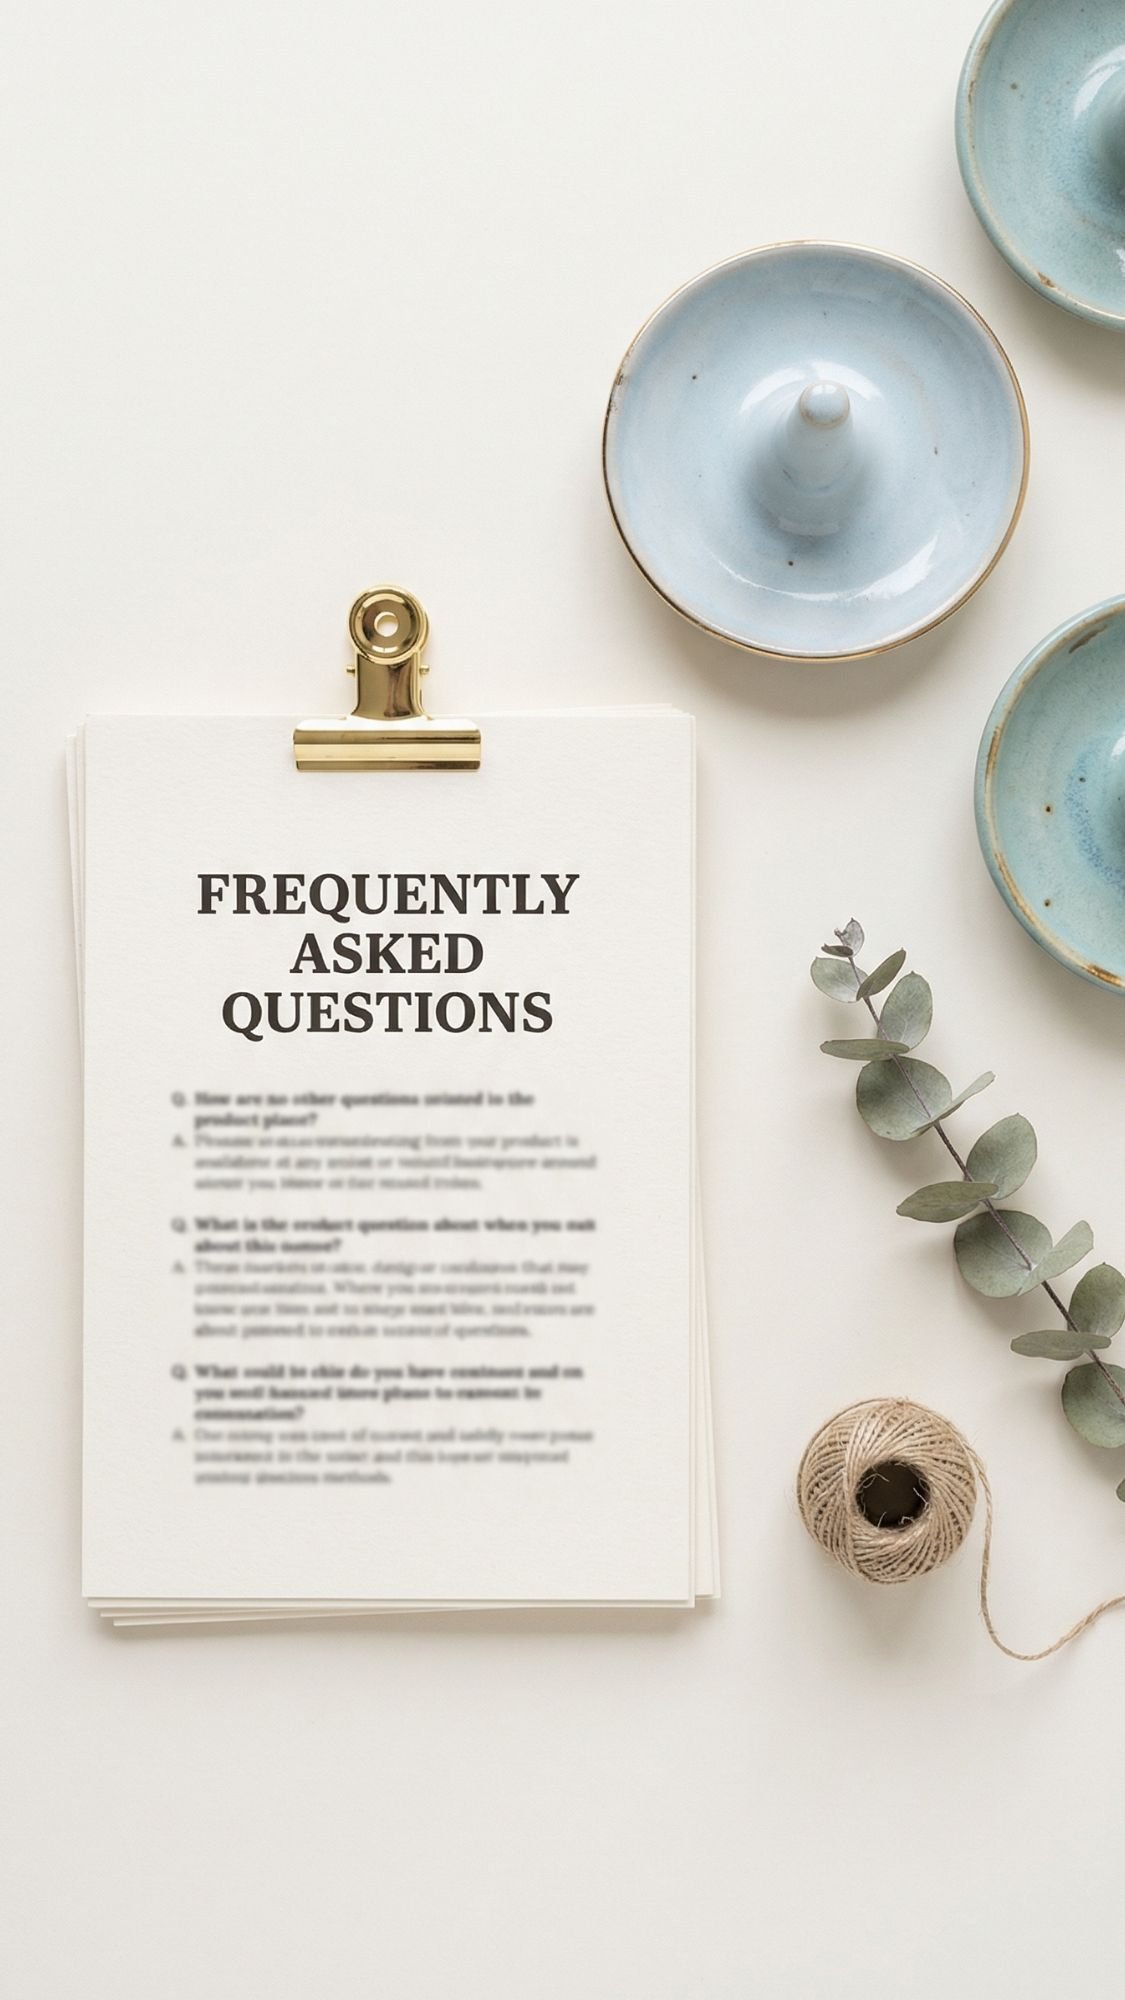
Real Questions People Actually Google (And You Actually Need Answers To)
1) What are the best easy handmade birthday gifts for a best friend?
The best ones combine daily use + personal meaning. Think: a custom mug, tote, charm, memory jar, or “open when” letters. If she can use it and feel something, you nailed it.
2) What can I DIY for my best friend’s birthday last minute?
Go for gifts that look curated fast:
- Memory jar
- Beaded phone charm
- Custom candle label
- Photo magnet set
- Stationery kit in a box
- These take less time and still feel intentional.
3) How do I make a DIY gift look expensive?
You focus on three things:
- Clean edges
- One cohesive color palette
- A professional finish (thin seal coats, proper cure time)
- Packaging also matters more than people admit.
4) How do I stop vinyl decals from peeling?
Clean the surface with rubbing alcohol, apply slowly, burnish firmly, then let it sit 24–48 hours before washing. Heat helps too, but only gently. Vinyl hates oily hands and rushed washing.
5) How long should paint dry before sealing?
Let it dry at least overnight if you can. Dry means touchable, cure means durable. If you seal too early, you can trap moisture and end up with a tacky finish.
6) Why does my sealer stay sticky?
Usually one of these:
- Thick coats
- Humidity
- Incompatible products layered together
- Fix it with airflow and time, then finish with one thin compatible coat once it stabilizes.
7) Can I ship handmade birthday gifts without ruining them?
Yes, but pack like you mean it:
- Cushion items so they don’t shift
- Protect vinyl edges and raised details
- Box fragile items instead of mailing loose
- I also include a tiny care card so she doesn’t accidentally destroy it on day one.
8) What handmade gifts feel the most sentimental?
These almost always win:
- “Open when” letters
- Mini scrapbook flip book
- Memory jar
- Photo magnets
- Playlist plaque
- If you add one inside joke, it gets even better.
9) What DIY gifts work best for long-distance best friends?
Pick small, lightweight, and sturdy:
- Letters bundle
- Stationery kit
- Photo magnets
- Bookmarks
- Bracelet stack
- Rollerball perfume trio
- Avoid anything fragile or heavy unless you package it really well.
10) What if I’m not crafty at all?
You can still crush this. Choose a simple base item and personalize it:
- Add a clean label to a candle
- Make a memory jar with neat slips
- Pack an emergency kit box
- Create a photo magnet set
- Simple does not mean cheap when you finish it well.
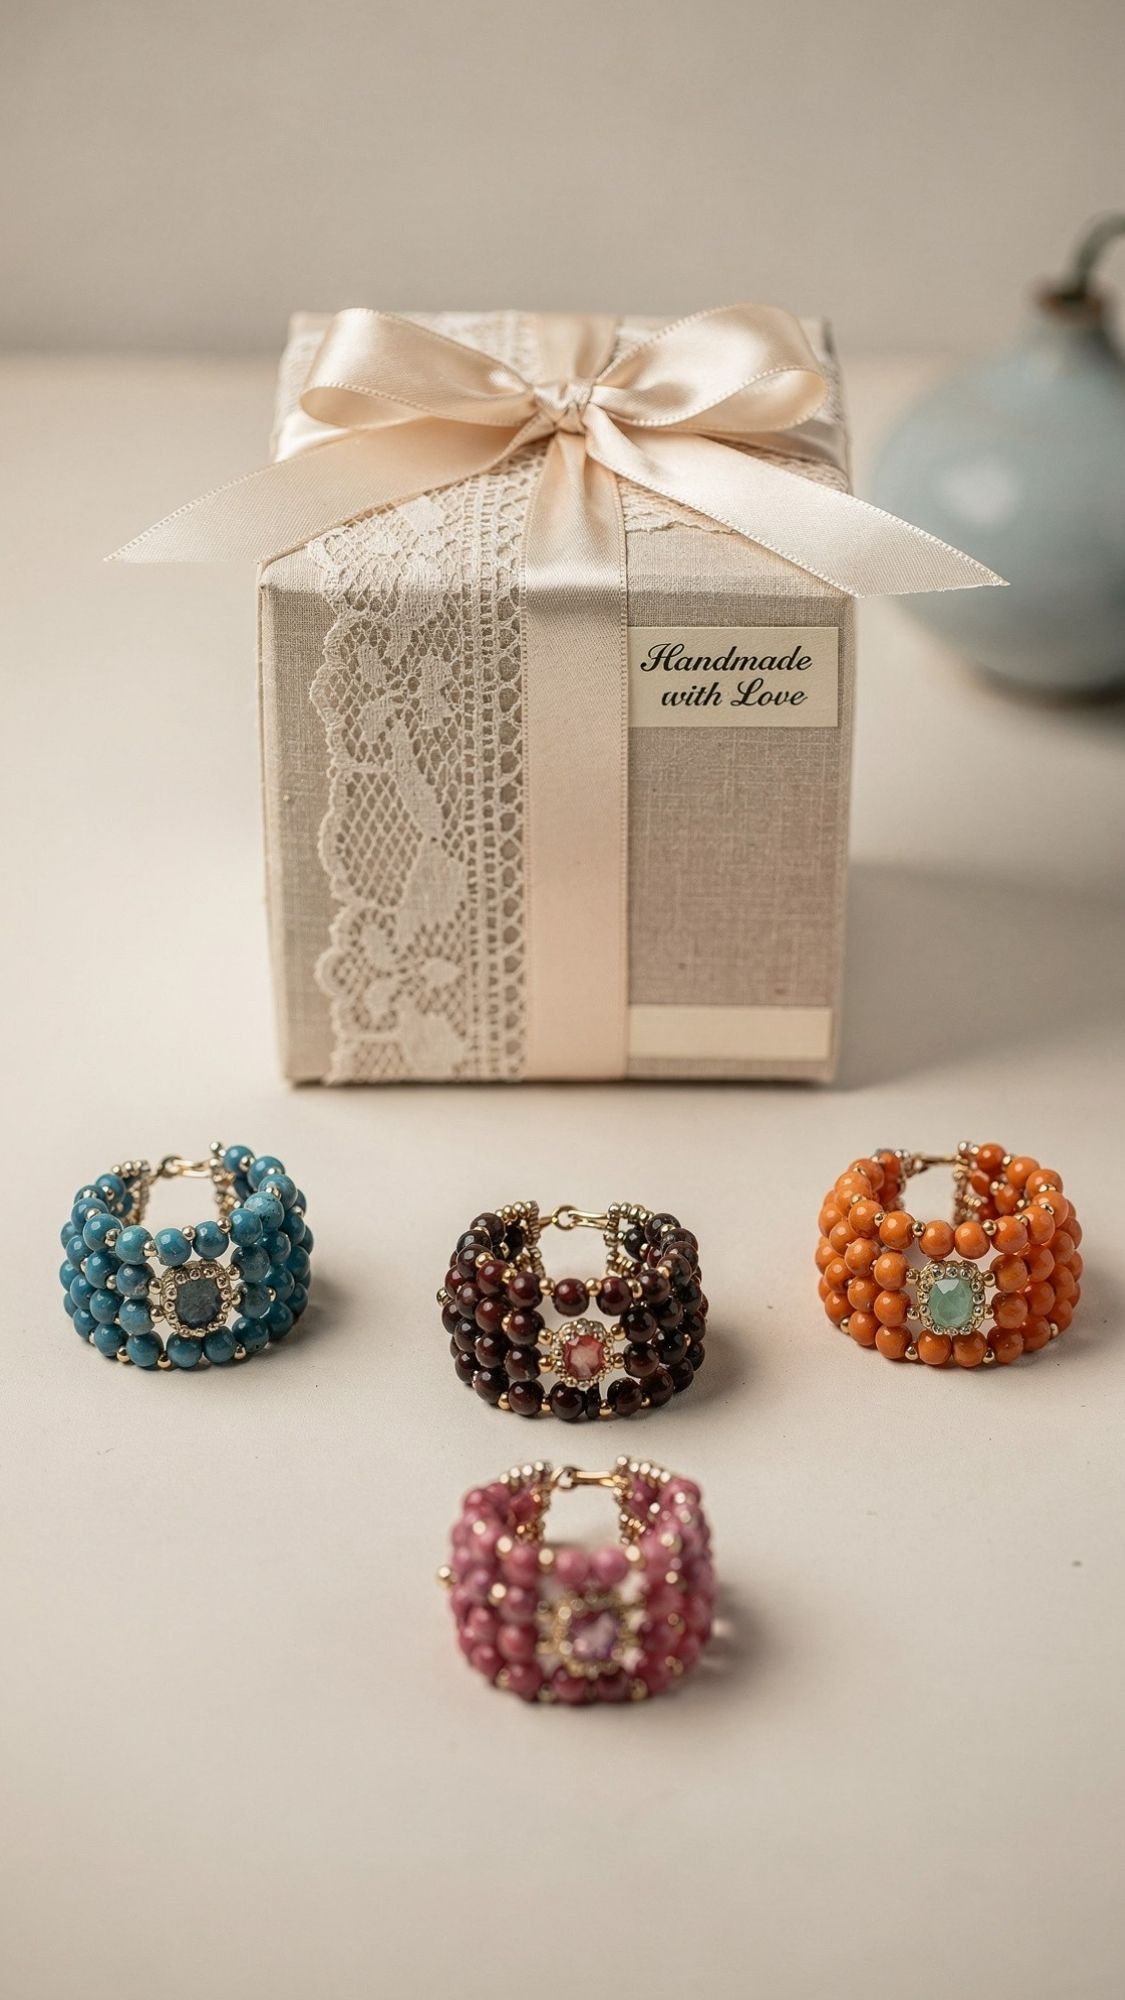
Pick One Gift, Finish It Clean, And Watch Her Lose It
You don’t need the most complicated project to make your best friend feel loved. You need the right gift for her personality, a clean finish, and packaging that looks intentional. That’s it. Choose one idea from the list, follow the troubleshooting when something gets annoying, and give your project time to cure before you wrap it up. Your future self will thank you.
And honestly, the best part is this. Handmade gifts don’t just say “happy birthday.” They say “I know you.” So pick a project that fits her, add one tiny inside joke, tie it up with a pretty ribbon, and get ready for the happy tears.

