Let’s be real for a second. There is nothing that ruins a vacation vibe faster than looking down at your hands and seeing a giant chip in your polish after only one hour in the waves. I have spent years tinkering around in the beauty industry, and if I had a dollar for every time I heard a client complain that their “long-wear” polish surrendered to a little bit of sand, I would be retired on a private island by now.
The mistake most people make is choosing a color based on the bottle alone without considering the “environmental stress” of a beach day. Summer 2026 is all about the “tactile luxury” trend. We are looking for textures that mimic the ocean and finishes that actually look better when the sun hits them. Whether you are sipping an iced latte at brunch or hunting for seashells, these 21 looks are designed to stay flawless. Are you ready to upgrade your nail game?
Quick Results Snapshot
- What this routine/look solves: Prevents “sandpaper” chipping and provides a high-end aesthetic that transitions from beach to fine dining.
- Who it’s best for: All nail types, specifically those who want 7+ days of wear without a salon visit.
- Time required: 20 to 90 minutes depending on the design.
- Budget range: $15 (DIY) to $150 (Pro Salon).
- Expected timeline: Instant aesthetic results with 2 weeks of durability if prepped correctly.
- Biggest mistake people make: Skipping the “free edge” seal and failing to dehydrate the nail plate before painting.

The “Foundation First” Prep Routine
What I’ve noticed is that people spend 90% of their time on the color and 10% on the prep. That is exactly why their nails pop off or peel. If your nail plate isn’t perfectly prepped, you are essentially painting on a moving target. Proper prep is the difference between a “home job” and a manicure that people ask about in the elevator.
Step 1: The Deep Cleanse
Start by removing every microscopic trace of old product. I always use 100% acetone because the “moisturizing” removers often leave behind oils that act as a barrier for your new polish. Once they are clean, shape them. My pro tip? File in one direction only. Sawing back and forth creates micro-shatters in the nail edge that lead to peeling later.
Step 2: The Dehydration Hack
This is my secret weapon. After you shape, wipe each nail with 90% isopropyl alcohol. You want the nail plate to look “chalky” and bone-dry. This removes natural oils and lingering dust. If your nail plate looks shiny before the base coat, your polish will not stick. It is that simple.
Step 3: Cuticle “Erase” instead of “Cut”
Stop nipping your cuticles like you’re trimming a hedge. It leads to inflammation and jagged regrowth. Use a liquid cuticle remover. Let it sit for 30 seconds. You’ll notice it has a slightly slippery, soapy texture as it breaks down dead skin. Gently push the skin back with a wooden stick and wash your hands. This creates a clean, massive “canvas” that makes your nails look longer instantly.
Here is the first batch of our summer nail lineup. We’re kicking things off with the looks that define the “Coastal Chic” aesthetic of the year.
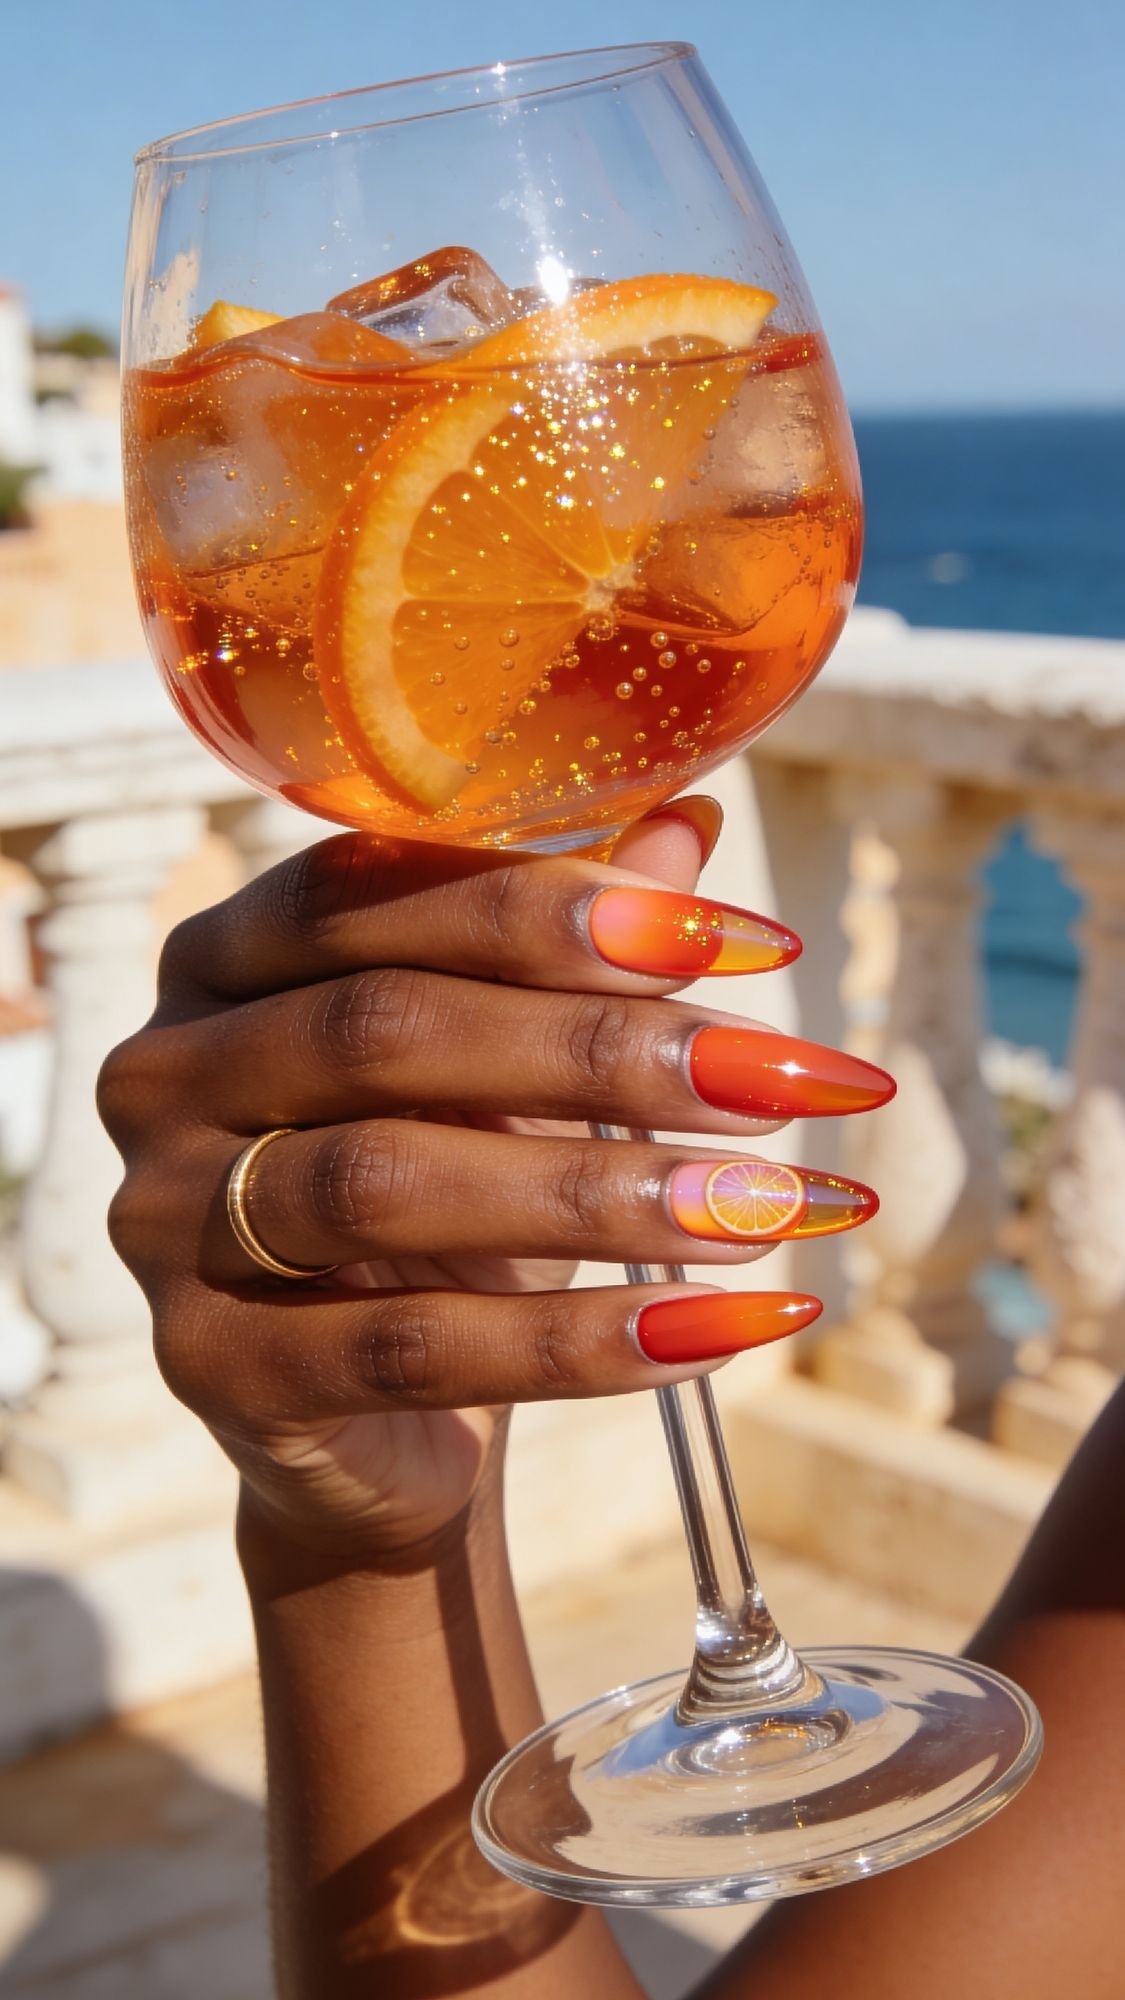
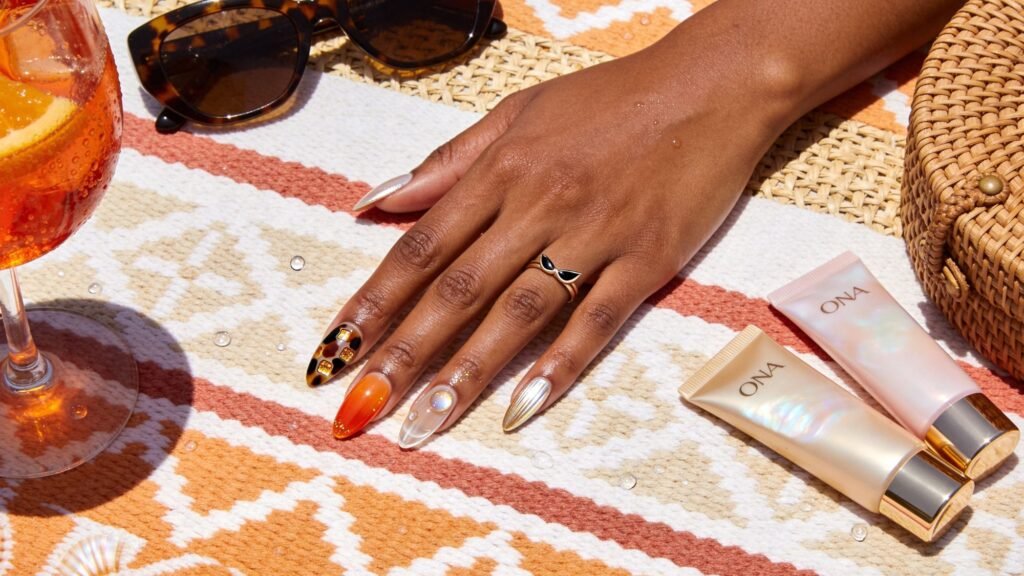
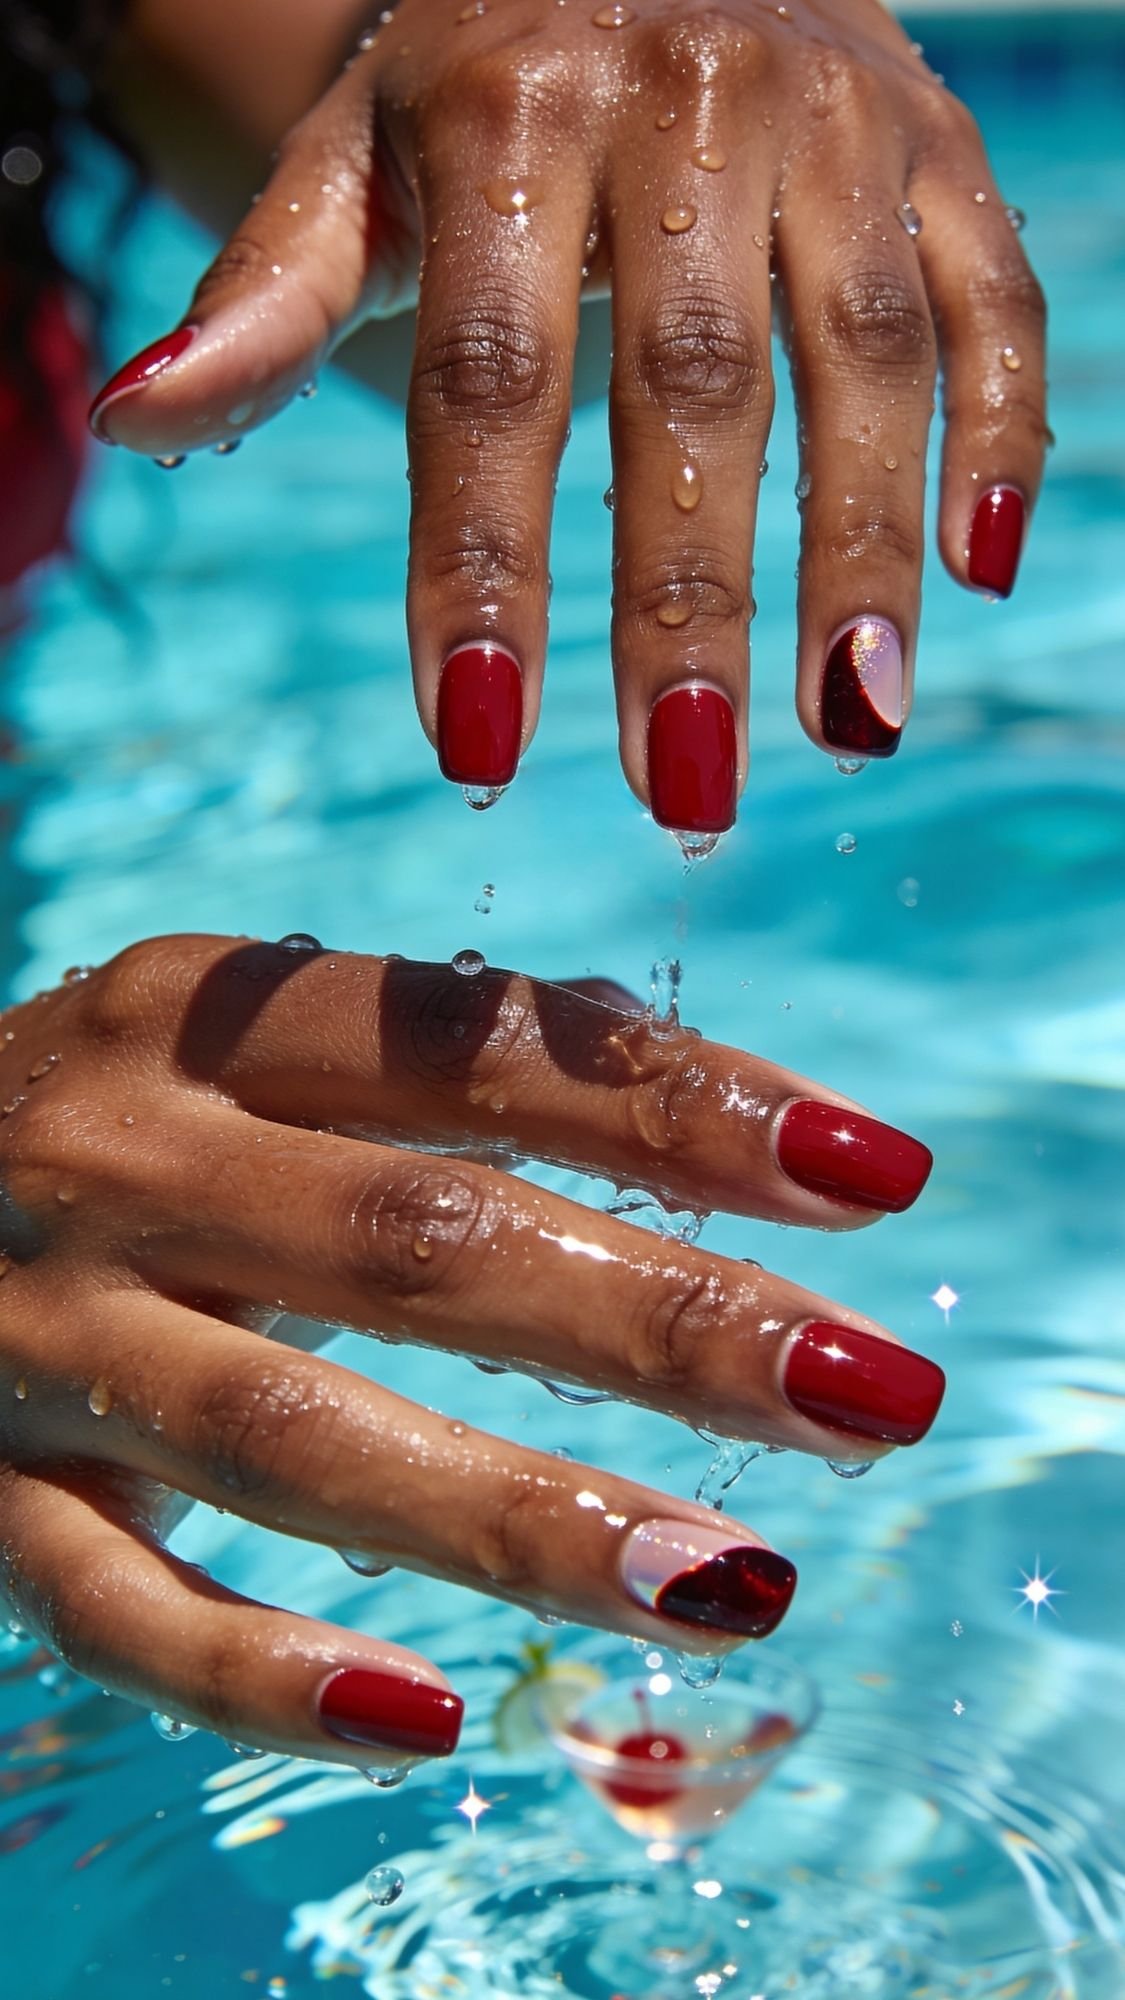
1. The “Aperol Spritz” Jelly
If you haven’t tried a jelly polish yet, where have you been? IMO, this is the ultimate “low-stakes” high-fashion look. It’s a translucent, juicy orange that mimics the glow of a cocktail under a patio umbrella. Unlike traditional cremes, jellies have a depth that looks like colored glass.
What I love about this is how it handles regrowth. Because the color is sheer, that annoying gap at your cuticle won’t scream for attention after a week of vacation. I recommend building this in three very thin layers. If you go too thick, it won’t dry properly and you’ll end up with “squishy” polish that dents the second you reach for your beach bag.

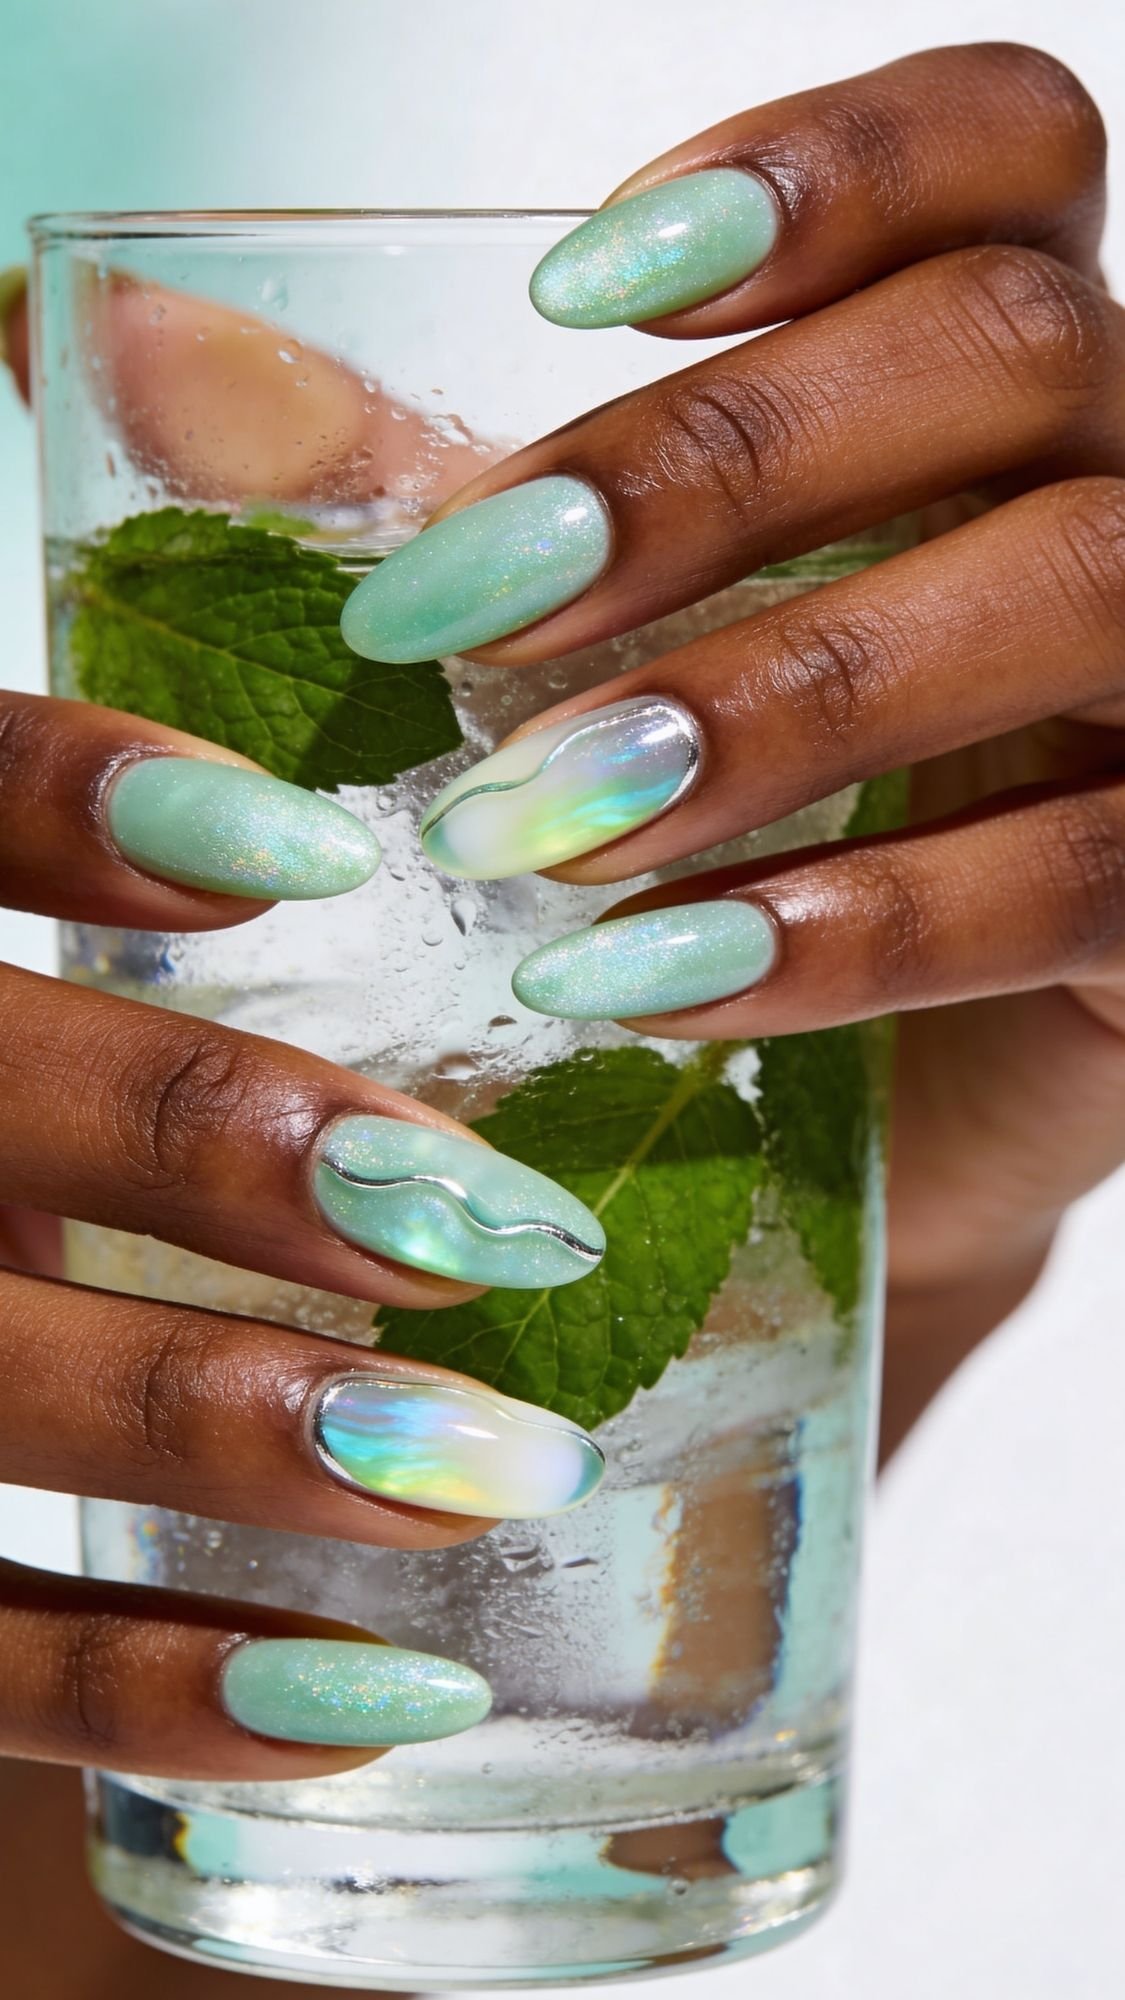
2. 3D “Ocean Droplet” Accents
This is for my girls who want people to stop them at the bar and ask, “Are your nails wet?” We use a thick-viscosity clear builder gel to create raised droplets on top of a finished manicure. It’s tactile, it’s weird, and it’s incredibly cool.
The mistake most people make? They try to do this with regular top coat. It will just flatten out and look like a blob. You need a gel that stays where you put it. I like to place these droplets over a matte blue base. The contrast between the flat matte and the glossy “water” is a sensory dream. It feels slightly bumpy and cool to the touch, which is strangely addictive.
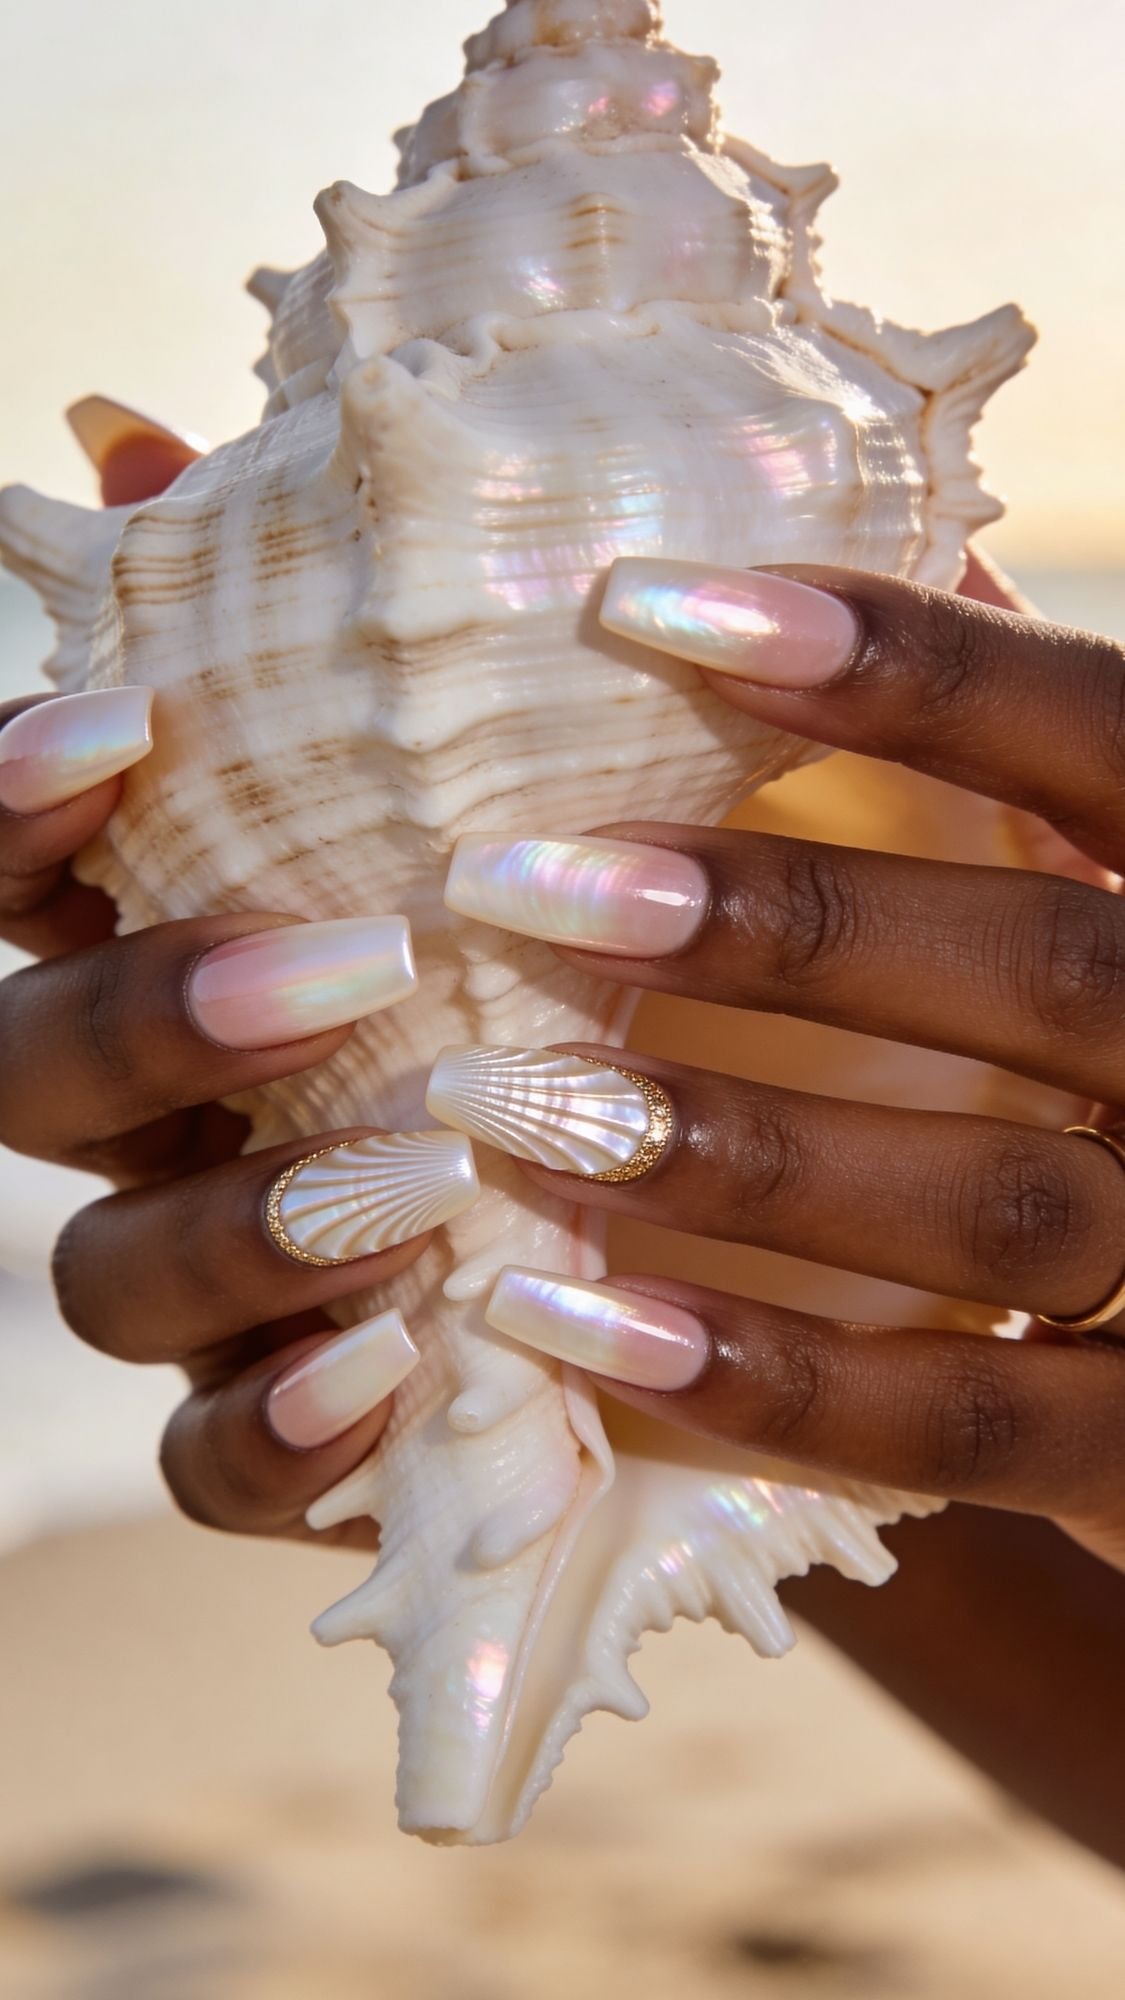
3. Satin Chrome “Seashell”
We are officially moving away from the “Mirror Chrome” that looks like a car bumper. In 2026, it’s all about the Satin Finish. Think of the iridescent inside of an oyster shell. It’s softer, more pearlescent, and way more forgiving on natural nails that might have a few ridges.
To get this look, you apply a pearl powder over a milky white or soft peach base. The pro hack: Use your finger to rub the powder in, not those cheap sponge applicators. The warmth of your skin helps the powder “melt” into the polish for a seamless glow. It looks sophisticated for a high-end brunch but glows like crazy when you’re swimming in the ocean.
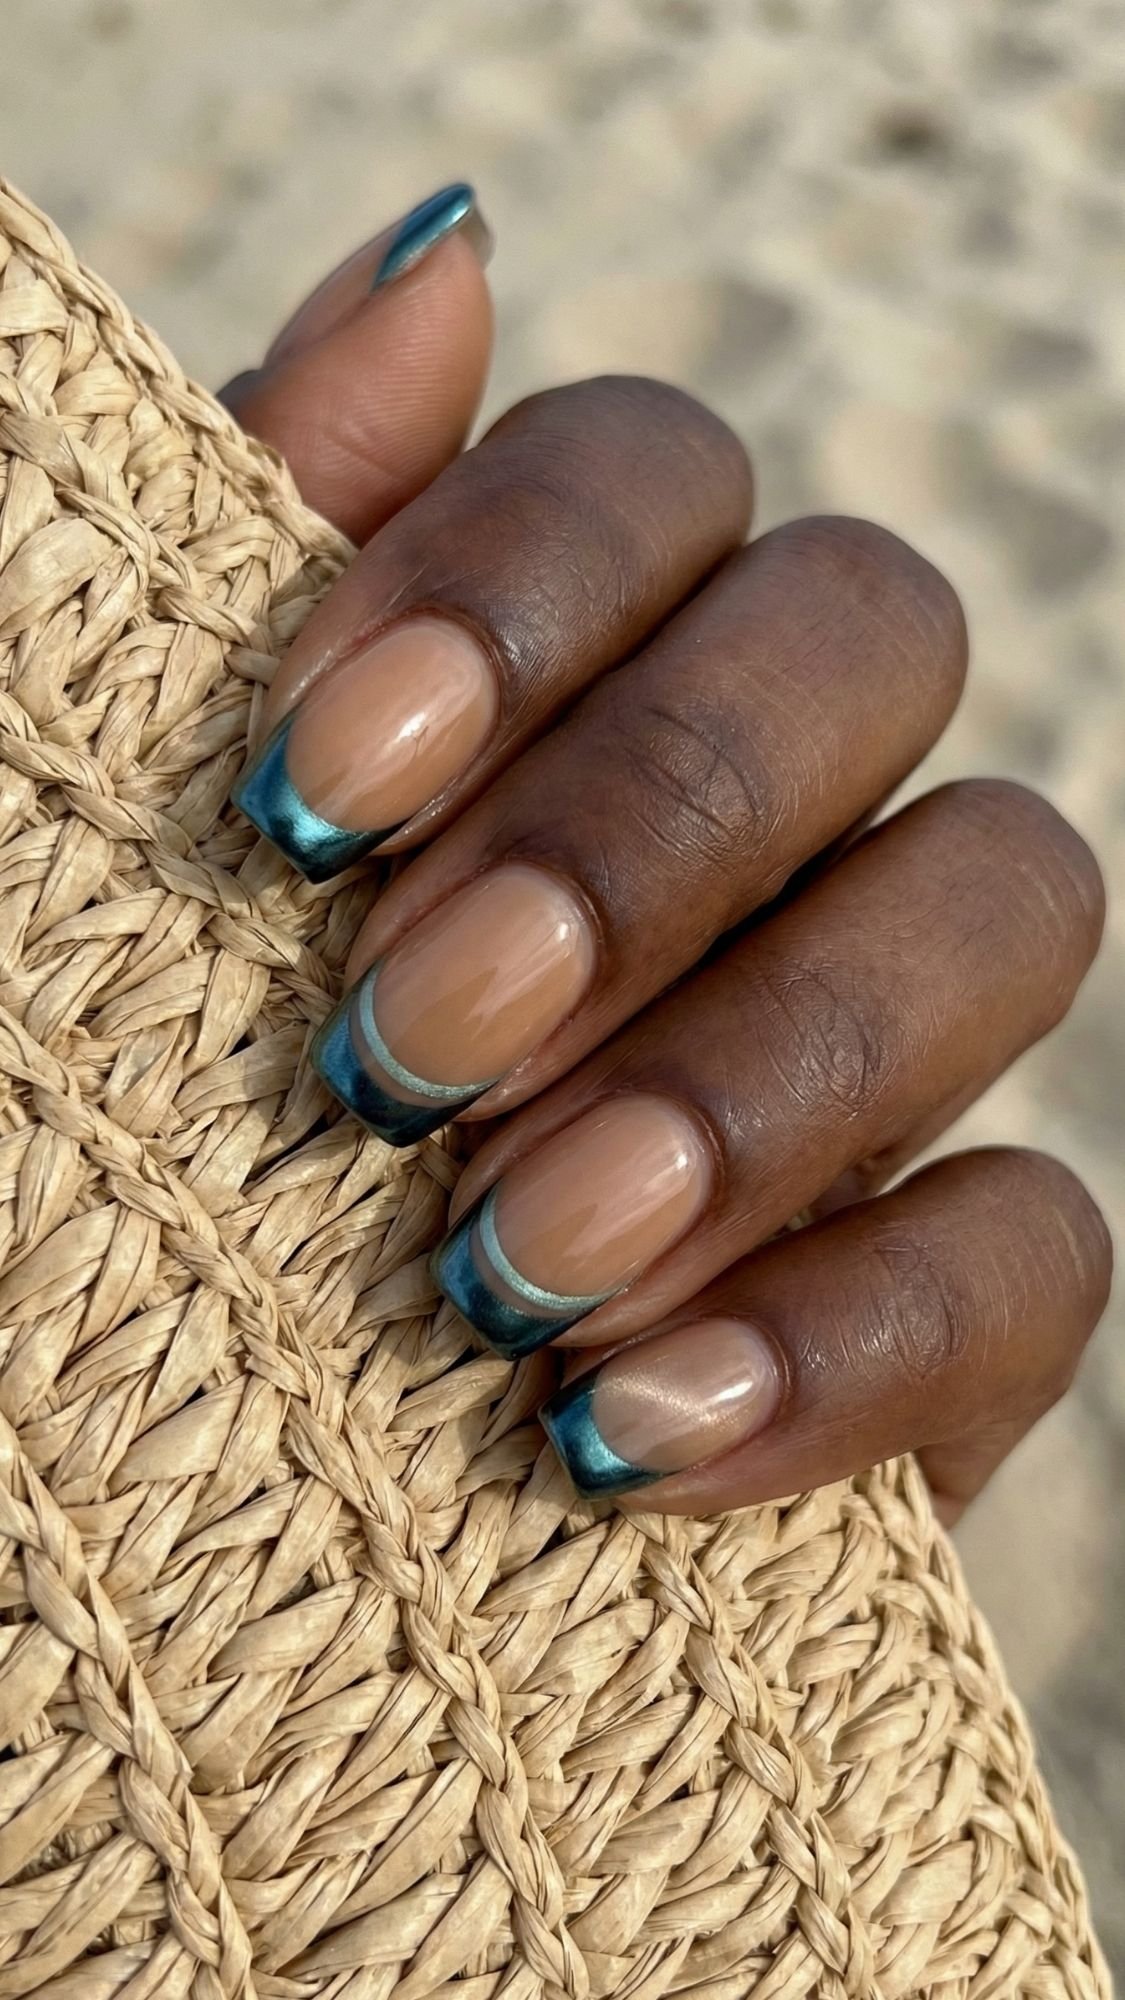
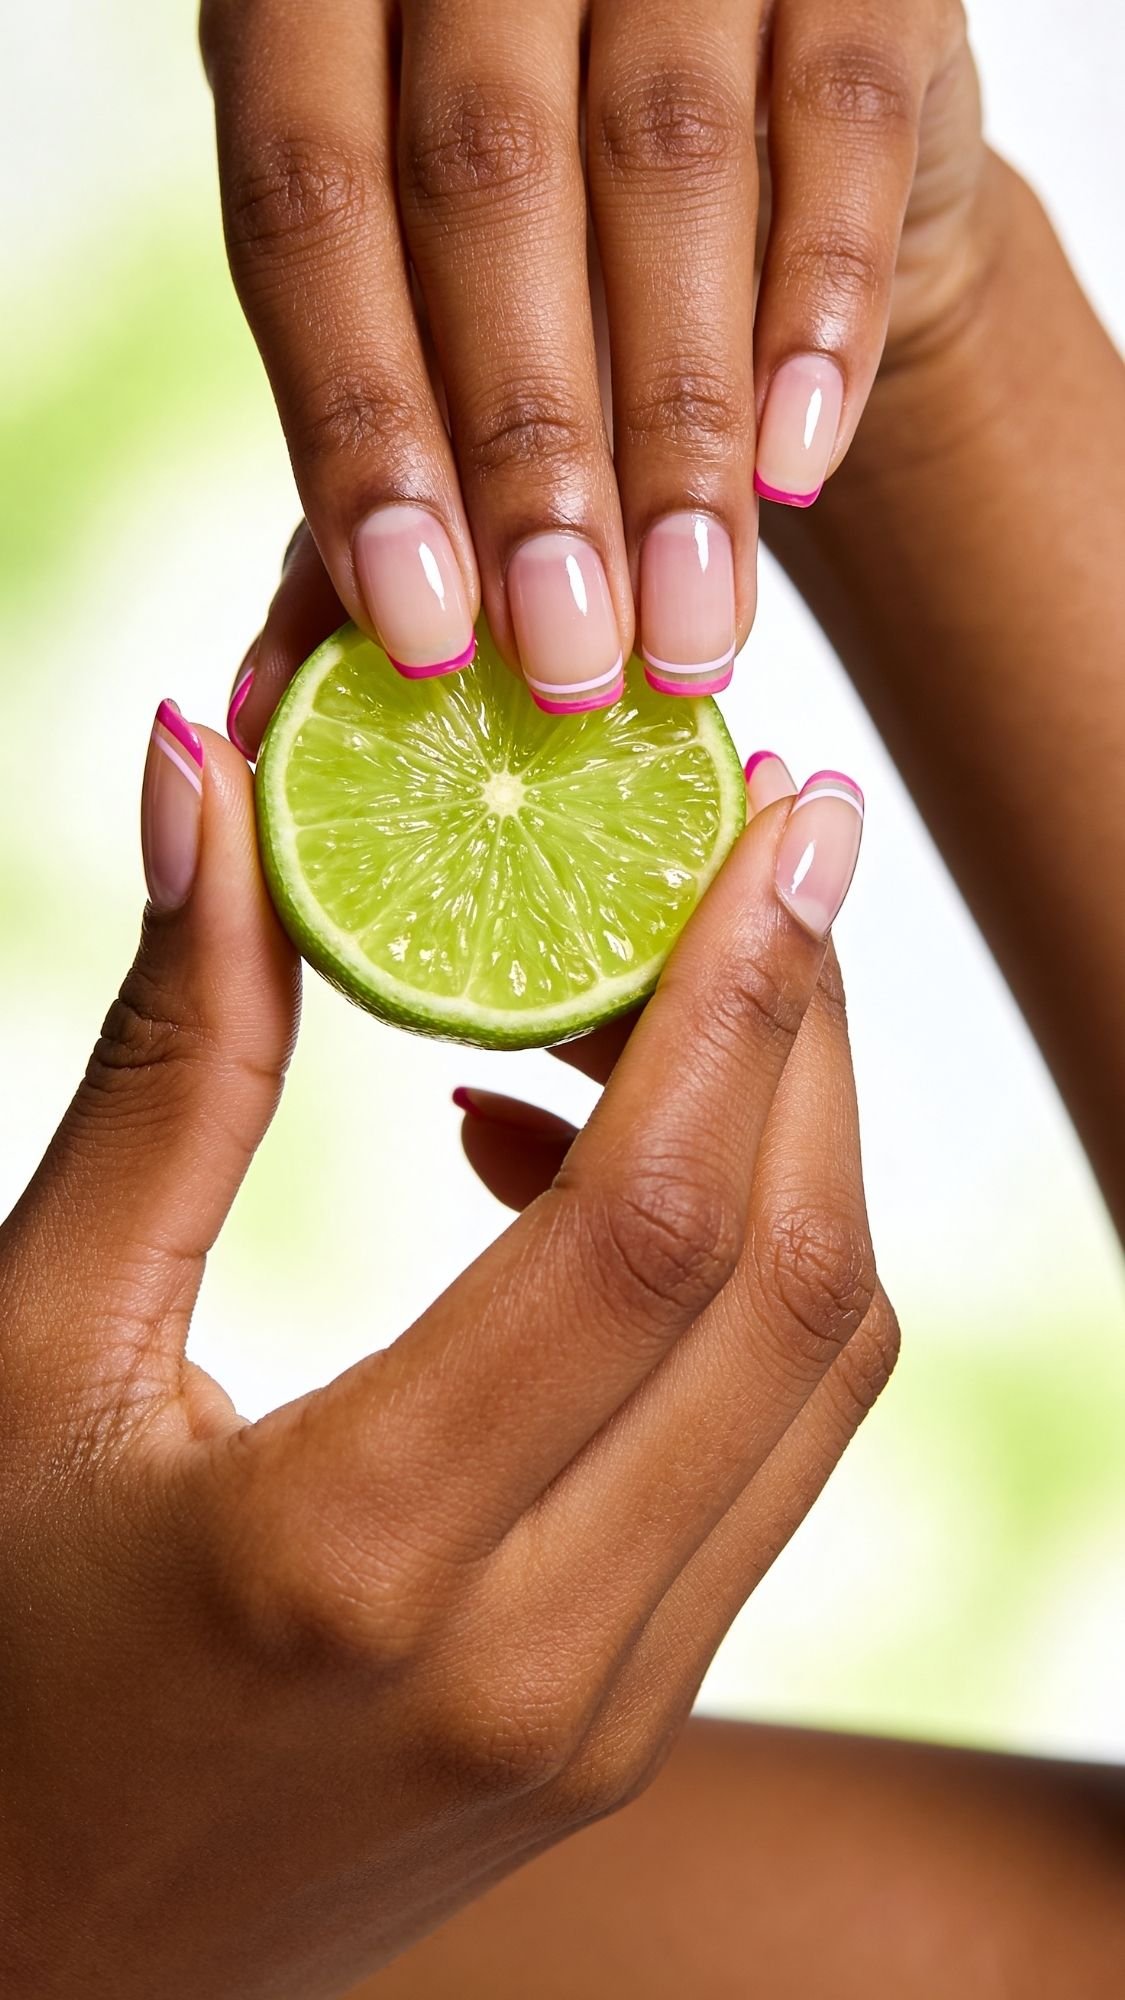
4. The “Deep Sea” French Tip
Classic French tips feel a bit “office” for a beach trip, right? So, we’re swapping the white for a shimmering deep teal or navy. It’s moody, it’s chic, and it’s incredibly practical.
Why is it practical? Because white tips show every bit of sand and dirt. A deep sea-tone hides the “beach grime” perfectly. I’ve noticed that using a micro-liner brush to keep the line ultra-thin makes your fingers look twice as long. If you have wide nail beds, don’t wrap the color all the way to the side walls; leave a tiny gap to create the illusion of a slimmer nail.
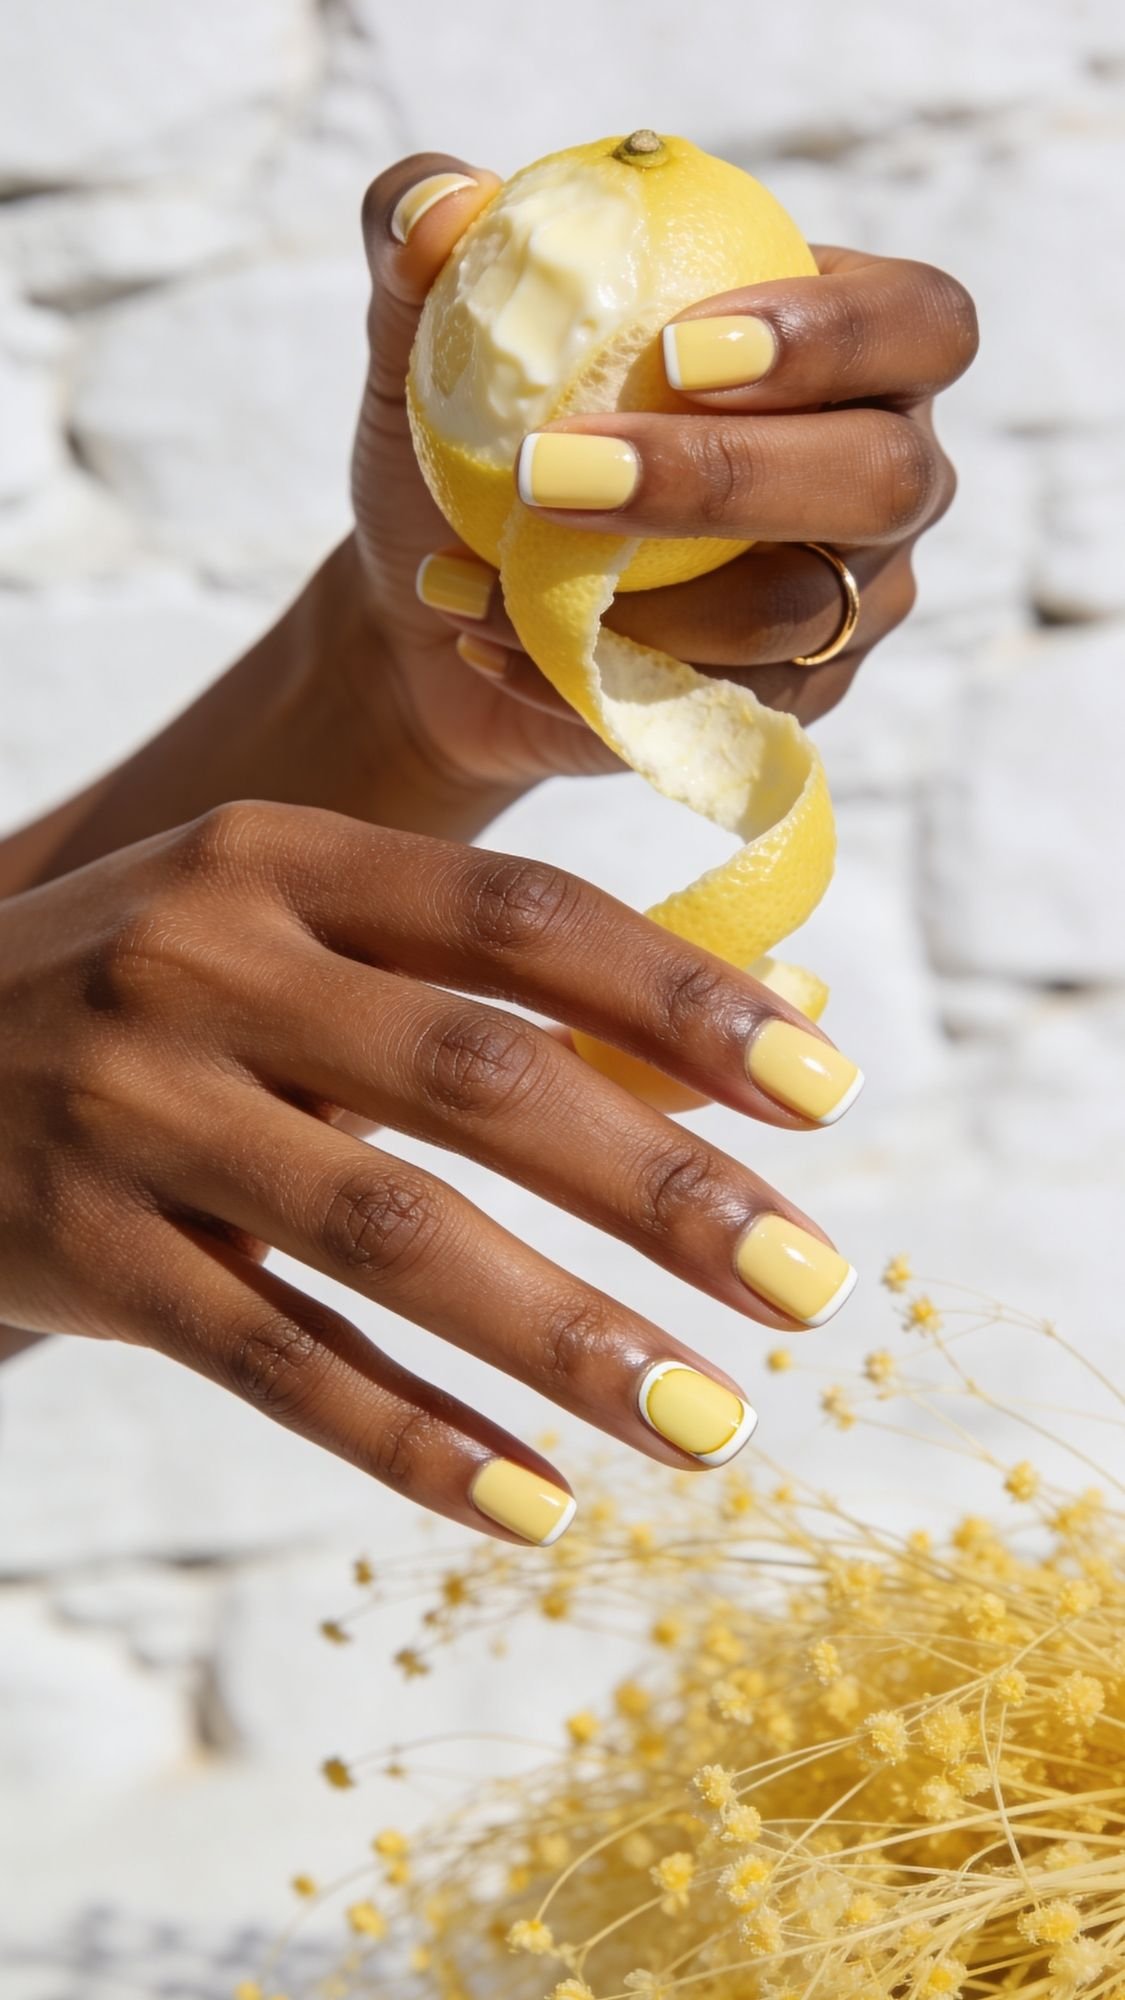
5. Butter Yellow Minimalism
Butter yellow is the breakout star of the season. It’s warmer than the “sour” neons of the past and looks incredible against deep skin tones. It’s the color of a luxury sundress and looks just as good with a bikini as it does with a blazer at brunch.
The trick to yellow is the base coat. Yellow pigment is notorious for being streaky. I always use a “ridge-filling” base coat first to create a smooth, opaque foundation. If you see streaks on the first coat, don’t panic! The second coat will level it out as long as you don’t over-work the brush.
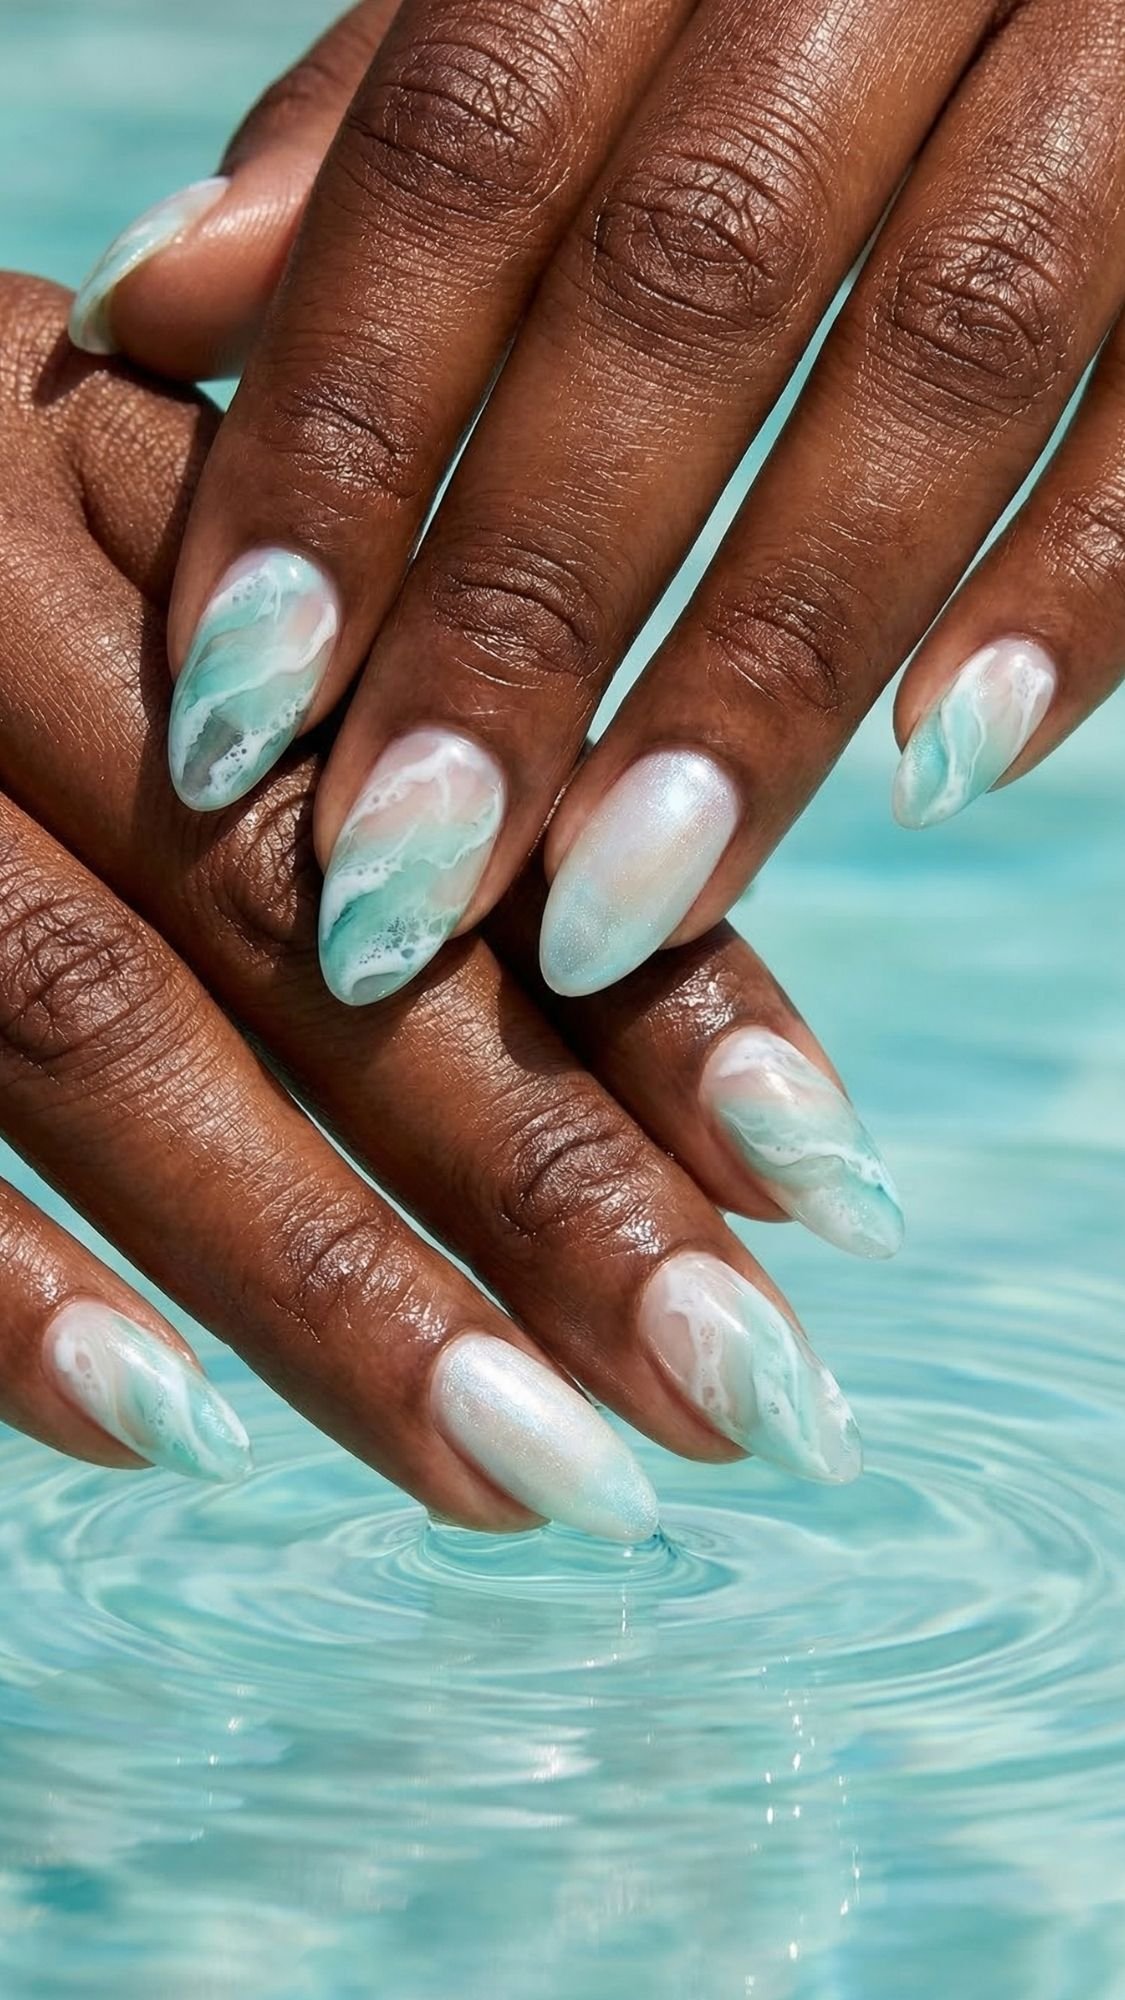
6. “Saltwater” Marble
This is essentially “nail art for people who can’t draw.” It mimics the foam and bubbles of a wave hitting the shore. You don’t need a steady hand; you just need a mixing palette (or a piece of tin foil).
Drop a bit of white polish into a pool of clear top coat and swirl it loosely with a toothpick. When you “scoop” it onto the nail, it creates a marbled, airy effect. What I’ve noticed is that people try to make it too perfect. The beauty is in the chaos! It should look like the ocean, not a kitchen countertop.
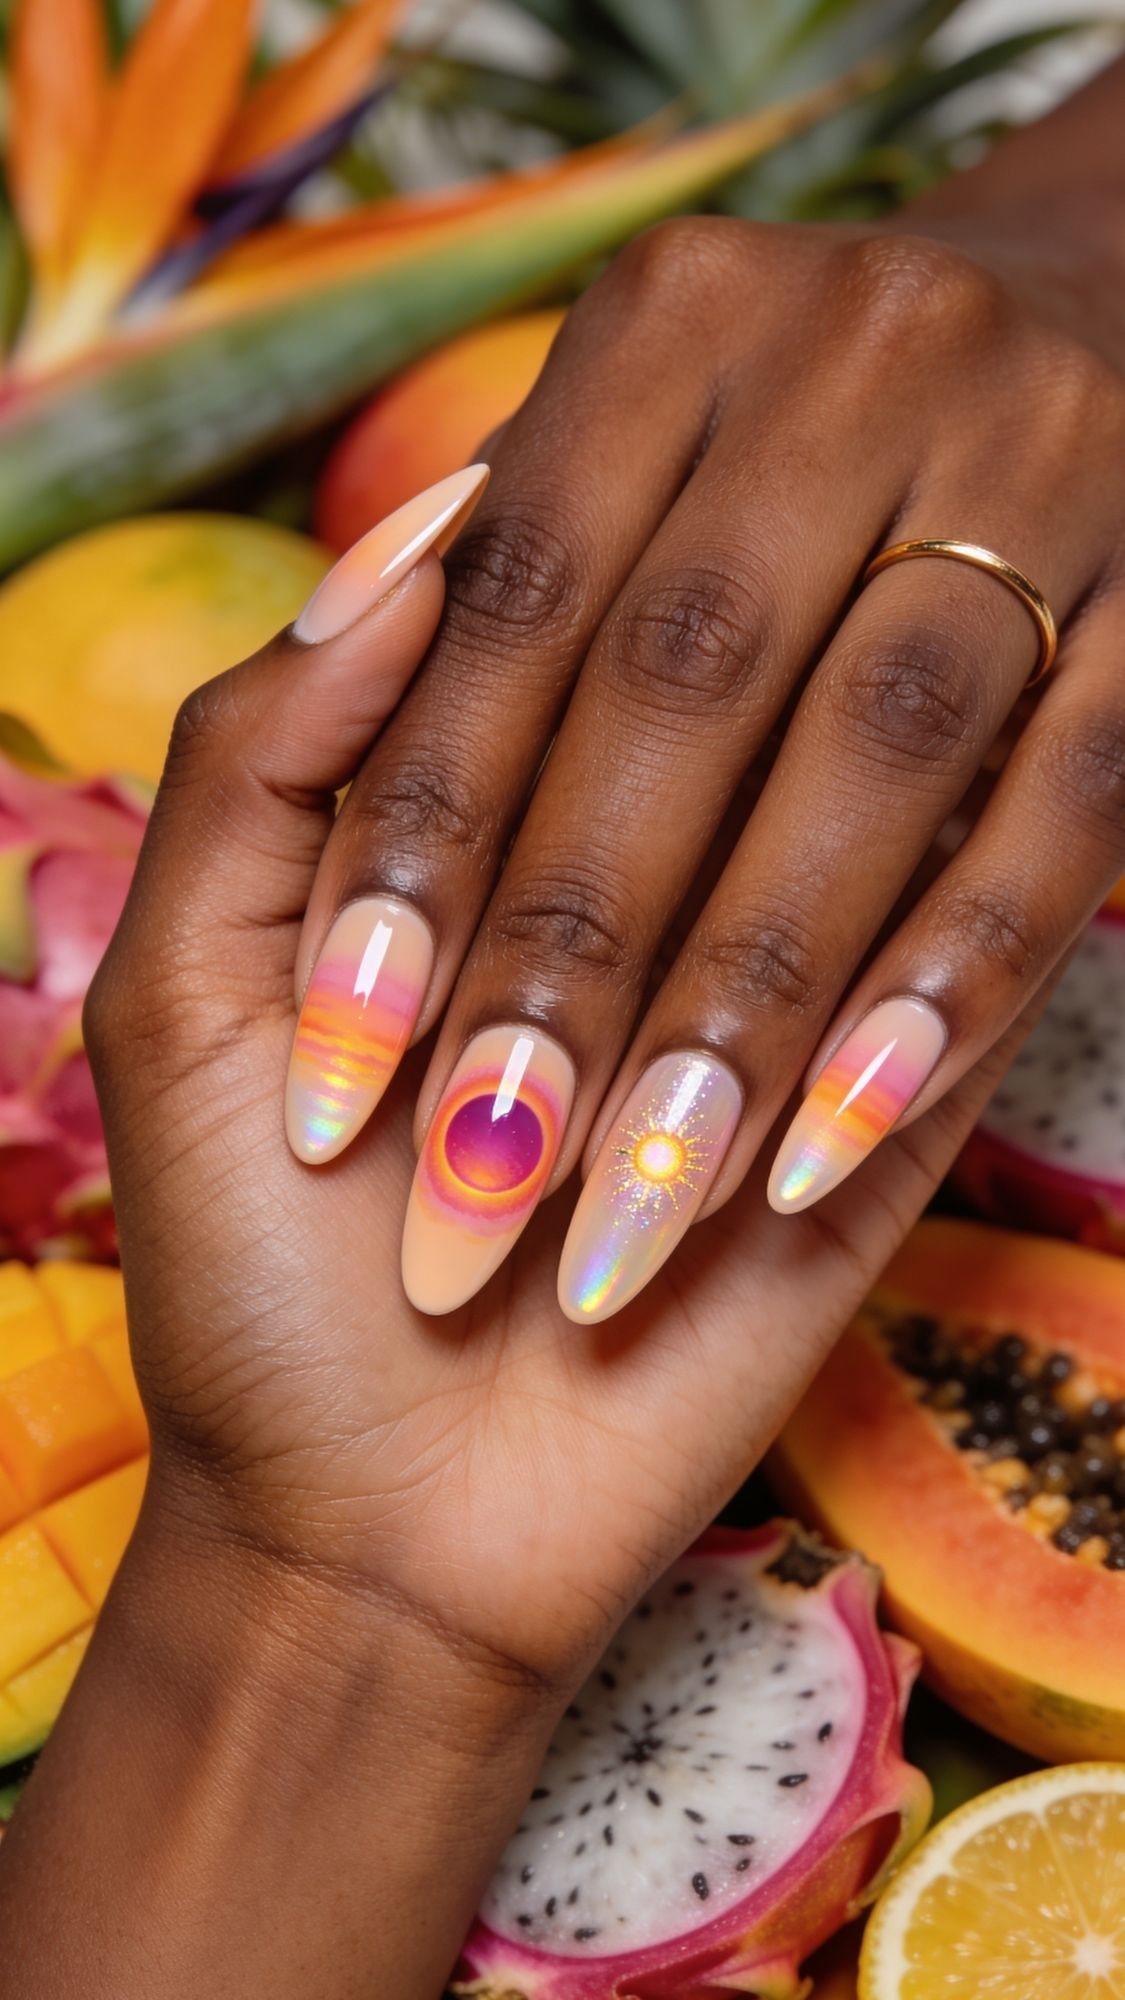
7. Sunset “Aura” Glow
Aura nails are staying for 2026, but we are doing them in Sunset Gradients. Think a soft, bubblegum pink that glows into a hot coral in the center. It looks like your nails are literally radiating heat.
You don’t need an airbrush for this! You can use a small makeup sponge. Dab the darker color in the center of the nail while the base is still slightly tacky. It creates a soft, blurred “halo” effect. It’s the perfect conversation starter at brunch because it looks like a professional salon job, even if you did it on your living room floor.
We are just getting warmed up. This next set of designs is where we transition from “classic beach” to “high-end influencer” vibes. If you want your hands to look like they belong on a yacht in the Mediterranean, this section is for you.
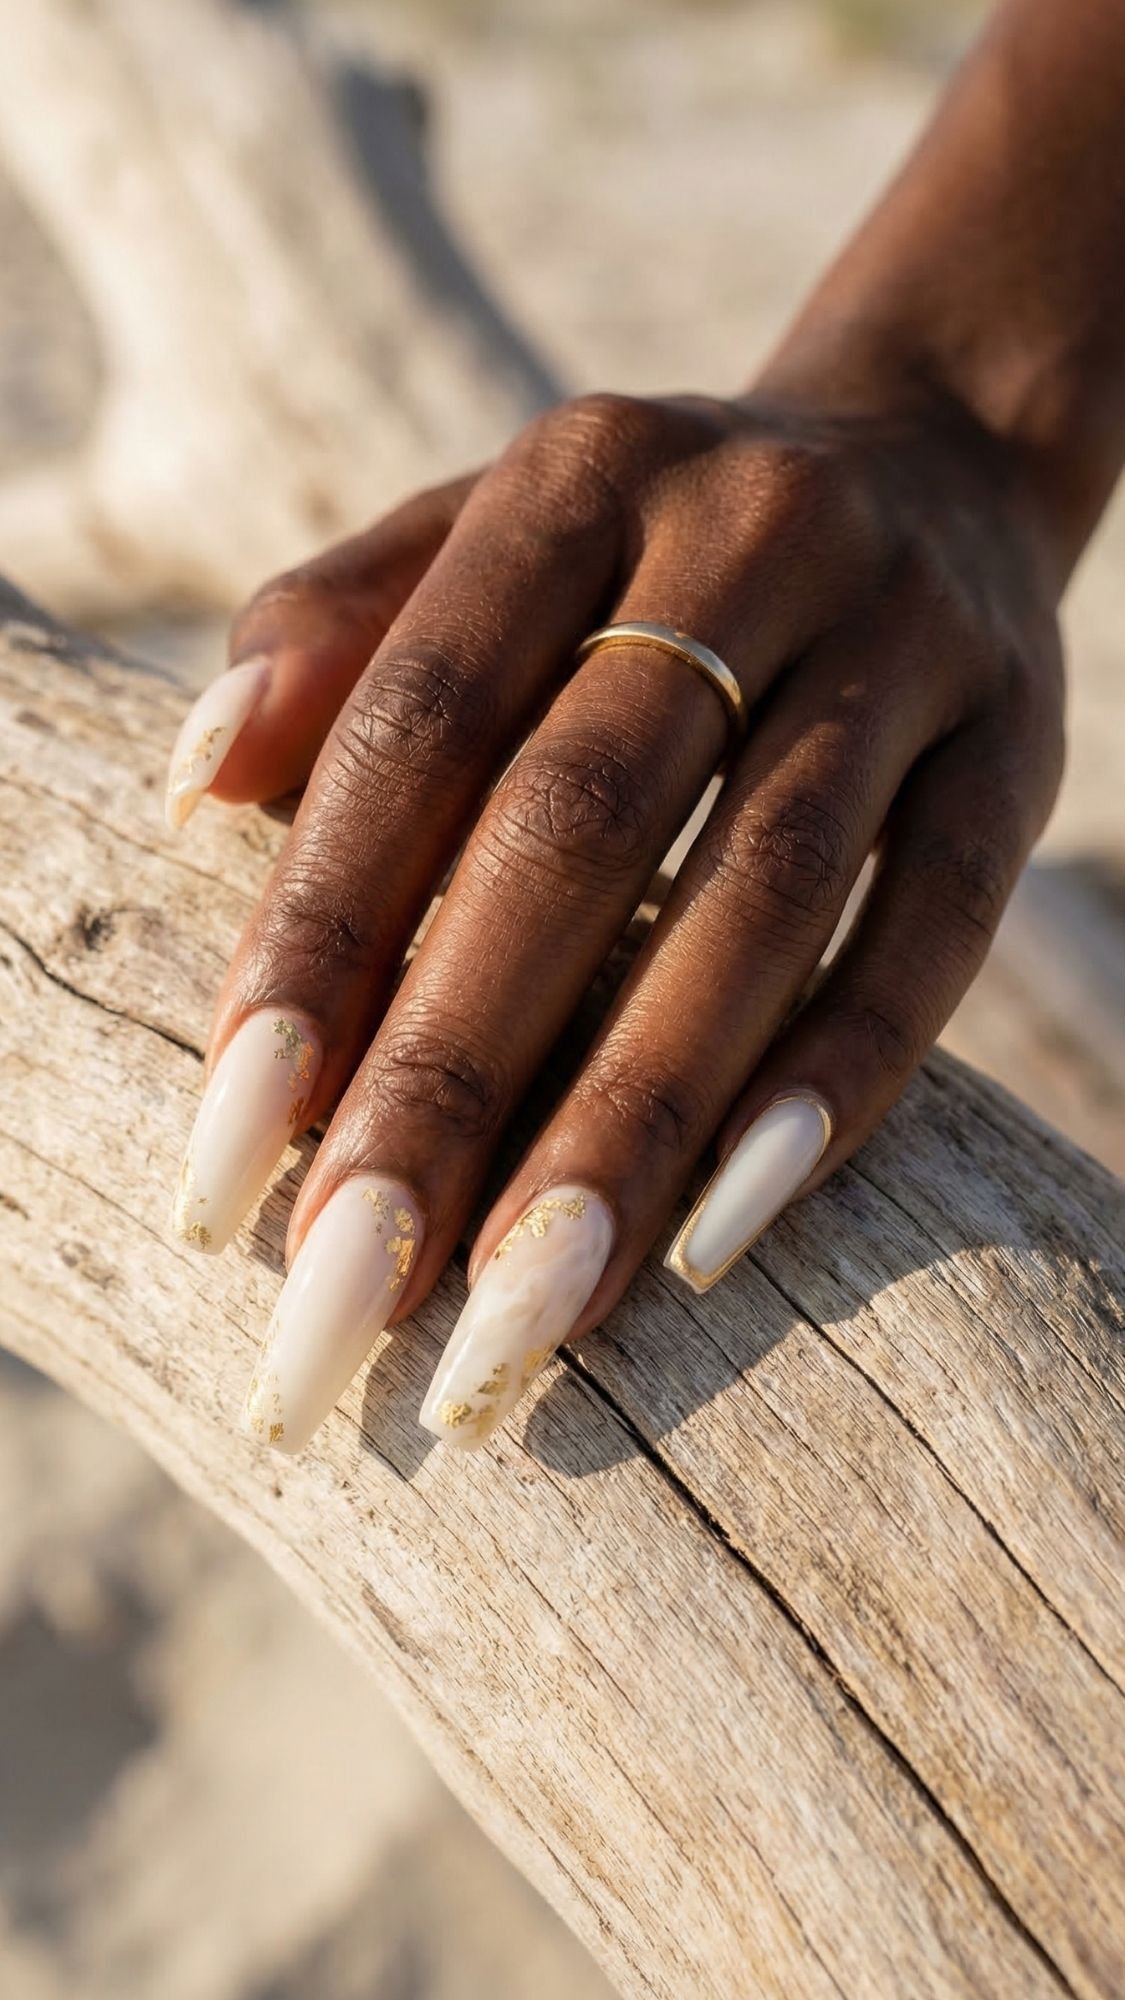
8. Milky Coconut with Gold Leaf
This is what I call the “Yacht Girl” manicure. It is a soft, semi-sheer white that looks like coconut milk, accented with tiny flecks of genuine gold leaf. What I have noticed over the years is that gold leaf adds a level of texture that glitter just cannot touch. It looks organic and expensive.
The secret here is placement. Do not just dump the gold everywhere. I like to cluster it near the cuticle on just two fingers to keep it elegant. Use a pair of tweezers to place the flakes while your polish is still “tacky” but not wet. If it’s too wet, the gold will sink and look dull. If it’s too dry, it won’t stick. It is a 30-second window of opportunity, so have your tweezers ready!
9. Neon “Micro-French”
If you are scared of neon, this is your gateway drug. The Micro-French is a line so thin it’s almost a whisper. We are talking about a neon lime or “highlighter” pink stripe that is less than a millimeter wide. It gives you that “pop” of summer color without making you look like you are headed to a 2012 rave.
To pull this off at home, you need a long-haired striping brush. Do not use the brush that comes in the bottle. Hold the striping brush still and move your finger in a semi-circle underneath it. It sounds counterintuitive, but moving your finger gives you a much smoother curve than trying to “paint” the line with a shaky hand.
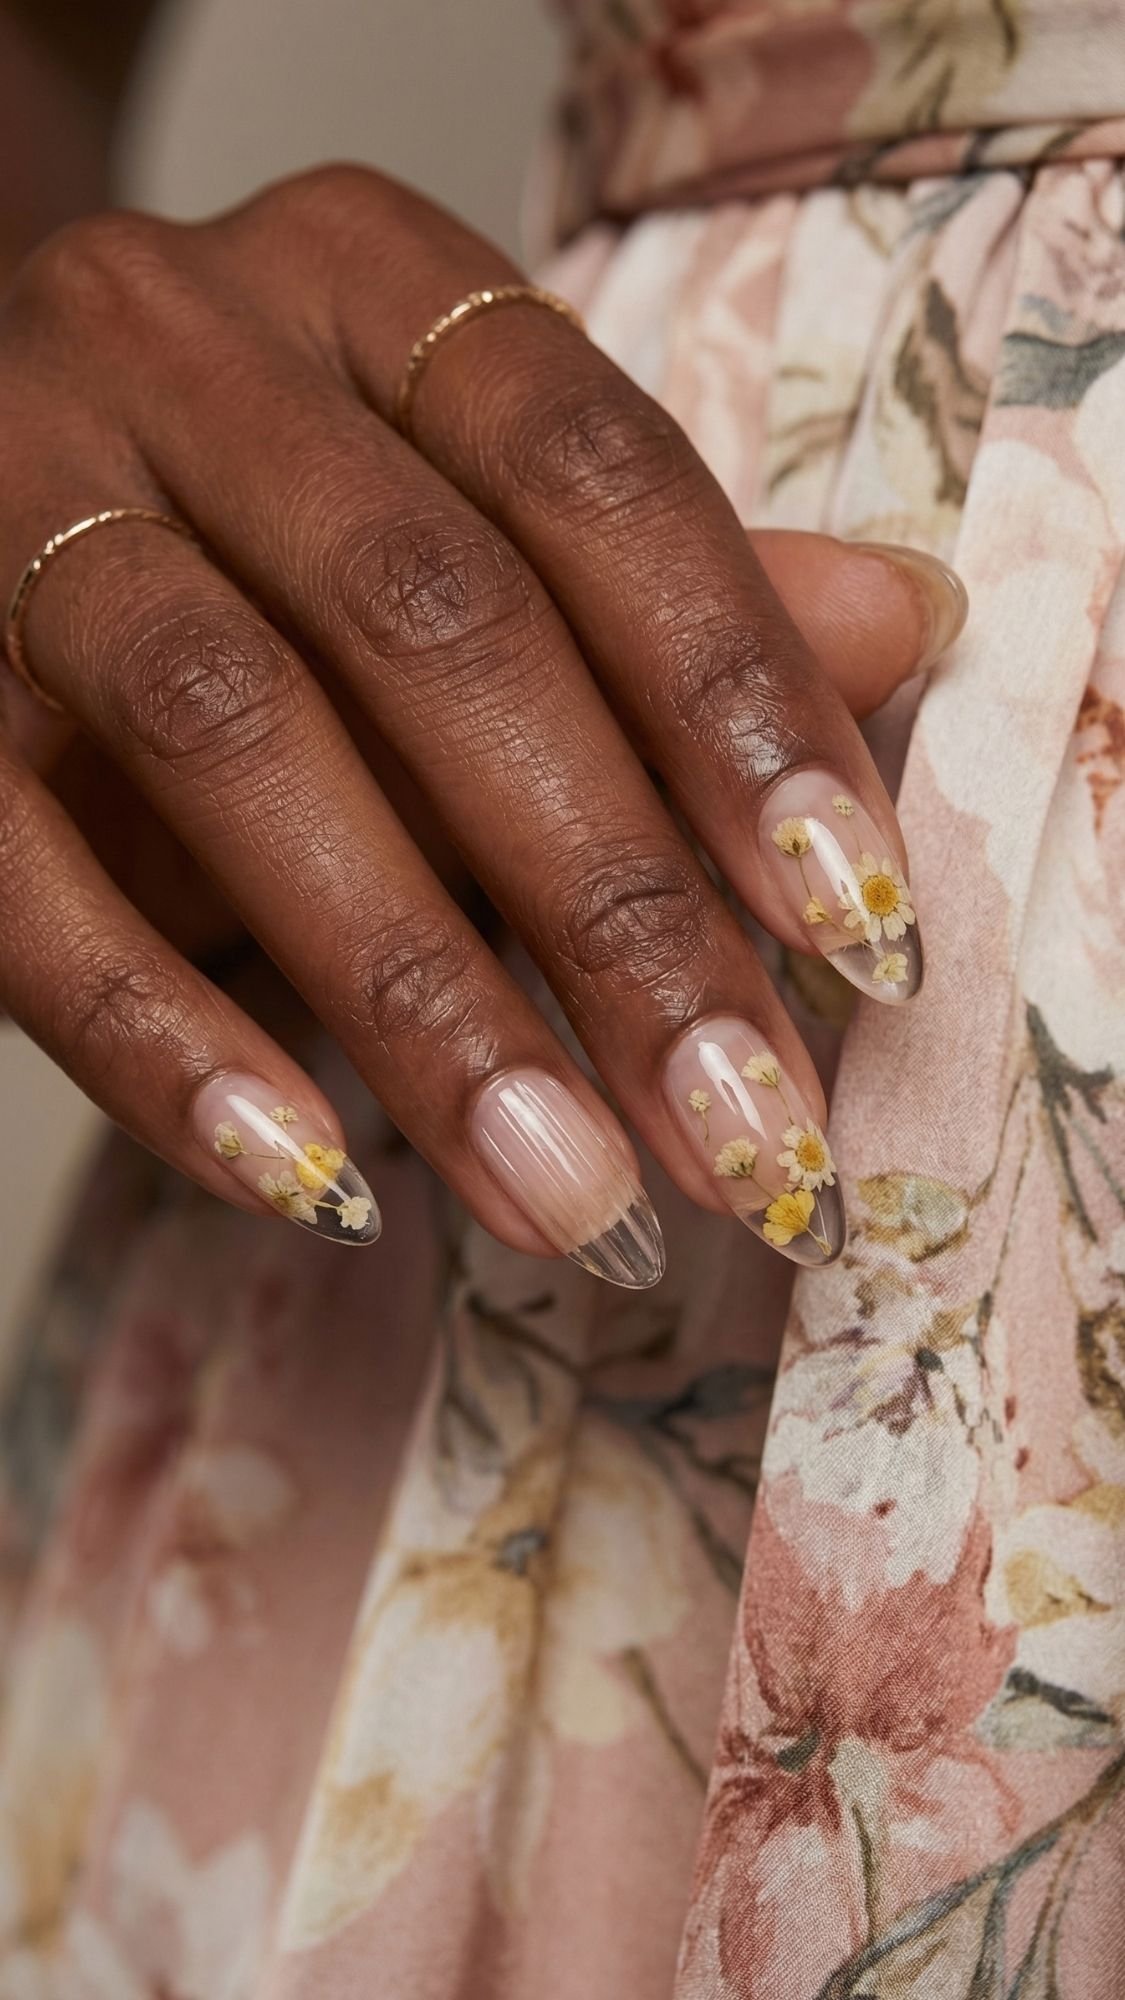
10. “Glass” Nails with Dried Flowers
This look is a literal conversation starter at any brunch table. We are encapsulating real, tiny dried flowers inside a clear gel or thick top coat. It looks like a botanical garden frozen in ice. It is delicate, feminine, and looks incredibly high-effort.
Pro tip: Make sure your dried flowers are completely flat before you start. If they have any “bulk” to them, they will snag on your hair or your beach towel. I usually press them between the pages of a heavy book for a few hours before application. Seal them in with two coats of a high-shine top coat to ensure the edges don’t lift when you are swimming.
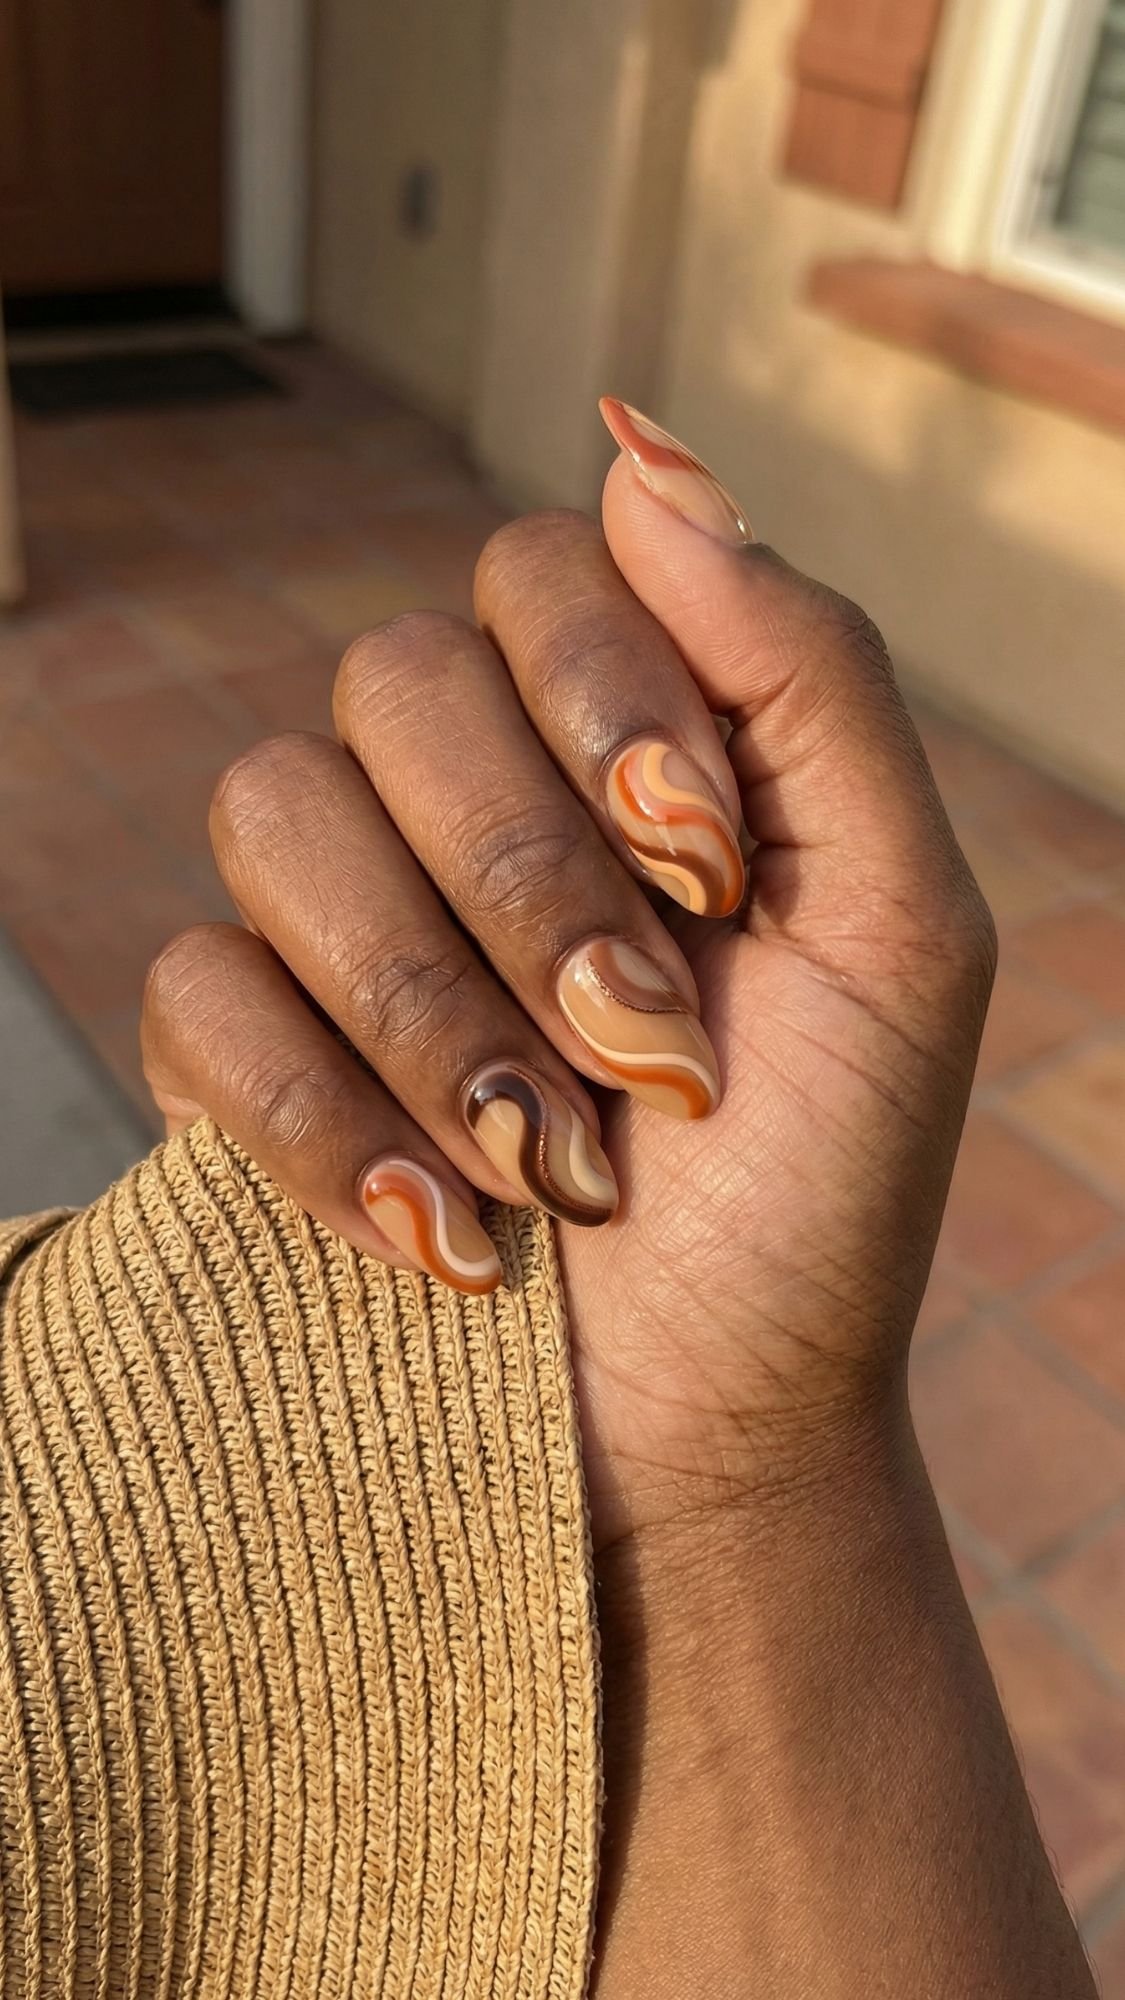
11. Retro 70s Swirls
This look is for my boho-chic girls. We are talking about wavy, trippy lines in shades of terracotta, cream, and mustard. It is very “vintage summer” and looks amazing with a crochet cover-up.
The best part about swirls? They are infinitely forgiving. If your hand shakes, just turn the shake into a curve. I’ve noticed that using a matte top coat over these earthy tones makes them look more like a high-end textile print and less like a “nail design.” It is a sophisticated way to do “fun” nails.
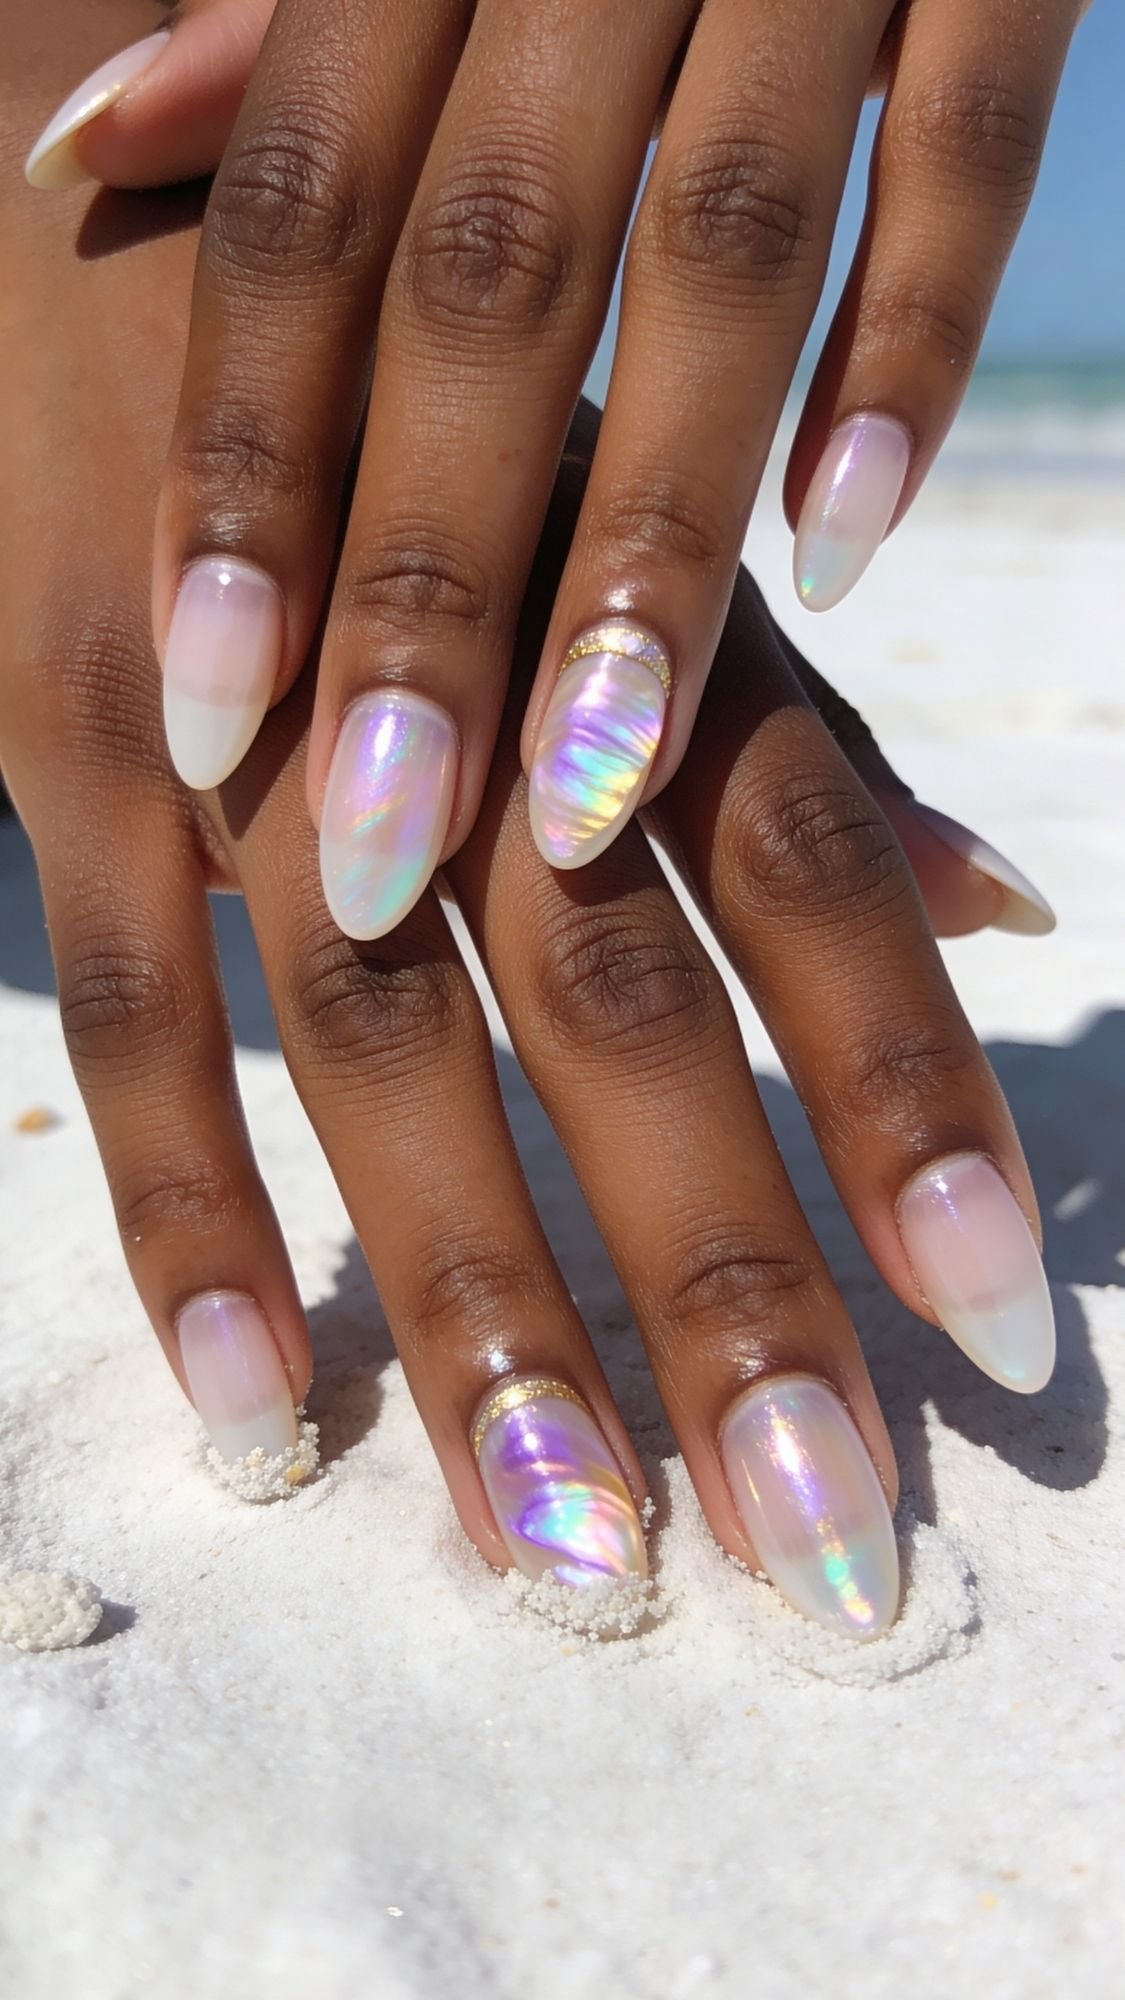
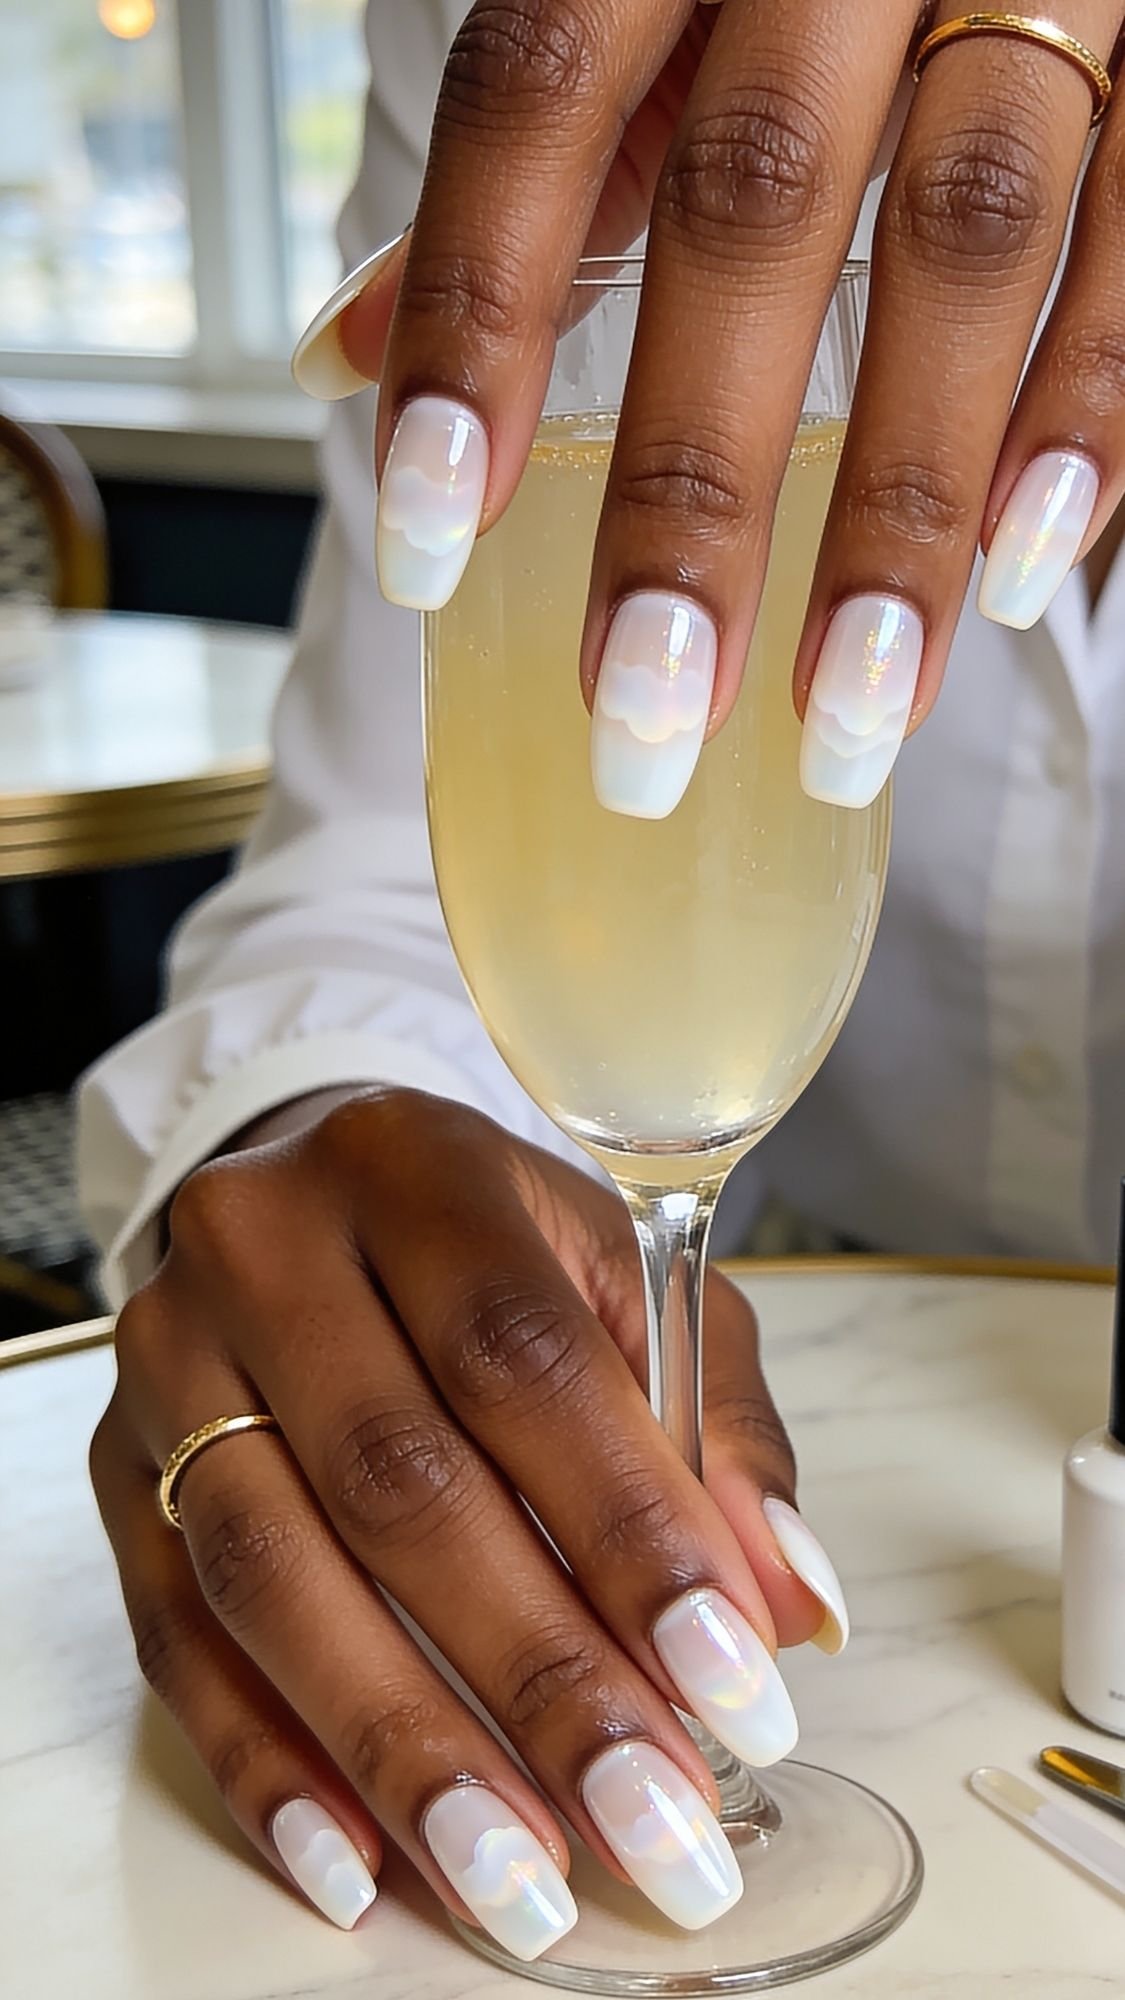
12. “Glazed Donut” 2.0 (Holographic Edition)
The chrome trend isn’t going anywhere, but for 2026, we are adding a holographic shift. Instead of a flat pearl, we are using a powder that flashes rainbows when the sun hits it. It is the “main character” of beach nails.
The mistake most people make is rubbing the powder on too hard. You want to use a light, buffing motion with a silicone tool or your fingertip. If you scrub it, you’ll actually scratch the base coat and lose that mirror-like finish. It looks like a soft “clean girl” nail at brunch, but under the direct beach sun, it becomes a literal light show.
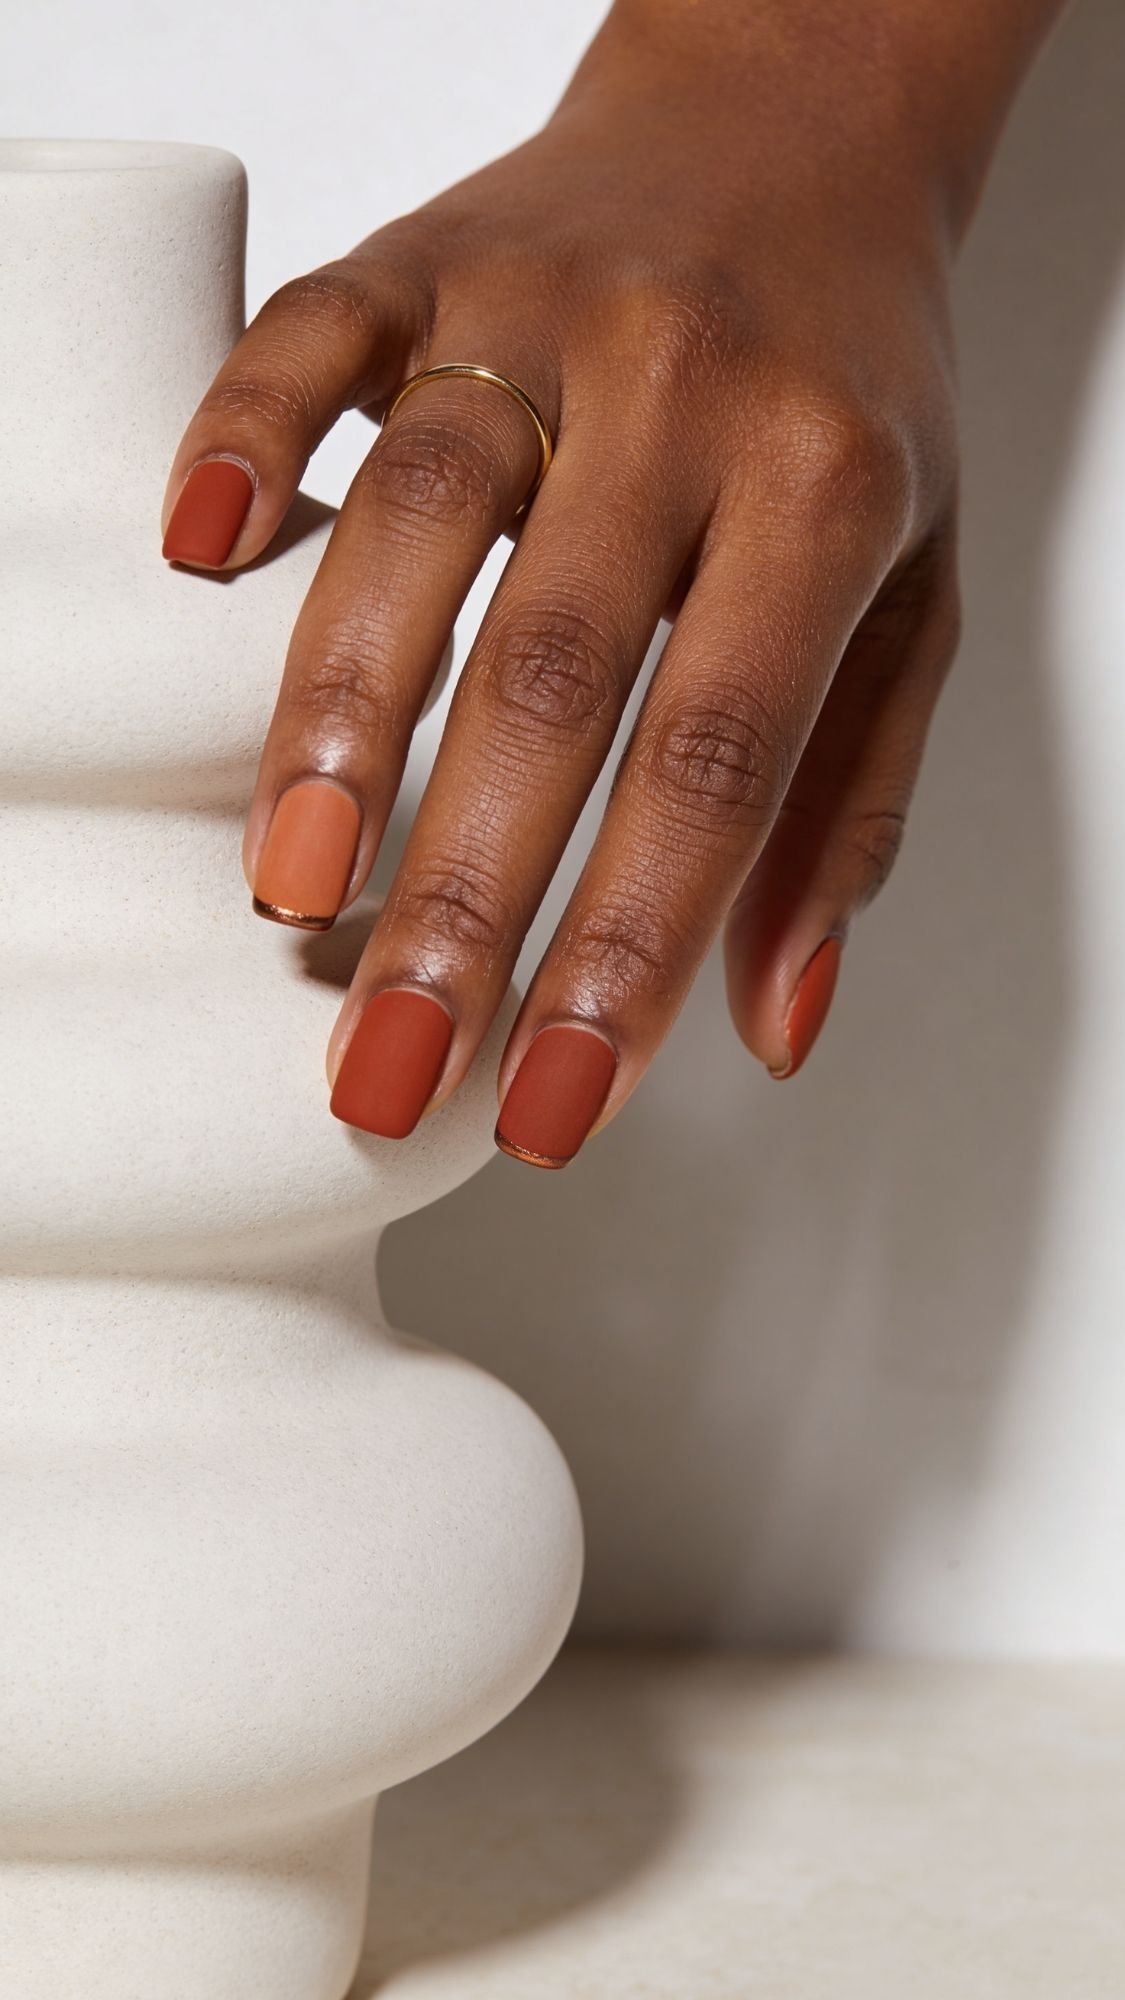
13. Terracotta Matte
Sometimes you want to go against the grain. While everyone else is doing “glass” and “chrome,” a deep matte terracotta stands out in the best way. It looks like Mediterranean pottery and provides a stunning contrast to the blue of the ocean.
One warning: Matte top coats show every single imperfection in your nail prep. If you have ridges, use a ridge-filling base coat first. Also, matte finishes tend to “pick up” oils and dirt more easily. IMO, you should keep a small alcohol wipe in your beach bag to give them a quick swipe and keep that “stony” finish looking fresh.
14. “Seafoam” Shimmer
This is my favorite “hack” for making hands look instantly more tanned. The cool, minty undertone of seafoam green makes the warmth in your skin pop. When you add a fine, silvery shimmer, it looks like sunlight hitting the shallow part of the shore.
I recommend this for anyone with shorter nails. The shimmer reflects light away from the edges, which makes the nail bed look wider and more “healthy.” It’s a refreshing, “cool” look that feels like a breath of fresh air when the temperature hits 90 degrees.
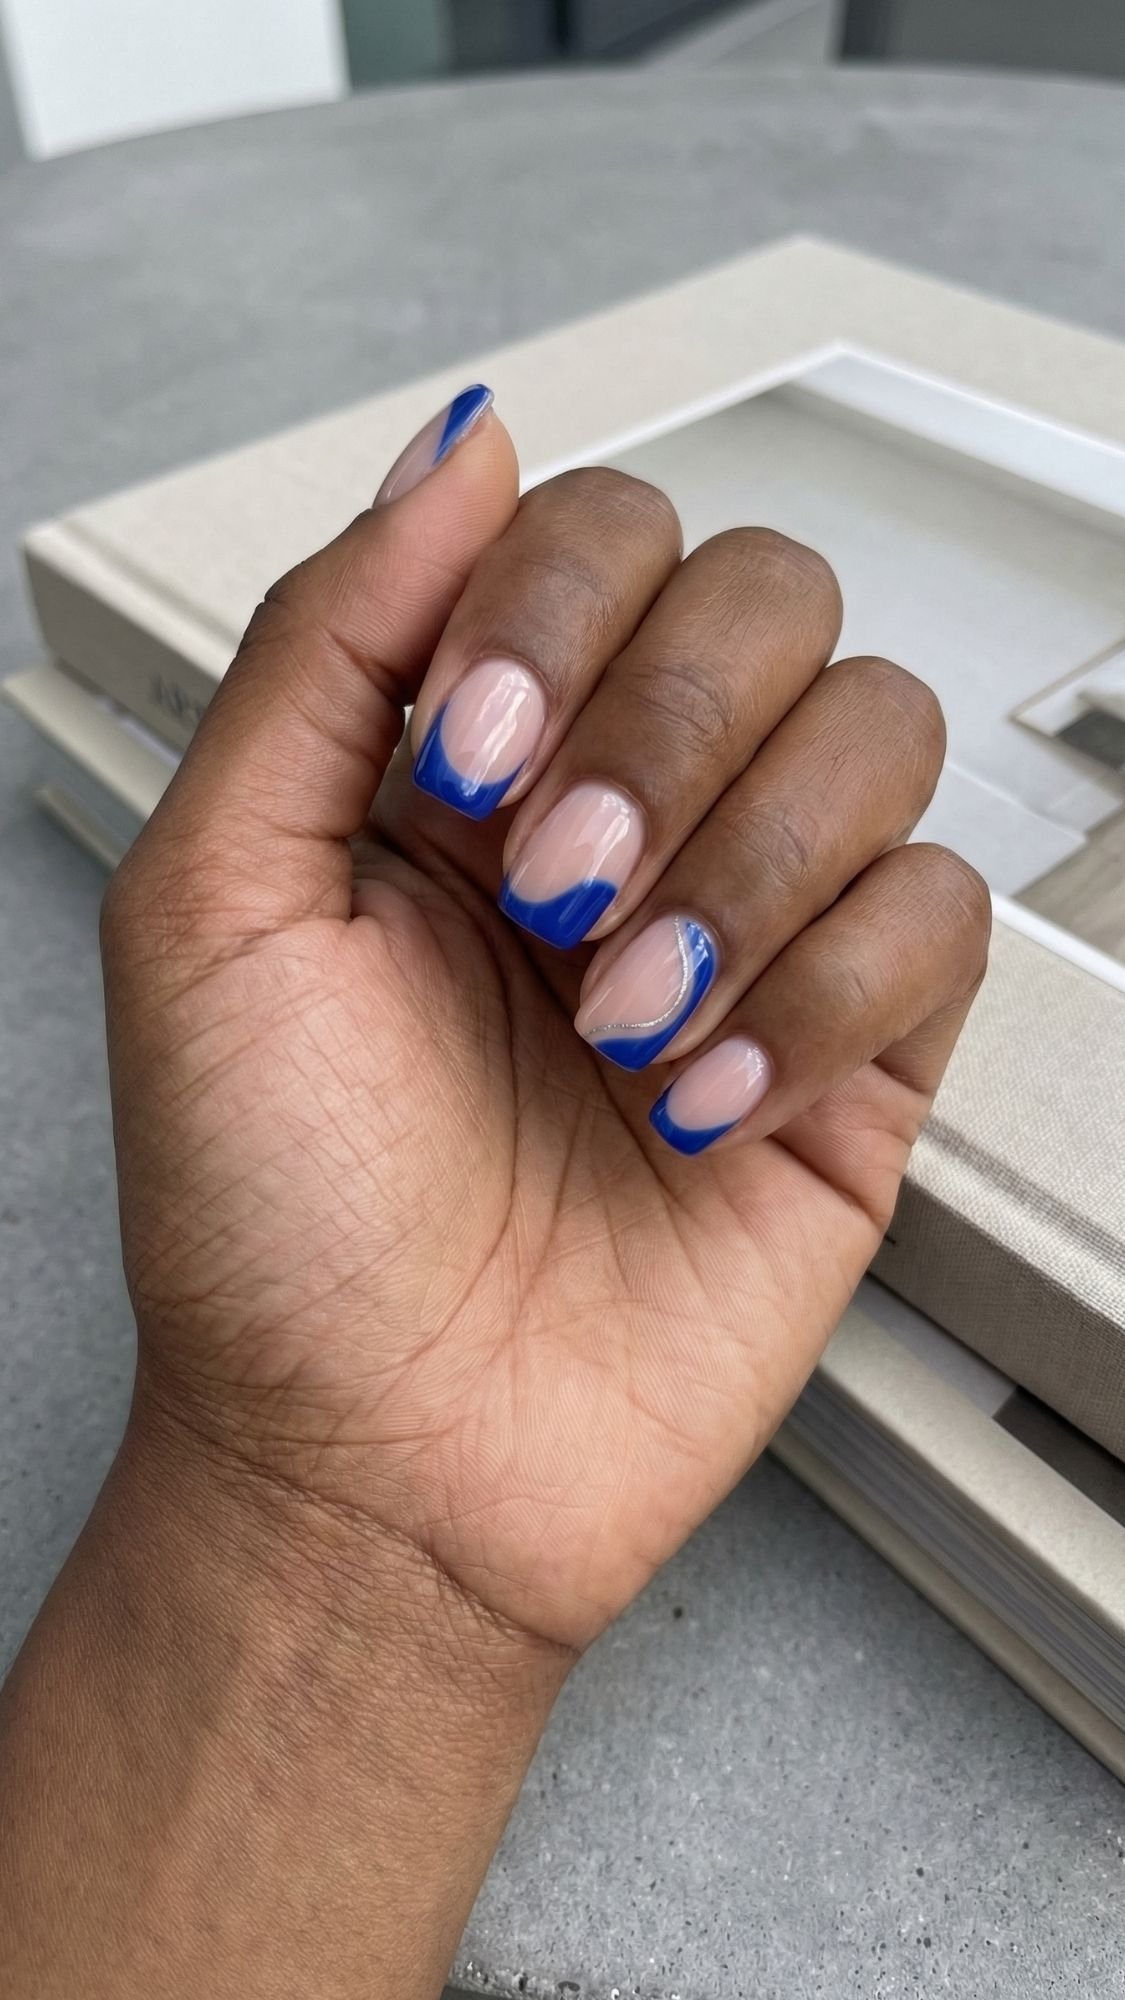
15. The “Negative Space” Wave
This is for the minimalist who wants “nail art” without the commitment of a full design. We leave the bottom half of the nail bare (just a glossy clear coat) and paint a single, stylized, curving wave across the top half in a bright cobalt or cerulean blue.
It’s modern, artistic, and very “New York art gallery director on vacation.” The beauty of negative space is that the grow-out is virtually invisible for the first two weeks. Pro Tip: Use a flat cleanup brush dipped in acetone to perfect the curve of the wave. If that line isn’t razor-sharp, the whole look fails.
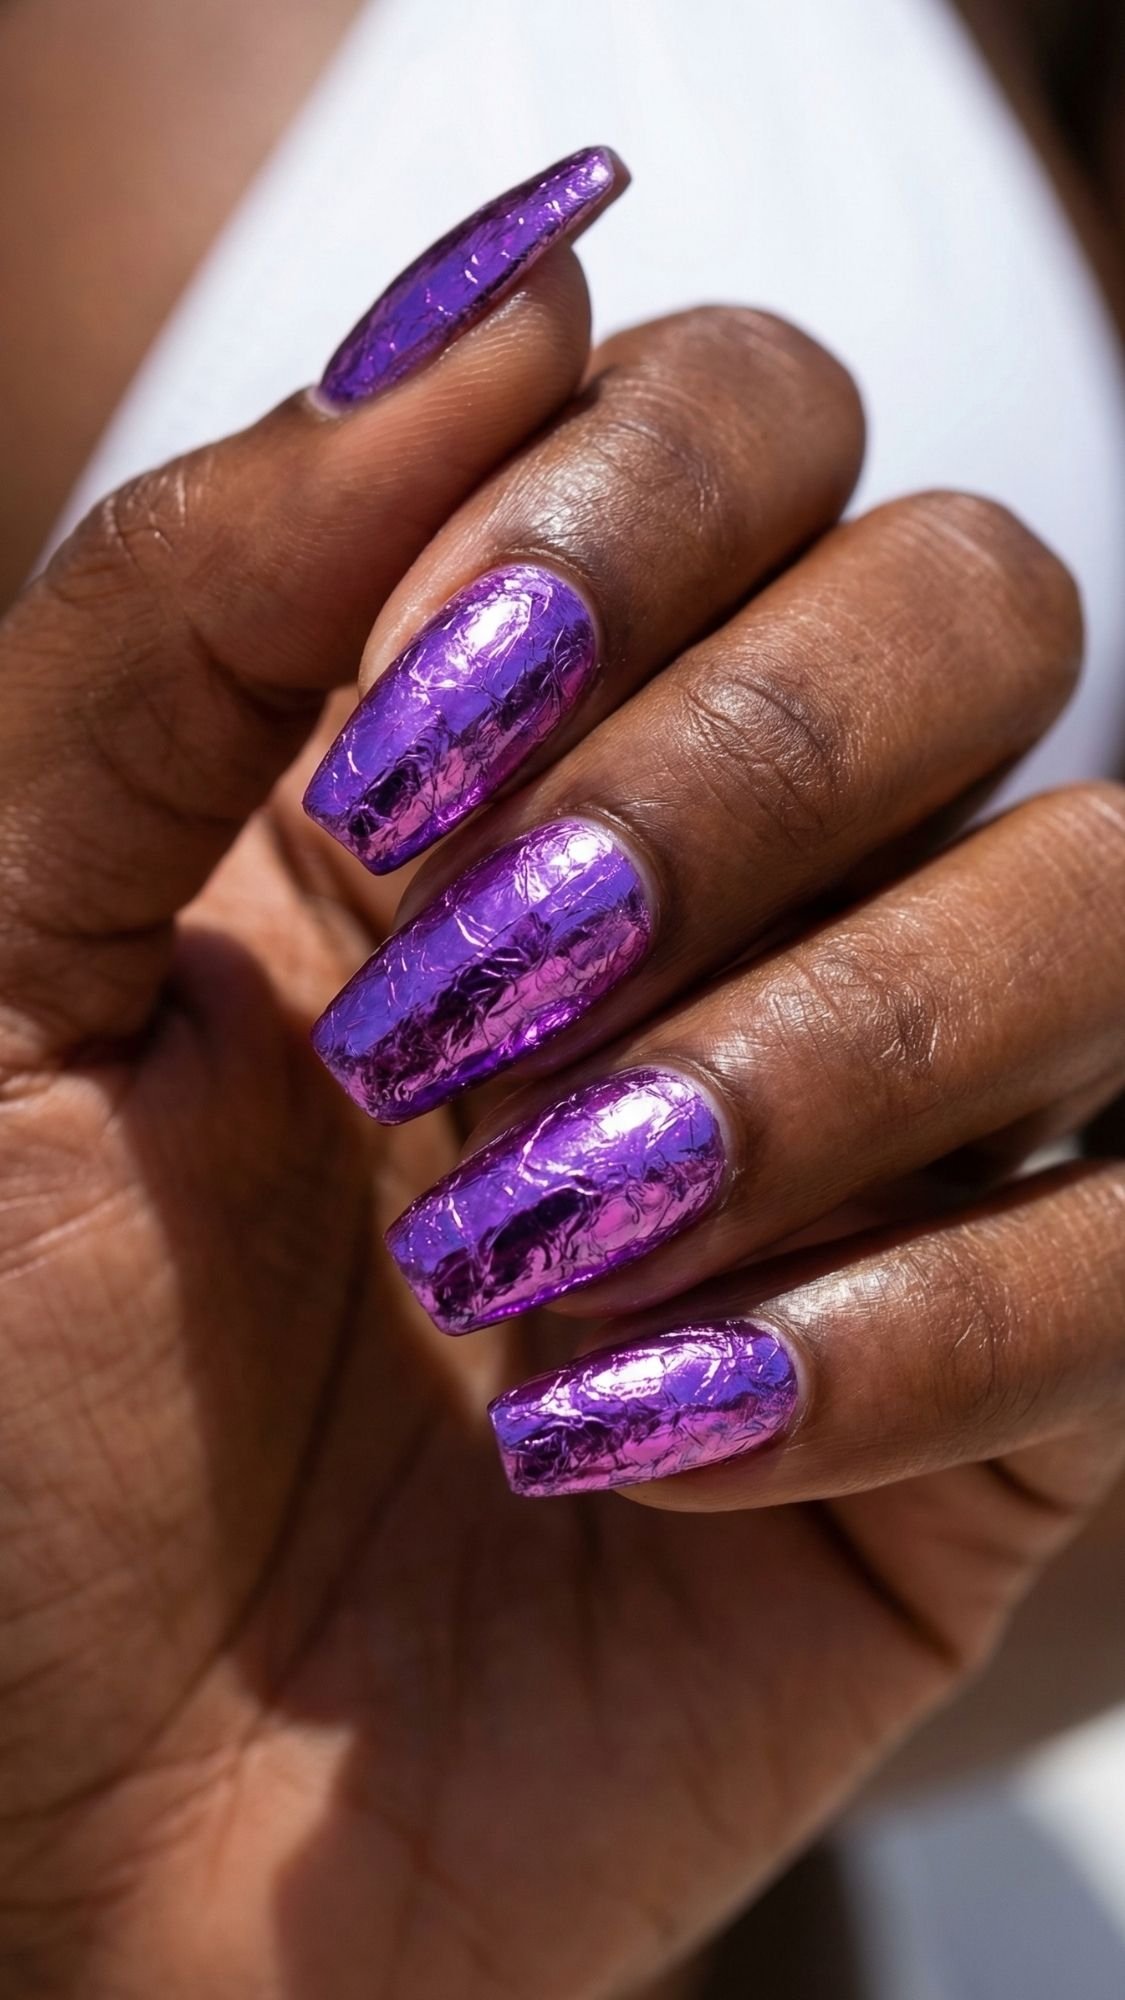
16. Electric Purple Foil
Purple is criminally overlooked for summer. We aren’t talking Barney purple; we’re talking a vibrant, electric grape with a metallic foil finish. It is bold, unexpected, and looks absolutely killer against a white linen beach set.
Foil can be tricky. The mistake people make is applying the foil too soon. You have to wait for the special foil glue to turn completely clear before pressing the foil sheet down. If it’s still cloudy, it’s too wet, and it won’t transfer. When it hits the light, it should look like crinkled metallic candy wrappers.
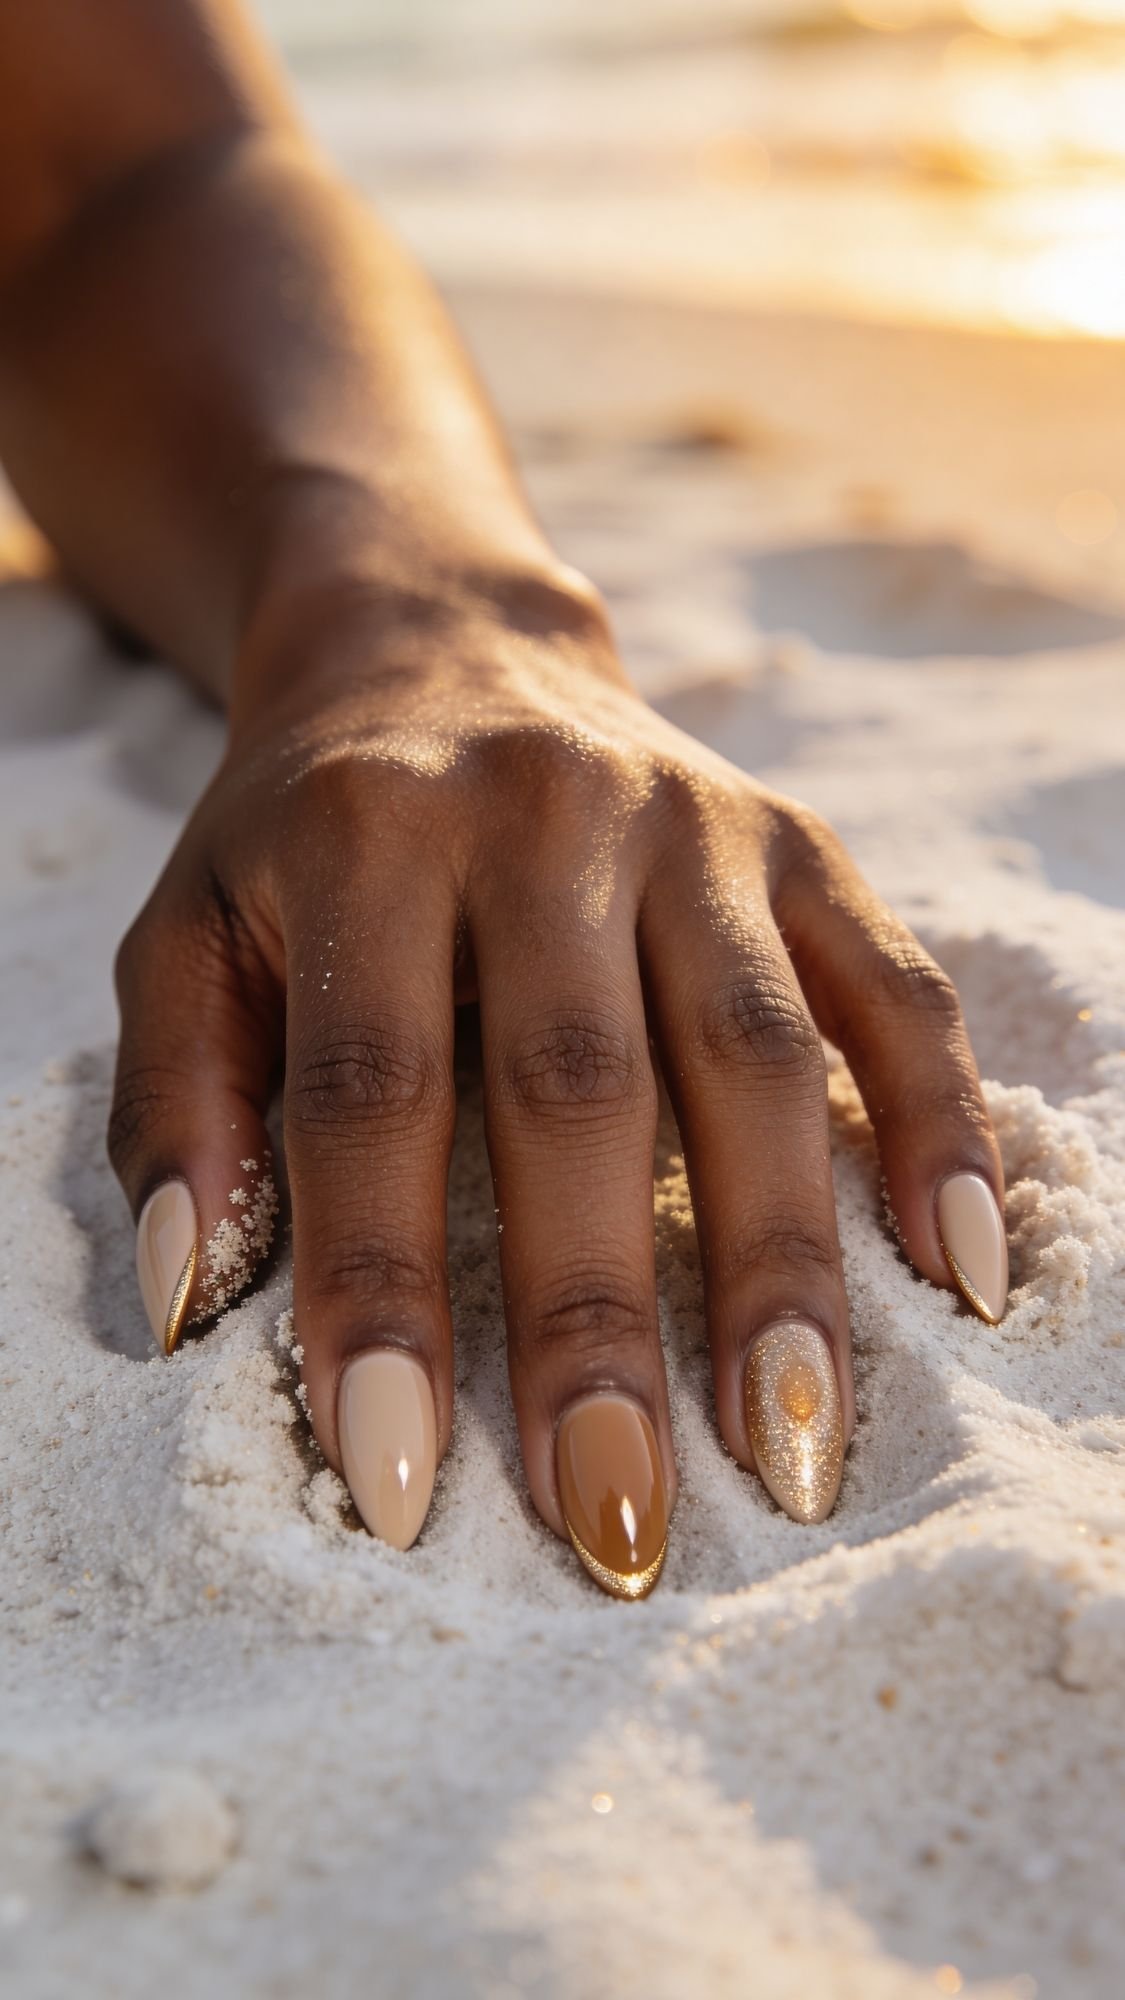
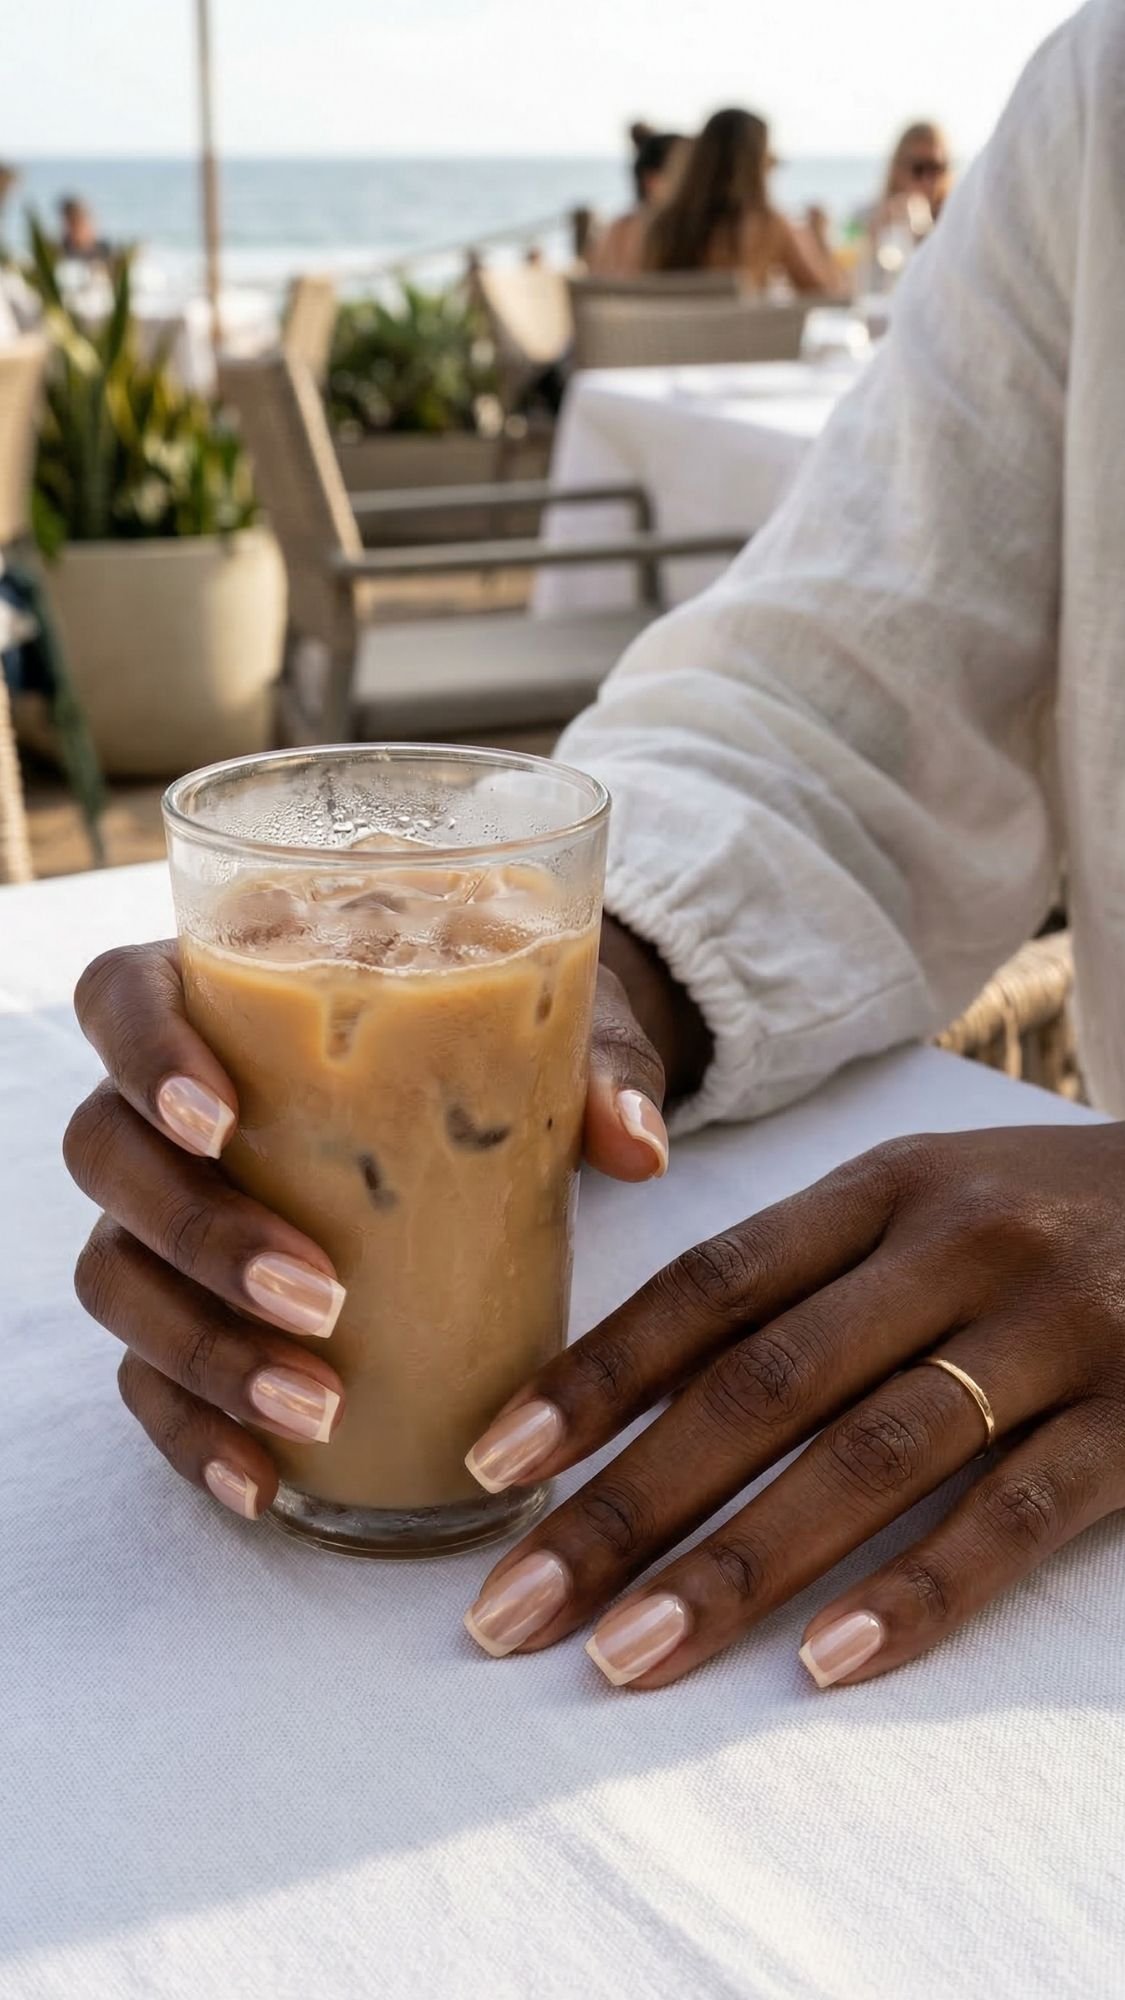
17. “Sand Dune” Nude
Sometimes the biggest flex is a perfect nude. But for summer 2026, we are ditching the flat beige. The “Sand Dune” nude is one shade lighter than your natural skin tone with a very fine, almost invisible micro-shimmer.
This shimmer isn’t glitter; it just stops the polish from looking flat and “dead” in bright sunlight. It elongates the fingers and looks incredibly expensive and polished at a high-stakes brunch. It’s the “quiet luxury” of the nail world.
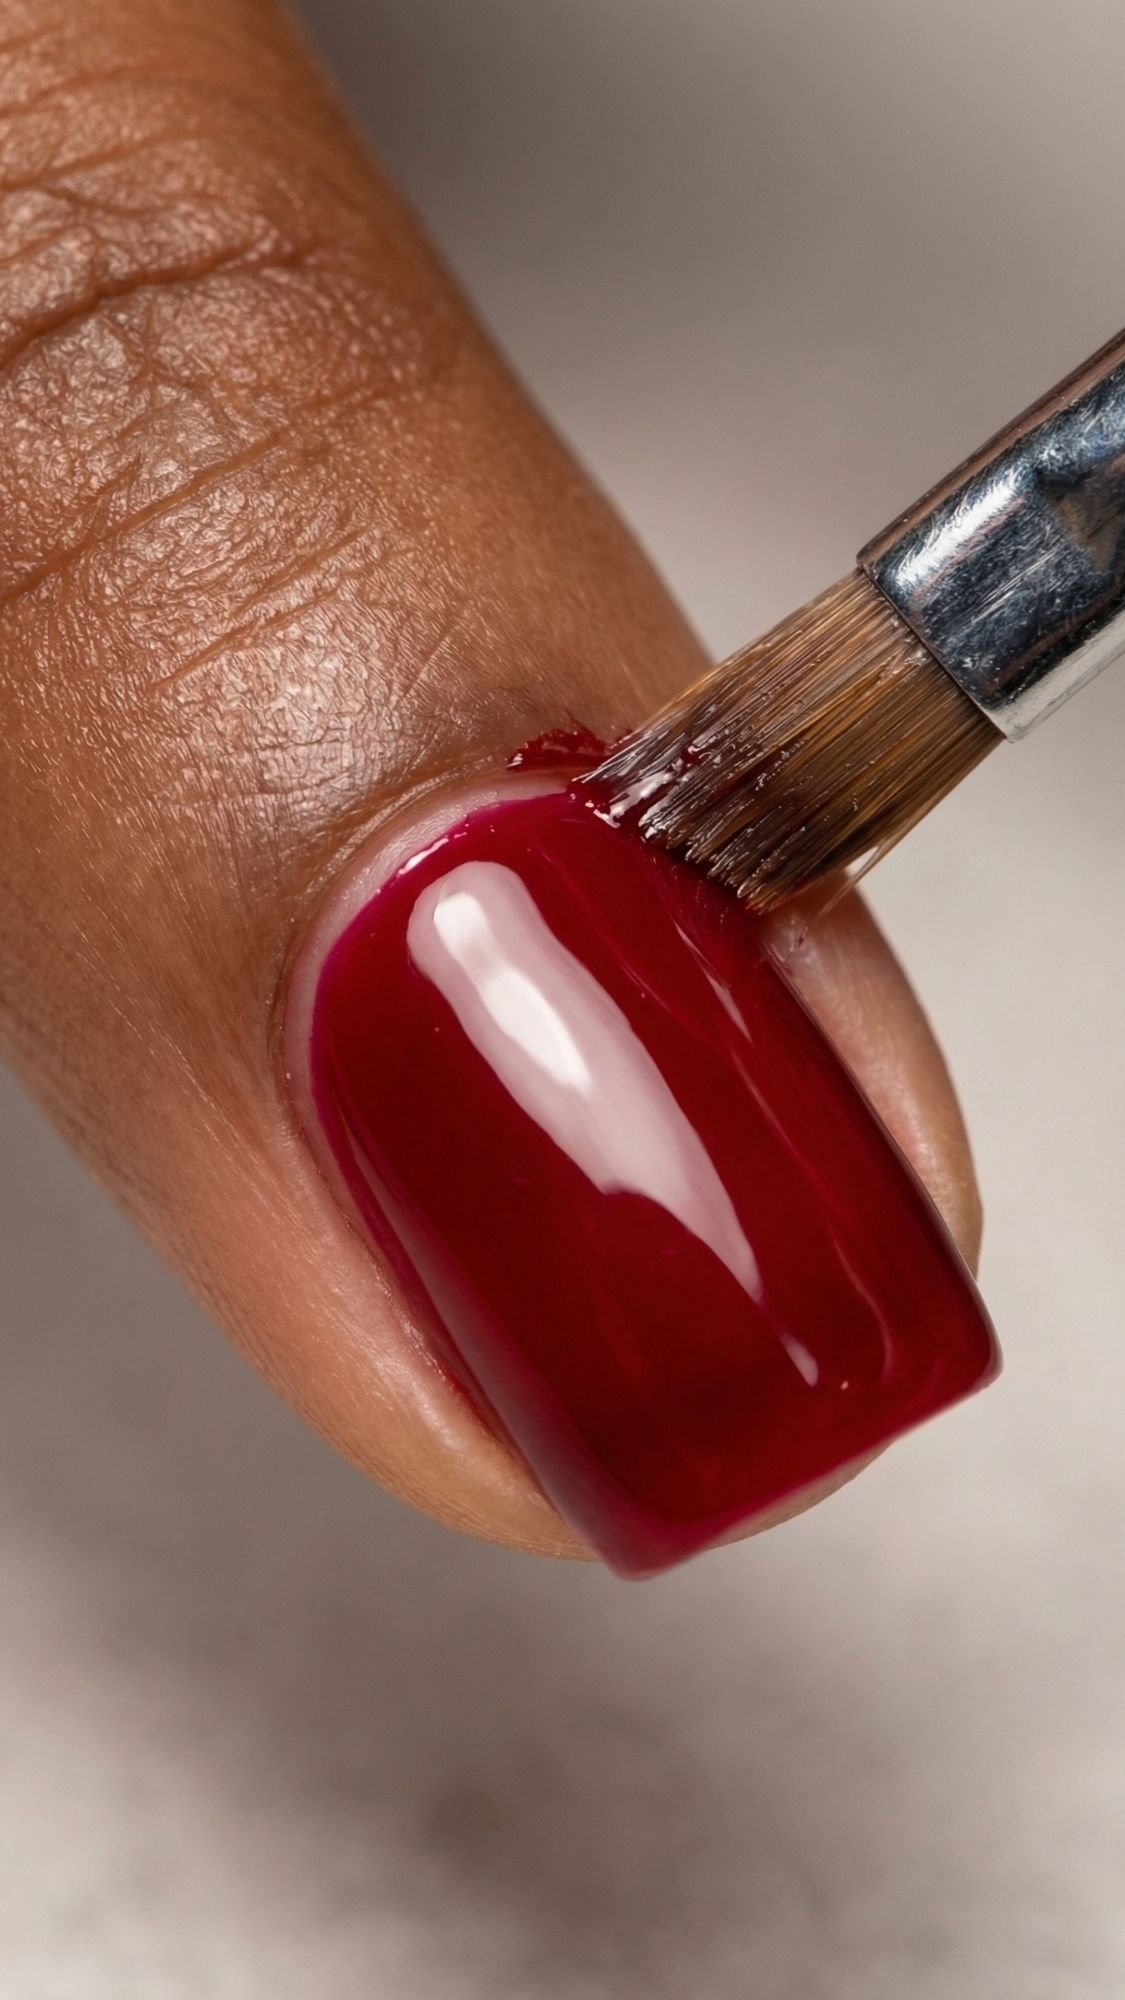
18. Cherry Red “Poolside”
A classic bright red never fails. It’s the “red lipstick” of manicures—it signals confidence. But for summer, you have to choose the right undertone.
IMO, you need a “warm” red (think tomato or chili pepper) rather than a “cool” red (like burgundy or berry). Warm reds pop under the yellow sun; cool reds can look a bit vampy and autumnal on the beach. This color demands a perfectly clean application—any flooded cuticles will stand out like a sore thumb.
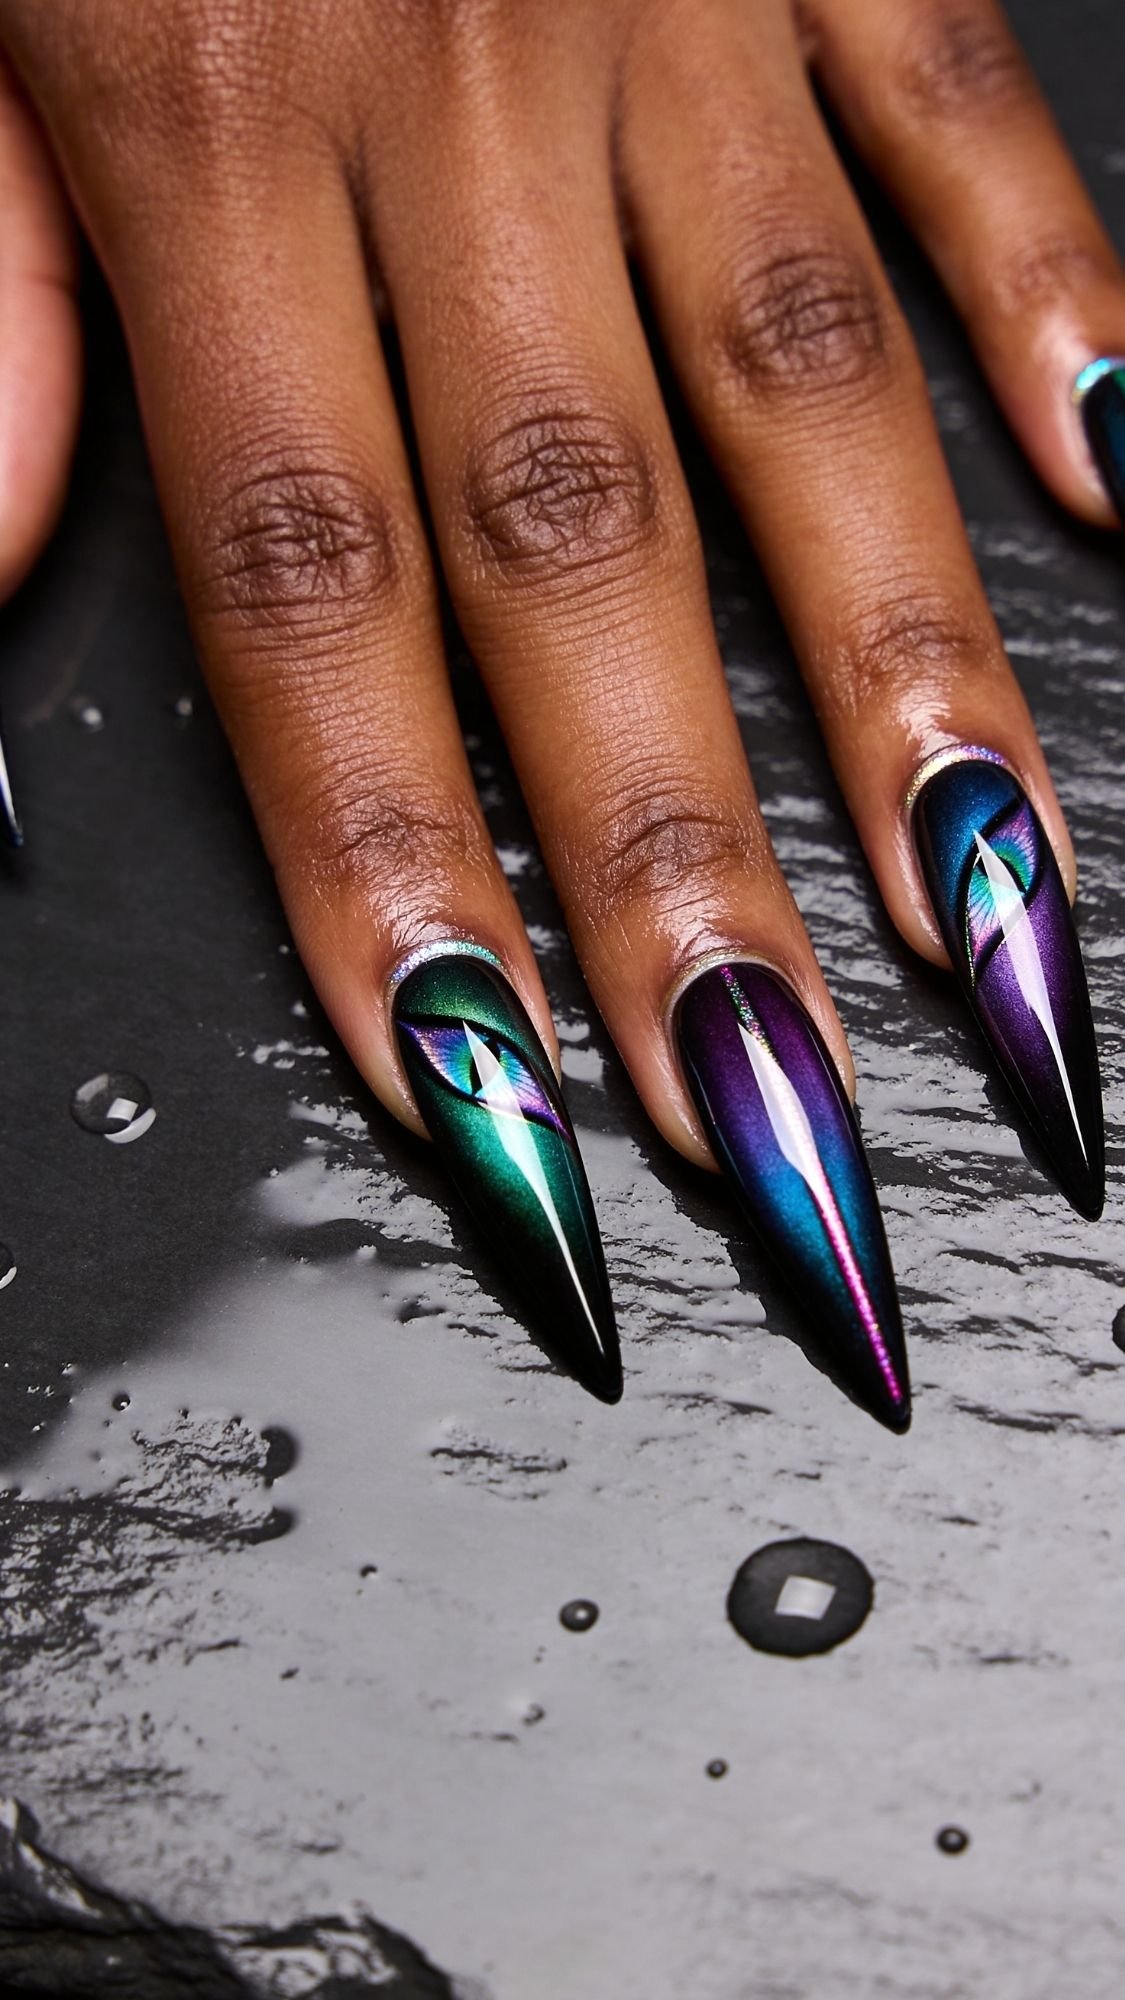
19. Iridescent “Oil Slick”
This is for the edgy girls who still want summer vibes. We use a multi-chrome powder over a black base. When you look at it straight on, it might look dark green. Turn your hand, and it shifts to purple, then blue. It literally looks like an oil slick on water.
This look absolutely requires a no-wipe gel top coat to work. If you try to rub the powder into a regular tacky layer, it turns into a glittery mess rather than a smooth chrome mirror. It’s hypnotic in the sun.
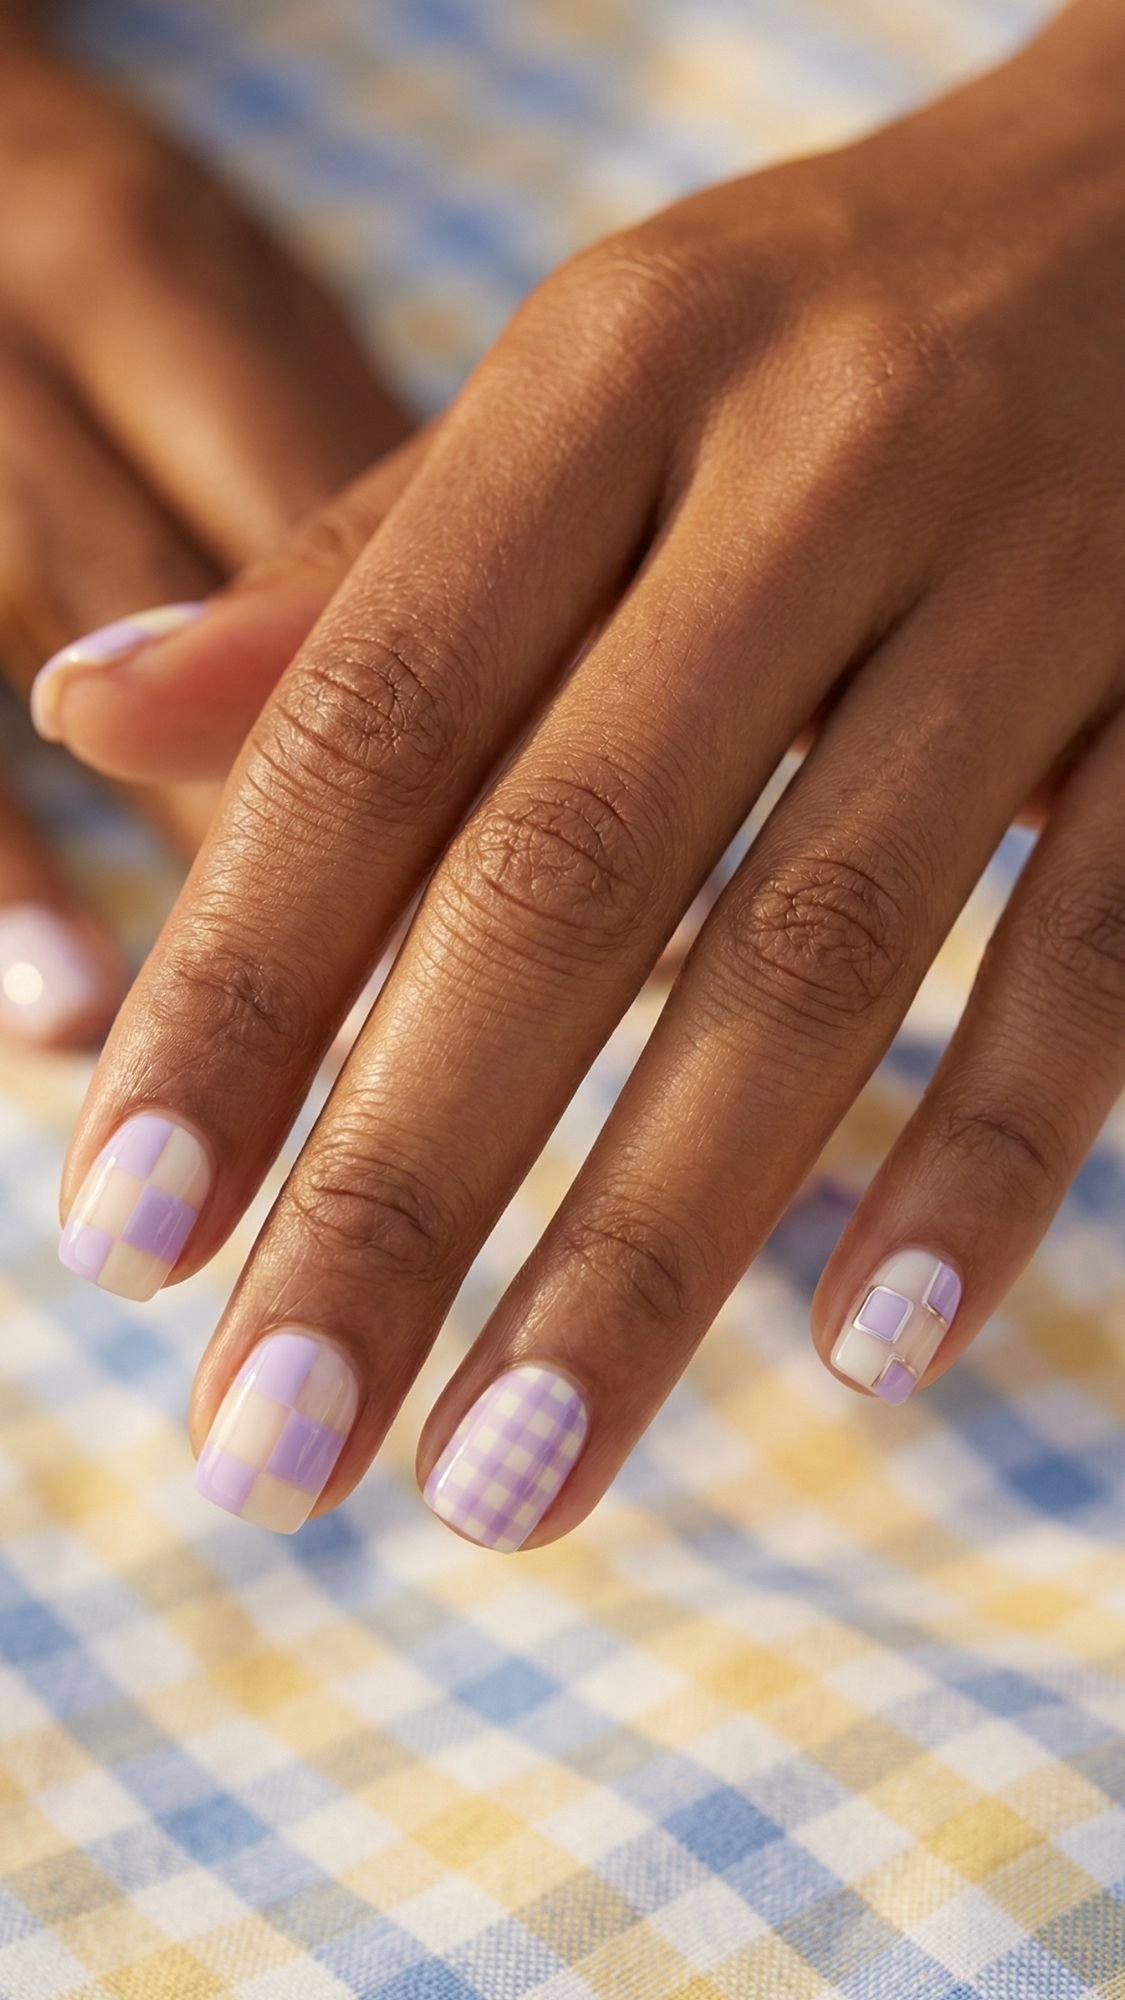
20. “Checkered” Summer
Y2K trends are evolving, and the checkered pattern is having a moment. For brunch, we are keeping it soft: lavender and white, or mint and cream. It gives a “chic picnic” vibe.
Unless you have the steady hand of a surgeon, do not try to freehand this. Use nail vinyls or stickers. Stick them on, paint over them, and peel them off immediately while the polish is wet for crisp lines. If you wait until it dries, you’ll rip the design.
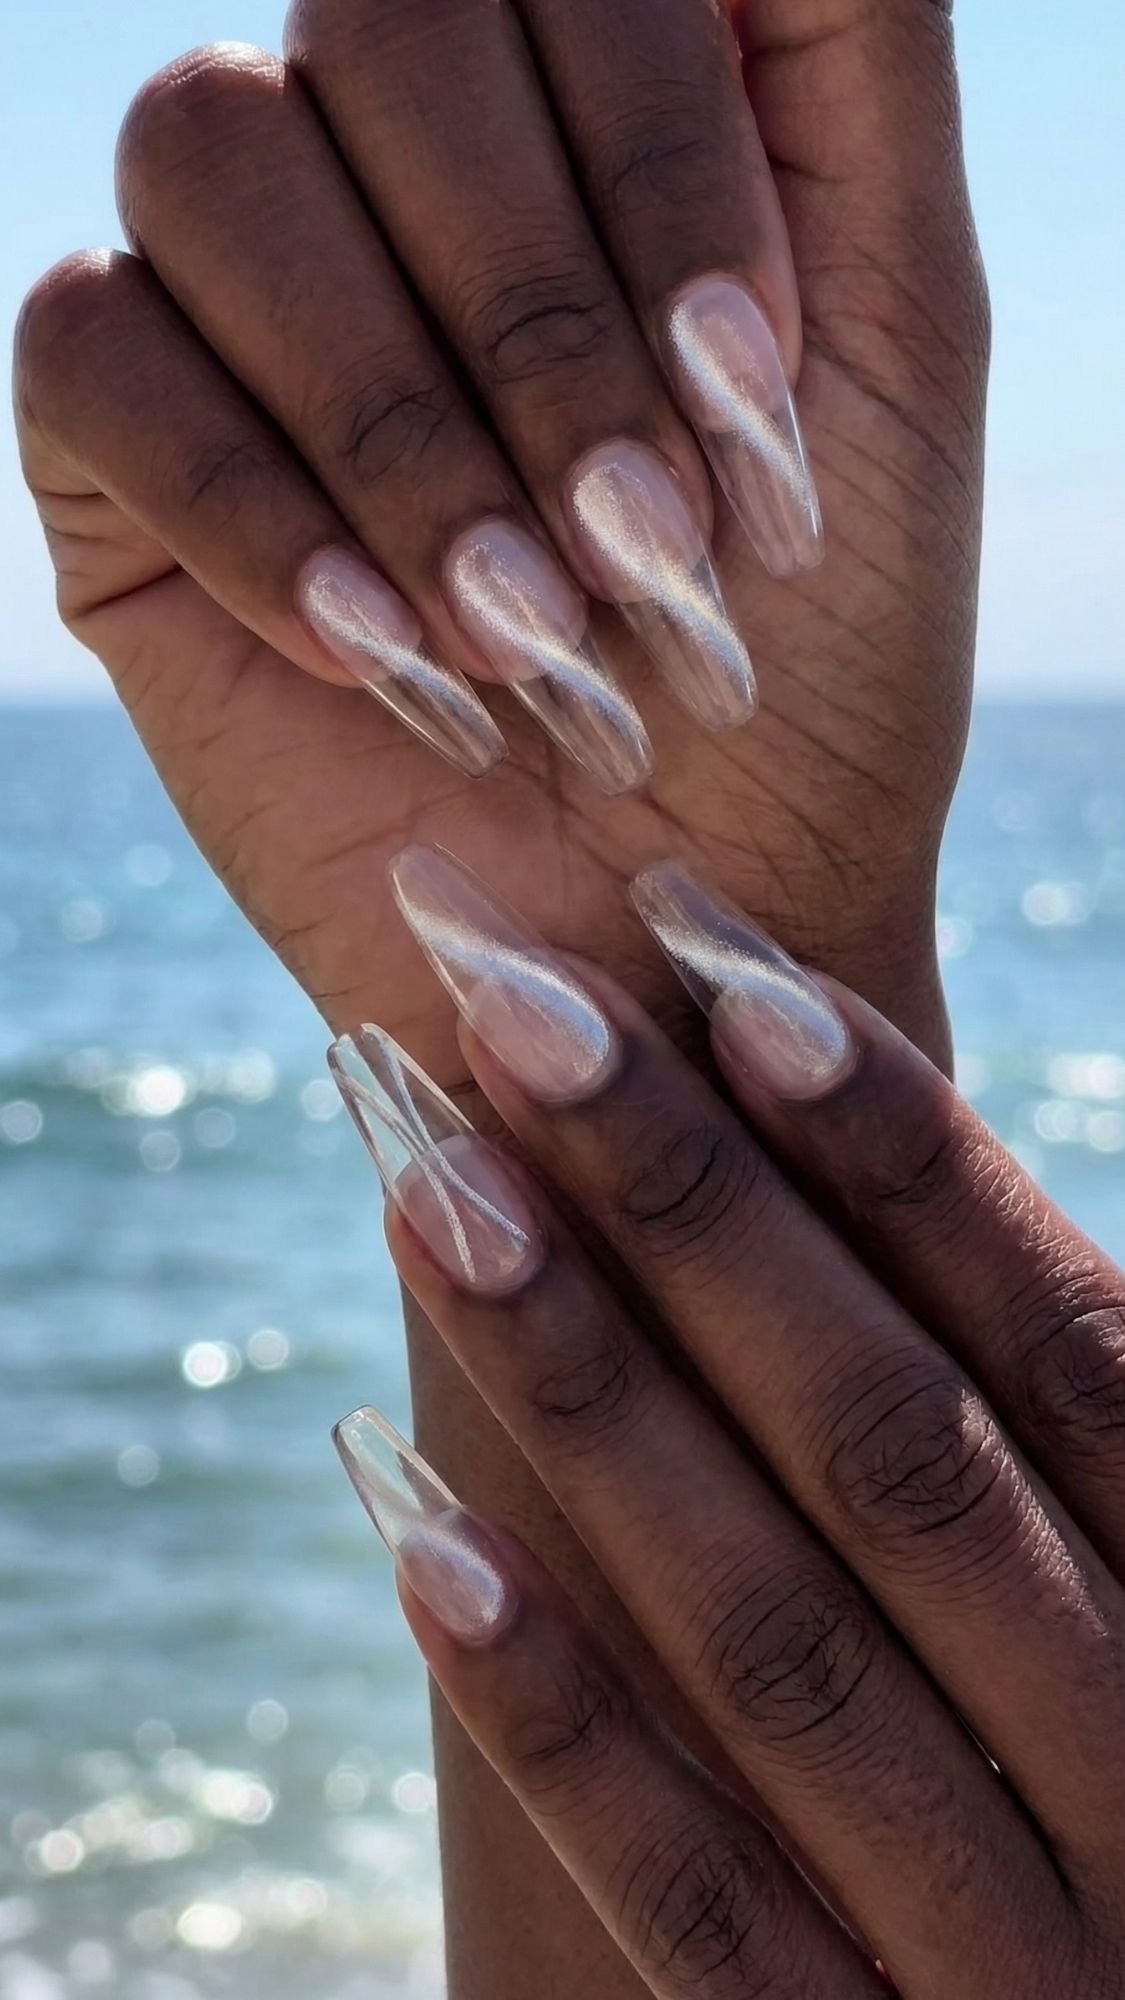
21. The “Crystal” Clear Cat-Eye
This is the most futuristic look on the list. You need clear gel extensions for this. We apply a sheer, silver magnetic cat-eye polish over the clear tip.
When you use the magnet, it pulls the silver particles into a tight, floating diagonal line. The result is a nail that looks like clear glass with a floating beam of light trapped inside it. It’s incredibly cool and looks different in every lighting situation.
Longevity + Maintenance Plan (How To Make It Last)
You spent the time (and money) on these nails; don’t ruin them in 48 hours. Here is the maintenance schedule professionals give their celebrity clients before they go on vacation.
- Day 1-3 (The Danger Zone): Your nails are still “settling.” Avoid hot tubs or very long, steamy baths. Intense heat causes the nail plate to expand, which can break the bond with the polish before it’s fully cured, leading to early lifting.
- Day 4-7 (The Refresh): If you are wearing regular polish, re-apply your top coat now. The sand has likely micro-scratched the surface, dulling the shine. A fresh coat brings the “brunch-ready” gloss back and reseals the edges.
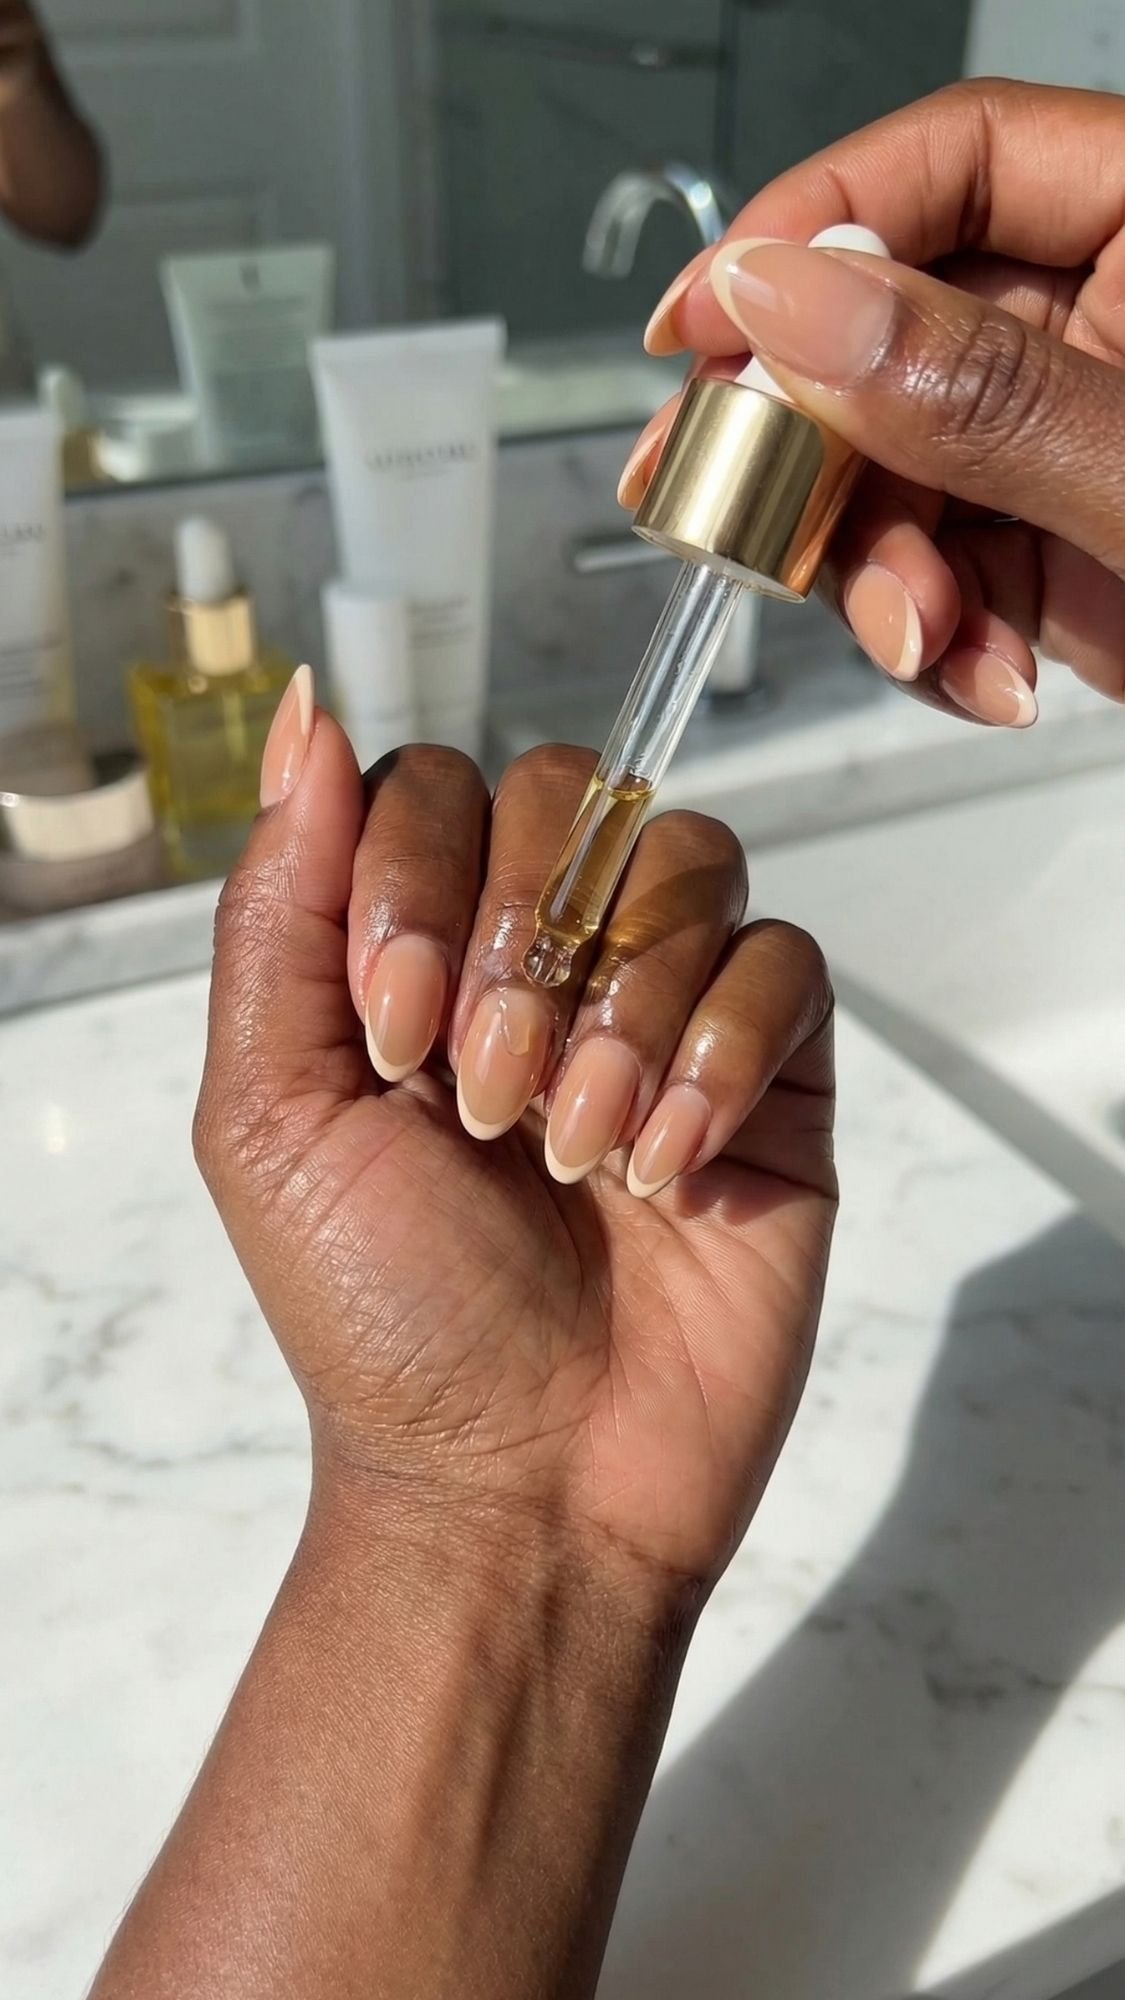
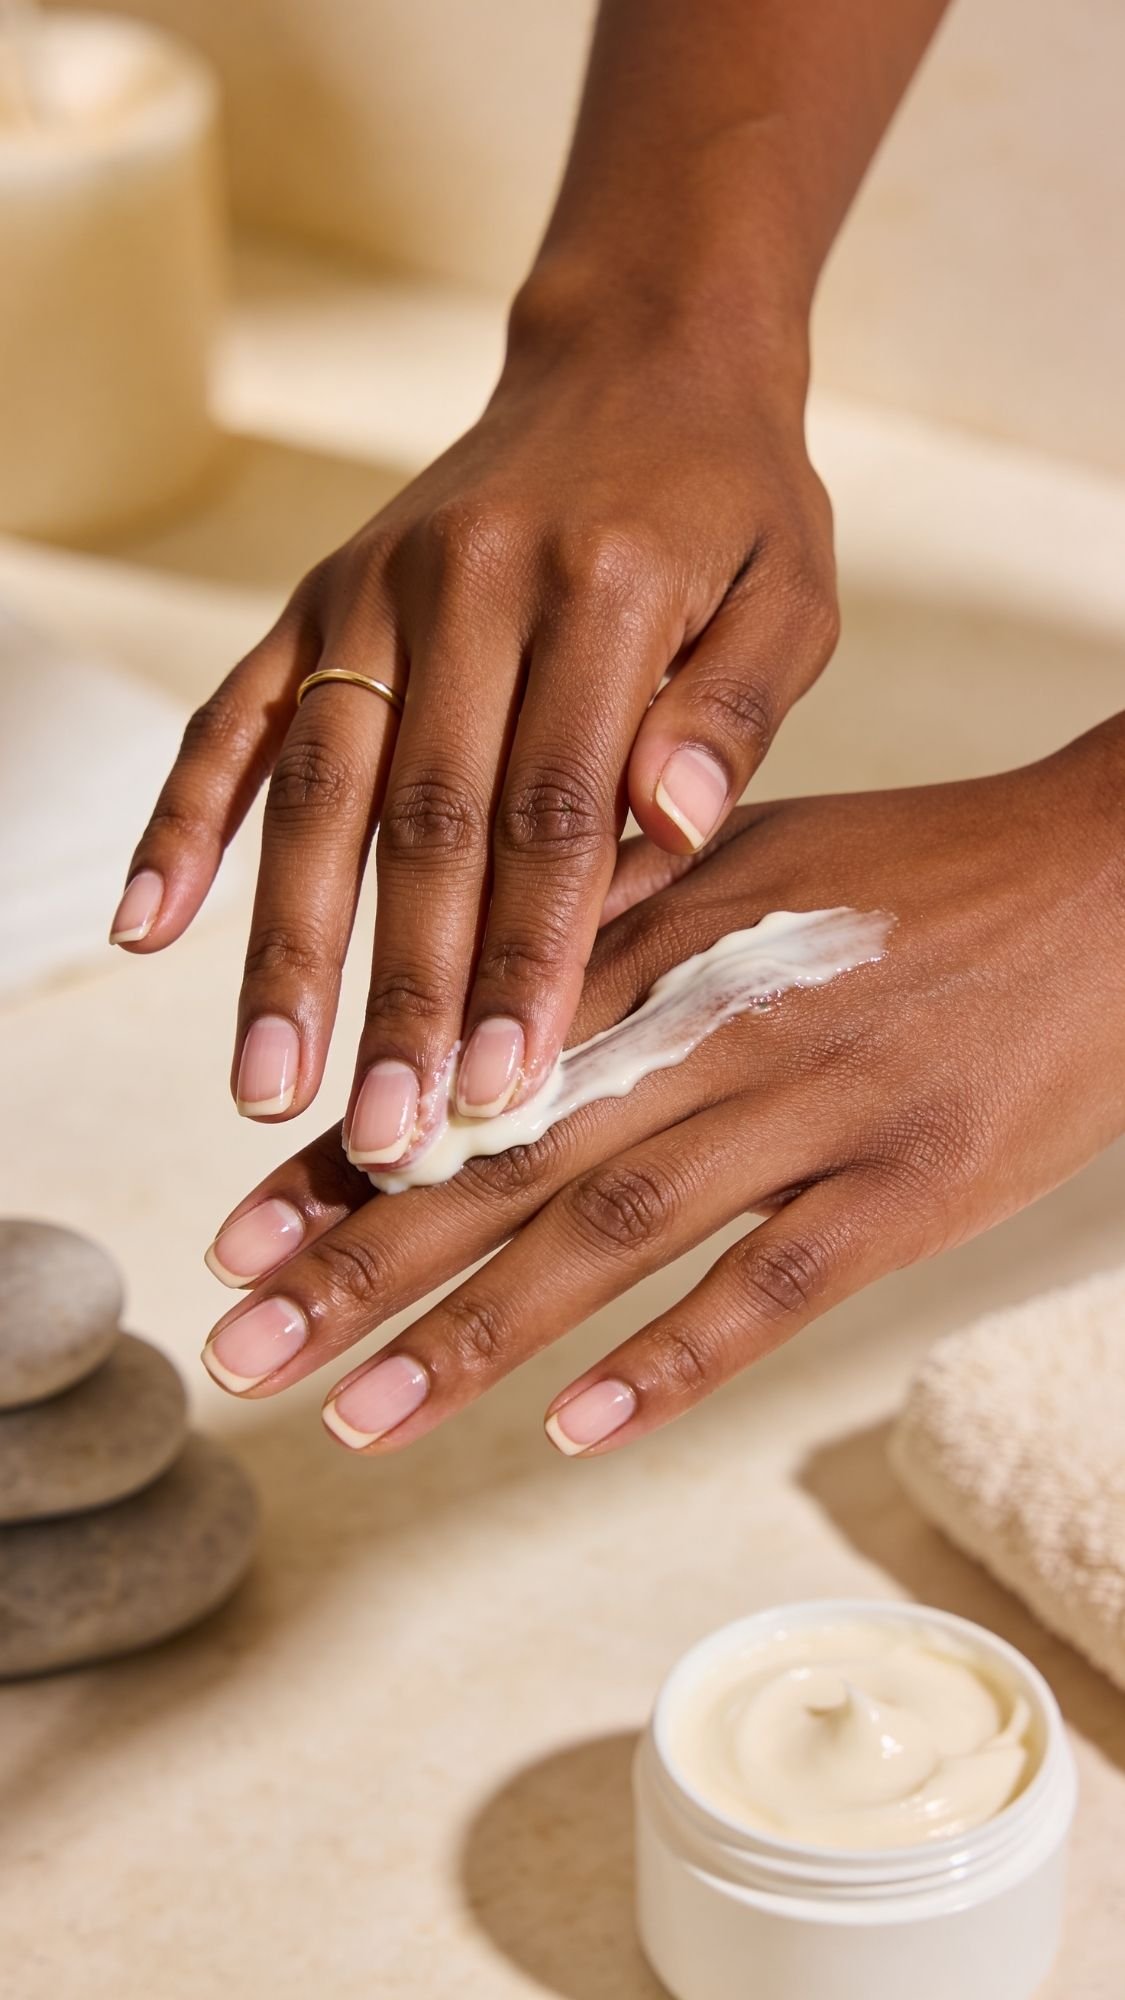
- Every. Single. Night. Apply cuticle oil. I don’t care if you’re tired from dancing. Salt and sun dry out your skin and nails, causing them to shrink away from the polish. Oil keeps everything flexible so it bends with the polish instead of snapping against it.
Troubleshooting: Because Life Happens
Even with perfect prep, things go wrong. Here are the quick fixes for the most common summer nail disasters.
- Polish is “Pooling” in the Cuticles: You have too much product on the brush. Fix: Use the three-stroke method. Wipe one side of the brush clean on the bottle neck. Paint one stripe down the center, then one on each side using the remaining product.
- Bubbles appearing after drying: You probably shook the bottle like a Polaroid picture. This traps air. Fix: Roll the polish bottle between your palms to mix the pigment without creating fizz.
- Gel “Shrinkage” at the tips: The polish pulled back from the edge while curing. Fix: You likely “flash cured” it (pulled your hand out too fast) or didn’t cap the edge. Ensure you cure for the full recommended time and wrap that tip!
- Press-Ons Popping Off in the pool: Water got under the nail because of air pockets in the glue. Fix: When applying, put glue on both your natural nail and the press-on. Press down firmly starting from the cuticle and rocking toward the tip to push all air out.
- Sunscreen Stain: Mineral sunscreens can turn white or light polish yellow. Fix: Look for a “stain-resistant” top coat, and immediately wipe your nails with an alcohol swab after applying your SPF.
Nail Health: The “Breathing” Myth
Let’s bust a myth right now: Your nails do not have lungs. They do not need to “breathe.” They get their nutrients from your blood supply, not the air.
However, they do need a break from the trauma of removal. If you are a chronic gel wearer, I recommend taking a week off every 3-4 sets. During this week, do not use “nail hardeners” (which make nails brittle and snap); use “nail strengtheners” or hydration treatments that add flexibility. If you ever see green discoloration under a nail, that is a bacterial infection (a “greenie”) from trapped moisture. Take the product off and see a pro immediately.
Beauty Rules of Thumb
- The “Shadow” Rule: To make short fingers look longer, pick a nude that is one shade darker than your skin tone.
- The “Sand” Rule: If you know you’ll be digging in the sand, choose glitters or shimmers. They hide scratches way better than flat cremes.
- The “Sun” Rule: Neons fade fast in UV light. Always use a top coat specifically labeled “UV protective” or “non-yellowing.”
- The “Two-Coat” Rule: Two thin coats dry faster and last longer than one thick, gloopy coat. Period.
FAQ
Q: Can I really wear press-ons in the ocean? A: Yes, but only if you use a high-quality brush-on glue. Do NOT use those adhesive jelly tabs; they will dissolve in saltwater faster than cotton candy. A good glue application should survive 3-5 days of swimming.
Q: How do I stop sand from getting stuck under my gel near the cuticle? A: If sand is getting under there, it means your gel has already lifted. This usually happens because you didn’t remove the dead cuticle skin on the nail plate during prep. The gel bonded to skin, not nail, and lifted up.
Q: What is the absolute strongest nail shape for an active beach vacation? A: Short “squoval” (a square with rounded corners). Stilettos and sharp squares have corners that easily snag on beach towels and bikinis, leading to breaks.
Q: I just painted my nails with regular polish. How long until I can swim? A: Give it at least 4 hours. Even if it feels dry to the touch, the deepest layers take hours to fully harden against water submersion. Gel, however, is ready the second it’s cured.
The 15-Minute Beginner Version
Look, sometimes you get invited to a last-minute brunch and your hands look crazy. Forget painting.
Go buy a set of high-quality Milky White Press-Ons. They are elegant, they match everything, and they look expensive.
- Wipe your nails down with an alcohol pad (crucial!).
- Gently push back your cuticles.
- Apply a brush-on glue to your nail and the fake nail.
- Press and hold tightly for 30 seconds per nail.
- Rub some cuticle oil on, grab your mimosa, and fake it ’til you make it.
Your Summer, Your Rules
At the end of the day, the best summer manicure is the one that makes you feel confident enough to wave down the waiter for another round of mimosas without hiding your hands under the table.
Whether you go for the high-maintenance 3D art that demands attention or stick to the fifteen-minute press-on hack before running out the door, remember this: the secret isn’t the price tag of the polish, it’s the prep. Take those extra ten minutes to dehydrate your nail plate, and I promise, your nails will outlast your vacation tan. Now go enjoy the sunshine. You earned it. xo