Let’s get this show on the road. I’ve been looking forward to this because, frankly, my keyboard is much happier when I’m not rocking two-inch acrylics.
Why Short Nails are the Ultimate Power Move
You know that feeling when you’ve just spent two hours at the salon getting long extensions, only to realize you can’t even pick up a credit card off the floor? I have been there more times than I care to admit. I have realized something that might shock you. Short nails are actually the ultimate power move for anyone who wants to look “quiet luxury” without the hassle.
The most elegant women I know are not rocking four-inch stilettos on their fingers. They are rocking perfectly shaped, impeccably groomed short nails. Why? Because short nails require a level of precision that long nails can sometimes hide. If your cuticles are a mess or your shape is off, short nails will tell on you immediately. But when you get it right, it looks incredibly expensive.
What I have noticed is that the “Clean Girl” aesthetic isn’t just a trend. It is a shift back to simplicity and nail health. We are moving away from masking damage with heavy products and moving toward highlighting the natural beauty of the hand. Ever wondered why a simple sheer pink looks so much more “boss” in a boardroom than a neon coffin shape? It is all about that understated confidence.
Today, I am sharing 20 looks that prove short nails are the elite choice this year. We are going to focus on the science of the “glow,” the secret to a perfect shape, and the colors that make your hands look like they belong in a jewelry ad. IMO, once you go short and chic, you never go back. 🙂
Quick Results Snapshot
- What this routine/look solves: Eliminates the “clumsy” factor of long nails while providing a high-gloss, professional finish that lasts.
- Who it’s best for: Busy professionals, new moms, or anyone who values a low-maintenance, sophisticated aesthetic.
- Time required: 30 to 45 minutes for a full DIY session.
- Budget range: $15 (at-home) to $60 (professional gel).
- Expected timeline: Instant results.
- Biggest mistake people make: Skipping the “dehydration” step of the nail plate, which leads to chipping within 48 hours.
- Biggest mistake people make: Using a dull, old file that “saws” the nail instead of a glass file that seals it.
If you think we are jumping straight into the polish, I’m going to have to stop you right there. I have learned the hard way that a $50 polish looks like a $5 disaster if your nail prep is lazy. I’ve realized that prep is actually 90% of the manicure. It is the difference between your nails looking “done” and looking like they were done by an actual professional.
Nail Prep (THIS IS THE DIFFERENCE MAKER)
We need a clean canvas before we even think about color. Think of this like skincare before makeup. If you skip the primer and the moisture, the foundation just sits on top and looks cakey. On nails, poor prep leads to the two things we hate most: lifting and chipping. Let’s break down the steps that will make your short nails look salon-quality from your own living room.
1. The Clean Slate (Remove and Scrub)
First, you must remove every single trace of old product. I don’t care if it’s just a clear coat. Use a non-acetone remover if your nails are brittle, but if you’re prepping for a long-wear look, pure acetone is your best friend. It gets rid of the stubborn oils that cause polish to slide right off.
- Why it matters: It ensures the new product actually bonds to your natural keratin.
- Pro Tip: Use a lint-free wipe instead of a cotton ball. Cotton leaves behind tiny fibers that look like boulders once you paint over them.
- Common Mistake: Leaving old bits of polish in the “sidewalls” or corners. Use a wooden stick dipped in remover to detail those edges.
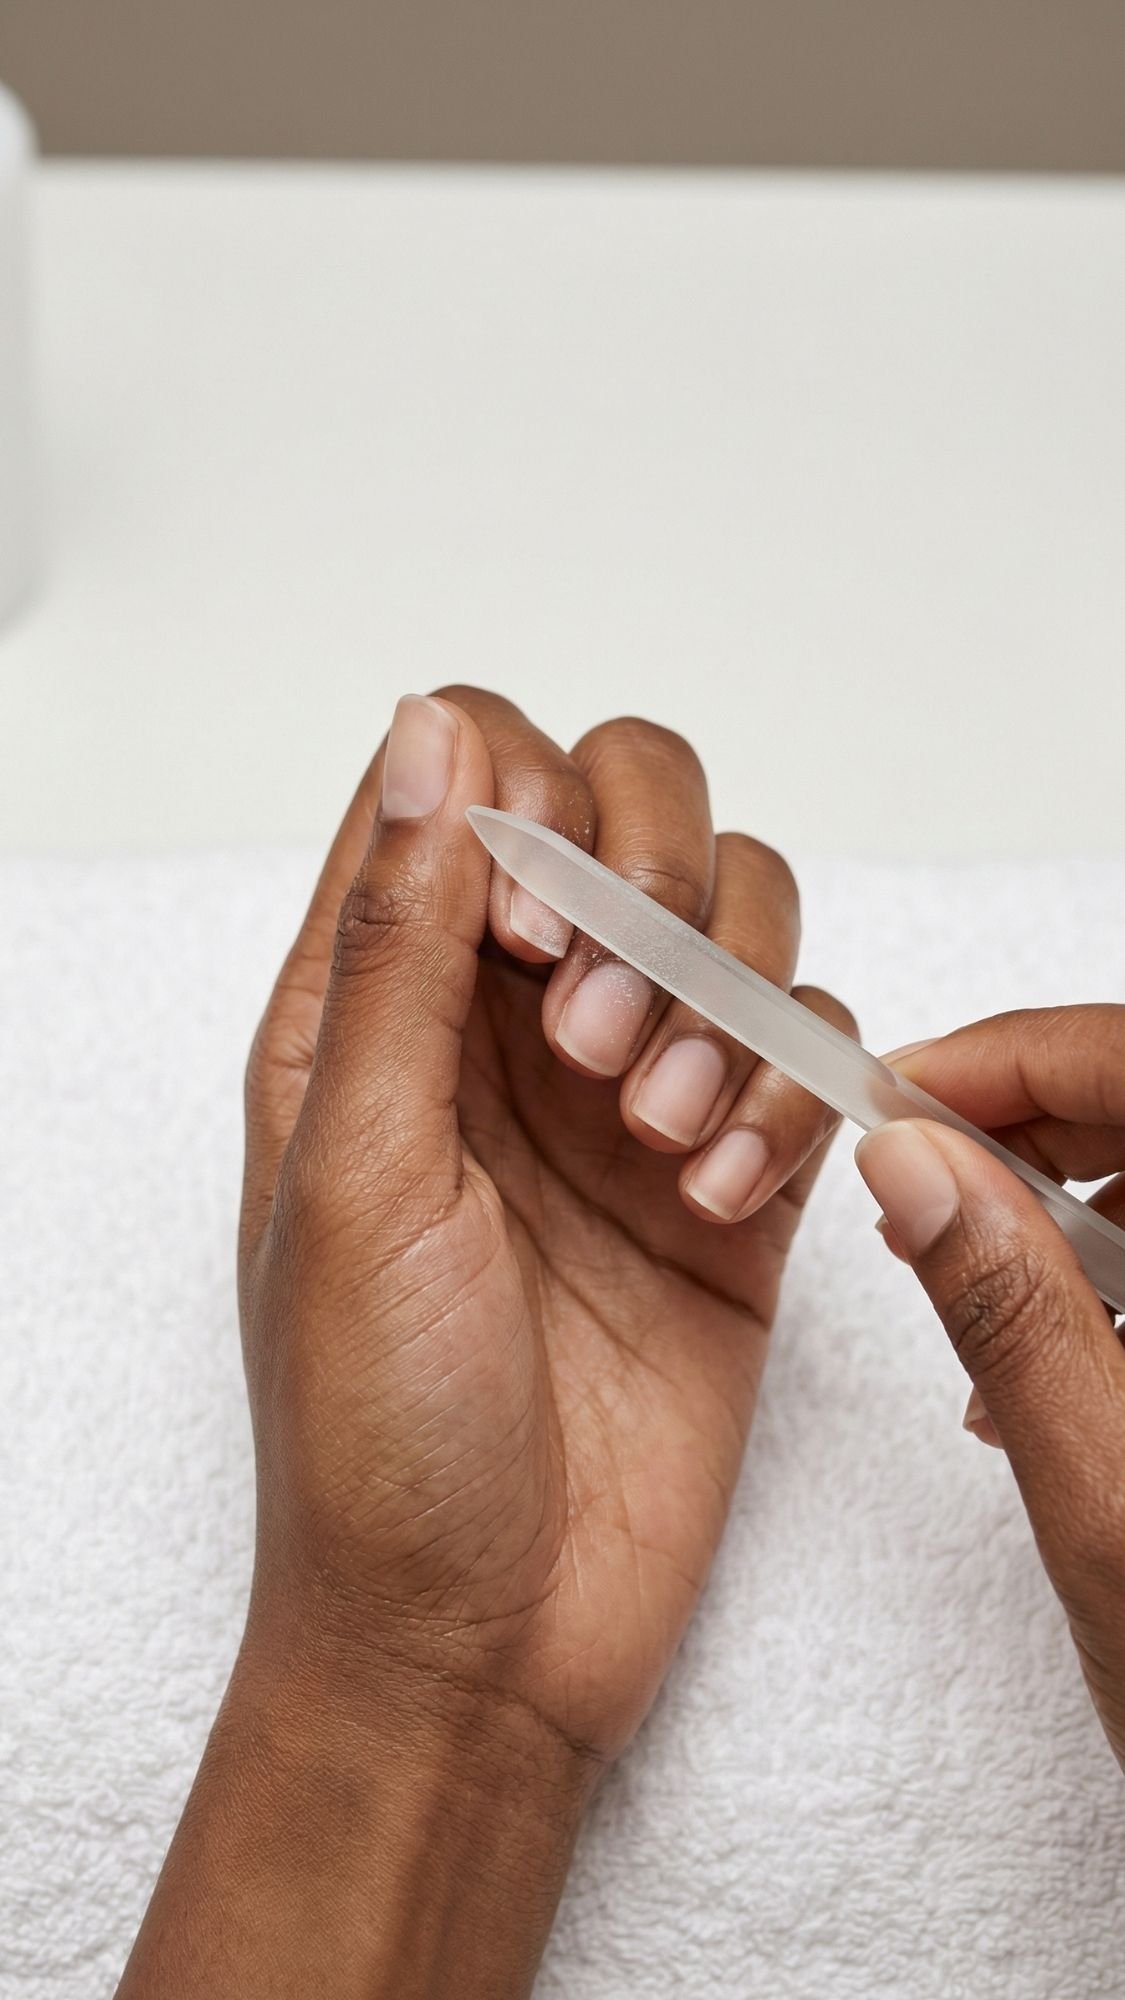
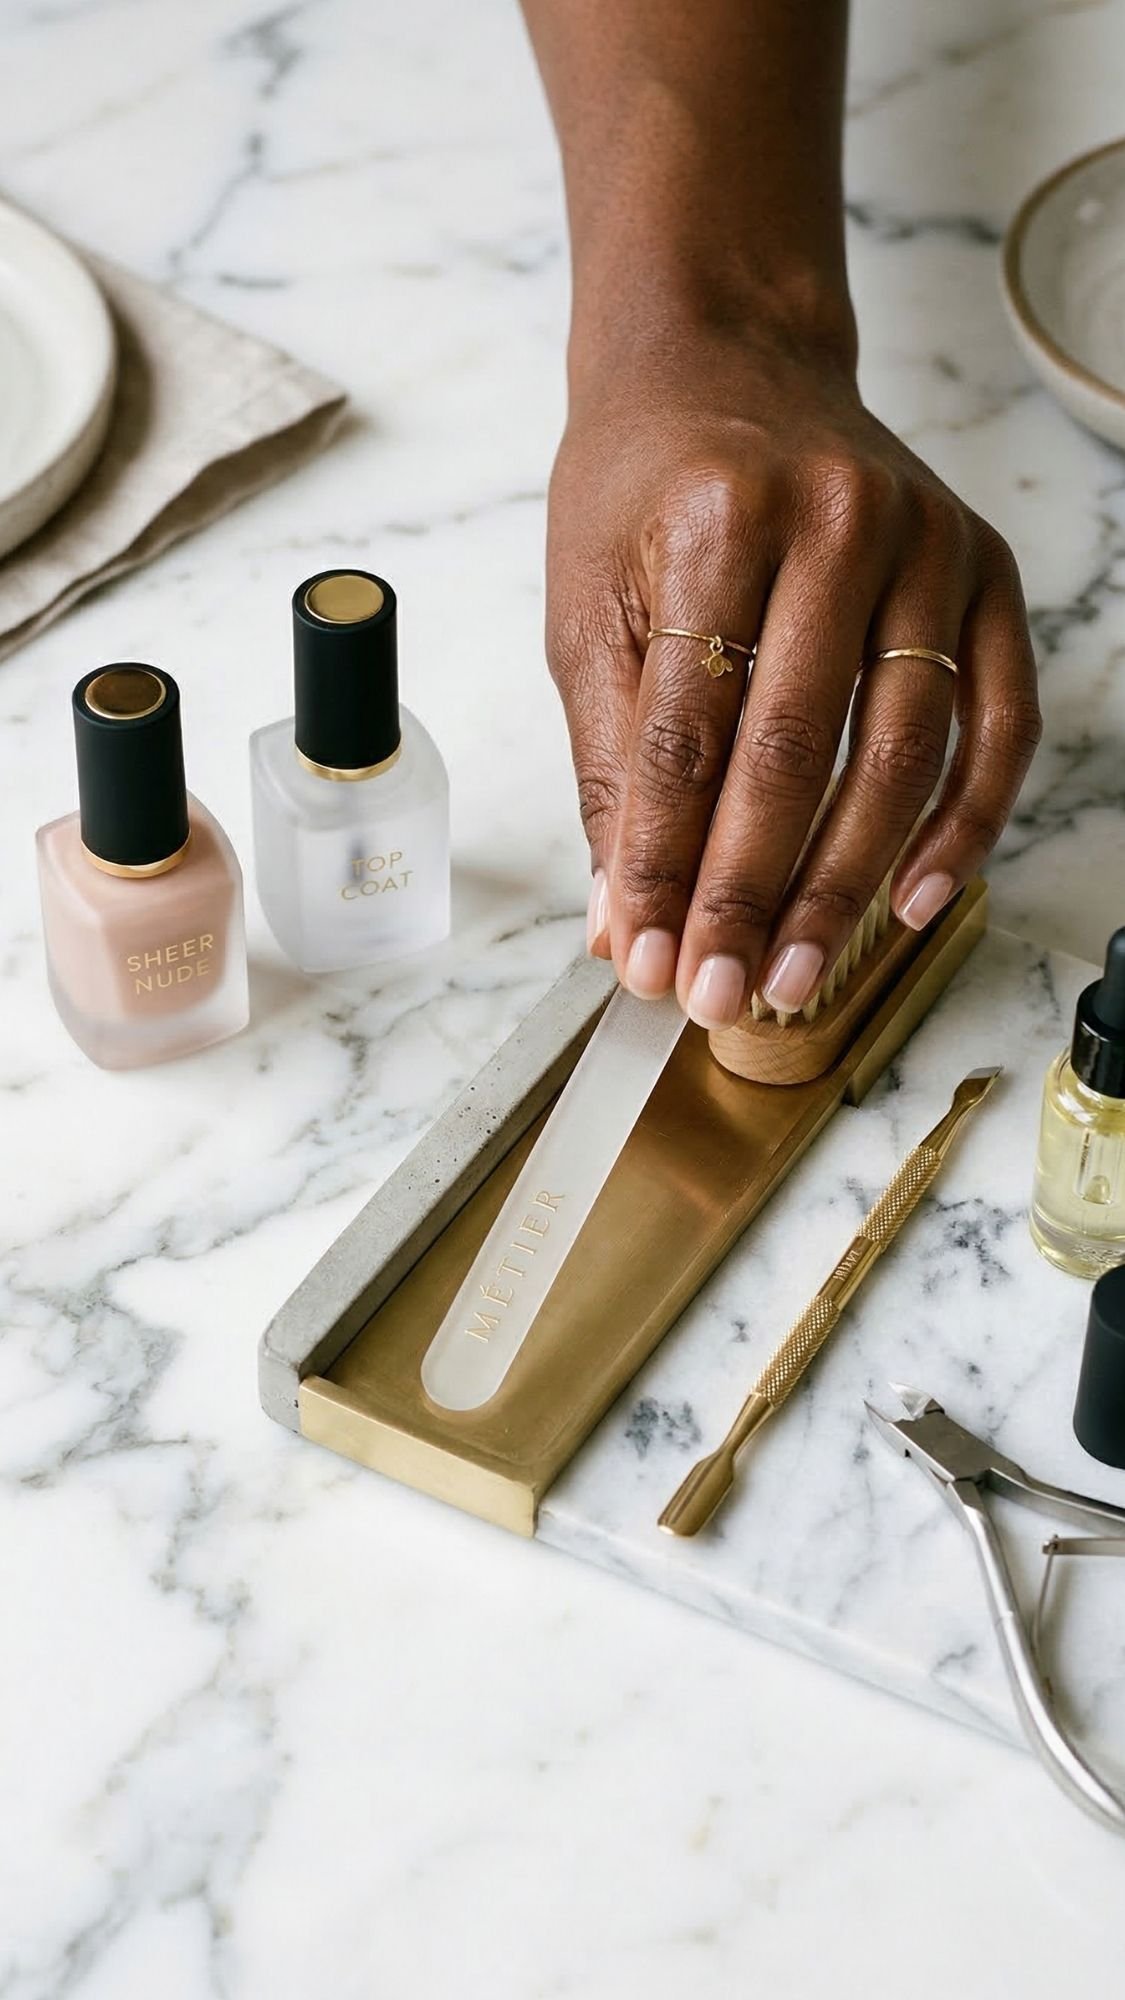
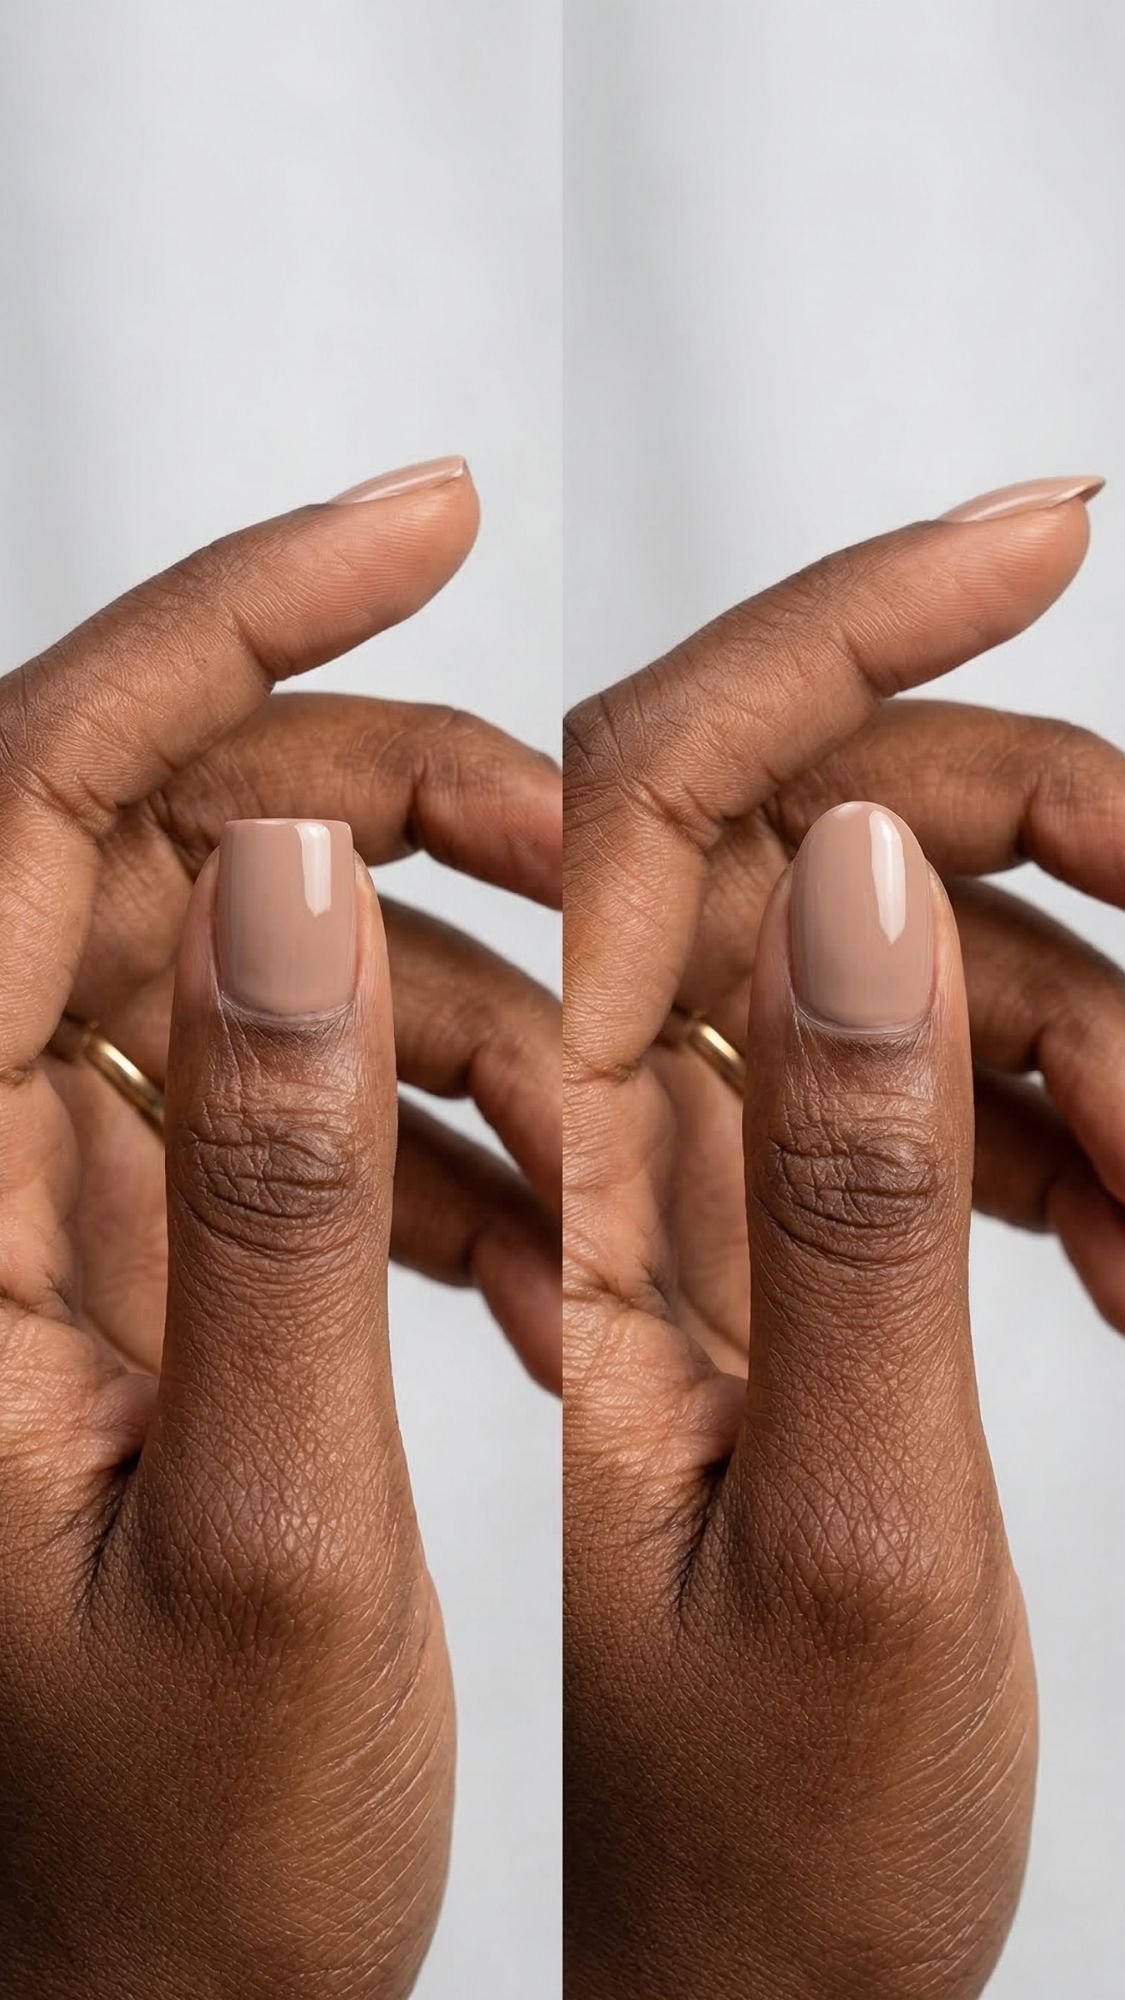
2. Shaping for Elongation
For short nails, the shape is everything. I always recommend a “Squoval” or a soft Oval. These shapes follow the natural curve of your cuticle, which makes your fingers look longer. I have noticed that sharp square edges on short nails can sometimes make the hands look a bit “boxed in.”
- Why it matters: It prevents snags and creates a cohesive, elegant silhouette.
- Pro Tip: Always file in one direction. Do not “saw” the file back and forth. Sawing creates heat and micro-shatters the nail layers, which leads to peeling tips.
- Common Mistake: Filing too deep into the corners. This weakens the nail and causes it to break more easily.
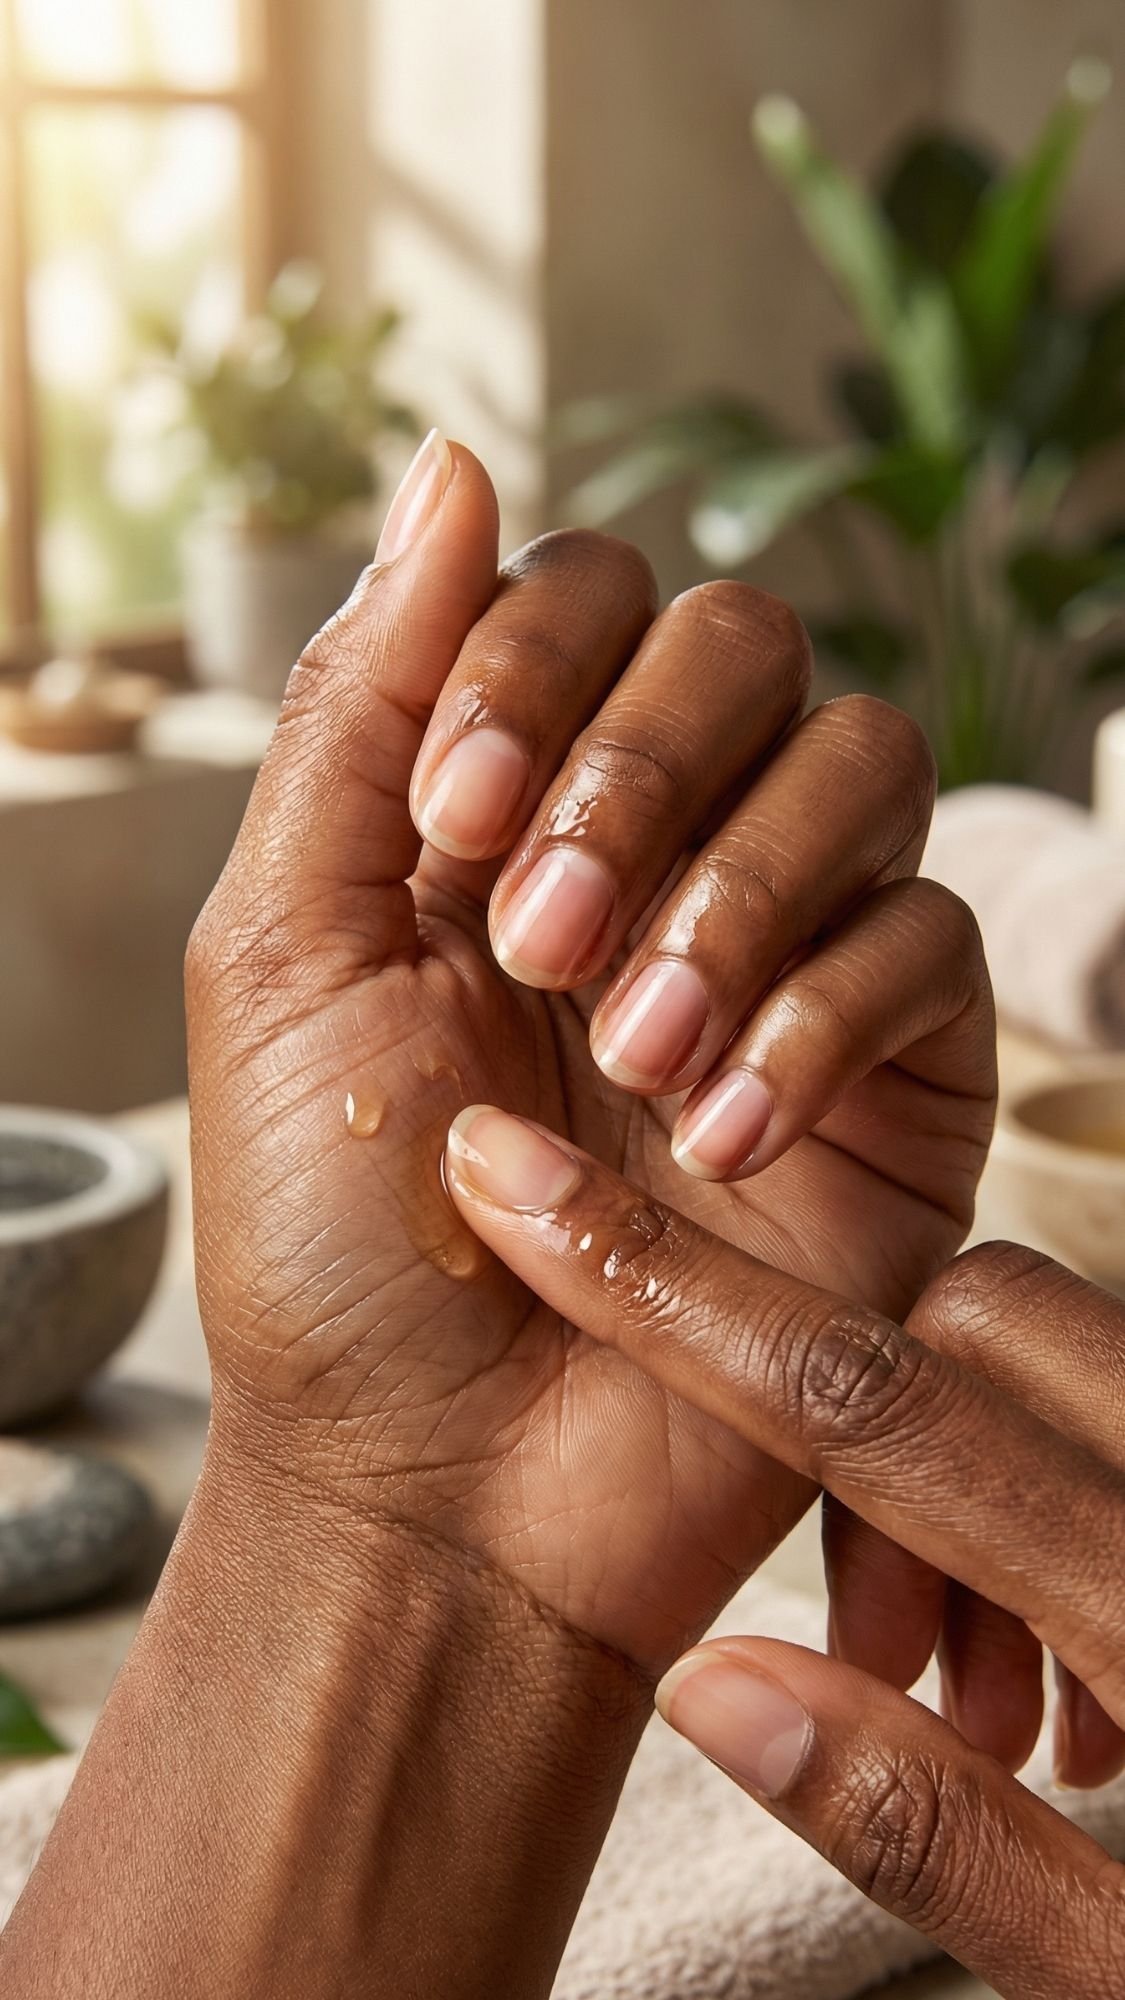
3. The Cuticle Care (No Cutting!)
Please, for the love of all things beauty, put down the nippers. I have seen too many infections and ragged edges from people “trimming” their live cuticles. Instead, use a high-quality cuticle remover liquid. It dissolves the dead skin on the nail plate in about 30 seconds.
- Why it matters: It clears the “eponychium” (the thin skin on the nail) so the polish can get as close to the base as possible without touching skin.
- Pro Tip: Use a glass or metal pusher to gently guide the skin back. If you do this regularly, your nail beds will actually start to look longer over time.
- Common Mistake: Thinking the cuticle is the thick fold of skin at the base. That is live tissue! Only the white, crusty stuff on the nail plate should be pushed and cleared.
4. Dehydrate and Sanitize
This is the “secret sauce” of every veteran nail tech. Right before you apply your base coat, you must dehydrate the nail plate. I use a lint-free wipe soaked in 91% isopropyl alcohol. Scrub the nail until it literally looks chalky and white.
- Why it matters: It removes any lingering oils from your cuticle remover or your natural skin. If there is oil, the polish will lift within 48 hours.
- Pro Tip: After you dehydrate, do not touch your nails with your fingers. You will just put oil right back on them.
- Common Mistake: Skipping this step because your nails “look clean.” Trust me, they aren’t.
You don’t need a massive kit to get high-end results, but you do need the right stuff. I have seen so many people try to do an elegant manicure with tools that look like they belong in a garage. If your file is gritty enough to sand down a door frame, we need to talk. Over the years, I have realized that the quality of your tools directly dictates how long your polish stays on your nails.
Tools + Products (The “Editor’s Kit”)
I personally prefer to invest in the “liquids” (base and top coats) and save on the colors. A cheap color looks expensive under a high-quality top coat, but a cheap top coat makes everything look like plastic. Here is exactly what is in my kit when I’m aiming for that effortless, short-nail look.
Must-Haves vs. Nice-to-Haves
Let’s get real about what you actually need. You can skip the fancy “nail soak” bowls and the electric drills.
- Must-Have: Glass Nail File. These are non-negotiable. They seal the edges of your nails as you file. Regular emery boards leave the nail “open” and prone to peeling.
- Must-Have: 91% Isopropyl Alcohol. You likely already have this in your medicine cabinet. It is the best dehydrator on the market.
- Must-Have: Ridge-Filling Base Coat. This is my secret weapon for short nails. It acts like a “blurring primer” for your nails, filling in any dips or lines.
- Must-Have: High-Gloss Top Coat. Look for one that says “plumping” or “gel-effect.”
- Nice-to-Have: Clean-up Brush. A small, angled brush from a makeup set works perfectly for fixing shaky-hand mistakes.
- Nice-to-Have: Quick-Dry Drops. If you are impatient like me, these are a life-saver. They set the surface of the polish in seconds.
Budget Alternatives That Actually Work
You don’t have to break the bank to look like a million bucks. FYI, some of my favorite “elegant” shades come from the drugstore.
- The File: You can find great glass files for under $10 online. Just make sure it feels smooth, not like sandpaper.
- The Polish: Brands like Essie or Orly have “long-wear” lines that perform just as well as luxury brands. I have noticed that their “sheer” formulas are particularly good for that clean-girl aesthetic.
- The Dehydrator: Skip the expensive “nail prep” sprays. Plain rubbing alcohol on a paper towel does the exact same thing for a fraction of the cost.
What to Look For (The Quality Checklist)
When you are shopping, don’t just grab the prettiest bottle. I always check for a few specific things.
- The Brush Shape: Look for a brush with a rounded, wide edge. It mimics the shape of your cuticle, which means you can get a perfect line in just one or two strokes.
- The Consistency: Give the bottle a quick tilt. If the polish moves like water, it is too thin and will be streaky. If it barely moves, it is old and will bubble. You want it to move like heavy cream.
- “Big 5” Free: This means the formula doesn’t have the nasties like formaldehyde or DBP. It is better for your nail health and usually smells less chemically.
Now that we have our canvas prepped and our kit ready, it is time for the part that actually makes people stop you in the grocery store to ask where you get your nails done. I have spent a decade testing every application method under the sun. What I have noticed is that people usually fail because they are in too much of a hurry. They glob on the polish like they are frosting a cake. If you want that effortless, high-end look, you have to treat this like a fine art project.
The “Perfect Set” Application (The Professional Way)
I prefer a high-quality regular polish or a “gel-effect” system for short nails. Why? Because it is easier to change when your mood shifts and it doesn’t require the harsh removal process that thins out your nail plate. The goal here is a finish so smooth it looks like colored glass.
1. The Anchor (Base Coat)
Do not even think about skipping the base coat. I use a ridge-filling formula because it acts like a “blurring primer.” It fills in those tiny vertical lines that come with age or dehydration. I apply a medium-thin layer and let it dry until it is no longer “tacky” to the touch.
- Technique: Start at the center of the nail, about a hair’s breadth away from the cuticle. Push the brush slightly toward the cuticle to create a perfect curve, then pull it toward the tip.
- Why it matters: It prevents staining from dark colors and gives the color something to “grip.”
- Pro Tip: If your nails are very thin, use two coats of base coat. It adds “girth” to the nail without looking bulky.
2. The Thin Coat Technique
The biggest mistake people make is trying to get full coverage in one layer. That is how you get bubbles and streaks. I always do two or three paper-thin coats. If the first coat looks like a patchy mess, you are doing it right.
- Amount: Wipe one side of the brush completely clean on the neck of the bottle. You should only have a small bead of polish on one side.
- Placement: Use three strokes. One down the center, and one on each side. Do not go over the same spot twice while it is wet.
- Wait Time: Give it at least two minutes between layers. If you apply wet polish over wet polish, it will never truly set.
3. Capping the Free Edge
This is the “secret” to making a manicure last fourteen days without a lamp. On the very first layer of color and the final layer of top coat, I run the brush along the very edge of the nail tip. This “wraps” the polish around the tip of the nail.
- Why it matters: It prevents the polish from “shrinking” away from the tip as it dries. It also acts as a bumper against your keyboard.
- Pro Tip: Even if your nails are tiny, you can still cap them. Use a tiny bit of polish and a very light touch.
- Common Mistake: Capping with too much polish. This creates a “bead” at the tip that looks thick and clunky.
4. The High-Gloss Seal
The top coat is your protection. I like a “plumping” top coat that mimics the thickness of a salon gel. I apply a slightly thicker layer than the color coats. I let the polish “float” off the brush onto the nail so I don’t create “drag” marks in the color.
- Fixing Mistakes: If you got a little messy, dip your angled clean-up brush into acetone. Trace the edge of your polish to create a crisp, professional “gap” between the color and your skin.
- Drying Strategy: Give yourself 20 minutes of “hand-free” time. IMO, this is the perfect time to catch up on a podcast or a show. 🙂
Sometimes, we just don’t have the patience for “dry time,” or maybe you have a special event tonight and your natural nails aren’t cooperating. I have been around for a long time (don’t do me boo not that long though), and I’ve seen the “Press-On Renaissance” firsthand. Forget those plastic-looking claws from the 90s (not to much, watch your mouth baby this was my era and nothing beats the fashion and vibes). The new generation of short press-ons is so good that even my fellow nail enthusiasts can’t tell they aren’t my real nails.
The “Instant Chic” Press-On Method
If you want the look of a $100 gel manicure in fifteen minutes, this is your route. However, the mistake I see most people make is just sticking them on and hoping for the best. If you want them to stay on for two weeks—and not “pop off” in the middle of a dinner date—you have to follow the “Pro” adhesion rules.
1. Sizing Strategy (The Fit is Everything)
Before you touch the glue, lay out all ten nails. I have noticed that if a press-on is even a hair too wide, it will lift within 24 hours because it’s resting on your skin, not the nail.
- The Rule: If you are between sizes, always go smaller. A slightly smaller nail looks more natural and stays on longer.
- Pro Tip: If the sides don’t fit your natural curve perfectly, use your glass file to “custom fit” the base of the press-on nail before applying.
2. Adhesion Options: Glue vs. Tabs
I get asked this all the time: “Which one is better?” It depends on your lifestyle.
- Glue Tabs: These are like double-sided tape. They are perfect for a weekend event or a photoshoot. They last about 2 to 3 days and are much gentler on your natural nails.
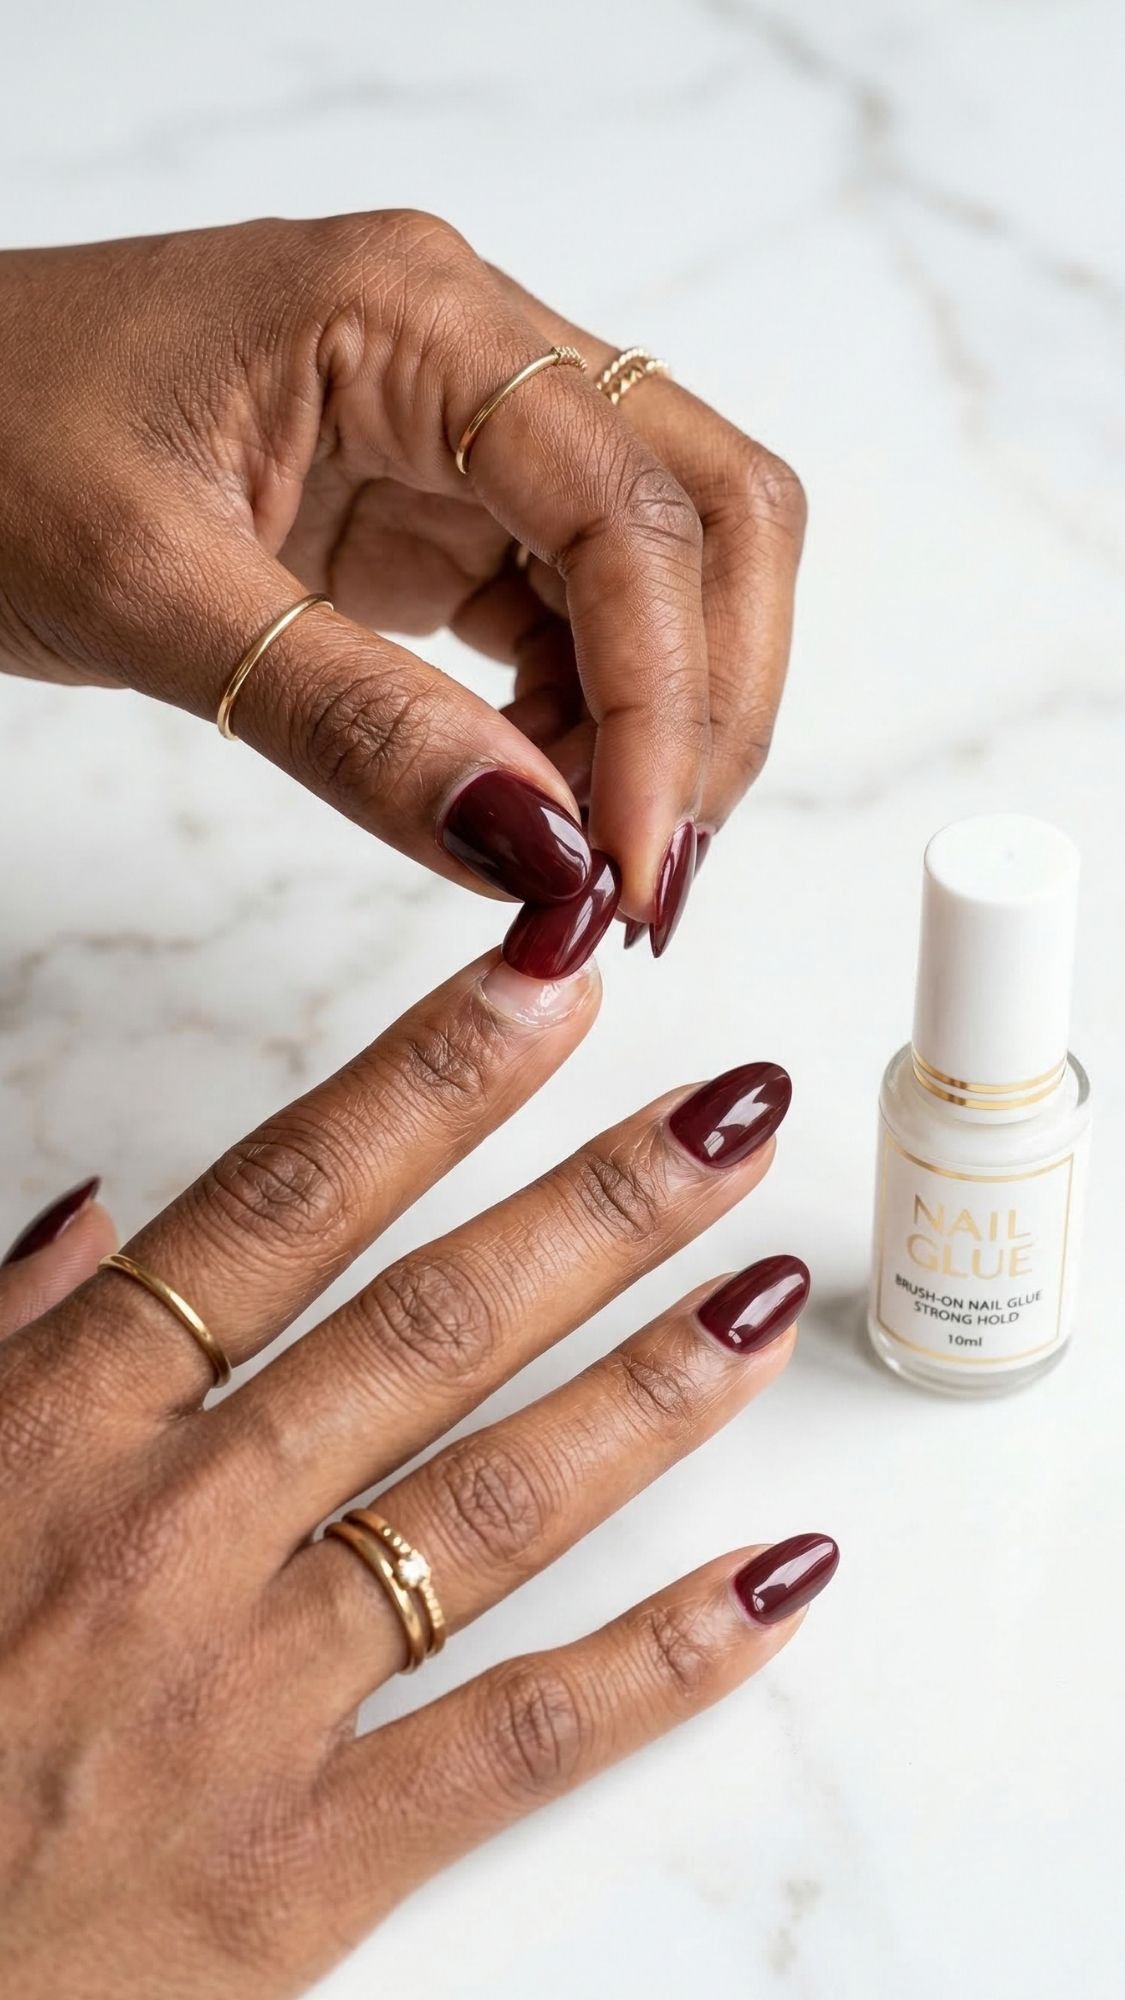
- Liquid Glue: This is for the 14-day wear. Look for a “brush-on” glue rather than a squeeze bottle. It allows you to apply a thin, even layer without the mess.
3. The “Airless” Application
This is where the magic happens. I apply a thin layer of glue to my natural nail and a small drop to the back of the press-on. When you apply the nail, start at a 45-degree angle right at the cuticle line and “roll” it down toward the tip.
- Why it matters: This “rolling” motion pushes out any air bubbles. Air bubbles are the #1 cause of bacteria growth and premature lifting.
- The Press: Hold each nail down with firm pressure for a full 30 seconds. Do not let go early!
- Common Mistake: Washing your hands or applying cuticle oil immediately after. I wait at least two hours for the glue to fully “set” and bond.
4. The Edge Seal
After all the nails are on, I take my glass file one last time and lightly file the very tip of the press-ons. Most factory-made nails have a tiny “tab” or plastic burr at the tip from the manufacturing mold.
- Pro Tip: Filing that tiny tip smooth makes them feel like real nails and prevents them from catching on your hair or sweaters.
Alright, let’s get to the main event. Here are the 20 looks that are making me want to keep my nails short forever. I’ve curated these to focus on what I call “The Expensive Hand” aesthetic—designs that look like you have a standing appointment at a boutique salon in Paris, even if you’re just doing this at your kitchen table.
20 Short Nails That Look Effortlessly Elegant
1. The “Soap” Nail (The Ultimate Clean Aesthetic)
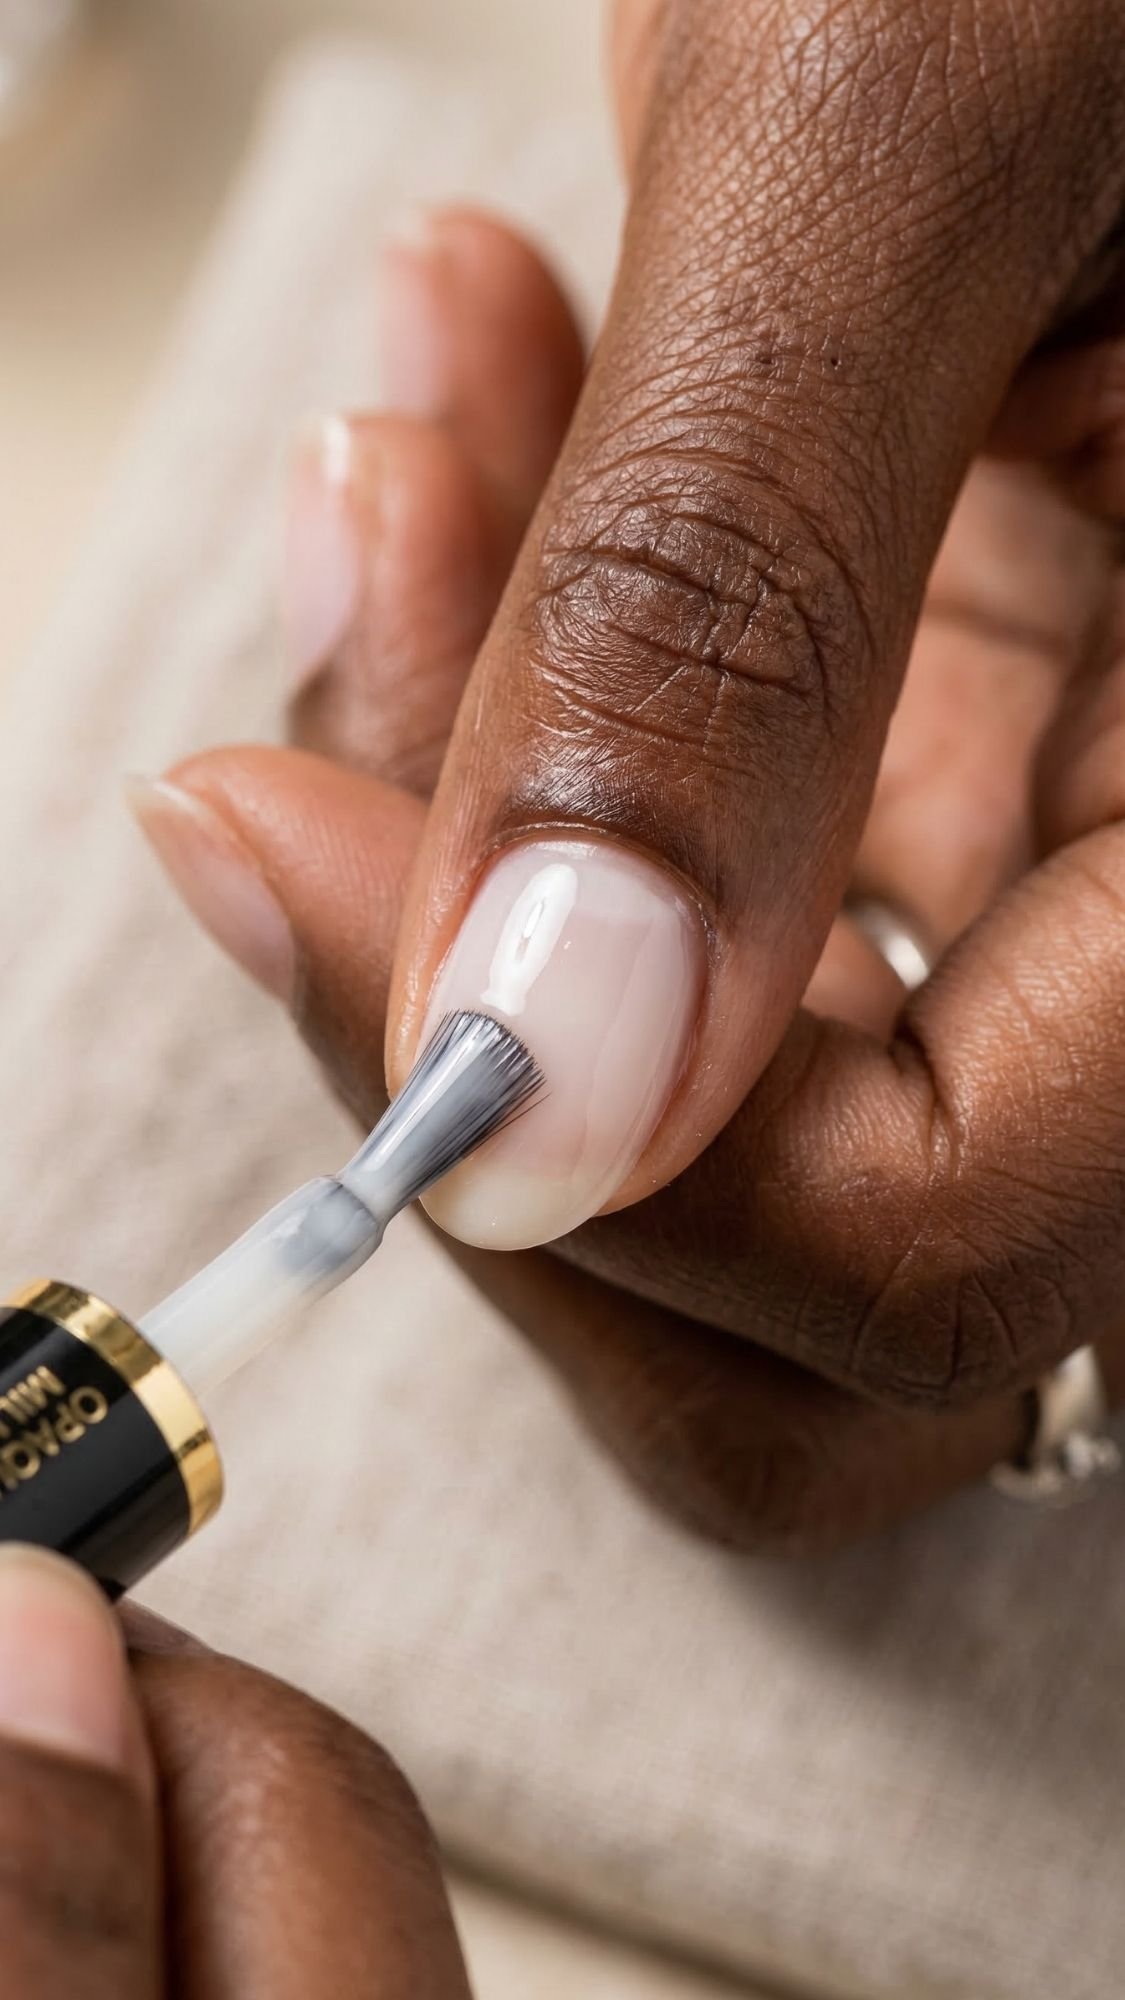
This is the “no-makeup makeup” of the nail world. It looks like your nails but better, with a high-gloss finish that mimics the sheen of a fresh bar of soap. What I’ve noticed is that this look works best when you use a polish with a slight lavender undertone to cancel out any natural yellowing on the nail plate. The texture should feel thin and watery, absorbing into the nail for a translucent glow rather than sitting on top like a paint.
- Tools Needed: A sheer, translucent pink or milky polish and a ultra-high-shine top coat.
- Step-by-Step: Apply one thin coat of ridge filler to smooth the canvas. Follow with two very quick, light coats of sheer pink. Seal with a “wet look” top coat.
- Mistake + Fix: Applying too many coats in an attempt to get “more color.” If it becomes opaque, it’s no longer a soap nail. Stick to two sheer layers max.

2. The Micro-French (The “Invisible” Tip)
Forget those thick, 90s-style blocky French tips. The micro-french uses a line so thin you almost miss it. It is incredibly chic on short nails because it doesn’t “cut off” the visual length of your nail bed like a thick line does. It works best on a “squoval” or soft square shape.
- Tools Needed: A long-haired striping brush (do not use the bottle brush!) and a crisp, opaque white polish.
- Step-by-Step: Paint your base a “rich girl beige.” Once dry, dip just the tip of your striping brush in white and draw a razor-thin hairline curve along the very free edge.
- Mistake + Fix: Wobbly lines due to shaky hands. Fix this by “resting” your pinky finger on the table to stabilize your working hand while you draw the line.

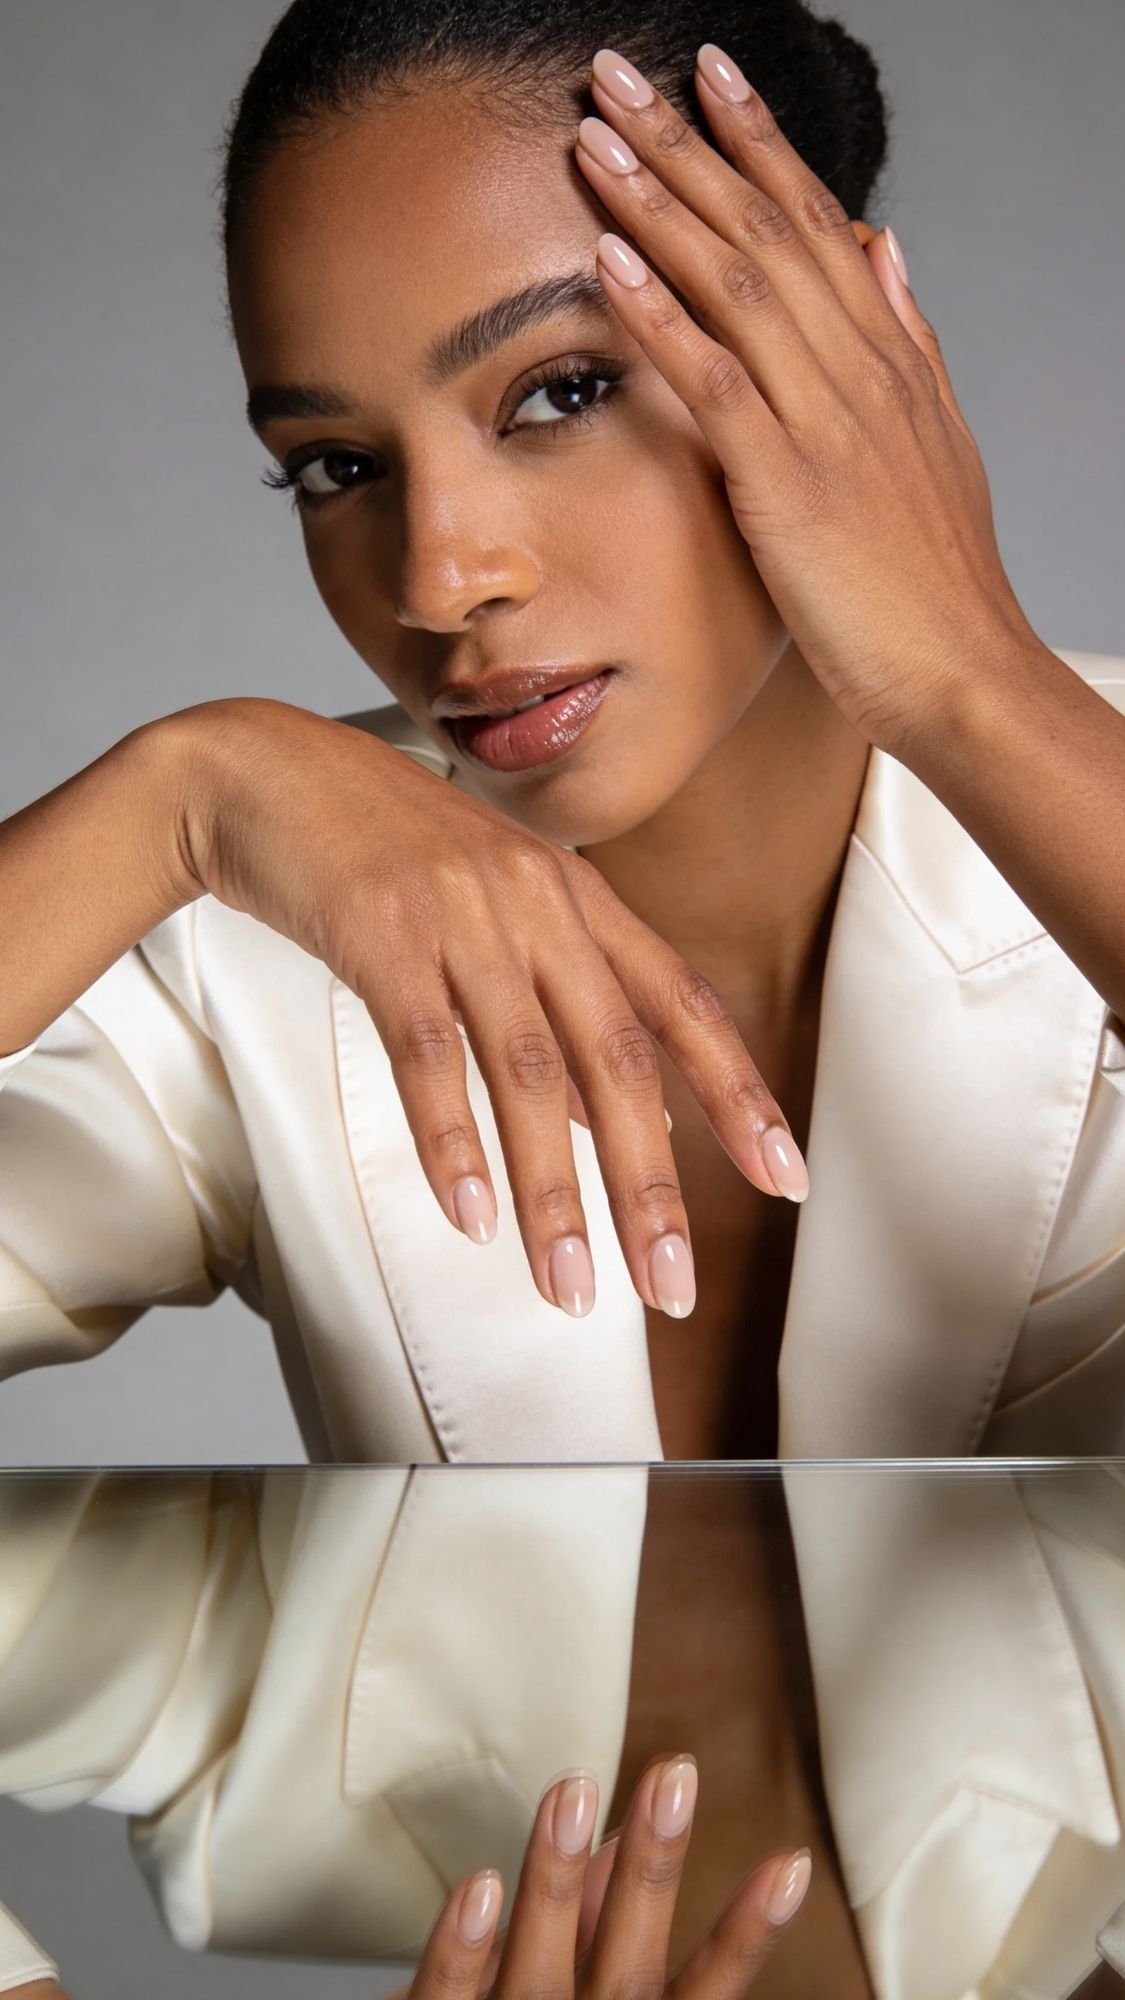
3. Rich Girl Beige (The Quiet Luxury Staple)
This is the ultimate neutral that perfectly matches your skin’s undertone. When I wear this, people assume I just have naturally perfect hands; they don’t immediately notice “the polish.” The trick here is finding a “full coverage” cream formula that doesn’t look chalky or flat.
- Tools Needed: A high-pigment cream polish in a nude shade matched to your undertone.
- Step-by-Step: Apply two even, self-leveling coats. Use a clean-up brush dipped in acetone to ensure the “gap” between the polish and your cuticle is perfectly round and crisp.
- Mistake + Fix: Choosing a shade that is too light for your skin tone. If it looks like “white-out,” it’s too stark. Go half a shade darker than your natural skin for that expensive, “melted” look.

4. Milky Matcha (The Sophisticated Pop)
Pastels can sometimes look a bit juvenile on short nails, but a “milky” matcha green feels grounded and sophisticated. I love how this looks against deeper skin tones—it’s a refreshing pop of color that feels modern without being loud.
- Tools Needed: A muted sage or matcha green polish and a sheer white polish.
- Step-by-Step: To get that “milky” look without streaks, mix one drop of green with two drops of sheer white on a piece of foil. Apply in thin layers to get that semi-sheer “jade” depth.
- Mistake + Fix: Streaky application. Green and pastel pigments are notoriously heavy and drag easily. Use a “floating” brush technique where you don’t let the bristles press down hard onto the nail plate.
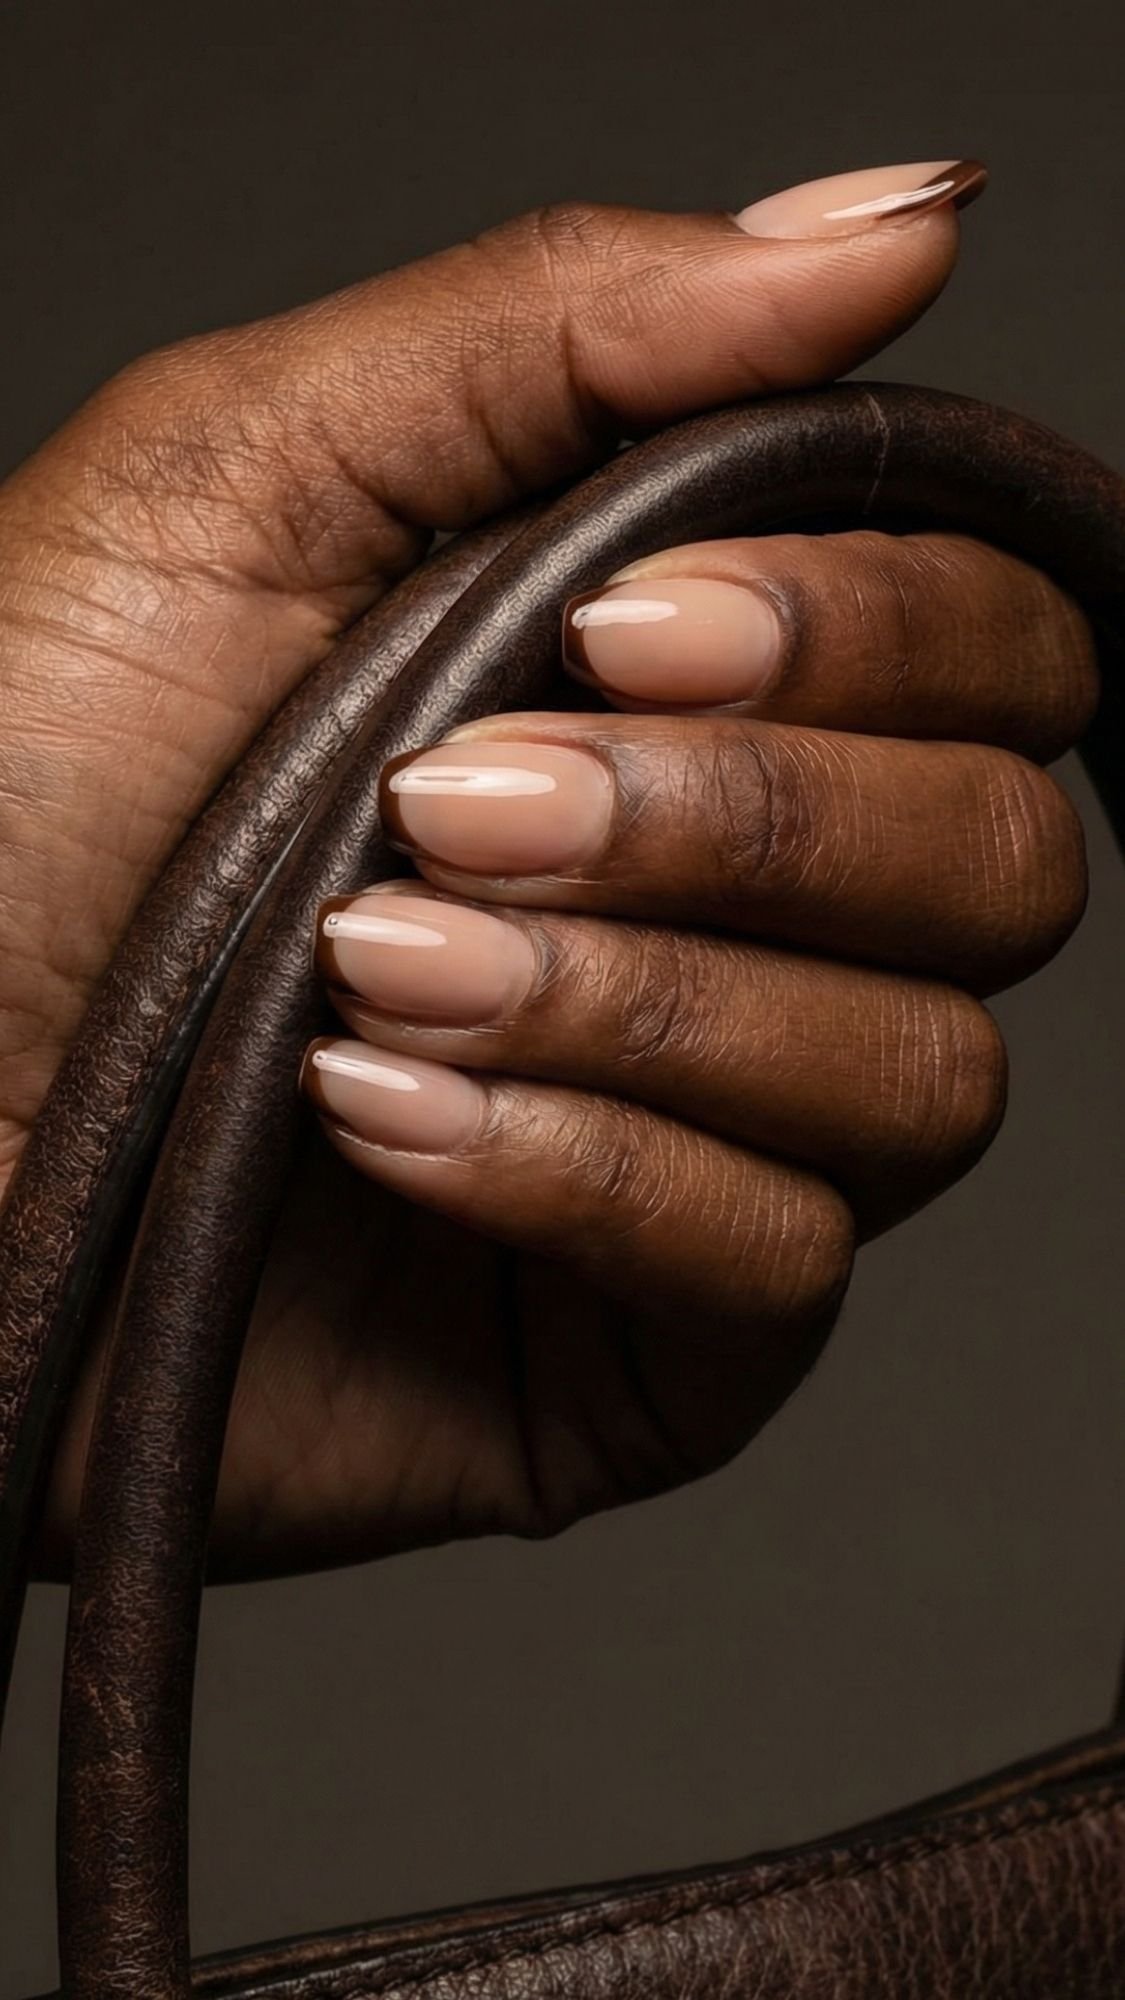
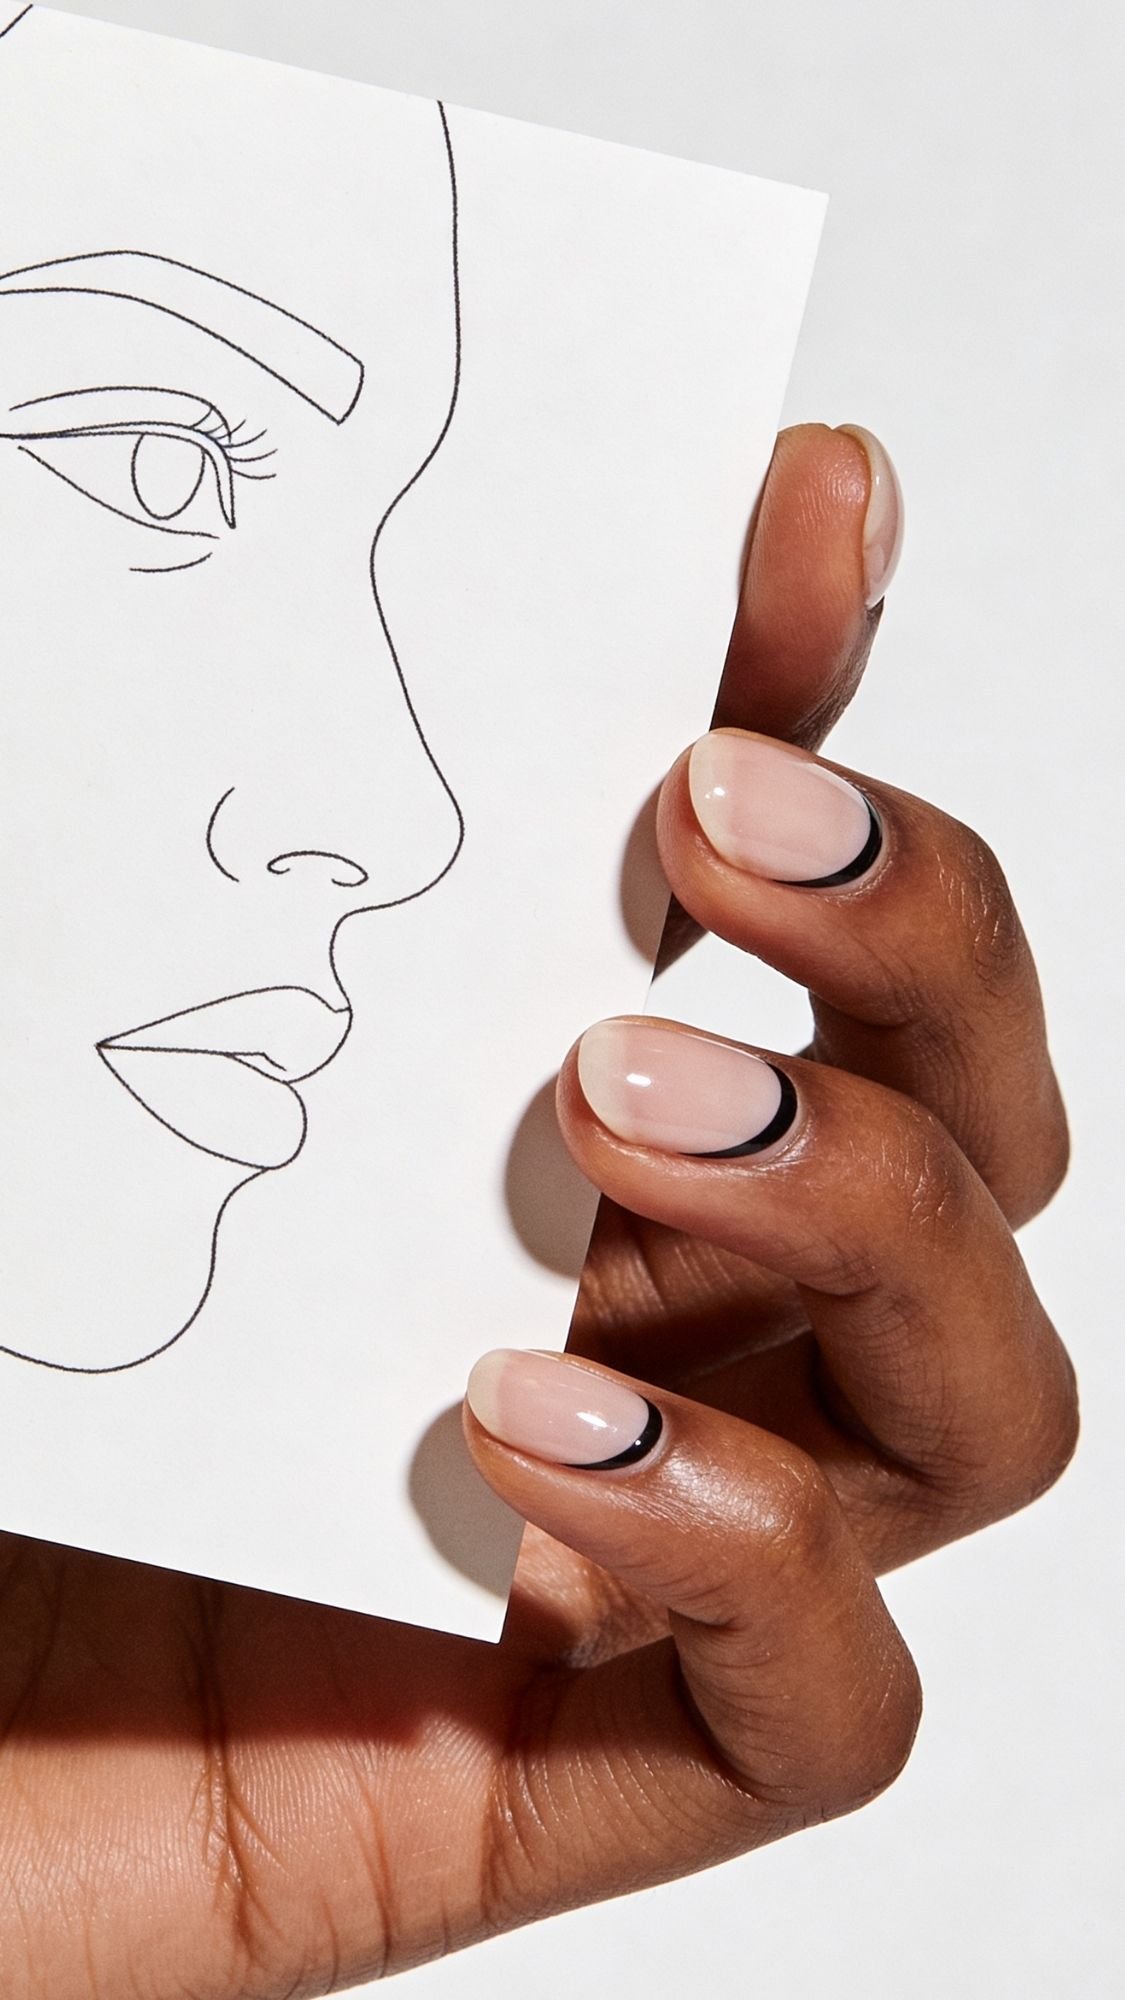
5. The Espresso Micro-Tip (Modern Contrast)
Instead of a white tip, we are using a deep espresso brown. It provides a “frame” for the nail that feels much more modern and edgier than a traditional French. It is my absolute go-to for an elegant autumn or winter look.
- Tools Needed: A sheer nude base and a deep, almost-black chocolate brown polish.
- Step-by-Step: Apply your sheer nude base and let it dry completely. Use a dotting tool or a very thin brush to trace the free edge with the brown.
- Mistake + Fix: The tip looking too thick or clunky. Keep the brown line under 1mm thick for the most elegant, high-fashion result.
We are picking up some serious momentum. Let’s get into the next five looks. These are the ones where we start playing with light and texture. I’ve noticed that for short nails, how the light hits the surface is just as important as the color itself.
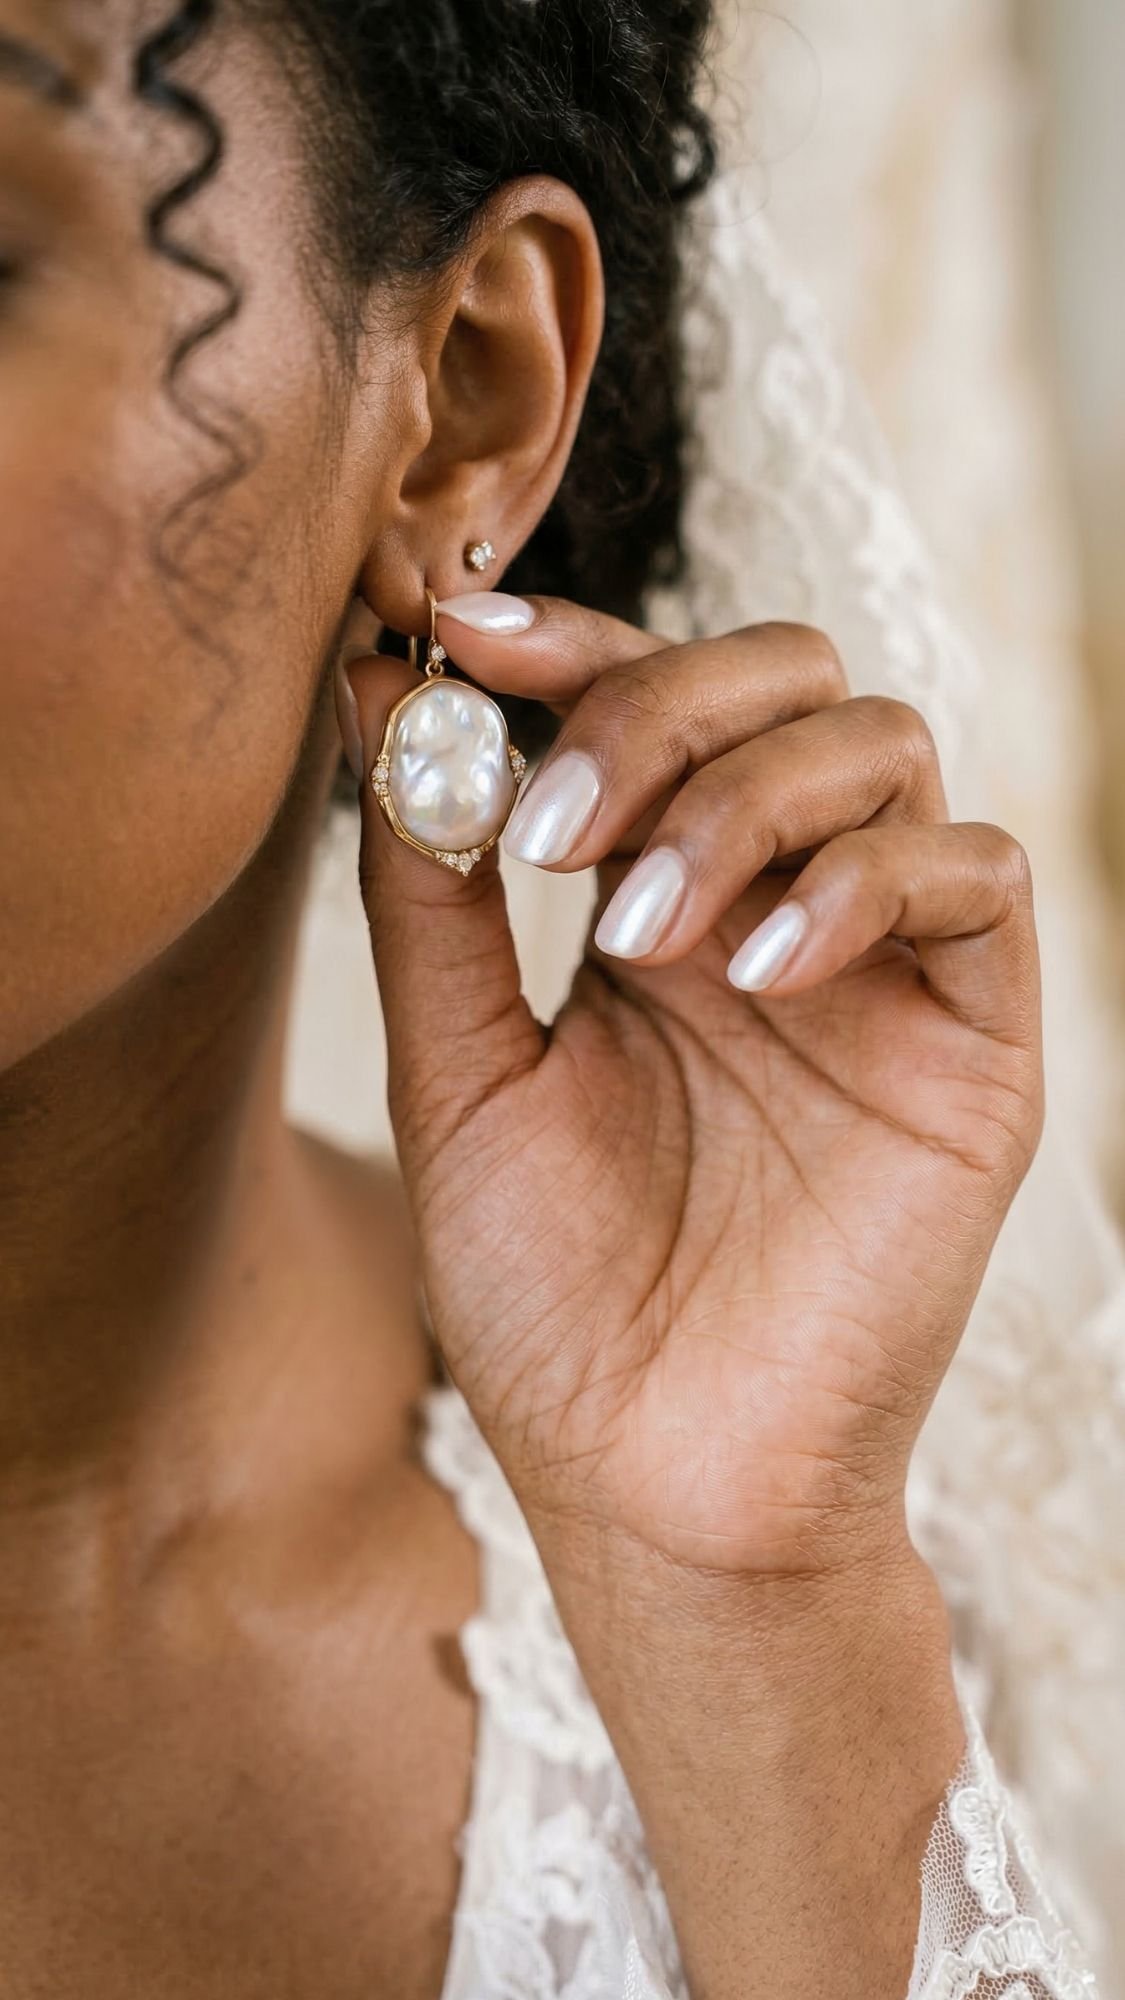
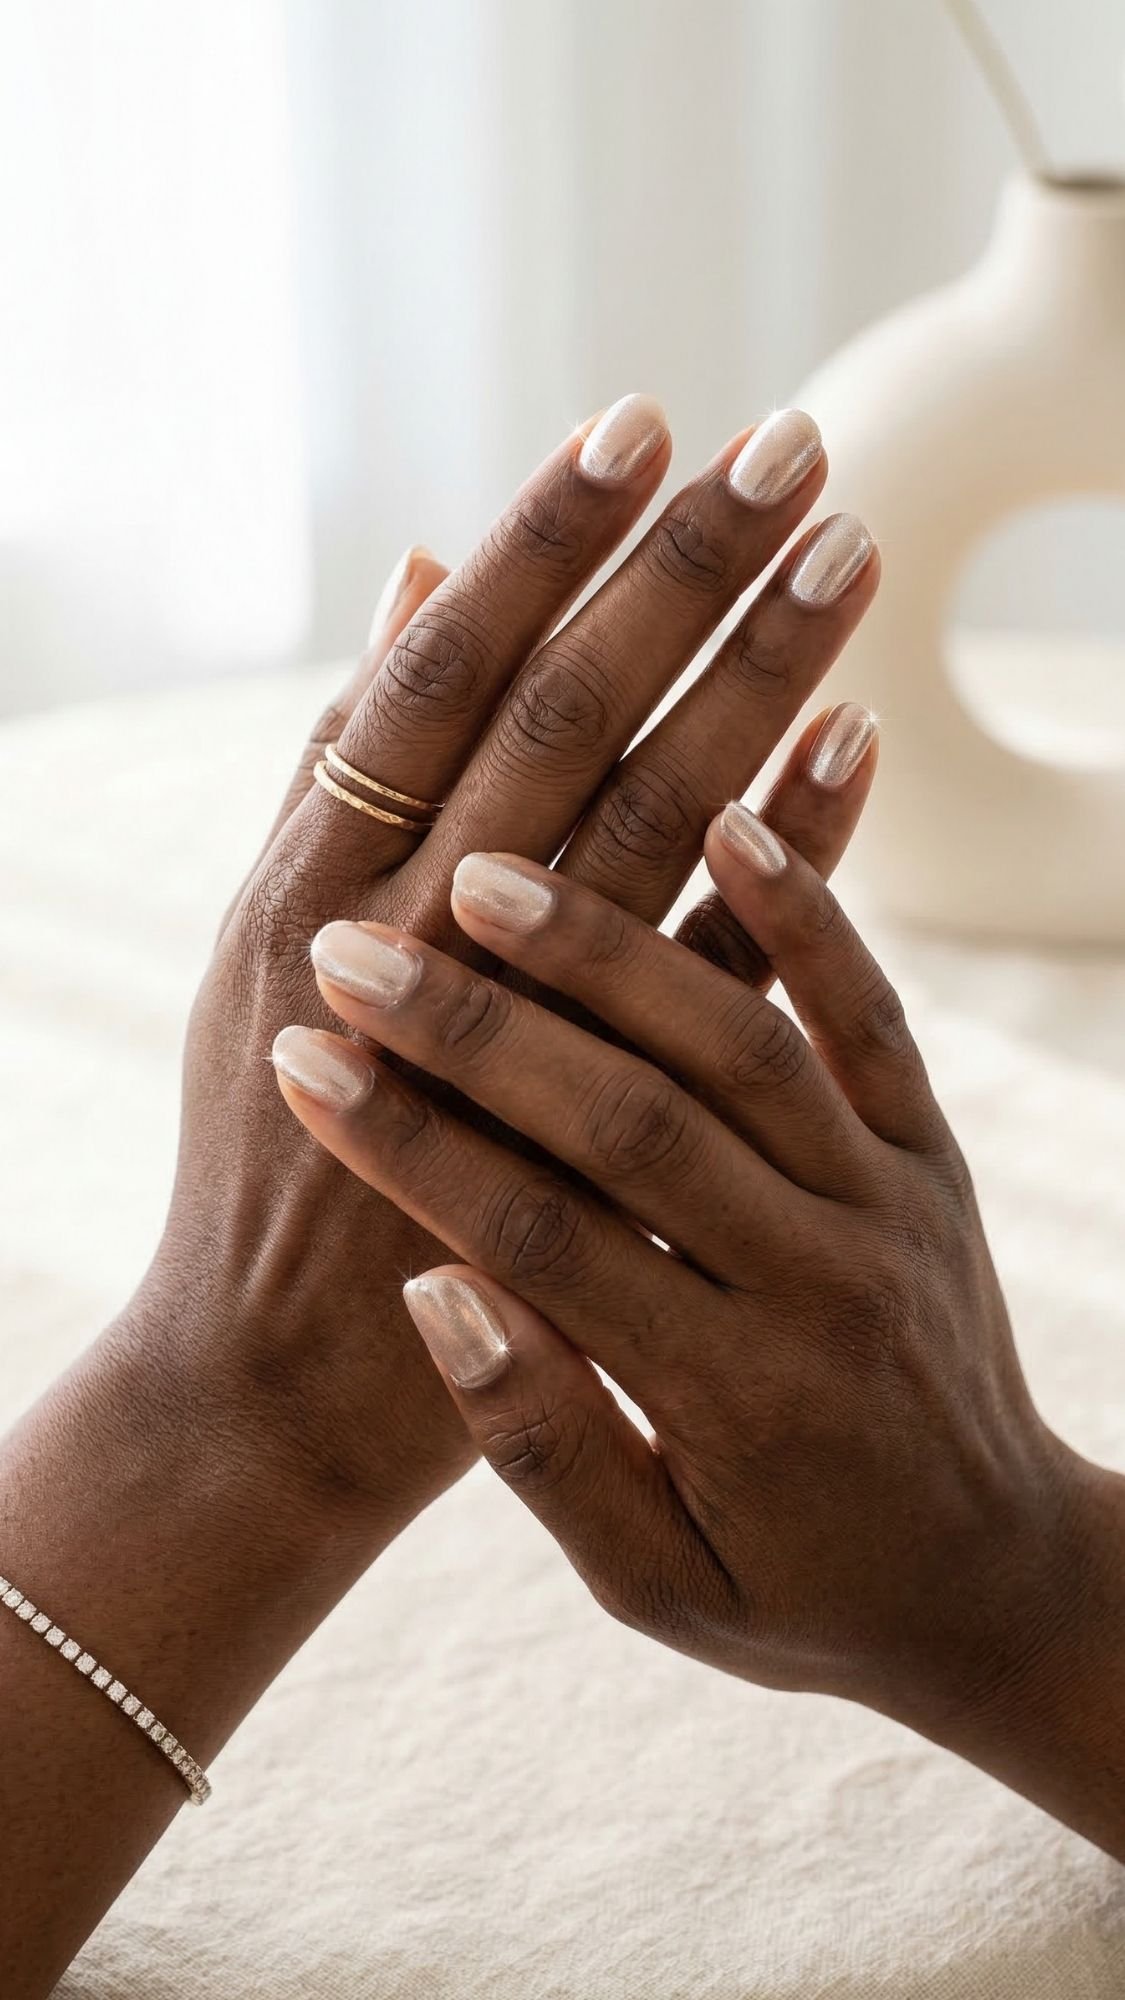
6. Glazed Pearl (The “Inside of a Shell” Glow)
The “Glazed Donut” trend has finally grown up. We are moving away from that heavy, metallic chrome look and toward something much softer. Think of the iridescent shimmer on the inside of an oyster shell. It is a soft, multi-dimensional glow that catches the light without looking like a disco ball.
- Tools Needed: A sheer white base and a “pearl essence” polish or a very fine pearl chrome powder.
- Step-by-Step: Apply one coat of sheer white. While it is still slightly tacky, use a makeup sponge to buff in a tiny amount of pearl powder. Seal with a high-gloss top coat to lock in the “wet” look.
- Mistake + Fix: Using too much powder. If you apply it too thickly, you lose the elegance and it starts to look like cheap silver. Use a light “dusting” motion instead.
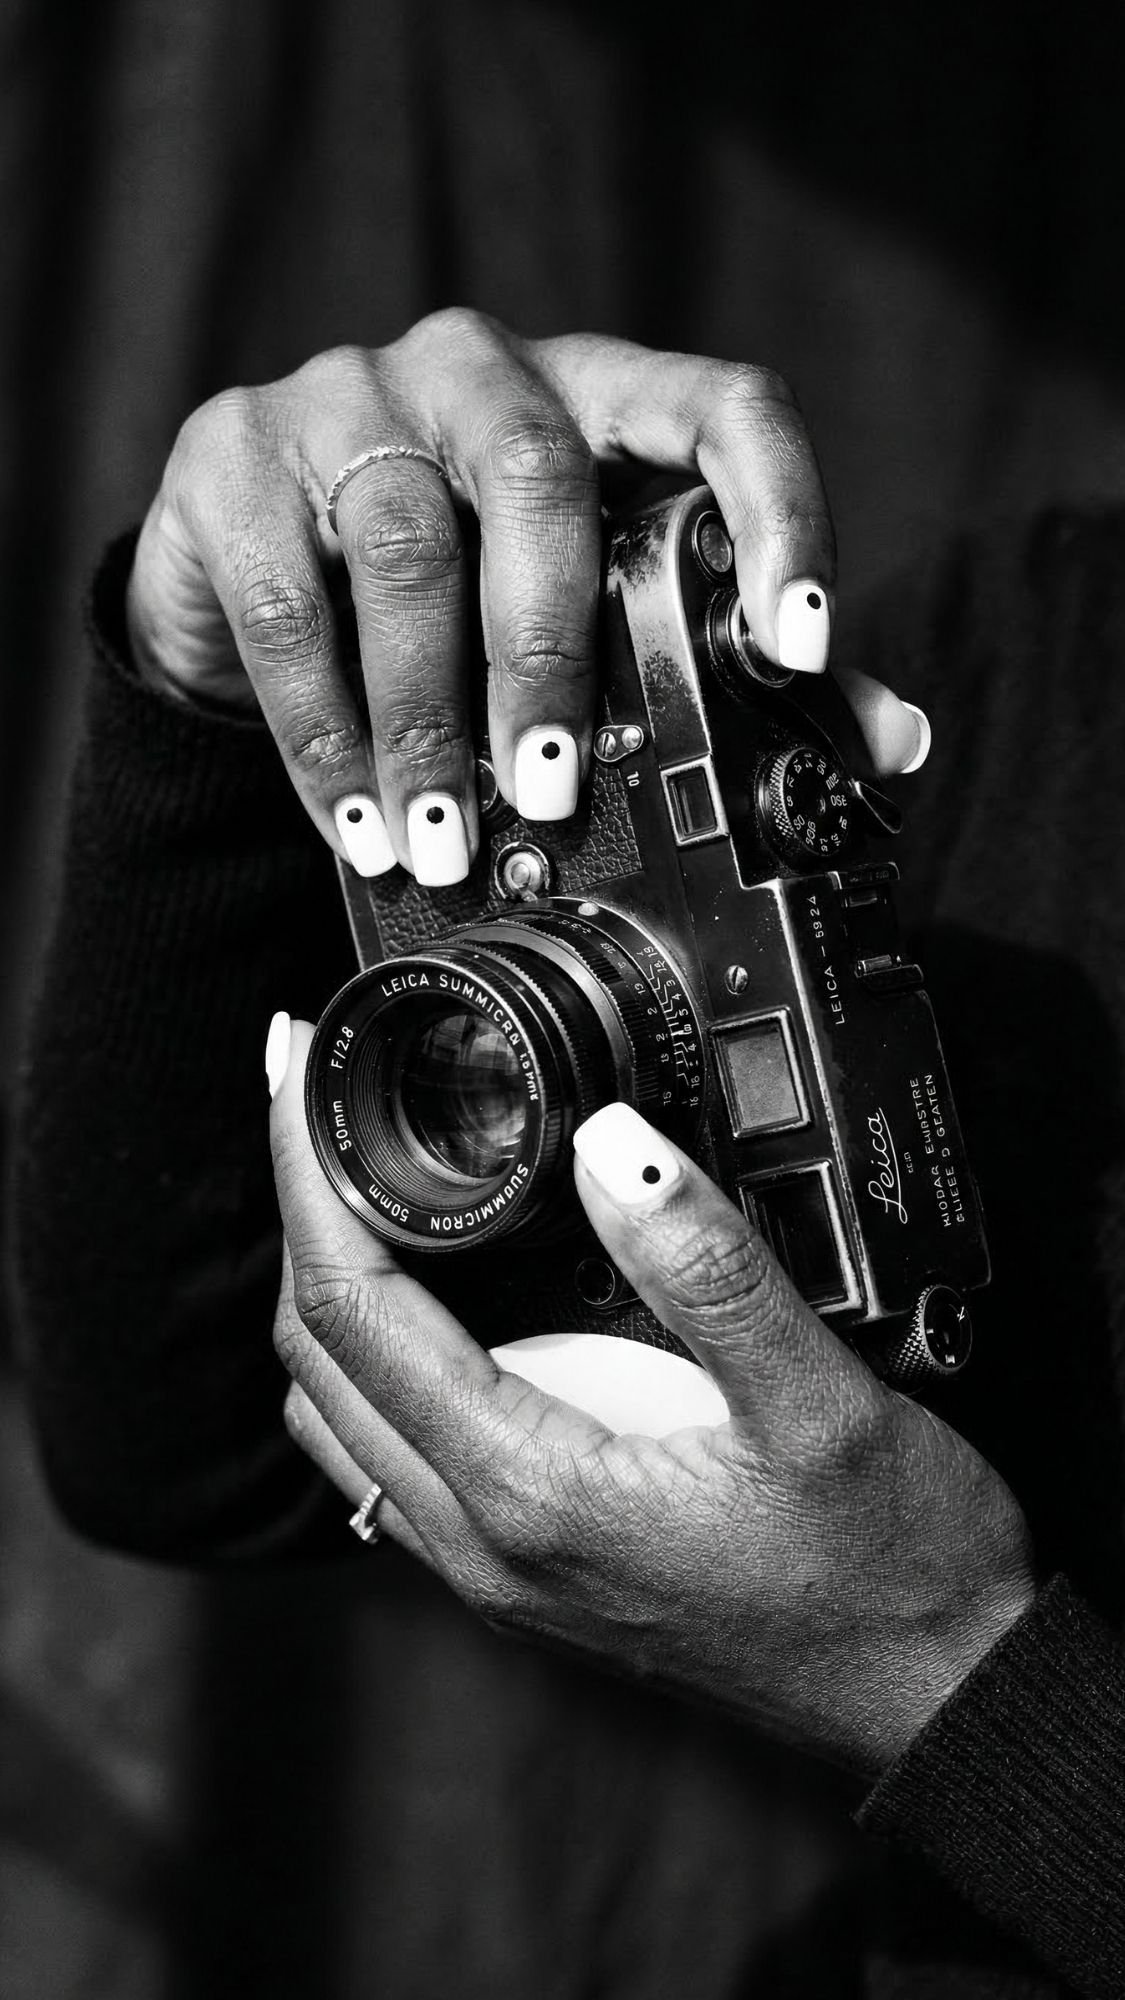
7. Tuxedo Accents (The Minimalist Masterclass)
Black and white is a combination that will never let you down. For short nails, I love a “negative space” tuxedo look. It is bold, artistic, and incredibly clean. I usually do a single black dot at the base of a stark white nail, or a thin vertical line down the center.
- Tools Needed: Opaque black and white polishes, plus a fine-point dotting tool.
- Step-by-Step: Paint the nail with two coats of white. Once dry, place one small, perfect dot of black at the center of the cuticle line.
- Mistake + Fix: Smudging the dot. Black polish takes a long time to dry. Wait at least five minutes before you even think about applying your top coat.
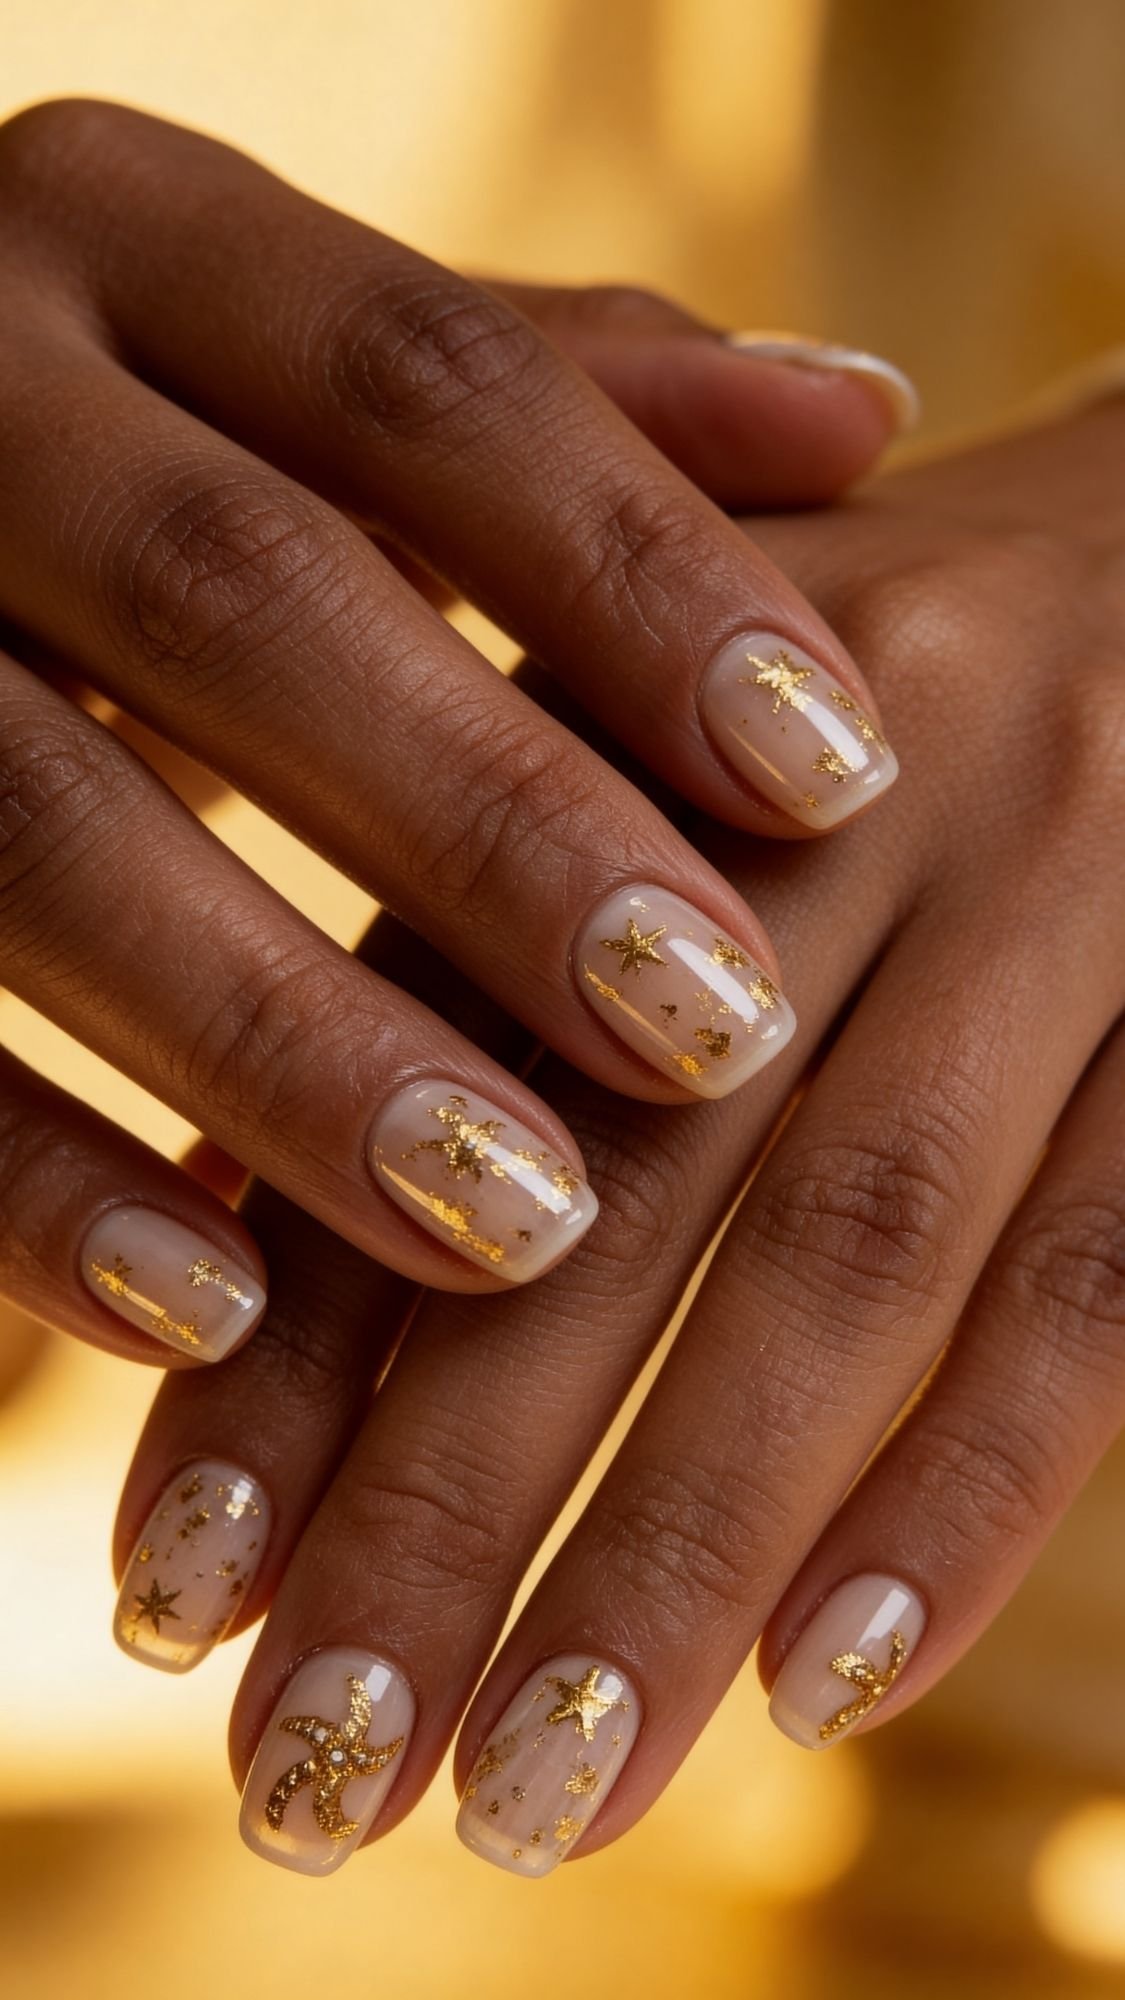
8. Floating Gold Foil (The “Finger Jewelry” Look)
If you want to look like you spent $150 at a boutique salon in five minutes, this is your secret weapon. Adding organic flecks of gold foil to a “naked” nail is the ultimate way to look expensive. It looks like you are wearing jewelry built into your hands.
- Tools Needed: Gold leaf or gold foil flakes and a pair of precision tweezers.
- Step-by-Step: Apply a clear base coat. While it is still tacky, use tweezers to place small, jagged flecks of gold near the cuticle or the side of the nail. Press them down flat.
- Mistake + Fix: Foil sticking to your fingers instead of the nail. Use a wooden orange stick to press the foil into the polish for a smooth finish.

9. Cherry Mocha Gloss (The “It Girl” Shade)
This is the breakout star of the season. It is a red so deep it almost looks black in the shade, but it glows a rich, bloody burgundy in the light. On short nails, this color looks incredibly powerful and decisive.
- Tools Needed: A deep “black-cherry” cream polish and a “plumping” top coat.
- Step-by-Step: This shade stains the nail plate like crazy. You must use two coats of base coat. Apply the color in two thin layers and finish with a thick, gel-like top coat.
- Mistake + Fix: Ragged edges. Dark colors show every wobble. Use your angled cleanup brush dipped in acetone to “carve” a perfect line around the cuticle.
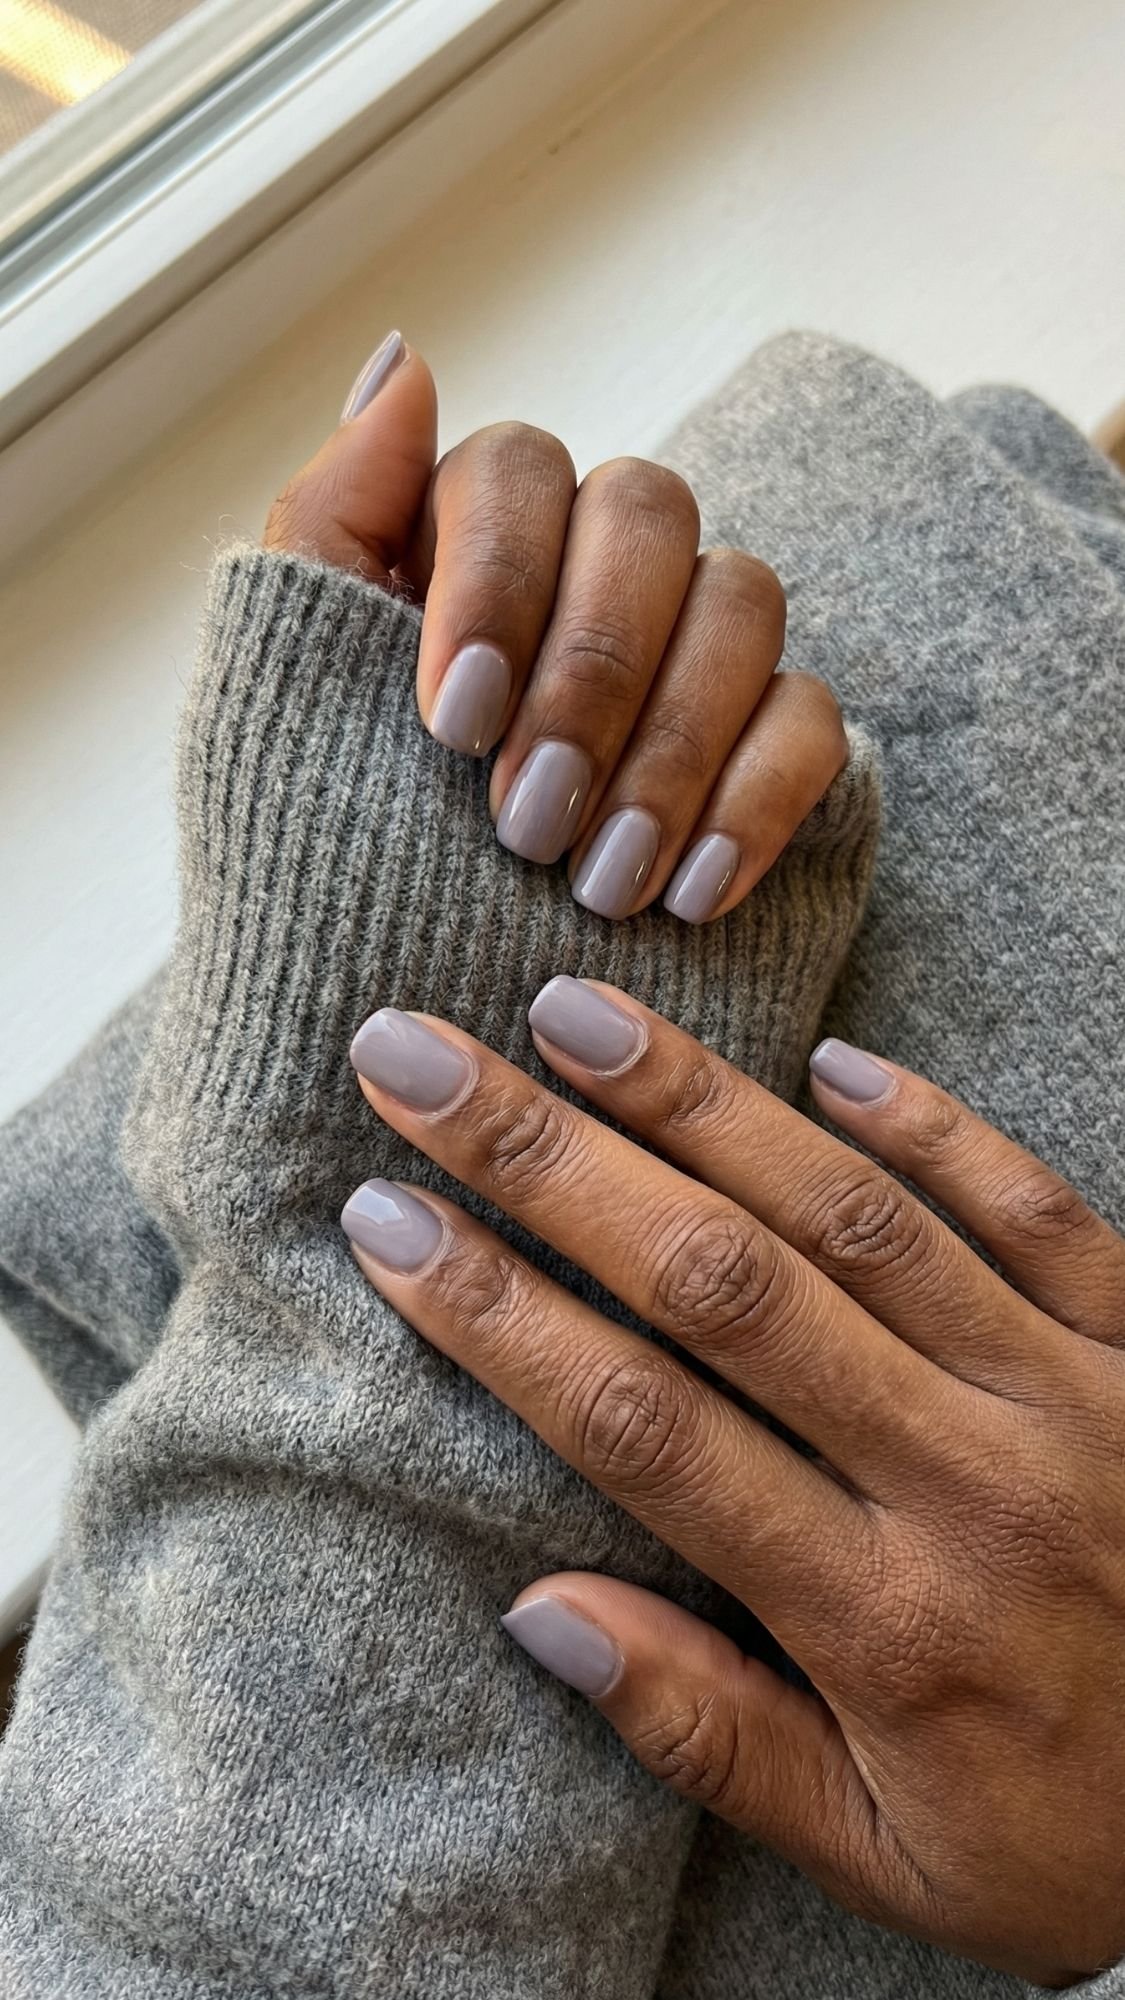
10. Muted Lavender Smoke (The Intellectual Neutral)
Traditional lavender can sometimes look a bit “Easter egg” for my taste. But when you add a drop of grey to the mix, it becomes “Smoke.” This is a neutral with a real personality. It is incredibly flattering on cool undertones and looks stunning against silver jewelry.
- Tools Needed: A dusty, grey-toned lavender polish.
- Step-by-Step: Apply two even coats. I have noticed this color can sometimes look “flat” once it dries, so I always finish with a top coat that has a blue-shimmer “optical brightener” built in.
- Mistake + Fix: The color looking too “chalky.” If it looks like paint rather than a manicure, add a drop of clear polish to the bottle to sheer it out slightly.
We are moving into the “intellectual” phase of the list. These next five looks are for the girl who wants a little bit of art but doesn’t want her hands to look like a craft project. What I’ve learned is that restraint is the loudest form of style. You don’t need ten fingers of glitter to make a statement. Sometimes, it’s just about where you place the detail.

11. Tortoiseshell Corner (The Academic Aesthetic)
Full tortoiseshell on short nails can sometimes look a bit cluttered. But when you only do a small “flick” of the pattern on the corner of the nail, it looks like a custom piece of jewelry. It adds a bit of “Ivy League” energy to your look.
- Tools Needed: A sheer amber polish, a chocolate brown, and a tiny bit of black.
- Step-by-Step: Paint your base a sheer nude. On the corner of your ring finger, drop a blob of amber. While wet, add tiny specks of brown and a single pin-prick of black. Swirl them together gently with a toothpick.
- Mistake + Fix: Over-mixing. If you swirl too much, it just turns into a muddy brown mess. Stop before you think you’re done to keep the “marbled” look.
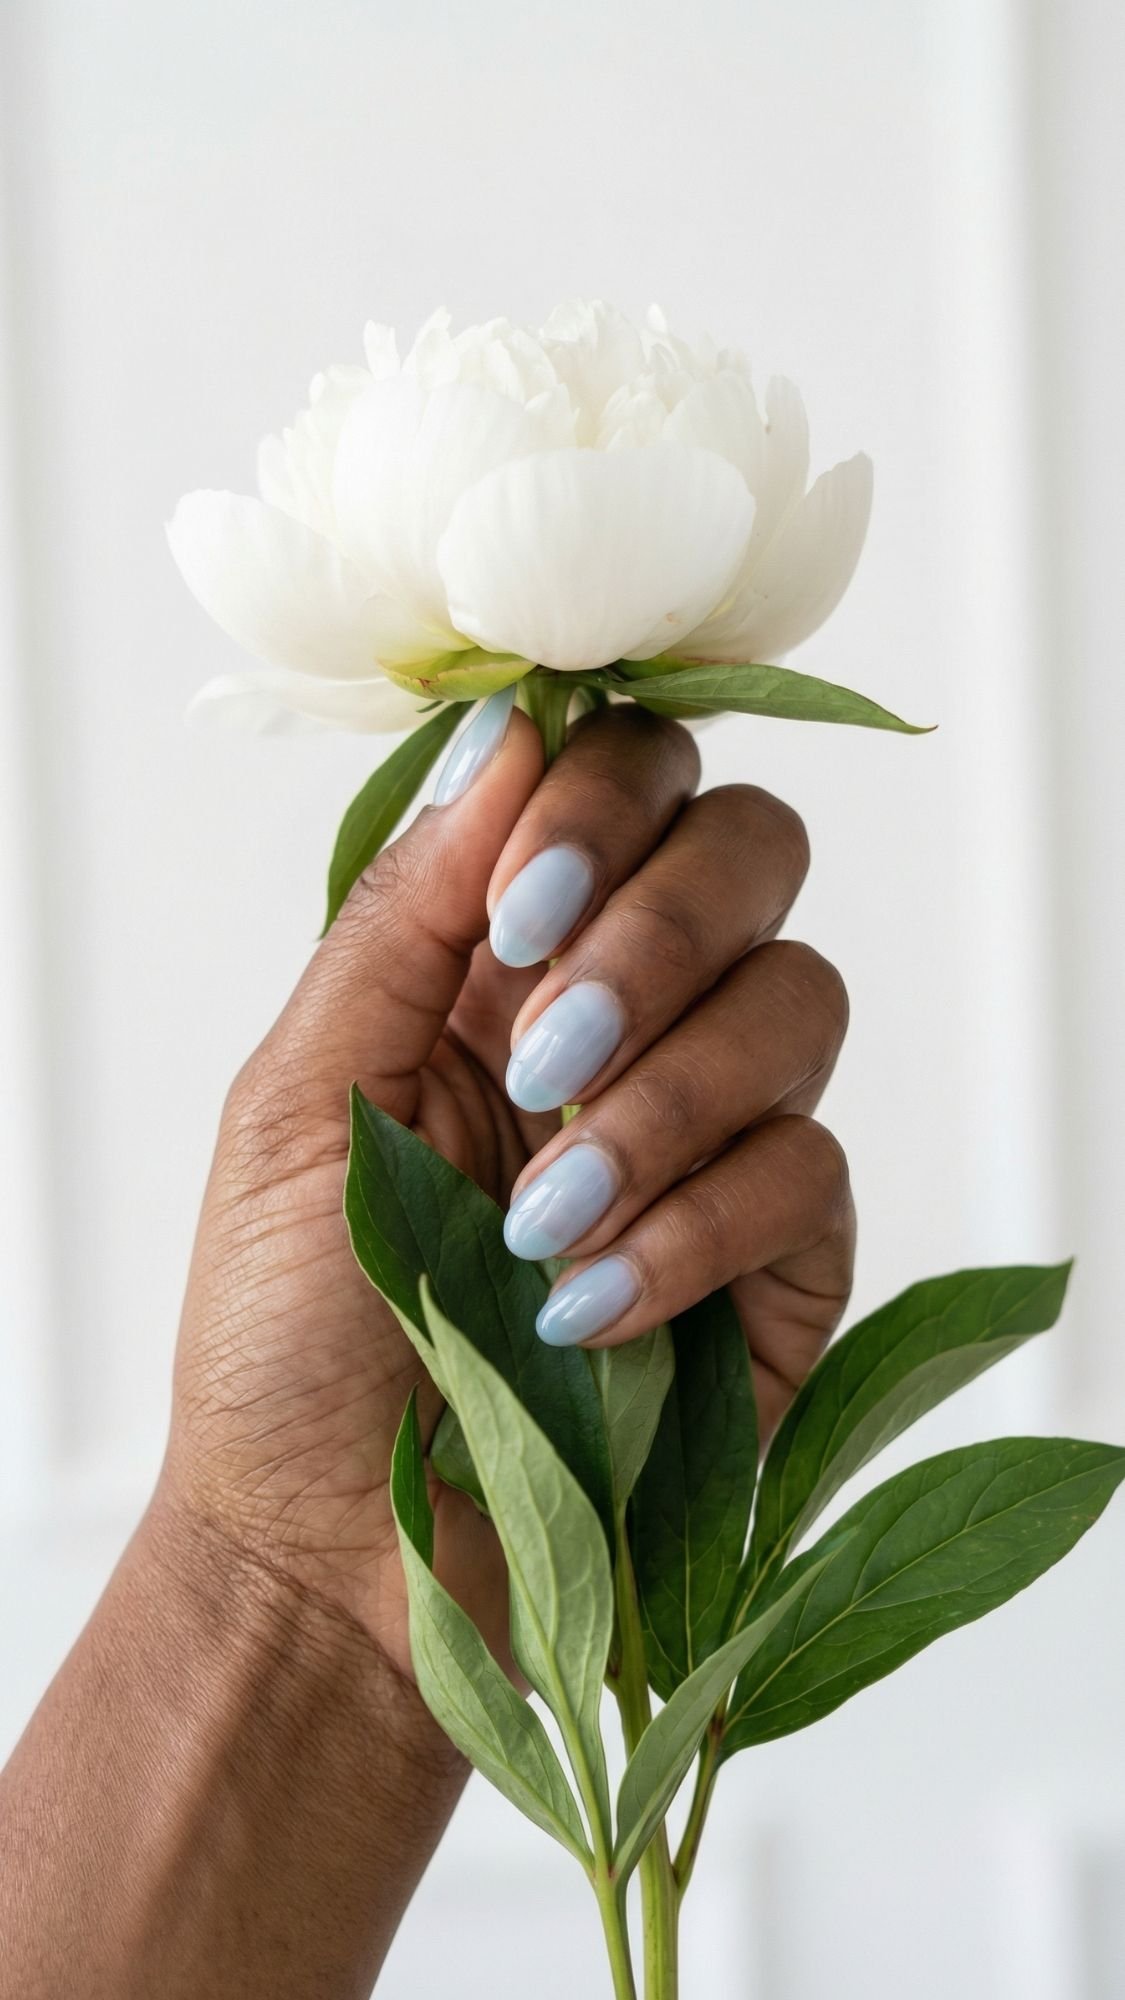
12. “Cloud” Blue Sheer (The Misty Neutral)
Blue can be a tricky color for an “elegant” list. If it’s too bright, it looks like a teenager’s manicure. But a sheer, misty sky blue? That is pure sophistication. It looks like a clear morning in the city. I’ve noticed this shade makes the whites of your eyes and your teeth look brighter because of the cool undertones.
- Tools Needed: A very pale, translucent blue polish.
- Step-by-Step: Apply two thin coats. If the blue looks too “stark,” I like to layer one coat of a sheer white over the top to “milkify” the color and make it softer.
- Mistake + Fix: Yellowing. Blue shows every bit of staining underneath. Always use a high-quality base coat to keep the blue looking crisp and not “muddy.”
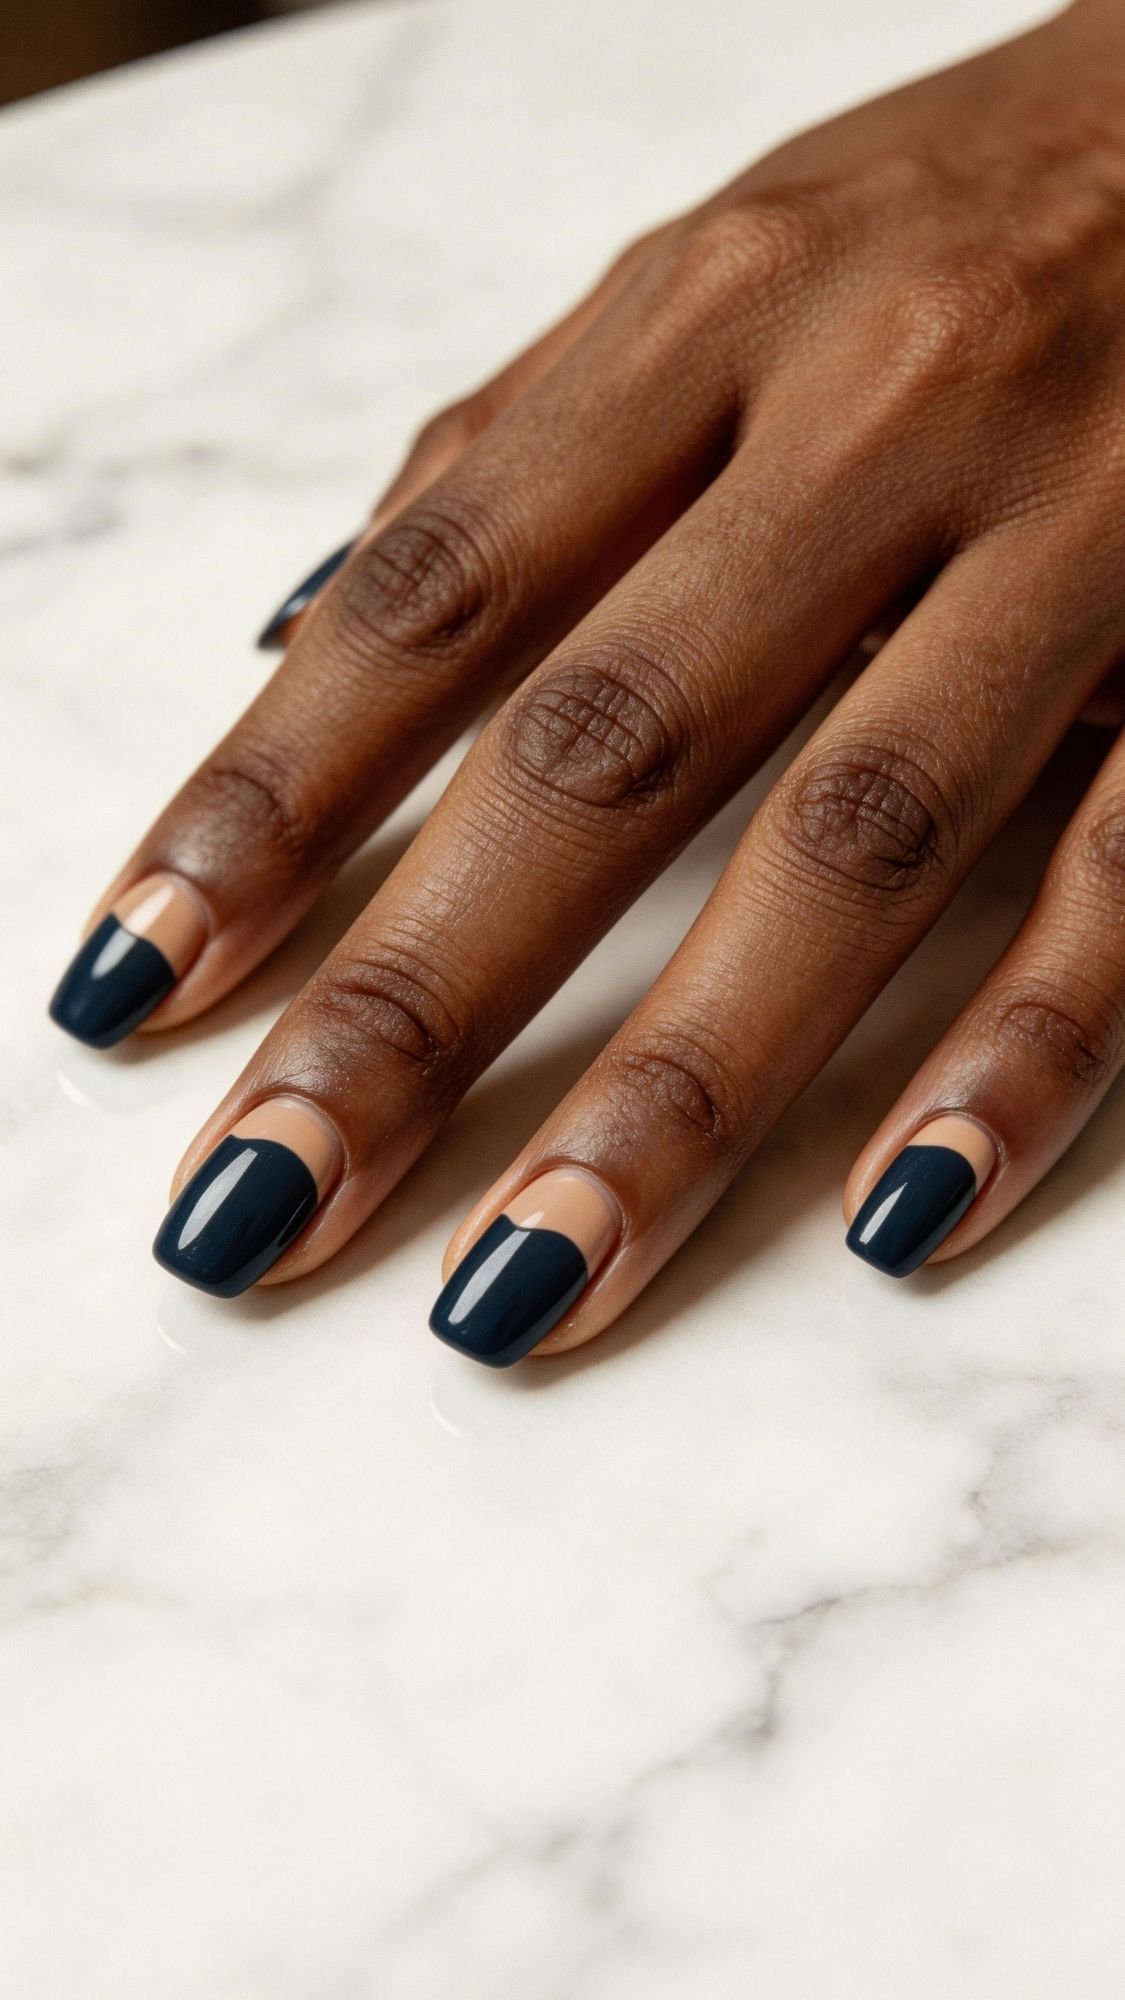
13. Reverse French (The Half Moon)
This is a vintage look that screamed “Old Money” in the 1940s, and it’s back for 2026. Instead of painting the tip, you highlight the “lunula” (that half-moon shape at the base of your nail). It’s architectural and very high-fashion.
- Tools Needed: A deep color (like navy or burgundy) and hole-punch reinforcement stickers from an office supply store.
- Step-by-Step: Place the sticker over the base of your nail to block out the “moon.” Paint the rest of the nail with your deep color. Peel the sticker while the polish is still slightly wet for a crisp line.
- Mistake + Fix: Ragged lines. If the edge is messy, use your angled clean-up brush dipped in acetone to “carve” that perfect curve at the base.
14. Velvet Cat-Eye (The Jewel Box Effect)
Velvet nails aren’t just for long extensions. On short nails, the magnetic “cat-eye” effect creates a 3D depth that makes the nail look like a polished gemstone. In a champagne or emerald tone, it is absolutely mesmerizing.
- Tools Needed: Magnetic “Cat-Eye” polish and a strong magnet.
- Step-by-Step: Apply a thick coat of the magnetic polish. Hold the magnet over the nail for a full 30 seconds before the polish dries. This “pulls” the shimmer to the surface.
- Mistake + Fix: The “blur.” If you move the magnet too quickly, the particles will spread out and you’ll lose the crisp line. Hold perfectly still!
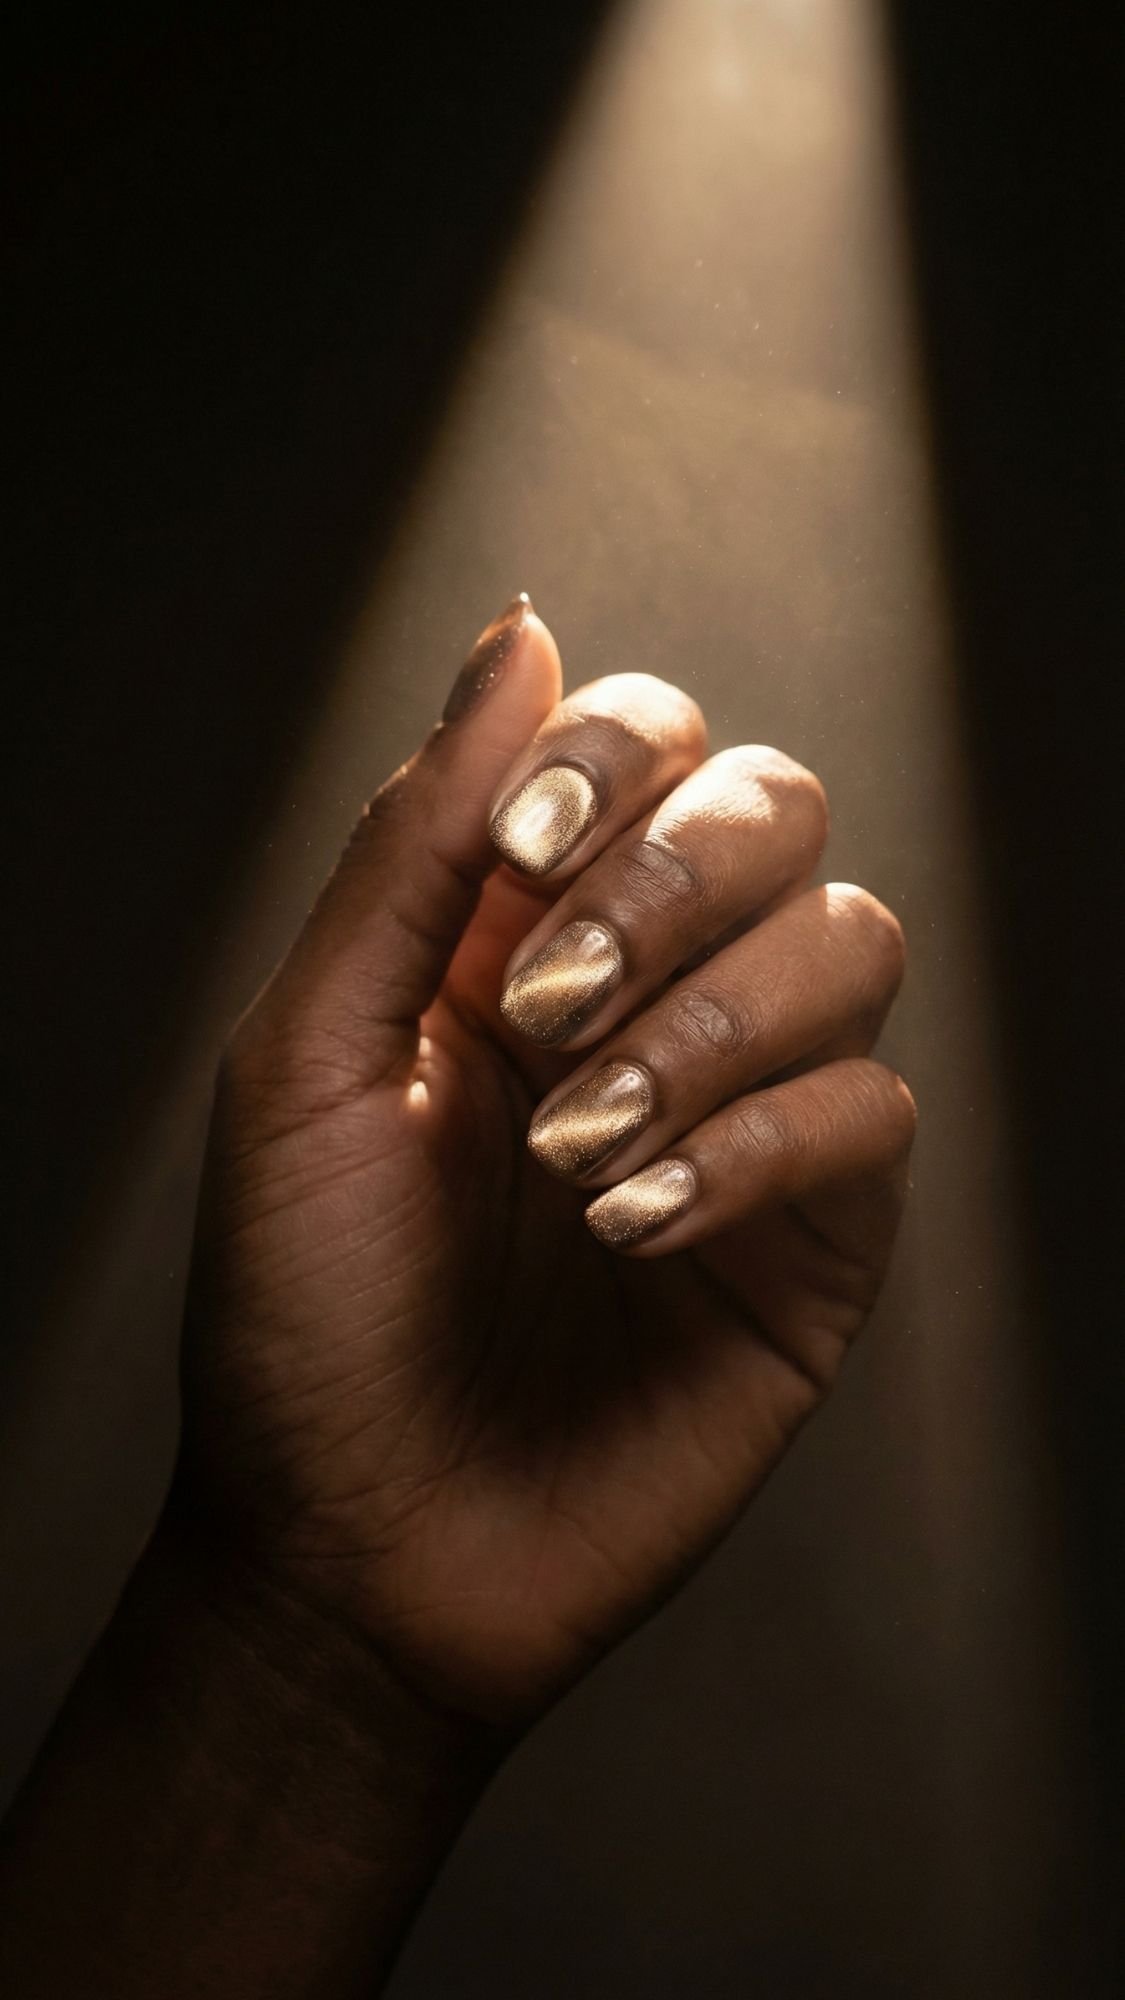
15. Chrome Dusting (The Brushed Metal Glow)
Forget the “liquid mirror” chrome that was everywhere last year. We are doing a “dusting.” It is a sheer base with a very fine chrome powder rubbed over the top to give a “brushed satin” finish. It looks like your nails are made of expensive silk.
- Tools Needed: A sheer nude base and a fine silver or champagne chrome powder.
- Step-by-Step: Apply your base and a no-wipe top coat. Use a makeup sponge to buff a tiny amount of powder onto the nail. Do not rub too hard; you want a “glow,” not a mirror.
- Mistake + Fix: Glittery particles. If you see individual specks of glitter, your powder isn’t fine enough. Buff it more vigorously to “melt” the particles together.
We are rounding the corner to the finish line, and honestly, these last five are some of my personal favorites. They are the “closet staples” of the nail world. You know, like that one perfect white button-down or the leather jacket that makes you feel invincible? These looks are the nail equivalent of that.
16. The Negative Space Arc (Architectural Minimalist)
This is the height of minimalist nail art. It is just a simple, curved line that follows the shape of your nail, leaving the rest of the nail completely bare. It is subtle, but I have noticed that people with the most “refined” style tend to gravitate toward this. It says you don’t need to shout to be heard.
- Tools Needed: A clear strengthening base coat and a black or navy striping polish.
- Step-by-Step: Apply two coats of your clear base. Using a very thin brush, draw a single, continuous arc that mimics your cuticle line about halfway up the nail.
- Mistake + Fix: Dry nail plates. Since the nail is “naked,” any white spots or ridges will show. I always use a buffing block to smooth the surface before starting this look.
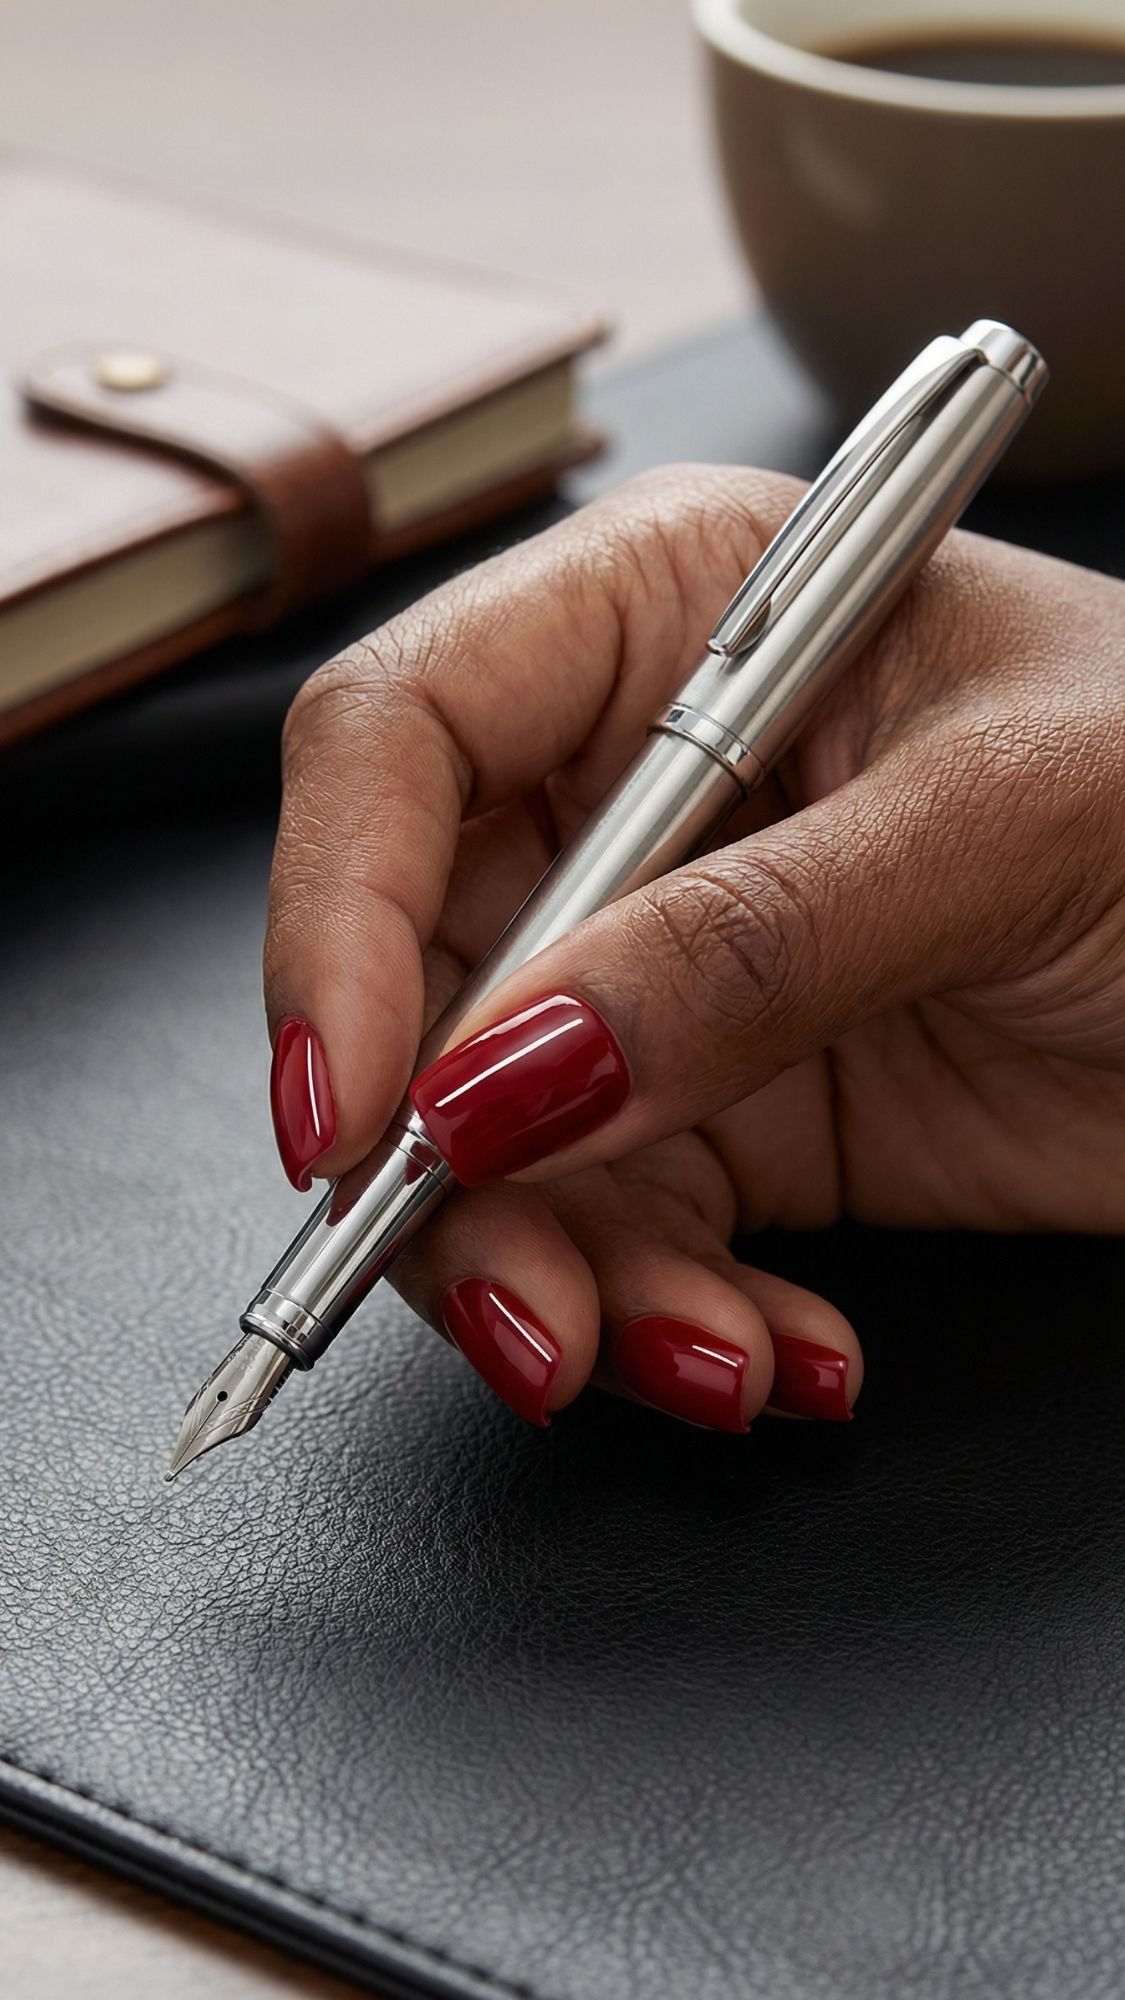
17. Classic Red (The “Executive” Power Move)
There is a reason why red never goes out of style. On short nails, it looks incredibly powerful and decisive. I have a theory that a short red nail is the mark of a woman who gets things done. I always prefer a blue-toned red because it makes your hands look younger and cancels out any redness in your skin.
- Tools Needed: A vibrant, blue-toned red cream polish and a high-gloss top coat.
- Step-by-Step: Apply two paper-thin layers. Red is notoriously difficult to remove if you mess up, so keep your “clean-up” brush handy.
- Mistake + Fix: Thick edges. Red can look “stubby” if the polish is too thick at the tips. Keep your layers thin and always “cap the free edge” for a sharp finish.
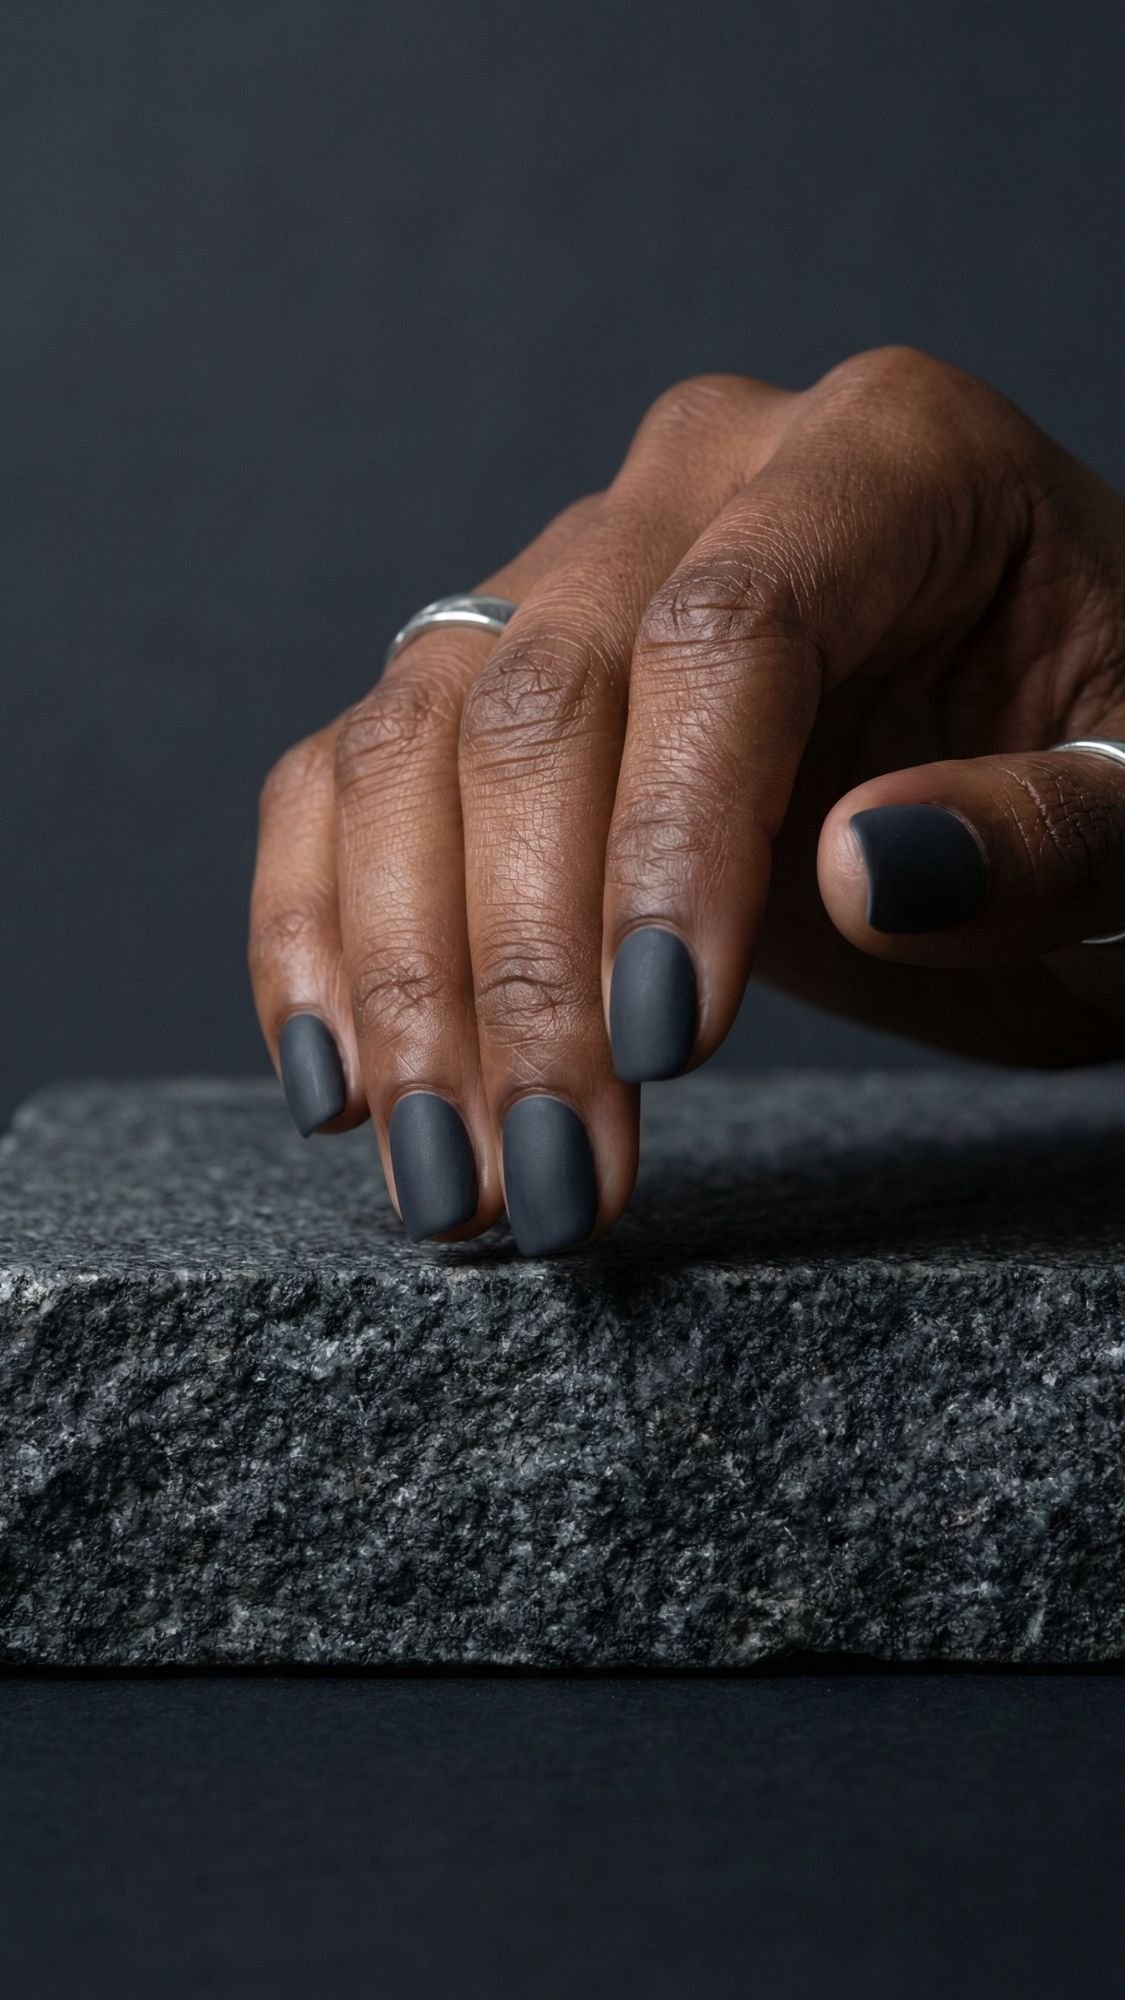
18. Soft Charcoal Matte (The Modern Edge)
Black polish can sometimes feel a bit harsh on short nails, but a deep charcoal grey in a matte finish? That is pure luxury. It looks like expensive slate or soft cashmere. It is the perfect choice for when you want something edgy but still appropriate for a professional environment.
- Tools Needed: A dark charcoal grey polish and a high-quality matte top coat.
- Step-by-Step: Apply your grey color as usual. Once dry, apply the matte top coat in quick, even strokes.
- Mistake + Fix: Streaky matte. Matte top coats dry very fast. If you go over the same spot twice, it will clump. Use a “three-stroke” method and move quickly.
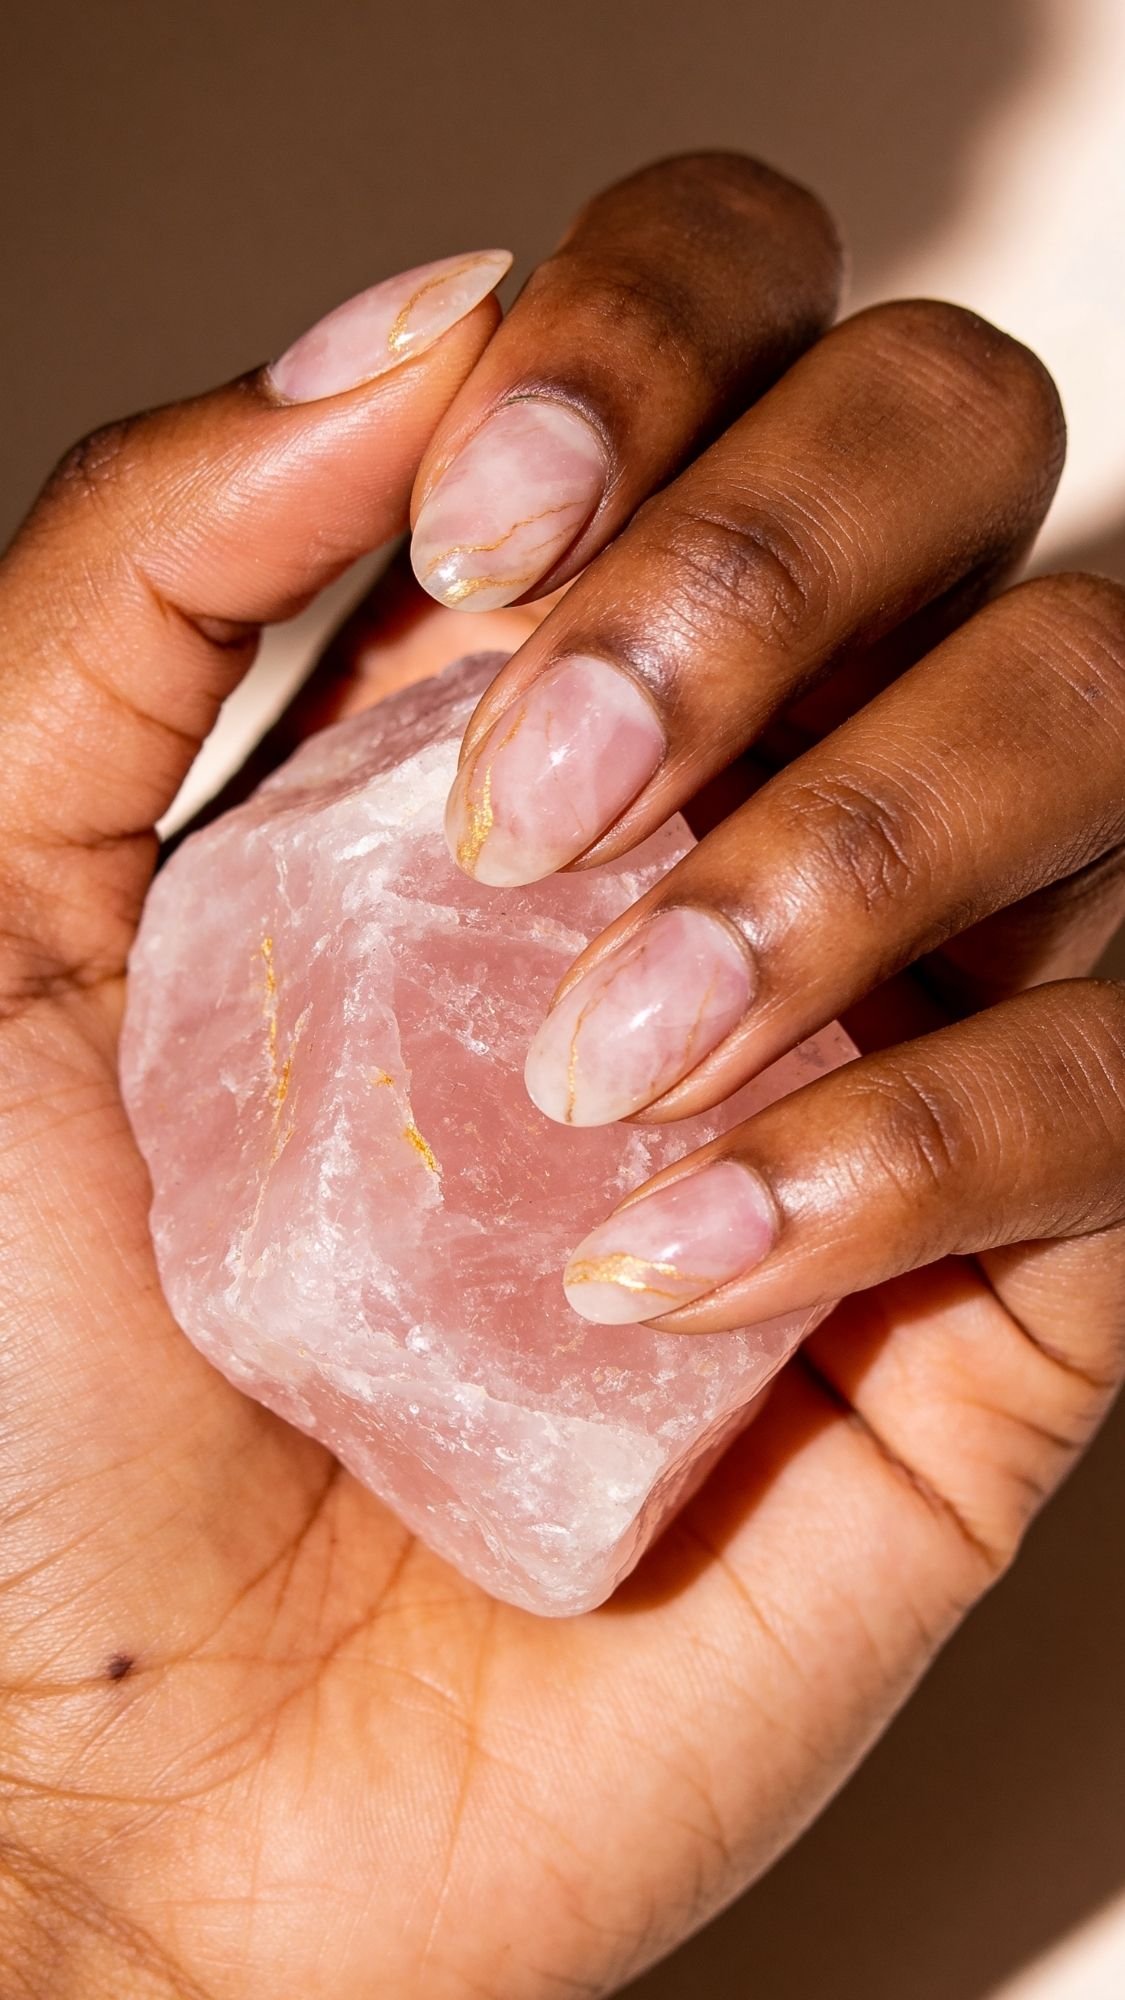
19. Rose Quartz Marble (The Romantic Gemstone)
This look makes your nails look like actual semi-precious stones. It uses shades of pink and white swirled together to mimic the natural veins in a quartz crystal. It is soft, romantic, and incredibly flattering on every skin tone.
- Tools Needed: A sheer pink base, a white polish, and a small piece of plastic wrap.
- Step-by-Step: Apply your pink base. While wet, dot a tiny bit of white on the nail. Use the crumpled plastic wrap to “dab” the colors together, creating an organic marble effect.
- Mistake + Fix: Looking “messy” rather than “marbled.” If the white is too stark, apply one more thin coat of your sheer pink over the top to “blur” the lines.
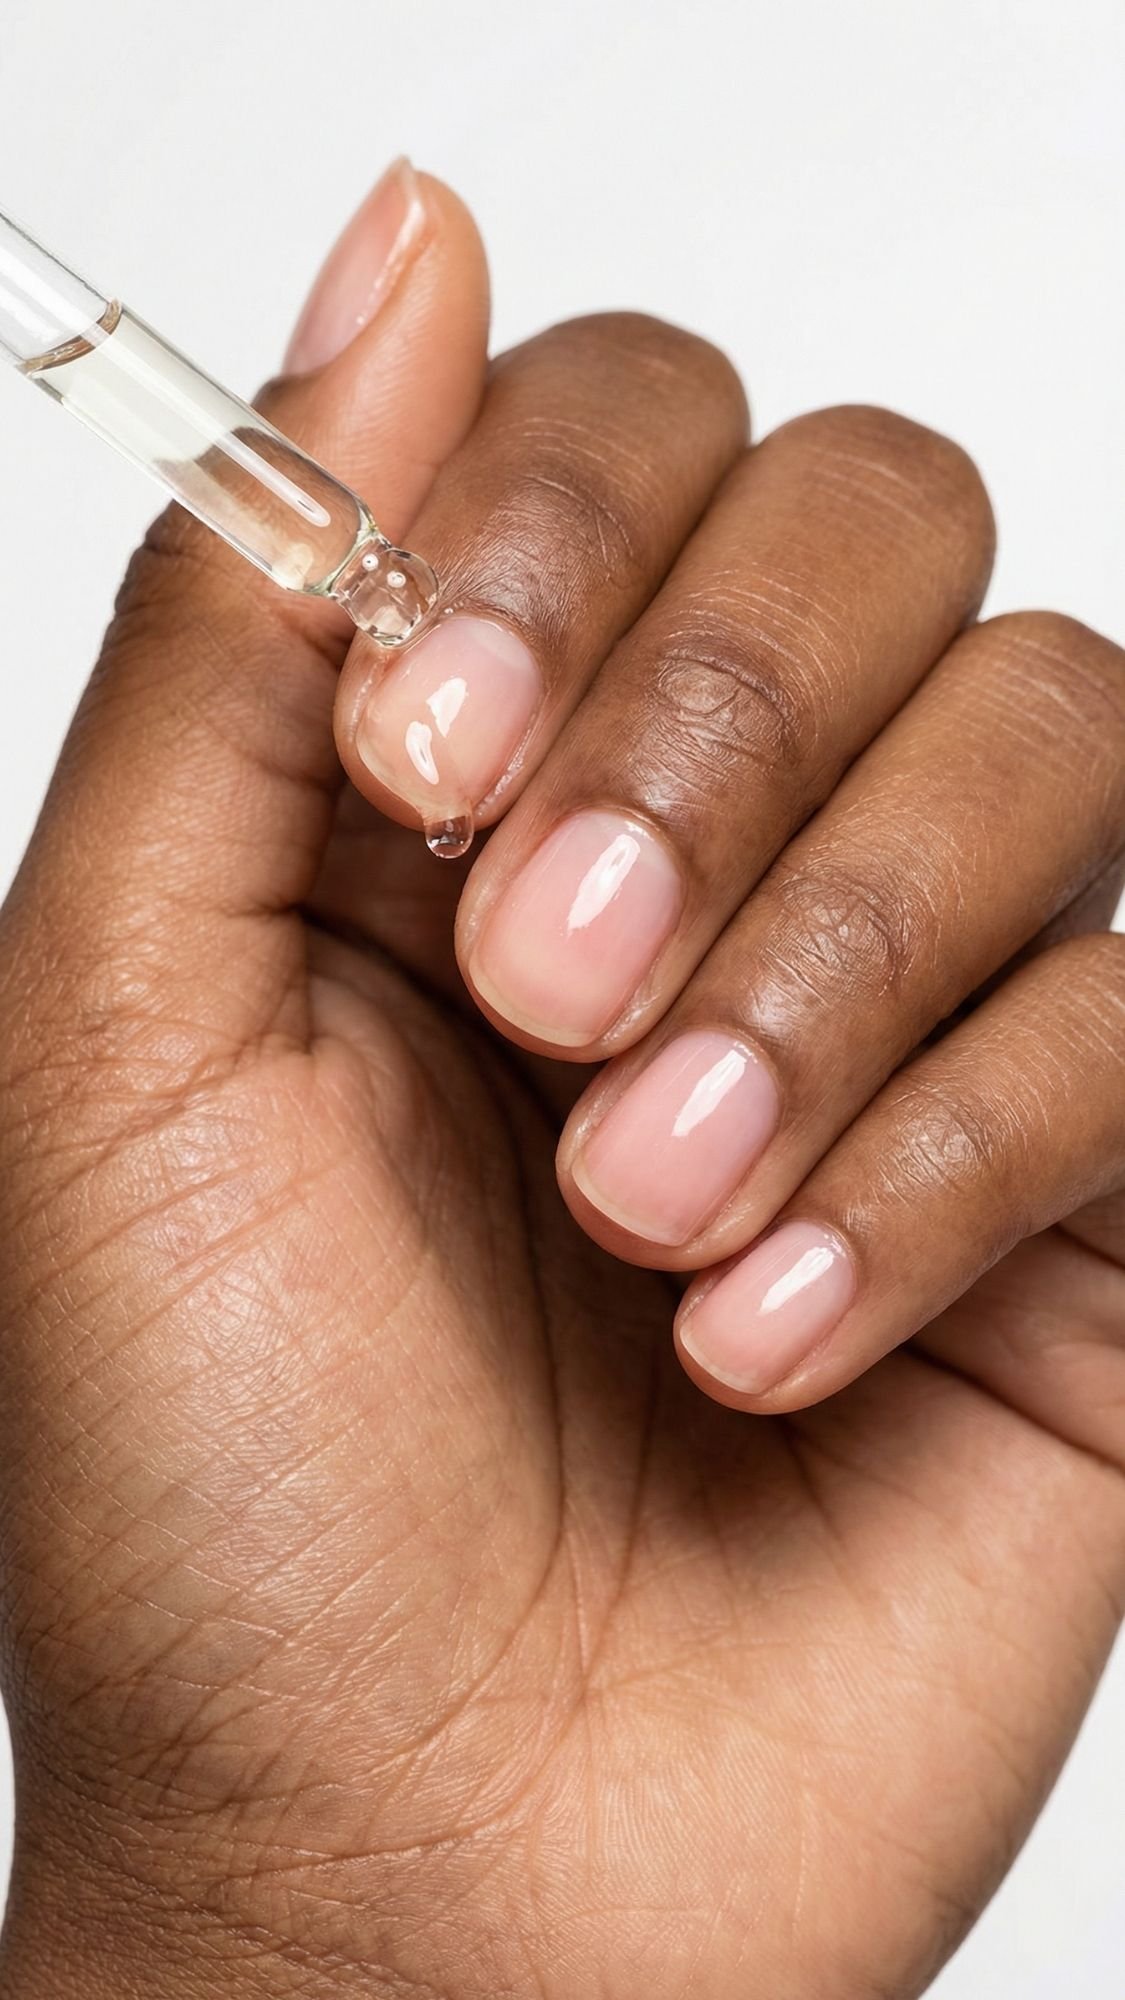
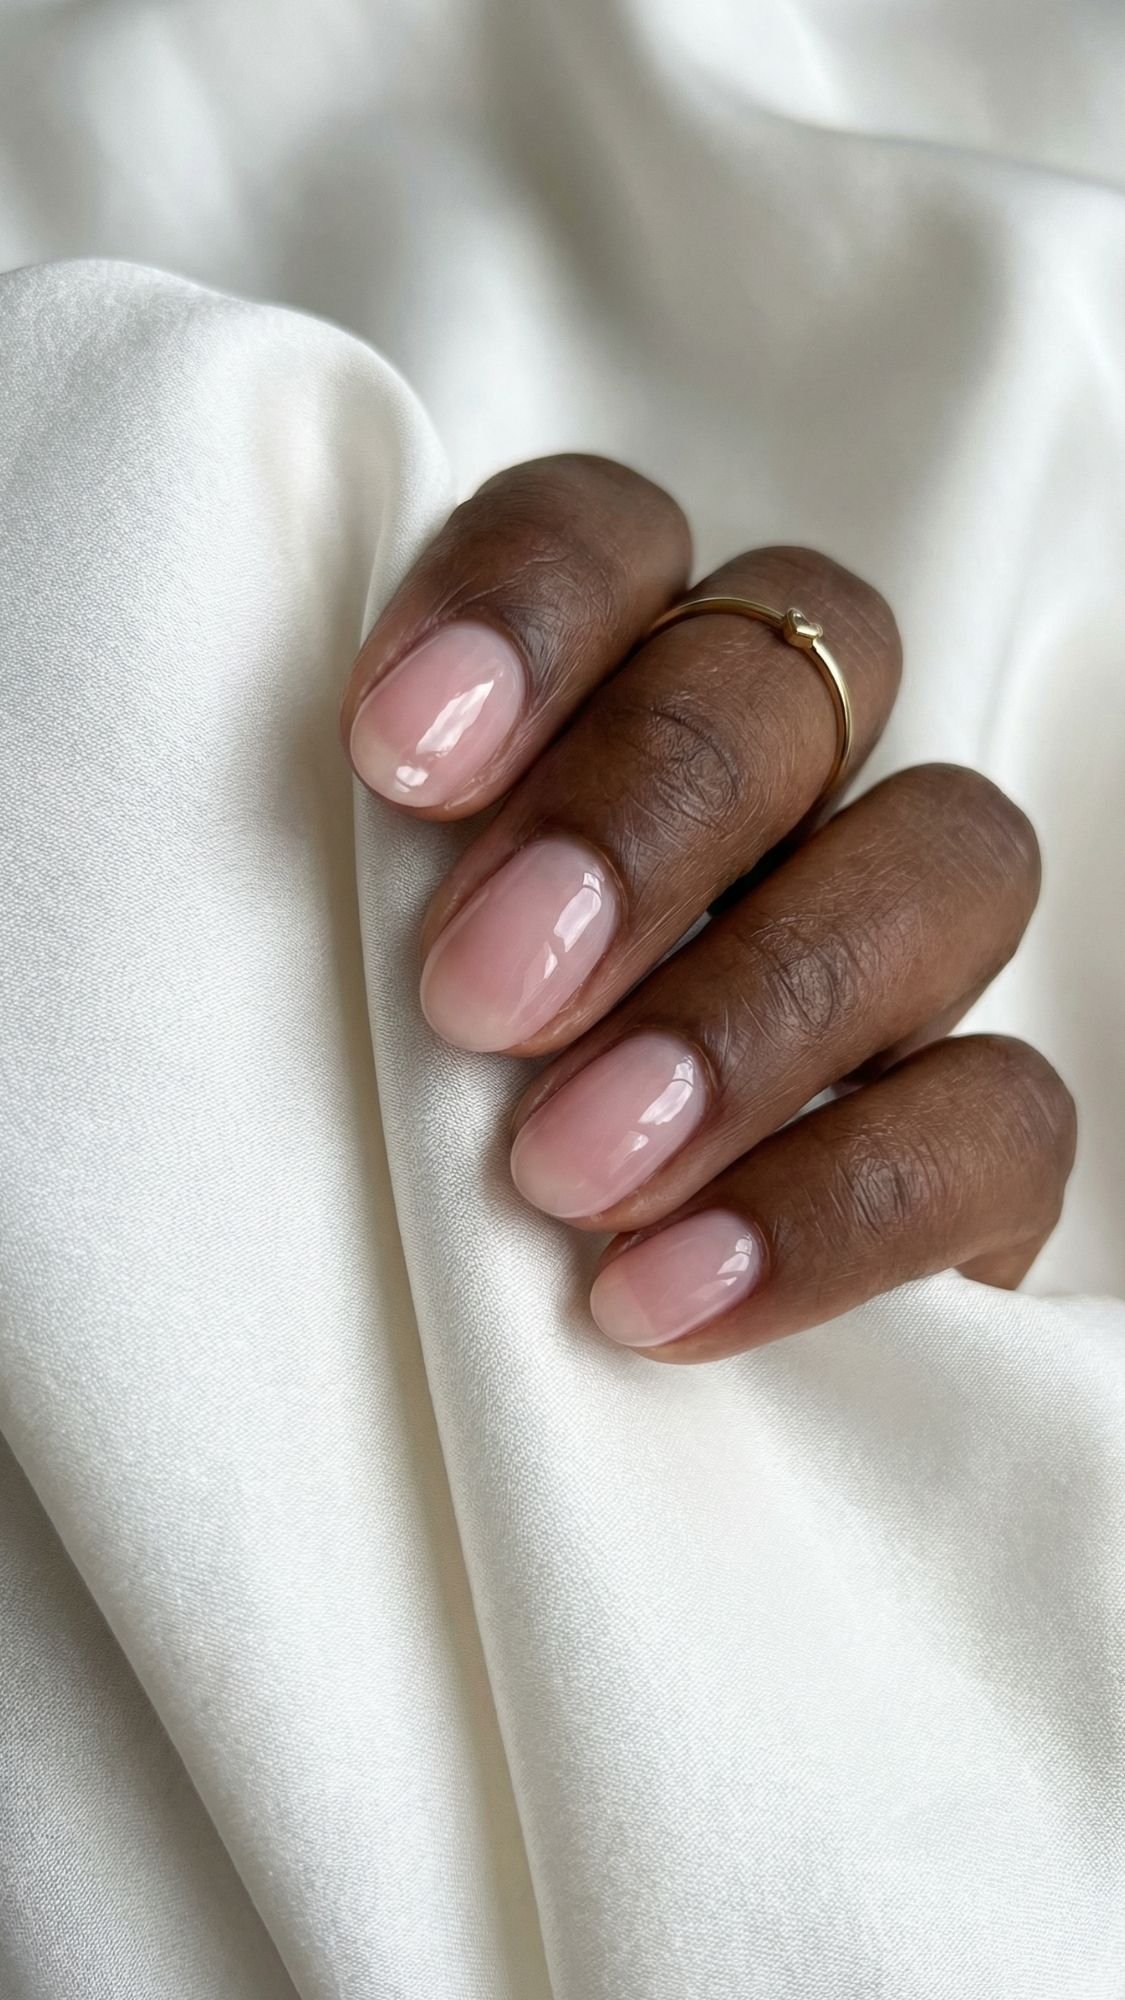
20. The “Clean Girl” Buff & Shine (The Pure Essential)
Sometimes, the most elegant move is to wear no color at all. This isn’t just “bare” nails. This is a high-shine buff, perfectly manicured cuticles, and a clear strengthening treatment. It is the ultimate “I have my life together” look.
- Tools Needed: A four-way buffing block and a high-quality cuticle oil.
- Step-by-Step: Shape your nails, push back your cuticles, and use the buffing block to create a mirror-like shine. Finish with a clear strengthener and a heavy dose of oil.
- Mistake + Fix: Over-buffing. If you buff too often, you will thin out your nail plate. Only do a full buffing session once every two or three weeks.
Now that you have your “expensive” short nails, let’s talk about the heartbreak of the first chip. We have all been there. You spend forty minutes getting them perfect, and then you try to open a cardboard box and rip. I have learned that a manicure isn’t just a one-time event. It is a relationship. If you treat your nails well throughout the week, they will stay looking like you just stepped out of the salon.
Longevity + Maintenance: The 7-Day Survival Guide
Most people think once the top coat is dry, the work is over. IMO, that is where the real maintenance begins. I have noticed that if I follow a specific “top-up” schedule, my regular polish can easily last 10 days without a single chip. Here is how I manage my short nails from Day 1 to Day 14.
The Day 1-3 Rule: Hands Off
During the first 72 hours, your polish is still “settling” into the nail plate. Even if it feels hard, it is still vulnerable to heat and steam. I avoid long, hot baths or saunas during this time.
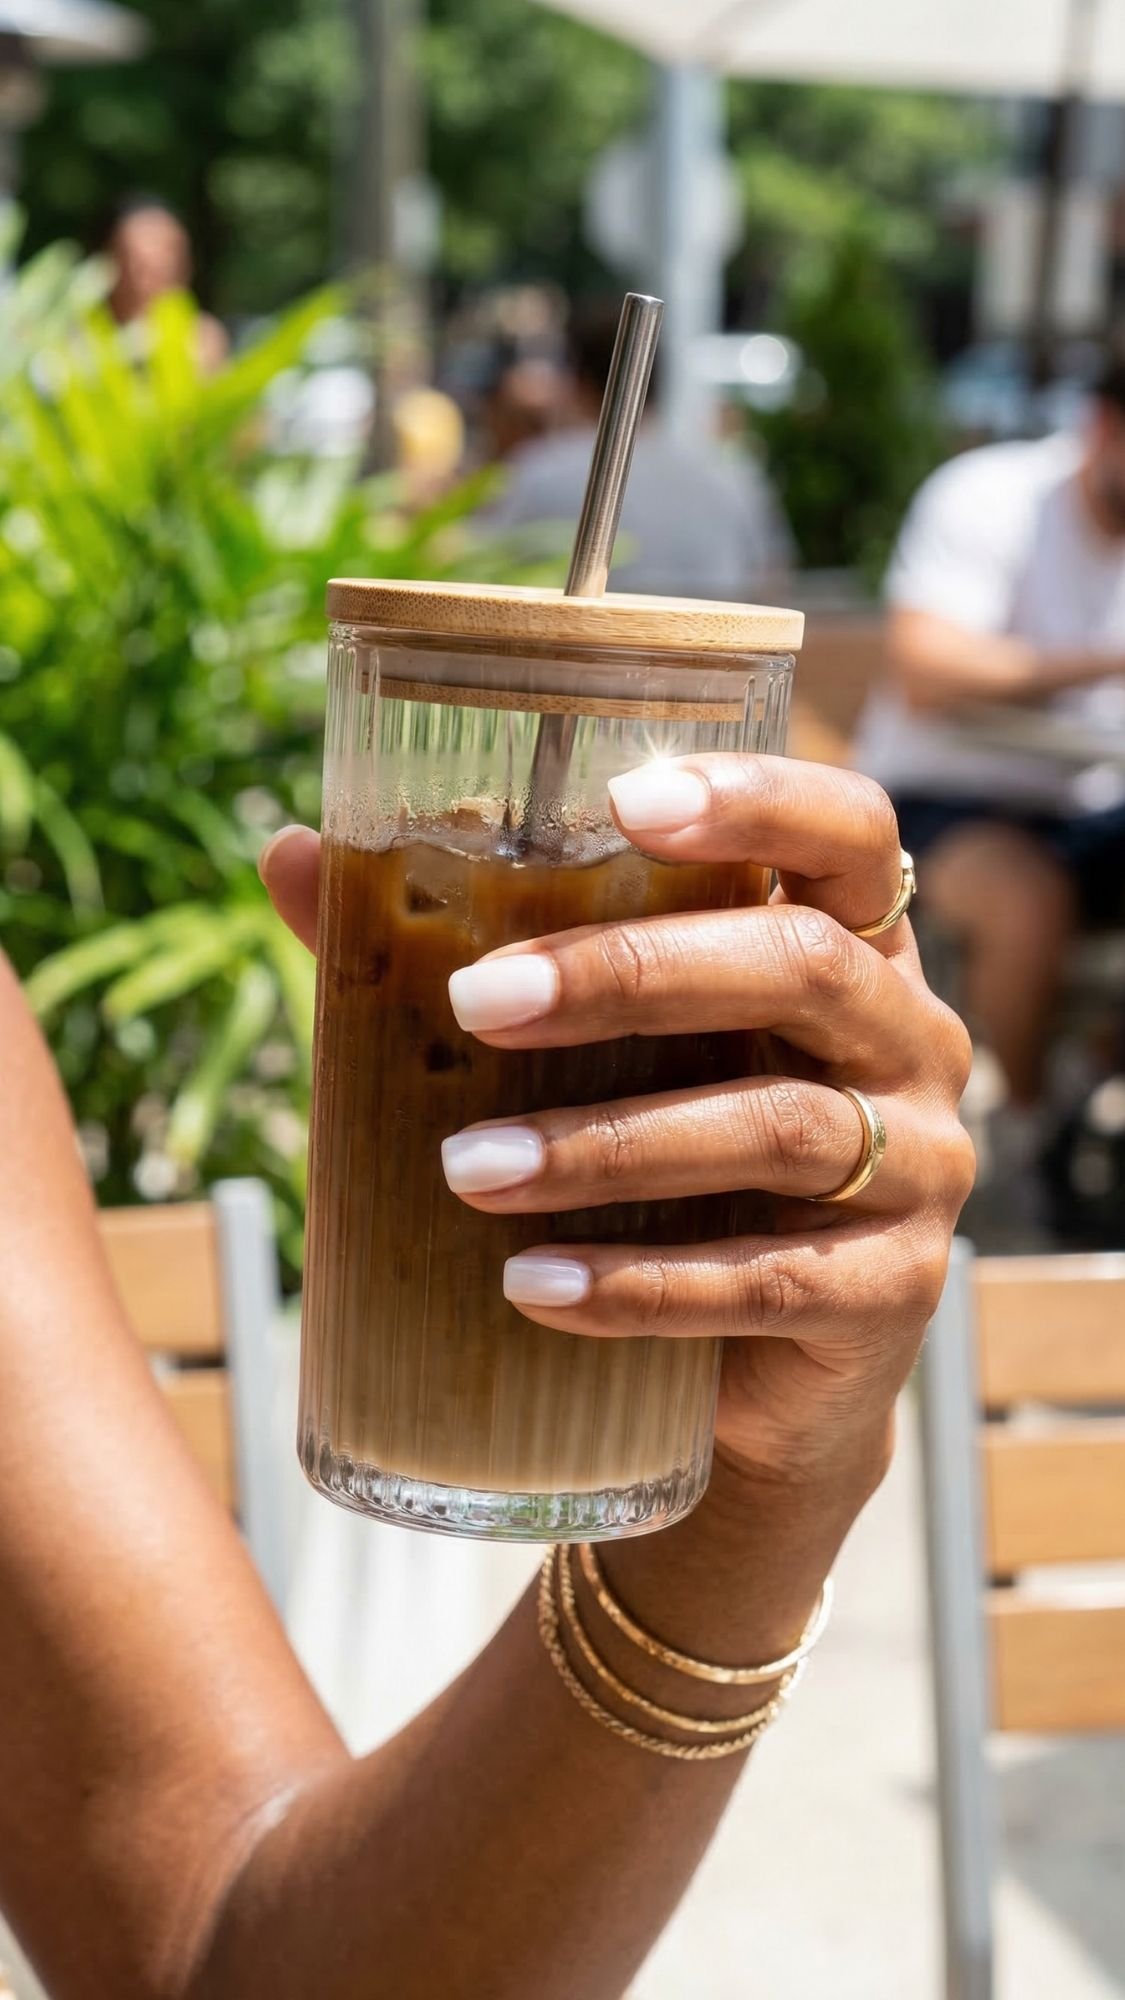
- The Secret: Use a straw for everything. It sounds extra, but protecting your tips from constant contact with glasses and cans during the first few days makes a massive difference.
- Maintenance: Apply a fresh drop of cuticle oil every single night. If the skin around the nail stays hydrated, the polish is less likely to “pull” away at the edges.
The Day 4 Refresh: The Second Seal
By Day 4, your top coat has likely taken a few hits from your keyboard and your keys. It starts to lose that “glass” shine. This is when I do my “mid-week refresh.”
- The Technique: I lightly swipe the nail with a tiny bit of alcohol to remove oils, then apply one very thin layer of a quick-dry top coat.
- Why it matters: It fills in micro-scratches and adds a fresh layer of protection over the free edge. It makes the manicure look brand new again.
Preventing the “Pop-Off” (Press-On Edition)
If you are wearing press-ons, Day 7 is usually when the glue starts to lose its grip. I check for “lifting” every morning. If I see a tiny gap at the cuticle, I don’t wait for it to fall off. I add a tiny drop of glue to a toothpick and slide it under the gap, then press for thirty seconds.
- Pro Tip: Avoid submerging your hands in water for long periods. If you are doing dishes, wear gloves. Water is the #1 enemy of nail glue.
Troubleshooting: 5 Manicure Fails + The Fix
Ever felt like throwing your polish bottle across the room? I have. Nail art can be frustrating, especially when things go wrong in the final seconds. After years of trial and error, I have found that almost every “disaster” has a 30-second fix.
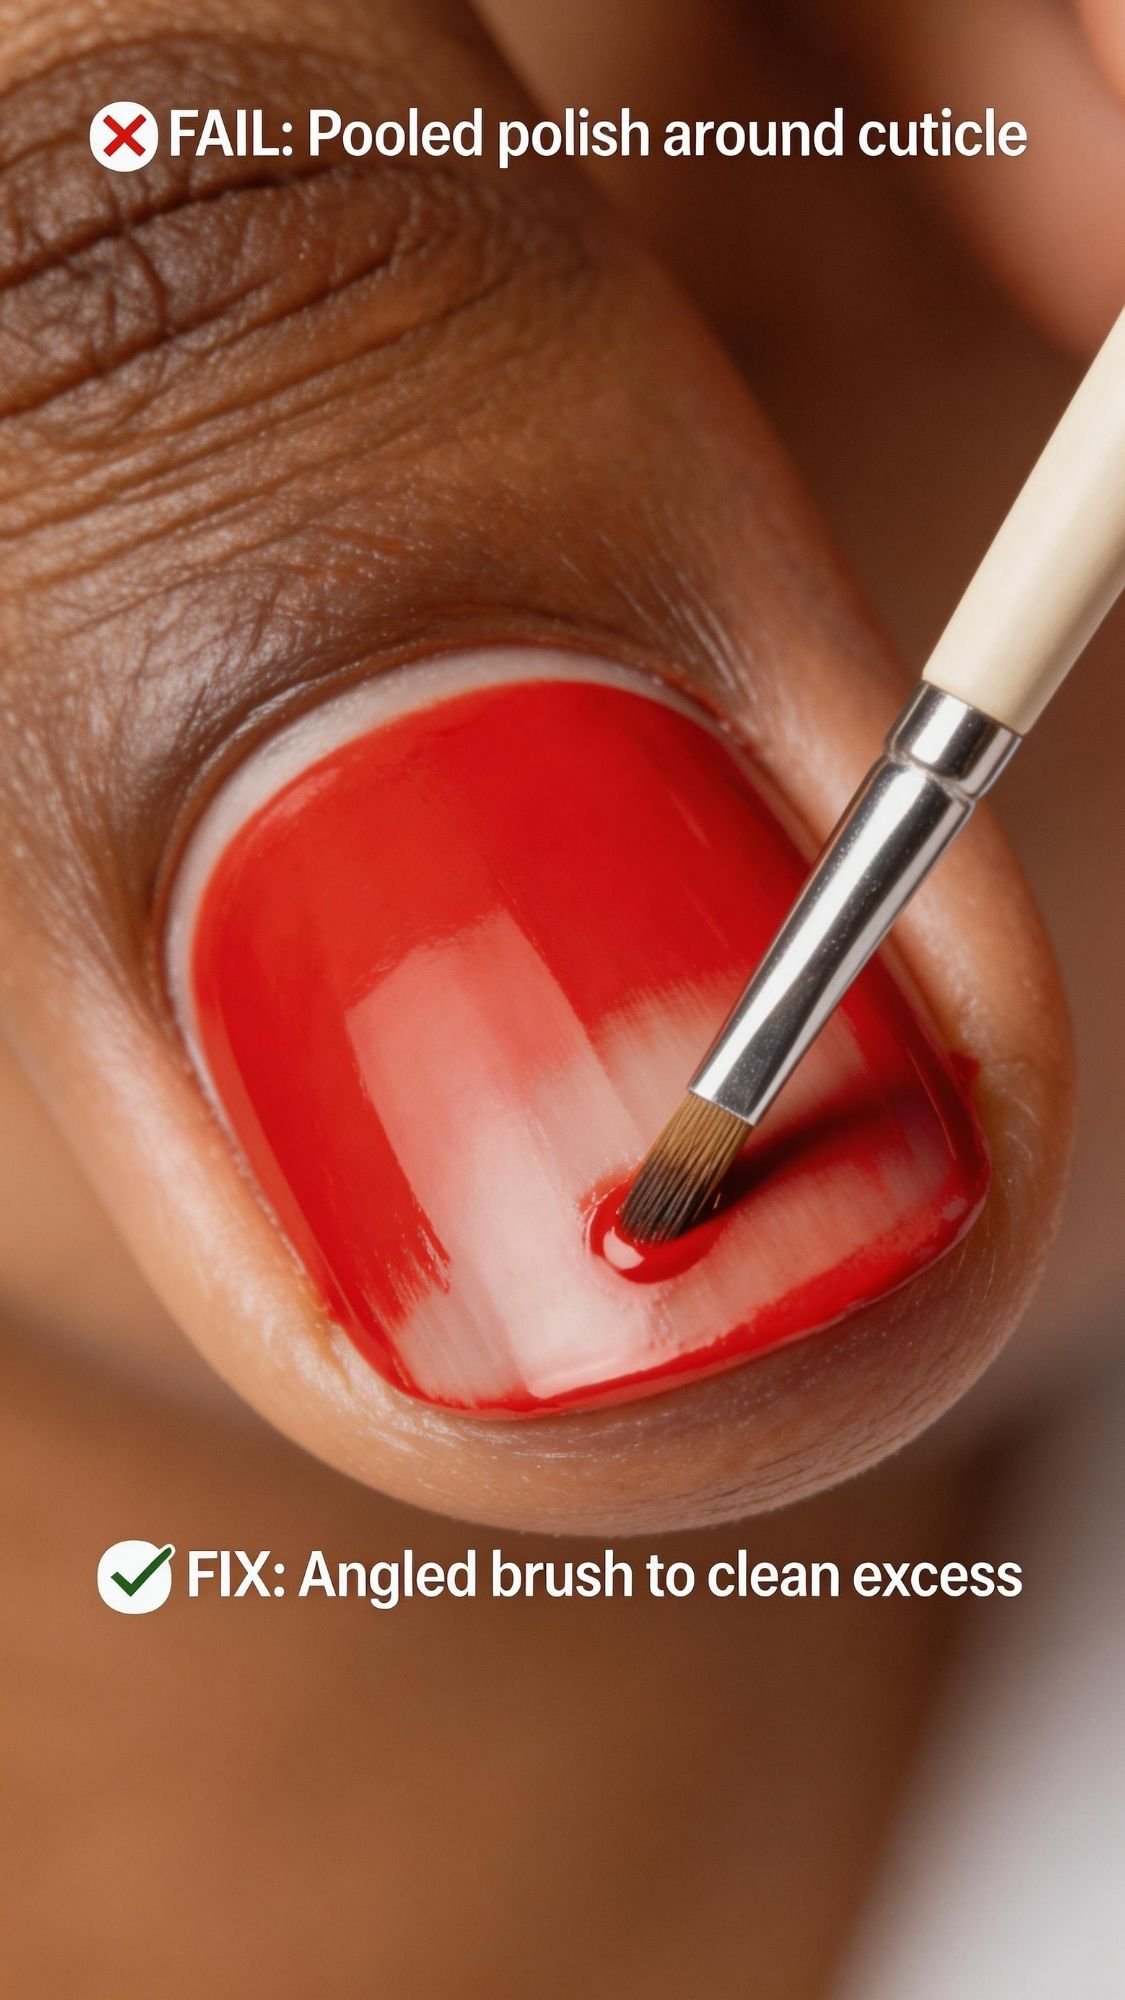
1. The “Pooling” Polish
The Issue: The polish has flooded your cuticles and looks like a messy puddle. The Fix: Do not try to wipe it with your other finger! Use your angled clean-up brush dipped in acetone. Trace the cuticle line slowly to “carve” out the excess. It creates a crisp, professional gap.
2. The Dreaded Bubbles
The Issue: Your smooth polish suddenly looks like it has tiny grains of sand under it. The Fix: This usually happens because you shook the bottle or painted too fast. If it’s just one or two bubbles, wait for it to dry, lightly buff the bubble flat with a fine-grit buffer, and re-apply top coat.
3. Tip Shrinkage
The Issue: The polish has pulled back from the tip, leaving a sliver of natural nail visible. The Fix: This is caused by your top coat drying faster than your color. Next time, apply your top coat while the color is still slightly “tacky.” To fix it now, just dab a tiny bit of color on the tip and re-seal.
4. The “Sheet Mark”
The Issue: You went to bed thinking your nails were dry, but you woke up with fabric textures imprinted on them. The Fix: This is the worst! The easiest fix is to apply a “shimmer” top coat or a “pearl” layer over the texture. It masks the marks perfectly and looks like intentional art.
5. Press-On Popping Off
The Issue: One nail has decided to exit the chat. The Fix: Do not just glue it back on over the old glue. You must scrape the dried glue off your natural nail and the back of the press-on first. If the surface isn’t smooth, the new glue won’t bond.
If you’ve spent years hiding your natural nails under thick acrylics, your nail beds might be screaming for help. I have seen so many people reach for another set of extensions because their natural nails look “thin” or “ugly.” I am here to tell you that recovery is not just possible, it is actually quite fast. You just have to stop treating your nails like they are made of steel.
Nail Health + Recovery
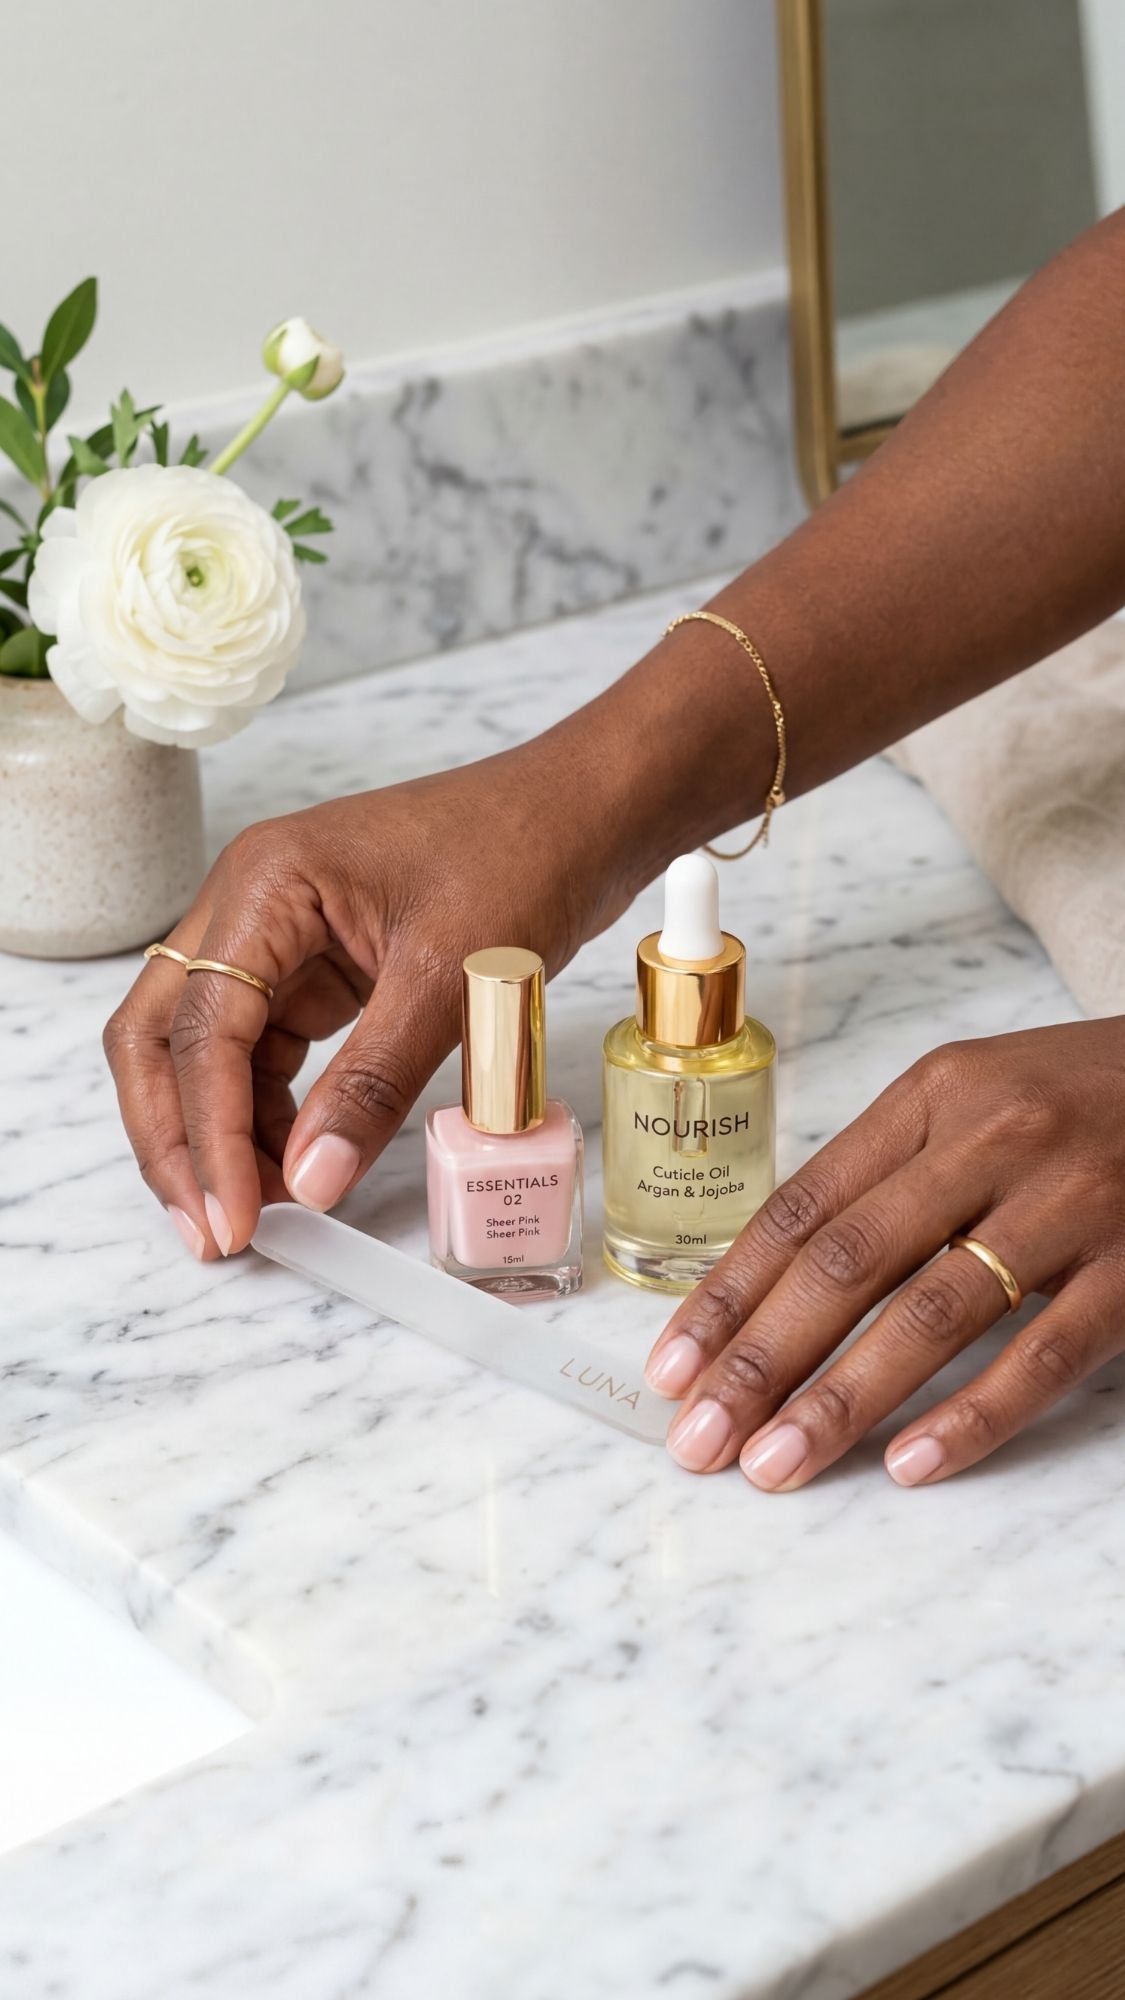
I often hear people say that nails need to “breathe.” FYI, nails do not have lungs. They are made of dead keratin. However, the nail bed and the matrix (where the nail grows from) need blood flow and moisture. If you’ve just removed gels or press-ons, your nails might feel “bendy.” This is usually because they are over-hydrated with water or damaged from improper removal.
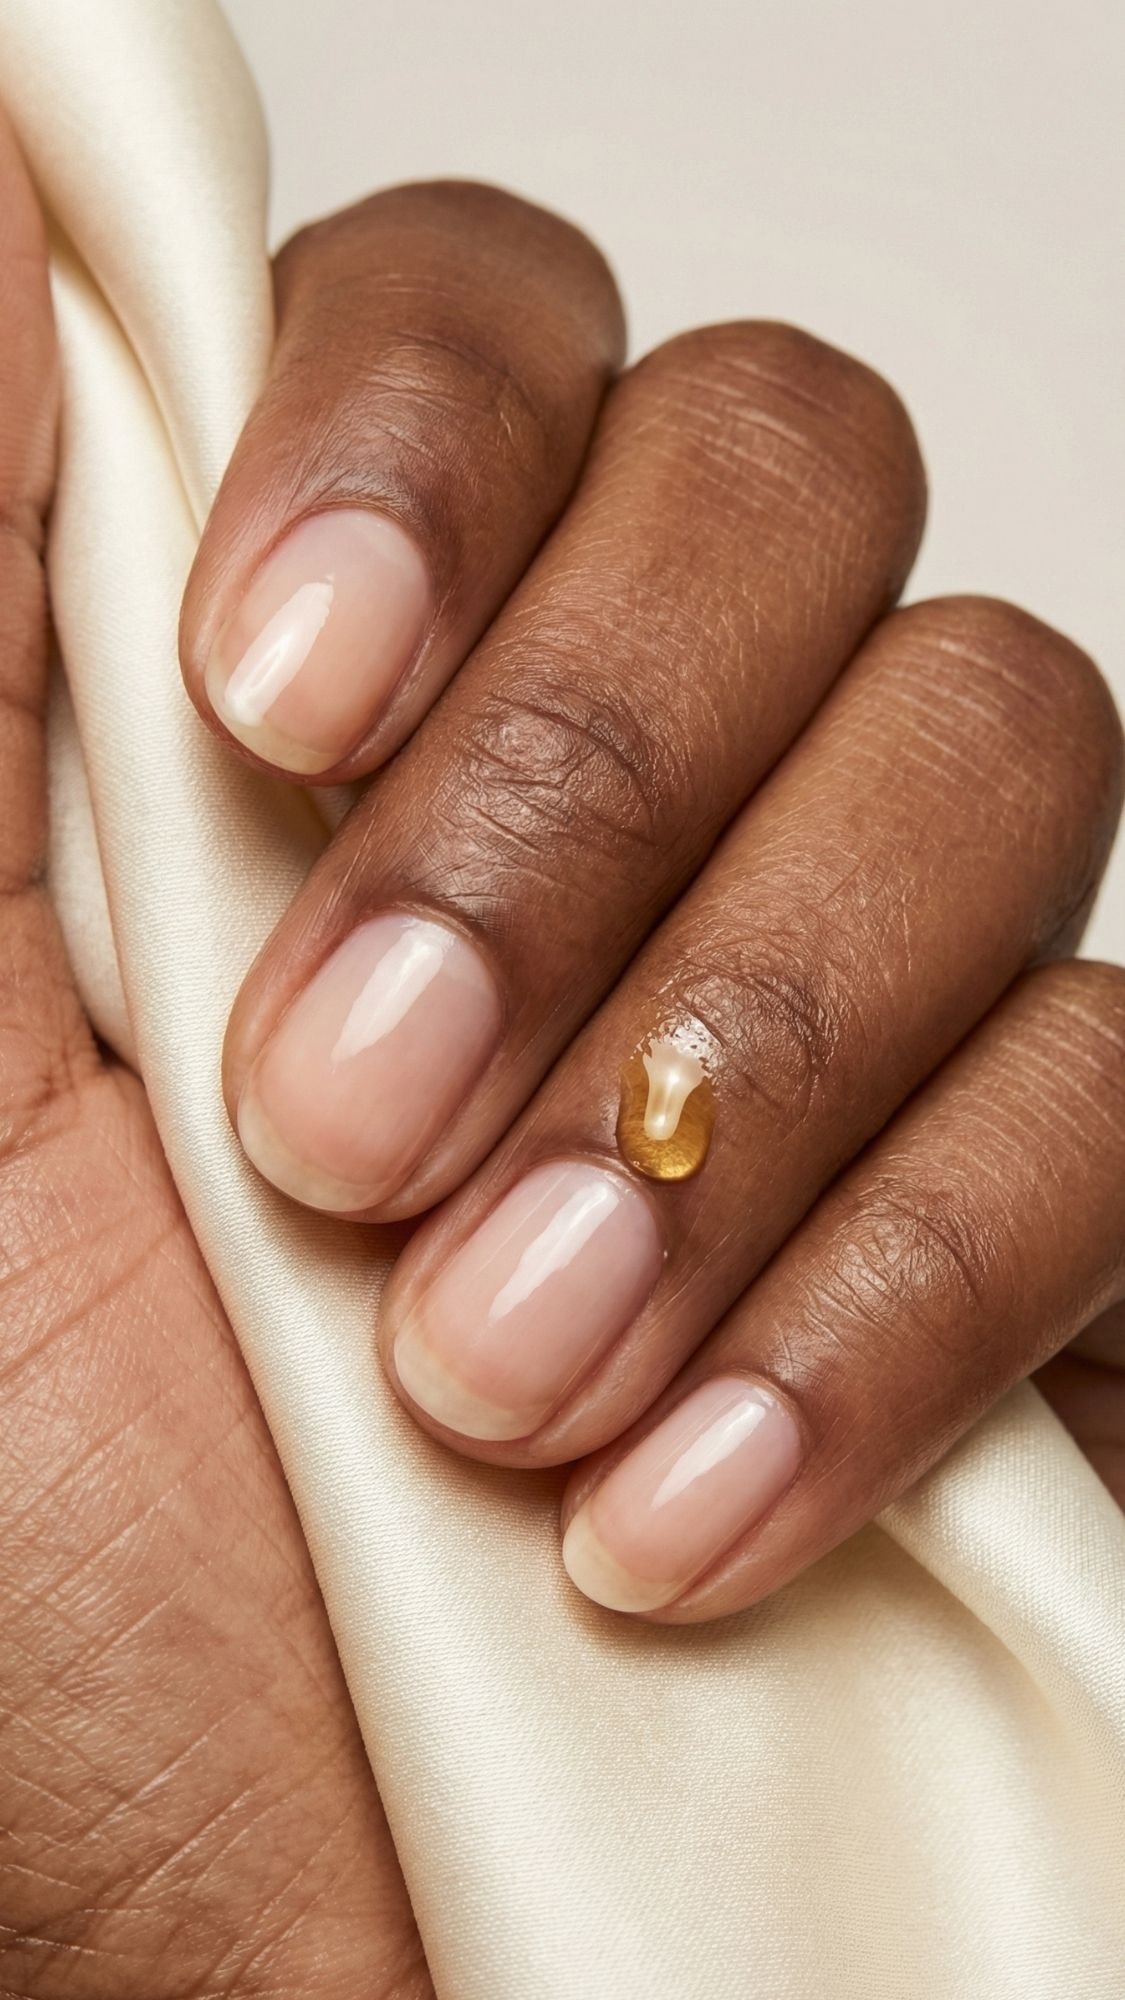
- The Cuticle Oil Routine: This is my number one secret. I keep a bottle of jojoba-based oil on my nightstand. Jojoba is one of the few oils with a molecular structure small enough to actually penetrate the nail plate.
- The “Citrus” Sensory Tip: My favorite oil has a slight, zesty orange scent and feels warm for about ten seconds after you massage it in. That warmth is the blood flow returning to your nail matrix.
- Avoid the “Peel”: If a press-on or gel starts to lift, do not rip it off. You are literally ripping off layers of your own nail. Use a dedicated remover or a soak.
- When to see a Pro: If you notice your nail pulling away from the skin (onycholysis) or any green tint, stop the DIY and see a dermatologist. Safety first!
Shade + Shape Guidance
Not every short nail is built the same. I have realized that the shape you choose can actually change the entire look of your hand. If you feel like your hands look “stubby,” it is likely a shape issue, not a length issue.
- For Wide Nail Beds: Stick to an Oval or Almond shape. By narrowing the tip slightly, you create the illusion of a slimmer nail.
- For Short Fingers: Try the “Italian Manicure” technique I mentioned earlier. Leave a tiny gap of “naked” nail on the left and right sides when painting. It creates a vertical line that elongates the finger.
- Color Rules: Dark colors like navy or espresso “shrink” the nail. If you want your nails to look larger and “cleaner,” stick to the Sheer Pinks and Milky Whites.
- The “Nude” Rule: Always match your nude polish to your undertone. If you have cool undertones, go for a pinky-beige. If you are warm, go for a peachy or tan-beige.

The “Value-Add” Cheat Sheets
I love a good list, so I’ve compiled the absolute essentials here. These are the “rules of thumb” I live by after a decade in the beauty trenches.
Beauty Rules of Thumb
- Your nails are jewels, not tools. Never use them to open cans or boxes.
- If the polish touches your skin, it will chip. Period.
- Two thin coats will always dry faster than one thick coat.
- Cap the free edge on every single layer.
- Always wait at least 2 minutes between layers.
- Use a glass file to prevent “fraying” at the tips.
- Change your top coat every 3 or 4 days to maintain the shine.
Ingredient & Technique Cheat Sheet
- Jojoba Oil: Best for penetration and flexibility.
- Isopropyl Alcohol (91%): The gold standard for dehydration.
- Ethyl Acetate: The ingredient in “good” removers that doesn’t strip as much moisture.
- The “Three Stroke” Method: Center, Left, Right. That is all you need.
- The “Rolling” Method: For press-ons, roll from cuticle to tip to avoid air bubbles.
Common Mistakes and Easy Fixes
- Mistake: Shaking the bottle. Fix: Roll it between your palms to avoid bubbles.
- Mistake: Painting in the sun. Fix: Polish dries too fast in UV light and gets “gloopy.” Paint indoors.
- Mistake: Skipping base coat. Fix: If you already did it and got a stain, use a whitening toothpaste to scrub the nail.
- Mistake: Using old, thick polish. Fix: Add two drops of “Polish Thinner” (never acetone) to the bottle.
- Mistake: Hot water after painting. Fix: Use a “cold plunge.” Dip your hands in ice water for 30 seconds to set the surface.
Beginner Shopping List
- Glass File (Target or Amazon has great ones for $8).
- 91% Alcohol (Drugstore staple).
- Essie “Hard to Resist” (A great 2-in-1 treatment and base).
- A “Sheer Pink” Polish (Look for “Skinny Dip” or “Sugar Daddy” vibes).
- Seche Vite Top Coat (The industry standard for “glass” shine).
FAQ
Q: How do I make my short nails look like gel without a lamp? A: Use a “Plumping” top coat. These formulas are thicker and create that high-dome look that mimics gel. Layering it twice (on day 1 and day 4) keeps the illusion alive.
Q: Why does my polish always peel off in one big piece? A: This is almost always due to oil on the nail plate. If you don’t scrub with alcohol before you start, the polish is just “floating” on your natural oils.
Q: Can I wear short nails to a wedding? A: Absolutely. IMO, a short, “Glazed Pearl” or “Soap” nail is much more elegant for a wedding than long, distracting extensions. It lets your dress and your jewelry be the stars.
Q: How do I remove press-ons without damage? A: Soak them in warm water, olive oil, and dish soap for 15 minutes. The oil breaks down the glue bonds so they “slide” off instead of ripping.
Q: Do I really need to wait 20 minutes for them to dry? A: If you want them to last? Yes. But you can speed it up with quick-dry drops. They create a slippery barrier so if you bump your nail, it “slides” rather than “dents.”
I’ve wasted hundreds of dollars over the last decade on “magic” products that ended up in the back of my bathroom drawer. You don’t need a hundred bottles to get this look. You just need the right ones. If you are ready to build your “Expensive Nail” starter kit, here is exactly what I would buy if I had to start my collection from scratch today.
The “Expensive” Short Nail Shopping Guide
I have found that the brand of the color matters far less than the brand of the prep tools. You can make a $2 bottle of polish look like a million bucks if your base and top coats are elite. FYI, these are the categories I swear by for that high-gloss, long-wear finish we’ve been talking about. 🙂
1. The “Indestructible” Prep Tools
- The Glass Nail File: Skip the sandpaper files. I’ve noticed that a high-quality glass file lasts forever and prevents the peeling that usually ruins short nails.
- 91% Isopropyl Alcohol: Buy the big bottle at the drugstore. It is the most effective way to “reset” your nail plate before you paint.
- A Professional Cuticle Remover: Look for a liquid or gel formula containing potassium hydroxide. It dissolves dead skin in seconds without the need for sharp nippers.
2. The “Blurring” Liquids
- Ridge-Filling Base Coat: This is the secret to making short nails look smooth. I look for formulas that have a slight “milky” tint to neutralize any natural staining on the nail.
- A “Plumping” Top Coat: You want a formula that feels thick and “juicy” on the brush. It provides that gel-like dome shape that makes a manicure look expensive.
3. The “Hall of Fame” Shades
- The Soap Pink: Look for “sheer” or “translucent” on the label. If the bottle looks like a very pale, milky lavender-pink, that is the one you want.
- The Perfect Nude: Match this to your skin’s undertone. I have realized that a nude that is slightly darker than your skin looks more sophisticated than one that is too light.
- The Cherry Mocha: This should be a deep, “oxblood” red with a brown base. It is the ultimate power color for short nails.
4. The Maintenance Kit
- Jojoba-Based Cuticle Oil: Check the ingredients. If the first ingredient is mineral oil, put it back. You want pure jojoba or almond oil for real penetration.
- A Small Angled Makeup Brush: This is for cleanup. It doesn’t need to be expensive; any stiff, synthetic eyeliner brush will do the trick.
Why Less is Always More
At the end of the day, elegance is really just about intentionality. Choosing to rock a short, perfectly groomed nail is a choice that says you value your health and your time. I’ve noticed that when I switch from long extensions back to my natural short nails, my entire vibe changes. I feel more capable, more professional, and honestly, much more chic.
Ever wondered why the most iconic fashion houses always feature short nails on their runways? It is because a short nail never competes with your outfit. It complements it. Whether you go for the “Soap” nail or that bold “Cherry Mocha,” the key is in the prep and the confidence you carry it with.
I hope this guide helps you reclaim your natural nails and find a look that makes you feel incredible. After all, your hands do so much for you. Why not give them the luxury treatment they deserve? IMO, there is nothing more powerful than a woman who knows exactly how to take care of herself. 🙂