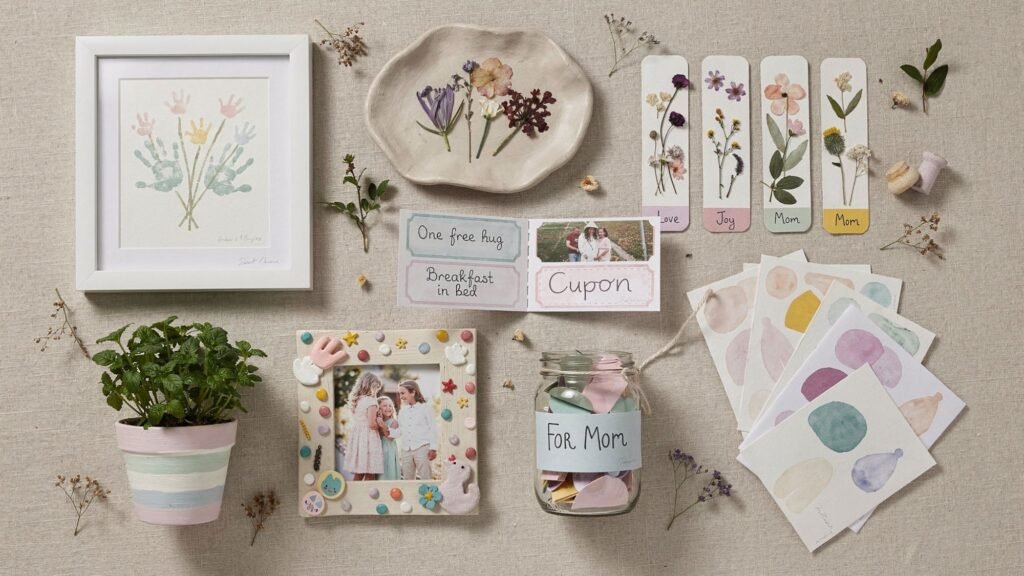
Let’s be real, kids want to make something for Mom that feels like a “real gift,” and you want a project that doesn’t end with glue in someone’s hair and tears over a crooked cut. So I pulled together 22 kid-friendly DIY presents that actually work, even if you’re doing this at the kitchen table with a toddler who thinks paint belongs on elbows. These ideas stay simple, doable, and cute enough that Mom will keep them, not “politely smile and secretly toss them later.” You know what I mean. 🙂
In my workshop, I’ve found that the difference between a craft that looks sweet and a craft that looks… suspicious, usually comes down to two things, prep and the right materials. You can hand a kid the best idea in the world, but if the glue is wrong, the paint is too wet, or the paper is too thin, the whole thing slides apart like a sad little tragedy. So in this post, I’m not just listing ideas, I’m giving you the why, the how, and the “what to do when it goes sideways” fixes.
Here’s how this list is set up so you can actually use it:
- Each gift includes: best age range, time estimate, materials, steps, and pro tips
- I’ll also tell you when an adult should jump in, because IMO nobody needs a 6-year-old operating a hot glue gun like it’s a tiny flamethrower
- You’ll get a full troubleshooting section, plus finishing and sealing tips so these gifts last
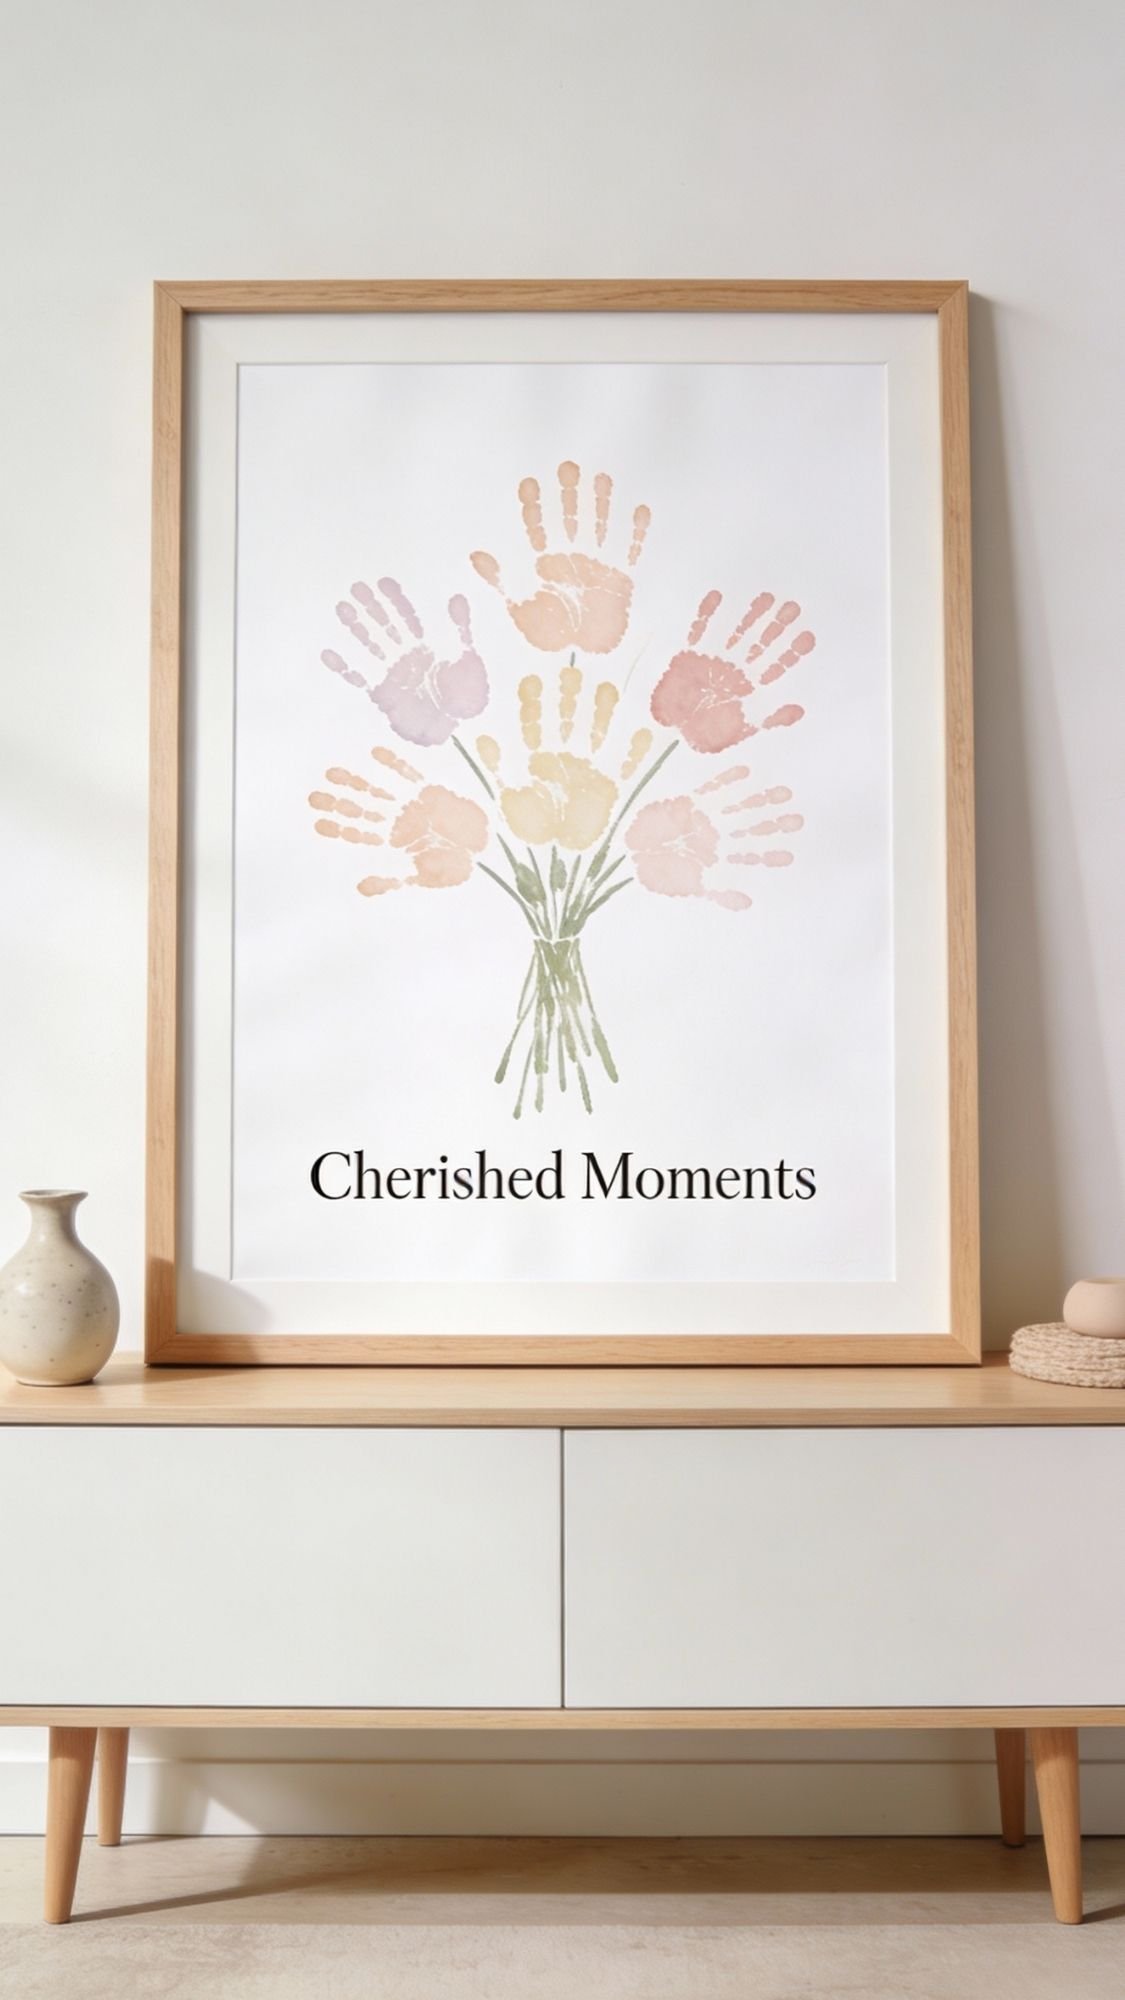
DIY Gift #1: Handprint Flower Bouquet Card in a Frame
This one hits every time because it feels personal, it looks adorable, and it turns into something Mom can actually display instead of stuffing it in a drawer. Plus, you can adjust it for toddlers, preschoolers, or older kids just by changing the details.
Best for: Ages 2 to 10 (adult help for little ones)
Time: 20 to 30 minutes + dry time
Difficulty: Easy, low mess if you follow the paint trick below
Materials
- White cardstock or heavyweight paper (cardstock matters, thin paper wrinkles fast)
- Washable tempera paint (or washable acrylic for older kids)
- Mini foam roller or makeup sponge (this is the secret to clean prints)
- Paper plate or paint tray
- Black marker or paint pen
- Frame (simple dollar store frames work great)
- Baby wipes or damp paper towels
Steps
- Prep the print zone. Put cardstock on a hard surface, not a soft towel. Soft surfaces make prints blurry.
- Load the paint thin. Pour a small amount of paint on a plate, roll the foam roller lightly. You want an even coat, not a dripping mess.
- Stamp the “flowers.” Press the child’s hand straight down, then lift straight up. No wiggling. Wiggling turns flowers into blobs.
- Add stems and a bow. Use a black marker to draw green stems and a ribbon bundle. Older kids can draw leaves, little ones can do fingerprint leaves.
- Write the message. Keep it short and sweet: “I love you, Mom” or “Happy Mother’s Day.”
- Dry completely. Let it dry flat for at least 30 minutes before you even think about framing it.
Pro Tips that make it look polished
- Do a test stamp first on scrap paper. Kids relax once they see how it works.
- Use a foam roller, not a paintbrush. Brushes leave streaks and thick patches that smear.
- If you want it extra cute, let older kids outline the handprints with a thin marker once dry. It makes the “flowers” pop.
Quick fixes if it goes wrong
- Smudged print: Turn it into a “double flower” by adding petals with a marker.
- Too much paint: Blot gently with a paper towel, then restamp on fresh paper.
- Wrinkled paper: That usually means the paper is too thin. Switch to cardstock and try again.
Age tweaks
- Toddlers: You do the rolling, they do the stamping.
- Preschool: Let them choose paint colors and add fingerprint leaves.
- Elementary: They can add a full bouquet, write a note on the back, and decorate the frame.
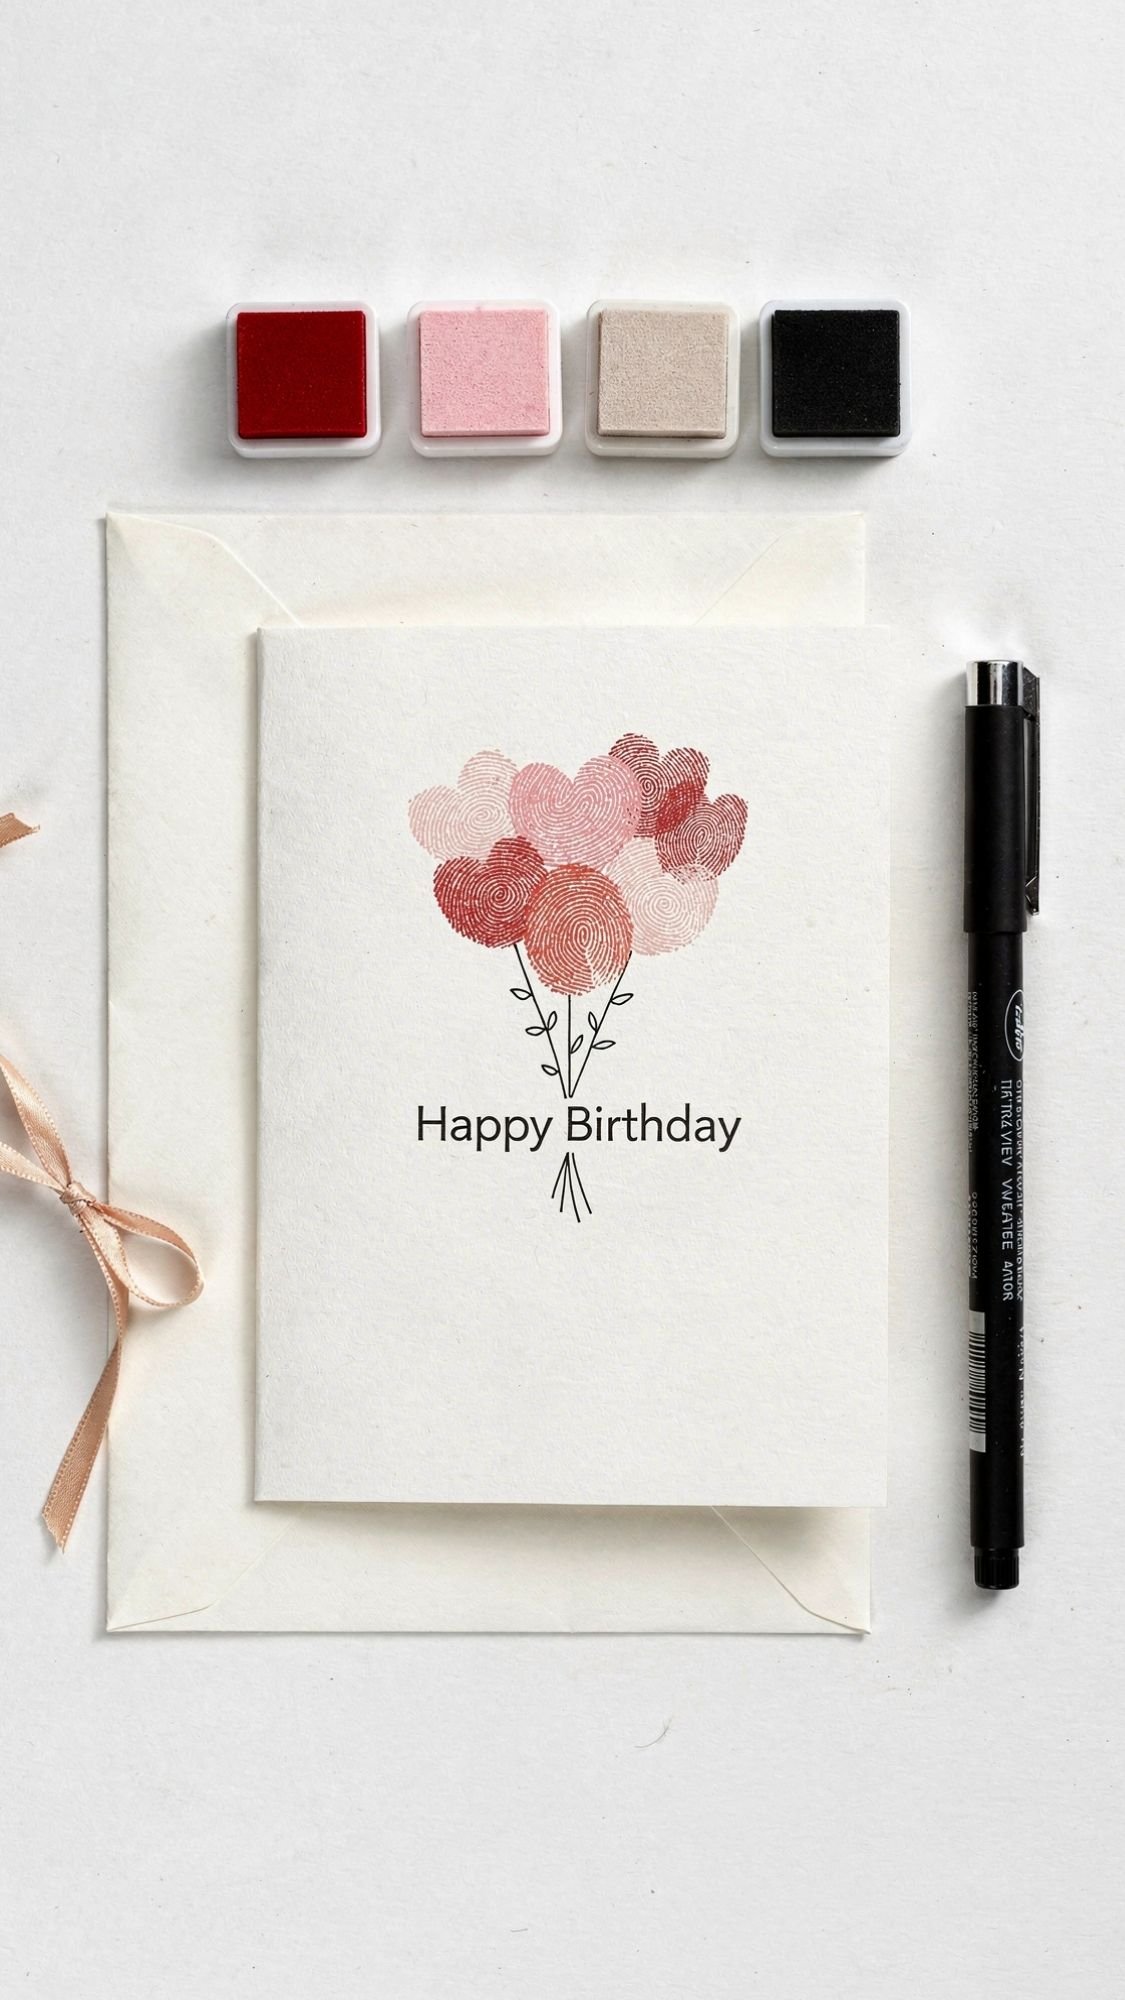
DIY Gift #2: Fingerprint Heart “Bouquet” Card
This one is the easiest “big impact, low stress” craft. Kids feel like they’re doing real art, and the finished card looks surprisingly intentional, even if someone’s fingerprints are a little… enthusiastic.
Best for: Ages 3 to 10
Time: 15 to 25 minutes + dry time
Difficulty: Very easy
Materials
- White cardstock (or a blank folded card)
- Washable ink pads or washable paint
- Black fine-tip marker (or a regular marker for younger kids)
- Optional: green marker for stems
- Baby wipes or a damp paper towel
Steps
- Draw the stems first. Use the black marker to draw several long stems coming from the bottom of the page like a bouquet.
- Add a vase or “hand-tied” bow. Draw a simple jar at the bottom, or just draw a ribbon tied around the stems.
- Make the heart fingerprints.
- Have the child press a fingertip into the ink pad or paint.
- Press two fingerprints side-by-side at an angle to form a heart shape.
- Repeat at the top of each stem like “flowers.”
- Add leaves and details. Older kids can add small leaves, dots, or tiny lines around the bouquet.
- Write the message. Keep it short and bold so it reads clean: “Happy Mother’s Day” or “Love You, Mom.”
- Let it dry flat. Do not fold the card until the ink or paint feels completely dry.
Pro Tips that make it look clean, not chaotic
- Ink pads beat paint if you want crisp fingerprints with minimal smearing.
- If you use paint, use less than you think. A thin layer gives cleaner prints.
- Tell kids to press and lift. If they twist their finger, the heart turns into a blob. Ask me how I know. :/
Quick fixes if it goes wrong
- Blobby hearts: Outline the heart shape with a marker and add a few tiny dots around it, it becomes “stylized.”
- Smudged stems: Turn the smudge into leaves. Nobody needs to know.
- Uneven bouquet: Add a couple extra hearts to balance it out. Extra flowers always look intentional.
Age tweaks
- Toddlers: You draw the stems and vase, they stamp single fingerprints, you turn them into hearts.
- Preschool: They can attempt the double-print heart with guidance.
- Elementary: They can do the full layout and write a longer note inside.
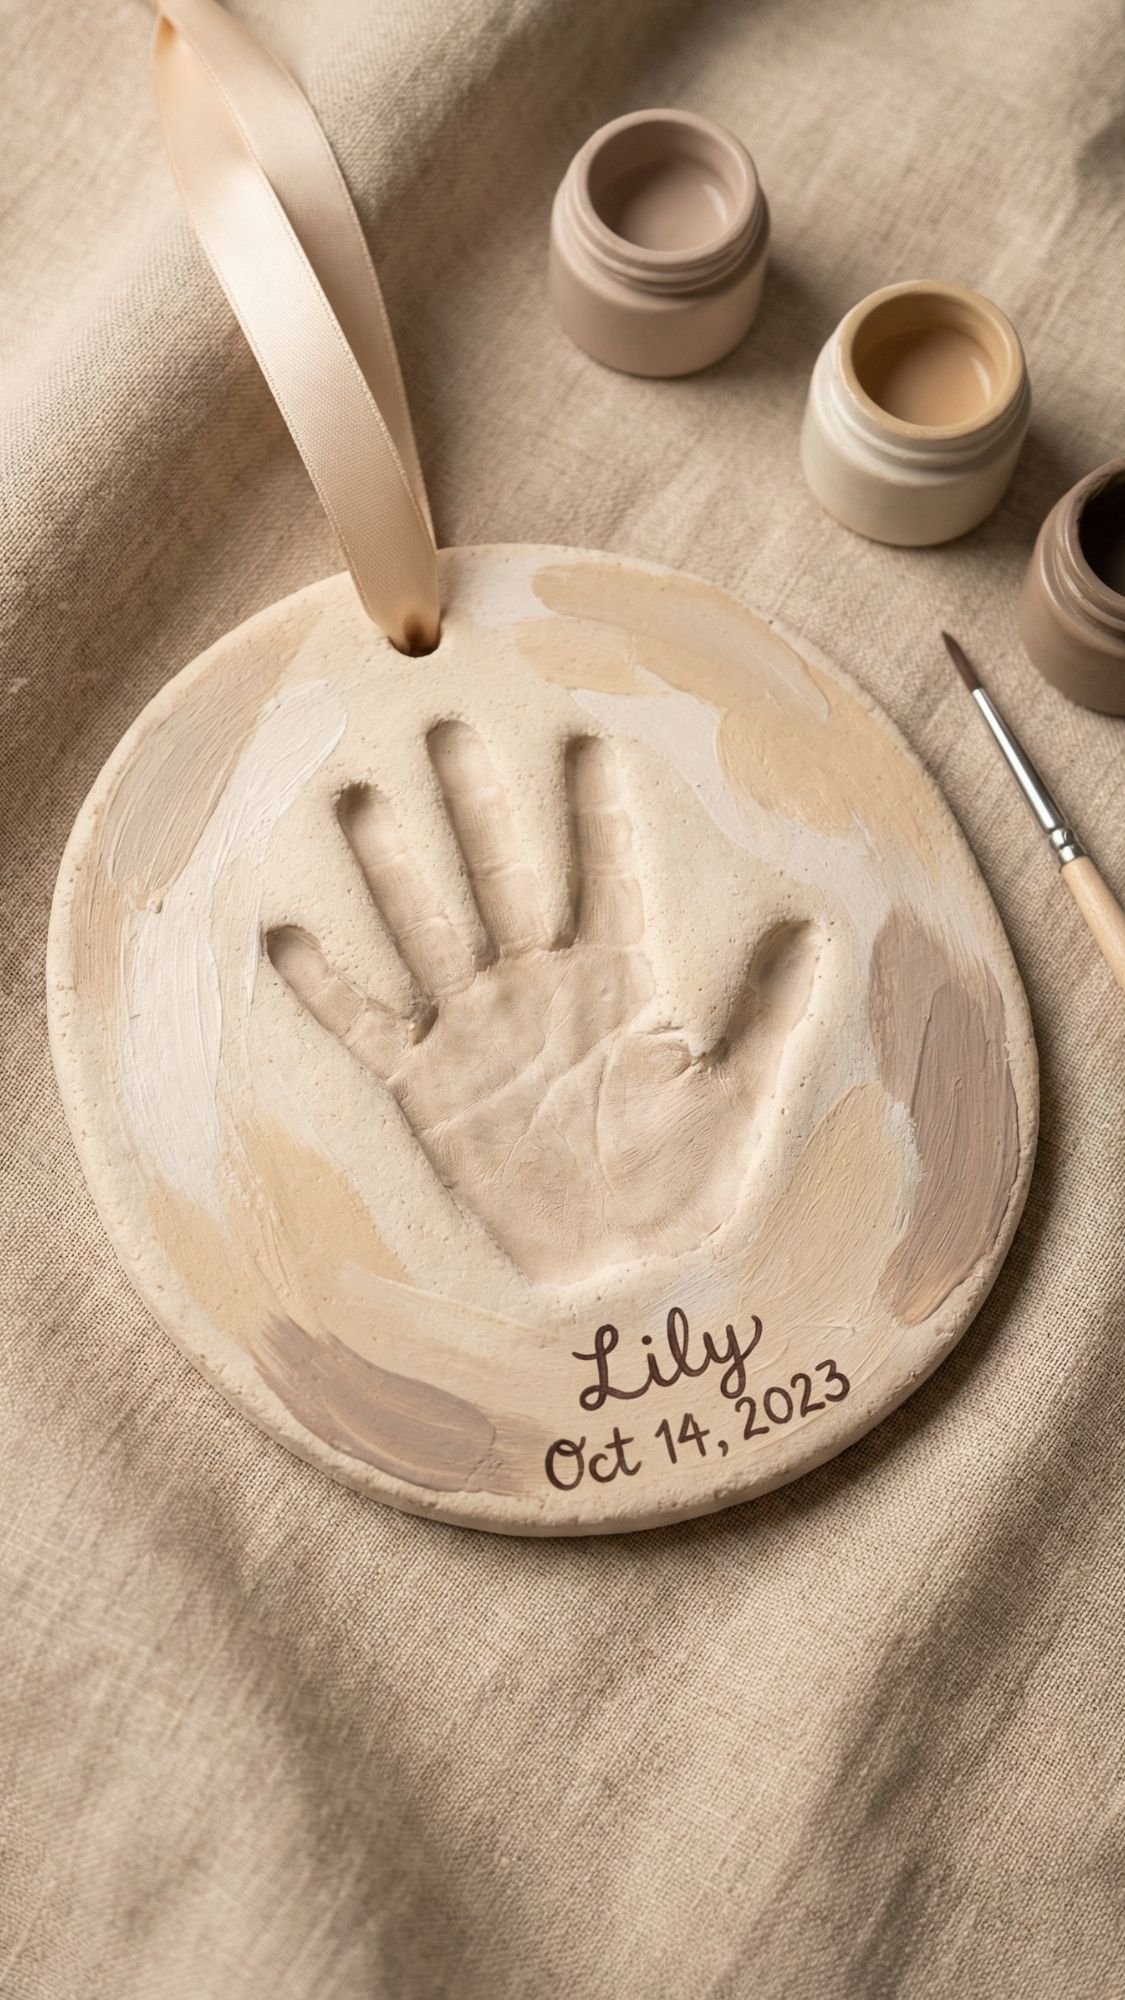
DIY Gift #3: Salt Dough Handprint Keepsake Plaque
This one is an instant classic because it turns a tiny handprint into something Mom will keep for years. It feels like a “real” gift, and you can make it look surprisingly polished with a couple small choices.
Best for: Ages 2 to 10 (adult does mixing and baking)
Time: 20 minutes hands-on + drying/baking time
Difficulty: Easy, but timing matters
Materials
- 1 cup all-purpose flour
- 1/2 cup salt (fine salt works best)
- 1/2 cup water (add slowly)
- Rolling pin (or a clean cup)
- Straw (for a ribbon hole)
- Baking sheet and parchment paper
- Acrylic paint or washable paint (older kids can paint, adults can touch up)
- Clear sealer (brush-on Mod Podge or acrylic spray sealer)
- Ribbon or twine
- Optional: letter stamps, paint pen for name and date
Steps
- Mix the dough. Stir flour and salt, then add water slowly until it feels like playdough. If it sticks to your fingers, sprinkle in a tiny bit more flour.
- Roll it thick. Roll to about 1/2 inch thick. Thin dough cracks fast, and nobody wants a shattered keepsake.
- Make the handprint. Press the child’s hand straight down firmly, then lift straight up. If they wiggle, you get a “ghost hand.”
- Add a hole. Use a straw near the top for hanging. Wiggle the straw slightly so the hole stays open after baking.
- Bake or air dry.
- Bake option: Bake at 200°F for 2 to 3 hours (flip halfway if it’s thick).
- Air dry option: Let it air dry 24 to 48 hours, flipping once.
- Paint and personalize. Paint the handprint, add name and date, keep the design simple and sweet.
- Seal it. Use thin coats. Let each coat dry before adding the next.
- Add ribbon and gift it. Tie a ribbon through the hole, you’re done.
Pro Tips that prevent cracking and warping
- Thicker is safer. If you roll it too thin, it dries uneven and cracks.
- Dry slow. Keep it away from heaters and sunny windows. Fast drying causes cracks.
- Use parchment. It helps prevent sticking and makes flipping easier.
Quick fixes if it goes wrong
- Cracks after drying: Fill cracks with lightweight spackle or a bit of fresh dough “paste,” let dry, then sand gently and repaint.
- Warping: Flip it during drying or baking so both sides dry evenly.
- Handprint looks shallow: Paint inside the print with a darker shade so it reads clearly.
Age tweaks
- Toddlers: Adults press the hand gently and quickly, toddlers love the painting part later.
- Preschool: They can help mix dough and choose paint colors.
- Elementary: They can stamp letters, paint details, and write the message on the back.
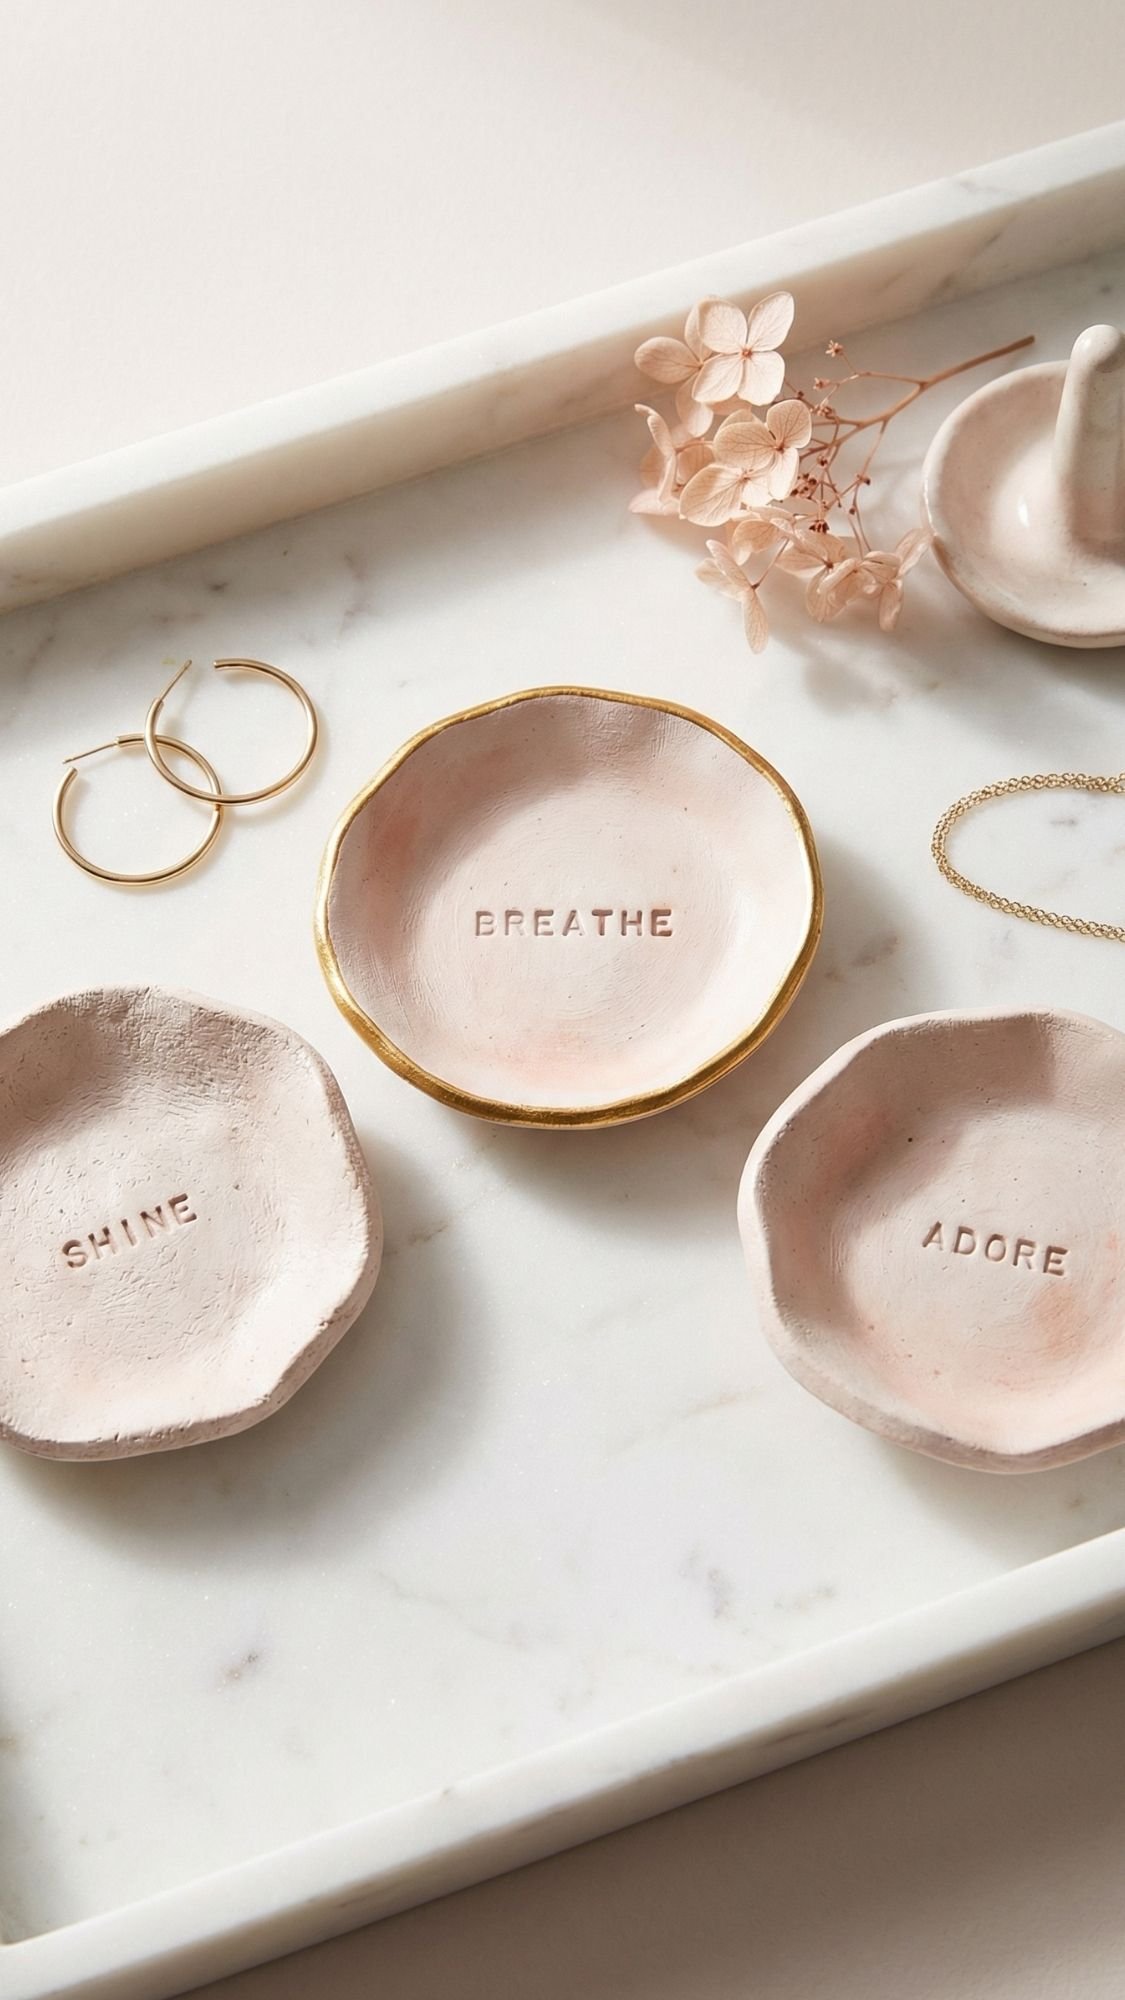
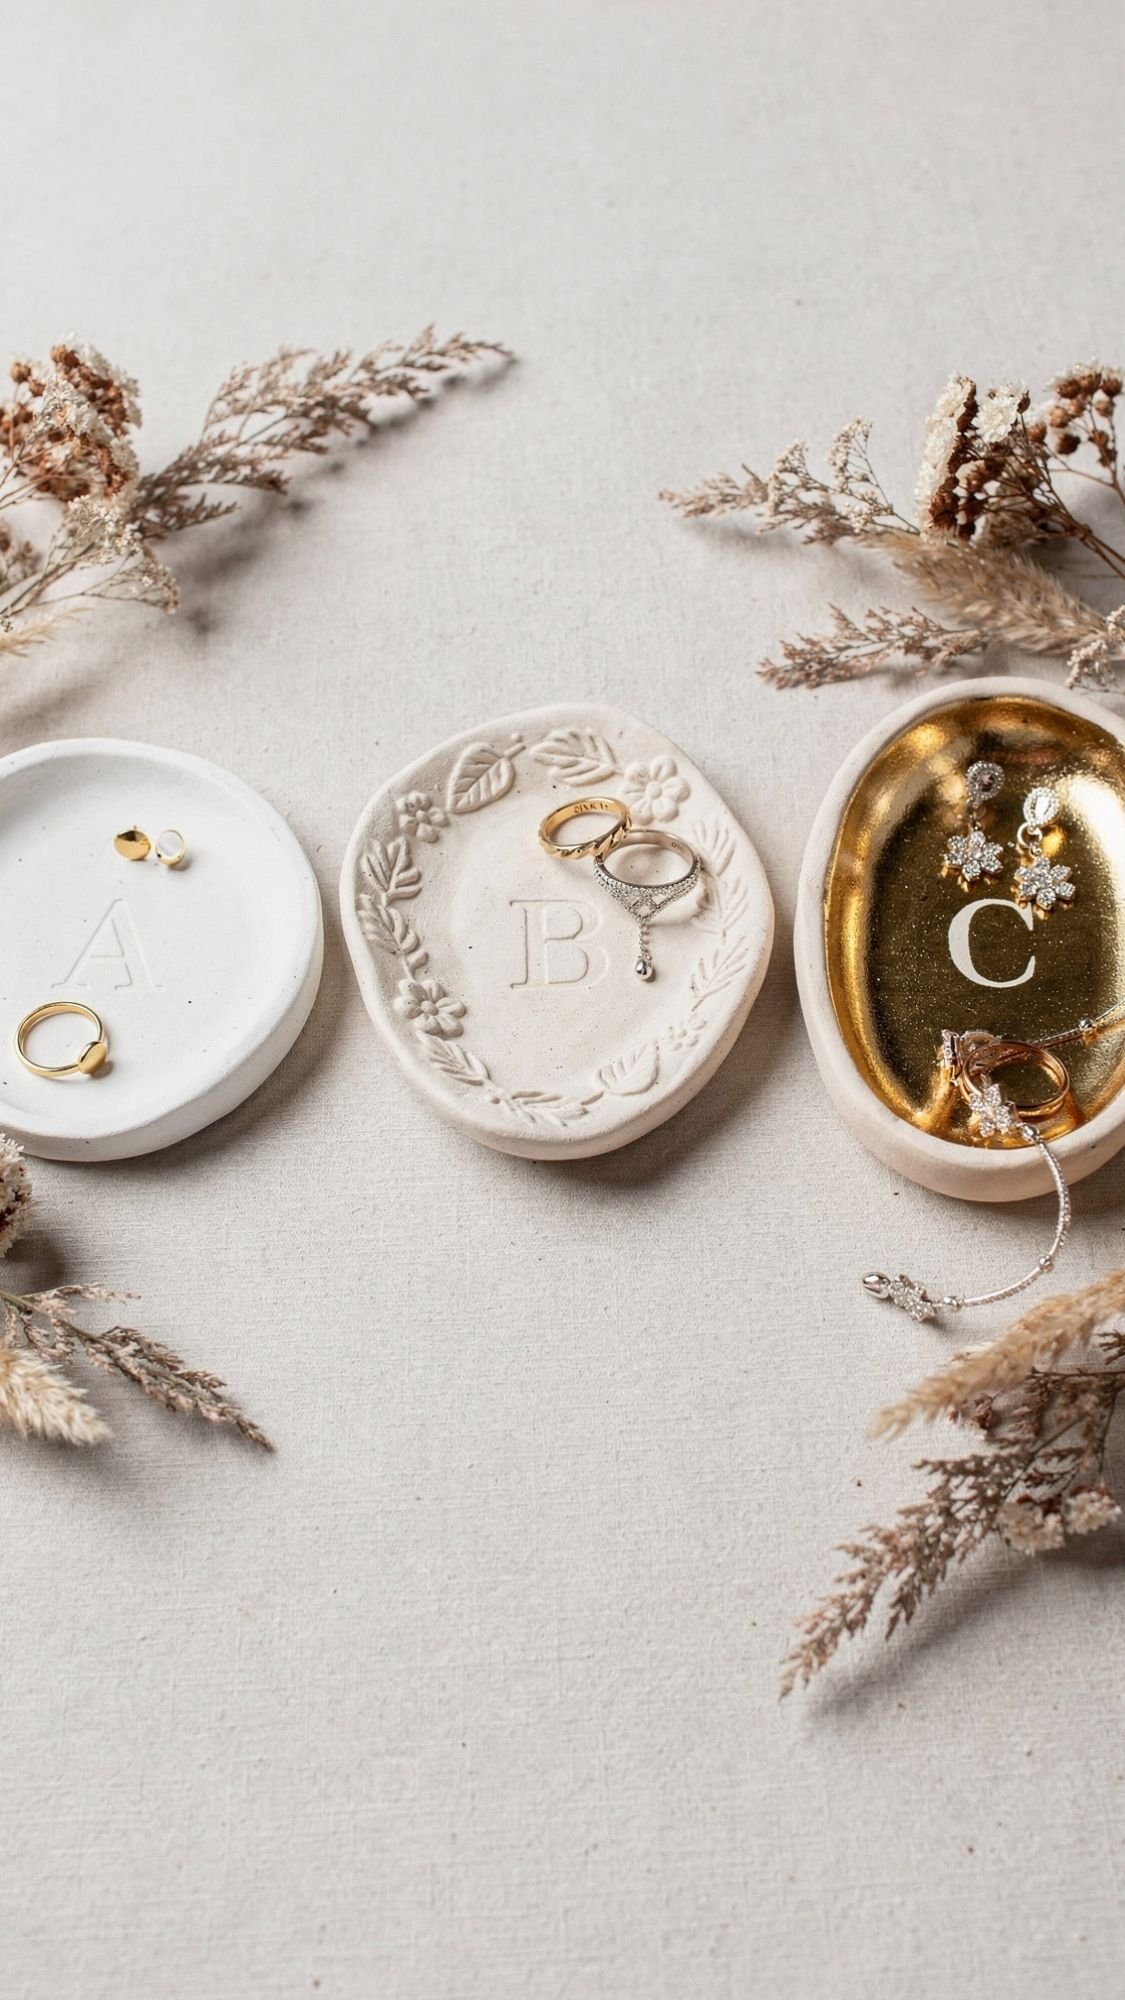
DIY Gift #4: Air-Dry Clay Trinket Dish With Stamped Letters
This one looks like something you’d buy at a boutique, which is honestly hilarious considering it starts as a blob of clay on a kitchen table. Moms love it because it’s useful, and kids love it because they get to “make pottery” without a wheel or a kiln.
Best for: Ages 6 to 12 (younger kids can help with shaping, adult handles sealing)
Time: 30 minutes hands-on + 24 to 48 hours dry time
Difficulty: Easy, but be patient with drying
Materials
- Air-dry clay (white or natural)
- Small bowl (this becomes your mold)
- Rolling pin (or smooth bottle)
- Letter stamps or alphabet beads (for “MOM” or initials)
- Butter knife or clay tool (optional)
- Fine grit sandpaper (220 to 400 grit)
- Acrylic paint or metallic paint pen (optional)
- Clear sealer (brush-on Mod Podge, acrylic spray, or water-based polyurethane)
- Small paintbrush
- Parchment paper
Steps
- Prep your surface. Roll clay on parchment paper so it doesn’t stick.
- Roll clay evenly. Aim for about 1/4 inch thick. Too thin warps, too thick takes forever to dry.
- Cut a circle. Use the rim of a bowl or a cup to trace and cut a clean circle.
- Shape the dish. Lift the clay circle and press it gently into an upside-down bowl to create the dish shape.
- Stamp the letters. Stamp “MOM,” initials, or a short word while the clay is still soft. Press straight down and lift straight up so letters stay crisp.
- Smooth edges. Use a damp fingertip to smooth cracks or rough spots.
- Dry completely. Leave it in the bowl mold for the first 12 to 24 hours so it holds shape. Then remove it and let it finish drying.
- Sand and decorate. Once fully dry, sand the edges lightly. Paint details if you want.
- Seal it. Apply thin coats, and let each coat dry fully before the next.
Pro Tips that make it look clean and store-bought
- Even thickness matters. Uneven clay is the #1 reason dishes warp.
- Leave it in the bowl mold longer than you think. Pulling it out too early makes it slump.
- Sand the rim lightly after drying. That one step makes it look finished, not “kid craft.”
Quick fixes if it goes wrong
- Warping: Put it back in the bowl mold while it’s still slightly damp and let it dry longer.
- Cracks: Smooth with a damp finger early. If it’s already dry, fill tiny cracks with a bit of clay paste, let dry, sand, then seal.
- Letters look messy: Trace over them with a paint pen after drying, it turns into a design choice.
Age tweaks
- Younger kids: They can press the clay into the mold and decorate edges with texture (fork, lace, leaves).
- Elementary: They can stamp clean letters and paint a metallic rim.
- Older kids: They can make a set, one for rings and one for earrings.
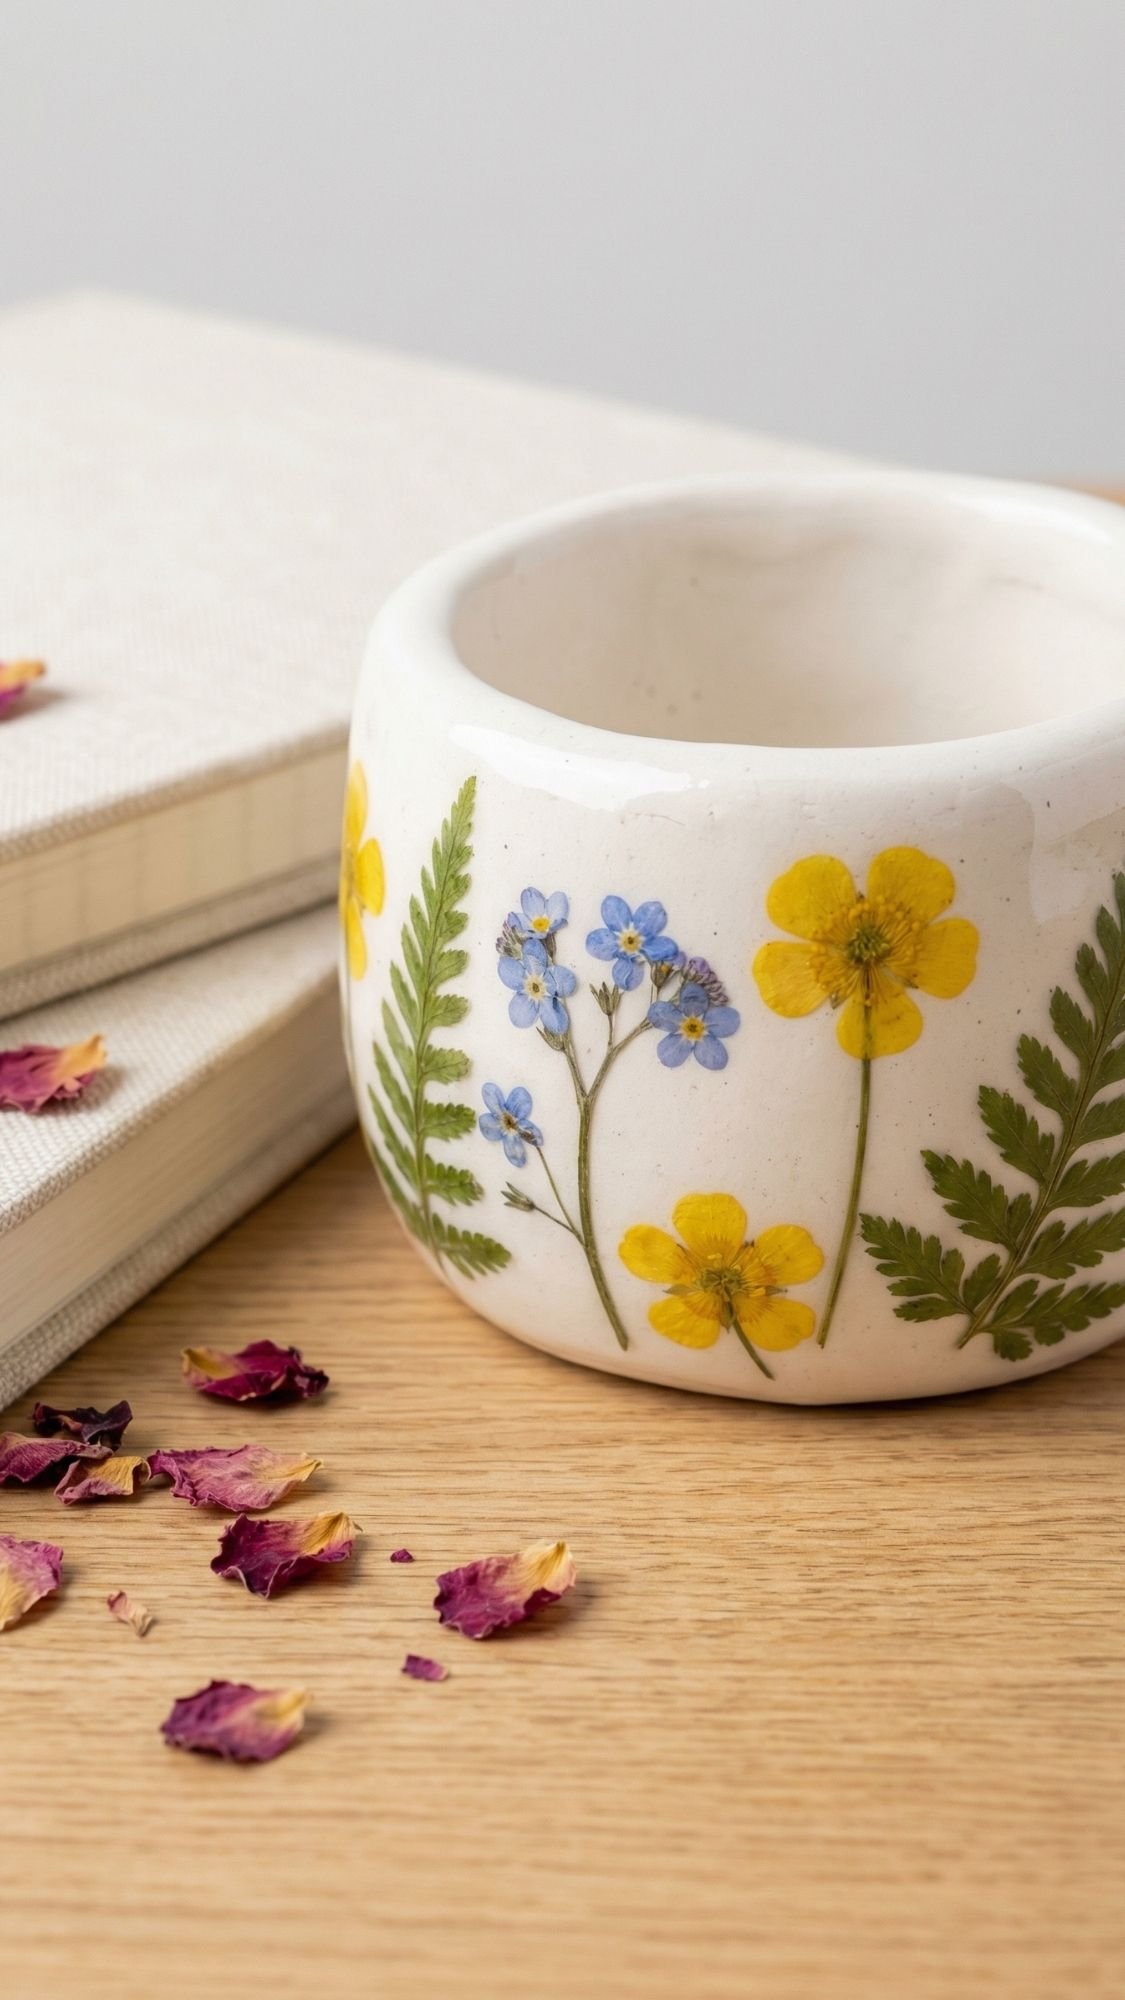
DIY Gift #5: Pressed Flower Clay Pinch Pot
This is the one that makes people say, “Wait… a kid made that?” because it looks delicate and expensive. The trick is using fully dried pressed flowers and sealing them the right way so they don’t lift or brown later.
Best for: Ages 7 to 12 (adult helps with sealing)
Time: 35 minutes hands-on + 24 to 72 hours dry time
Difficulty: Easy, but detail work takes patience
Materials
- Air-dry clay (white works best for a clean look)
- Pressed flowers (fully dried)
- Small bowl of water
- Soft paintbrush
- Mod Podge (matte or gloss) or clear-drying craft glue
- Clear sealer (water-based, brush-on or spray)
- Parchment paper
- Optional: gold paint pen for a rim detail
- Optional: fine sandpaper (220 to 400 grit)
Steps
- Make the pinch pot base. Roll a ball of clay, then press your thumb into the center and pinch outward to form a small bowl shape.
- Let it firm up slightly. Wait about 10 to 15 minutes so the clay holds shape better and doesn’t squish under the flowers.
- Place the pressed flowers. Lay flowers gently on the surface where you want them. Keep them flat and avoid thick stems.
- Press flowers into the clay. Use a fingertip or the back of a paintbrush to press them lightly so they sit flush.
- Seal the flowers immediately. Brush a thin coat of Mod Podge over the flowers. Work from the center outward so you don’t rip petals.
- Dry completely. Let the pot dry 24 to 72 hours depending on thickness. Flip it after the first day so the bottom dries evenly.
- Sand and finish. Sand rough edges lightly once fully dry.
- Add optional details. A thin gold rim looks fancy, but keep it minimal.
- Seal the whole piece. Add 1 to 2 thin coats of clear sealer to protect it.
Pro Tips that keep the flowers crisp and pretty
- Use fully pressed flowers only. If flowers still hold moisture, they brown or get cloudy under sealant.
- Choose thin flowers. Baby’s breath, small daisies, and flat petals behave better than chunky blooms.
- Thin coats win. Thick Mod Podge puddles turn milky and distract from the flowers.
Quick fixes if it goes wrong
- Flowers lifting: Add a thin Mod Podge layer, cover with parchment, press gently with a book for 10 minutes.
- Cloudy sealant: That usually comes from thick coats or moisture. Let it dry longer, then add a thin clear coat over the top.
- Warped pot: Dry it in a small bowl mold for the first 12 hours so it holds shape.
Age tweaks
- Younger kids: Let them texture the clay with lace or a leaf, then you place and seal the flowers.
- Elementary: They can arrange flowers like a design puzzle and do careful sealing with guidance.
- Older kids: They can make a set and match flower colors to Mom’s vibe.
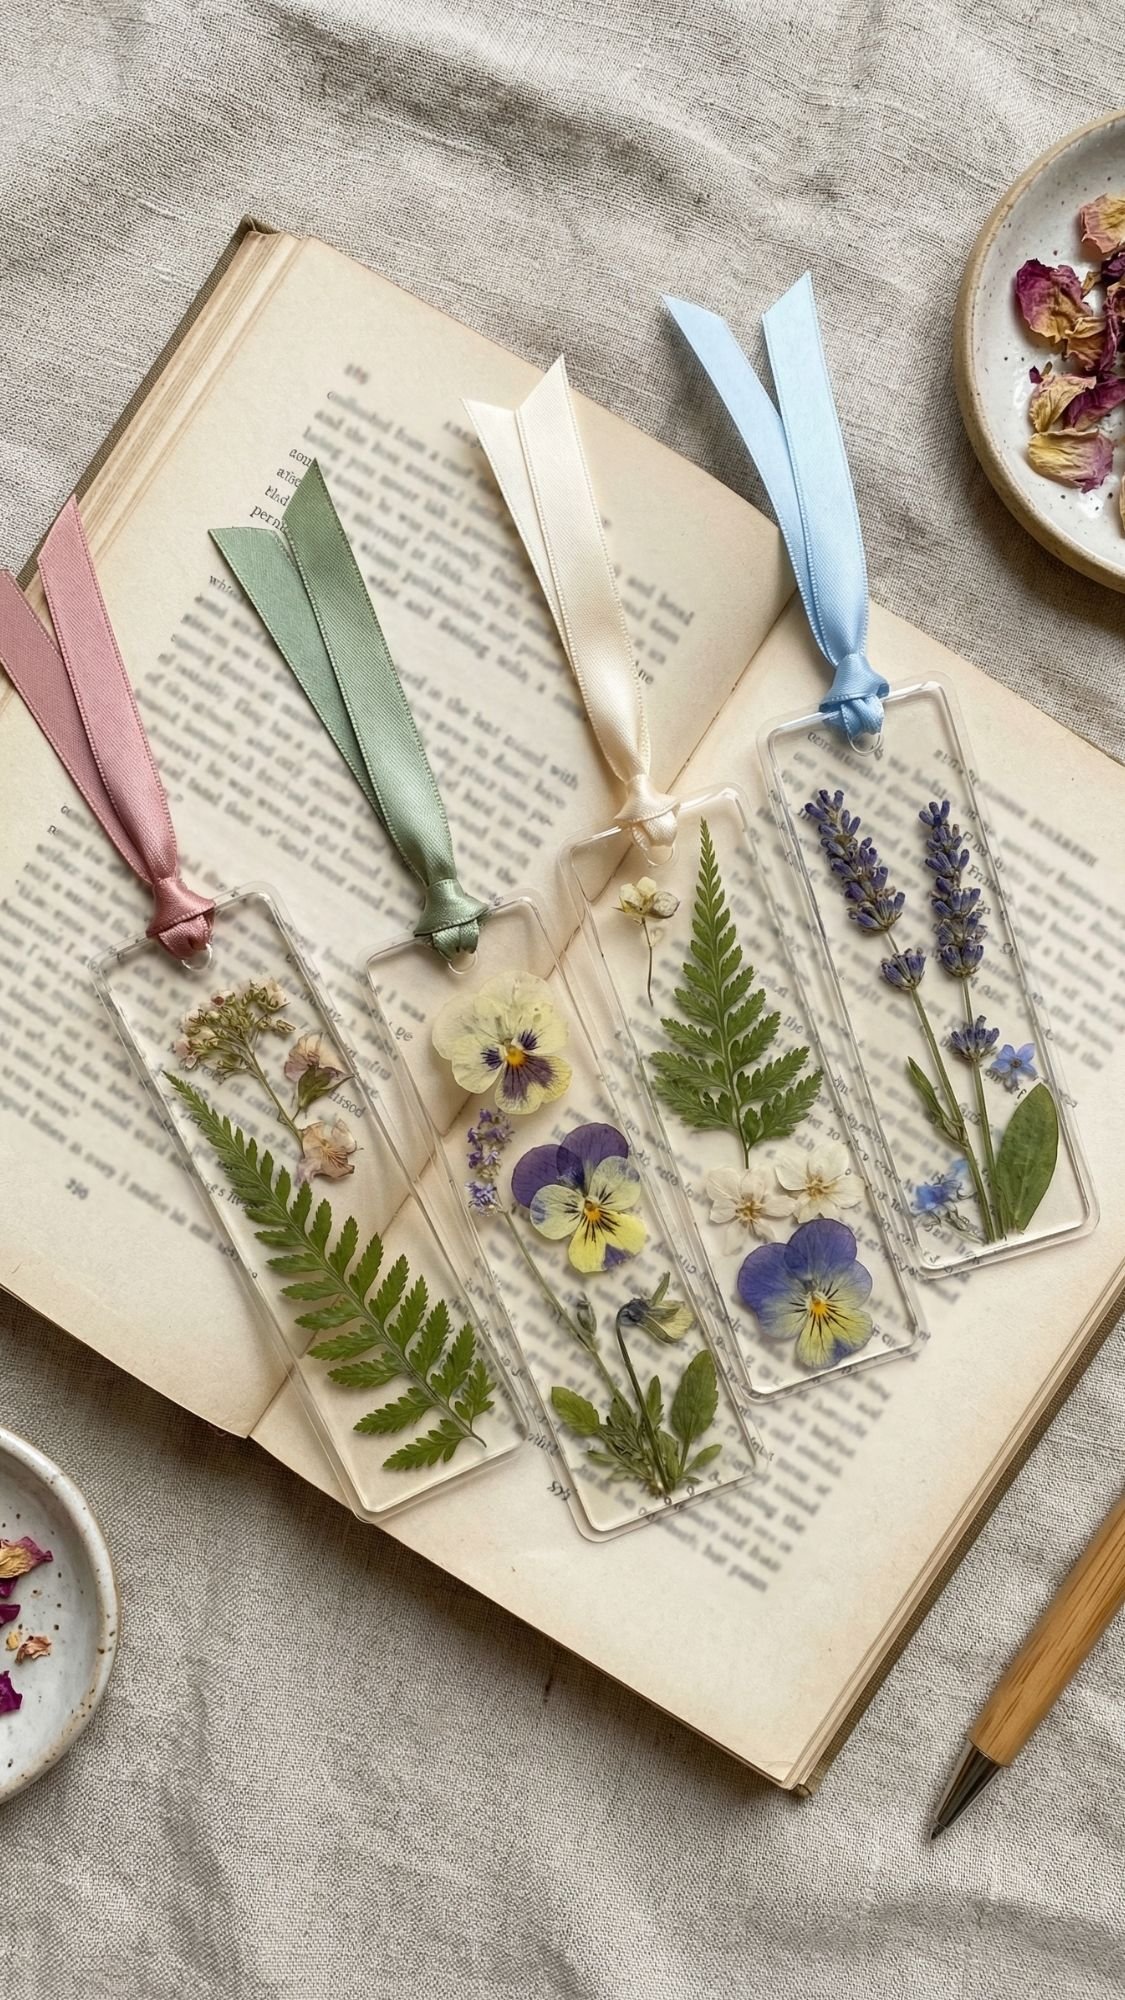
DIY Gift #6: Laminated Pressed Flower Bookmark
This is one of the easiest “looks fancy, costs almost nothing” gifts on the list. Moms actually use bookmarks, and the pressed flowers give it that sweet, botanical vibe that looks way more grown-up than most kid crafts.
Best for: Ages 5 to 12 (adult helps with laminating if needed)
Time: 15 to 25 minutes (plus flower pressing time)
Difficulty: Very easy
Materials
- Pressed flowers (fully dry, flat)
- Cardstock or watercolor paper (cut into bookmark strips)
- Laminating sheets or clear packing tape
- Scissors or paper trimmer
- Hole punch
- Ribbon or tassel
- Optional: metallic marker for a border
Steps
- Cut the bookmark base. Cut cardstock into strips about 2 inches wide by 6 to 7 inches long. (You can go longer if Mom likes big bookmarks.)
- Arrange flowers first. Lay flowers on the strip before laminating. Keep them thin and leave a clean border around the edge so the laminate seals.
- Laminate it.
- Laminating sheets: Place bookmark inside, press from the center out.
- Tape method: Lay packing tape sticky-side down on the table, place the bookmark on it, then cover with another strip of tape. Smooth like your life depends on it.
- Trim neatly. Leave a small clear border so it stays sealed. Sharp corners catch and peel, so round them slightly.
- Punch a hole and add ribbon. Punch near the top and tie ribbon or a tassel.
Pro Tips that keep it crisp and bubble-free
- Leave a border. If flowers touch the edge, the laminate won’t seal and it starts peeling later.
- Burnish slowly. Use a gift card to press out bubbles.
- Round the corners. It’s a tiny detail that makes it last longer.
Quick fixes if it goes wrong
- Bubbles: Press them toward the edge with a gift card. If one stays trapped, pop it with a pin and smooth it flat.
- Peeling edges: Trim again, then reseal with a fresh laminate layer or a strip of tape around the edge.
- Flowers shifting: Place them with tweezers, or press lightly on top before sealing so they stay put.
Age tweaks
- Little kids: They can pick the flowers, you do the precise arranging and laminating.
- Elementary: They can arrange and press everything themselves.
- Older kids: They can make a set of 3 to 5 bookmarks and tie them into a gift bundle.
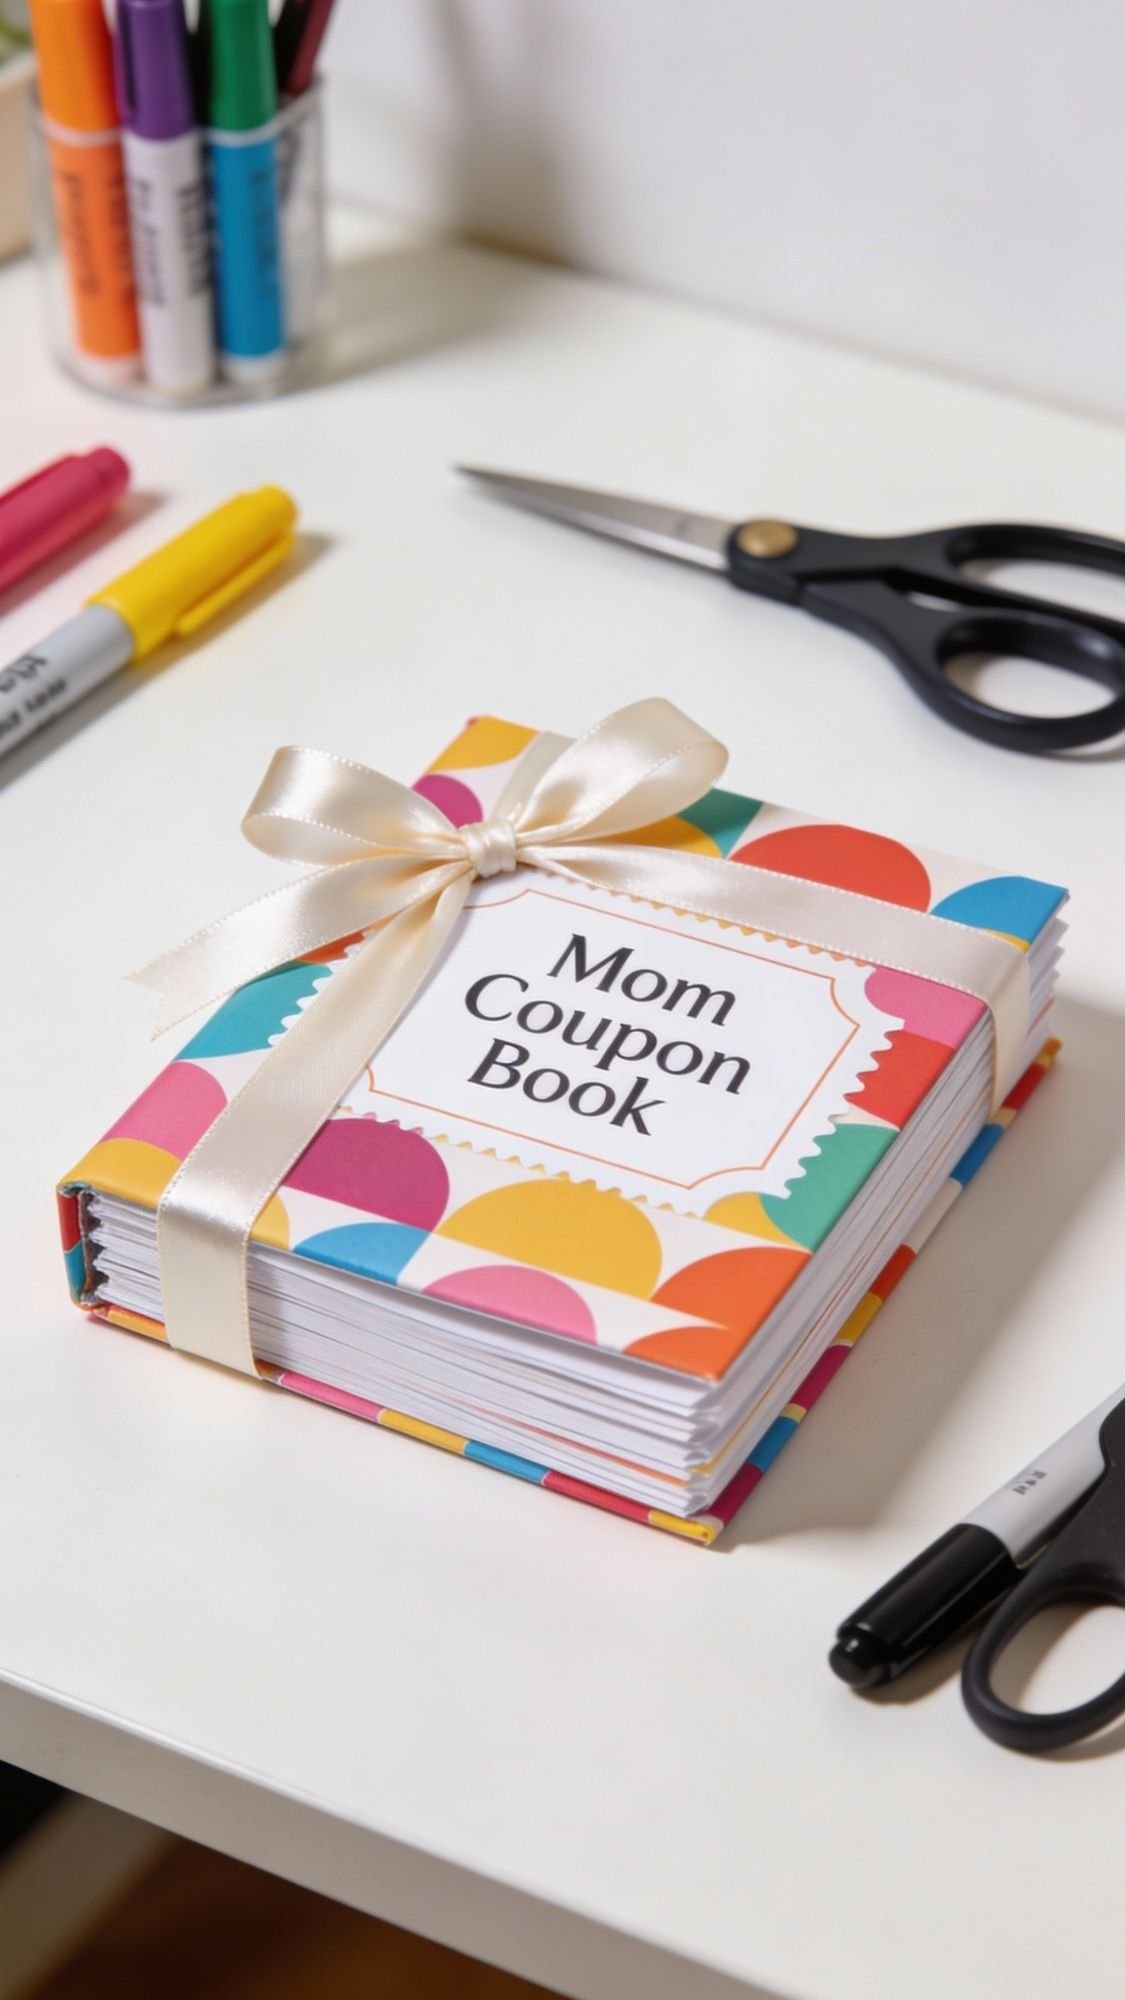
DIY Gift #7: “Mom Coupons” Mini Coupon Book
This one is the ultimate kid-made gift because it’s fast, personal, and honestly useful. Also, it’s a lifesaver for last-minute gifting because kids can make it with basic paper and markers, no craft store run required.
Best for: Ages 3 to 12 (younger kids decorate, older kids write)
Time: 20 to 35 minutes
Difficulty: Very easy
Materials
- Paper (printer paper works, cardstock for the cover is even better)
- Scissors or paper trimmer
- Stapler (or hole punch + ribbon)
- Markers, crayons, stickers
- Optional: printable coupon pages
- Optional: washi tape for a clean spine
Steps
- Cut your pages. Cut paper into rectangles, about 3 x 5 inches or half-sheet folded if you want larger coupons.
- Make a sturdy cover. Use cardstock and let kids decorate it first.
- Stack and bind.
- Staple along one edge, 2 staples usually hold well.
- Or punch holes and tie with ribbon if you want a cute “gift shop” look.
- Write the coupons. Keep them realistic. Kids love promising “I will clean the whole house,” and then everyone regrets it.
- Add a “redeem rules” page. One simple page makes it feel polished:
- “One coupon per day”
- “Valid anytime”
- “Mom picks the date”
- Finish with a ribbon. Tie it closed and add a tag if you want.
Coupon ideas that moms actually like
Pick 8 to 12 and let the kid personalize the wording:
- One big hug
- Breakfast helper
- One chore swap (kid does a small chore)
- Quiet time coupon
- Movie night pick
- Foot rub for 5 minutes (if your kid won’t panic halfway through)
- Extra bedtime story
- Car wash helper
- Snack delivery service
- Picnic together
- No whining for one hour (this one is bold, but funny)
Pro Tips that keep it from falling apart
- Cardstock cover matters. It stops the staples from ripping through.
- Don’t overstuff. Too many pages makes stapling weak and uneven.
- Use washi tape on the spine for extra strength and a clean look.
Quick fixes if it goes wrong
- Staples tearing the paper: Add a cardstock cover, then staple again through everything.
- Pages crooked: Tap the stack on the table edge before stapling.
- Kid runs out of ideas: Give them a list to choose from, it prevents blank-page panic.
Age tweaks
- Toddlers: They decorate the cover, you write coupons based on what they can do.
- Preschool: They can draw pictures for each coupon instead of writing.
- Elementary: They can write the coupons and add a “Mom’s favorites” page.
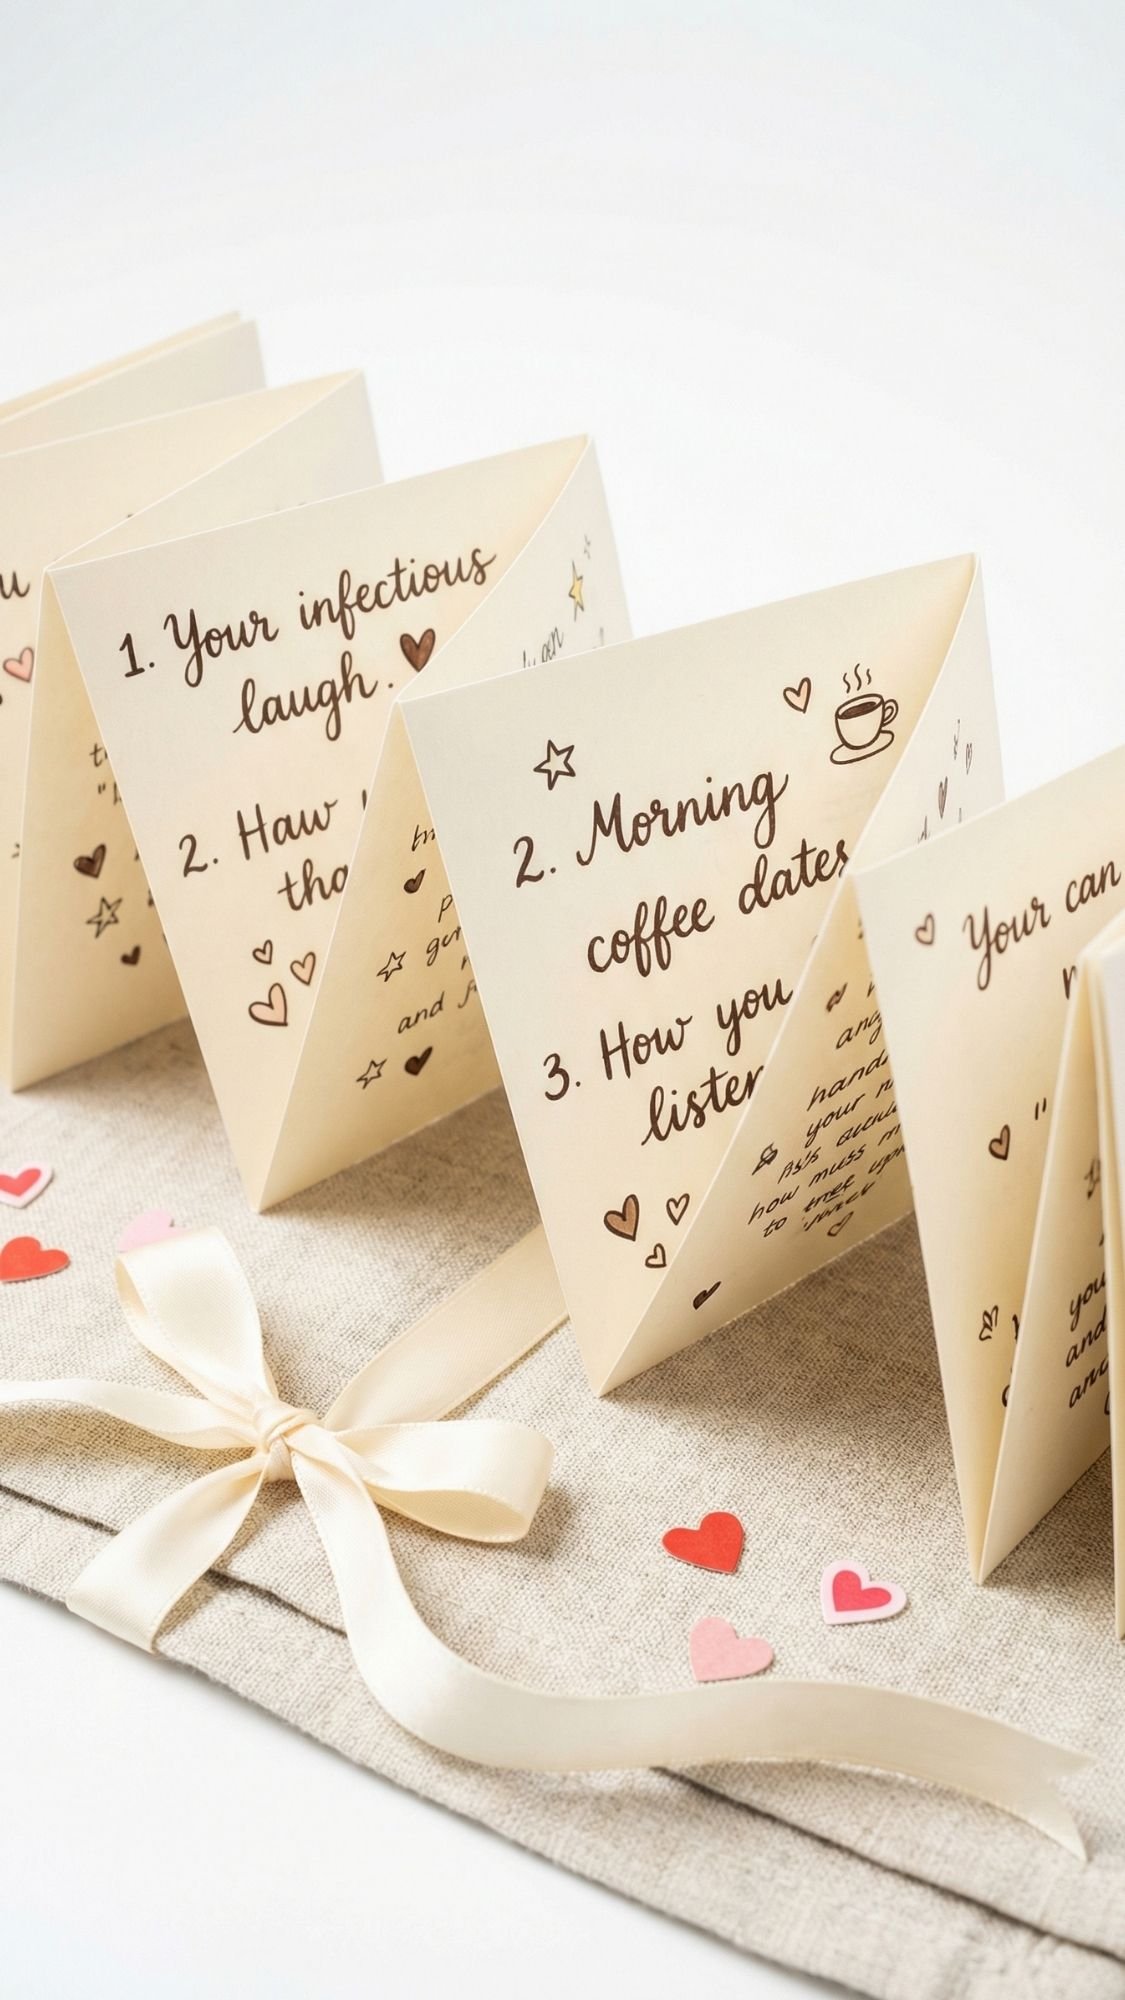
DIY Gift #8: “Reasons I Love You” Accordion Mini Book
This is the sweet, low-mess gift that makes moms tear up every single time. It’s simple, but it feels personal in a way store-bought gifts just can’t touch. Also, it’s a great option if you want something meaningful without paint involved. Win.
Best for: Ages 4 to 12 (younger kids can draw, older kids write)
Time: 20 to 35 minutes
Difficulty: Easy
Materials
- Cardstock strip (or tape multiple pieces of paper together)
- Markers, crayons, colored pencils
- Stickers or small embellishments (optional)
- Glue stick (optional)
- Ribbon, twine, or a mini binder clip to close it
- Optional: small envelope to gift it in
Steps
- Make your strip. Cut cardstock into a long strip about 3 to 4 inches wide. If you don’t have a long strip, tape two pieces together on the back.
- Fold accordion style. Fold back and forth like a fan. Aim for 8 to 12 panels.
- Add one reason per panel.
- Little kids can draw pictures for each panel.
- Older kids can write short reasons and add doodles.
- Decorate the front cover panel. Title ideas:
- “Reasons I Love You, Mom”
- “Mom, You’re My Favorite”
- “Love Notes for You”
- Tie it up. Wrap ribbon around it, or clip it closed so it feels like a real little gift.
Reason ideas (for kids who freeze up)
- “You make the best snacks.”
- “You give the best hugs.”
- “You help me when I’m sad.”
- “You make our house feel safe.”
- “You always listen.”
- “You make me laugh.”
- “You love me no matter what.”
Pro Tips that make it look polished
- Keep each reason short. One sentence per panel looks clean and reads easily.
- Use a ruler for folds if the panels get wobbly.
- Add a tiny drawing on every panel so it feels full, even if the writing is short.
Quick fixes if it goes wrong
- Crooked folds: Refold using the edge of a ruler or a book to sharpen the crease.
- Taped seam looks messy: Cover the seam with a strip of washi tape or a sticker border.
- Marker bleed-through: Cardstock helps, but if you already used thin paper, add a backing panel behind each page with a glue stick.
Age tweaks
- Preschool: 6 to 8 panels, mostly drawings.
- Elementary: 10 to 12 panels with short reasons and doodles.
- Older kids: Add a final panel that says “One more thing…” and write a longer note.
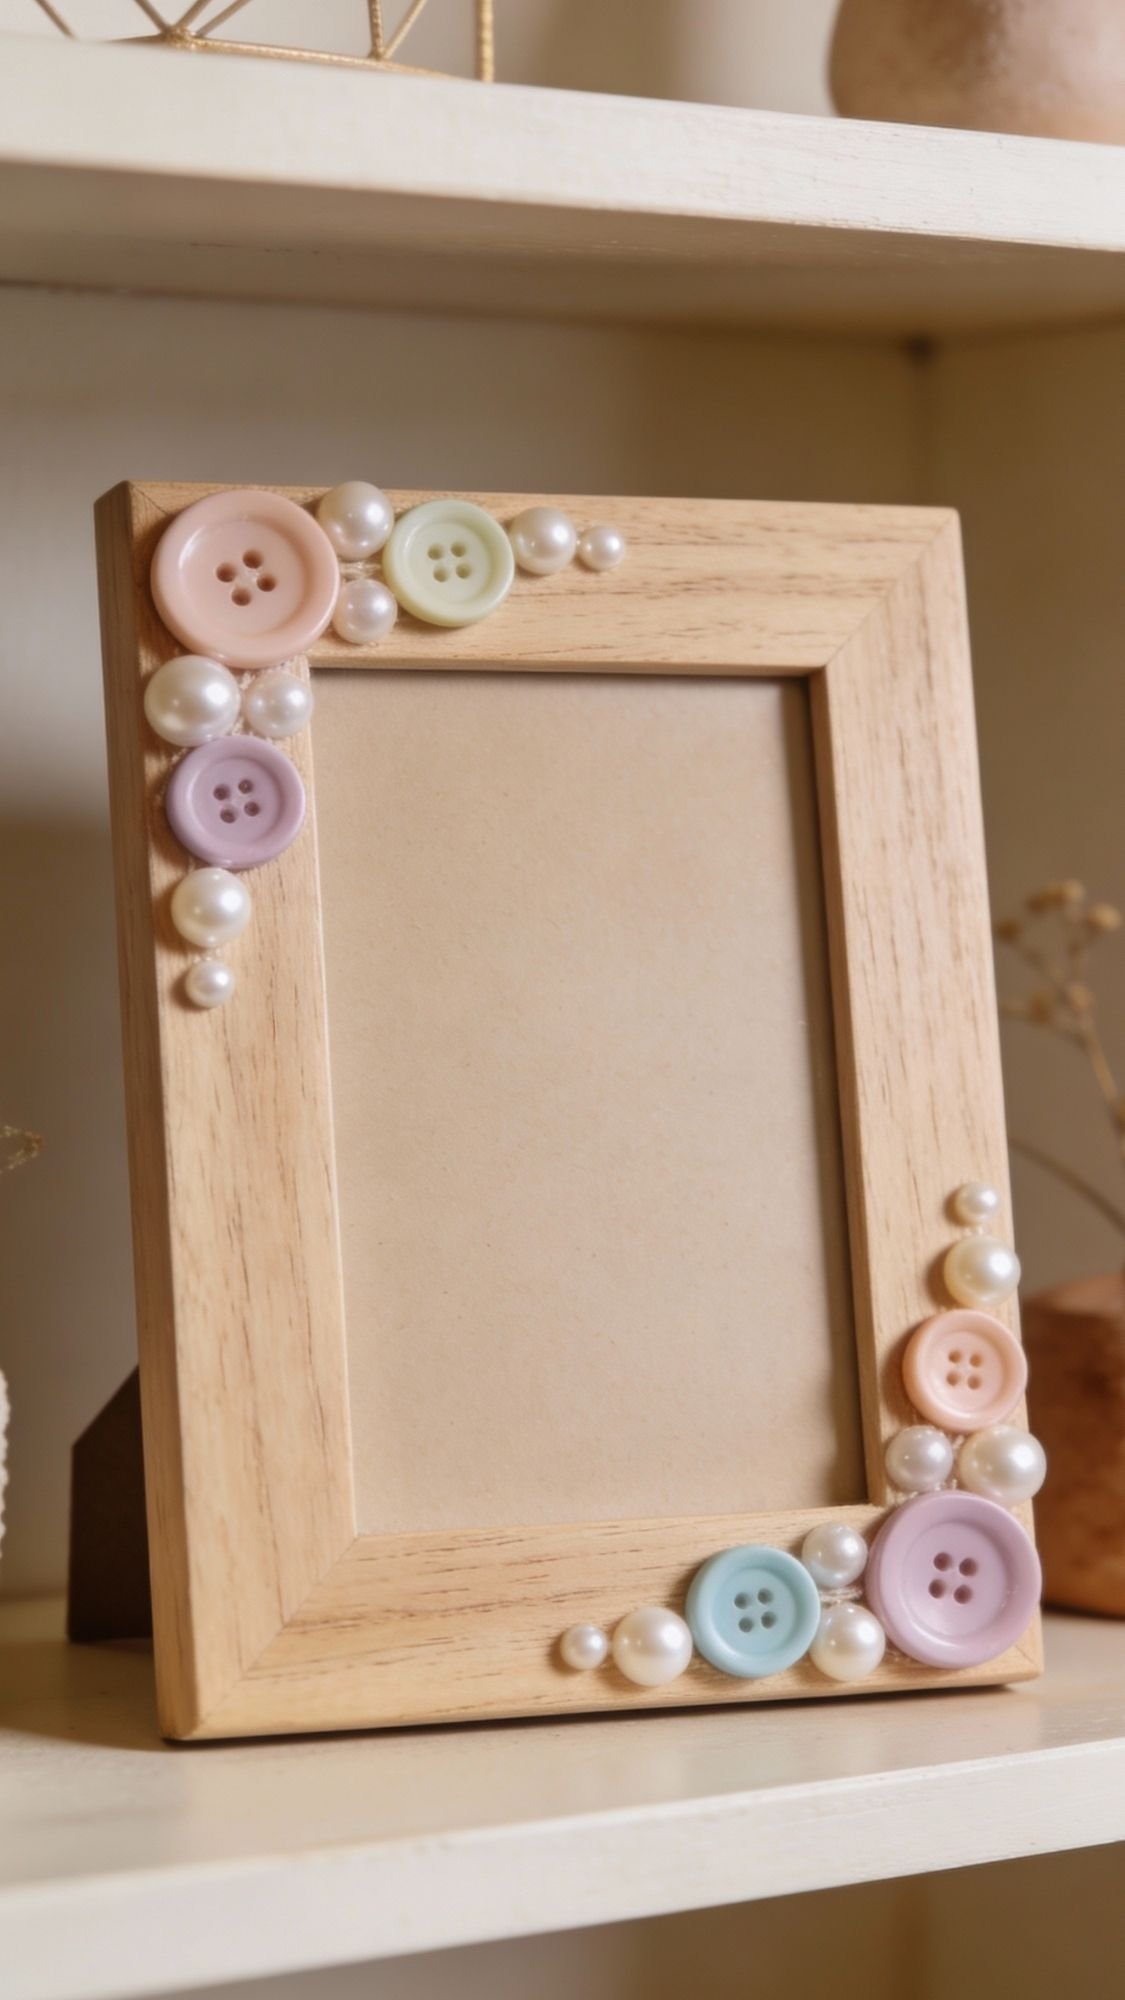
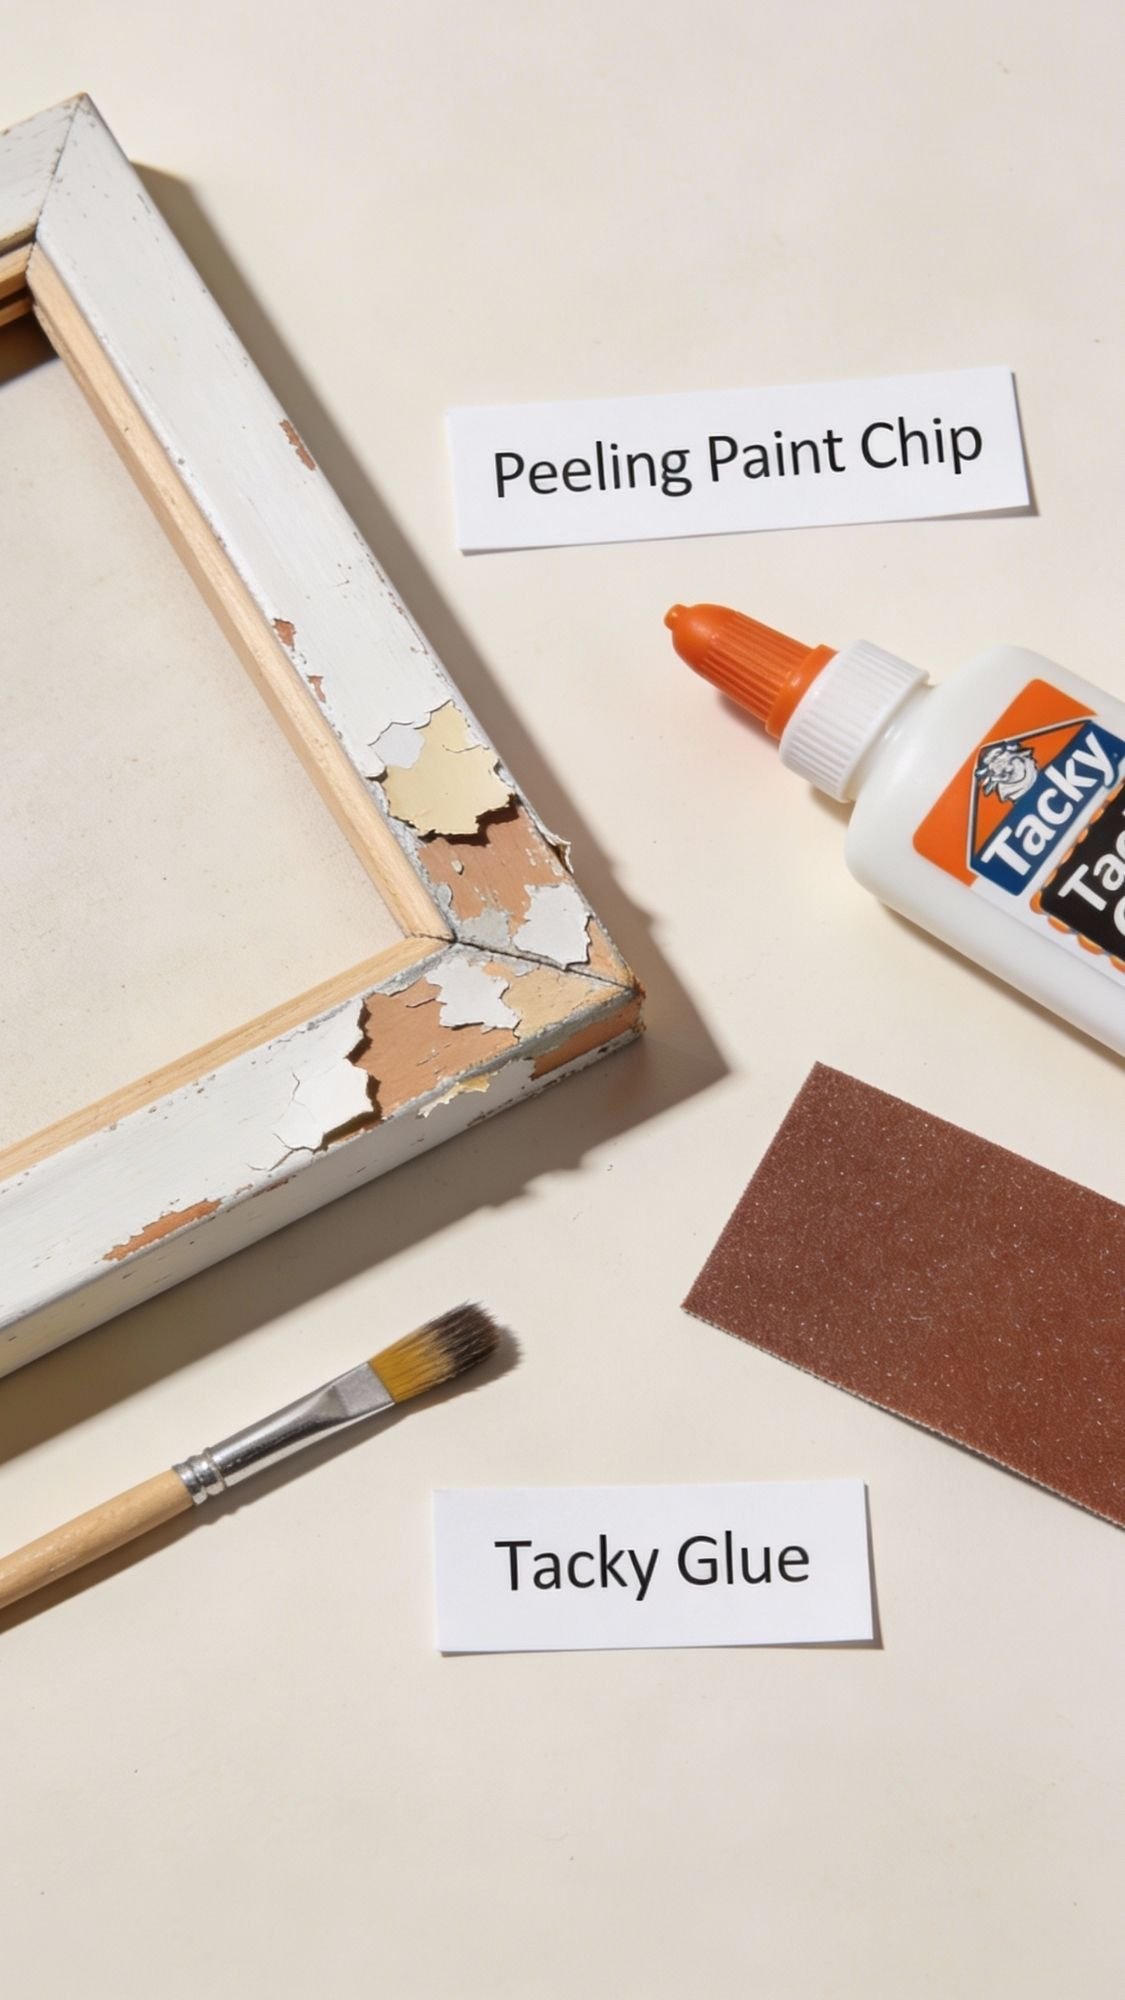
DIY Gift #9: Decorated Photo Frame With Buttons and Beads
This one is a guaranteed Mom-keeper because it holds a photo, and it looks extra cute on a desk or nightstand. The key is using the right glue and doing the layout first so the beads don’t slide around like they’re trying to escape.
Best for: Ages 4 to 12 (adult supervises glue and small pieces)
Time: 25 to 40 minutes + dry time
Difficulty: Easy, but detail-heavy
Materials
- Plain frame (unfinished wood looks the cleanest, but any flat frame works)
- Buttons, pony beads, flat-back pearls, gems, or small charms
- Tacky glue (best for this)
- Optional: low-temp hot glue gun (adult only)
- Paint (optional, if you want to paint the frame first)
- Small paintbrush (optional)
- Tweezers (optional, but honestly helps kids place tiny pieces neatly)
- Paper towel and baby wipes
Steps
- Decide if you’re painting first. If you paint the frame, let it dry fully before decorating. Wet paint and glue together get messy fast.
- Plan the design before gluing. Lay buttons and beads on the frame dry so you can see spacing. This saves a lot of “why does it look weird” moments.
- Glue in sections. Add glue to a small area, place pieces, then move on. If you glue the whole frame at once, everything slides.
- Press and hold. Hold bigger buttons for a few seconds so they grab.
- Let it dry flat. Leave it alone for at least a few hours, overnight is safest.
- Add the photo last. Once it’s fully dry, put in a photo, or leave a note telling Mom to pick her favorite.
Pro Tips that make it look clean, not cluttered
- Pick a theme. All pastel, all neutrals, rainbow, or “all one color plus pearls.” A theme makes it look intentional.
- Use tacky glue, not school glue. School glue stays slippery too long and beads slide.
- Less is more around the corners. Corners look best when you leave a little breathing room.
Quick fixes if it goes wrong
- Pieces keep sliding: Let the glue sit for 1 to 2 minutes so it gets tacky, then place the bead.
- Glue oozes out: Wipe it immediately with a damp cotton swab before it dries shiny.
- Frame feels heavy and unstable: Use fewer large buttons, or switch to flat-back gems.
Age tweaks
- Preschool: Use bigger buttons and a simple pattern like “one button, one bead.”
- Elementary: Let them plan a border and mix textures.
- Older kids: Add a painted base coat and a metallic paint pen detail on the edges.
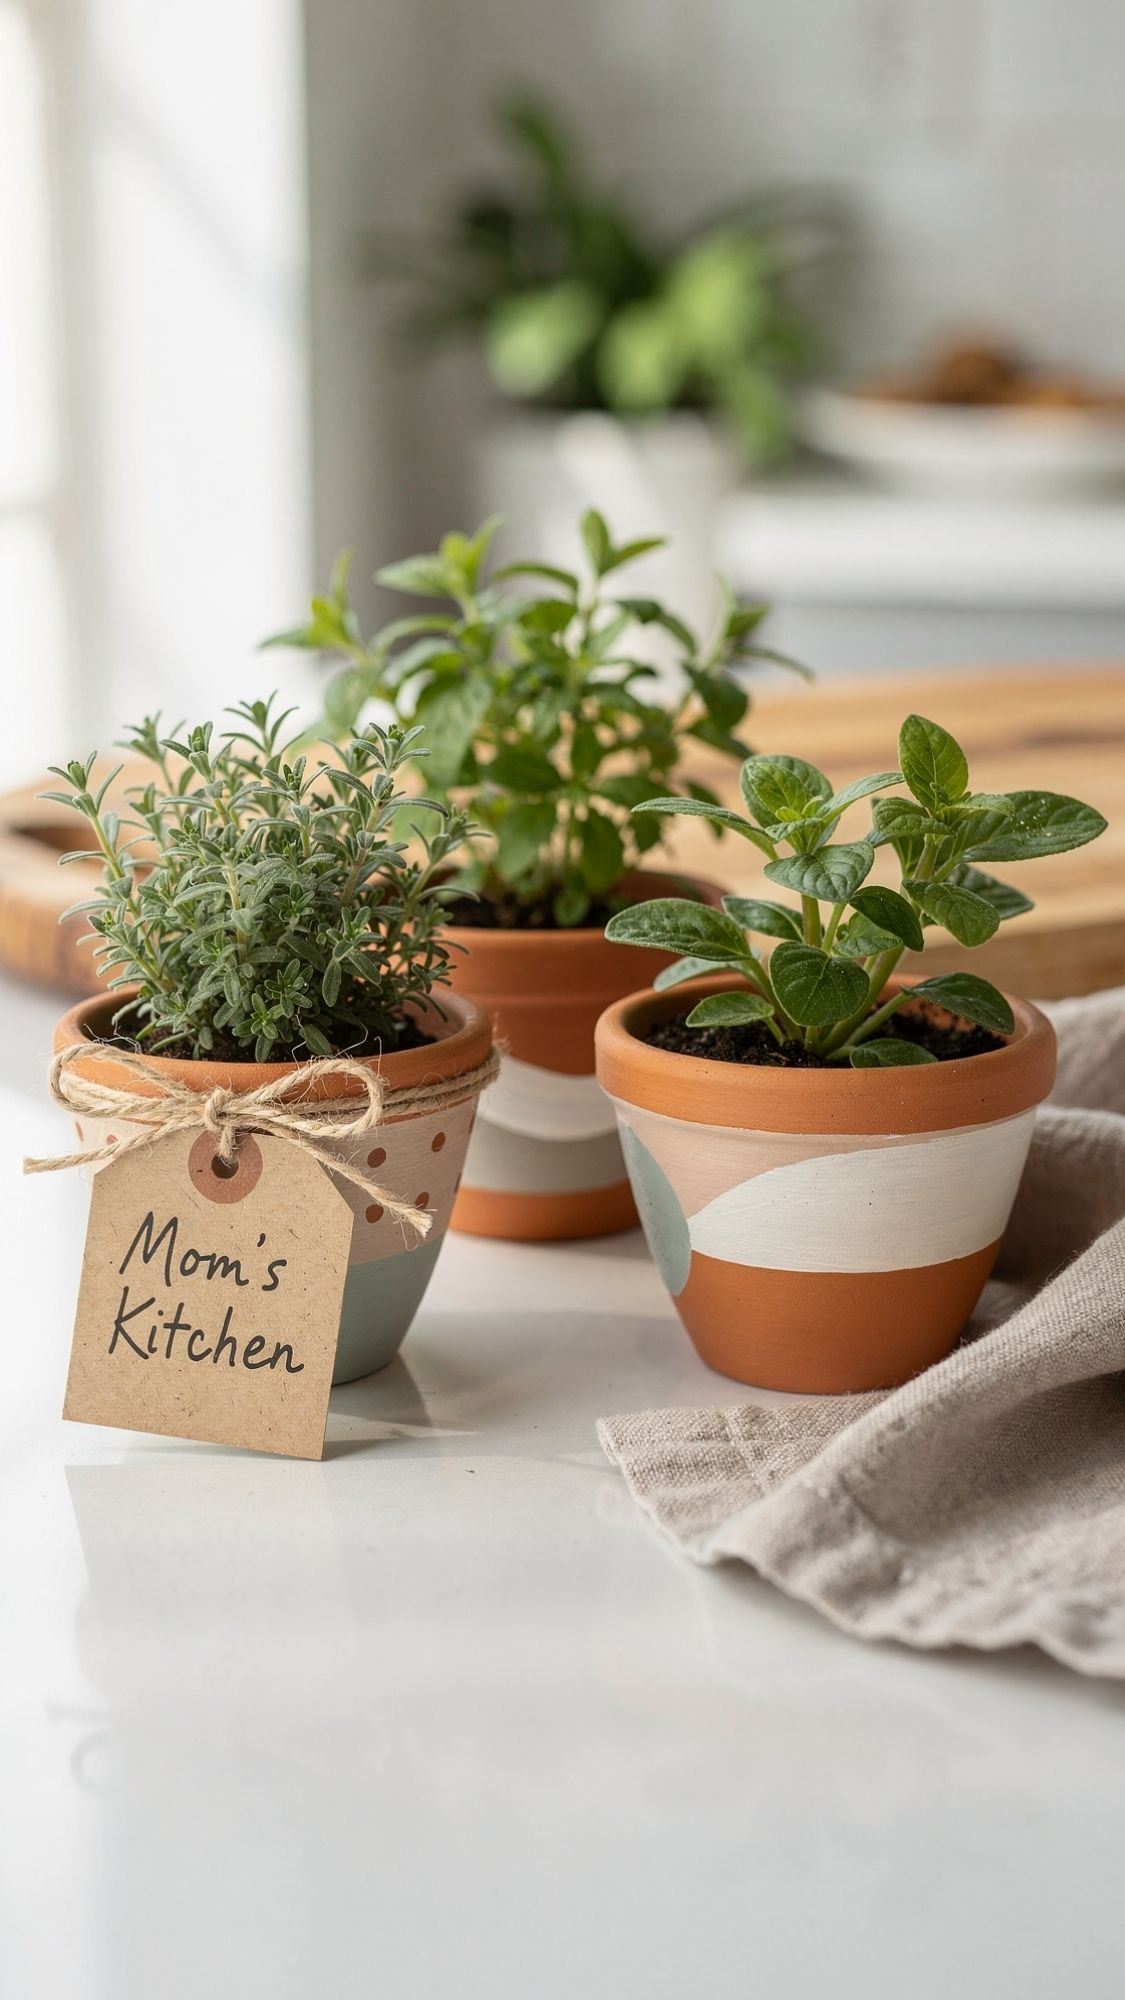
DIY Gift #10: Painted Terracotta Herb Pot With a “Mom’s Kitchen” Tag
This one feels like a real gift because it’s cute and useful. A tiny herb plant plus a kid-painted pot is basically the “I tried and I love you” combo every mom appreciates. The trick is prepping the pot so paint sticks, and sealing the outside so it doesn’t chip the second someone looks at it wrong.
Best for: Ages 5 to 12 (adult helps with sealing)
Time: 35 to 50 minutes + dry time
Difficulty: Easy
Materials
- Small terracotta pot (3 to 4 inches is perfect)
- Acrylic paint (multi-surface works great)
- Paintbrushes or sponge daubers
- Optional: paint pen for details
- Fine grit sandpaper (220 grit)
- Paper towel or dry cloth
- Clear sealer (water-based spray sealer is easiest)
- Herb plant (basil, mint, rosemary) or a small succulent
- Tag: cardstock, twine or ribbon, marker
Steps
- Lightly sand the pot. Terracotta is dusty and rough. A quick sand helps paint grip.
- Wipe off dust. Use a dry cloth, don’t skip this or your paint looks gritty.
- Paint a base coat. Use thin coats. Thick paint takes forever to dry and chips easier.
- Add simple designs. Easy patterns kids can handle:
- Polka dots
- Stripes
- Hearts
- Simple flowers
- A painted “scallop” border near the rim
- Let it dry fully. Give it at least 30 to 60 minutes between layers.
- Seal the outside only. Do not seal the inside where soil sits unless the sealer is plant-safe. Stick to the outside and rim.
- Add the plant. Pop in the herb or succulent.
- Make the tag. Write “Mom’s Kitchen” or “Love You Mom,” punch a hole, tie it on with twine.
Pro Tips that prevent chipping and peeling
- Thin layers beat thick layers. Thick paint looks lumpy and chips faster.
- Seal in light coats. Two light coats protect better than one heavy sticky coat.
- Keep the bottom edge clean. Paint and sealer globs on the bottom make it stick to surfaces.
Quick fixes if it goes wrong
- Paint chips: Touch up with paint, let dry, then reseal the area.
- Streaky paint: Use a sponge dauber for smoother coverage, or add a second thin coat.
- Tag looks messy: Cut it into a simple rectangle or circle and keep text big. Tiny handwriting turns chaotic fast.
Age tweaks
- Preschool: One color base + big dots is plenty. Cute beats complicated.
- Elementary: They can do stripes, florals, and a paint pen message.
- Older kids: Add a coordinated set of two pots or a mini “windowsill herb kit.”

DIY Gift #11: Hand-Painted Wooden Spoon + Recipe Card Set
This one feels extra thoughtful because it’s a “use it in real life” gift, not just a craft. Mom gets a cute spoon for her utensil crock and a recipe card written by the kid, which is the kind of thing she keeps forever. The big thing here is keeping paint off the food-contact part and sealing the handle correctly so it doesn’t stay tacky.
Best for: Ages 6 to 12 (adult supervises sealing and tape)
Time: 30 to 45 minutes + dry/cure time
Difficulty: Easy, but finishing matters
Materials
- Plain wooden spoon (unfinished wood works best)
- Painter’s tape
- Acrylic paint (multi-surface is great)
- Small paintbrushes
- Paint pen (optional for tiny details)
- Blank recipe cards (or cut cardstock)
- Ribbon or twine
- Clear sealer for the handle only
- Best option: water-based polyurethane or a clear craft sealer
- Avoid sealing the spoon bowl unless you’re using a truly food-safe finish
Steps
- Tape off the bowl. Wrap painter’s tape around the spoon just below the bowl so kids paint only the handle.
- Paint the handle in thin coats. Stripes, polka dots, tiny florals, or a simple color block all work.
- Let it dry completely. If the handle still feels cool or soft, it needs more time.
- Add details. Older kids can write “Mom” or add tiny hearts with a paint pen.
- Seal the handle. Use thin coats, let each coat dry before the next. Do not glob it on.
- Make the recipe cards. Options that work well:
- “Mom’s favorite snack” recipe (even if it’s “toast and jam,” that’s cute)
- A family recipe the kid knows
- “How to make Mom smile” as a funny “recipe”
- Bundle it up. Tie the spoon and cards together with ribbon.
Pro Tips that make it look like a boutique set
- Tape is your best friend. A clean line between bowl and handle makes it look professional.
- Thin paint layers. Thick paint chips and feels bumpy.
- Let paint dry longer than you think before sealing. Sealing too soon causes tackiness.
Quick fixes if it goes wrong
- Paint bled under tape: Let it dry, then scrape gently with a fingernail or a dull edge. Touch up with paint.
- Handle feels sticky after sealing: It usually means thick coats or not enough dry time. Let it sit in a dry spot for 24 hours. If it still feels sticky, lightly sand and reseal in thinner coats.
- Brush strokes look rough: A second thin coat usually smooths it out. You can also use a sponge brush for the base coat.
Age tweaks
- Younger kids: Give them 2 colors and a sponge dauber for dots. Simple patterns look best.
- Elementary: Add a theme, like “garden flowers” or “rainbows.”
- Older kids: They can make a mini matching set, spoon + spatula.
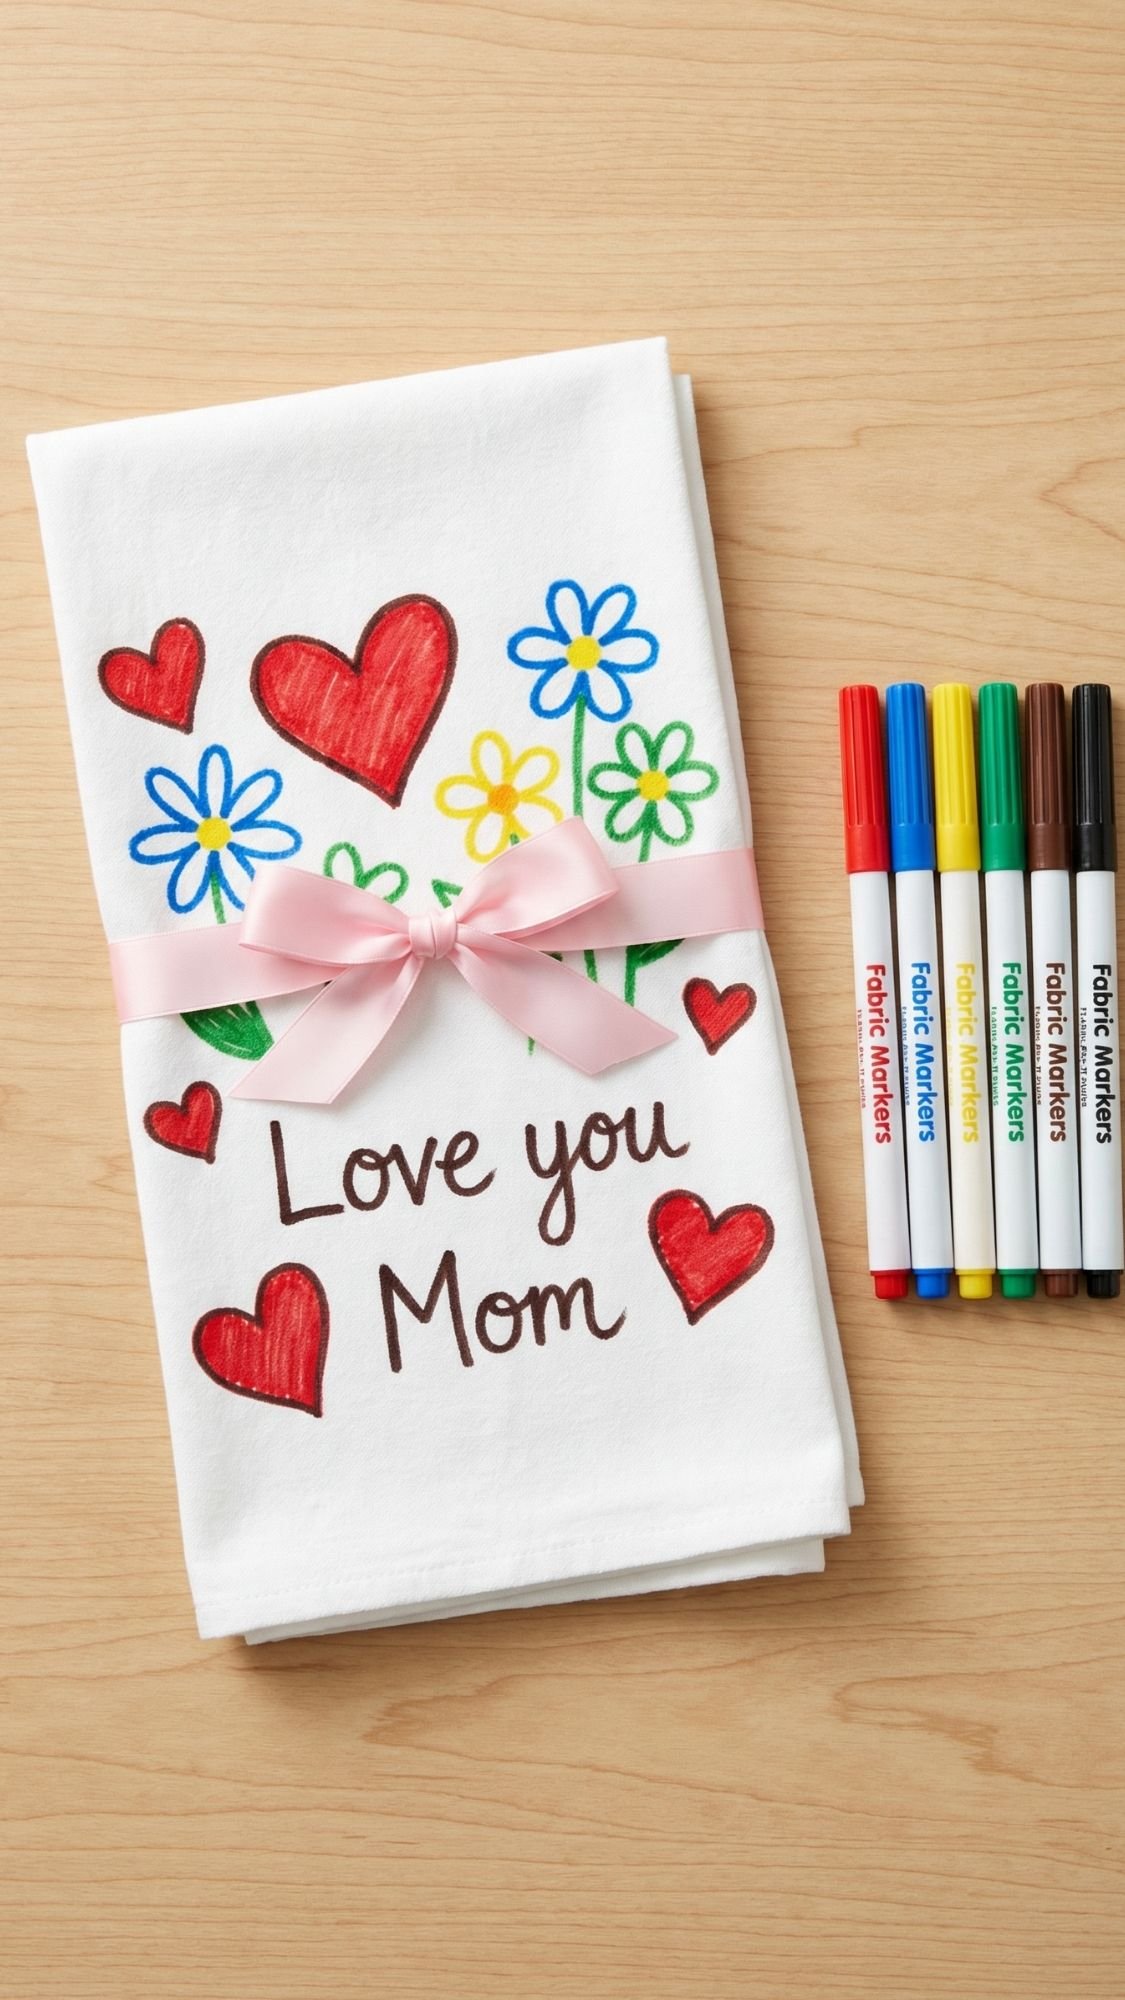
DIY Gift #12: Fabric Marker Tea Towel Art
This is one of my favorite “kid art, but make it useful” projects. Mom gets a tea towel she can actually use, and the kid gets to draw like they’re doing a masterpiece. The only thing that can ruin it is bleed-through or skipping the heat-set step, so I’m making those parts super clear.
Best for: Ages 5 to 12 (adult helps with heat-setting)
Time: 20 to 30 minutes + heat-set time
Difficulty: Easy
Materials
- Plain flour sack tea towel (white or cream looks clean and bright)
- Fabric markers or fabric paint pens
- Cardboard (to slide inside towel)
- Painter’s tape (optional, for a clean border)
- Pencil (optional for older kids to sketch first)
- Iron or dryer for heat-setting (adult only)
Steps
- Pre-wash the towel if you can. Fabric sizing can make markers bleed weirdly. Wash and dry, then iron flat.
- Insert cardboard inside. Slide a piece of cardboard inside the towel so the ink doesn’t bleed through to the back.
- Optional border trick. Tape off a simple border so the art stays contained and looks intentional.
- Draw the design. Kid-friendly ideas:
- Big hearts and flowers
- A “Mom” doodle collage
- Hand-drawn bouquet
- Simple repeating pattern (dots, tiny hearts, stars)
- Let it dry flat. Give it at least 15 minutes before moving it.
- Heat-set the design.
- Iron method: Place parchment paper over the design and iron on medium-high for 3 to 5 minutes, moving the iron around.
- Dryer method: Toss it in the dryer on high heat for 30 minutes.
- Gift it neatly. Fold it like a store towel and tie with ribbon.
Pro Tips that keep it clean and washable
- Use fabric markers, not regular markers. Regular markers fade fast and can bleed.
- Keep designs bold. Tiny details blur on fabric.
- Cardboard insert is non-negotiable. Without it, the back gets ruined.
Quick fixes if it goes wrong
- Ink bleeds: That usually happens on cheap thin towels or when the fabric is damp. Let it dry fully, then outline shapes with a darker fabric pen to sharpen edges.
- Marker skips on fabric: Press a little more firmly, or switch to fabric paint pens for smoother flow.
- Design fades after washing: That means it wasn’t heat-set long enough. Heat-set again, then wash in cold and air dry.
Age tweaks
- Preschool: Give them 2 to 3 colors and tell them to fill big shapes only.
- Elementary: Add a border and a message like “Love you Mom.”
- Older kids: They can do a simple floral line drawing and add color blocks for a modern look.
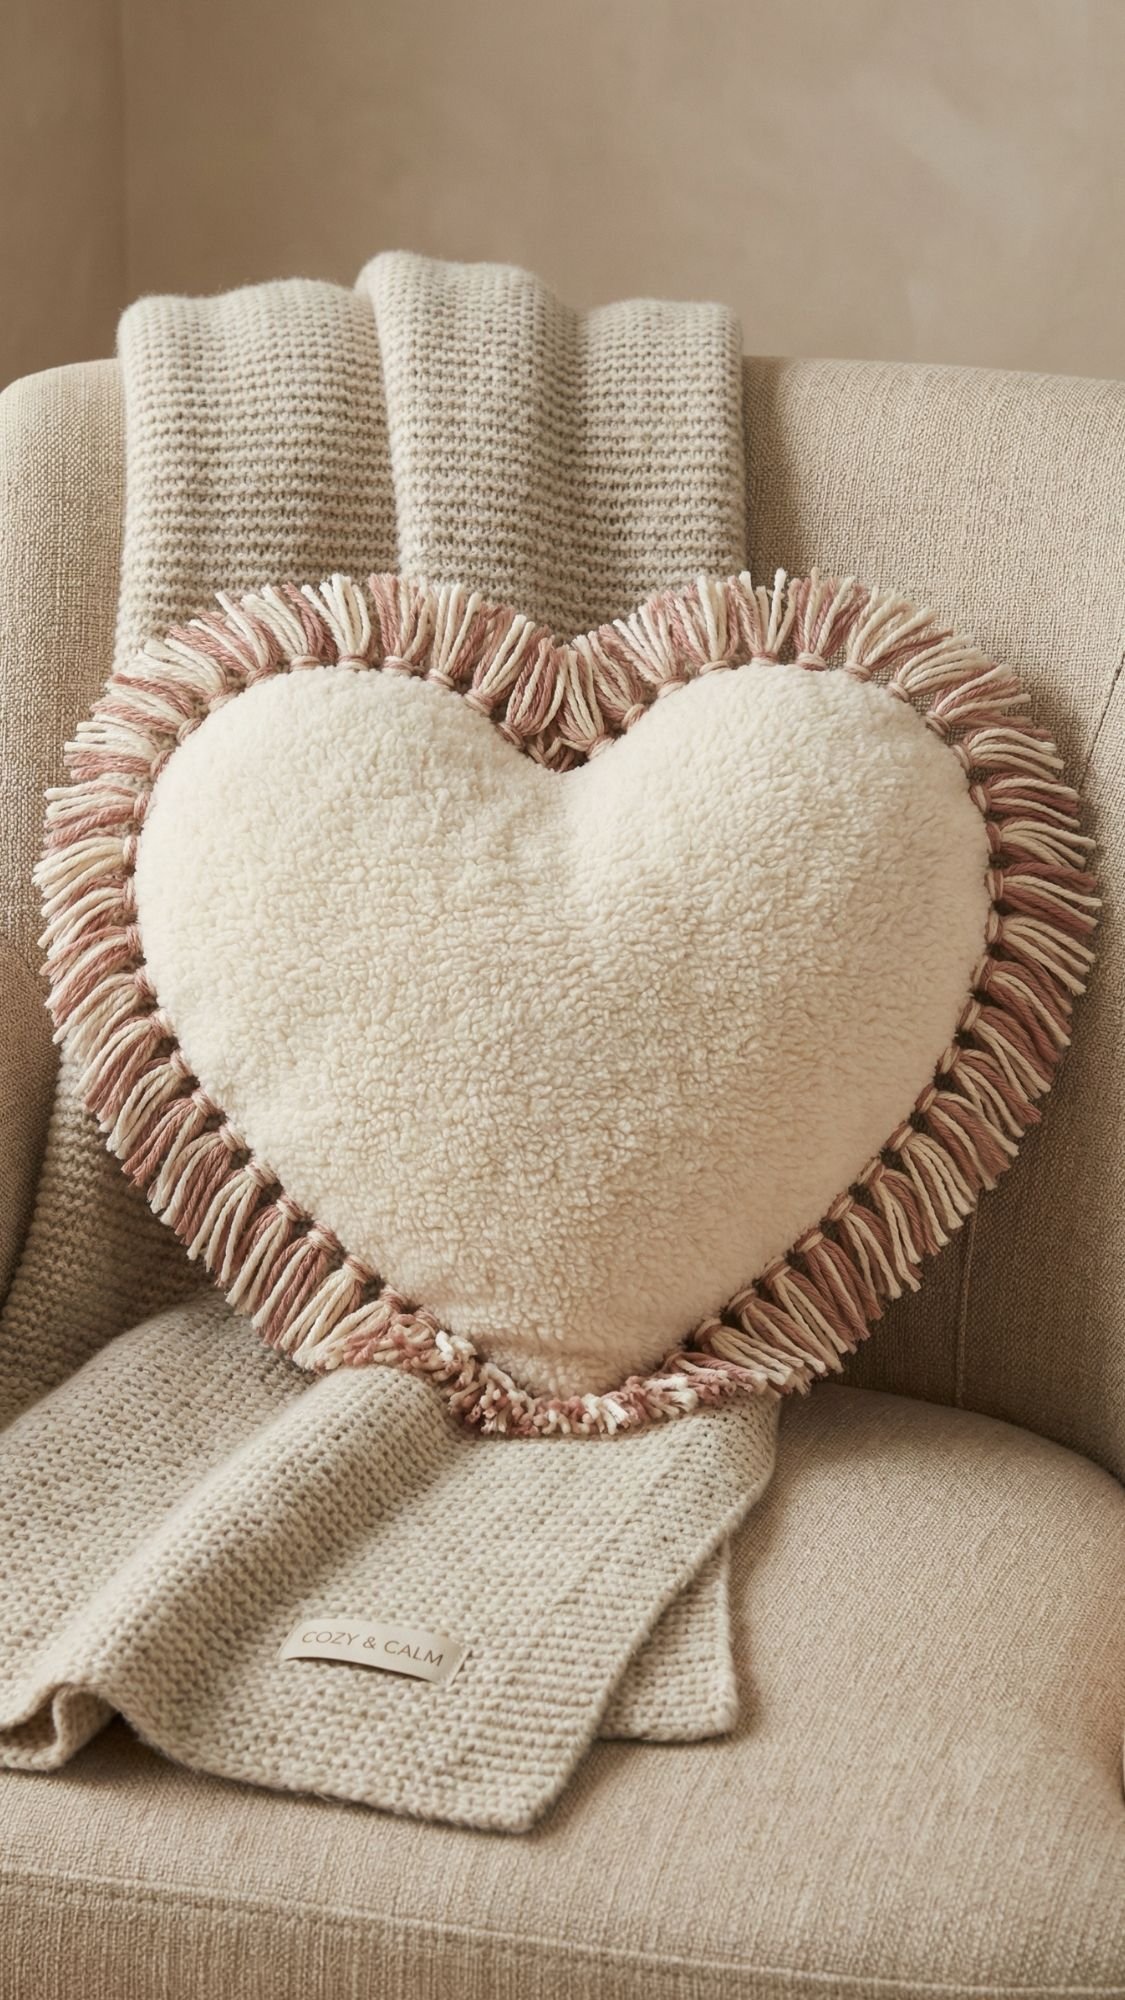
DIY Gift #13: No-Sew Tie Fleece Heart Pillow
This one is cozy, cute, and kid-friendly because it skips the sewing machine completely. Kids basically “tie” the pillow together, and Mom gets something she can toss on a chair or keep in her room. Just make sure you cut the fringe evenly so the knots don’t look like they gave up halfway through.
Best for: Ages 7 to 12 (adult helps with cutting for younger kids)
Time: 30 to 45 minutes
Difficulty: Easy, but cutting takes focus
Materials
- Fleece fabric (two pieces, about 12 x 12 inches each)
- Scissors (sharp scissors make this so much easier)
- Heart template (paper heart, plate, or printable)
- Fabric marker or chalk
- Polyfill stuffing (or cotton balls in a pinch, but stuffing works better)
- Optional: fabric paint pen to write “Mom” or initials
Steps
- Cut two matching hearts. Stack the two fleece pieces, trace a heart template, cut both layers together so they match.
- Cut fringe around the edge. Cut strips around the outside edge, about 1 inch deep and 1/2 inch wide. Keep them as even as you can.
- Start tying knots. Tie the top and bottom fringe pieces together around the heart. Work your way around.
- Leave an opening. Stop tying when you have a 3 to 4 inch gap.
- Stuff the pillow. Add stuffing in small handfuls so it stays smooth, not lumpy.
- Finish tying. Tie the remaining fringe pieces to close it up.
- Optional personalization. Write “Mom” or the year on one side with a fabric paint pen.
Pro Tips that make it look neat
- Cut fringe evenly. Uneven fringe makes uneven knots, and the pillow looks messy fast.
- Use small handfuls of stuffing. One big wad makes lumps that never smooth out.
- Tie tight. Loose knots shift and gap over time.
Quick fixes if it goes wrong
- Fringe strips tear: That means the strips are too thin. Cut them a bit wider next time, or just double-knot the torn ones.
- Pillow looks lumpy: Pull stuffing out and reinsert in smaller pieces, then fluff it with your hands.
- Gaps between knots: Tie tighter, or add a second knot in the problem area.
Age tweaks
- Younger kids: They can help stuff and tie a few knots, adults do most cutting.
- Elementary: They can cut with supervision and tie the whole thing.
- Older kids: They can make a matching set, heart pillow plus a small star or square pillow.
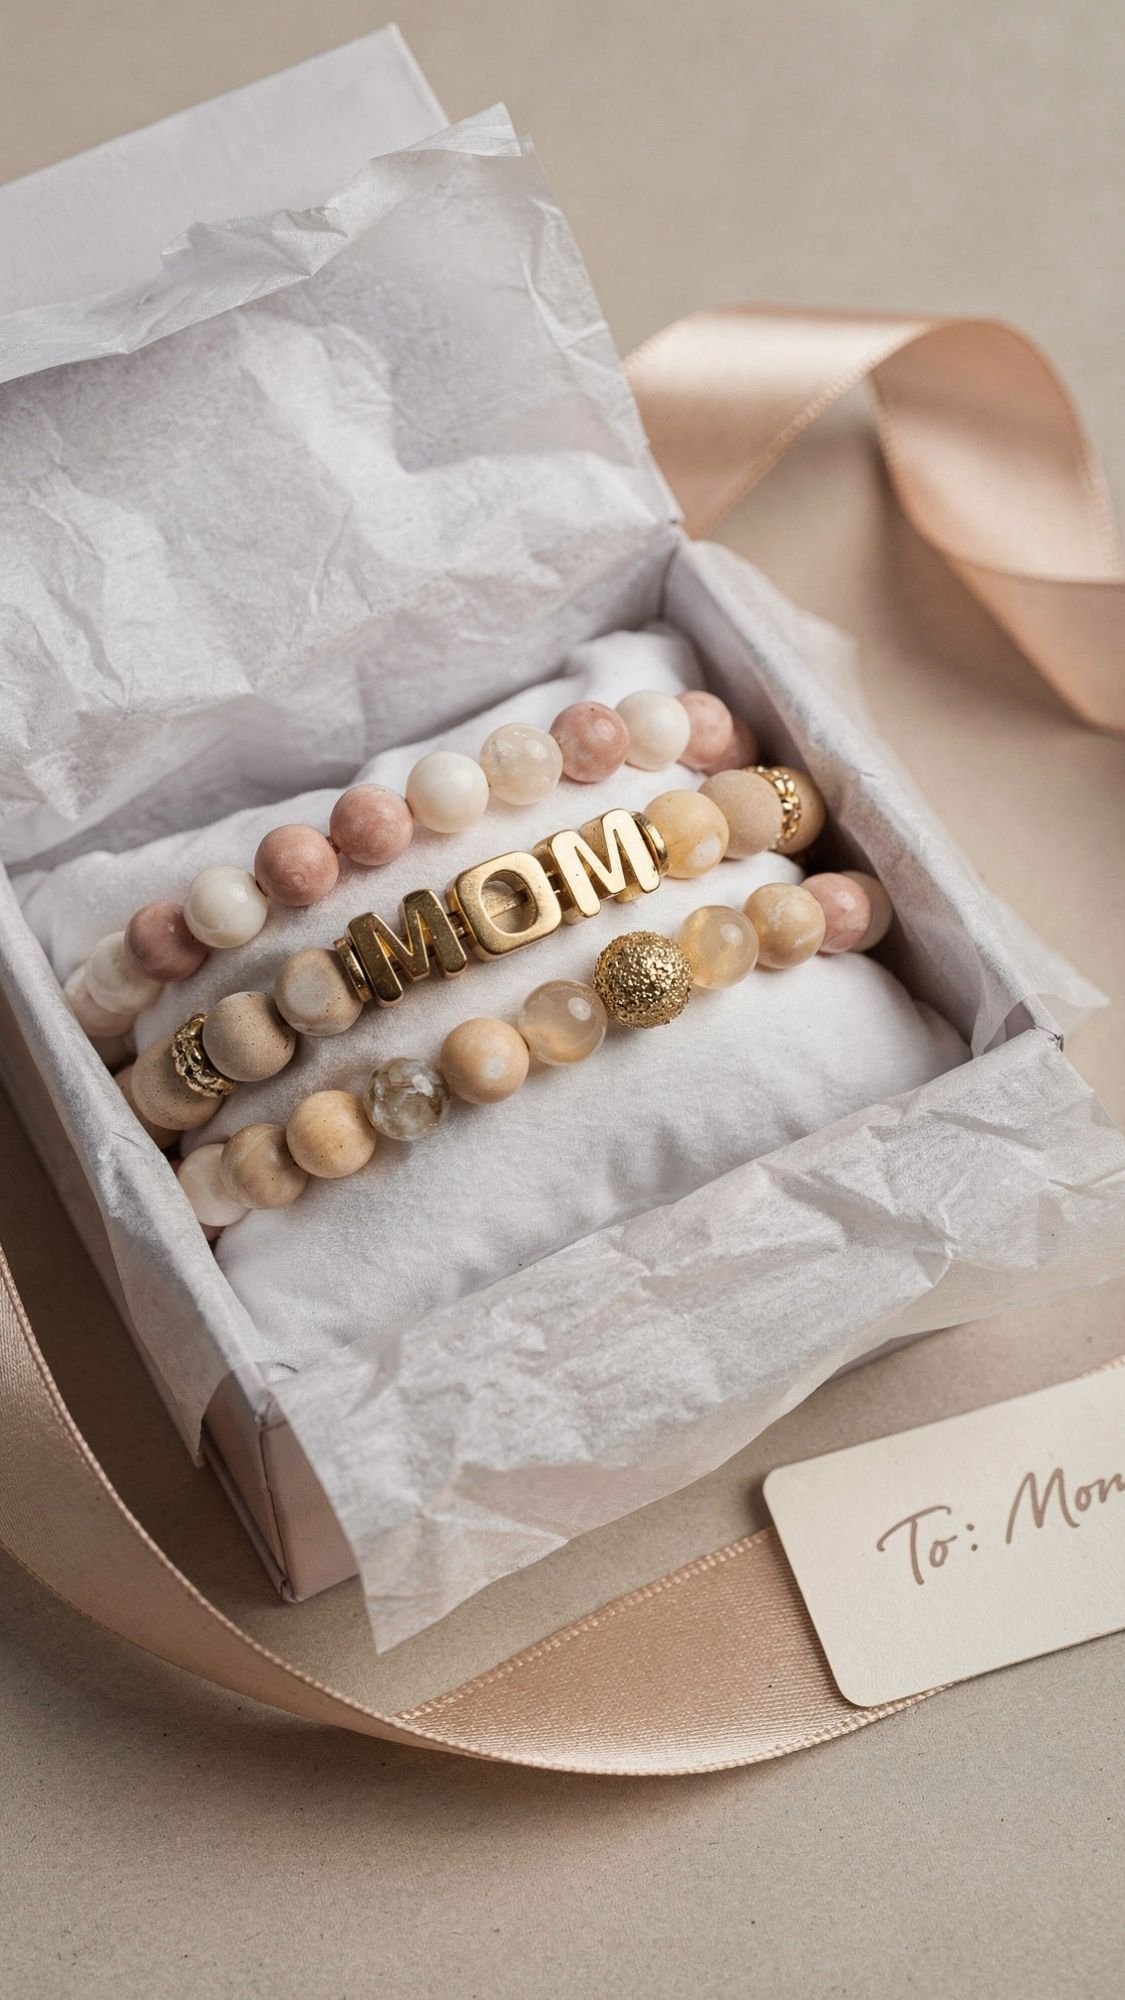
DIY Gift #14: Beaded Bracelet With a Hidden Message
This is a fun one because kids feel like they’re making “real jewelry,” and Mom ends up with something she can actually wear. The hidden message trick makes it feel extra thoughtful, even if the beads look like a candy aisle exploded. In a good way.
Best for: Ages 6 to 12 (adult helps with knot securing)
Time: 15 to 25 minutes
Difficulty: Easy
Materials
- Pony beads or acrylic beads (mix sizes for a nicer look)
- Letter beads (for MOM, LOVE, initials)
- Stretchy elastic cord (0.7 to 1 mm works well)
- Scissors
- Tape (to hold cord in place)
- Optional: bead tray or small bowl
- Adult-only: clear nail polish or a tiny dot of glue to seal the knot
Steps
- Pre-cut the cord. Cut about 10 to 12 inches of elastic cord per bracelet. Longer is easier for kids to handle.
- Tape one end down. Tape the end of the cord to the table so beads don’t fly everywhere.
- Plan the message. Decide where “MOM” goes, usually centered. Dry-fit the beads first if the kid likes planning.
- String the beads. Add beads until it fits. A good fit is snug but not tight.
- Tie the knot. Use a double or triple knot. Adult steps in here because knots matter.
- Seal the knot. Add a tiny dot of clear nail polish or glue on the knot, let it dry, then trim ends.
Hidden message ideas
- Center letters: MOM
- Center initials: M + (child initial)
- Short words: LOVE, HUGS
- “Secret code” option: pick a color pattern and assign meanings:
- Pink = love
- Blue = calm
- White = hugs
- Gold = “you’re the best”
Pro Tips that keep it from breaking
- Pre-stretch the elastic. Pull it gently before beading so the bracelet holds shape.
- Use a triple knot. One knot is asking for beads on the floor later.
- Seal the knot. That tiny dot is the difference between lasting and snapping.
Quick fixes if it goes wrong
- Bracelet snaps: Re-string on new cord, and make sure you pre-stretch first.
- Knot slips: Tie again with a triple knot, then seal it. If cord is super slick, switch to a slightly thicker elastic.
- Bracelet is too big: Remove 3 to 5 beads and retie. Kids always make them too loose at first.
Age tweaks
- Younger kids: Use bigger pony beads only, skip tiny letter beads if they frustrate them.
- Elementary: They can spell MOM and plan a pattern.
- Older kids: They can make a set of 2 bracelets, one for Mom and one for themselves, matching vibes.
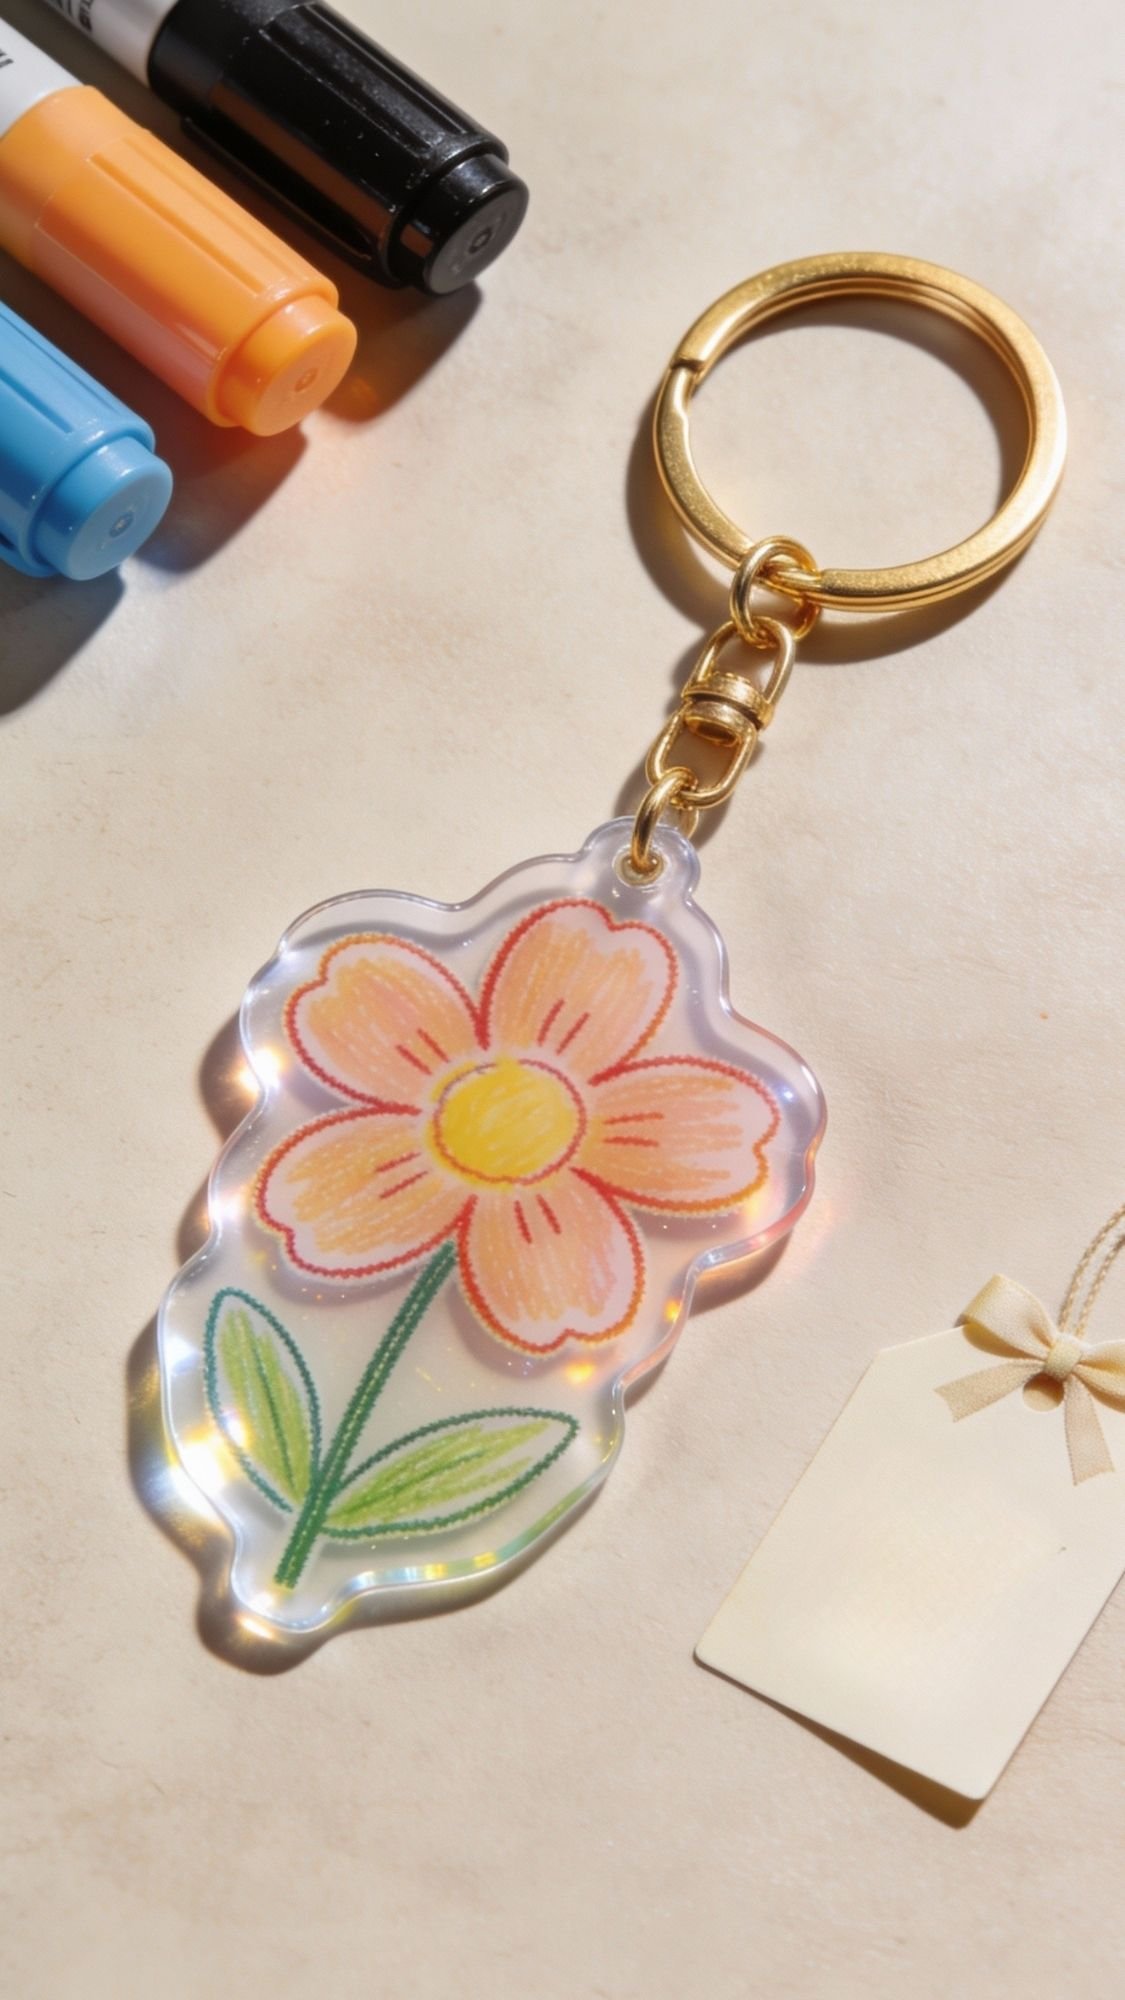
DIY Gift #15: Shrinky Dink Keychain From a Kid Drawing
This one is pure magic for kids because their drawing turns into a real keychain. Moms love it because it’s personal and actually usable. The only chaos point is shrink plastic curling in the oven, but I’ll tell you exactly how to handle that so nobody panics.
Best for: Ages 7 to 12 (adult handles oven)
Time: 10 to 15 minutes prep + 3 to 5 minutes baking
Difficulty: Easy, with adult help
Materials
- Shrink plastic sheets (Shrinky Dinks or any shrink film)
- Permanent markers (Sharpie-style) or paint pens made for plastic
- Scissors
- Hole punch (single-hole punch works best)
- Key ring and jump ring
- Baking sheet + parchment paper
- Oven or toaster oven (adult only)
- Optional: fine sandpaper (400 grit) if plastic feels slick
Steps
- Pick the art. Simple drawings shrink the cleanest. Big bold shapes work better than tiny details.
- Prep the plastic.
- If your plastic looks glossy, lightly scuff it with fine sandpaper so marker grips.
- Trace or draw. Kids draw directly on the plastic, or trace a drawing underneath.
- Cut it out. Leave a small border around the drawing so it doesn’t get too fragile.
- Punch the hole. Punch near the top, at least 1/4 inch from the edge so it doesn’t crack after shrinking.
- Bake it.
- Place on parchment paper on a baking sheet.
- Bake according to your shrink plastic instructions, usually around 325°F for a few minutes.
- Expect it to curl. It will curl up like a potato chip, then flatten back down. This is normal.
- Flatten if needed. If it stays a little curved after baking, press it flat with a second baking sheet for 10 seconds while it’s still warm. Adult does this part.
- Attach the key ring. Add a jump ring and key ring once fully cool.
Pro Tips that make it look crisp
- Use bold lines. Thin lines can look faint after shrinking.
- Color in solid. Light coloring shrinks into a speckled look.
- Punch a bigger hole than you think. Holes shrink too.
Quick fixes if it goes wrong
- It stayed curled: Put it back in the oven for 10 to 15 seconds, then press flat with a baking sheet.
- Marker smears: Let the drawing dry 5 minutes before cutting or baking.
- Keychain cracks near hole: Hole was too close to edge. Next time, punch farther in and leave a thicker border.
Age tweaks
- Younger kids: You trace their drawing and let them color it in. They still feel like they made it.
- Elementary: They can design their own, just keep it simple.
- Older kids: They can make a set of 2 to 3 keychains, one for Mom, one for Grandma, one for themselves.
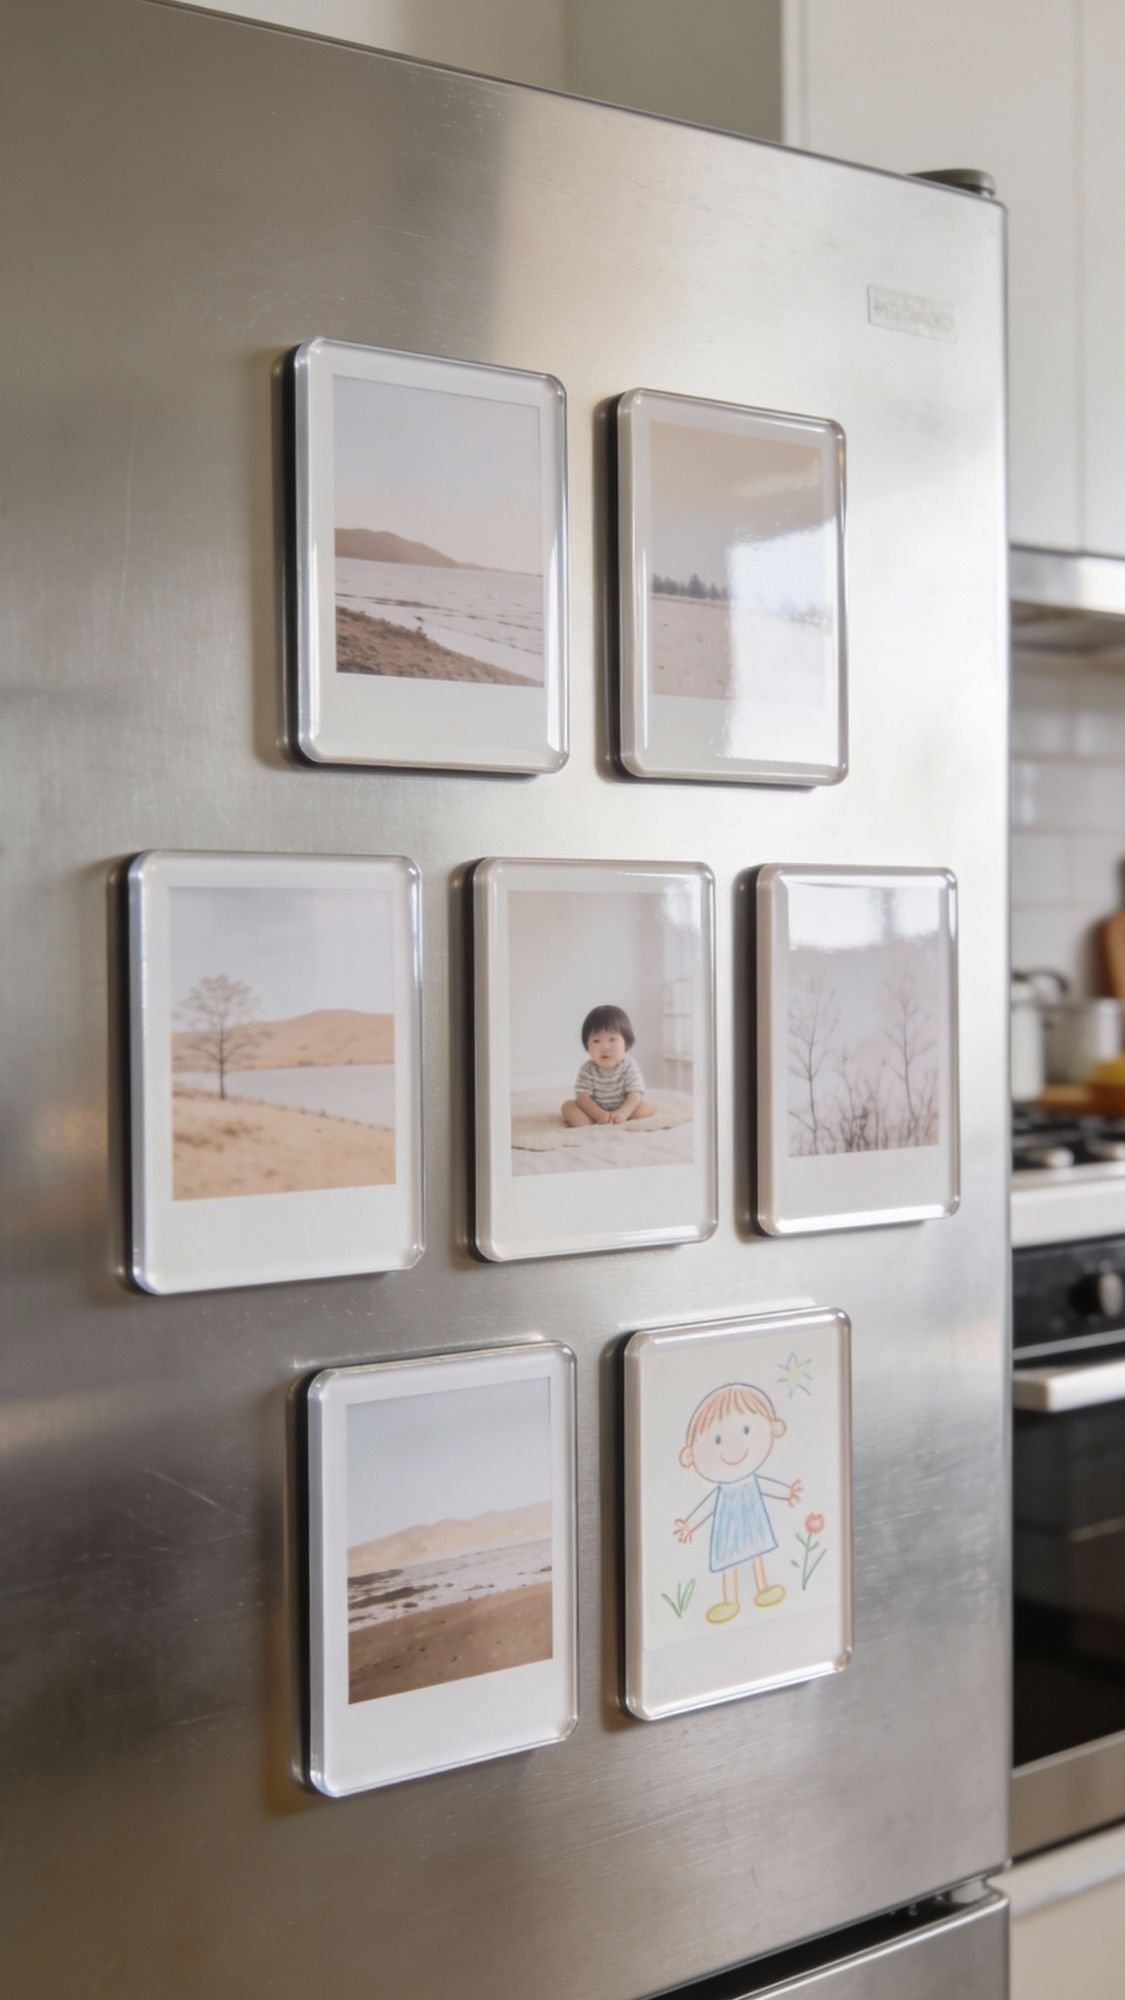
DIY Gift #16: Photo Magnets (Quick Keepsake Set)
These are ridiculously easy and moms actually use them. Plus, you can make a whole little set so it feels like a “real gift” instead of one single craft. The trick is cutting clean edges and sealing the photo so it doesn’t peel or curl later.
Best for: Ages 4 to 12 (adult helps with cutting for younger kids)
Time: 20 to 30 minutes
Difficulty: Easy
Materials
- Printed photos (wallet size works great)
- Cardstock (optional, for extra sturdiness)
- Self-adhesive magnet sheets or adhesive magnets
- Scissors or paper trimmer
- Laminating sheets or clear packing tape (optional but helps a lot)
- Corner rounder (optional, but it makes them look store-bought)
- Ruler (optional)
Steps
- Pick the photos. Choose 3 to 6 photos so you can make a mini set.
- Cut clean rectangles. Use a paper trimmer if you have it. Scissors work too, just go slow.
- Mount on cardstock (optional). If your photo paper feels thin, glue the photo to cardstock first, then cut again.
- Seal the photo.
- Laminate if you can.
- Or cover with clear packing tape, smoothing from the center out.
- Round the corners. This stops peeling and looks polished.
- Add the magnet backing. Stick magnet sheet to the back, then trim to match.
- Press firmly. Rub the back with a gift card to make the adhesive grab.
Pro Tips that make them last
- Seal first, magnet second. If you stick magnets first, trimming gets awkward and edges peel faster.
- Round corners. Square corners catch and lift in drawers and on fridge edges.
- Make a set of odd numbers. Sets of 3 or 5 look intentional, like a gift pack.
Quick fixes if it goes wrong
- Photo curls: Mount it to cardstock before sealing, or laminate it.
- Edges peel: Trim a tiny bit smaller, then reseal with laminate or tape.
- Magnet won’t stick well to fridge: Use thicker magnet sheets, thin ones are weak.
Age tweaks
- Preschool: Kids can pick the photos and help press tape down, adults handle cutting.
- Elementary: Kids can cut and assemble, with help sealing neatly.
- Older kids: They can add little captions, like “Best Mom Ever,” on a tiny label strip.
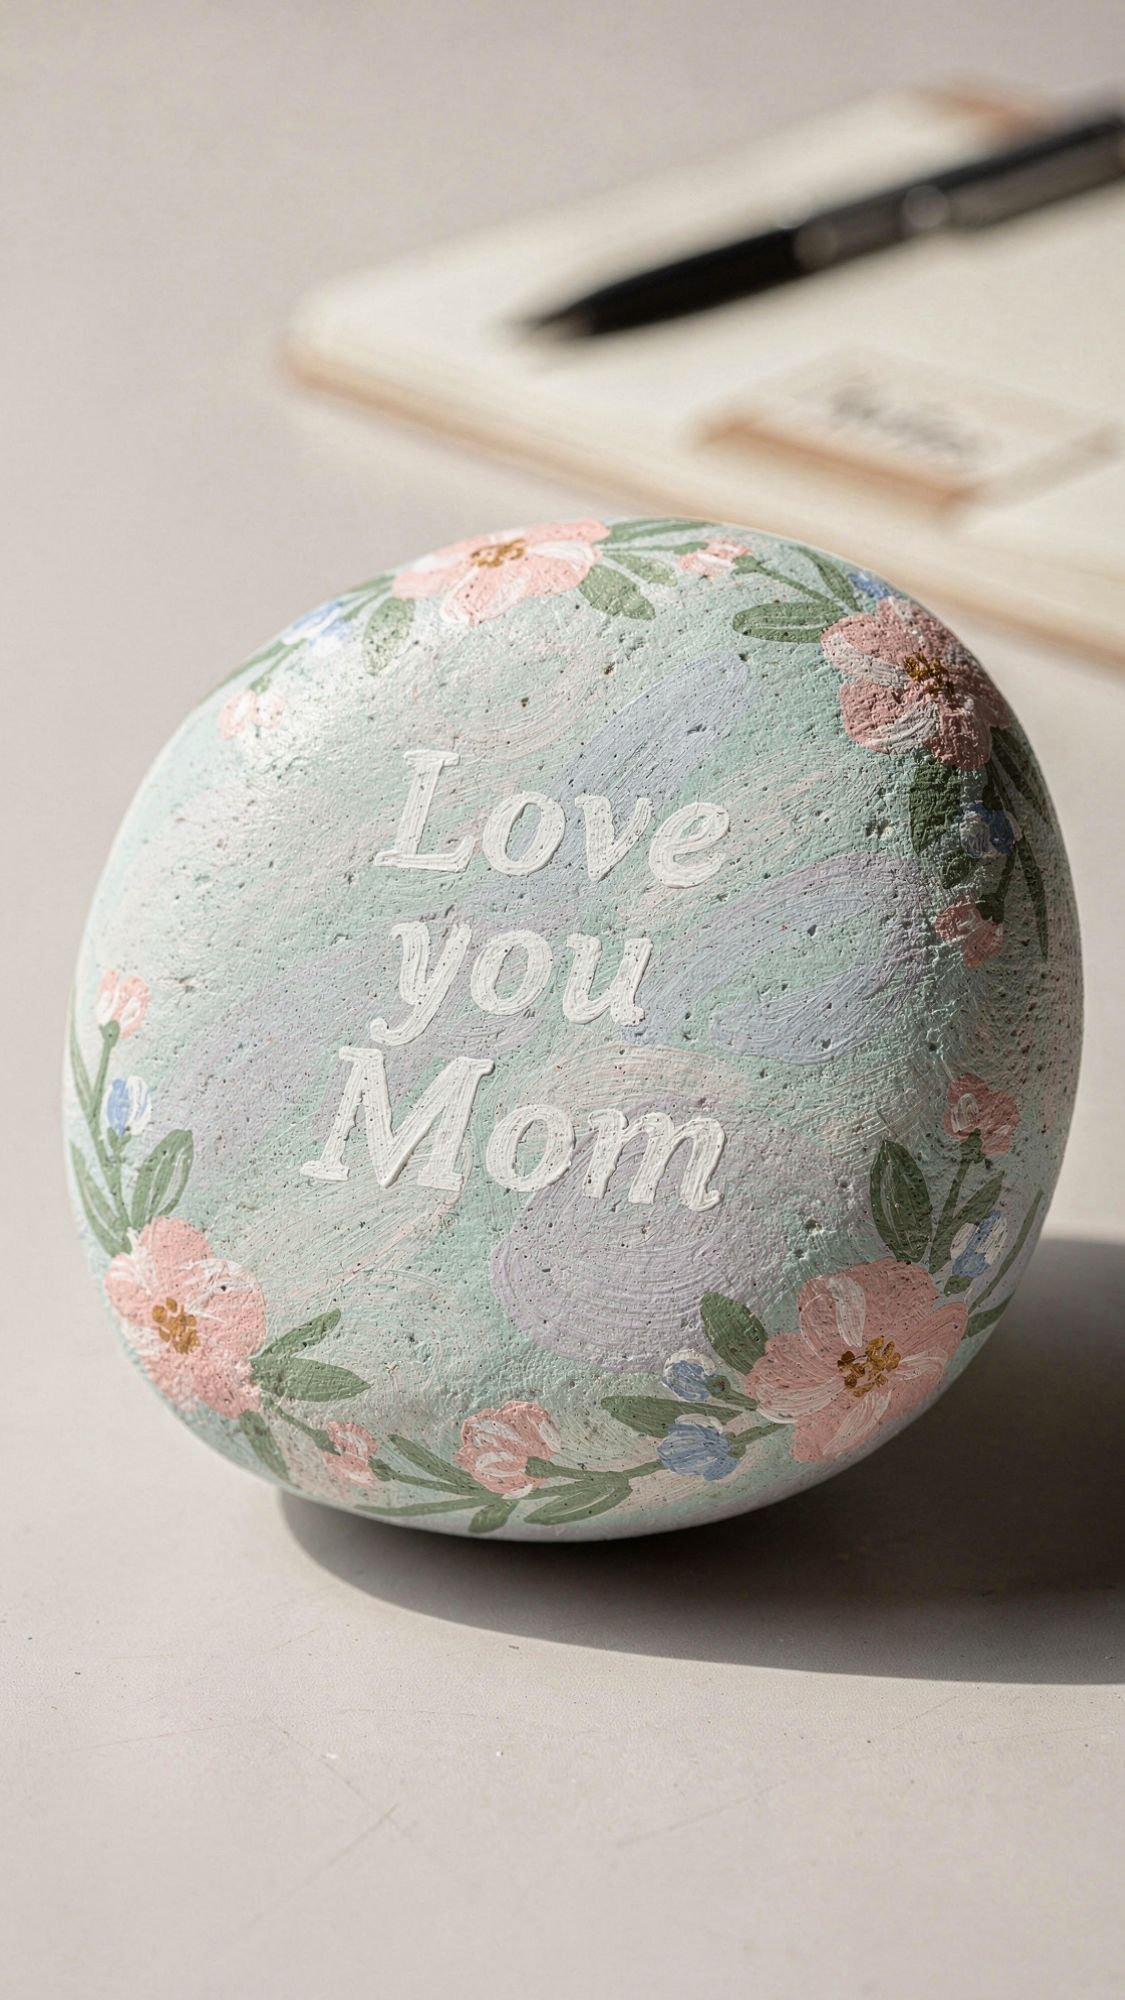
DIY Gift #17: Painted Rock Paperweight With a Sweet Message
This one is simple, cheap, and weirdly satisfying. Kids love painting rocks, and Mom gets a little desk paperweight she can actually keep on display. The main thing is prepping the rock so paint sticks, then sealing it so it doesn’t chip or rub off.
Best for: Ages 4 to 12
Time: 20 to 35 minutes + dry time
Difficulty: Easy
Materials
- Smooth rock (flat-ish works best, about palm size)
- Acrylic paint or washable paint (acrylic lasts better)
- Paintbrushes
- Paint pen (for the message and details)
- Cup of water + paper towels
- Clear sealer (spray sealer is easiest, brush-on works too)
Steps
- Wash and dry the rock. Dirt and dust make paint peel. Scrub it with soap and water, then let it dry completely.
- Paint a base coat. Use a thin coat, let it dry, then add a second coat if needed.
- Add a simple design. Easy ideas:
- A big heart with tiny dots around it
- Small flowers around the edge
- A rainbow stripe
- Polka dots in one color theme
- Write the message. Use a paint pen for clean lines. Keep the message short so it reads well:
- “Love you Mom”
- “Best Mom”
- “You got this”
- Let it dry fully. Give it at least 30 minutes before sealing.
- Seal it. Spray or brush on 1 to 2 thin coats. Let each coat dry before the next.
Pro Tips that make it look polished
- Use a smooth rock. Rough rocks eat your paint pen and make the message look shaky.
- Stick to big shapes. Tiny details disappear on curved surfaces.
- Seal in thin coats. Thick sealer can drip and dry cloudy.
Quick fixes if it goes wrong
- Paint won’t stick: Rock was dusty or damp. Wash, dry, then repaint with acrylic.
- Message looks messy: Let it dry, then paint over that area with base color and rewrite.
- Chipping: Add another thin coat of sealer after 24 hours.
Age tweaks
- Preschool: Let them do dots and big hearts. You write the message neatly.
- Elementary: They can do the full design and message with a paint pen.
- Older kids: Add a metallic border or a mini floral wreath design.
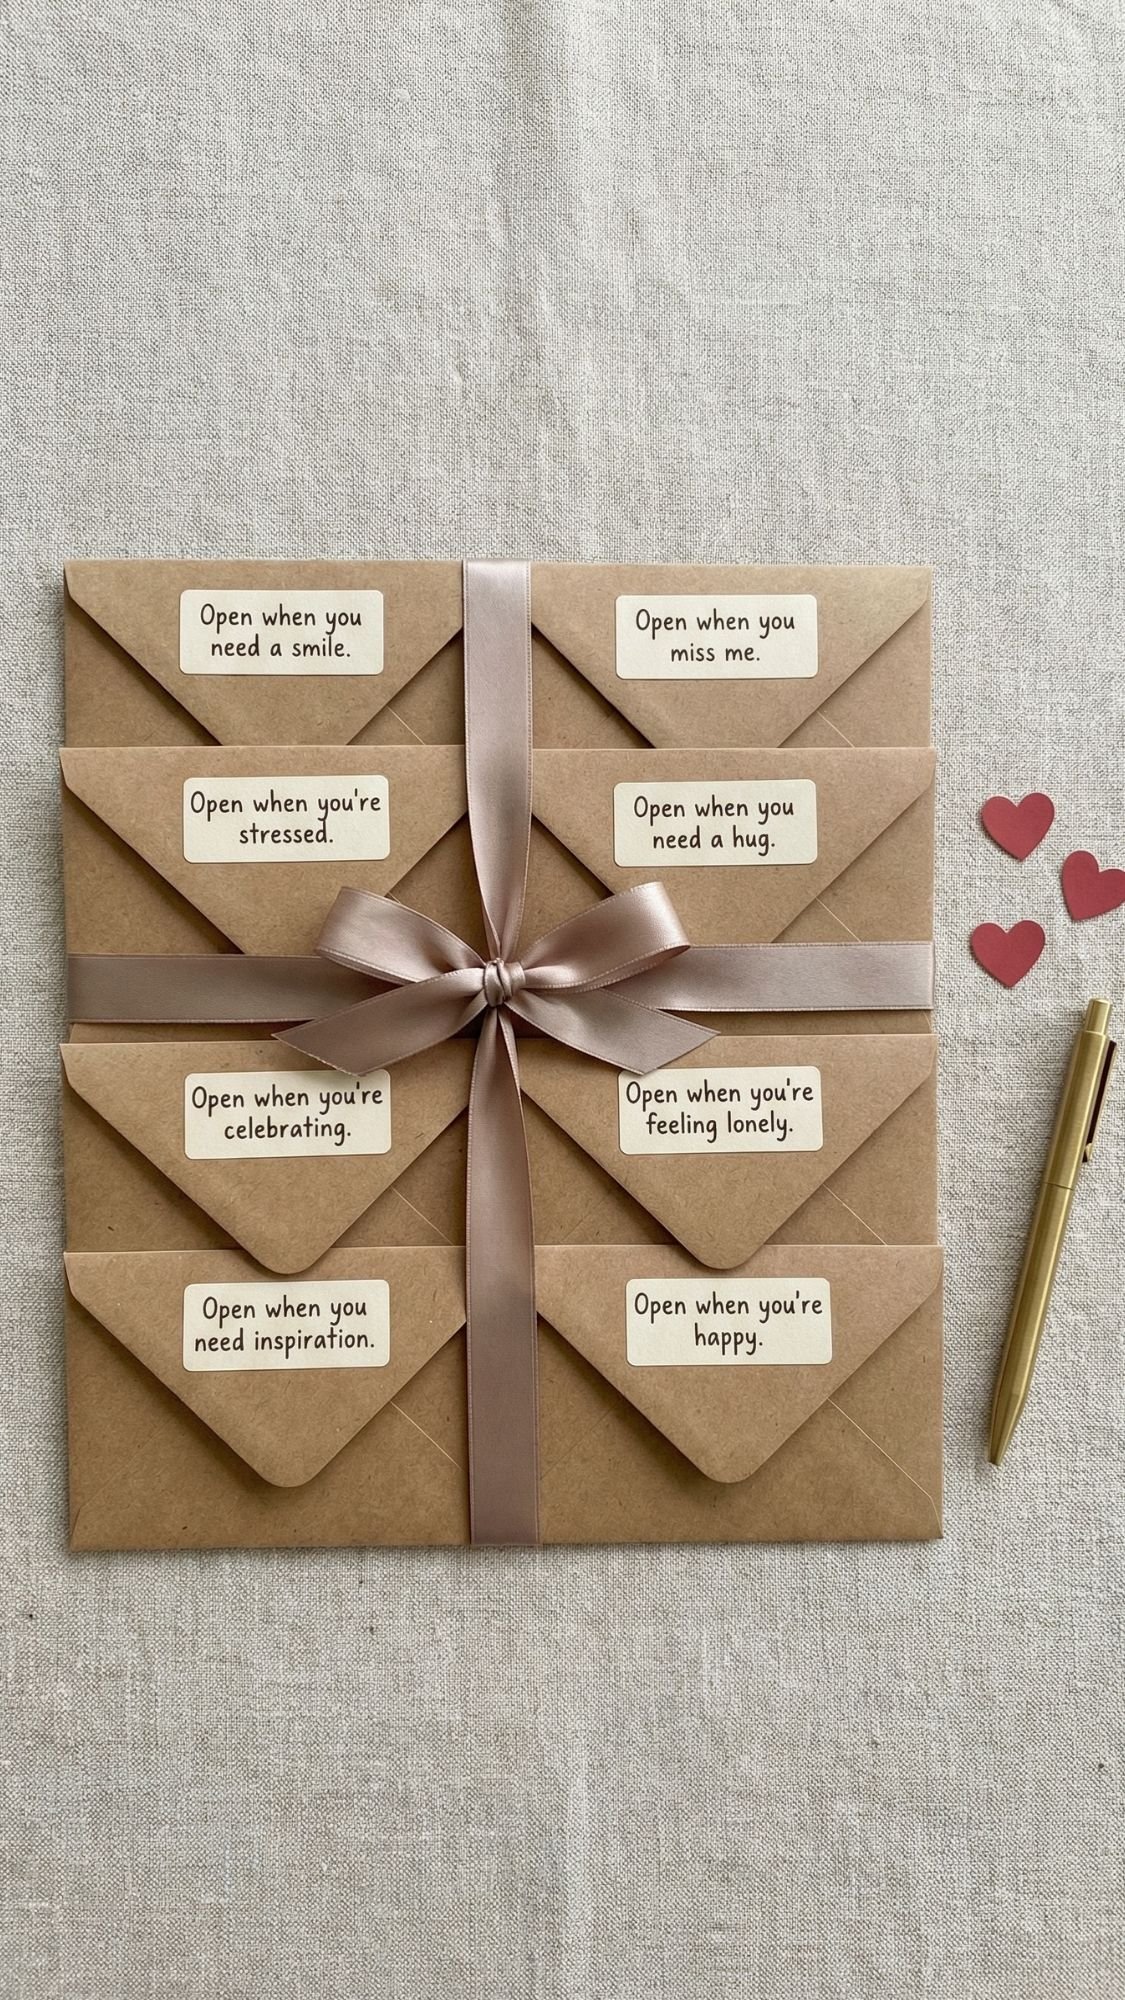
DIY Gift #18: “Open When” Mini Envelope Set
This is one of those gifts that feels simple but lands hard emotionally. Moms love it because it’s personal, and kids love it because they get to be creative without needing perfect cutting or painting skills. Also, it’s secretly great for kids who don’t want to do messy crafts. 🙂
Best for: Ages 7 to 12 (younger kids can draw inside notes)
Time: 30 to 45 minutes
Difficulty: Easy
Materials
- Mini envelopes (store-bought or folded from paper)
- Small paper notes or cut cardstock rectangles
- Markers or colored pencils
- Stickers or washi tape (optional)
- Ribbon or twine to bundle
- Optional: small box or gift bag
Steps
- Pick the “Open When” prompts. Aim for 6 to 10 envelopes so it feels like a set.
- Label each envelope. Write prompts in big, readable letters.
- Write the notes. One note per envelope. Keep them short and sweet, and let kids add doodles.
- Add tiny extras. Optional but cute:
- A little heart sticker
- A small joke
- A mini drawing
- Seal the envelopes. You can leave them unsealed if you want Mom to peek, but sealed feels more “gift.”
- Bundle it up. Stack them, tie with ribbon, add a tag.
“Open When” prompt ideas
- Open when you feel tired
- Open when you need a hug
- Open when you miss me
- Open when you need to smile
- Open when you had a hard day
- Open when you want to laugh
- Open when you need encouragement
- Open when you want to feel loved
Pro Tips that make it look gift-shop cute
- Use the same envelope style for the whole set so it looks cohesive.
- Write prompts the same way on every envelope. Consistency makes it look polished.
- Add a “Read Me First” card at the top that explains what the set is.
Quick fixes if it goes wrong
- Handwriting looks messy: Use a bold marker and write bigger. Tiny writing always looks shakier.
- Notes keep falling out: Tape one edge of the note inside the envelope, like a little hinge.
- Envelopes rip: Reinforce the flap with a strip of washi tape.
Age tweaks
- Younger kids: They draw pictures for each envelope, you write the prompt label.
- Elementary: They can write short notes themselves with help brainstorming.
- Older kids: They can add humor, like “Open when you need a snack idea.”
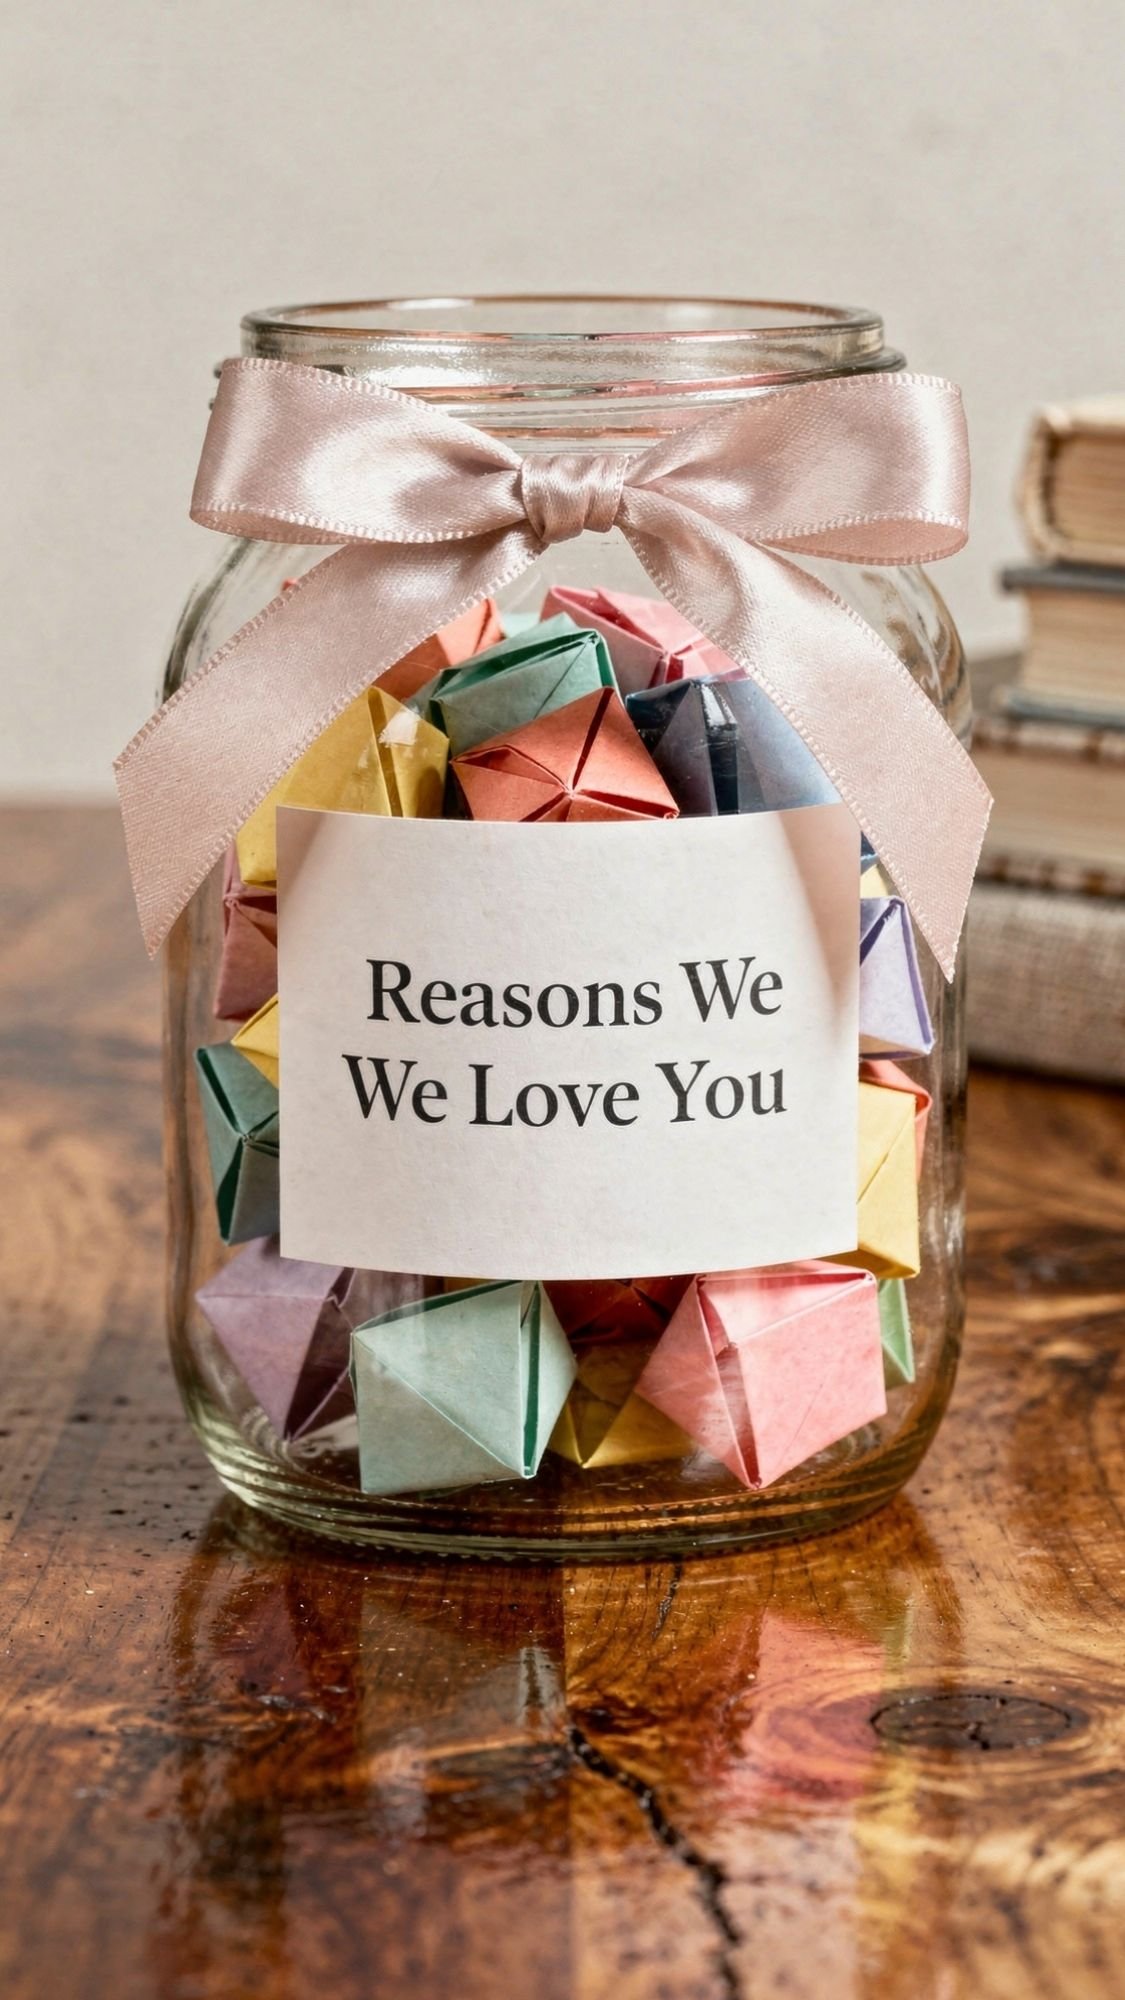
DIY Gift #19: Gratitude Jar Filled With Tiny Notes
This one is pure heart. Moms keep these forever because they can pull a note out on a rough day and instantly feel loved. It’s also super flexible, little kids can draw, older kids can write, and you can make it look very giftable with simple styling.
Best for: Ages 4 to 12
Time: 20 to 45 minutes
Difficulty: Easy
Materials
- Jar with a lid (mason jar, pasta sauce jar, any clean jar works)
- Paper (colored paper looks extra cute)
- Scissors or paper cutter
- Markers or pens
- Ribbon or twine
- Label or gift tag (cardstock works)
- Optional: stickers, washi tape
- Optional: hole punch
Steps
- Clean the jar. Remove labels and wash it well. Dry completely so your label sticks.
- Cut note strips. Aim for 1 x 4 inch strips or small squares. Keep them consistent so the jar looks tidy.
- Write the notes.
- Younger kids: draw hearts, flowers, or “Mom” pictures
- Older kids: write one reason per note
- Fold the notes. Fold into thirds or roll them into tiny scrolls.
- Fill the jar. Pack it full. A full jar looks way more impressive than a half-full one.
- Decorate the lid. Wrap ribbon around the jar neck and tie a bow.
- Add a label. Easy label ideas:
- “Reasons We Love You”
- “Open When You Need a Smile”
- “Mom, You’re the Best”
Note ideas that don’t feel repetitive
- “I love when you…”
- “My favorite thing you do is…”
- “You make me feel safe because…”
- “You’re the best at…”
- “One funny memory I love is…”
Pro Tips that make it look polished
- Use the same size notes. It looks clean and gift-ready.
- Use thicker paper if kids write with markers, thin paper bleeds through.
- Add a mix of notes and doodles. It keeps the jar fun and not all the same.
Quick fixes if it goes wrong
- Jar label won’t stick: Wipe jar with rubbing alcohol, then apply label or use a tag tied with twine instead.
- Notes are messy and oversized: Give kids a template strip to trace and cut.
- Jar looks empty: Add tissue paper filler at the bottom or cut more notes. Full is the goal.
Age tweaks
- Preschool: Mostly drawings and hearts, adults write a short caption on each note.
- Elementary: One sentence per note, plus doodles.
- Older kids: Add a few longer “story notes” with a memory or a thank you.
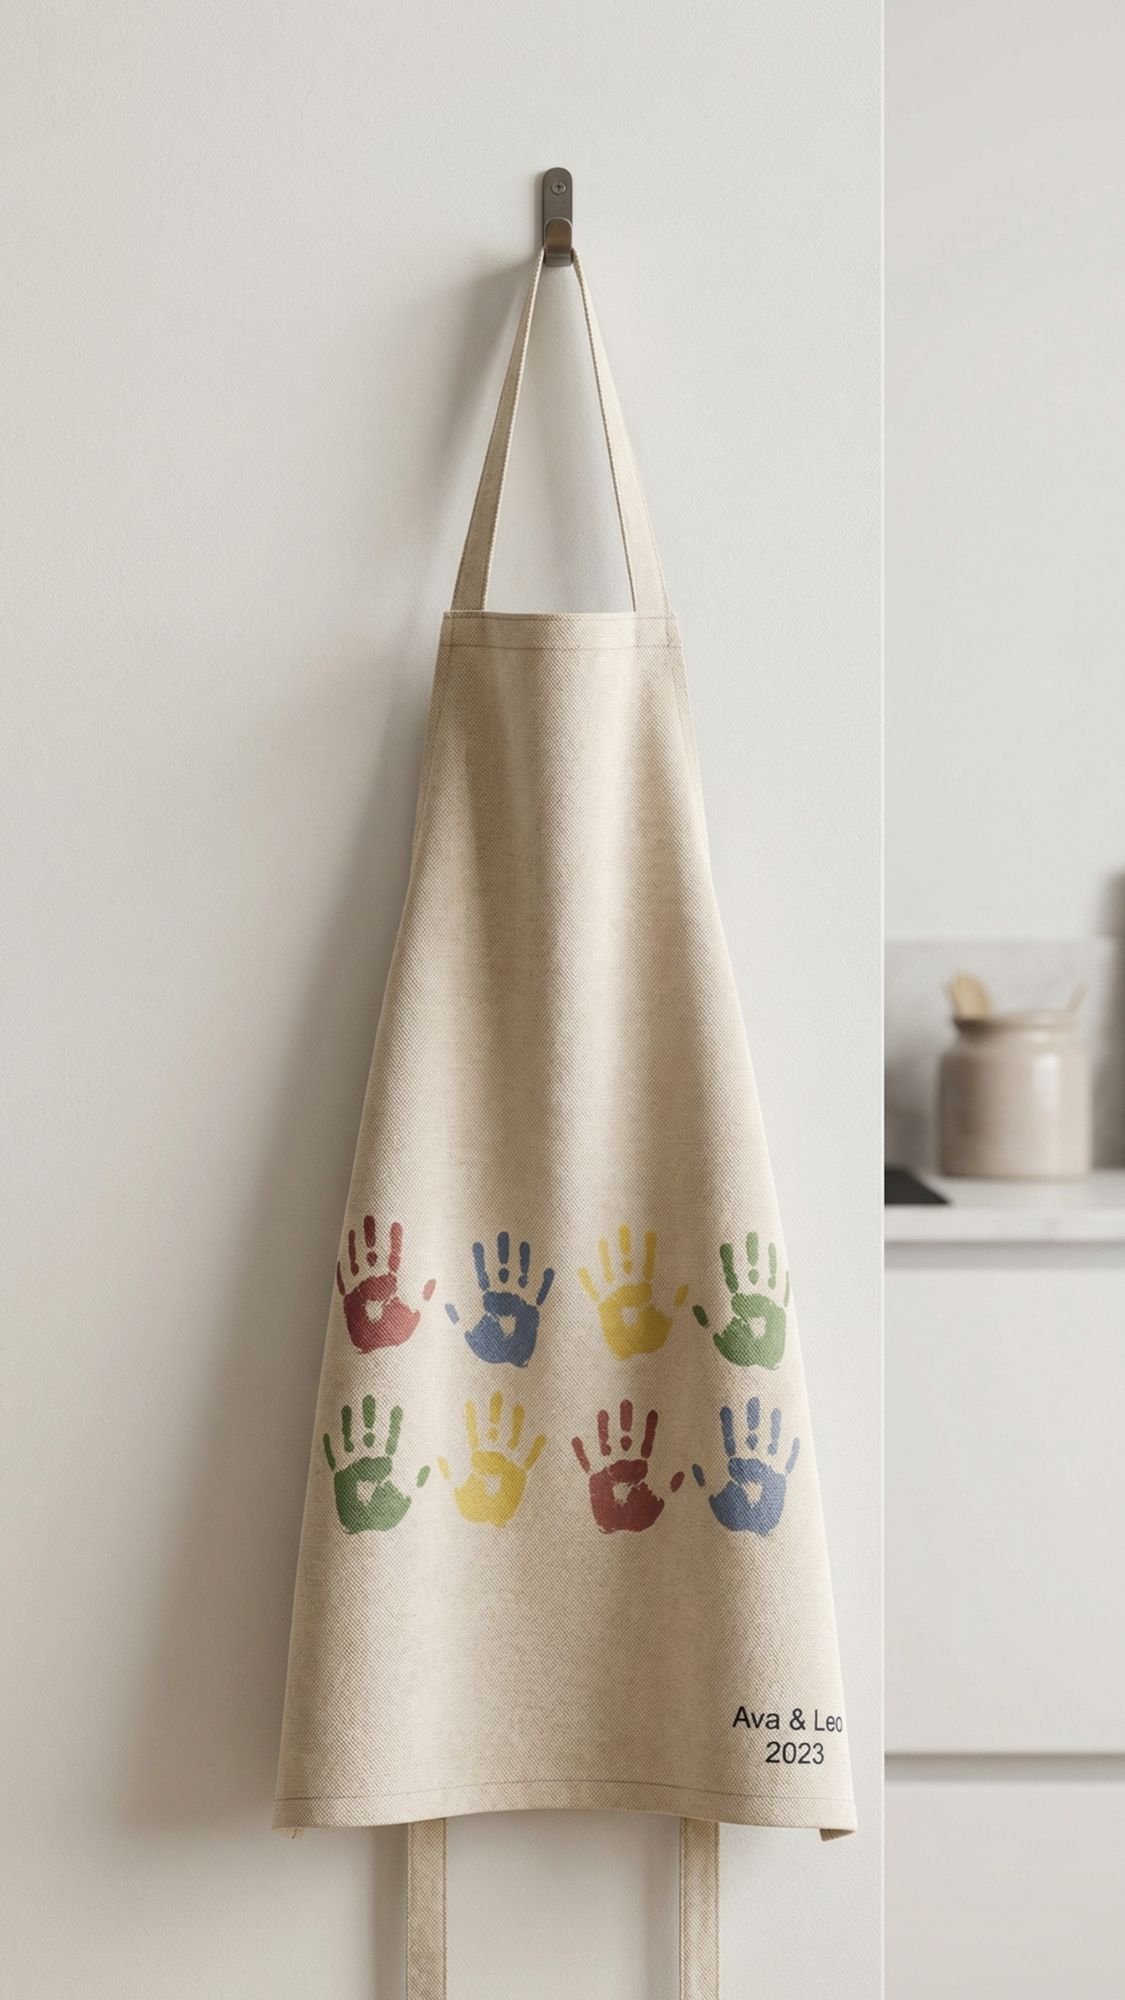
DIY Gift #20: Handprint Apron (A Wearable Keepsake)
This one is a total Mom win because it’s sentimental and practical. She can cook, garden, or bake while wearing literal tiny handprints, and yes, it’s as cute as it sounds. The big keys are using fabric paint and heat-setting so the prints don’t fade the first time it gets washed.
Best for: Ages 3 to 12 (adult helps with placement and heat-setting)
Time: 20 to 30 minutes + dry time + heat-set
Difficulty: Easy, slightly messy
Materials
- Plain apron (cotton or cotton blend works best)
- Fabric paint (or fabric ink)
- Mini foam roller or makeup sponge
- Cardboard (to slide inside apron)
- Paper plate or paint tray
- Baby wipes
- Optional: fabric marker for names or date
- Iron or dryer for heat-setting (adult only)
Steps
- Pre-wash the apron if possible. It helps paint grip and prevents weird shrink surprises later.
- Insert cardboard inside. Slide cardboard behind the apron front so paint doesn’t bleed through.
- Plan placement. Decide where prints go:
- A border along the bottom
- One big handprint in the center
- Two handprints forming a heart shape
- Load paint thinly. Roll paint onto the child’s hand with a foam roller. Thin coat, no drips.
- Stamp the handprints. Press hand down firmly, lift straight up. No sliding.
- Let it dry flat. Give it at least 2 to 4 hours before heat-setting.
- Heat-set the design.
- Iron method: Put parchment paper over prints and iron on medium-high for 3 to 5 minutes, moving the iron slowly.
- Dryer method: Dry on high for 30 minutes.
- Optional personalization. Add names and the year with a fabric marker after prints dry, then heat-set again if needed.
Pro Tips that make prints clean and bold
- Foam roller beats a brush. Brush strokes create streaks and thick blobs.
- Use fabric paint, not washable paint. Washable paint fades fast.
- Do a test print on scrap fabric or paper first so kids know what to expect.
Quick fixes if it goes wrong
- Smudged print: Once dry, outline it with a fabric marker to sharpen edges, or add a second print nearby and call it a layered look.
- Faded look after washing: It wasn’t heat-set enough. Heat-set again, then wash cold and air dry.
- Bleed-through: Cardboard insert was too thin or shifted. Use thicker cardboard and tape it in place next time.
Age tweaks
- Toddlers: Adults roll paint and guide the hand placement.
- Preschool: Let them pick paint colors and do a bottom border pattern.
- Elementary: They can plan a full design, add names, date, and little doodles.
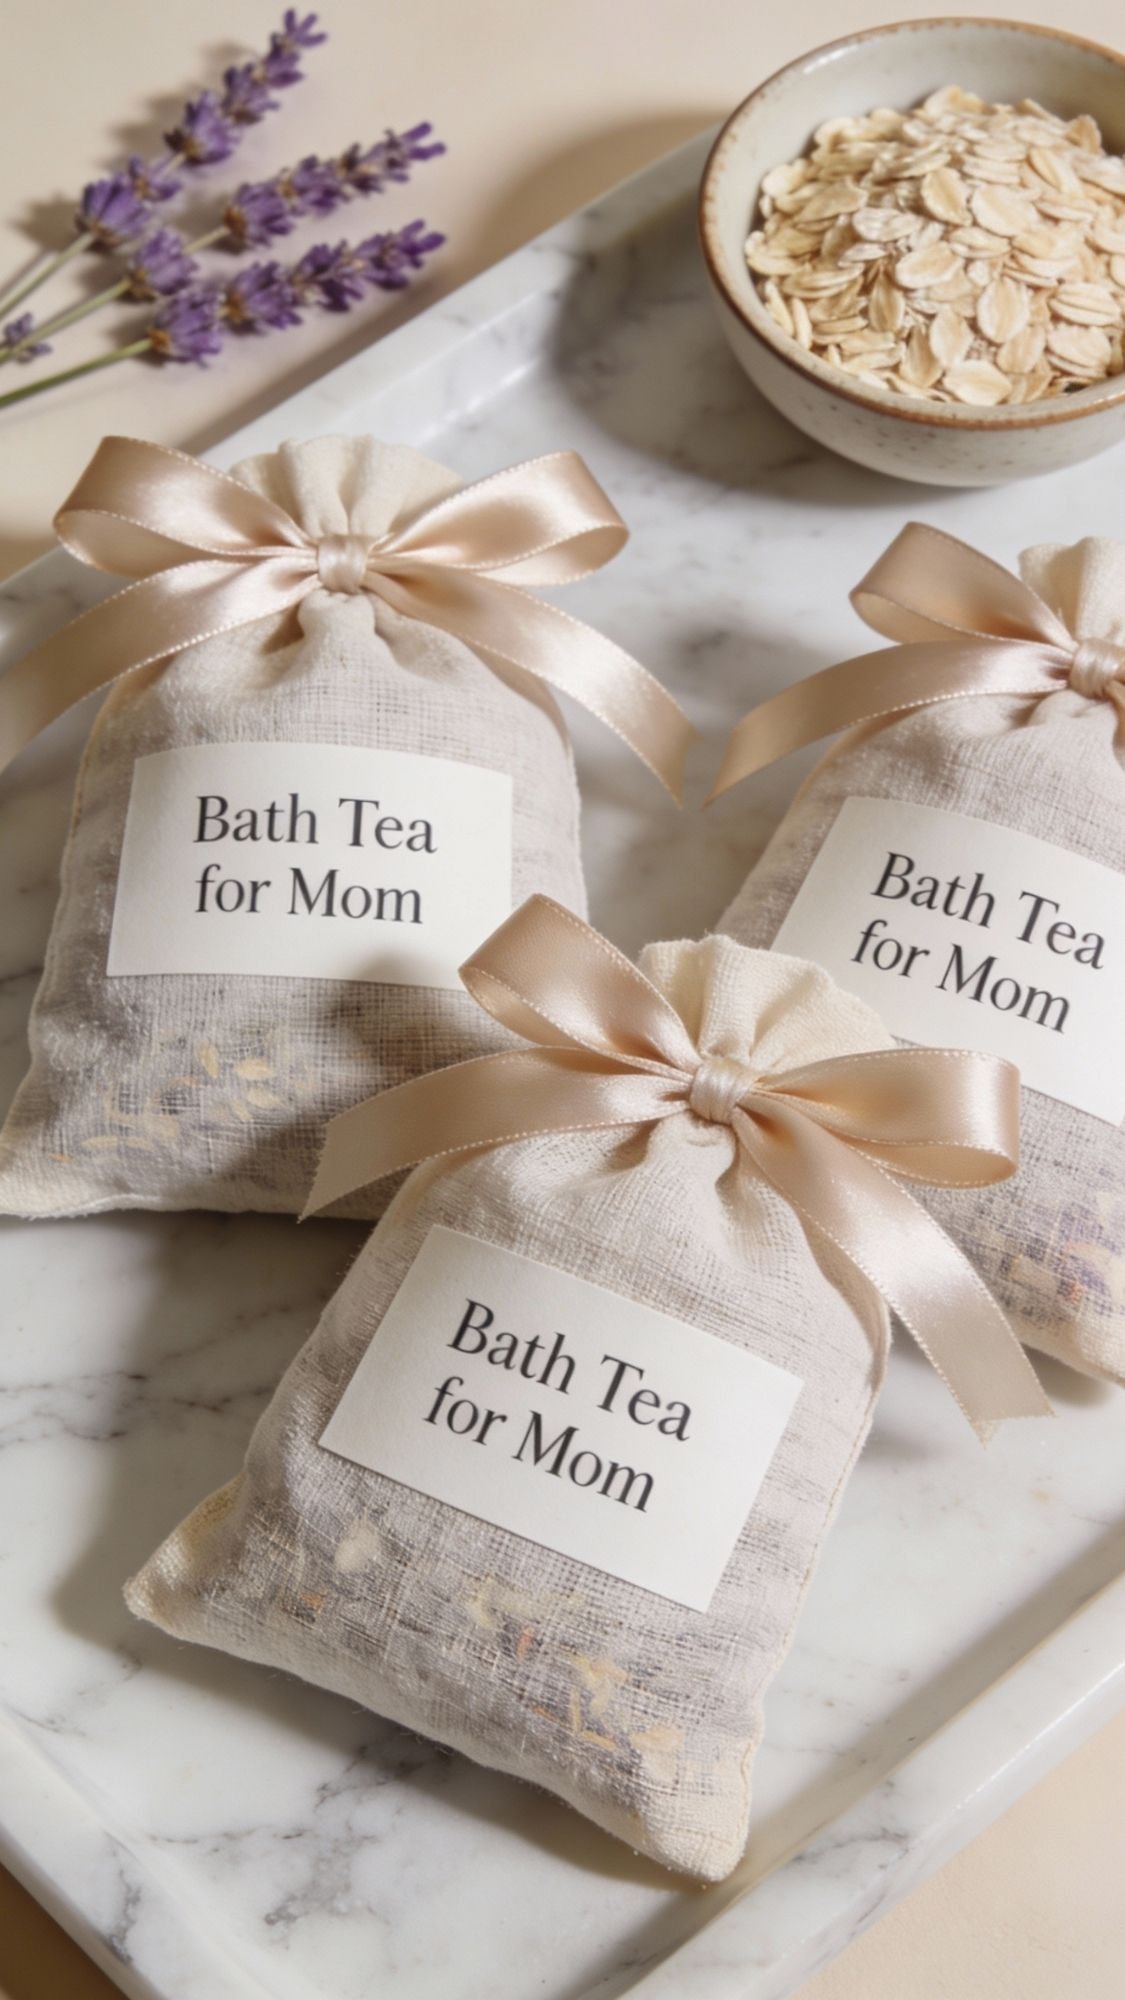
DIY Gift #21: DIY Bath Tea Sachets (Feels Fancy, Super Easy)
These feel like a boutique spa gift, but kids can make them with simple scooping and tying. They’re also great if you want a craft that doesn’t involve paint, cutting, or a mess explosion. Just keep scents gentle because some moms love lavender and some moms get a headache from it in five seconds flat.
Best for: Ages 8 to 12 (adult supervises ingredients and tying tight)
Time: 15 to 25 minutes
Difficulty: Easy
Materials
- Muslin drawstring bags or empty tea filter bags
- Rolled oats (soothing and cheap)
- Dried herbs or flowers (choose 1 to 2):
- Lavender (classic)
- Chamomile (mild)
- Rose petals (pretty, can be messy)
- Optional: Epsom salt (adds “spa” feel)
- Measuring spoons
- Bowl
- Spoon or small funnel
- Ribbon and tags for gifting
Steps
- Mix the dry ingredients. In a bowl, combine:
- 2 tablespoons oats
- 1 tablespoon dried lavender or chamomile
- Optional: 1 tablespoon Epsom salt
- Fill the bags. Scoop mixture into muslin bags. Don’t overfill, you need room to tie or cinch closed.
- Close tightly. Pull drawstrings tight, double-knot if needed.
- Label the sachets. Add a tag that says:
- “Bath Tea for Mom”
- “Pour into warm bath, soak 15 minutes”
- Bundle it up. Tie 2 to 3 sachets together with ribbon so it feels like a set.
Pro Tips that make it feel gift-shop legit
- Keep the blend simple. Too many ingredients looks messy.
- Use fine dried herbs. Big chunky petals break apart and float everywhere.
- Make a set of 3. One sachet feels small, three feels like a gift.
Quick fixes if it goes wrong
- Herbs poke through the bag: Double-bag it using two muslin bags, or switch to tighter weave bags.
- Sachets leak oats: Use tea filter bags instead, they’re tighter.
- Scent feels too strong: Use less herb and more oats. Oats still feel luxurious without a heavy smell.
Age tweaks
- Younger kids: They can scoop oats, adults handle tying and labeling.
- Elementary: Kids can make the mix and pack the bags.
- Older kids: Add a “spa bundle” by pairing sachets with a handmade coupon for “quiet bath time.”
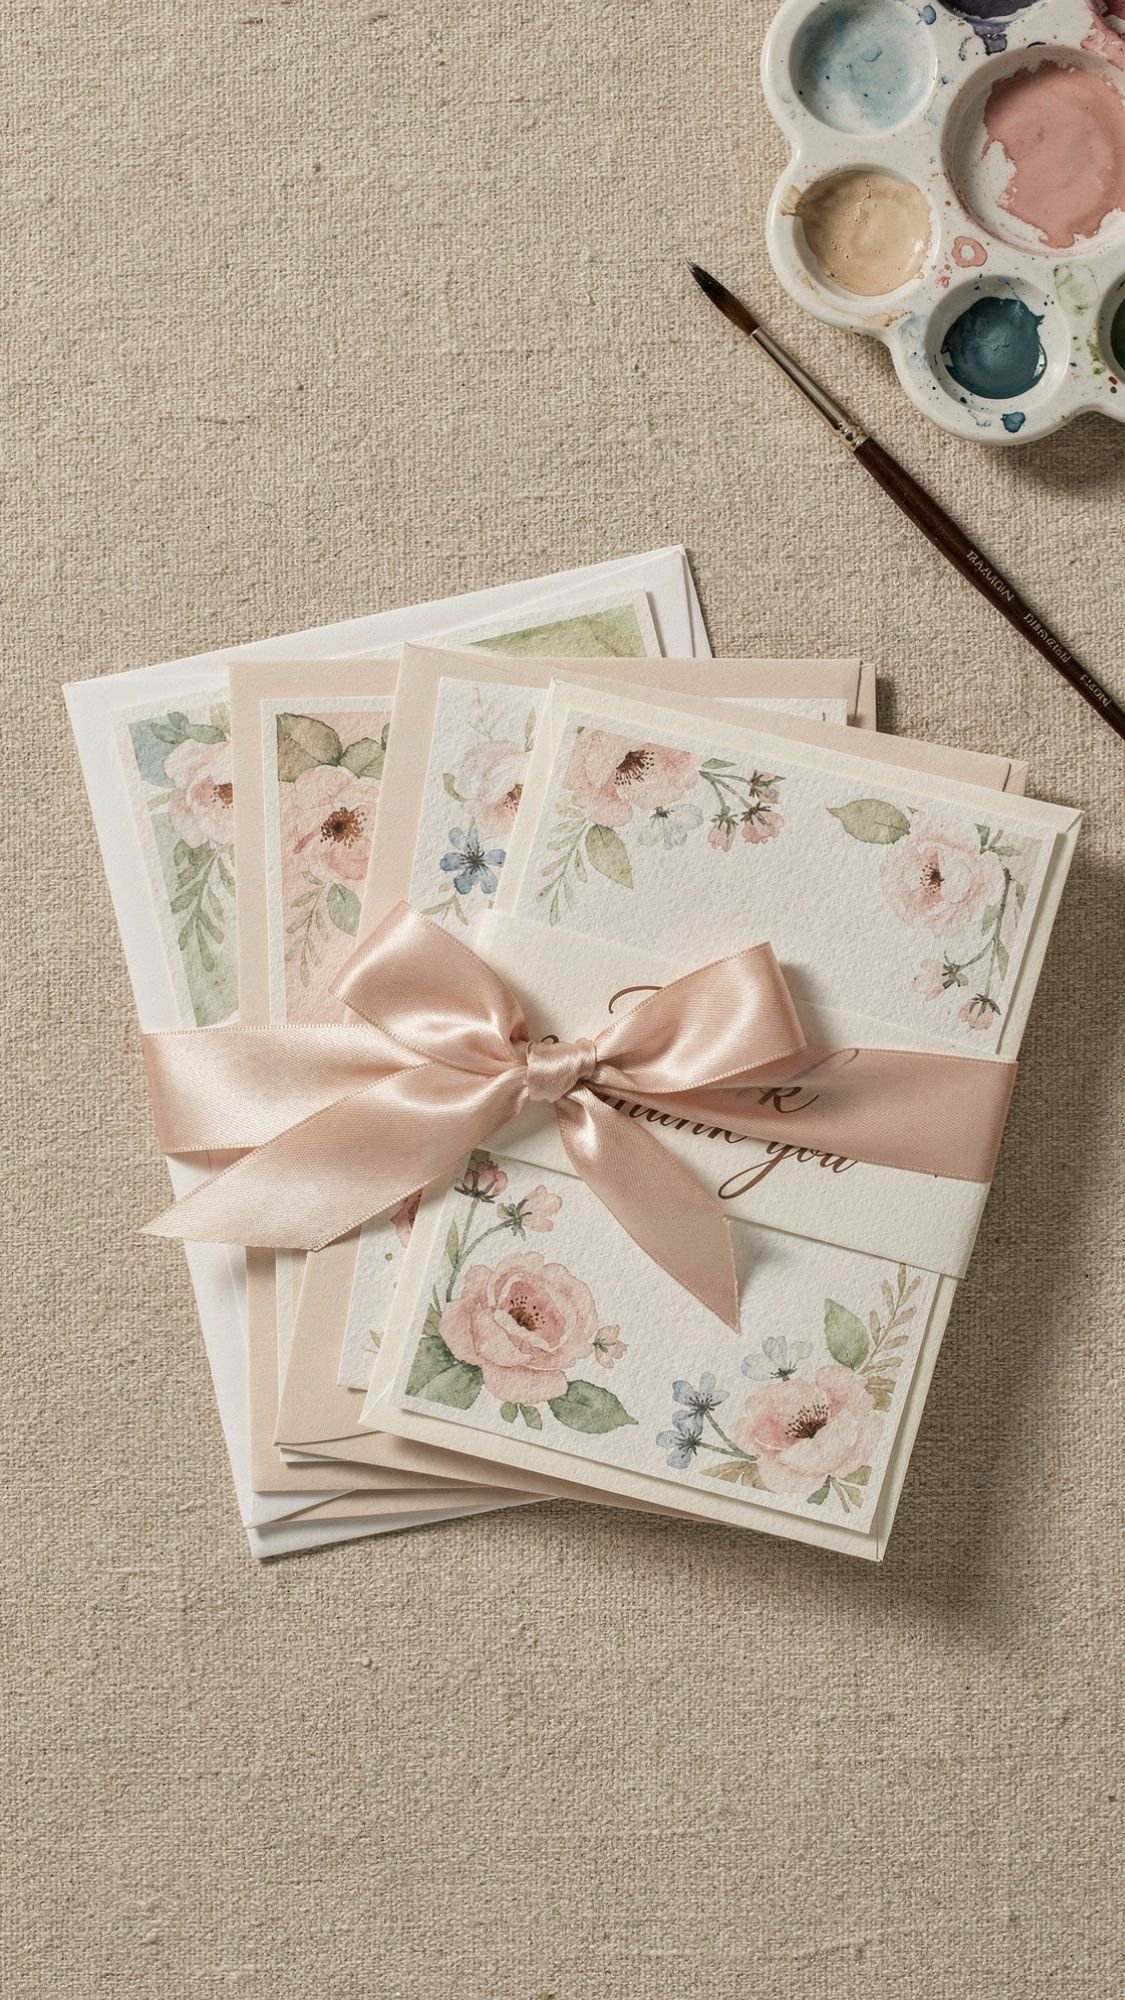
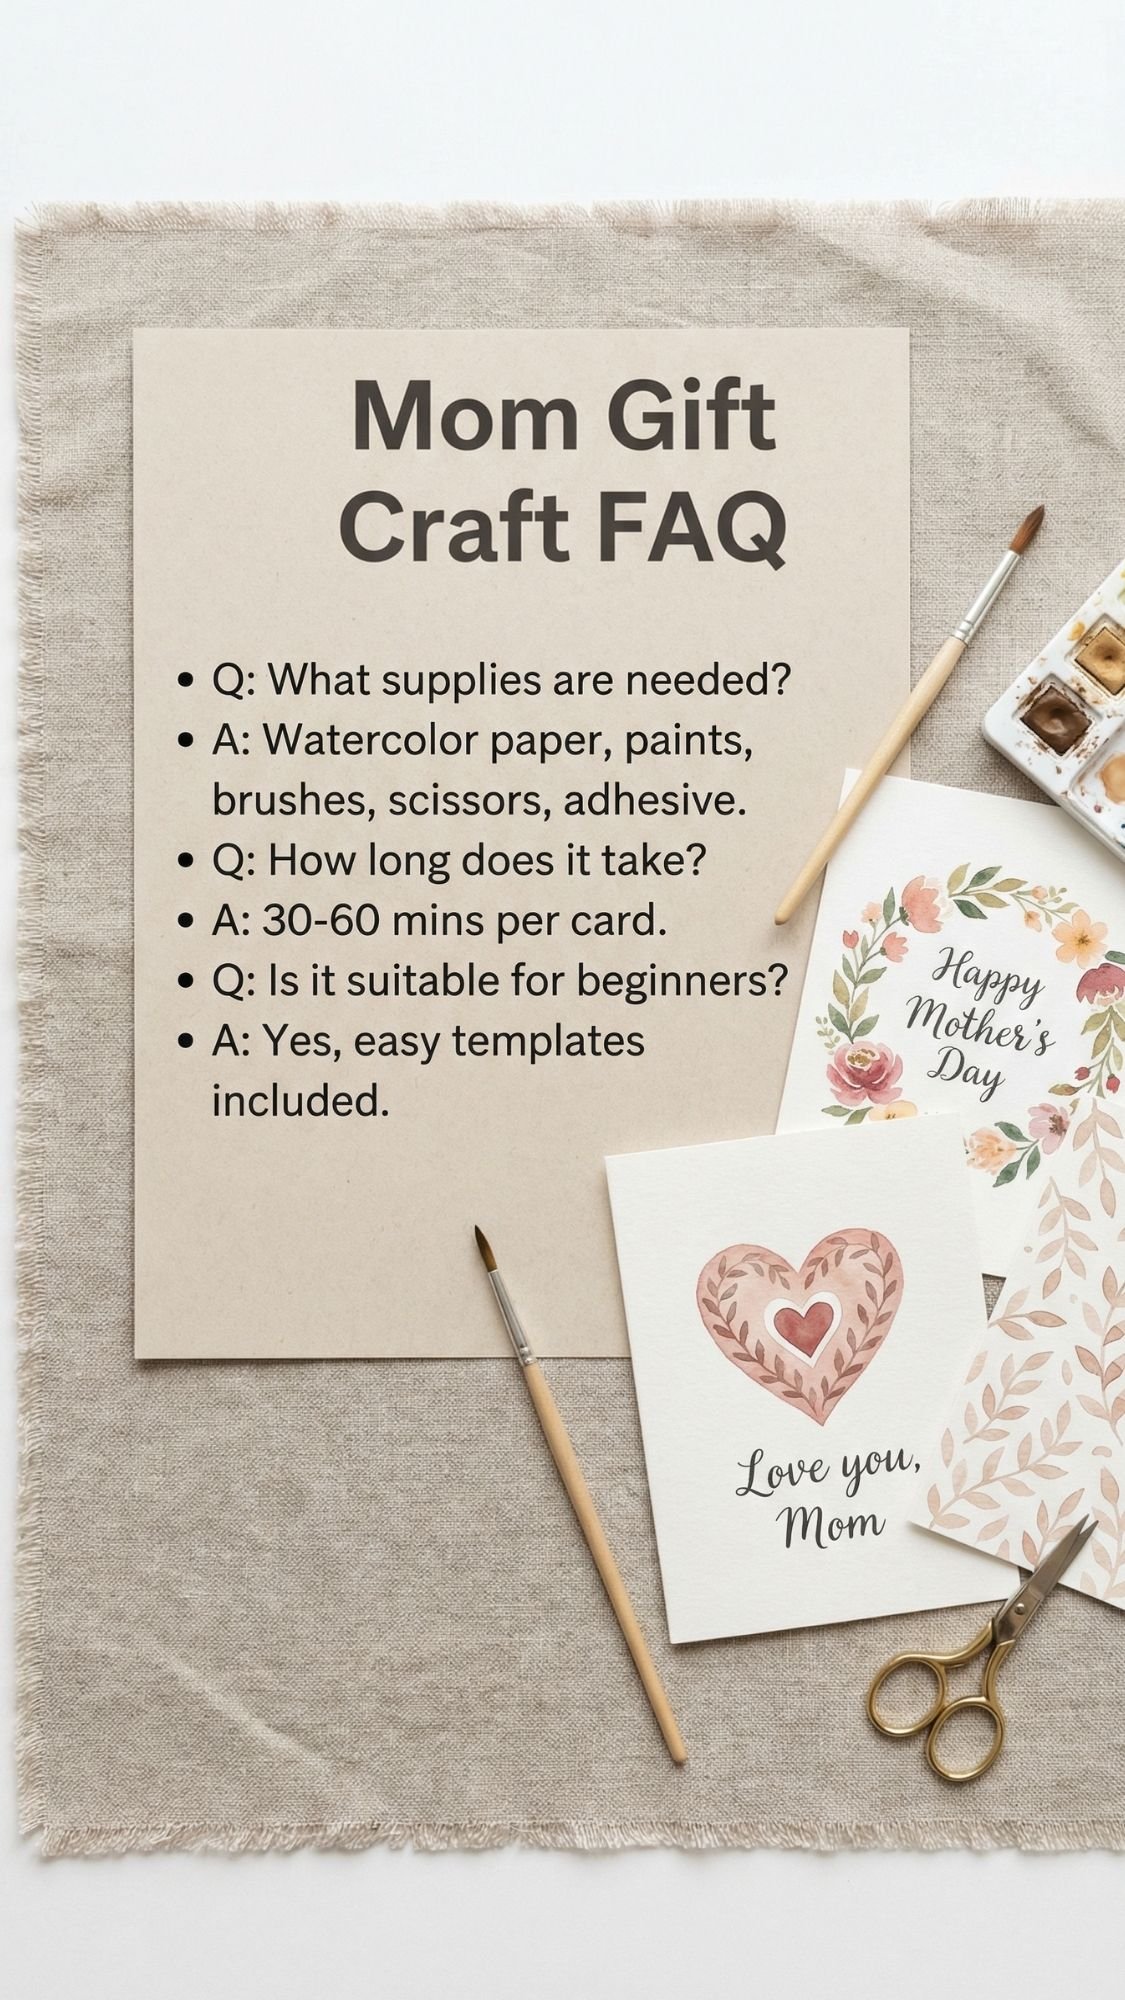
DIY Gift #22: Watercolor Card Set (Mom Gets a Whole Pack)
This is such a smart “kid art” gift because it turns painting time into something Mom can actually use later. A set of cards feels way more impressive than one card, and watercolor looks artsy even when kids keep it simple. The big thing is controlling water so the paper doesn’t warp into a potato chip.
Best for: Ages 5 to 12
Time: 30 to 45 minutes + dry time
Difficulty: Easy
Materials
- Watercolor paper (or heavy cardstock, but watercolor paper works best)
- Watercolor paint set
- Paintbrushes
- Painter’s tape (for clean borders)
- Cup of water + paper towel
- Black fineliner marker (optional, for outlines after drying)
- Envelopes
- Optional: metallic paint pen for tiny accents
Steps
- Cut the paper. Cut watercolor paper into card sizes, like 5 x 7 inches, then fold if you want folded cards.
- Tape a border. Tape around the edges so you get clean, crisp borders when you peel it off. This makes kid art look intentional instantly.
- Paint simple designs. Easy ideas that always look good:
- Ombre wash (one color fading lighter)
- Loose florals (big petals, not tiny details)
- Polka dot watercolor blobs
- Rainbow stripe wash
- Let it dry fully. Don’t peel tape early, wet paper tears.
- Optional outline step. Once dry, older kids can add simple line doodles with a fineliner. That “ink + watercolor” look feels fancy.
- Peel the tape slowly. Pull tape back on itself at an angle so it doesn’t rip the paper.
- Assemble the set. Bundle 4 to 6 cards with envelopes and tie with ribbon.
Pro Tips that prevent warping
- Use watercolor paper. Regular paper buckles, then kids get mad, then everyone gets mad.
- Less water, more control. Dab your brush on a paper towel before painting.
- Tape to a hard surface. Tape the paper to a cutting board or clipboard so it dries flatter.
Quick fixes if it goes wrong
- Paper warped: Let it dry completely, then press under heavy books overnight.
- Colors look muddy: Kids mixed too many colors while wet. Let it dry, then paint a fresh layer in one color family.
- Tape tore the paper: Peel slower and use lower-tack tape next time. You can also stick the tape to your shirt first to remove some stickiness.
Age tweaks
- Preschool: One or two colors, big blobs, simple hearts.
- Elementary: Ombre washes and loose florals.
- Older kids: Add fineliner details and make a matching envelope design.
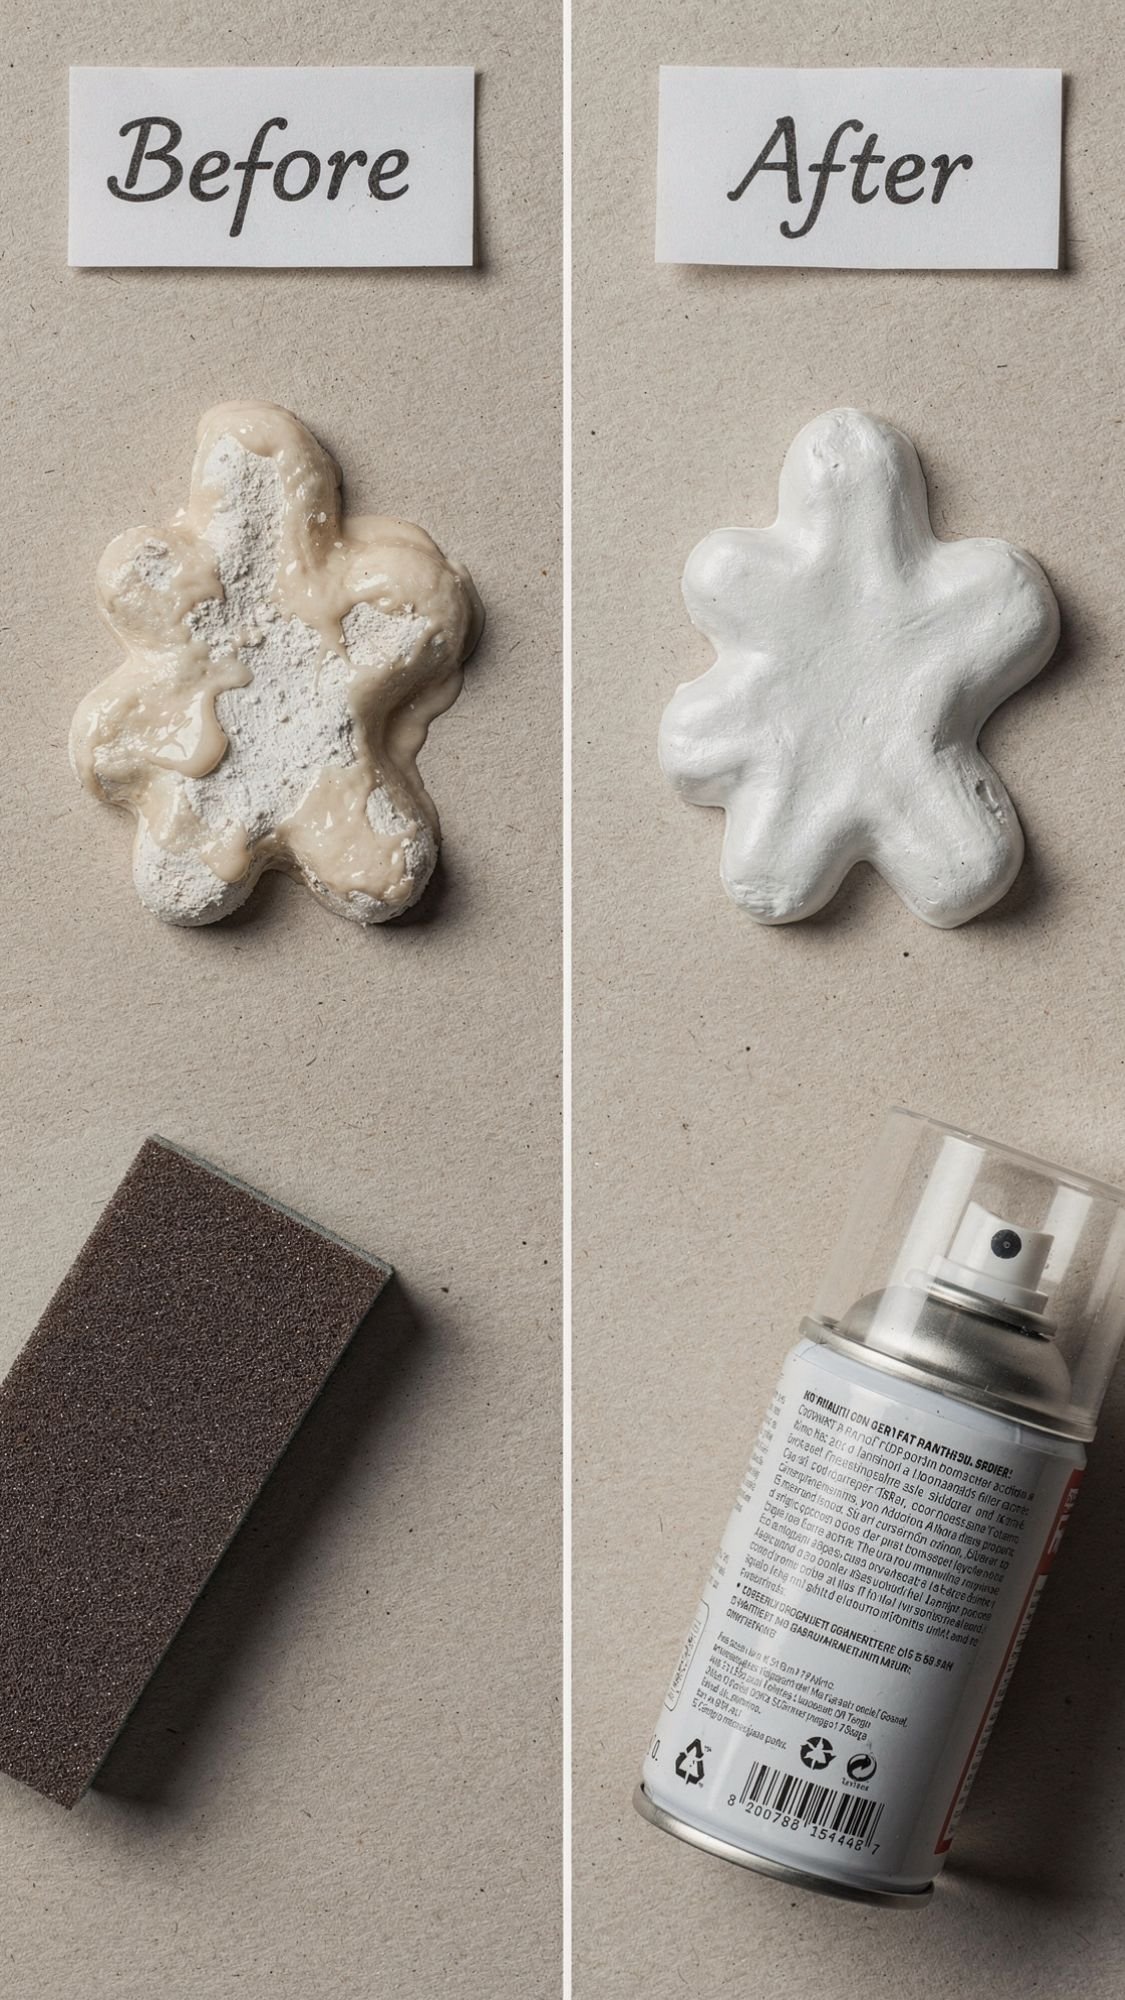
The Time I Sealed Too Soon and Everything Turned Gummy
I learned this the hard way, and I’m telling you so you don’t repeat my mistake with a kid-made gift you actually want to keep. I once helped my nephew finish a painted keepsake, and it looked adorable… until I rushed the last step. I grabbed the clear sealer because I wanted it “done done,” and I sealed it while the paint still felt dry-ish but not truly dry. Big mistake.
The second my brush hit the surface, the paint started dragging and smearing like frosting. The finish turned tacky, the colors dulled, and the whole thing looked like it had been through a tiny craft hurricane. I wanted to pretend it was “a cool abstract effect,” but no. It was just me being impatient.
Here’s exactly how I fixed it without starting over:
- I stopped touching it immediately and let it sit overnight in a dry room. If you keep messing with tacky sealer, it only gets worse.
- The next day, I lightly sanded the sticky areas with fine grit sandpaper (220 to 400). I didn’t sand to bare wood, I just knocked down the gummy layer.
- I wiped off dust with a dry cloth, then repainted in thin layers where the color smeared.
- When the paint fully dried, I switched strategies. I used a spray sealer for the first coat instead of brushing. That first mist coat locks everything in so a brush can’t drag the paint around.
Lesson learned:Dry time and cure time are not the same thing. Paint can feel dry on top but still stay soft underneath. If you seal too early, you trap moisture and create that sticky, smeary mess.
Quick rule that saves you: If you can press a fingernail into it and leave a dent, it isn’t ready to seal yet.
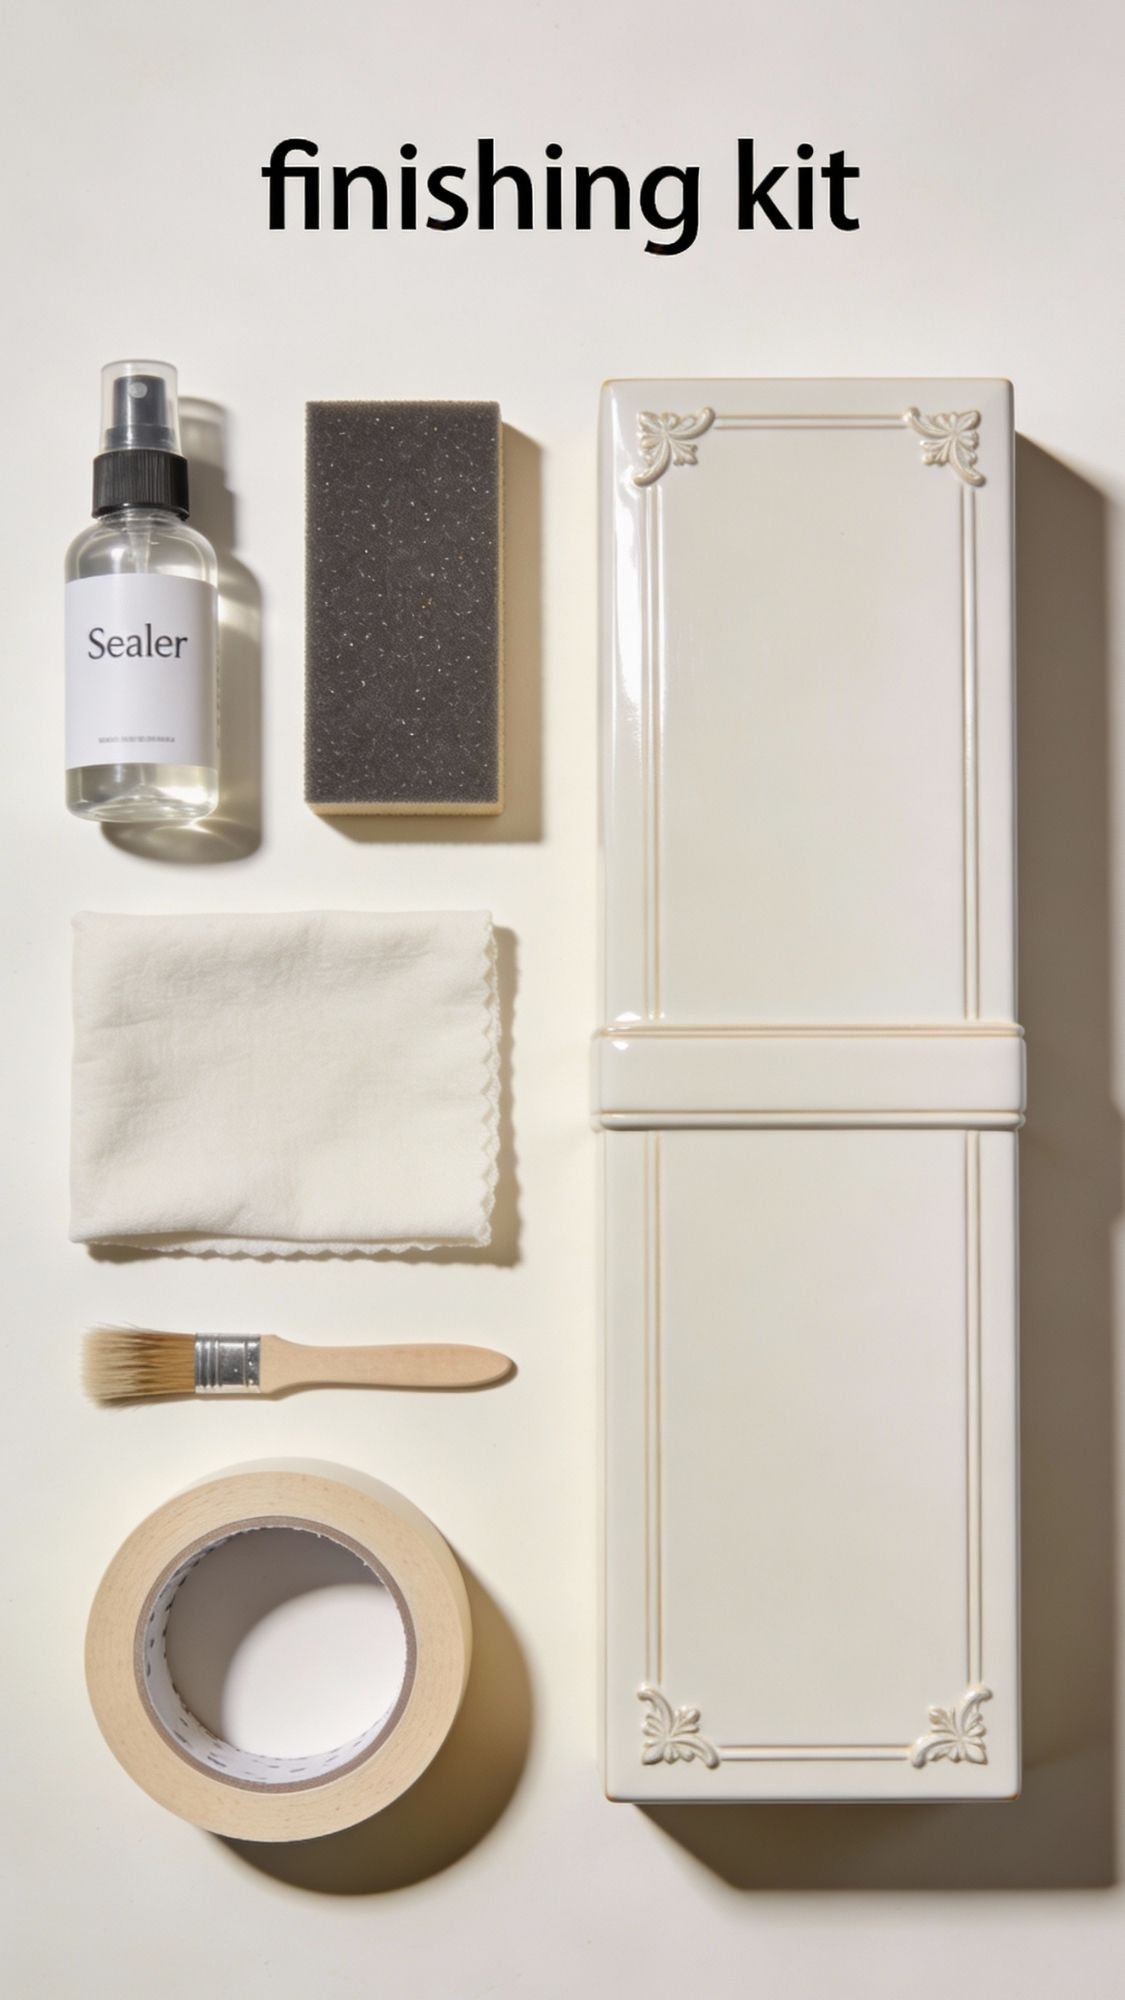
Make These Gifts Last (Without Ruining Them)
If you want these kid-made gifts to survive longer than a week on Mom’s nightstand, finishing matters. Not in a fussy way, in a “please don’t let the paint smear and the clay crack” way. The good news, you don’t need fancy products. You just need the right finish for the right material, and a little patience.
How to finish it professionally (by project type)
Paper gifts (cards, handprint art, accordion books)
- Frame it if it’s wall-worthy. A cheap frame instantly makes it feel like a real gift.
- Mat it with a larger sheet of cardstock behind it. That clean border looks intentional.
- Protect it:
- Best: laminate, or slide it into a clear document sleeve inside the frame
- Quick option: clear sheet protectors trimmed to size
- Avoid: heavy brush-on sealer. It can wrinkle paper and make ink run.
Clay gifts (air-dry clay dishes, pinch pots, salt dough keepsakes)
- Sand lightly after fully dry using 220 to 400 grit. Focus on rims and rough edges.
- Seal in thin coats. Thin coats protect better and look cleaner.
- For a smooth finish: use a soft brush and don’t overwork the sealer.
Painted wood (spoons, frames, anything wooden)
- Let paint dry longer than you think. Touch dry is not “ready.”
- Seal with a spray sealer first coat if you used acrylic paint. Then brush-on works fine after.
- Keep finish thin. Thick sealer stays tacky and attracts lint.
Fabric gifts (tea towels, aprons)
- Use fabric markers or fabric paint only.
- Heat-set every time. Heat-setting turns “cute craft” into “washable gift.”
- Wash cold, gentle cycle. Skip harsh stain removers.
Dry time vs cure time, in plain language
This matters because most craft disasters happen when people rush this part.
- Dry time: It feels dry when you touch it lightly. The surface looks matte and no longer shiny.
- Cure time: It hardens all the way through. It stops feeling soft, it resists scratches, and it holds up to handling.
Easy test: Press your fingernail gently into an unseen spot.
- If you leave a dent, it needs more time.
- If it feels hard and nothing marks, you’re good.
Typical timing (because everyone asks):
- Acrylic paint: often dry in 30 to 60 minutes, can take 24 hours to cure depending on thickness and humidity.
- Brush-on sealer: usually dry in 1 hour, can take 24 to 72 hours to fully cure.
- Air-dry clay: 24 to 72 hours depending on thickness. Thick dishes take longer.
- Salt dough: dry time depends on thickness and bake method, but sealing should wait until it feels fully dry and hard.
Cleaning and care instructions (so Mom doesn’t accidentally ruin it)
- Paper: keep dry, frame it or store it flat.
- Clay: wipe with a damp cloth only, don’t soak it unless you sealed heavily and know it’s water-resistant.
- Wood: wipe clean, don’t soak. Decorative spoons should stay decorative unless you used a truly food-safe finish.
- Fabric: wash cold, gentle, air dry or tumble low if you heat-set properly.
How long it lasts, and how to refresh it
- Paper art in a frame: years, as long as it stays dry.
- Sealed clay keepsakes: years, but avoid soaking or dropping.
- Painted items: can last a long time, but chips happen.
- Refresh by touching up paint, then resealing in thin coats.
- Fabric gifts: last through many washes if heat-set correctly. If it fades, re-outline with fabric marker and heat-set again.
8 Common Kid-Craft Problems (And How to Fix Them)
If a craft goes sideways, it usually isn’t because the idea was bad. It’s because of one of these classic issues: wrong glue, too much water, not enough dry time, or someone “helping” by smearing a handprint at the last second. Here are the fixes I actually use, plus how to prevent the same problem next time.
1) Paint peels off plastic frames or glossy surfaces
- Symptom: Paint flakes or rubs off when touched.
- Likely cause: The surface is slick or dusty, paint can’t grip.
- Fix: Wipe with rubbing alcohol, lightly scuff with fine sandpaper, repaint with thin coats.
- Prevention next time: Use unfinished wood frames, or prime slick surfaces before painting.
2) Glue won’t stick, beads and buttons keep sliding
- Symptom: Pieces drift out of place, or pop off after drying.
- Likely cause: School glue is too wet, or you used the wrong glue for the material.
- Fix: Switch to tacky glue, apply small dots, wait 1 to 2 minutes, then place pieces.
- Prevention next time: Dry-fit the design first, glue in small sections.
3) Paper wrinkles or buckles under paint
- Symptom: Card looks wavy, warped, or rippled.
- Likely cause: Paper is too thin, paint is too wet.
- Fix: Let it dry under a heavy book overnight, or remount it to cardstock.
- Prevention next time: Use cardstock or watercolor paper, apply thin paint with a foam roller or sponge.
4) Handprints look streaky, blotchy, or smudged
- Symptom: Prints look uneven or smeared.
- Likely cause: Too much paint, brush streaks, or the hand slid during stamping.
- Fix: Let it dry, then outline the print with a marker, or add extra “petals” to turn it into a design.
- Prevention next time: Roll paint on with a mini foam roller, and do a test print first.
5) Air-dry clay cracks while drying
- Symptom: Fine cracks form along edges or base.
- Likely cause: Clay rolled too thin, dried too fast, uneven thickness.
- Fix: If still damp, smooth with a wet fingertip. If fully dry, fill with clay paste or lightweight spackle, let dry, sand, then seal.
- Prevention next time: Keep clay thickness even, dry away from heaters and sunny windows.
6) Clay dish warps or slumps out of shape
- Symptom: Dish dries uneven and becomes lopsided.
- Likely cause: Uneven thickness, moved too early, dried without support.
- Fix: While still slightly damp, reshape in a bowl mold and dry longer. If fully dry, sand the base to level it.
- Prevention next time: Dry inside the bowl mold for the first 12 to 24 hours.
7) Pressed flowers brown, look cloudy, or lift under sealer
- Symptom: Flowers discolor, curl, or look “wet” under the top coat.
- Likely cause: Flowers weren’t fully dried, sealer applied too thick.
- Fix: Let it dry completely, then add a thin coat of Mod Podge, cover with parchment, press gently with a book for 10 minutes.
- Prevention next time: Press flowers 1 to 2 weeks, use thin flowers only, seal with thin coats.
8) Sealer stays sticky or turns cloudy
- Symptom: Finish feels tacky days later, or looks milky.
- Likely cause: Sealed too soon, humidity, or thick coats.
- Fix: Let it cure longer in a dry room. If still sticky, sand lightly and reseal with thin coats. Use spray sealer as the first coat if paint drags.
- Prevention next time: Wait for full dry time, apply thin coats, avoid sealing in humid weather.
3 Ways to Match Mom’s Style (Without Making It Hard)
You can keep the projects easy and still make them feel like they match Mom’s vibe. A few small swaps, color choices, and personalization details change everything. Which style feels like her, modern, boho, or glam?
Variation 1: Modern and Clean
Style swaps
- Keep designs simple: stripes, dots, one bold handprint, minimal florals.
- Use white space. Don’t fill every inch.
Color palette ideas
- Black + white + blush
- Sage + cream + soft gray
- Navy + white + sand
Personalization options
- Initials only (clean and classy)
- Name and year in small text in a corner
- One short message like “Love you, Mom”
Material upgrades
- Use watercolor paper for cards and handprint art
- Frame art in light oak or white frames
- Add a matte clear finish instead of glossy for clay
Variation 2: Boho and Cozy
Style swaps
- Add pressed flowers, twine, kraft tags, and soft textures.
- Use hand-drawn rainbows, botanicals, and warm earthy details.
Color palette ideas
- Terracotta + cream + muted mustard
- Dusty rose + beige + olive
- Warm tan + sage + ivory
Personalization options
- A handwritten note on the back of the framed art
- “Reasons I love you” jar notes with tiny doodles
- Floral name lettering on tags
Material upgrades
- Linen ribbon instead of shiny ribbon
- Wooden beads on jar ties
- Clay textures made from lace, leaves, or a woven placemat
Variation 3: Glam and Sparkly (But Not Messy)
Style swaps
- Add thin metallic accents only, don’t go full glitter tornado.
- Use pearls, gold paint pen borders, and glossy finishes.
Color palette ideas
- Pink + gold + ivory
- White + champagne + blush
- Lavender + silver + soft gray
Personalization options
- Monograms with letter beads
- A gold “MOM” stamp on clay
- Metallic edge on a frame or dish rim
Material upgrades
- Satin ribbon and a clean gift box
- Metallic paint pens for crisp lines
- Gloss sealer on clay for a shiny boutique look
FAQ
1) What are the easiest DIY gifts kids can make for mom in one day?
Kids can finish coupon books, accordion love-note books, photo magnets, painted rocks, and watercolor card sets in a single sitting. You can also finish clay gifts in one sitting, but you need extra time for drying and sealing.
2) What Mother’s Day gifts work best for toddlers and preschoolers?
Toddlers and preschoolers do best with projects that use handprints, fingerprints, big shapes, and simple decorating. Try the handprint bouquet art, fingerprint heart bouquet card, handprint apron, or a decorated coupon book cover.
3) How do I get clean handprints without streaks or blobs?
Roll paint onto the hand with a mini foam roller or makeup sponge, then press the hand straight down and lift straight up. Use less paint than you think. Too much paint causes smears and mushy prints.
4) What glue works best for kids’ crafts with buttons, beads, or gems?
Use tacky glue for most embellishments. School glue stays slippery too long and pieces slide. If you need something to grab instantly, an adult can use a low-temp hot glue gun, but only for older kids and supervised projects.
5) How long does air-dry clay take to dry before sealing?
Most air-dry clay needs 24 to 72 hours depending on thickness, humidity, and airflow. If the clay still feels cool or slightly soft, wait longer. Seal only when it feels dry all the way through, not just on the surface.
6) Why does salt dough crack, and how do I prevent it?
Salt dough cracks when it’s too thin or dries too fast. Roll it about 1/2 inch thick and dry it slowly. Keep it away from heaters and direct sun. If cracks happen, fill them with a bit of dough paste or lightweight spackle, then sand and repaint.
7) How do I stop pressed flowers from turning brown in crafts?
Use flowers that are fully pressed and completely dry, usually 1 to 2 weeks in a book. Choose thin flowers, avoid thick stems, and seal with thin coats. Moist flowers trap water and discolor under sealant.
8) What sealer should I use for kid-made gifts so they last?
For paper, skip sealers and use lamination or framing. For clay and painted items, use a clear craft sealer in thin coats. If brushing sealer drags paint, use a spray sealer first coat, then brush-on works after it sets.
9) How do I heat-set fabric marker or fabric paint so it stays after washing?
Let the design dry fully, then heat-set with an iron using parchment paper over the design for 3 to 5 minutes, or use a dryer on high for 30 minutes. Wash cold and avoid harsh stain removers to protect the design.
10) What are safe DIY gift ideas if mom has scent sensitivities?
Skip strong fragrances and choose paper gifts, framed handprint art, photo magnets, watercolor card sets, beaded bracelets, or a gratitude jar. If you make bath sachets, keep it mild with mostly oats and a small amount of chamomile.
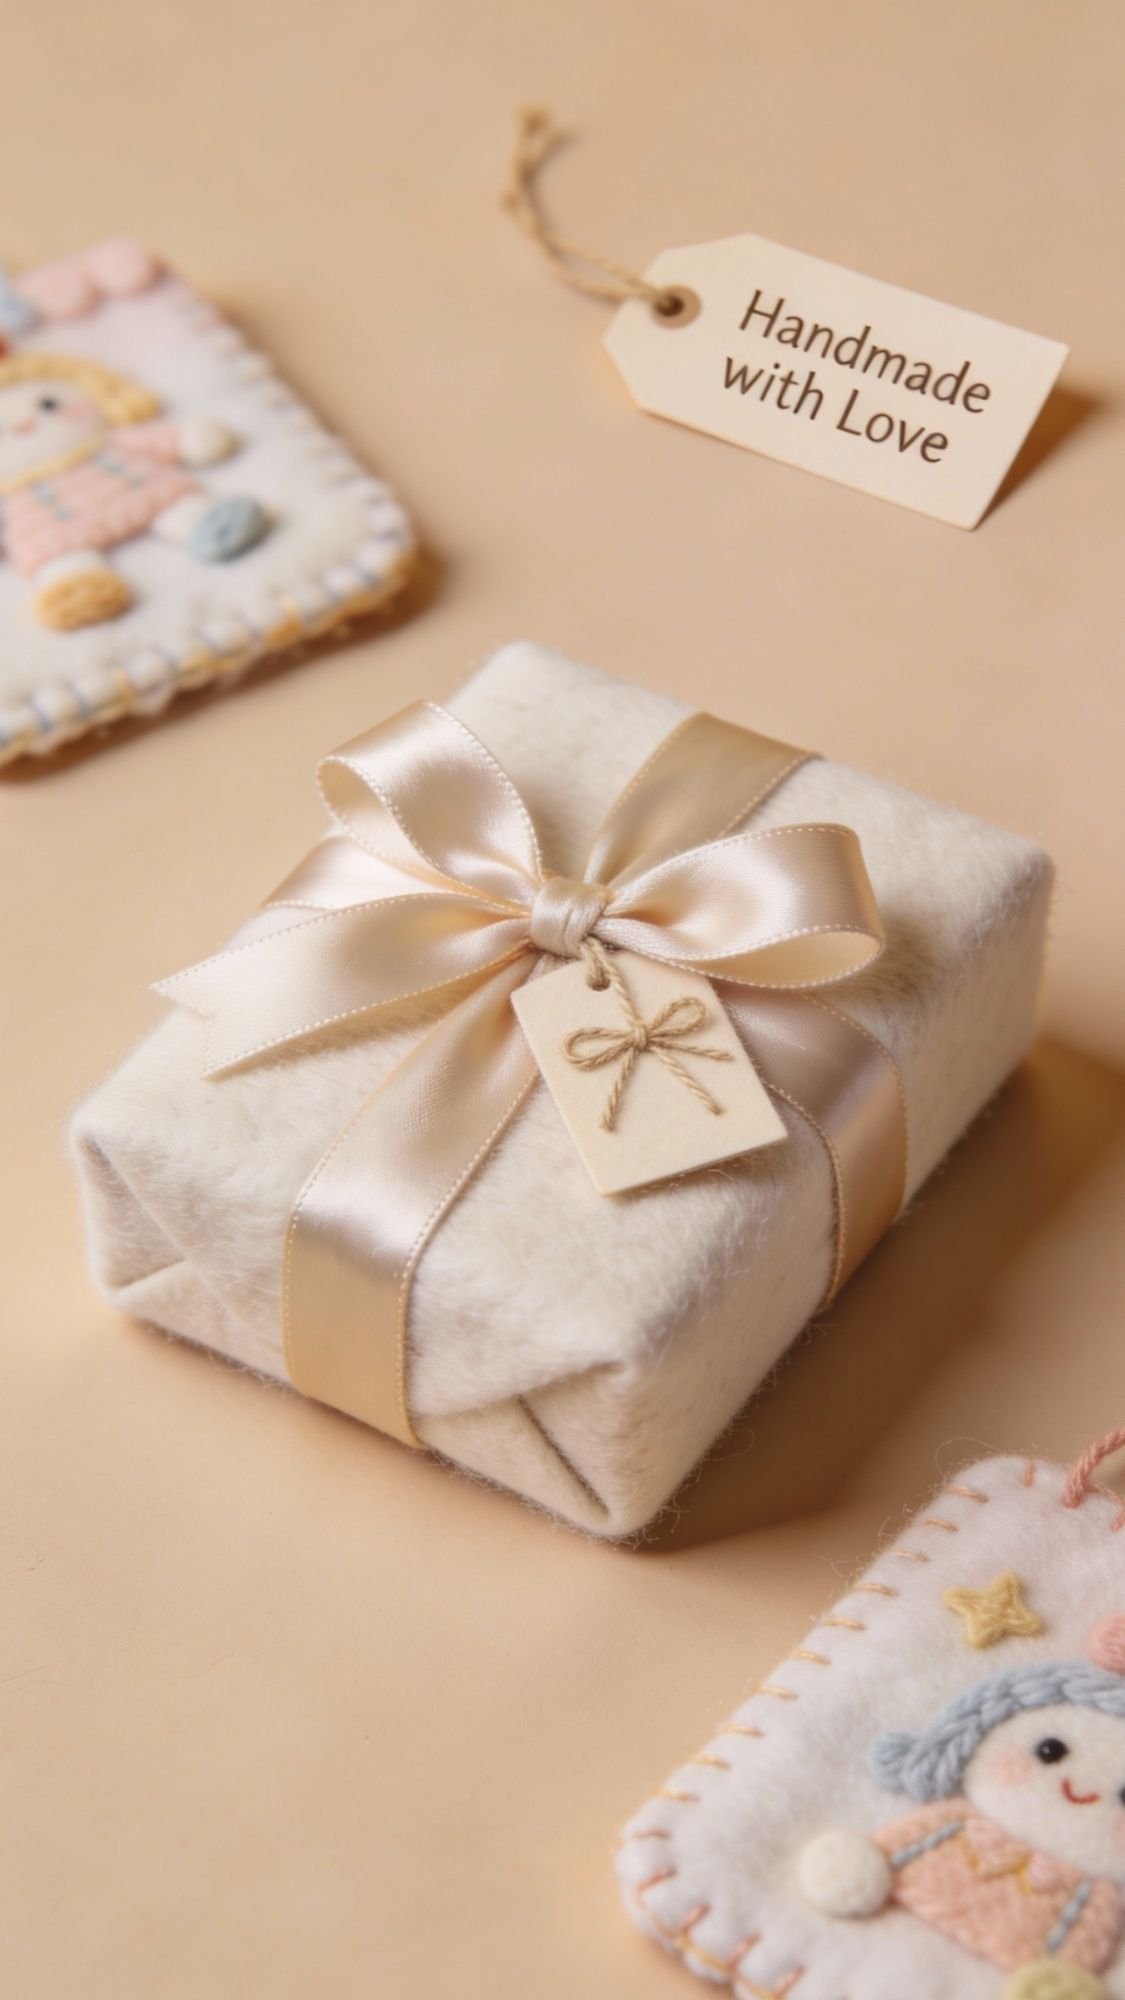
Pick One, Set a Timer, and Let Kids Surprise Her
If you’ve made it this far, you already did the hardest part, choosing something kids can finish without a total craft meltdown. These 22 DIY presents work because they stay simple, they feel personal, and they turn kid creativity into something Mom will actually use or display. So now you just need to pick one idea that matches your kid’s age and attention span, set up a quick supply station, and let them go for it.
If you want my honest opinion, gifts that moms keep the longest usually fall into two categories: useful keepsakes (like the apron, tea towel, photo magnets, clay dish) and heart-on-paper gifts (like the reasons book, coupon book, open-when envelopes). Which one fits your kid best, the “I want to paint everything” kid or the “I’d rather write you a note” kid?
One last tip before you wrap it up: package it like a real gift. A ribbon, a tag, and a clean fold or little box makes the whole thing feel intentional, even if the craft table looked like a tornado five minutes ago.