A Spa Day Gift That Mom Will Actually Use
Mom doesn’t need another candle she feels guilty for not lighting. She needs a real break, the kind where nobody asks her where the scissors are while she’s trying to relax. So this post is all about DIY spa-day gifts that feel expensive, work the first time, and come with the little details that make them feel thoughtful, not thrown together.
I’ve made a lot of “self-care” DIYs over the years, and here’s the truth. The gift only feels spa-level if it’s part of a ritual. A scrub without a plan just sits under the sink. A steamer without instructions gets used wrong once, then forgotten. But a mini routine like Shower Reset Kit or Bath Night Box makes Mom feel like someone actually planned this out, because you did.
Also, I’m not here to give you 21 messy science experiments. I’m giving you reliable, repeatable DIYs with the exact ratios, the common mistakes, and how to fix them if something goes sideways. Because nothing ruins the spa vibe like your bath bombs cracking in half while you’re whisper-yelling, “Why are you like this?” :/
By the end, you’ll be able to make 1–3 items for a small gift, or go big and build a full Spa Day At Home box that looks boutique-level. You’ll also get troubleshooting, finishing tips, cure times vs dry times in normal human language, and packaging ideas that make the whole thing look like it came from a fancy shop.
Before we jump into the list, let’s lock in the formula that makes these gifts feel intentional.
The Spa Gift Formula That Always Works: So Your DIY Doesn’t End Up Under the Sink
If you want your gift to feel like a real spa day and not a random pile of “self-care stuff,” use this simple formula. I swear this is the difference between “cute” and “wow, you really thought about me.”
Pick a Ritual, Not Random Products
Think in mini experiences. Mom doesn’t need 12 items. She needs 3 items that work together.
Choose one of these spa “paths”:
- Everything Shower Reset: shower steamers + scrub cubes + body oil or lotion bar
- Bath Night Box: magnesium soak + bath tea sachet + candle
- Face and Chill Ritual: mask powder + lip balm + gua sha or cooling eye mask
- Foot Recovery Kit: foot soak + pumice + lotion bar
Why this works: when the products connect, Mom uses them in one session and feels the payoff immediately. Ever notice how the best spa experiences guide you step-by-step? Same concept, just at home.
The 3 Upgrades That Make It Look Boutique-Level
You can make the simplest DIY in the world and still make it look expensive if you do these three things.
- Stick to one scent family
- Lavender-vanilla (calm, cozy)
- Eucalyptus-mint (spa clean)
- Citrus-rosemary (fresh, energizing)
If you mix five different scents in one box, it starts smelling like a candle aisle brawl. Keep it cohesive.
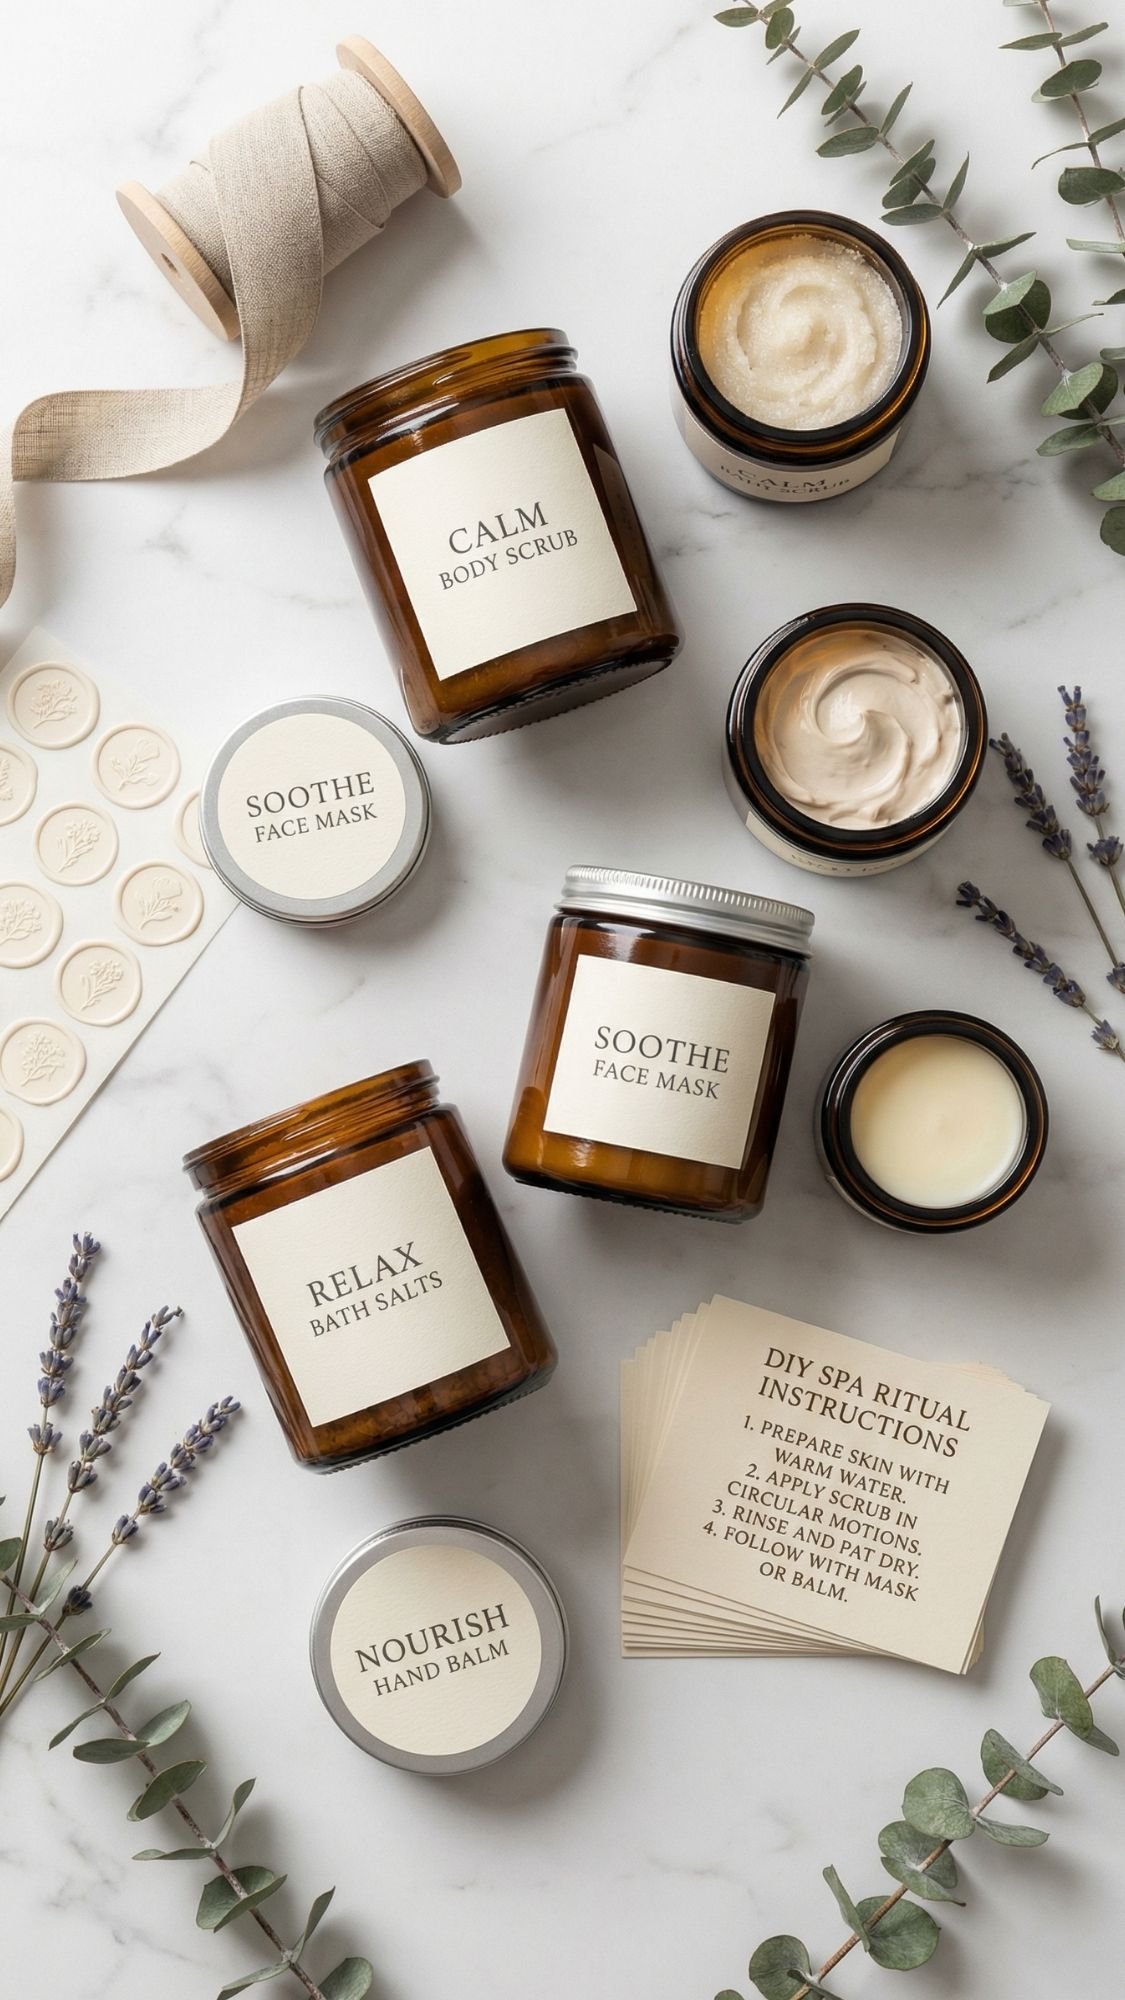
- Use consistent packaging
- Amber jars or clear apothecary jars
- Matching lids (black, gold, or bamboo)
- One label style for the whole set
This is where people mess up. They make gorgeous products, then slap on three different fonts and call it done. The spa vibe leaves the building.
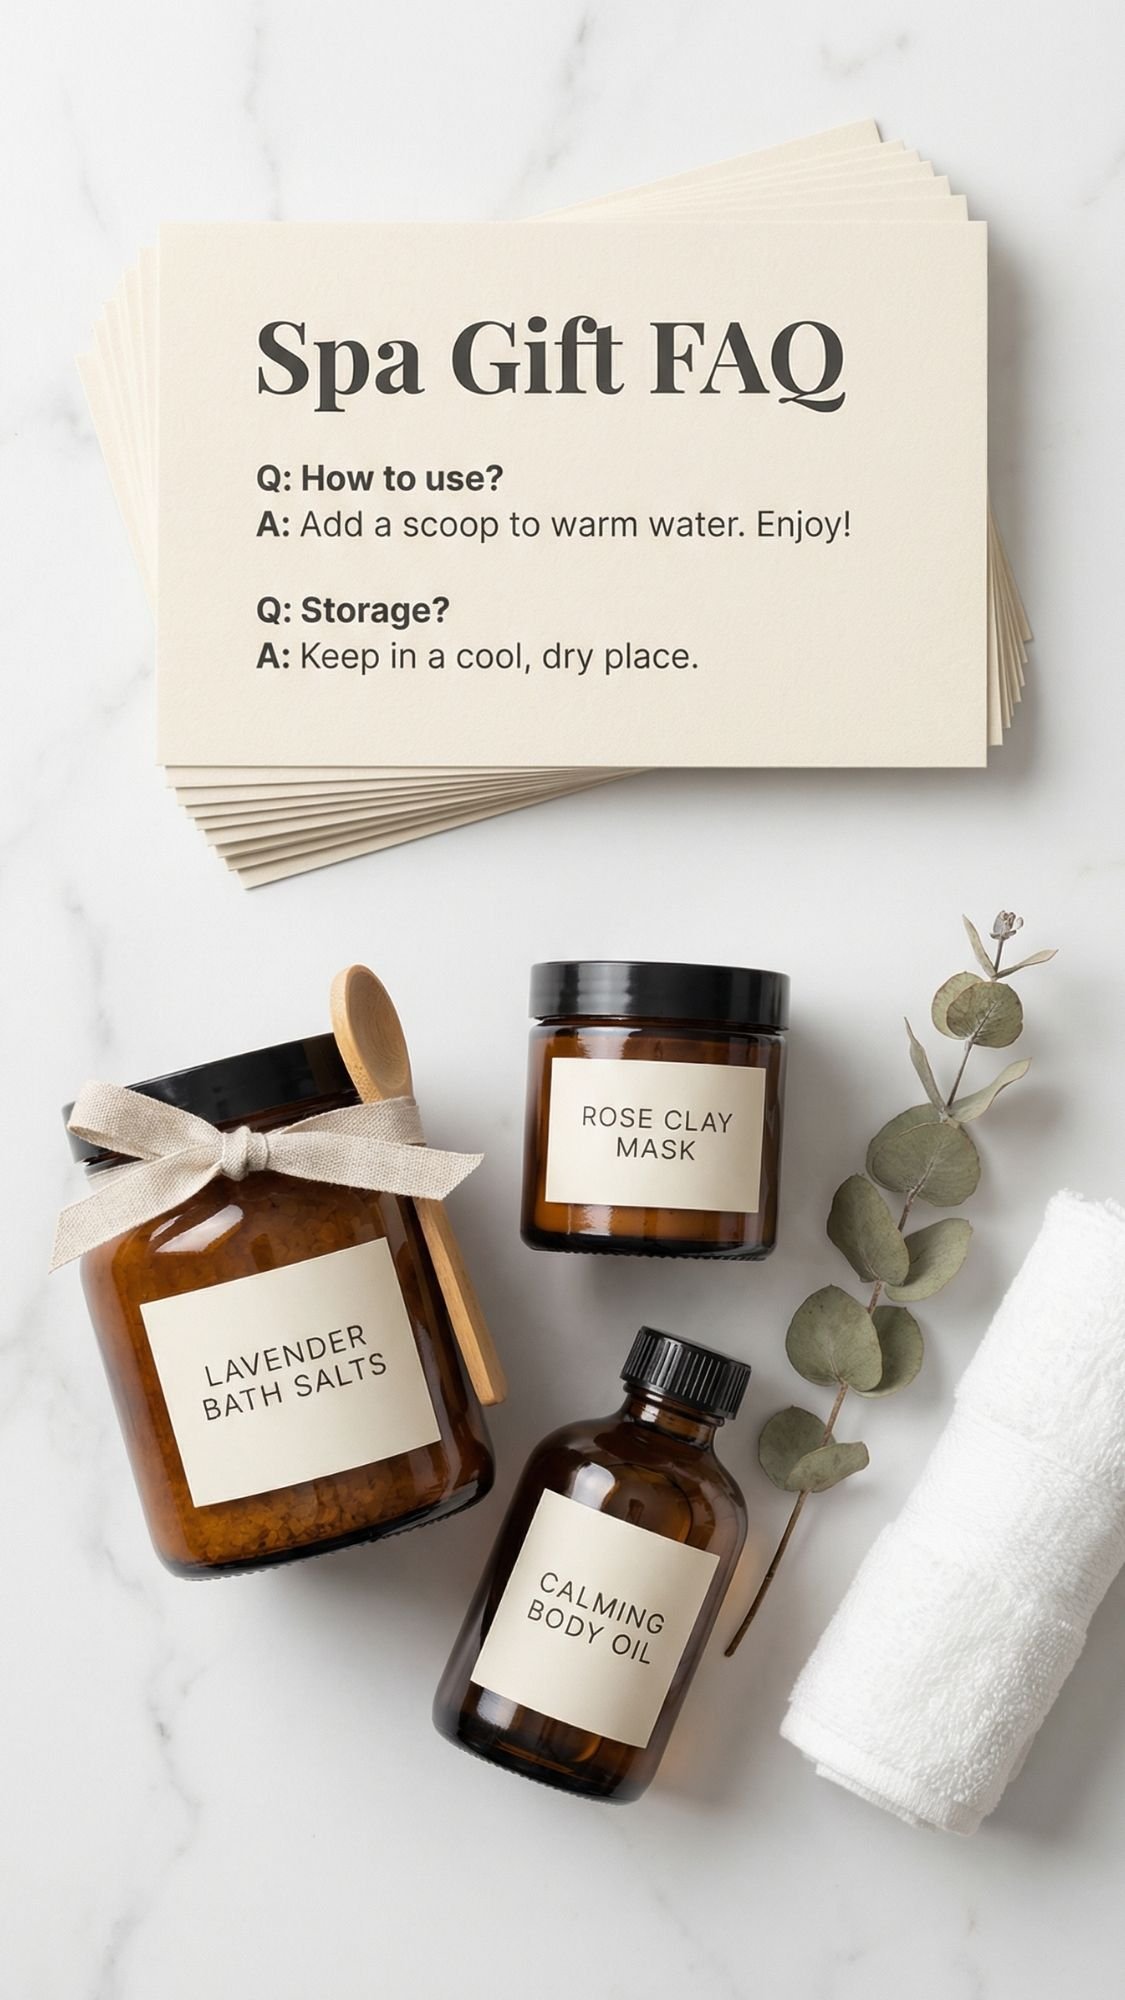
- Add a tiny instruction card
This is the sneaky detail that makes the gift feel thoughtful and actually usable.
On each card, include:
- What it is
- How to use it
- How much to use
- One pro tip (like where to place the steamer in the shower)
You don’t need a novel, just enough so she doesn’t guess.
Quick “Build a Box” Shortcut (If You’re Busy)
If you only want to make one set without overthinking:
- 1 scent hero: shower steamers or linen spray
- 1 body treat: scrub cubes or magnesium soak
- 1 comfort add-on: candle, tea sachets, or coupon book
That’s it. Three items, one vibe, and it looks intentional.
My Pro Secret That Makes DIY Spa Gifts Look Professional
Here’s the thing nobody tells you when you start making spa DIYs. Oil and water hate each other, and they will absolutely try to ruin your cute little jar moment if you let them. Scrubs separate. Sprays get cloudy. Bath products leave an oily ring. Then Mom’s relaxing spa night turns into “why is my tub slippery” and that’s not the vibe.
So here’s my go-to pro move.
Pro Secret: Use a Solubilizer or Emulsifier When You Add Oils
Any time you add fragrance oil or essential oil to something water-based, or anything that will hit a lot of water (like bath products), you want the scent to disperse evenly instead of floating on top.
Two common options:
- Polysorbate 80: Great for bath soaks, bath bombs, shower melts, and anything you want to rinse cleaner.
- Solubilizer (like for linen sprays): Helps fragrance mix into water so you don’t get oily droplets.
Why it matters: this makes the final gift feel polished, safer, and more “store bought,” because it performs the way Mom expects it to.
The “Don’t Make This Mistake” Moment
A common mistake beginners make is dumping essential oils into a jar and calling it done. It looks fine for five minutes, then:
- the oil floats on top,
- the scent hits uneven,
- the product feels greasy,
- and the container gets messy fast.
When you use the right helper ingredient, you skip all of that.
Label Tip That Instantly Levels It Up
If your gift might live in a steamy bathroom, use at least one of these:
- Waterproof label paper
- Laser printed labels (they resist smearing better than inkjet)
- Clear label laminate over the top for extra protection
This is one of those tiny details that makes people think, “Wow, she really knows what she’s doing.”
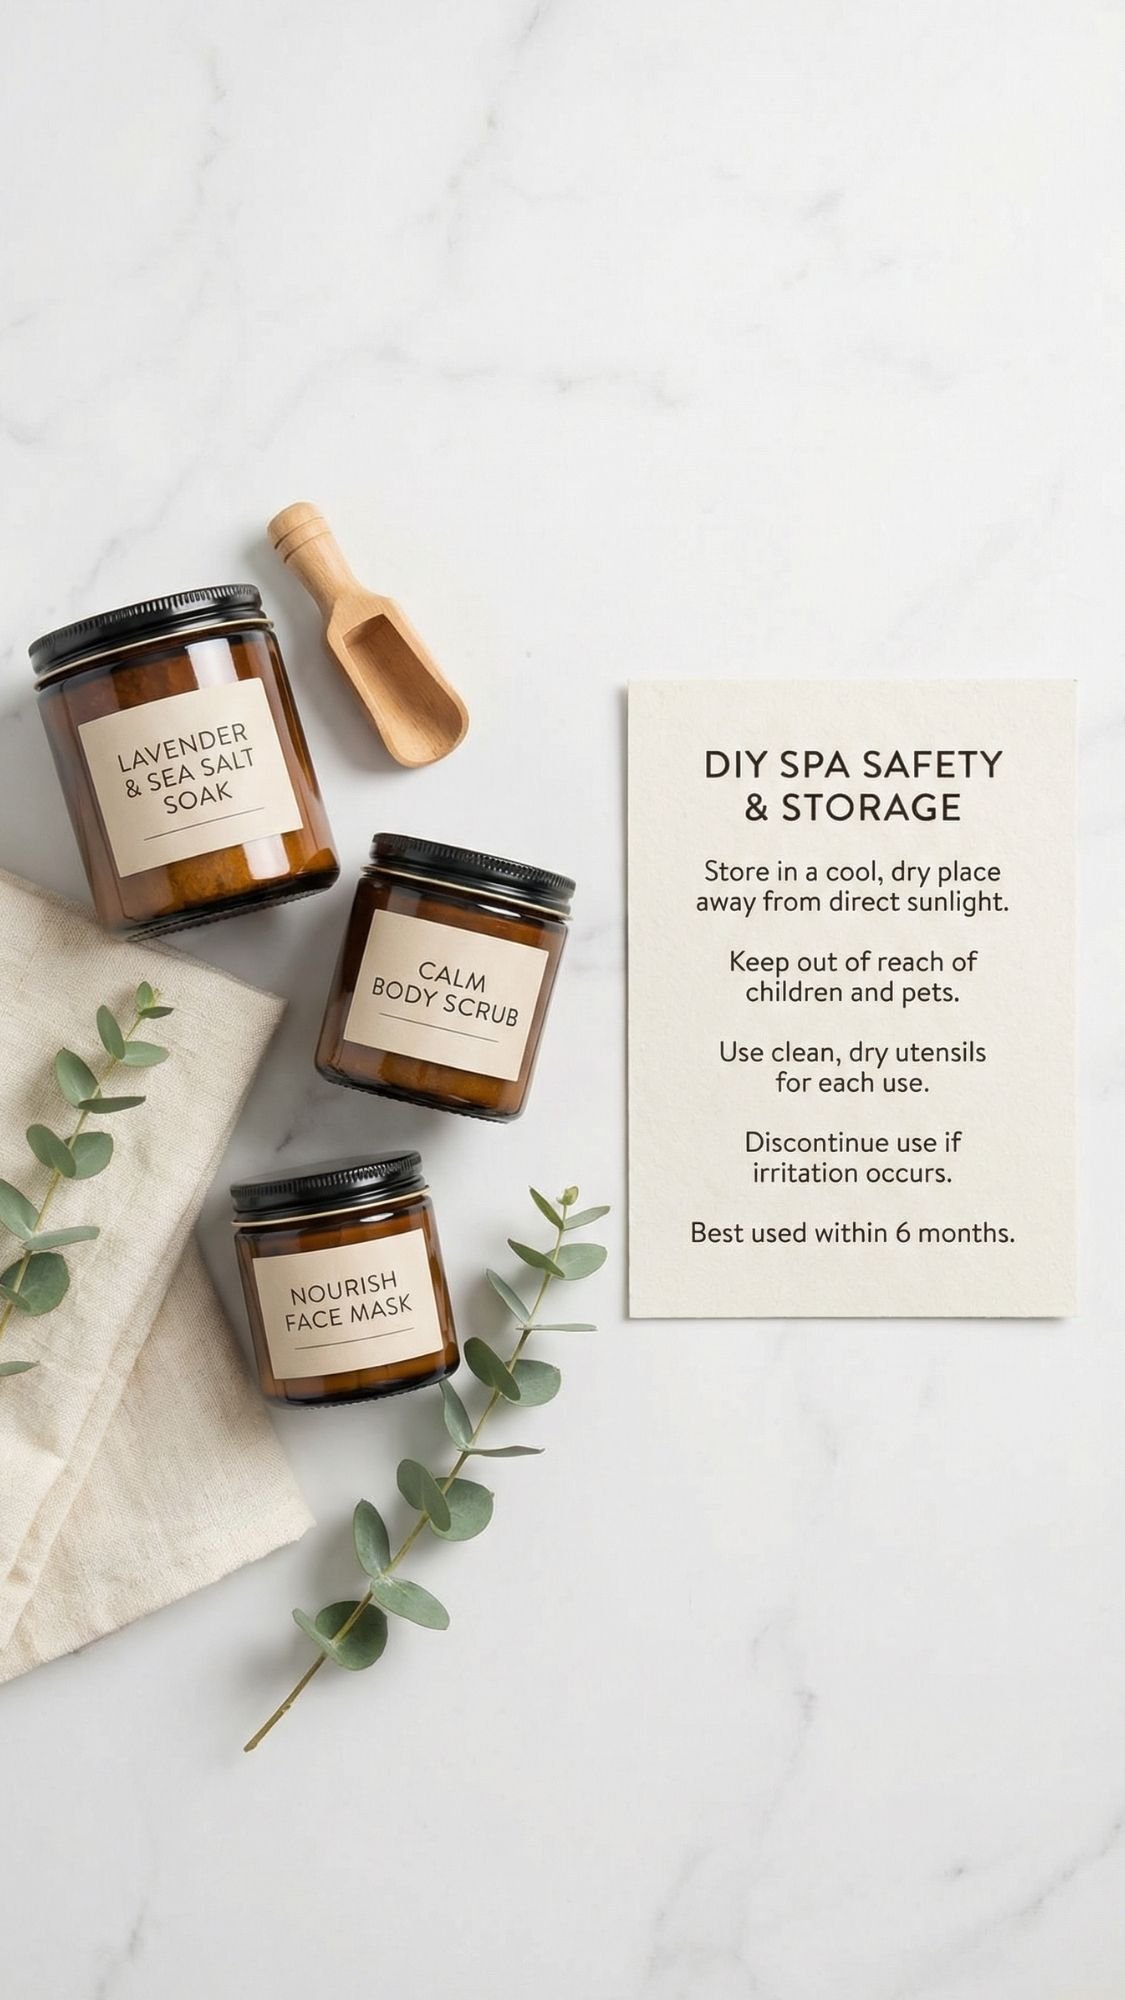
Safety + Storage: Because Nobody Wants a “Cute Gift” That Goes Weird in 2 Weeks
Okay, quick real talk. DIY spa gifts are amazing, but they live in bathrooms, which means heat, humidity, and wet hands. If we don’t plan for that, even a beautiful gift can get funky fast. And I refuse to let your hard work end up in the trash.
The Simple Safety Rules I Follow Every Time
You don’t need to be dramatic about it, you just need to be smart.
- Patch test anything scented if Mom has sensitive skin.
- Keep essential oils away from eyes, and don’t “free pour” strong ones.
- Skip irritating ingredients like rough salts on broken or freshly shaved skin.
- Avoid fresh food ingredients (fruit, yogurt, honey-heavy water blends) unless you use proper preservation. Most “Pinterest recipes” ignore this part, and that’s how you get science projects.
If you want clean and safe with minimal fuss, stick to anhydrous products, meaning no added water. They last longer and behave better.
Shelf Life Cheat Sheet (So You Can Label It Confidently)
This is the easiest way to keep things accurate without overpromising.
Longer-lasting (great for gifting):
- Sugar scrubs (no water added)
- Bath salts and magnesium soaks
- Shower steamers
- Lotion bars
- Lip balms
- Bath tea sachets (dry)
Shorter-lived or needs extra care:
- Anything with water in it (sprays, gels, creamy scrubs) unless you use a preservative correctly
- Anything stored where water can splash into it
A simple label line like “Best used within 3–6 months” works well for most dry or anhydrous gifts, depending on oils and storage. If your home runs humid, keep it closer to 3 months for anything oil-based that could go rancid faster.
Storage Tips That Make Your DIY Gifts Last
These are small, but they save the whole project.
- Tell Mom: Use dry hands or a scoop for scrubs and soaks.
- Add a mini wooden scoop when you can. It feels fancy and keeps water out.
- Store jars away from the shower spray zone.
- Keep things out of direct sunlight and away from heaters.
Packaging Tip That Protects the Product
If you’re boxing everything together:
- Put powders and salts in sealed jars or bags
- Add a tiny silica packet (optional but helpful)
- Keep anything meltable (lotion bars) in a spot that won’t get baked in transit
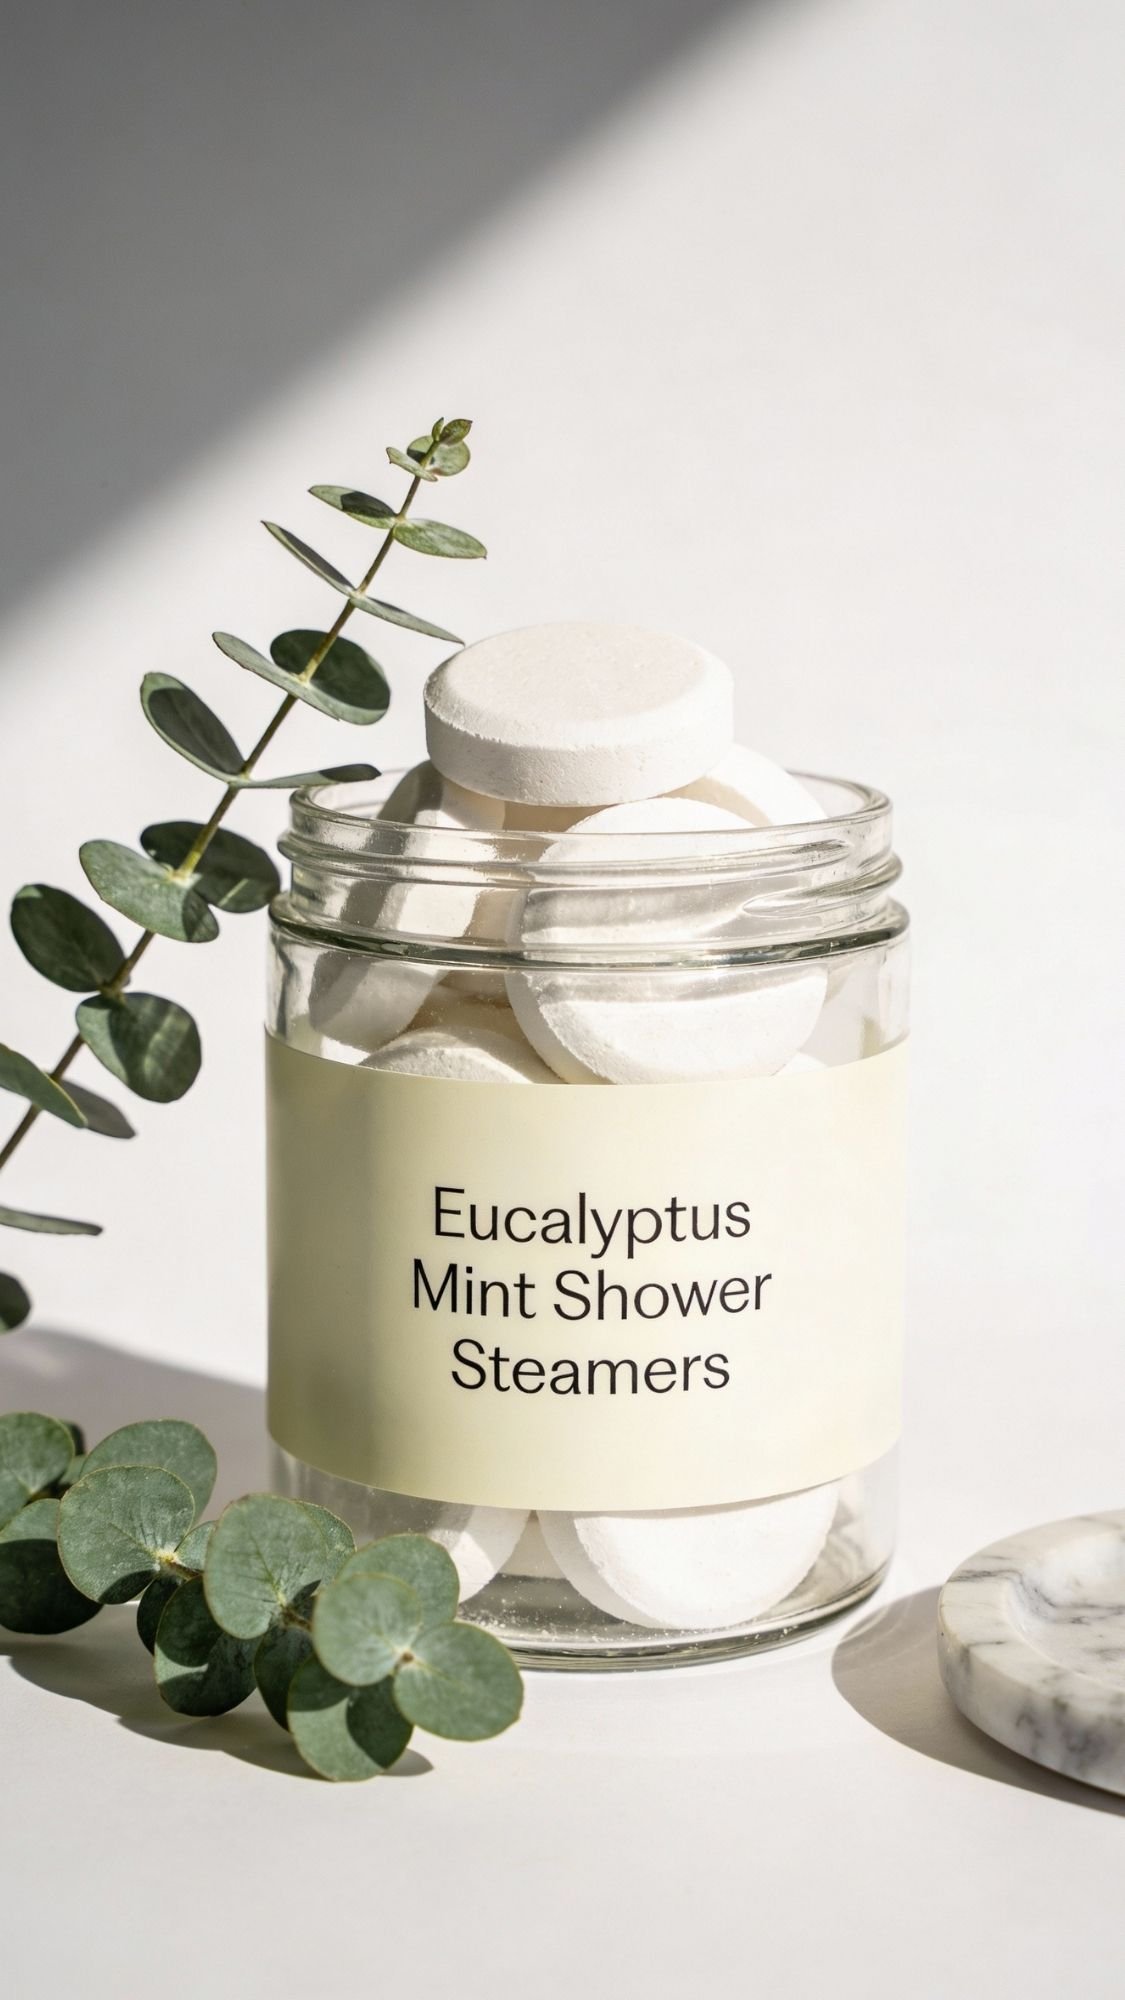
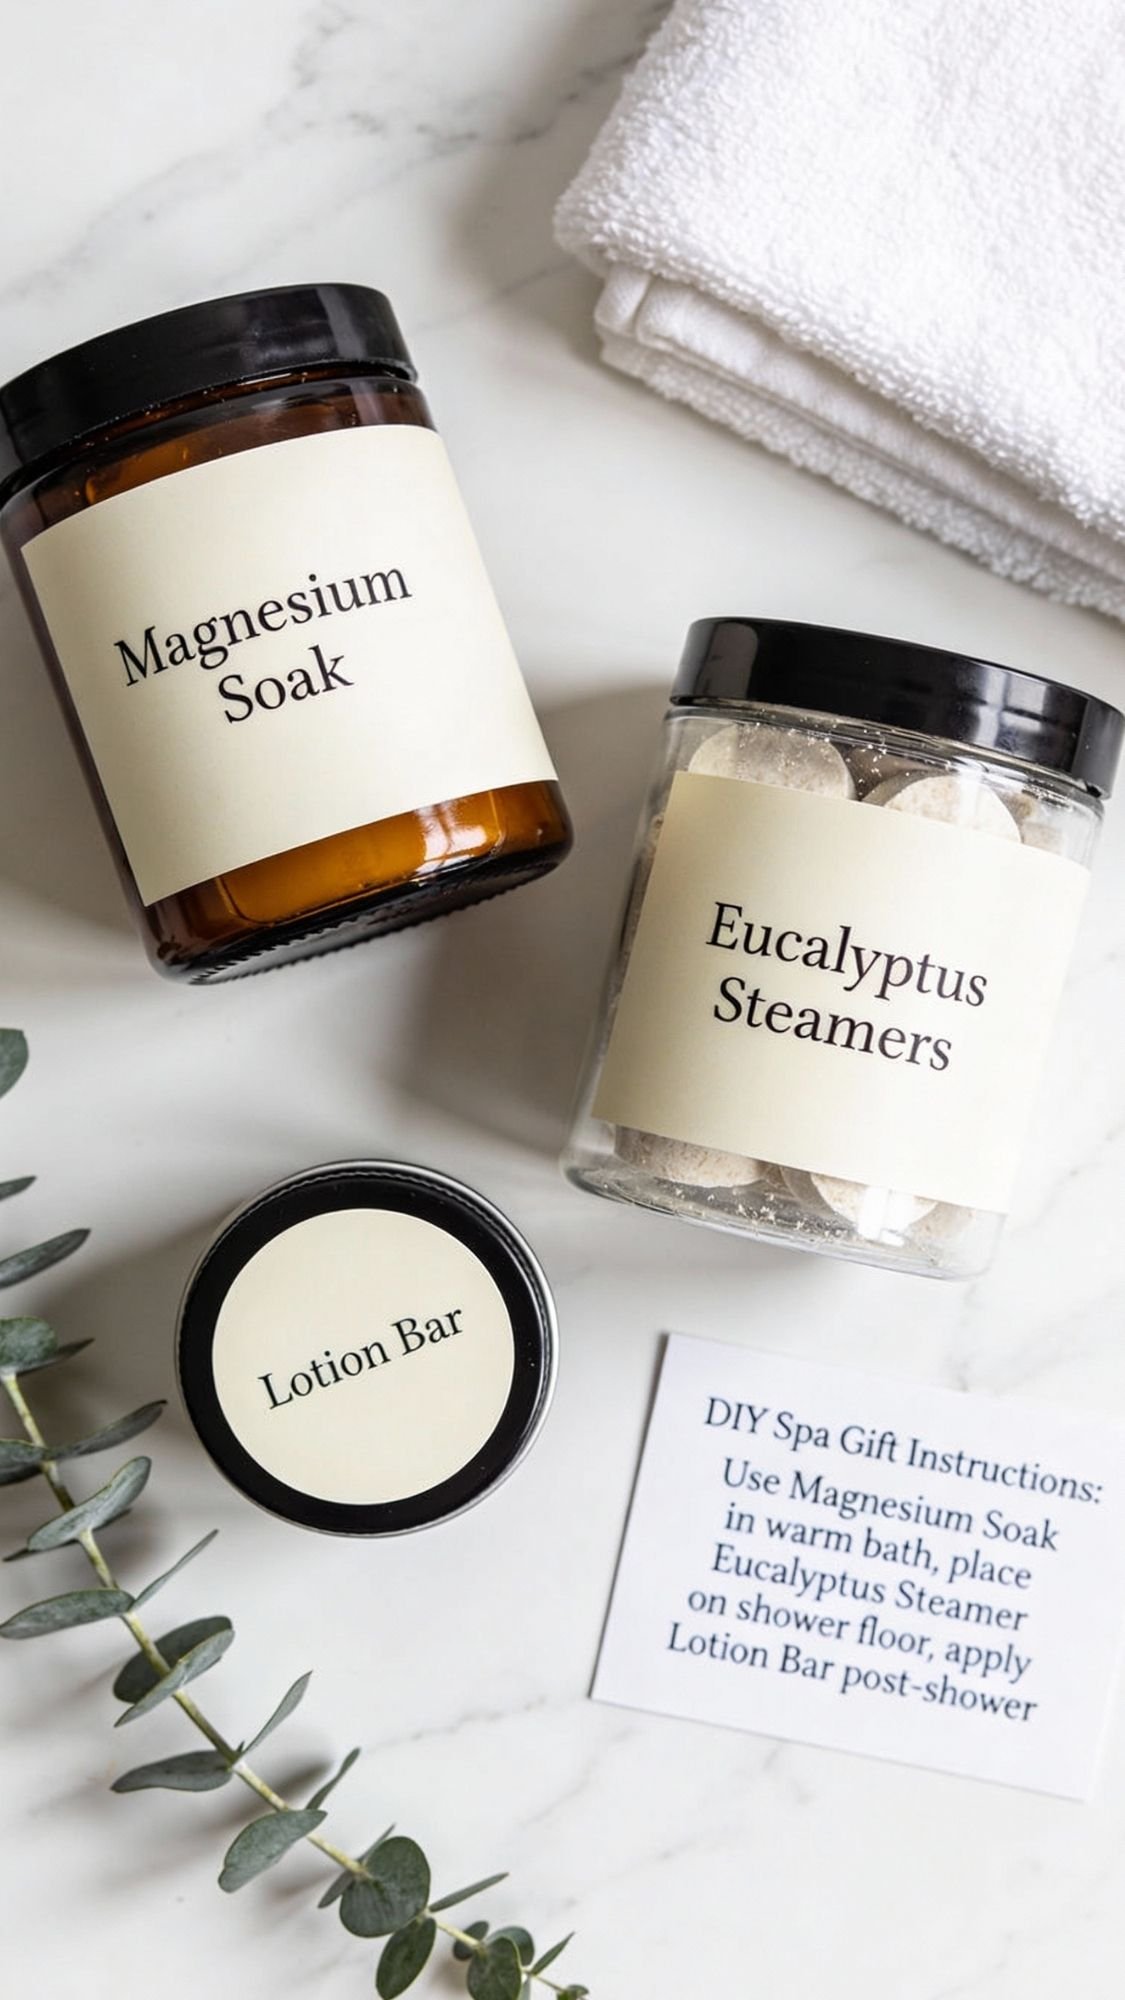
DIY Gift #1: Aromatherapy Shower Steamers (Eucalyptus Mint)
If Mom loves the idea of a spa day but never has time for a bath, shower steamers are your best friend. They make the whole bathroom smell like a spa in under a minute, and they feel way fancier than they are. Also, they’re one of those gifts that people actually use up, which is the goal.
Why this is a perfect “Spa Day At Home” gift
- It creates instant spa vibes, even on a random Tuesday.
- It works for moms who don’t take baths.
- It feels thoughtful without being high-maintenance.
Materials (with the why behind each)
- Baking soda: the base, keeps it solid and slow-dissolving
- Citric acid: activates fizz when it meets water
- Cornstarch or kaolin clay: slows the reaction and helps it hold together
- Essential oils: eucalyptus + peppermint or spearmint for that spa smell
- Isopropyl alcohol (in a fine mister): binds the mix without triggering fizz like water does
- Silicone mold: easy release and clean edges
- Optional: menthol crystals (tiny amount) for extra “spa steam” effect
The method that actually works (no crumble, no puffing up)
- Mix your dry ingredients in a bowl until the texture looks totally even.
- In a small cup, mix your essential oils into a spoonful of the dry mix first, then pour that back in. This prevents scent pockets.
- Mist with isopropyl alcohol slowly, mixing between sprays. Stop when it holds its shape like damp sand.
- Pack the mixture firmly into your mold. Press harder than you think you need to.
- Let them dry in a low-humidity spot for 24–48 hours before packaging.
Pro-Tips (these save you from classic steamer drama)
- Do not place the steamer under direct shower spray. It will dissolve too fast and the scent won’t last. Tell Mom to put it on the shower floor in a corner.
- If your bathroom runs humid, cure longer. Humidity makes them soft.
- If they crumble, your mix stayed too dry. If they crack and puff, you added too much liquid.
Simple “How to Use” card wording (copy-paste friendly)
“Place 1 steamer on the shower floor away from direct water. Let the steam activate the scent. Use within 3–6 months for best fragrance.”
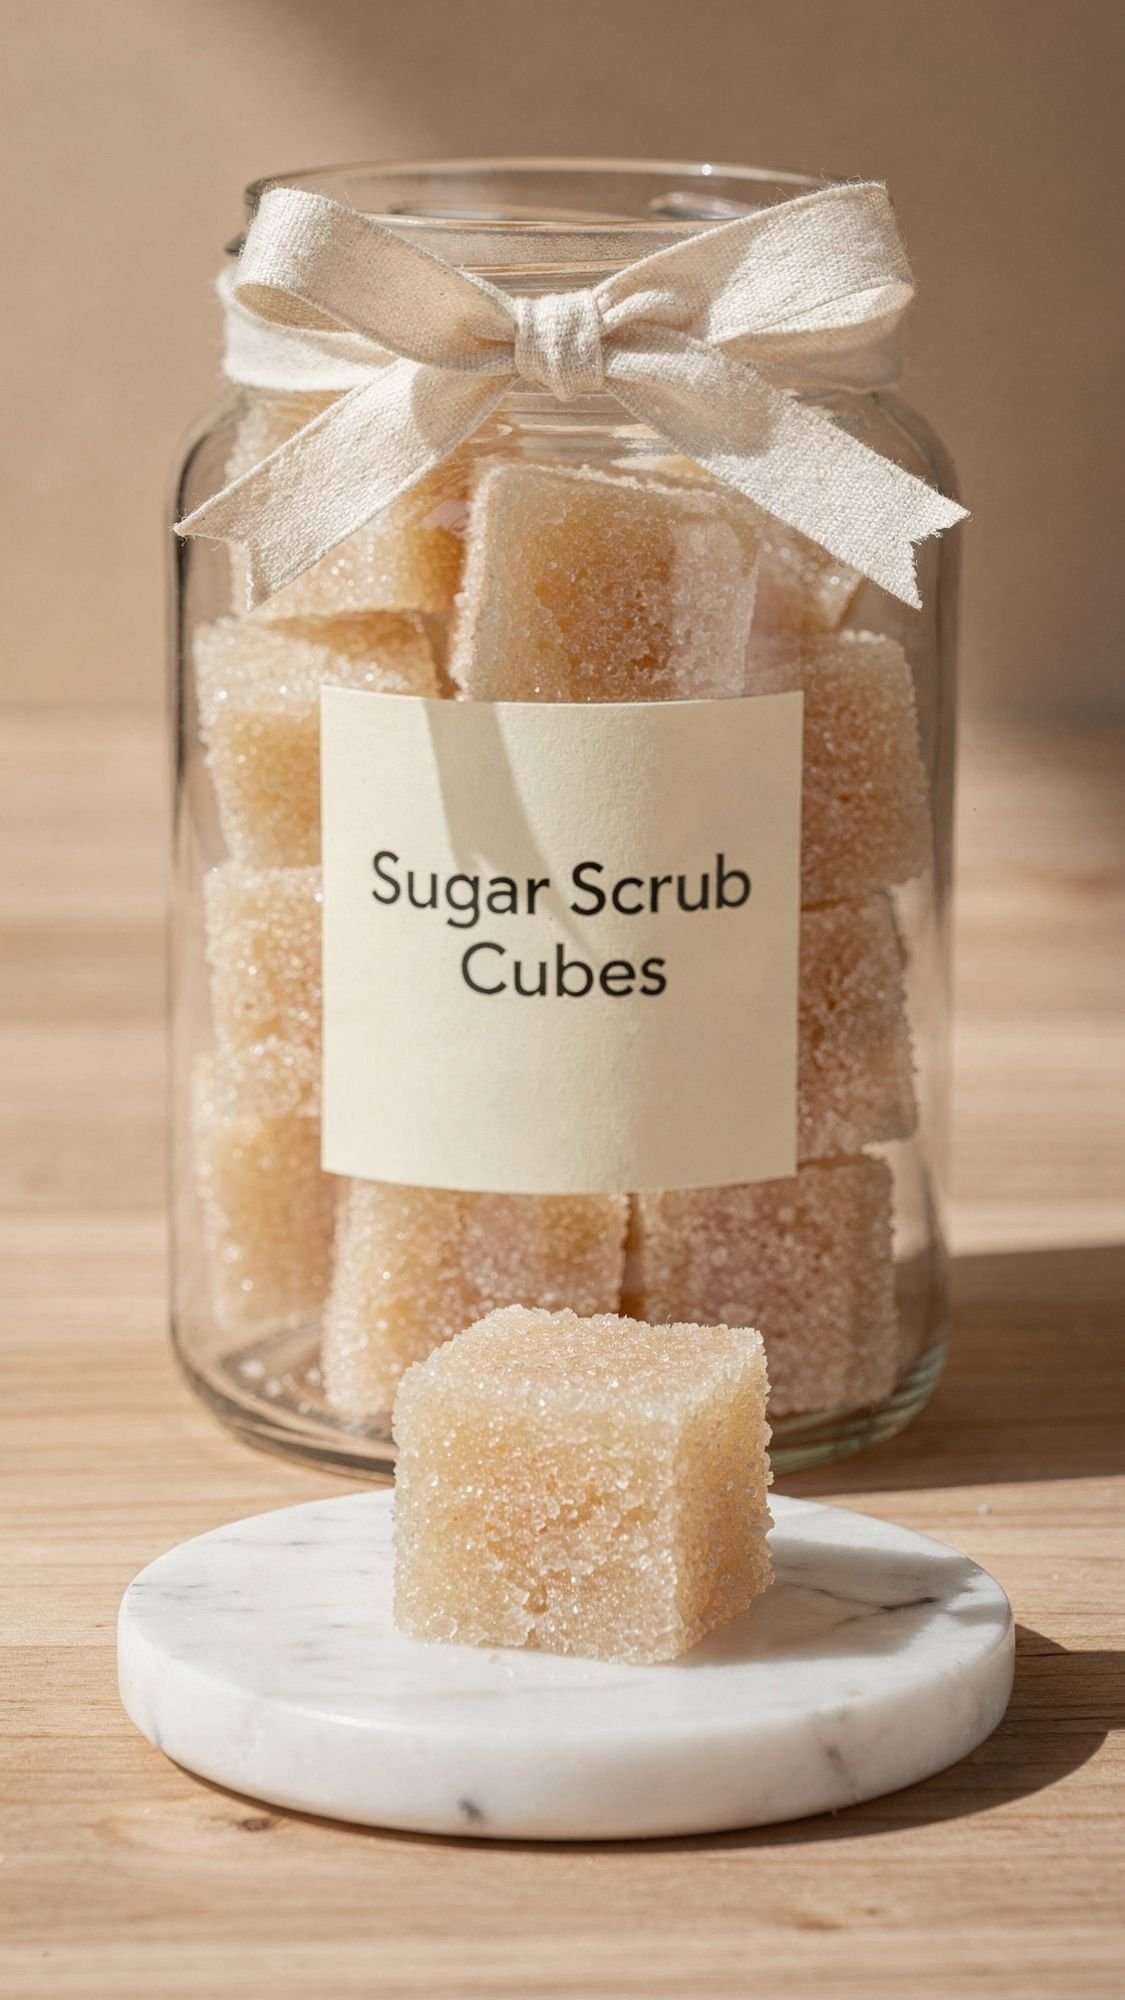
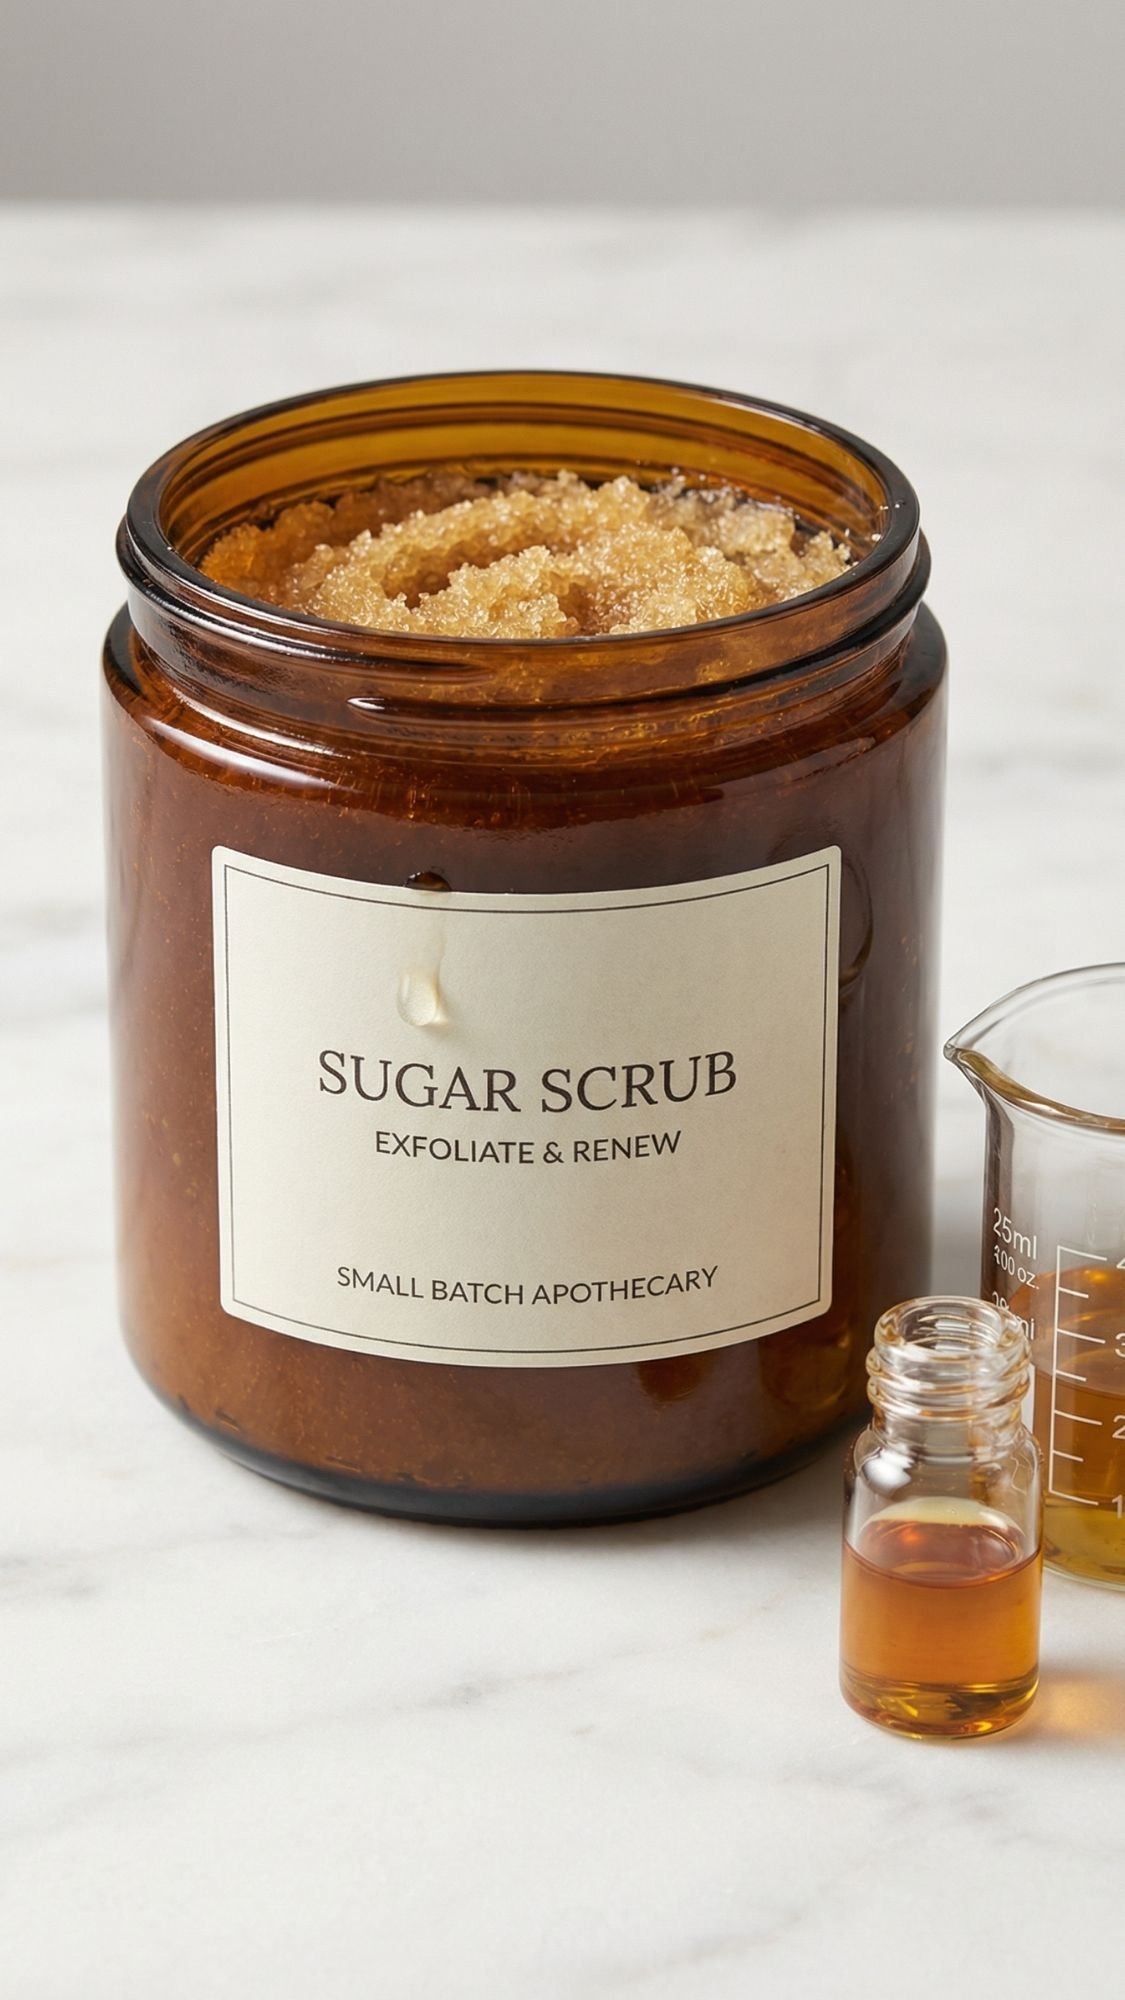
DIY Gift #2: Sugar Scrub Cubes: No Mess, No Scooping, No “Oops I Dropped Half the Jar”
If you’ve ever gifted a body scrub and the lid got slippery, then the whole jar turned into a shower hazard, you already know why I love cubes. These feel fancy, they look boutique-level, and Mom can grab one cube and move on with her life. Who has time to scoop goop at 9 PM?
Why this gift wins every time
- Cubes control the mess. Mom uses one at a time, no wet fingers in the jar.
- They look expensive. Cubes instantly read “curated spa set.”
- They travel well in a gift box, especially if you wrap them right.
Materials (and the job each one does)
- Fine sugar: exfoliates without feeling like gravel
- Melt-and-pour soap base (small amount): binds the cube so it holds shape in the shower
- Oil or butter (light amount): adds slip so it doesn’t feel scratchy
- Fragrance oil or essential oil: scent
- Optional: mica for color, dried botanicals for a pretty top (use a tiny amount so it doesn’t clog drains)
- Silicone cube mold: clean edges, easy release
- Mixing bowl + spatula: keep it simple
Step-by-step method (so they hold together and don’t turn into mush)
- Chop a small amount of melt-and-pour soap base and melt it gently.
- Stir your fragrance into the melted soap base first, then add your oil.
- Add sugar slowly and mix until it looks like thick, scoopable wet sand.
- Press the mixture firmly into the mold. Pack it like you mean it.
- Let the cubes set fully, then unmold and air-dry for a few hours so the outside firms up.
Pro-Tips (the “learned it the hard way” stuff)
- Use less oil than you think. Too much oil makes cubes greasy and soft.
- Use just enough soap base to bind. If you pour a lot, cubes feel like soap with sugar, not scrub cubes.
- Wrap them well. Humidity makes them sweat and soften. I like wax paper or shrink wrap, then a pretty label band.
- If you want a super clean, spa look, stick to white, cream, or soft sage cubes and keep the label minimal.
Quick packaging idea
Stack 6 to 9 cubes in a clear jar or a small box, then add a tiny tag that says:
“Use 1 cube on wet skin. Rinse well. Keep water out of the container.”
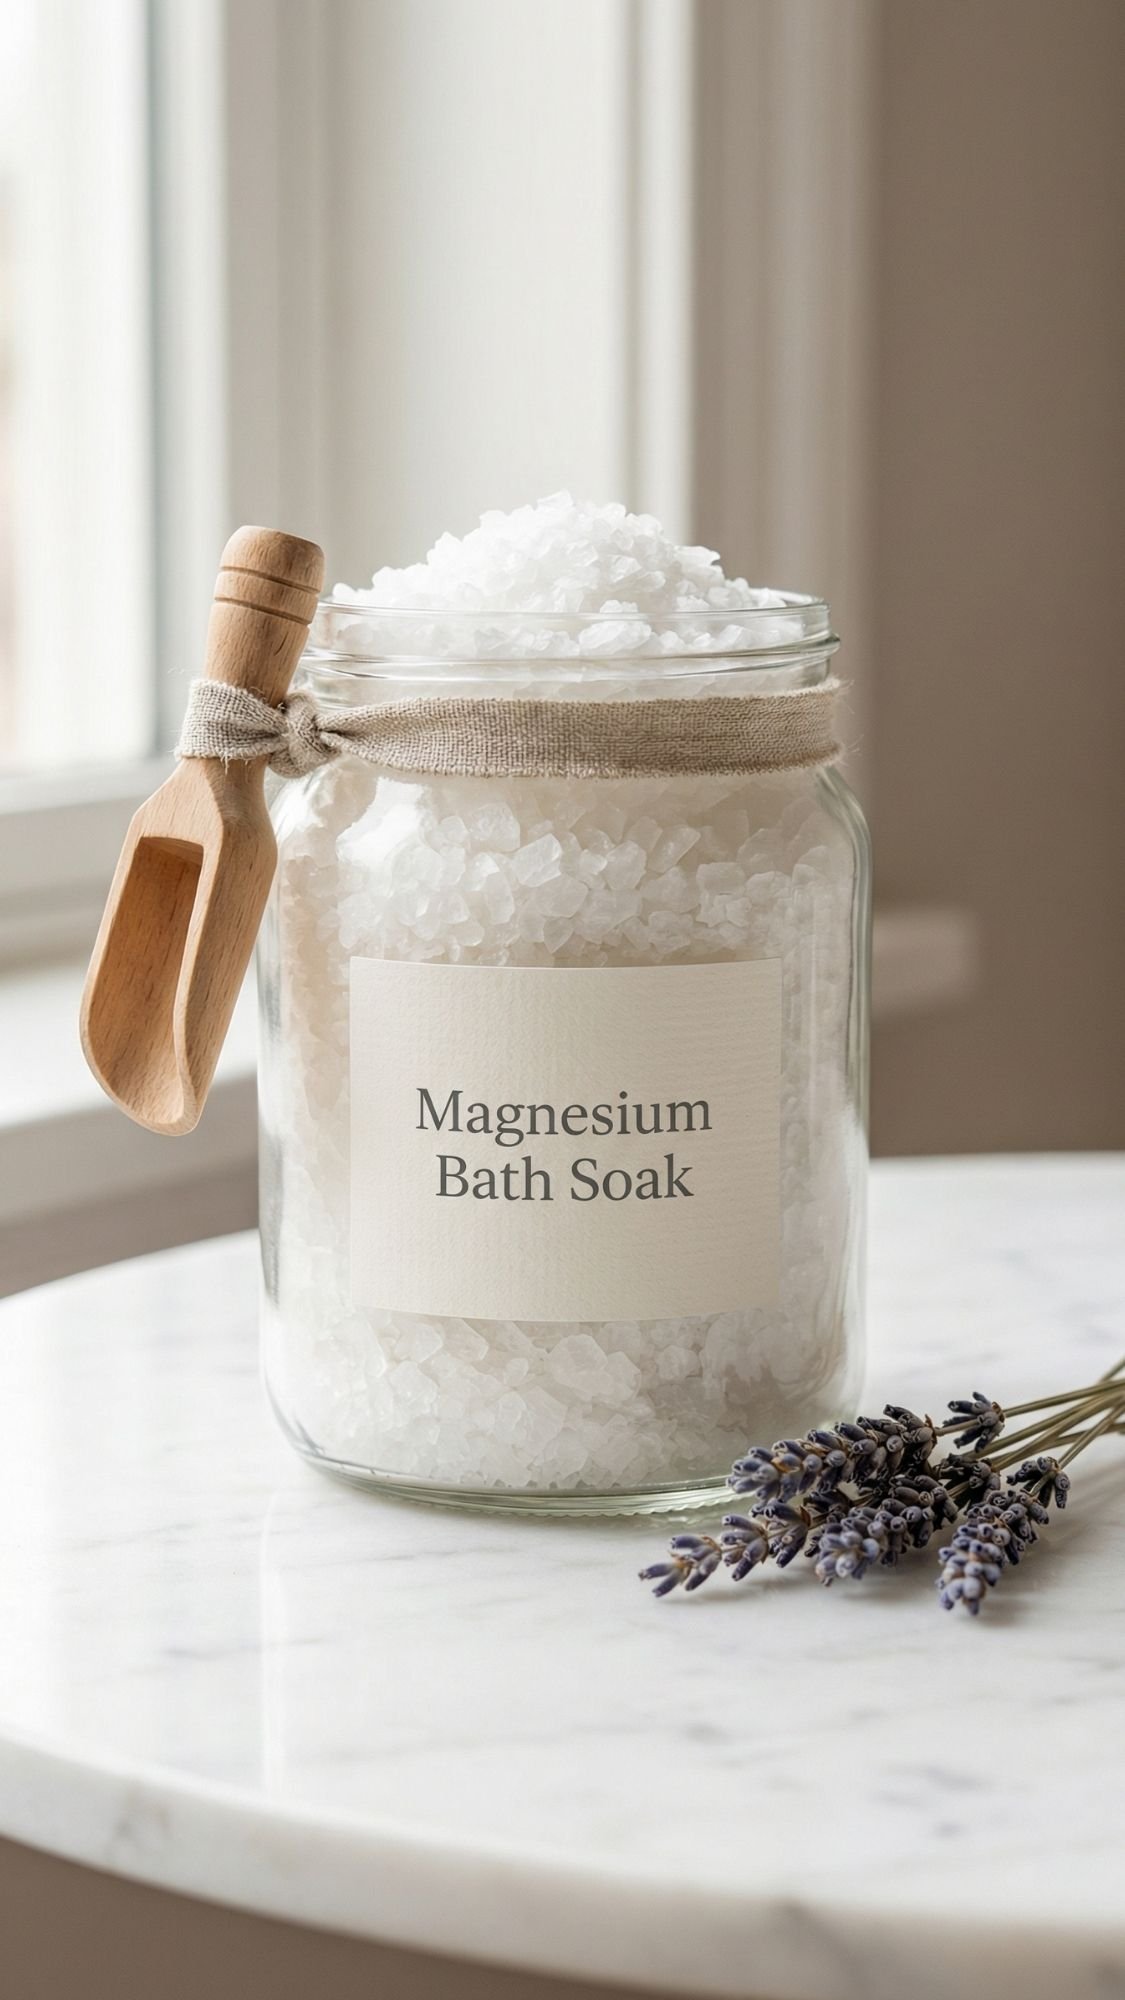
DIY Gift #3: Magnesium Bath Soak Jar: The “My Whole Body Exhaled” Gift
This one feels like a real spa upgrade because it’s practical and soothing. Mom pours it in, the water feels softer, and she gets that “okay, I can breathe again” moment. Also, it looks ridiculously pretty in a jar, which helps when you want the gift to feel expensive without spending a fortune.
Why moms love this one
- It supports a real bath-night ritual, not just a product.
- It feels like recovery and relaxation in one step.
- It’s easy to customize with scent and botanicals.
Materials
- Magnesium flakes or Epsom salt (you can use one or do a blend)
- Baking soda (optional, helps soften bath water feel)
- Dried lavender or chamomile (optional)
- Essential oil or fragrance oil (optional)
- Polysorbate 80 (optional, but it helps oils disperse more evenly)
- Glass jar with lid
- Wooden scoop
- Optional: muslin sachets if you want botanicals without cleanup
How I assemble it so it stays nice and usable
- Pour your salts or flakes into a large bowl and break up any clumps.
- If you add baking soda, mix it in thoroughly so it distributes evenly.
- If you want botanicals, either mix in a tiny amount or place them in a muslin sachet that Mom can toss in the bath like a tea bag.
- If you add scent, mix your fragrance with a small amount of Polysorbate 80 first, then drizzle that into the salts while stirring. This prevents oily “hot spots.”
- Spoon into a jar, wipe the rim clean, and add your scoop tied on with ribbon.
Pro-Tips (these keep it from turning into a clumpy, oily mess)
- Don’t drip essential oils directly onto dry salts and call it done. The oils can clump and hit the skin unevenly.
- If Mom has sensitive skin, skip scent and let the soak stand on its own. It still feels luxe.
- If you want the “spa look,” use an amber jar, a minimalist label, and one dried botanical accent only.
- If you include botanicals loose, keep it minimal. Nobody wants to scrub petals off the tub later.
Copy-paste “How to Use” card
“Add 1 to 2 scoops to warm bath water and swish to dissolve. Soak 15 to 20 minutes. Keep jar dry and closed between uses.”
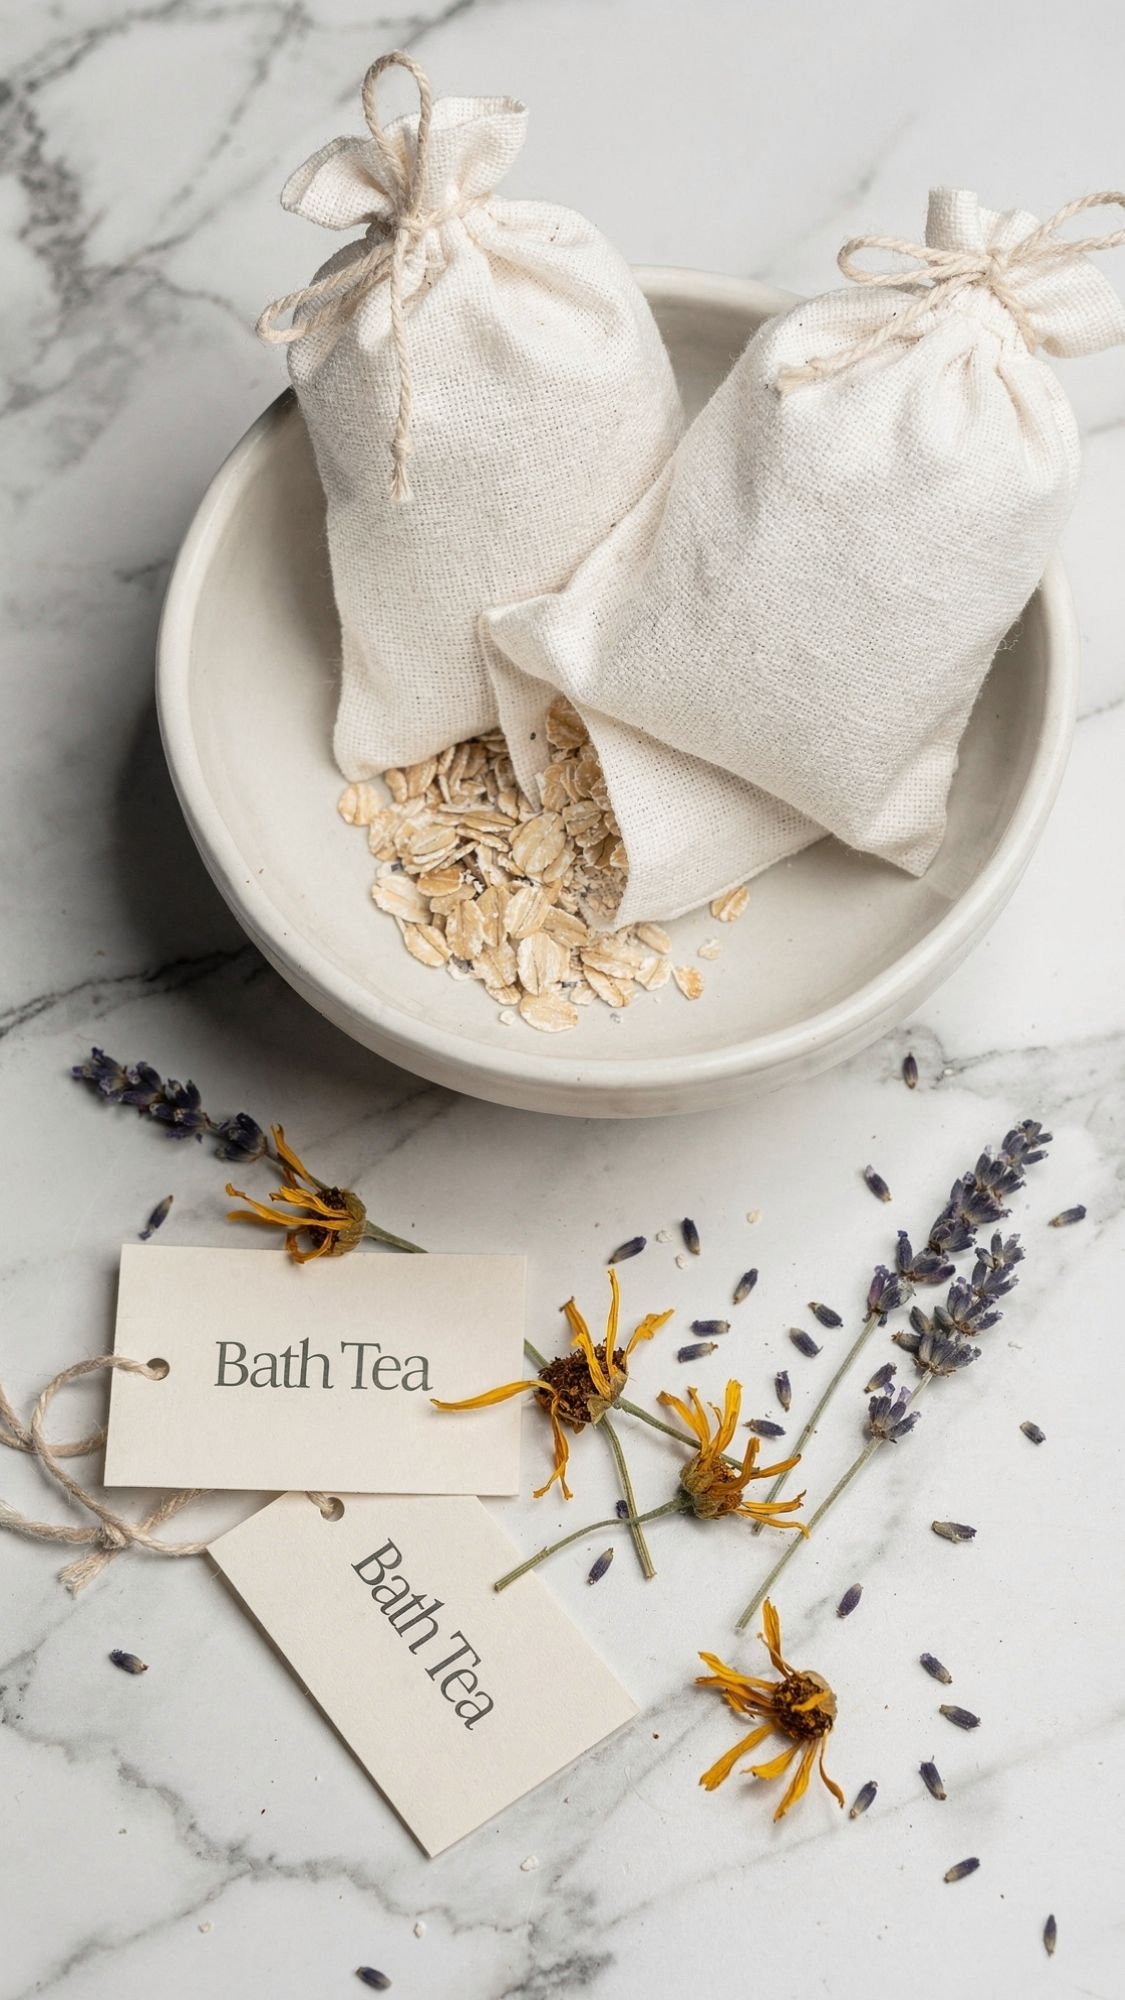
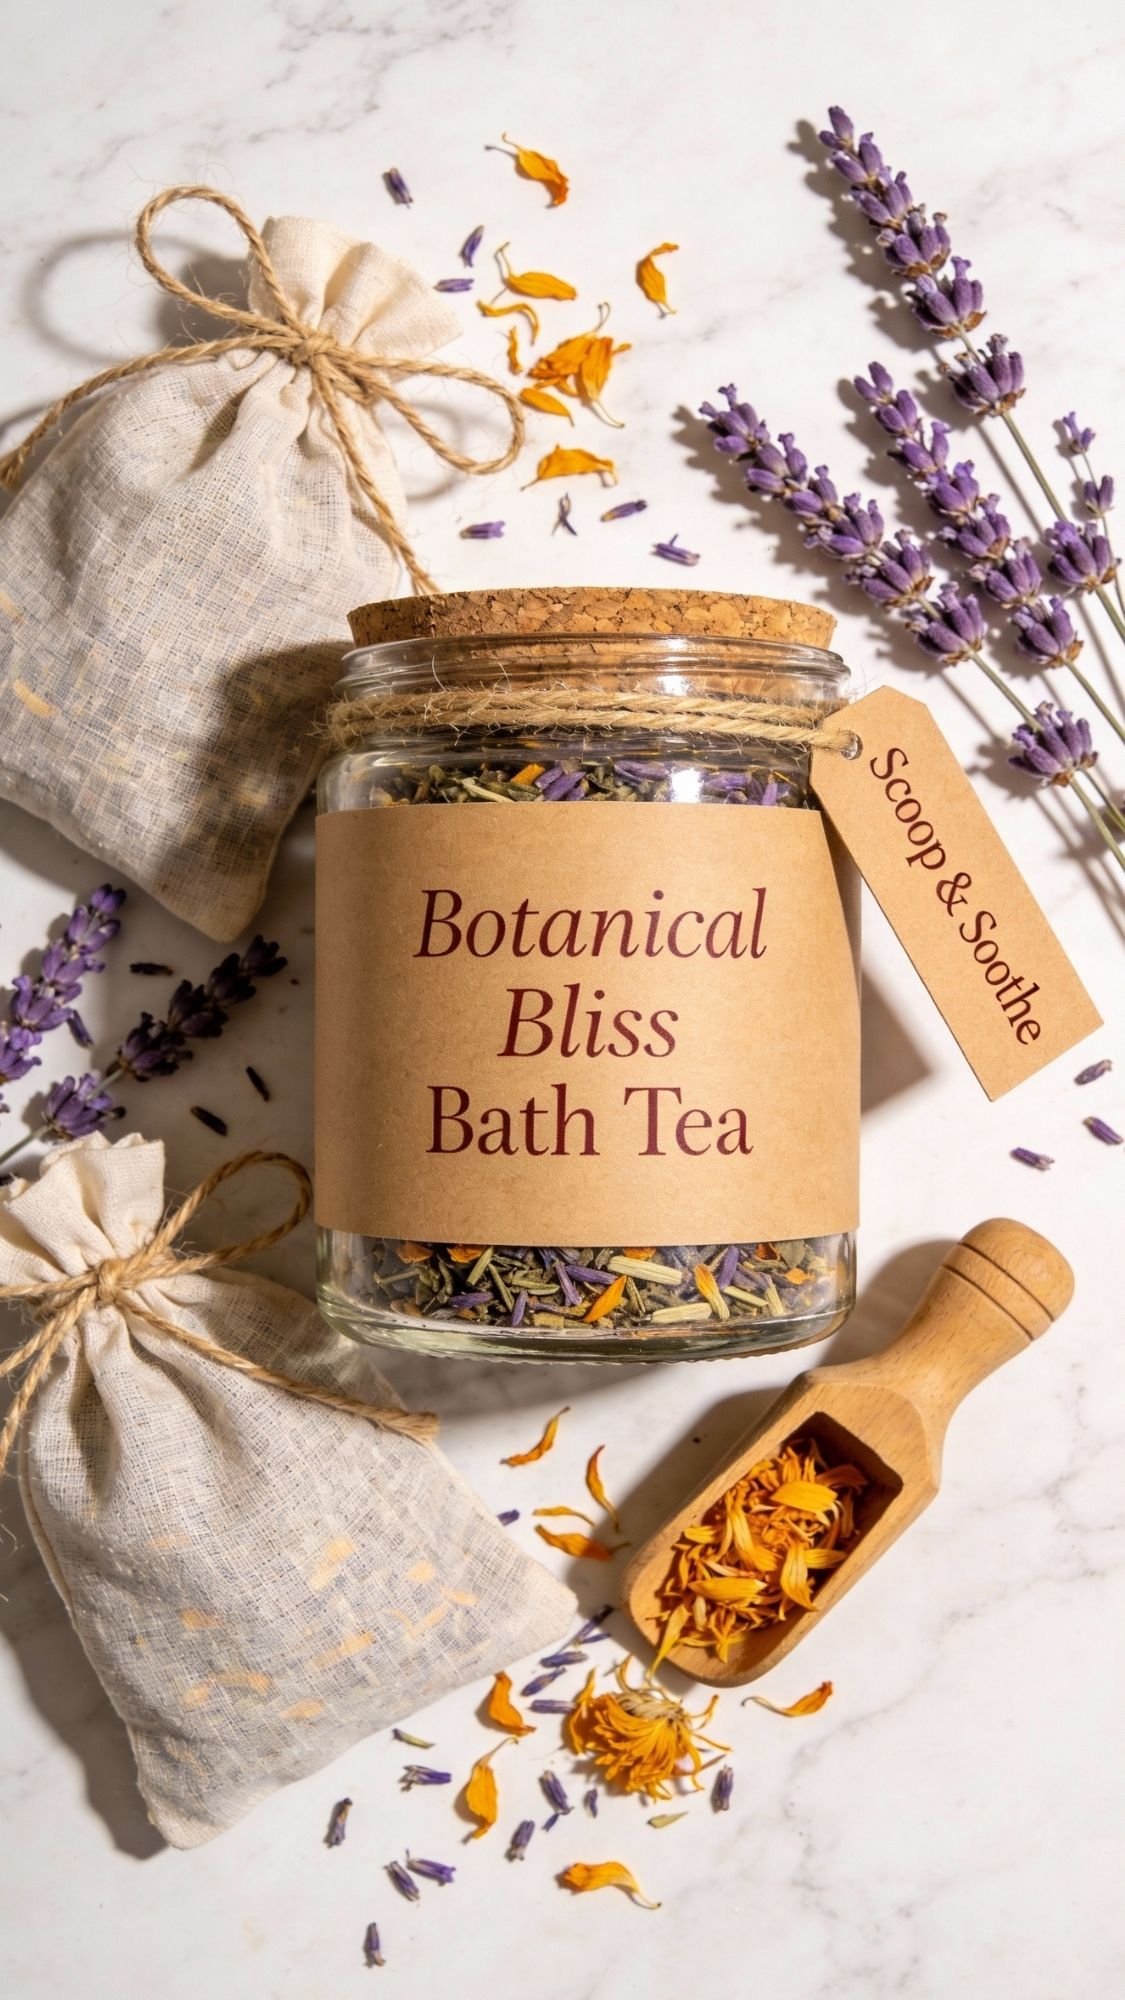
DIY Gift #4: Bath Tea Sachets: All the Spa Vibes, None of the Tub Cleanup
Bath tea sachets are one of my favorite “quiet luxury” gifts because they look delicate and fancy, but they’re super practical. Mom gets that soft, soothing soak, then she just tosses the sachet. No herbs stuck to her back, no flower bits glued to the tub like confetti after a party nobody asked for.
Why this is a smart spa gift
- It feels high-end and thoughtful, especially paired with a soak or candle.
- It avoids the biggest bath annoyance, cleanup.
- It’s easy to customize for different “mom moods.”
Materials (keep it simple and skin-friendly)
- Empty tea bags or muslin drawstring bags
- Colloidal oatmeal or finely ground oats (for that soft “milky bath” feel)
- Dried chamomile (calming)
- Dried lavender (spa scent)
- Dried calendula (gentle, pretty, classic)
- Optional: Epsom salt (small amount), baking soda (small amount)
Skip: big chunky herbs, glitter, or anything sharp. Pretty is not worth irritation.
How to assemble them so they feel boutique, not messy
- Mix your dry ingredients in a bowl. Keep the blend fine and even.
- Spoon into tea bags or muslin bags, don’t overfill. They need room to move in the water.
- Seal the bags, then add a small tag with scent and instructions.
- Store them in a jar or box away from humidity.
Pro-Tips (the little details that make it feel like a real spa)
- Want that creamy bath look without actual milk? Use colloidal oatmeal. It gives that soft, luxe feel without making something that spoils.
- If you use muslin bags, tell Mom to swish it in water, then gently squeeze it like a tea bag. That’s where the magic happens.
- Add 3 to 5 sachets into a gift box for that “spa bundle” look.
Copy-paste “How to Use” card
“Drop 1 sachet into warm bath water. Swish and squeeze gently to release the soothing blend. Toss after use. Keep sachets dry between baths.”

DIY Gift #5: Lotion Bars: The No-Spill, Purse-Friendly Moisture Fix
Lotion bars are one of those gifts that make moms go, “Oh wait, this is genius.” They feel luxe, they’re super practical, and they don’t leak in a bag. If you want something that looks boutique-level with minimal drama, make these.
Why this is a spa-day-at-home MVP
- No pump, no spill, no mess.
- Feels rich and moisturizing, especially after a shower or bath.
- Looks gorgeous in a tin or molded shape with a clean label.
Materials (and why each matters)
- Beeswax (or candelilla wax for vegan): gives structure so the bar stays solid
- Body butter (shea, cocoa, mango): adds richness
- Liquid oil (sweet almond, jojoba, fractionated coconut): adds glide
- Essential oil or fragrance oil (optional): scent
- Silicone mold or metal tins
- Optional: vitamin E: helps slow rancidity, nice label-friendly bonus
The method that makes them smooth and not grainy
- Melt wax + butter slowly using a double boiler setup. Keep heat gentle.
- Stir until fully melted, then remove from heat.
- Add liquid oil and scent, stir well.
- Pour into molds or tins. Tap gently to release bubbles.
- Let set until firm, then harden overnight before packaging.
Pro-Tips (this is where people mess up)
- A common mistake beginners make is overheating the butter. That can cause a grainy texture later, especially with shea. Keep the heat low and steady.
- If your bar feels too soft, add a bit more wax next batch. If it feels too draggy, add a bit more oil.
- Use tins if you want the most “giftable and durable” option. Bars in tins travel better and look more polished.
Copy-paste “How to Use” card
“Warm the bar between your hands, then glide onto dry skin after a shower or before bed. Store away from heat. Best used within 6 months.”

DIY Gift #6: DIY Linen Spray: Bedtime Spa Energy in a Bottle
This is one of the easiest ways to make Mom’s whole house feel like a calm spa without asking her to do anything extra. Linen spray makes pillows, sheets, towels, and even a robe feel “special.” And when you package it right, it looks like something you’d buy at a high-end boutique, not something you made at your kitchen counter.
Why this gift works so well
- It turns everyday stuff into a ritual, especially bedtime.
- It’s fast to use, which means Mom will actually use it.
- It pairs perfectly with a candle, bath tea, or coupon book.
Materials (don’t skip the key one)
- Fine mist spray bottle (glass looks more luxe)
- Distilled water (reduces cloudiness and weird residue)
- Solubilizer (this is the key, it helps fragrance blend into water)
- Fragrance oil or essential oil (keep it calm and simple)
- Optional: a tiny splash of alcohol to help it dry faster and reduce “wet spots”
- Optional: label + small instruction card
How to make it so it doesn’t separate or leave spots
- Add your fragrance to the solubilizer first and stir. This helps it blend evenly.
- Add that mixture into the bottle.
- Pour in distilled water and swirl gently.
- Test spray on a towel first. Let it dry and check for spotting.
- Label it and include a “shake before use” note if needed.
Pro-Tips (the difference between a good spray and a gross one)
- If your spray looks cloudy or leaves oily spots, your fragrance isn’t properly solubilized. Fix the ratio instead of shaking harder. Shaking is not a magic spell.
- Stick to 1 scent family. Linen spray gets overpowering fast if you go too heavy.
- Mom-friendly scent combos:
- Lavender + vanilla
- Eucalyptus + mint
- Bergamot + soft floral
- Citrus + rosemary
Copy-paste “How to Use” card
“Mist lightly onto sheets, pillows, towels, or a robe from 12 inches away. Let dry before lying down. Test on fabric first. Store away from heat.”
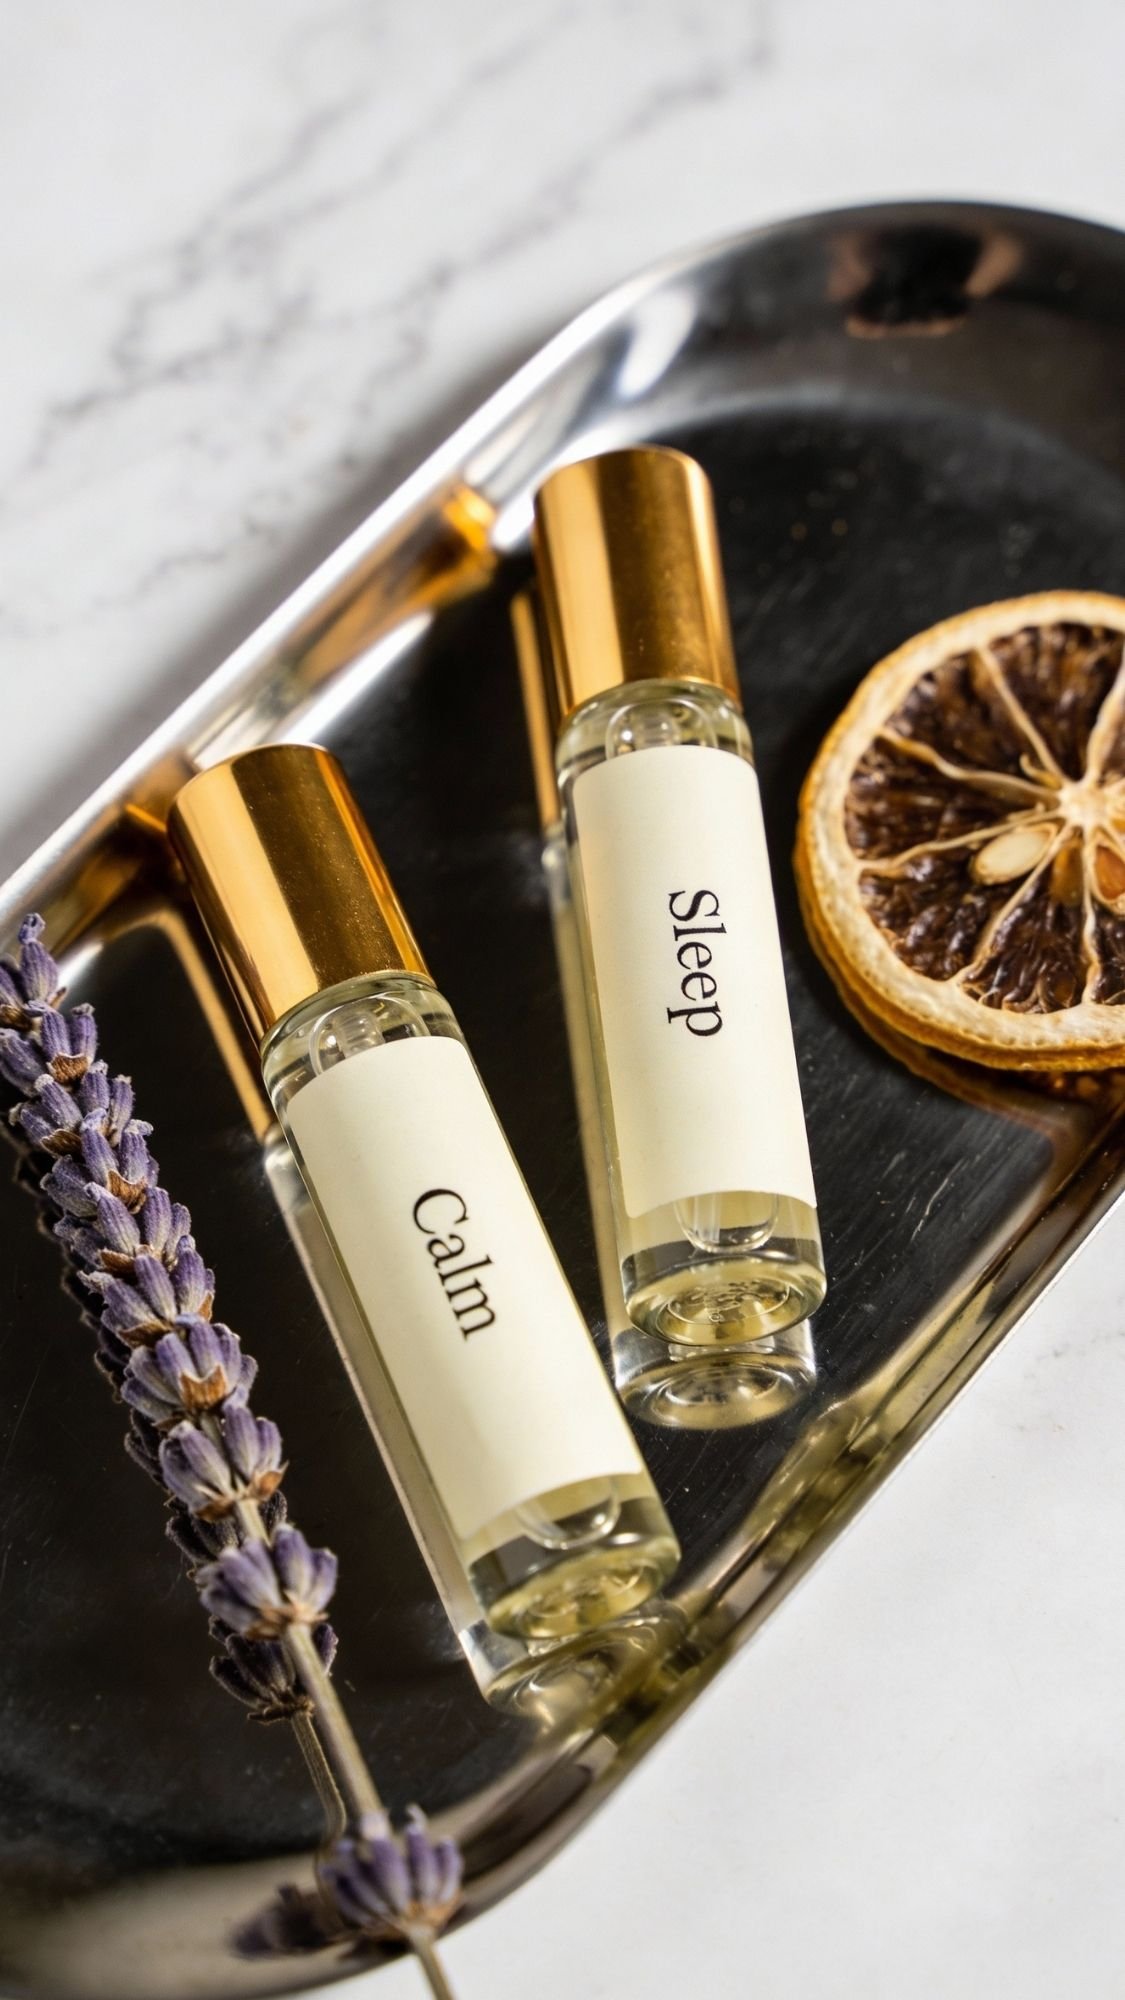
DIY Gift #7: Aromatherapy Roller Blend: The Tiny Gift That Feels Shockingly Luxurious
This is one of those gifts that looks small, but it hits hard. A roller blend feels personal, like you made it specifically for Mom. It also taps into that whole “soft scent, calm nervous system, bedtime ritual” vibe without being complicated. Plus, it’s easy to slip into a spa box as the “little extra.”
Why moms love this one
- It’s portable, simple, and gets used fast.
- It feels like a boutique wellness product when you label it nicely.
- It layers well with perfume, so it doesn’t fight her usual scent.
Materials
- Roller bottles (preferably glass)
- Carrier oil (jojoba or fractionated coconut oil works great)
- Essential oils (keep it gentle and classic)
- Optional: vitamin E (nice for shelf life)
- Mini funnel or dropper
- Minimalist labels
How to make it (clean and consistent)
- Add your essential oils to the roller bottle first.
- Fill the rest with carrier oil.
- Pop the roller top on and shake gently.
- Label it with the scent name and a simple “how to use.”
Pro-Tips (so it feels high-end, not homemade)
- Keep the blend simple. Two to three essential oils max usually smells more expensive than a chaotic mix.
- Label the “vibe,” not just the ingredients. Mom wants “Calm” or “Sleep,” not “Lavender Frankincense Peppermint Situation.”
- Add a tiny note: “Apply to wrists or temples, avoid eyes.” It’s small but it looks professional.
Easy blend ideas (pick one vibe per bottle)
- Calm: lavender + bergamot
- Sleep: lavender + cedarwood
- Fresh Spa: eucalyptus + spearmint
- Uplift: sweet orange + bergamot
Copy-paste “How to Use” card
“Roll onto wrists, neck, or shoulders. Breathe in slowly. Avoid eyes. Store away from heat.”
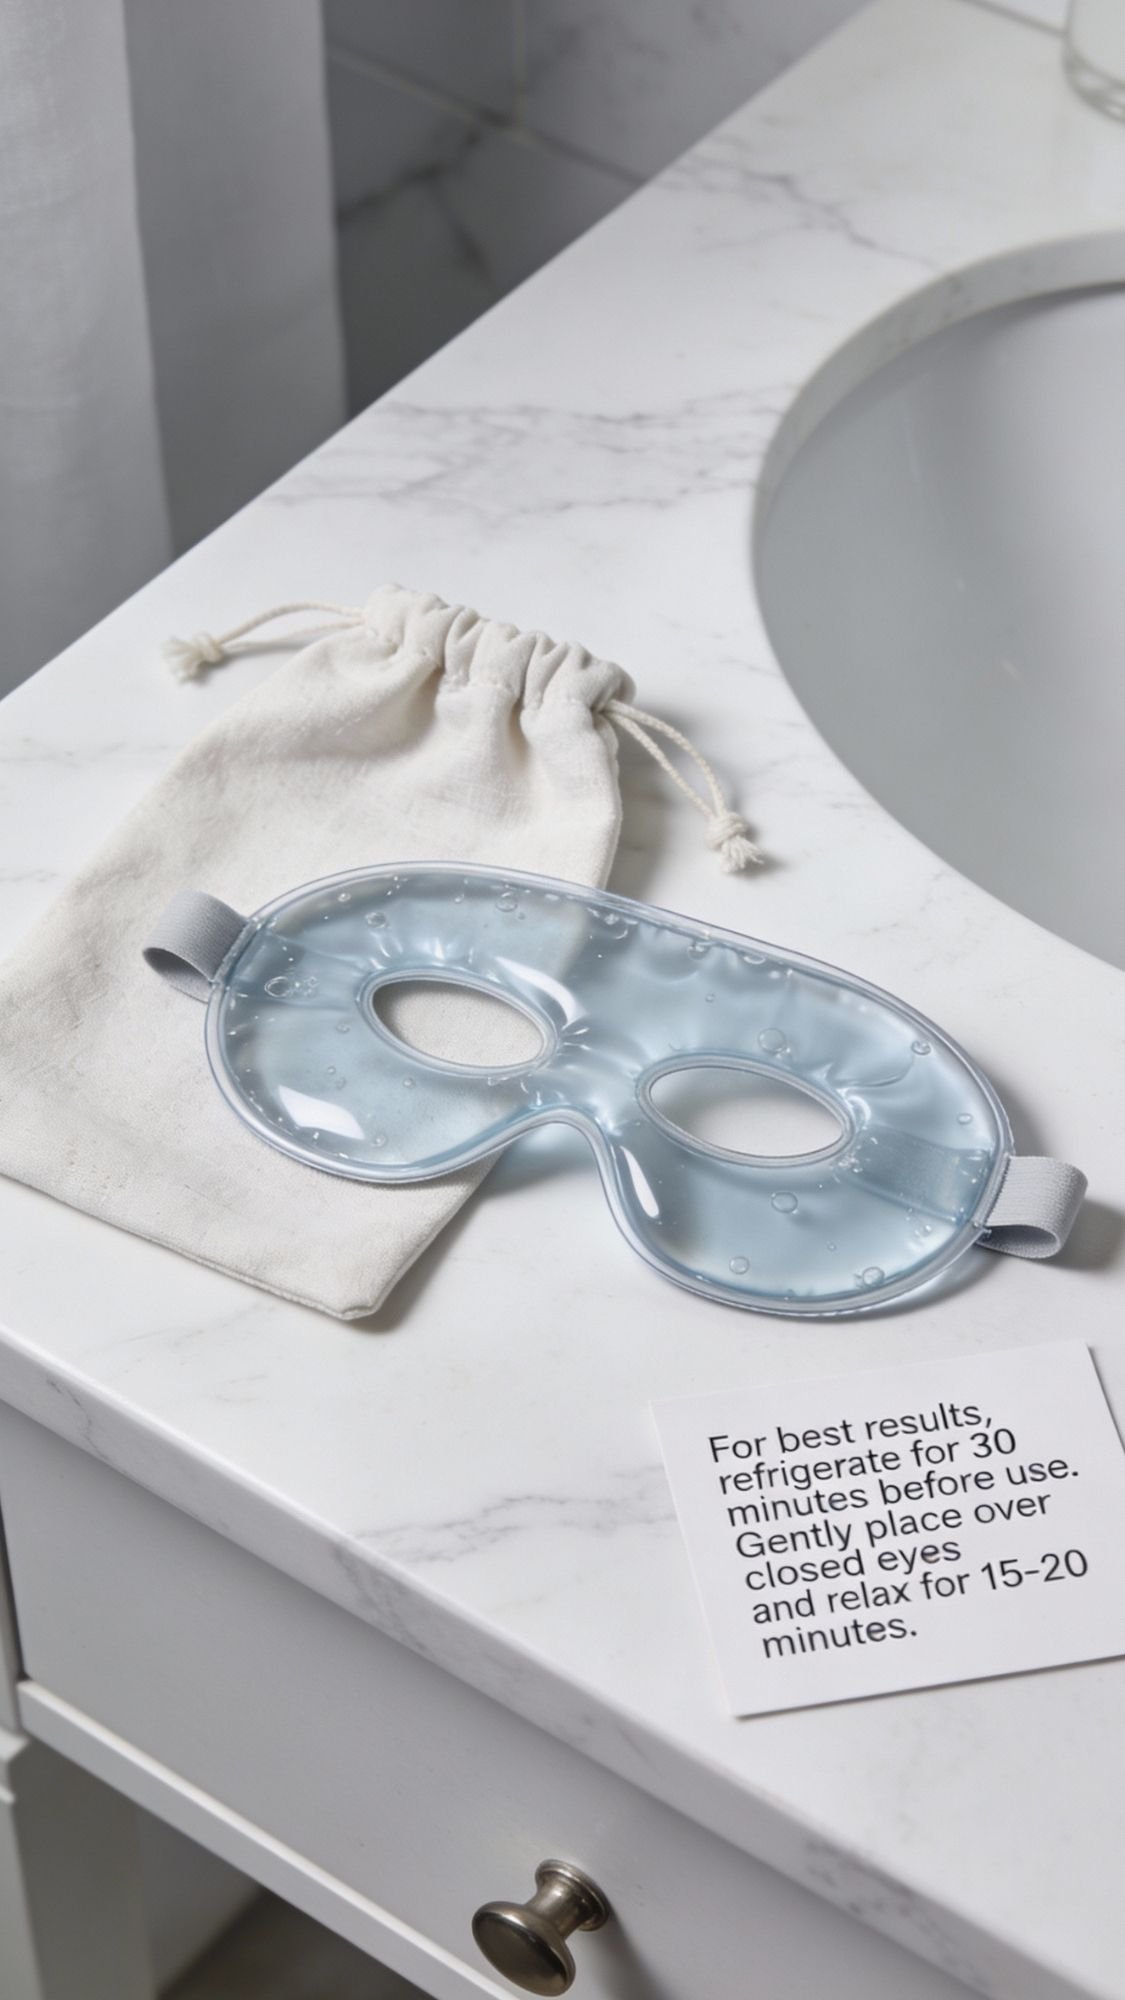
DIY Gift #8: Cooling Under-Eye Mask Gift: The “I Slept Eight Hours” Lie
This is a sneaky-good spa gift because it’s instant gratification. Mom can pop it in the fridge, slap it on for 10 minutes, and suddenly she looks like she didn’t spend the whole week solving everyone else’s problems. It also pairs perfectly with a coupon book because it basically demands quiet time.
I’m going to recommend the smart version of this gift. I skip homemade water-based gels for gifting unless you’re using proper preservation. It’s not worth the spoil risk.
Why this works as a gift
- Fast results, low effort.
- Feels luxe and spa-like without being messy.
- Safer and more shelf-stable if you choose reusable cooling masks.
What to include (simple but high-end)
- Reusable gel bead eye mask (or cooling eye pads)
- A small storage pouch
- A “how to use” card
- Optional add-on: a mini linen spray or candle for a full “rest ritual”
How to make it feel custom, not store-bought
- Put the eye mask in a small linen pouch or a clean zip pouch.
- Add a minimalist label tag like “Cool + Reset.”
- Include a tiny card with:
- Chill instructions
- Time limits
- A reminder to rest eyes, not scroll
Pro-Tips (this is where you look like a pro)
- Tell Mom to chill it in the fridge or freezer, but limit use to 10 minutes max if it’s freezer-cold. Overdoing it can irritate sensitive skin.
- If Mom gets migraines or tension headaches, mention she can use it while lying down with low light. That’s a thoughtful touch.
- Don’t add scented oils to anything that goes this close to the eyes. Just don’t.
Copy-paste “How to Use” card
“Chill in fridge for 30 minutes or freezer for 10 minutes. Place over eyes for up to 10 minutes. Wipe clean after use. Store in pouch.”
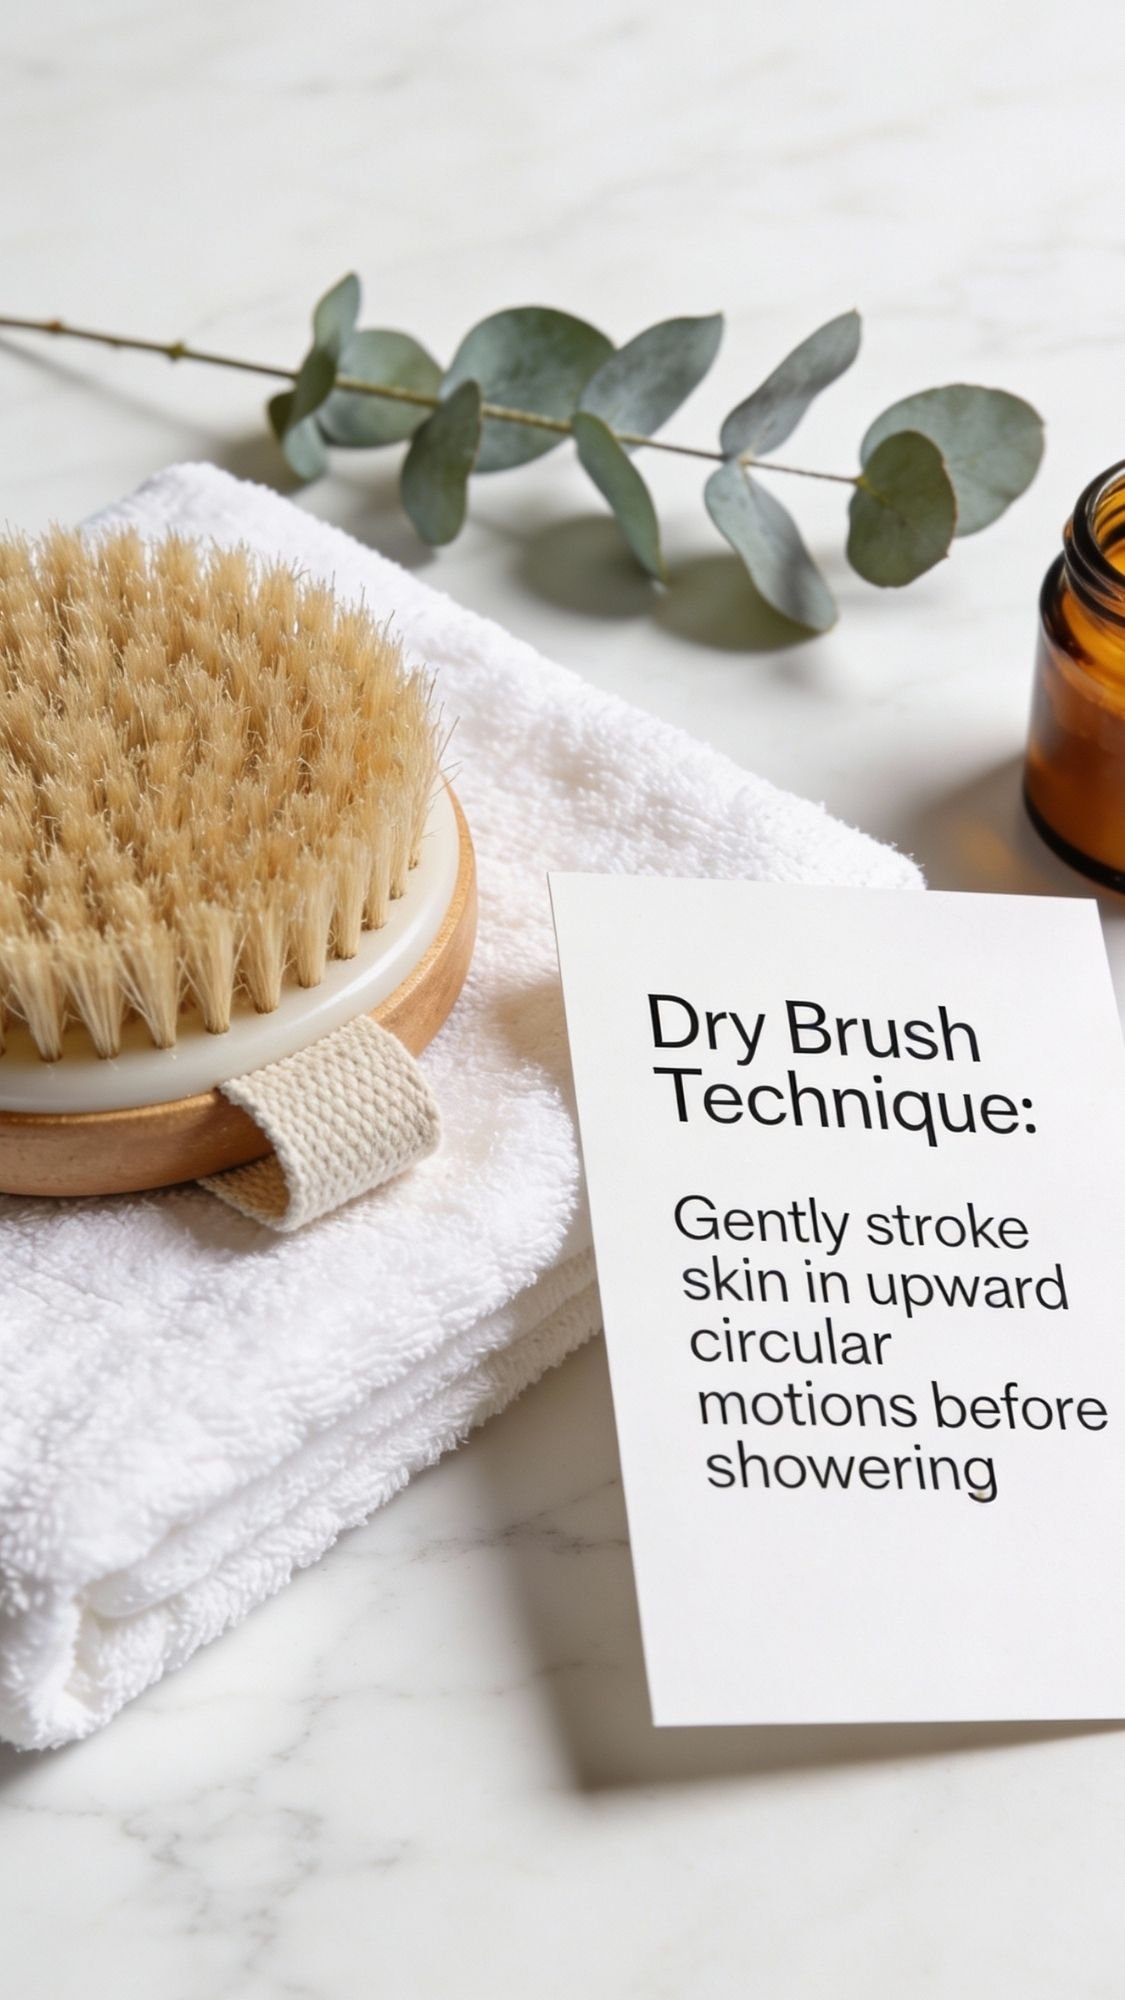
DIY Gift #9: Dry Brushing Starter Kit: The Pre-Shower Ritual That Feels So Spa
Dry brushing is one of those old-school spa habits that’s making a big comeback because it’s simple, it feels good, and it turns a regular shower into a whole ritual. It also makes a great DIY gift because the “DIY” part is the way you curate it. Brush, card, packaging, done. And it looks expensive if you style it right.
Why this is a strong spa-day gift
- It turns into a routine Mom can repeat anytime.
- It pairs perfectly with shower steamers and lotion bars.
- It feels like something a spa would recommend, not a random gift.
What to include in the kit
- Dry brush with natural bristles (strap handle is a plus)
- Small storage pouch or box
- Instruction card with a simple step-by-step
- Optional add-on: lotion bar or body oil for after brushing
How to assemble it so it looks boutique-level
- Wrap the brush in tissue or place it in a small linen pouch.
- Add a minimalist tag like “Pre-Shower Ritual.”
- Include a small card with:
- When to do it
- How to brush
- What to avoid
- A “finish” step (moisturize after)
Pro-Tips (so Mom enjoys it instead of hating it)
- Dry brushing should feel stimulating, not painful. Tell Mom to go light, especially at first.
- Avoid freshly shaved skin, broken skin, or irritated areas.
- Keep the brush dry. Water ruins bristles and can cause musty smells.
Copy-paste “How to Use” card
“Use on dry skin before showering. Brush in gentle strokes toward the heart. Start with 1 to 2 minutes. Rinse off, then moisturize. Keep brush dry.”

DIY Gift #10: Gua Sha Gift Set: Face and Body Friendly, Not Just a Trend
Gua sha gets hyped a lot, but when you gift it the right way, it feels genuinely useful. The trick is to package it like a spa tool, not a random stone. Mom needs the tool, the slip, and simple instructions so she doesn’t drag it on dry skin once and decide it’s “not for her.”
Why this makes a great spa gift
- It feels luxe and intentional, especially in a pouch.
- It’s a real ritual add-on for face or tension relief.
- It pairs beautifully with a roller blend or a body oil.
What to include in the set
- Gua sha stone (smooth edges, good weight)
- Small linen pouch or box
- Slip product like a mini face oil, lotion bar, or balm
- Instruction card with 3 simple moves
How to assemble it so it looks boutique
- Put the stone in a linen pouch.
- Add a minimalist label tag like “Glow Tool” or “Tension Reset.”
- Add a small oil sample or mini balm.
- Include a short how-to card. Keep it simple and confident.
Pro-Tips (so it feels good and doesn’t irritate)
- Always use it with slip. Oil, balm, or lotion, anything that prevents tugging.
- Start gentle. More pressure does not mean more results.
- Clean it after use. A quick wipe works, soap and water when needed, dry it fully.
Copy-paste “How to Use” card (simple and beginner friendly)
“Apply a little oil or balm first. Glide the stone gently, never on dry skin. Use 3 to 5 minutes. Wipe clean after use and store in pouch.”
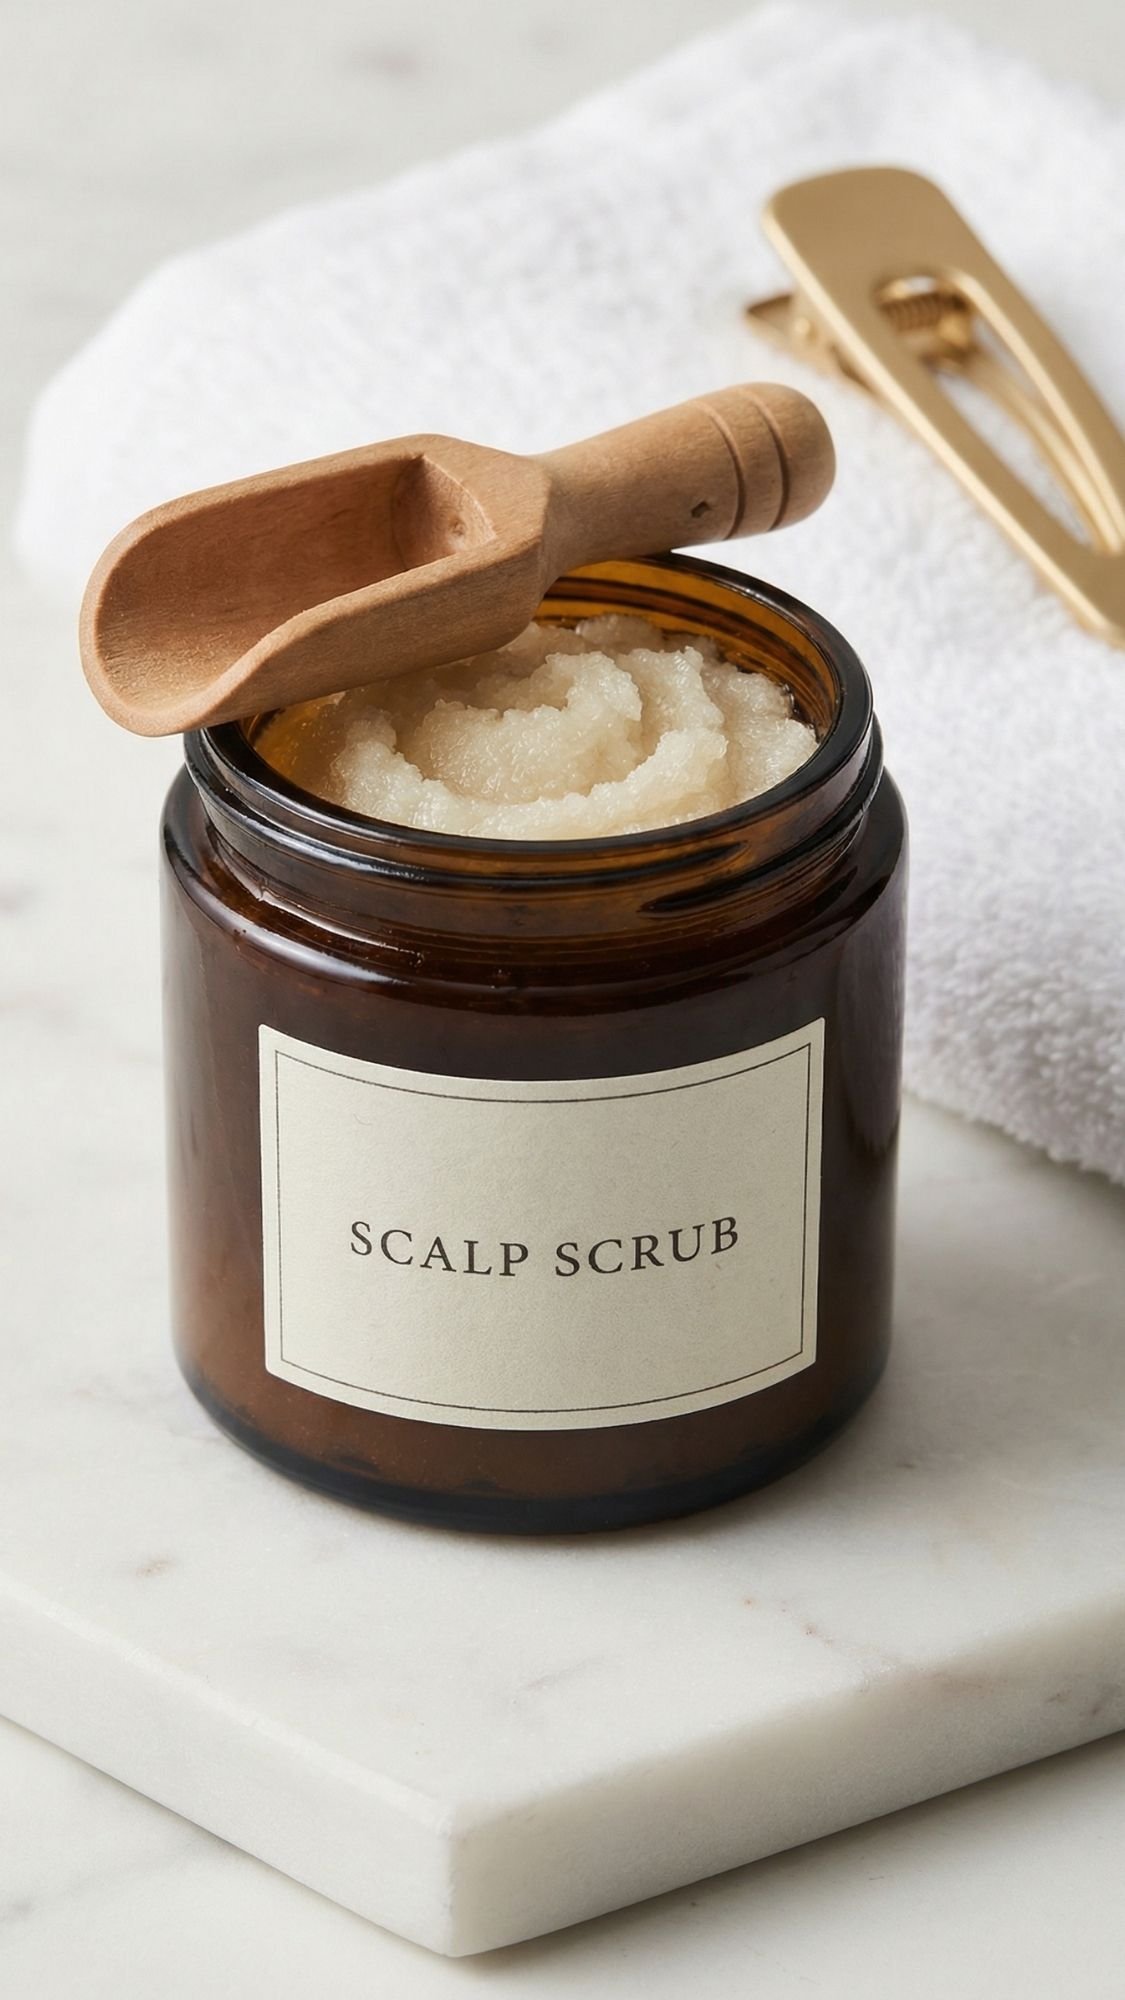
DIY Gift #11: Scalp Scrub: For the “Everything Shower” Mom
Scalp care counts as self-care, period. A good scalp scrub makes hair feel cleaner, helps product buildup, and honestly makes the whole shower feel more spa-like. Have you ever done a deep scalp scrub and realized your shampoo suddenly works better? Same.
I keep this gift simple and mostly oil-based so it stores well and doesn’t turn into a questionable science experiment.
Why this is a great spa-day add-on
- It fits the “everything shower” ritual perfectly.
- It feels like a salon upgrade, but you can DIY it.
- It’s useful even for moms who don’t do baths.
Materials
- Fine sugar (gentler than coarse, less scratchy)
- Lightweight oil (jojoba or fractionated coconut oil works well)
- Optional: a little castile soap or a mild surfactant for extra rinse-off (keep it minimal)
- Optional: peppermint or rosemary essential oil (tiny amount, go easy)
- Small jar with lid
- Mini scoop (strongly recommended)
- Label + instruction card
How to make it (so it stays scoopable and not oily soup)
- Add sugar to a bowl.
- Drizzle oil in slowly and mix until it looks like wet sand. You want it thick enough to scoop.
- If you add essential oils, mix them into the oil first, then stir into the scrub.
- Spoon into a jar, wipe the rim clean, and cap it tightly.
- Add a scoop and label it clearly.
Pro-Tips (the “please trust me on this” list)
- Use fine sugar. Coarse sugar can feel too rough on sensitive scalps.
- Keep essential oils very light. The scalp can get irritated fast if you go heavy.
- Tell Mom to avoid use on broken skin or freshly scratched areas.
- Use a scoop. Wet fingers add water, and water makes scrubs spoil faster.
Copy-paste “How to Use” card
“Wet hair and scalp. Part hair in a few sections. Massage a small amount into the scalp for 30 to 60 seconds. Rinse well, then shampoo. Keep water out of the jar.”
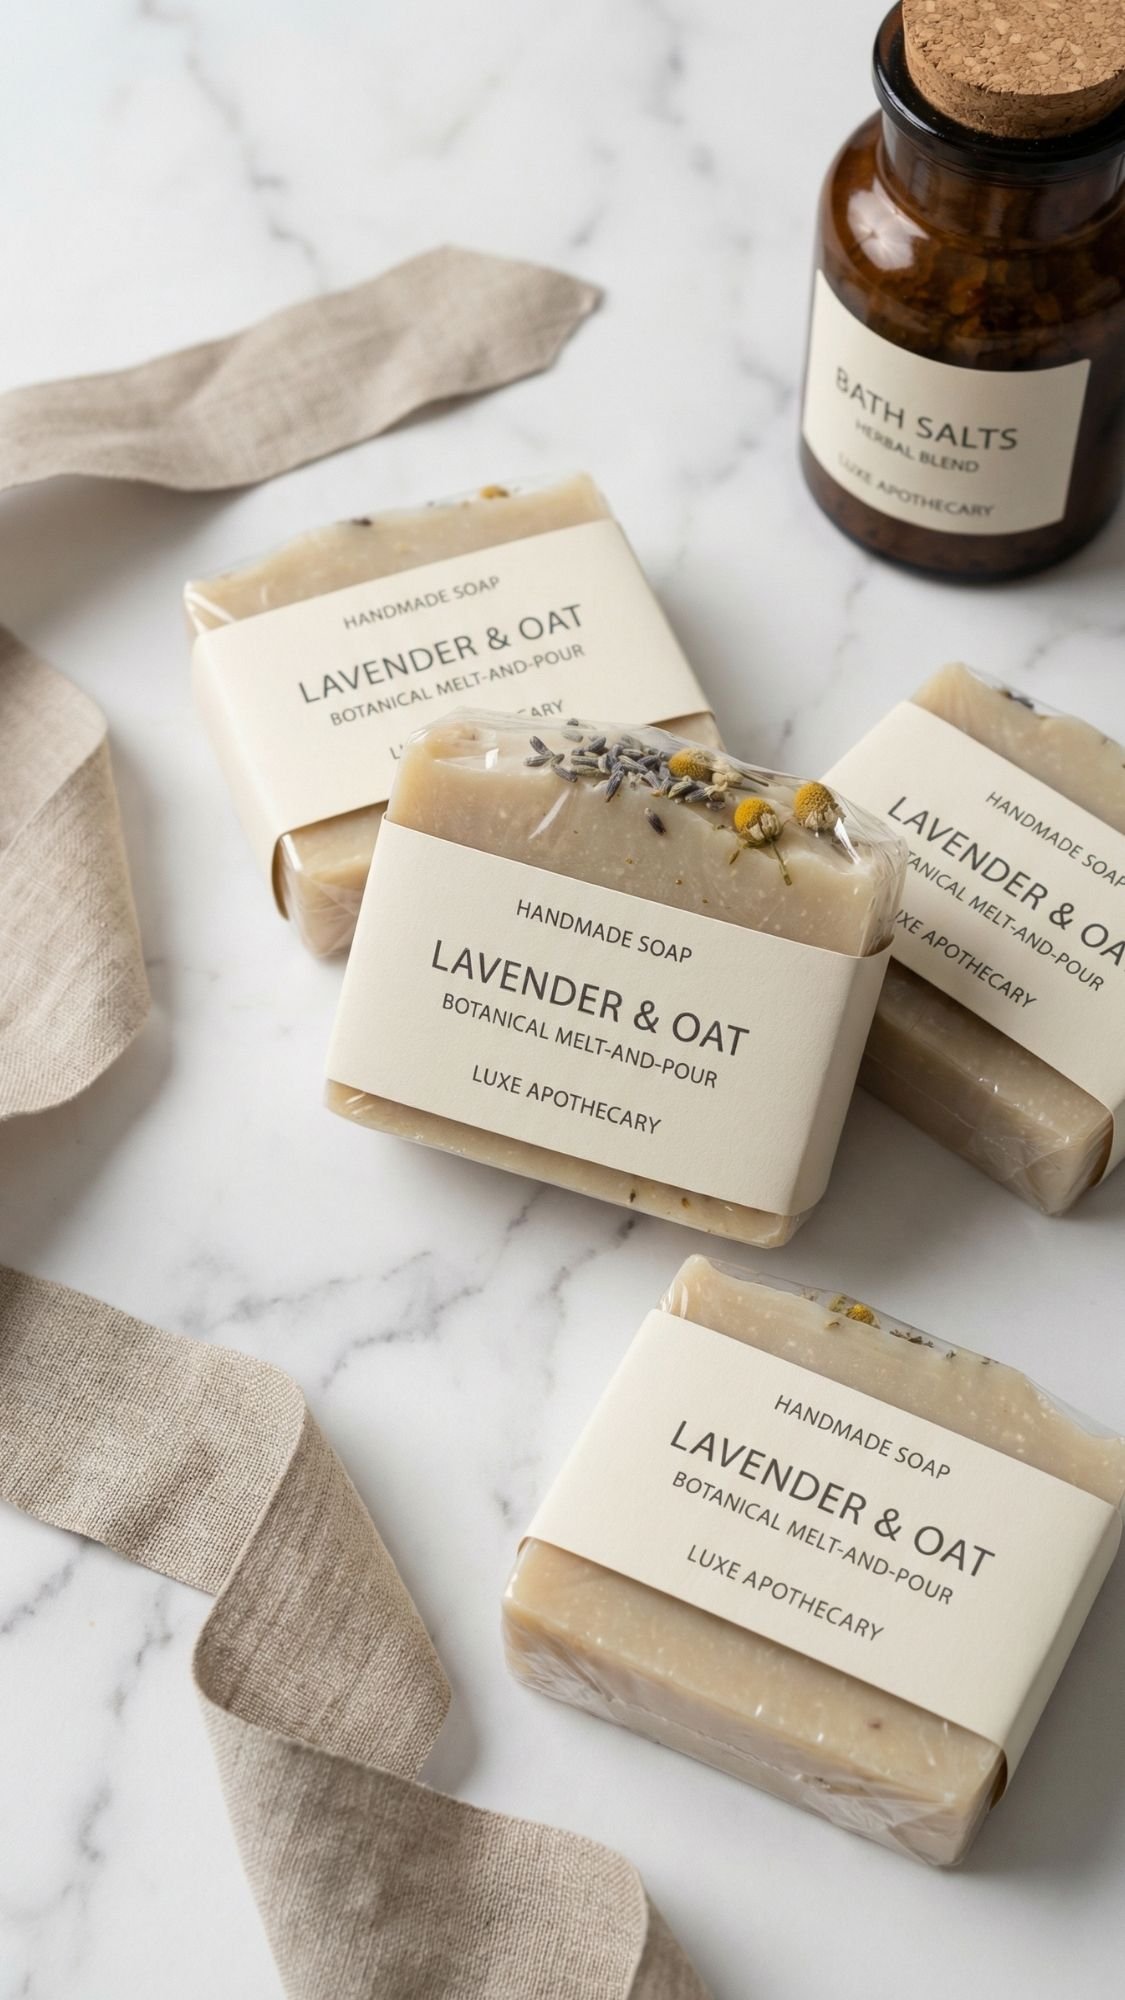
DIY Gift #12: Melt-and-Pour Soap Bars: Pretty, Practical, and Actually Beginner-Friendly
Soap bars are one of my favorite “looks expensive but isn’t stressful” DIYs. You get that boutique vibe, you can customize the scent, and it’s not the kind of project that randomly decides to fail because the humidity looked at it wrong.
The key is packaging. Soap looks high-end when you wrap it clean and label it well.
Why this is a solid spa-day gift
- It’s useful, everyone uses soap.
- It looks boutique-level with minimal effort.
- It pairs perfectly with a scrub, lotion bar, or linen spray.
Materials
- Melt-and-pour soap base (clear or white)
- Soap-safe fragrance oil or a gentle essential oil blend
- Optional: mica for color (soap-safe)
- Optional: dried botanicals for a top garnish (keep it minimal)
- Silicone soap mold
- Rubbing alcohol in a mister (for popping surface bubbles)
- Knife + cutting board
- Wrapping: shrink wrap, plastic film, or wax paper + belly band label
Step-by-step method (clean edges, smooth finish)
- Cut soap base into cubes so it melts evenly.
- Melt slowly in short bursts. Stir between bursts so you don’t overheat it.
- Stir in fragrance. Keep it measured and don’t overdo it.
- Pour into mold. Mist the top with alcohol to pop bubbles.
- Let set fully, then unmold and trim edges if needed.
Pro-Tips (so your soap doesn’t “sweat” and look messy)
- Melt-and-pour soap can form moisture droplets in humid rooms. That’s normal, but it looks sloppy in gift packaging.
- Wrap it tightly once fully cooled. I like shrink wrap for the cleanest look, then add a minimalist belly band label.
- Keep botanicals to a light garnish on top. Too much looks messy and can get scratchy.
Copy-paste “How to Use” card
“Lather with warm water. Let the bar dry between uses for a longer life. Store wrapped bars in a cool, dry place until gifting.”
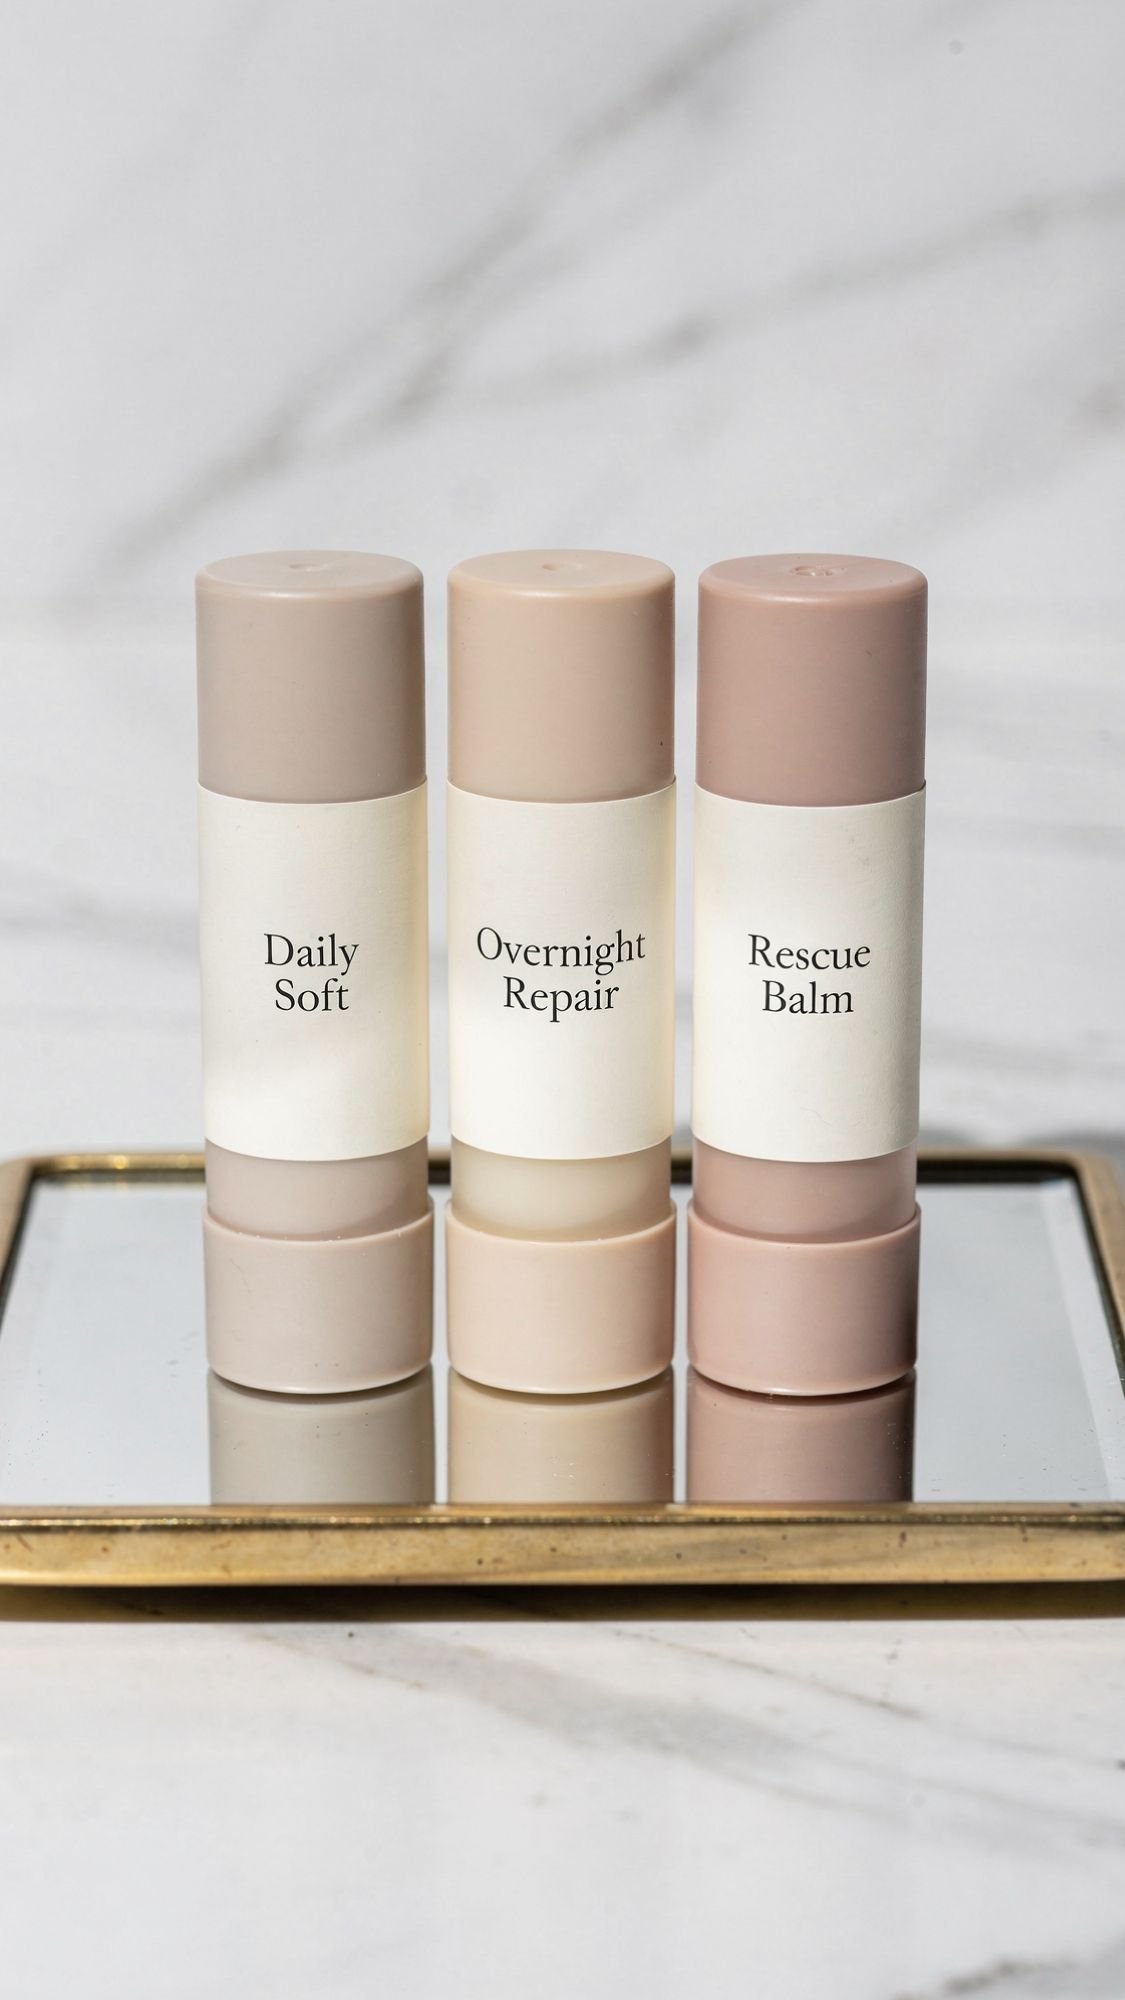
DIY Gift #13: Lip Balm Trio: Day, Night, and “Emergency Purse One”
This is one of the most useful spa gifts because it’s tiny, practical, and gets used up fast. A trio also makes it feel intentional, like you planned it, not like you made one tube and called it a day.
The secret to making lip balm feel luxe is the packaging and the “routine” names. Mom doesn’t want “Basic Lip Balm.” She wants “Night Repair,” “Daily Soft,” and “Purse Rescue.”
Why this gift works
- It’s easy, but it doesn’t look easy.
- It fits any spa box as the little extra.
- It feels personal when you name the trio.
Materials
- Beeswax (or candelilla wax)
- Lip-safe butter (shea or cocoa)
- Lip-safe oil (sweet almond, jojoba, fractionated coconut)
- Optional: vitamin E
- Optional: lip-safe flavor oil or a tiny amount of fragrance designed for lips
- Lip balm tubes or tins
- Small pouring pitcher or dropper
- Labels
How to make it (smooth texture, no weird grit)
- Melt wax + butter gently, low heat.
- Stir in oil, then remove from heat.
- Add vitamin E and any flavor oil. Stir well.
- Pour into tubes or tins.
- Let set completely before capping and labeling.
Pro-Tips (the little details that make it feel pro)
- Don’t overheat the butters. Gentle heat keeps the texture smooth.
- If you want one tinted balm, use a tiny amount of lip-safe mica or a cosmetic tint. Keep it subtle so it feels wearable.
- Label each one clearly so Mom knows which is which.
Trio naming ideas (copy-paste friendly)
- Day: “Daily Soft”
- Night: “Overnight Repair”
- Purse: “Rescue Balm”
Copy-paste “How to Use” card
“Apply as needed. Use ‘Overnight Repair’ before bed. Store away from heat. Best used within 6 to 12 months.”
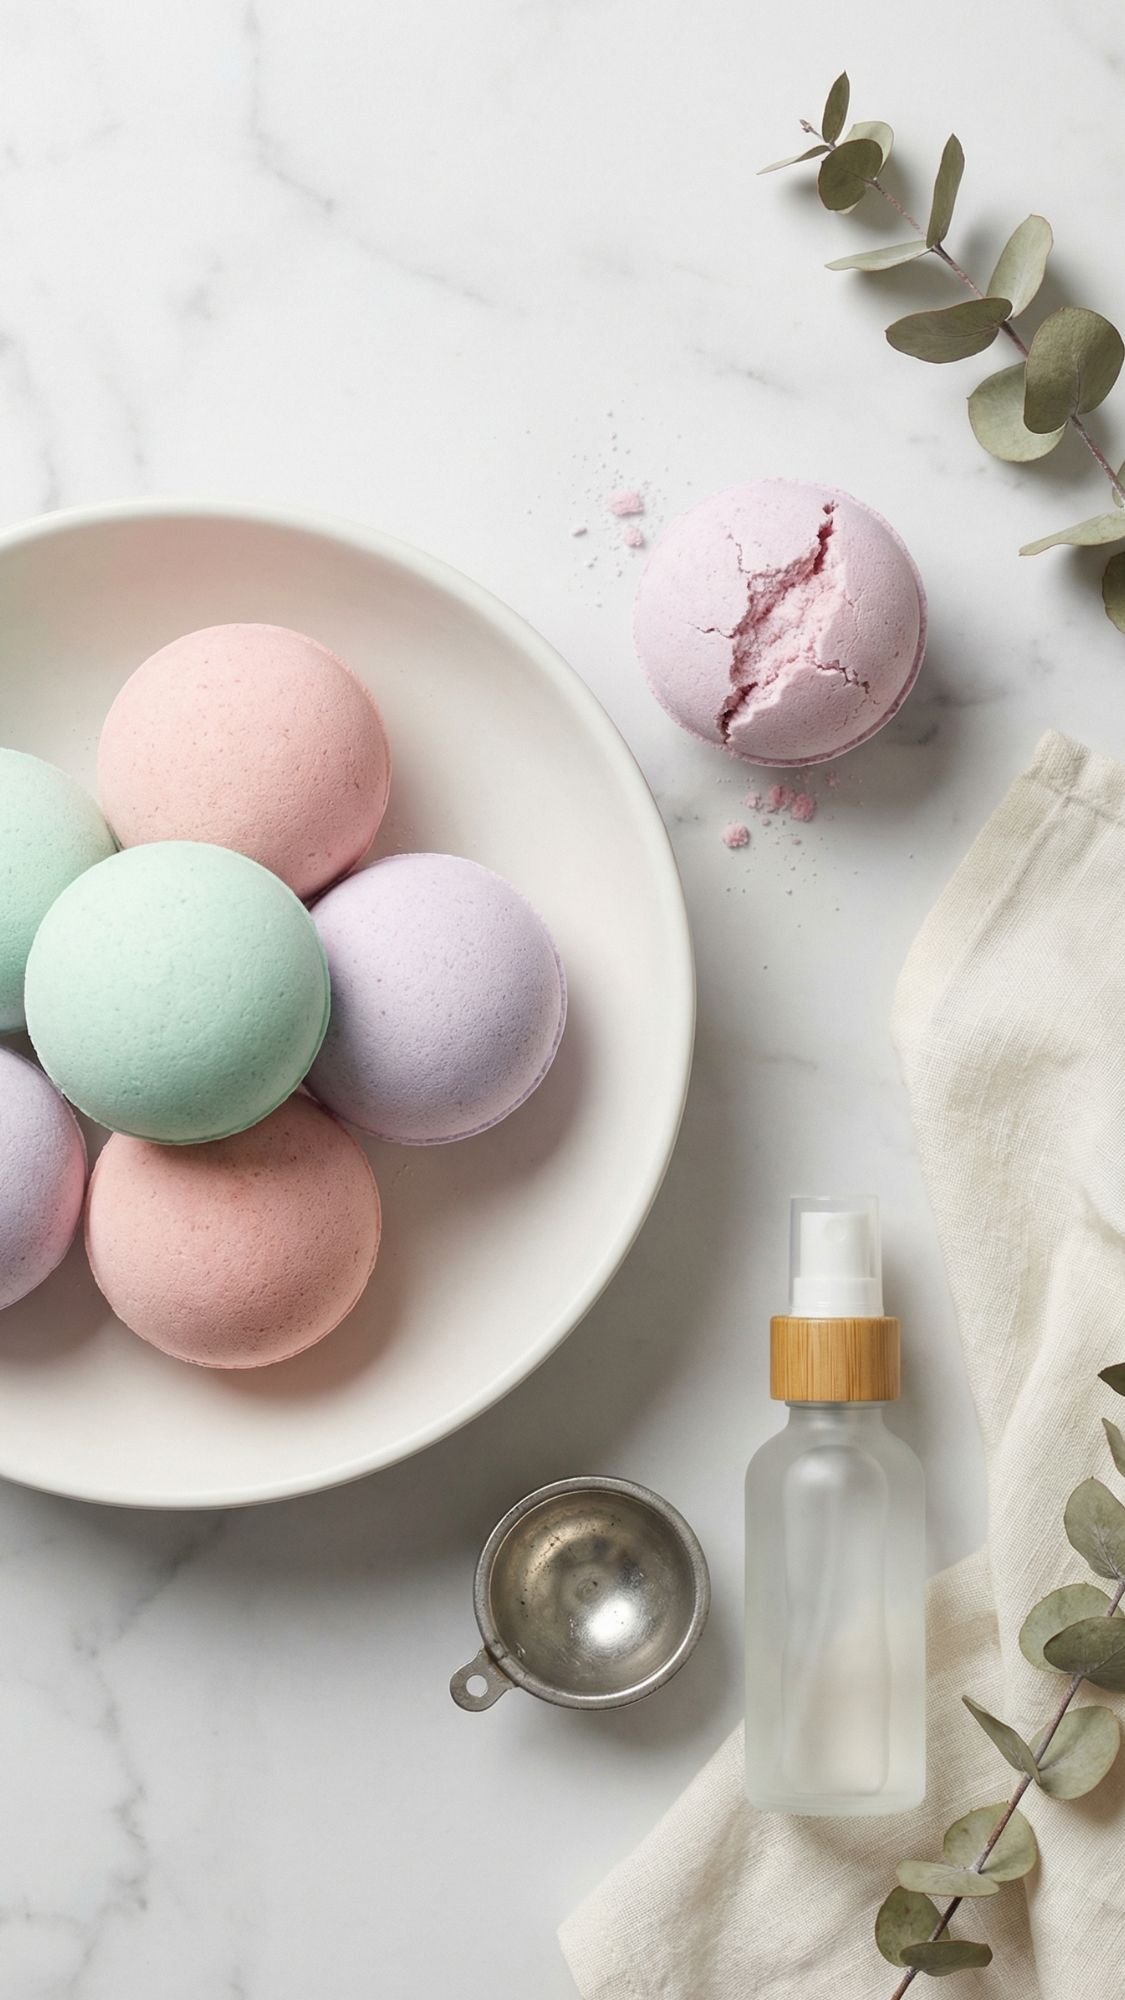
DIY Gift #14: Bath Bombs: Classic, but You’re Going to Do Them Right
Bath bombs are the drama queens of DIY spa gifts. When they behave, they’re gorgeous. When they don’t, they crack, crumble, expand, or turn into sad powder while you stand there like, “I followed the recipe??” So I’m giving you the version that actually works, plus the exact fixes when something goes sideways.
Why bath bombs still make an amazing gift
- They feel instantly “spa.”
- They’re fun, pretty, and satisfying.
- They make the whole gift box feel special.
Materials
- Baking soda
- Citric acid
- Cornstarch or kaolin clay (helps bind and slows reaction)
- Epsom salt (optional, can weaken structure if you use too much)
- Oil (small amount for skin feel, too much causes softness)
- Fragrance oil or essential oil
- Witch hazel or isopropyl alcohol in a fine mister (binder without triggering fizz like water)
- Bath bomb molds
- Optional: Polysorbate 80 (helps oils disperse, reduces greasy ring)
- Optional: mica (soap-safe/bath-safe)
The method I trust (no rushing, no chaos)
- Mix all dry ingredients until totally uniform. Break up every clump.
- In a small cup, mix your fragrance into your oil, then add Polysorbate 80 if you use it.
- Drizzle the oil mixture into the dry ingredients while whisking constantly.
- Mist your binder slowly, mixing between sprays. Stop when the mix holds shape like damp sand.
- Pack the molds tightly, overfill slightly, then press both sides together firmly.
- Let set, then unmold carefully. Cure in a dry place 24 to 48 hours.
Pro-Tips (aka how you avoid heartbreak)
- Humidity matters. If the air is humid, bath bombs take longer to cure and crack more easily.
- If your mix starts fizzing while mixing, you added liquid too fast. Stop, add a little dry mix, and slow down.
- Pack hard. Most crumbly bath bombs happen because people press gently like they’re handling a baby bird. Don’t.
Copy-paste “How to Use” card
“Drop 1 bath bomb into a full tub of warm water. Let it dissolve fully before entering for best slip and scent. Use within 3 to 6 months for strongest fragrance.”
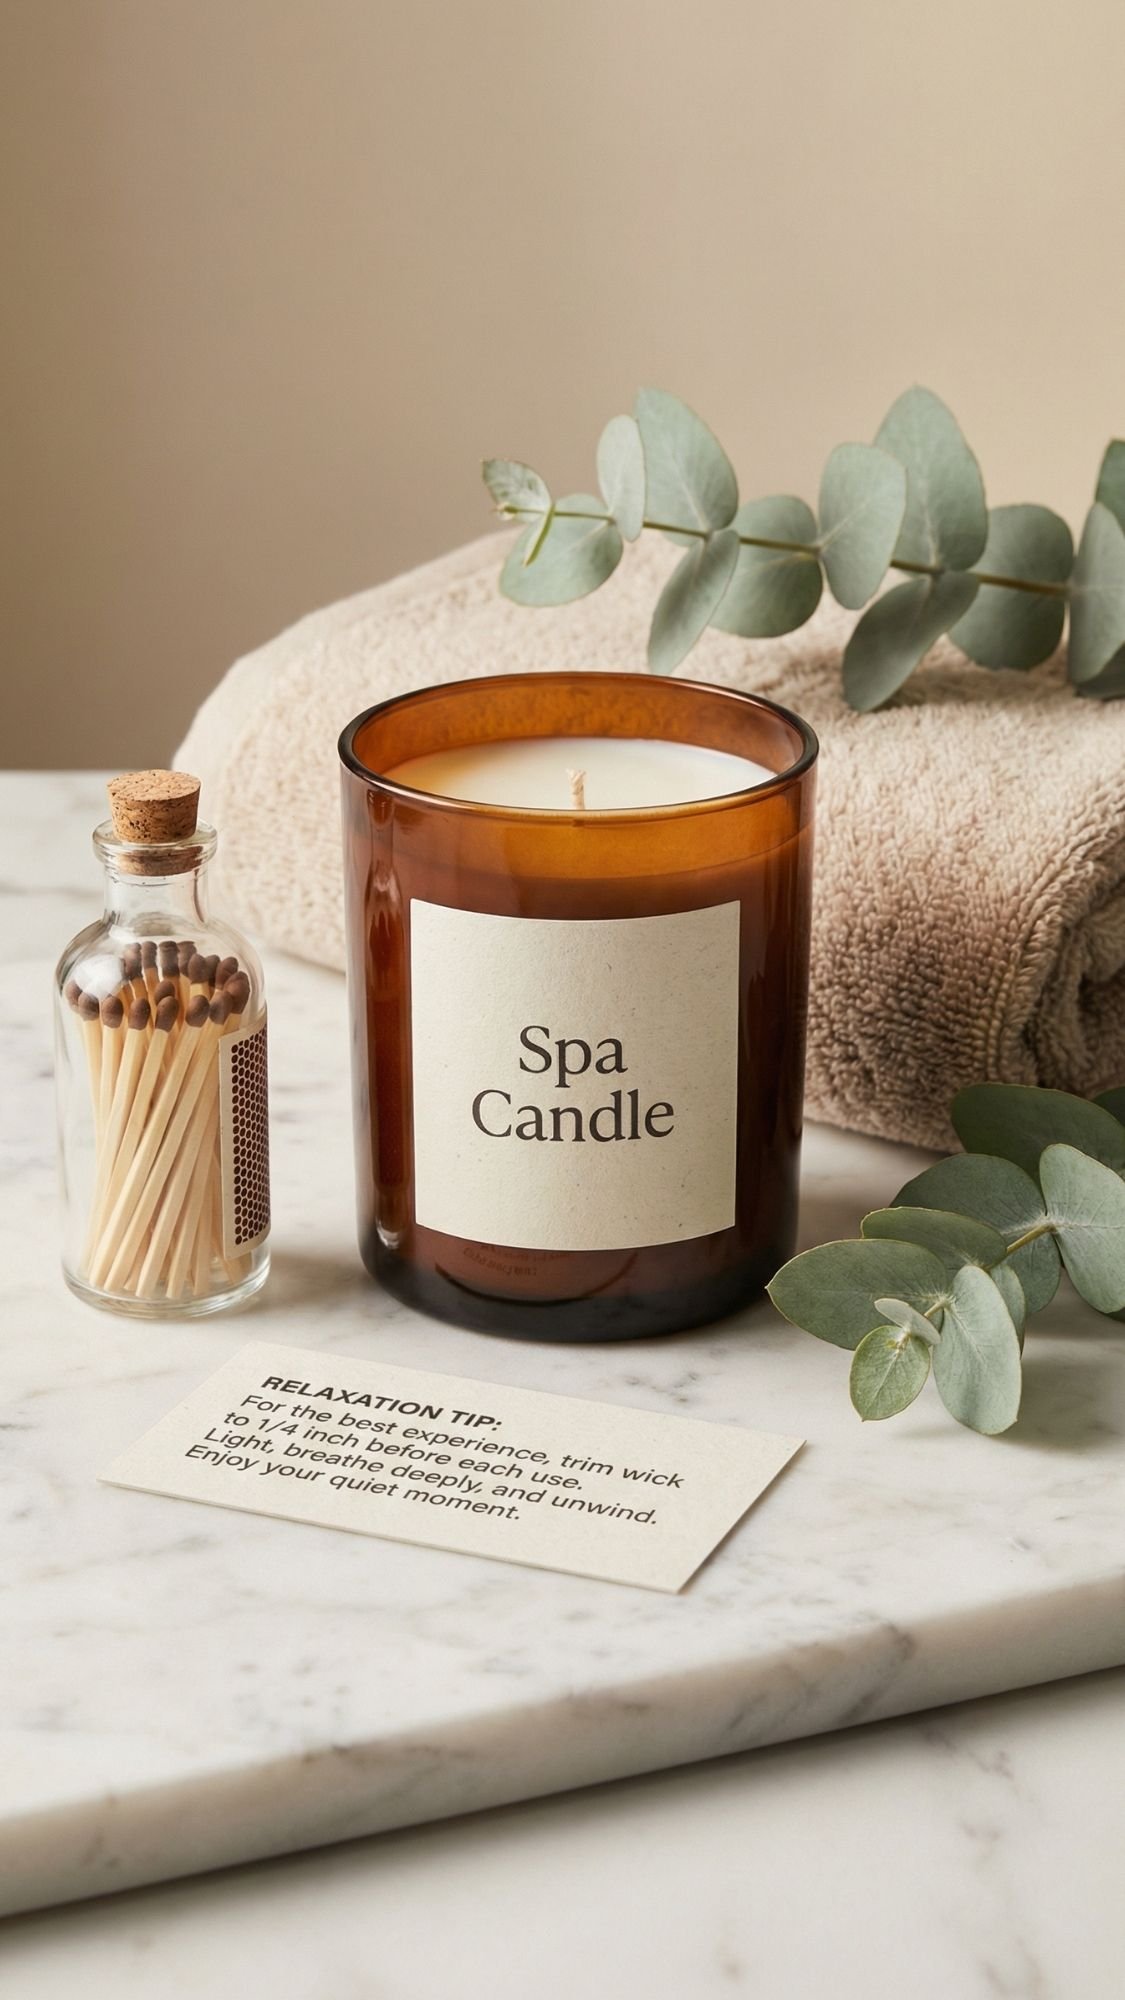
DIY Gift #15: Spa Candle: With a “Don’t Tunnel It” Tip Card
Candles are a classic spa gift for a reason. One flame and the whole room feels calmer. But here’s what makes your candle gift feel smarter than the average candle. You include a tiny tip card so Mom doesn’t end up with a sad tunnel candle after two burns. That little detail makes it feel curated and intentional.
You can DIY a full candle, or you can keep it simple by gifting a beautiful candle and adding your handmade touches like labels, matches, and a routine card. Either way, it fits perfectly in a spa box.
Why this belongs in a spa-day gift set
- It sets the mood instantly.
- It pairs with literally every other DIY in this post.
- It feels luxurious when you style it like a boutique item.
Option A: Easy “Curated” Candle Gift (fast and foolproof)
- A simple candle in an amber jar or neutral vessel
- A minimalist label or tag
- A match bottle or matchbox
- A tip card, so it burns clean
This option is perfect if you want zero pouring wax stress.
Option B: DIY Soy Candle (if you want to fully make it)
Materials
- Soy wax flakes
- Candle vessel (glass or ceramic)
- Wick + wick sticker
- Fragrance oil (candle-safe)
- Pouring pitcher
- Thermometer (helps consistency)
Basic method
- Melt wax slowly.
- Add fragrance at the right temperature for your wax type.
- Center wick, pour wax, and let it cure in a cool spot.
- Trim wick after setting.
Pro-Tips that make your candle gift feel high-end
- Keep scent calm and spa-like. Lavender, eucalyptus, soft vanilla, or clean linen vibes.
- Use a minimalist label and match the aesthetic of your other spa items.
- Include a tip card. That’s the whole flex.
Copy-paste “How to Use” card (the tunnel-prevention card)
“First burn matters. Let the wax melt to the edges (about 2 to 3 hours) to prevent tunneling. Trim wick to 1/4 inch before each burn. Never burn longer than 4 hours.”
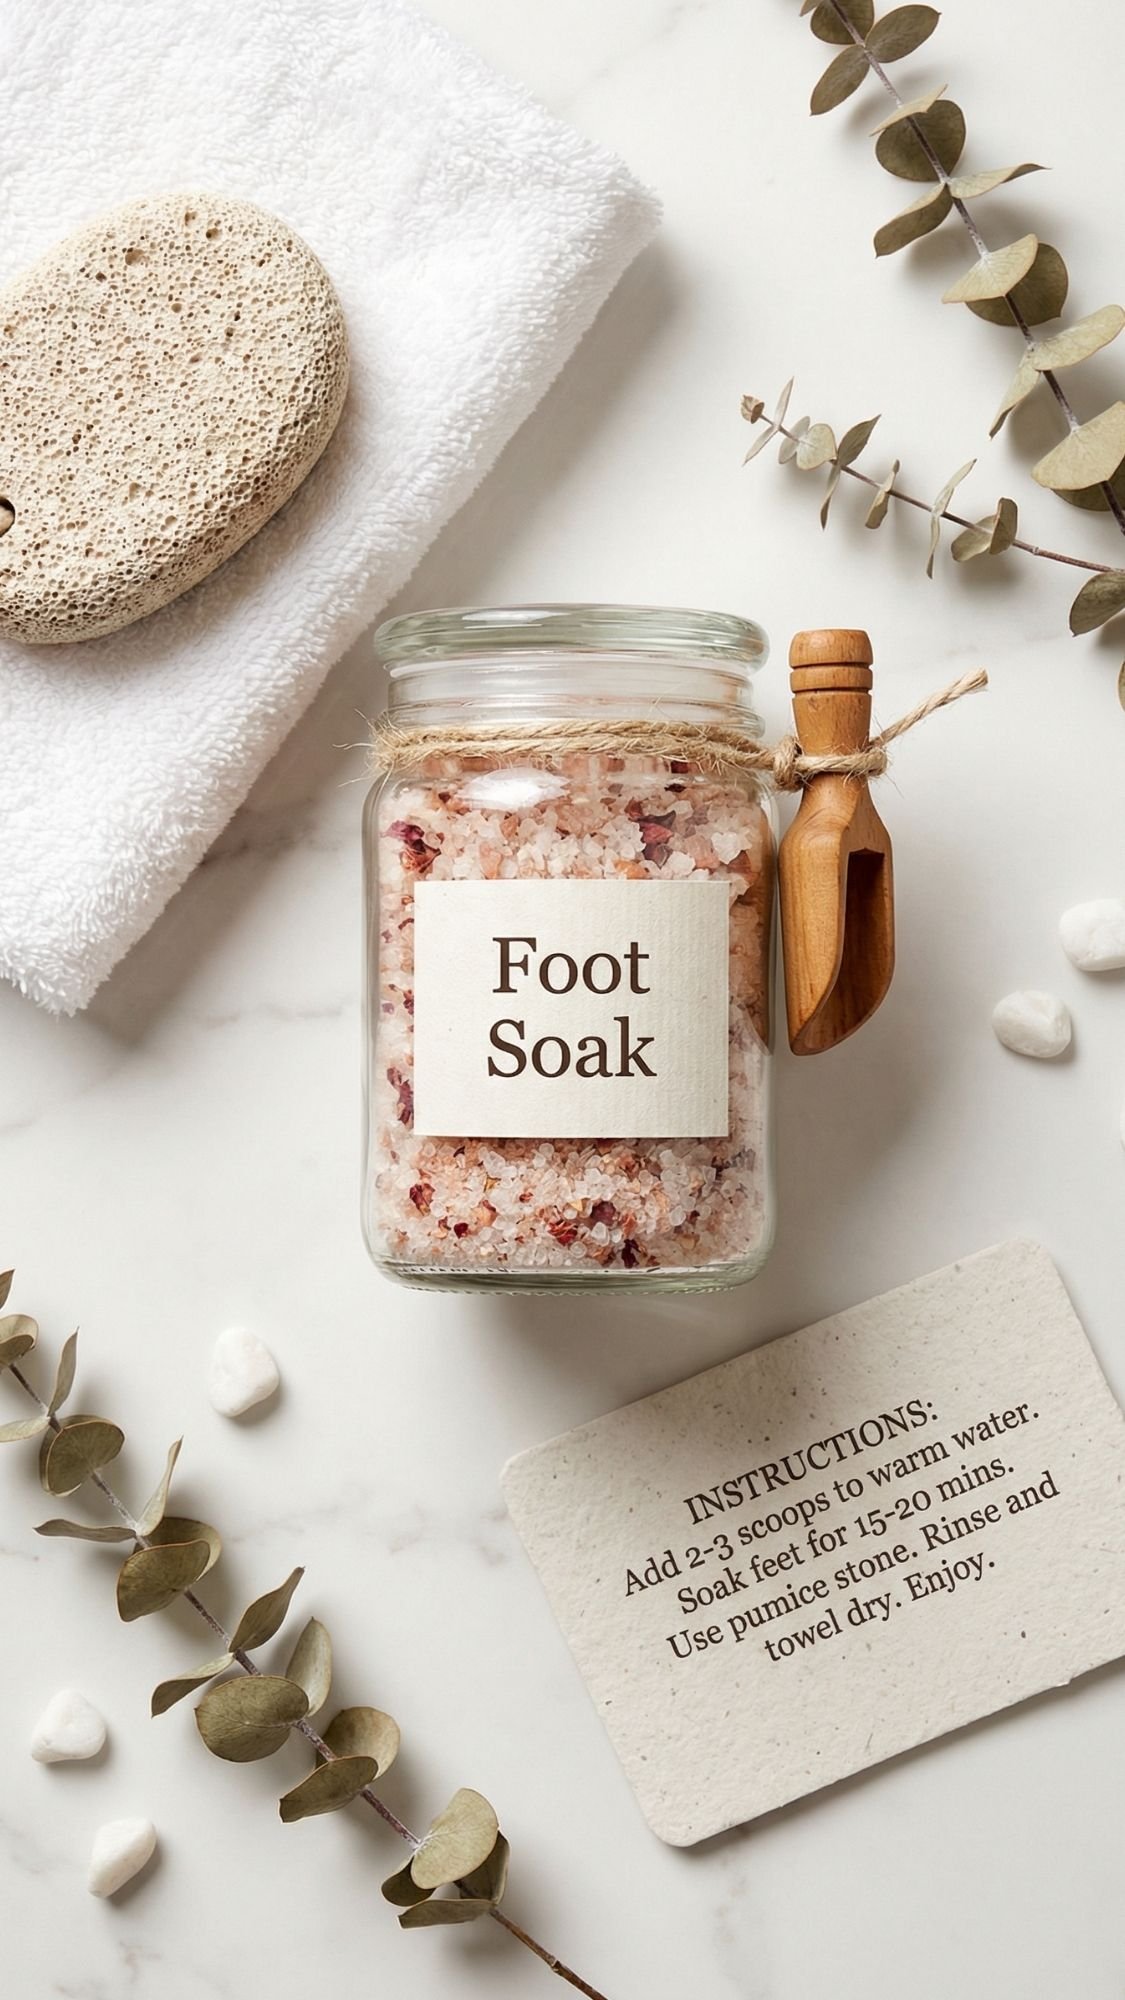
DIY Gift #16: Foot Soak Kit: The “I’ve Been On My Feet All Day” Saver
If Mom stands, walks, runs errands, chases kids, works long shifts, or just exists in a busy life, this gift hits. A foot soak feels like a tiny spa appointment she can do in 15 minutes, and it’s one of the easiest DIYs to make look expensive.
Why this is such a good spa-day-at-home gift
- It feels instantly soothing and practical.
- It works even if Mom never takes baths.
- It pairs perfectly with a lotion bar and a candle.
Materials
- Epsom salt (classic soak base)
- Baking soda (optional, softens the water feel)
- Dried peppermint or mint tea (optional)
- Optional: essential oil (peppermint or lavender, go light)
- Jar or pouch
- Wooden scoop
- Add-ons that make it feel deluxe:
- Pumice stone
- Mini lotion bar
- Soft socks (if you’re building a bigger kit)
How to assemble it so it looks boutique
- Mix salts and baking soda in a bowl until evenly blended.
- If you use dried herbs, either add a tiny amount or package them in a muslin sachet so cleanup stays easy.
- If you add essential oils, blend them into a small portion of salt first, then mix into the full batch.
- Pack into a jar, wipe the rim clean, add scoop, label it.
Pro-Tips (so it feels good, not irritating)
- Keep peppermint light. Too much can feel intense fast.
- If Mom has sensitive skin, skip essential oils and let the soak do the work.
- If you add herbs loose, Mom will have bits stuck to the tub. Sachet is the move.
Copy-paste “How to Use” card
“Fill a basin with warm water. Add 1 to 2 scoops and stir to dissolve. Soak feet 10 to 15 minutes. Pat dry, then apply lotion. Keep jar dry between uses.”
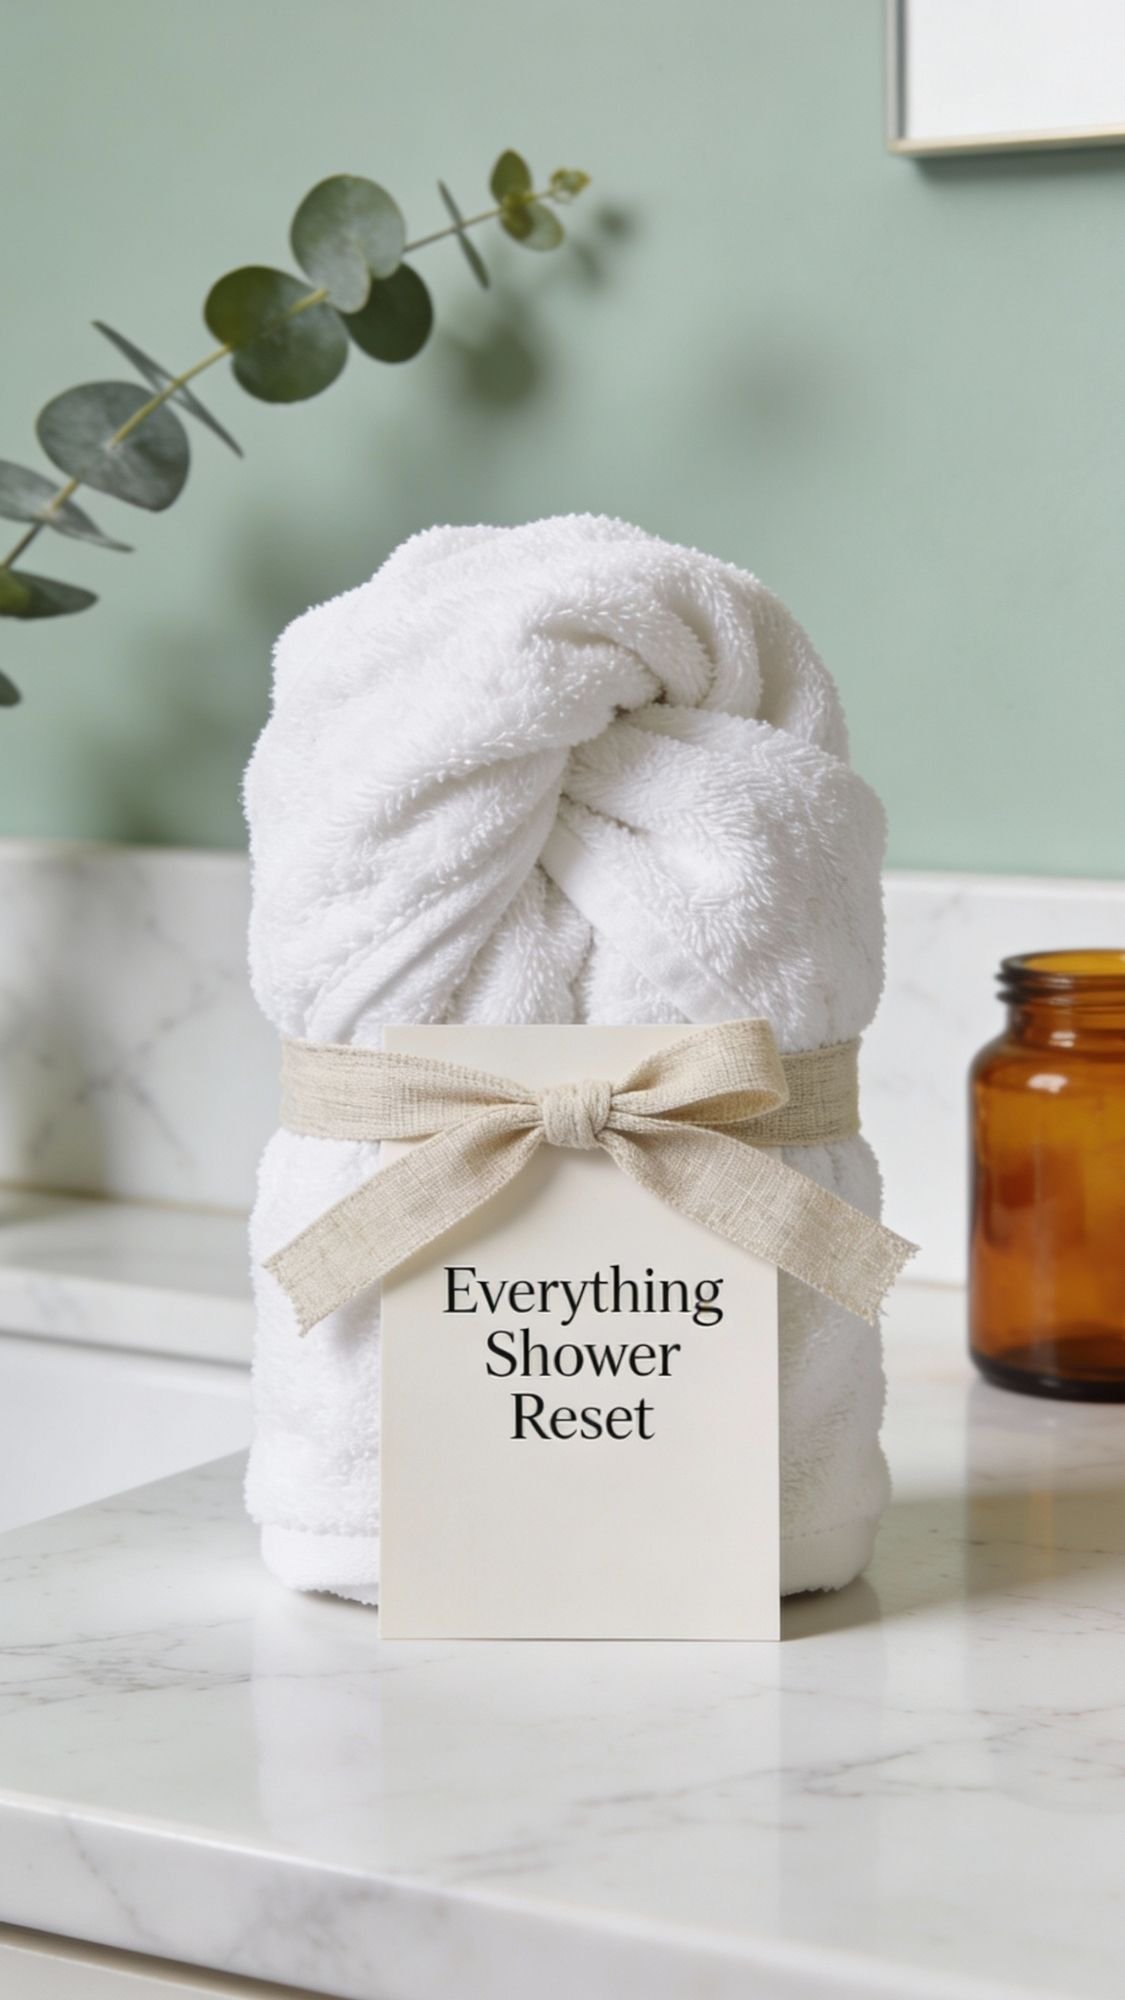
DIY Gift #17: Hair Wrap Towel + “Everything Shower” Routine Card (Ritual in 2 Minutes)
This one sounds almost too simple, but it’s sneaky powerful. A hair wrap towel turns a regular shower into a routine. Mom washes her hair, wraps it up, and suddenly she’s in her spa era. The real magic is the routine card. It makes the whole gift feel intentional, not like you grabbed a towel and hoped for the best.
Why this is a great spa gift
- It’s useful and gets used constantly.
- It pairs perfectly with steamers, scalp scrub, and lotion bars.
- It turns “shower time” into “me time.”
What you need
- Hair wrap towel (microfiber or soft terry)
- Minimal tag or label
- Everything Shower routine card
- Optional add-on: shower steamers or scalp scrub
How to package it so it looks boutique
- Fold the towel cleanly like a store display.
- Wrap with a belly band label or a ribbon tied in a simple knot.
- Slide the routine card under the ribbon so it’s visible.
Pro-Tips (this makes it feel premium)
- Stick to neutral colors or one accent color that matches your other spa items.
- Include a routine that feels realistic. Mom does not need a 14-step plan unless she asked for it.
- Add one line that gives permission to keep it short. That’s the gift.
Copy-paste “Everything Shower” Routine Card (short and actually doable)
“Everything Shower Reset”
- Dry brush, 1 minute
- Shower steamer in the corner
- Scalp scrub, 30 to 60 seconds
- Rinse, shampoo, condition
- Sugar scrub cube on arms and legs
- Hair wrap towel on
- Lotion bar or body oil after
Optional line at the bottom: “Do steps 2, 4, and 7 if you’re tired. It still counts.”
DIY Gift #18: DIY Spa Headband: No-Sew or Simple Sew, Cute and Actually Useful
A spa headband is one of those small gifts that gets used constantly if Mom does skincare, masks, or even just washes her face at night. It also makes the whole spa box feel more complete. Like, “Oh, she thought of everything.” And you don’t need a fancy sewing setup to make this look clean and boutique.
Why this is a great spa add-on
- It’s practical, not just decorative.
- It looks expensive when you choose the right fabric.
- It pairs perfectly with mask powder, gua sha, or lip balm.
Materials (pick your level)
No-sew option
- Soft stretch fabric (microfiber, terry, or jersey)
- Velcro dots or a wide Velcro strip
- Fabric glue (strong, flexible)
- Optional: a small tag or label
Sew option
- Soft stretch fabric
- Elastic
- Sewing machine or hand stitch supplies
How to make it (no-sew version that still looks professional)
- Cut a strip of soft fabric wide enough to fold over and still feel plush.
- Fold it, glue along the long edge, and press firmly.
- Turn it inside out so the seam hides.
- Add Velcro at the ends so it closes snugly but comfortably.
- Let the glue cure fully before packaging.
Pro-Tips (so it doesn’t scream “I made this in 7 minutes”)
- Use plush fabric. Thin fabric looks homemade fast.
- Hide seams or keep them clean and straight.
- Add a minimalist tag. One tiny tag makes it feel store-bought.
- If you want it extra luxe, include a matching wash cloth or mini towel.
Copy-paste “How to Use” card
“Use to keep hair back during skincare or masking. Hand wash or gentle cycle. Air dry for best shape.”
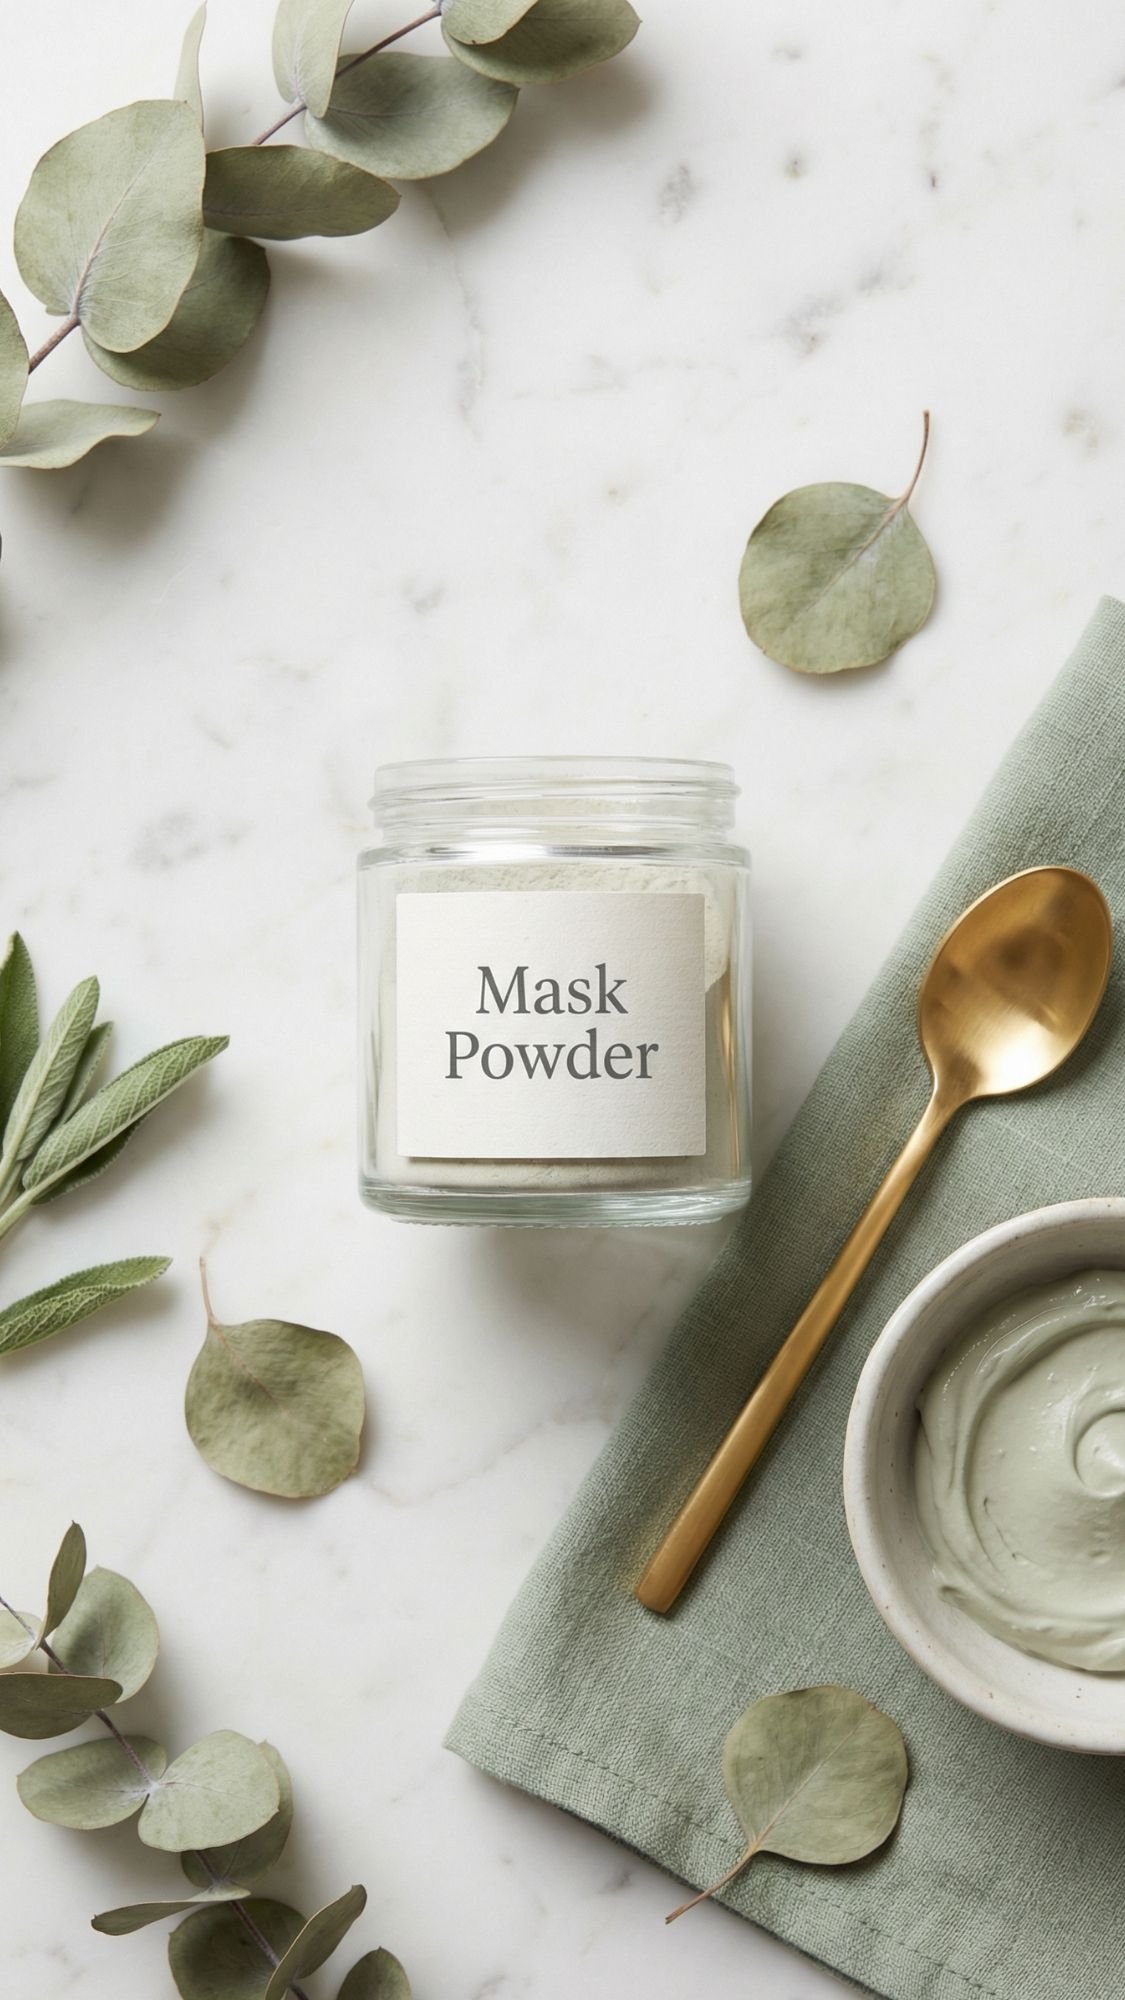
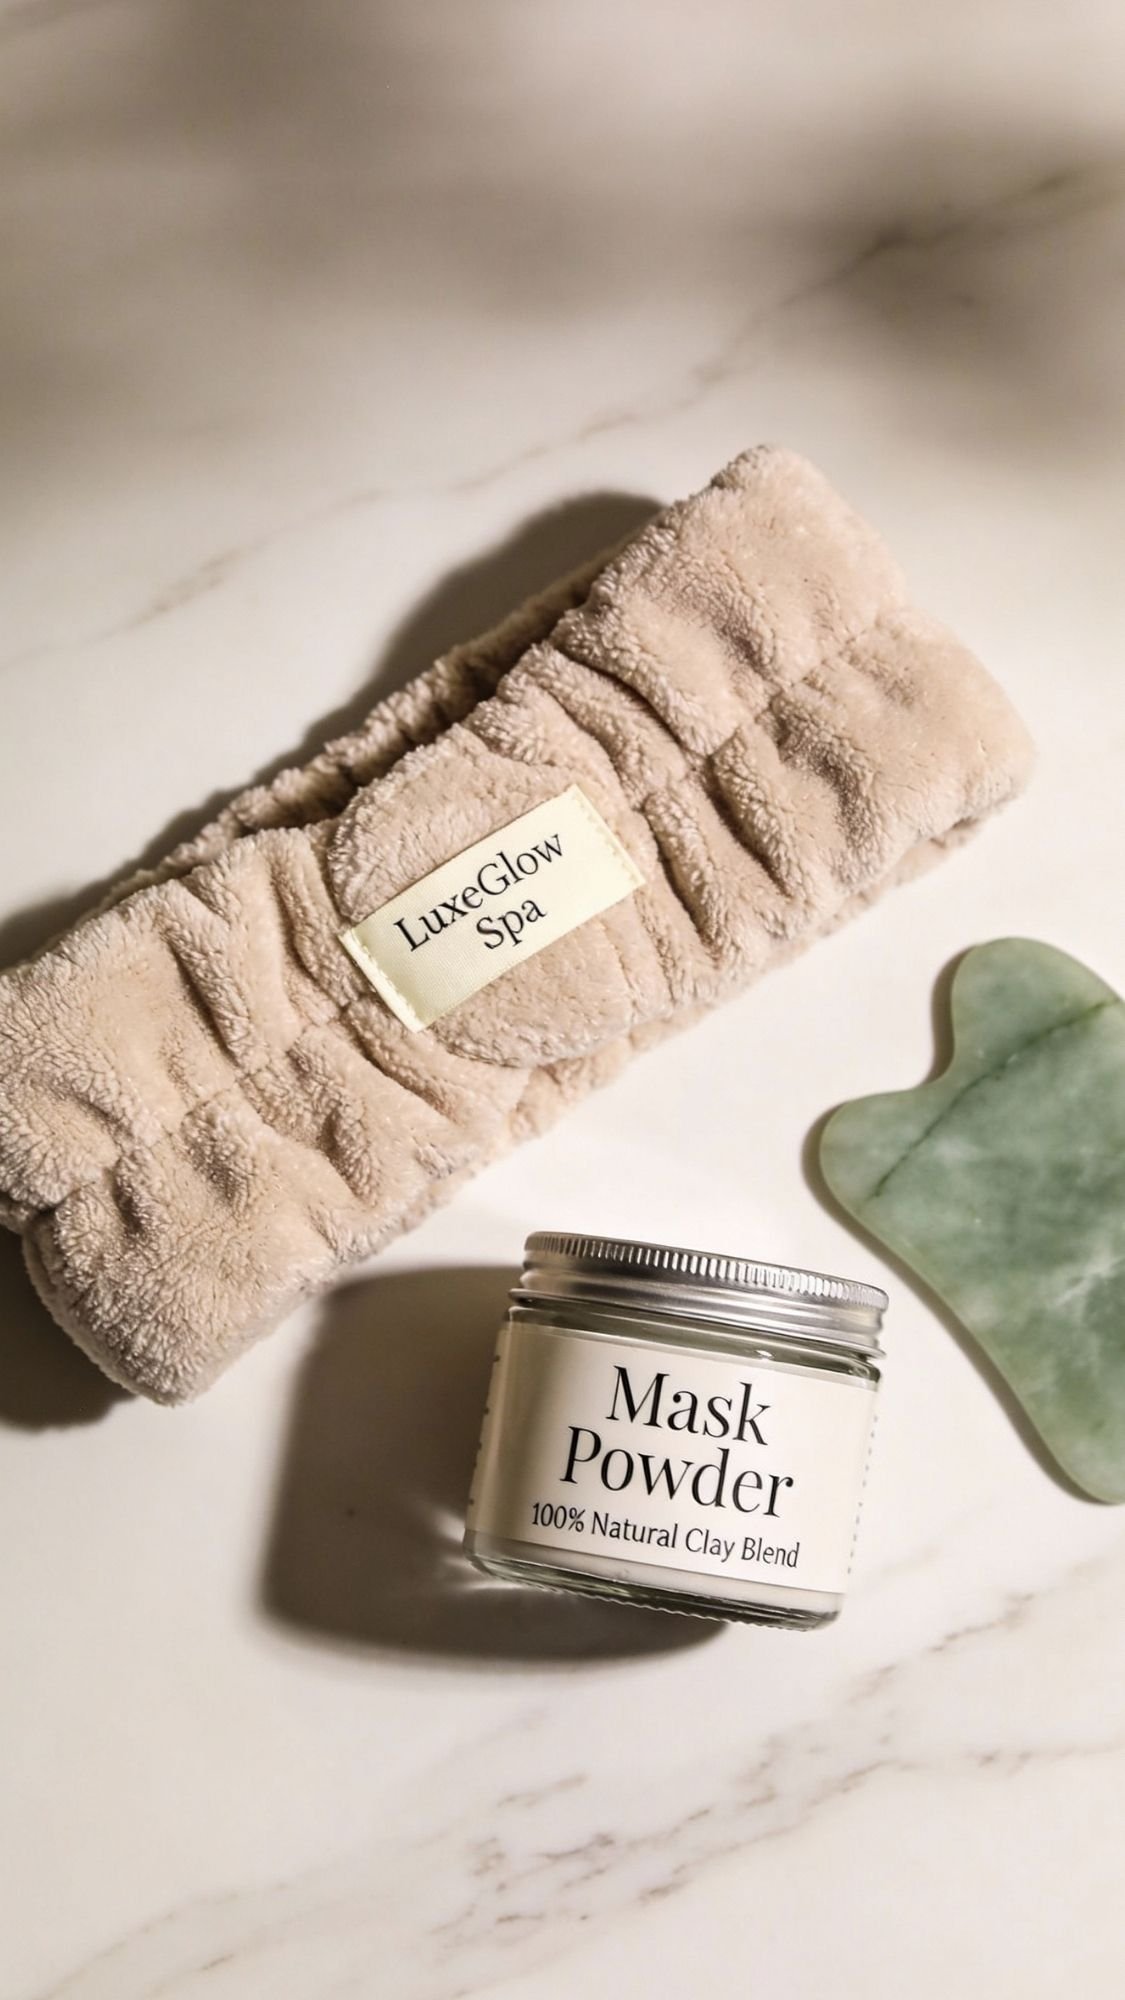
DIY Gift #19: Face Mask Powder Jar (Just Add Water, Use Fresh)
This is my favorite way to gift “skincare” without creating a product that can spoil. Powder masks feel fancy, they’re easy to store, and Mom mixes a fresh little batch when she’s ready. It’s basically the safest way to gift a face mask without getting into preservatives, emulsions, and heartbreak.
Why this works as a DIY spa gift
- It feels like a high-end skincare ritual.
- It stores well because it’s dry.
- Mom controls the texture every time she mixes it.
Materials
- Clay (kaolin for gentle, bentonite for stronger oil control)
- Colloidal oatmeal (soft, soothing feel)
- Optional: powdered botanicals (keep it gentle and skin-safe)
- Small jar with lid
- Tiny spoon
- Label + mixing instructions card
How to assemble it so it mixes smoothly
- Sift or whisk the powders together to break up clumps.
- Spoon into a clean, dry jar. Wipe the rim and seal tightly.
- Add a tiny spoon and label it clearly.
- Include a mixing guide so Mom doesn’t guess.
Pro-Tips (so it feels luxe and not dusty)
- A common mistake beginners make is skipping the sifting. Then the mask mixes lumpy and feels annoying. Break up clumps before they ever hit the jar.
- Keep botanicals minimal. Too many “extras” can irritate skin.
- Make the label simple and clean, and include a “use within” note.
Copy-paste “How to Use” card
“Mix 1 teaspoon powder with 1 to 2 teaspoons water until smooth. Apply a thin layer. Leave on 5 to 10 minutes, do not let it fully crack dry. Rinse and moisturize. Keep jar dry.”
Optional line if you want it extra thoughtful:
“Sensitive skin? Mix with water only and keep time closer to 5 minutes.”
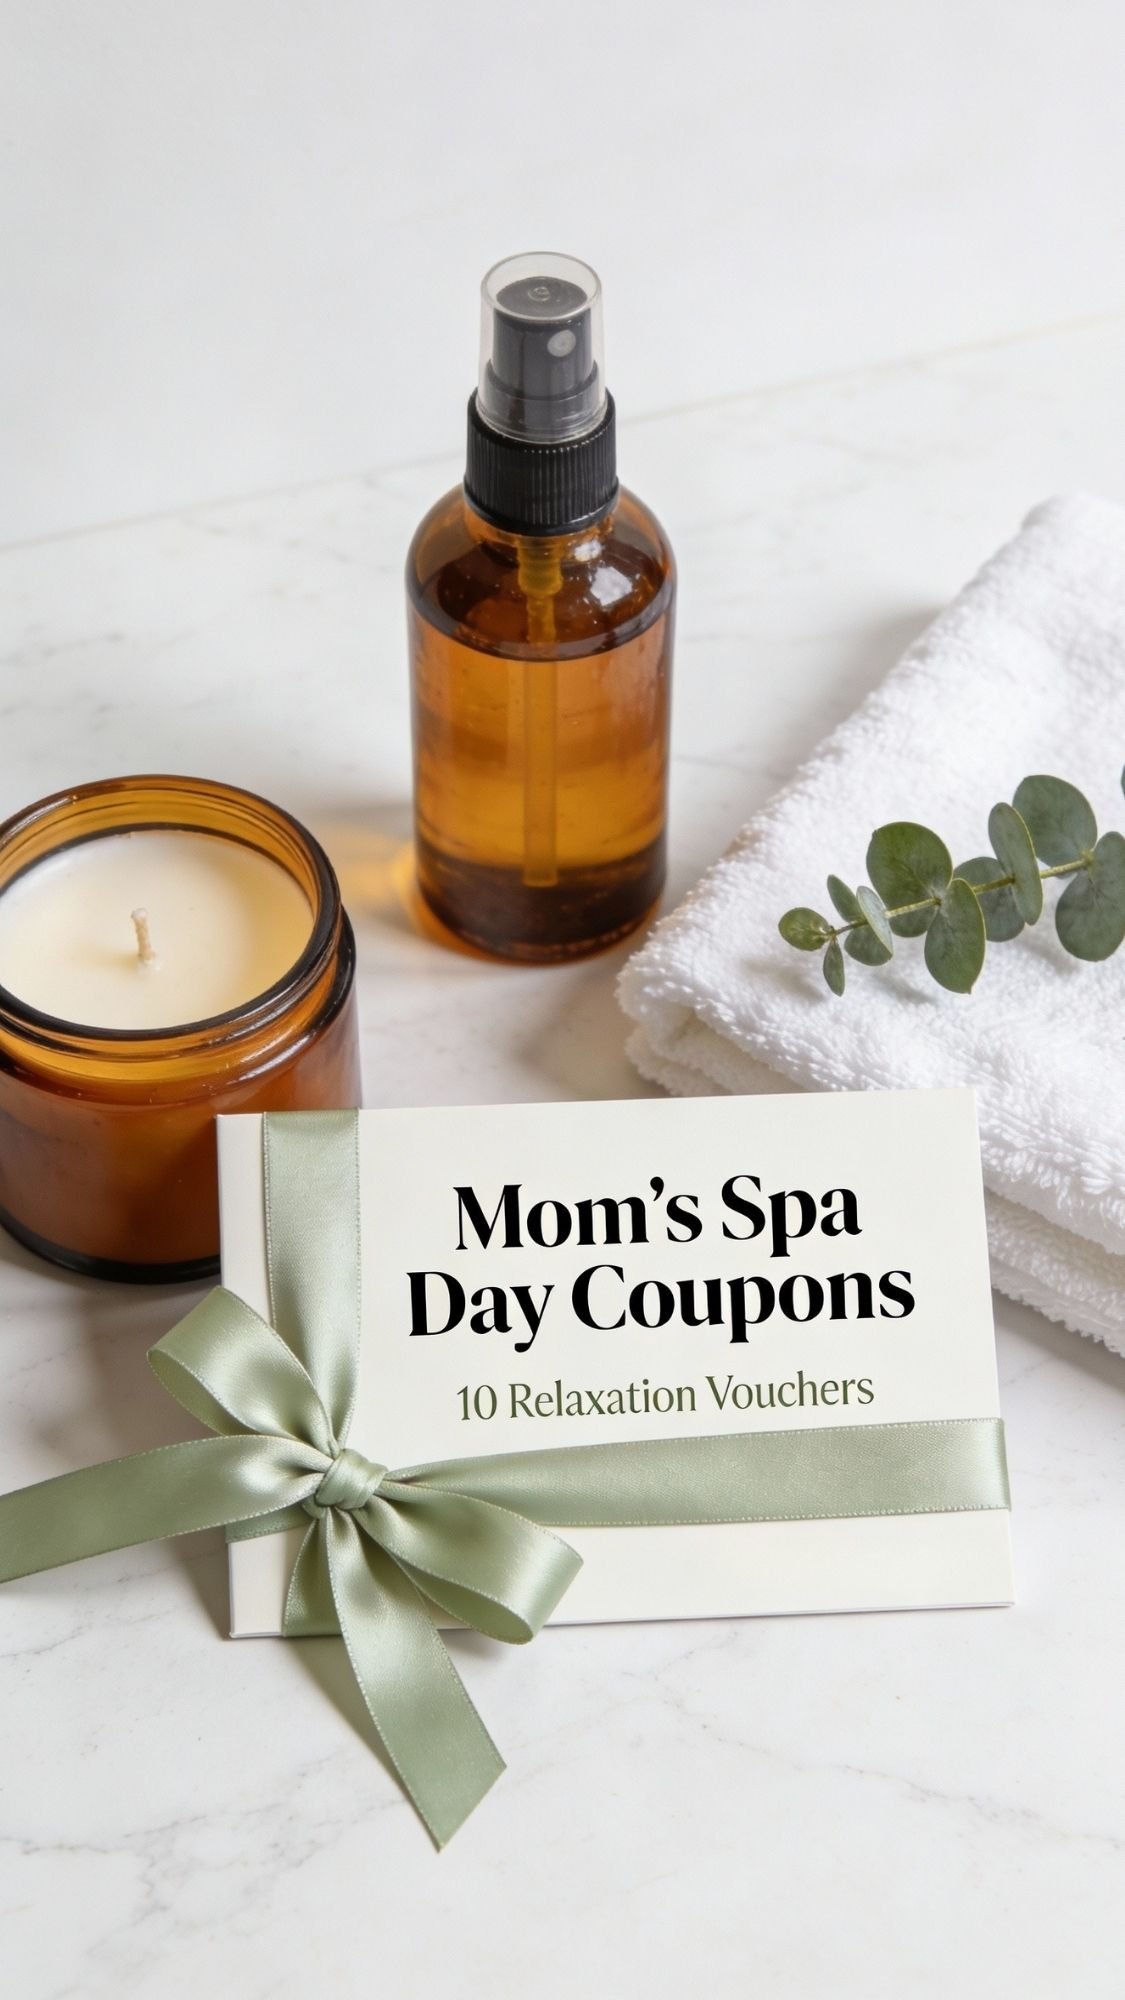
DIY Gift #20: Printable Spa Coupon Book: The Gift That Forces Rest, In the Best Way
This might be the most meaningful gift in the whole list because it doesn’t just look cute. It actually gives Mom time. And IMO, time is the real luxury. A coupon book also works as the perfect add-on when you’re gifting physical spa items, because it turns them into an actual plan.
Because let’s be honest, Mom can own a linen spray and a candle and still never get a break. The coupon book is your way of saying, “No, you’re doing the spa day. I’m handling the world for a minute.”
Why this gift is a winner
- It guarantees she uses the spa items.
- It feels personal, thoughtful, and real.
- It costs almost nothing but feels priceless.
What to include in the coupon book
Pick 8 to 12 coupons. Keep them specific, not vague.
Spa-day coupons that moms actually want
- “30 minutes alone, no questions asked”
- “I handle dinner tonight”
- “Laundry gets folded by someone else”
- “I clean the kitchen while you soak”
- “Phone on DND, I’m in charge”
- “Quiet house for 1 hour”
- “Foot soak setup, I’ll bring the towel”
- “Movie night, you pick, I don’t complain”
- “Breakfast in bed”
- “I’ll run the errands”
- “Bedtime handled”
- “You take a nap, I guard the nap”
How to make it look boutique, not like a school worksheet
- Print on thicker cardstock if you can.
- Cut evenly using a paper cutter for clean edges.
- Punch one hole and tie with ribbon, or staple neatly with a clean cover page.
- Add a minimalist title like “Mom’s Spa Day Coupons.”
Pro-Tips
- Add one “big coupon” and one “tiny easy coupon.” The big one feels generous, and the easy one gets redeemed quickly so she starts using it.
- If you’re gifting to a new mom, add coupons like “I hold the baby while you shower” and “I handle bedtime.” Those hit different.
Copy-paste Cover Text
“Redeem anytime. No guilt. No expiration. You deserve this.”
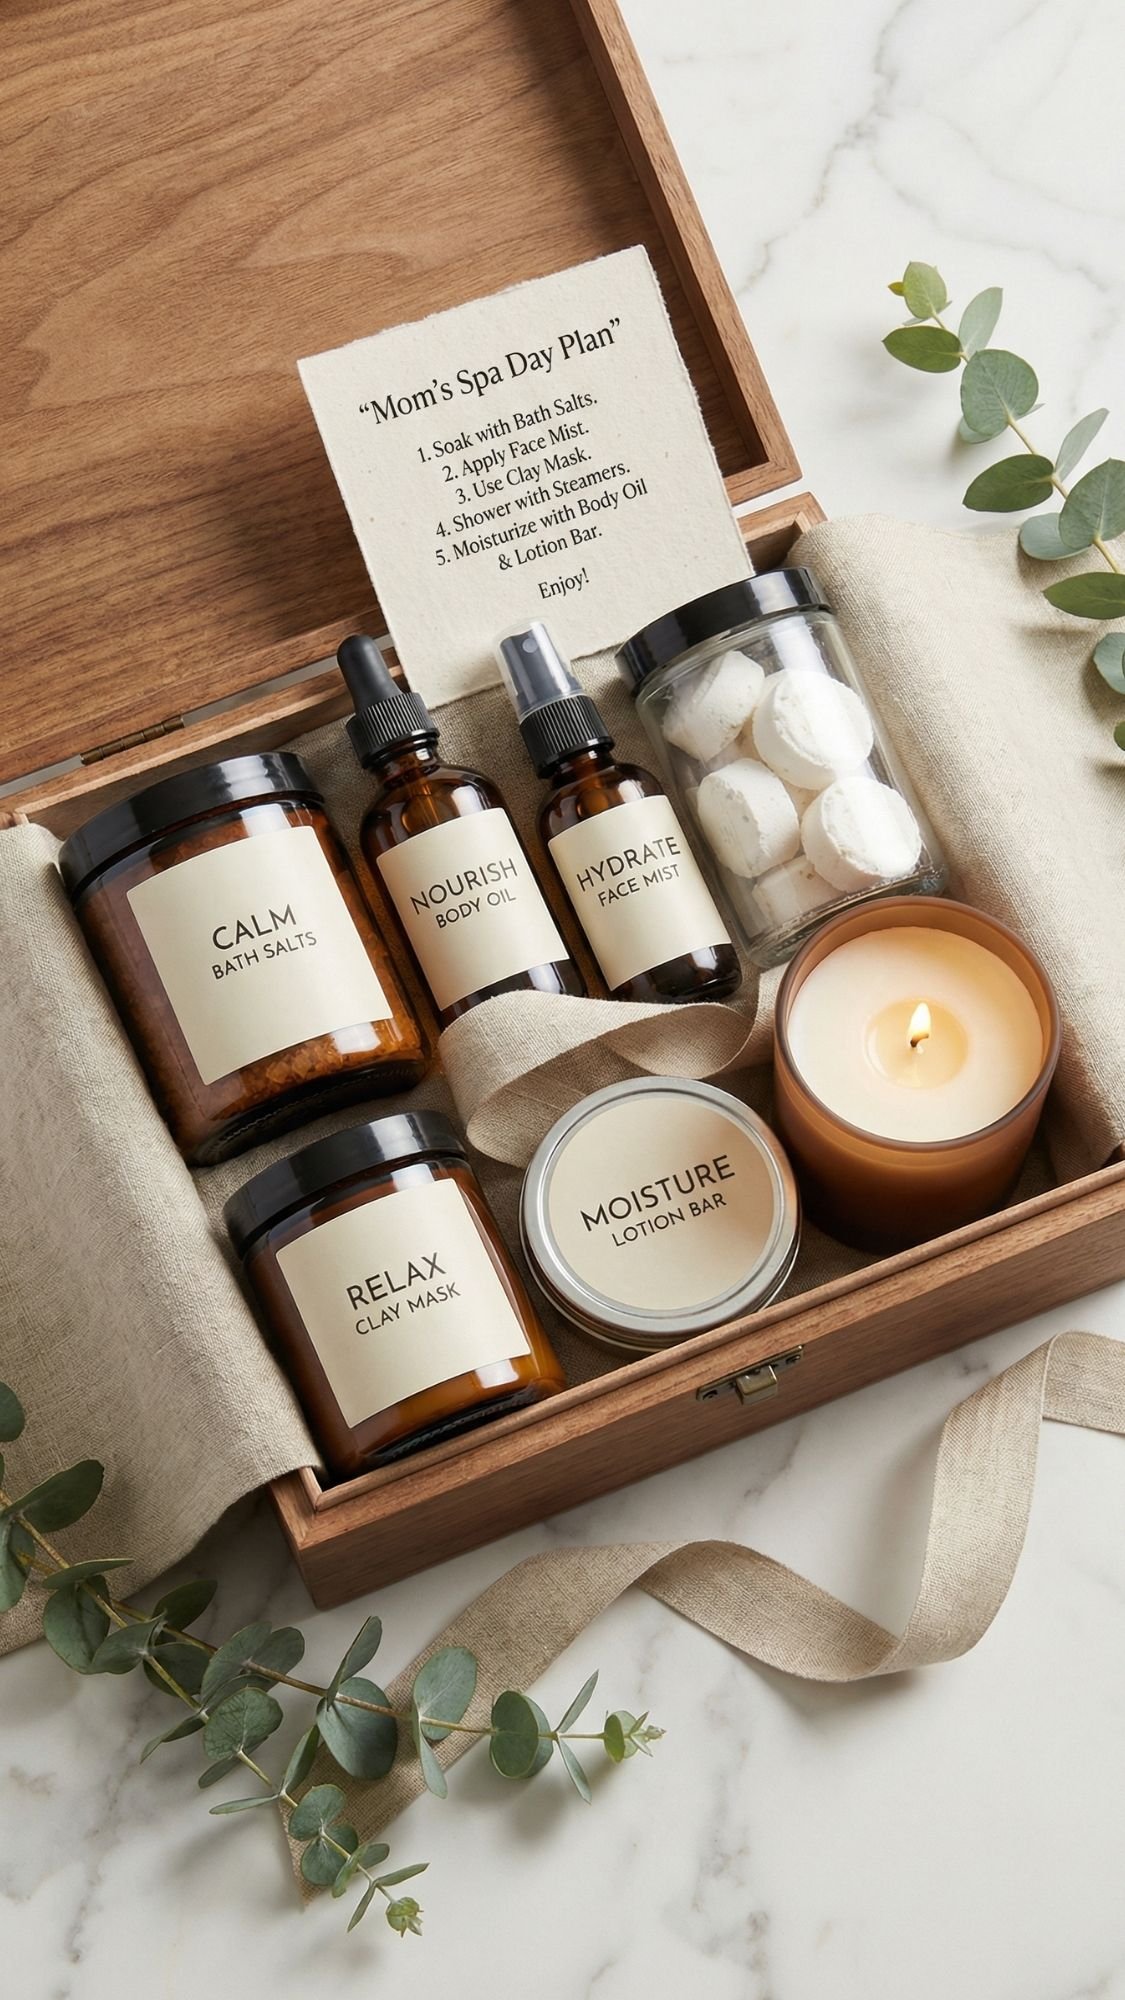
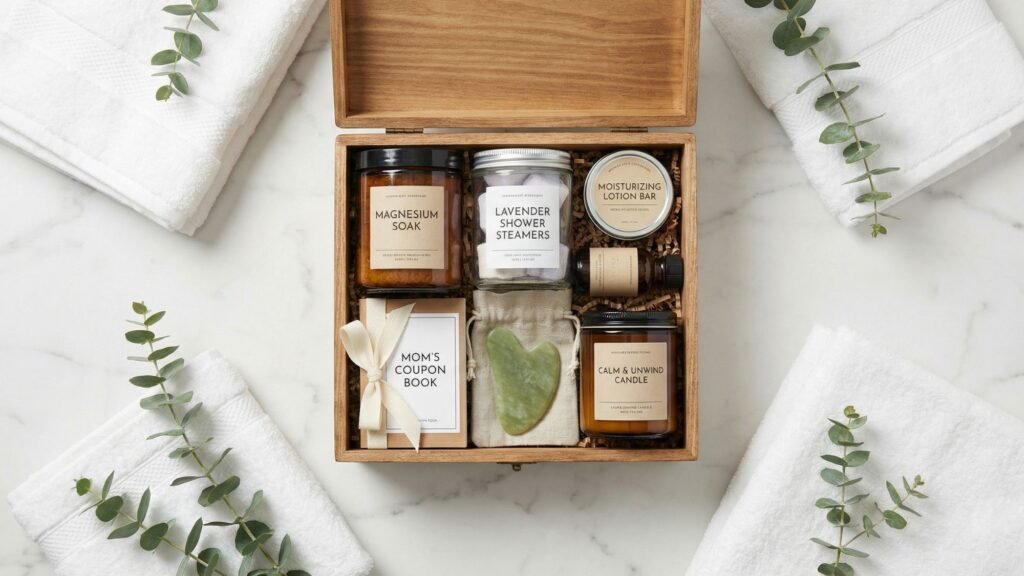
DIY Gift #21: The Full “Spa Day At Home” Box Assembly (Make It Look Boutique-Level)
This is where everything comes together. You can make the best DIY items in the world, but the box is what makes Mom open it and go, “Oh my gosh.” The goal is a gift that feels curated, cohesive, and easy to use. Not a random collection of jars.
The simplest box formula (works every time)
Pick:
- 1 scent hero (sets the mood)
- 1 body treat (the main “spa” item)
- 1 comfort add-on (the cozy factor)
- 1 instruction card (the pro touch)
Here are some easy combos:
Everything Shower Reset Box
- Shower steamers
- Sugar scrub cubes
- Lotion bar
- Hair wrap towel + routine card
Bath Night Box
- Magnesium soak jar
- Bath tea sachets
- Candle
- Coupon book (optional but powerful)
Face and Chill Box
- Mask powder jar
- Lip balm trio
- Gua sha set
- Cooling eye mask gift
How I make it look expensive in 10 minutes
- Choose one color story
- Modern spa: cream, sage, black
- Boho botanical: sand, olive, terracotta
- Glam spa: blush, gold, deep brown
- Use matching containers
Even if they’re different shapes, match the vibe:
- Amber jars and bottles, black lids
- Clear jars with cream labels
- Metal tins with minimalist labels
- Add filler that looks clean
- Shredded kraft paper
- White crinkle paper
- Tissue paper in neutral tones
- Include one instruction card on top
This is the “boutique unboxing” moment.
Title options:
- “Mom’s Spa Day Plan”
- “Tonight’s Reset Ritual”
- “Spa Night, No Guilt Allowed”
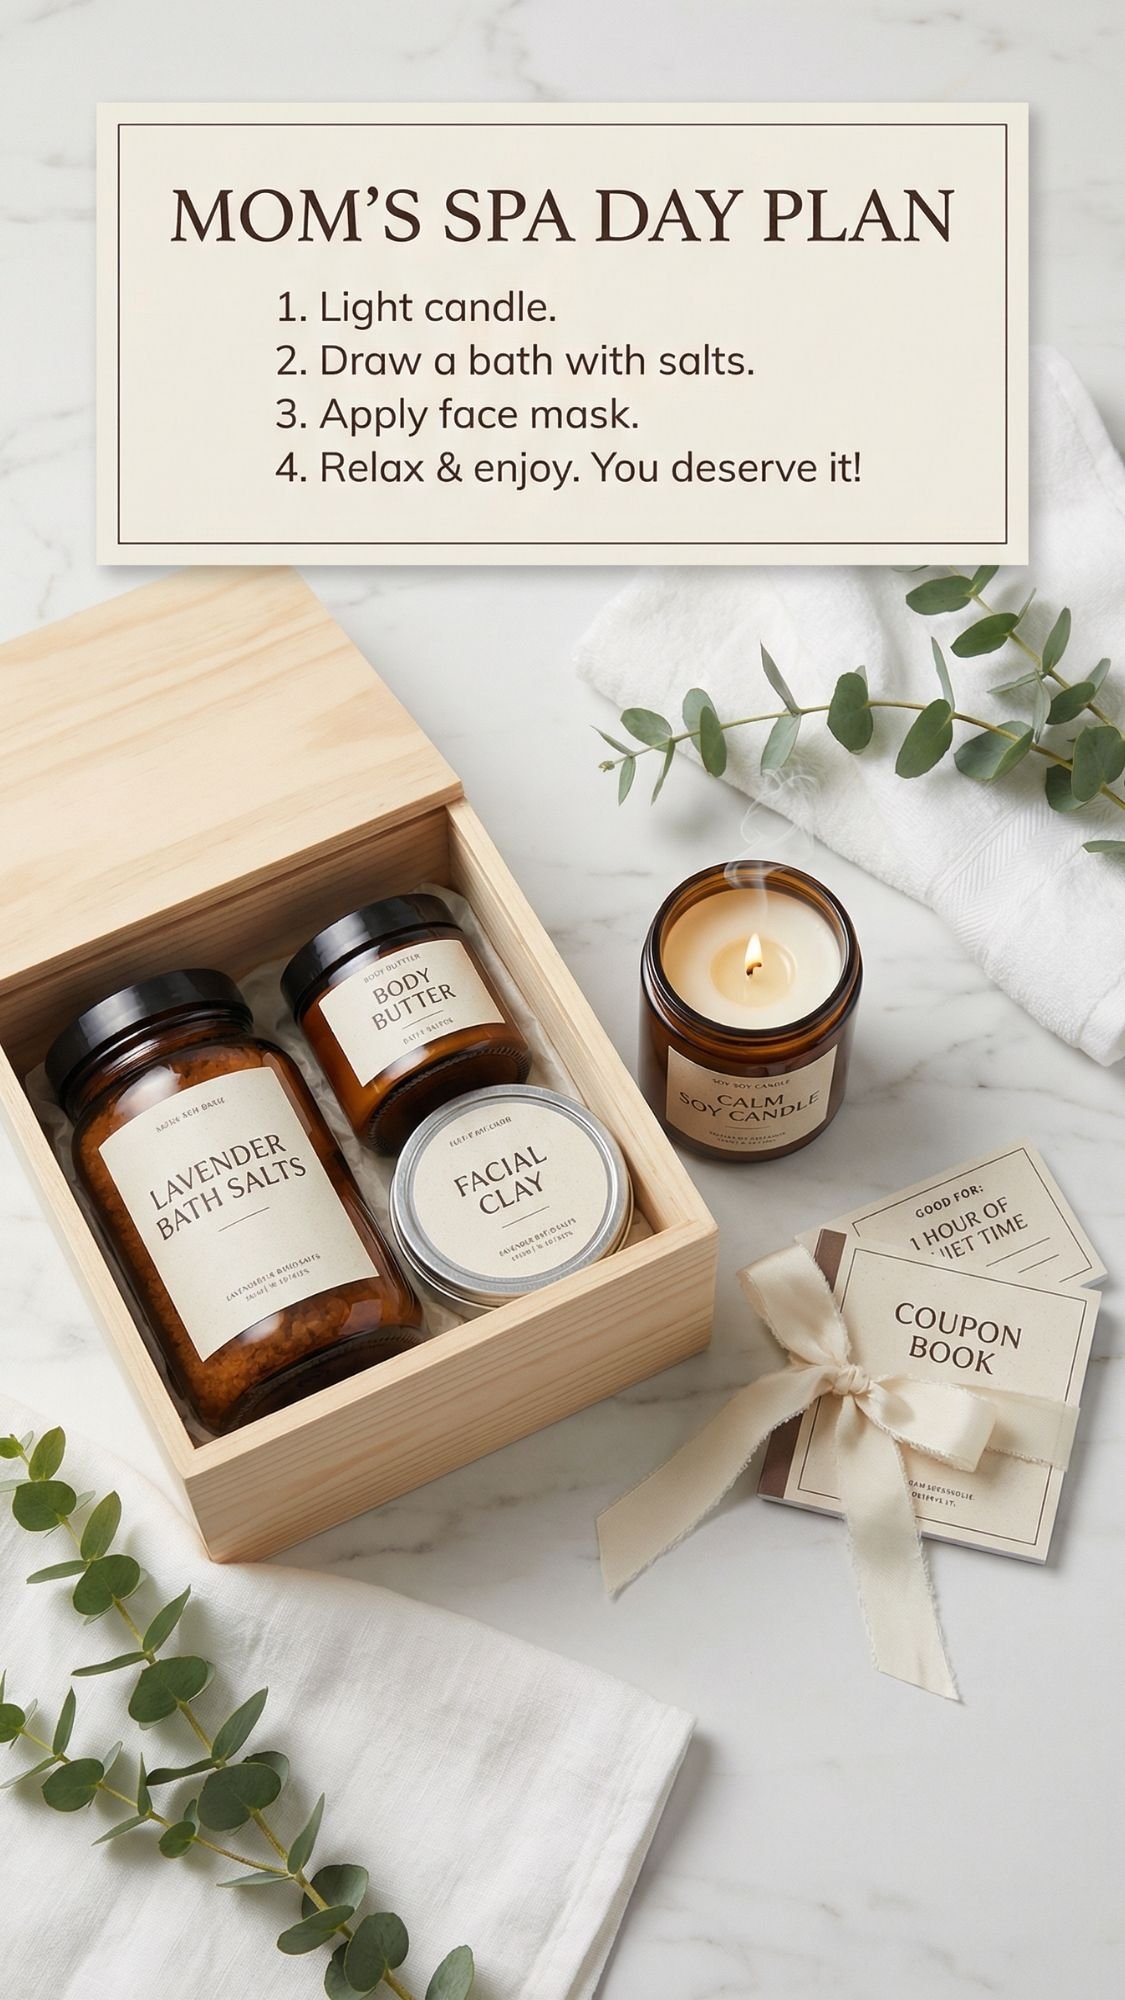
The instruction card template (copy-paste)
“Mom’s Spa Day At Home”
- Light the candle. Put your phone on DND.
- Use the steamer or start your bath soak.
- Scrub, rinse, and moisturize.
- Finish with lip balm and a cozy moment.
- Redeem one coupon and relax like you mean it.
Optional line: “This is your reminder, rest counts.”
Pro-Tips (the details that make it feel professionally made)
- Keep scents consistent. One scent family per box.
- Keep labels consistent. One font style, one label size if possible.
- Add one small “luxury” detail:
- wax seal sticker
- linen ribbon
- mini scoop tied on
- a tiny tag on the towel or brush
- If you include botanicals, keep them minimal. Too many looks messy fast.
The Bath Bomb Batch That Humbled Me
I once got cocky and tried to make bath bombs on a humid day, because I thought, “How different could it be?” Spoiler, it was different. I mixed everything up, the texture felt perfect, and I packed the molds like a pro. Then I came back a few hours later and found tiny cracks forming like my bath bombs had stress lines. By the next morning, half of them looked like they tried to escape the mold and failed. Have you ever watched a project fall apart while you just stand there holding a spray bottle like it betrayed you? Yeah, same. :/
What went wrong
- I misted too much binder too fast, and the mix started reacting early.
- The room stayed humid, so the bombs cured slowly and cracked as they expanded.
How I fixed it, and saved the batch
I didn’t toss them. I broke the cracked bombs back down into a bowl and I added a handful of dry mix to balance the moisture. Then I whisked everything until it looked like damp sand again, not clumpy dough. I packed the molds harder than my feelings wanted to admit, and I let them cure in the driest spot in the house, far from the bathroom. The second cure worked, and the bombs held their shape and fizzed normally. That little rescue taught me a rule I follow every time now.
What I do now so it doesn’t happen again
- I mist slowly and I stop the second the mix holds shape.
- I avoid making bath bombs when humidity runs high, or I run a dehumidifier nearby.
- I cure them on a tray in a dry room for a full 24 to 48 hours before wrapping.
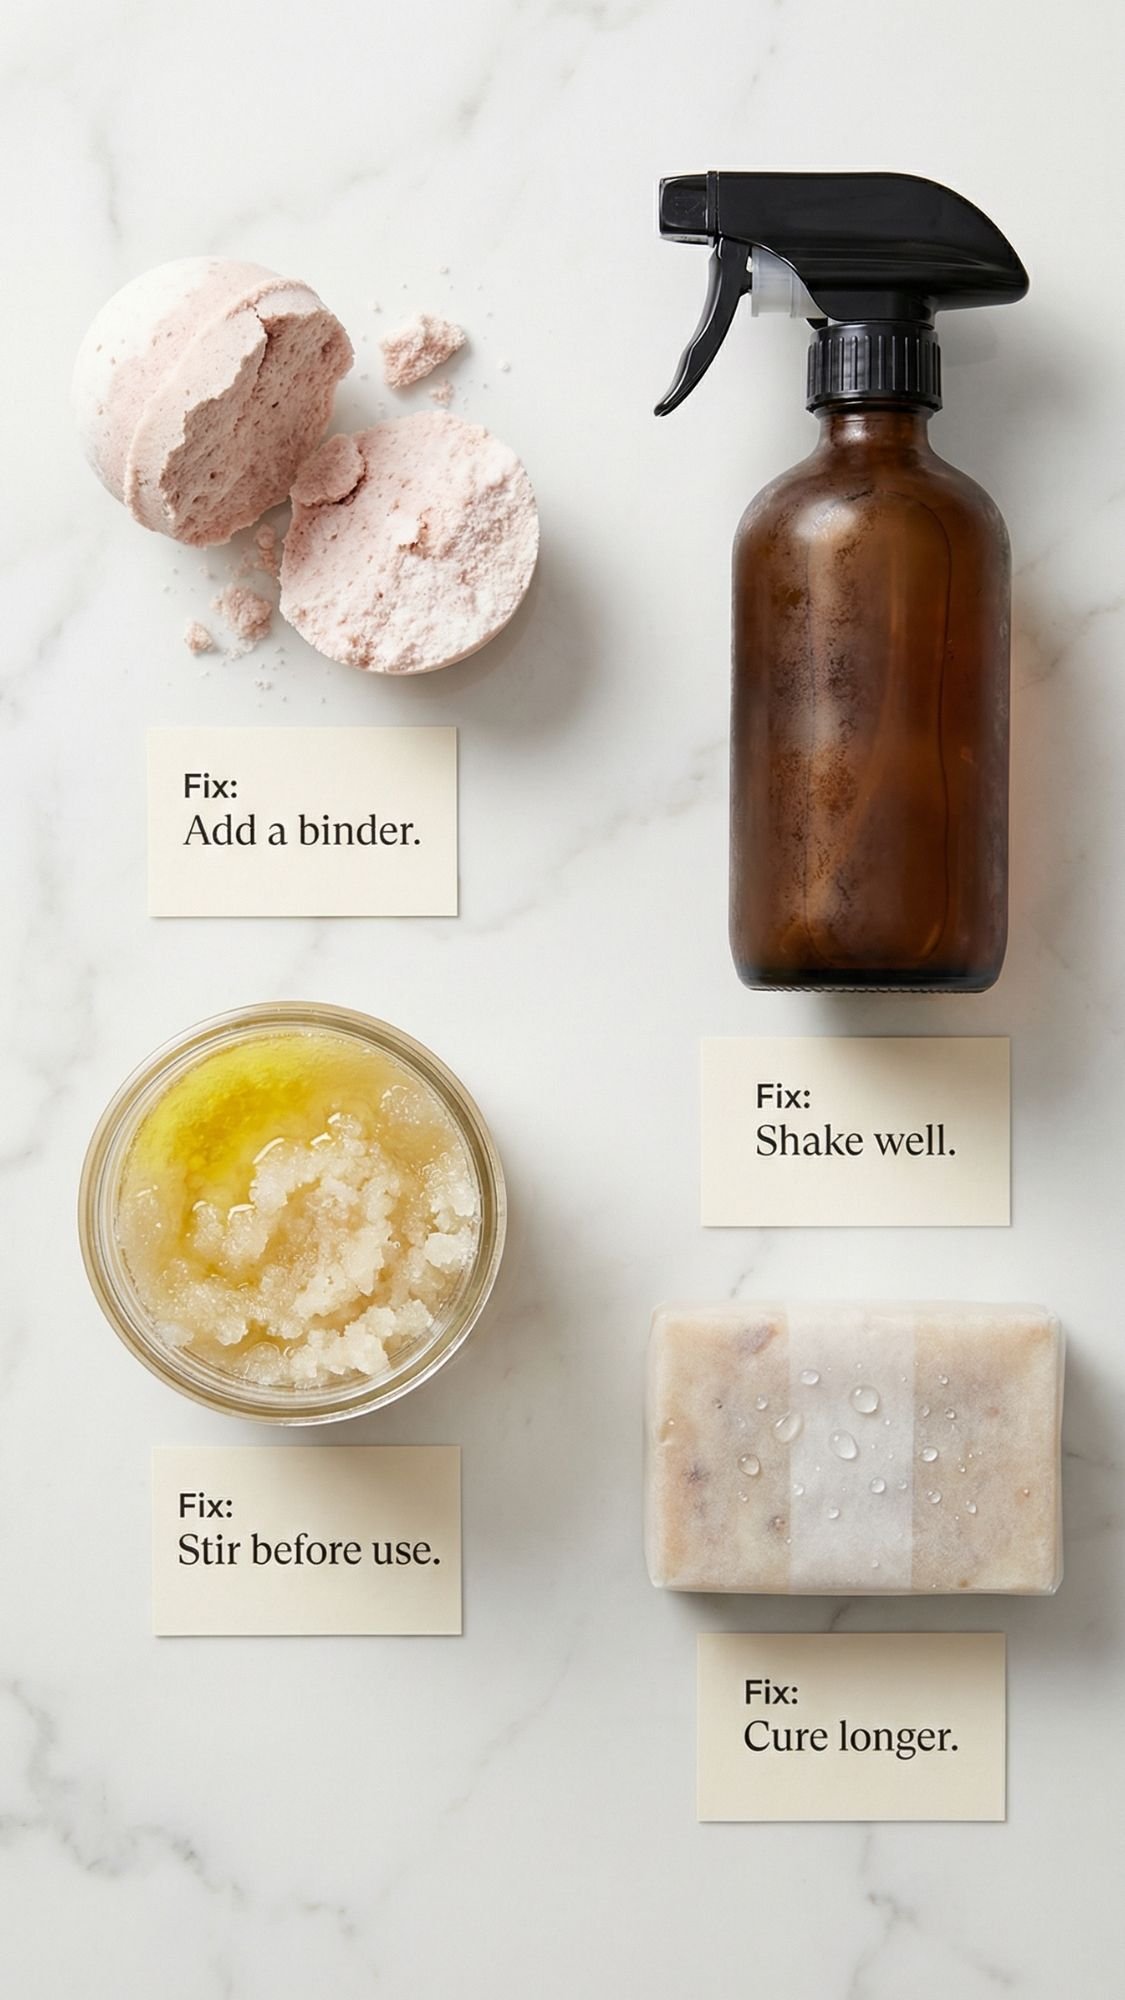
The 10 Most Common DIY Spa Gift Problems, Plus the Fix
If something goes wrong, don’t panic. Almost every DIY issue has a predictable cause, and you can usually fix it without starting over. Here are the problems I see the most with these spa-day projects.
1) Bath bombs crumble when you unmold them
- Symptom: Bomb falls apart or sheds crumbs as soon as you remove it from the mold.
- Likely cause: Mix stayed too dry, you didn’t pack firmly enough.
- Fix: Mist 1 to 2 more sprays, remix, then repack tighter.
- Prevention next time: Use a fine mister, press hard, and check texture before molding.
2) Bath bombs crack or “puff up” while drying
- Symptom: Hairline cracks form, bombs expand, or tops look rough.
- Likely cause: Too much binder too fast, mix reacted early, humidity slowed curing.
- Fix: Break and remix with more dry ingredients, repack, cure in a drier spot.
- Prevention next time: Mist slowly, avoid humid rooms, cure 24 to 48 hours.
3) Shower steamers fizz too fast and the scent disappears
- Symptom: It dissolves quickly, you barely smell it.
- Likely cause: Steamer sits in direct shower spray.
- Fix: Move it to a corner, away from the stream.
- Prevention next time: Add placement directions on the label.
4) Shower steamers crumble or feel soft
- Symptom: Edges chip, steamer feels fragile or damp.
- Likely cause: Mix stayed too dry, or you cured it in humidity.
- Fix: Next batch, mist slightly more and cure longer in a dry room.
- Prevention next time: Store finished steamers in an airtight jar with a desiccant packet.
5) Sugar scrub cubes turn mushy in the shower
- Symptom: Cubes soften, melt, or lose shape fast.
- Likely cause: Too much oil, not enough binder, or they got exposed to humidity.
- Fix: Next batch, reduce oil and add a touch more melt-and-pour base.
- Prevention next time: Wrap cubes tightly and store them sealed.
6) Sugar scrub separates with a greasy layer on top
- Symptom: Oil pools at the top of the jar.
- Likely cause: Oil ratio too high, you mixed warm ingredients and they settled.
- Fix: Stir in more sugar to thicken, then let it rest and check again.
- Prevention next time: Measure oils, cool mixtures before jarring, keep texture like wet sand.
7) Lotion bars feel grainy or gritty
- Symptom: Bar looks smooth, then turns grainy later.
- Likely cause: You overheated the butter, especially shea, then it crystallized unevenly.
- Fix: Remelt gently, cool slightly, pour again, then let it set undisturbed.
- Prevention next time: Use low heat, melt slowly, avoid boiling hot temps.
8) Linen spray looks cloudy or leaves spots on fabric
- Symptom: Cloudy bottle, oily droplets, spotting on sheets.
- Likely cause: Fragrance did not solubilize, ratio stayed off.
- Fix: Add more solubilizer per product directions, shake, then retest on a towel.
- Prevention next time: Always premix fragrance with solubilizer before adding water, test before gifting.
9) Melt-and-pour soap “sweats” beads of moisture
- Symptom: Dewy droplets form on the surface or inside packaging.
- Likely cause: Humidity, glycerin draws moisture.
- Fix: Wipe dry and wrap tighter with shrink wrap or plastic film.
- Prevention next time: Store wrapped soap in an airtight container until gifting.
10) Labels smear, wrinkle, or peel in the bathroom
- Symptom: Ink runs, label lifts at the corners, looks messy fast.
- Likely cause: Inkjet ink, moisture exposure, or low-adhesive paper.
- Fix: Reprint on waterproof label paper, add clear laminate, press edges firmly.
- Prevention next time: Use laser printing when possible, keep labels away from product seams, seal edges.
Finishing + Sealing + Care (So It Looks Professional and Lasts)
This is the unglamorous part that makes the whole gift feel high-end. Finishing is what separates “DIY cute” from “wait, where did you buy this?” And it also keeps the products from getting messy in a steamy bathroom.
How I finish it professionally
- I wipe every jar rim and lid before labeling. Any oil or dust will mess with adhesion.
- I place labels at the same height on every container. Consistency makes it look boutique.
- I keep the design simple. One font style, one label shape, one vibe.
- I add one luxury detail, not ten. Linen ribbon, wax seal sticker, or a scoop tied on, pick one.
Sealing and packaging that actually holds up
- Scrubs and soaks: Use tight lids and include a scoop. Water ruins everything.
- Soap bars: Wrap tightly to prevent sweating. Shrink wrap looks the cleanest.
- Cubes and steamers: Store in airtight jars so humidity doesn’t soften them.
- Linen spray: Use a fine mist bottle, label “test first,” and keep it out of heat.
If you’re gifting in a box, line it with tissue, then keep anything that could leak or crumble inside a jar, tin, or sealed bag.
Dry time vs cure time (plain language, no weird science lecture)
- Dry time means it feels set on the outside. You can touch it without leaving fingerprints.
- Cure time means it reaches its final performance. Stronger scent, harder texture, better use.
Examples from this post:
- Shower steamers: dry in 12 to 24 hours, cure in 24 to 48 hours
- Bath bombs: dry in 12 to 24 hours, cure in 24 to 48 hours, longer if humid
- Lotion bars and balms: set in 1 to 2 hours, fully firm overnight
- Candles: set overnight, best burn after 48 hours cure
Care instructions to include in your gift (copy-paste friendly)
Add one small “Care” line on the label or instruction card:
- Keep water out of jars.
- Store away from heat and direct sunlight.
- Close lids tightly.
- Use dry hands or a scoop.
How long it lasts, and how to refresh it
Be honest and practical. Here’s an easy guide:
- Scrubs, soaks, steamers, balms: best within 3 to 6 months for scent and freshness
- Soap bars: longer, especially if wrapped and stored dry
- Linen spray: use within a few months for best scent, shake if needed
Quick refresh tips:
- Scrub too thick: stir in a few drops of oil.
- Scrub separated: stir, then adjust sugar.
- Steamers softened: store airtight with a desiccant packet.
- Labels lifting: press edges down and add clear laminate next time.
Customization Ideas (3 Gift Vibes That Make It Feel Personal)
This is where you make the gift feel like it was made for Mom, not just made. You can use the exact same DIYs and get totally different vibes just by changing the style, color story, and small upgrades. It’s honestly the easiest way to make your post feel high-value, because readers can pick a look that matches their mom.
Variation 1: Modern Spa (clean, minimal, expensive-looking)
Style swaps
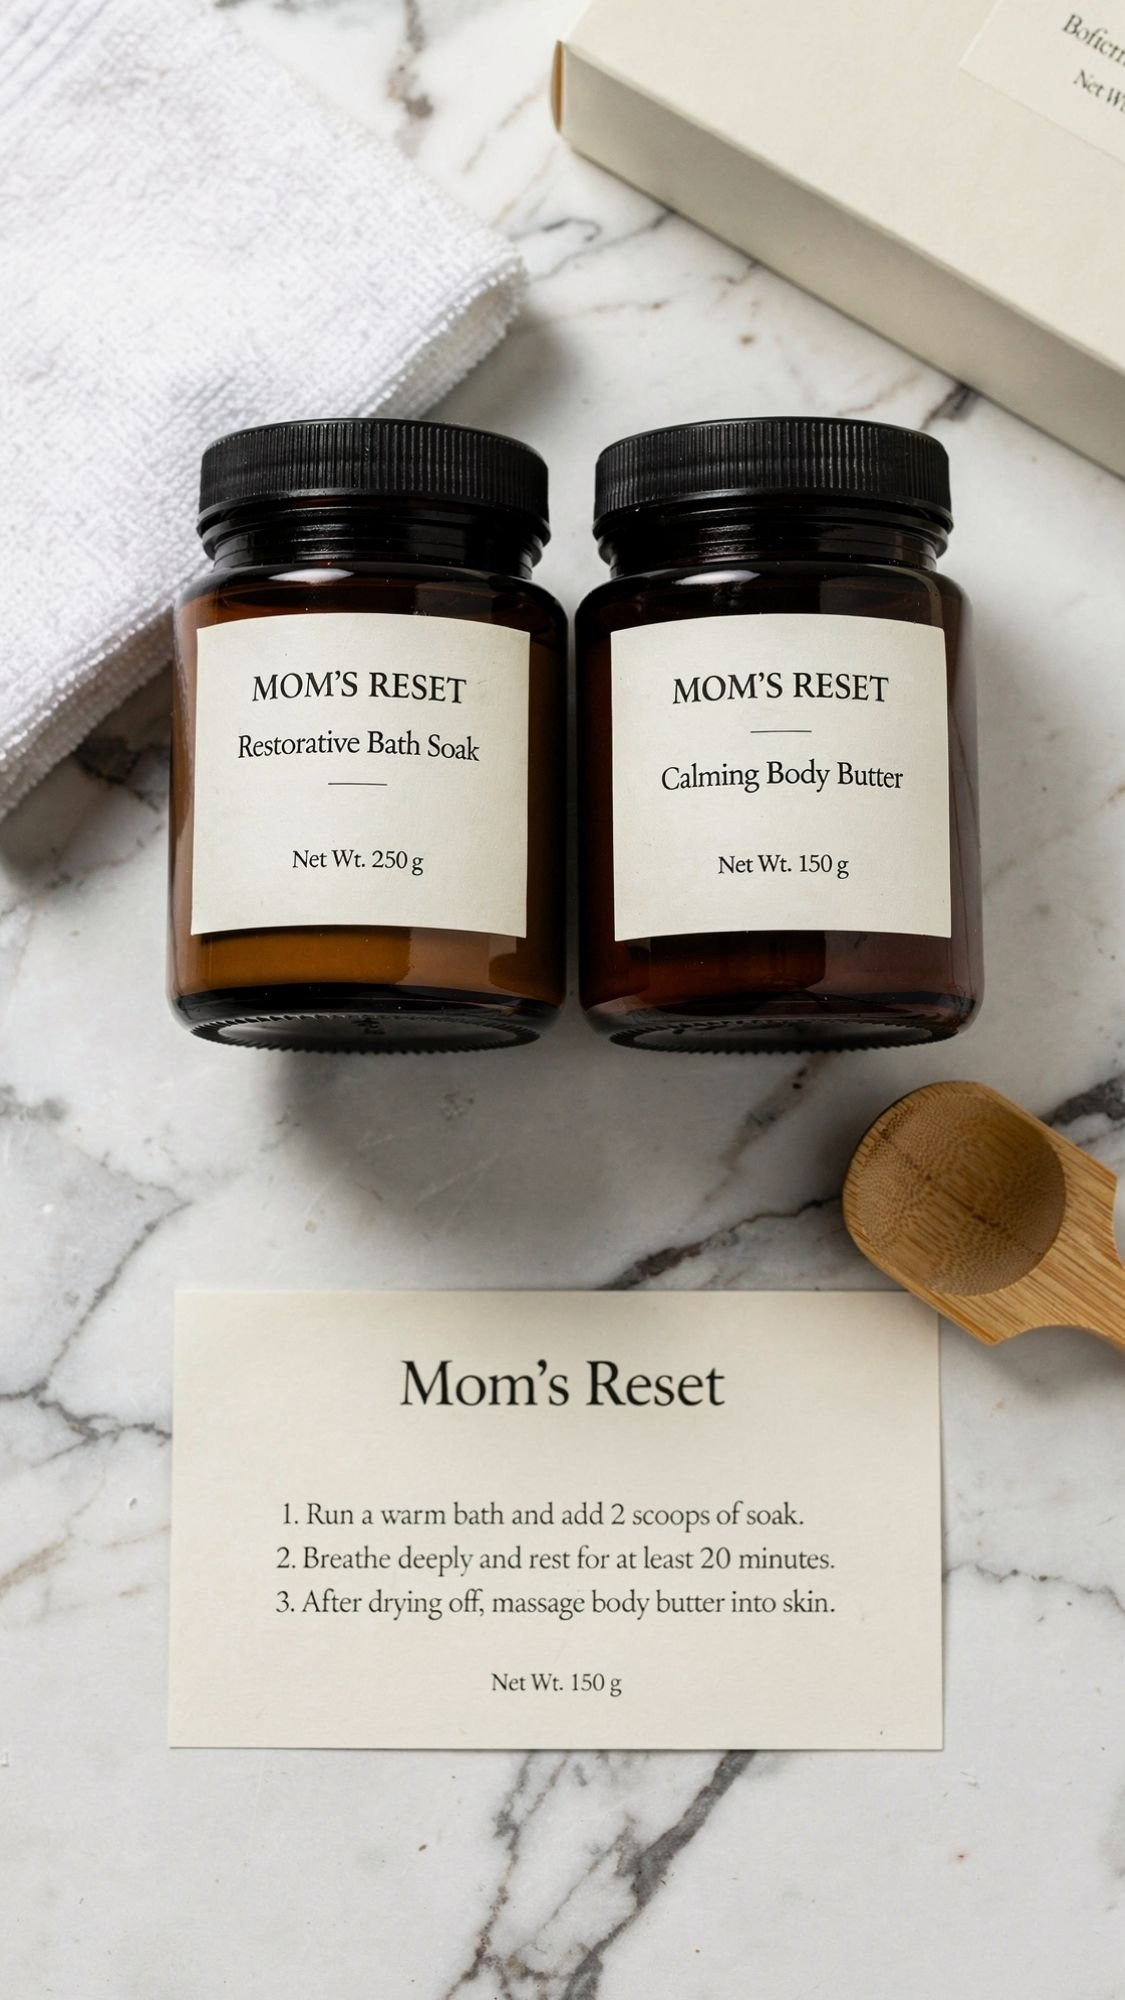
- Amber jars, black lids, minimalist labels
- White towels, marble tray, simple ribbon
Color palette
- Cream, sage, warm wood, matte black
Personalization ideas
- Label names like “Mom’s Reset,” “Shower Ritual,” “Bedtime Calm”
- Add a sleek coupon card titled “Spa Night Plan”
Material upgrades
- Glass apothecary jars
- Bamboo scoop
- Linen ribbon instead of satin
Variation 2: Boho Botanical (soft, earthy, cozy)
Style swaps
- Clear jars or frosted jars
- Kraft tags, muslin bags, twine bows
- A few dried florals, but keep it tidy
Color palette
- Sand, olive, terracotta, warm cream
Personalization ideas
- “Garden Calm,” “Herbal Soak,” “Soft Skin Ritual”
- Add a tiny handwritten note card for a warm touch
Material upgrades
- Wooden scoop
- Muslin sachets for bath tea
- Small woven basket instead of a box
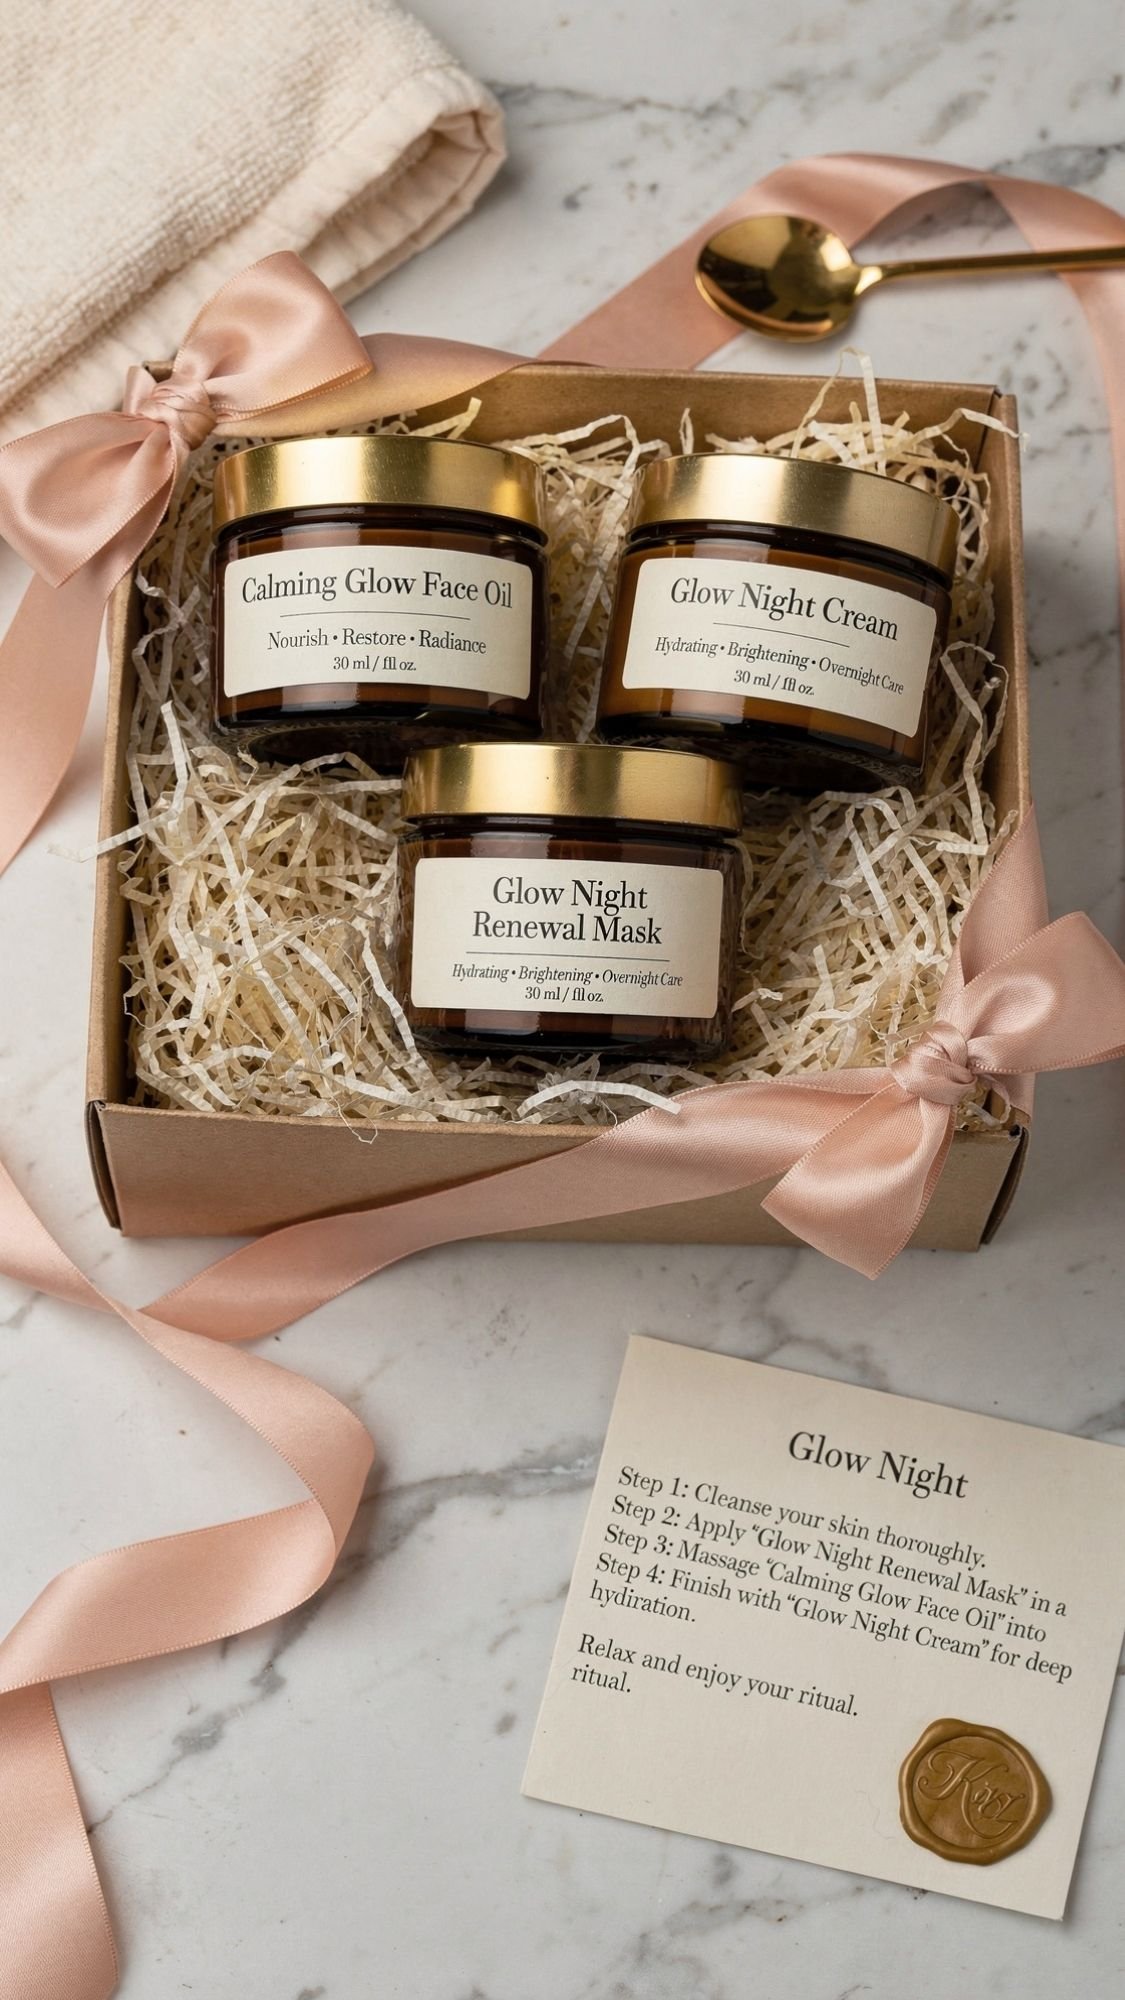
Variation 3: Glam Spa (blush, gold, treat-yourself energy)
Style swaps
- Gold lids, satin ribbon, wax seal sticker
- Pink or blush accents, keep labels minimal so it still looks luxe
Color palette
- Blush, cream, gold, deep brown
Personalization ideas
- “Glow Night,” “Soft Skin,” “Luxury Soak”
- Add a little “Tonight’s Plan” card like a fancy menu
Material upgrades
- Metallic tins
- Satin ribbon
- A small mirrored tray
Quick personalization options that always land
- Monogram labels
- “Mom’s Spa Day” date tag
- Scent named after her, like “Rose Garden Calm” or “Mint Reset”
- Theme boxes: “Sunday Reset,” “Bedtime Ritual,” “Post-Work Unwind”
FAQ
1) What are the best DIY spa gifts for moms who don’t take baths?
Go for shower steamers, sugar scrub cubes, lotion bars, linen spray, and a dry brush kit. These give the spa vibe without needing a bathtub, and they’re easy for Mom to actually use on a normal day.
2) How do I make shower steamers that smell strong in the shower?
Place them away from direct water flow so they release scent slowly through steam. Also, cure them fully so they don’t crumble. If you put them right under the spray, they dissolve too fast and the scent disappears.
3) Why did my bath bombs crack after drying?
Humidity and too much binder usually cause cracks. If the mix reacts early or cures too slowly, the bomb expands and splits. Cure them in a dry room for 24 to 48 hours, and mist binder slowly.
4) How long do bath bombs need to cure before gifting?
Most bath bombs need 24 to 48 hours to cure in a dry space. If humidity runs high, they can need longer. Dry time means they feel set, cure time means they perform better and hold up in packaging.
5) Why does my sugar scrub separate into an oily layer?
You used too much oil or you didn’t mix evenly. Scrubs should look like wet sand, not syrup. Stir in more sugar to thicken, and measure oils next time so the texture stays stable.
6) How do I keep DIY spa gifts from going bad?
Stick to dry or anhydrous recipes for gifting. Avoid water-based gels or creams unless you know how to preserve them properly. Keep water out of jars, use scoops, and store items away from heat and humidity.
7) Can I use essential oils safely in DIY spa gifts?
Yes, but keep them light and don’t overdo it. Skip strong oils near the eyes, and label clearly. If Mom has sensitive skin, you can make many gifts unscented and still keep them spa-level with good packaging.
8) What’s the difference between dry time and cure time?
Dry time means the product feels set and touchable. Cure time means it reaches its best texture and performance. Bath bombs and steamers need cure time to harden and work properly. Candles need cure time for better burn.
9) How do I package DIY spa gifts so they look expensive?
Use matching jars, minimalist labels, and a cohesive color palette. Add one luxury detail like linen ribbon or a wax seal sticker. Include an instruction card so it feels curated, not random.
10) What should I write on an instruction card for a spa gift basket?
Keep it short:
- what it is
- how to use it
- how much to use
- one pro tip
- Example: “Place steamer in the shower corner away from direct water for longer scent.”
11) How long do DIY spa gifts last?
Most dry or anhydrous gifts stay best for 3 to 6 months for scent and freshness. Lip balms and lotion bars can last longer if stored away from heat. Labels and storage habits matter a lot, especially in bathrooms.
12) What are the easiest DIY spa gifts for beginners?
Shower steamers, bath soaks, bath tea sachets, lip balm, and melt-and-pour soap are the easiest. They’re forgiving and don’t require fancy tools to look good.
Make the Spa Day Easy to Say Yes To
If you take nothing else from this post, take this. Mom will use the gift when it feels like a plan. Pick one ritual, keep the scent family cohesive, and include the little instruction card so she doesn’t have to think. That’s what turns a cute DIY into a gift that actually gets opened, used, and remembered.
Start small if you want. Make shower steamers, scrub cubes, and a lotion bar. Tie it up with a linen ribbon, add a coupon that says “30 minutes alone, no questions,” and you’re done. Or go bigger and build the full box with a candle and a routine card on top like a spa menu. Either way, you’re giving her something better than stuff. You’re giving her permission to rest.
And FYI, if anyone tries to interrupt her spa moment, you’re officially on “handle it” duty. That’s in the coupon book. I don’t make the rules.