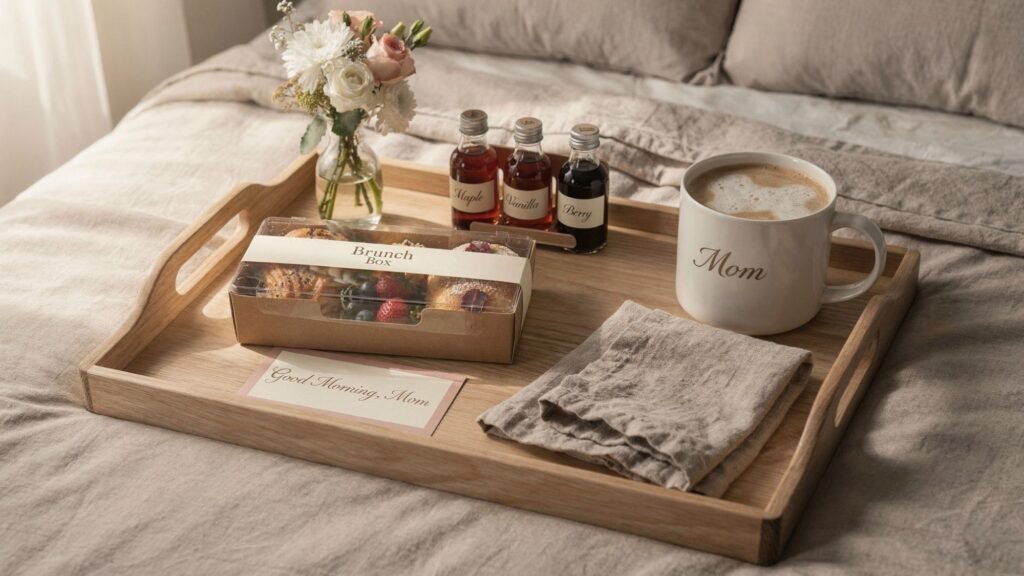
Intro, let’s make Mom’s morning feel like a tiny hotel stay
If you’ve ever watched a mom get up early, handle everything, and still say “I’m fine,” then you already know why we’re doing this. I love a big gift, but a breakfast-in-bed moment hits different because it feels personal, calm, and genuinely thoughtful. And no, you don’t need to wake up at 5 a.m. to pull it off. You just need one solid DIY “hero” piece, plus a couple small extras that make the whole setup look intentional.
Here’s the game plan for this list. I’m giving you 20 DIY gifts you can mix and match, from a tray that actually survives coffee spills to quick “wow” add-ons like syrup flights and brunch boxes. I’ll tell you what matters, what breaks, and how to fix it when it breaks, because nothing ruins the vibe like a sticky finish or a leaking jam jar at 8 a.m. Ever wonder why some breakfast trays look expensive even when they aren’t? It’s almost always the clean finishing and the little details, not the price tag.
Quick build-your-own formula (so you don’t overthink it):
- Pick 1 hero gift: tray, brunch box, or personalized mug
- Add 1 edible wow: syrup flight, granola jar, or parfait kit
- Add 1 cozy detail: linen napkin, bud vase, or mini menu card
Pro-Tip: I always add one “quiet luxury” detail like a folded linen napkin or a tiny bud vase. It makes the whole moment feel planned, even if you assembled it in under an hour. FYI, this is the kind of thing people save on Pinterest because it photographs beautifully and feels doable.
1) The “Spill-Proof” DIY Breakfast Tray (that actually survives coffee)
If you make one thing from this whole list, make the tray. It turns a regular breakfast into a full moment, and it gives every other little gift a “home.” Also, this is the piece that can look wildly expensive even when it’s not, as long as you finish it like you mean it.
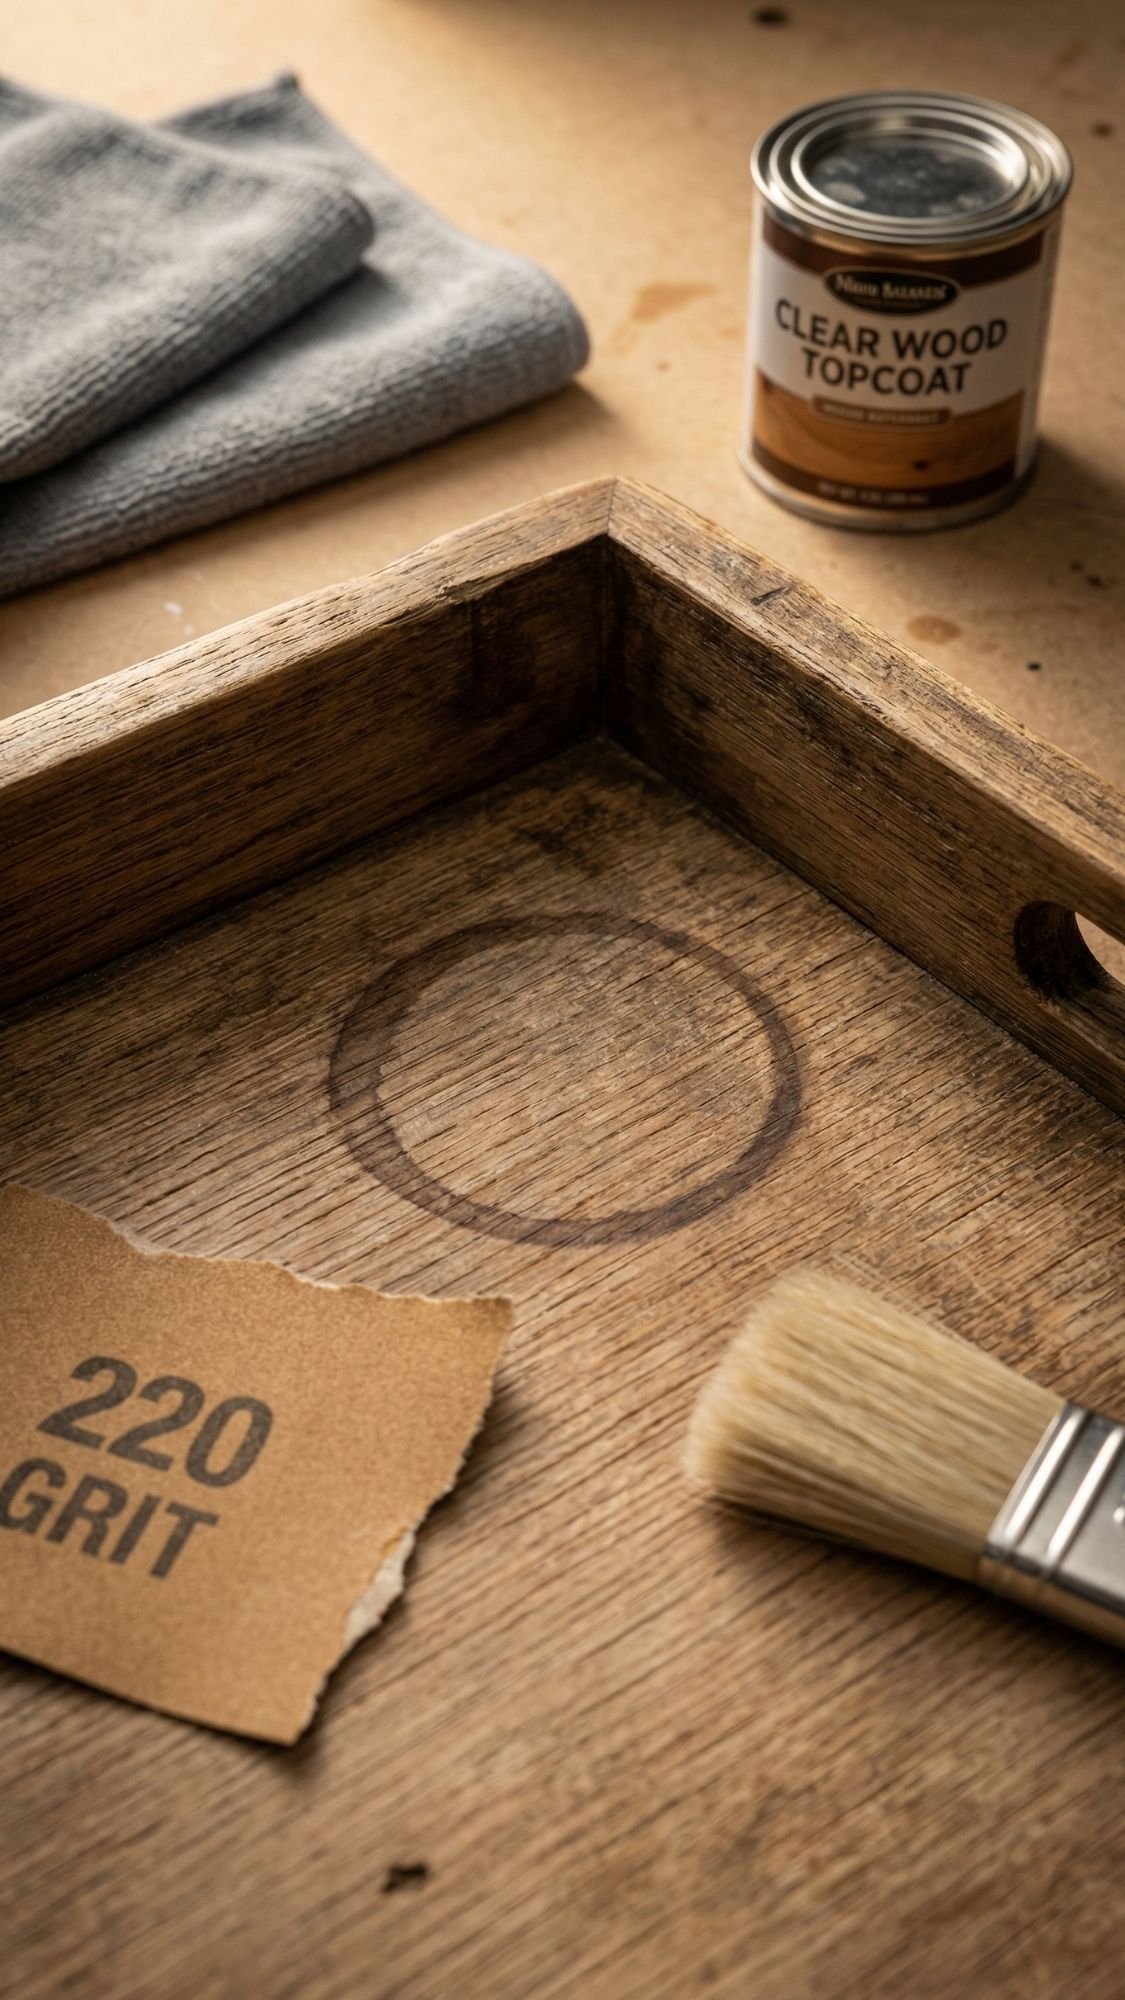
Here’s the pro move I use after years of trial, error, and one tragic mug ring incident. Seal first, decorate second, seal again. That first seal coat acts like a barrier so stain doesn’t creep, paint doesn’t bleed, and vinyl actually sticks. A common mistake beginners make is decorating directly on raw wood and then wondering why the edges look fuzzy or the vinyl starts lifting two days later. Raw wood drinks product like it’s thirsty. Don’t give it the chance.
Materials and tools
- Unfinished wood tray, or a thrifted tray with good bones
- Sandpaper: 150 grit then 220 grit
- Tack cloth or microfiber rag
- Paint or stain
- Optional: stencil or vinyl decal
- Topcoat: water-based polyurethane for durability, or a food-safe oil for a natural look
- Small foam roller or brush
- Felt pads or rubber feet for the bottom
- Painter’s tape, optional for clean lines
Step-by-step, my “no sticky tray” method
- Sand the tray with 150 grit, then 220 grit. Hit corners and edges, those spots grab finish differently.
- Wipe off all dust. I use a microfiber cloth, then a tack cloth. Dust ruins smooth finishes.
- Apply a thin seal coat first. This can be a thin coat of water-based poly or a sanding sealer. Let it dry.
- Lightly sand with 220 grit if it feels rough, then wipe dust again.
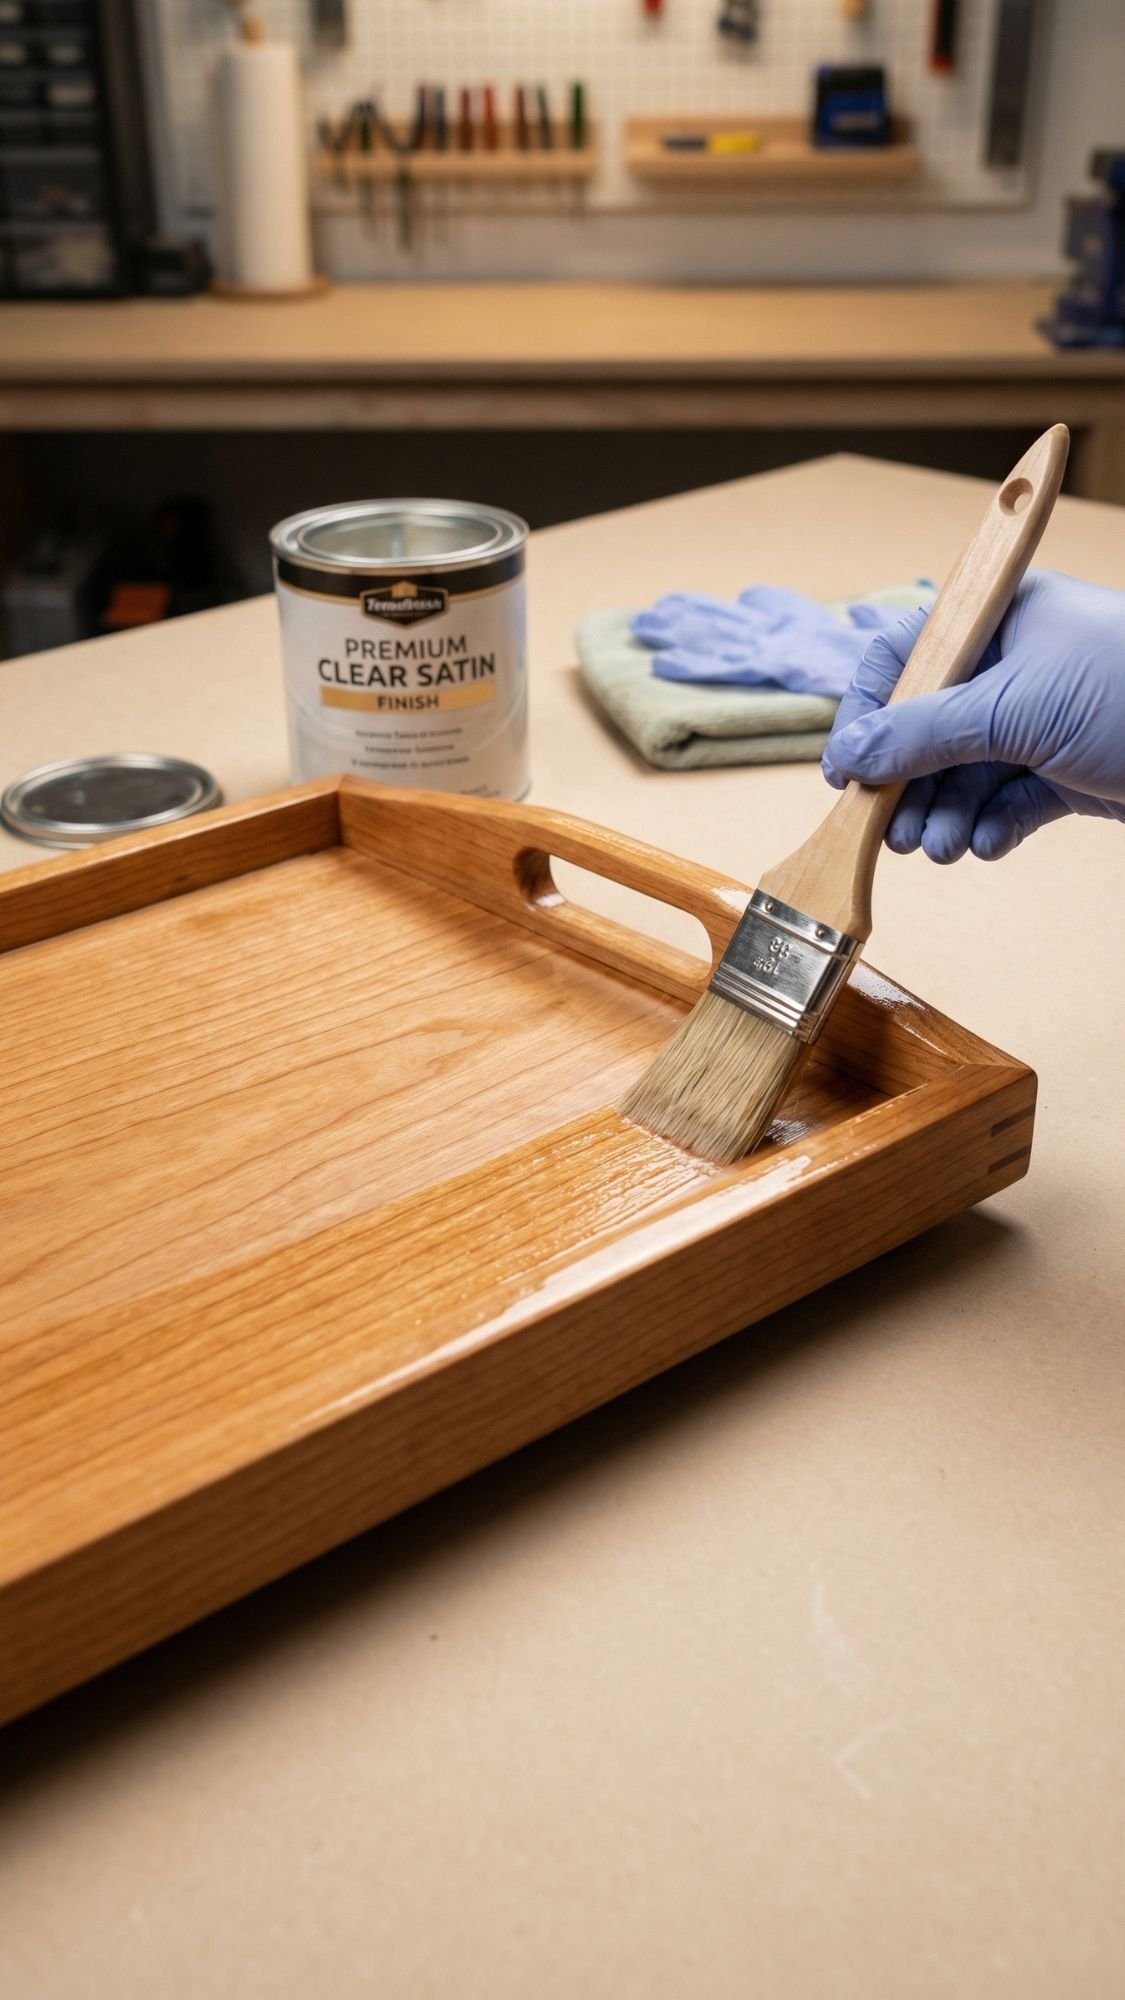
- Paint or stain. Keep coats thin. Let it dry fully.
- Add your design, vinyl, stencil, or a simple stripe.
- Topcoat 2 to 4 thin layers. Let each coat dry before the next.
- Add felt pads or rubber feet so the tray doesn’t slide around on bedding.
Pro-Tips, the stuff that makes it look pro
- Thin coats beat thick coats. Thick coats stay tacky and collect lint like it’s their job.
- Sand between coats when needed. If you feel bumps, you will see bumps.
- Test heat resistance. Put a warm mug on the underside or a hidden spot before you call it “done.”
- If you use vinyl, burnish the edges hard and topcoat over it for extra durability.
Dry time vs cure time, in plain language
- Dry means it doesn’t feel wet.
- Cured means it can handle real life, heat, moisture, and repeated use.
- Depending on your finish and humidity, a tray might feel dry in a few hours but needs several days to fully cure. I learned that lesson when I rushed a tray overnight and the next morning the coffee mug left a perfect ring imprint. It felt dry. It was not cured. Rude.
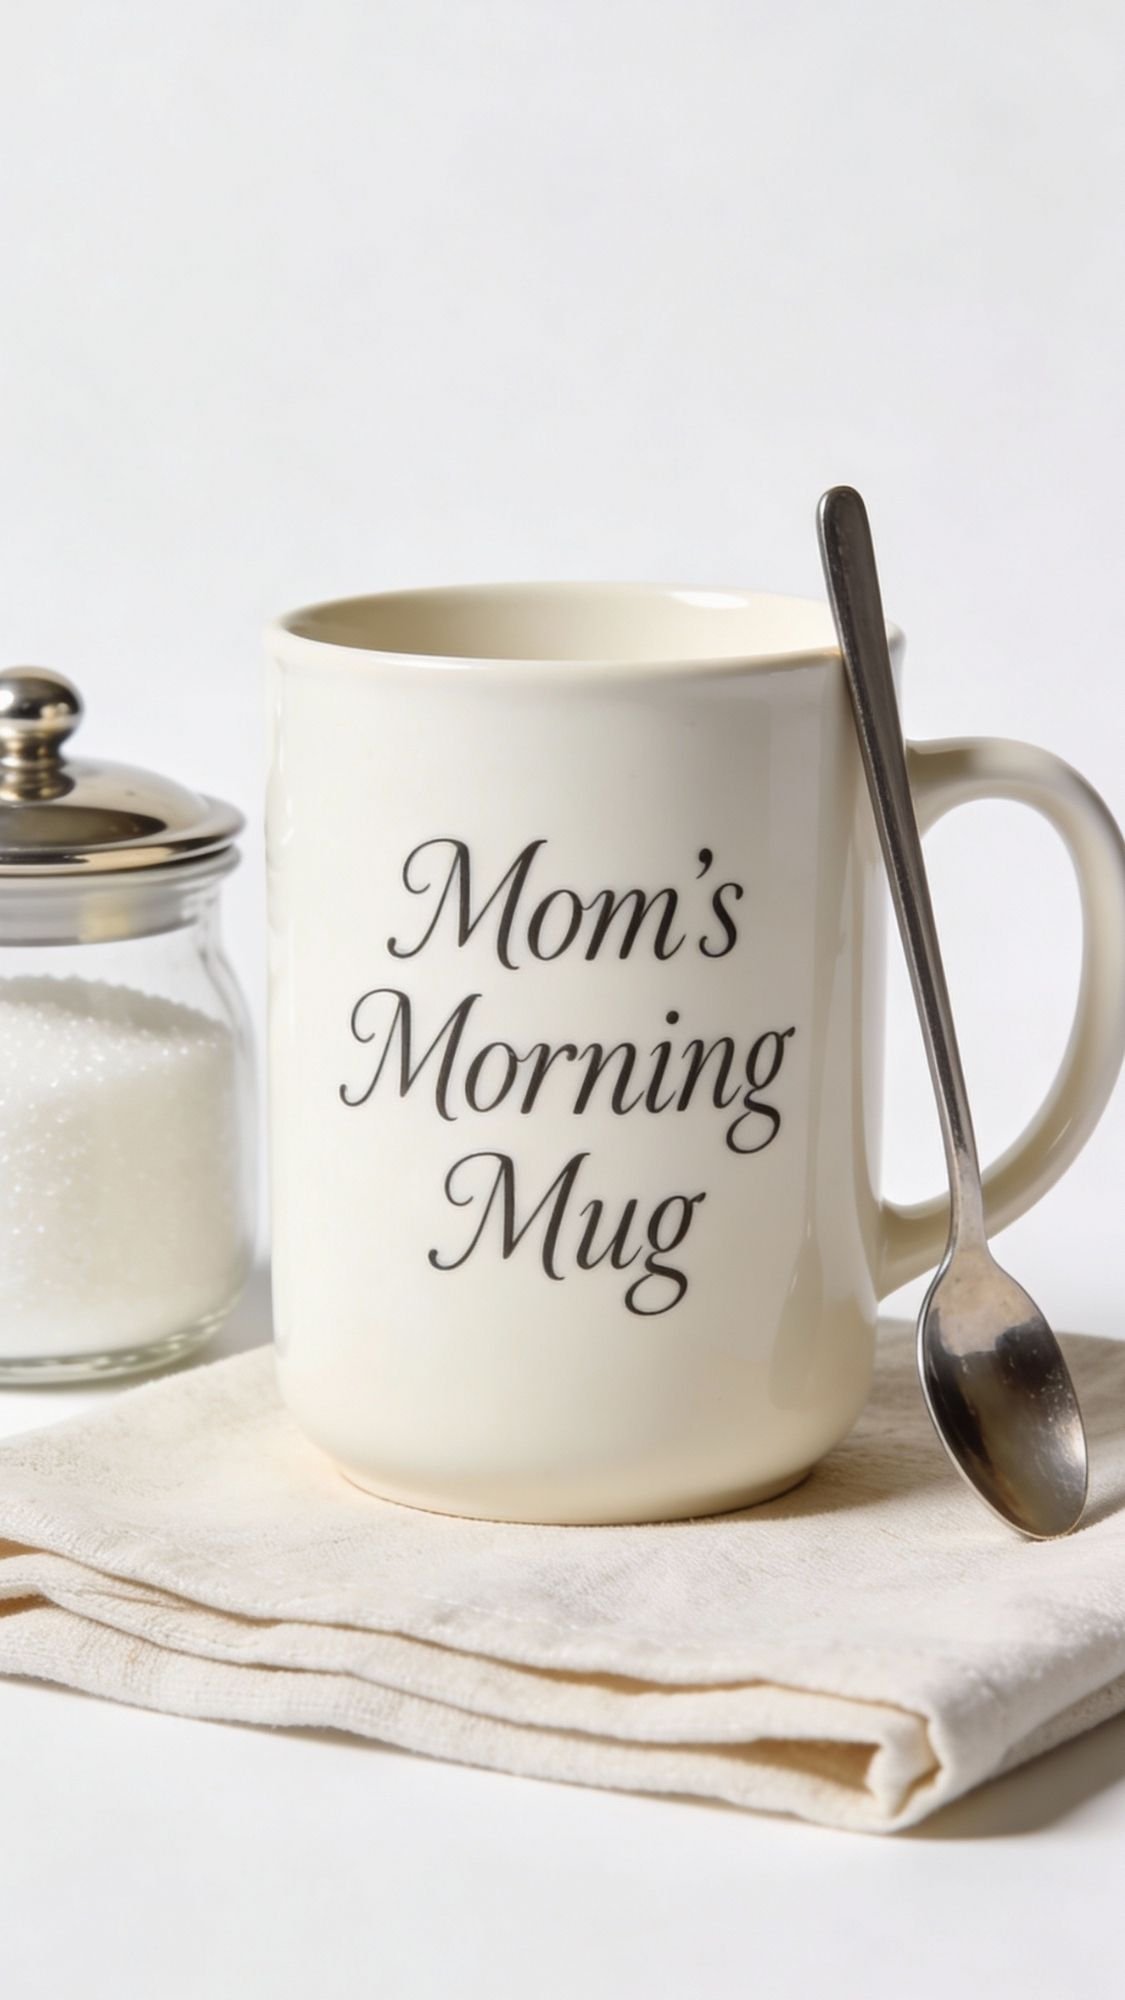
2) Personalized Mug, but make it last (aka not a one-wash wonder)
A personalized mug is one of those gifts that feels small, but it hits daily. Every time she grabs it, she thinks of you. Also, it’s an easy add-on that makes the whole breakfast-in-bed setup look complete. Ever notice how a tray instantly looks more “gifted” when there’s a mug on it? Exactly.
Here’s the deal though. If you pick the wrong method, your cute design turns into a sad blur after two washes. I’m not here for heartbreak at the bottom of the dishwasher. In my workshop, I’ve found the most reliable results come from permanent adhesive vinyl for crisp designs, or oil-based paint pens with a proper cure. I avoid regular craft paint unless I want a smeary mess.
Option A, Cricut style with permanent vinyl (cleanest and most durable looking)
Materials
- Plain ceramic mug, matte or glossy both work
- Permanent adhesive vinyl
- Transfer tape
- Rubbing alcohol
- Scraper tool, or an old gift card
Steps
- Wash and dry the mug, then wipe the design area with alcohol.
- Cut your design. Keep it bold and readable.
- Apply vinyl using transfer tape, then burnish like you mean it.
- Peel tape slowly, then press edges down again.
- Let it sit at least 24 hours before washing.
Pro-Tips
- Place the design where her hand won’t rub constantly, usually opposite the handle.
- Avoid tiny hairline details, those lift first.
- Hand wash if you want maximum longevity. Dishwashers are chaos goblins.
Option B, oil-based paint pen (simple, no machine needed)
Materials
- Oil-based paint pen
- Plain ceramic mug
- Rubbing alcohol
- Painter’s tape, optional for clean lines
Steps
- Clean with alcohol, let it fully dry.
- Draw your design, keep strokes confident and not too thick.
- Let it air dry completely. Follow your pen brand’s cure directions.
- If the brand recommends baking, follow their temp and timing exactly.
Pro-Tips
- A common mistake beginners make is touching the ink too soon, then smearing it and pretending it was “intentional.”
- Do a test design on the bottom first if you’ve never used that pen brand.
- If you bake it, let it cool in the oven gradually so the mug doesn’t temperature-shock.
Personalization ideas that feel thoughtful, not cheesy
- “Mom’s Morning Mug”
- “Quiet Coffee Club”
- Initials in a tiny monogram
- A short phrase she actually says, you know she has one
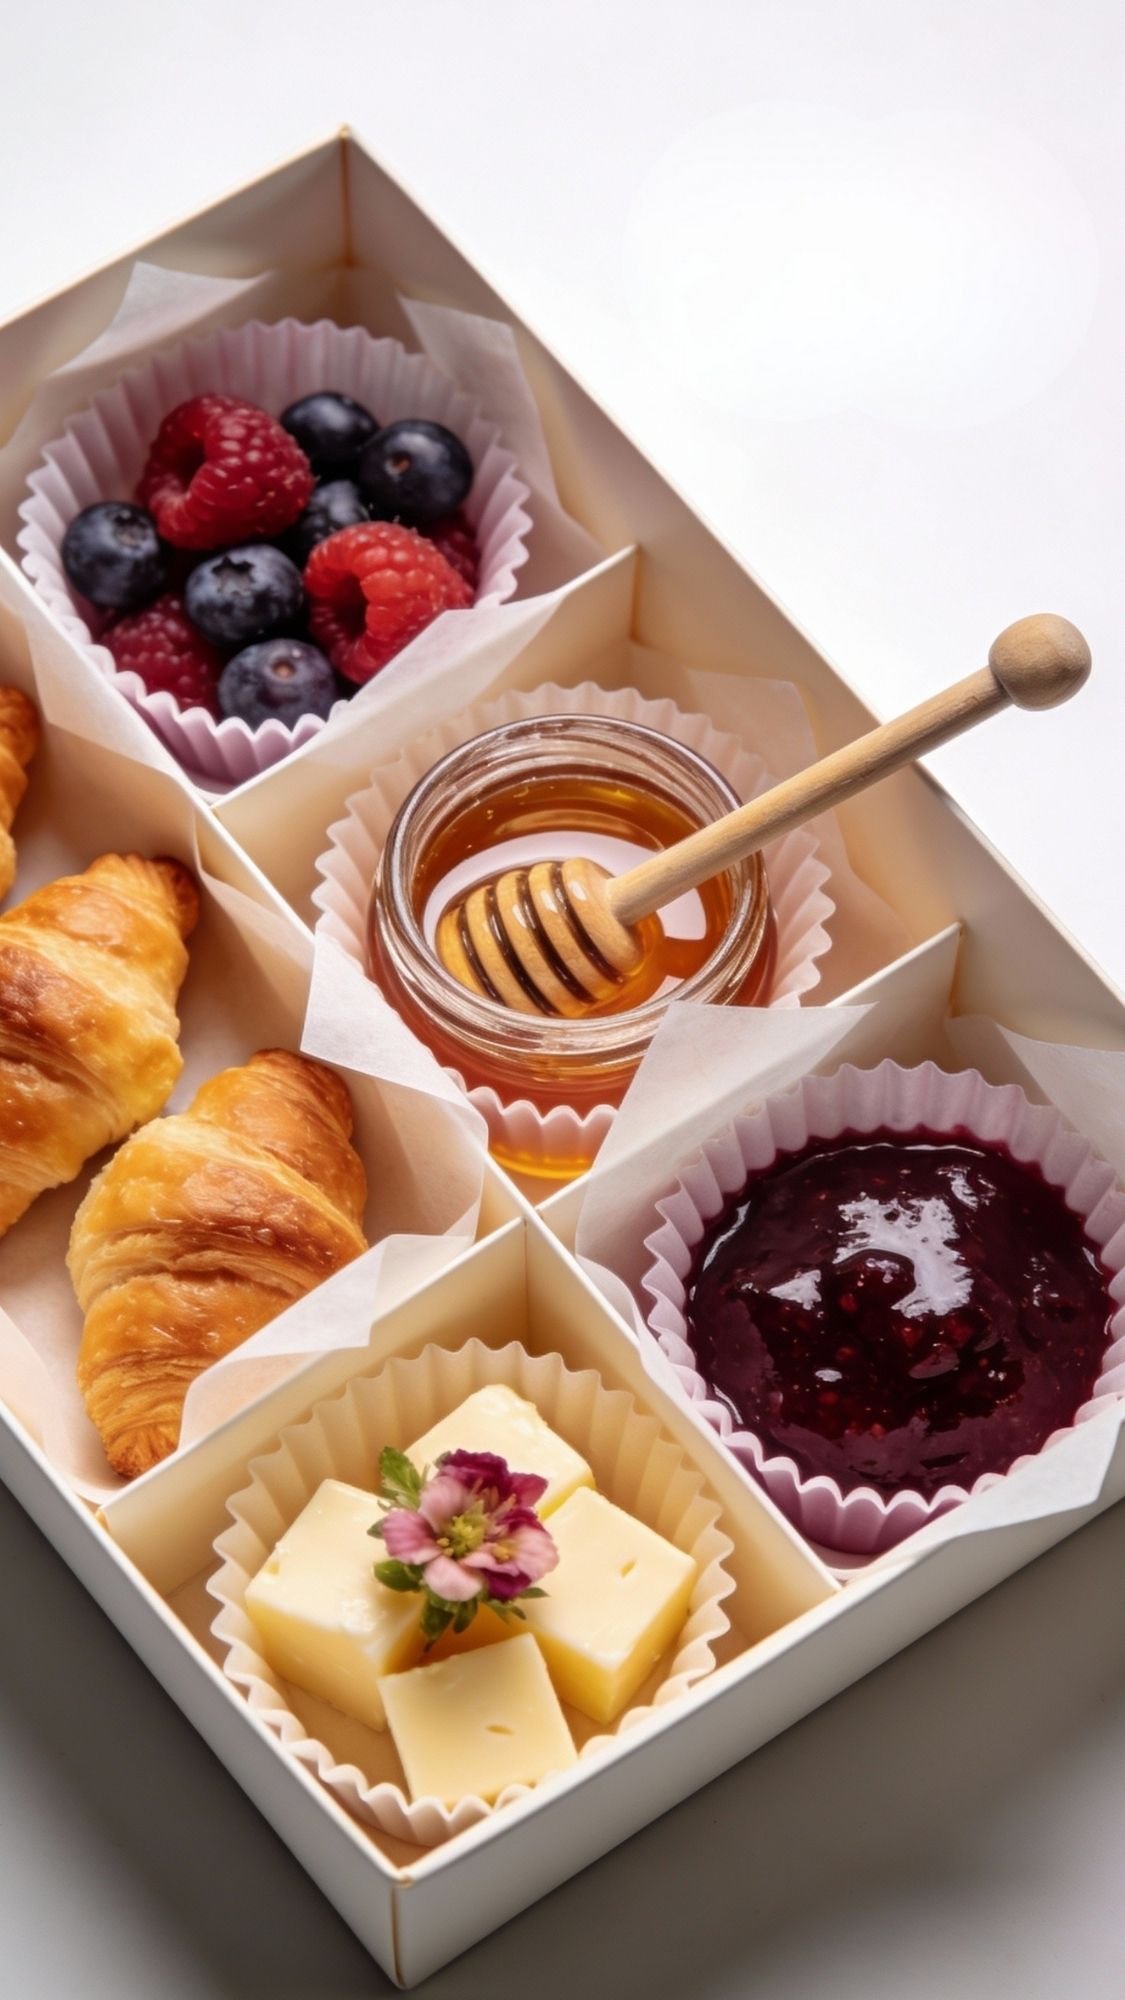
3) “Brunch Box” Gift Kit (adult Lunchables energy, mom-approved)
This one wins on Pinterest because it looks like you ordered it from a fancy café, but you can assemble it in your kitchen with zero drama. The secret is structure. When you use compartments and repeat colors, it looks expensive. When you toss stuff in a box like a raccoon with a schedule, it looks, well, tossed.
I’ve found the most “premium” brunch boxes follow a simple rule. Pick one main carb, one fruit, one protein, one spread, and one treat. That’s it. Keep it balanced, and you avoid the classic mistake of making a box that feels random or overly sweet.
What to pack (mix and match menu)
Choose 1 main
- Mini croissants, scones, muffins, or waffles
- Mini bagels, English muffins, or a small pastry assortment
Choose 1 fruit
- Berries, grapes, sliced strawberries, or citrus segments
- Bonus points for fruit that stays pretty, apples brown fast unless you treat them
Choose 1 protein
- Mini cheese rounds, cheddar cubes, or string cheese cut into bite sizes
- Hard-boiled eggs, or yogurt cup if you keep it cold
Choose 1 spread
- Mini jam jar, honey, nut butter, lemon curd
Choose 1 sweet treat
- Dark chocolate squares, chocolate covered almonds, or a few truffles
Packaging that makes it look boutique
- Bento box, pastry box, or divided tray
- Parchment paper liners for clean edges
- Mini cupcake liners for small snacks
- Tiny lidded jars for jam, honey, syrup
- A small kraft tag with the menu, simple and readable
Pro-Tip: Add one “premium-looking” item, like a mini brie or a specialty jam. It upgrades the entire box instantly. Ever notice how one fancy thing makes everything around it look fancy too? That’s the whole trick.
How to keep it from getting soggy or messy
- Keep wet spreads in sealed jars, always.
- Separate anything crunchy from anything moist.
- Put the jam and honey in the corners so they stay upright.
- If you include waffles or pastries, pack them in a liner so they don’t absorb moisture from fruit.
Pro finishing touches that photograph well
- Repeat colors, pick a palette, like berry reds and creamy neutrals.
- Use height, stack one item slightly for dimension.
- Add a tiny flower or herb sprig, but keep it minimal.
- Include a small “Good Morning, Mom” menu card, it makes it feel planned.
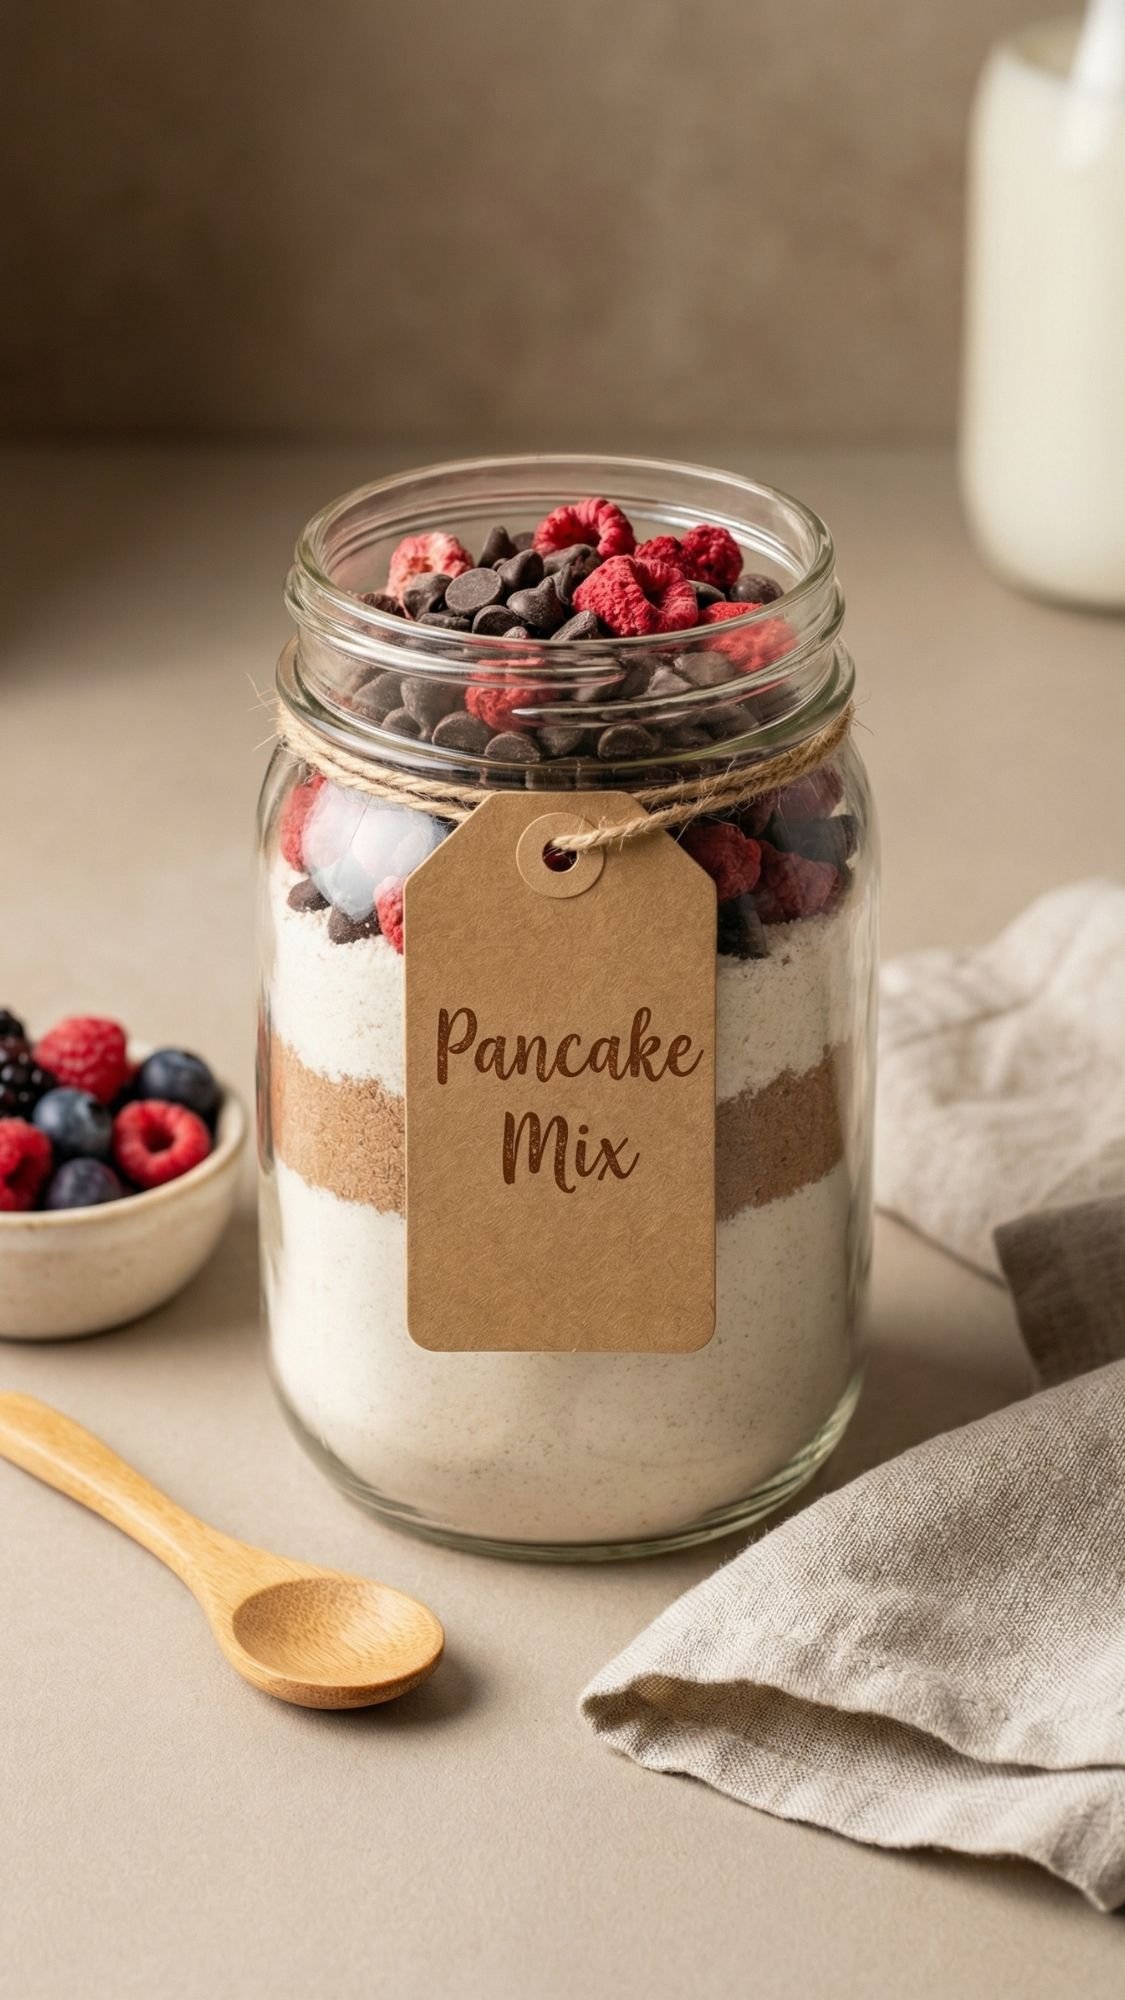
4) Homemade Pancake Mix in a Jar (with add-ins that make it feel special)
This is one of my favorite “looks adorable, actually useful” gifts. A pancake mix jar feels old-school in the best way, and it works as a pantry gift she can use whenever she wants a slow morning. The key is making it easy to use, not a science experiment in a jar. Ever grabbed a cute mix and then realized the directions made no sense? Yeah, we’re not doing that.
A common mistake beginners make is layering ingredients without thinking about clumping and usability. If you pack brown sugar or anything sticky directly into the jar, it can turn into a brick. You want dry ingredients layered cleanly, and you want add-ins that stay separate and pretty.
Materials
- 1 quart mason jar or similar clear jar with a tight lid
- Dry pancake mix ingredients (homemade blend or a base mix you improve)
- Add-ins: chocolate chips, freeze-dried berries, cinnamon sugar, mini sprinkles
- Funnel, optional but helpful
- Kraft tag or label
- Twine or ribbon
Layering plan that stays neat
- Bottom: flour blend or base pancake mix
- Middle: sugar and leaveners layer, if you’re using a homemade blend
- Top: add-ins that you want visible, like chocolate chips or freeze-dried fruit
Pro-Tip: Tap the jar gently on the counter after each layer. It settles everything so the layers look crisp and you don’t get weird air pockets.
Easy tag directions, keep it simple
Write directions that a tired person can follow. Put it on a tag, or print a small label.
Example direction copy
- “Add 1 egg, 1 cup milk, and 2 tbsp melted butter. Mix until just combined. Cook on a lightly greased skillet.”
- “Let the batter sit for 5 minutes, then cook.”
That last line matters. Letting batter rest gives you fluffier pancakes and fewer weird lumps. IMO, it’s the difference between pancakes and “why is this rubbery.”
Add-in ideas that feel like a treat
- Freeze-dried strawberries plus a little vanilla sugar
- Mini chocolate chips plus cinnamon
- Lemon zest sugar blend, packaged separately in a tiny bag
- “Confetti” mini sprinkles, but keep it tasteful, we’re going cozy, not chaos
Packaging upgrades that make it giftable
- Add a mini wooden spoon tied to the jar
- Pair with a tiny syrup bottle or jam jar
- Include a “Sunday Morning” recipe card with topping ideas

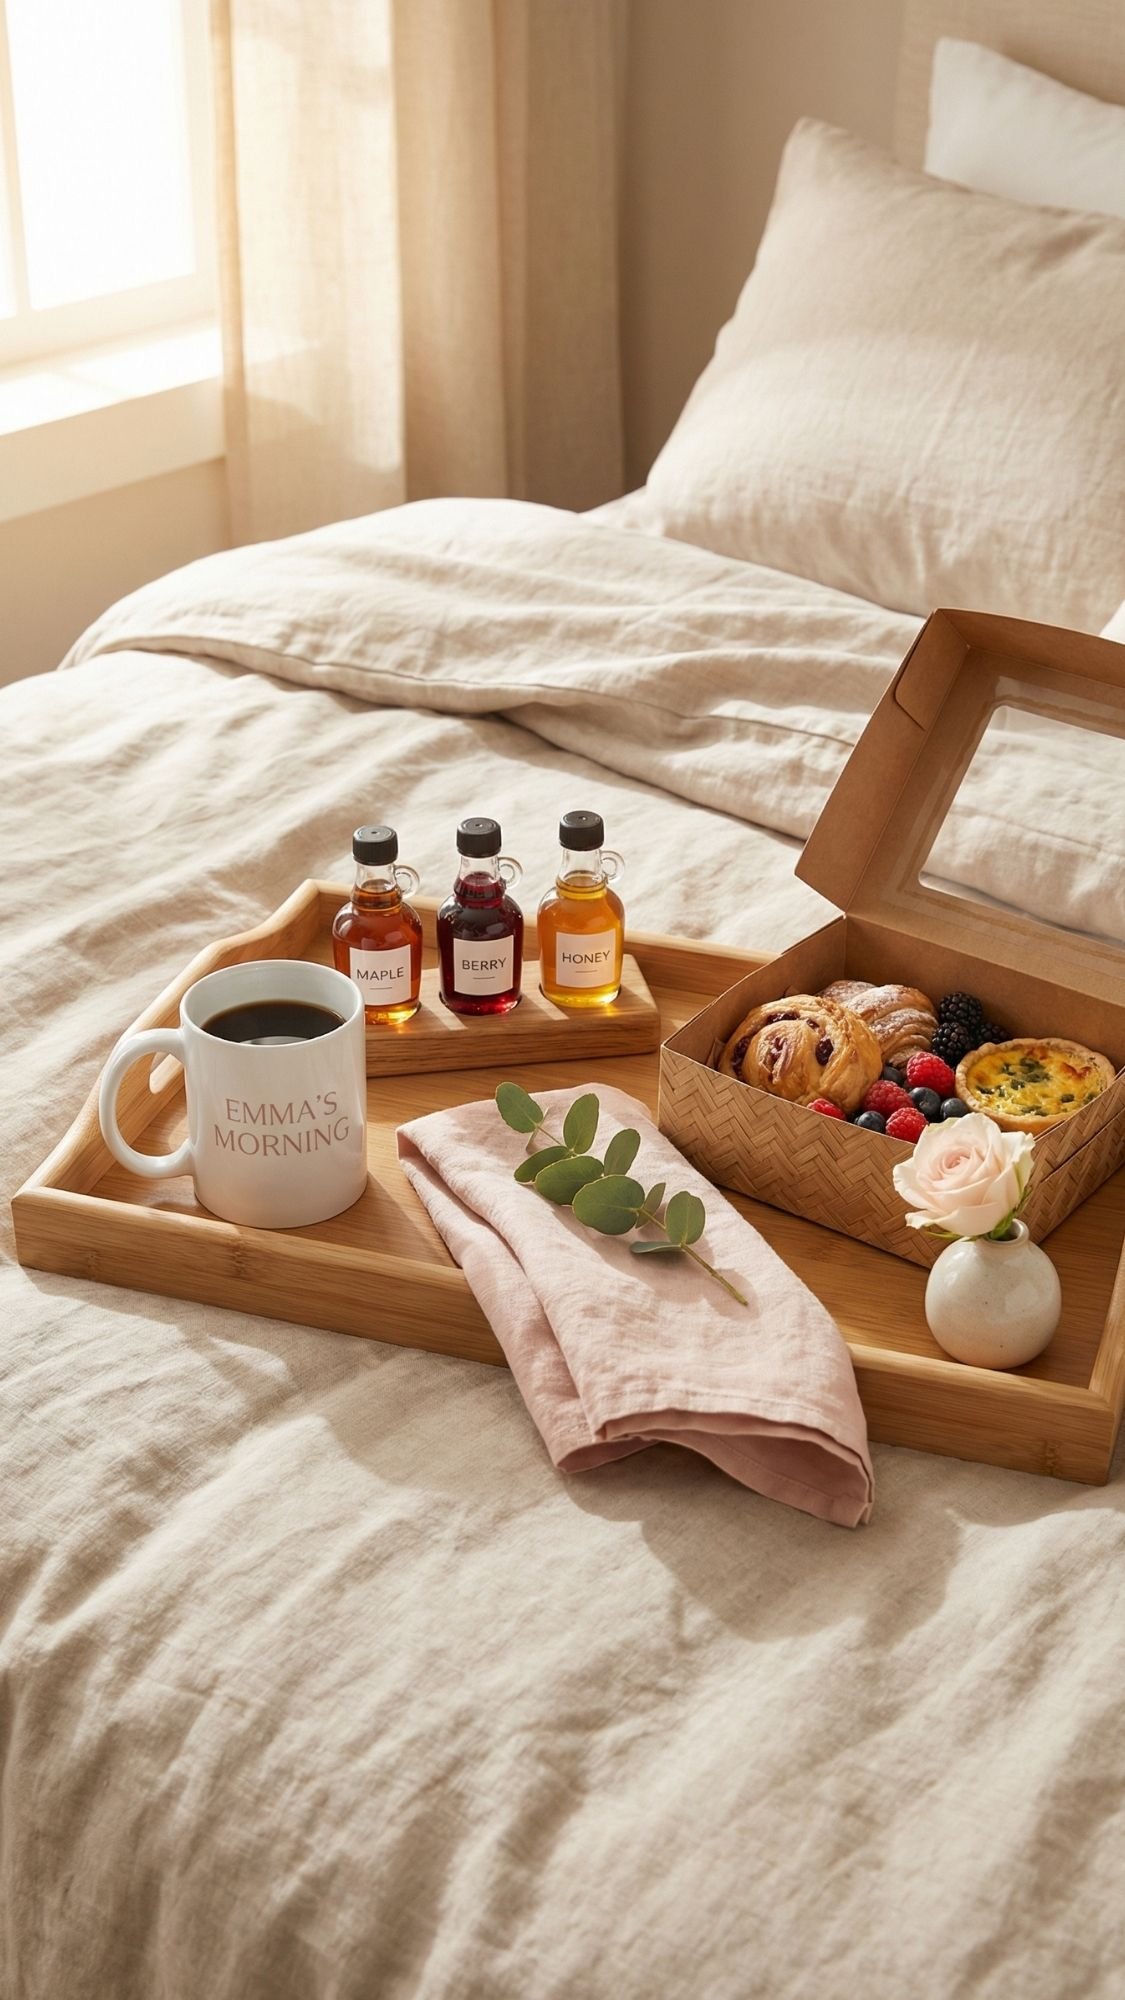
5) Syrup Flight Set (the “wow” add-on that takes 5 minutes)
This is the kind of extra that makes Mom go, “Oh you planned this.” Tiny bottles instantly read boutique, even if you filled them at your kitchen counter while wearing paint-splattered leggings. Ever notice how mini versions of anything feel fancier? Same logic here.
You can go two routes. You can do store-bought syrups decanted into cute bottles for speed, or you can do simple homemade flavored syrup if you want the full DIY flex. Either way, the presentation does the heavy lifting.
What you need
- 3 to 4 mini glass bottles with tight, leak-proof lids
- Mini funnel or squeeze bottle for filling
- Labels or kraft tags
- Optional: heat-shrink bands for a sealed look
- Syrups: maple, vanilla, cinnamon, berry, or caramel
Flavor combos that feel intentional
Pick 3 flavors that cover different moods.
Classic cozy
- Maple
- Vanilla
- Cinnamon
Fruity brunch
- Maple
- Strawberry
- Blueberry or mixed berry
Coffee lover
- Vanilla
- Caramel
- Brown sugar cinnamon
Pro-Tip: Keep it to 3 or 4 bottles. More than that looks crowded and starts feeling like a science lab.
How to bottle it so it doesn’t leak
A common mistake beginners make is overfilling the bottles, then the lid smears syrup everywhere when you tighten it. Leave a little headspace.
- Fill to about 80%
- Wipe bottle threads clean before closing
- Tighten lids firmly
- If you want extra polish, add a heat-shrink band
- Pack the bottles upright in a small box or tray corner
Labels that look clean and photograph well
- Use simple names: “Vanilla,” “Cinnamon,” “Berry”
- Keep the label centered on the front
- Use the same label size on all bottles
If you want to add a cute line, put it on the back label, not the front. Front labels should stay clean and readable at a glance.
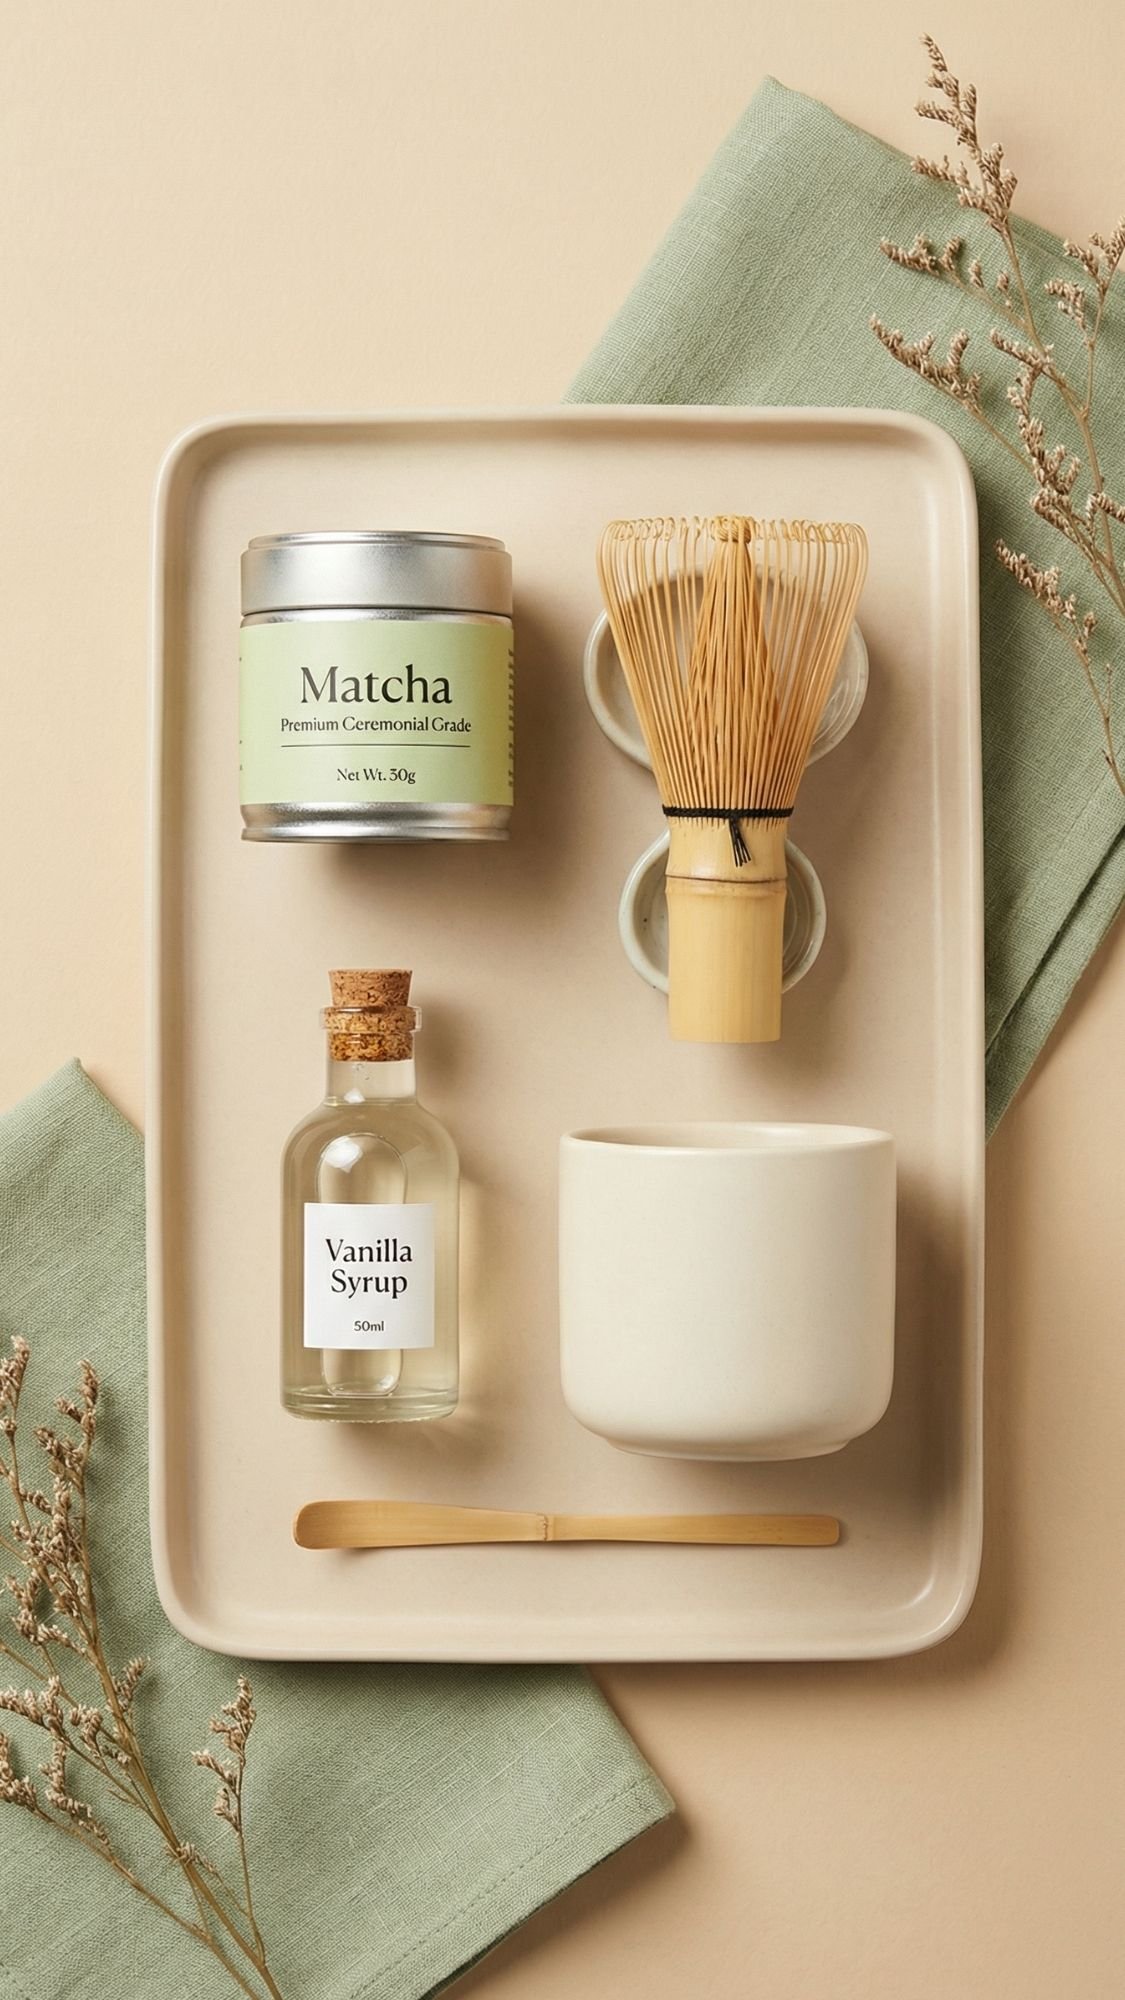
6) Matcha Latte Kit (modern, pretty, and very “I know what’s trending”)
If Mom loves coffee and tea, this kit feels like a thoughtful upgrade. Matcha also brings that soft green color that photographs beautifully, so it plays really well with neutral breakfast tray styling. And if she’s not a matcha person yet, this is basically your chance to convert her. Ever tried a sweet, creamy matcha latte that actually tastes good? Yeah, it’s not the grassy sadness some cafés serve.
I’ve found kits feel more valuable when they include one tool. Just one. A tiny whisk or frother turns a jar of powder into a real gift.
What to include
- Matcha powder in a small tin or jar
- Sweetener, optional: vanilla syrup or honey sticks
- A mini whisk or handheld frother
- A cute scoop spoon
- Optional add-on: a tiny jar of vanilla sugar or cinnamon
Assembly and packaging
- Place matcha in a tin or jar and label it clearly.
- Add the whisk or frother beside it so it feels like a complete kit.
- Add a sweetener and a scoop spoon.
- Pack everything in a small box, or build it right on the tray in one corner.
Pro-Tip: Put the matcha in the middle and build around it. It becomes the “anchor,” so the kit looks neat instead of scattered.
Make it beginner-friendly with a simple instruction card
A common mistake beginners make is using boiling water. That makes matcha bitter fast.
Simple card copy
- “Add 1 tsp matcha to a cup. Add a splash of warm, not boiling water. Whisk until smooth. Add milk and sweetener.”
That’s it. No essay required.
Pro notes that keep it fresh
- Store matcha away from heat and sunlight.
- Keep the lid tight to prevent clumping.
- If you include a frother, test it before gifting. Dead batteries are a mood killer.
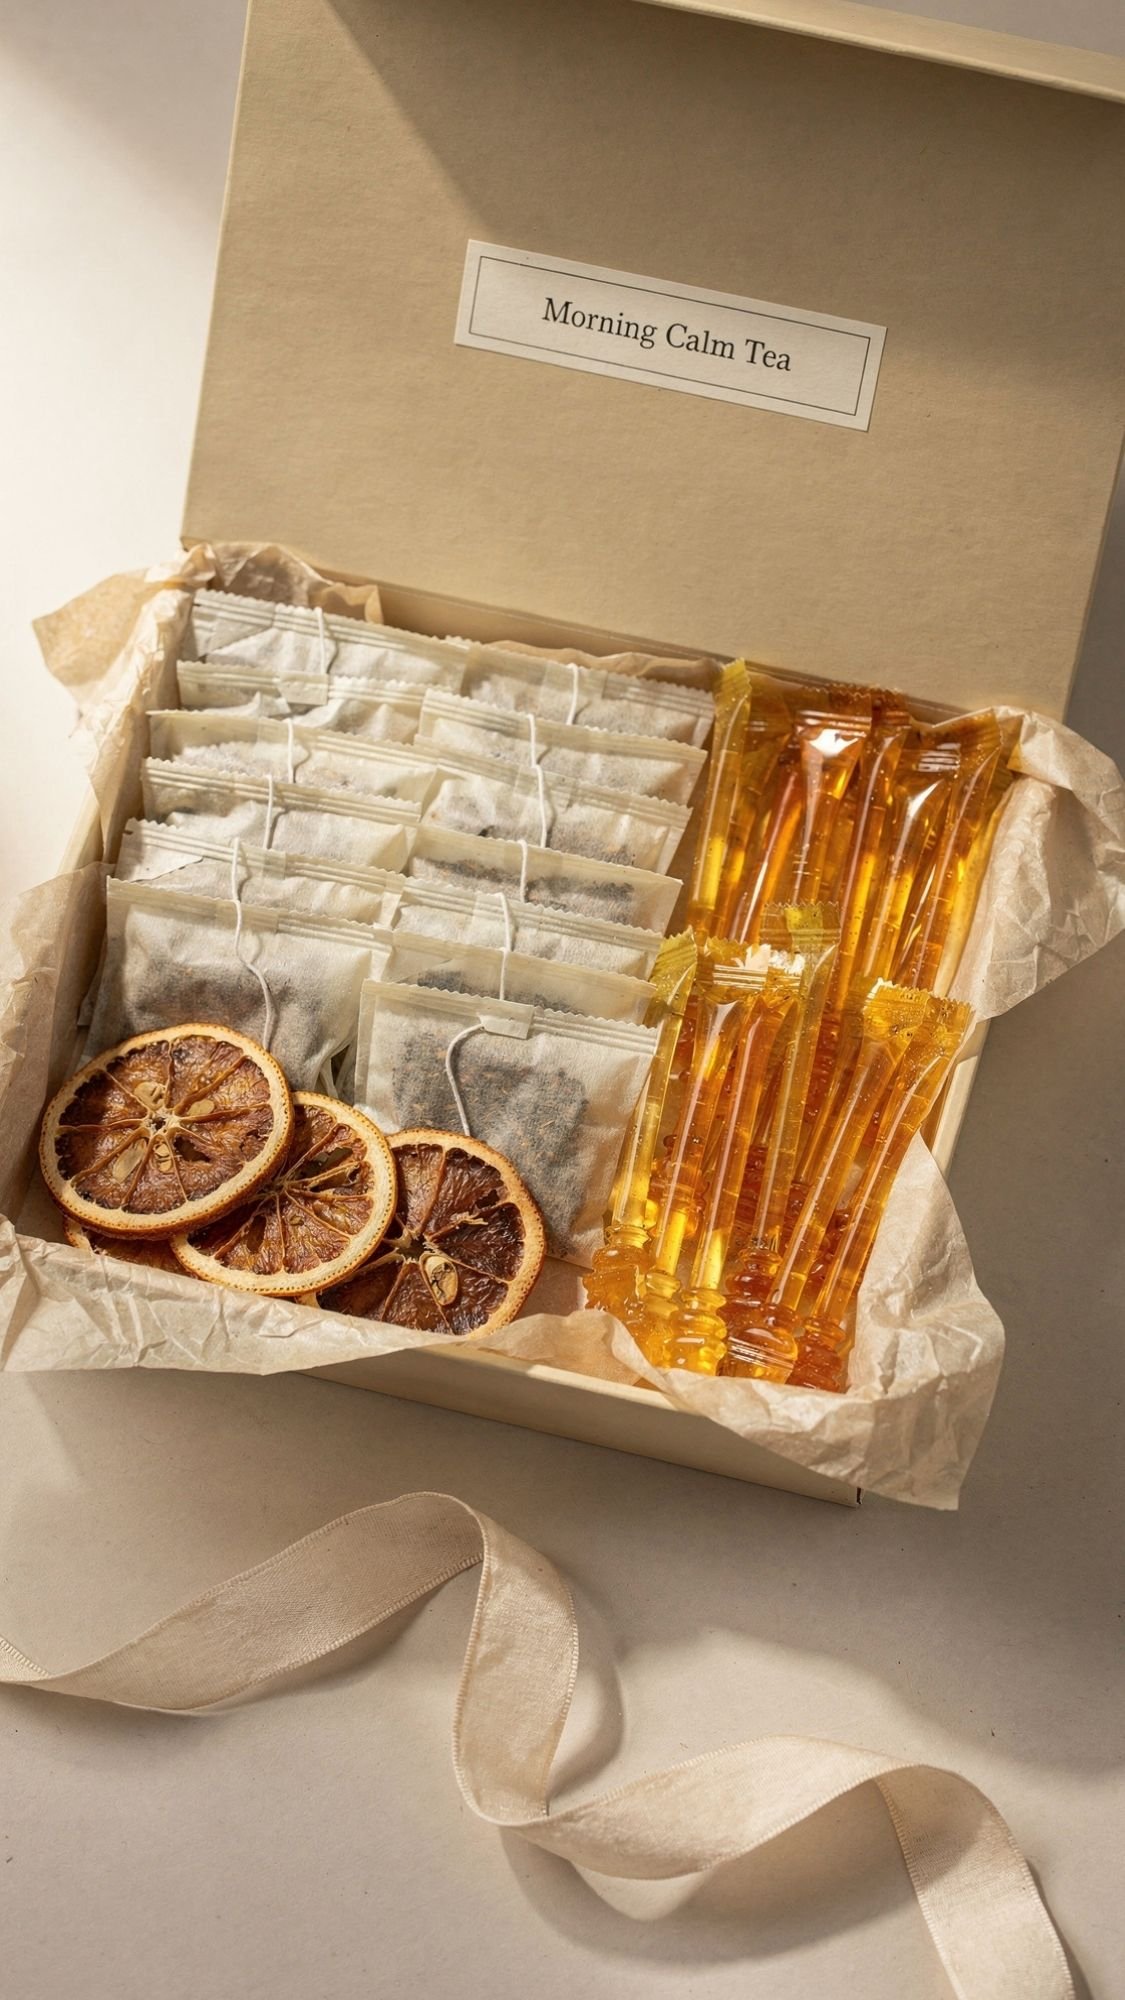
7) Tea Sampler “Morning Calm” Box (easy, elegant, always useful)
This is the gift you make when you want Mom to actually slow down. It feels thoughtful without being complicated, and it looks beautiful styled on a tray. Plus, tea packaging is already pretty, so you get an instant aesthetic boost. Ever notice how tea sachets look like they belong in a spa gift set? Exactly.
I’ve found tea samplers land best when you keep the theme tight. Don’t throw in every random tea you own. Pick a vibe and commit.
Pick a theme (this makes it feel curated)
Choose one:
- Cozy and classic: breakfast tea, vanilla chai, cinnamon spice
- Fresh and bright: lemon ginger, mint, citrus green tea
- Sleepy morning calm: chamomile, lavender, honey vanilla
What to include
- 6 to 10 tea sachets, all in the same theme
- Honey sticks or a mini honey jar
- Dried orange slices or cinnamon sticks for a fancy touch
- Optional: a tiny ceramic spoon or tea infuser
Pro-Tip: Keep each tea in its own wrapper. If you toss unwrapped tea together, the scents blend, and suddenly everything tastes like one confused potpourri.
Packaging that looks premium
- Small gift box, tin, or clear lidded container
- Parchment liner to keep it tidy
- A simple label on the lid: “Morning Calm Tea” or “Mom’s Tea Box”
- Optional ribbon wrap around the box
Add a tiny instruction card (so it feels complete)
Keep it readable and useful.
Card idea
- “Steep 3 to 5 minutes. Add honey if you want. Take five minutes to yourself. Yes, I mean it.”
That last line is the emotional hook. It makes it more than tea.
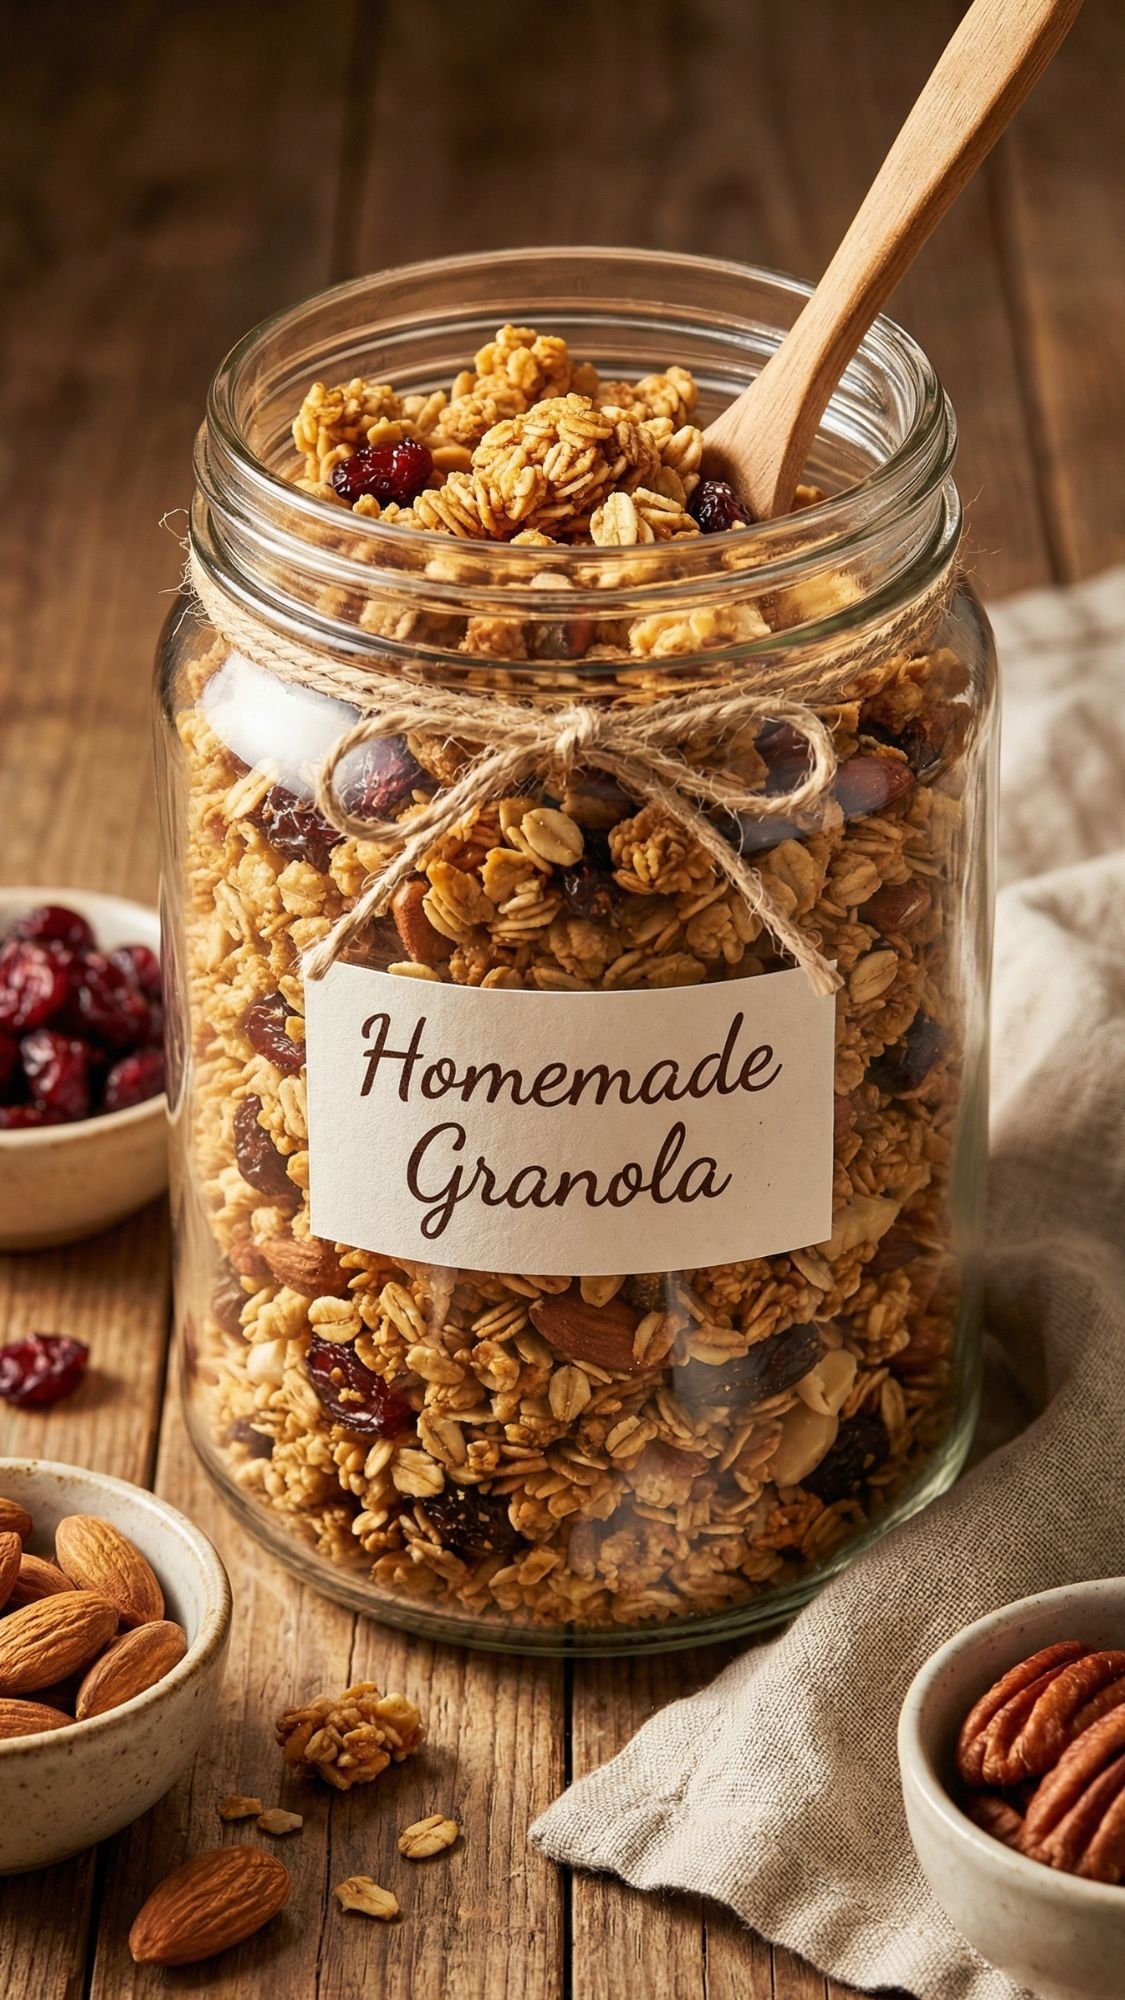
8) Homemade Granola Jars (crunch that makes mornings feel put together)
Granola is one of those small joys that makes breakfast feel intentional, even if the rest of the day turns into chaos. These jars work as a stand-alone gift or as the crunchy add-on to a parfait kit later in the list. And they look gorgeous. Texture sells, always.
Here’s the key thing I’ve learned after making granola a lot. Low and slow wins. If you crank the oven temp because you’re impatient, the edges burn while the middle stays soft. Granola burns in the time it takes to answer a text. Ask me how I know.
What you need
- Glass jars with tight lids
- Homemade granola, fully cooled
- Optional add-ins: dried fruit, coconut flakes, mini chocolate chips
- Kraft label or tag
- Optional: silica packet for gifting, helps keep it crisp in humid areas
Make it gift-worthy, not just “granola in a jar”
- Layer it with intention. Put the prettiest bits where they show.
- Add a simple label, like “Homemade Granola” and the date.
- Tie on a mini note with serving ideas.
Serving note ideas
- “Sprinkle on yogurt with berries.”
- “Top pancakes or waffles.”
- “Eat straight from the jar, no judgment.”
Pro-Tips for crunchy granola that stays crunchy
- Let it cool completely before you jar it. Warm granola creates steam, steam makes soggy granola.
- Store it airtight. Loose lids invite moisture.
- If you add dried fruit, mix it in after baking so it doesn’t turn into hard little rocks.
A common mistake beginners make is packing it while it still feels slightly warm because it looks dry. It might look dry, but the trapped heat turns into moisture in the jar. That’s how you get “chewy granola sadness.”
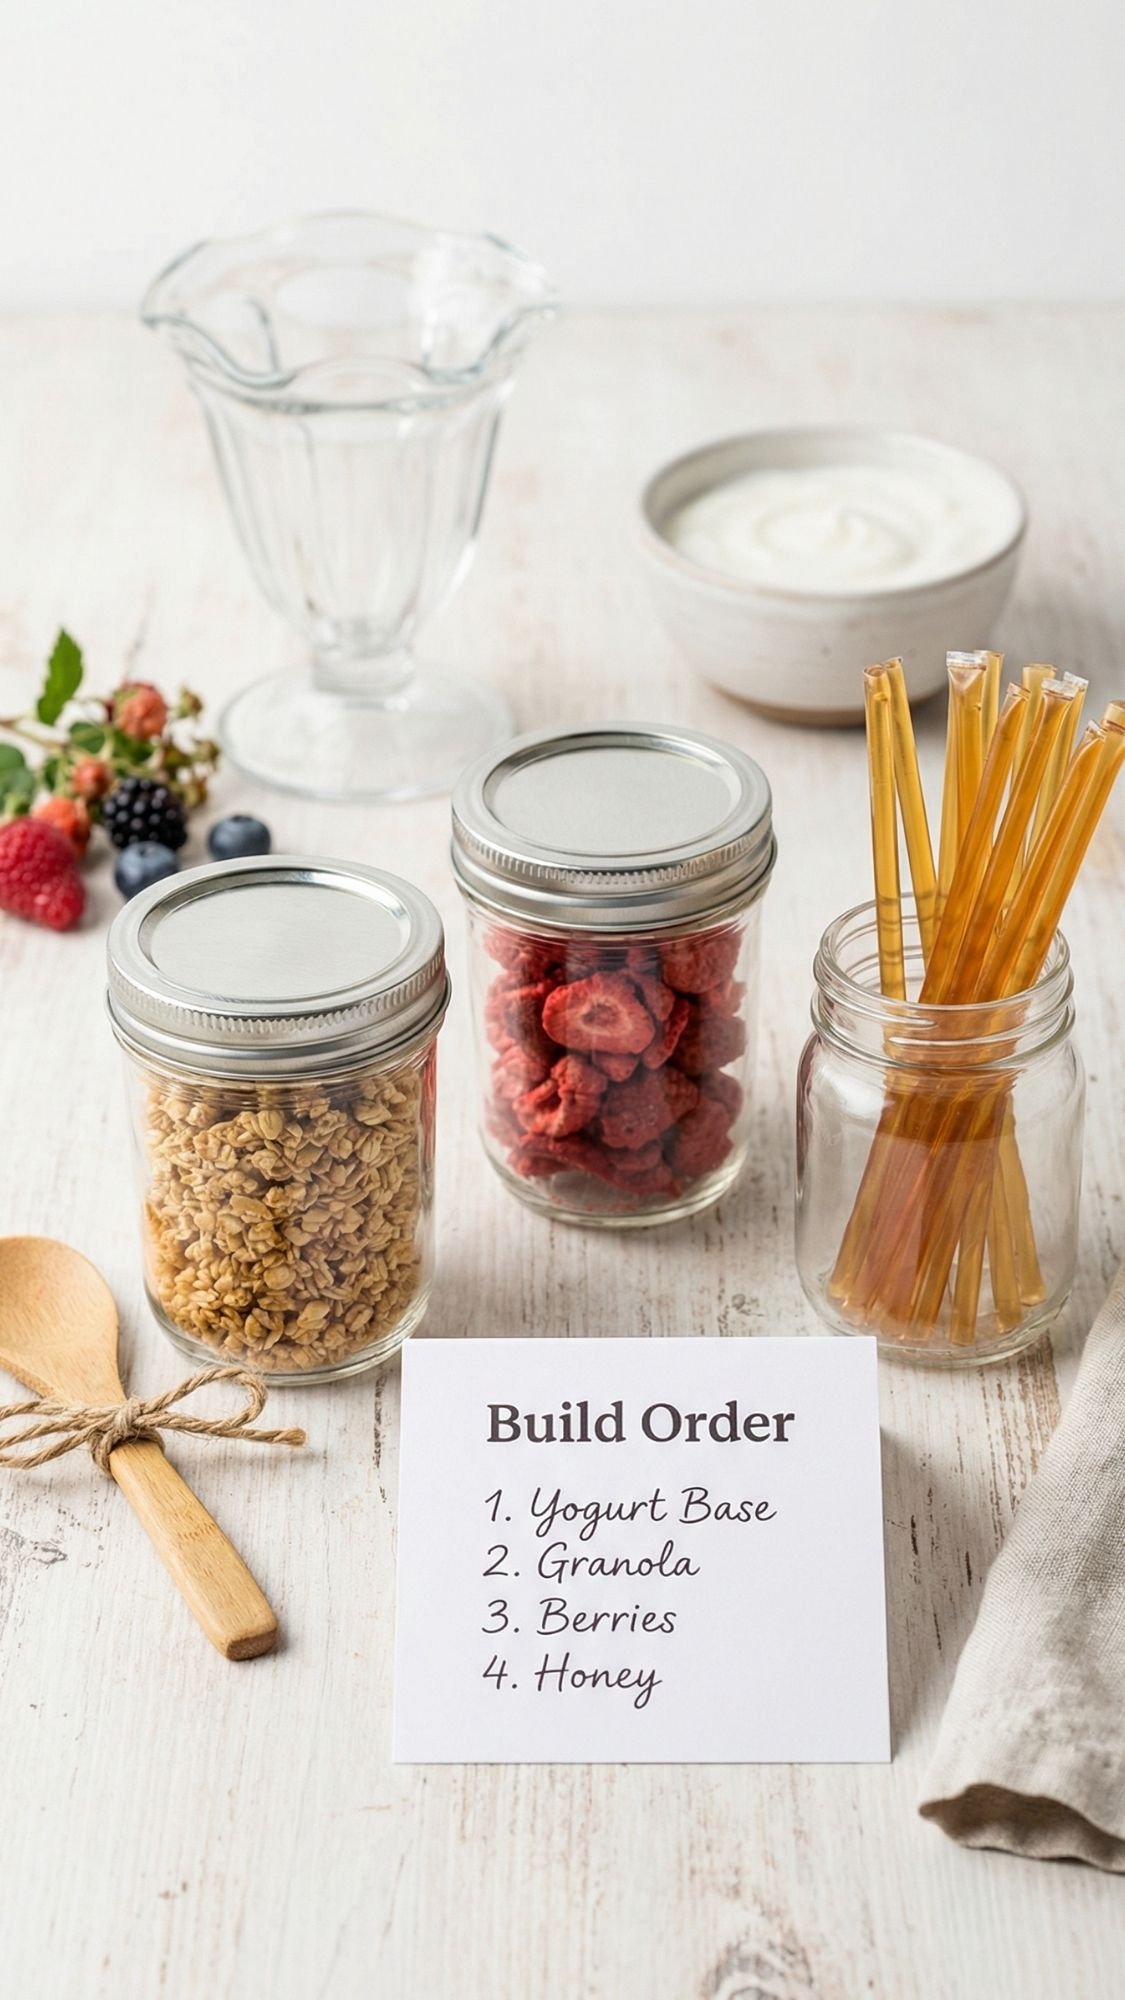
9) Yogurt Parfait Kit (pretty, practical, and zero soggy surprises)
This one looks fancy but it’s basically just smart packing. A parfait kit makes breakfast feel like a café moment, and it fits perfectly with the “breakfast in bed” vibe because it’s light, fresh, and easy to assemble. Ever had a parfait where the granola went soft and sad before you even took a bite? Yeah, we’re avoiding that at all costs.
I’ve found the difference between a “cute kit” and a “wow kit” is simple. Separate the crunch from the creamy. Always.
What to include
- Small jar of granola, from DIY gift #8
- Freeze-dried fruit or dried fruit
- Mini honey jar or honey sticks
- Optional: chia seeds or vanilla sugar
- Optional: a small spoon tied with twine
How to package it so it stays crisp and clean
- Put granola in its own jar with a tight lid.
- Put fruit in a tiny jar or sealed bag.
- Add honey sticks or a mini jar, and keep it upright.
- Bundle everything in a small box or basket, or style it right on the tray.
Pro-Tip: I always include a “build order” card. It makes the kit feel like a real gift, not just ingredients.
Simple build order card (copy-paste friendly)
- “Yogurt first. Fruit next. Granola last. Honey on top.”
- That’s it. Clear, easy, and it prevents the soggy situation.
Pro-Tips so it looks premium in photos
- Use clear containers so you can see texture and color.
- Stick to one fruit color story, like berries or citrus.
- Keep labels minimal. Too many words starts looking messy.
- Add one small garnish item, like a dried orange slice, if it matches your vibe.
A common mistake beginners make is adding fresh fruit into the kit too early. Fresh fruit can leak, and then everything turns into a sticky mess. If you’re gifting ahead of time, use freeze-dried fruit for the kit, and let Mom add fresh fruit when she eats it.
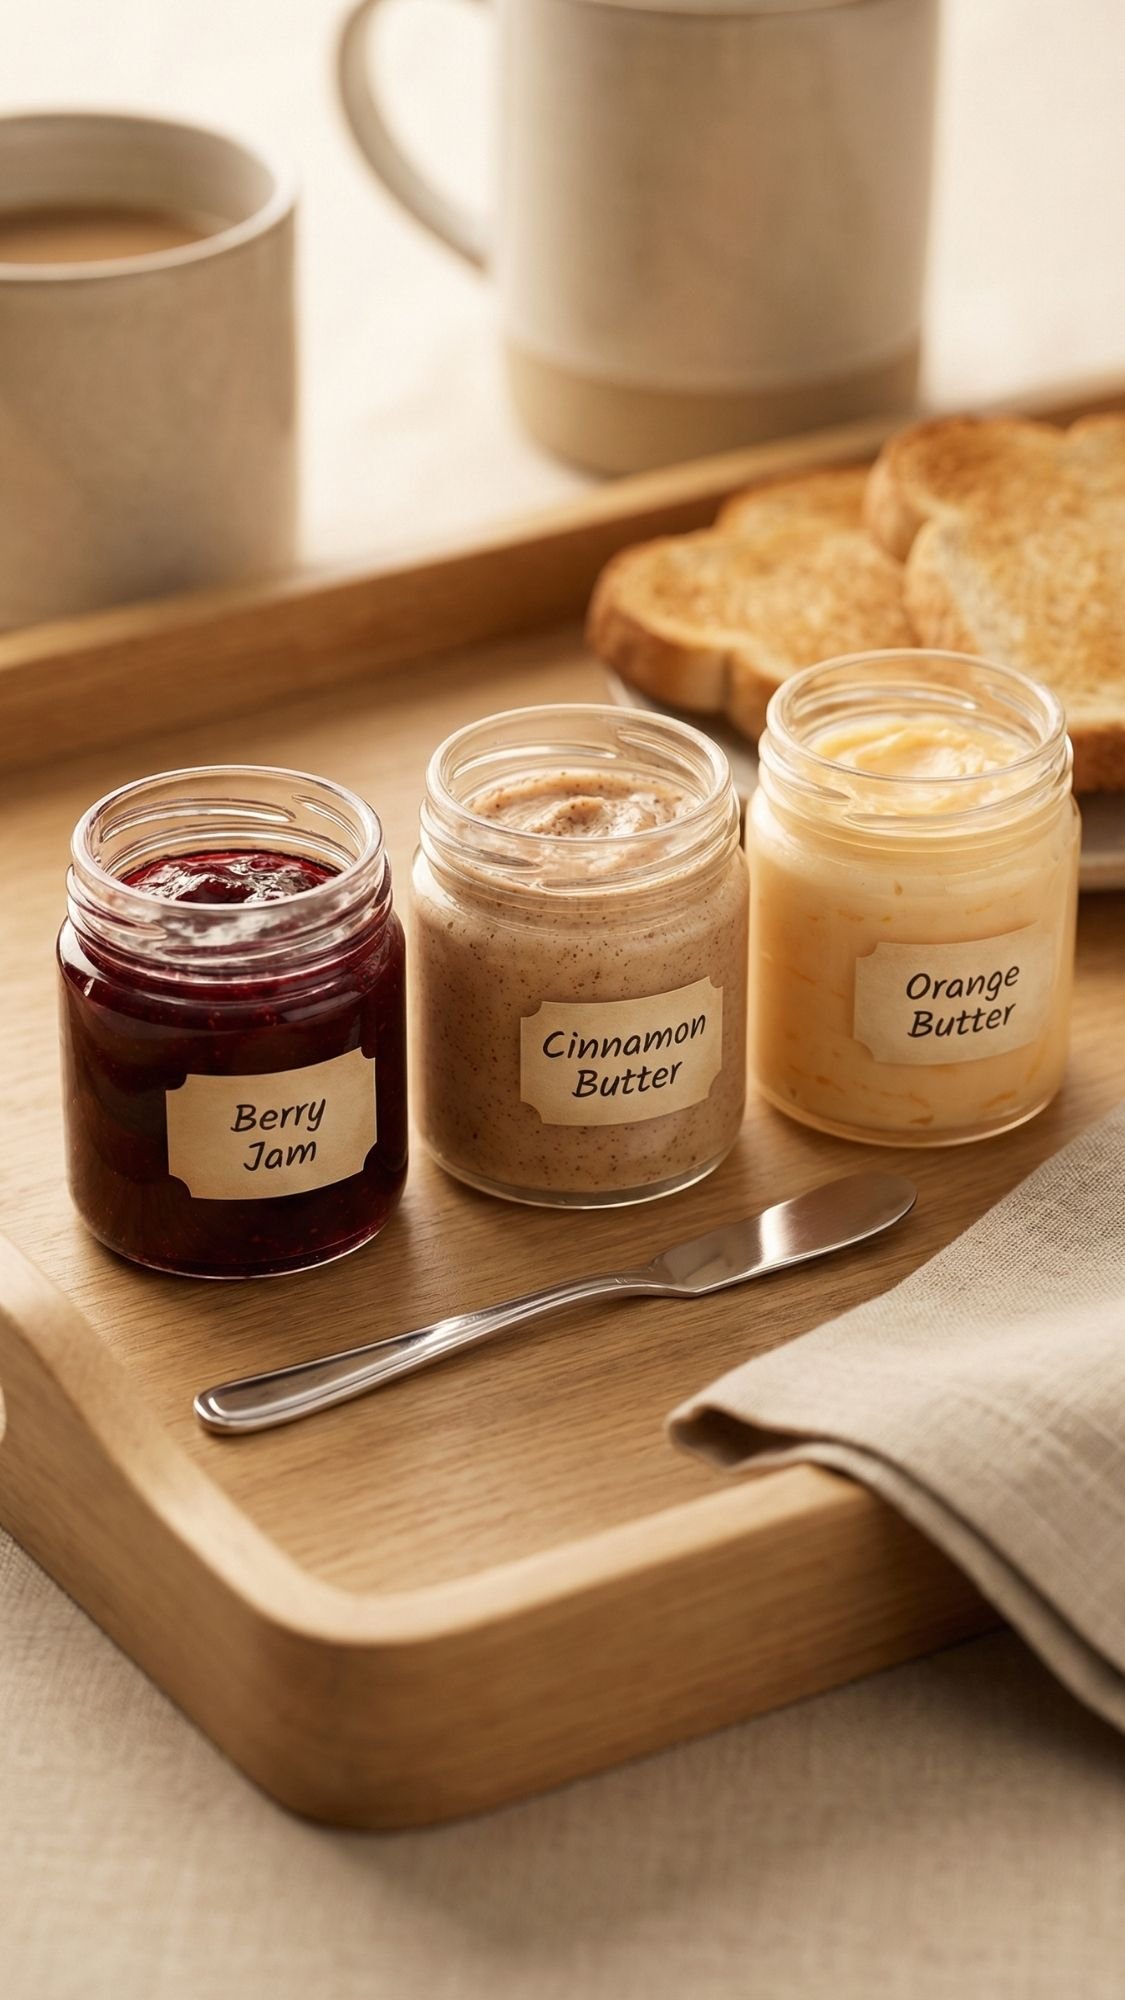
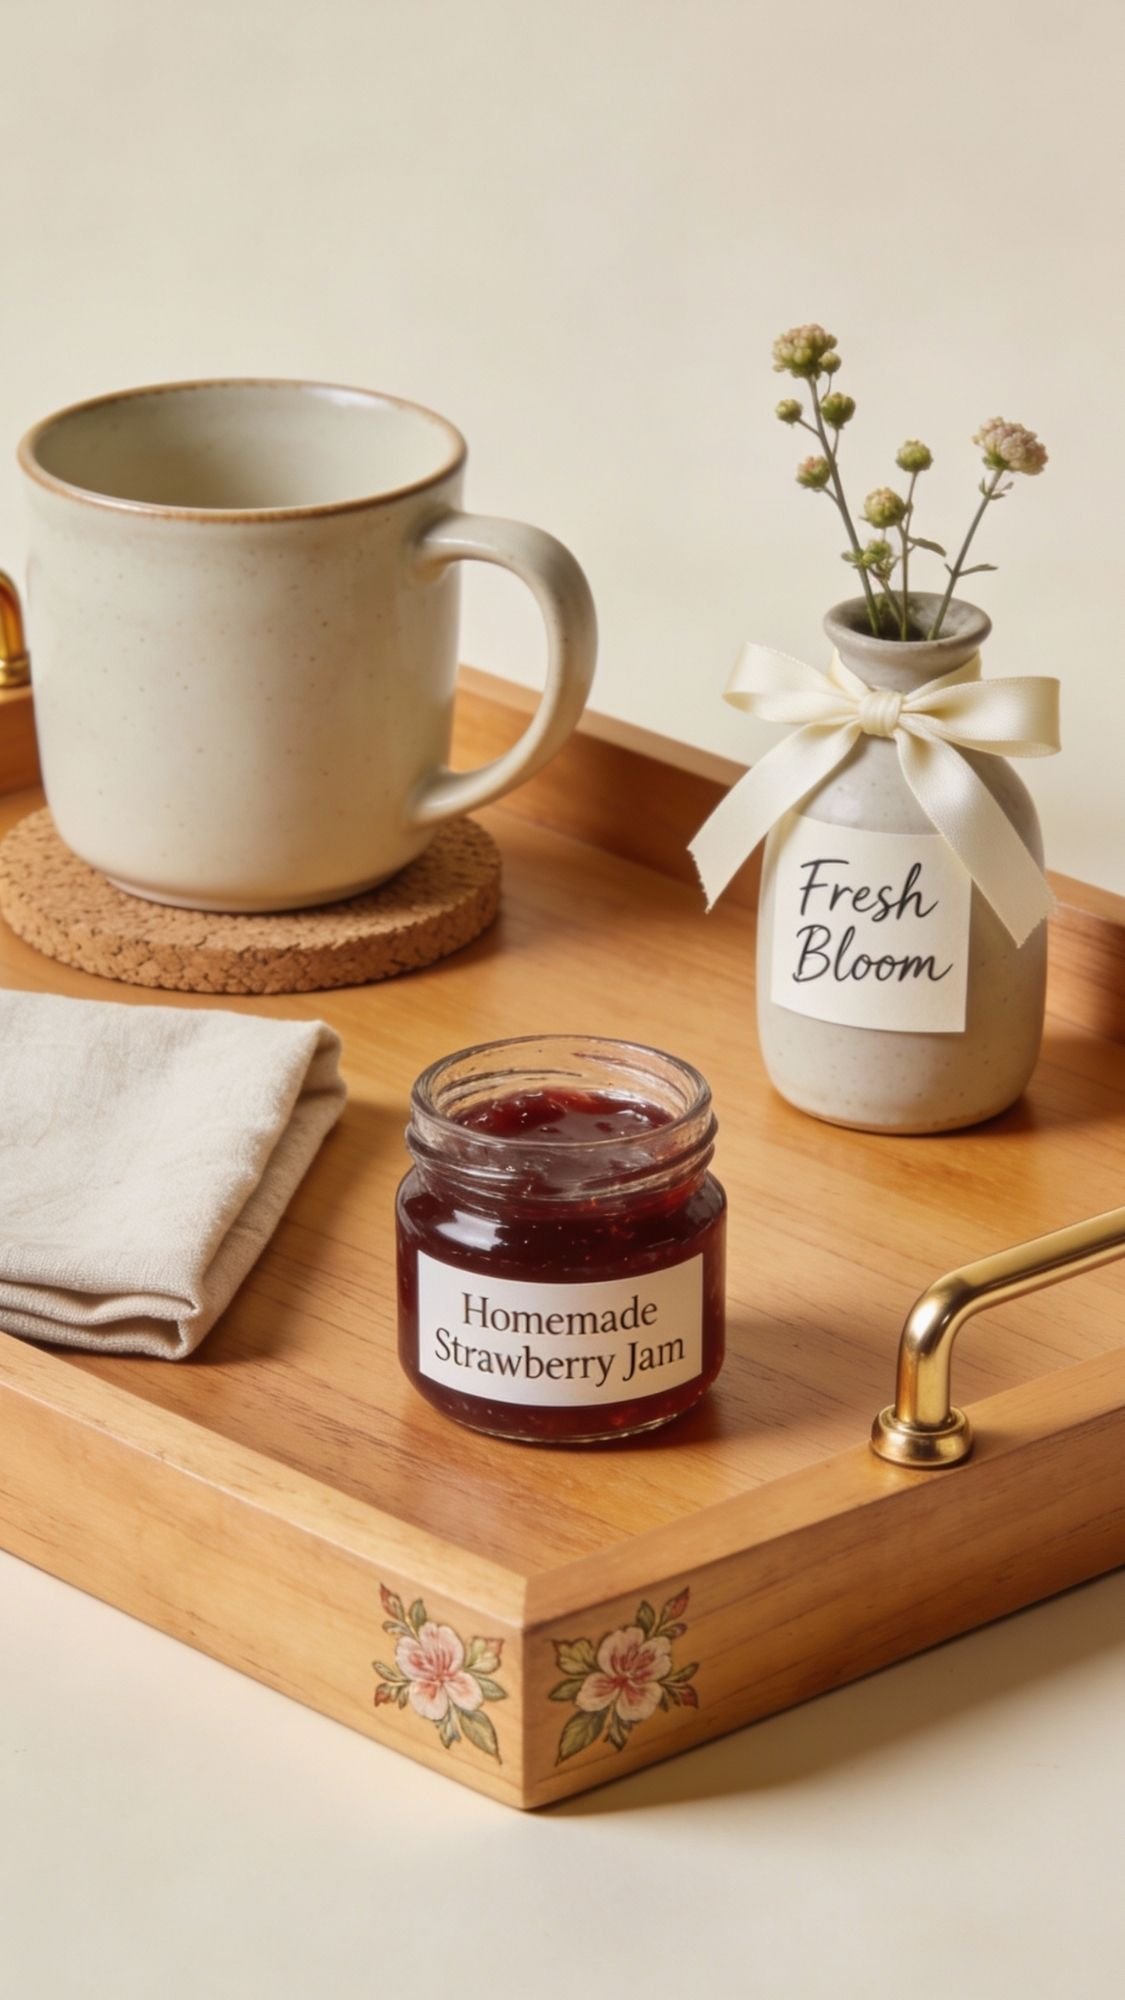
10) Jam + Butter Sampler (tiny jars, big “I thought of you” energy)
This one feels like a fancy little brunch board add-on, but it’s ridiculously simple to pull together. Mini jars make anything look curated, and a jam and butter sampler instantly upgrades toast, biscuits, pancakes, waffles, you name it. Ever seen those boutique hotel breakfast spreads where everything comes in tiny dishes? Same vibe, way cheaper.
I’ve found this gift works best when you keep the flavors balanced. Do one classic, one fruity, one cozy-spiced. That variety makes the sampler feel intentional instead of random.
What to include
- 2 to 4 mini jars with tight lids
- Jam, store-bought or homemade
- Butter, plain or flavored
- Optional: honey or lemon curd
- Mini spreader knife or small wooden spreaders
- Labels or kraft tags
Flavor ideas that always work
Jam
- Strawberry, raspberry, or mixed berry
- Apricot or peach for a softer, sunny option
- Fig jam if you want it to feel extra fancy
Flavored butter ideas
- Cinnamon honey butter
- Berry butter (jam swirled into softened butter)
- Orange zest butter with a pinch of salt
Pro-Tip: Chill flavored butter before packing it. Warm butter slides around and smears the jar. Cold butter holds shape and looks clean.
How to package it cleanly
- Fill jars about 80 to 90% so you don’t smear the lid.
- Wipe the rim and threads before closing. This step matters more than people think.
- Label each jar clearly on the front.
- Add a mini spreader knife or two, it makes it feel complete.
A common mistake beginners make is skipping labels because they think the flavors look obvious. They don’t. At 8 a.m., “is this apricot or peach” becomes a real question.
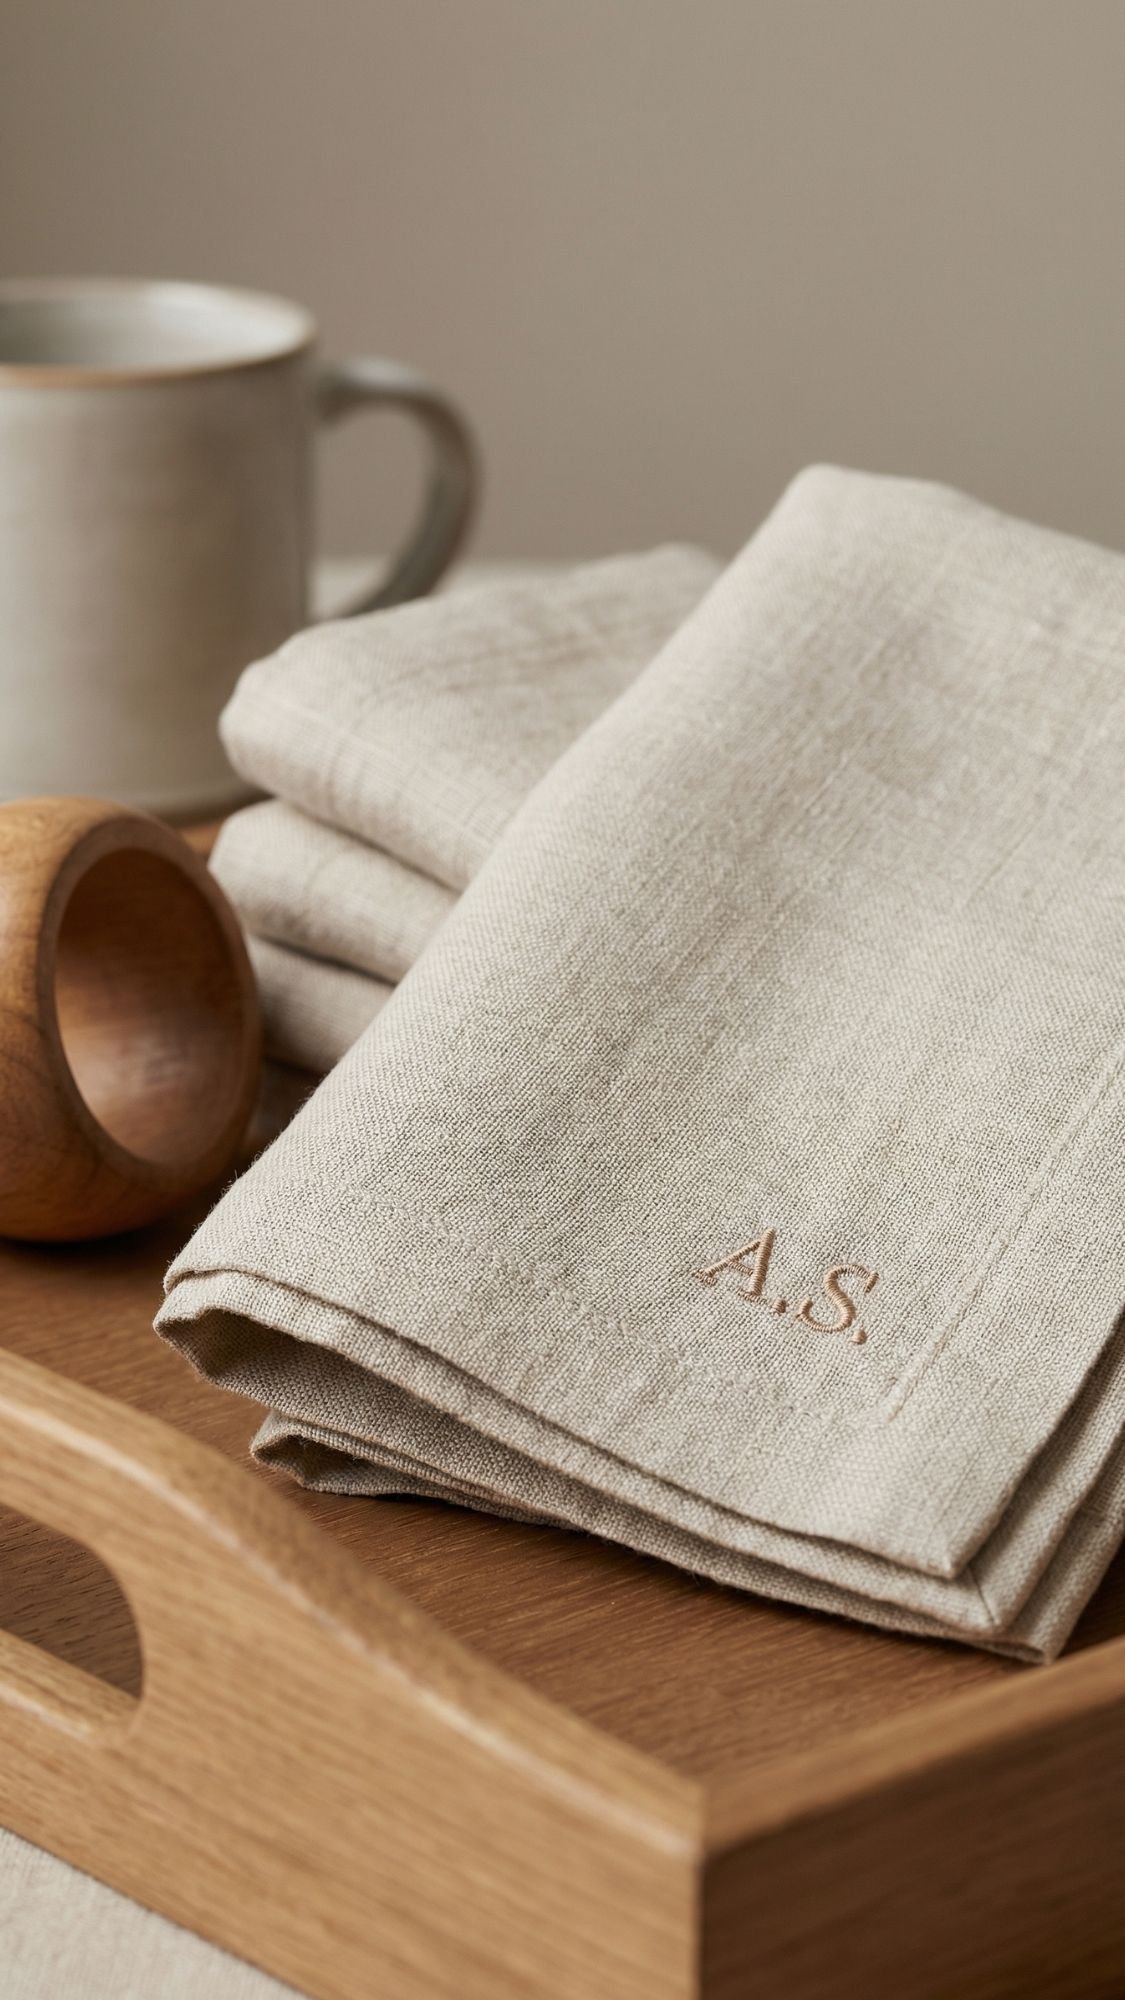
11) Linen Napkins with a Simple Hem or Iron-On Monogram (quiet luxury in fabric form)
If you want the whole breakfast-in-bed setup to feel intentional, linen napkins do a lot of work. They look expensive, they feel nice, and they’re actually useful long after the waffles disappear. Ever notice how even a basic breakfast looks fancier when it’s paired with linen? Yep, that’s the move.
You can go two ways here. If you sew, you can hem a clean edge. If you don’t sew, you can still make this look polished with an iron-on monogram, as long as you prep correctly.
Option A, quick sewn hem (the cleanest finish)
Materials
- Linen fabric or linen-blend fabric
- Fabric scissors or rotary cutter
- Iron and ironing board
- Pins or fabric clips
- Sewing machine or hand needle and thread
Steps
- Cut your squares, keep them even. I like a simple size that folds nicely.
- Press the edges, then press again. The iron makes this look pro.
- Sew a straight line around the edge. Keep your stitch length consistent.
Pro-Tip: Pressing before sewing matters. In my workshop, I’ve found a clean press fixes 80% of what people call “my sewing looks messy.”
Option B, iron-on monogram (no-sew, still giftable)
Materials
- Pre-made linen napkins or cut fabric squares
- Iron-on vinyl letters or monogram
- Iron, parchment paper
- Lint roller and optional fabric pre-wash
Steps
- Pre-wash and dry the napkins if you can. Fabric shrinkage ruins placements.
- Press the napkin flat and remove lint.
- Place the monogram in one corner, keep it subtle.
- Press with parchment paper using the correct heat and timing.
A common mistake beginners make is trying to iron on top of wrinkled fabric. Wrinkles cause uneven pressure, and the vinyl lifts at the edges later.
Monogram placement that looks high-end
- Keep it in the lower corner, not centered
- Use a simple initial or two letters
- Match the color to the tray vibe, like cream, warm gray, or soft black
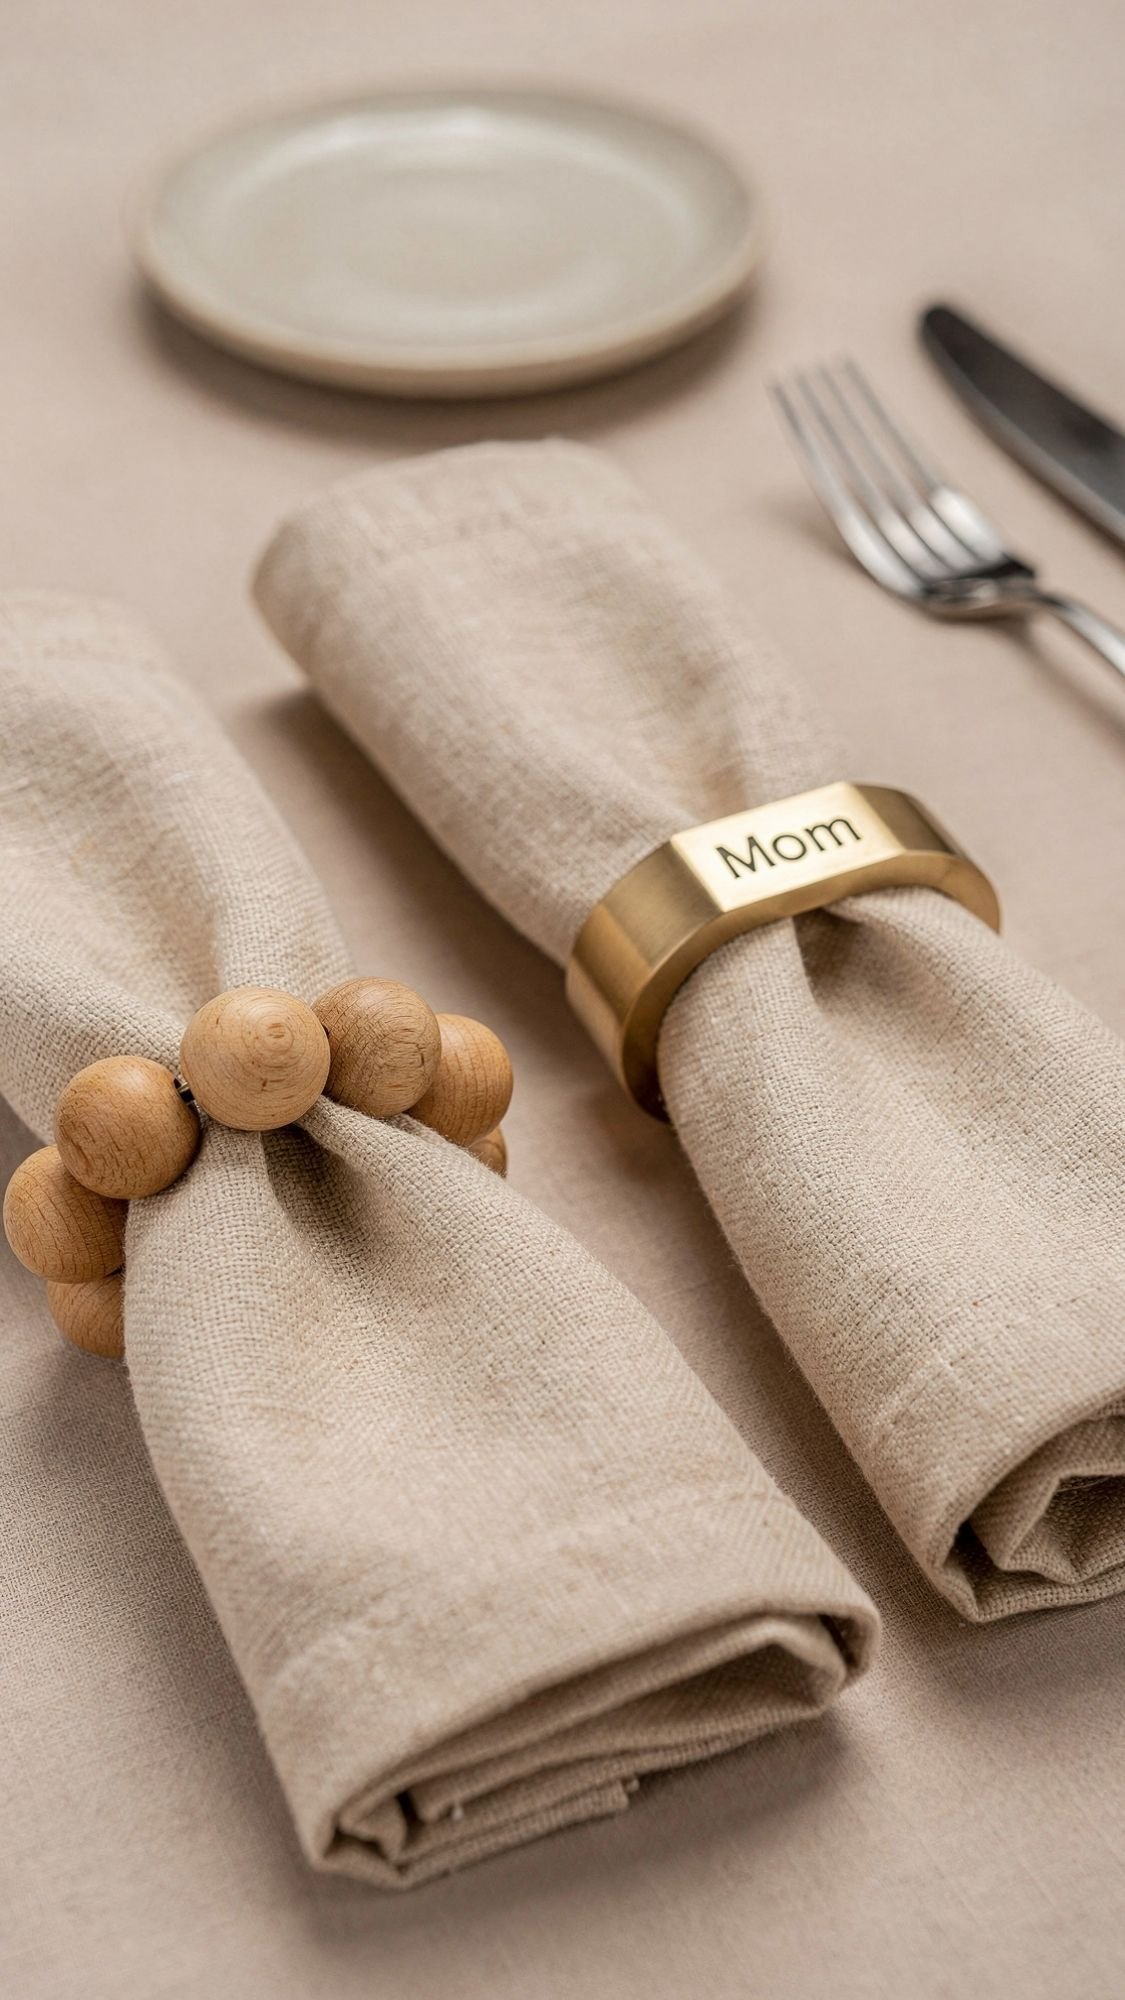
12) DIY Napkin Rings (wood bead, brass, or modern minimalist)
Napkin rings are tiny, but they make the whole tray look styled. They’re also a nice way to use up scraps, and they photograph beautifully because they add shape and texture. Ever wonder why styled breakfast trays look “finished” even when the food is simple? It’s usually the accessories, and napkin rings are one of the easiest wins.
I’ve found this project works best when you keep it consistent. Make a matching set, use the same materials, and don’t over-decorate. Simple looks more expensive.
Option A, wood bead napkin rings (boho, cozy, super giftable)
Materials
- Large unfinished wood beads
- Leather cord, cotton cord, or macramé cord
- Scissors
- Hot glue or strong craft glue, optional
- Optional: small tassel or tiny tag
Steps
- String beads until they form a circle that fits around a rolled napkin.
- Tie a tight knot, trim ends neatly.
- Add a tiny tassel if you want, but keep it small.
- Optional: add a dab of glue inside the knot for security.
Pro-Tip: Pre-roll the napkin first, then size the ring around it. If you guess the size, you’ll either make it too tight or comically loose.
Option B, minimalist ribbon or faux leather wrap (modern and fast)
Materials
- Plain metal rings or sturdy cardboard rings
- Linen ribbon or faux leather strip
- Glue, double-sided tape, or a single stitch
Steps
- Wrap the ring tightly with ribbon or strip material.
- Secure the end neatly on the inside.
- Keep the seam hidden so it looks clean.
A common mistake beginners make is using hot glue that leaves visible blobs. Use tiny amounts and keep the seam inside, always.
Option C, brass ring with a tiny name tag (simple and classy)
Materials
- Brass rings
- Small kraft tags or mini blank tags
- Pen or letter stamps
Steps
- Write “Mom” or a short word on the tag.
- Tie the tag to the ring with twine.
- Slide on the napkin and you’re done.
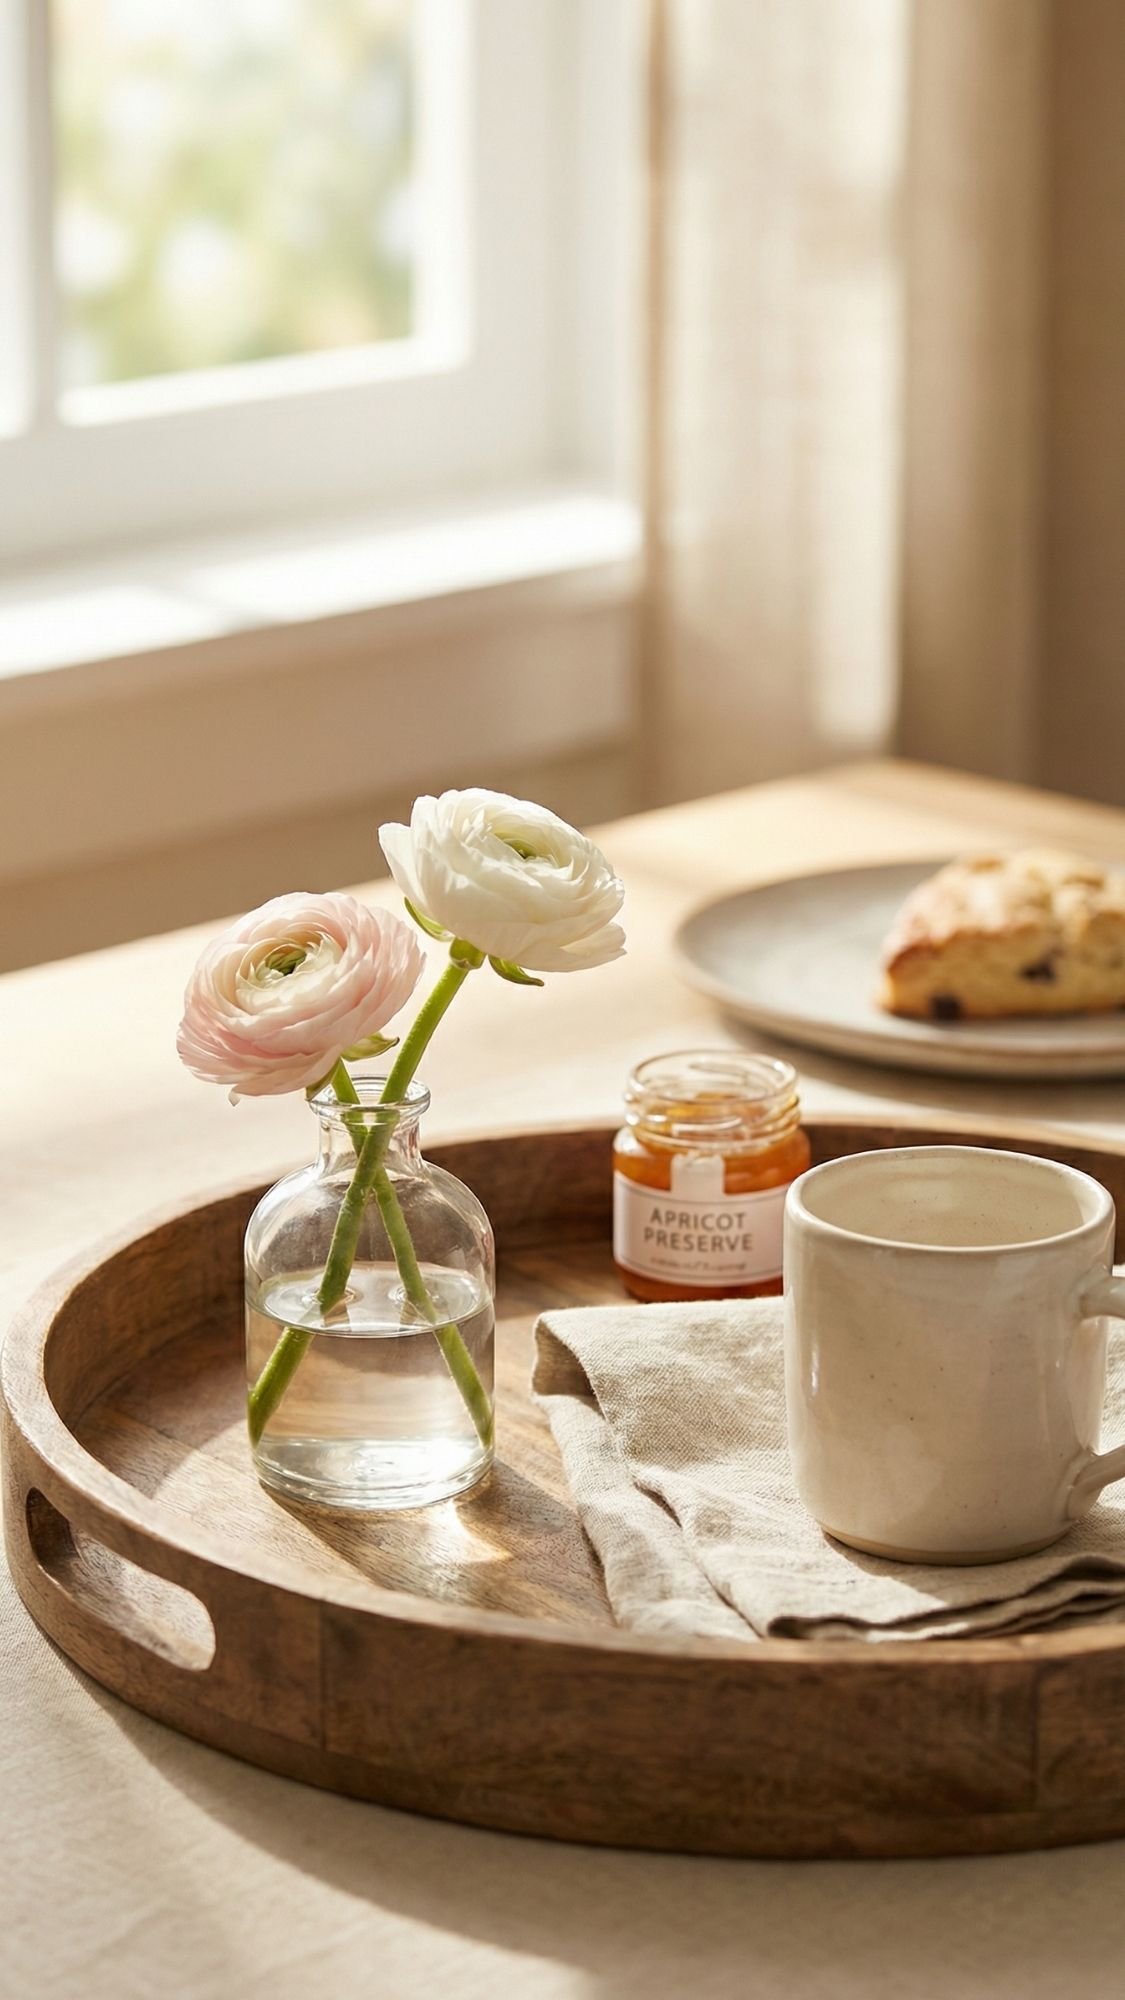
13) Mini Bud Vase (the tiny flowers trick that makes the tray feel planned)
If you want the whole setup to look like you thought about it for more than five minutes, add a bud vase. It’s such a small detail, but it changes the entire mood. Ever seen a breakfast tray that looks like a magazine shoot? There’s almost always a little flower moment happening.
This gift also works if you’re short on time because you can keep it simple. You don’t need a big arrangement. One or two stems does the job.
Materials
- Small bud vase, thrifted vase, or a tiny jar
- Optional: spray paint, acrylic paint, or glass paint
- Optional: ribbon or twine
- Fresh flowers or greenery, 1 to 3 stems
- Optional: adhesive felt dots for the base
Two easy ways to do it
Option A: Thrift and clean (fastest)
- Pick a small vase with a stable base.
- Wash it thoroughly and polish it dry.
- Add one or two stems, done.
Option B: Paint and seal (more DIY)
- Clean the vase, then paint in thin coats.
- Let it dry fully.
- If needed, seal it with an appropriate clear coat for the paint type.
- Add felt dots underneath to keep it from sliding on the tray.
Pro-Tip: I stick with lighter paint coats. Thick paint shows drips and brush marks fast, and the vase ends up looking homemade in the wrong way.
Flower choices that work for breakfast
- Low-scent flowers, like small roses, tulips, ranunculus, or simple greenery
- Avoid anything with a strong smell right next to food and coffee. It competes, and not in a cute way.
A common mistake beginners make is choosing tall stems that tip over on a tray. Keep the stems short so the vase stays stable.
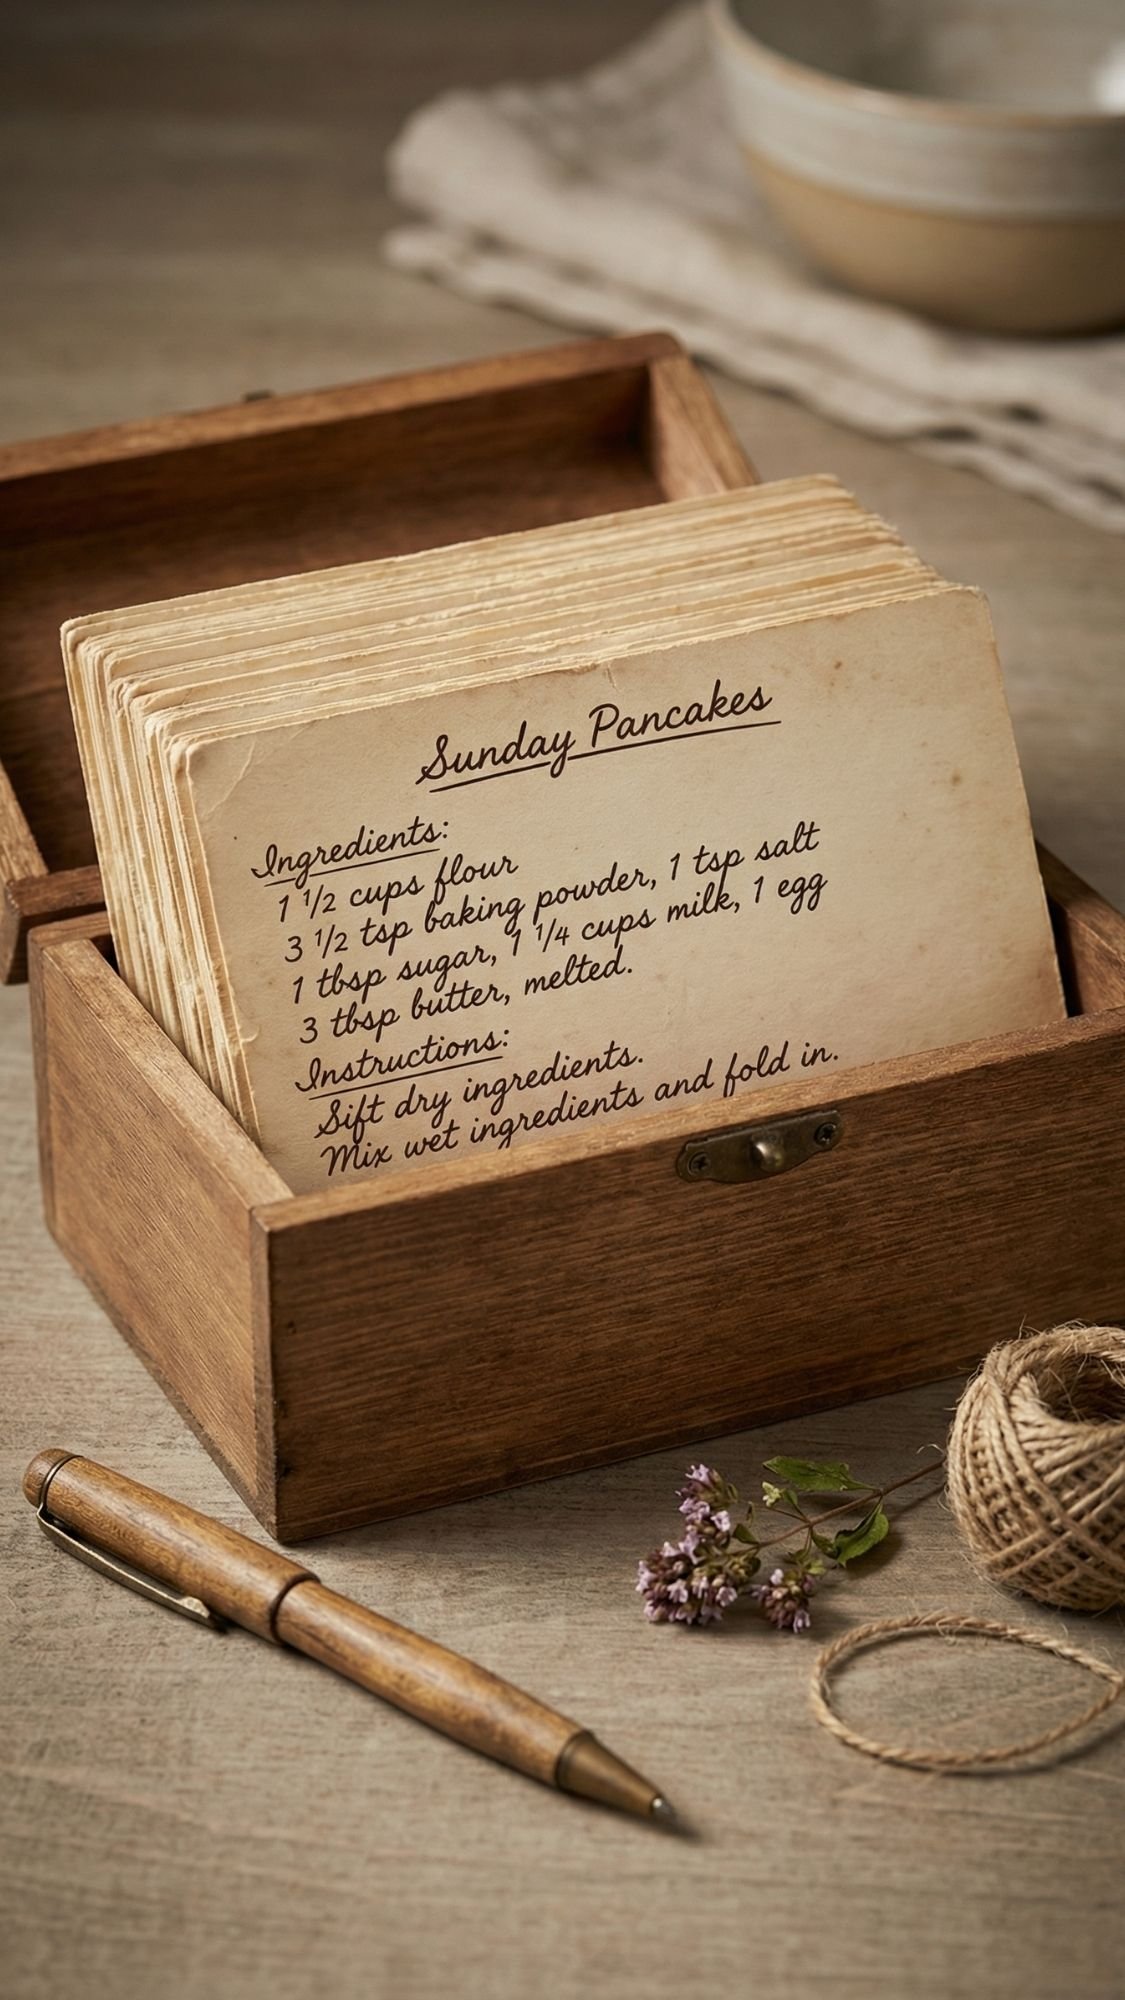
14) Recipe Card Keepsake Set (sentimental, useful, and not cheesy)
This gift is sneaky emotional. It’s not just “here’s a thing,” it’s “here’s a little piece of our family and my favorite memories with you.” Moms eat that up, in the best way. Ever notice how a handwritten recipe feels more meaningful than a printed one, even if the ingredients are identical? That’s the magic.
I’ve found the difference between a cute recipe set and a truly giftable one is structure. You don’t need 100 cards. You need a small set that’s finished, legible, and easy to store.
What to include
- 10 to 20 blank recipe cards
- 3 to 5 filled-out “starter” recipes from you
- A small recipe box, tin, or ring binder
- Optional: dividers like “Breakfast,” “Dessert,” “Family Favorites”
- A nice pen, optional but adds polish
How to make it feel personal fast
- Write one card that says “Mom’s favorite” and fill it in
- Add a note on the back of one card, like a tiny memory
- Include one “lazy day” recipe that’s super easy, because real life exists
Pro-Tip: I always include a “Sunday Pancakes” card or a “Quick Omelet” card. It ties into the breakfast-in-bed theme and makes the set feel connected to the gift moment.
Presentation that looks clean
- Stack the cards neatly.
- Add a simple label on the box: “Mom’s Recipes” or “Family Breakfast Favorites.”
- Tie a ribbon around the box or wrap it in parchment for a soft, premium look.
A common mistake beginners make is writing tiny and cramped. Bigger handwriting looks more confident and it’s easier to read. Your future self will thank you.
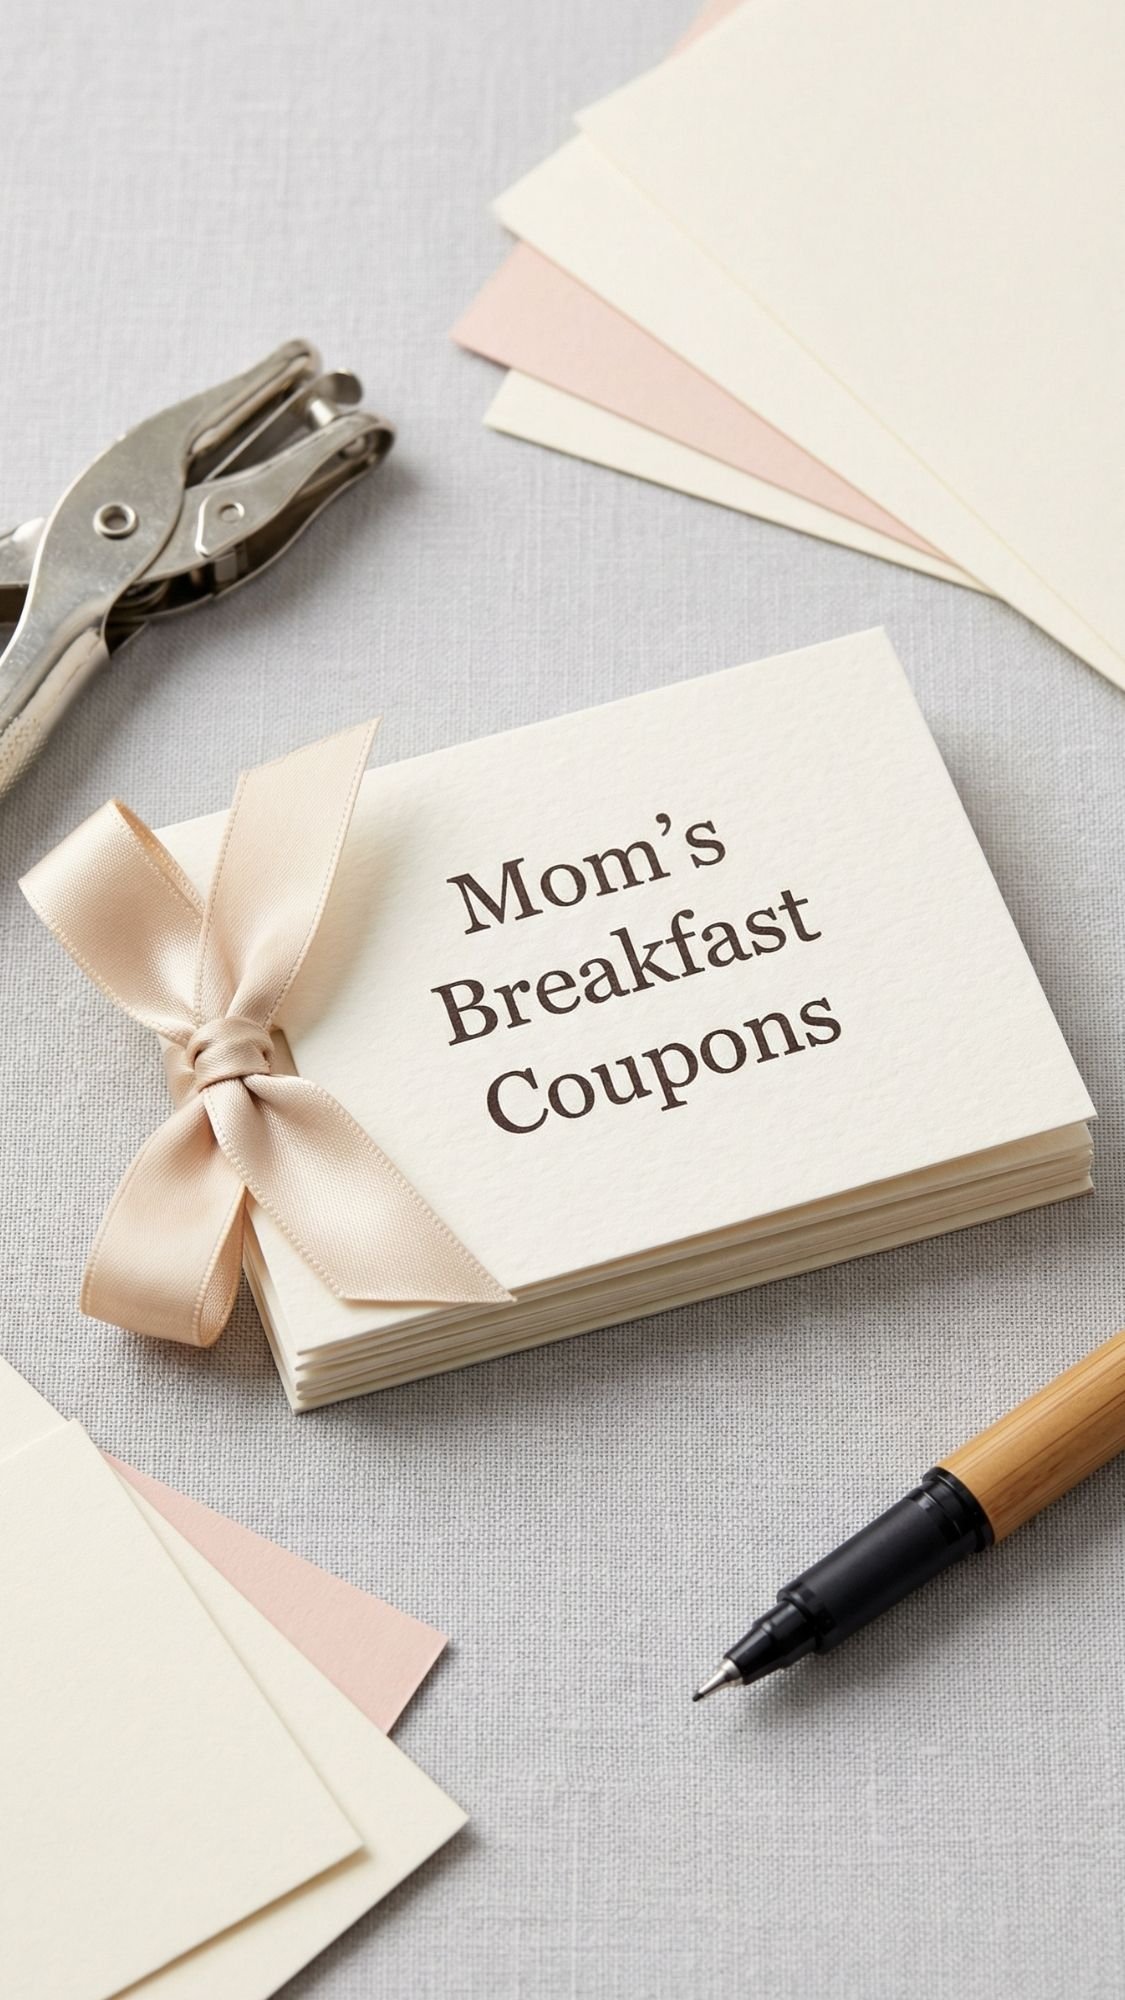
15) Breakfast in Bed Coupon Book (printable, handmade, and honestly the most-used gift)
This is the gift that keeps paying rent. A coupon book feels cute, but it’s also practical because it gives Mom little breaks she can actually redeem. Ever had someone give you a gift that was sweet but you couldn’t really use? Coupons fix that. They turn “I love you” into “I’ll handle the annoying stuff.”
I’ve found coupon books work best when you mix two types of coupons. One set for relaxation, one set for help. The help coupons hit hardest because they remove effort from her day.
Materials
- Cardstock or thick paper
- Scissors or paper trimmer
- Hole punch or stapler
- Ribbon, binder ring, or twine
- Markers or pens
- Optional: printable template you design once and reuse
Coupon ideas that moms actually want
Help coupons
- “I do the dishes, no complaints.”
- “Laundry handled, start to finish.”
- “I clean the kitchen counters and the floor.”
- “I run the errands, you stay home.”
Relaxation coupons
- “Uninterrupted nap time.”
- “Pick the movie, I bring snacks.”
- “Solo coffee run, your order only.”
- “Read time, I handle everything for 30 minutes.”
Breakfast-themed coupons
- “Breakfast in bed, your choice.”
- “Waffle bar morning.”
- “Fancy latte delivery.”
Pro-Tip: Put the best coupon last. The last page should feel like a finale, not an afterthought.
Make it look polished fast
- Keep all coupons the same size, straight edges matter.
- Use a simple cover, like “Mom’s Breakfast Coupons.”
- Add a small number in the corner of each coupon. It looks intentional.
- Bind it with a ring or ribbon so it flips easily.
A common mistake beginners make is writing too much on each coupon. Keep it short, bold, and clear. If it takes her longer to read it than to redeem it, it’s too wordy.
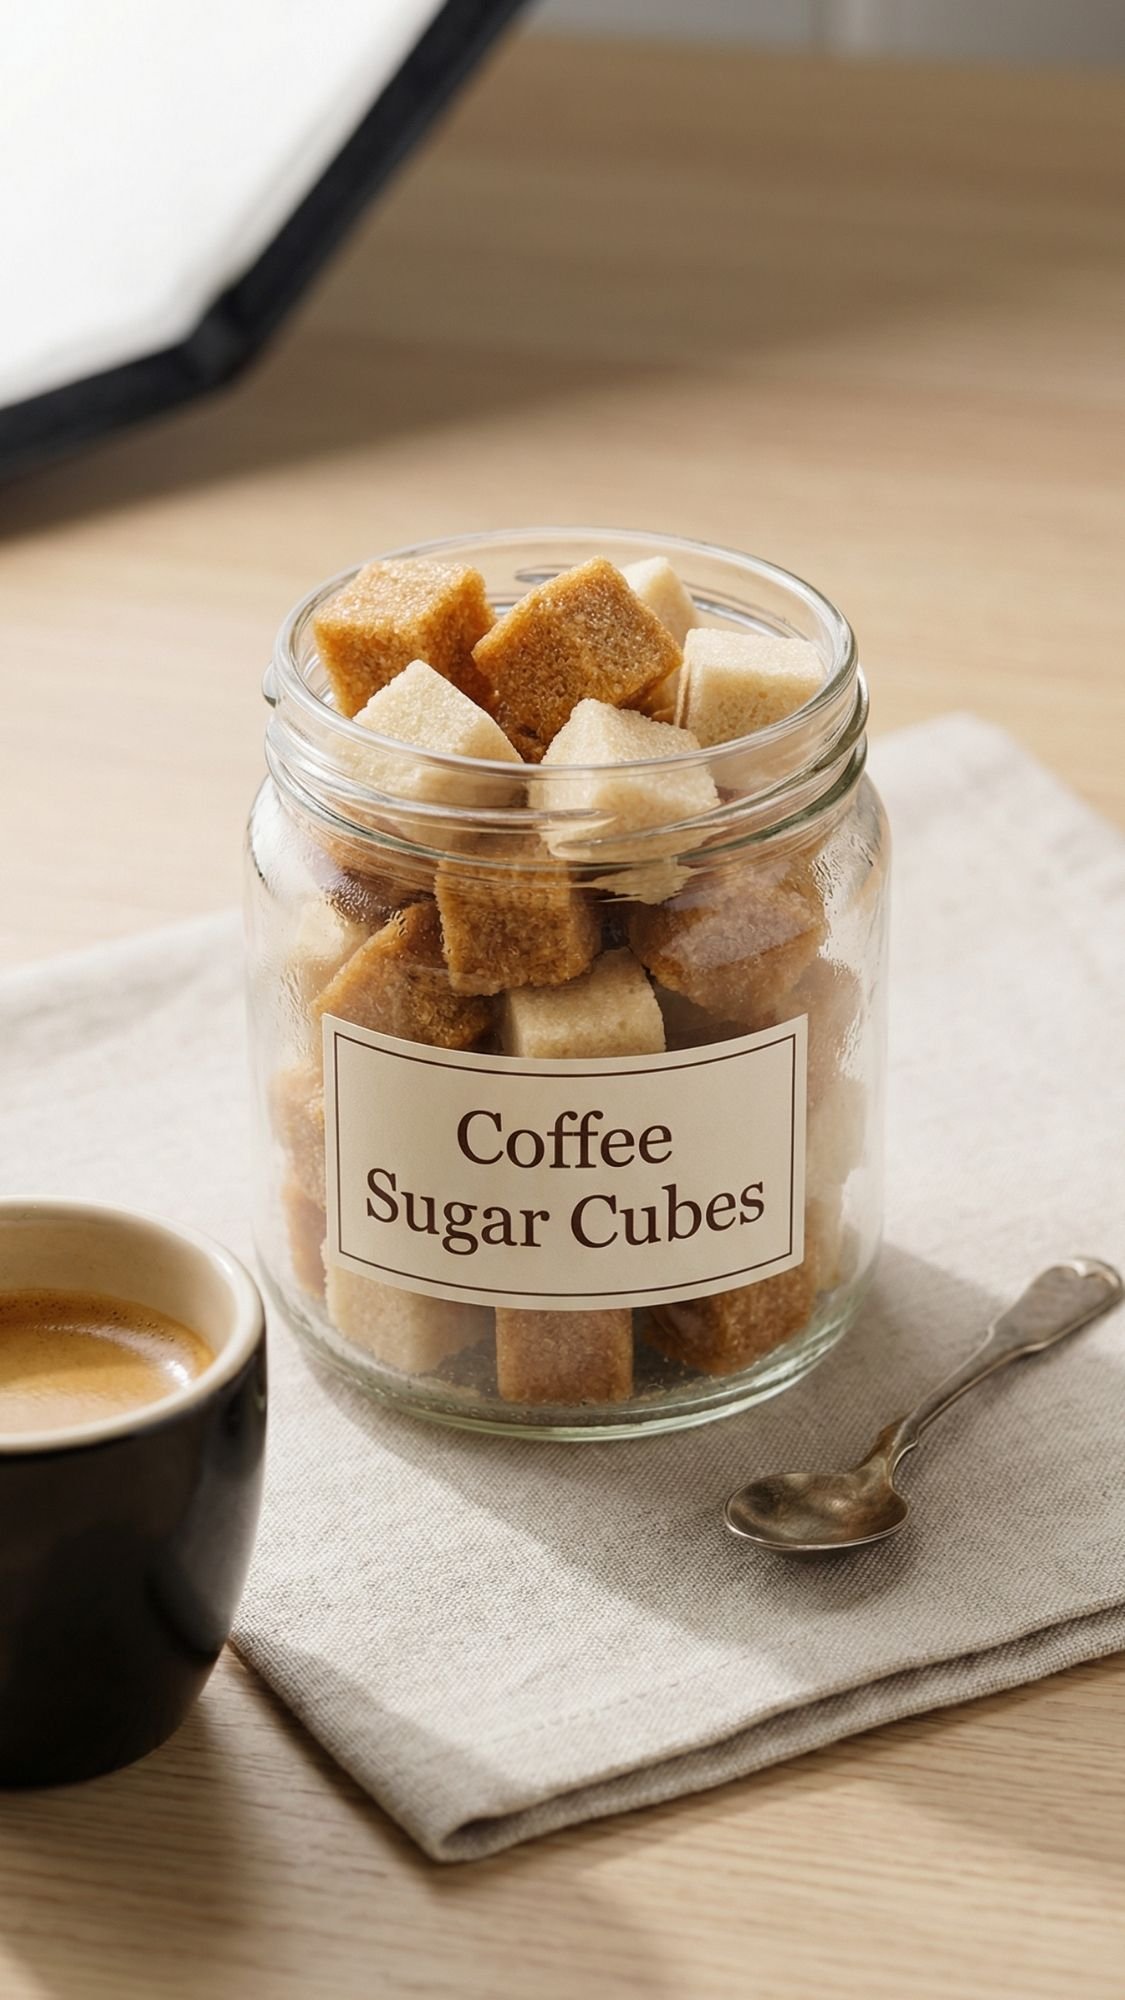
16) Coffee Syrup Sugar Cubes (tiny luxury, big payoff)
These little cubes feel like something you’d find in a boutique café, but you can make them with basic pantry stuff. They’re perfect on a breakfast tray because they look cute, they’re functional, and they don’t take up much space. Plus, you can customize flavors based on what Mom actually likes. Ever dropped a plain sugar cube into coffee and thought, “Cool, I added sugar,” and that was it? These make it feel like a treat.
The trick is using just enough moisture to bind the sugar without turning it into wet sludge. If you go too wet, the cubes take forever to dry and can crumble later. If you go too dry, they fall apart when you pop them out.
Materials
- Granulated sugar, regular white works best for structure
- Strong brewed coffee or espresso, cooled
- Optional flavor boosts:
- Vanilla extract
- Cinnamon
- Maple syrup, tiny amount
- Cocoa powder
- Small bowl + spoon
- Silicone mini cube mold, or a shallow tray you can cut
- Parchment paper
- Airtight jar or tin for storage
Step-by-step
- Add sugar to a bowl. Start with enough to fill your mold.
- Drip in cooled espresso a little at a time, and mix after each addition.
- Aim for “wet sand” texture. It should clump when you squeeze it, but it should not look shiny or runny.
- Pack the mixture firmly into your mold. Press hard so the cubes hold shape.
- Let cubes dry uncovered in a low-humidity spot until fully hard.
- Pop them out and store airtight.
Pro-Tips that keep them crisp and sturdy
- Press harder than you think. Loose packing causes crumbly cubes.
- Use espresso instead of regular coffee for stronger flavor without adding extra liquid.
- If you add syrup, use a tiny amount. Syrup adds moisture and slows drying.
- Let them dry longer than they look like they need. Soft centers cause collapse later.
Flavor combos that feel “giftable”
- Vanilla espresso
- Cinnamon latte
- Mocha, with cocoa powder mixed into the sugar
- Maple coffee, with just a touch of maple
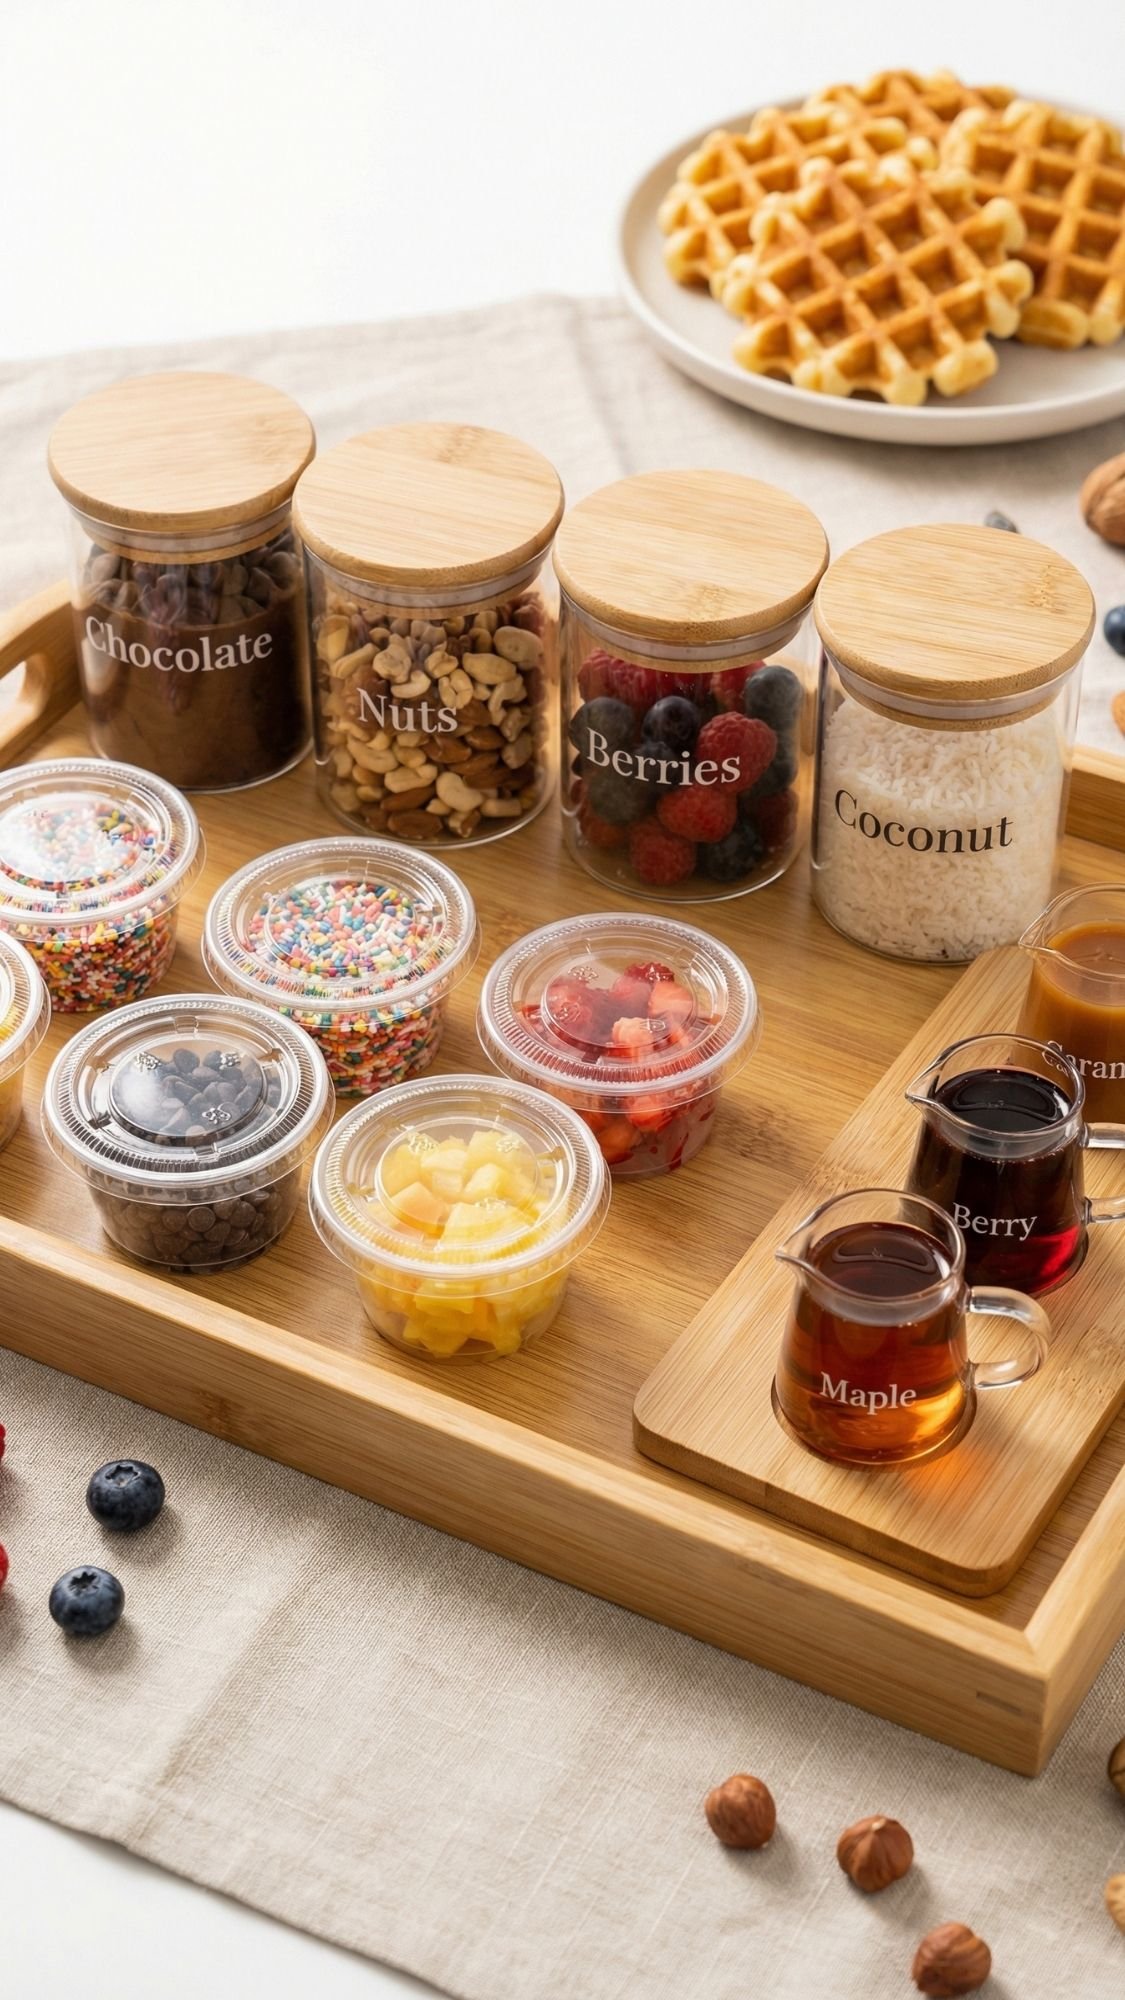
17) Waffle Topping Bar Kit (the “build-your-own” gift that feels like brunch out)
This kit always gets a reaction because it turns a regular waffle into a choose-your-own-adventure. And it’s not hard, it’s just organized. Ever wonder why “topping bars” feel so fun? It’s the tiny choices. People love tiny choices. Also, it looks adorable laid out on a tray.
I’ve found this gift works best when you keep it tidy and contained. Loose toppings rolling around the tray ruins the whole vibe. So we pack everything in mini lidded cups or jars and keep the color story simple.
What to include
Base toppings
- Chocolate chips or mini chocolate chunks
- Chopped nuts, like pecans or almonds
- Sprinkles, optional, keep it minimal
- Coconut flakes
Fruity options
- Freeze-dried strawberries or blueberries
- Dried cherries
- Optional fresh fruit, if you’re assembling right before serving
Sauces
- Your syrup flight from DIY gift #5
- Optional: honey or chocolate drizzle
Extras
- Tiny spoon or mini tongs
- Small topping menu card, optional but cute
Packaging that stays neat
- Mini condiment cups with lids or small jars
- A small box or tray insert to keep cups from sliding
- Parchment liners so the kit looks clean
Pro-Tip: If you want it to look premium, repeat shapes. Use the same jar style, the same label style, and the same lid color if you can. That uniform look makes it feel boutique.
How to keep it from turning into a mess
A common mistake beginners make is overfilling the cups. When you overfill, the lids don’t seal, and toppings spill as soon as you move the tray.
- Fill cups about 70 to 80%
- Pack cups snugly together so they don’t tip
- Put heavier items, like nuts, toward the back or corners
- Keep sauces upright and separate
A simple topping menu card (copy-paste idea)
- “Pick 2 toppings + 1 syrup. Add fruit if you want. Repeat until happy.”
It’s simple, and it makes it feel like a “real” brunch setup.

18) DIY “Morning Playlist” Card + QR Code (simple, modern, surprisingly emotional)
This one costs almost nothing, but it feels personal in a way that hits hard. You pair a calm breakfast moment with a playlist that says “I know you,” and suddenly it’s not just pancakes. It’s a vibe. Ever notice how music makes an ordinary morning feel like a movie scene?
I like this gift because it adds meaning without adding clutter. It also looks clean on a tray, especially if you keep the design minimal and readable.
Materials
- Cardstock, matte works best so it photographs clean
- Printer or a print shop option
- QR code for a playlist link from Spotify or Apple Music
- Scissors or paper trimmer
- Optional: corner rounder
- Optional: self-adhesive laminating sheet, matte
- Optional: small acrylic card stand, or a mini clothespin clip
Step-by-step
- Create your playlist and copy the share link.
- Generate a QR code from that link.
- Design a simple card front with a clear title, like “Mom’s Morning Playlist”.
- Place the QR code on the lower right corner, and leave whitespace around it so phones scan easily.
- Print on matte cardstock, then trim cleanly.
- Optional, laminate the card if you want it wipeable, then round the corners.
Pro-Tips that prevent the “why won’t it scan” problem
- Test the QR code before you gift it. Scan it from a few angles and distances.
- Keep contrast high, black QR on a light background scans fastest.
- Make the QR big enough to scan easily. Tiny codes look cute but fail in real life.
- If you laminate, choose matte. Gloss can reflect light and slow scanning.
A common mistake beginners make is printing the QR too small or putting it on a patterned background. Patterns confuse phone cameras fast.
Tiny upgrades that make it feel premium
- Add one line under the title, like “For slow mornings and hot coffee.”
- Slip the card into a mini stand on the tray so it looks intentional.
- Match the font style to the rest of your labels so everything feels cohesive.
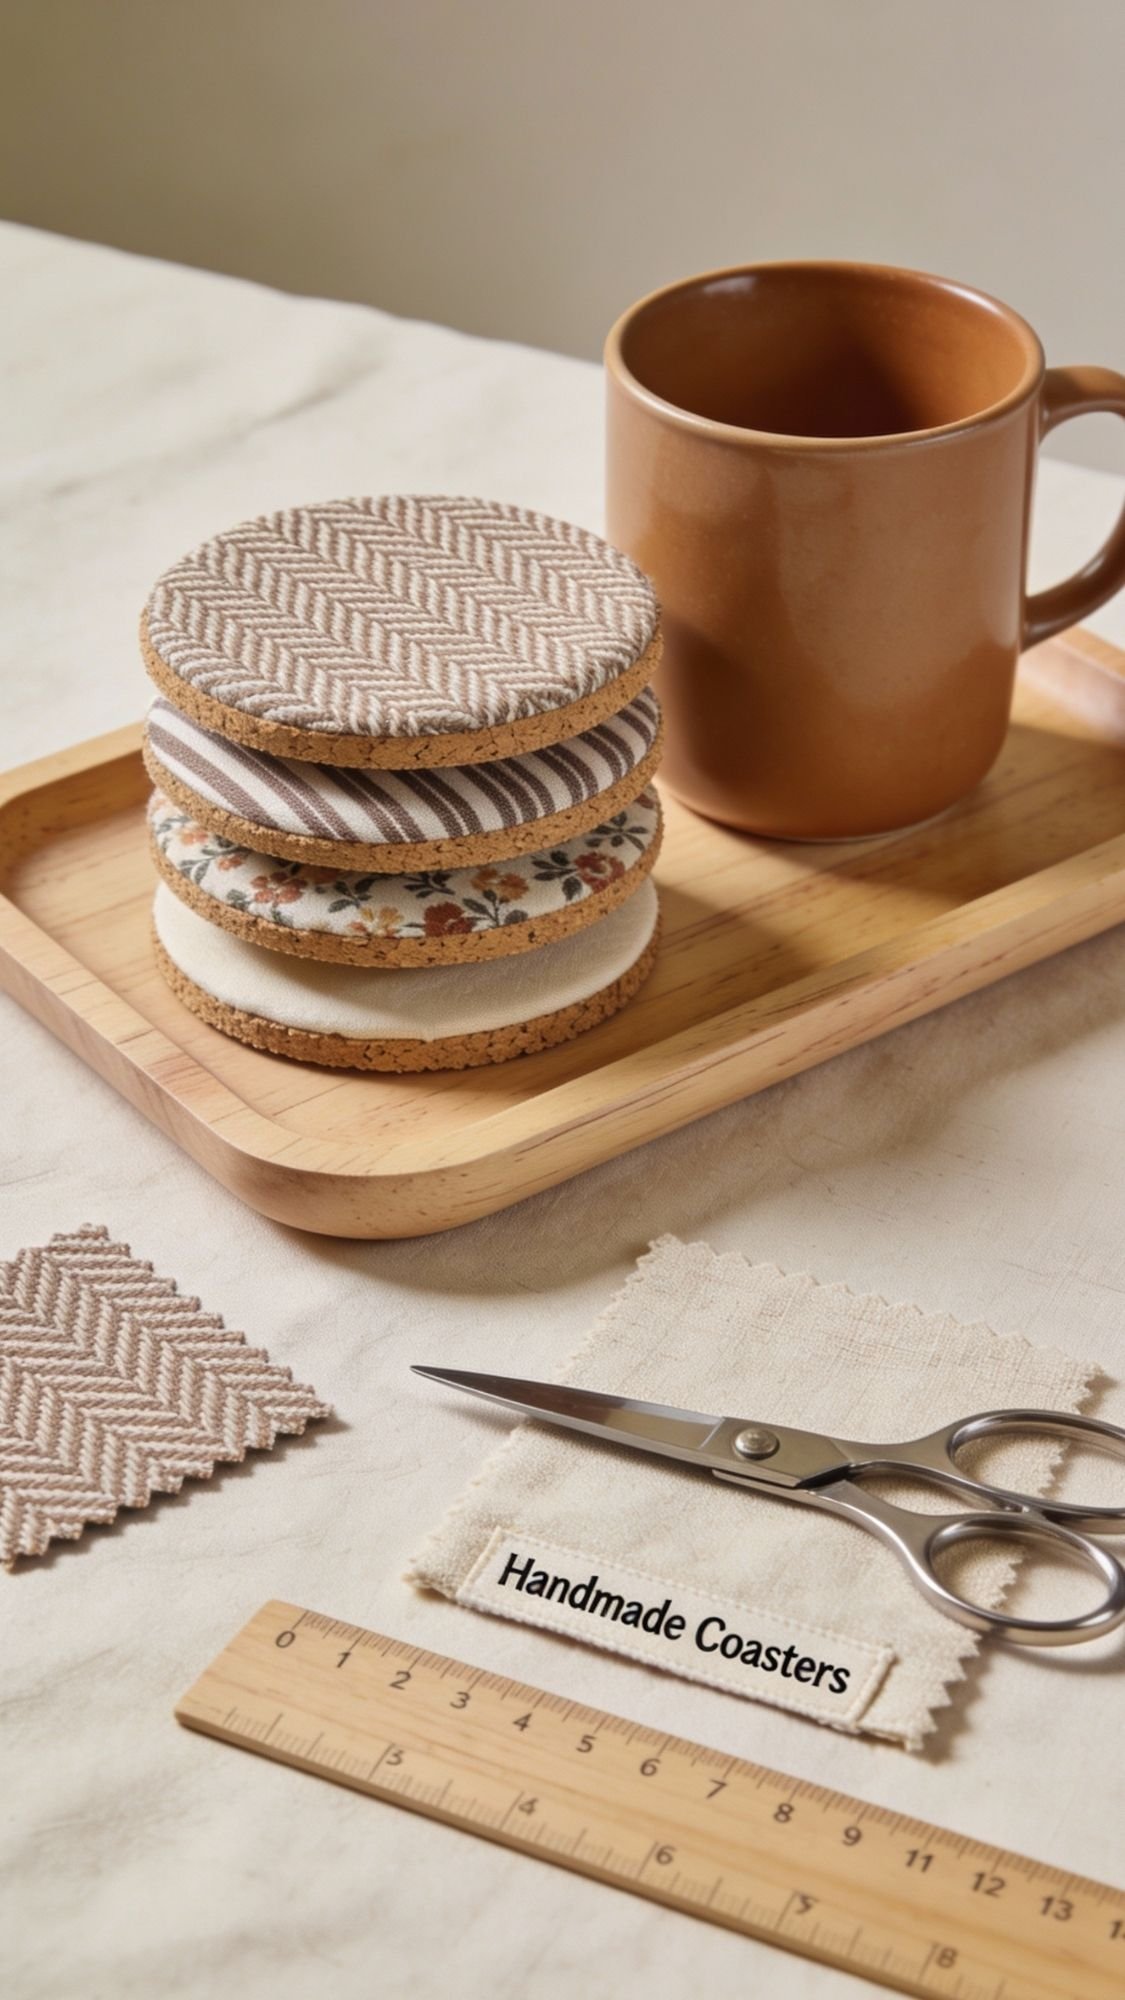
19) DIY Cloth Coasters (because mugs sweat and trays suffer)
Coasters feel like a boring gift until you actually use them. Then you realize they save your tray, your nightstand, and your sanity. Also, they make the breakfast setup look finished, especially when you match them to the napkins. Ever put a hot mug on a “dry” finished tray and thought you were safe? That’s how you meet the mug ring of doom.
I’ve found coasters look the most high-end when you keep the edges clean and the thickness consistent. Messy edges scream “last minute.” Clean edges scream “I’m competent,” which is always a nice vibe.
Materials
Pick your base:
- Cork rounds, felt rounds, or thin wood circles
Pick your top:
- Linen scraps, cotton fabric, faux leather, or real leather
Adhesive options:
- Strong fabric glue
- Contact cement for leather
- Double-sided adhesive sheets for fabric, great for clean bonding
Tools:
- Sharp scissors or rotary cutter
- Ruler or template
- Heavy book for pressing while it dries
Step-by-step
- Cut your fabric or leather slightly larger than the base.
- Apply adhesive evenly. Don’t blob it.
- Press the top layer onto the base and smooth from the center out.
- Flip and trim the edges cleanly if needed.
- Press under a heavy book until fully set.
Pro-Tip: Use a rotary cutter if you can. It gives that crisp edge that looks professional.
Edge finishing upgrades
- For fabric: fold edges under if you want a sewn look, or trim perfectly flush for modern minimal.
- For leather: burnish edges slightly or choose faux leather that already has a clean finish.
A common mistake beginners make is using too much glue. Excess glue seeps out the sides, then dries shiny and looks messy. Use thin, even coverage and press firmly.
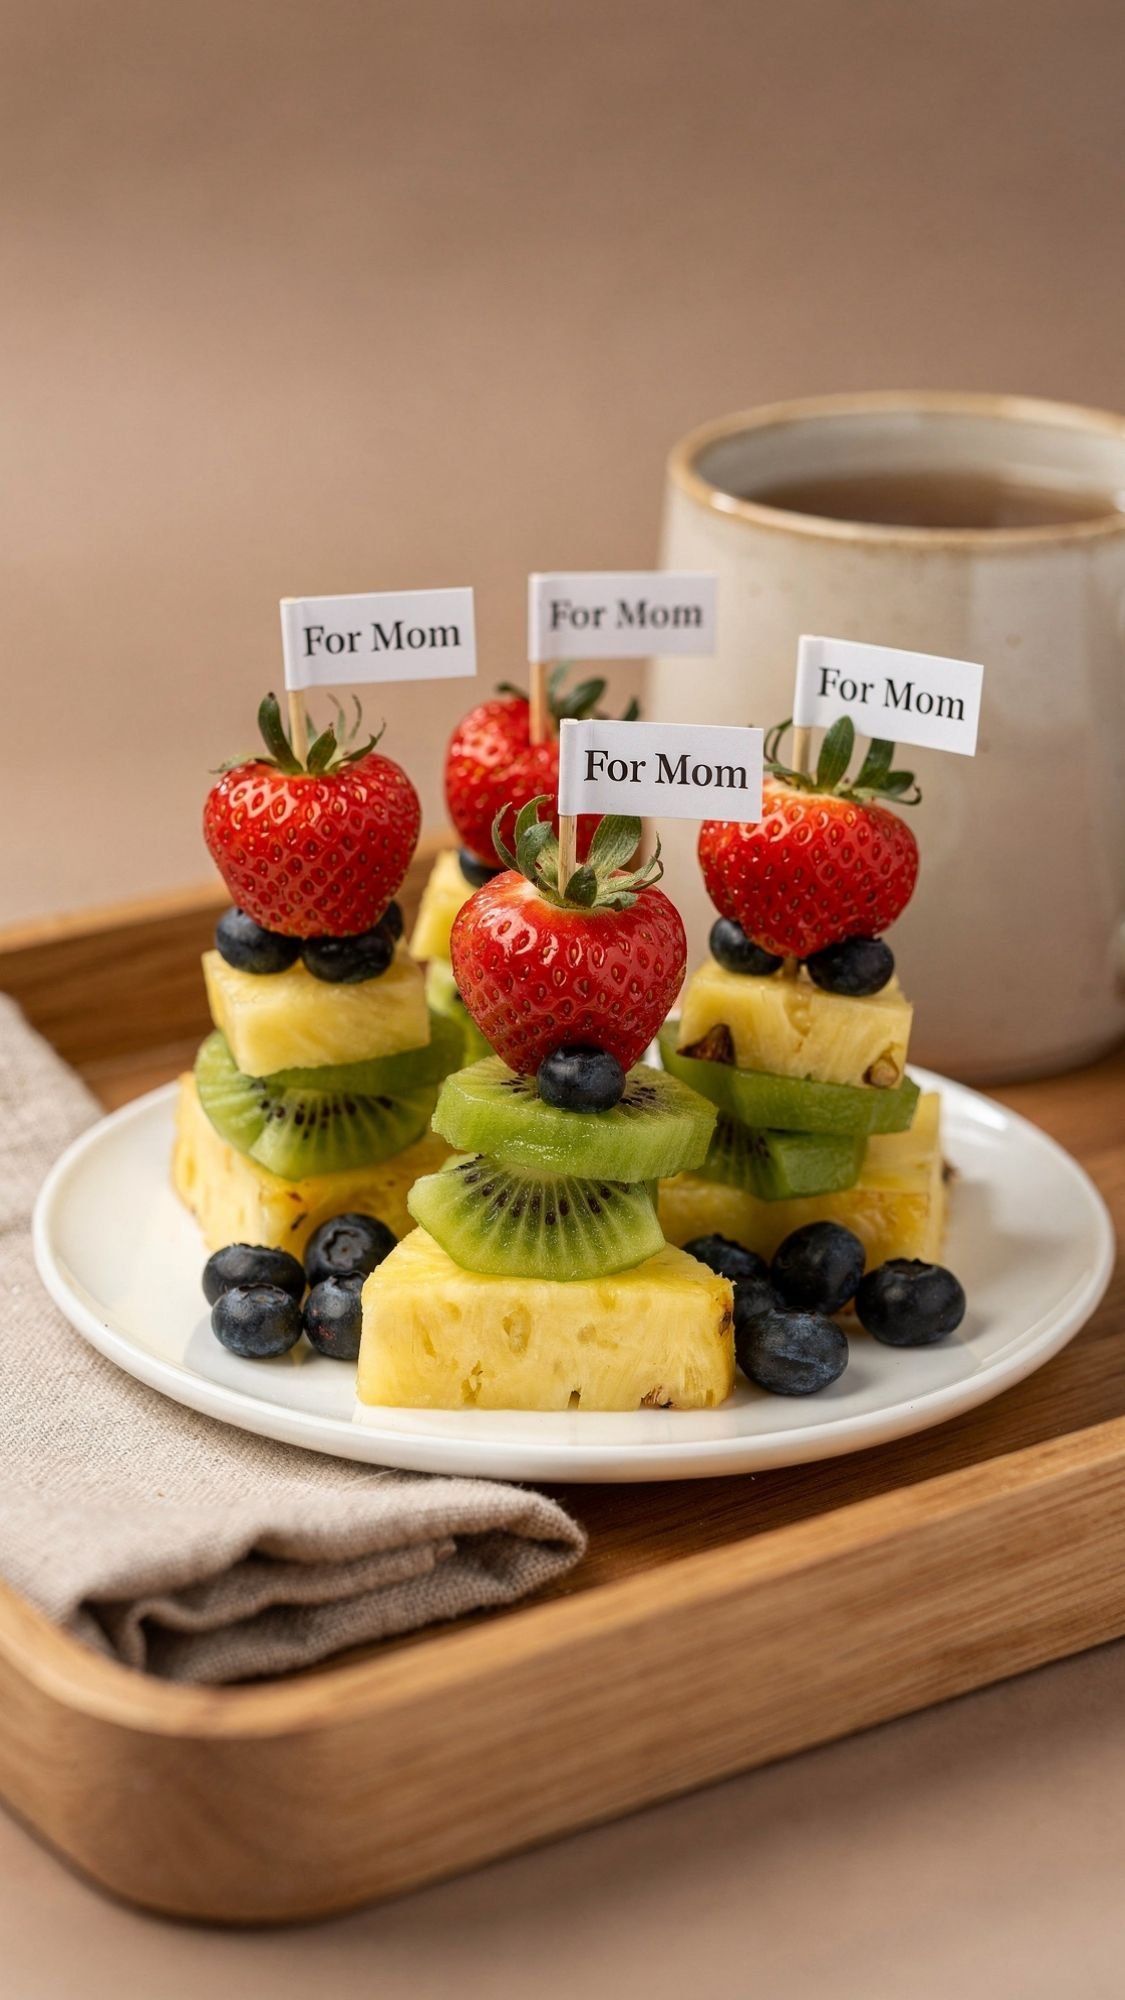
20) Mini “Breakfast Bouquet” Food Picks (cute without being fussy)
This is the tiny detail that makes the tray feel like a celebration. Food picks turn fruit into “a thing,” and that’s the whole point here. You’re not just serving breakfast, you’re gifting a moment. Ever notice how cafés make a simple plate feel special with one garnish or one little flag? Same trick.
I’ve found these look best when you keep them short, clean, and consistent. Long skewers flop over on a tray, and then the whole setup starts looking messy.
Materials
- Mini skewers or cocktail picks, short ones work best
- Cardstock for tiny flags
- Glue stick or double-sided tape
- Scissors
- Pen, marker, or printable mini labels
- Optional: mini hole punch for tiny tag shapes
Make the picks
- Cut small flag shapes from cardstock.
- Write a short word on each flag, keep it readable.
- Fold the flag over the pick and secure it with tape or glue.
- Let it set, then insert into fruit pieces or mini pastries.
Pro-Tip: Keep the words simple. “For Mom” and “Good Morning” are perfect. Tiny cursive that no one can read is not the vibe.
What to use them for
- Fruit cubes, like melon or pineapple
- Strawberries, grapes, berry clusters
- Mini waffles or pancake bites
- Cheese cubes
A common mistake beginners make is pushing the pick through soft fruit too aggressively and splitting it. Insert slowly and aim for the firmest part of the fruit.
Styling tip that makes it look premium
- Use 2 to 3 picks max on the tray. Too many turns it into a party platter, not breakfast in bed.
- Match the cardstock color to your palette, like cream, blush, or kraft.
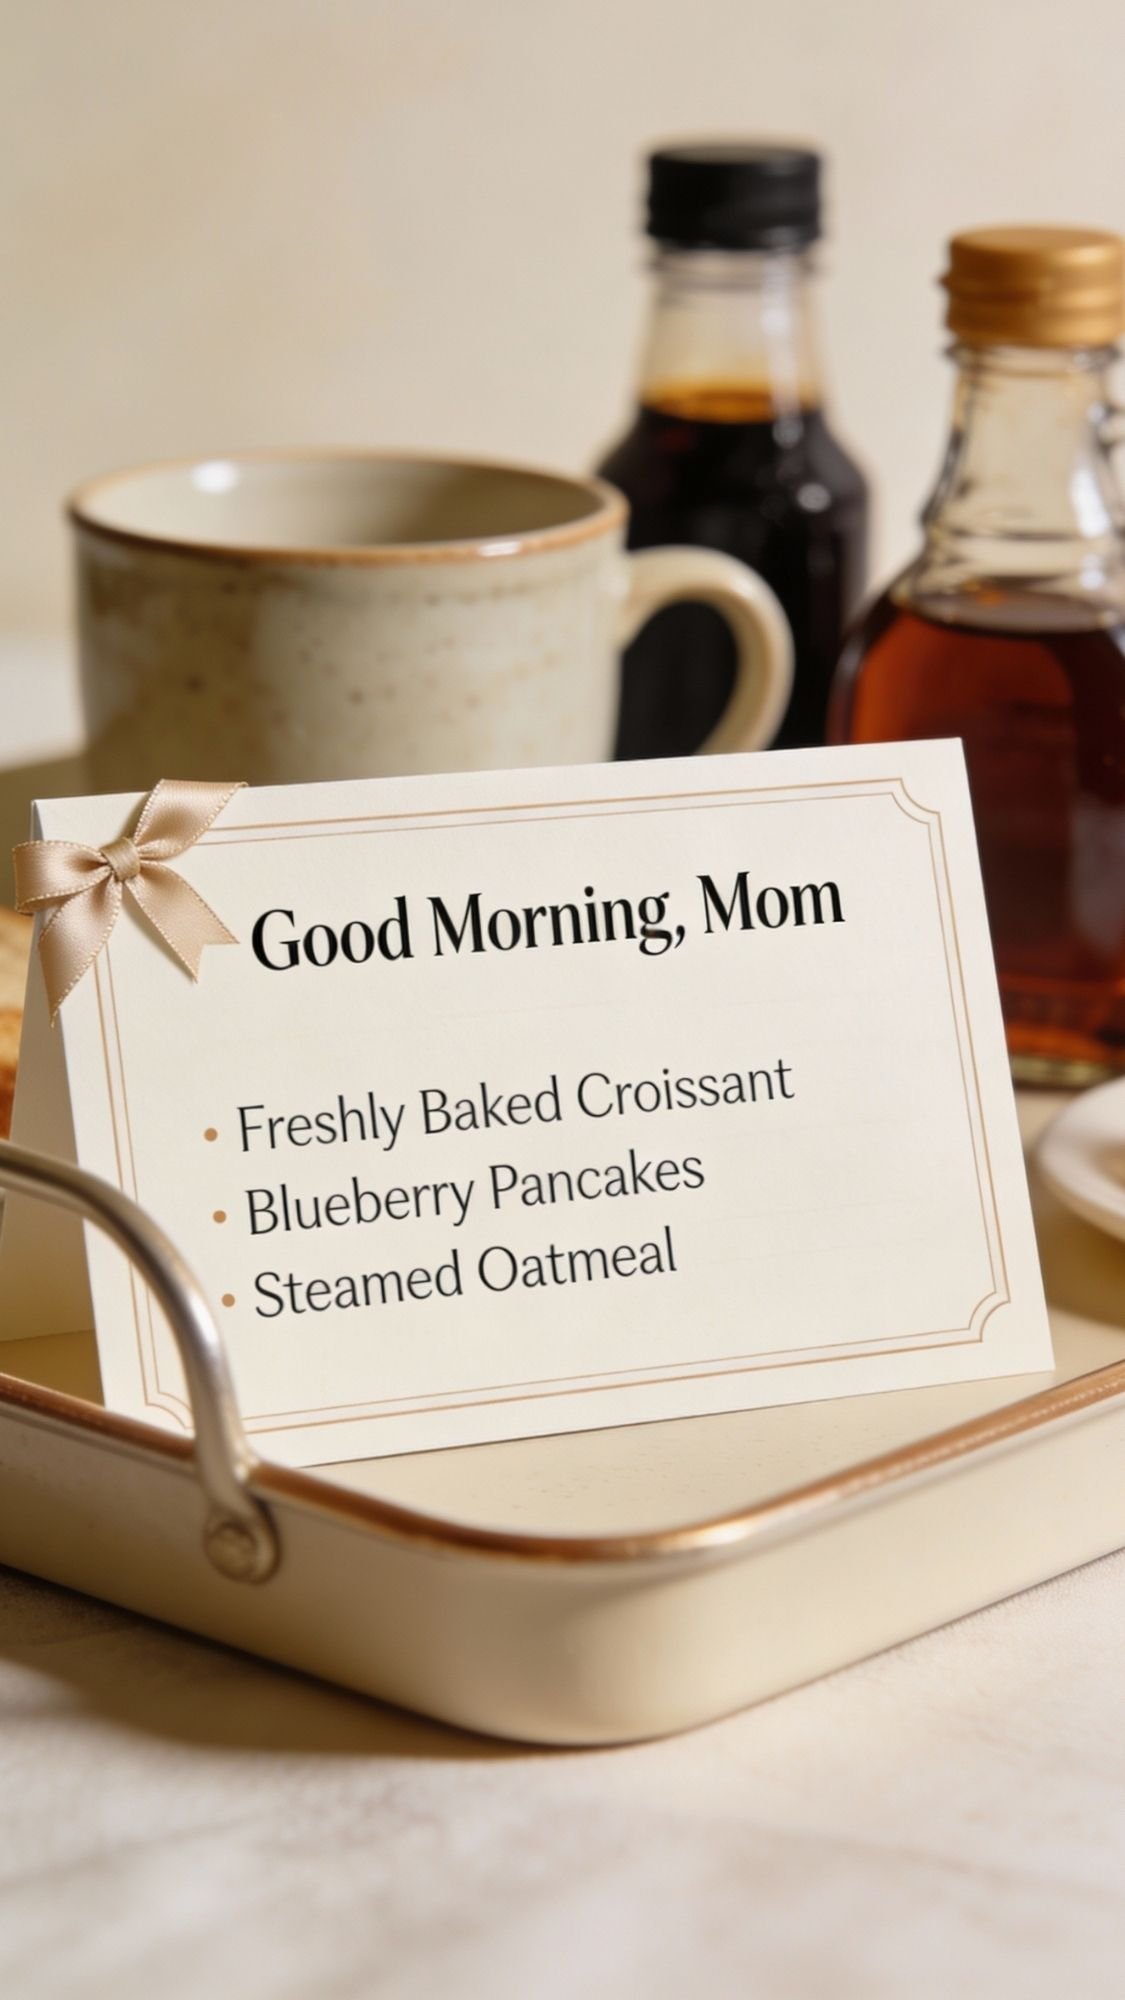
21) The “Good Morning, Mom” Printable Mini Menu (fast, polished, saves the vibe)
This is one of my favorite “cheat codes” because it makes the whole breakfast tray feel planned. A mini menu takes two minutes to print, but it gives the setup that hotel-brunch vibe. Ever seen a simple plate look fancy because there’s a little card next to it? That’s exactly what we’re doing.
I’ve found menus work best when they’re minimal. One title, three lines, and done. If you write a whole paragraph, it starts looking like a wedding place card. Cute, but not the goal.
Materials
- Cardstock, matte if possible
- Printer
- Paper trimmer or scissors
- Optional: corner rounder
- Optional: ribbon, twine, or a mini clip
- Optional: a small stand, or tuck it under the mug coaster
What to write on it (copy-paste ideas)
Pick one of these formats.
Option A: Simple and classic
- “Good Morning, Mom”
- “Today’s Menu”
- “Coffee, waffles, fruit, and a slow morning”
Option B: Slightly playful
- “Good Morning, Mom”
- “Chef’s Special”
- “Whatever you want, I’m on duty”
Option C: Brunch box version
- “Good Morning, Mom”
- “Brunch Box Menu”
- “Croissant bites, berries, cheese, jam, and something sweet”
Pro-Tip: Make sure “Good Morning, Mom” sits centered at the top and stays readable from a quick glance. Clean typography looks more expensive than complicated designs.
How to make it look premium in 60 seconds
- Print on cardstock.
- Trim straight edges.
- Add one detail, like a ribbon corner, a tiny clip, or a wax seal sticker if that fits your vibe.
- Place it on the tray near the front corner, so it reads clearly in photos.
A common mistake beginners make is printing on thin paper and letting it flop around. Cardstock holds its shape and looks intentional.
The tray that looked dry but absolutely was not
Let me save you from a very specific kind of morning disappointment. I once finished a breakfast tray late at night. It looked perfect. It felt dry. I stood back, admired it, and told myself I was a productive DIY legend. The next morning, I set a warm coffee mug on it and walked away for maybe two minutes. When I came back, there was a crisp mug ring stamped into the finish like it had been branded on purpose. It was not cute. It was not “rustic character.” It was a mistake.
Here’s what actually happened. The topcoat dried on the surface, but it hadn’t cured through. Dry means the finish doesn’t feel wet. Cured means it can handle heat, moisture, and real-life use. I rushed the timeline, and the finish basically said, “Love that for you,” then punished me.
Why it went wrong
- I applied coats a little too thick because I wanted fast coverage.
- The room was cooler than I thought, so curing slowed down.
- I treated “dry to the touch” like “ready for coffee.” That was the lie.
How I fixed it
- I let the tray sit another full day so the finish hardened more.
- I lightly sanded the ring area with 220 grit to level it.
- I wiped all dust completely.
- I applied a thin recoat, then let it cure longer in a warm, low-dust spot.
The lesson learned, aka the part that saves your project
- Thin coats win. Thick coats trap solvents and stay soft longer.
- Warm, dry air helps curing. Humidity and cold slow everything down.
- If the tray will touch hot mugs, give it real cure time, not just “overnight.”
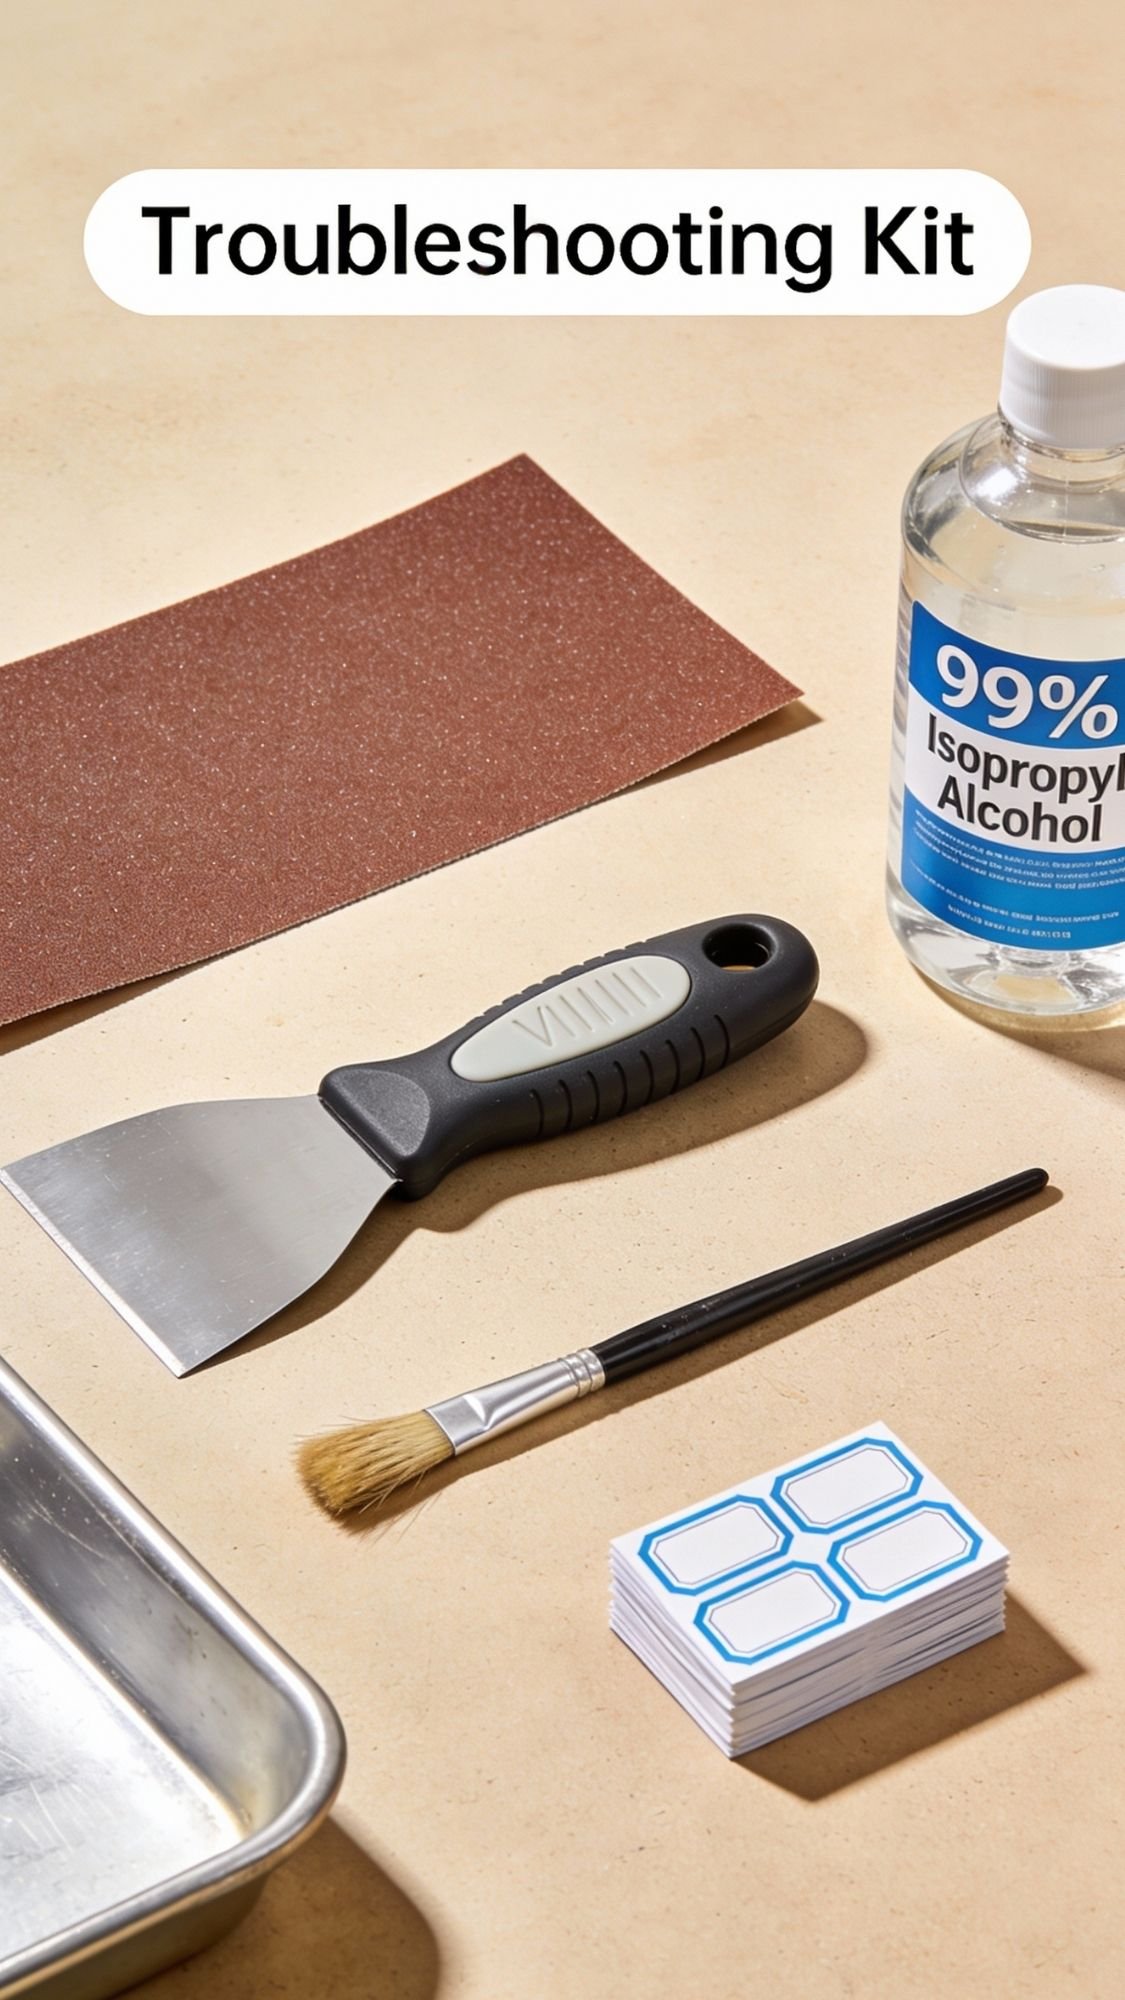
Fix the stuff that tries to ruin your cute plans
This is the part people skip, then regret later. I’m not judging, but I am side-eyeing a little. Troubleshooting is what turns a “cute idea” into a gift that actually holds up. Ever had a DIY look amazing on day one and then slowly fall apart like it got bored? Yeah. Let’s not do that.
Below are the most common breakfast-tray and gift-packaging problems I see, plus the fastest fixes.
1) Vinyl won’t stick to the tray
- Symptom: Vinyl lifts at corners or edges within hours
- Likely cause: Dust, oily residue, textured wood grain, or applying vinyl on raw wood
- Fix: Clean the area with rubbing alcohol, warm the vinyl slightly, press down, burnish hard, then seal over it
- Prevention next time: Seal the wood first, then apply vinyl to a smoother surface
2) Stencil paint bleeds under the design
- Symptom: Fuzzy edges, blurred lines
- Likely cause: Too much paint, stencil not pressed flat, porous unsealed surface
- Fix: Touch up edges with a small brush, or re-stencil the area once it dries
- Prevention next time: Seal first, then use almost-dry paint on a sponge
3) Topcoat stays tacky
- Symptom: Sticky feel, fingerprints, lint stuck in the finish
- Likely cause: Coats too thick, humidity, cold room, not enough time between coats
- Fix: Move it to a warmer, drier spot, wait longer, then sand lightly and recoat thin if needed
- Prevention next time: Thin coats only, and give it extra cure time in humid weather
4) Wood stain looks blotchy
- Symptom: Dark patches and uneven color
- Likely cause: Uneven sanding, soft wood species, no conditioner
- Fix: Sand back and restain, use conditioner if the wood drinks stain unevenly
- Prevention next time: Sand evenly and apply pre-stain conditioner on soft woods
5) Paper tags curl or warp
- Symptom: Tags look wavy or bend forward
- Likely cause: Wet glue, thin paper, humidity
- Fix: Press tags under a heavy book, switch to double-sided tape
- Prevention next time: Use cardstock and dry adhesive
6) Food containers leak in the brunch box
- Symptom: Jam, honey, or syrup oozes into compartments
- Likely cause: Loose lids, overfilled jars, lids not wiped clean
- Fix: Wipe everything, repackage into tighter jars, add parchment liners to salvage the look
- Prevention next time: Fill jars 80 to 90%, wipe threads, pack upright and snug
7) Iron-on monogram peels
- Symptom: Edges lift after one wash
- Likely cause: Low heat, not enough press time, fabric not prewashed, wrinkles during pressing
- Fix: Re-press with correct heat using parchment, apply firm pressure
- Prevention next time: Prewash fabric, press flat, follow timing exactly
8) Paint pen design smears on a mug
- Symptom: Smudges when touched, faint marks after washing
- Likely cause: Not fully cured, oily surface, wrong pen type
- Fix: Let it cure longer, switch to hand wash, redraw and cure again if needed
- Prevention next time: Clean with alcohol first and cure longer than you think
9) Granola turns soft in the jar
- Symptom: Crunch disappears, texture gets chewy
- Likely cause: Jarred while warm, lid not tight, humidity
- Fix: Re-toast briefly, cool fully, repack airtight
- Prevention next time: Cool completely before packing, store airtight
10) Syrup crystallizes or thickens oddly
- Symptom: Grainy texture or sugar crystals
- Likely cause: Overheating, too much sugar, temperature swings
- Fix: Warm gently and shake to re-dissolve
- Prevention next time: Follow consistent ratios and store sealed
Finishing + Sealing + Care, so your gift lasts past Sunday morning
This section is what makes your DIY look professional, not just “cute for one day.” Finishing is the difference between a tray that survives coffee and a tray that becomes a coaster museum. Ever touched a project that felt dry and then left fingerprints anyway? That’s because dry and cured are not the same thing.
I’ve found the best results come from picking the right finish for how the item will be used, then respecting the cure time like it’s a rule, not a suggestion.
Dry time vs cure time, plain language
- Dry: The surface doesn’t feel wet, and you can lightly touch it.
- Cured: The finish hardens all the way through and can handle heat, moisture, and regular use.
A tray might feel dry the same day, but it often needs days to cure enough for hot mugs. Humidity and cold slow curing down. Warm, dry air speeds it up.
Best finishes for a breakfast tray, and why
Option A: Water-based polyurethane
- Why it works: Strong protection against coffee, syrup, and wipe-downs
- Best for: Trays that will see spills and hot mugs
- Watch out for: Thick coats can stay tacky, and rushing cure time causes rings
Option B: Hardwax oil or food-safe oil finish
- Why it works: Natural look and feel, easy to refresh
- Best for: Trays that lean “natural wood, minimal chemicals”
- Watch out for: Lower heat and moisture resistance, you’ll reapply over time
Option C: Sealer + decorative layer + topcoat
- Why it works: This is the pro method for paint, stencils, and vinyl
- Best for: Personalized trays with designs
- Watch out for: Skipping the first seal coat leads to bleed and lifting
My pro finishing checklist, follow this and you’ll avoid 90% of problems
- Sand smooth with 150 grit, then 220 grit
- Remove dust completely, every time
- Apply a thin seal coat first if you plan to stencil or vinyl
- Keep coats thin and even
- Let each coat dry fully before the next
- Lightly sand between coats if you feel roughness
- Let the finished tray cure in a warm, low-dust spot
Pro-Tip: If your finish feels “rubbery” or soft, don’t keep piling coats on top. Let it rest. More product on top of uncured product makes it worse.
Care instructions you can include in the gift
You can write these on a small card or keep them as a note in the post.
- Wipe spills quickly with a damp cloth
- Don’t soak the tray in water
- Use a coaster under hot mugs if you can
- Avoid harsh cleaners, mild soap is enough
- Store in a dry place
How long it lasts, and how to refresh it
- A poly-finished tray can last a long time with simple wipe-down care.
- An oil-finished tray needs occasional refresh coats, but it’s easy to maintain.
Refresh method
- Lightly scuff sand the surface.
- Wipe dust completely.
- Apply a thin recoat and let it cure.
Three variations that keep the same DIY base
This is where you make the same project feel totally different without reinventing the wheel. Ever notice how two people can make the same tray and one looks modern and one looks farmhouse? It’s just finish choices, hardware, and color story.
I’ve found customization works best when you keep two things consistent:
- One consistent neutral base
- One intentional accent, not five competing accents
Below are three style directions you can apply to the tray, mugs, labels, napkins, and even the brunch box packaging.
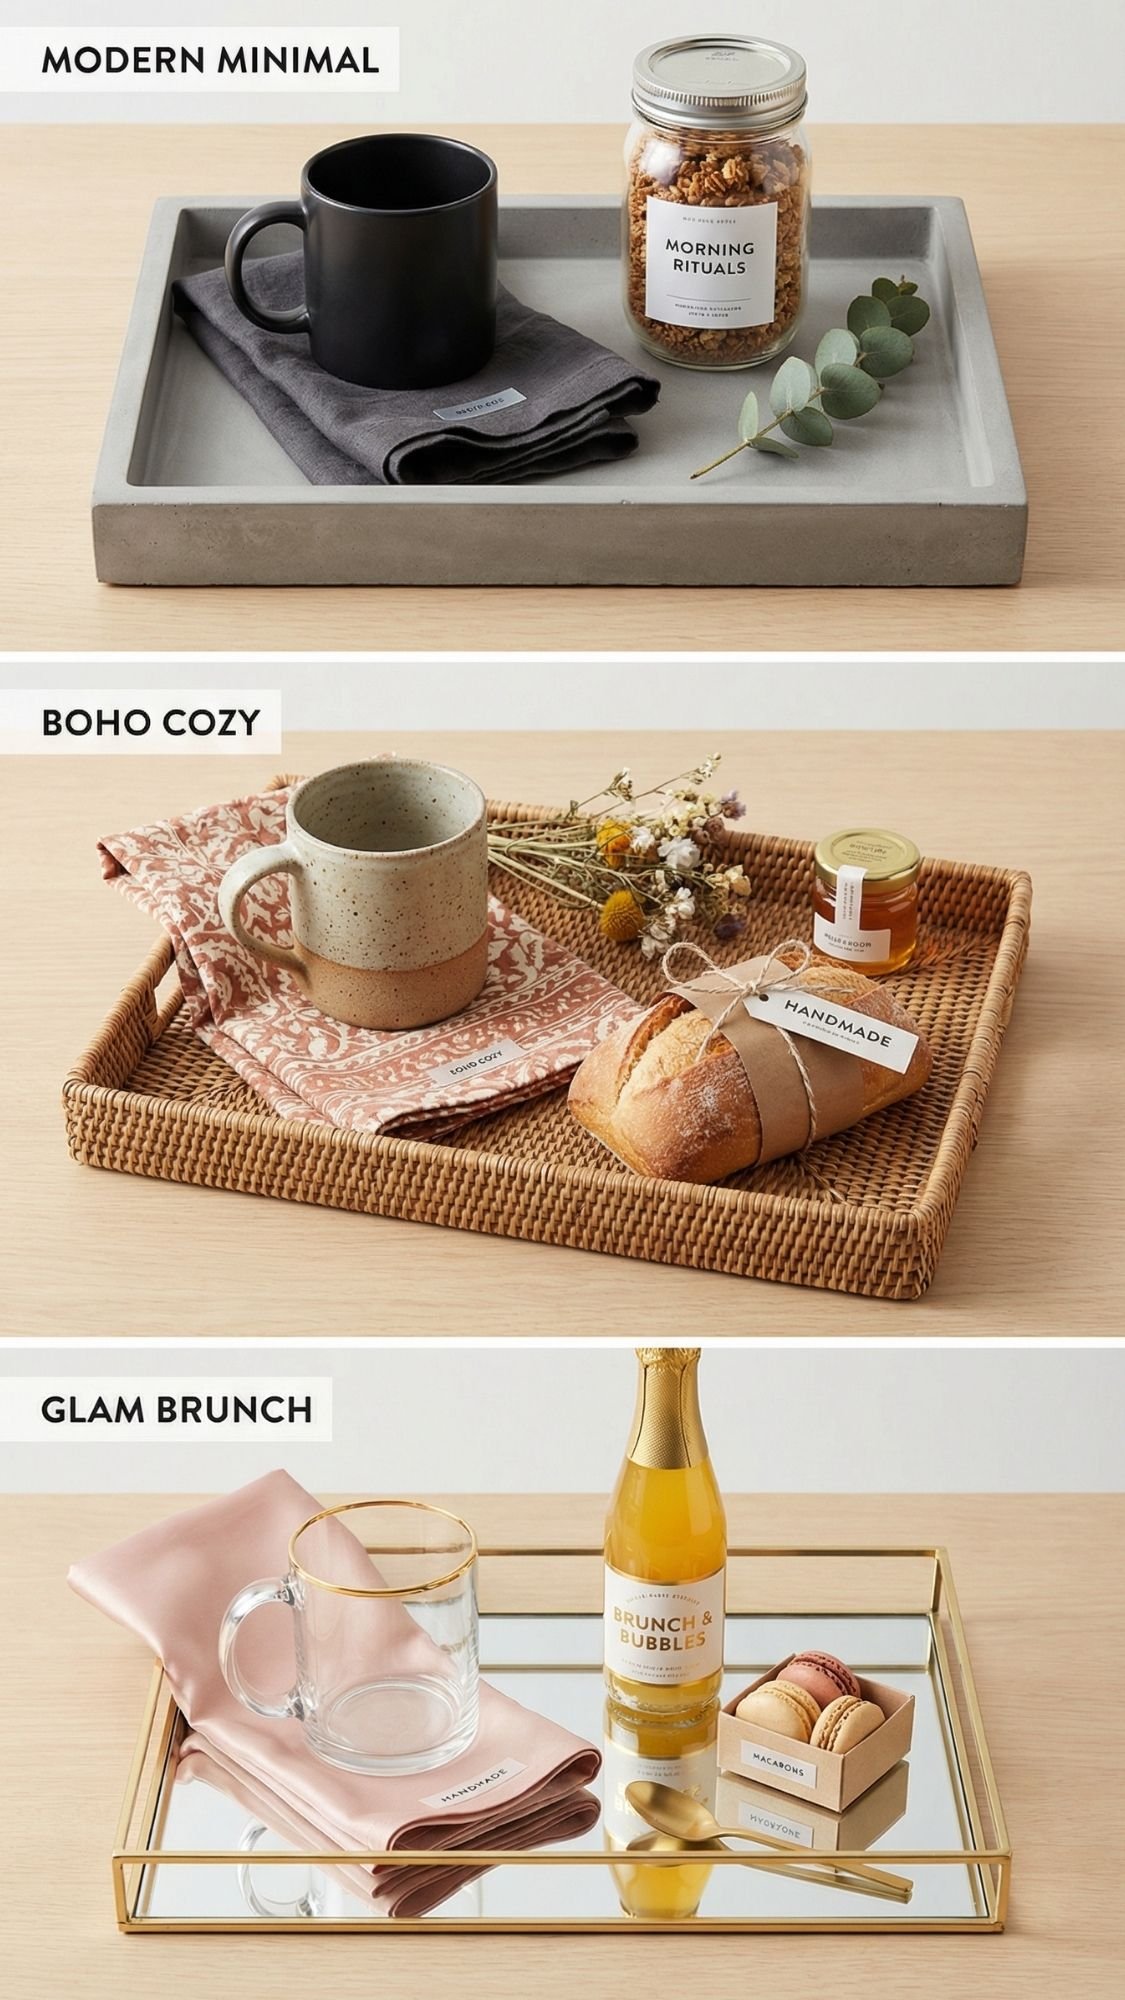
Variation 1, Modern Minimal
Style swaps
- Smooth wood or matte painted tray in warm white or sand
- Simple stripe detail or small corner monogram
- Black or brass hardware, clean lines
Color palette ideas
- Warm white, sand, soft black
- Cream, taupe, muted olive
Personalization options
- Small initials on the tray corner
- “Mom’s Morning” on the mug in a clean font
- Minimal label set for syrups and jars
Material upgrades
- Brass handles
- Matte acrylic stand for the playlist QR card
- Cork coasters with crisp fabric edges
Variation 2, Boho Cozy
Style swaps
- Natural wood tray with a soft satin finish
- Wood bead napkin rings, linen textures
- Kraft tags, twine, dried florals
Color palette ideas
- Oat, terracotta, warm beige
- Cream, caramel, muted sage
Personalization options
- Handwritten labels, slightly imperfect in a charming way
- Small phrase tags like “For Mom” and “Slow Morning”
- Dried orange slices tucked in the tea sampler
Material upgrades
- Linen napkins instead of cotton
- Real leather cord on tags
- A small woven coaster set
Variation 3, Glam Brunch
Style swaps
- Painted tray in ivory or blush with a glossy, smooth topcoat
- Gold accents, satin ribbon
- Clean, high-contrast labels
Color palette ideas
- Ivory, blush, gold
- White, soft pink, warm champagne
Personalization options
- Foil-style labels for the syrup flight and sampler jars
- A menu card with simple elegant type
- Initials on the mug in gold paint pen or gold vinyl
Material upgrades
- Metallic napkin rings
- Glass bud vase with one luxe bloom
- Small gold spreader knife for the jam and butter sampler
FAQ
Ever started a DIY and then realized the one detail you needed was buried in a comment section somewhere? Not today.
1) What can I make for a breakfast in bed gift the night before?
You can prep almost everything the night before. Make the tray, label jars, assemble the brunch box dry items, and prep the printable cards. In the morning, you only add fresh items like hot coffee, warm pastries, and fresh fruit.
2) How do I seal a wooden tray so coffee won’t leave rings?
Use a durable topcoat like water-based polyurethane, and apply multiple thin coats. Let it cure fully before use. Dry to the touch does not mean cured, and warm mugs test that truth fast.
3) How long should polyurethane cure before I use the tray?
Cure time depends on humidity, temperature, and coat thickness. In a warm, dry space with thin coats, you often need several days for the finish to harden enough for hot mugs. If the room feels cold or humid, expect longer.
4) What finish works best for a tray that might touch food?
A fully cured durable clear coat protects best from spills. If you prefer a more natural finish, use a food-safe oil, but expect to refresh it over time. The best option depends on how often the tray will be wiped and how much heat it will see.
5) How do I stop stencil paint from bleeding on wood?
Seal the wood first, then use a nearly dry sponge or brush and build color slowly. Too much paint causes bleed, especially on raw wood grain.
6) What do I put in a brunch box so it doesn’t get soggy?
Separate crunchy items from moist items. Put spreads like jam and honey in sealed jars. Use liners under pastries, and avoid adding fresh fruit too far ahead if it tends to leak.
7) How do I package homemade food gifts so they don’t leak?
Use jars with tight lids, fill to about 80 to 90%, wipe the threads clean, and pack upright. If you want extra security, add a seal band and place jars in a small tray corner or snug box insert.
8) Can I make a personalized mug that lasts in the dishwasher?
Permanent vinyl can last a long time, but dishwashers are harsh on any surface design over time. If you want maximum longevity, hand wash and keep the design away from the grip area. For paint pens, follow cure directions closely and treat it gently.
9) What’s the best way to label jars and bottles for a gift tray?
Keep labels simple, readable, and consistent. Place them centered on the front, and use the same label size across jars so the whole tray looks cohesive.
10) How do I make a Mother’s Day breakfast tray look expensive on a budget?
Focus on clean finishes, consistent packaging, and one or two intentional styling details. Linen napkins, tiny jars, and a mini menu card do more for the vibe than expensive ingredients.
11) What can I do if my tray finish feels sticky after drying?
Move it to a warmer, drier area and give it more time. If it stays tacky, you can lightly sand and recoat thinly. Thick coats and humidity cause most tackiness issues.
12) How do I keep granola and toppings crunchy for gifting?
Cool baked items completely before packing, store in airtight jars, and avoid moisture exposure. If you live in a humid area, a food-safe silica packet in the gift box helps.
Give Mom the slow morning she actually deserves
Here’s the funniest part about a breakfast-in-bed gift. It’s not the pancakes that make it special. It’s the fact that you took a normal morning and made it feel calm, cared for, and just a little fancy. Ever notice how moms rarely ask for “a moment,” but they light up when they get one? That’s what this whole list is for.
If you want this to be easy, stick to the simple formula. Pick one hero gift like the sealed tray or a brunch box, then add one wow add-on like the syrup flight or parfait kit, then finish with one cozy detail like linen napkins or a mini menu card. Those small details make everything look intentional without making you do the most.
Before you call it done, do a quick reality check. Does the tray finish feel solid, not tacky? Do the jars seal tight? Can the QR code scan? If yes, you’re good. If not, fix it now so you’re not troubleshooting with syrup on your hands at 8 a.m. That’s a personal hell I don’t recommend.
Quick wrap-up checklist
- Tray sealed and cured enough for mugs
- All jars wiped clean and packed upright
- Labels readable and consistent
- One photo-ready detail like flowers or a menu card
Now go set it up, snap your photos, and let the morning feel special. And if something goes wrong, welcome to crafting. We fix it, we learn, and we pretend it was planned. 😉

