Sweet, simple, and actually useful
Grandmas are the queens of noticing the little things. So when you hand her a DIY gift that feels thoughtful and looks polished, she’s going to clock every detail. The good news, you do not need an advanced craft setup to make something that feels special. You just need the right project, clean finishing, and a tiny bit of strategy.
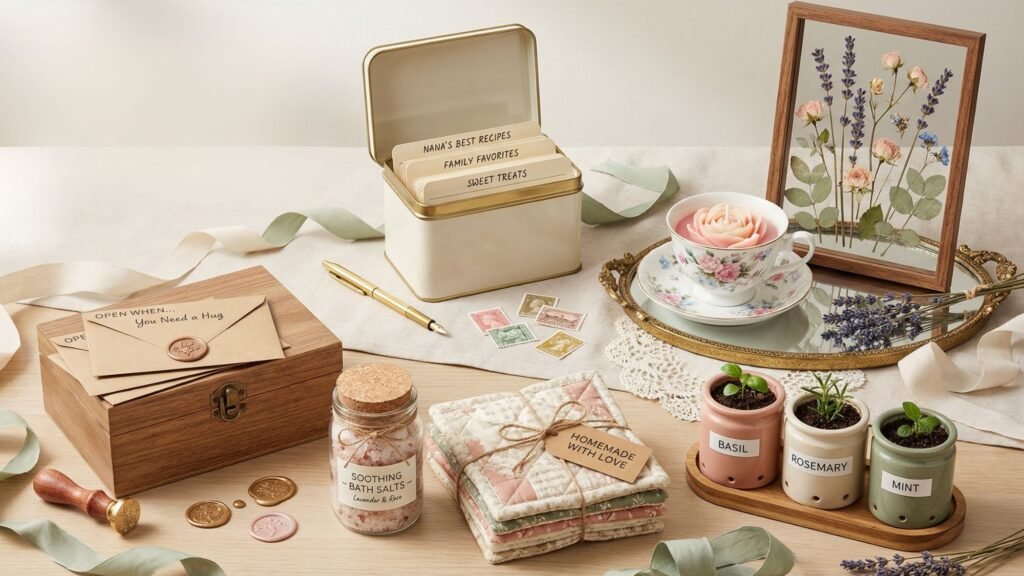
In my workshop, I’ve learned that the gifts grandmas love most fall into two buckets. They either make her day easier, like a pretty mug rug or a calendar she actually uses, or they hit her right in the feelings, like handwritten recipe cards or a memory jar. Bonus points when you combine both, because she gets something useful and sentimental without it feeling cluttery. Ever notice how the simplest things end up being the most meaningful?
This list is built for real life. Every gift idea includes what to use, how to make it, and what can go wrong so you can fix it fast. I’ll also share one pro trick most tutorials skip, the barrier-coat method that makes vinyl and labels stick like they mean it. Because nothing ruins a sweet gift faster than peeling letters two days later. :/
Before we start, quick reminder. Dry time and cure time are not the same thing. If you wrap a project that “feels dry” but has not cured, you can trap moisture and end up with dents, sticking, smears, or fingerprints. Ask me how I know.

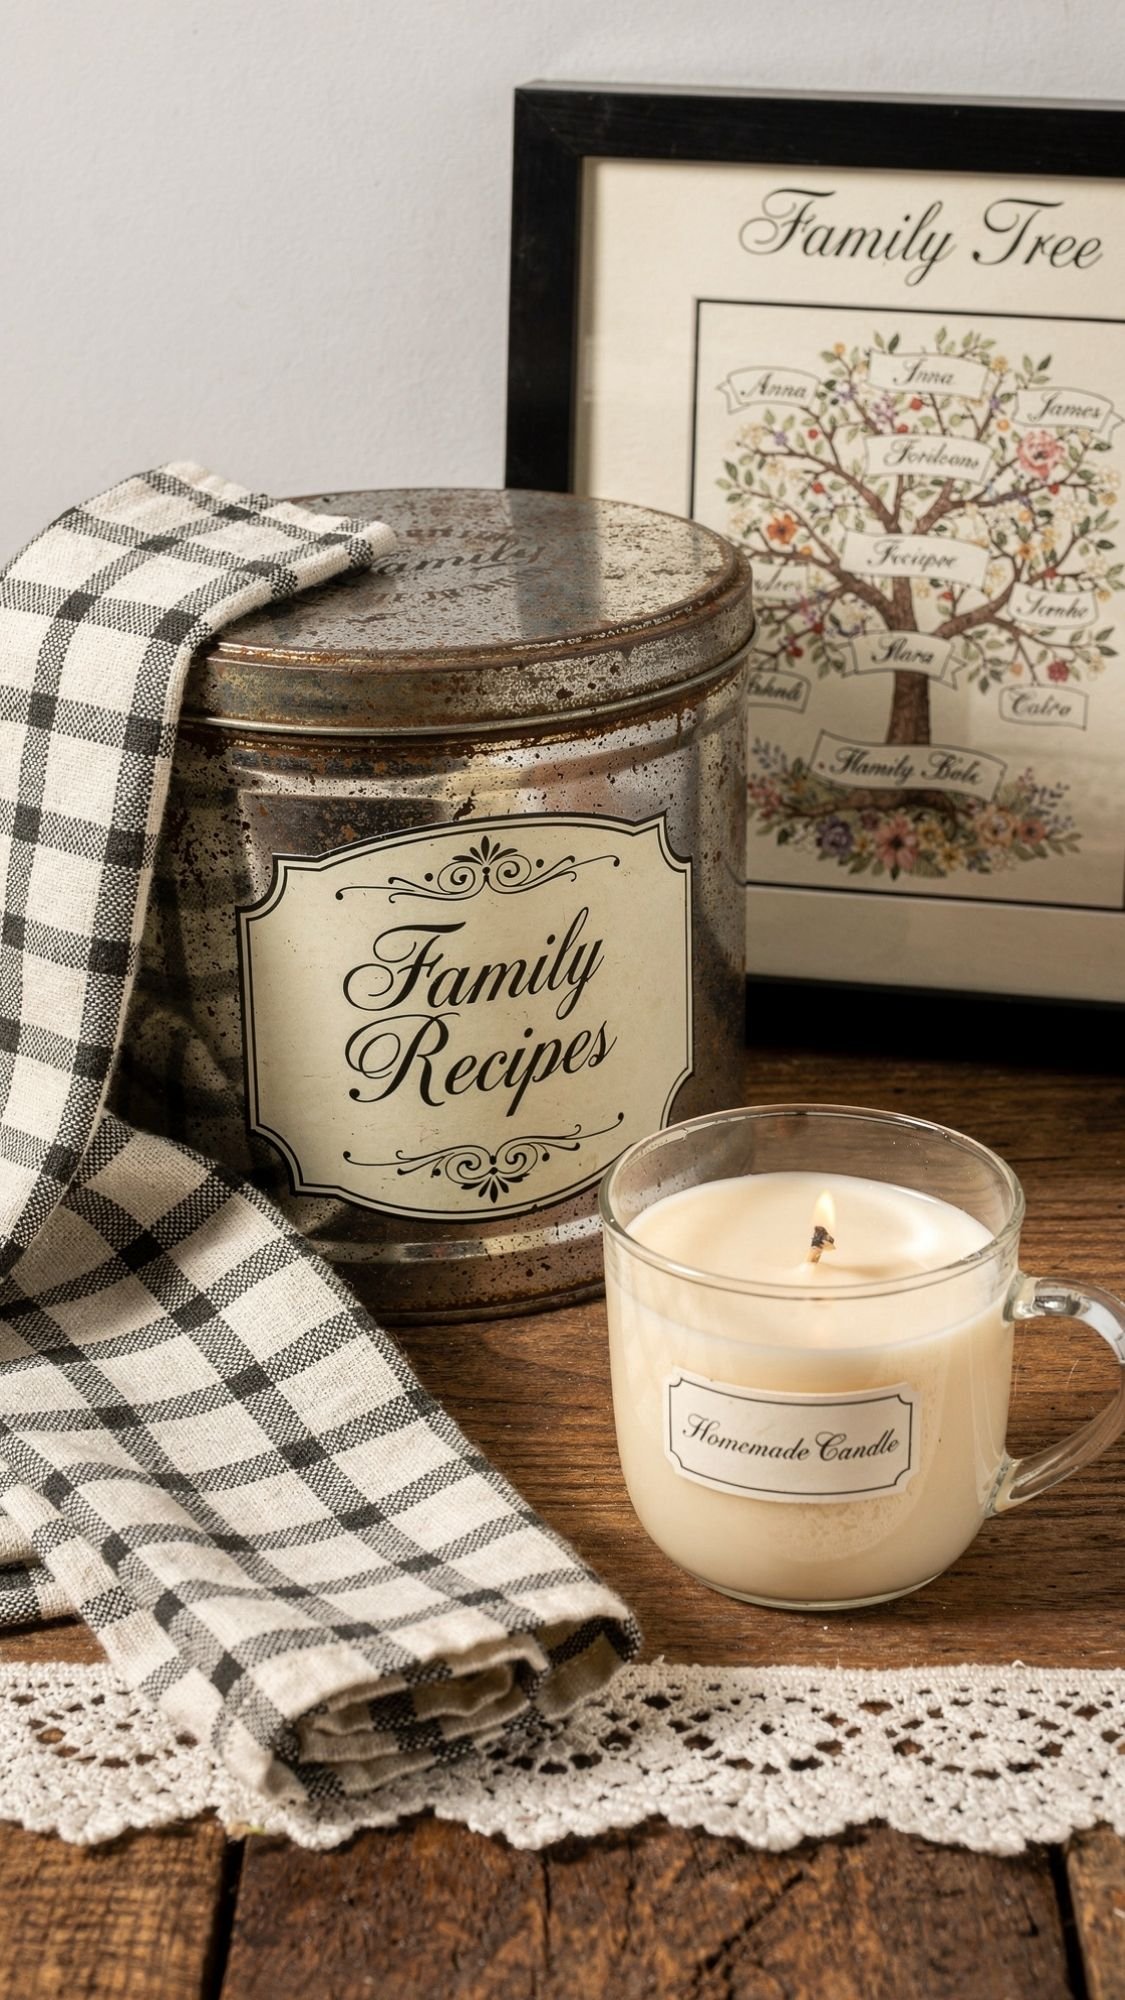
Gift Idea 1: Handwritten Recipe Card Box With Family Favorites
If your grandma loves feeding people, this gift feels like a love letter disguised as dinner. It’s practical, sentimental, and it gives her something she can actually use without having to “find a place for it.” Also, recipe cards age well. Ten years from now, she’ll still pull these out like they’re treasure, because they are.
Why it works so well
- It’s personal without being fussy. You’re not building a cabinet. You’re sharing family food.
- It invites connection. She’ll read the little notes, then call you to talk about them. That’s the real gift, right?
- It becomes an heirloom fast. Handwriting plus family recipes equals instant keepsake energy.
Materials
- Recipe cards (4×6 works best)
- Recipe card box, tin, or small lidded container
- Divider tabs (blank or pre-labeled)
- Archival pen or a good gel pen that dries clean
- Optional: laminator or plastic card sleeves
- Optional: label or tag for the lid, twine or ribbon
Step-by-step
- Pick 8–15 recipes she genuinely loves or recipes tied to family stories.
- Write each recipe with large, readable spacing. Leave breathing room between steps.
- Add one short “memory line” at the bottom, like:
- “You made this every Sunday.”
- “This is the cookie recipe everyone fights over.”
- Sort recipes into dividers like Breakfast, Dinner, Desserts, Holidays, Favorites.
- If you laminate or sleeve them, do it before you pack the box so everything stays crisp.
Pro tips that make this look store-bought
- Consistency matters. Use the same pen color, same format, same spacing.
- Add one utility card. A quick conversion chart or “oven temps and common swaps” card makes the whole set feel extra thoughtful.
- Use thick cards. Flimsy recipe cards curl and get sad-looking fast.
Mini “pro secret” for labels that do not peel later
If you label the tin or box with vinyl or a sticker, seal the surface first with a thin clear coat, let it cure, then apply the label. Stickers and vinyl hate dusty, thirsty surfaces. Smooth and sealed equals strong hold.
Common mistake beginners make
They cram too much text onto one card, then Grandma has to squint. Give her space. Big letters win.
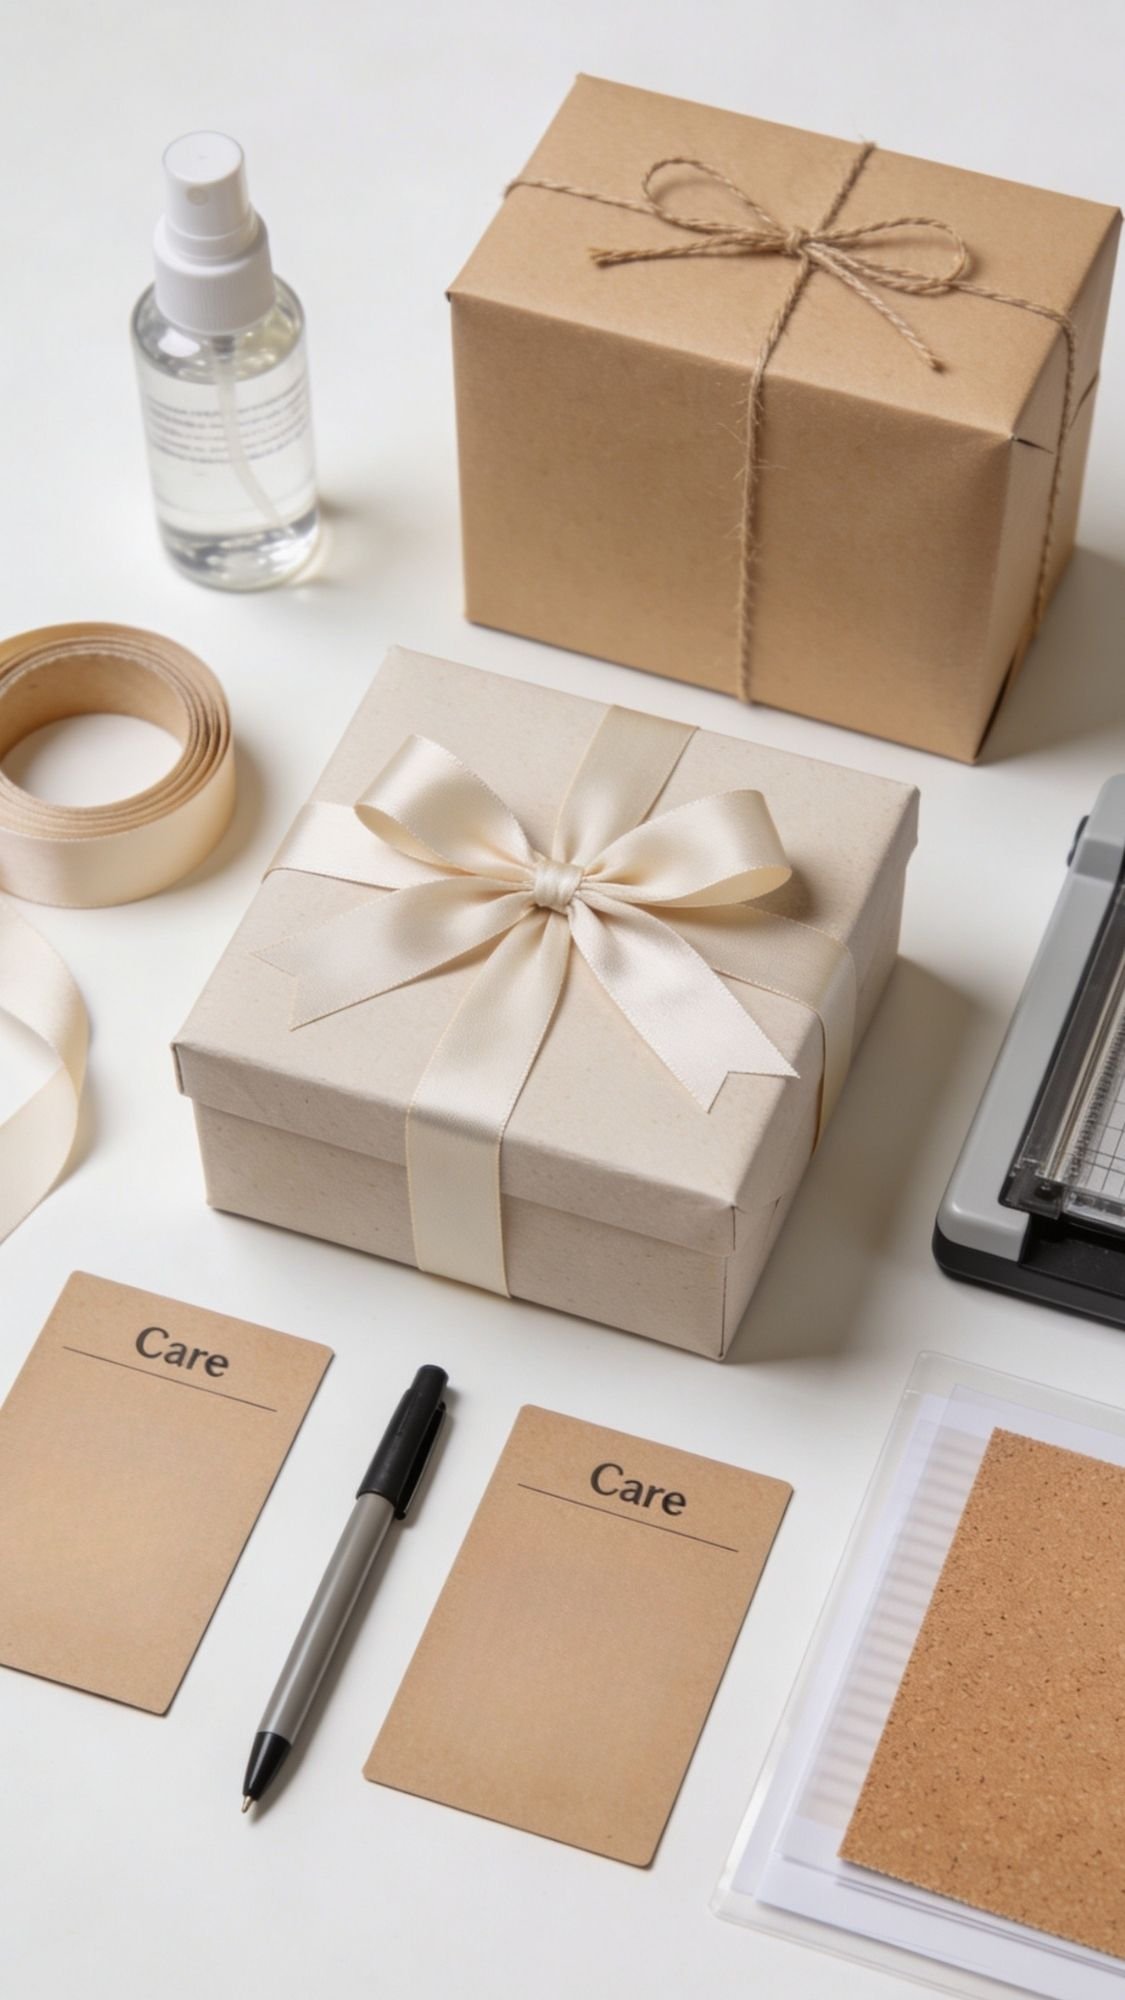
Care card you can include
- Store away from heat and steam if possible
- Wipe the tin with a damp cloth only
- If cards get splattered, wipe gently and let air dry flat
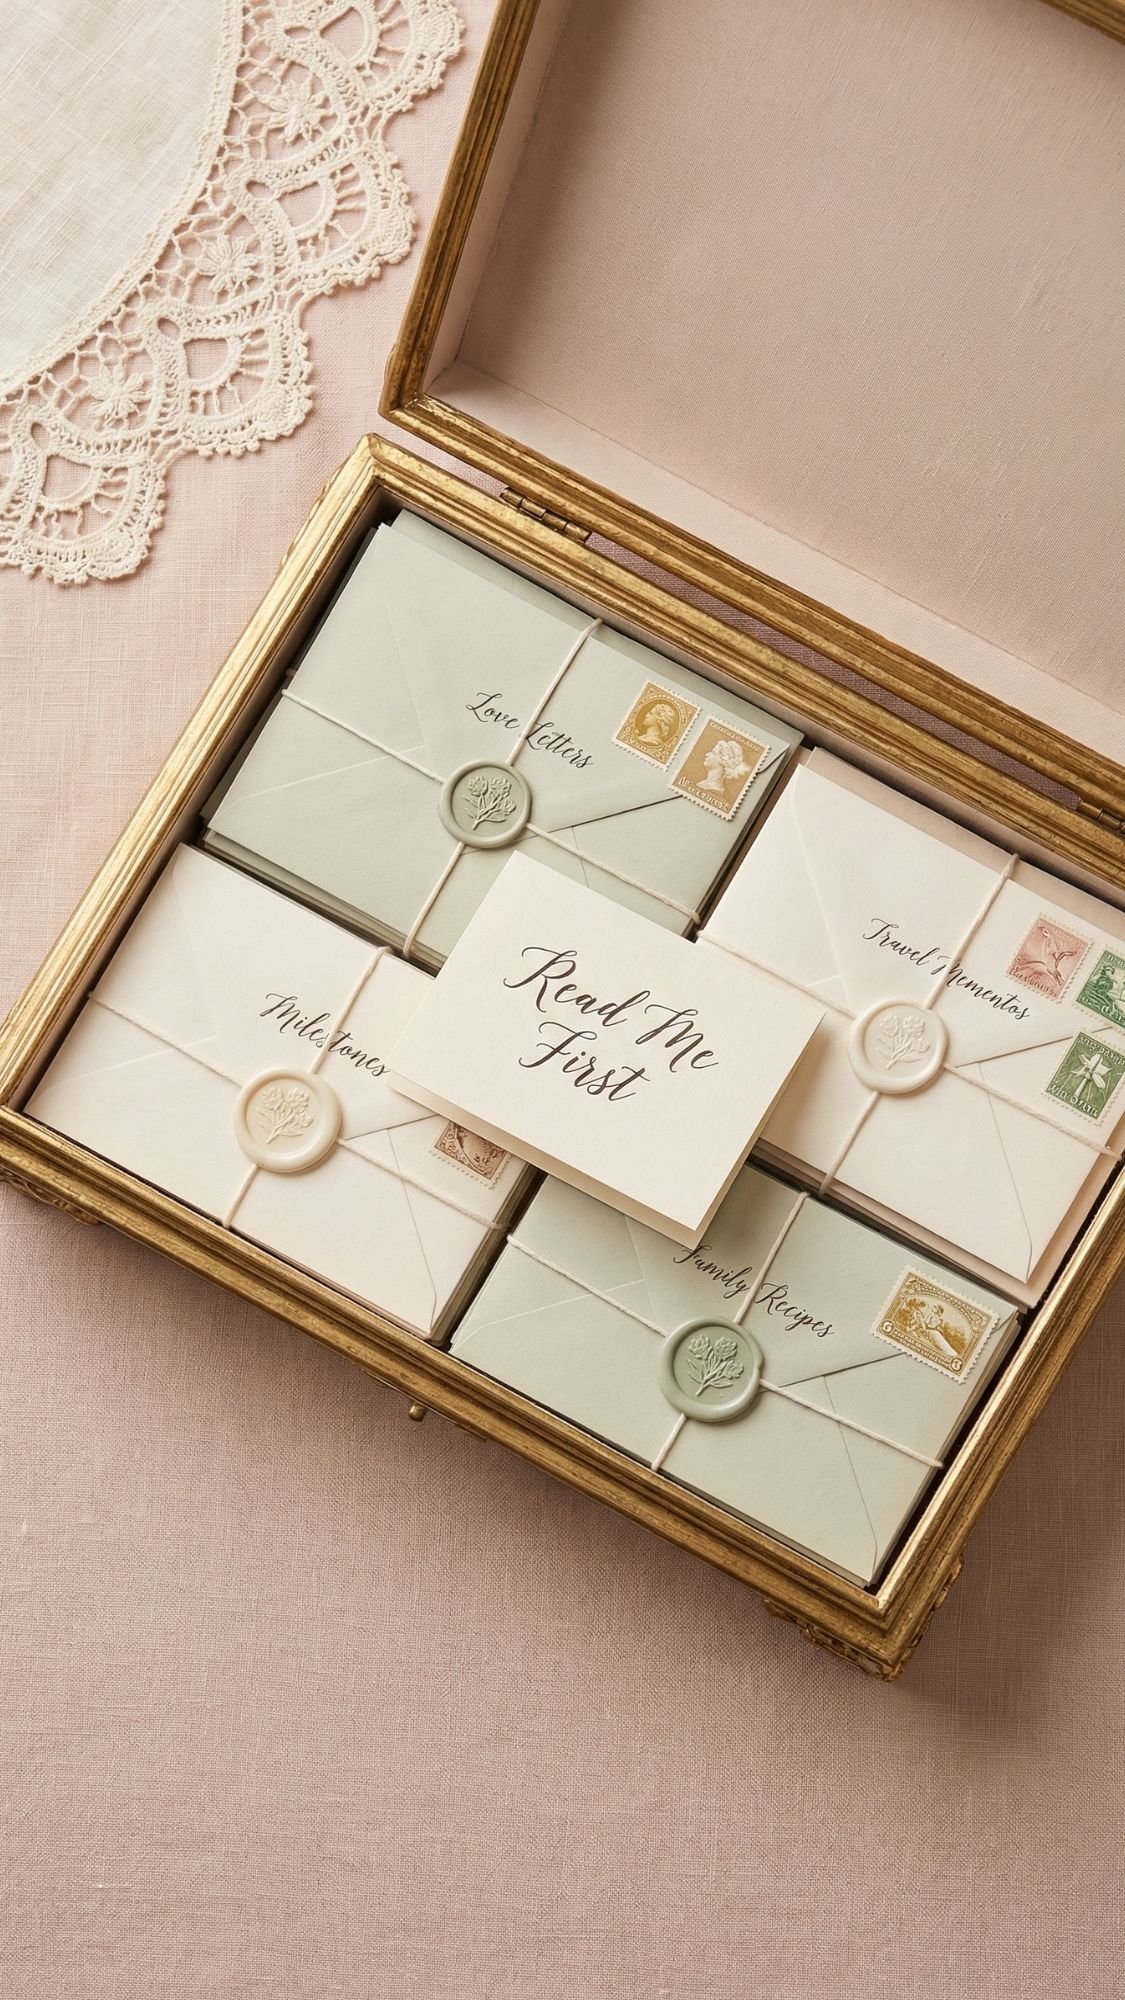
Gift Idea 2: “Open When” Letters Keepsake Box
This one is basically guaranteed happy tears. It’s simple to make, cheap, and wildly meaningful. Also, it fits the current love for snail mail and nostalgic paper goods without you having to do anything complicated. You’re just showing up with words, and words hit harder than glitter, IMO.
Why it works so well
- It feels like ongoing companionship. She can open one whenever she needs it.
- It’s easy to personalize. You can tailor the prompts to her personality.
- It stores neatly. No clutter, no dust-catcher vibes.
Materials
- Small keepsake box (wood, tin, or sturdy cardboard)
- 8–12 envelopes (A2 or small square envelopes look extra pretty)
- Cardstock or nice writing paper
- Stickers, stamps, washi tape, or wax seal accents (optional)
- Ribbon or twine
- Label for the lid
Pick your “Open When” prompts
Choose 8–12, depending on how ambitious you feel:
- Open when you miss us
- Open when you need a laugh
- Open when you feel proud
- Open when you’re having a rough day
- Open when you want to feel close to family
- Open when you need a cozy evening idea
- Open when you want to remember a sweet moment
- Open when it’s your birthday
- Open when it’s a holiday
- Open when you can’t sleep
Step-by-step
- Write each letter on cardstock or nice paper. Keep it short and warm, not a novel.
- Add a small tuck-in if you want:
- A printed photo
- A tea bag
- A pressed flower
- A tiny “coupon” like “Call me anytime”
- Seal each envelope and label the front in big, readable lettering.
- Make one “Read this first” card that explains the set in 2–3 lines.
- Stack the envelopes in the box by theme or just neatly by size.
Pro tips that make it feel luxury, not craft-fair
- Stick to one design vibe. One washi tape style, one label style, one palette.
- Use a liner. A simple piece of patterned paper inside the box makes it look boutique.
- Add structure. Put envelopes upright like a mini file system, it looks intentional.
Common mistake beginners make
They over-decorate the envelopes so much the text becomes hard to read. Keep it clean. Grandma needs to see the prompt instantly.
Optional add-on that hits hard
Include one envelope called “Open when you want to know what I learned from you.” Write a few specific things she taught you. This one gets people.
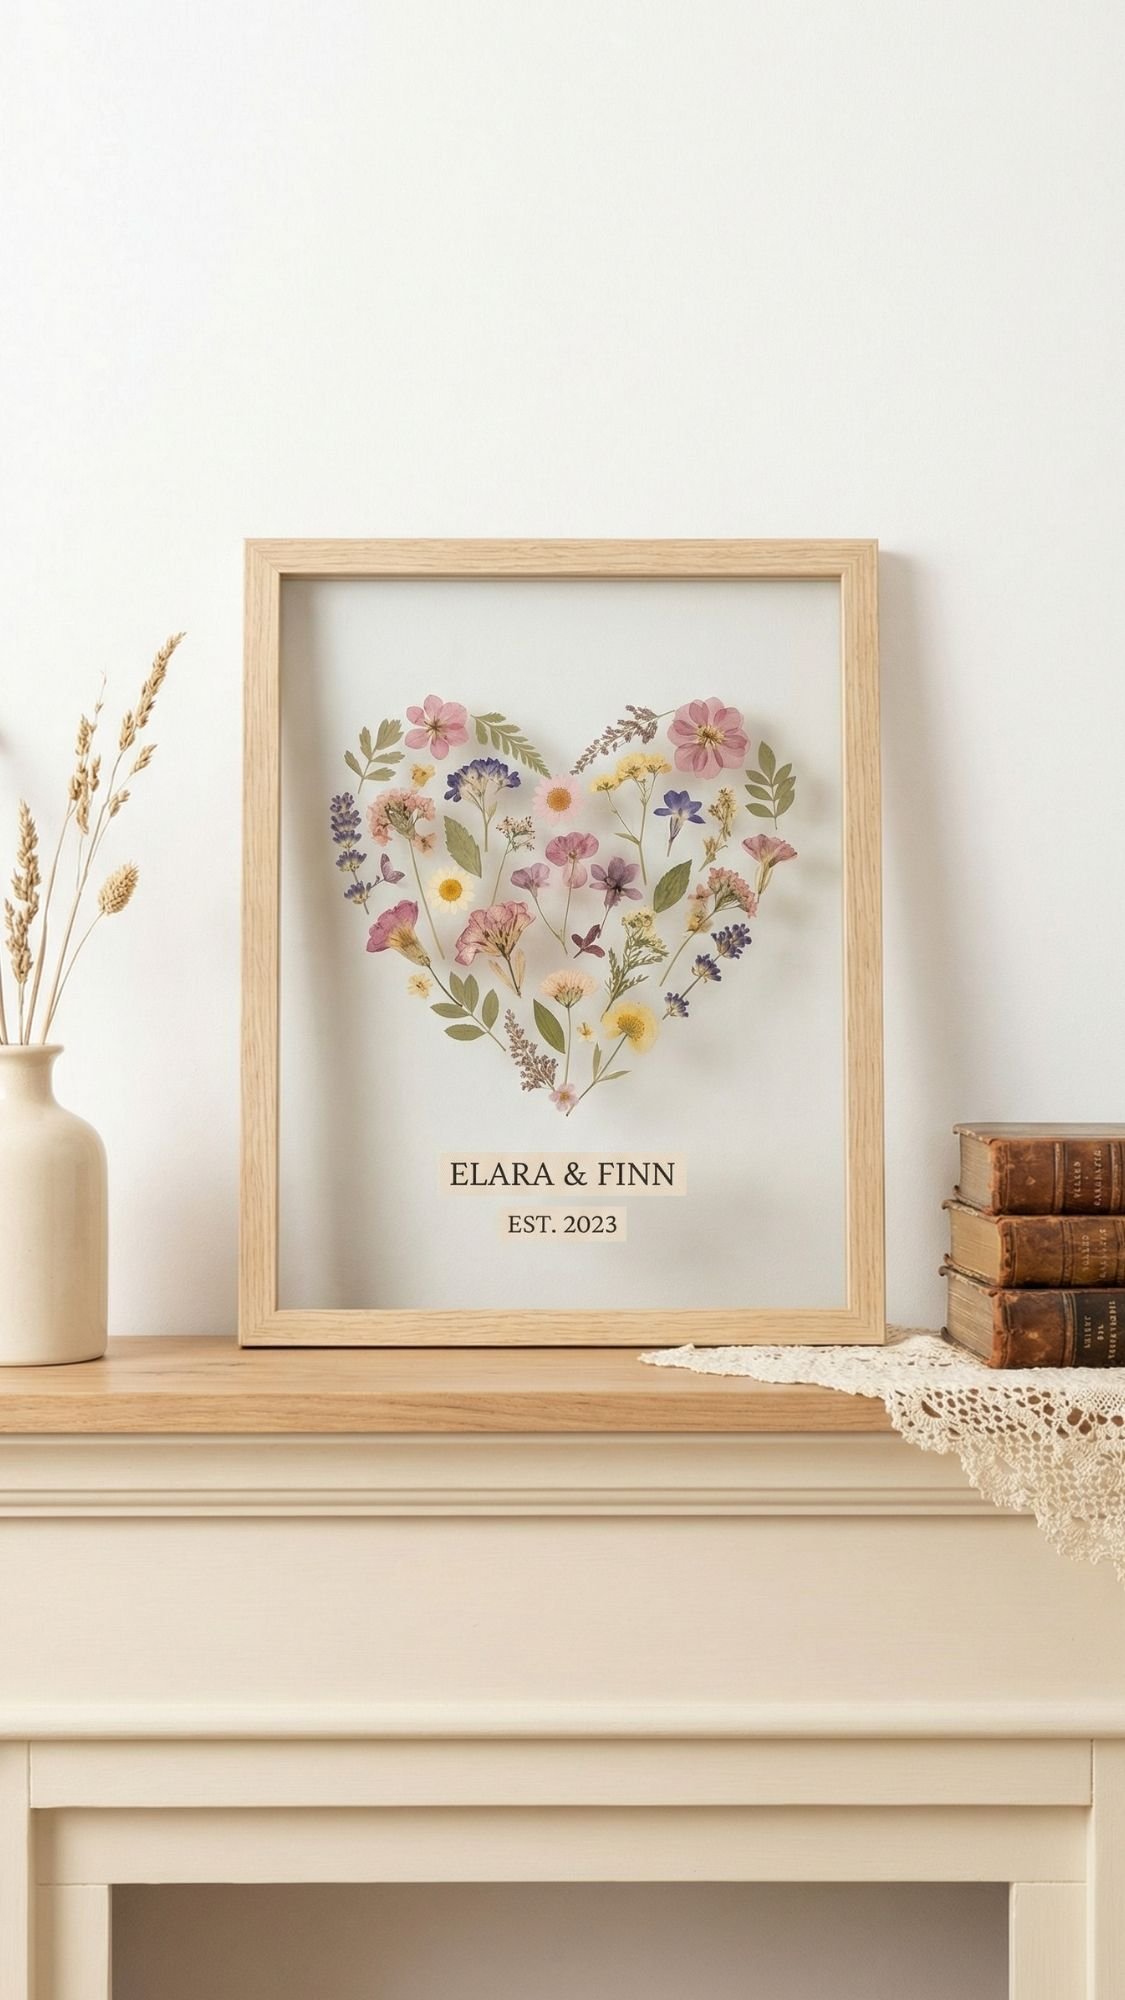
Gift Idea 3: Pressed Flower Frame With Names and Dates
This is one of those projects that looks like you bought it at a fancy little gift shop, but it’s secretly simple. Pressed flowers bring instant “keepsake” energy, and the frame turns it into decor she can display year-round. Want it to feel extra meaningful? Use flowers that connect to her, like blooms from her garden, wedding bouquet leftovers, or a bouquet from a family event.
Why it works so well
- It’s sentimental and pretty, without being messy.
- It feels custom. Names and dates make it personal fast.
- It lasts. A properly framed pressed piece can look good for years.
Materials
- Pressed flowers (store-bought or pressed at home)
- Frame (float frame looks especially high-end)
- Acid-free paper or cardstock for the backing
- Tweezers (seriously helpful)
- Glue dots or tiny dabs of clear-drying craft glue
- Fine-tip pen or printable name label
- Optional: clear archival spray (only if needed)
Step-by-step
- Lay your backing paper on the table and place the frame glass on top to check sizing.
- Arrange flowers without glue first. Move things around until it feels balanced.
- Use tweezers to place each flower, then tack down with glue dots.
- Add names and a date in one corner. Keep it clean and readable.
- Close the frame and secure the back fully so dust can’t sneak in.
Pro tips for a crisp, expensive finish
- Go flatter than you think. Chunky flowers can keep the glass from closing properly.
- Leave breathing room. A tight crowded arrangement can look chaotic.
- Pick a simple layout. Heart shape, corner cluster, or soft border works every time.
Pressing flowers at home
- Place flowers between parchment paper sheets.
- Press inside a heavy book for 1–2 weeks.
- Swap out paper if it gets damp so you avoid browning.
Common mistake beginners make
They glue before arranging. Then they regret everything. Dry-fit first, always.
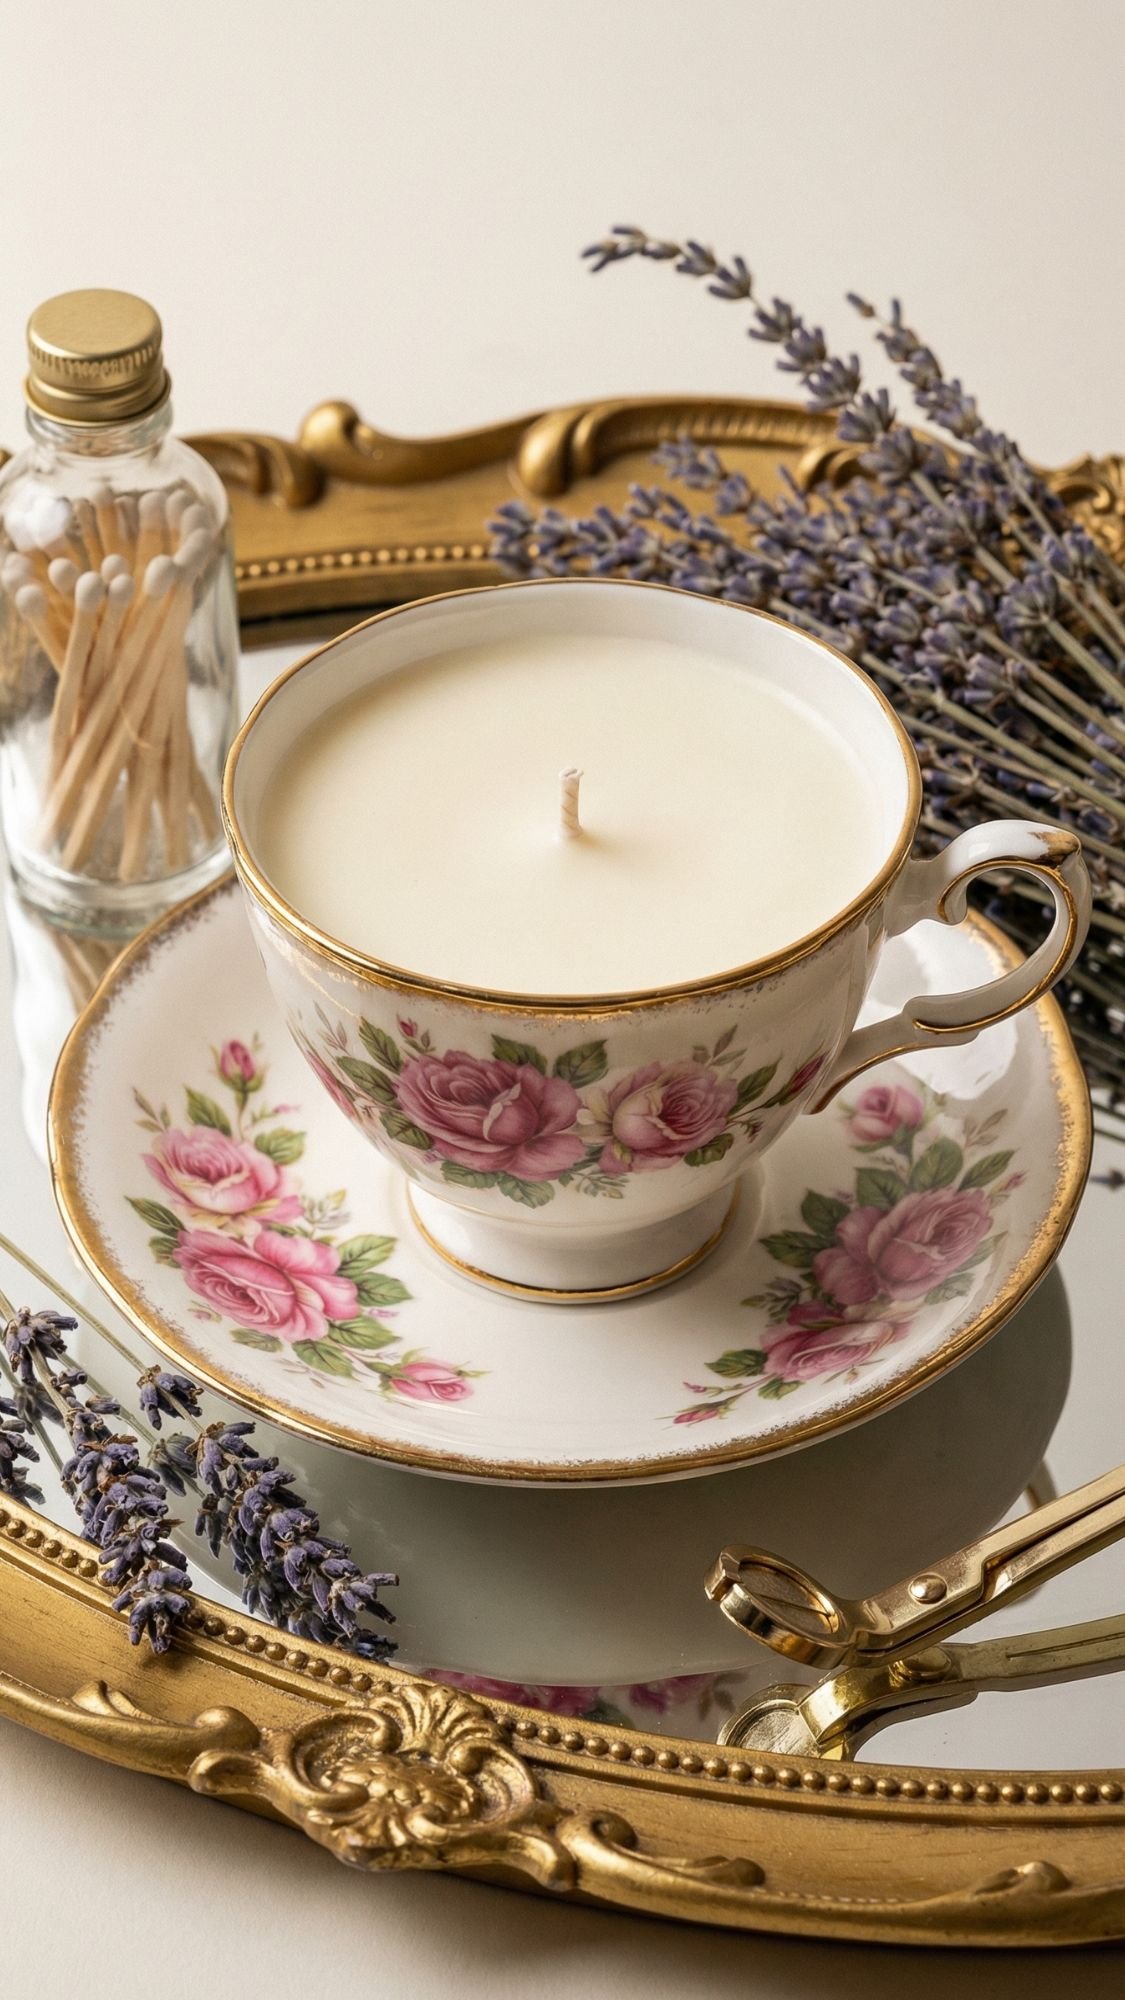
Gift Idea 4: Teacup Candle That Looks Like a Boutique Find
This is the kind of gift Grandma will display like it’s decor, then actually use because it feels cozy and practical. The teacup makes it special, and you can keep the scent gentle so it feels relaxing, not like you lit a perfume counter on fire.
Why it works so well
- It’s functional and pretty. A candle in a teacup feels instantly gift-worthy.
- It fits the grandma vibe perfectly. Vintage, cozy, sweet, not try-hard.
- It upgrades easily. One good teacup makes it look expensive.
Materials
- Vintage teacup (thrift store, flea market, or something from a family set)
- Soy wax flakes (or a soy blend)
- Cotton wick (size depends on cup width)
- Wick sticker or hot glue dot
- Wick centering tool (or two chopsticks)
- Optional: fragrance oil (light scent only)
- Optional: dried botanicals for the top (use sparingly)
Step-by-step
- Clean the teacup well and let it dry fully.
- Stick the wick to the center of the cup using a wick sticker.
- Melt wax slowly in a double boiler setup.
- Let the wax cool slightly before you pour. If you pour too hot, you risk cracks and sinkholes.
- Pour slowly, keep the wick centered, then let it set undisturbed.
- Trim the wick to about 1/4 inch after it hardens.
Pro tips for a smooth, pro-looking top
- Pour a little cooler, not boiling hot. It helps prevent surface issues.
- Warm the cup slightly with a hair dryer if your room is cold. Cold ceramic can cause rough tops.
- Skip heavy dried flowers. They can become fire hazards. If you want a pretty top, keep it minimal and off to the side.
Cure time and why it matters
Even if the candle looks solid, give it time to fully settle for the best burn and scent.
- Dry to the touch: usually within hours
- Cure for best performance: 2–7 days depending on wax
Common mistake beginners make
They light it the same night. The candle will still burn, but it won’t perform as well and the scent can feel weak. Waiting a few days makes a difference.
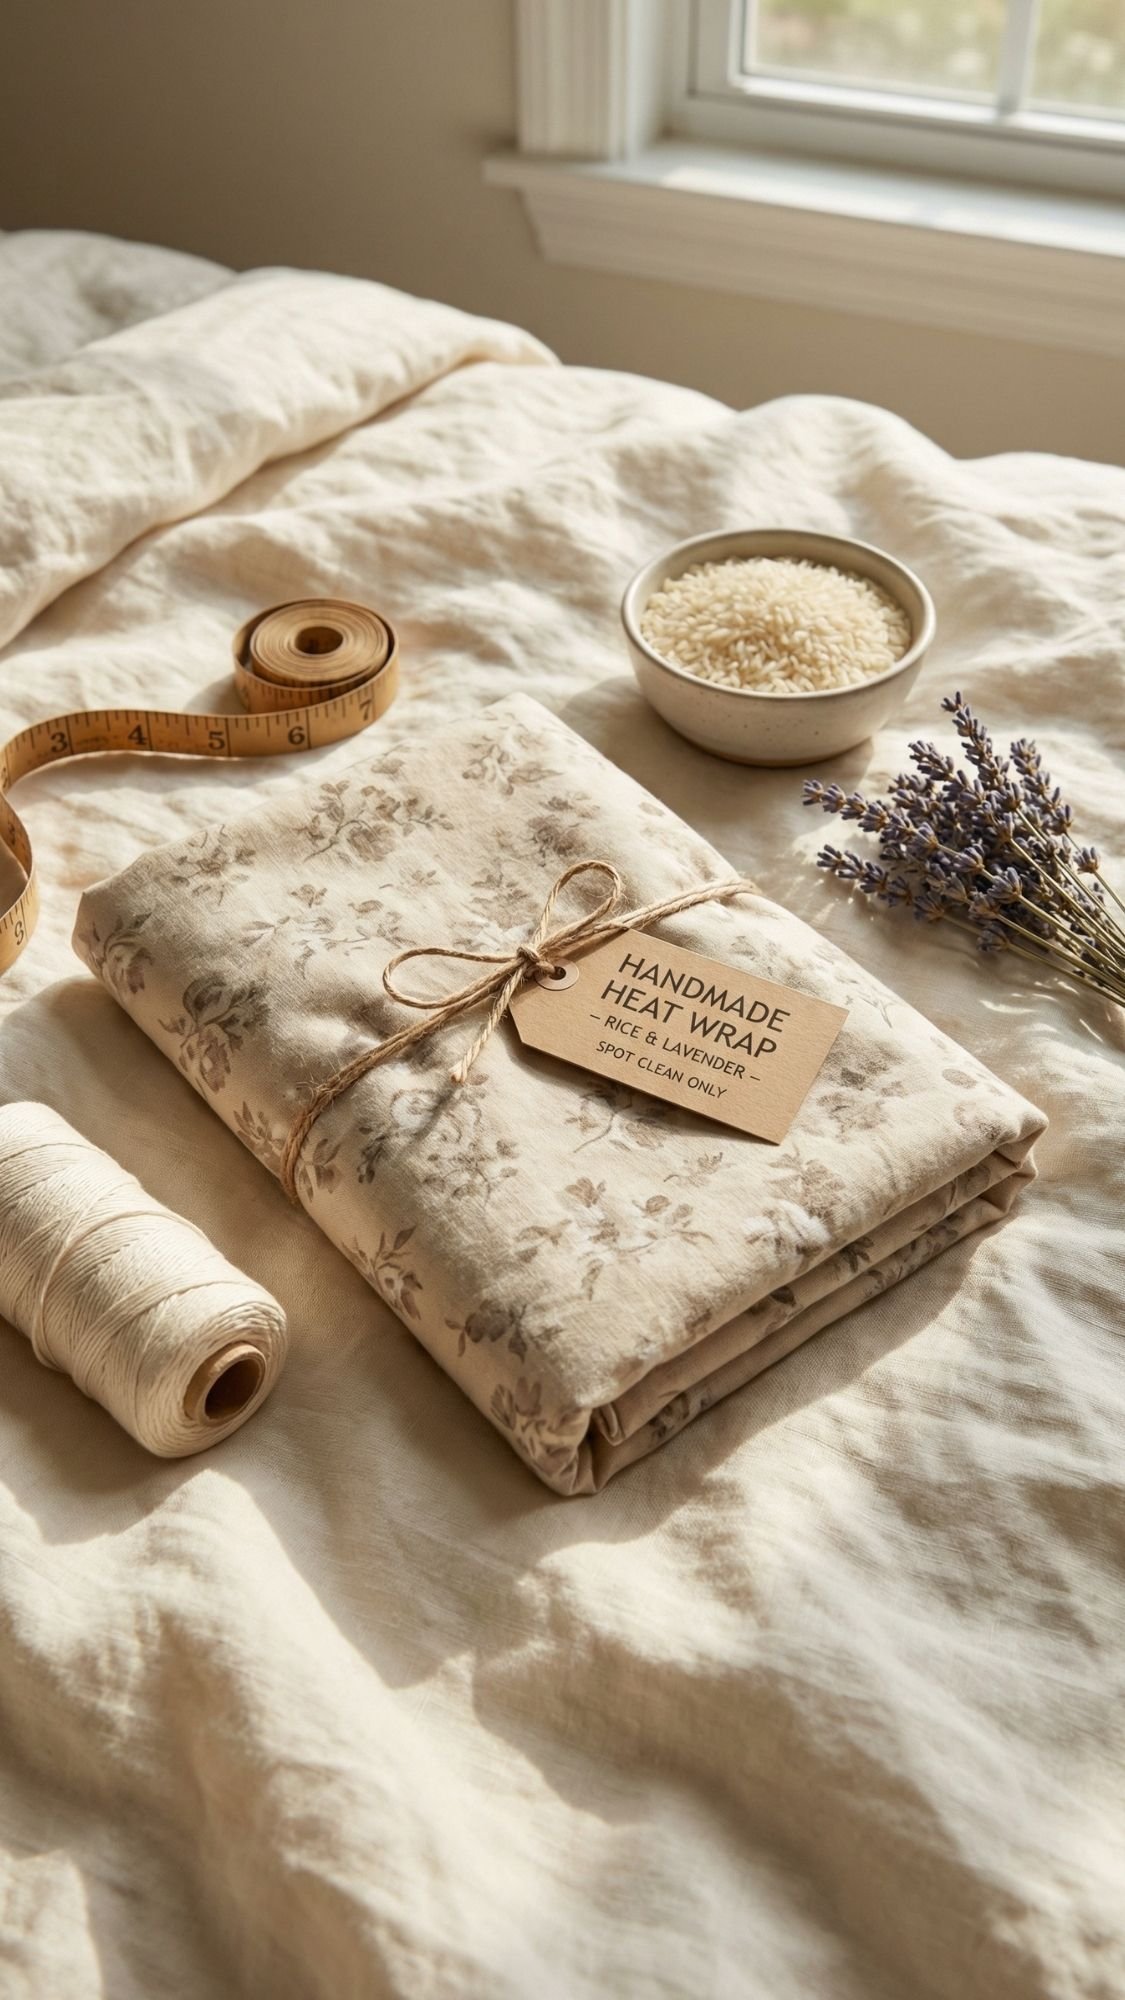
Gift Idea 5: Microwaveable Rice Heat Pack for Neck or Lap
This gift is sweet because it’s comfort you can actually use, and comfort is basically Grandma’s love language. A good heat pack helps sore shoulders, cold hands, and that “why is my knee doing that” feeling. You can sew it in under an hour, and it still looks thoughtful even if you keep the design simple. The key is choosing the right fabric and not overstuffing it, because a brick-shaped heat pack feels like a prank.
Why it works so well
- It feels like care, not clutter.
- It’s useful year-round. Warm in winter, soothing any time.
- It’s easy to personalize. Pick a floral print, her favorite color, or a fabric that matches her chair blanket.
Materials
- 100% cotton fabric (quilting cotton works great)
- Uncooked white rice
- Thread
- Sewing machine or hand needle
- Funnel or paper rolled into a cone
- Optional: dried lavender buds (use lightly)
- Optional: removable washable cover fabric
Step-by-step
- Cut two rectangles. A good starter size is 8 x 18 inches for a neck pack, or 7 x 10 inches for a lap/hand warmer.
- Place fabric right sides together, then sew three sides with a 1/2 inch seam allowance.
- Turn it right side out, poke corners neatly, then press flat.
- Fill with rice using a funnel. Aim for about 2/3 full so it drapes instead of clumping.
- Fold the open edge inward, then stitch it closed with a tight seam.
- Optional upgrade: sew a simple envelope-style cover so she can wash the outside easily.
Pro tips for a polished, not-lumpy finish
- Use 100% cotton only. Synthetic fabric can melt or scorch in a microwave.
- Do not overfill. If it feels stiff, remove a little rice.
- Add channels if you want it extra fancy. Sew 2–3 vertical seams after filling to keep rice from migrating into one corner.
Microwave safety card you can include
- Heat 30 seconds at a time, then check warmth.
- Most packs land at 60–90 seconds total, depending on microwave strength.
- If it smells toasted, stop heating and let it cool fully.
Common mistake beginners make
They stitch the final seam too close to the edge, then rice sneaks out later like it’s trying to escape. Leave enough folded fabric inside so that closing seam bites into multiple layers.
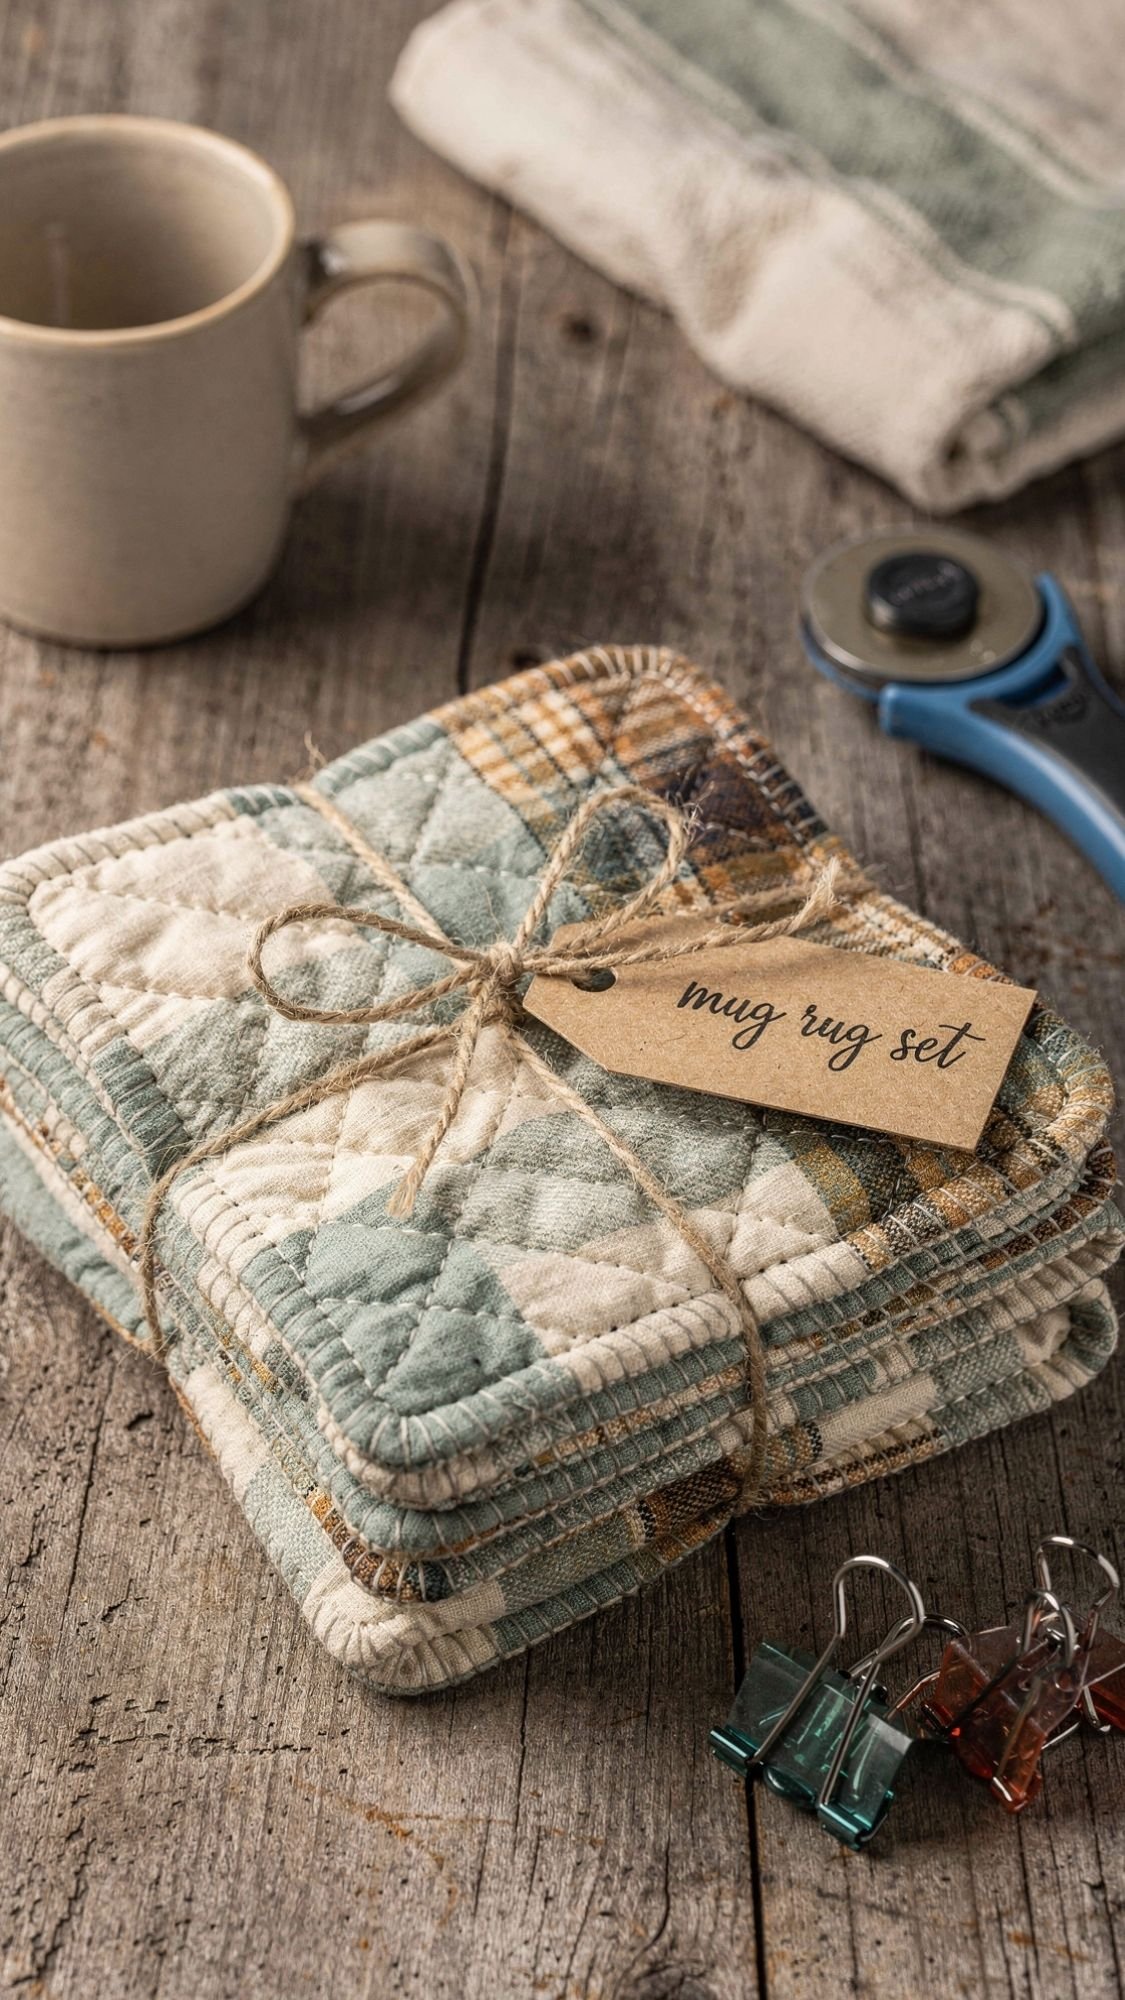
Gift Idea 6: Quilted Mug Rug or Fabric Coaster Set
This one is small but mighty. A mug rug sits under her tea or coffee, catches drips, and makes her little routine feel cozy. It also uses up scrap fabric, which is basically crafting’s version of using leftovers for a really good meal. If you want a simple gift that looks boutique, this is it.
Why it works so well
- It’s useful every day. Grandma will actually use it, not store it.
- It’s beginner-friendly sewing. Straight lines, quick win.
- It looks expensive with clean edges. Finish matters more than fancy fabric.
Materials
- Cotton fabric scraps (top and backing)
- Thin batting or felt
- Thread
- Sewing machine (or hand sew, it just takes longer)
- Rotary cutter + mat (optional but helps)
- Iron and ironing board
- Optional: binding tape or bias tape for extra clean edges
Step-by-step
- Cut layers the same size. A great mug rug size is 6 x 9 inches, coasters can be 4 x 4 inches.
- Stack: backing (pretty side down), batting, top (pretty side up).
- Quilt simple lines across the top. Keep it straight and evenly spaced.
- Trim edges so everything squares up perfectly.
- Finish edges:
- Quick finish: zigzag stitch around the edge
- Cleaner finish: bind with bias tape
- Neatest finish: sew right sides together, flip, then topstitch
Pro tips for that crisp “store-bought” look
- Press often. Pressing fabric before sewing makes edges cleaner.
- Use a walking foot if you have one. It prevents shifting layers.
- Topstitch the edge. One clean topstitch line instantly makes it look professional.
Common mistake beginners make
They skip trimming and squaring. If the edges aren’t straight, the whole thing reads sloppy, even if the sewing is fine. Trim and square before you finish.
Care card you can include
- Machine wash gentle, cold water
- Lay flat to dry or tumble low
- Press lightly if needed
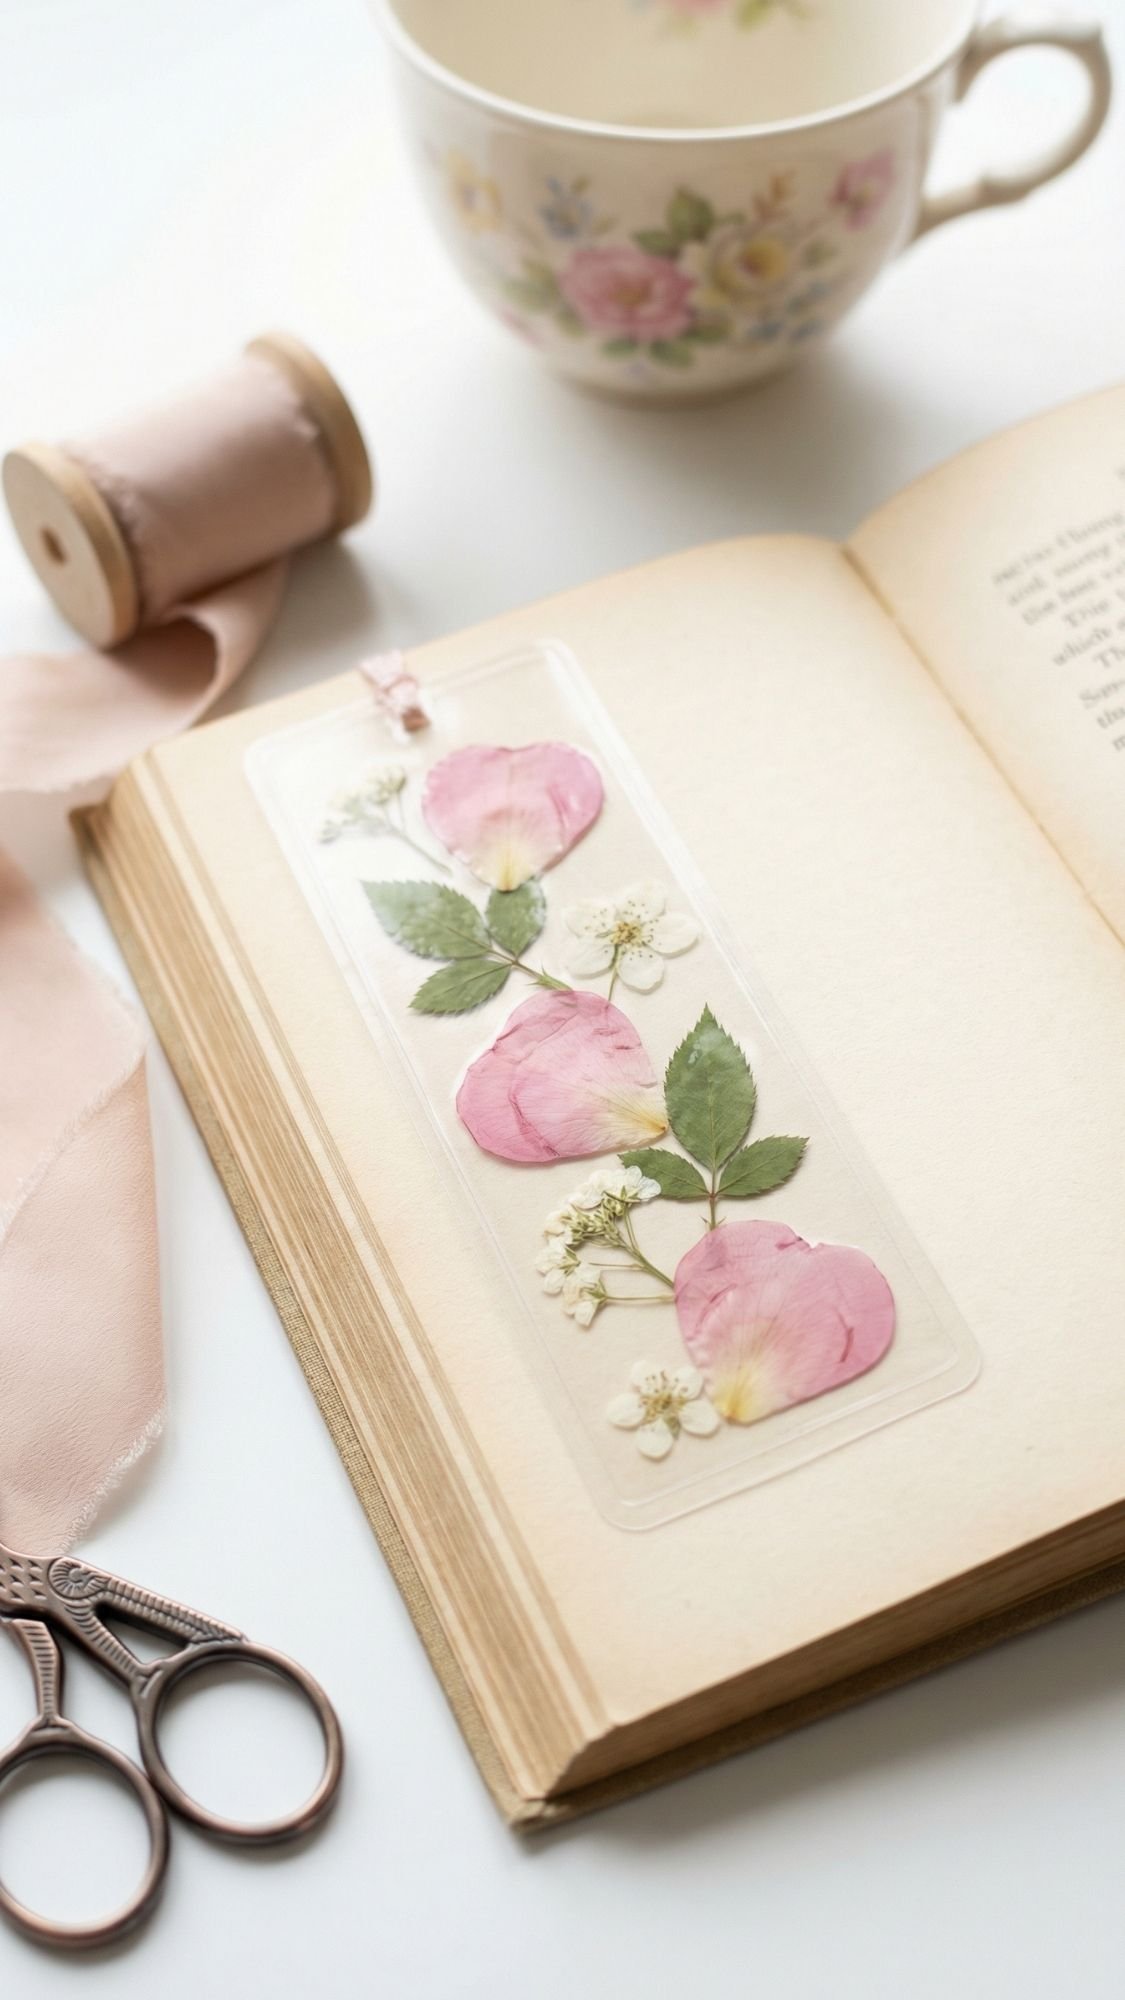
Gift Idea 7: Laminated Bookmark With Pressed Flowers
This is a quick little gift that feels fancy, especially if Grandma loves reading, devotions, cookbooks, or even just marking her place in a puzzle book. It’s also one of those projects where the details matter. Clean edges and bubble-free laminate make it look like a boutique stationery find instead of a “my laminator and I had a disagreement” situation.
Why it works so well
- Fast and affordable, but still sentimental.
- Easy to personalize with her favorite colors or flowers.
- Practical keepsake she can use daily.
Materials
- Pressed flowers (tiny flat ones work best)
- Cardstock or thick paper for the base
- Laminating sheets and laminator
- Scissors or paper trimmer
- Hole punch
- Ribbon, thin twine, or tassel
- Optional: gold pen for a small name or year
Step-by-step
- Cut cardstock to bookmark size. A good size is 2 x 7 inches.
- Arrange pressed flowers on the cardstock. Keep them flat and leave a clean border.
- Slide the bookmark into the laminating sheet.
- Laminate slowly, and keep it straight as it feeds through.
- Trim the bookmark, leaving at least 1/8 inch laminate border all around so it stays sealed.
- Punch a hole at the top and add ribbon or a tassel.
Pro tips for a bubble-free finish
- Wipe your table first. Tiny crumbs cause bumps and bubbles.
- Use flatter flowers than you think. Thick ones create air pockets.
- Feed slowly. Rushing is how bubbles happen.
- If you get a bubble, you can sometimes fix it by re-laminating with a fresh sheet.
Common mistake beginners make
They trim too close to the paper edge. Then the laminate opens at the corners later. Leave that little border, it’s boring but it works.
Cute personalization ideas
- Add a small name at the bottom in clean lettering.
- Add the year on the back like a tiny signature.
- Make a set of three with different flowers, then tie them with ribbon.
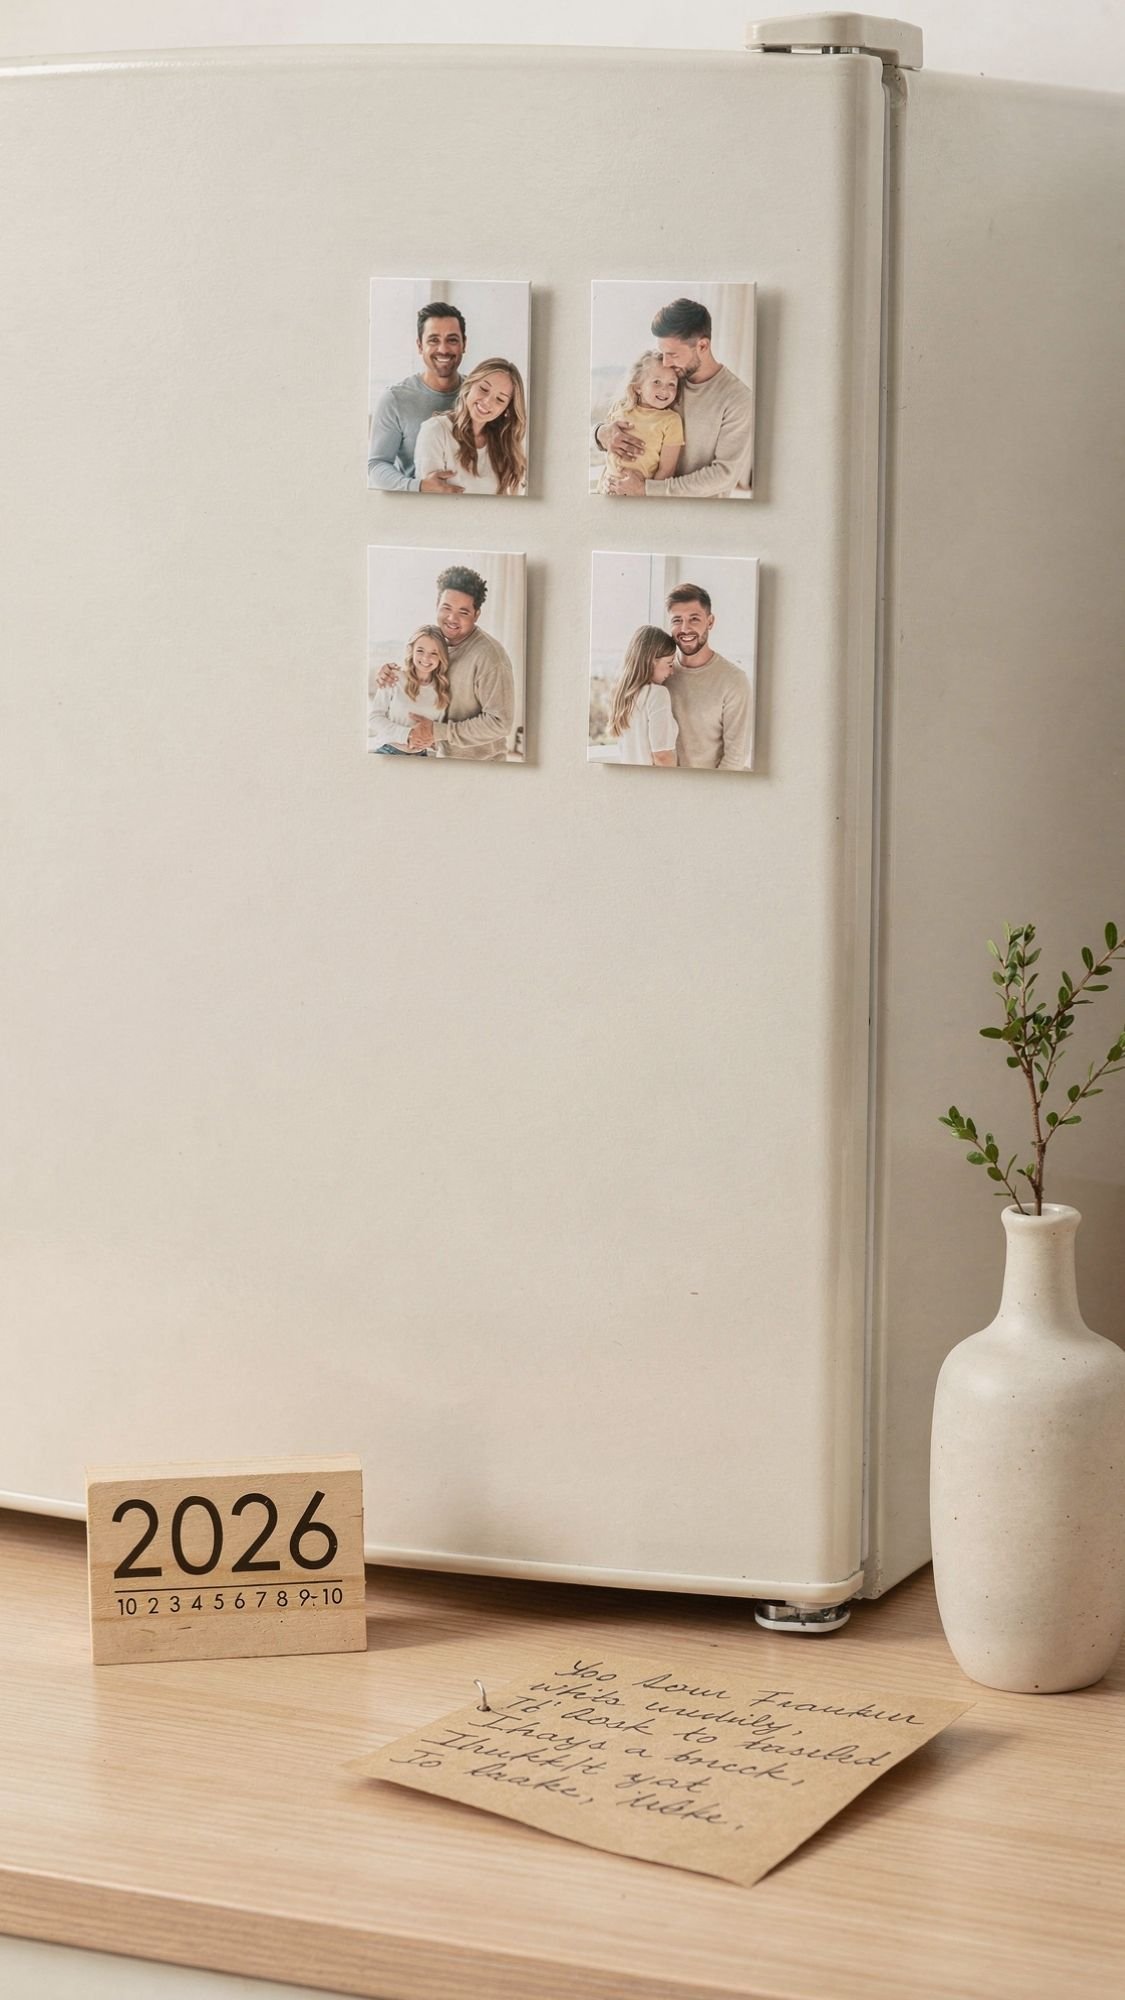
Gift Idea 8: Photo Magnet Set for the Fridge
This is one of the most “Grandma will actually use this” gifts on the list. Because grandmas love a fridge photo moment. It’s basically their social media feed, but with better snacks nearby. The trick is making these magnets wipeable and sturdy so they do not curl, peel, or look tired after a month.
Why it works so well
- Daily joy. She sees the photos every time she grabs the milk.
- Low effort, high emotion. Photos do the heavy lifting.
- Easy to make a set. A coordinated grid looks clean and intentional.
Materials
- Printed photos (wallet size or 2×3 looks great)
- Adhesive magnet sheets or blank magnet squares
- Scissors, paper trimmer, or craft knife + ruler
- Clear protective film, laminate sheet, or a thin clear sealer
- Optional: corner rounder for a polished finish
Step-by-step
- Choose 6–12 photos and crop them to the same size for a cohesive look.
- Print on matte photo paper if possible, it handles glare better in kitchens.
- Cut photos with a straight edge so the corners stay crisp.
- Stick photos to magnet sheets or blanks and press firmly.
- Add protection:
- Laminate the front, or
- Cover with clear film, or
- Brush on a thin clear coat and let it cure fully
- Let everything set before stacking or gifting.
Pro tips for a clean, high-end look
- Go with a theme. All grandkids, all family trips, or “best hugs” moments.
- Round the corners. It instantly looks more finished and less homemade.
- Burnish hard. Use a brayer or an old gift card to press the photo down evenly.
Common mistake beginners make
They skip sealing, then fingerprints and kitchen moisture wreck the photos. A quick protective layer makes these magnets last way longer.
Packaging idea that looks cute
Stack the magnets, tie with twine, and add a small tag that says “Fridge favorites” or “Daily smiles.”
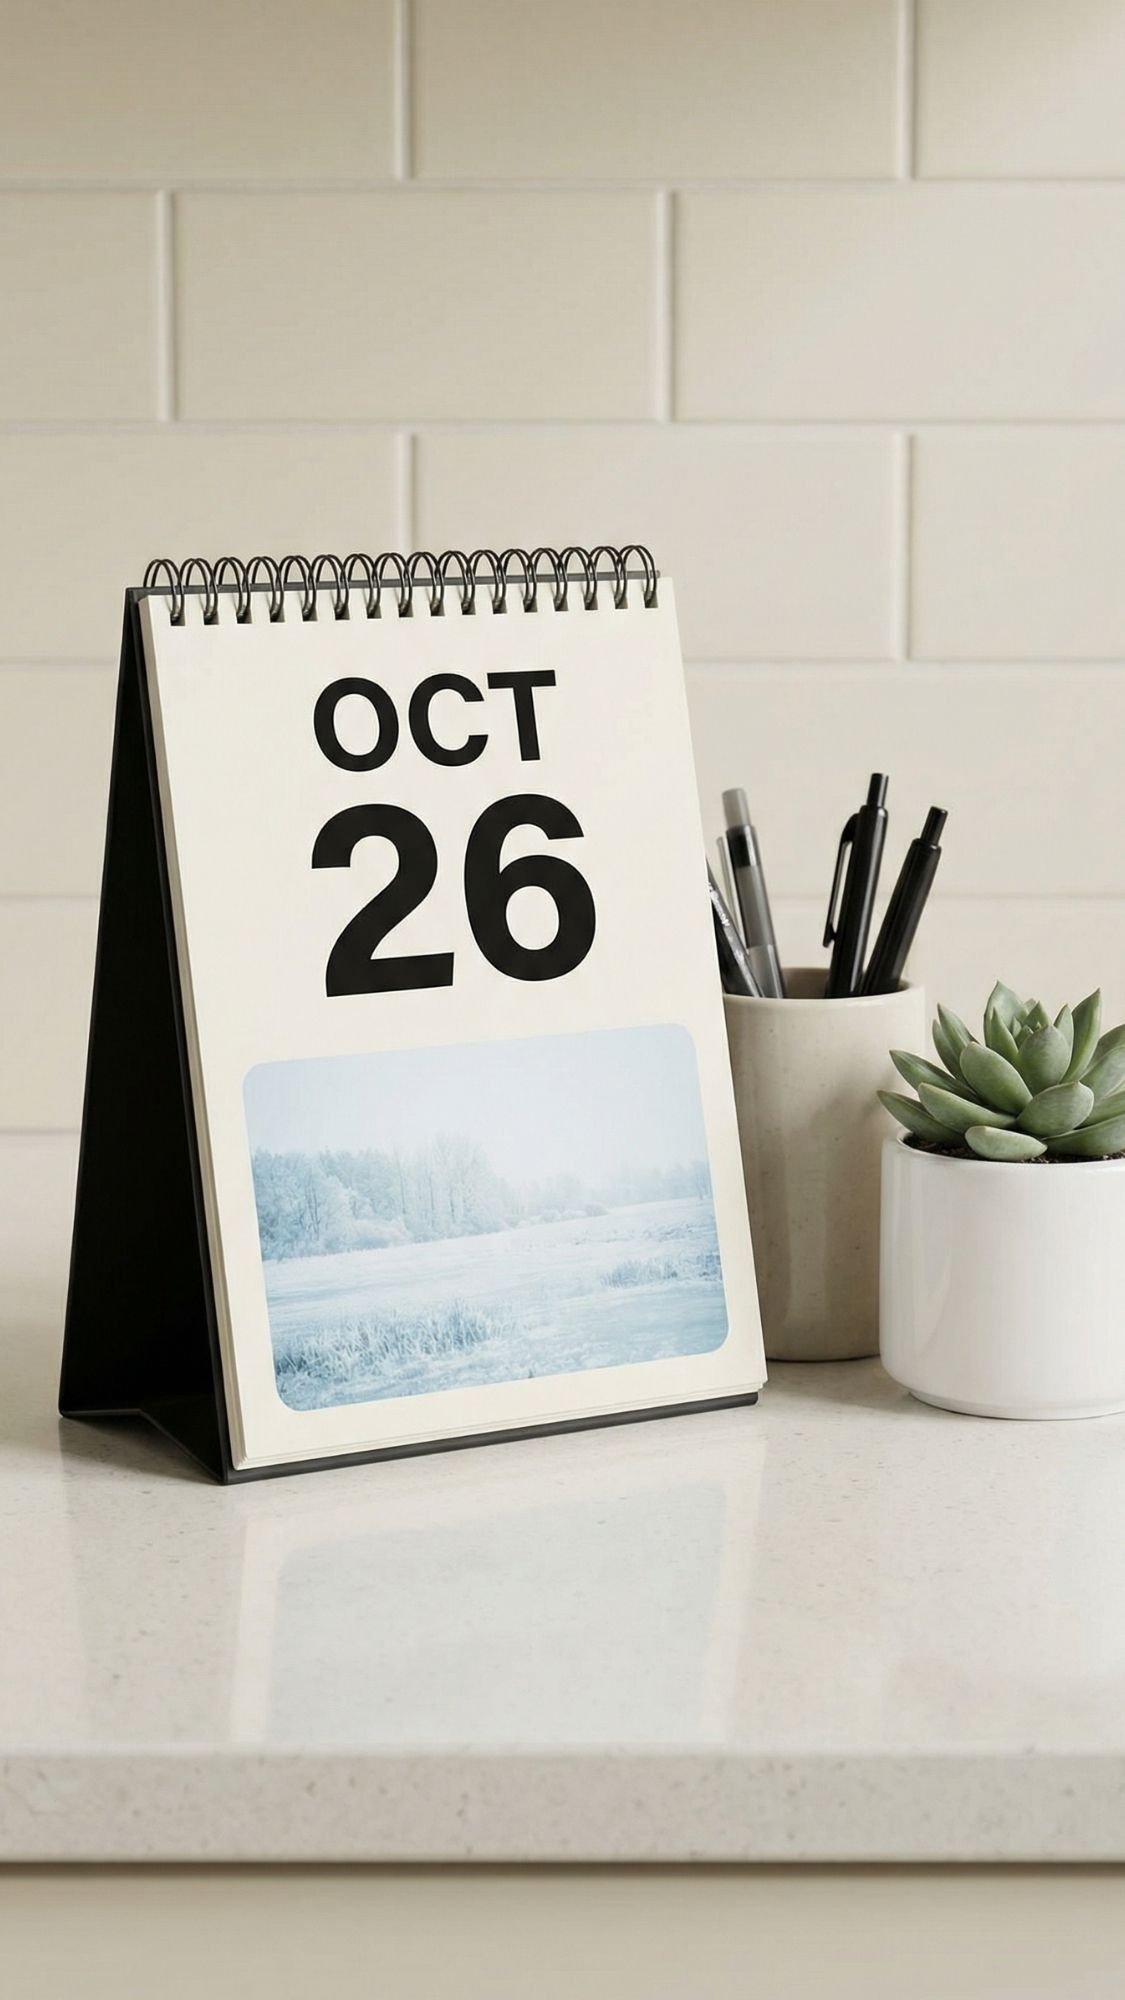
Gift Idea 9: Personalized Calendar With “Family Dates That Matter”
This gift is sneaky-good because it’s sentimental and useful at the same time. Grandma gets a calendar she can actually plan with, and you quietly pre-load it with the dates she cares about most. Birthdays, anniversaries, “first day of school,” the day you always visit, all that good stuff. It’s thoughtful without being extra.
Why it works so well
- She uses it all year. A calendar is not a shelf-sitter.
- You bake in meaning. The dates make it personal without clutter.
- You can make it look polished fast. Consistent layout does the heavy lifting.
Materials
- Printable calendar pages (monthly)
- 12 photos or 12 simple themed images (one per month)
- Printer paper upgrade: heavy matte paper or cardstock
- Binder rings, mini clipboard, or spiral bind option
- Hole punch (or binding machine if you have one)
- Optional: stickers or small icons for birthdays and holidays
Step-by-step
- Choose a format:
- Wall calendar with binder rings
- Standing desk calendar
- Mini clipboard flip calendar
- Add the “must-have” dates first:
- Birthdays and anniversaries
- Family traditions
- Travel or visit weekends
- Add one photo or image per month. Keep it consistent in size and placement.
- Print on thick matte paper so it doesn’t look flimsy.
- Punch holes and bind with rings, then add a sturdy backing.
Pro tips that make it look store-bought
- Leave blank space. Grandma needs room to write appointments, not a calendar packed like a scrapbook.
- Use big, readable numbers. Thin tiny fonts look cute online, then turn into squint city.
- Pick one accent color. Too many colors can make it feel chaotic.
Common mistake beginners make
They forget to test print one page first. Always print one sample page to check:
- readability
- margins
- color clarity
- photo placement
Packaging idea
Tie the calendar with a ribbon, include a pen, and add a tag that says “So you never miss a moment.” Yes, she will love that.
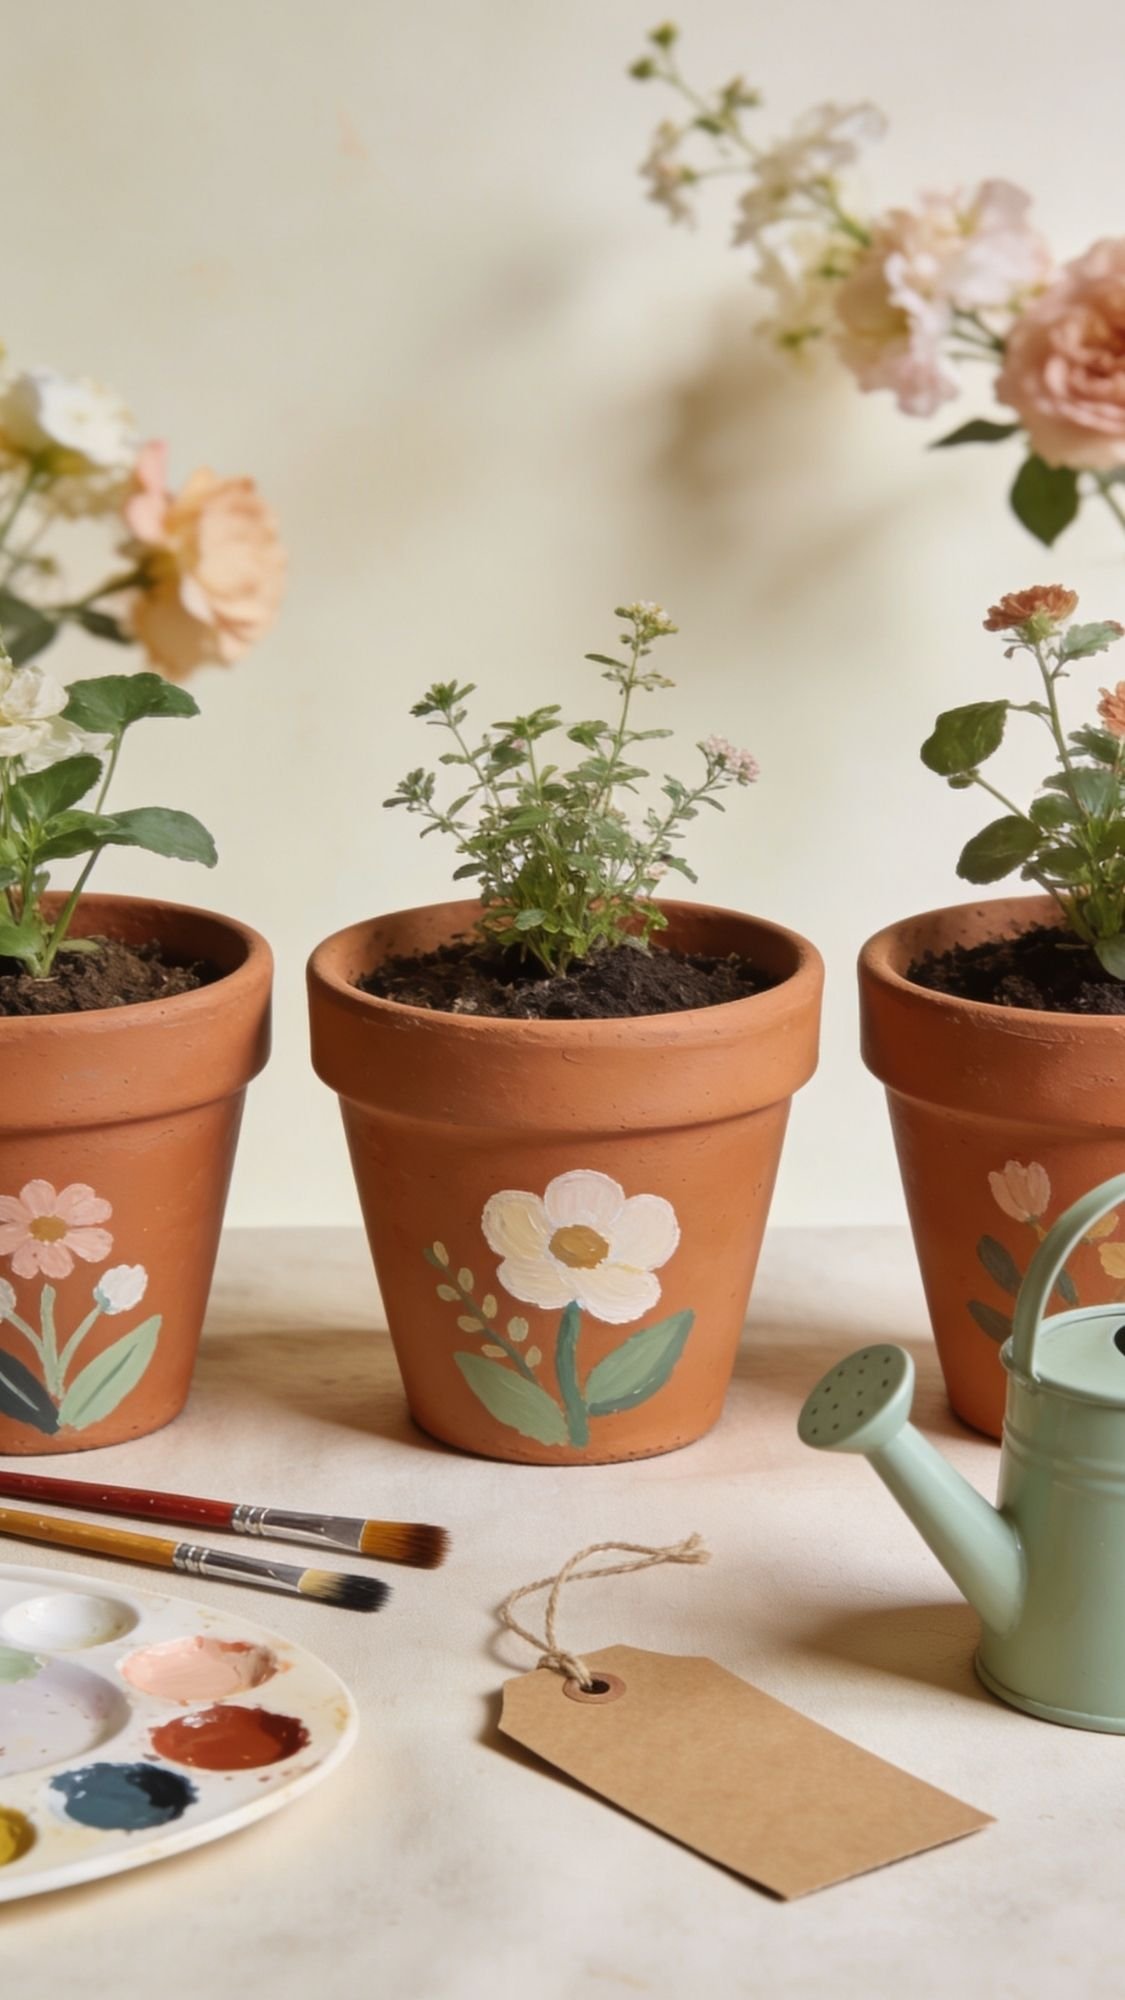
Gift Idea 10: Hand-Painted Flower Pot With an Easy-Care Plant
This is a classic for a reason. A painted pot feels handmade and personal, and an easy-care plant makes it feel alive and cheerful without becoming a responsibility. The key is making the paint job clean and sealing it correctly so it does not chip the first time she waters it.
Why it works so well
- It’s pretty and practical. Decor plus plant, done.
- It fits tons of styles. You can go modern, boho, farmhouse, or floral.
- It photographs beautifully. Great for pins, great for gifting.
Materials
- Terra cotta pot (4–6 inch size is easy to gift)
- Acrylic paint (multi-surface works great)
- Paintbrushes (one flat, one small detail brush)
- Pencil for light sketching
- Clear sealer (matte or satin)
- Easy-care plant, like pothos, snake plant, or a small herb
- Optional: painter’s tape for clean stripes
Step-by-step
- Wipe the pot clean and let it dry fully. Terra cotta holds dust like it’s its job.
- Lightly sketch your design with pencil. Keep it simple, stripes and florals work every time.
- Paint in thin coats. Let each coat dry before the next.
- Let the paint dry completely, then seal the outside of the pot only.
- Add your plant and wipe the rim so everything looks clean.
Pro tips for a polished finish
- Seal the outside only. Sealing the inside can trap moisture and mess with the plant over time.
- Two thin coats beat one thick coat. Thick paint chips faster and looks bumpy.
- Use tape for crisp lines. Peel the tape while paint is slightly tacky for sharp edges.
Common mistake beginners make
They skip sealing, then water drips soften the paint and cause peeling. A proper sealer solves most of that.
Cute personalization options
- Paint a small name or initial near the bottom.
- Add a tiny date on the underside, like a maker mark.
- Use Grandma’s favorite flower colors without making it overly busy.

Gift Idea 11: Herb Jar Starter Kit With Cute, Readable Labels
This one feels like a mini “I want you to have something cheerful on your counter” gift. It’s sweet, useful, and easy to customize. The win is making it simple enough that she actually uses it. That means clear labels, clear instructions, and herbs that forgive a missed watering.
Why it works so well
- It’s practical and pretty. Counter decor that also turns into dinner.
- It feels thoughtful without being complicated.
- You can tailor it. Cooking grandma, tea grandma, garden grandma, you get it.
Materials
- Mason jars, small pots, or small planters (3 is a nice set)
- Soil pods or potting soil
- Seeds: basil, mint, parsley, chives are beginner-friendly
- Small plant markers or label tags
- Twine or ribbon
- Optional: tiny scoop or spoon
- Optional: waterproof label tape or vinyl labels
Step-by-step
- Choose 2–3 herbs that match her habits:
- Basil for cooking
- Mint for tea
- Parsley for everything
- Add soil to each jar or pot, then plant seeds at the recommended depth.
- Label each one with big, readable lettering.
- Include a tiny instruction card:
- how much light it needs
- how often to water
- when to pinch leaves for growth
- Tie the set together with a ribbon and tag.
Pro tips for a clean, “gift shop” finish
- Waterproof the labels. Kitchens get steamy, labels hate steam.
- Keep the set cohesive. Same jar style, same label style, same ribbon.
- Add a watering schedule card. It turns a cute gift into an actually successful gift.
Common mistake beginners make
They pick herbs that are dramatic. If you choose something fussy and it dies, Grandma will blame herself and feel bad. Stick with forgiving herbs and simple instructions.
Packaging idea
Set the jars on a small tray, add a tag that says “Fresh for your kitchen”, and you’re done.
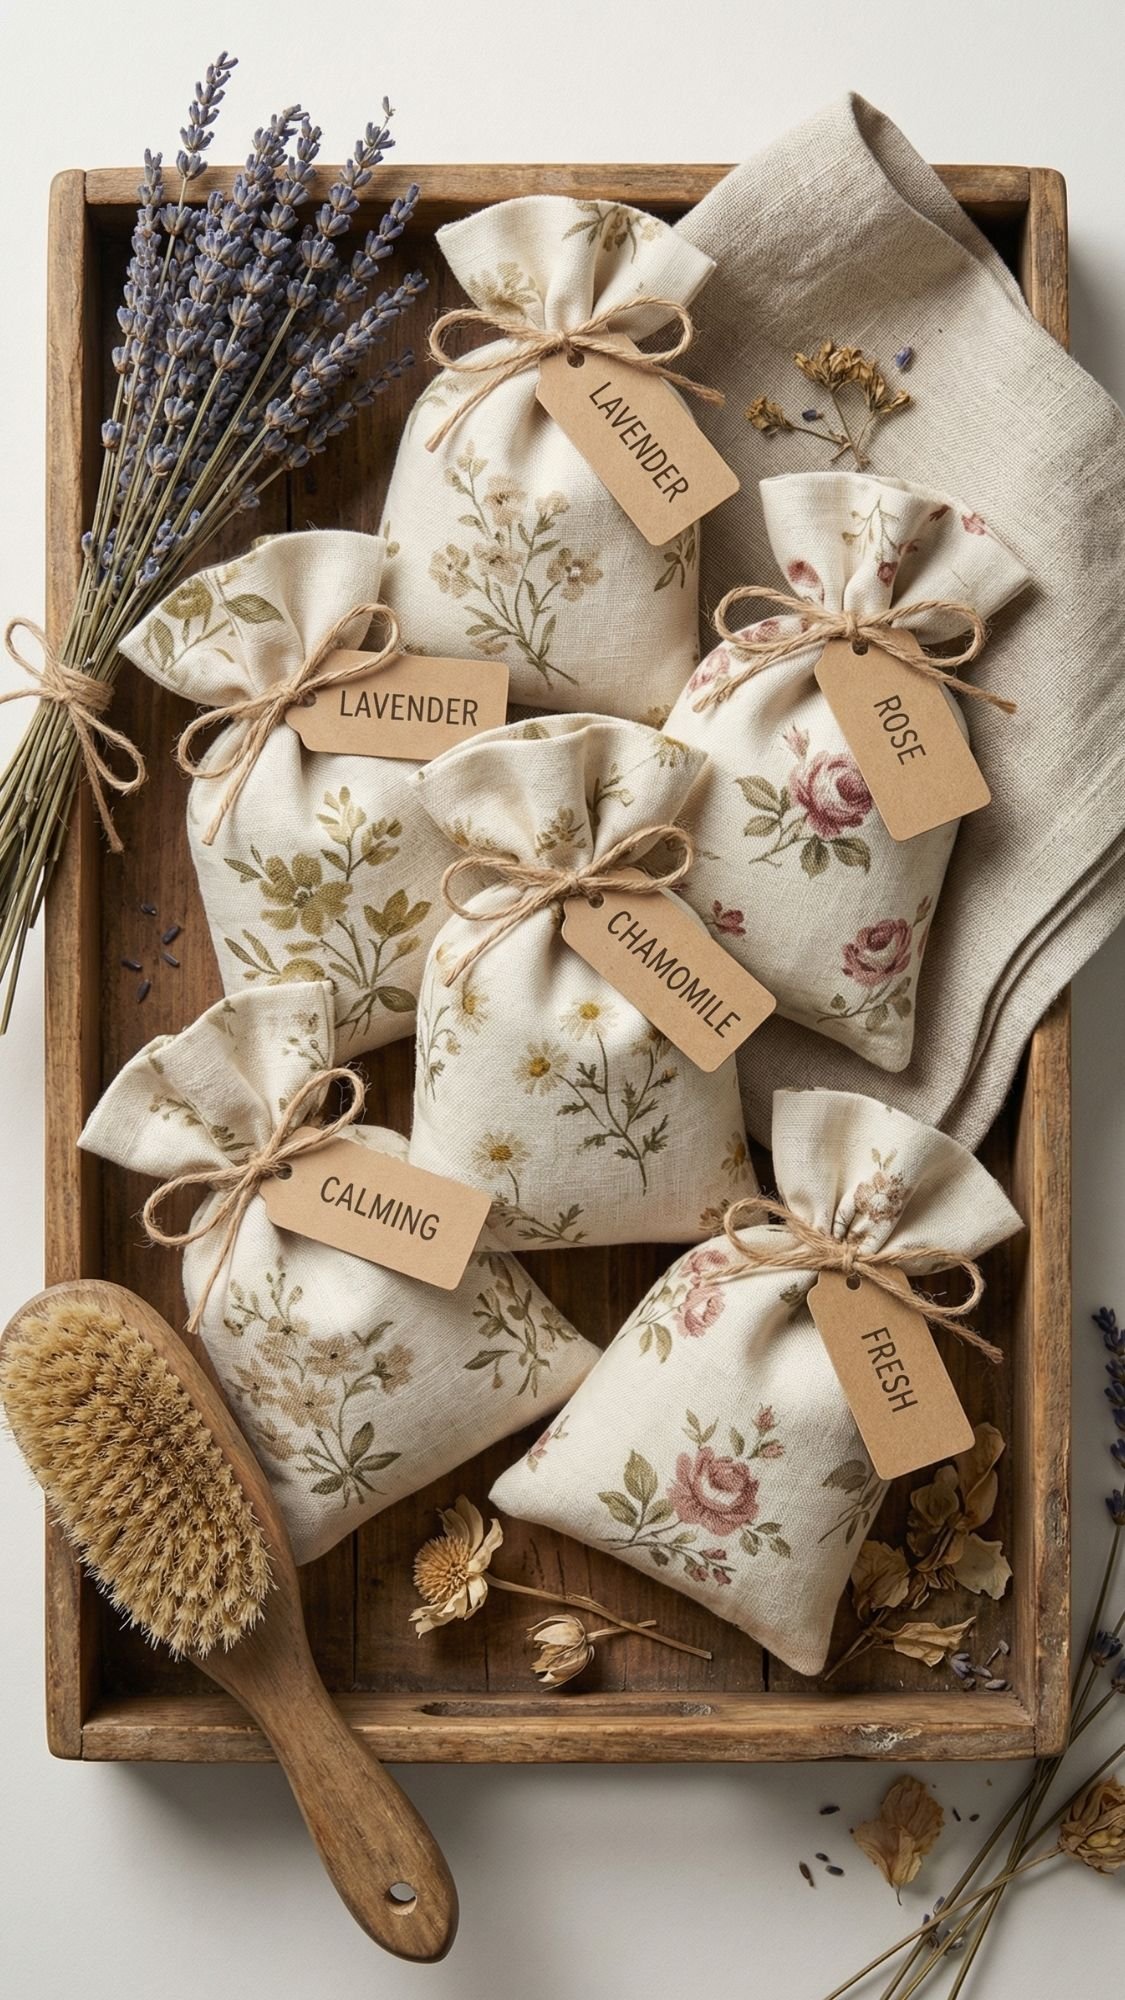
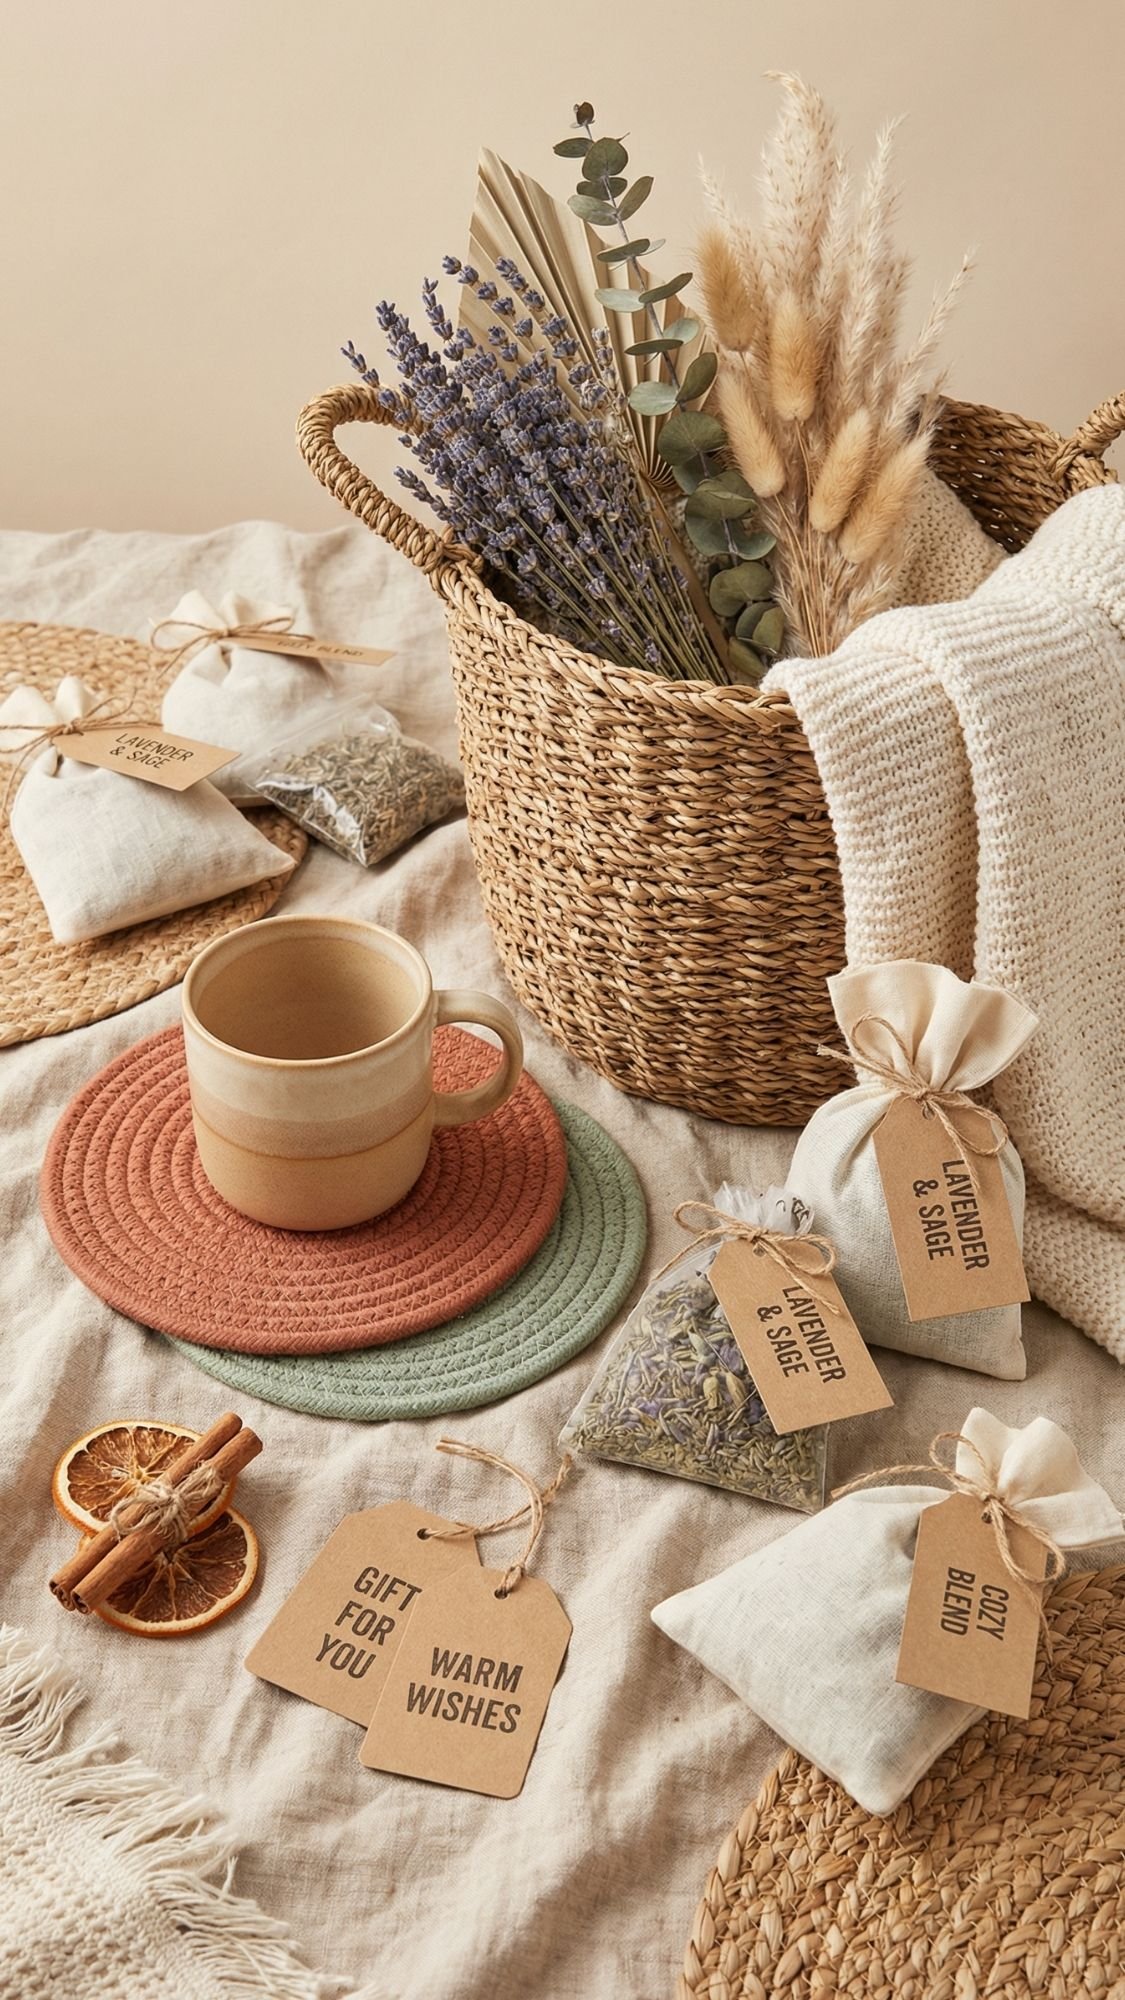
Gift Idea 12: Drawer Sachets for Linens and Sweaters
This is a small gift that feels surprisingly luxe. Sachets make drawers and closets smell fresh, and they feel very “grandma,” in the best way. The trick is keeping them neat and not overstuffed so they look smooth, not lumpy, and making sure the scent stays gentle.
Why it works so well
- It’s useful and doesn’t create clutter.
- It feels fancy. Like something from a boutique linen shop.
- It’s easy to batch-make. Great if you need multiple gifts.
Materials
- Cotton fabric scraps or linen scraps
- Dried lavender buds or dried rose petals (or cedar chips for a no-floral option)
- Needle and thread or sewing machine
- Ribbon or twine
- Optional: pinking shears for cute edges
- Optional: tiny tag label
Step-by-step
- Cut two squares or rectangles. A good size is 4 x 6 inches.
- Sew three sides, then turn right side out.
- Fill lightly with dried lavender or cedar. Aim for about halfway full.
- Stitch closed, then tie with ribbon.
- Add a small tag if you want, like “Lavender Linen Sachet.”
Pro tips for a polished finish
- Do not overfill. Overfilled sachets strain seams and look messy.
- Use tight stitching. Lavender buds can sneak out through gaps.
- Add a tiny inner pouch if you want extra clean edges. You can sew a simple muslin pouch inside the pretty fabric.
Scent choice tips
- Lavender is classic, but not everyone loves it.
- Cedar chips work great for sweaters and feel more neutral.
- If you add essential oil, use one drop max. Too much can stain fabric and smell intense.
Common mistake beginners make
They use fabric with a loose weave and the filling leaks out. Stick to quilting cotton, linen with a tight weave, or add an inner pouch.
Care and refresh
- Keep sachets dry.
- Refresh scent by gently squeezing them or adding a single drop of oil on the inside pouch, not the outer fabric.
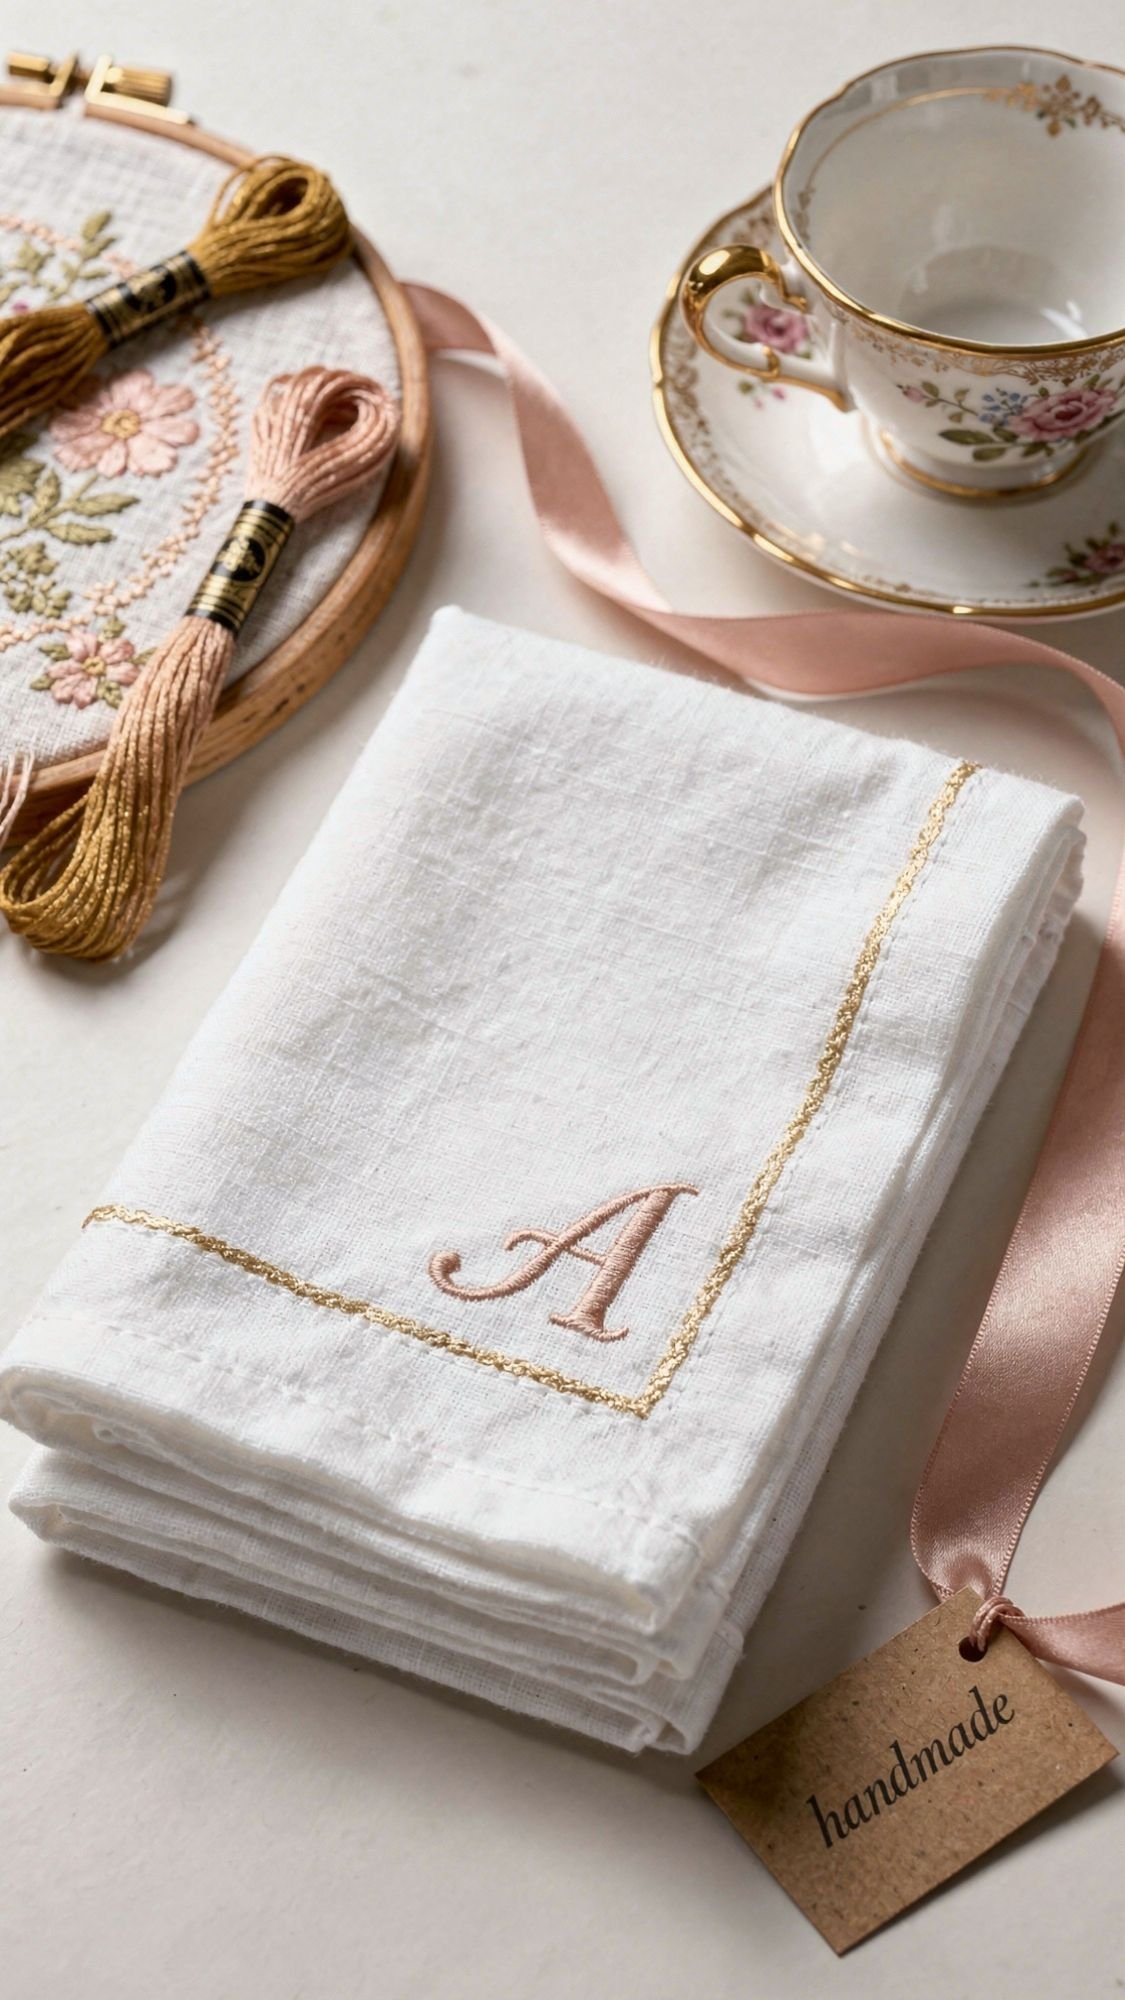
Gift Idea 13: Monogrammed Tea Towel or Napkin Set
This is one of those gifts that looks simple, but feels fancy. A clean monogram makes basic towels feel custom, and grandmas love anything that feels “made just for me.” The biggest win here is choosing a monogram method that stays put through washing, because nobody wants peeling letters floating around in the laundry. Not cute.
Why it works so well
- It’s useful. Towels always get used.
- It feels personal. A monogram is an instant upgrade.
- It’s easy to match her style. Classic, farmhouse, modern, whatever.
Materials
- Plain cotton tea towels or cloth napkins (white or beige looks timeless)
- One monogram method:
- Embroidery floss + needle (most durable)
- Iron-on letters or HTV vinyl (fastest)
- Fabric paint pen (easy, but test for bleed)
- Iron and ironing board
- Optional: stabilizer (for embroidery)
- Optional: heat press or EasyPress (nice, not required)
- Optional: fabric-safe sealer for paint pen designs
Step-by-step (choose your method)
Method A, Simple Embroidery Monogram
- Wash and dry the towels first to prevent shrinking later.
- Lightly pencil the monogram in a corner, about 2–3 inches from the edge.
- Hoop the fabric and stitch using backstitch or satin stitch.
- Tie off securely and trim threads cleanly.
Pro tip: A simple block letter looks cleaner than a swirly script if you’re new to embroidery.
Method B, Iron-On Letters or HTV Vinyl
- Prewash and press the towel so it’s smooth.
- Position the letter and measure so it sits straight.
- Apply heat exactly as the product instructions say.
- Let it cool fully, then peel the carrier sheet.
- Press again with parchment paper on top to lock it in.
Pro tip: If the towel texture is bumpy, seal it lightly first or choose iron-on that bonds well to fabric. Texture makes adhesion harder.
Method C, Fabric Paint Pen
- Insert cardboard inside the towel so ink doesn’t bleed through.
- Write the monogram slowly, then let it dry fully.
- Heat set if the pen requires it.
- Wash test once before gifting.
Pro tip: Test on a scrap towel first, some fabrics feather like crazy.
Common mistake beginners make
They skip prewashing. Then the towel shrinks after the first wash and the monogram looks warped. Prewash saves you.
Packaging idea that looks expensive
Fold the towels into a neat stack, tie with ribbon, add a tiny tag that says “Made for you” or “From my heart, to your kitchen.”
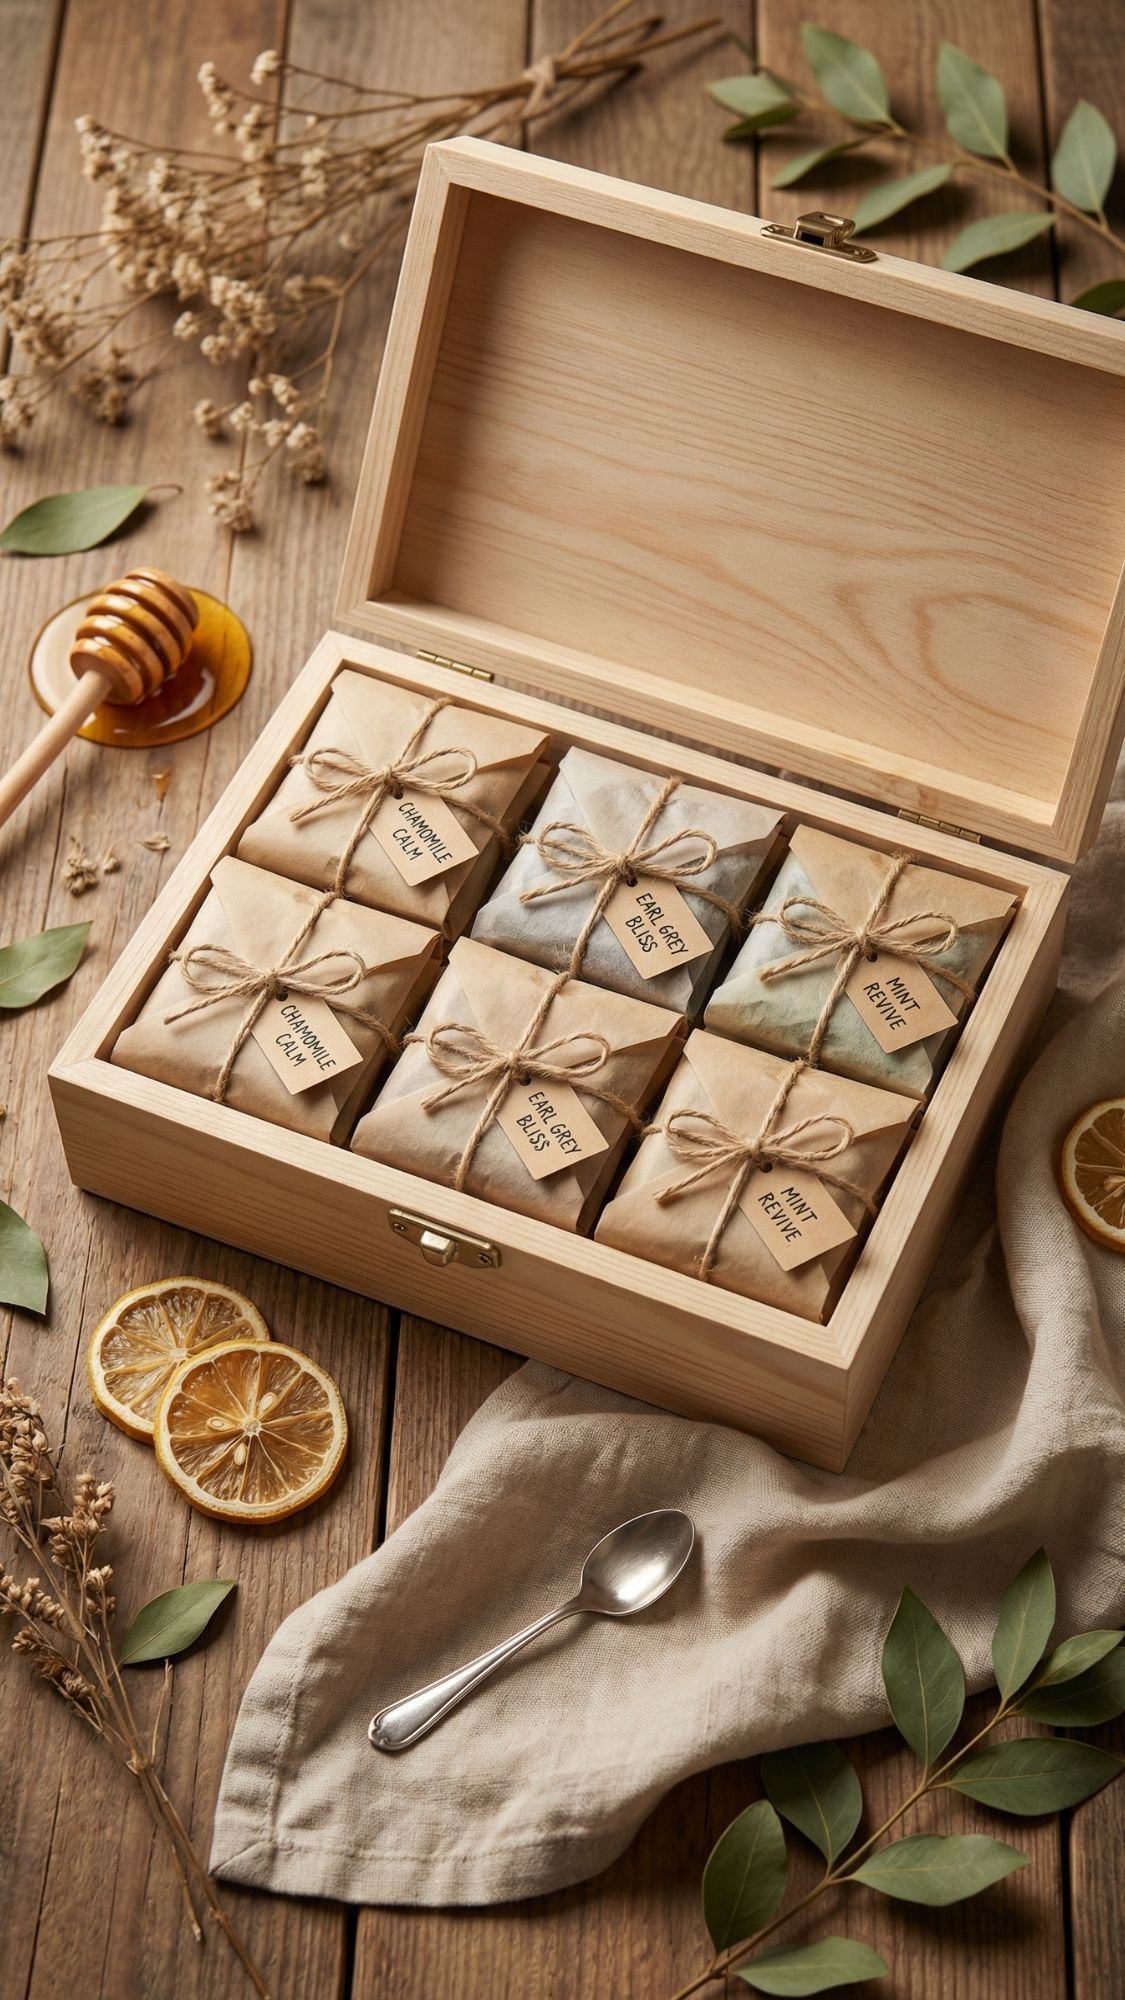
Gift Idea 14: Tea Sampler Gift Box With Homemade Tags
This one feels thoughtful without being complicated, and it’s perfect for the grandma who loves a cozy routine. The tea does most of the work. Your job is to make it look curated, not like you dumped a drawer of tea bags into a box and called it a day.
Why it works so well
- It’s useful and consumable. No clutter guilt.
- It feels like self-care. Cozy gift, low effort for her.
- It’s easy to personalize. You can match her taste, caffeine needs, and vibe.
Materials
- Assorted tea bags or sachets (10–20 total)
- Small gift box or tin
- Cardstock for tags and a brew guide card
- Twine or ribbon
- Pen or printer for clean labels
- Optional: honey sticks or sugar cubes
- Optional: lemon candies or a small spoon
Step-by-step
- Pick a theme:
- Classic comfort: black tea, earl grey, chamomile
- Herbal cozy: mint, ginger, sleepy-time blends
- Bright and fruity: berry, citrus, hibiscus
- Arrange tea in sections inside the box so it looks intentional.
- Make simple tags for each tea type. Keep lettering big and readable.
- Add a “brew cheat sheet” card:
- how long to steep
- best add-ins
- caffeine or caffeine-free notes
- Close the box, tie with ribbon, and add a top label.
Pro tips for boutique-level presentation
- Keep the box organized. Dividers made from folded cardstock look clean and cost nothing.
- Mix caffeine-free options in. Many grandmas drink tea at night.
- Use one label style. Consistency makes it feel high-end.
Common mistake beginners make
They forget steep times. Then Grandma over-steeps something bitter and decides she “doesn’t like that tea.” The brew card prevents that.
Optional add-on that makes it extra sweet
Include a tiny card that says:
“Text me when you pick a tea, I’ll have one too.”
That turns tea into a little shared ritual, which is adorable.
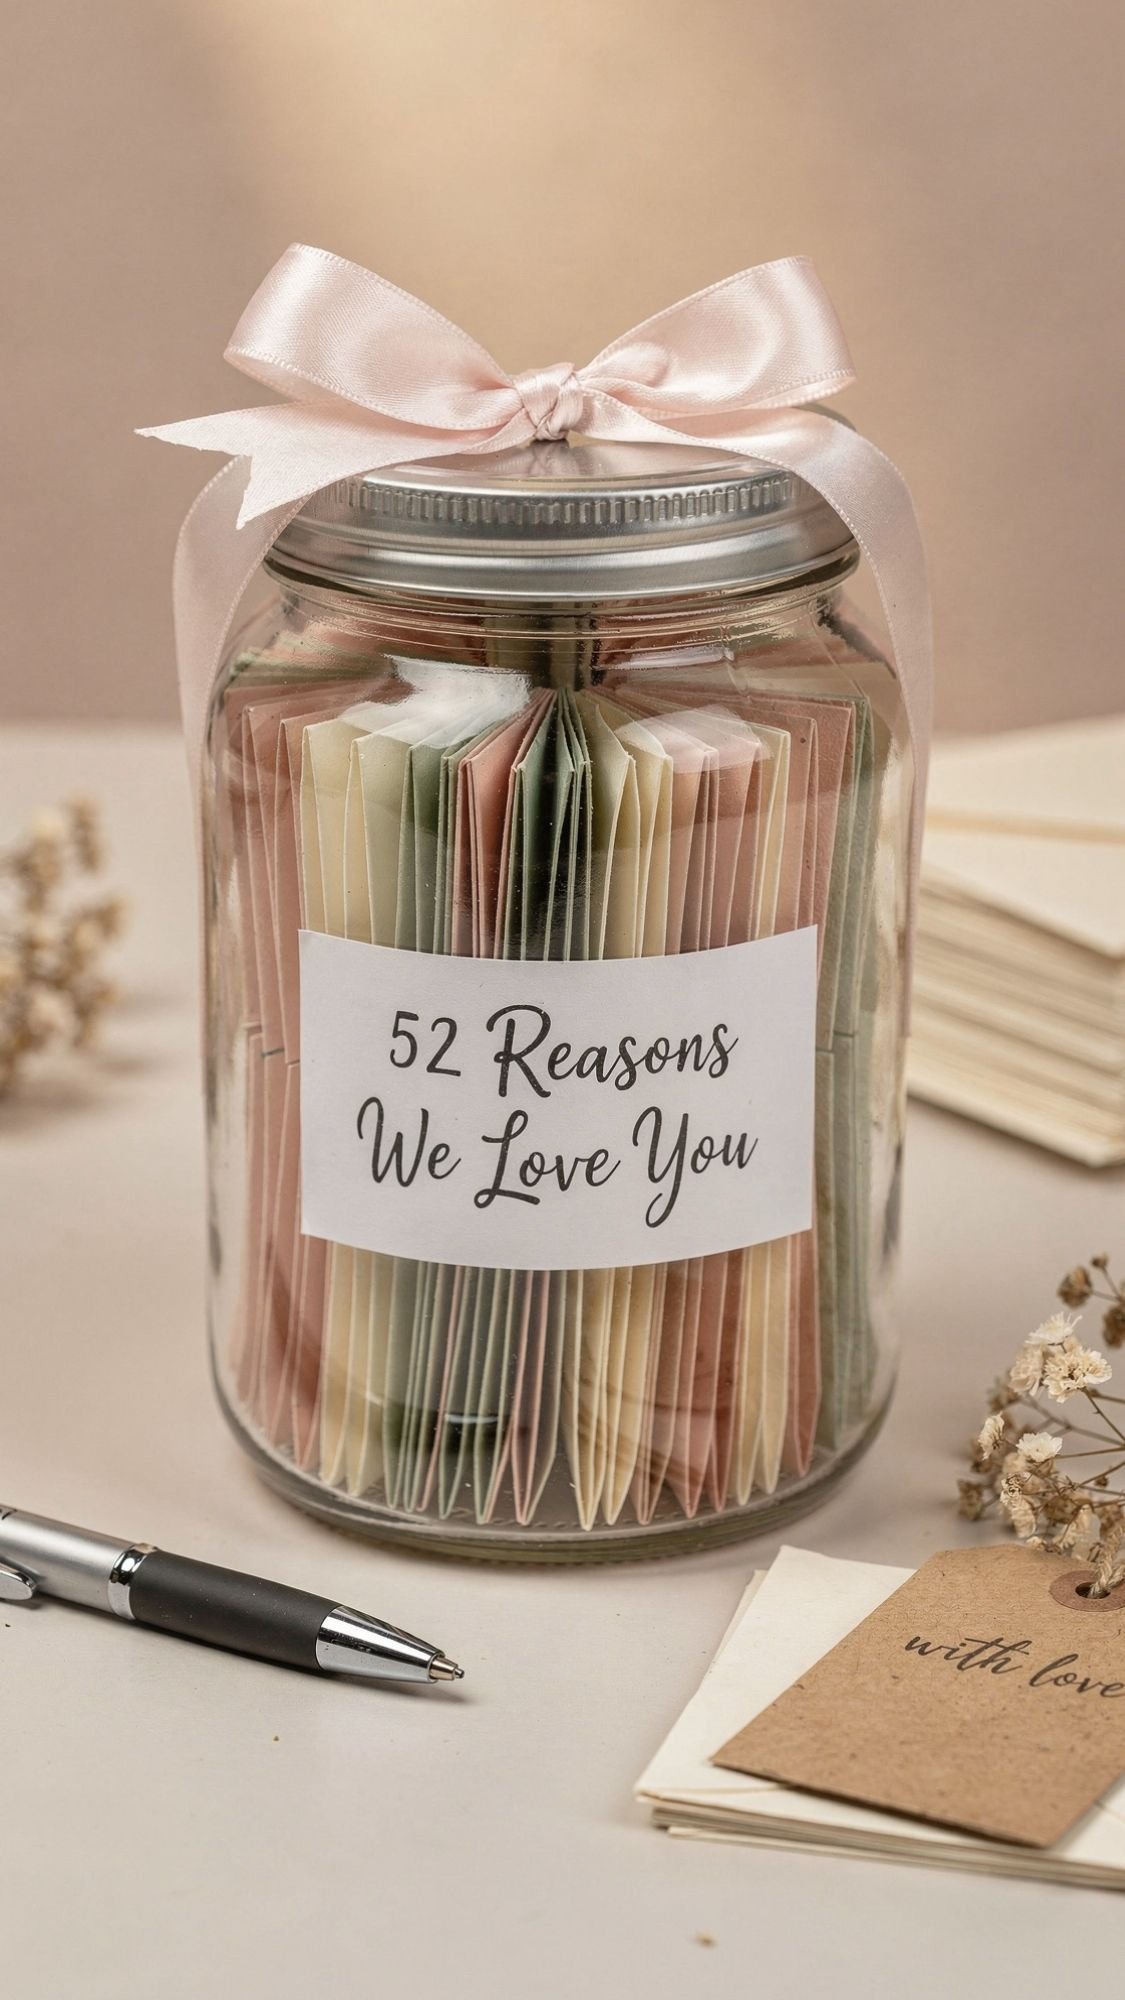
Gift Idea 15: Memory Jar With 52 Tiny Notes
This gift is small, sweet, and completely unfair in the best way, because it keeps paying off all year. Grandma opens one note a week and gets a little hit of love on a random Tuesday, which is honestly when people need it most. The secret is making it look tidy and intentional, not like a jar of crumpled receipts.
Why it works so well
- It’s emotional and simple. No fancy skills required.
- It lasts. A full year of notes is a long-running gift.
- It feels personal without being clutter. It’s one jar, not 20 little items.
Materials
- Jar with a lid (mason jar or apothecary-style looks great)
- Paper strips or small cardstock pieces
- Pen (archival ink is ideal)
- Ribbon or twine
- Label or tag
- Optional: mini envelopes for each note
- Optional: tiny dried flowers for decoration (keep it minimal)
Step-by-step
- Decide how many notes you want:
- 52 notes for weekly
- 30 notes for daily in a month
- Cut paper into uniform pieces. A good size is 1 x 3.5 inches.
- Write short notes that fit in 1–2 lines:
- “I love how you make everyone feel safe.”
- “Remember when we laughed so hard at dinner?”
- “You are the reason our family feels like home.”
- Fold them the same way every time, or roll them and tie with thread.
- Add a label like:
- “52 Reasons We Love You”
- “Open One When You Need a Smile”
- Pack the jar neatly, then tie ribbon around the lid.
Pro tips for a clean, luxury look
- Uniform folds are everything. Consistency makes it look polished.
- Use thicker paper. Thin paper wrinkles and looks messy fast.
- Add structure. You can separate notes by color, like:
- yellow for funny memories
- pink for compliments
- green for gratitude
Common mistake beginners make
They write long paragraphs. Keep it short. The power is in quick little moments she can reread easily.
Optional upgrade that makes it even more meaningful
Add 5 blank notes and a pen, with a tag that says:
“Add your own memories too.”
Now it becomes a two-way keepsake.
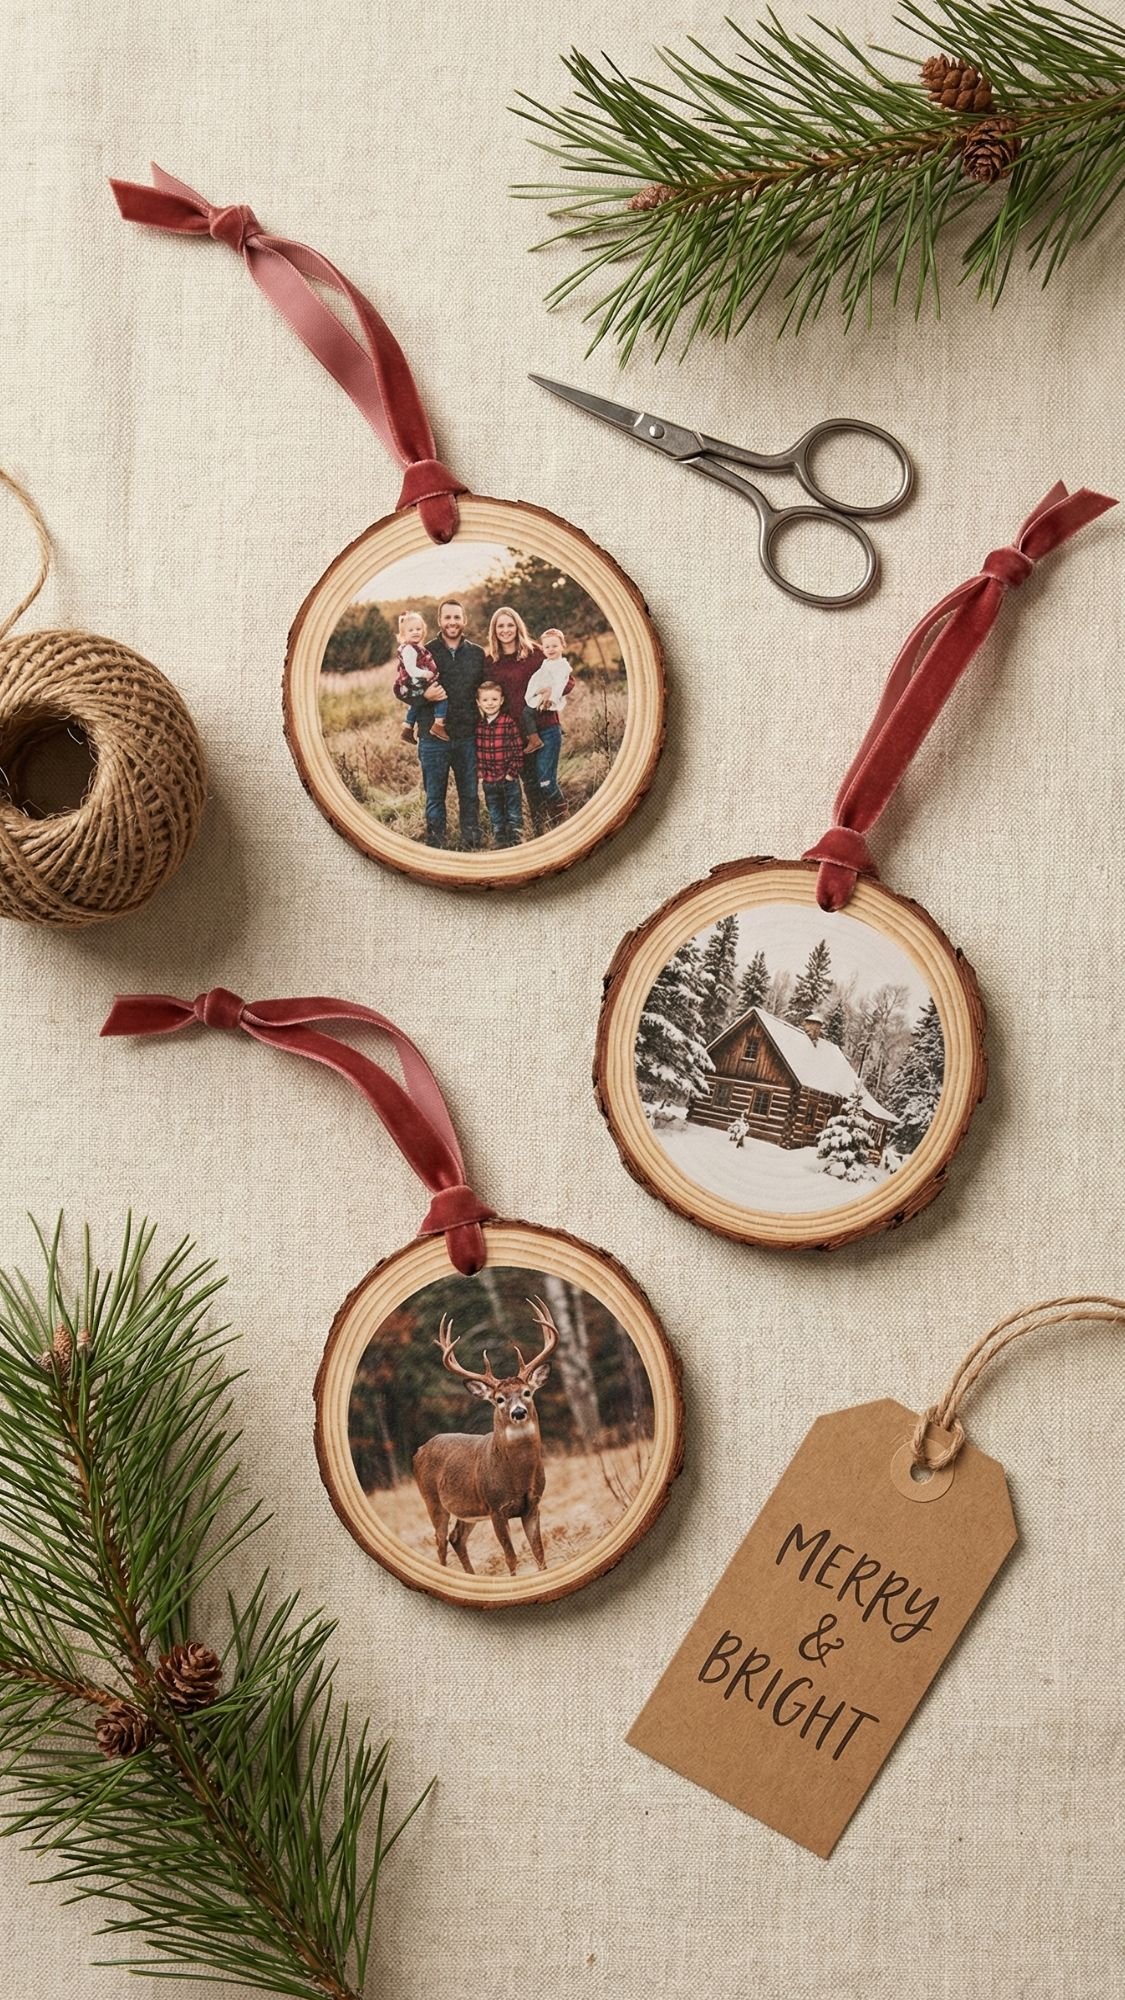
Gift Idea 16: Photo Transfer Wood Slice Ornament Set
These look like something you’d find at a cute holiday market, but you can make them with basic supplies. They’re sentimental, they store easily, and they come out every year like a little time capsule. The biggest difference between “handmade” and “homemade” here is surface prep and patience. If you rush, you get bubbles and peeling. If you take your time, you get heirloom vibes.
Why it works so well
- It’s meaningful and compact. Easy to store, easy to gift.
- It lasts for years. Especially if you seal it properly.
- You can make a set. One ornament per grandkid or per memory.
Materials
- Wood slices (pre-cut, about 3–4 inches wide)
- Fine sandpaper (220 grit)
- Printed photos (laser prints work best for transfer methods)
- Decoupage medium or photo transfer medium
- Foam brush or flat paintbrush
- Twine, velvet ribbon, or thin cord
- Clear sealer (matte or satin)
- Optional: hole punch tool or small drill for the hanging hole
Step-by-step
- Sand the front and edges of the wood slice until it feels smooth, then wipe off dust.
- Cut the photo to fit the slice. Keep the crop simple so it reads clearly.
- Apply a thin, even layer of medium to the wood.
- Press the photo down firmly and smooth from center outward to push out air.
- Let it dry fully. Do not rush this part.
- Seal the front once it’s dry and stable, then add ribbon for hanging.
Pro tips for a crisp finish
- Sand more than you think. Rough edges make it look unfinished.
- Burnish hard. Use a brayer or an old gift card to press the photo down evenly.
- Seal after full dry time. If you seal too soon, moisture gets trapped and causes cloudiness.
Common mistake beginners make
They apply too much medium. Thick layers can create bubbles and a cloudy look. Thin and even wins.
Packaging idea
Stack the ornaments with a velvet ribbon and add a tag like “For your tree, with love.” It’s simple, but it hits.
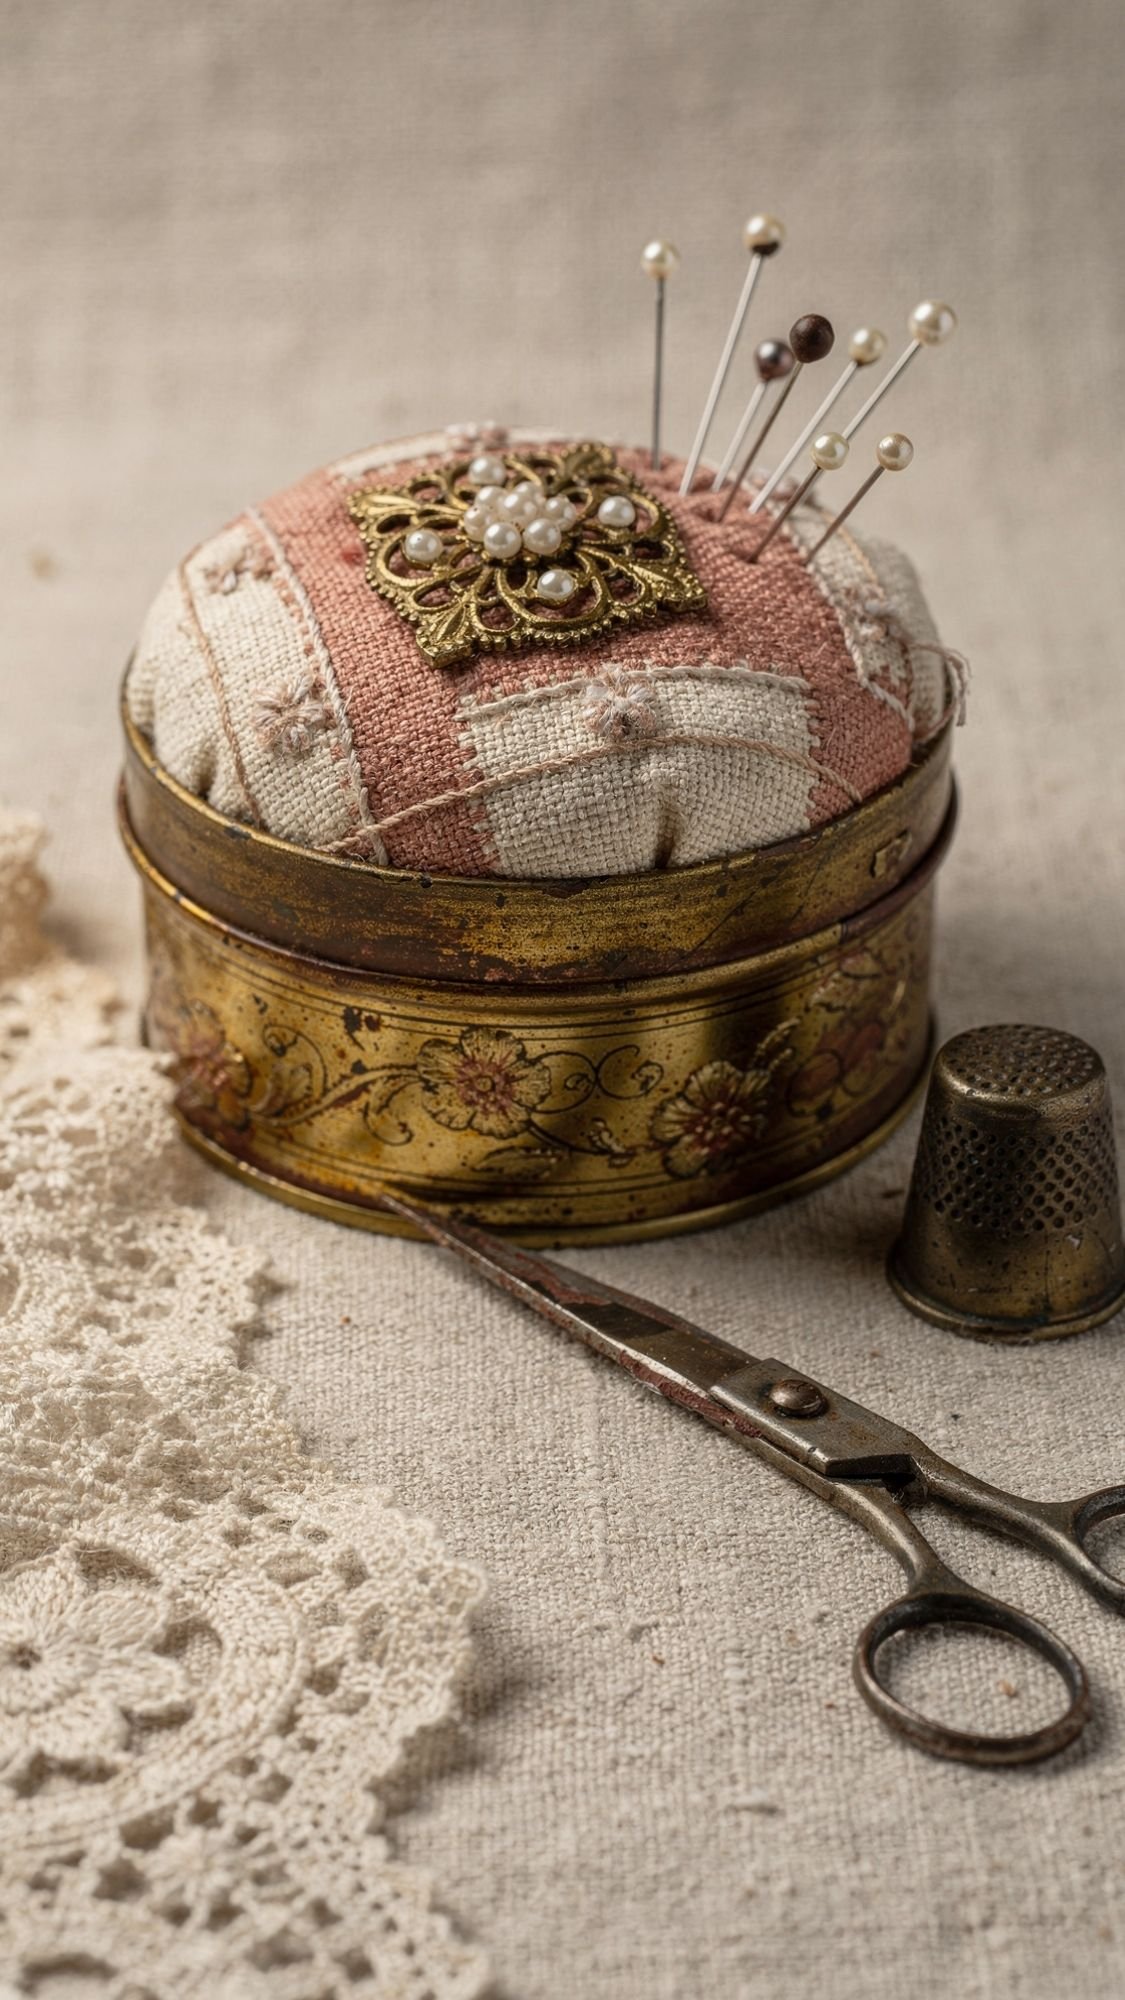
Gift Idea 17: Vintage-Style Brooch Pin Cushion
This gift feels like something Grandma would keep on a little side table and quietly love forever. It’s cute, useful, and it scratches that “pretty but practical” itch. Also, a brooch on top makes it look like you bought it at a charming antique shop, not like you made it at your kitchen table with determination and snacks.
Why it works so well
- It’s functional. If she sews, she uses it. If she does not sew, she still displays it because it’s adorable.
- It looks high-end fast. One pretty brooch changes the whole vibe.
- It’s a great scrap-buster. Small fabric pieces work perfectly here.
Materials
- Small tin or shallow jar lid (2–3 inches wide works great)
- Cotton or velvet fabric scrap
- Stuffing or batting
- Strong glue (E6000-style or a heavy-duty craft glue)
- Vintage-style brooch or decorative pin
- Optional: lace trim or ribbon
Step-by-step
- Cut a fabric circle about 2 inches wider than your tin opening.
- Place stuffing in the center, then gather the fabric edges up like a little pouch.
- Pull it snug so the top looks smooth and domed, then tie or stitch the gathered part closed.
- Glue the padded fabric insert onto the tin lid or into the tin.
- Let the glue set fully, then attach the brooch to the top center.
Pro tips for a clean, boutique finish
- Aim for a smooth dome. Lumpy stuffing makes it look rushed.
- Use strong glue and give it time. If you move it too soon, the brooch slides and ruins the symmetry.
- Add a tiny lace border around the edge if you want extra “heirloom” energy.
Common mistake beginners make
They attach the brooch before the base fully sets. Then it shifts a little and everything looks crooked. Let the cushion base dry first, then pin or glue the brooch.
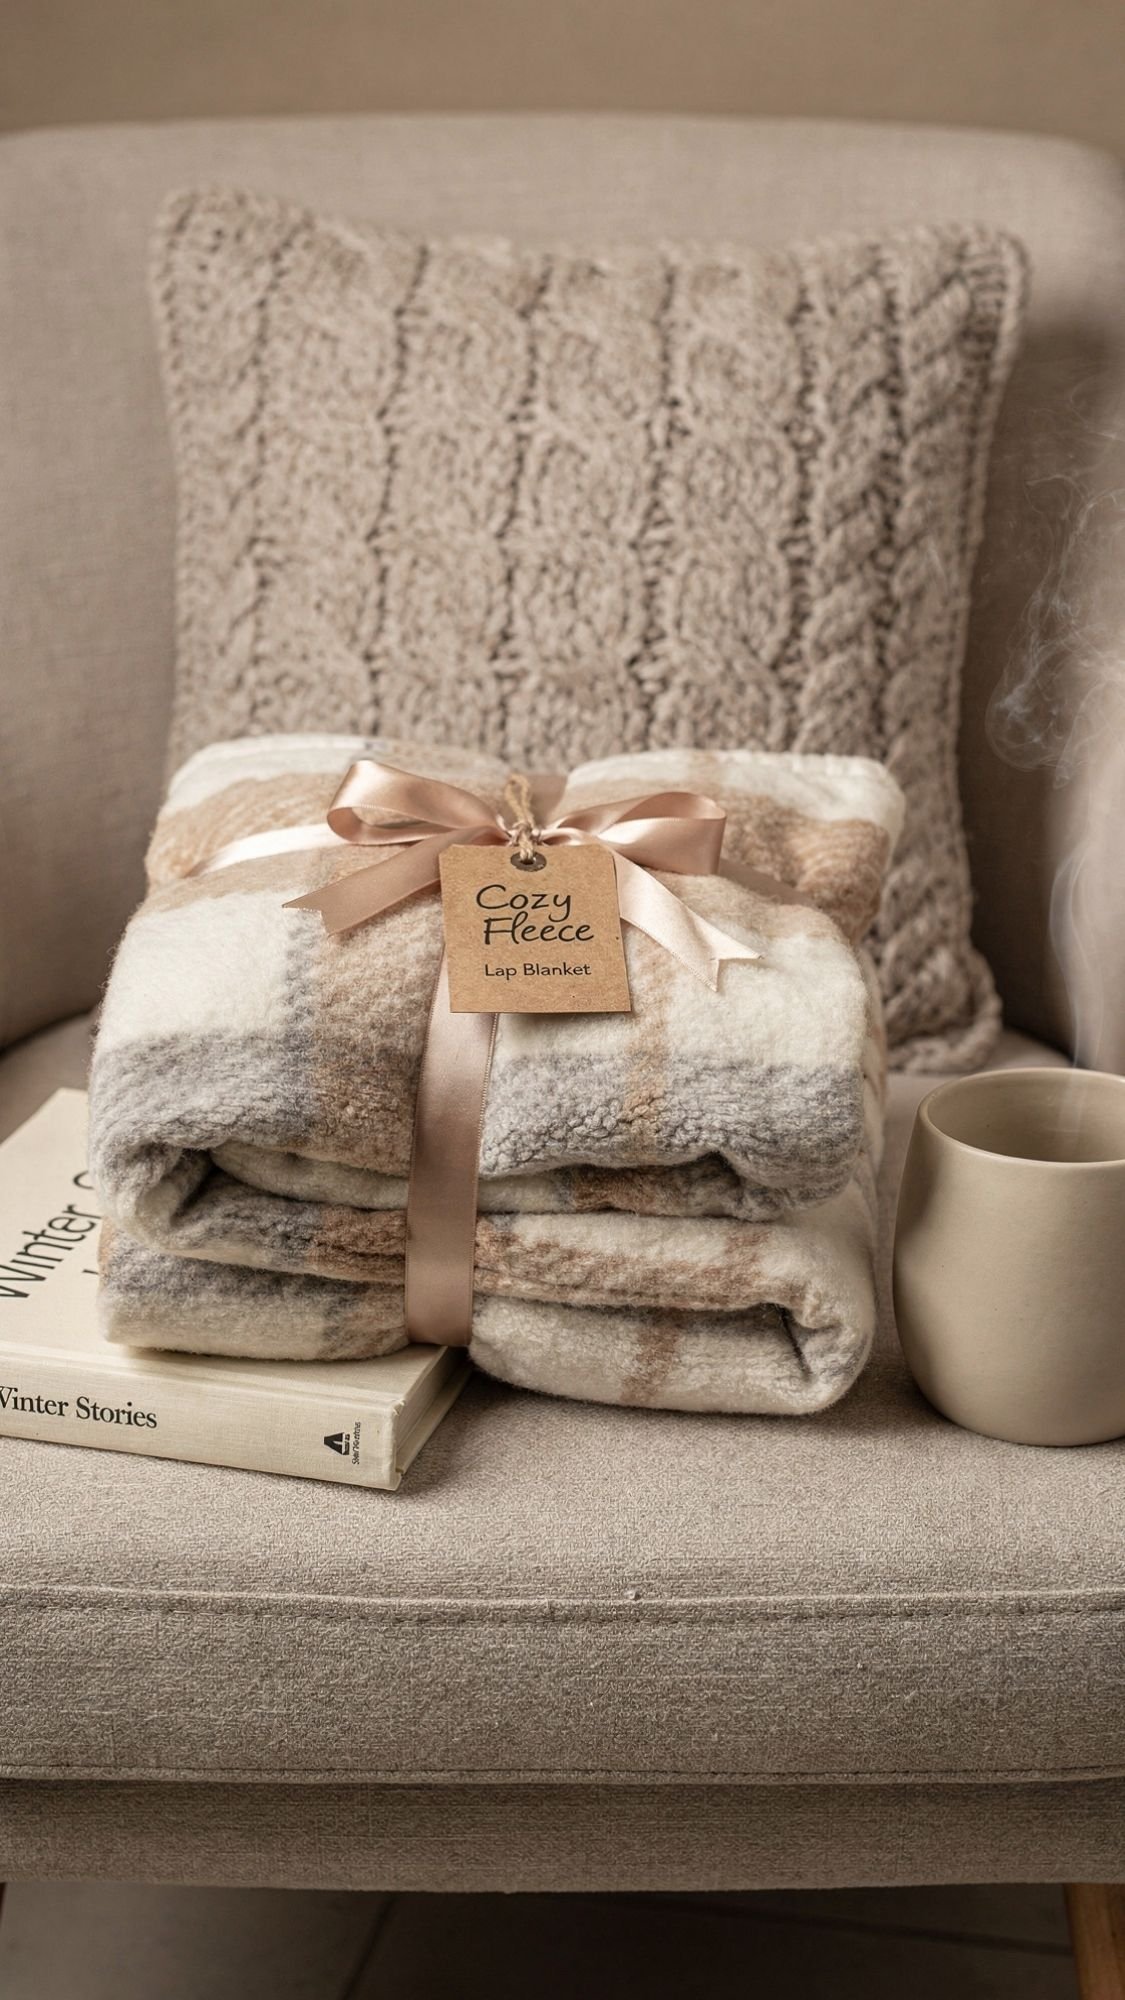
Gift Idea 18: No-Sew Fleece Lap Blanket With a Clean Edge Finish
This is comfort in gift form. A lap blanket is one of those things Grandma will use constantly, on the couch, in the car, at appointments, everywhere. The only way this goes wrong is if it looks sloppy. So the goal is clean edges, square corners, and a finish that holds up without fraying.
Why it works so well
- It’s genuinely useful. Cozy gifts get used, period.
- No sewing required. You can still make it look finished.
- Easy to match her style. Floral, plaid, solid neutral, whatever fits her home.
Materials
- Fleece (1 to 1.5 yards, depending on how big you want it)
- Fabric scissors (sharp ones, please)
- Measuring tape or ruler
- Optional: hem tape (iron-on) for a cleaner edge
- Optional: ribbon and gift tag
Step-by-step
- Decide on size:
- Lap blanket: about 36 x 50 inches
- Chair throw: about 45 x 60 inches
- Lay fleece flat and trim the edges so they are straight and squared.
- Choose your edge finish:
- Tied fringe: cut 4-inch fringe strips around the edges, then tie knots
- Folded edge + hem tape: fold 1 inch, press with iron-on tape, and seal
- Simple edge: fleece doesn’t fray much, but a finished edge looks better
- Fold neatly, tie with ribbon, and add a tag.
Pro tips for a polished finish
- Trim slow. Rushing makes wavy edges.
- Square the corners. Crooked corners ruin the look instantly, even if everything else is fine.
- Choose anti-pill fleece if possible. It looks nicer longer.
Common mistake beginners make
They cut fringe unevenly. Then the knots look messy. Mark your fringe length first, and cut in consistent strips.
Care card you can include
- Machine wash cold
- Tumble low or air dry
- Avoid high heat, it can make fleece feel stiff
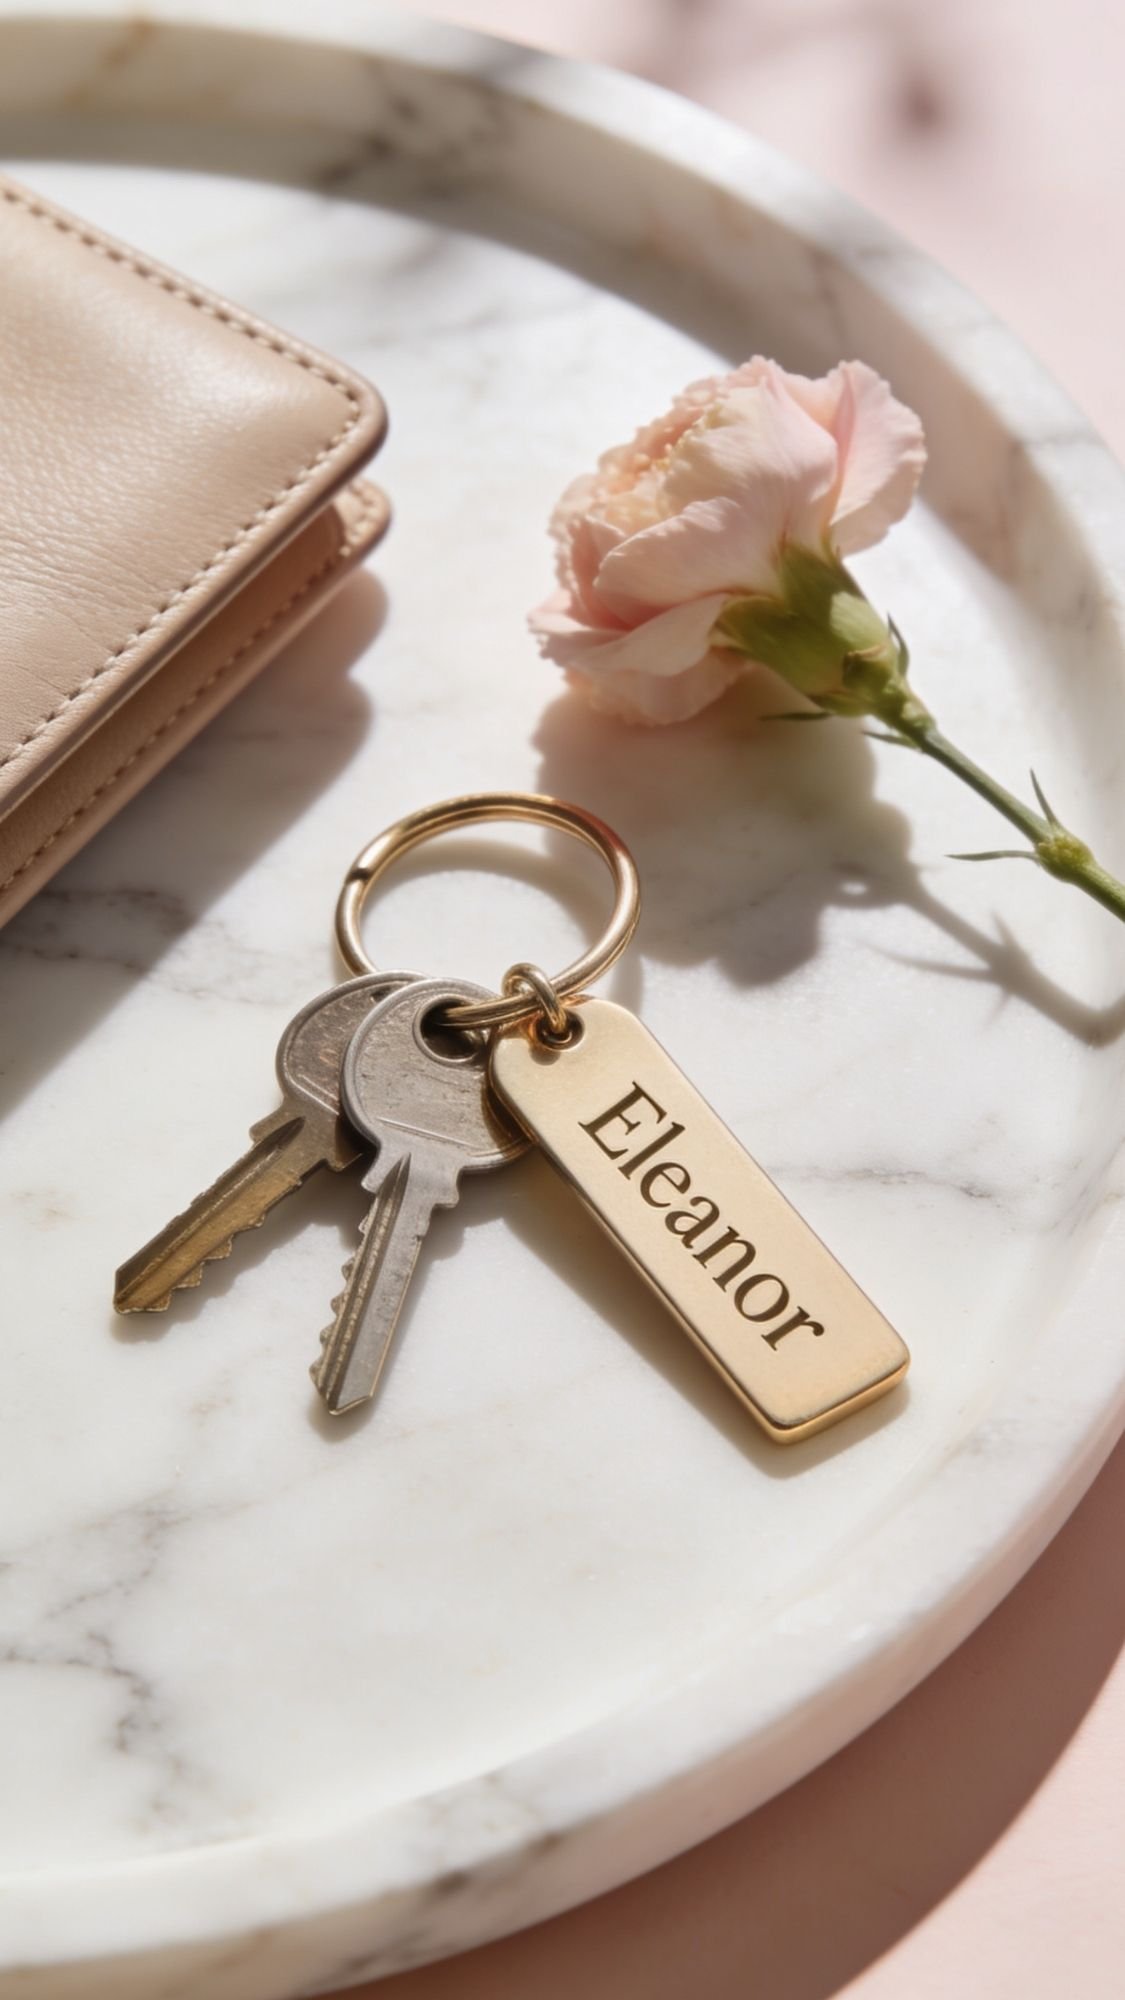
Gift Idea 19: Customized Keychain With Big, Readable Lettering
This is small, sweet, and super practical. Grandma uses it every day, and every time she grabs her keys she gets a tiny reminder that you love her. Also, if you make the lettering big and clean, it feels polished and intentional, not like a rushed craft experiment.
Why it works so well
- Daily use. She actually sees it, constantly.
- Easy personalization. Name, initials, “Nana,” “Grandma,” whatever fits.
- Fast project. Great when you need something meaningful without a full weekend of crafting.
Materials
Choose a base:
- Acrylic keychain blank
- Leather keychain blank
- Wooden keychain blank
- Metal tag blank
Then add:
- Permanent vinyl, sticker vinyl, or paint pen
- Key ring hardware
- Clear sealer (spray or brush-on, depending on the blank)
- Optional: tassel, charm, or bead
Step-by-step
- Clean the blank so it’s free of dust and oils.
- Plan your lettering:
- Keep it simple and bold
- Avoid thin scripts, they can be hard to read
- Apply the name or word:
- Vinyl: place carefully, then burnish hard
- Paint pen: write slowly, let it dry fully
- Seal it so it resists scratches and fingerprints.
- Attach the key ring, add a charm if you want, and you’re done.
Pro tips for long-lasting vinyl and labels
- Smooth surfaces hold vinyl best. If the blank is textured or unfinished wood, apply a thin clear coat first, let it cure, then apply vinyl.
- Burnish like you mean it. Use a brayer or an old gift card to press every edge down.
- Seal after vinyl sets. A thin top coat protects edges from peeling.
Common mistake beginners make
They seal too soon, before the lettering fully sets. Then it can shift or wrinkle. Give the vinyl or paint time to settle before you top coat.
Packaging idea
Put it in a small box with tissue paper and a tiny note that says:
“So you always carry a little love with you.”
Yes, she will absolutely keep that note.
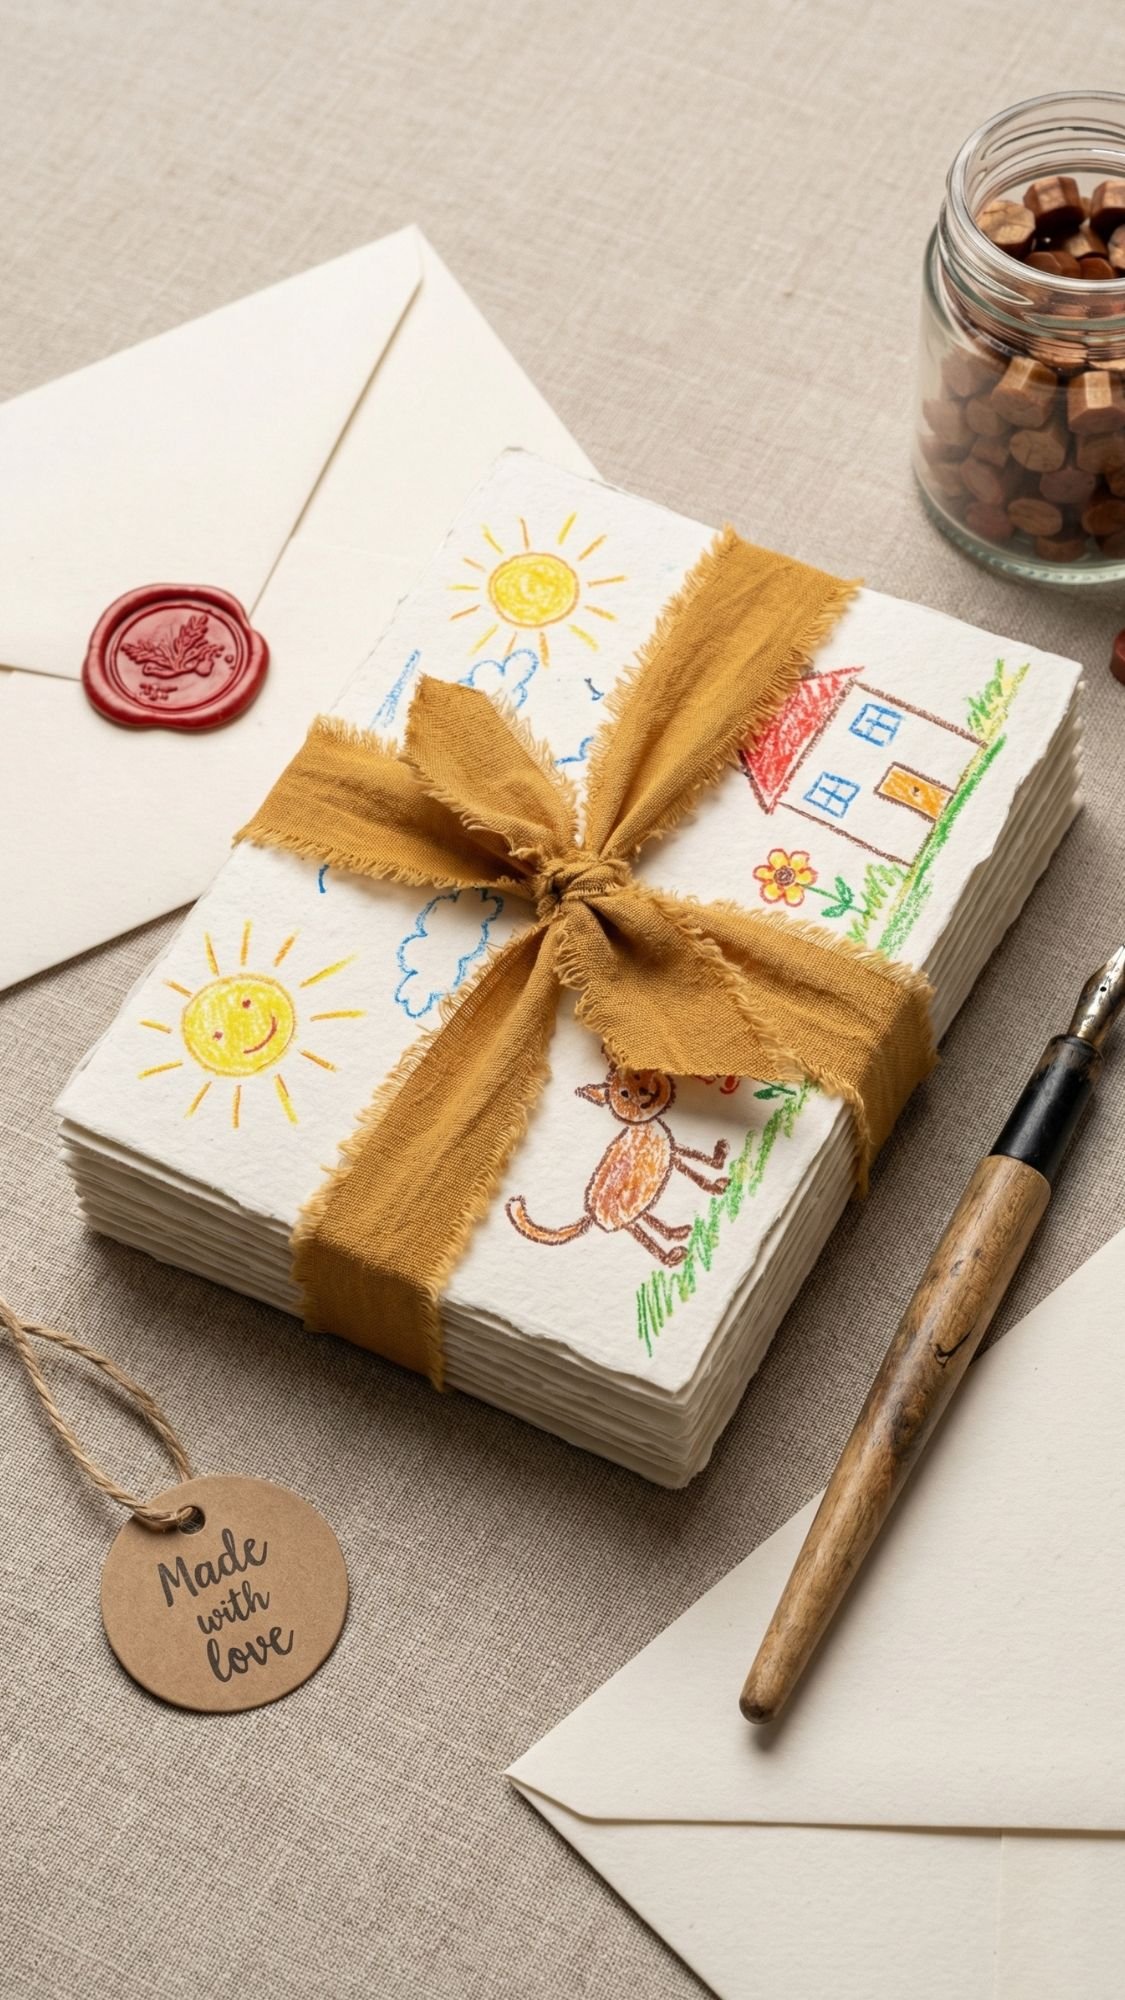
Gift Idea 20: Grandkids’ Art Turned Into Notecards
This one is pure grandma gold. You take something she already loves, the kids’ art, and turn it into something she can actually use. It feels personal, it looks polished, and it avoids the “I have 400 drawings in a drawer” problem. Also, notecards are useful. Grandma can mail a quick note, tuck one in a gift, or keep them on her desk like a tiny brag collection.
Why it works so well
- It preserves memories without clutter.
- It turns into a usable gift. Notecards never go to waste.
- It looks custom and thoughtful. Like boutique stationery, but sentimental.
Materials
- Scanned or photographed kid art
- Cardstock (heavy matte looks best)
- Printer
- Envelopes (A2 size pairs nicely)
- Paper trimmer or scissors
- Optional: corner rounder
- Optional: sticker label or stamp for the back of each card
Step-by-step
- Pick 6–12 pieces of art with bold shapes and strong color, they print best.
- Scan or photograph in bright natural light so colors stay accurate.
- Crop and resize so each card has a clean layout:
- Full art front, blank inside
- Or art on the top half, blank bottom for writing
- Print on heavy cardstock.
- Trim carefully with a straight edge.
- Add envelopes, then stack and tie with ribbon.
Pro tips for a polished stationery look
- Standardize the sizing. Same size, same margin, same vibe.
- Use thick cardstock. Thin paper screams “printer paper.”
- Add a simple back label. Something like “Made from your grandkid’s art, 2026” makes it feel official.
Common mistake beginners make
They print without color-correcting the scan. Some scans turn out dull or yellow. Quick fix:
- bump brightness slightly
- increase contrast a touch
- print one test page before doing the full set
Packaging idea
Put the stack in a small box with tissue paper, then add a tag that says:
“Tiny masterpieces, ready to mail.”
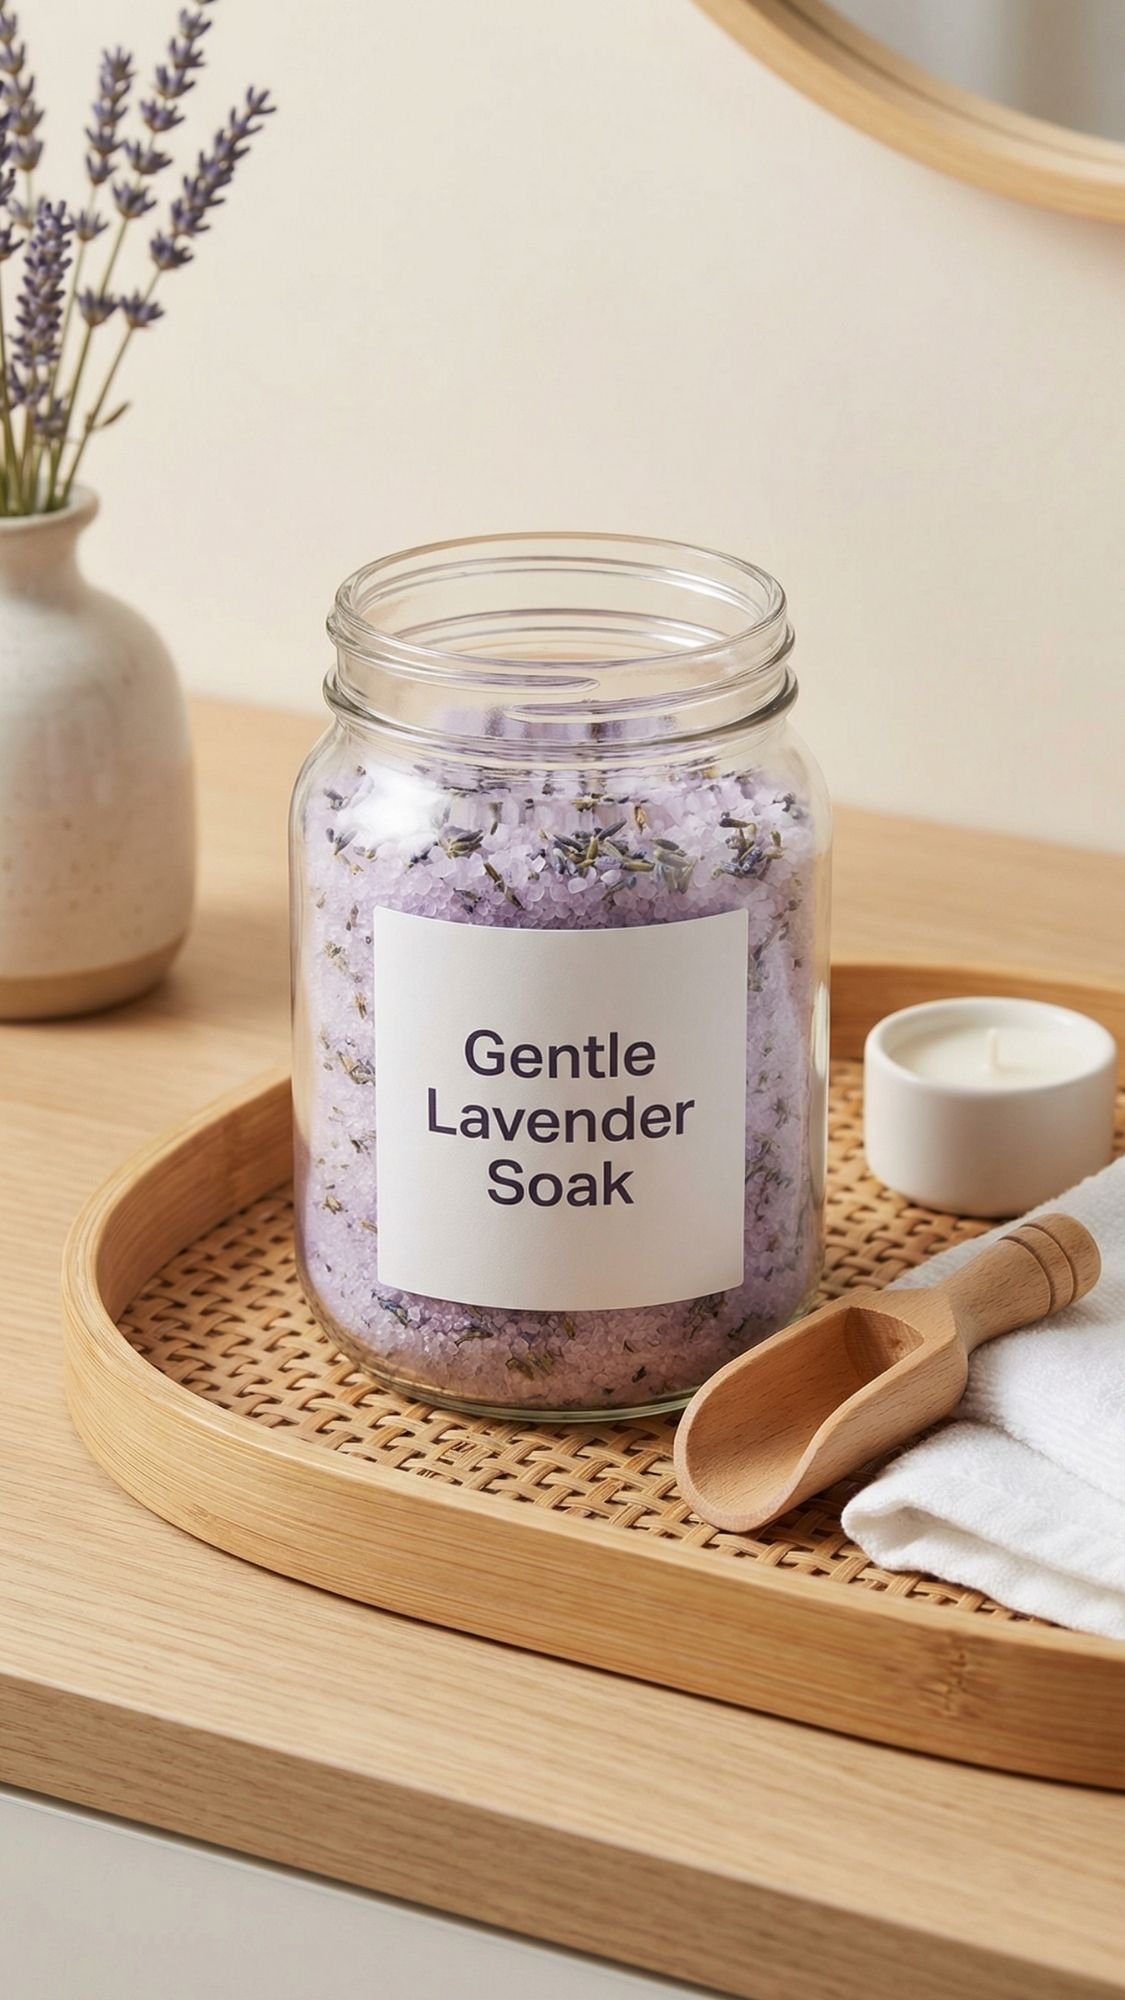
Gift Idea 21: Bath Salt Jar With a Gentle Scent Label
This is a sweet “take care of yourself” gift that does not take over her house. It’s also easy to make look high-end if you keep the jar clean, the label readable, and the scent soft. The biggest mistake people make is going too intense with fragrance or adding things that clog drains. Keep it simple. Grandma wants relaxing, not a plumbing adventure.
Why it works so well
- Consumable gift, zero clutter guilt.
- Feels calming and thoughtful.
- Looks boutique with the right jar and label.
Materials
- Epsom salt
- Optional add-ins: baking soda (for a softer feel), a small pinch of dried lavender
- Essential oil or fragrance oil (optional, use lightly)
- Glass jar with lid
- Spoon or funnel
- Printable label or kraft tag
- Optional: small wooden scoop
Step-by-step
- Measure your base mix:
- 2 cups Epsom salt
- Optional: 1/2 cup baking soda
- If you add scent, start tiny:
- 6–10 drops essential oil per 2 cups salt
- Mix thoroughly so scent distributes evenly.
- Add a small pinch of dried lavender only if you want the look. Keep it minimal.
- Funnel into the jar and wipe the rim so it looks clean.
- Add a clear directions label:
- “Add 1/2 cup to warm bath, soak 15–20 minutes.”
Pro tips for a clean, professional finish
- Use a wide-mouth jar. It looks nicer and is easier to scoop.
- Make labels big and readable. Thin fonts look cute, but Grandma needs clarity.
- Skip chunky botanicals. They look pretty but can clog drains and feel annoying in the tub.
Common mistake beginners make
They dump in too much oil. Then the salts clump, feel greasy, or smell overwhelming. Add less than you think, mix well, then test.
Packaging idea
Tie a ribbon around the jar, add a tiny scoop, and include a note that says:
“A little calm for your next cozy night.”
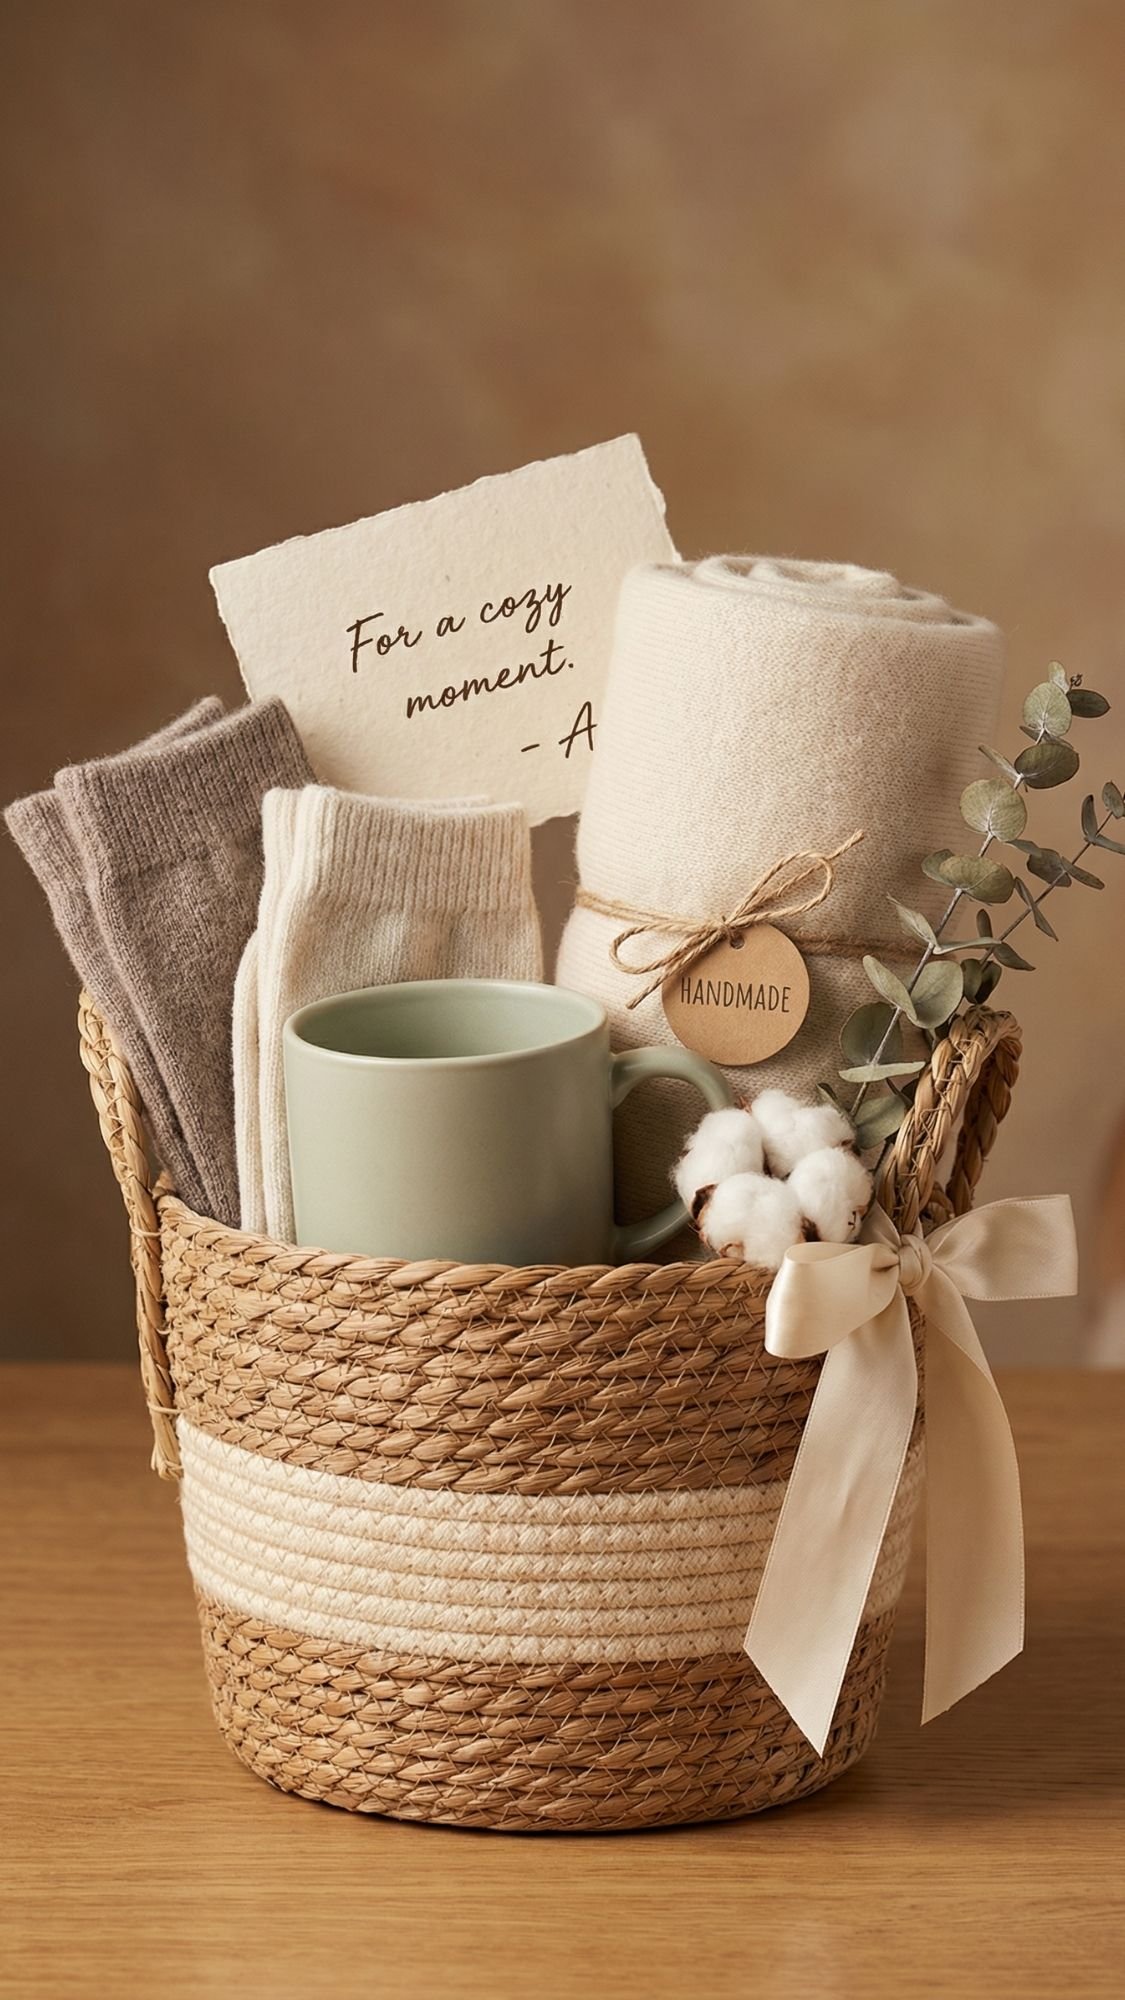
Gift Idea 22: Mini “Comfort Kit” Basket for Cozy Days
This gift feels like a hug in a basket. It’s simple, but it lands because you’re basically saying, “I want you comfy, warm, and taken care of.” Also, it’s easy to tailor based on what your grandma actually likes, which is the whole point. The only way this goes sideways is if it looks messy, so we’re going for curated, not chaotic.
Why it works so well
- It’s useful and consumable. She can use everything, no clutter pileup.
- It feels thoughtful immediately. The basket presentation does the work.
- It’s easy to personalize. You can make it calm, cozy, or cheerful.
Materials
Pick a small basket, tray, or decorative box, then fill it with 4–6 items like:
- Cozy socks or a soft pair of slippers
- Tea bags or a mini tea sampler
- Hand cream (light scent or unscented is safest)
- Lip balm
- A small snack (wrapped cookies, candies, honey sticks)
- A little notebook or notecard set
- A handwritten note on top
Optional upgrades:
- Ribbon and a gift tag
- Mini hot cocoa packets
- A small microwave heat pack (mini version of Gift #5)
Step-by-step
- Choose a theme so it feels intentional:
- “Sunday Morning Cozy”
- “Warm Hands Kit”
- “Tea and a Book”
- Add your largest item first (socks or cream) as the anchor.
- Fill in smaller items around it, keeping labels facing forward.
- Add filler only if needed, like tissue paper or a linen napkin.
- Place the handwritten card on top so she sees it first.
Pro tips for a boutique-level look
- Match your colors. One palette makes it look expensive.
- Keep scents gentle. Hand cream should feel soothing, not overpowering.
- Make it easy to unpack. Do not tape everything down like it’s going through a hurricane.
Common mistake beginners make
They cram too many items into a small basket and it looks cluttered. Leave space. Empty space reads “fancy,” crowded reads “clearance aisle.”
Tag ideas that feel sweet, not cheesy
- “For your cozy days”
- “A little comfort, just because”
- “Warm and loved”
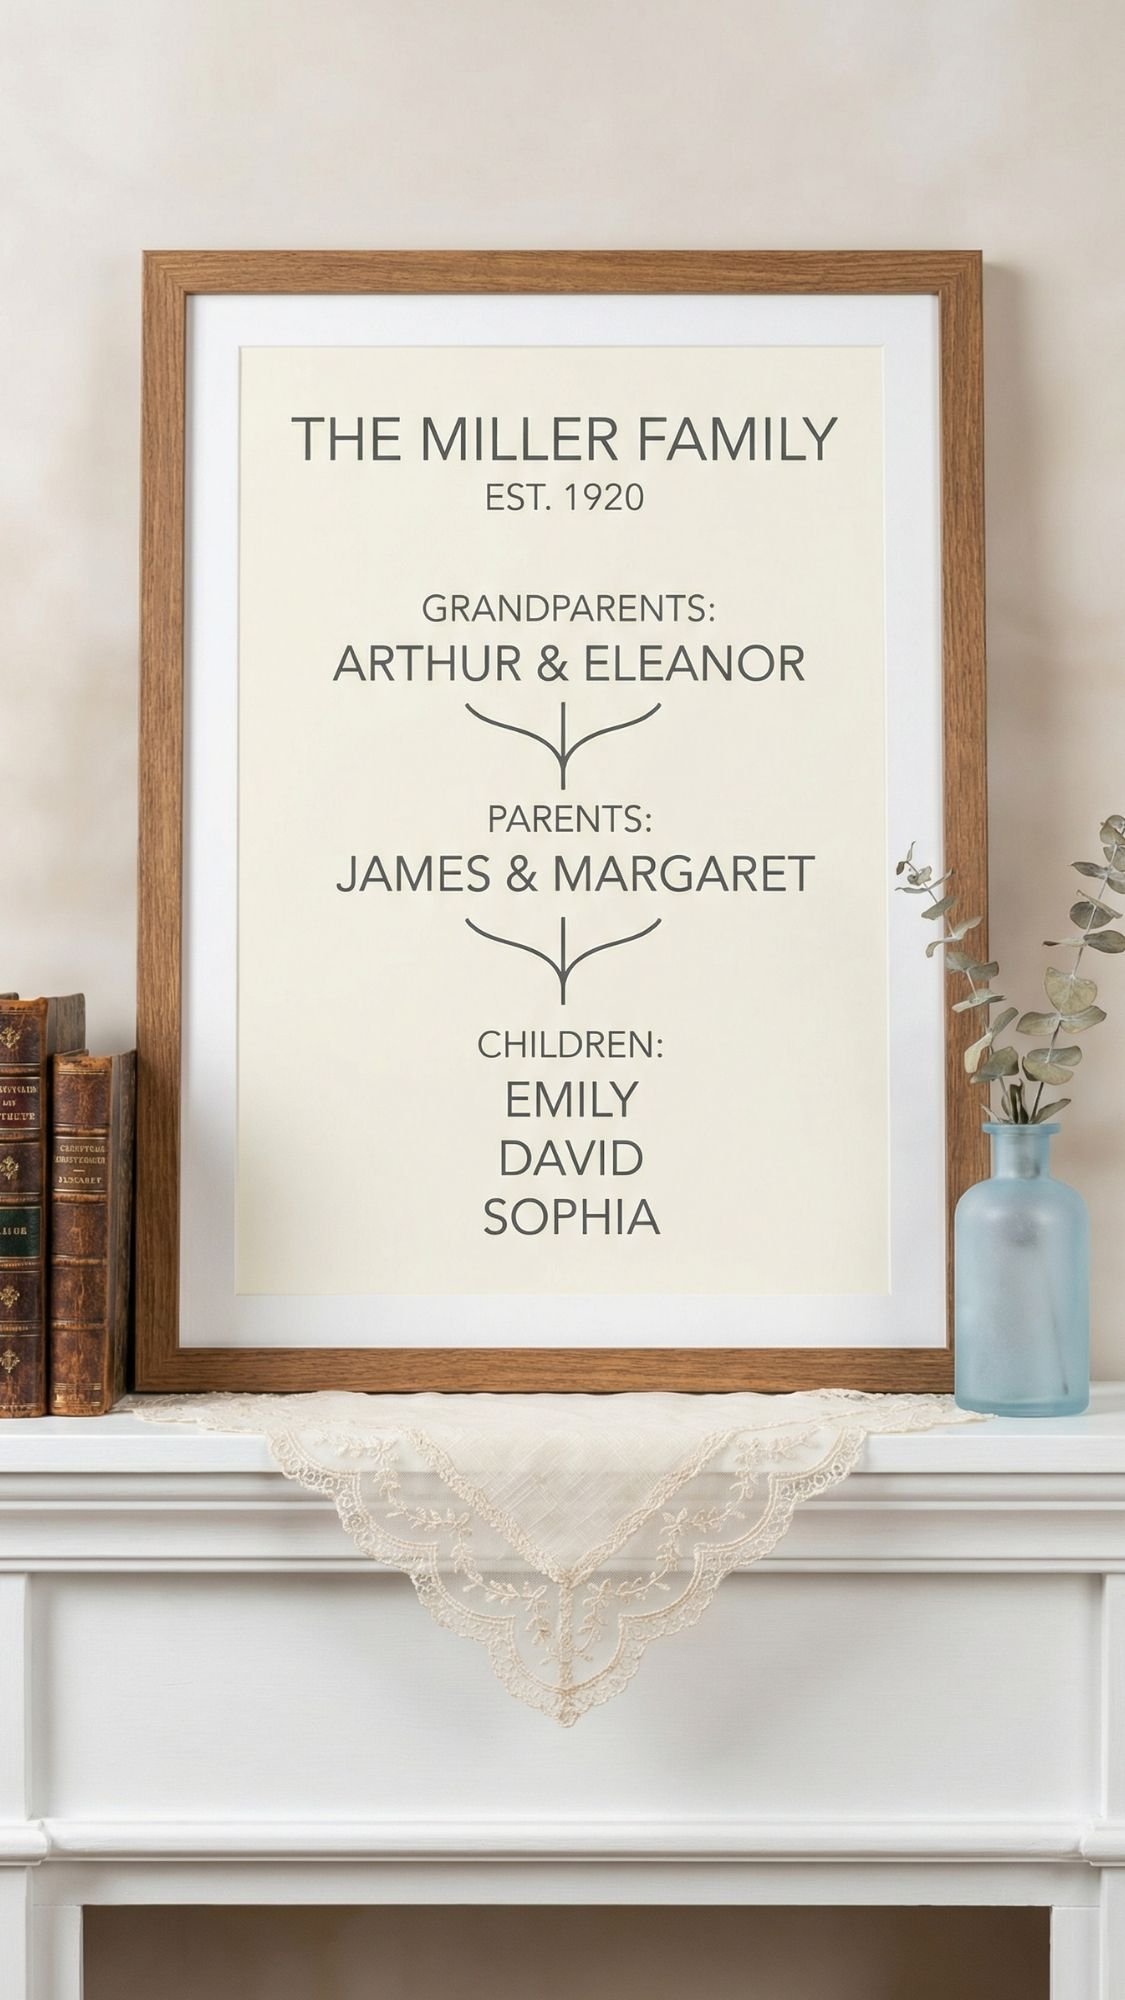
Gift Idea 23: “Family Tree” Printable Art With a Simple Frame
This is the perfect “sweet and simple” closer because it feels meaningful and display-worthy without being complicated to make. You’re basically giving Grandma a visual reminder of her favorite people, all in one tidy frame. Keep it readable, keep it clean, and it will look like something you ordered custom.
Why it works so well
- It’s sentimental and timeless.
- It becomes decor. No storage needed, it lives on the wall.
- It feels personalized without being clutter.
Materials
- Family tree printable template (or your own simple layout)
- Heavy matte paper or cardstock
- Printer
- Frame (8×10 or 11×14 looks best for readability)
- Optional: backing board or mat for a more high-end look
- Optional: label for the back with a sweet note
Step-by-step
- Choose a clean family tree layout with large readable names.
- Fill in names, double-check spelling, then check it again because typos on family names hurt.
- Print a test copy on regular paper to confirm sizing and spacing.
- Print the final on heavy matte paper.
- Frame it and make sure it sits perfectly centered.
- Add a note on the back like:
- “Made with love, 2026”
- “Your family, always around you”
Pro tips for a polished, expensive finish
- Use one accent color only. Too many colors can look busy.
- Pick a high-contrast font. Dark text on light background wins.
- Add a mat. A simple white mat instantly makes it look like real art.
Common mistake beginners make
They choose a fancy script font that looks cute but becomes hard to read. Grandma should not have to decode the family tree like it’s a secret message.
Styling tip for gifting
Wrap the frame in kraft paper, tie with ribbon, and add a sprig of dried flowers. It’s simple, and it looks like a boutique gift.
3 easy ways to match Grandma’s style
You can take the same exact gift and make it feel totally different just by swapping color, texture, and label style. This keeps your DIY from looking generic, and it helps you match Grandma’s home without guessing wildly.
Variation 1: Modern Clean
Style swaps
- Clean fonts, minimal labels, simple shapes
- Acrylic blanks, white cardstock, clear frames
Color palette ideas
- Cream + charcoal + icy blue accent
- White + soft gray + muted navy
Personalization options
- First name only, or initials in block letters
- Dates in small text on the back, like a maker mark
Material upgrades
- Matte laminate instead of glossy
- Linen ribbon, clear label film, float frames
Variation 2: Boho Cozy
Style swaps
- Soft florals, twine, woven baskets, natural textures
- Kraft paper tags, feather-light lace accents
Color palette ideas
- Warm sand + terracotta + sage
- Cream + dusty rose + muted olive
Personalization options
- Pressed flowers, handwritten tags, “From the grandkids” notes
- Tiny charm add-ons on baskets or keychains
Material upgrades
- Woven tray for a comfort kit
- Handmade paper for letters, cotton ribbon
Variation 3: Farmhouse Heirloom
Style swaps
- Gingham, classic stripes, vintage tins, simple florals
- Black-and-cream labels, wooden accents
Color palette ideas
- Cream + black + muted floral pink
- Warm white + sage + soft gray
Personalization options
- “Est.” dates on recipe tins or frames
- Family surname in bold serif lettering
Material upgrades
- Vintage recipe tin or thrifted teacups
- Bias-bound edges on mug rugs, framed prints with mats
Make it last, and make it look professional
This is the part most “cute DIY list” posts skip, and it’s exactly why people end up with peeling vinyl, smudged labels, and projects that look tired after a week. You can keep every gift simple and still make it feel expensive if you finish it like you mean it.
Dry time vs cure time, in plain language
- Dry time means it feels dry when you touch it.
- Cure time means it reaches full strength and durability.
If you wrap something that is dry but not cured, you can trap moisture and create:
- tacky surfaces
- fingerprints that never really go away
- sticking tissue paper
- cloudy sealers
- vinyl edges that lift later
A quick rule that saves headaches: if you can still smell strong “finish” smell, it’s not cured.
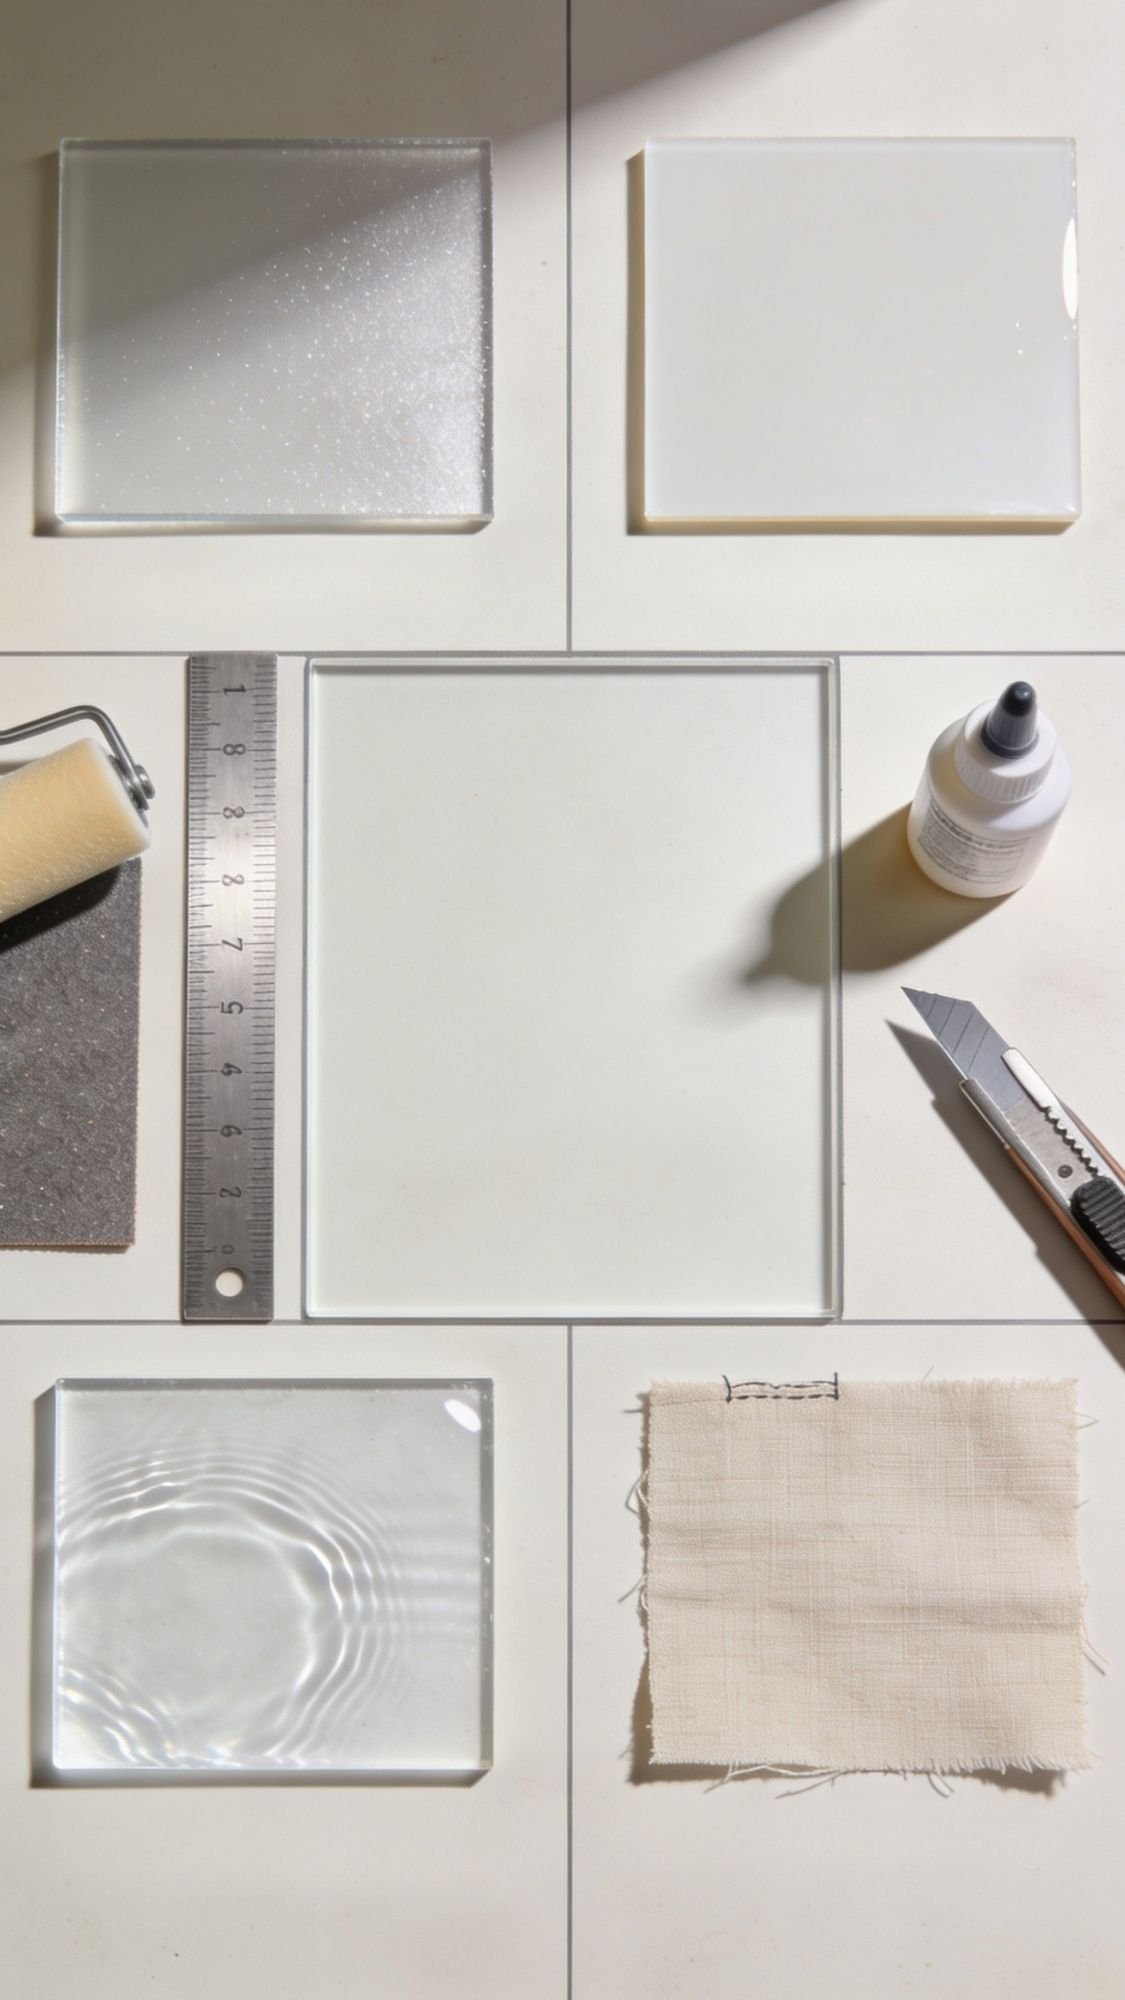
The clean finishing checklist
Use this before you gift anything:
- Sand wood edges smooth to 220 grit so it feels soft, not scratchy.
- Wipe dust off with a barely damp cloth, then let it dry fully.
- Seal thin, not thick. Thin coats level better and dry more evenly.
- Let it cure fully before stacking, wrapping, or putting it in a box.
- Add a care card for anything that needs washing, wiping, or heat.
Best finishes by project type
Paper and printables (recipe cards, calendars, notecards, bookmarks)
Goal: keep them crisp and wipeable.
- Use heavy matte cardstock so it does not curl.
- Protect with lamination, sleeves, or clear film.
- Store flat until gifting, so edges stay straight.
How long it lasts
- Laminated or sleeved paper items can last years with normal use.
Care
- Wipe gently with a barely damp cloth, do not soak.
Wood and tins (boxes, ornaments, keychains)
Goal: stop peeling, lifting, and scuffs.
- Sand smooth, wipe clean, then apply a thin sealer coat.
- Let it cure, then apply vinyl or labels if needed.
- Add a final thin protective coat if the surface allows it.
Typical timing
- Touch-dry can happen fast, but full cure can take 24–72 hours, sometimes longer depending on product, humidity, and thickness.
Care
- Wipe with a damp cloth, avoid soaking.
- Avoid harsh cleaners.
Fabric (heat packs, mug rugs, towels, sachets)
Goal: keep it washable and neat.
- Prewash cotton fabric when you can, it prevents shrinking surprises.
- Press seams as you go, it makes projects look clean.
- Include a small care tag so she does not guess.
Care
- Wash gentle, cold water
- Air dry or tumble low
- Press lightly if needed
Candles and bath items (teacup candle, bath salts)
Goal: keep them safe and pleasant.
- Candles need cure time for best burn and scent performance.
- Bath salts should stay dry and lightly scented.
Typical timing
- Candle cure often improves over 2–7 days depending on wax.
- Bath salts are ready immediately, but keep the jar sealed.
Care
- Candle: trim wick before first burn, keep burns long enough to avoid tunneling.
- Bath salts: keep dry, use a scoop, avoid adding heavy botanicals.
How long it lasts and how to refresh it
- Sachets: refresh by gently squeezing, replace after 6–12 months, or add one tiny drop of oil to the inner pouch.
- Wood items: refresh with a light wipe, avoid soaking, reseal if it ever looks dull.
- Paper goods: replace a card if it gets splattered, keep extras blank for future use.
- Fabric: wash and press, it brings it back to “new” fast.
Quick Fixes For The Most Common DIY Gift Problems
This section exists because DIY is fun until something peels, bubbles, cracks, or looks wonky, and then suddenly you’re negotiating with a glue bottle at midnight. Here are the most common issues and how to fix them fast.
1) Vinyl lifts at the edges
- Symptom: corners pop up, edges curl, vinyl peels within a day or two
- Likely cause: dusty surface, textured surface, raw wood grain, weak burnish
- Fix: warm the vinyl lightly with a hair dryer, press down firmly using a brayer or gift card, then seal the surface if appropriate
- Prevention next time: apply a thin clear coat first on raw or textured surfaces, let it cure, then apply vinyl and burnish hard
2) Paint peels or chips on a pot or wood gift
- Symptom: paint flakes off around edges or near the rim
- Likely cause: surface dust, paint applied too thick, no sealer, handling too soon
- Fix: sand the peeling area smooth, wipe clean, repaint in thin coats, seal after full dry time
- Prevention next time: clean first, do two thin coats, then seal the outside only for pots
3) Decoupage looks cloudy or streaky
- Symptom: hazy patches, streaks, “milky” finish
- Likely cause: trapped moisture, coats too thick, humid drying conditions
- Fix: move it to a warm dry spot, let it dry longer, then add one thin final coat
- Prevention next time: apply thin coats only, let each layer dry fully before the next
4) Paper warps or curls
- Symptom: cards bow, corners curl, calendar pages ripple
- Likely cause: paper too thin, wet glue, heavy top coat, humidity
- Fix: press flat under books between clean paper overnight, reprint on heavier cardstock if needed
- Prevention next time: use heavy matte paper, use double-sided tape instead of wet glue when possible, store flat
5) Laminated bookmarks or cards get bubbles
- Symptom: air pockets, bumps, wrinkled laminate
- Likely cause: crumbs or dust, thick flowers, rushed feed through laminator
- Fix: re-laminate using a fresh pouch, trim with a clean border, press firmly while warm if your laminator allows it
- Prevention next time: wipe your work surface, choose flatter pressed flowers, feed slowly and straight
6) Candle tunnels or burns unevenly
- Symptom: wax burns down the center, leaves a thick ring on the outside
- Likely cause: first burn too short, wick too small for cup size
- Fix: do one longer burn to reach a full melt pool, or use a foil wrap around the rim to help even heat for one burn
- Prevention next time: tell Grandma to burn long enough on the first use, choose the right wick size for the cup diameter
7) Sachets leak filling or look lumpy
- Symptom: lavender buds escape, seams strain, pouch looks bumpy
- Likely cause: fabric weave too loose, overfilling, stitching too wide
- Fix: empty and refill to about half, restitch with smaller stitches, add an inner muslin pouch
- Prevention next time: use tight weave cotton, do not overfill, stitch tight and strong
8) Heat pack smells toasted or feels too hot
- Symptom: burnt smell, scorching, uneven heating
- Likely cause: overheated in microwave, fabric not 100% cotton, pack too dry or too dense
- Fix: stop heating immediately, let cool fully, then heat in 30-second intervals only
- Prevention next time: use 100% cotton, do not overfill, include a simple heating card
9) Keychain lettering smears or scratches off
- Symptom: paint pen smudges, vinyl scratches, edges lift
- Likely cause: handling before dry or cure, no seal, surface oils
- Fix: remove loose vinyl, clean, reapply lettering, seal after it sets
- Prevention next time: clean the blank first, let lettering fully dry, then seal with a thin protective coat
10) Crooked cuts and rough paper edges
- Symptom: uneven borders, jagged edges, cards look messy
- Likely cause: dull blade, rushing, no ruler guide
- Fix: recut using a sharp blade and a straight edge, trim consistently
- Prevention next time: use a paper trimmer, replace blades, measure twice
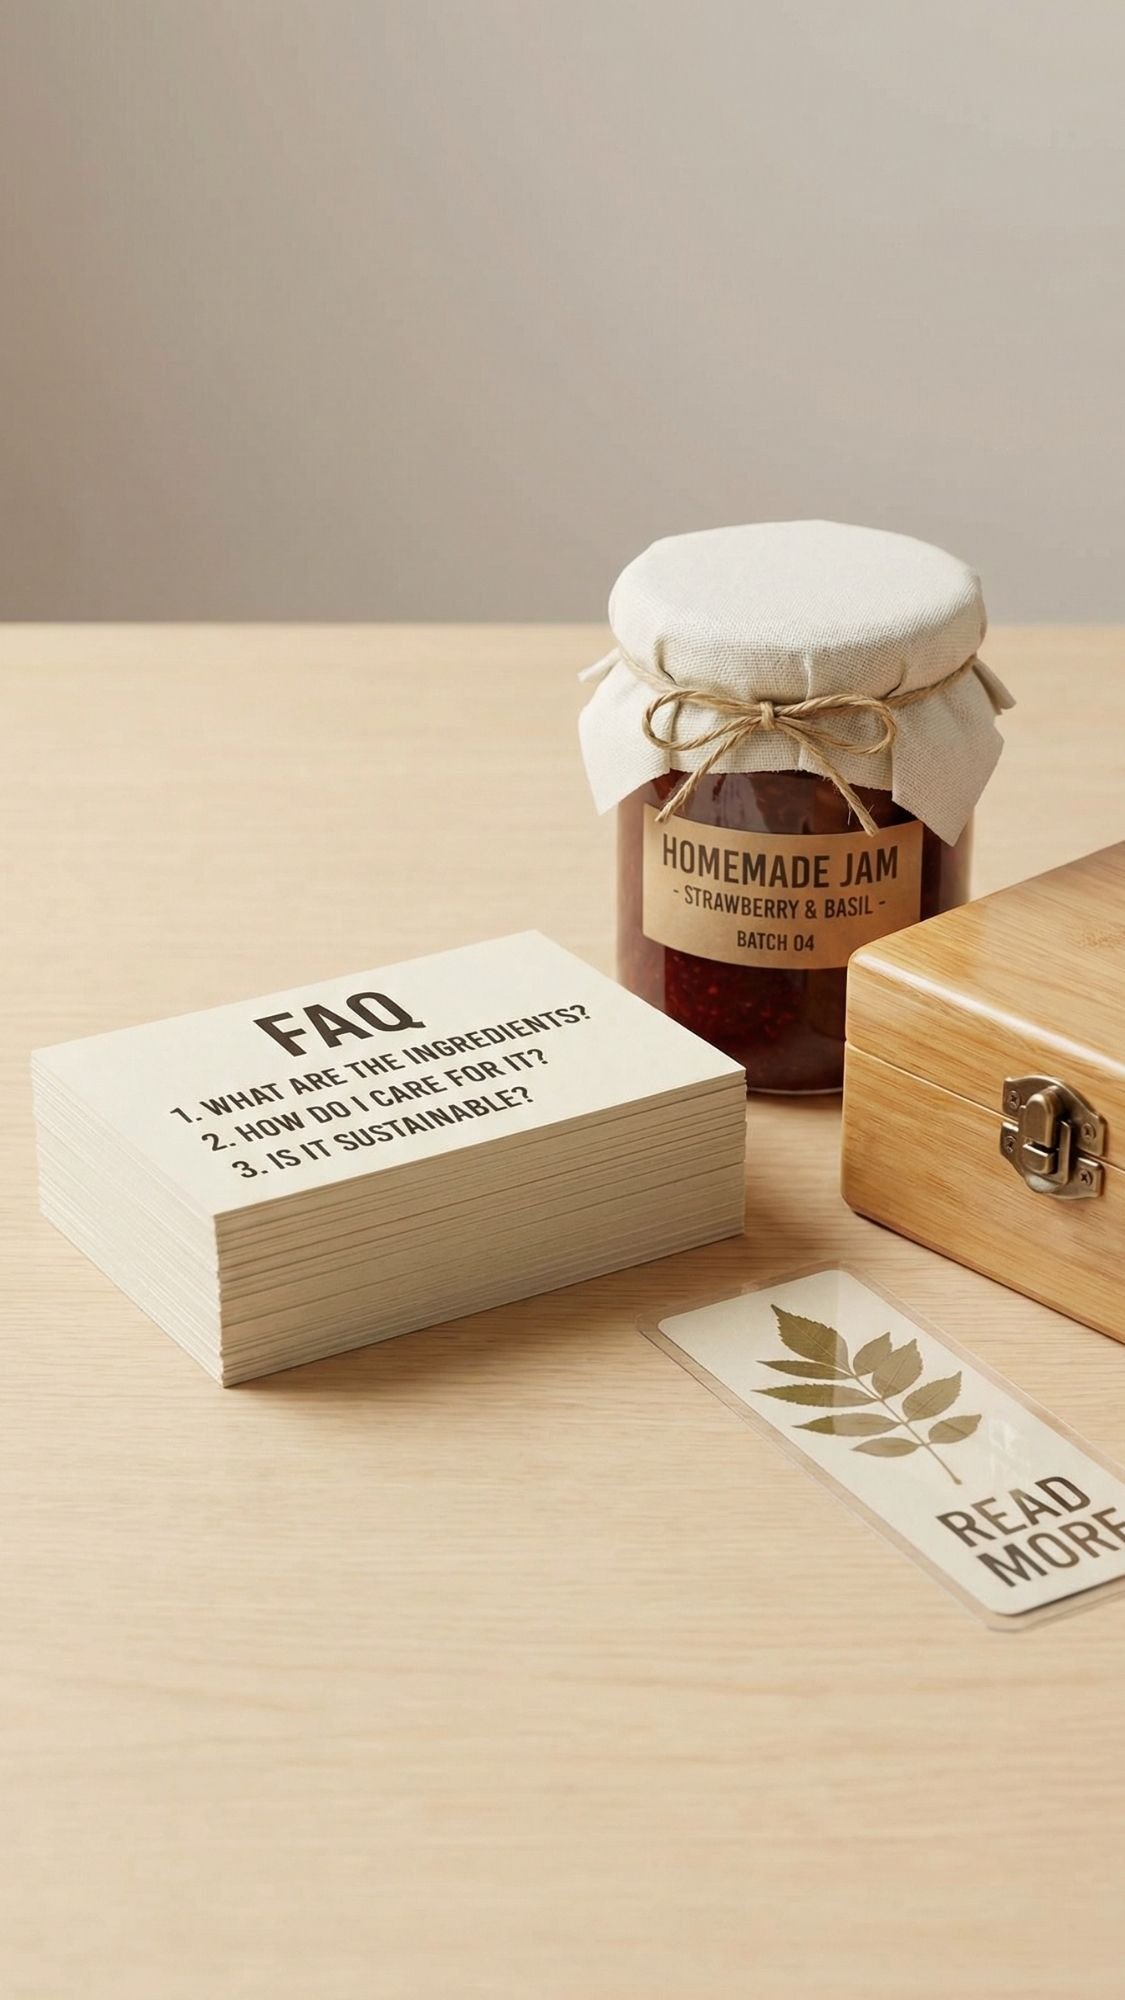
FAQ: DIY Presents for Grandma That Are Sweet and Simple
1) What are the easiest DIY gifts for grandma that still feel personal?
Pick something she will use, then add one meaningful detail. Photo magnets, a recipe card box, a calendar with family dates, or a tea sampler with a handwritten note all feel personal without getting complicated.
2) What can I make for grandma in under an hour?
Try bookmarks, sachets, bath salts, photo magnets, a tea sampler box, or a simple keychain. These projects look polished fast if you keep the labels clean and the edges tidy.
3) How do I keep vinyl from peeling on wood or textured surfaces?
Seal the surface first with a thin clear coat, let it cure fully, then apply vinyl and burnish firmly. Vinyl sticks best to smooth, sealed surfaces, not dusty raw grain.
4) What DIY gifts work well for a grandma who does not want more clutter?
Choose consumable or usable gifts. Tea kits, bath salts, sachets, notecards, calendars, towels, and heat packs all get used and do not sit around collecting dust.
5) How do I make simple DIY gifts look expensive?
Focus on finishing:
- sand edges smooth
- keep fonts bold and readable
- use one consistent color palette
- use thick paper and neat trimming
- let finishes cure before you wrap
6) What scents are safest for handmade gifts?
Go light and clean. Lavender, vanilla, chamomile, or unscented usually works. If you do not know her preferences, skip fragrance oil and let the “sweet” part come from the note you include.
7) How long should I wait before wrapping a project I sealed or painted?
Wrap after it cures, not just when it feels dry. If it still smells strongly like finish, give it more time. Humidity and thick coats slow curing, so thin coats help.
8) Can I ship these DIY gifts without ruining them?
Yes, but pack smart:
- wrap cured items only
- add padding so nothing rubs
- protect corners on frames
- keep jars upright and sealed
- include a care card so nothing gets mishandled
9) What if I do not have a cutting machine?
You can still do everything in this post. Use a ruler, paper trimmer or scissors, and printable labels. Clean cuts matter more than fancy machines.
10) What are good DIY Christmas gifts for grandma that she will use?
Recipe cards, ornaments, calendars, tea samplers, cozy lap blankets, mug rugs, and photo magnets all work well because they feel sentimental and practical.
11) What is a good DIY gift for a grandma with arthritis or limited grip strength?
Choose gifts that are easy to hold and easy to read. Large-label calendars, heat packs, lap blankets, framed prints, and soft textiles work better than tiny fiddly crafts.
12) How do I avoid mistakes like peeling, bubbles, and smudges?
Prep first, then slow down on the finish:
- clean and dry surfaces
- burnish vinyl firmly
- seal thin coats
- respect cure time
- test one sample before batch making
Pick one, keep it simple, and finish it clean
If you take one thing from this list, let it be this. A sweet gift does not need to be complicated, it needs to feel intentional. When you choose something Grandma will actually use, then you add one personal detail, you give her a gift that lands every single time.
Start with the project that matches her daily life. If she cooks, make the recipe card box. If she loves cozy nights, do the tea sampler or comfort kit. If she loves memories, go for the open-when letters or the 52-note jar. Then do the unglamorous part that makes the gift look expensive, clean edges, clear labels, and full cure time before you wrap. That’s how simple projects stop looking homemade and start looking heirloom.
If you want to be extra sweet, add one handwritten line. Not a novel, just one real sentence she can keep. Because Grandma will remember the words longer than she remembers the ribbon.

