
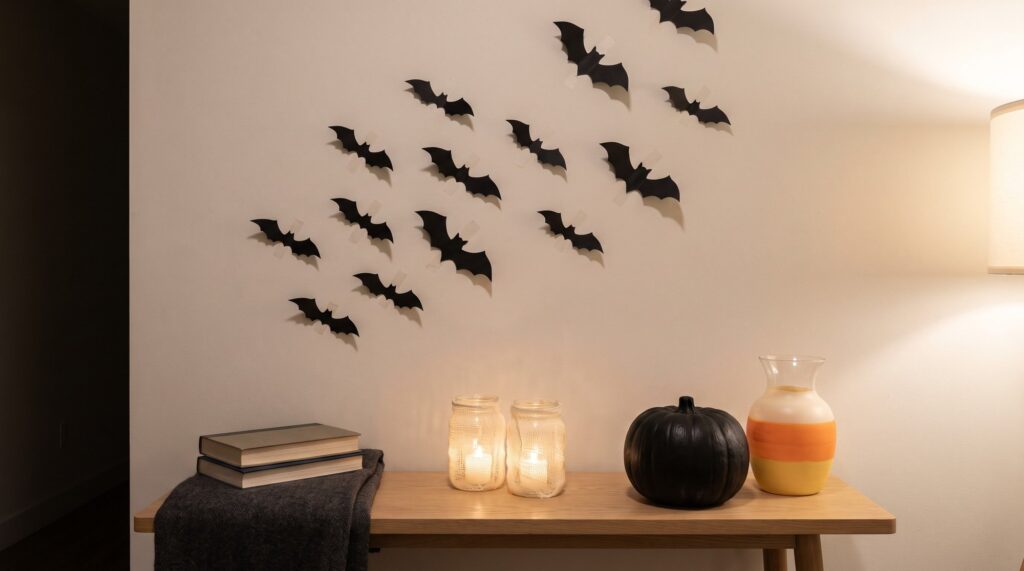
This post contains affiliate links. If you buy through one, I may earn a small commission at no extra cost to you.
You can decorate a whole apartment for Halloween for about twenty dollars, and most of the projects that get you there take under an hour. That is the actual answer, and everything below is the working.
Here is the thing nobody says out loud about Halloween decor. It is expensive for something that stays up for three weeks, and then it needs somewhere to live for the other eleven months. A single store bought porch prop runs forty dollars and takes up a shelf in a closet you do not have. Meanwhile the stuff that photographs best is almost never the expensive stuff.
So this post is organized by the three things that actually decide whether a project gets made: what it costs, how long it takes, and whether your walls can take it. Five sections, five projects each, and every project carries an honest active time and an honest drying time kept separate, because those are different numbers and collapsing them into one is the most misleading thing a craft post can do.
Section two exists specifically for the days when the energy is short. Twenty five projects is a lot to scroll, so if you have two hours and nothing left in the tank, start there and ignore the rest of the page. Nothing in that section has any drying time at all.
If you are still putting a costume together too, the Halloween costumes for Black women guide runs on the same logic, cheap and fast and organized by what you actually have.
Project Snapshot
| Active time | 10 minutes to 1.5 hours, stated per project below. There is no single blended number and anyone who gives you one is hiding the drying |
| Waiting time | 30 minutes to 2 hours on the painted projects, overnight on anything starched |
| Cure time | Up to 24 hours on painted foam. This is the one that ruins projects |
| Cost range | About $3 to $25 per project, checked 2026-08-25. Prices move, especially in October |
| Skill level | Beginner all the way through. No power tools, no drilling, and no measurement that has to be accurate |
| The one tool you cannot substitute | A hot glue gun. Heavy duty double sided tape covers paper and fabric, and it will not hold foam or glass |
| Best for | Renters, small spaces, and anyone starting in the last two weeks of October |
| Who should skip this | Anyone who wants one big statement piece. This is a many small things post and it says so up front |
When to start, counting dry time and not just work time
Start any painted project 48 hours before you want it out, because touch dry is not cure. Everything in section two can be finished the same day, which is exactly why that section exists. The outdoor projects need a dry forecast, and in the Southeast in October that is not a given.
Section 1: The Dollar Tree run
Five projects, one trip. Buy for all five at once and you will spend somewhere around twenty dollars total.
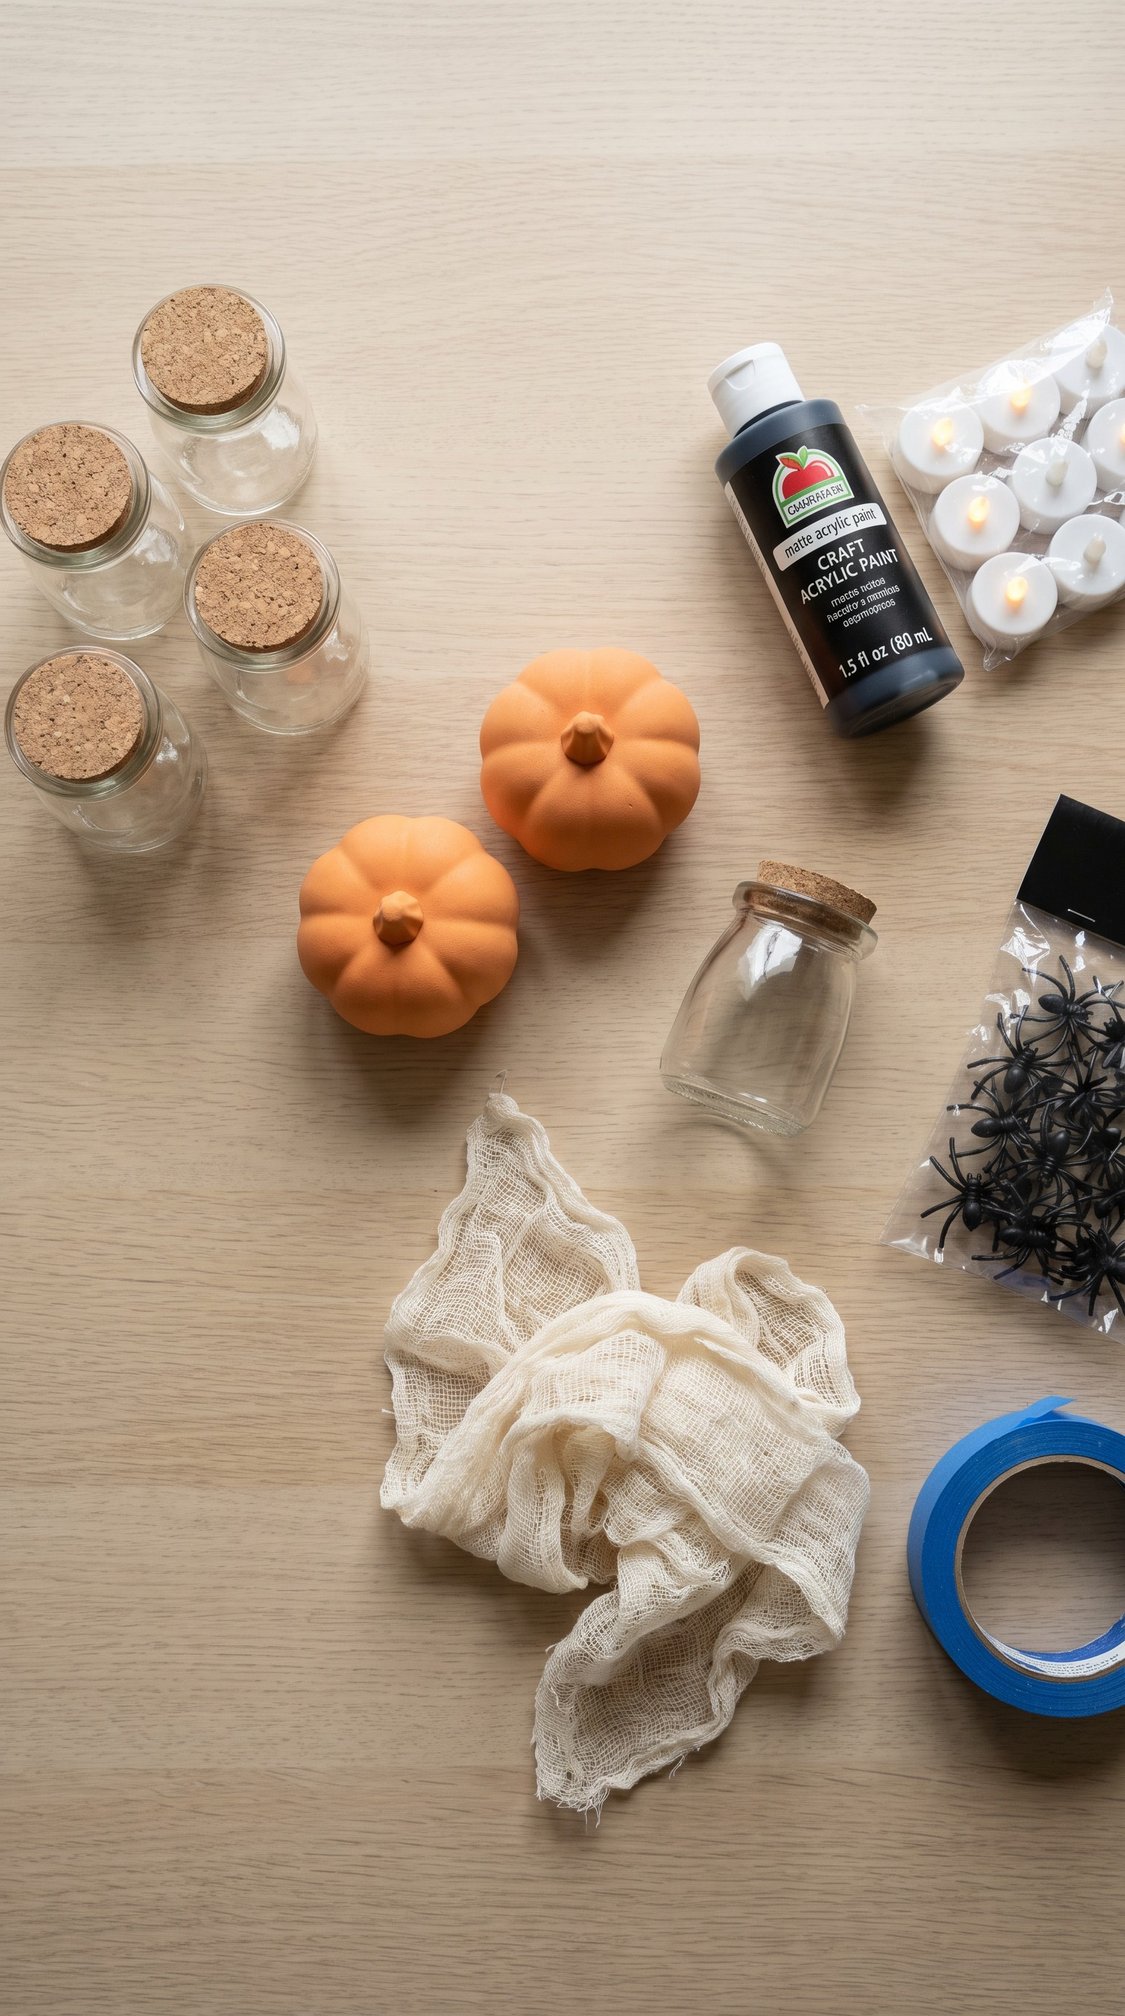
The shared list: glass jars, craft foam pumpkins, LED tealights, black acrylic paint, a bag of plastic spiders, cheesecloth. That covers every project in this section with material left over for section two.
1. Floating ghost jars
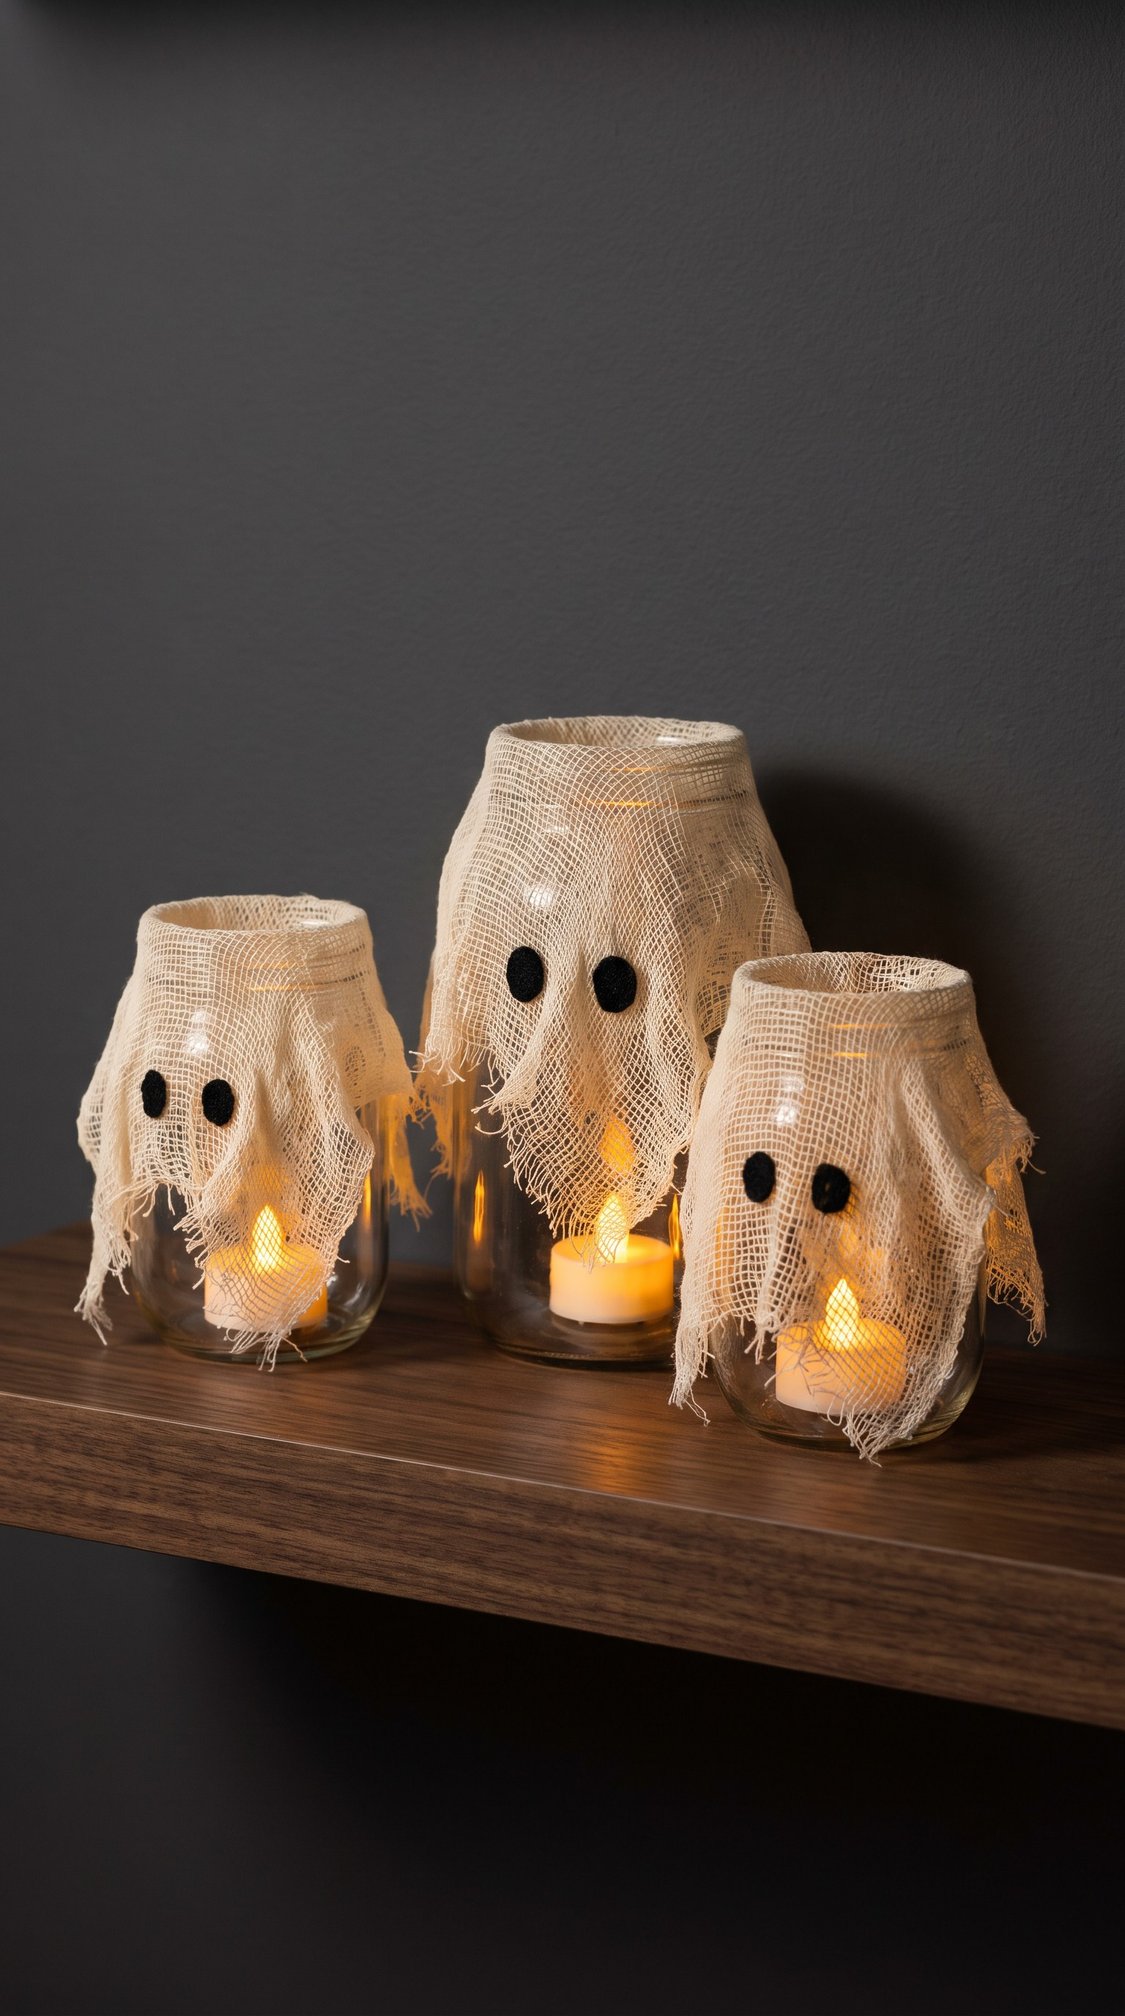
Cute. Active 15 minutes. Dry time none. About $4.
You need three glass jars in different heights, cheesecloth, black felt scraps and an LED tealight for each jar.
Drape the cheesecloth loosely over each jar so it pools at the base, then glue two black felt ovals on for eyes. Drop the tealight in. The whole effect depends on the light coming through the weave rather than around it, so keep the cloth in a single loose layer over the front and let the extra gather at the back.
Three different heights is what makes this read as a group instead of three of the same thing. Cut the eyes slightly uneven and slightly too big. Perfectly matched circles look printed, and lopsided ones look like a face.
Customization: swap the black felt for orange and the ghosts read as friendly rather than spooky, which matters if small kids live there.
2. Foam pumpkin makeover
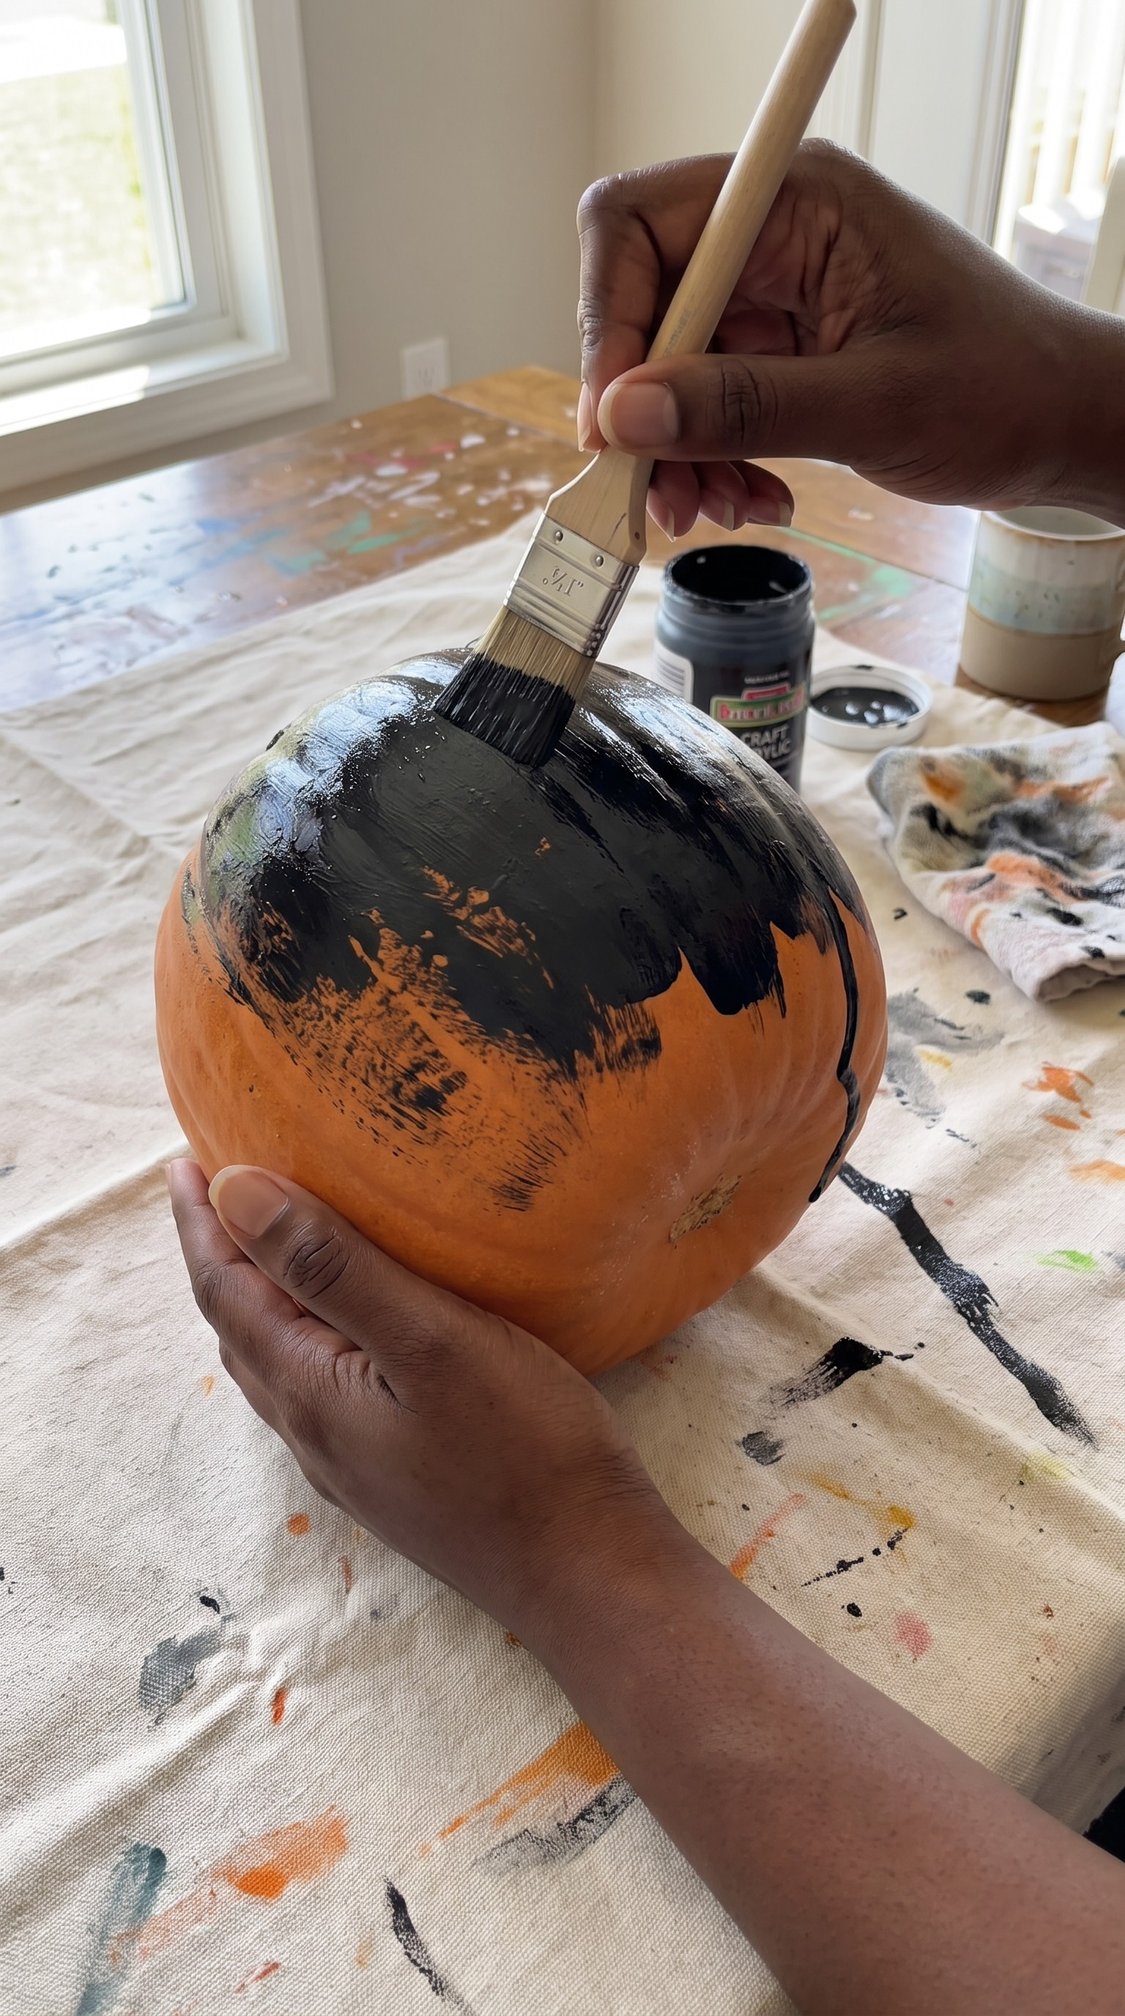
Vintage. Active 20 minutes. 24 hour cure. About $6.
You need a craft foam pumpkin, black acrylic craft paint, a wide flat brush and matte sealer if you have it.
Brush the paint on in two thin coats rather than one thick one. The first coat will look patchy and streaky and genuinely bad, with orange showing through everywhere. That is the coat doing its job. Let it dry for an hour, go again, and the second coat evens out.
The stem is worth painting a different shade. A dull bronze or a warm gray on the stem against a matte black body is the difference between a black pumpkin and a black pumpkin that looks bought.
Do not reach for spray paint here. Propellant eats craft foam, and it does it after the first coat already looks fine.
Customization: dry brush a little cream over the ridges once the black cures and it reads as aged plaster.
3. Skeleton hand candy bowl
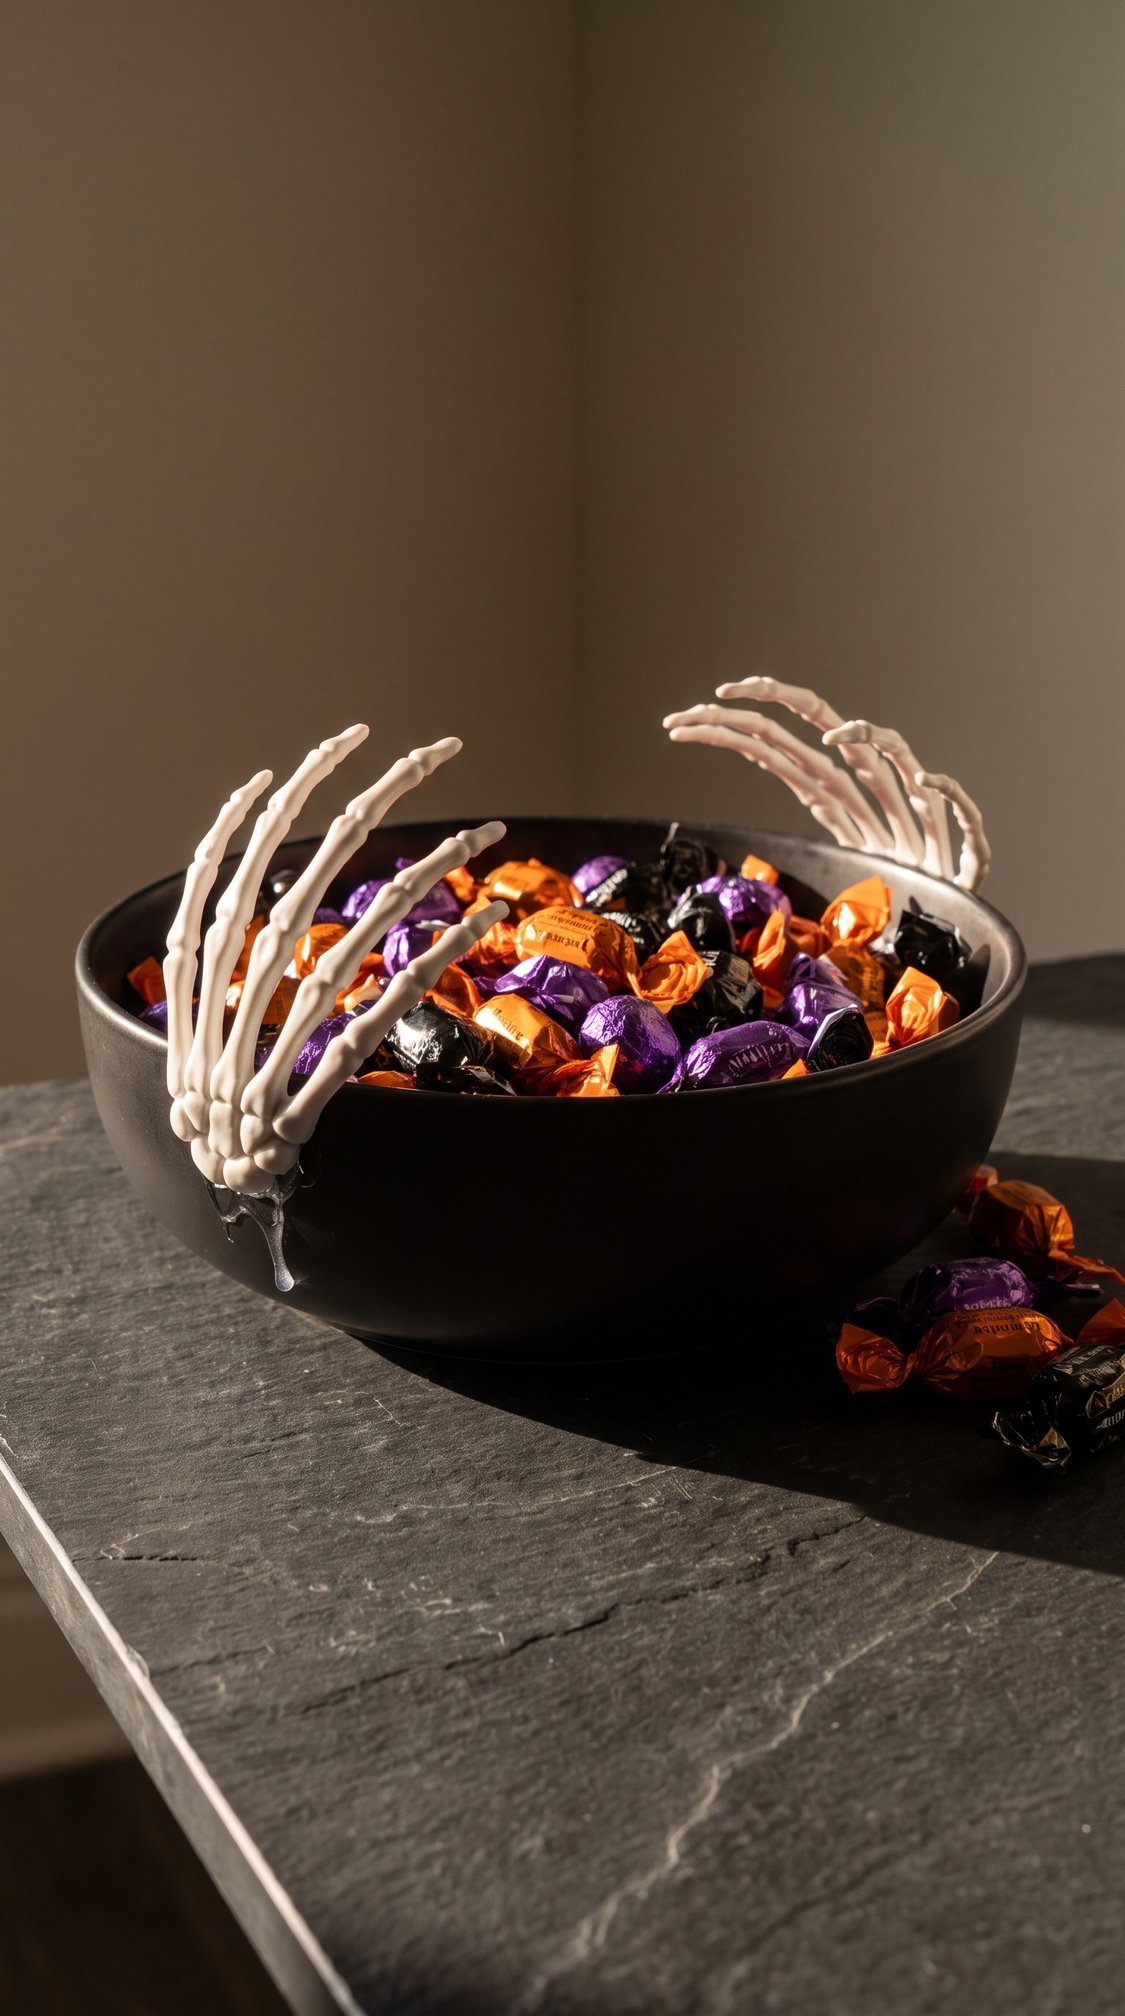
Scary. Active 10 minutes. 1 hour set. About $5.
You need a shallow dark bowl, two plastic skeleton hands from the party aisle and a hot glue gun.
Glue the hands so the fingers curl over the rim and into the bowl, as though something is reaching in rather than holding on. Hands placed symmetrically look like a craft. Hands placed at slightly different angles look like a moment.
Warm the bowl in your hands for a second before you glue, especially if it is glass or ceramic. Cold surfaces make hot glue skin over before it grabs, and the bond fails a week later when someone digs for the good candy.
FYI, this is the one project in the post that survives being handled by fifty children in one night, which makes it worth the ten minutes.
Customization: a white bowl with black hands photographs better and reads modern instead of gothic.
4. Thrift frame portrait swap
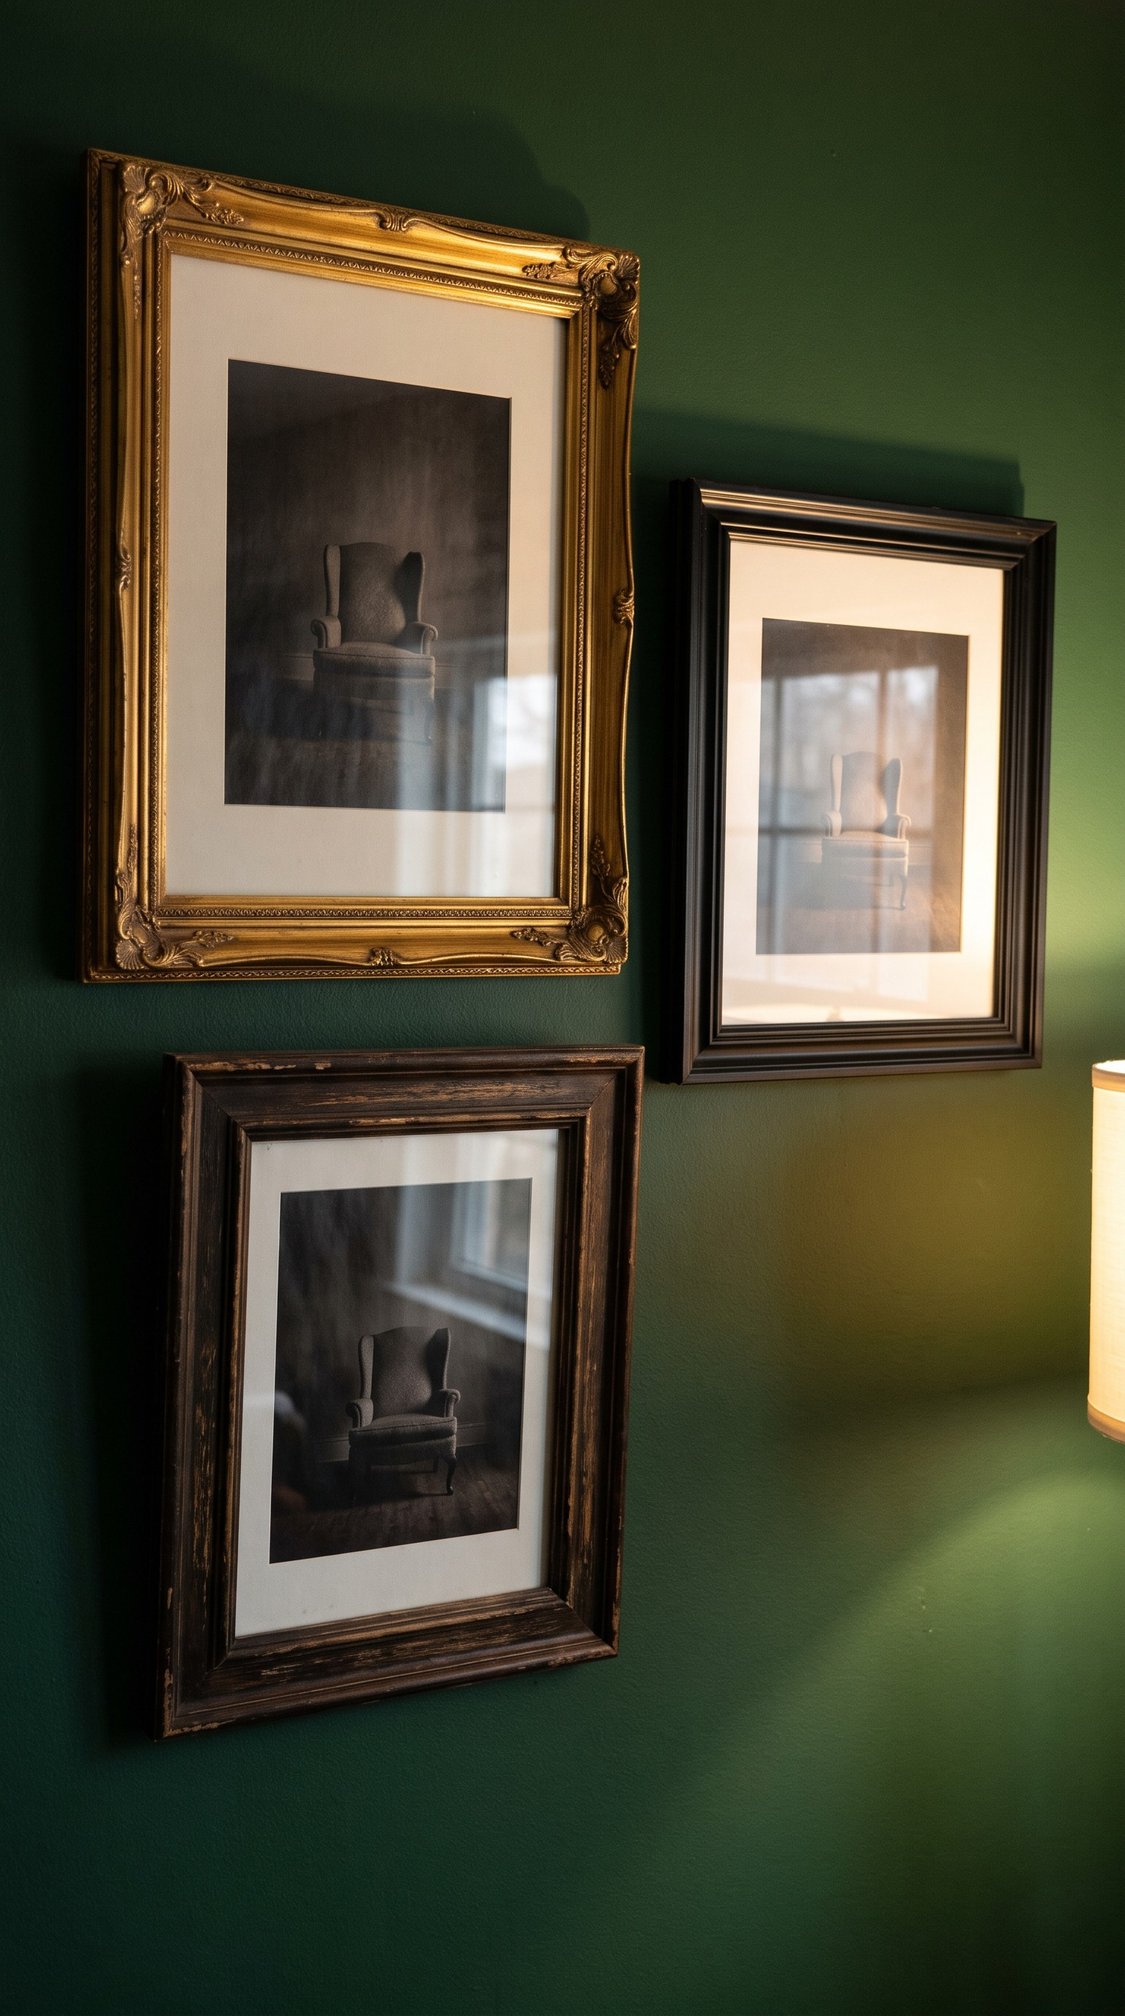
Vintage. Active 25 minutes. Dry time none. About $8 for three frames.
You need three thrifted frames in different sizes and finishes, and three dark moody prints on matte paper.
Print on matte, never glossy. Glossy paper behind glass produces a double reflection that reads instantly as a printout, and matte reads as a photograph. Empty chairs, empty rooms and dim interiors all work better than faces, because the missing person does the work.
Hang them in a loose cluster with one frame a couple of degrees off level. Perfectly aligned frames look like a gallery wall in any month. One crooked frame looks like the house is unsettled.
If you would rather print something made for the job than hunt for the right image, the Black Girl Halloween Ghost bundle is 19 designs for $4.99 and they print clean at frame size on matte cardstock. Three of them in three different frames is this whole project done in an afternoon, and it is the cheapest way I know to get a wall that looks styled rather than assembled.
This one is a natural pairing with upcycled crafts if you already keep a thrift habit going year round.
Customization: swap the prints for old family photos printed in high contrast black and white.
5. Foam board bat cluster
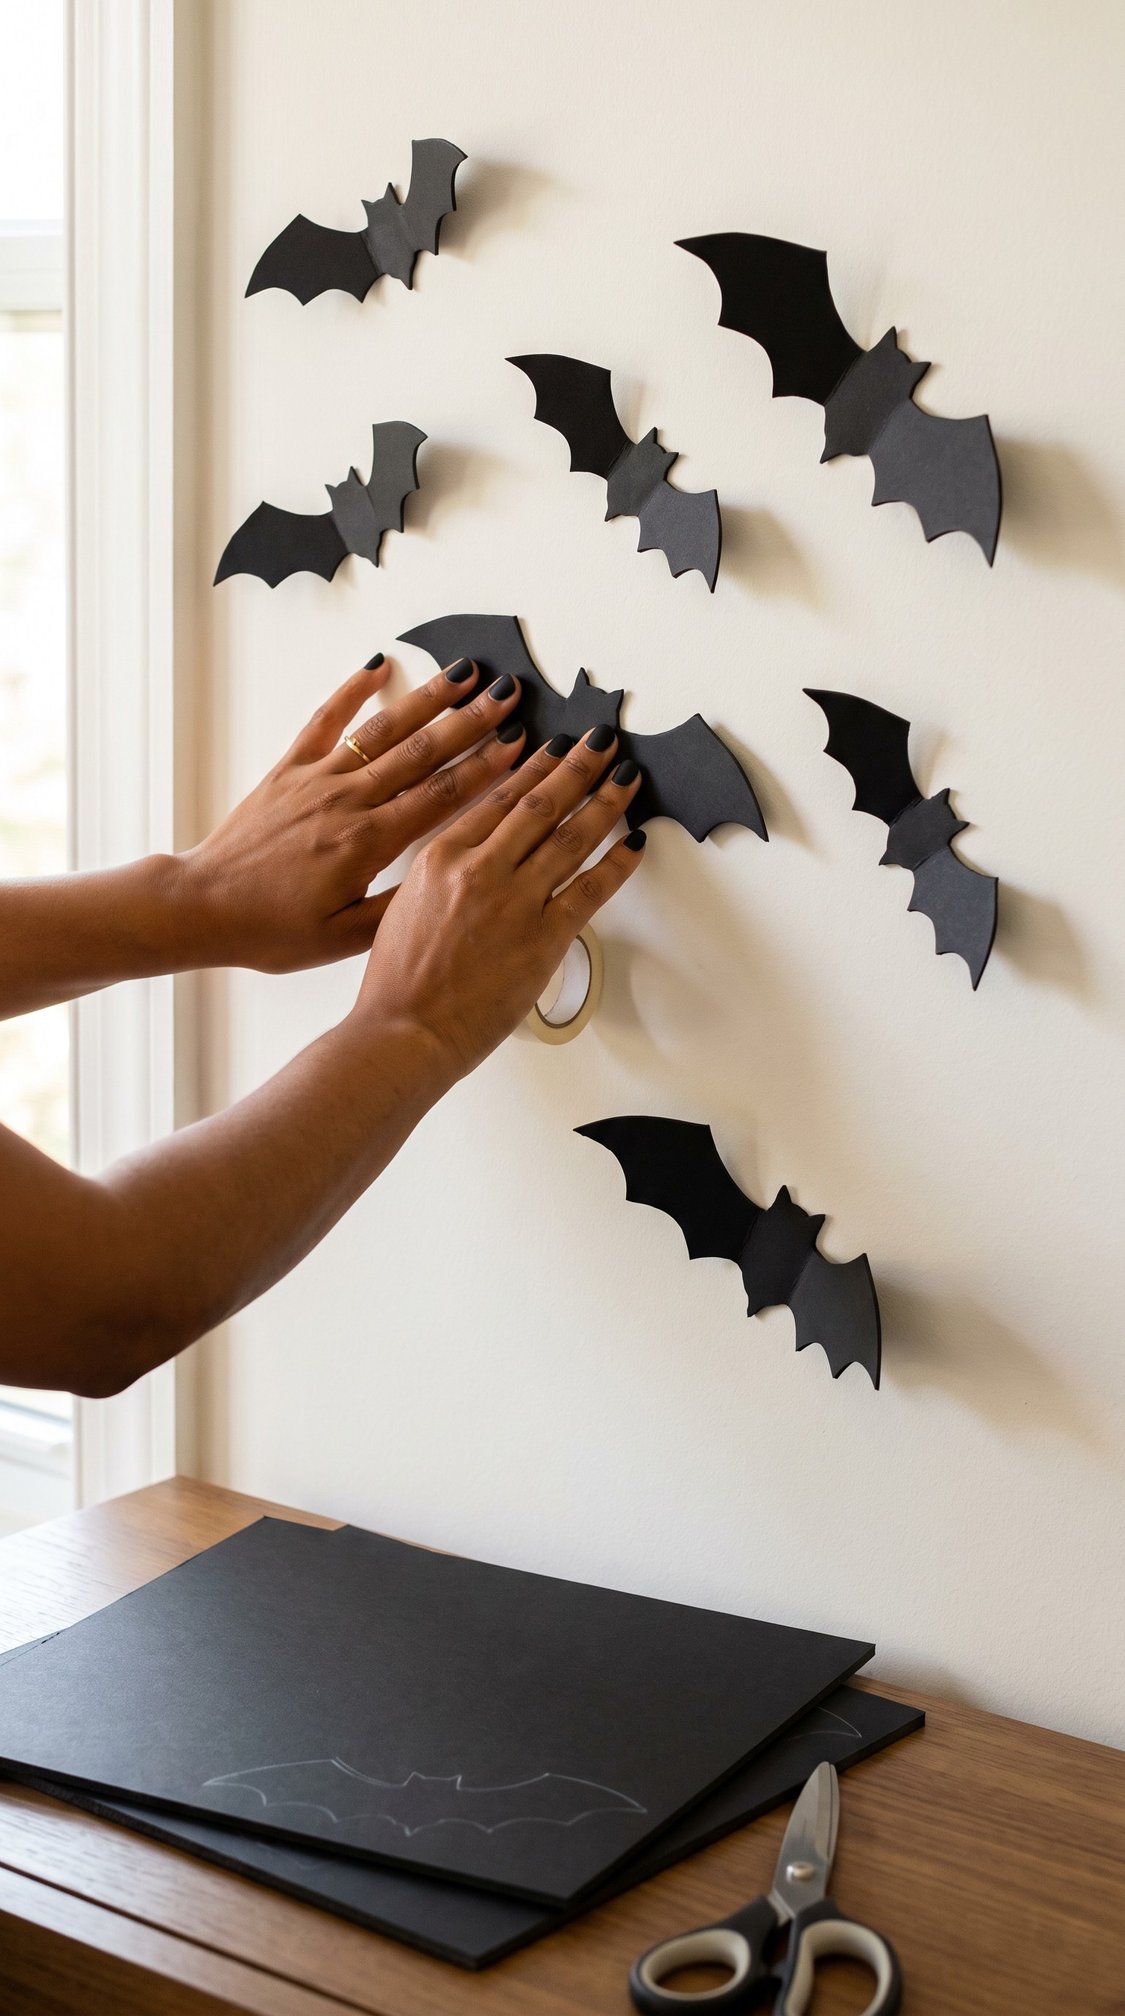
Cute. Active 30 minutes. Dry time none. About $5.
You need two sheets of black foam board, a craft knife, a cutting mat and removable adhesive strips.
Cut bats in three sizes and fold the wings up slightly along the body line. That fold is the whole trick. A flat bat is a sticker, and a bat with a five degree fold throws a real shadow on the wall and reads three dimensional from across the room.
Cluster them densest at one corner and let them thin out as they climb, like they are dispersing rather than arranged. Twelve to eighteen is the range where it starts to look like a swarm.
The one step people get wrong in this section: reaching for spray paint on foam. Brush acrylic on foam, and save the spray can for plastic and glass.
Customization: a single oversized bat above the others gives the cluster a leader and fixes a composition that feels flat.
Section 2: Under an hour, start to finish
Five projects with zero dry time, for the day you decided at 4pm that the house should look like something. If your energy comes in short windows rather than long ones, this is the section to work from, and the same logic runs through these easy DIY crafts for any month of the year.
Finishing is the point here. Every one of these is done when you put it down.
6. Cheesecloth ghosts
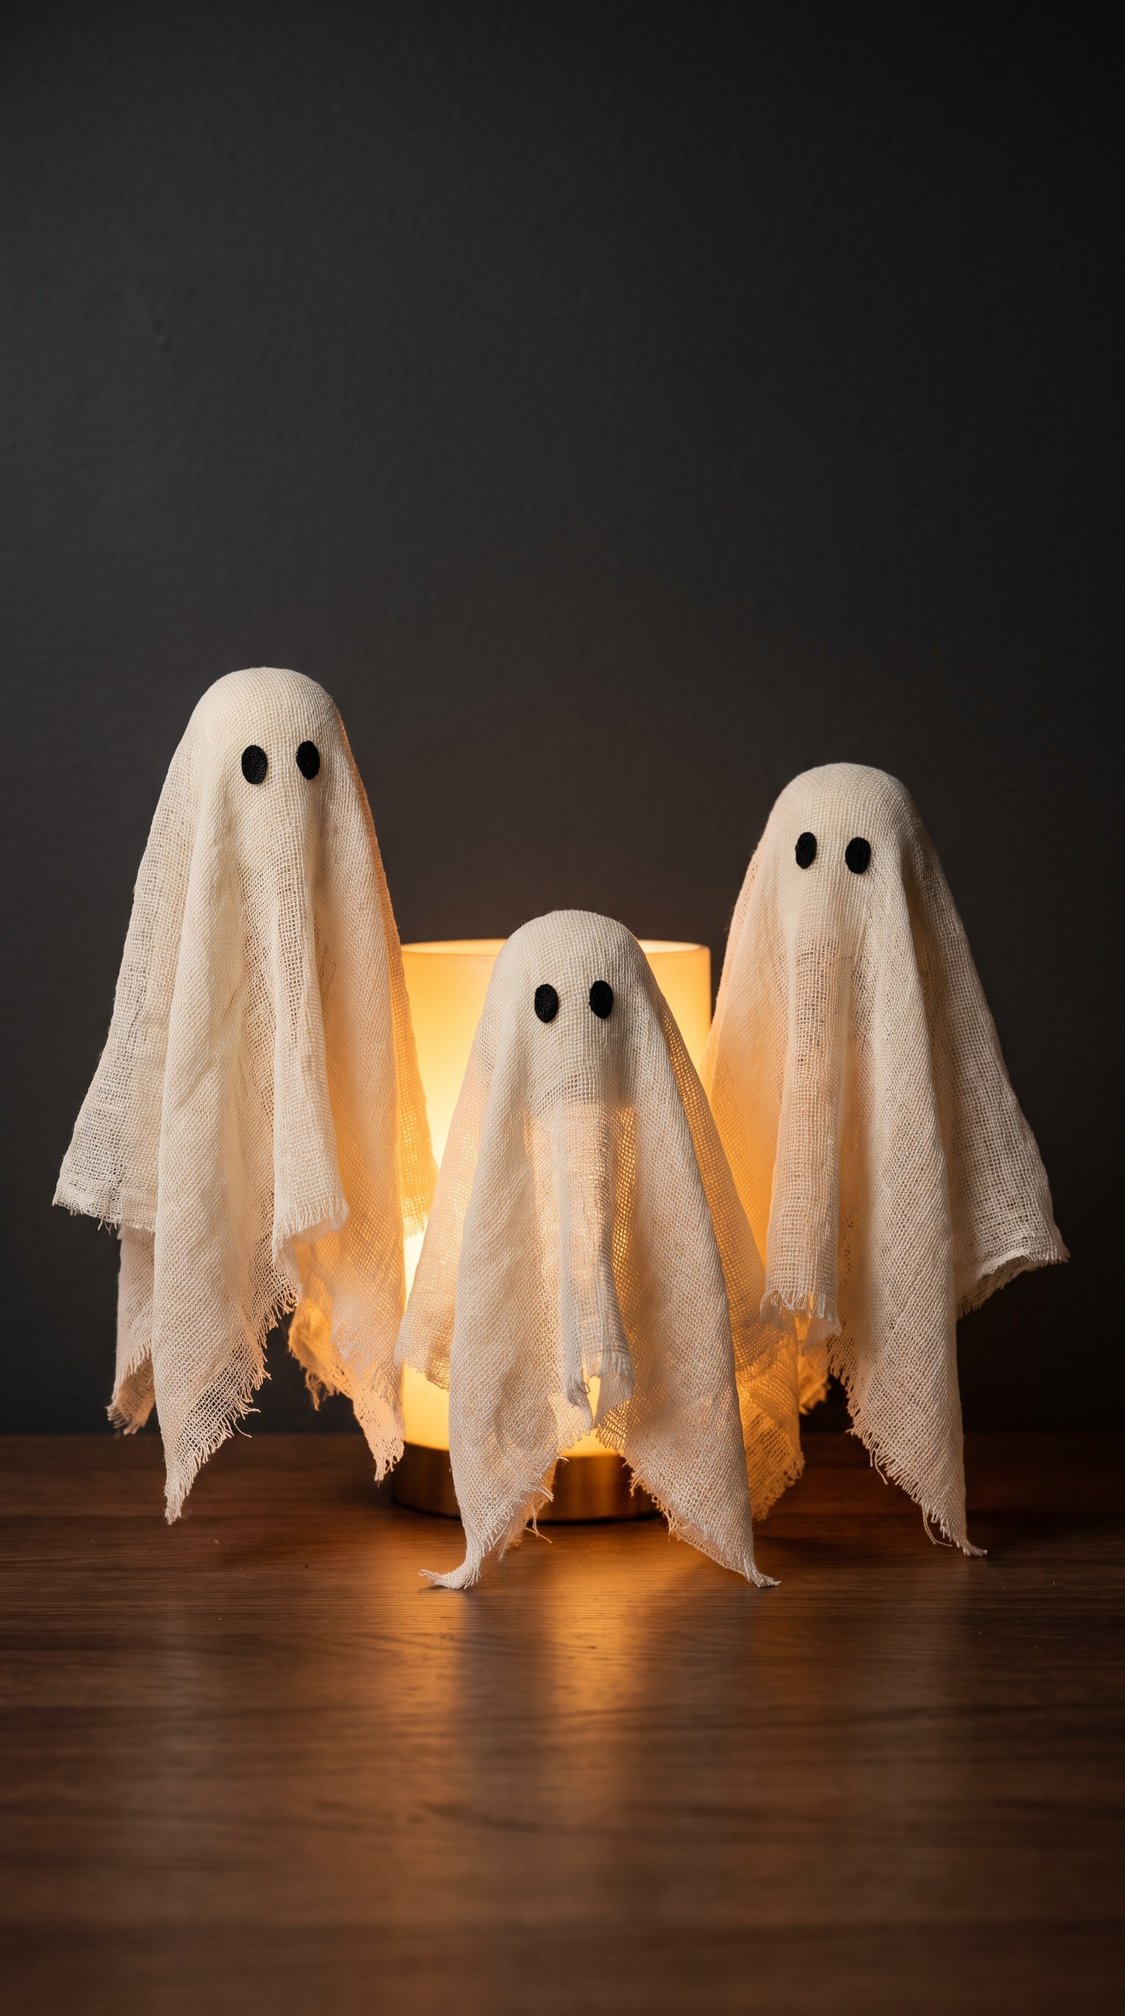
Cute. Active 20 minutes. Overnight if you starch them, none if you drape them.
You need cheesecloth, balloons, fabric stiffener or watered down school glue, and black felt.
Blow up a balloon, sit it on a cup, drape the cheesecloth over it and soak the cloth in stiffener. Leave it overnight, pop the balloon and you have a ghost that stands on its own.
If you do not have overnight, skip the stiffener entirely and drape the cloth over the balloon without soaking it. It will not hold a shape on its own, but sitting on a shelf with a light behind it, nobody can tell.
Light from behind and slightly below is what sells this. Front lighting flattens the folds and the whole thing goes shapeless.
Customization: three heights again, and let the tallest one lean slightly.
7. Toilet roll bats and monsters
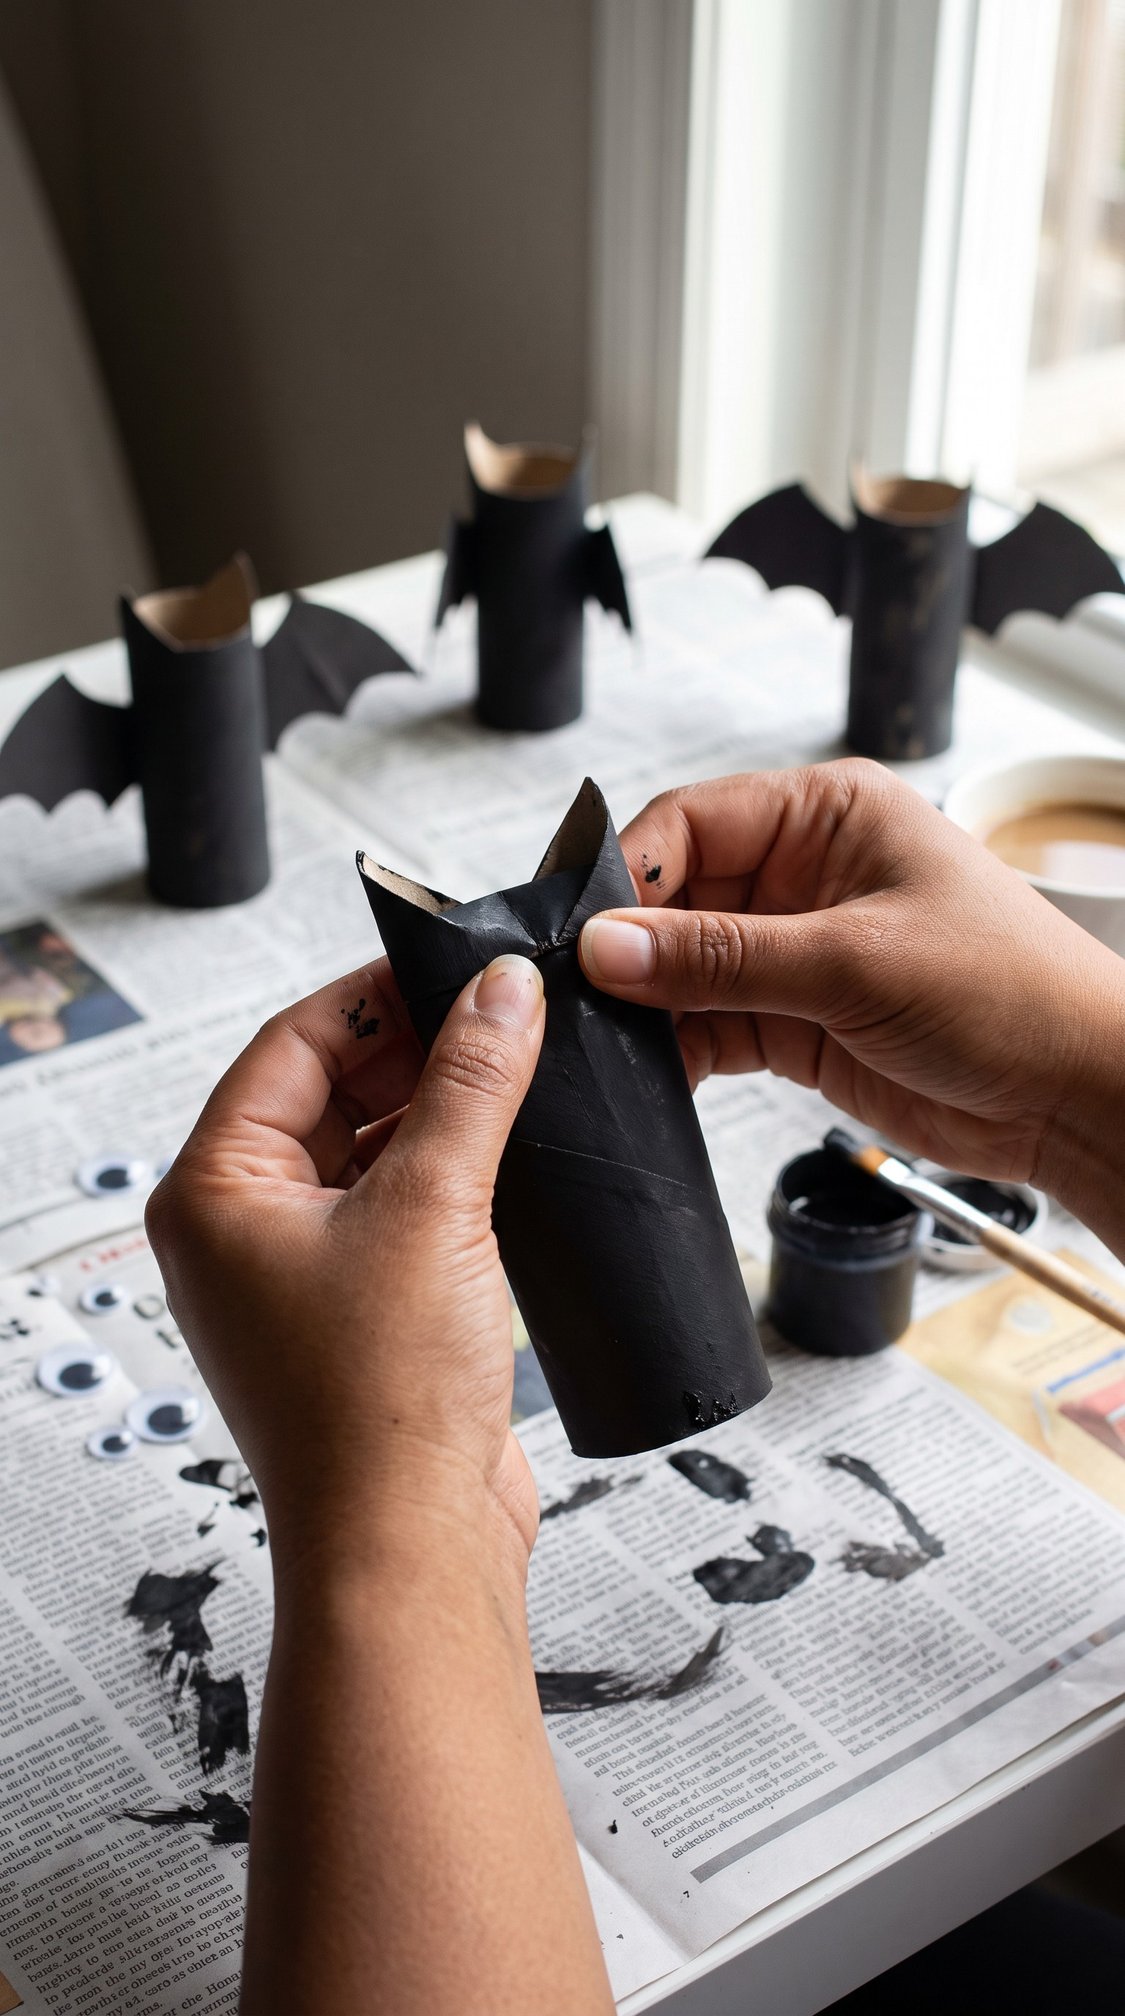
Cute. Active 15 minutes. Dry time none. Free.
You need cardboard tubes, black paint, googly eyes and scrap black cardstock for wings.
Paint the tube, let it dry for twenty minutes, then push the top edge inward from both sides so it folds into two points. Those are ears. Glue wings on the back and stick the eyes low on the body rather than up in the fold.
Eye placement is the entire personality of this project. Eyes high reads as a generic creature, and eyes low, close together and slightly uneven reads as a bat that is up to something.
This is the best project in the post for a kid who wants to help, because there is nothing sharp and nothing that can be ruined.
Customization: cut the wings with a scalloped bottom edge instead of a straight one.
8. Mason jar luminaries
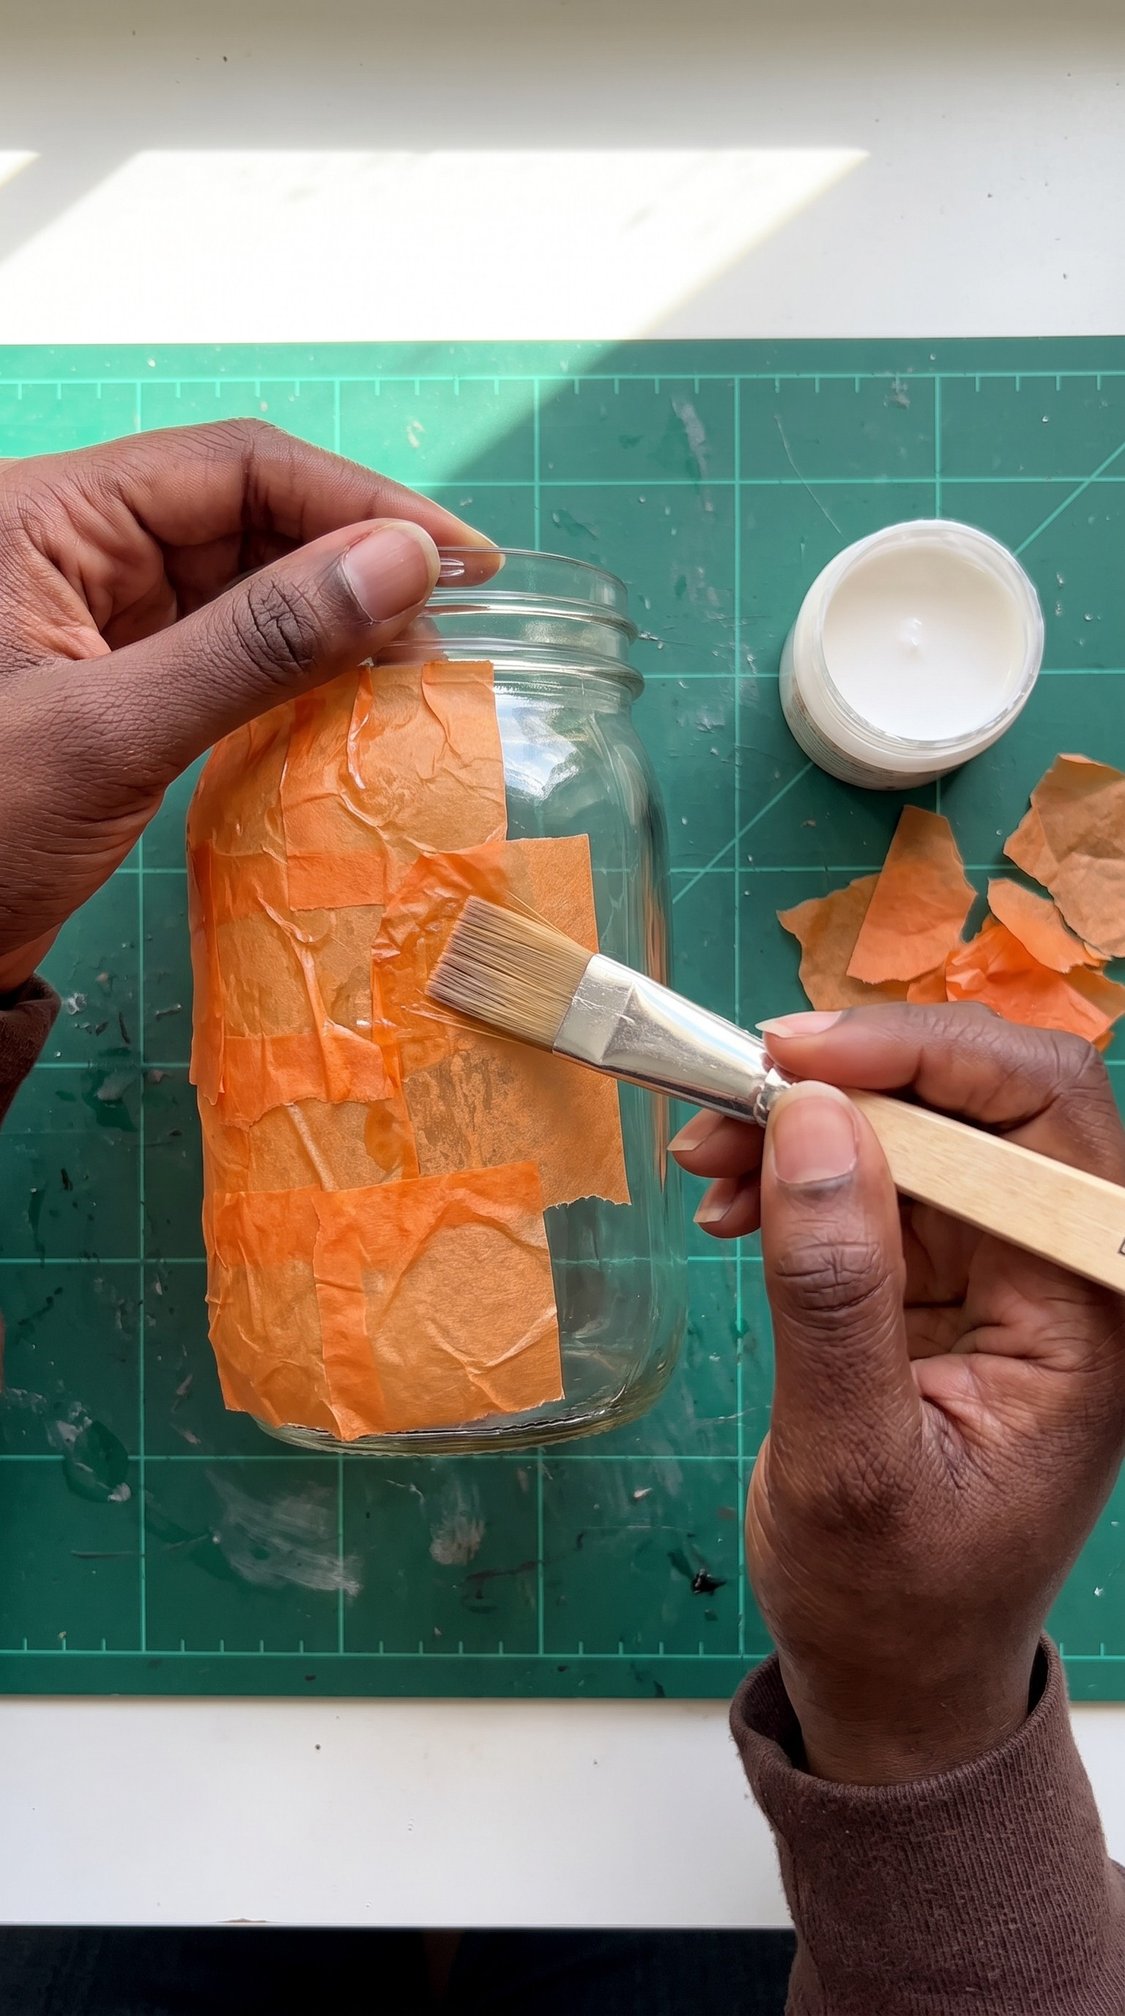
Cute. Active 25 minutes. 30 minutes dry. About $4.
You need a glass jar, orange tissue paper torn into rough squares, decoupage glue and a flat brush.
Brush glue onto the jar, lay a torn square down, then brush more glue over the top. Overlap every piece. Torn edges disappear into each other and cut edges show as hard lines through the light, so tear rather than cut.
Cover the outside, not the inside. Glue on the inside traps moisture and goes cloudy, and it puts paper next to your light source.
Drop an LED tealight in once it is dry. The uneven paper thickness is what makes the light look like it is flickering through something.
Customization: a black cardstock face glued over the front turns the luminary into a jack o lantern without any carving.
9. Witch hat door hanger
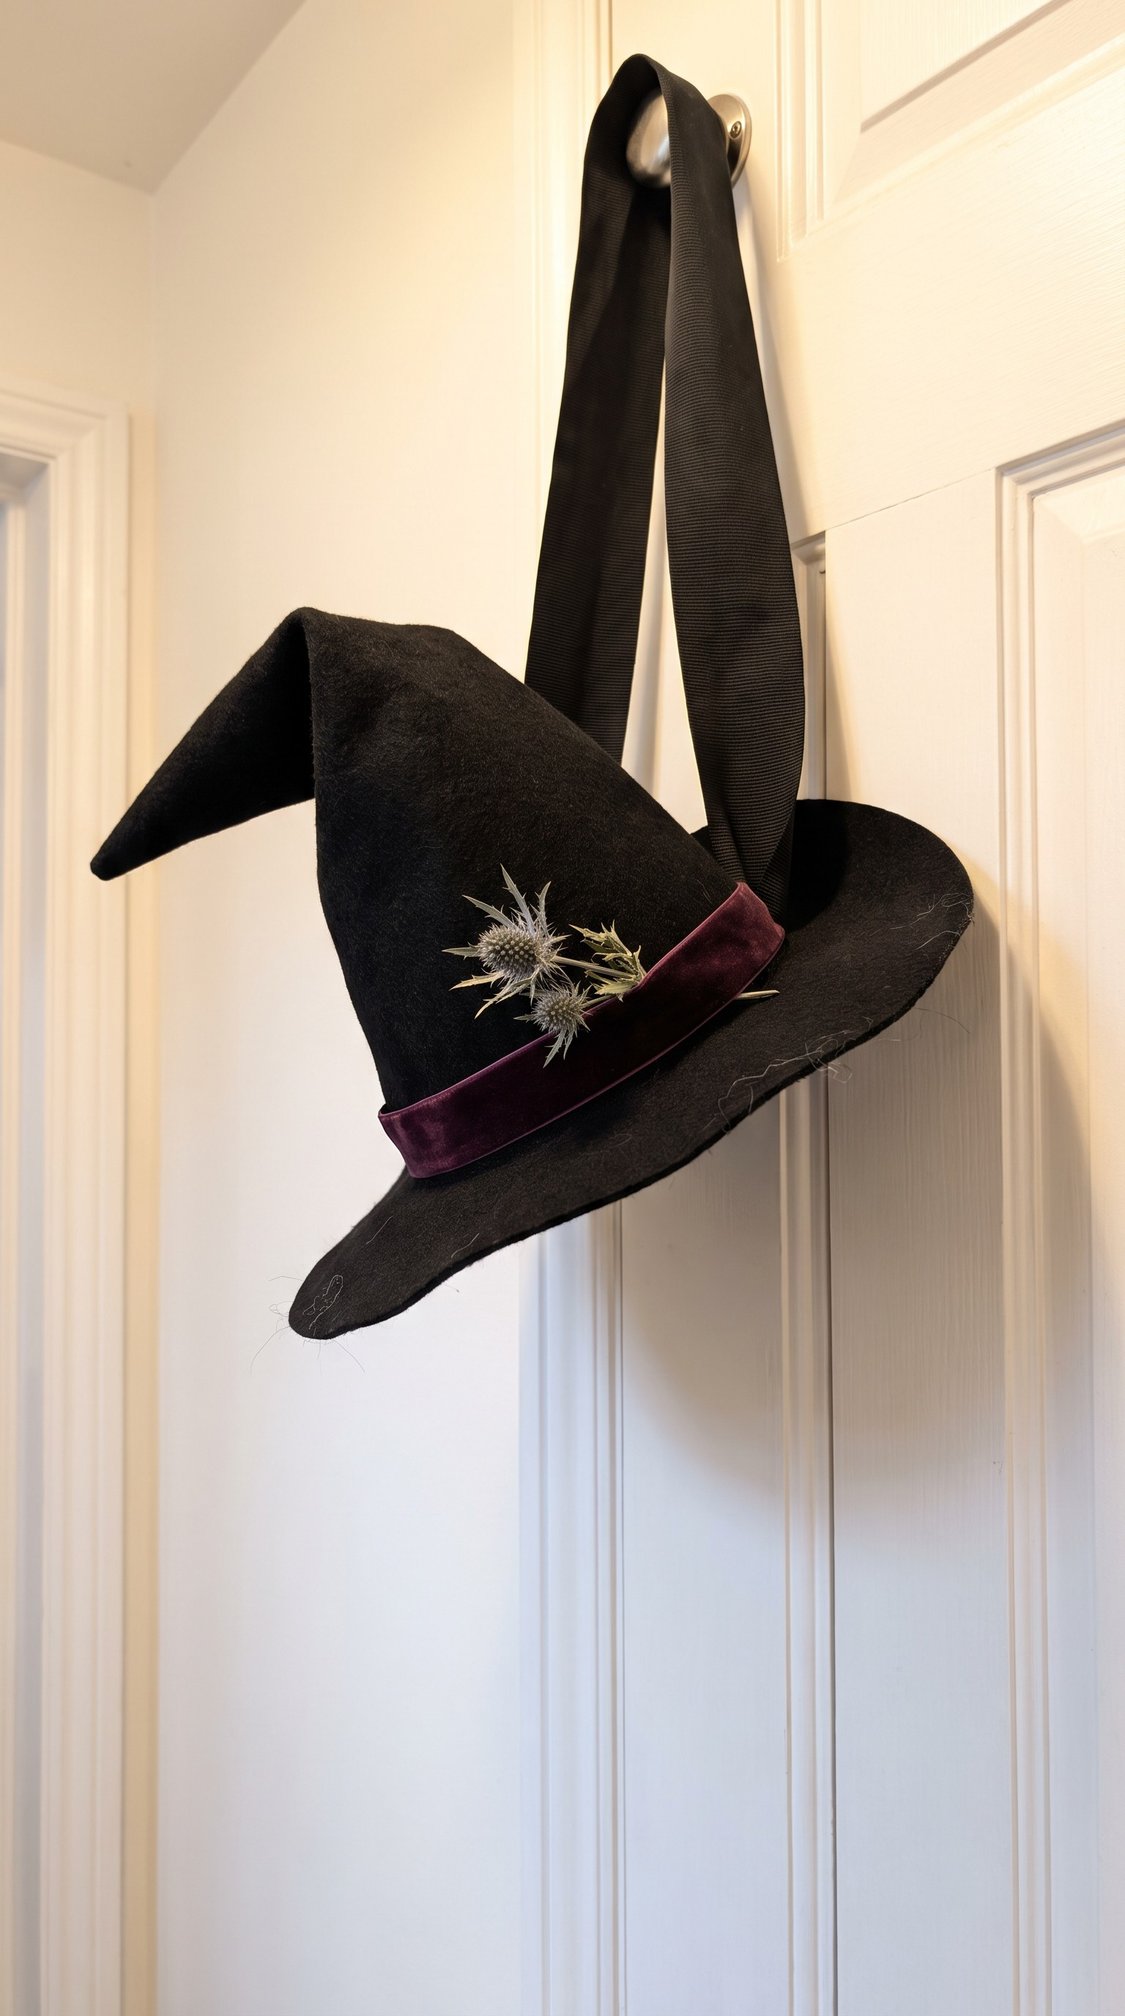
Scary. Active 20 minutes. Dry time none. About $7.
You need a black felt or fabric witch hat, wide black ribbon, and something for the band, dried thistle and a strip of velvet both work.
Loop the ribbon through the inside of the crown and over the door hook. Wrap the velvet around the base of the crown and tuck the dried stems in at one side rather than centering them.
The hat has to keep its point. A crown that collapses into the brim stops reading as a witch hat from more than a few feet away, and that is the whole job of a door decoration. Stuff the point with a wad of tissue if it will not hold.
IMO this is the highest impact per minute in the entire post.
Customization: a deep plum band instead of black reads vintage rather than costume.
10. Candy corn painted vases
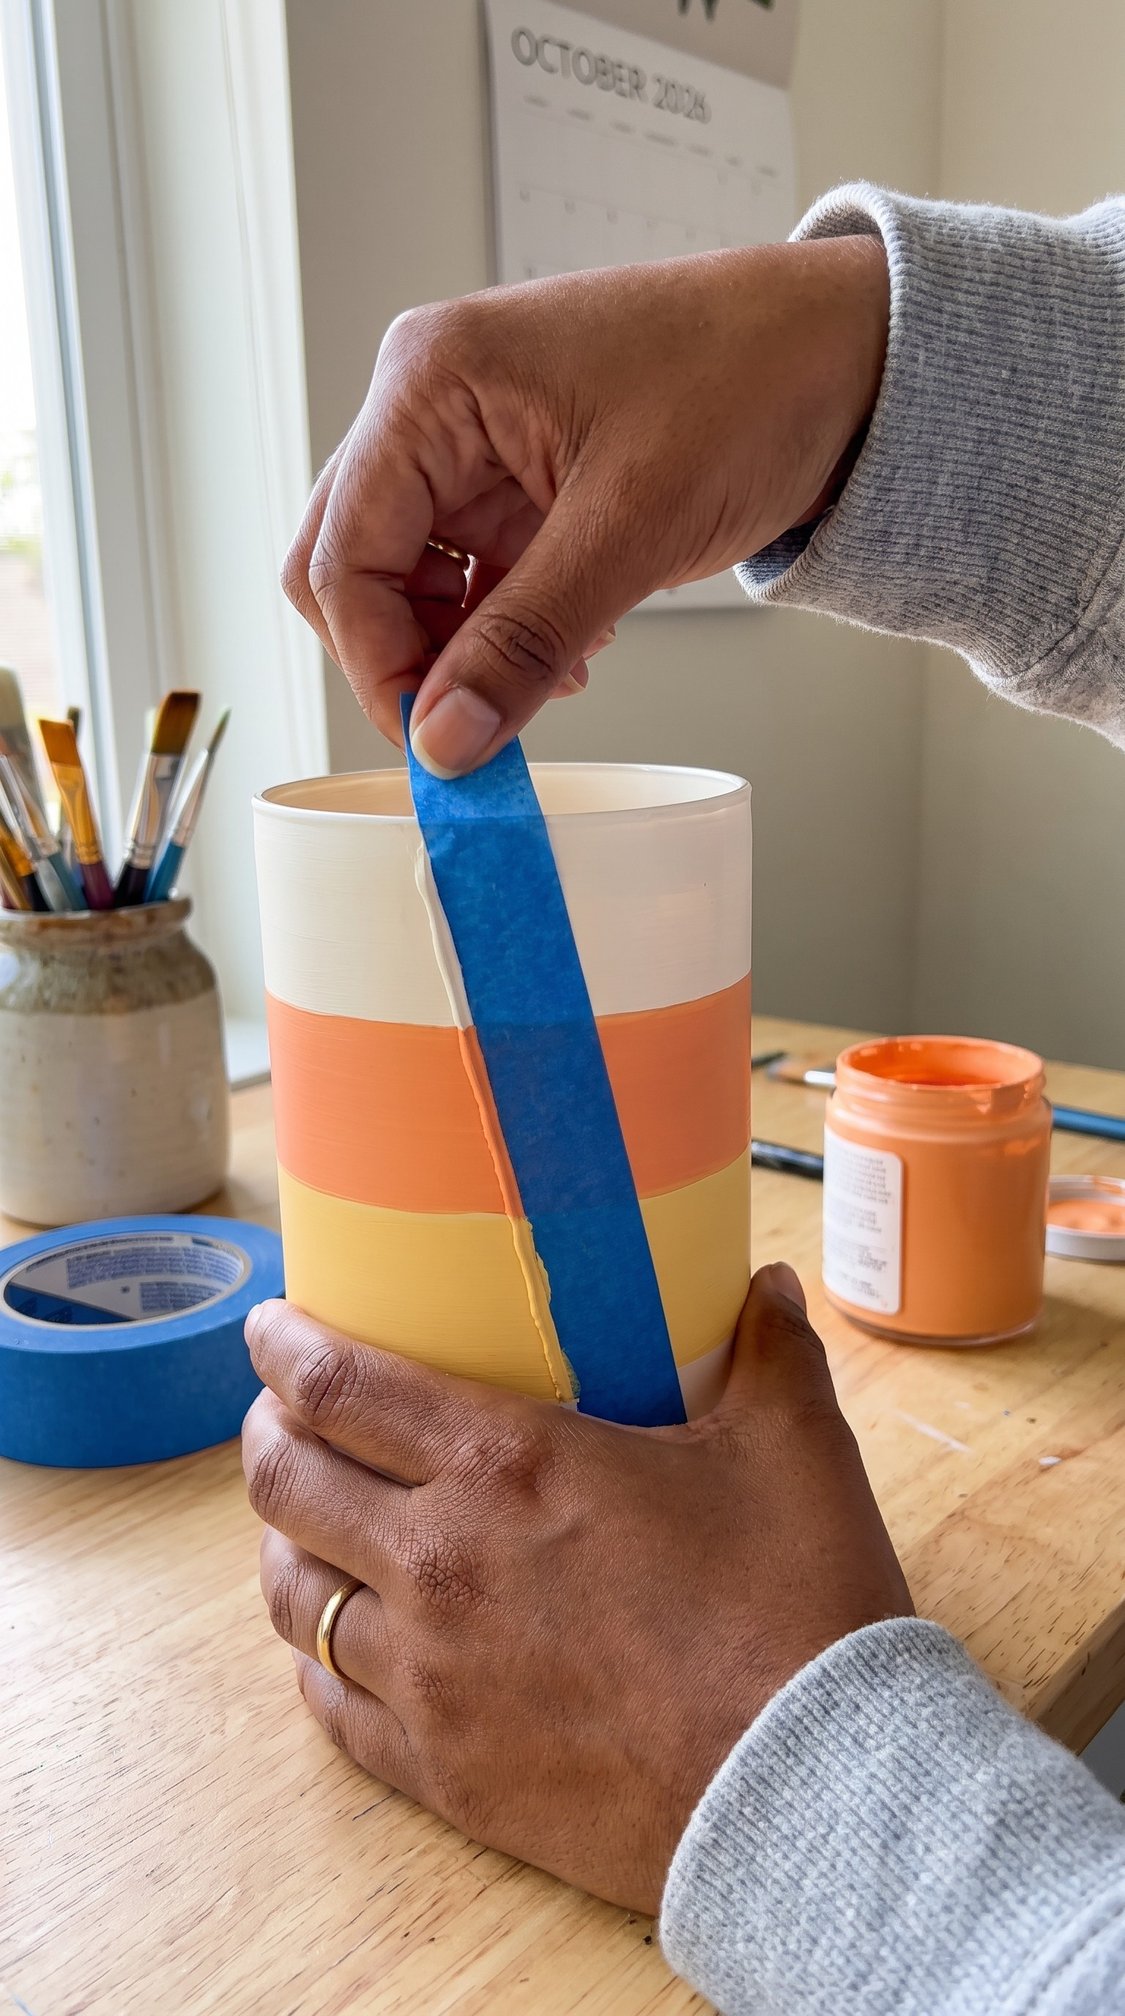
Vintage. Active 30 minutes. 2 hours between colors. About $6.
You need a glass vase or jar, white, orange and yellow acrylic paint, and painter’s tape.
Paint the whole vase white first and let it dry. Tape a band, paint orange below it, wait, then tape and paint yellow at the base. Three bands, widest at the bottom.
Press the tape edge down hard with a fingernail before you paint. Every bleed under a tape line happens because the edge was not burnished, and no amount of careful painting fixes it afterward.
The one step people get wrong in this section: peeling the tape after the paint has fully dried, which tears the line off with it. Peel at the tacky stage, roughly twenty minutes in, pulling the tape back on itself at a shallow angle.
Customization: matte sealer over the whole thing once it cures. Gloss on a dollar store vase looks like a dollar store vase.
Section 3: Paper and cardboard
Five projects where the material is nearly free, which means the only thing you are spending is an evening.
11. Paper bat wall cluster
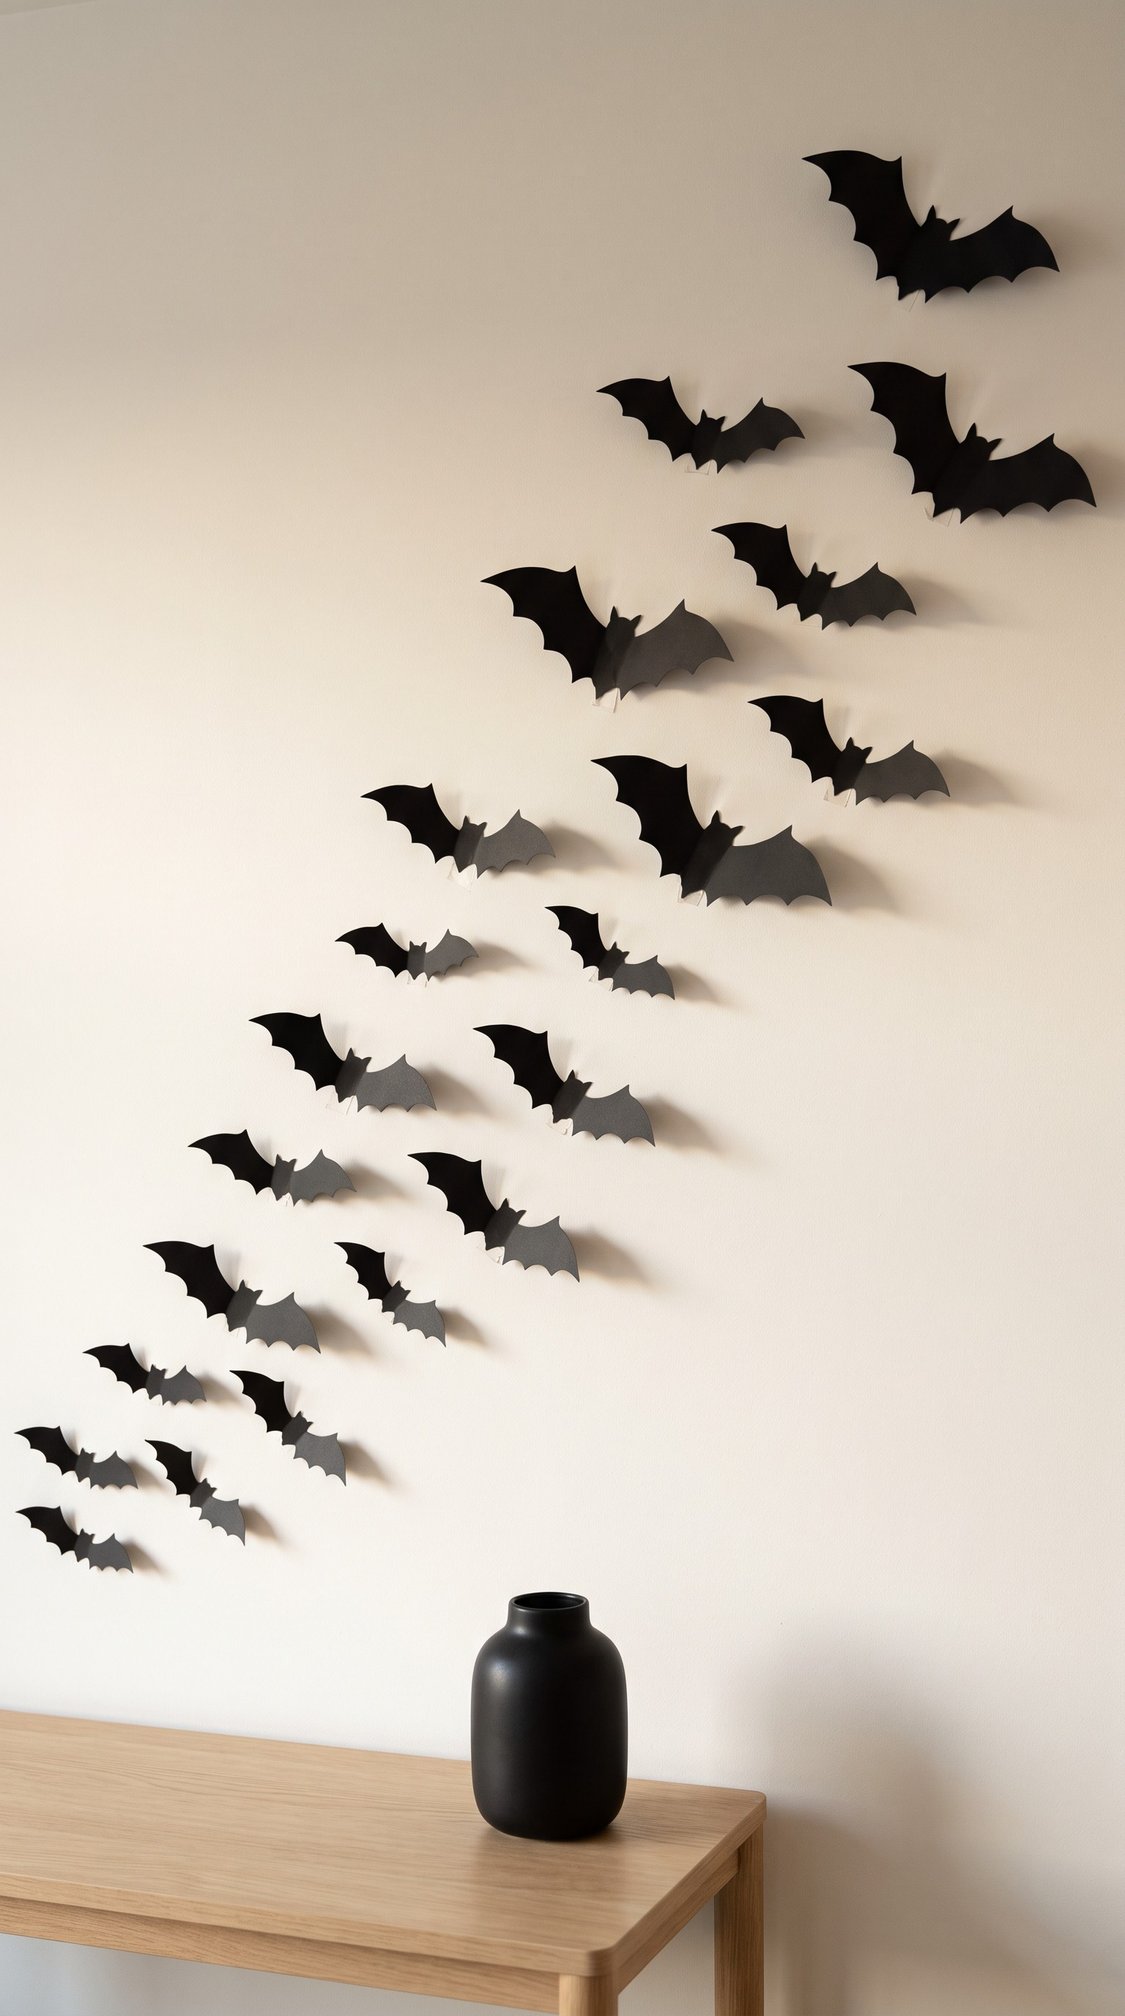
Cute. Active 45 minutes. Dry time none. About $3.
You need black cardstock, a craft knife, a cutting mat and removable adhesive strips or poster putty.
Cut three sizes, roughly six inches, four inches and two inches across the wingspan. Fold each one down the center line and bend the wings up. Run the cluster diagonally across the wall with the big ones leading.
Cut these with a craft knife, not scissors. Scissors leave a slightly wavy edge on cardstock and the wave is visible from across a room. A two dollar knife and a fresh blade is the entire difference between homemade and made.
Customization: a few bats on the ceiling just above the wall line makes the swarm look like it is coming over the top.
12. Cardboard tombstone
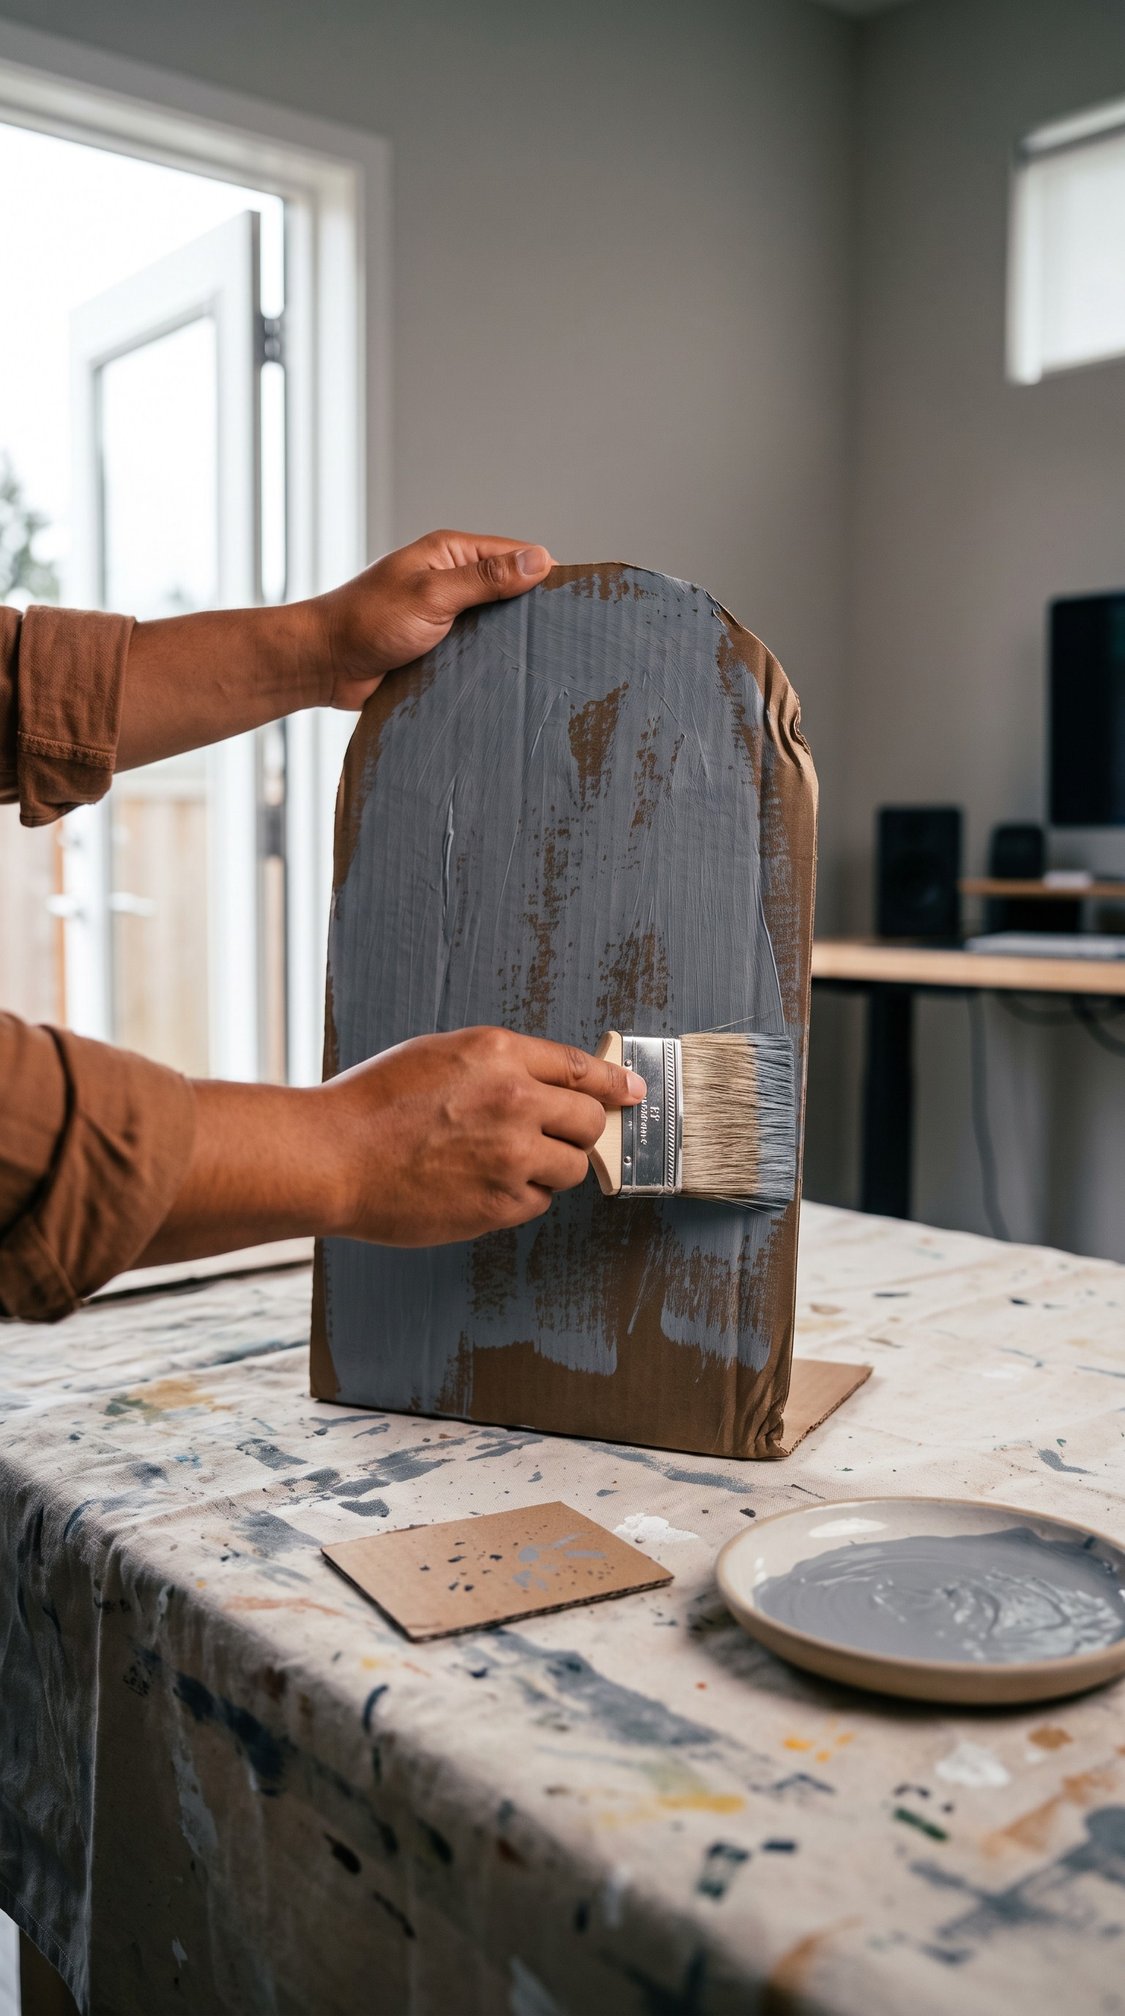
Scary. Active 1 hour. 4 hours dry. Free if you have a box.
You need a large cardboard box, a craft knife, gray and white acrylic paint and a dry brush.
Cut an arched top rather than a straight one. Paint the whole thing mid gray, then dry brush white unevenly over it once dry, concentrating on the edges. Almost no paint on the brush is the technique, and the corrugation showing through in places is what sells it as stone.
Leave it blank rather than lettering it. Hand lettering on a homemade tombstone is where this project usually goes wrong, and a blank weathered stone reads older and more unsettling anyway.
Customization: rub a little brown into the base so it looks like it has been standing in dirt.
13. Paper chain garland
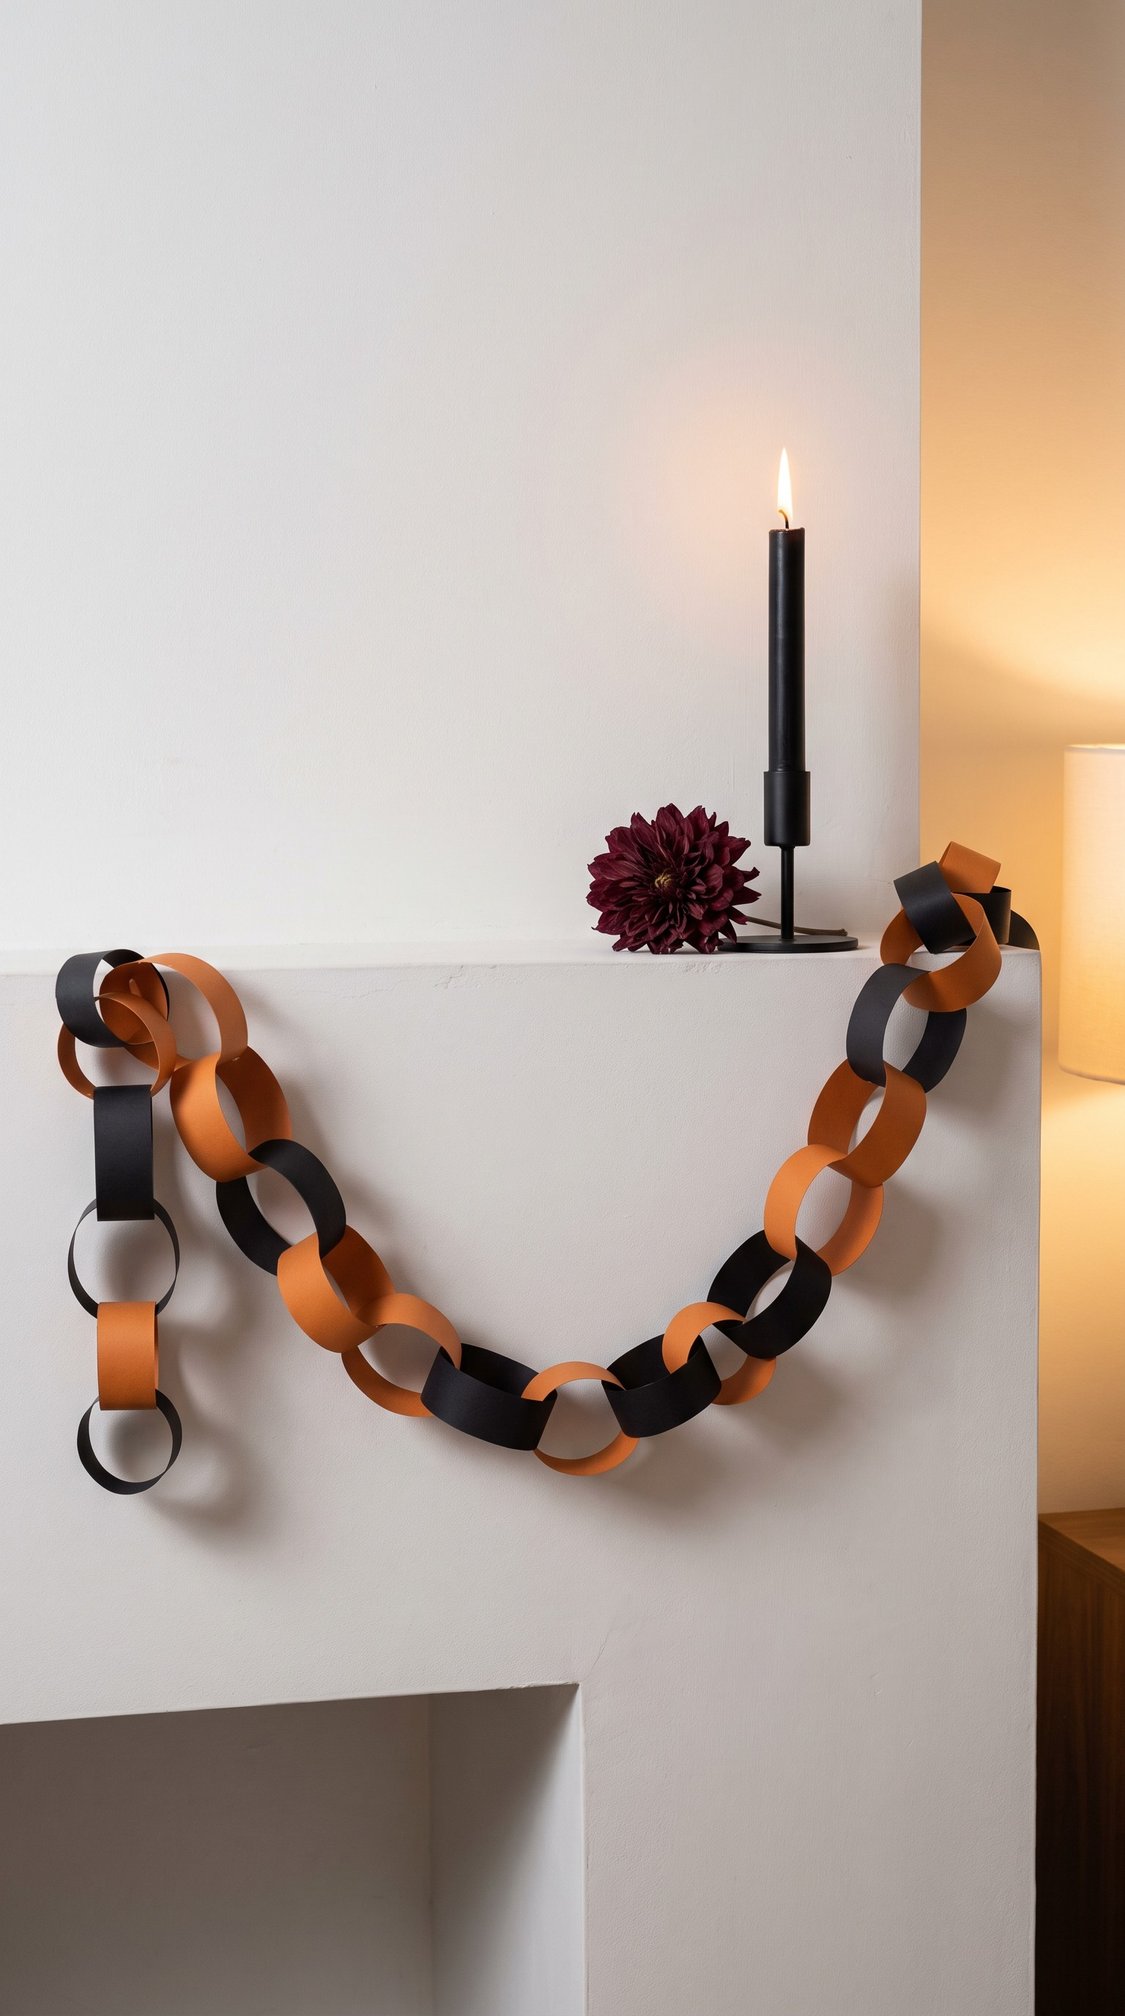
Cute. Active 30 minutes. Dry time none. About $3.
You need black and orange cardstock cut into strips about one inch by six, and a glue stick.
Alternate the colors and keep the loops loose rather than tight. A chain made from thin flimsy paper sags into a straight line, and cardstock holds an actual curve, which is the only reason this looks intentional instead of like a classroom project.
Drape it with a real dip in the middle and let one end hang longer than the other. Symmetry is what makes a paper chain look childish.
The one step people get wrong in this section: cutting cardstock with scissors instead of a craft knife.
Customization: black and cream instead of black and orange, which reads modern and photographs beautifully in a small room.
14. Window silhouette art
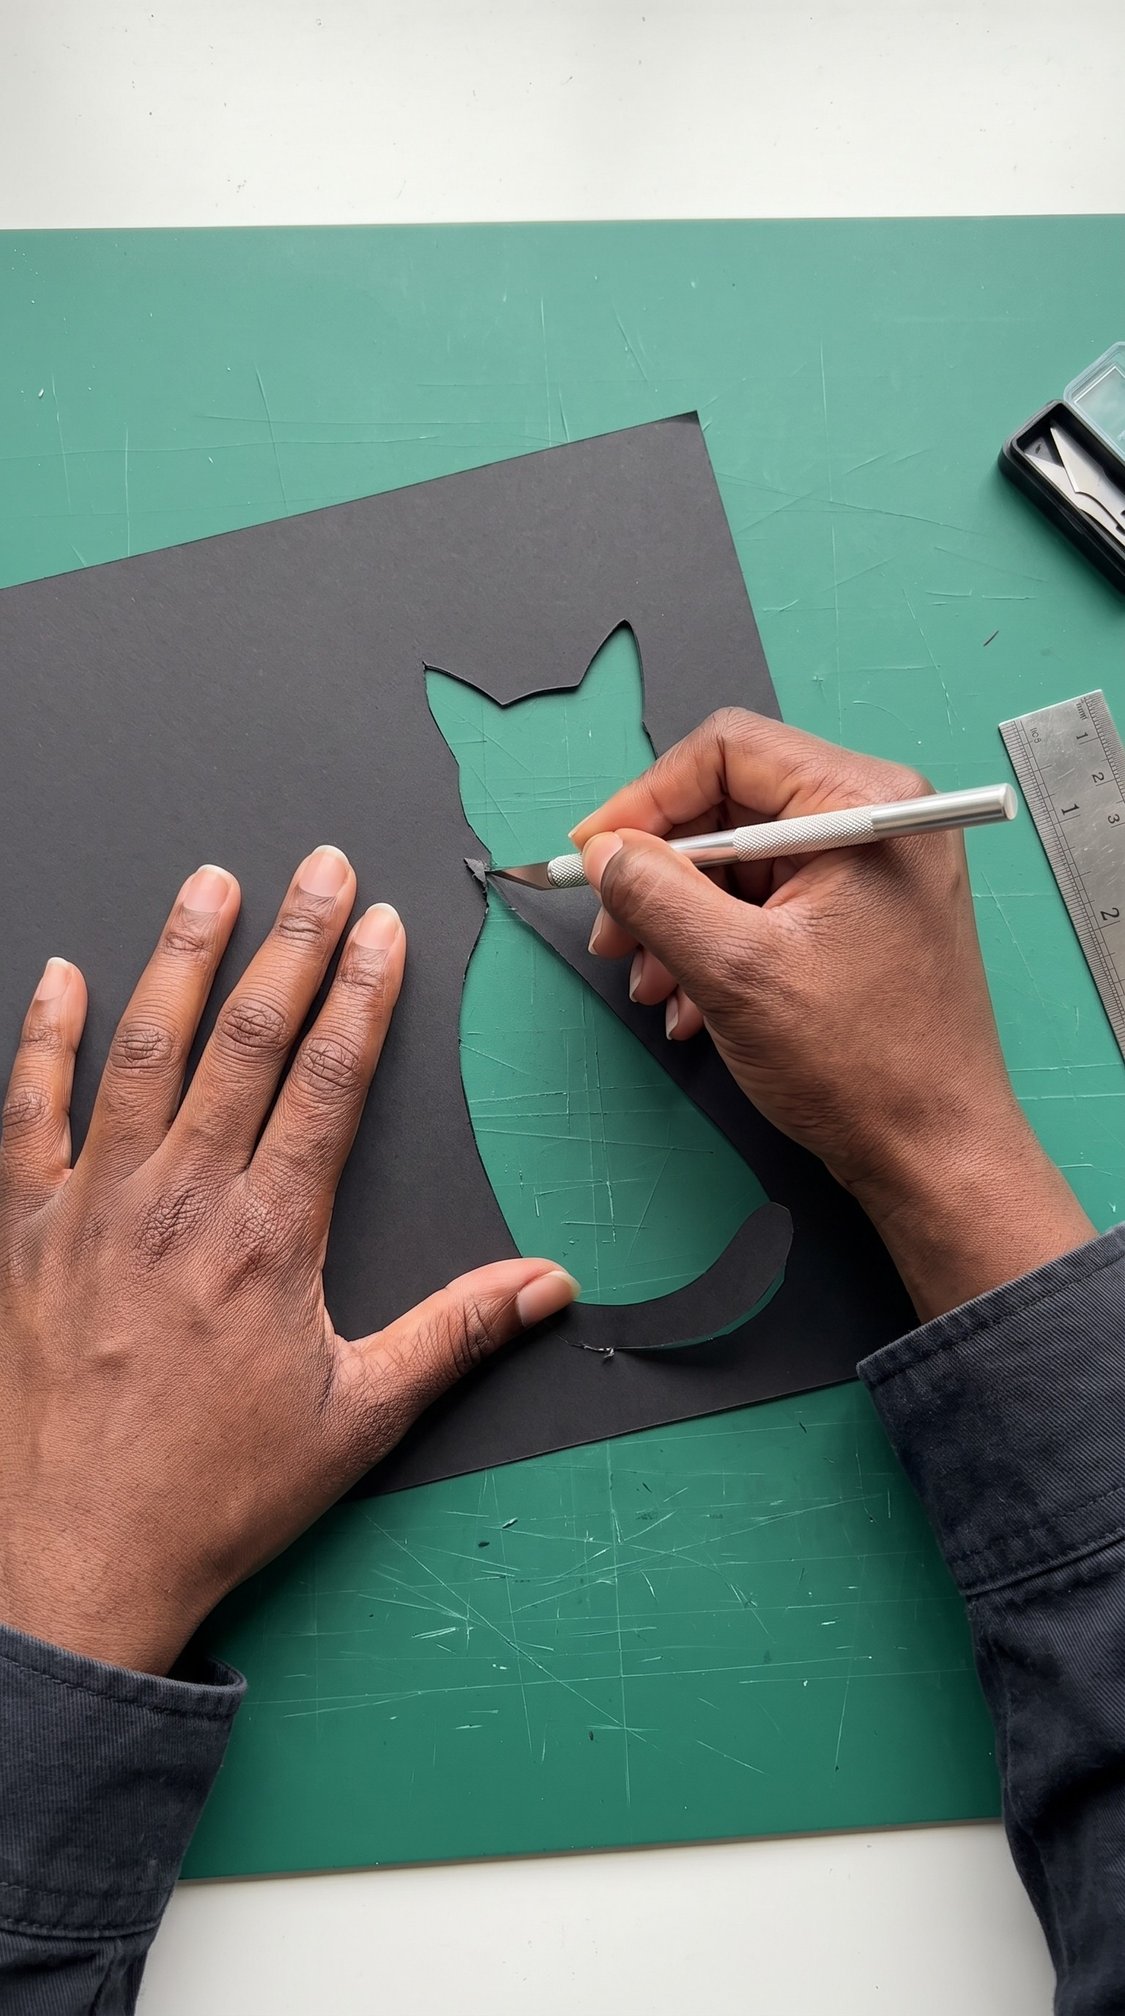
Scary. Active 40 minutes. Dry time none. About $3.
You need black cardstock, a craft knife, a cutting mat and low tack tape.
Draw the shape on the back of the cardstock so any pencil line ends up on the side nobody sees. A sitting cat, a few bats and a witch profile are the three that read instantly at silhouette scale. Trace around a printed image on your screen if drawing freehand is not your thing.
Cut on the mat, moving the paper rather than the knife on the curves. Tape it inside the glass, not outside, where weather cannot get at it.
Customization: the same cut file works for the lit window project in section five, so cut two while the mat is out.
15. Paper spider web
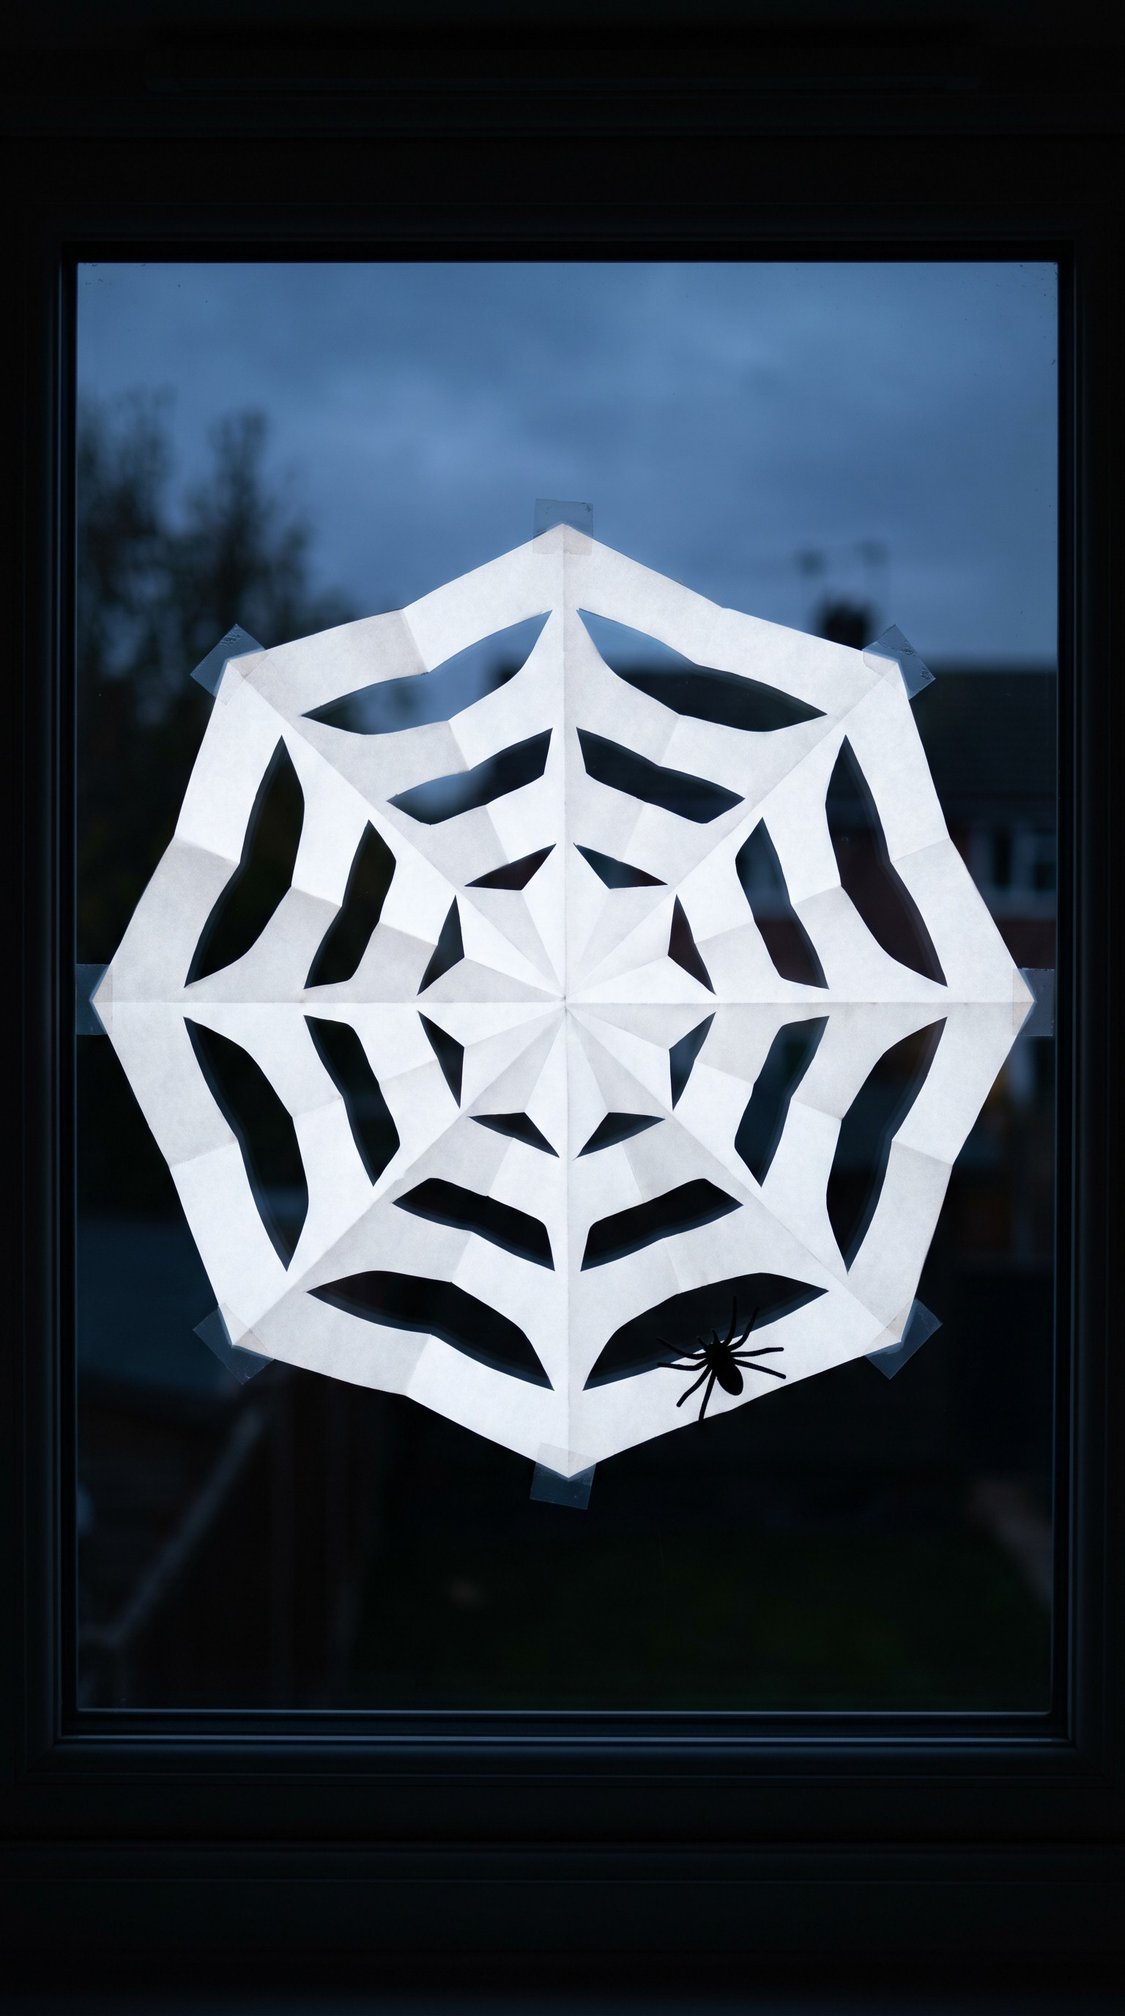
Scary. Active 20 minutes. Dry time none. Free.
You need a square of white paper and sharp scissors, and this is the one paper project where scissors are correct.
Fold it the way you would fold a paper snowflake, into eighths, then cut long curved slots parallel to the folded edge, leaving a spine of uncut paper between each one. Unfold slowly.
The slots have to be long and thin. Short fat cuts open into a doily, and long narrow cuts open into a web. If your first one looks like a snowflake, cut deeper and closer together on the next.
Tape it to a window and add one small plastic spider off center.
Customization: black paper on a white wall works exactly as well as white paper on glass.
Section 4: Small space and renter friendly
Five projects that mount with nothing permanent, and every one of them flattens or nests when the season ends. Storage is the real reason people stop making seasonal decor, so each entry says where it goes for the other eleven months.
16. Command hook bat swarm
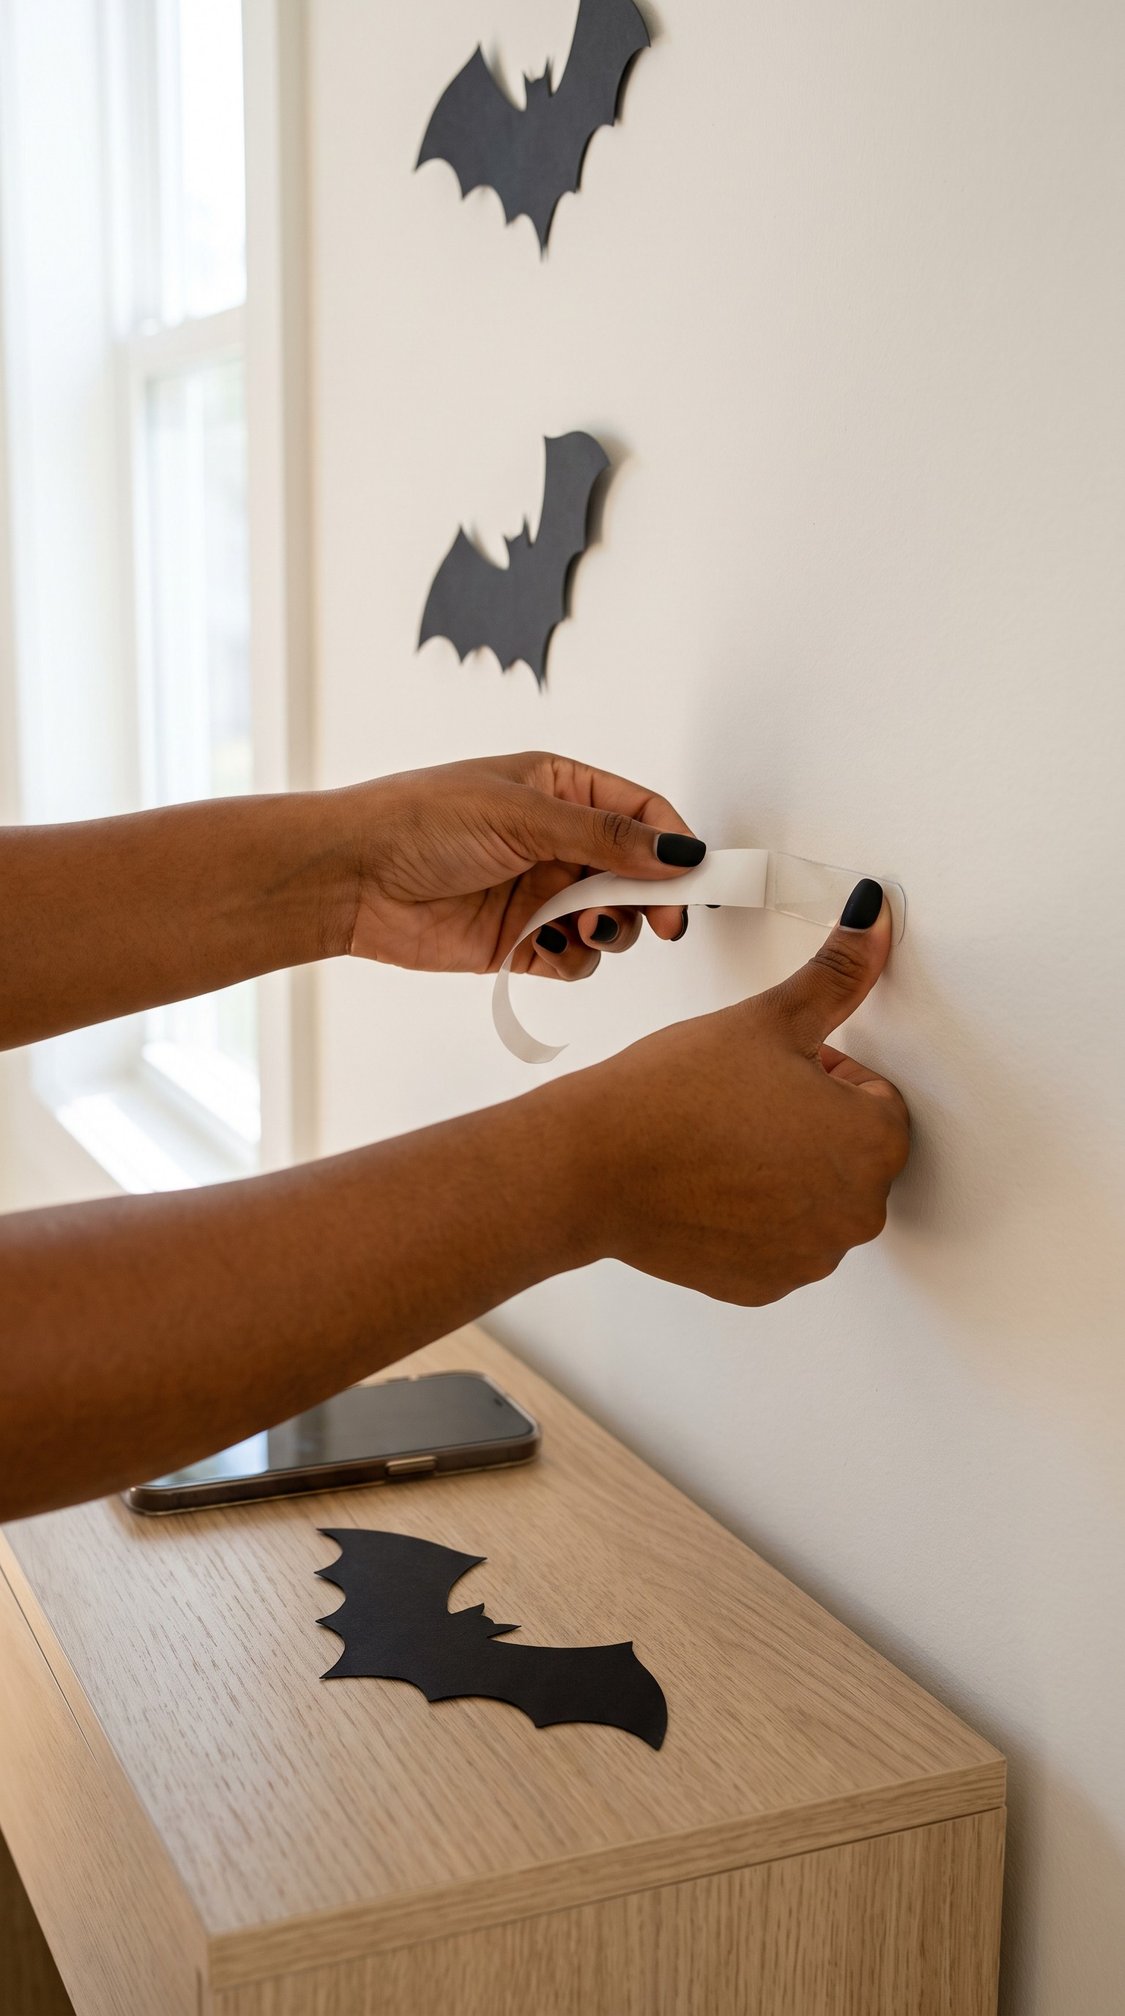
Cute. Active 30 minutes. Dry time none. About $8.
How it attaches: removable adhesive strips, nothing else.
Wipe the wall with rubbing alcohol and let it dry before anything goes on it. Skip that and you are sticking to dust.
Press each strip on and then leave it alone for a full hour before you hang anything from it. Every strip that lets go in November was hung at minute one in October.
Use the smallest strip that will hold the piece. Oversized strips on a rental wall are how paint comes off in April.
Storage: the bats go flat in a large envelope taped inside a closet door. The strips are single use.
Customization: the same strips hold the paper chain garland along a picture rail.
17. Removable window cling silhouettes
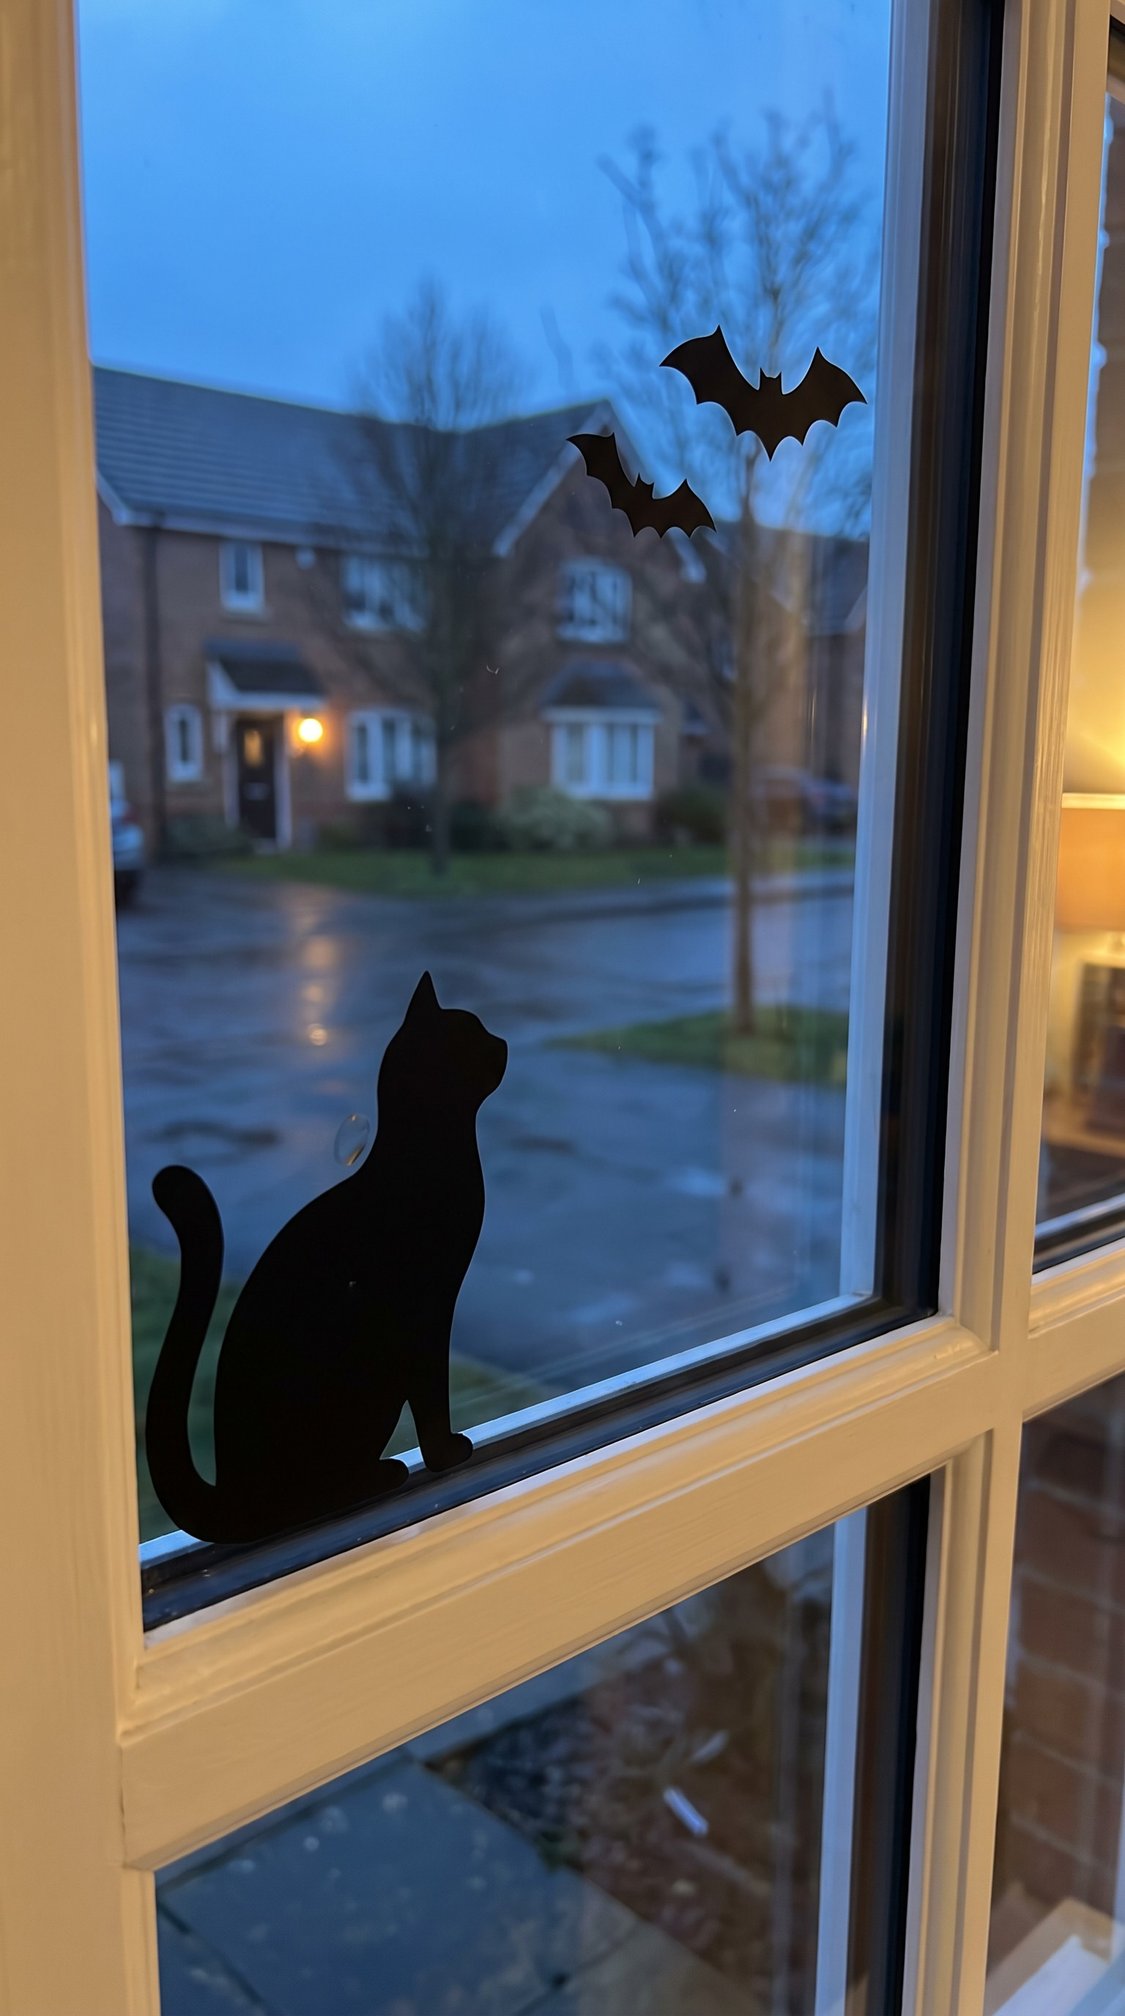
Scary. Active 25 minutes. 2 hours to set. About $6.
How it attaches: static cling, or a few dots of low tack tape behind cardstock cutouts.
Wash the glass and dry it completely first. Cold or dusty glass is why clings slide down the pane overnight.
Apply from the inside. It keeps the piece dry, it stops the wind taking it, and it means the silhouette reads against the lit room at night, which is when anyone is actually looking.
Work above sixty degrees. Vinyl will not tack properly to cold glass and you will blame the product.
Storage: clings go back on their backing sheet, cardstock cutouts go flat in the same envelope as the bats.
Customization: one cat at sill height and two bats up high tells a small story across the pane.
18. Tension rod doorway curtain
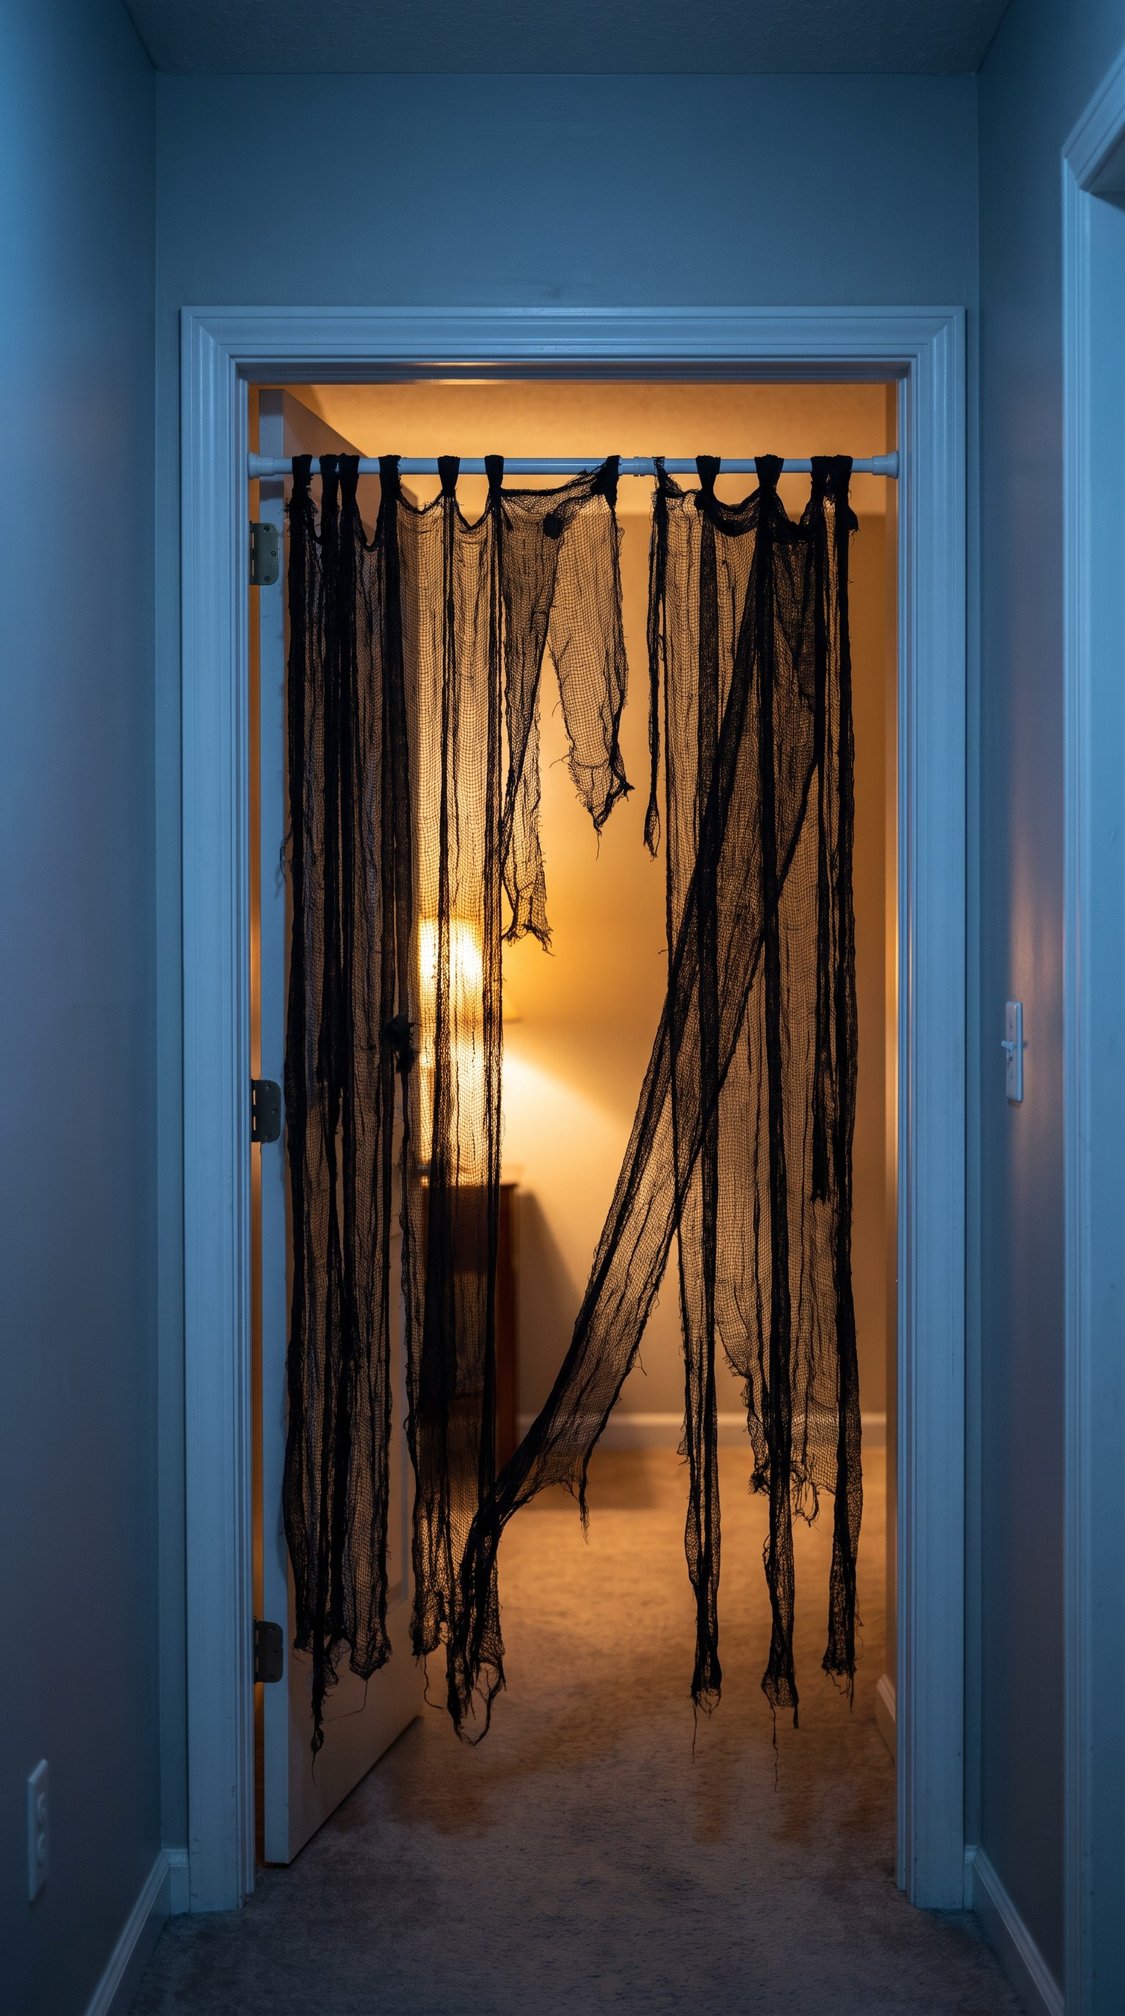
Scary. Active 15 minutes. Dry time none. About $10.
How it attaches: a tension rod inside the door frame. Nothing touches the walls.
Cut black gauze or cheesecloth into strips of deliberately uneven length and tie them along the rod. Uneven is the point. A curtain cut to one length reads as fabric, and ragged lengths read as something abandoned.
Tear the fabric rather than cutting it where you can. Torn gauze frays on its own and fraying is most of the effect.
Hang it where there is light behind it. In a dark doorway it is a black rectangle, and with a lit room behind it, it is a silhouette.
Storage: untie, roll around the rod, done. TBH this is the most compact project in the post and the one most likely to come back out next year.
Customization: a few strips in deep plum among the black stops it reading as a hardware store prop.
19. Tabletop haunted village
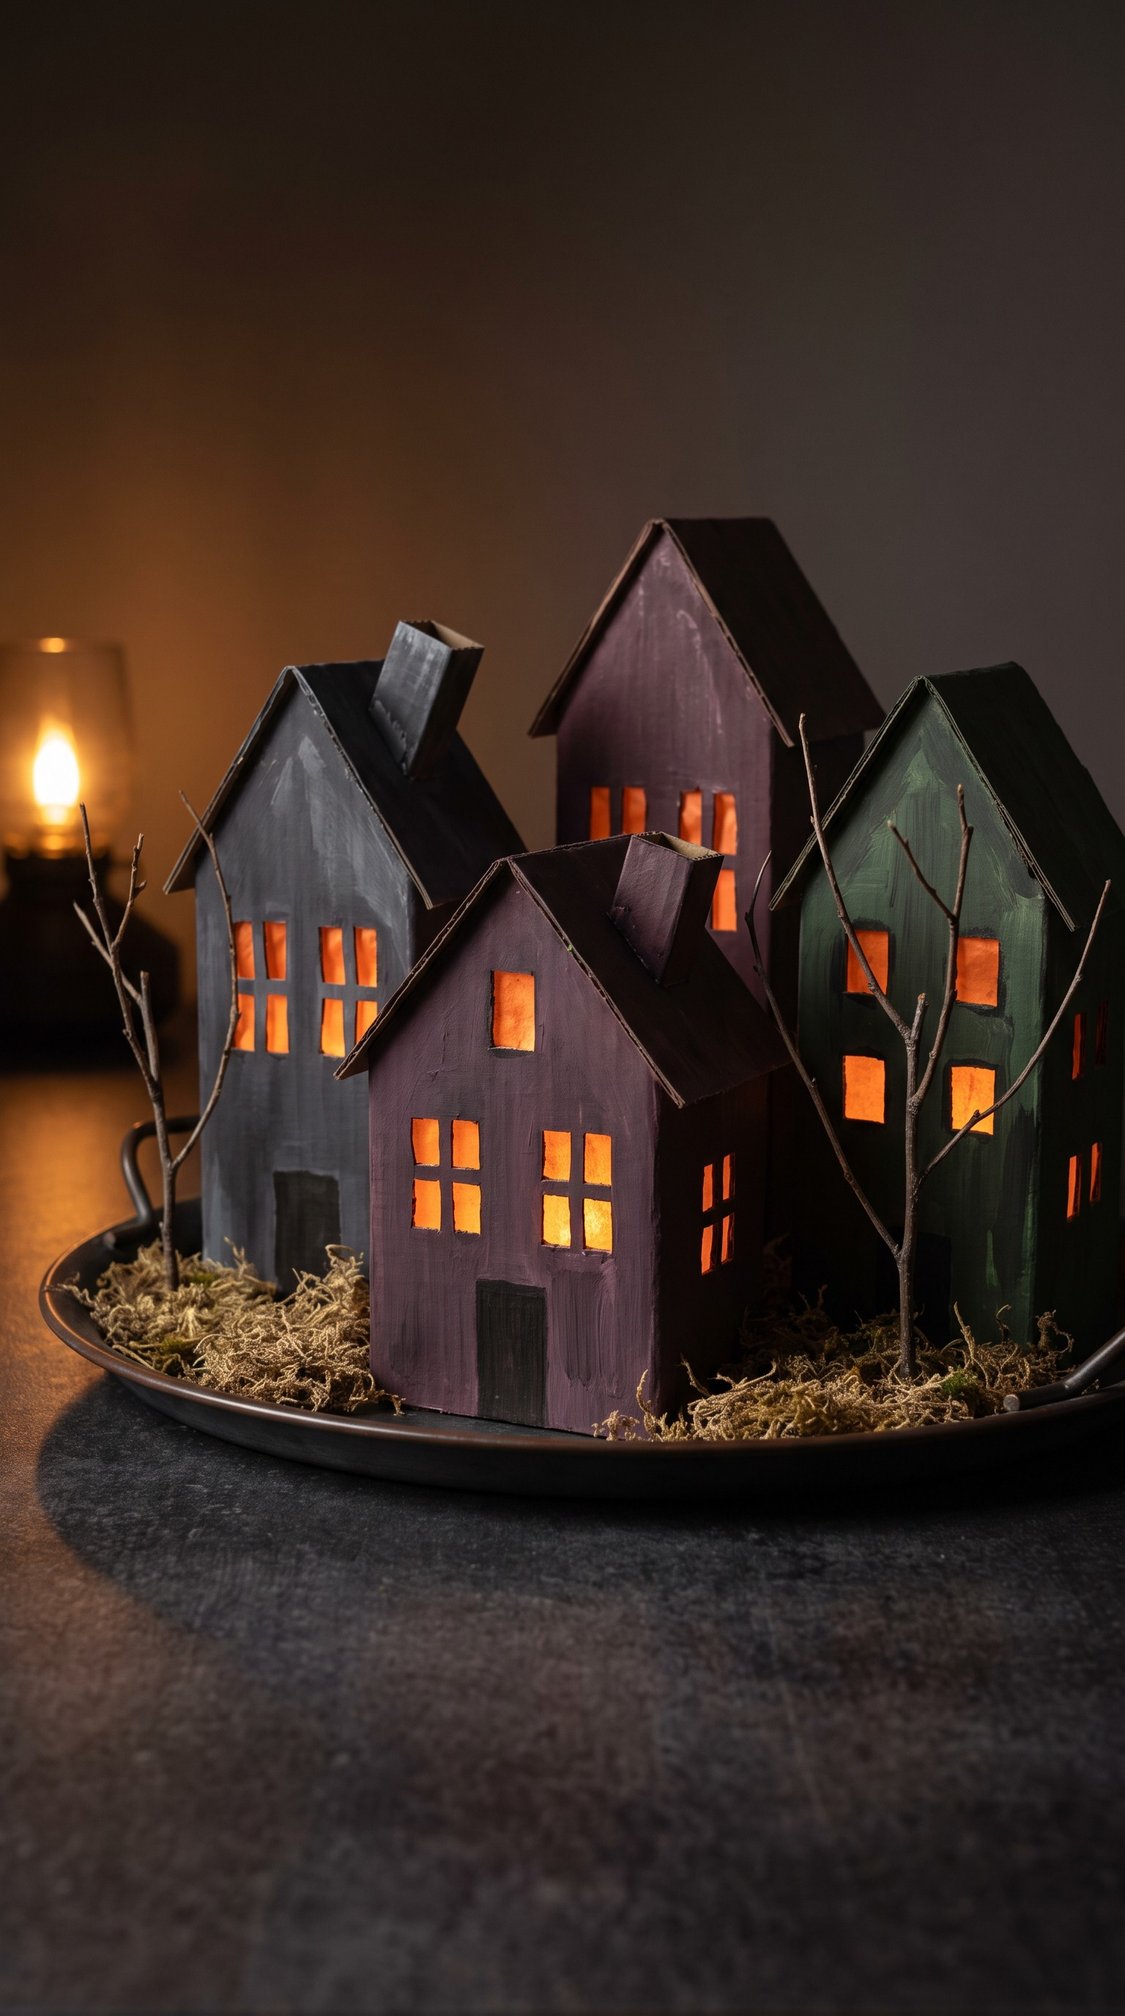
Vintage. Active 1.5 hours. 2 hours dry. About $5.
How it attaches: it does not. It sits on a tray, which is what makes it renter proof.
Cut four or five simple house shapes from cereal box card, score and fold them into boxes, and cut small windows out. Paint them in muted plum, slate and deep green rather than black. Glue orange tissue behind the windows and put a tealight inside each one.
Different heights and different roof angles matter more than neat cutting. Five identical houses is a craft kit, and five that clearly were not made from a template is a village.
Storage: the whole village nests inside the largest house.
Customization: a handful of moss and a few bare twigs on the tray turns it into a scene rather than a group of objects.
20. Over-the-door wreath
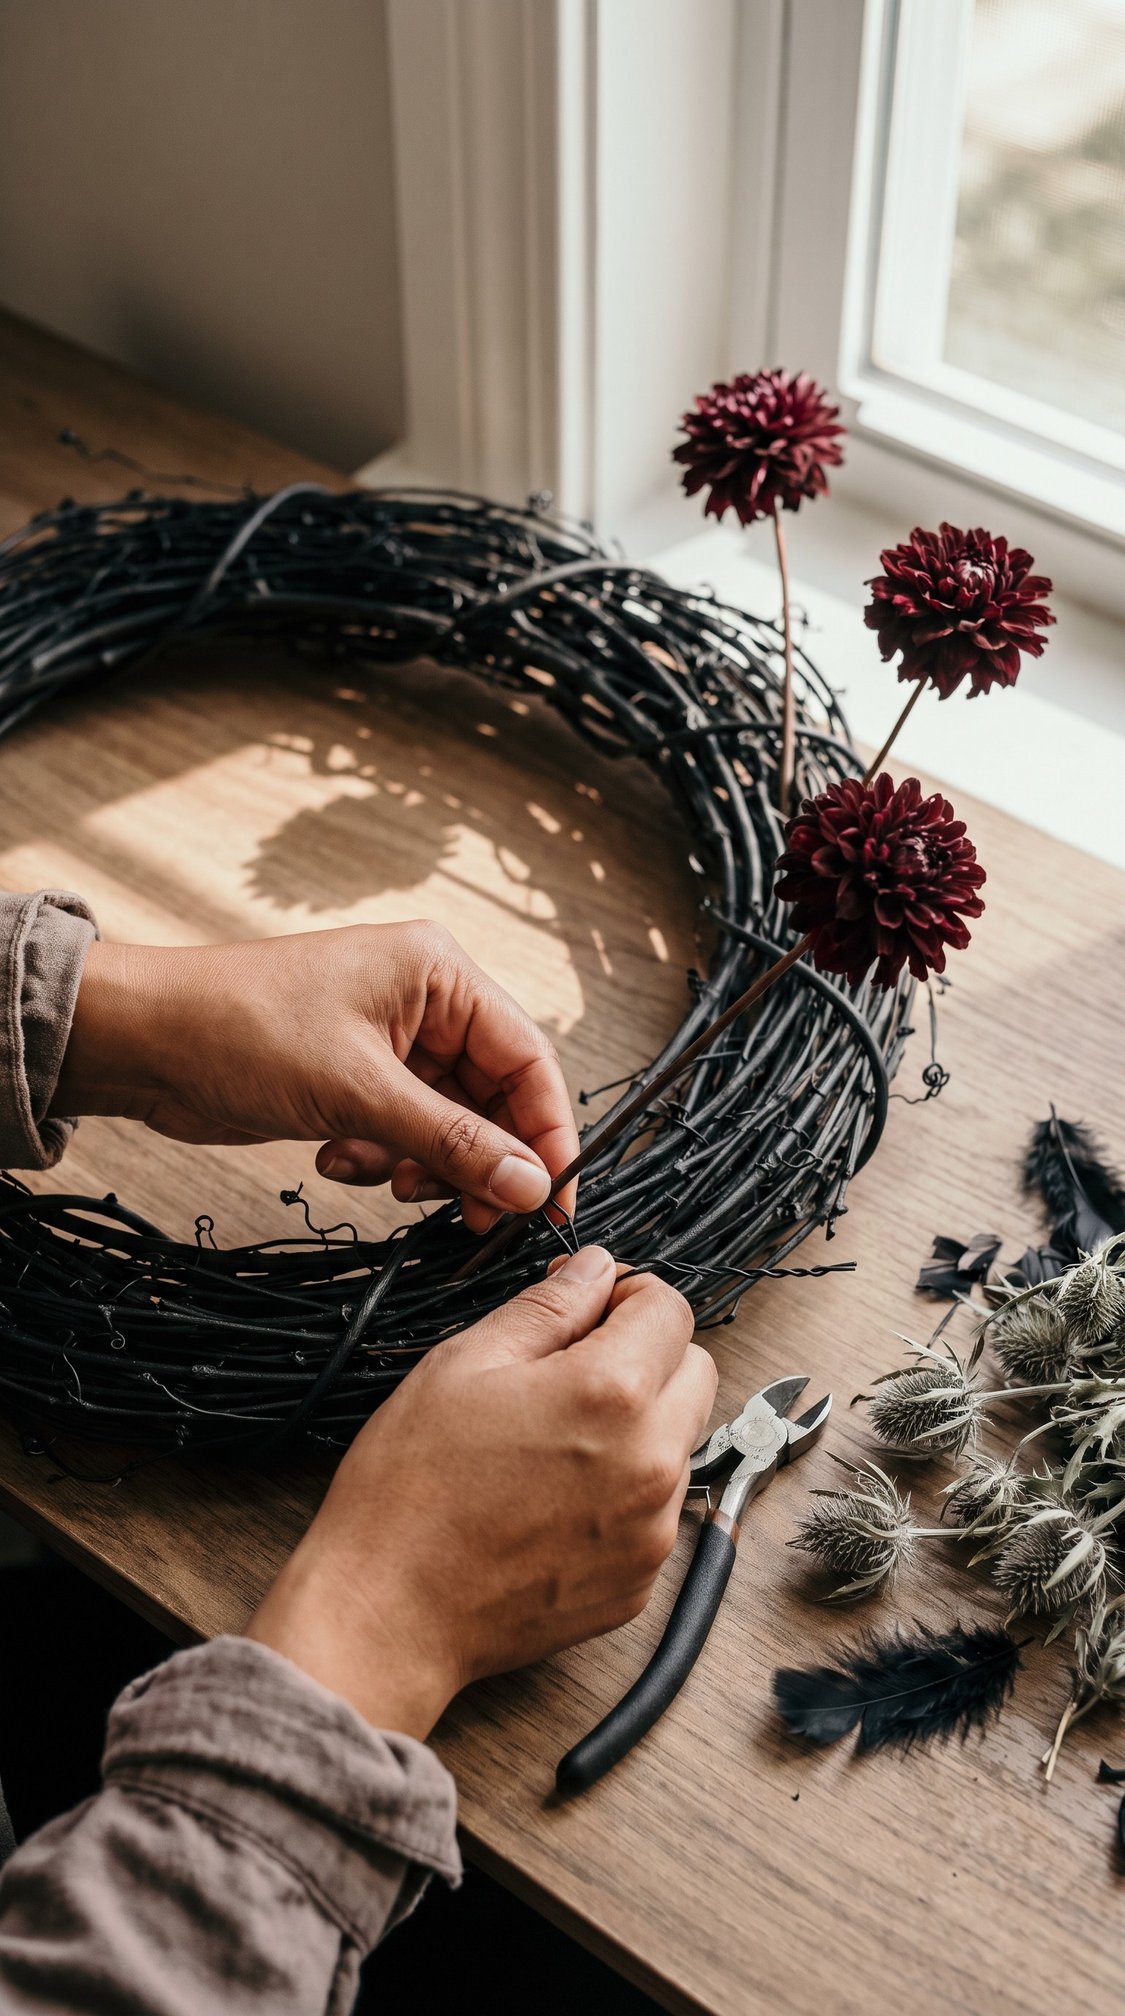
Cute. Active 40 minutes. Dry time none. About $15.
How it attaches: an over the door hook, or a length of ribbon looped over the top of the door.
Paint a grapevine wreath base matte black and let it dry, then wire in deep burgundy dried flowers, black feathers and dried thistle. Wire, do not glue. Wired stems can be moved when the arrangement is wrong, and glued ones cannot.
Work in odd numbers and keep everything on one side rather than spacing it evenly around the ring. An evenly filled wreath reads as store bought, and an asymmetric one reads as made.
The one step people get wrong in this section: pressing an adhesive strip on and hanging immediately. The adhesive needs a full hour before it takes any load.
Storage: hang it in a closet on the same hook. Pressing a wreath flat in a box crushes it permanently.
Customization: swap the burgundy for cream and rust for a fall wreath that stays up through November.
Section 5: Outdoor, and nothing gets drilled
Five projects for a porch, a step or a yard, and not one of them touches the building.
A plain weather line before you start: cardboard outdoors is a one night decoration. Anything that needs to stay up through the month has to be plastic, foam or fabric.
21. Luminary path jars
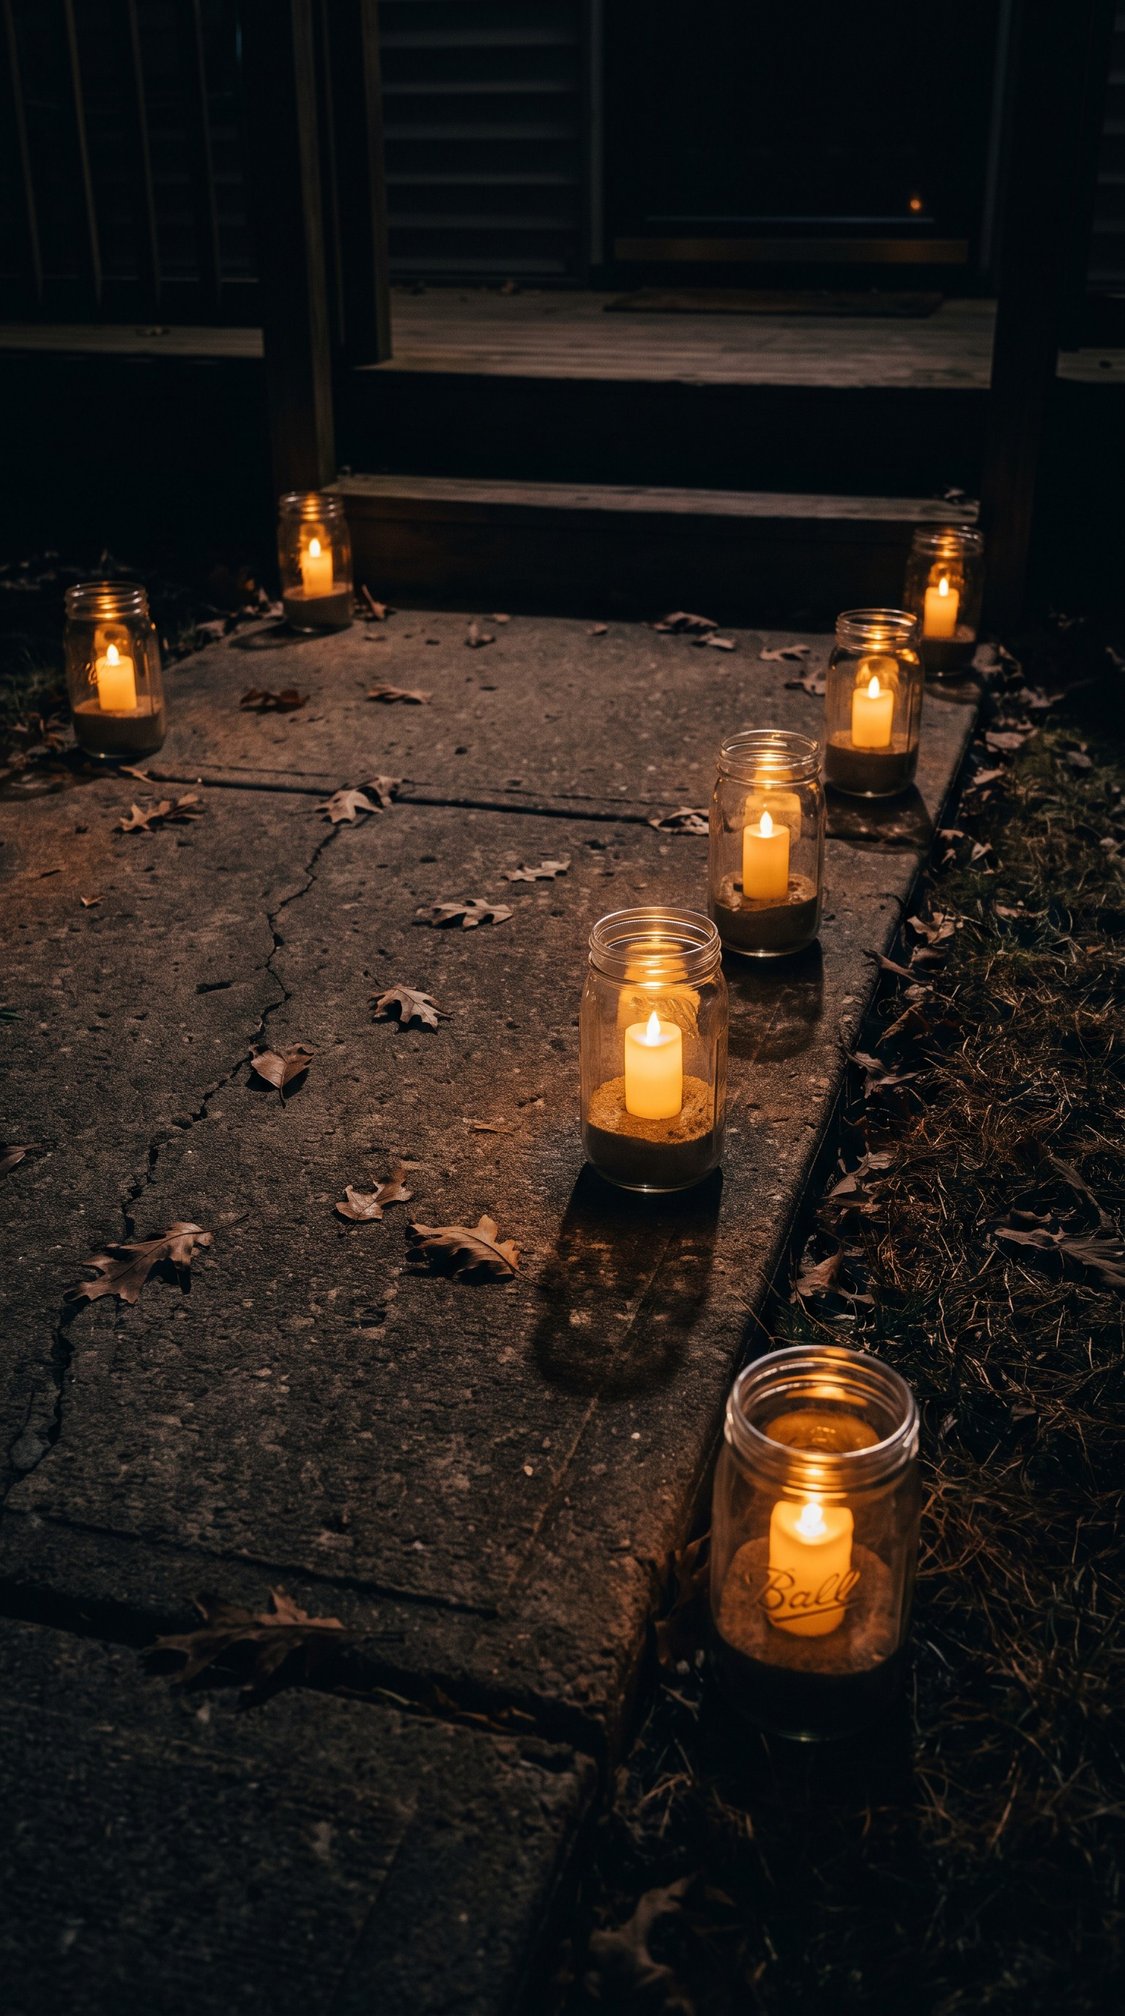
Cute. Active 30 minutes. Dry time none. About $8.
You need six glass jars, sand or gravel, and an LED tealight for each.
Two inches of sand in every jar, no exceptions. A luminary without weight is a broken jar by the second night, and the failure rate on a windy porch is close to total.
Stagger them along one edge of the path rather than lining both sides evenly. Alternating sides looks like an airport runway.
LED only. A real flame in a jar at ankle height on a night when children run past in costumes is not a risk worth taking.
The one step people get wrong in this section: not weighting anything that stands up outside.
Customization: a strip of black cardstock taped around the inside of the glass gives each jar a silhouette that shows when it lights.
22. Ghost lawn stakes
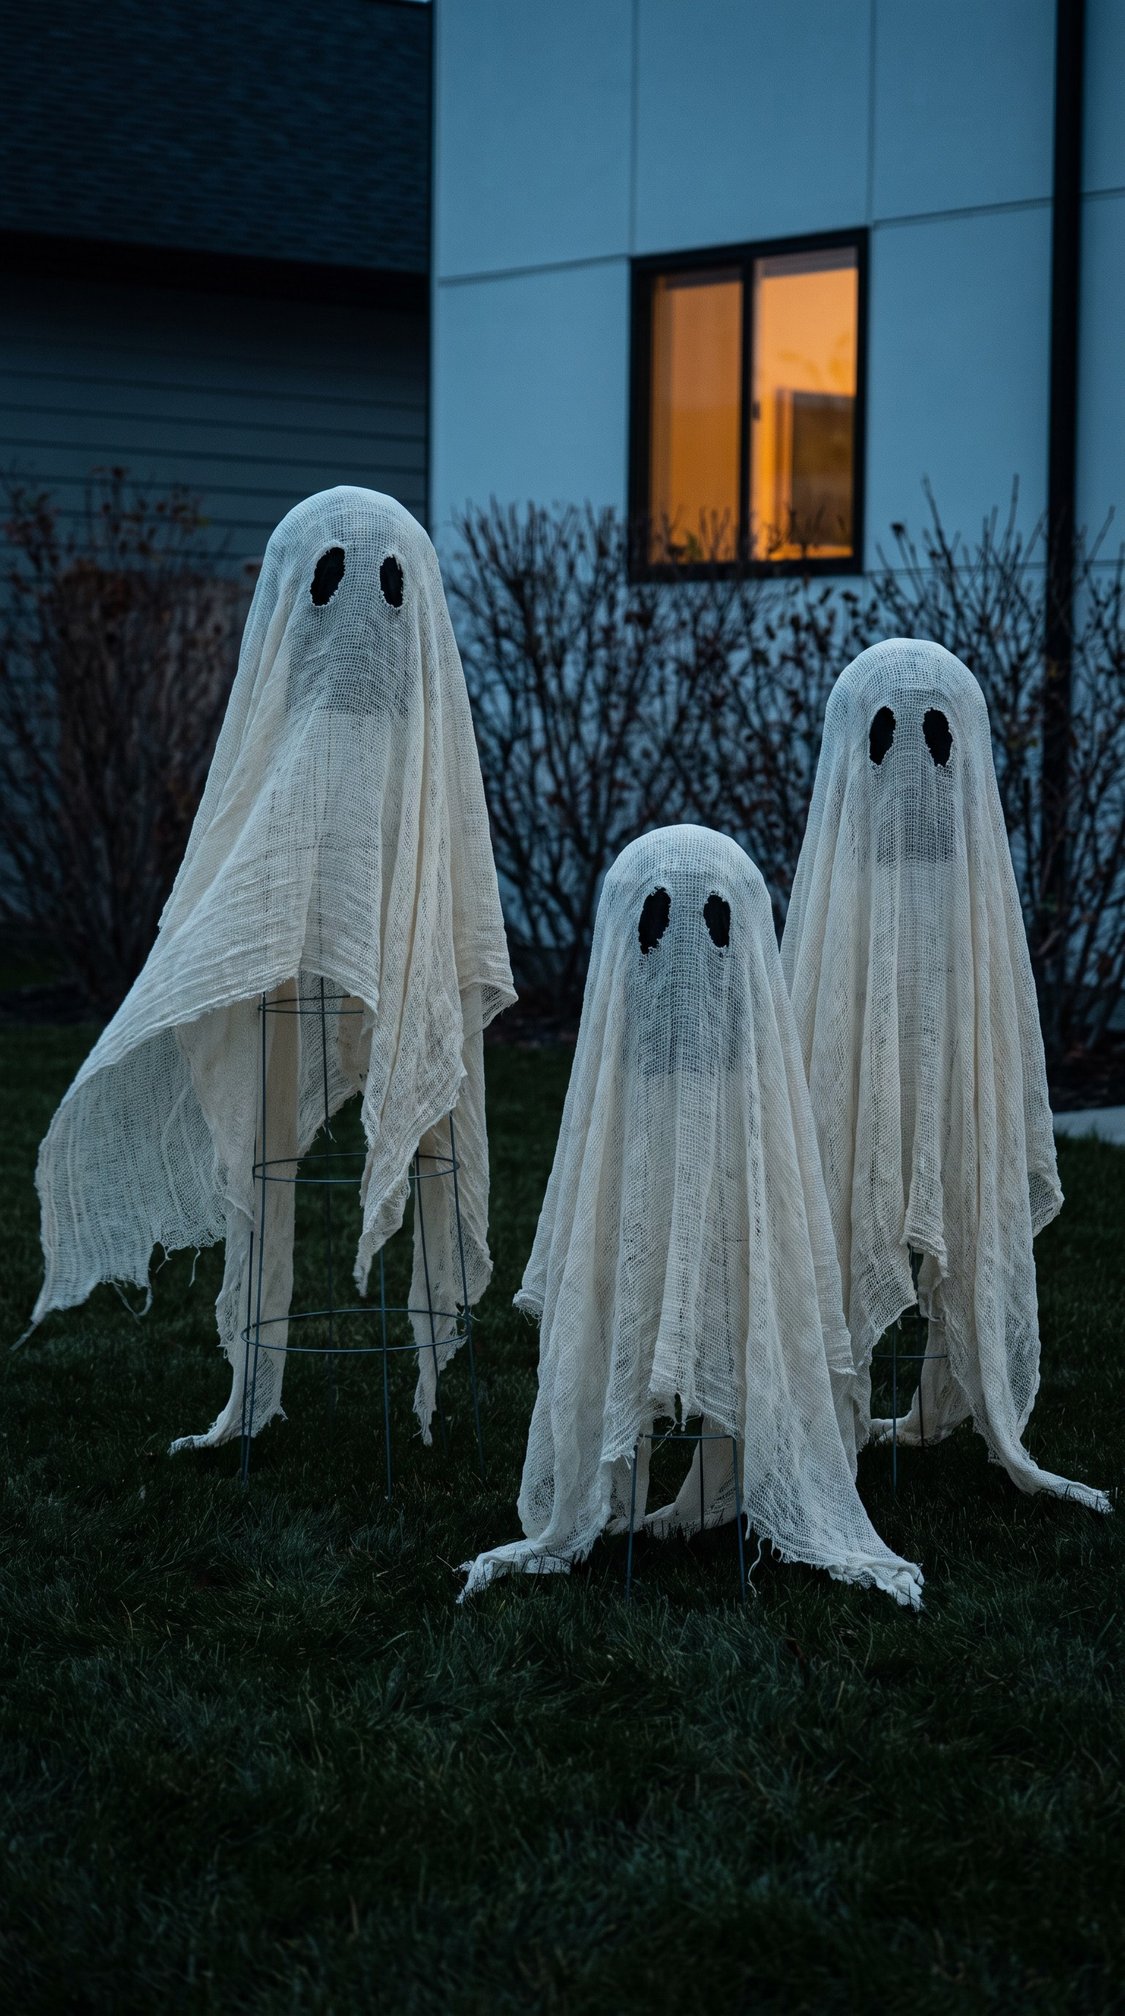
Scary. Active 45 minutes. Overnight if starched. About $12.
You need tomato cages or garden stakes, cheesecloth, fabric stiffener and black felt.
Invert a tomato cage so the narrow end is up, tie a ball of newspaper at the top for a head, and drape stiffened cheesecloth over the whole thing. The cage stays visible through the weave and that is fine, it reads as structure rather than as a mistake.
Three at different heights, spread out rather than lined up. Ghosts in a row look like laundry.
Push the stakes in deeper than feels necessary. Wet ground plus a windy night moves anything shallow.
Customization: a single LED tealight tucked at the base of each one lights the fabric from below.
23. Porch step pumpkin stack
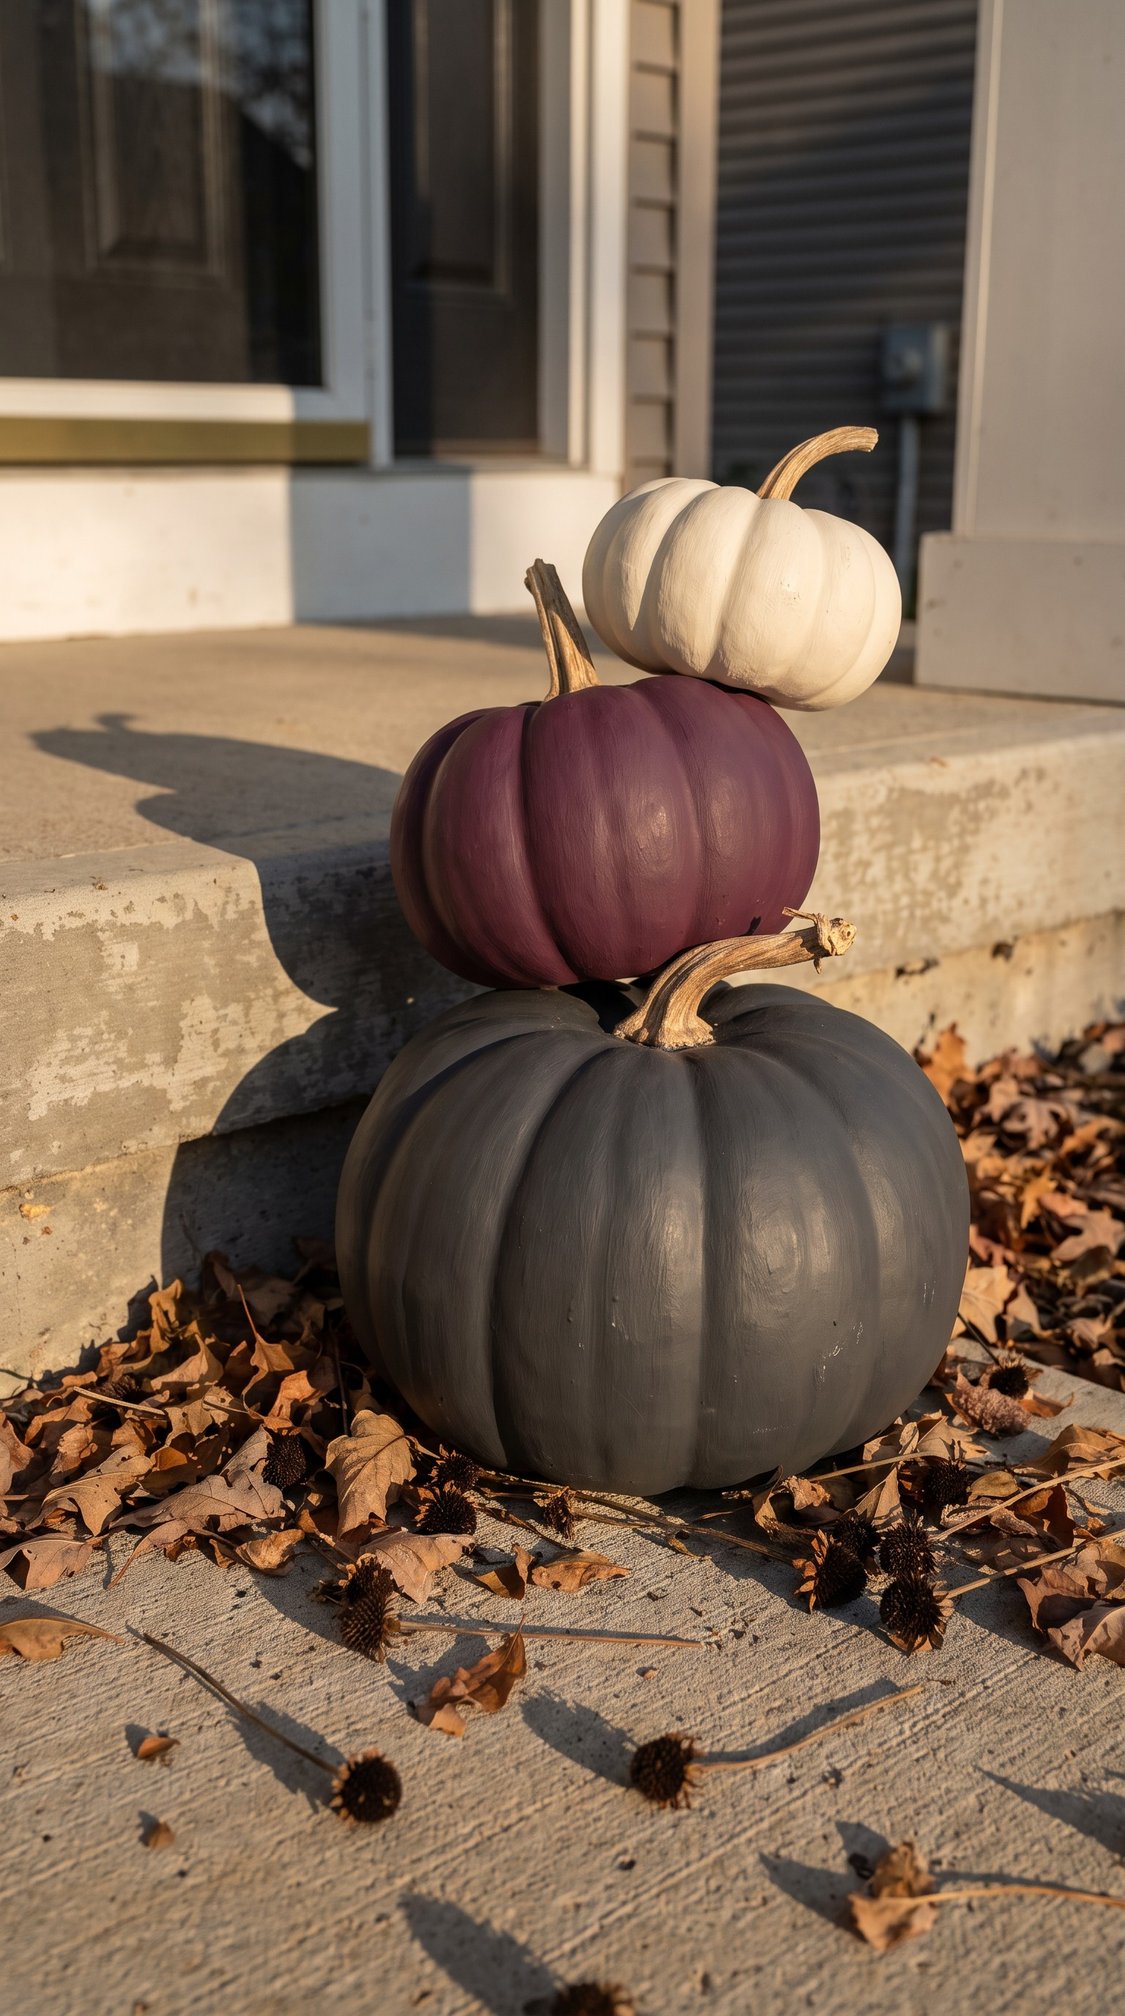
Vintage. Active 20 minutes. 24 hour cure. About $18.
You need three foam pumpkins in graduating sizes and acrylic paint in muted colors.
Cream on top, plum in the middle, slate at the base. Muted colors on a porch read expensive in a way that orange and black never does, and the brush texture showing through is part of it.
Give it the full 24 hours before you move it outside. Foam paint that is touch dry at 30 minutes is not cure dry, and every place you gripped it at hour two keeps a fingerprint permanently.
Customization: a few dry leaves and sweetgum balls scattered at the base finishes it without buying anything.
24. Yarn spider web across a railing
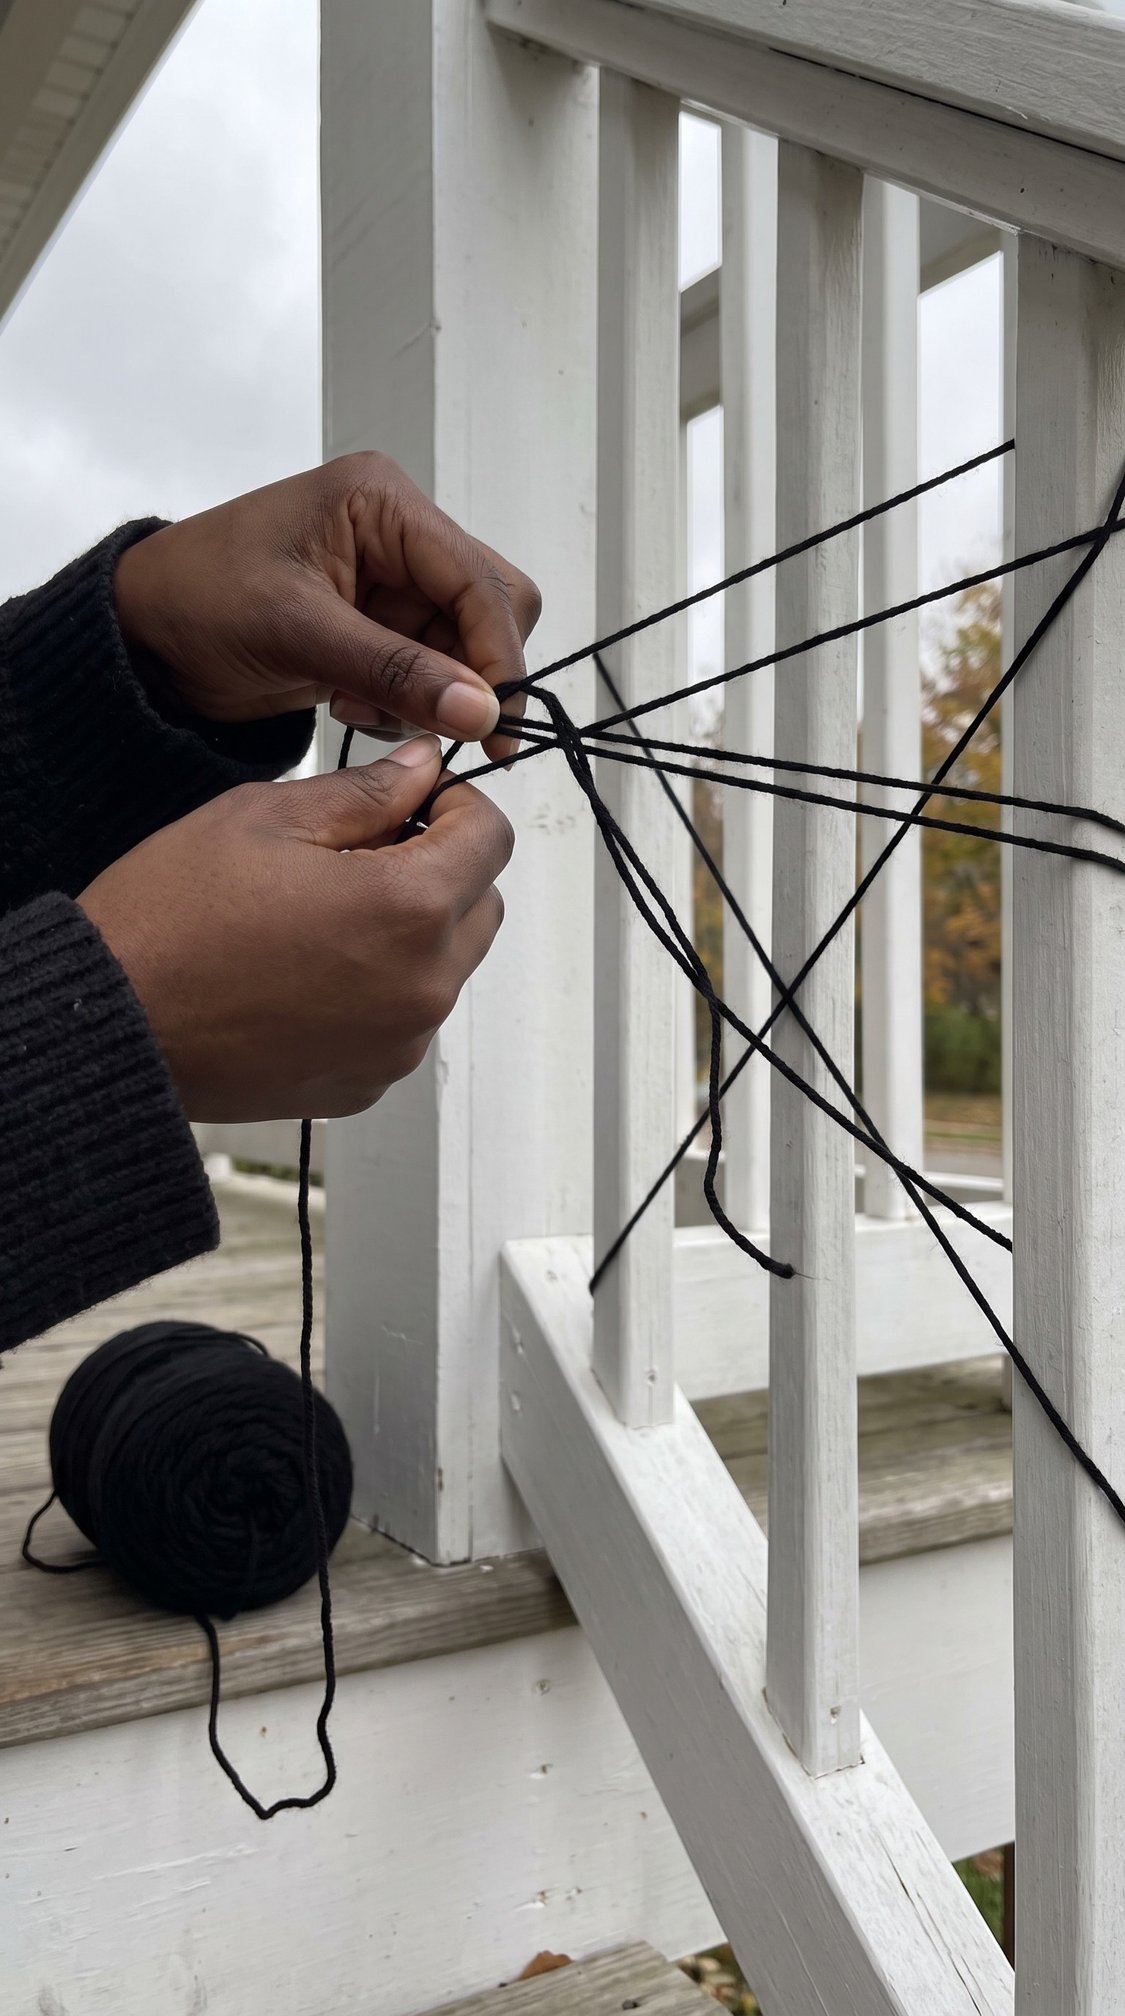
Scary. Active 40 minutes. Dry time none. About $4.
You need a ball of black acrylic yarn and scissors.
Tie the spokes first, running from a top rail down to the balusters like the ribs of a fan, then spiral around them working outward and knotting at each crossing. The spiral is the slow part and the spokes take five minutes.
Use acrylic yarn, not cotton. Cotton absorbs moisture, stretches overnight and the whole web is sagging by morning. Acrylic holds its tension through dew.
Customization: one oversized plastic spider near an edge rather than dead center in the web.
25. Lit window silhouette
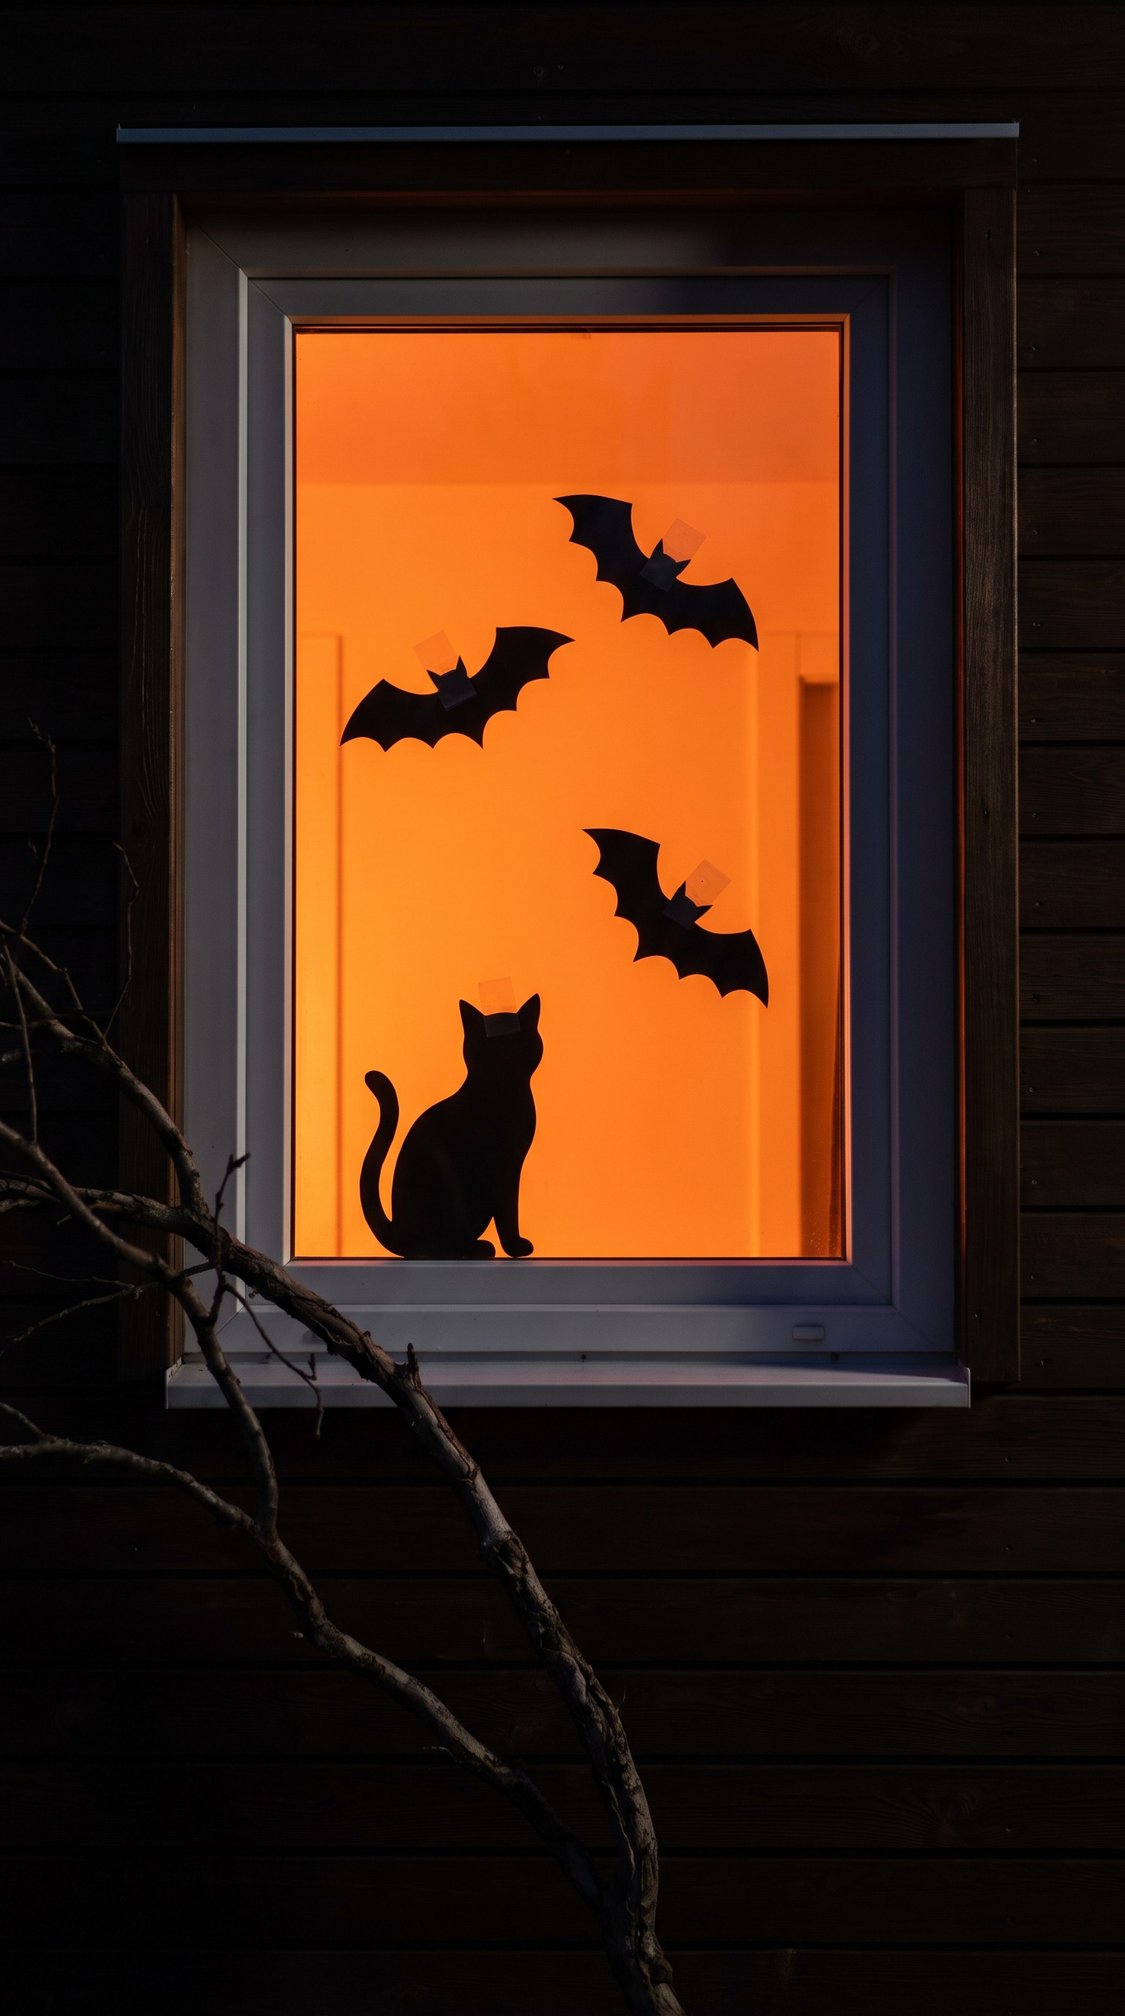
Scary. Active 30 minutes. Dry time none. About $5.
You need black cardstock cutouts, low tack tape and an orange bulb or a lamp with an orange gel behind it.
Tape the cutouts to the inside of the glass, then put a light source behind them and step outside to look. This is the only project in the post you have to judge from the street, and it usually needs the light moved twice.
An orange bulb in a lamp on a low table gives a better glow than a ceiling light, because the light comes from below the cutouts and throws them upward on the glass.
The tape squares are visible from outside and that is fine. Trying to hide them is how people end up using something that pulls paint off the frame.
Customization: a cat on the lower pane and bats on the upper one uses the same cut file twice.
Where these projects go wrong
The failure that actually happens is a calendar problem, not a skill problem. Someone starts a painted project on 29 October. Touch dry at 30 minutes reads as finished, the pumpkin comes inside, and by morning every place it was handled has a permanent fingerprint pressed into the finish. There is no fix for that one. There is only repainting it.
Start any painted project 48 hours before you want it out. The snapshot at the top of this post exists for exactly that reason.
The second failure is smaller and just as common. The first coat of paint on foam or cardboard always looks terrible. It goes on patchy and streaky, the color underneath shows through in stripes, and it looks like the project has already failed. It has not. Two thin coats is the method, and the first one is supposed to look like that. This is the step where people quit, usually about six minutes in.
Troubleshooting
| Symptom | Cause | Fix | Prevention |
|---|---|---|---|
| Paint peeling off foam | Spray propellant dissolving the surface | None, remake it | Brush acrylic on foam |
| Hot glue not holding on glass | Cold glass, glue skinned over before contact | Warm the glass, reglue | High temp gun, work in small sections |
| Tape line bleeding | Tape edge not burnished down | Touch up with a liner brush | Press the edge with a fingernail before painting |
| Cardstock edges wavy | Cut with scissors | Trim the edge with a knife | Craft knife and a fresh blade |
| Cheesecloth ghost collapsing | Not enough stiffener, or not fully dry | Re-starch and leave overnight | Two coats, dry completely |
| Adhesive strip falling | Hung before the adhesive set | Reapply and wait an hour | Clean the wall with alcohol first |
| Window cling not sticking | Dusty or cold glass | Wash and dry the pane | Apply indoors, above 60 degrees |
| Luminary jar tipping | No weight in the base | Add sand | Two inches, in every jar |
| Yarn web sagging | Cotton yarn stretching when damp | Retension it | Use acrylic yarn |
| Fingerprints set into the finish | Handled before cure | None, repaint | Wait the full 24 hours |
Finishing, sealing and care
One coat of matte sealer is the single biggest upgrade in this entire post. Gloss on a cheap material reads cheap, every time, and matte on the same material reads considered.
Dry and cure are not the same thing and this is where most projects get ruined. Dry means it is no longer wet to the touch. Cure means the paint film has actually hardened all the way through. On craft paint over foam, dry is about 30 minutes and cure is 24 hours.
Dust these with a dry brush. A damp cloth on paper or foam takes the finish with it.
The paper projects are a one season thing and that is fine, because they cost almost nothing. The glass and foam projects will come back for five years or more if they get stored flat and dry.
Three ways to change the look
- Go vintage. Swap black and orange for cream, rust and faded gold. This is the single most differentiated look available on this whole subject and almost nobody is doing it.
- Go monochrome. Black and white only. It reads modern, it photographs best in a small room, and it stops competing with whatever color your walls already are.
- Scale up. The five outdoor projects at double size stop being decorations and start being a display.
Safety
Craft knives cut away from your hand, on a mat, with a fresh blade. A dull blade causes more injuries than a sharp one, because a dull blade needs force and force slips.
Hot glue runs at about 380 degrees at the tip. Keep a bowl of cold water on the table before you start, not in the kitchen. That is a setup instruction, not a general caution.
Spray paint needs real ventilation, which means outdoors or a garage with the door open. A cracked window is not ventilation and a bathroom fan does not move enough air. Wear a mask rated for organic vapor. A dust mask does nothing against solvent.
Use LED tealights only, in anything a child or a pet can reach. Never a flame. Spray painted pieces stay out of reach for the full 24 hour cure, not just until they feel dry.
Spray cans are not household recycling in most of South Carolina. Check your county site before the can goes in the bin.
Seven rules that apply to all 25 projects
- Two thin coats beat one thick coat, every time, on every material.
- Matte finish on a cheap material, always.
- Brush on foam, spray on plastic and glass.
- Weight anything that stands up outside.
- Adhesive needs an hour before it takes any load.
- If it is going outside, it cannot be cardboard.
- Buy the black paint in the biggest size. You will run out.
Shop your own house first
Before you buy anything, check for black acrylic paint, a hot glue gun and sticks, painter’s tape, cardstock, glass jars, LED tealights and cheesecloth. Most of this post is made from things that are already in the house or already in the recycling.
Beginner shopping list
Buy first: hot glue gun, black acrylic paint, a craft knife with a mat, LED tealights.
Can wait: matte sealer, a second paint color, adhesive hooks.
Questions people ask
What is the cheapest Halloween decoration to make at home?
Toilet roll bats cost nothing at all, because the tubes are already in your recycling and the only bought item is a bottle of black paint you will use on four other projects. A paper spider web is the next cheapest, at the price of one sheet of paper.
How far in advance should I start making Halloween decorations?
Start any painted project 48 hours before you want it out, because paint that is touch dry at 30 minutes is not cured for another 24 hours. Projects with no paint and no starch can be made the same day you want them up.
What can I use instead of a hot glue gun?
Heavy duty double sided tape works for paper, cardstock and fabric. It will not hold foam or glass, so the pumpkin, jar and bowl projects genuinely need the glue gun. It is the one tool in this post with no real substitute.
How do I hang Halloween decorations without damaging rental walls?
Removable adhesive strips, applied to a wall wiped with rubbing alcohol, left one hour before anything hangs from them. Use the smallest strip that holds the weight. For doorways, a tension rod inside the frame touches nothing at all.
Does spray paint work on craft foam?
No. The propellant dissolves the foam surface, and it does it after the first coat already looks fine, so the damage shows up once you think the project is working. Brush acrylic craft paint on foam instead, in two thin coats.
How do I store handmade Halloween decorations?
Paper projects go flat in a large envelope. Wreaths hang on a hook rather than being pressed into a box, because pressure creases them permanently. A cardboard village nests inside its own largest piece. Store everything dry, and expect the paper items to last one season.
What is the difference between dry time and cure time?
Dry means the surface is no longer wet to the touch, usually about 30 minutes on craft paint. Cure means the paint film has hardened all the way through, which takes about 24 hours. A piece handled between those two points keeps a fingerprint in the finish permanently.
Can kids help with these projects?
Yes, on the projects with no blade and no hot glue. Toilet roll bats, paper chains and tissue paper luminaries are all safe for small hands. Keep children away from craft knives, the glue gun and anything spray painted until the full 24 hour cure has passed.
Will cardboard decorations survive outside?
For one night, in dry weather. Cardboard absorbs moisture from dew alone and will sag and soften by the second morning. Anything meant to stay outside for the season needs to be plastic, foam or fabric.
How do I make cheap decorations look expensive?
Matte sealer instead of gloss, muted colors instead of orange and black, and odd numbers at different heights instead of matched pairs. Those three changes do more than spending five times as much on materials.
Pick three and start there
Twenty five projects is a menu, not an assignment. Nobody makes all of them and the post is not built on the assumption that anyone will.
If you want the fastest possible win tonight, make the floating ghost jars, the toilet roll bats and the paper spider web. That is three projects, under an hour total, and every material is either a dollar or already in your recycling.
If you have a weekend and want the house to look properly done, do the foam pumpkin makeover and the porch step stack on Friday so they cure overnight, then spend Saturday on the paper bat cluster and the tabletop village. The painted things need the calendar and the paper things need the evening, and that is the whole scheduling problem in one sentence.
If you are renting and nervous, section four is the entire answer. Nothing in it touches a wall permanently and every piece flattens or nests for storage, which is the part most Halloween craft posts leave you to figure out in November.
The one thing worth repeating, because it is the difference between decorations that look homemade and decorations that look made: matte finish, muted colors, odd numbers at different heights. FYI that rule works in every month of the year and on every material in this post.
Save this one so you can find the timings again when you are standing in the craft aisle wondering whether you have time to paint something before Friday.
And if the printing route is the one that appeals, the 41 design Halloween bundle is $9.74 for the whole set. Ghosts, pumpkins and the boujee ones, twenty one of the forty one melanated, all high resolution and all yours to print for frames, jars, cards or whatever else the season demands.
More Halloween in the same spirit: Halloween costumes for couples if there are two of you to dress, and Halloween nail designs for the finishing touch that takes twenty minutes and gets noticed more than anything on your walls.