The shape decides everything. Before you pick a color, a motif or a single drop of chrome, decide whether you want coffin, almond, stiletto or short square, because that one call determines how the design reads, how long the set lasts, and whether you can still use a keyboard on Monday.
Halloween is the one time of year the dramatic shapes are worth it. A long coffin set in blood red is a commitment in October and a liability in February, which is exactly why now is when you book it. Below are 25 acrylic designs sorted by shape, with a note on who each one actually suits, plus the shade guidance that most roundups skip and the removal section that saves your natural nails.
Affiliate disclosure: some links in this post may earn a small commission at no extra cost to you.
What you are getting, at a glance
- 25 designs across four shapes, coffin, almond, stiletto and short square
- Salon or DIY: the chrome, cat eye and ombre sets are salon work. The solid colors and French tips are genuinely doable at home with tips and gel polish
- Wear time: two to three weeks before you need a fill
- Cost: varies enormously by region and by whether you are paying for shape, length and art separately. Call two salons near you and ask for the full-set price with extensions before you fall in love with a picture
- Biggest mistakes: picking a length you cannot work in, and popping them off at the end
Pick the shape before you pick the design
Every other Halloween nail roundup groups by color or by motif, which is backwards. Color is a thirty second decision. Shape is the thing you live with for three weeks, and it is the thing your nail tech needs to hear first.
Coffin
Tapered sides, flat squared tip. Coffin gives you the most surface area of any long shape, so it is the shape for anything with art on it, chrome, ombre, webs, drips. It also visually lengthens the hand more than any other shape here. The tradeoff is that flat tip, which catches on everything for the first three days.
Best on medium to long nail beds. On a very short nail bed the extension does all the work and can look pasted on, so ask for a shorter length than the photo you are holding.
Almond
Tapered sides curving to a soft rounded point. The most wearable shape in this list by a wide margin, and the one that survives a job with a keyboard. Almond flatters a wide nail bed better than square does, because the taper narrows the visual width of the nail.
FYI, almond is also the shape that ages best. When it grows out, the regrowth line sits at the cuticle where the curve already narrows, so it reads less obvious than it does on square.
Stiletto and extra long
Sharp sides to a single point. This is a costume shape and there is no point pretending otherwise, which is why it belongs to Halloween specifically. Stiletto is the weakest shape structurally, because all that length ends in a point with nothing supporting it, so it breaks more than anything else here.
If you want the drama for one night, ask about a shorter stiletto, around 12mm past the fingertip rather than 18mm. You get the silhouette without a snapped nail in the Uber home.
Short square
Straight across the tip, sharp corners, minimal length. Short is the single most searched modifier on this whole keyword, and the reason is obvious once you have worn a long set to work. Short square takes art surprisingly well because the flat surface gives a clean canvas, and it is the only shape here you can wear for six weeks without anyone at the office having an opinion.
What to actually say at the salon
Say the shape, then the length in millimeters past the fingertip, then the finish, then the art. In that order. “Coffin, about 12 millimeters, high gloss, blood red, no art” gets you what you pictured. “Something Halloween, kind of long” gets you whatever the tech likes doing that week.
Bring two photos, one for shape and one for color, and say which is which. IMO this is the single highest leverage thing you can do in a nail appointment.
If you are building your own set at home, the shape is decided by the tip you buy, not by the filing.
Long coffin Halloween acrylic nails
halloween nails acrylic coffin is the strongest term in this entire category, and it is not close. Eight designs, most art, most drama.
1. Blood Red Glass
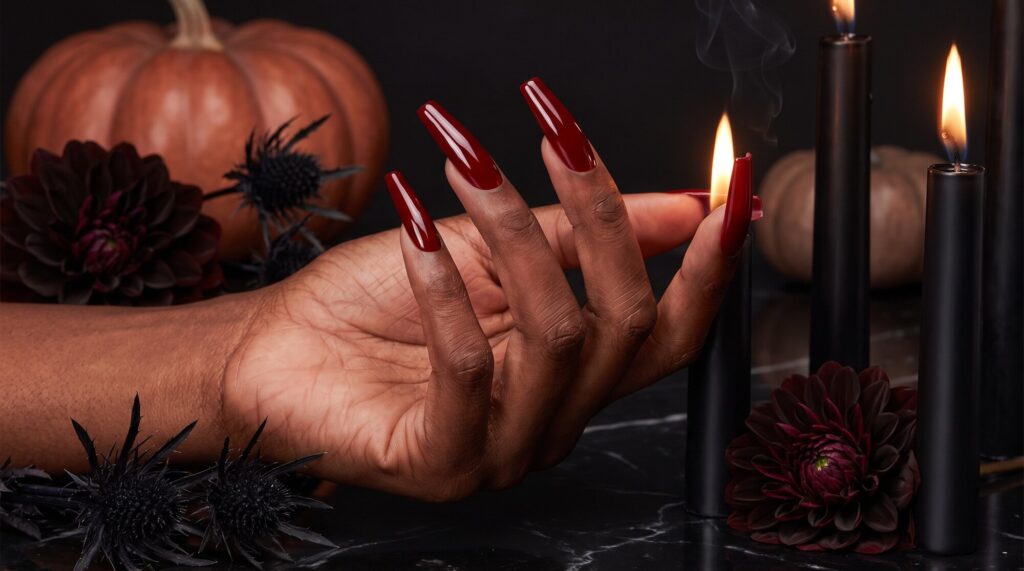
Deep blood red on all ten, high gloss, no art at all. The color sits somewhere between wine and arterial, and the gloss is doing the whole job. Best for: anyone who wants maximum impact with zero art budget. The technique note: ask for a glass or jelly finish rather than a flat cream. The depth is what separates this from a bottle of drugstore red.
2. Black Mirror Chrome
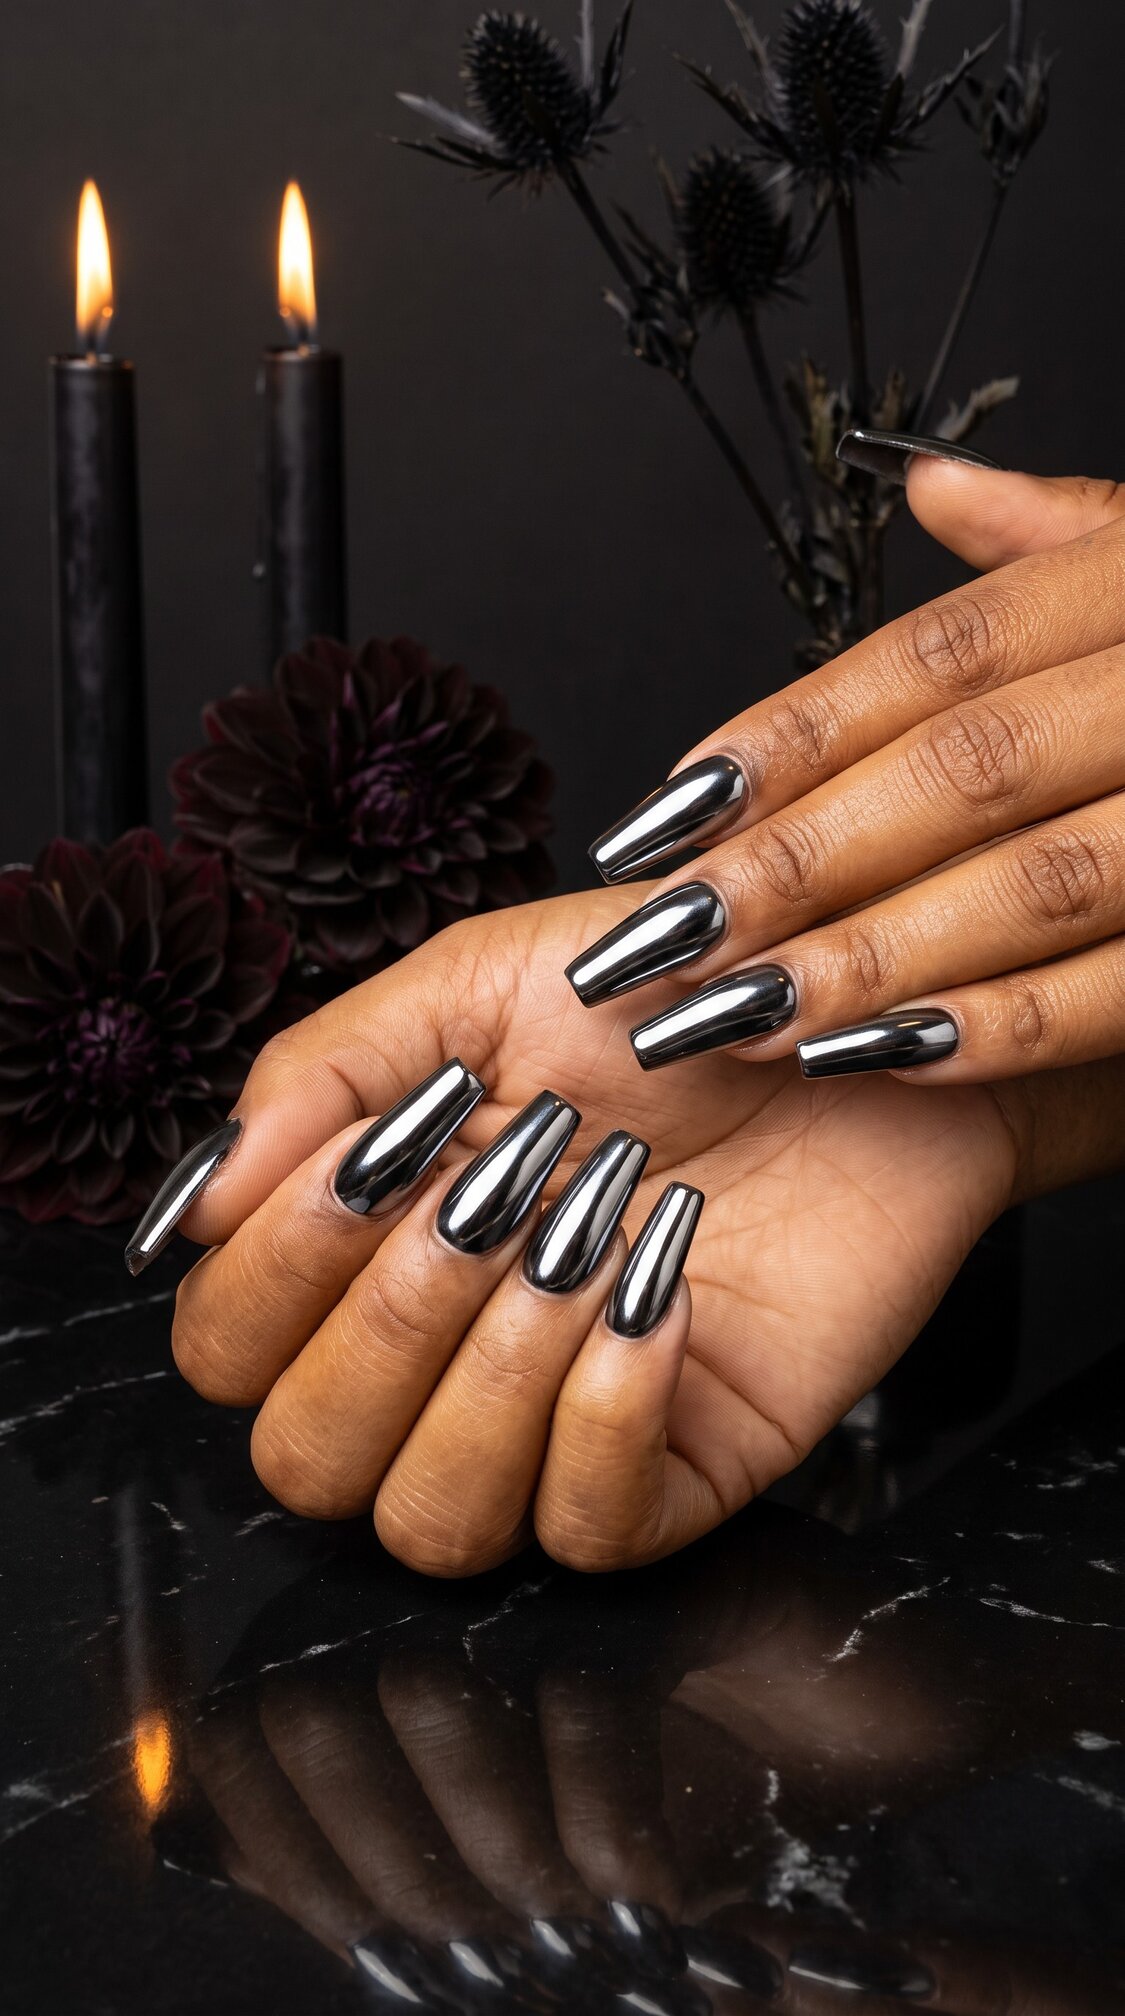
Jet black chrome on all ten with a true mirror finish, picking up silver where the light hits. Not glossy black polish, an actual reflective surface. Best for: long nail beds and anyone who photographs their hands. The technique note: chrome is powder buffed over a cured gel top coat, then sealed again. It cannot be done with polish, so this one is a salon design or a gel setup at home.
3. Milky Base Black French
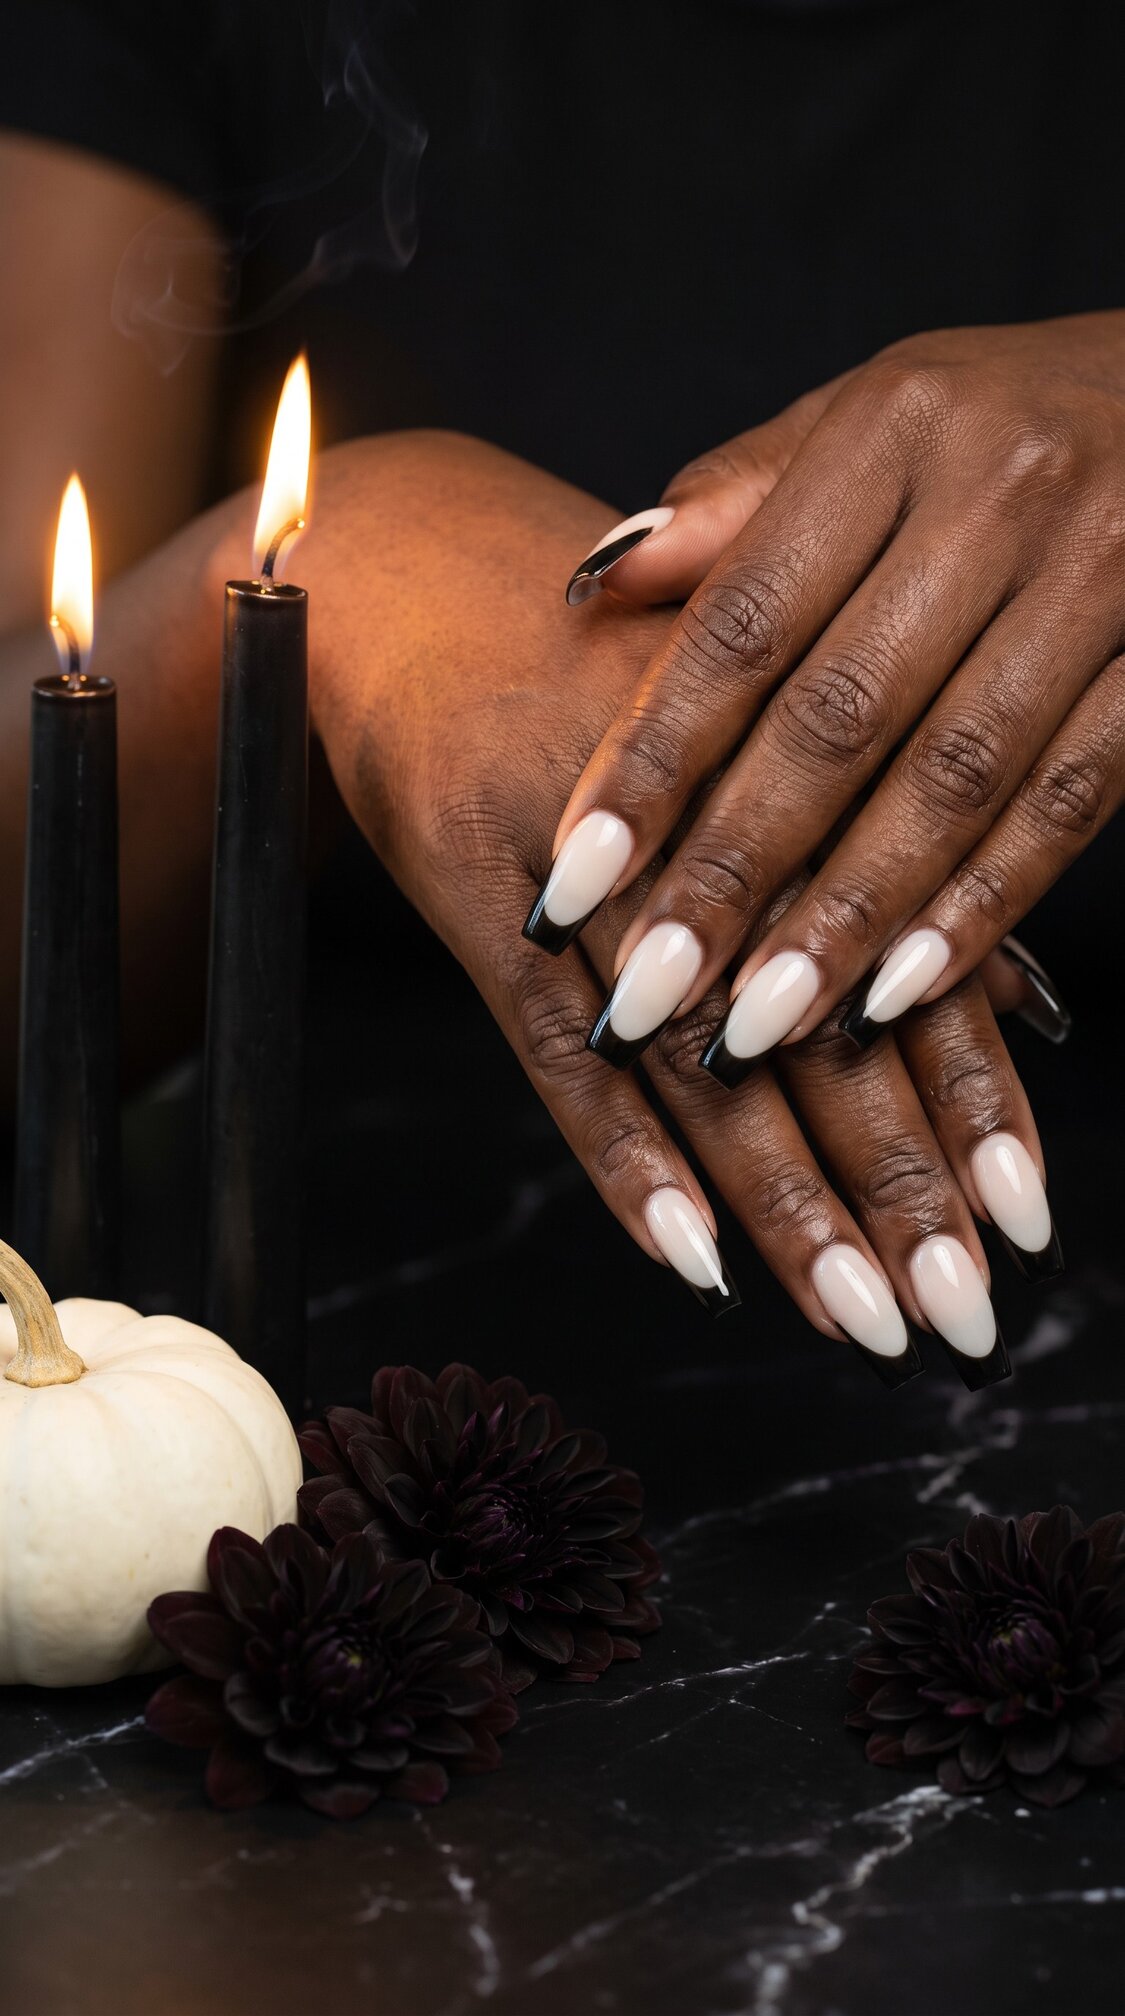
Sheer milky off white from cuticle to smile line, then a deep black French tip about 6mm deep with a crisp curve. The black wraps the squared tip completely. Best for: the Halloween set you can wear into November. The technique note: the smile line is the whole design, so it has to be sharp. A shaky line reads as a mistake, a clean one reads as expensive.
4. Red To Black Ombre
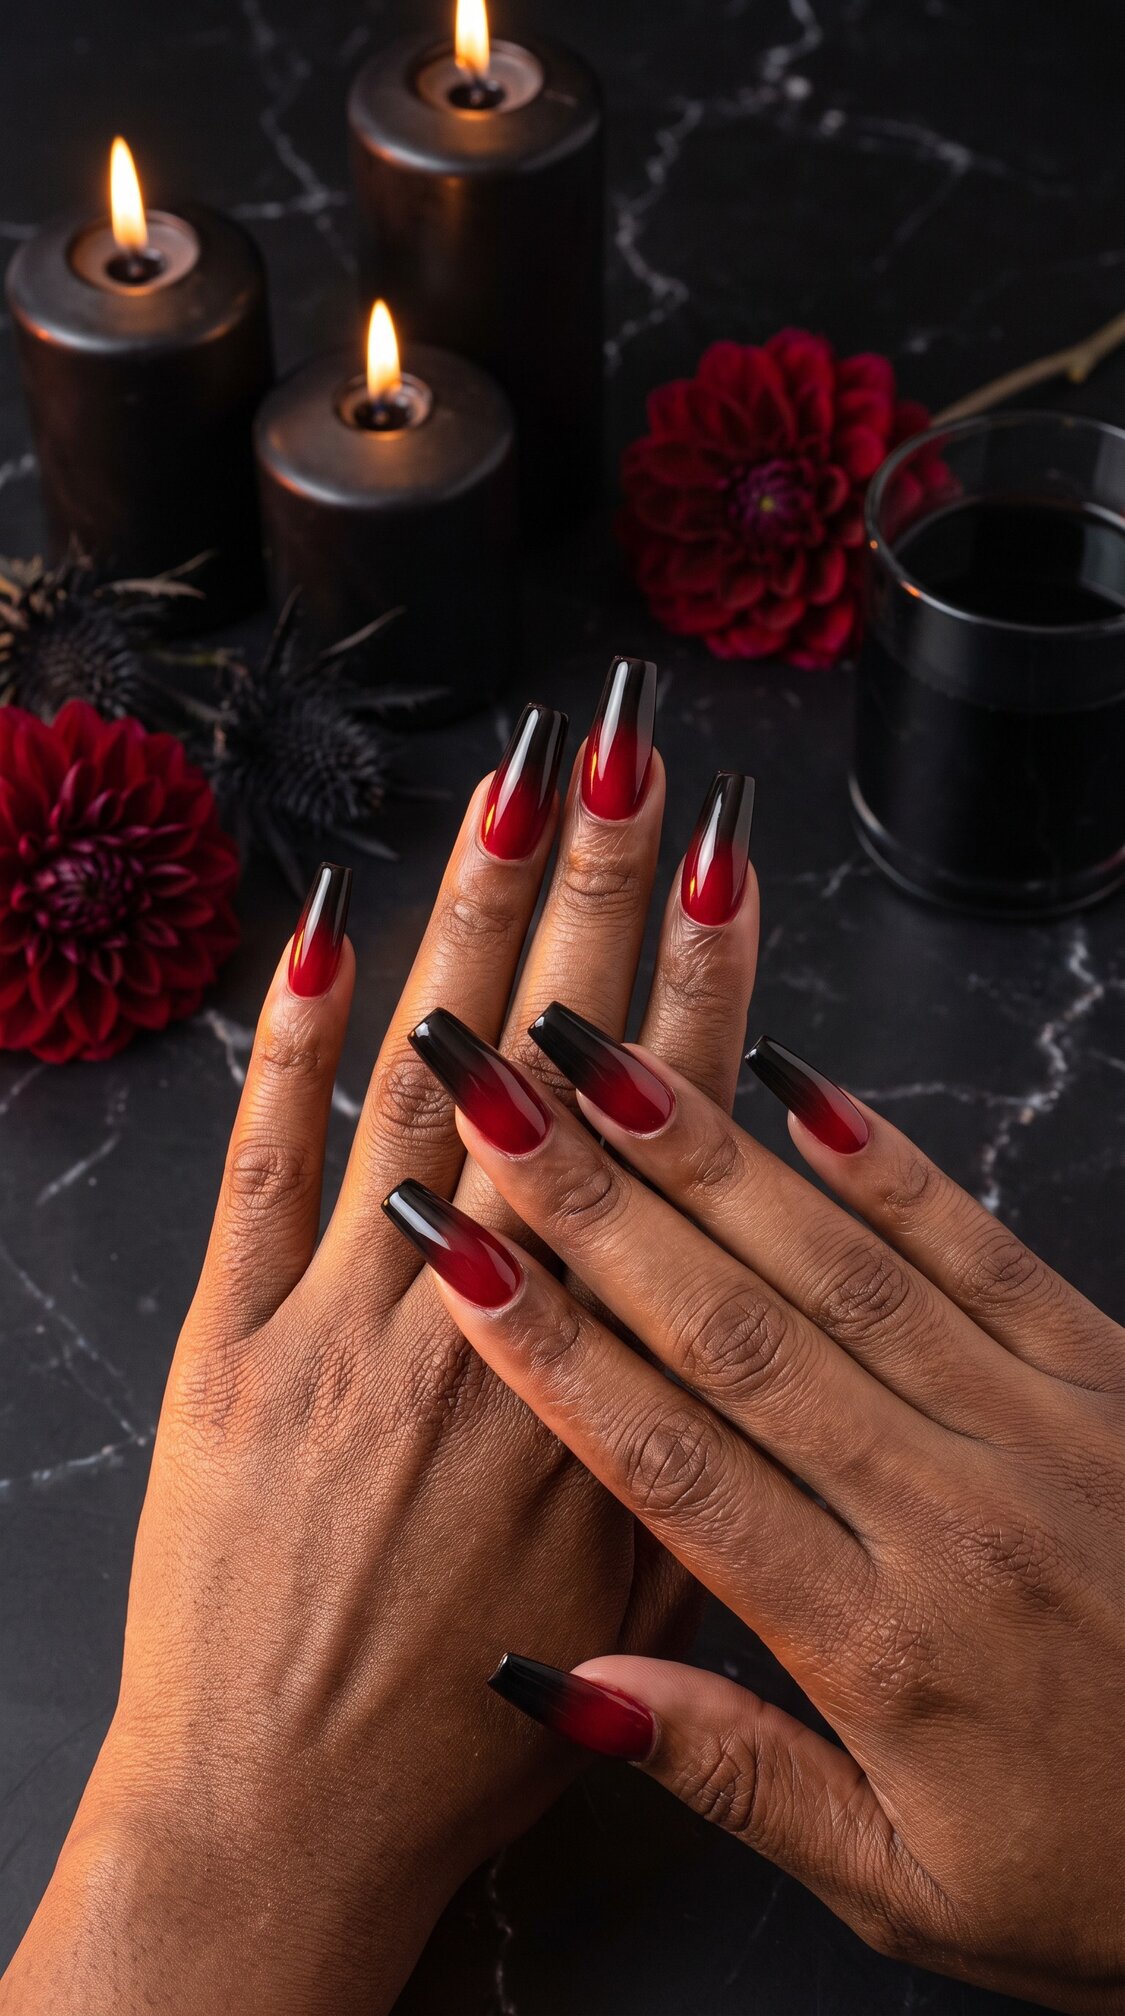
Blood red at the cuticle blending seamlessly to jet black at the tip, no visible line between them. Best for: long shapes only, because the gradient needs room to breathe. On a short nail it compresses into a muddy two tone. The technique note: the blend is sponged while the layers are still tacky. If your tech is painting it, you will see the join.
5. Purple And Black Web Tips
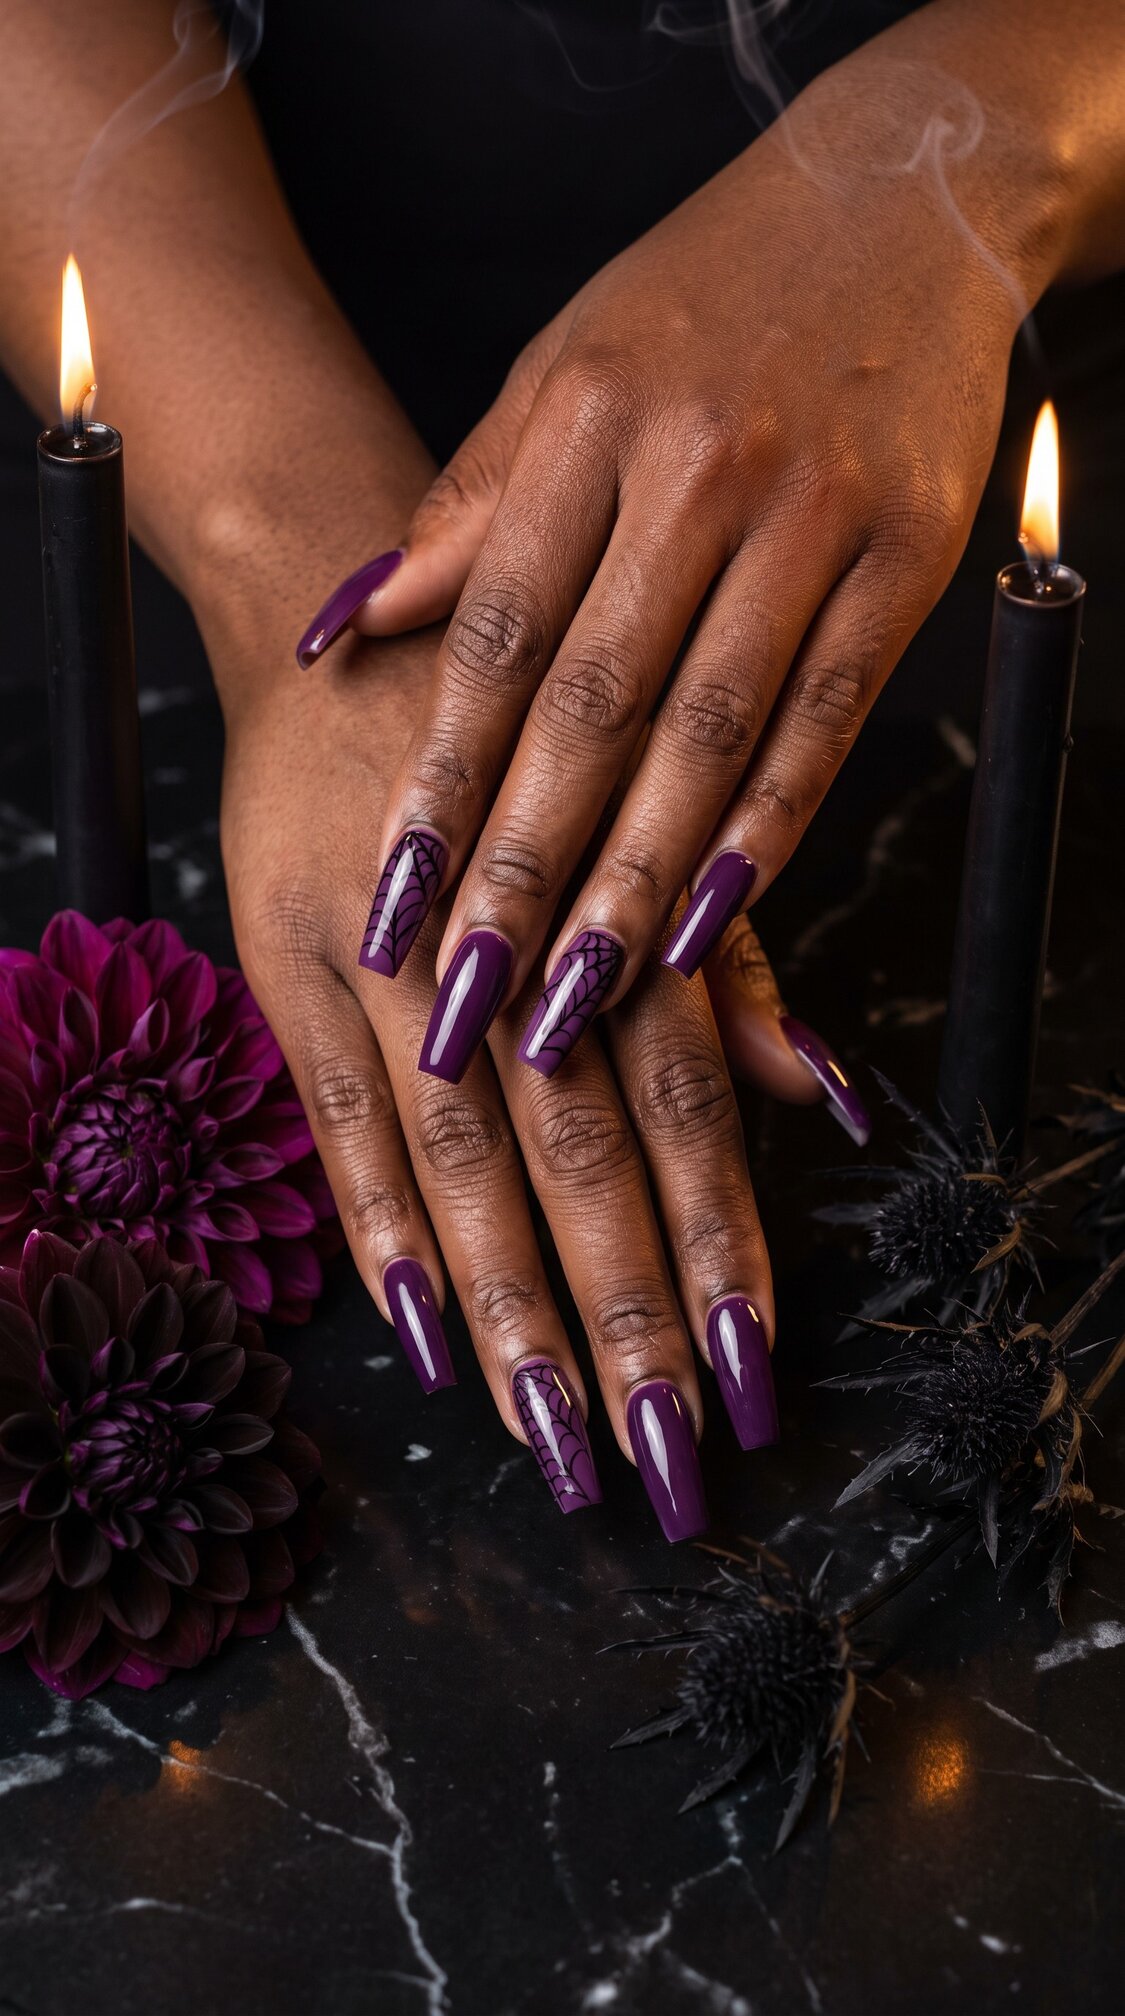
Deep amethyst purple on all ten, with a fine black spiderweb drawn across the top third of the index and ring fingers only. Four nails carry art, six stay clean. Best for: anyone who wants a motif without a costume. The technique note: the web goes on the outer corner and radiates inward, and the line weight has to stay thin. A thick web is the difference between a nail salon and a haunted scrapbook.
6. Burnt Orange Glitter Fade
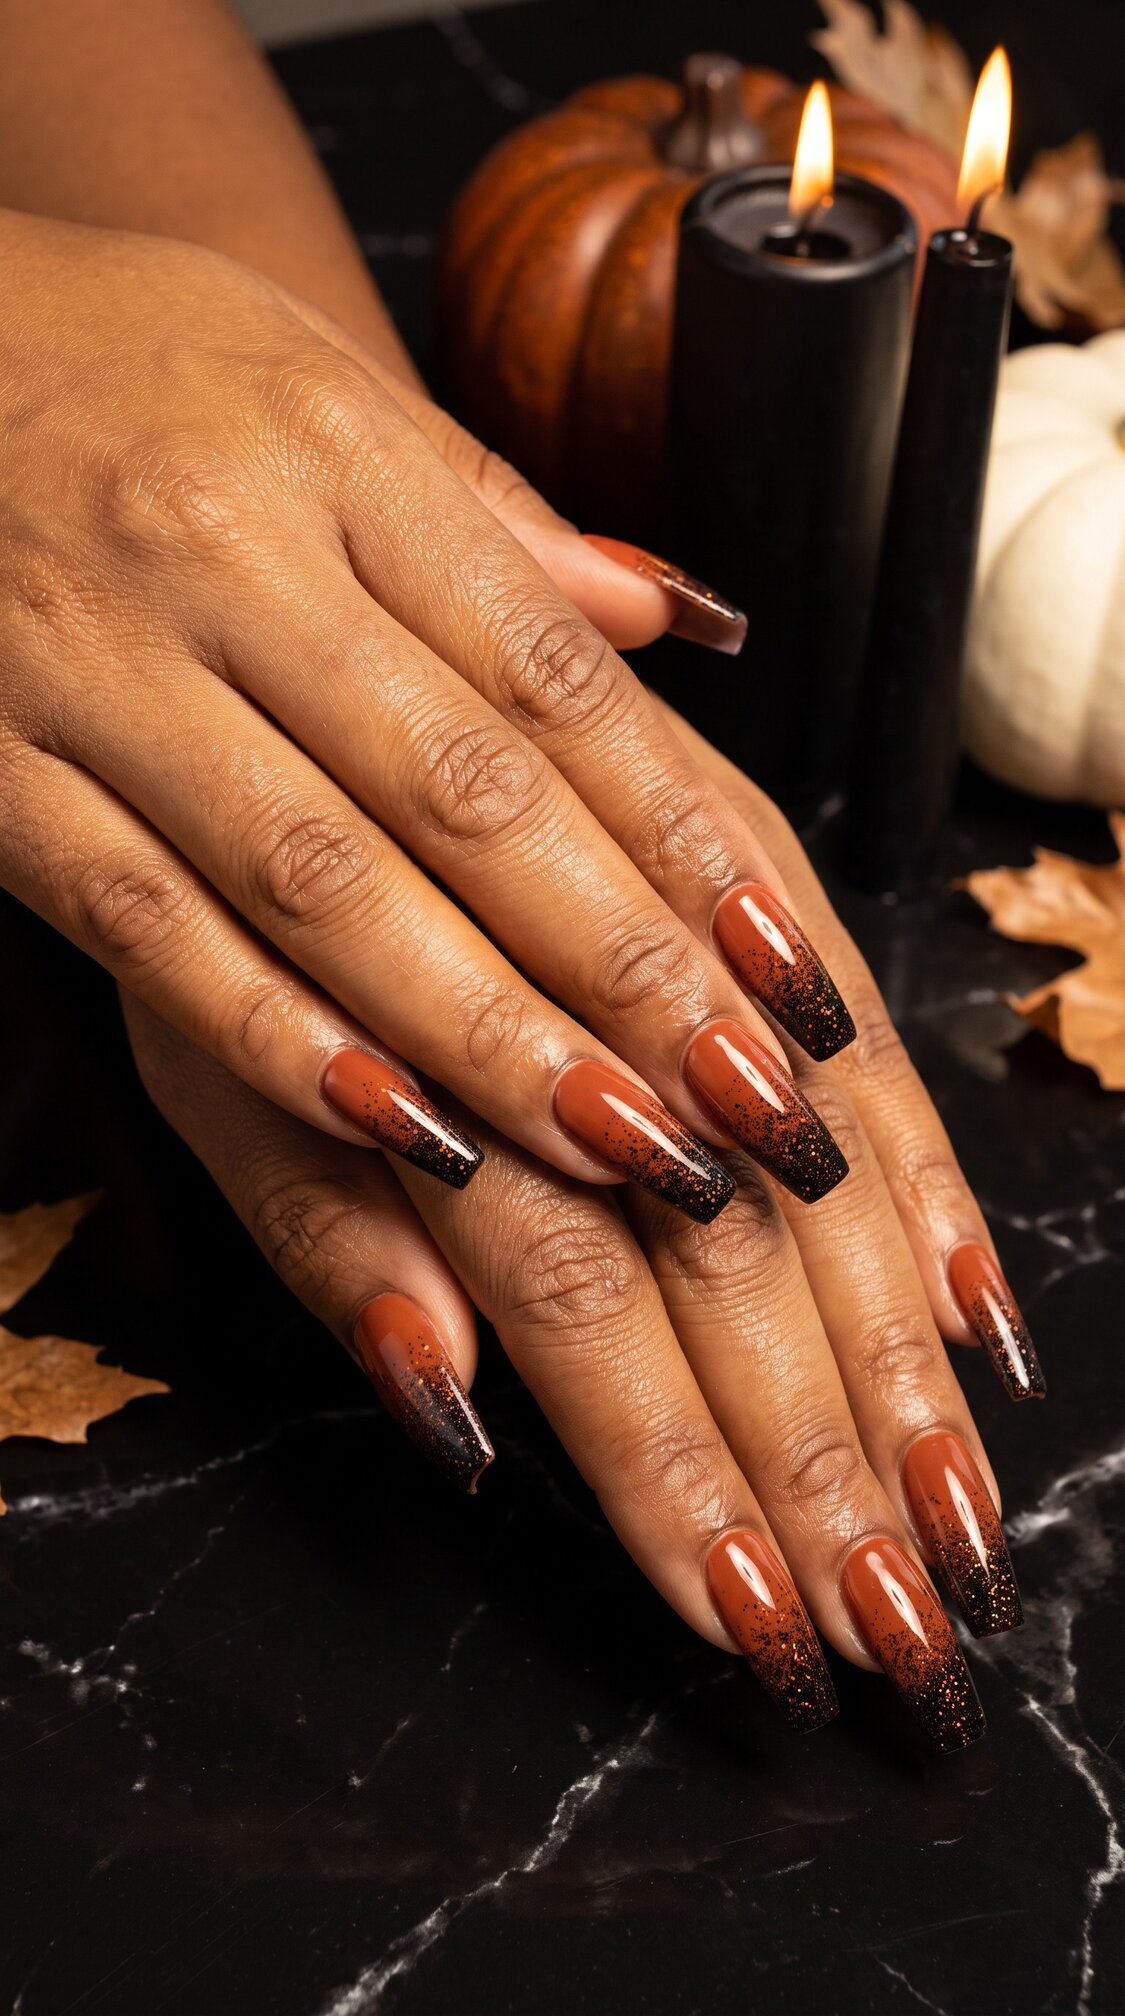
Rich burnt orange base with fine black micro glitter concentrated at the tip, thinning out and disappearing by the halfway point. Best for: the orange lover who does not want the plastic pumpkin version. The technique note: the orange has to be muted and deep, not neon. Neon orange plus black is a costume shop. Burnt orange plus black is autumn.
7. Black Cat Eye
Solid black base with a magnetic shimmer that pulls into a single bright line down the center of each nail, shifting as the hand moves. Best for: anyone who finds plain black boring but does not want art. The technique note: cat eye is magnetic polish plus a magnet held over the wet layer, and the line lands wherever the magnet sits. Ask for the line to run lengthwise rather than diagonally, it is more flattering on a long shape.
8. Sheer Smoke Gray
A translucent smoke gray jelly, the natural nail faintly visible through it, with the free edge just slightly more opaque. Best for: the reader who wants a Halloween set that does not announce itself. The technique note: sheer finishes show every ridge and every bit of leftover cuticle underneath, so the prep matters more here than on any other design in this list.
Almond Halloween acrylic nails
The wearable group. Everything here survives a normal week.
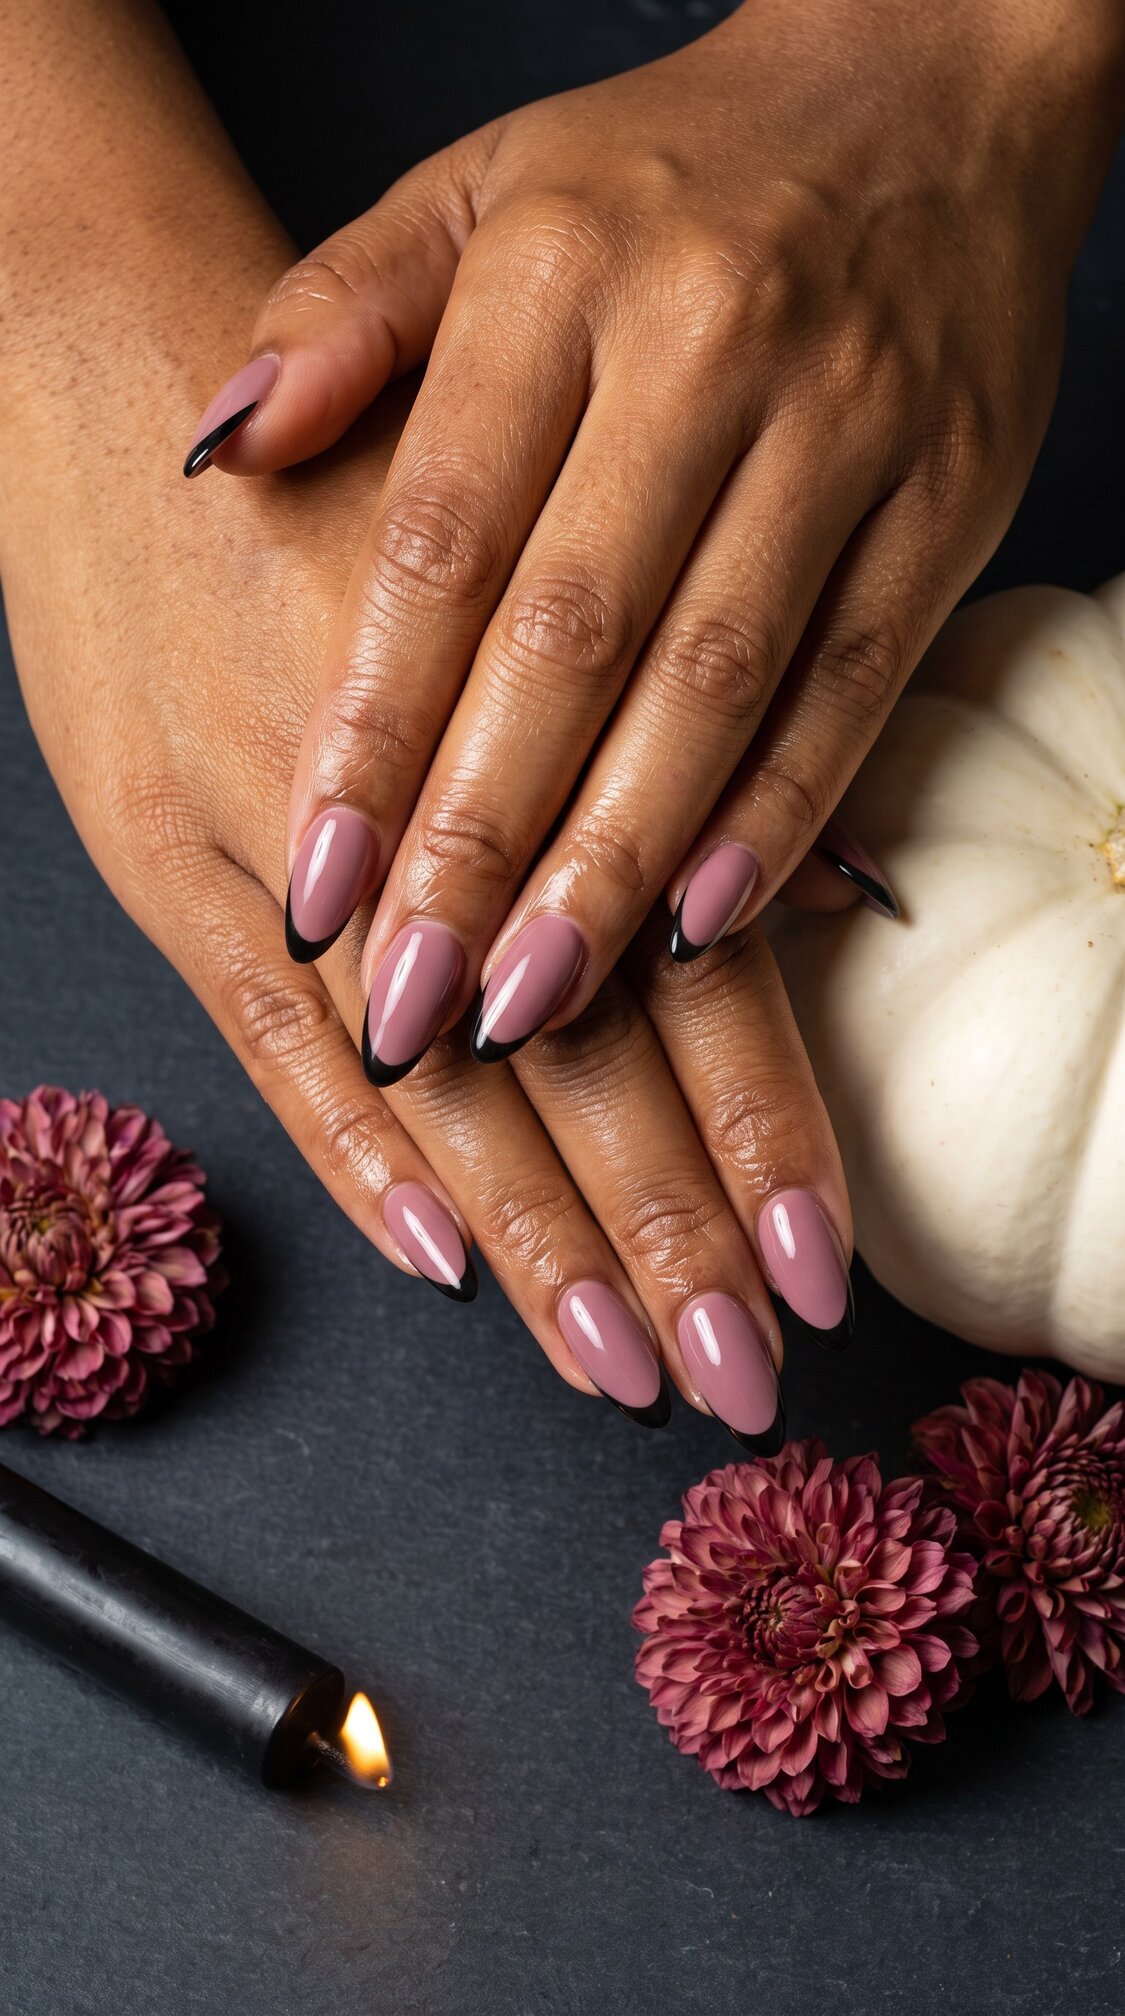
9. Dusty Rose Black French
A muted mauve rose base with a thin black French tip, about 3mm, following the almond curve. Best for: anyone who does not want black nails but does want Halloween. The technique note: the pink has to be dusty and grown up. Bubblegum pink with a black tip reads costume, dusty rose with a black tip reads editorial.
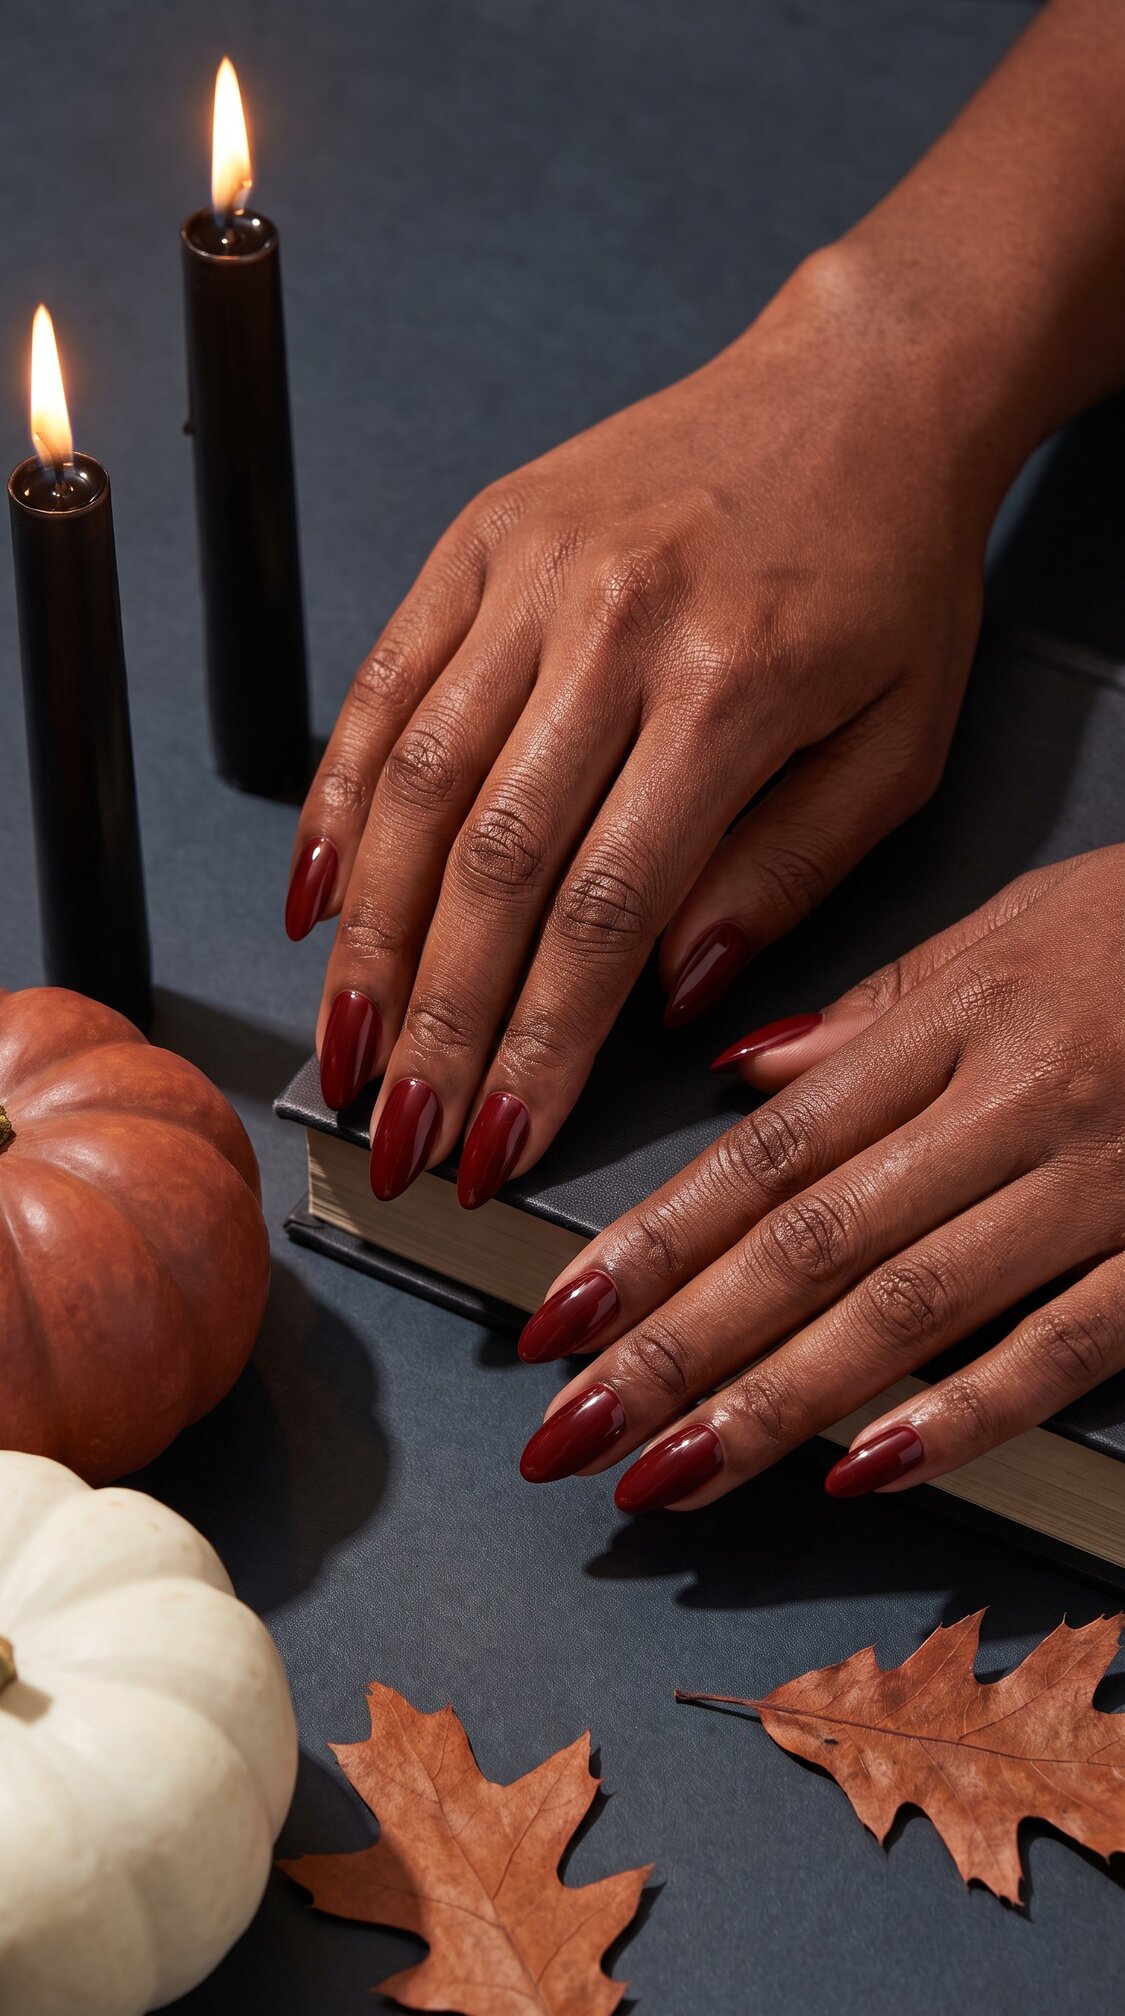
10. Oxblood Glossy
Deep oxblood on all ten, high gloss, no accent nail, no art. Closer to wine than to red. Best for: literally everyone, which is why it is here. The technique note: this is the one design in the list that genuinely works as a DIY. Two thin coats beat one thick coat on every measure, and the second coat is where the depth comes from.
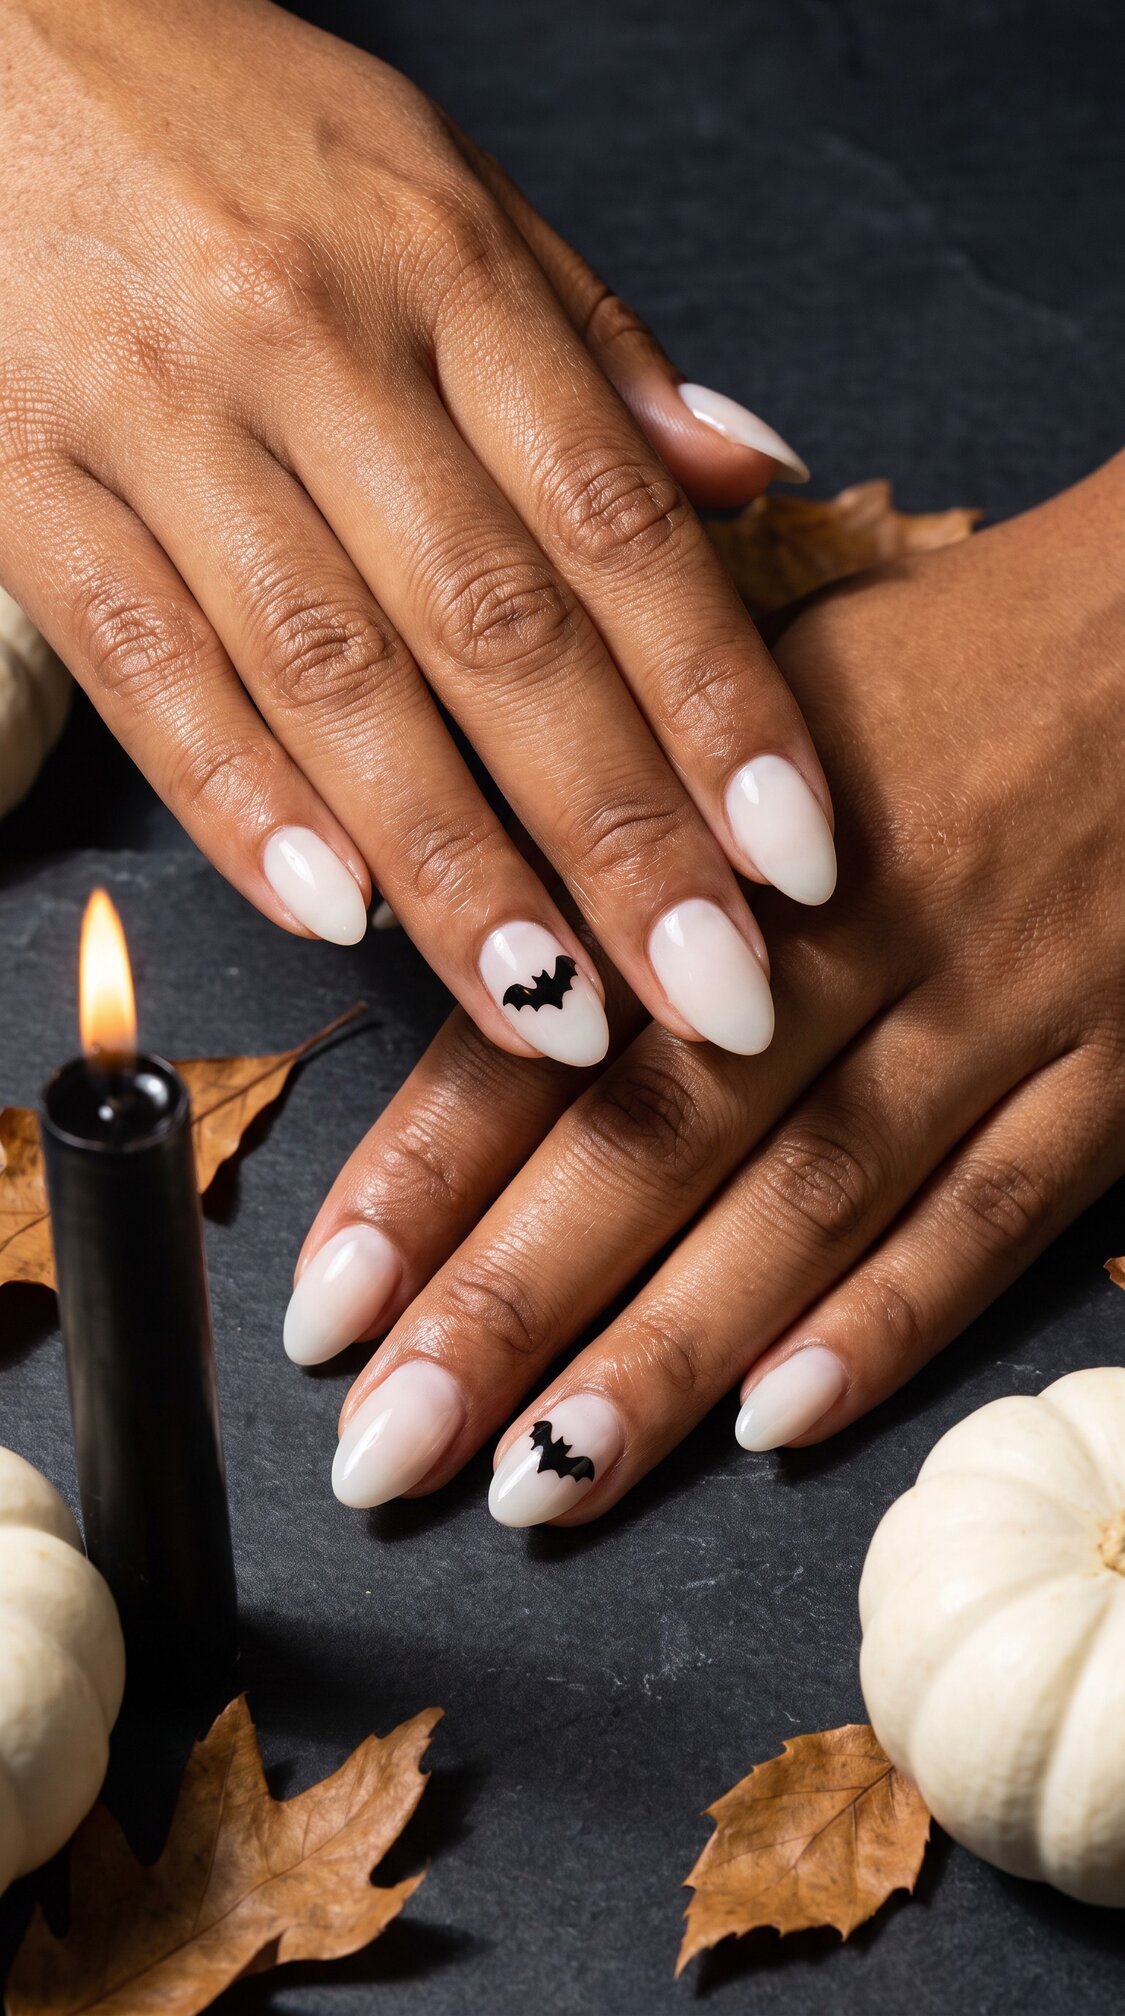
11. Milky Bat Accent Short Almond
Milky translucent white on all ten, with one small solid black bat silhouette centerd on the ring finger of each hand. Two nails carry art, eight do not. Best for: short almond, and for anyone who wants exactly one piece of Halloween on their hands. The technique note: the bat stays small, roughly a third of the nail, with plenty of milky space around it. Scale is the entire design.
12. Deep Plum Chrome
Deep plum with a mirror chrome finish that shifts toward violet in direct light. Best for: deeper skin tones especially, because the violet shift reads richer against warm undertones. The technique note: chrome over a dark base needs a perfectly smooth surface underneath, since chrome magnifies every bump it sits on.
13. Black Lace Tips
Nude or soft beige base with a fine black lace pattern painted over the tip third, like the edge of a veil. Best for: medium almond, and for a Halloween set that could pass at a wedding. The technique note: this is freehand detail work and it is priced accordingly. Ask to see the tech’s own lace work before booking it.
14. Matte Espresso Brown
A deep espresso brown, completely matte, no shine at all. Best for: every skin tone in this article, and it is the sleeper hit of the list. The technique note: matte top coat wears differently from gloss, it shows oils and fingerprints, so cuticle oil goes on the skin around the nail rather than flooded across the plate.
Stiletto and extra long Halloween acrylic nails
The drama group. Everything here is a statement and nothing here is practical, which is the point.
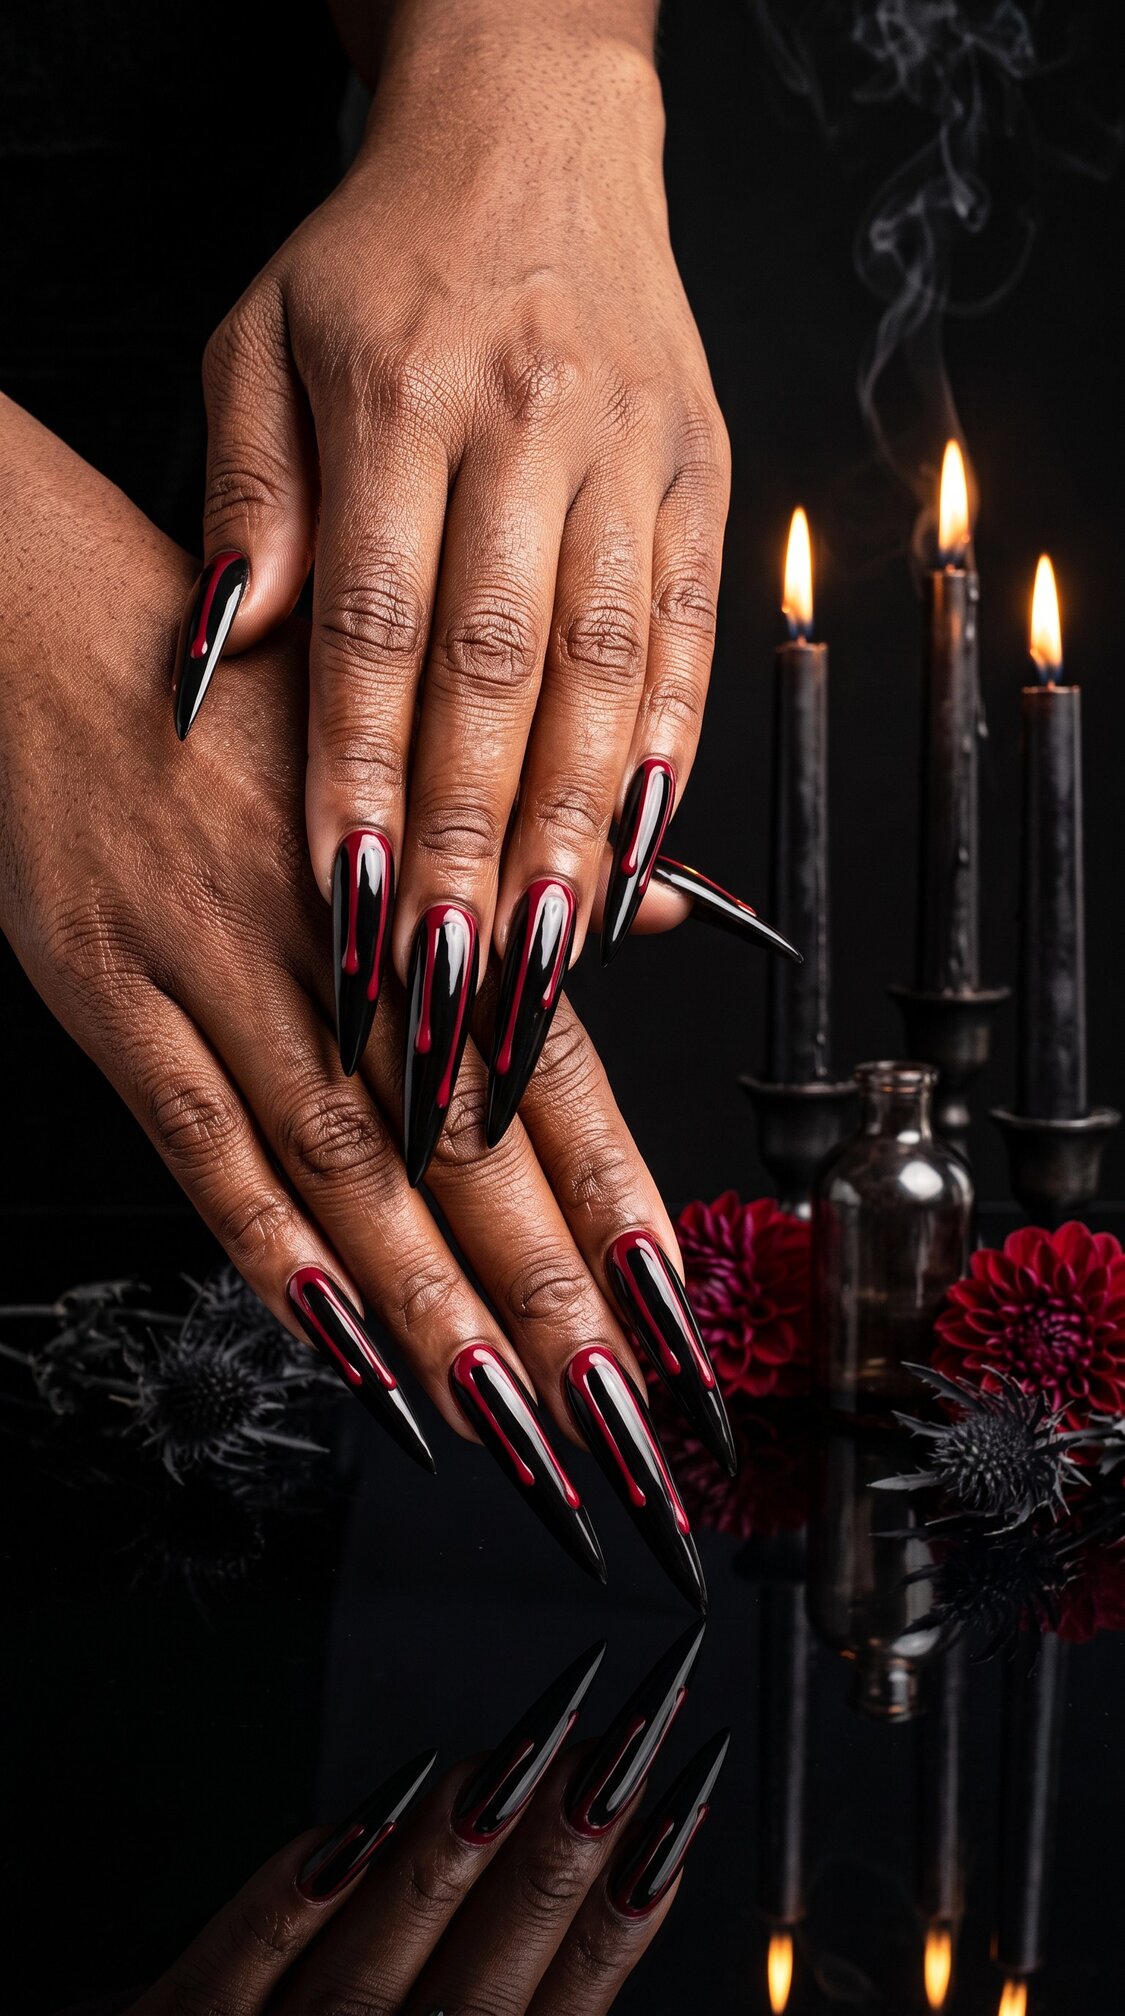
15. Crimson Drip Over Jet Black
Glossy jet black on all ten, with deep crimson running down from the cuticle in narrow rounded drips of varying lengths. The tip stays black. Best for: one night, photographed properly. The technique note: the drips start at the base and stop before the point, and no two nails match. Matching drips look printed, uneven ones look intentional.
16. Smoked Blood Red
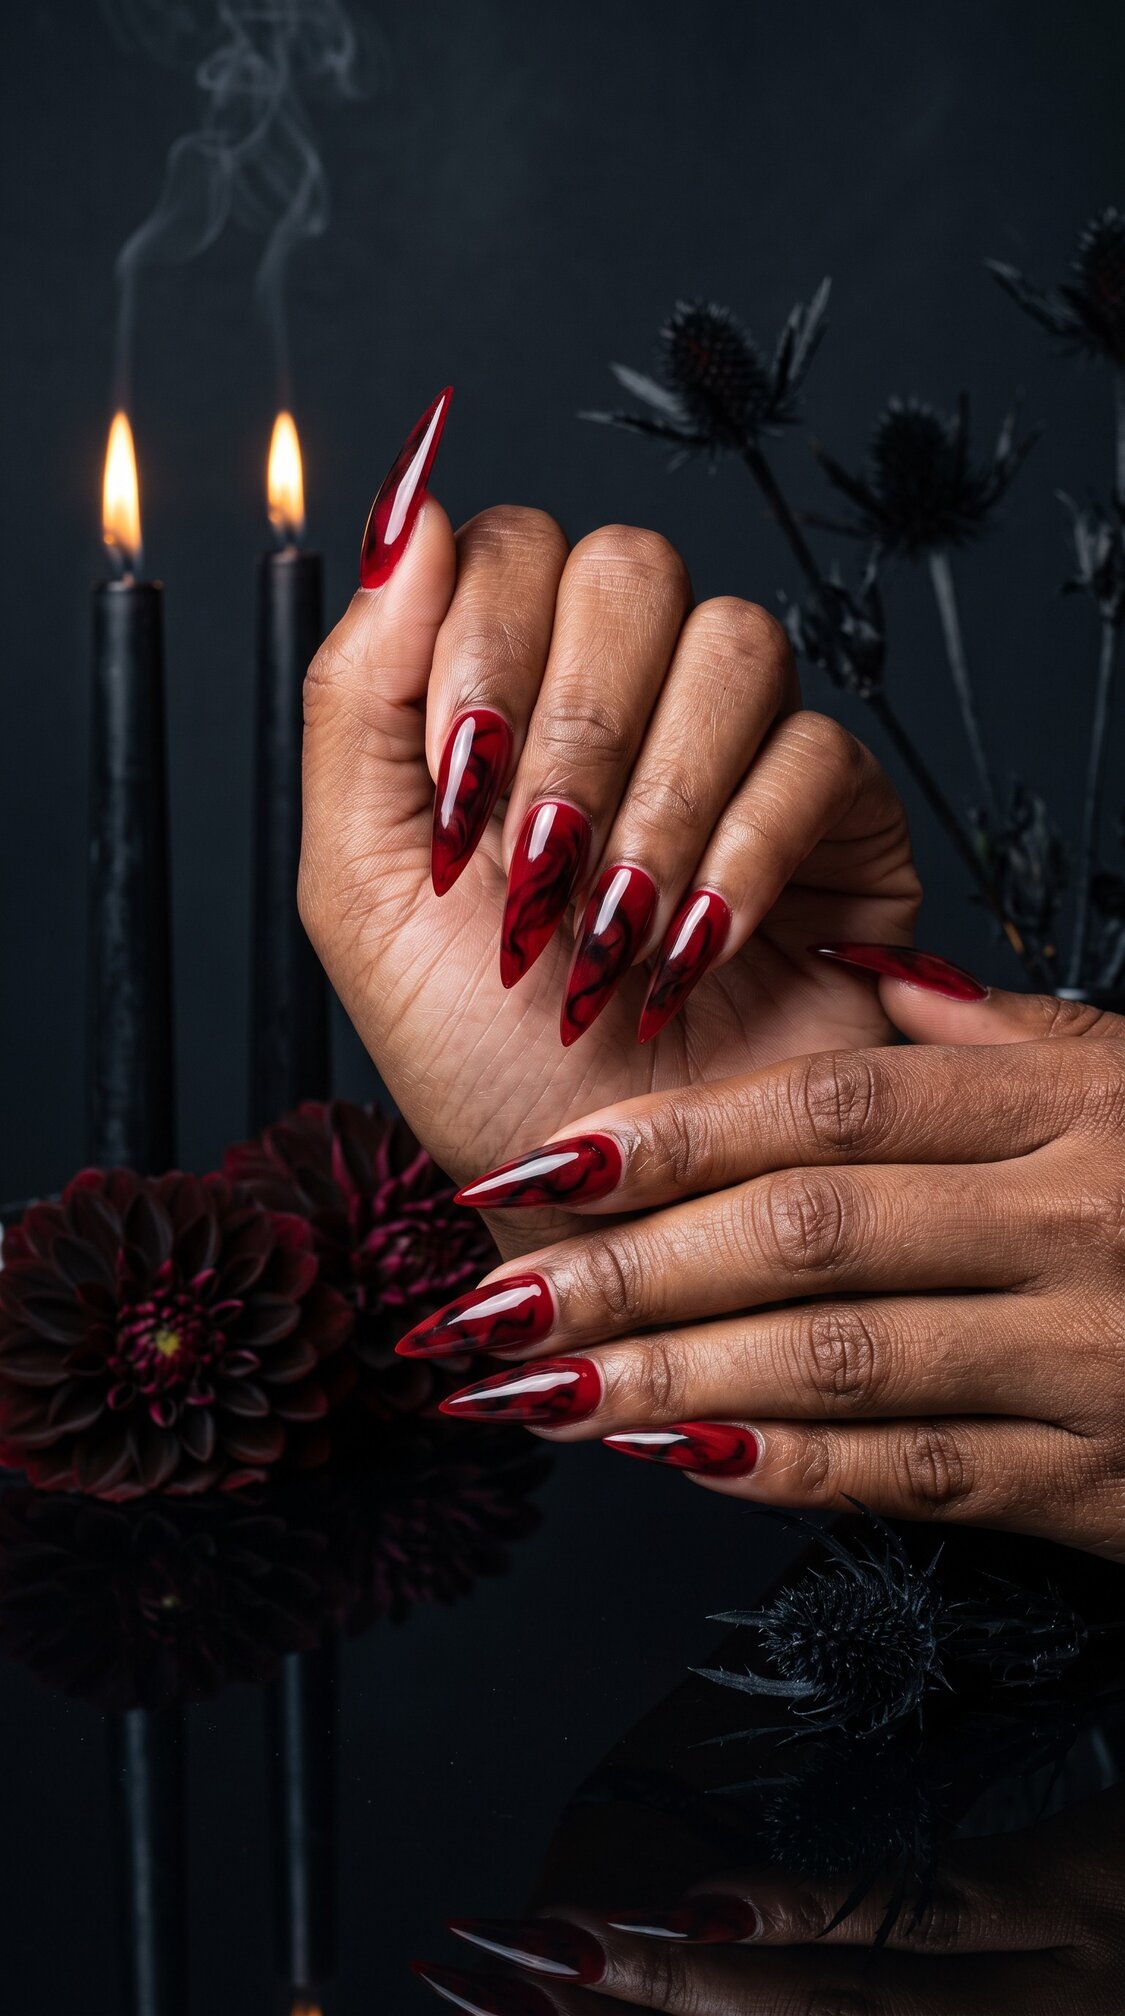
Deep blood red with soft black smoke marbling drifting through the tip half of each nail, different on every finger. Best for: anyone who wants art that does not read as art. The technique note: the smoke is dropped into a wet layer and pulled with a fine brush, so it has to be soft edged. Hard edges turn it into marble, which is a different design entirely.
17. Cracked Gold Over Matte Black
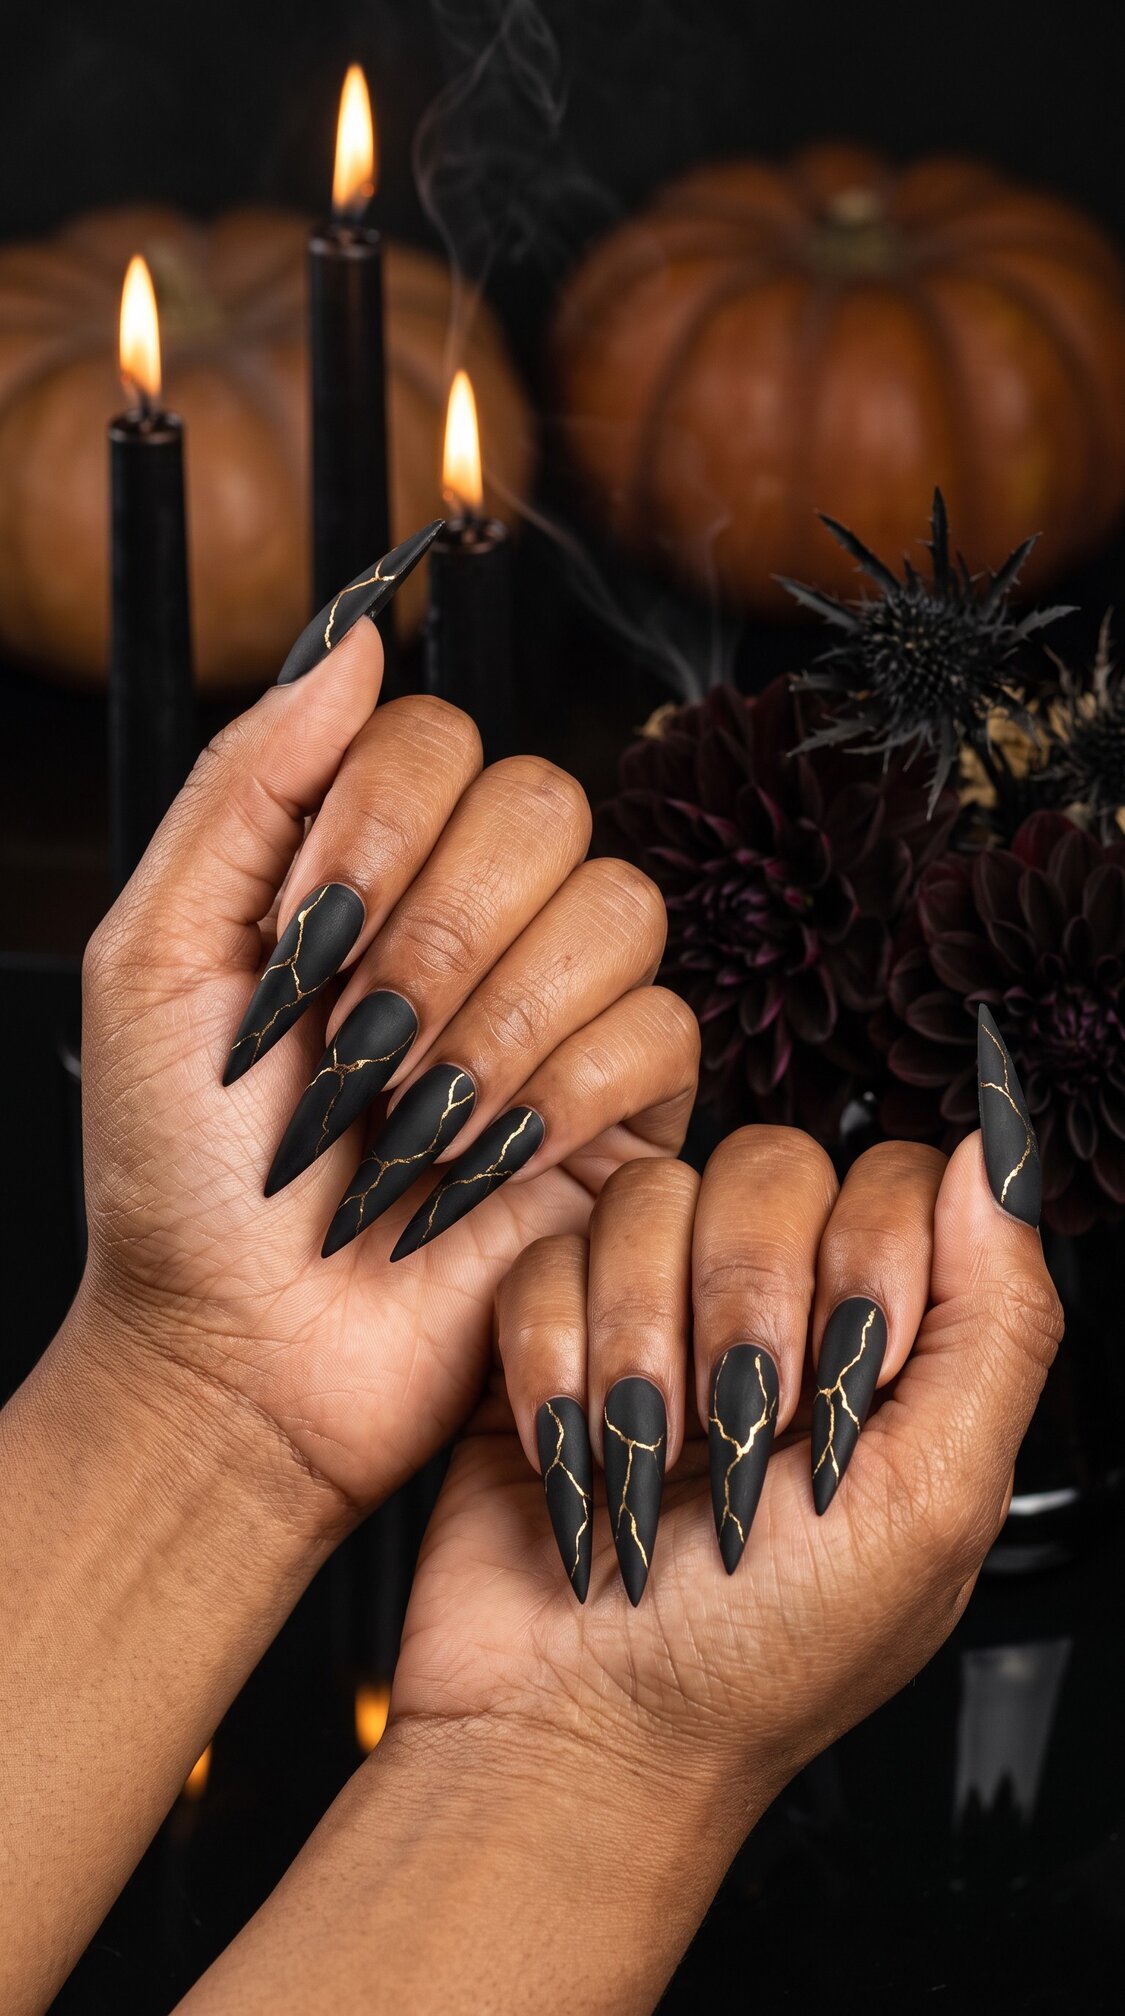
True flat matte black with fine antique gold cracks running through it like gold filling a break in stone. Sparse, so the nail reads black first and gold second. Best for: the most expensive looking set in this entire list. The technique note: the gold is foil, applied thin and irregular. Too much gold and it stops being a crack and starts being a pattern.
18. Silver Chrome Claw
Full mirror silver chrome, extra long, sharp point. Best for: a costume that needs to look expensive rather than bought. The technique note: silver chrome is the least forgiving finish here, it reflects the room including whatever is behind the camera, so it photographs best against a plain dark background.
19. Blackened Emerald
A very deep green that reads almost black until light hits it, high gloss. Best for: anyone tired of red and black. The technique note: ask for a green dark enough that it looks black in shadow. A mid green stiletto is a costume, a blackened emerald is a color choice.
Short and square Halloween acrylic nails
The group that survives a keyboard, a wash up and a full work week. Six designs, and every one is realistic for a Tuesday.
20. Matte Black With A Nude Web Accent
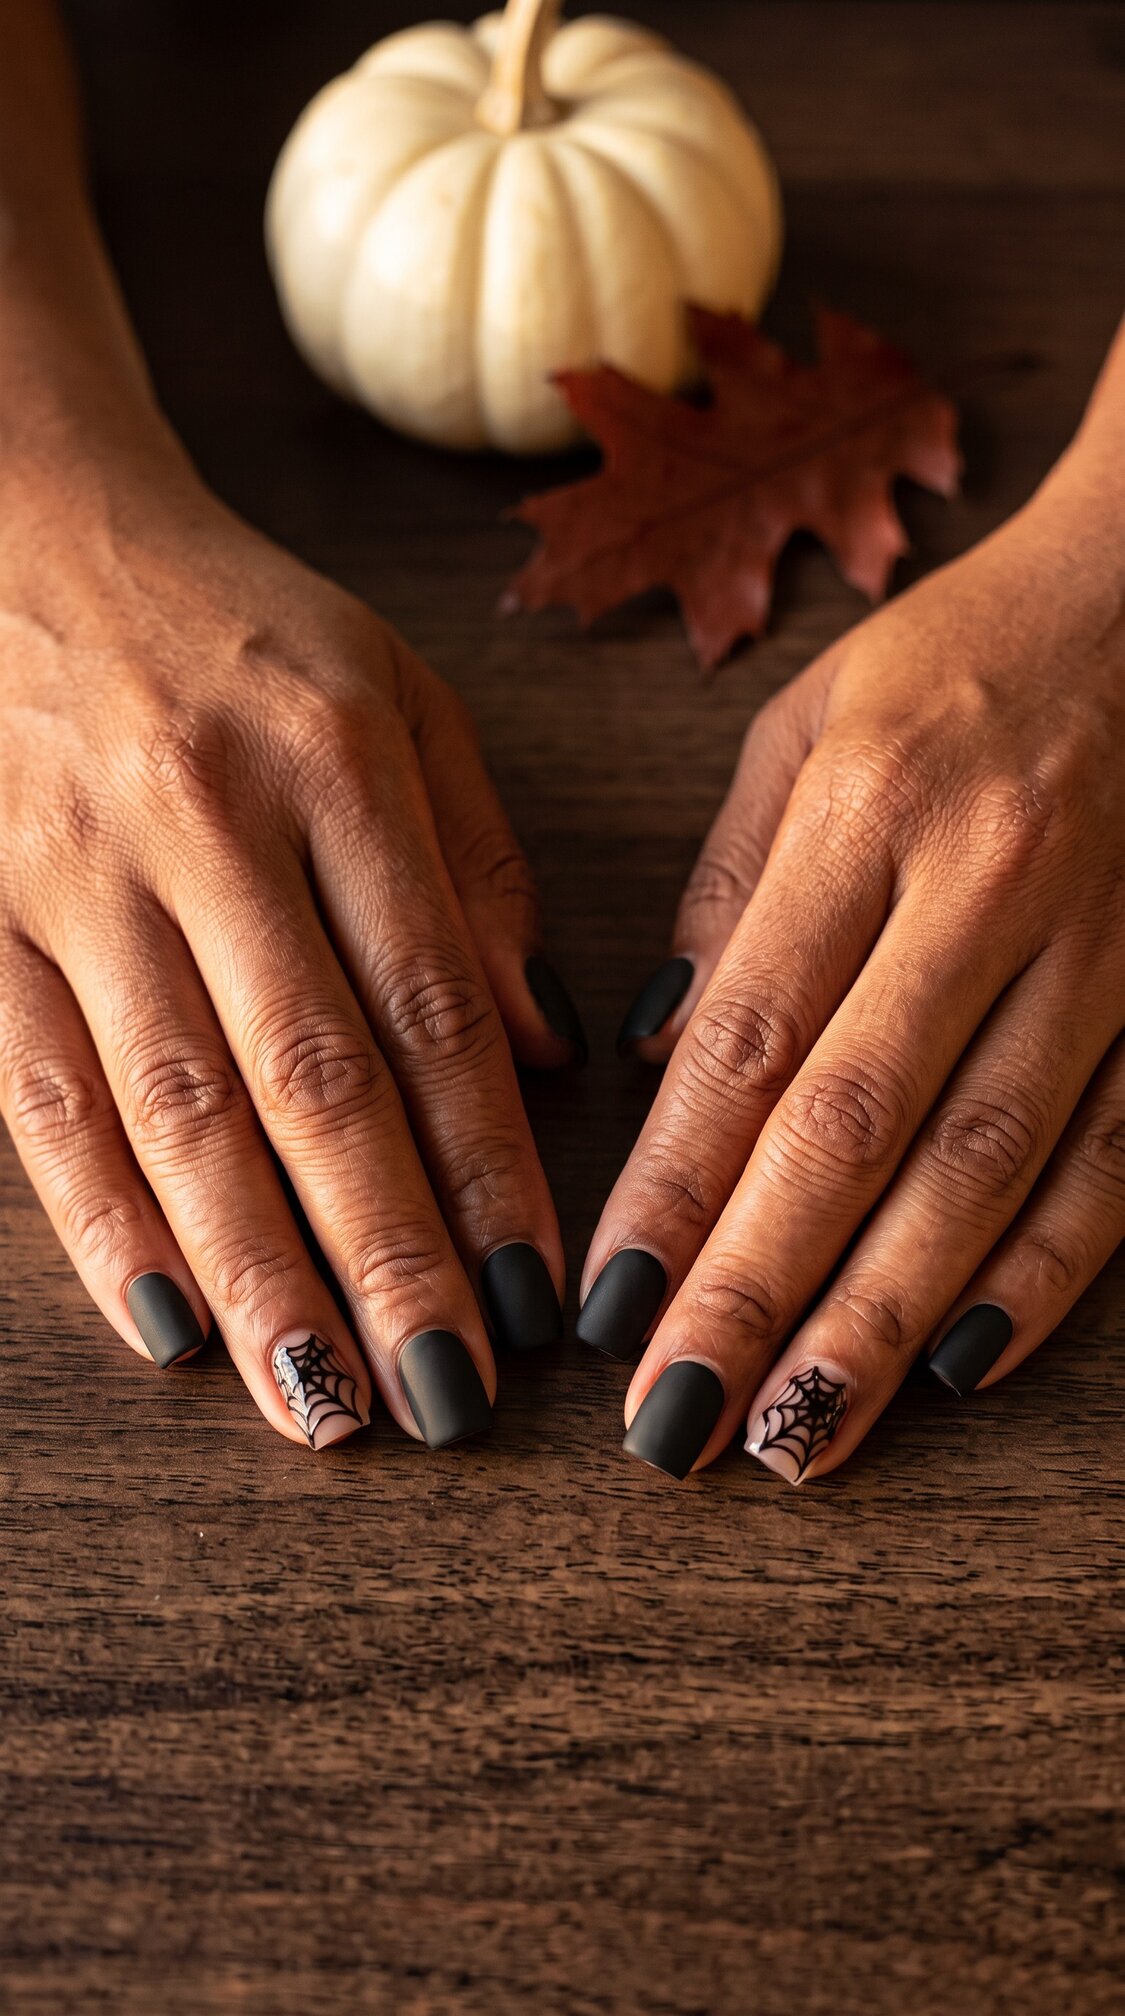
Flat matte black on eight nails, and one accent nail on each hand in soft nude carrying a fine black spiderweb. Best for: the subtlest Halloween set here that still says Halloween. The technique note: the contrast between the matte black and the nude web nail is what makes it read at arm’s length. All black with a black web disappears entirely at a normal viewing distance.
21. Milky White Black French
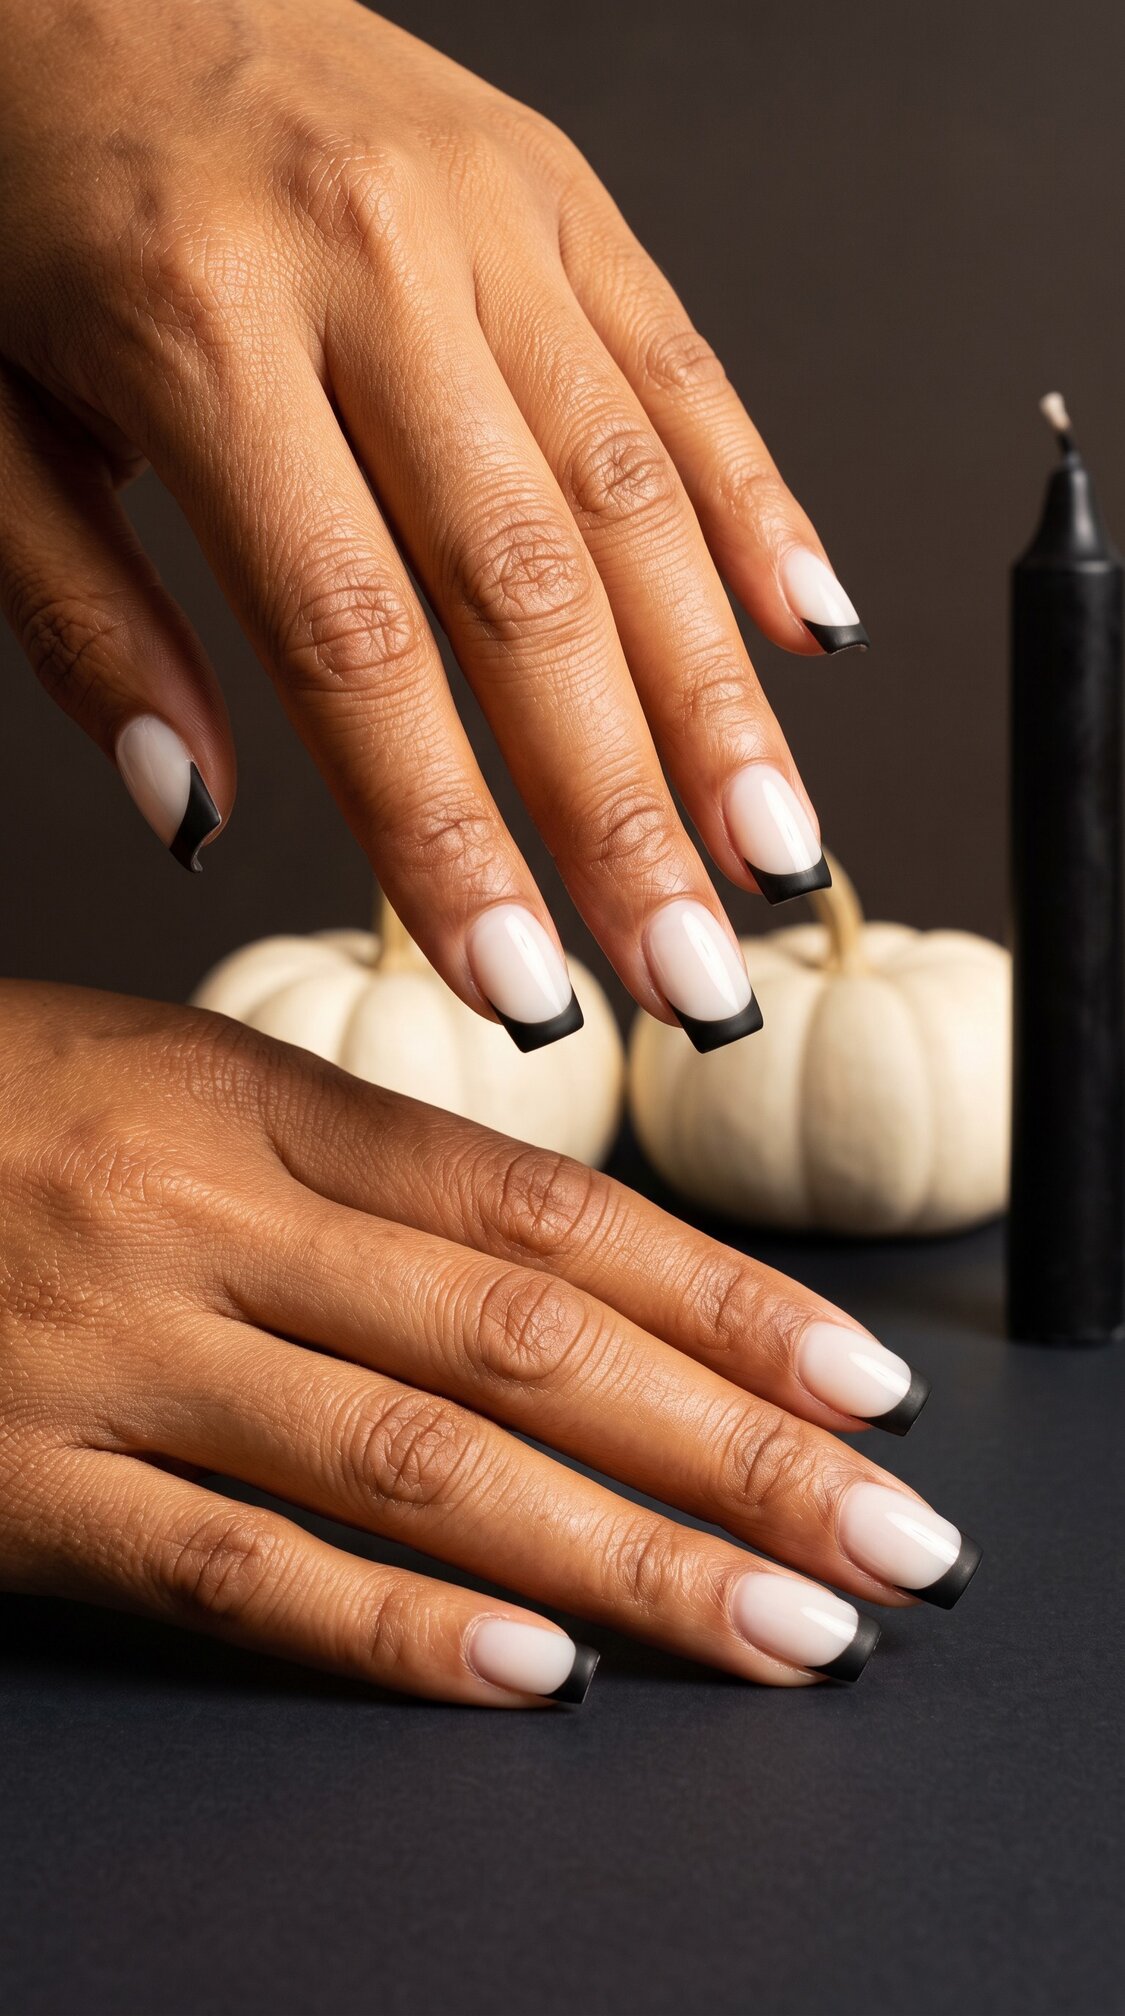
Milky off white base with a thin matte black French tip, about 2mm, cut straight across to follow the square. Best for: the easiest set in this article to ask for and the easiest to live with. The technique note: on a square nail the smile line runs straight, not curved. A curved line on a square tip fights the shape.
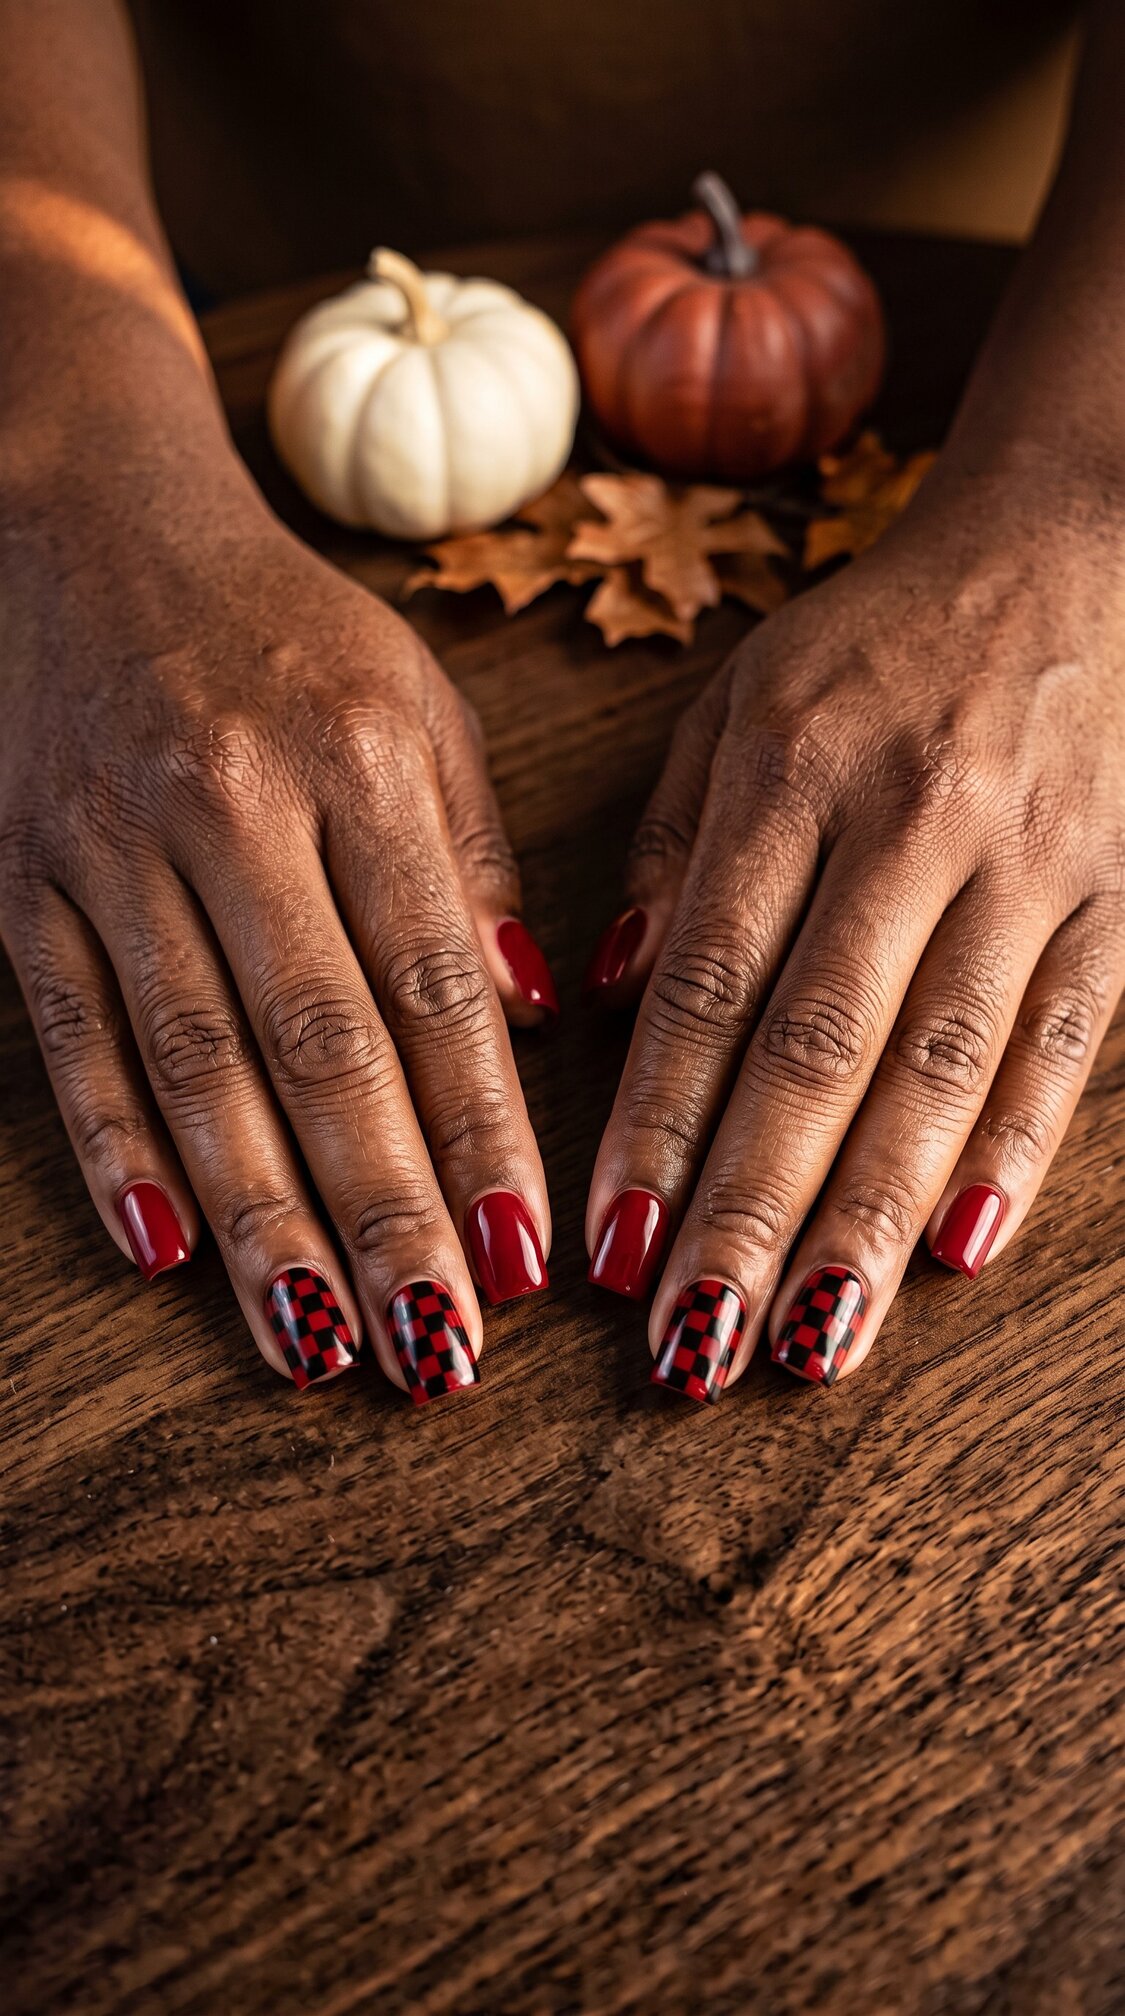
22. Red And Black Checkerboard
Solid blood red on six nails, with a small even red and black checkerboard on the index and ring fingers of each hand. Best for: short square specifically, because the flat surface keeps the grid straight. The technique note: the grid has to be even and the edges have to be crisp. A wobbly checkerboard is the fastest way to make a good set look homemade.
If you are not booking a salon for this one, a good press on set gets you the same shape and the same art without the appointment.
23. Cherry Cola Red
A deep cherry cola red, glossy, on all ten. Warmer and browner than a true red. Best for: every skin tone, and it is the most flattering red in this list on deeper tones. The technique note: cherry cola sits between red and brown, so it does not compete with warm undertones the way a blue based red does.
24. Black And Gold Speckle
Matte black base with fine gold speckle scattered across all ten, denser toward the tip. Best for: anyone who wants sparkle without full glitter. The technique note: speckle is flicked, not painted, so it is genuinely random. Ask for it lighter than you think you want, it always reads heavier once it is on the hand.
25. Tortoiseshell Amber
Amber and dark brown blended into a tortoiseshell pattern, glossy, different on every nail. Best for: the reader who wants autumn more than Halloween. The technique note: tortoiseshell needs at least three tones to look real, a light amber, a mid brown and a near black. Two tones looks like a stain.
Halloween acrylic colors that work on every skin tone
Here is the thing most roundups get wrong. Acrylic is opaque and it covers the entire nail bed, which means the shade sits on top of your skin rather than filtering through your natural nail the way sheer polish does. That changes which colors flatter and which ones fight you.
The contrast between the nail and the skin around it is doing more work than the color itself.
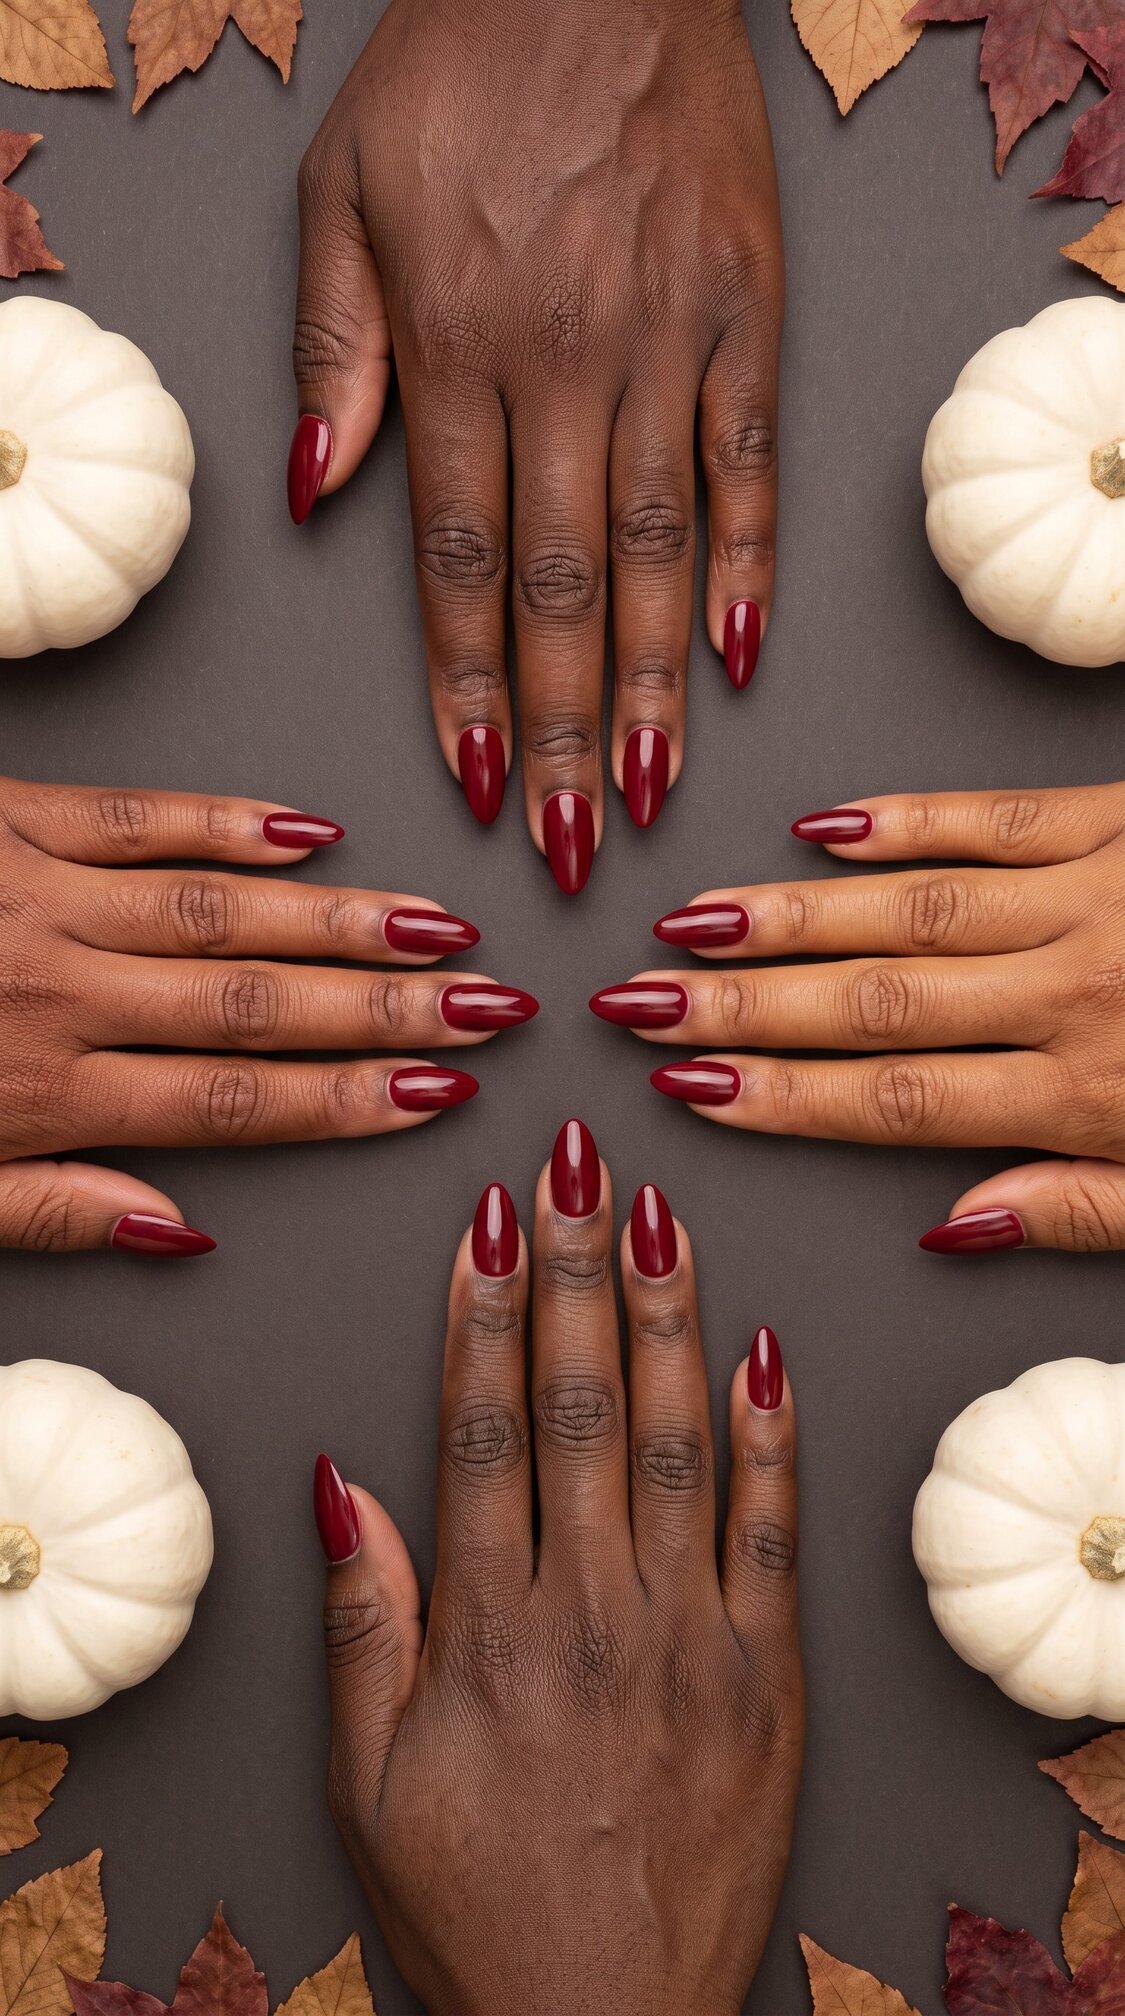
- Deep espresso and rich mahogany tones: warm reds, oxblood, burnt orange, gold and copper chrome all glow here. Blackened emerald and deep plum read jewel toned rather than dark. Mid grays and beiges are the ones that fall flat, because there is not enough contrast to make the nail read as a deliberate choice
- Deep umber and cocoa tones: blood red, cherry cola and espresso brown are the strongest. Silver and black chrome give a sharp contrast that reads intentional
- Rich caramel and golden bronze tones: almost everything works, which is a genuinely annoying thing to be told. The one to watch is a yellow based orange, which can sit too close to a golden undertone and disappear
- Warm chestnut and honey tones: dusty rose, plum, wine and tortoiseshell are the most flattering. Very pale milky white can read gray rather than crisp, so ask for a milky with warmth in it rather than a blue toned white
None of this is a rule about what you are allowed to wear. It is a description of how contrast behaves, and knowing it means you walk in asking for a shade rather than hoping.
If a color you love is on this list as one to watch, the fix is usually the finish and not the shade. Matte deepens a color, chrome brightens it, and a glass finish adds depth to anything that reads flat. For more on how one shade behaves across a whole season, the red nails guide works through the same problem in more detail.
How long Halloween acrylics last, and the fill schedule nobody mentions
Two to three weeks, then a fill. Not a new set, a fill.
Here is what actually happens. Your natural nail grows roughly 3mm a month, so about two weeks in you get a visible gap at the cuticle where the acrylic stops and new nail starts. That gap is cosmetic at first. It stops being cosmetic when the acrylic starts lifting, because the moment there is a gap between the product and the nail plate, moisture gets underneath.
A fill is your tech filing down the grown out edge, filling the gap at the cuticle and rebalancing the shape. It takes less time and costs less than a full set.
Leaving it too long is what causes the damage people blame on acrylic itself. A lifted nail that keeps getting knocked will separate further, and that is the point where it starts to hurt.
Between fills, oil the cuticle daily. Not the nail, the skin around it. Acrylic is rigid and your natural nail underneath is not, and flexible skin at the join is what stops the edge from lifting.
If you are going to stretch the schedule, stretch it on a short square set. On a long coffin or stiletto set the leverage is much higher, so a lifted long nail catches on something and takes your natural nail with it.
Taking them off without wrecking your nails
Soak. Never pop.
The single most common piece of nail damage is not from wearing acrylic, it is from removing it badly. Prying a set off takes layers of the natural nail plate with it, and that is where the thin, bendy, peeling nail afterwards comes from. It grows back, but it takes months.
The foil method, in order:
- File off the top coat and as much of the surface product as you can, until the shine is completely gone
- Soak a cotton pad in pure acetone, not regular polish remover, which is not strong enough
- Press the pad onto the nail and wrap the fingertip in foil
- Wait 20 to 30 minutes. Set a timer, because this is the step everyone shortcuts
- Slide the acrylic off gently with a cuticle pusher. If it resists, it is not ready. Re-wrap and wait another ten minutes
- Buff lightly, then oil
Give your nails a week off between sets if you can. Cuticle oil twice a day and a keratin treatment do more in that week than anything you can buy in a bottle marked “nail strengthener”.
If a nail stays painful, stays discolored, lifts away from the nail bed or shows any green or white patches underneath, stop and see a nail technician or a doctor. That is not a cosmetic problem and it does not resolve with another set on top. Nothing in this article is medical advice.
If you would rather skip extensions altogether this year, the Halloween nail designs guide covers 30 looks you can do on your own natural nails, sorted by how much commitment each one takes.
Halloween acrylic nail questions, answered
Which nail shape lasts the longest?
Short square lasts the longest. The shorter the extension, the less leverage there is on the join at the cuticle, so there is less lifting and less breakage. Stiletto is the shortest lived shape because all of its length ends in an unsupported point.
Can you get acrylics on short nails?
Yes. Acrylic extensions are built on a tip or a form that sits over your natural nail, so the length of your natural nail does not limit the length you can have. What it does affect is how natural the result looks, since a very long extension on a very short nail bed has less to bond to and can look pasted on.
How long do Halloween acrylics last?
Two to three weeks before a fill is needed, and a well maintained set can be filled repeatedly for months. The limit is not the acrylic, it is the natural nail growing out underneath and creating a gap at the cuticle.
Can you type with coffin nails?
Yes, with an adjustment period of roughly three days. Coffin and almond are both workable at a medium length. Extra long stiletto is not realistically typeable, which is why it belongs to a single night rather than a work week.
What nail shape is best for wide nail beds?
Almond. The taper narrows the nail visually and draws the eye to a point, which balances a wider bed. Square and coffin both emphasize width because the tip runs straight across at the widest part of the nail.
Do dark nail colors stain your natural nails?
They can, particularly deep reds and blacks worn without a base coat. The staining is on the surface of the nail plate and it grows out. A proper base coat prevents almost all of it, and it is the step most often skipped at home.
How much do Halloween acrylic nails cost?
It varies significantly by region and by whether shape, length and art are priced separately. Hand painted detail like lace, webs and drips is charged per nail almost everywhere. Call two salons near you and ask for the price of a full set with extensions plus art before you book.
Are press on nails a real alternative to acrylics?
For a short set, yes. A good press on set gives you the same shape and often the same art for a fraction of the cost, and it comes off in an evening instead of thirty minutes of acetone. For an extra long stiletto set worn for a week, no, the adhesive is the limiting factor.
The shape is the decision
Everything else on this list is a preference. The shape is the only choice that changes how the set fits into your actual life, and it is the one worth thinking about for longer than thirty seconds.
Long coffin if you want the photograph. Almond if you want to still like them in week three. Stiletto for one night and one night only. Short square if you have a job, a keyboard and no patience, which, FYI, is most of us.
Save the shape you want, screenshot the design that goes with it, and take both to the appointment. That is the whole method.
Looking for something shorter to wear after Halloween, the short nails guide and the almond nails guide both work through shapes that carry straight through winter. And if the black French tip is the part you keep coming back to, the French tip guide has more versions of it.