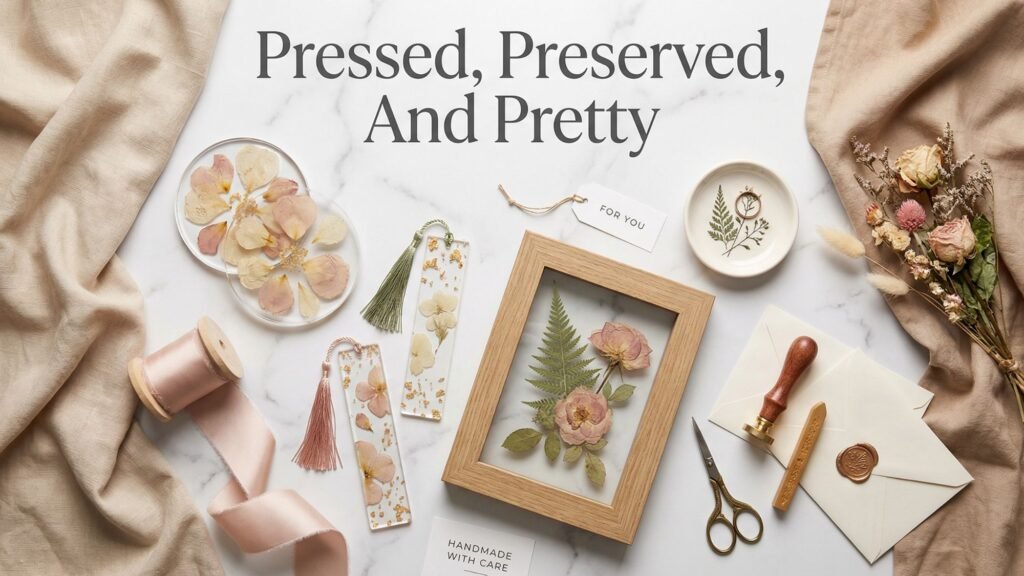
Ever found a flower tucked in a book and instantly remembered the day and where it came from? That’s the exact vibe we’re going for, except we’re turning it into gifts people actually use. I’ve made a lot of pressed and preserved flower projects over the years, and the ones that get the biggest reactions always share two things. They look clean and intentional, and they last longer than a week in someone’s sunny kitchen.
This post gives you 25 DIY presents with flowers that are pressed, preserved, and genuinely pretty, not “cute for a day.” You’ll get clear steps, my learned-the-hard-way fixes, and a troubleshooting section that saves projects when they start acting up. Because yes, resin can get cloudy, petals can brown, and glue can decide it hates you. We’ll handle all of it.
What you can expect inside
- Quick wins like pressed flower resin bookmarks and pressed flower resin coasters
- Keepsake projects like wedding bouquet preservation DIY frames and shadow boxes
- Non-resin options if you want the look without the mess
- Finishing + sealing + care so the gift stays crisp, not crusty
Before we start, my biggest “pro secret”
- I always pre-seal pressed flowers before I put them in resin or under a topcoat. In my workshop, I’ve found that this single step prevents most color bleed and a bunch of bubble drama. A common mistake beginners make is skipping sealing because the flower looks dry, then the pigment runs and the whole piece looks cloudy.
Quick prep checklist
- Press a few extra blooms, not just “exactly what you need”
- Sort flowers by color palette, so your finished gifts look curated
- Test one small flower first, especially if you plan to use resin
Why Pressed And Preserved Flower Gifts Are Everywhere Right Now
Pressed flowers used to feel like a grandma craft, and I say that with love. Now they look straight-up boutique because people style them like modern decor and jewelry, not like a school project. Pinterest saves keep spiking around resin botanicals, floating frames, and bouquet preservation, because they hit that perfect combo of sentimental and useful. Who doesn’t want a gift that feels personal but still looks polished enough to sit on a coffee table?
Another big reason these are trending is the vibe shift toward lasting, low-maintenance florals. Dried and preserved blooms feel sustainable, and they hold up way longer than fresh flowers that collapse in two days. Plus, if someone grew the flowers, or used wedding bouquet blooms, the gift instantly becomes a keepsake. That kind of emotional punch is hard to beat, and honestly, it’s why these projects get saved and shared so much.
What I’m leaning into for this list
- Functional gifts people actually use, like bookmarks, coasters, ring dishes, and trays
- Heirloom-style keepsakes, like bouquet preservation frames and herbarium shadow boxes
- Glass-and-gold styling, because it photographs like a dream and feels expensive fast
- Color stories, because a curated palette makes even a simple project look intentional
Tiny reality check
A common mistake beginners make is grabbing random flowers and sticking them into a project without thinking about color and shape. Then everything looks busy and a little chaotic, like a floral yard sale. If you pick a palette first, the same exact supplies suddenly look high-end. Funny how that works, right?

Flower Preservation Basics, Pick The Right Method For The Flower You Have
Let’s save you from the classic heartbreak. Not every flower wants to be pressed. Some blooms flatten beautifully and keep their color, and others turn into sad brown confetti if you look at them wrong. If you match the flower to the right preservation method, your projects instantly look cleaner and last longer.
Pressing works best when you want flat, modern, frame-worthy flowers
Best for
- pansies, violas
- cosmos
- daisies
- ferns
- small wildflowers
- greenery and leaves
Why pressing works
Pressing removes moisture slowly under pressure, so the flower dries flat and keeps a crisp shape. It also makes flowers easier to embed in resin without bulk.
How to press successfully
- place flowers face-down on blotting paper
- cover with another sheet
- press under heavy weight or in a flower press
- swap paper early if blooms feel damp
Common mistake beginners make
They press thick flowers like roses and wonder why everything molds or stays puffy. Thick blooms want silica gel instead.
Silica gel drying works best when you want 3D blooms that still look like flowers
Best for
- roses
- peonies
- ranunculus
- mums
- thick, layered petals
Why silica gel works
Silica pulls moisture out fast while supporting the bloom, so it keeps its shape instead of collapsing.
How to silica dry without wrecking petals
- pour a base layer of silica in an airtight container
- place the bloom gently
- sprinkle silica around and over it until fully covered
- close the lid, wait, then brush off gently
Pro-tip
If you crush a petal while burying it, don’t panic. I’ve fixed this by using a soft paintbrush to “fluff” petals back into place once the bloom dries. It feels ridiculous, but it works.
Air drying works best when you want rustic bundles and fragrance-friendly stems
Best for
- lavender
- baby’s breath
- strawflower
- statice
- eucalyptus
Why air drying works
Some flowers hold up better when they dry in the shape they naturally hang in. These also make great sachets and bundle gifts.
How to air dry
- bundle small bunches with twine
- hang upside down in a dark, dry space
- keep airflow moving
Quick decision guide, no overthinking
- want flat and modern? press it
- want 3D bouquet vibes? silica dry it
- want rustic bundles? air dry it

Supplies That Actually Matter, And What I Skip Every Time
You can absolutely do pressed flower gifts on a budget. But a few supply choices make the difference between “wow, where’d you buy that?” and “aww, cute.” I’m not trying to be dramatic, but the wrong paper and the wrong sealant will set you up for disappointment.
Pressing essentials
- Flower press or heavy books plus flat boards
- Blotting paper or uncoated absorbent paper
- Tweezers for delicate petals
- Small detail scissors
- Acid-free cardstock for mounting and framing
Pro-tip
In my workshop, I’ve found that blotting paper swaps early on prevent 80% of browning and mold issues. If the flower feels even slightly cool or damp, I swap the paper. I don’t argue with moisture. Moisture always wins.
Preserving essentials for 3D blooms
- Silica gel
- Airtight container with a lid that seals well
- Soft brush to remove silica without snapping petals
- Optional, but nice: small mesh strainer to reuse silica
Common mistake beginners make
They reuse silica that already feels clumpy or damp. Then the flower dries unevenly and looks tired. If your silica feels like wet sand, it needs drying or replacing.
Resin essentials, if you’re doing resin projects
- Low-viscosity epoxy resin with clear instructions and a reliable mix ratio
- Silicone molds (coasters, trays, bookmarks, ring dishes)
- Mixing cups with measurement lines
- Stir sticks and a scraper
- Heat tool for bubbles, used carefully
- Gloves and proper ventilation
Pro-tip
I warm resin bottles in lukewarm water before mixing when my room runs cool. It cuts bubbles and mixes smoother. Just don’t overheat it or you’ll speed up the working time and suddenly you’re sprinting, which is not the vibe.
Sealing essentials, the unsung hero
- Clear acrylic spray or archival matte fixative
- Microfiber cloth for dust
- Rubbing alcohol for wiping down surfaces before gluing
This is the part people skip. Then they wonder why petals bleed or look “wet” under resin. Pre-sealing is boring, but it saves your project. Yes, I’m being bossy about it.
What I skip, every single time
- Cheap “mystery resin” with vague instructions
- Gloss sprays that stay tacky
- Wet flowers anywhere near resin
- Glue that stays rubbery forever

The Secret Process, Stop Color Bleed, Floaters, And Bubble Drama Before It Starts
If you only remember one thing from this whole post, remember this. Pressed flowers act like tiny sponges and dye packs. If you drop them straight into resin or slap on a wet topcoat, they can bleed, float, or trap bubbles like they’re doing it on purpose. Want the clean, boutique look? Lock the flowers in first, then build your layers.
The 3-step “lock it in” method (works for resin and most topcoats)
Step 1: Dry means DRY
- Press until the petals feel papery, not cool or flexible.
- If your room feels humid, extend your press time and swap paper more often.
- Thick blooms still fight you, so use silica gel for those instead.
Step 2: Pre-seal both sides
- Mist with clear acrylic spray or archival matte fixative, front and back.
- Spray light coats, heavy coats puddle and darken petals.
- Let it dry fully before you do anything else, dry time changes based on humidity and spray brand.
Step 3: Tack it down, then pour
- Pour a thin base layer first.
- Place the flower with tweezers and gently press it flat.
- Add a whisper-thin “tack coat” over the flower, then let it set slightly.
- Finish with your full pour once the flower stays put.
Why this works (and why people skip it)
- Sealing creates a barrier so pigment bleeds less.
- The tack coat stops floaters.
- A thin base layer helps bubbles rise and pop easier.
- Ever wondered why some resin pieces look crystal clear and others look like foggy aquarium decor? Moisture and rushing usually cause that.
Bubble control that actually helps
- Mix slowly and scrape the sides of your cup.
- Warm resin bottles in lukewarm water if your room runs cool, it reduces bubbles.
- Use quick heat passes, don’t camp in one spot or you can scorch petals or warp molds.
- FYI, bubbles love to cling to textured petals, so sealing helps here too.
Common mistake beginners make
They set flowers into a deep pour right away. The flowers float, then they poke them down, then they trap bubbles, and suddenly the whole piece looks messy. If you layer it, you stay in control, and the finished gift looks intentional.

Planning Checklist, So You Don’t Sacrifice Your Favorite Blooms To The Craft Gods
Pressed and preserved flower gifts go best when you treat them like a tiny design project, not a random glue-and-hope situation. Five minutes of planning saves you hours of redoing things, plus it keeps the final gift from looking cluttered. And yes, I’ve learned that lesson the annoying way.
Quick plan before you start
- Pick the gift type first: resin, frame, paper craft, glass, or clay
- Choose a color palette: 2–3 main colors plus one neutral
- Sort flowers by size: tiny fillers, medium blooms, statement pieces
- Decide the layout style:
- Minimal: one bloom, lots of negative space
- Meadow: scattered wildflowers, airy and natural
- Cluster: floral corner or wreath shape, very intentional
- Prep extras: press more than you think you need, petals tear easily
Ever laid out flowers that looked gorgeous on the table, then somehow turned into chaos the second you committed them to resin or glue? That’s usually because you didn’t lock in a layout style first. Your brain wants a plan, even if your craft bin says otherwise.
My “test flower” rule (this saves heartbreak)
Before you use sentimental blooms, do a quick test with a similar flower.
- Test the sealant on one pressed bloom
- Test a small resin pour in your mold
- Check if the color shifts or bleeds
That little test tells you if you’re about to get crystal clear results, or if you’re about to create a cloudy science experiment.
Layout tricks that make projects look expensive
- Odd numbers look natural. Three small blooms often looks better than two.
- Leave breathing room. Negative space reads modern and high-end.
- Keep petals away from edges. Edges get sanded or scuffed, and petals there look messy fast.
- Repeat one element. Same tiny filler flower repeated across pieces makes a set feel cohesive.
Packaging plan (because gifting matters)
If you’re making sets like coasters or bookmarks:
- pick ribbon and tissue color that matches your palette
- add a small tag that says what the flowers are
- include a care note if it’s resin or framed
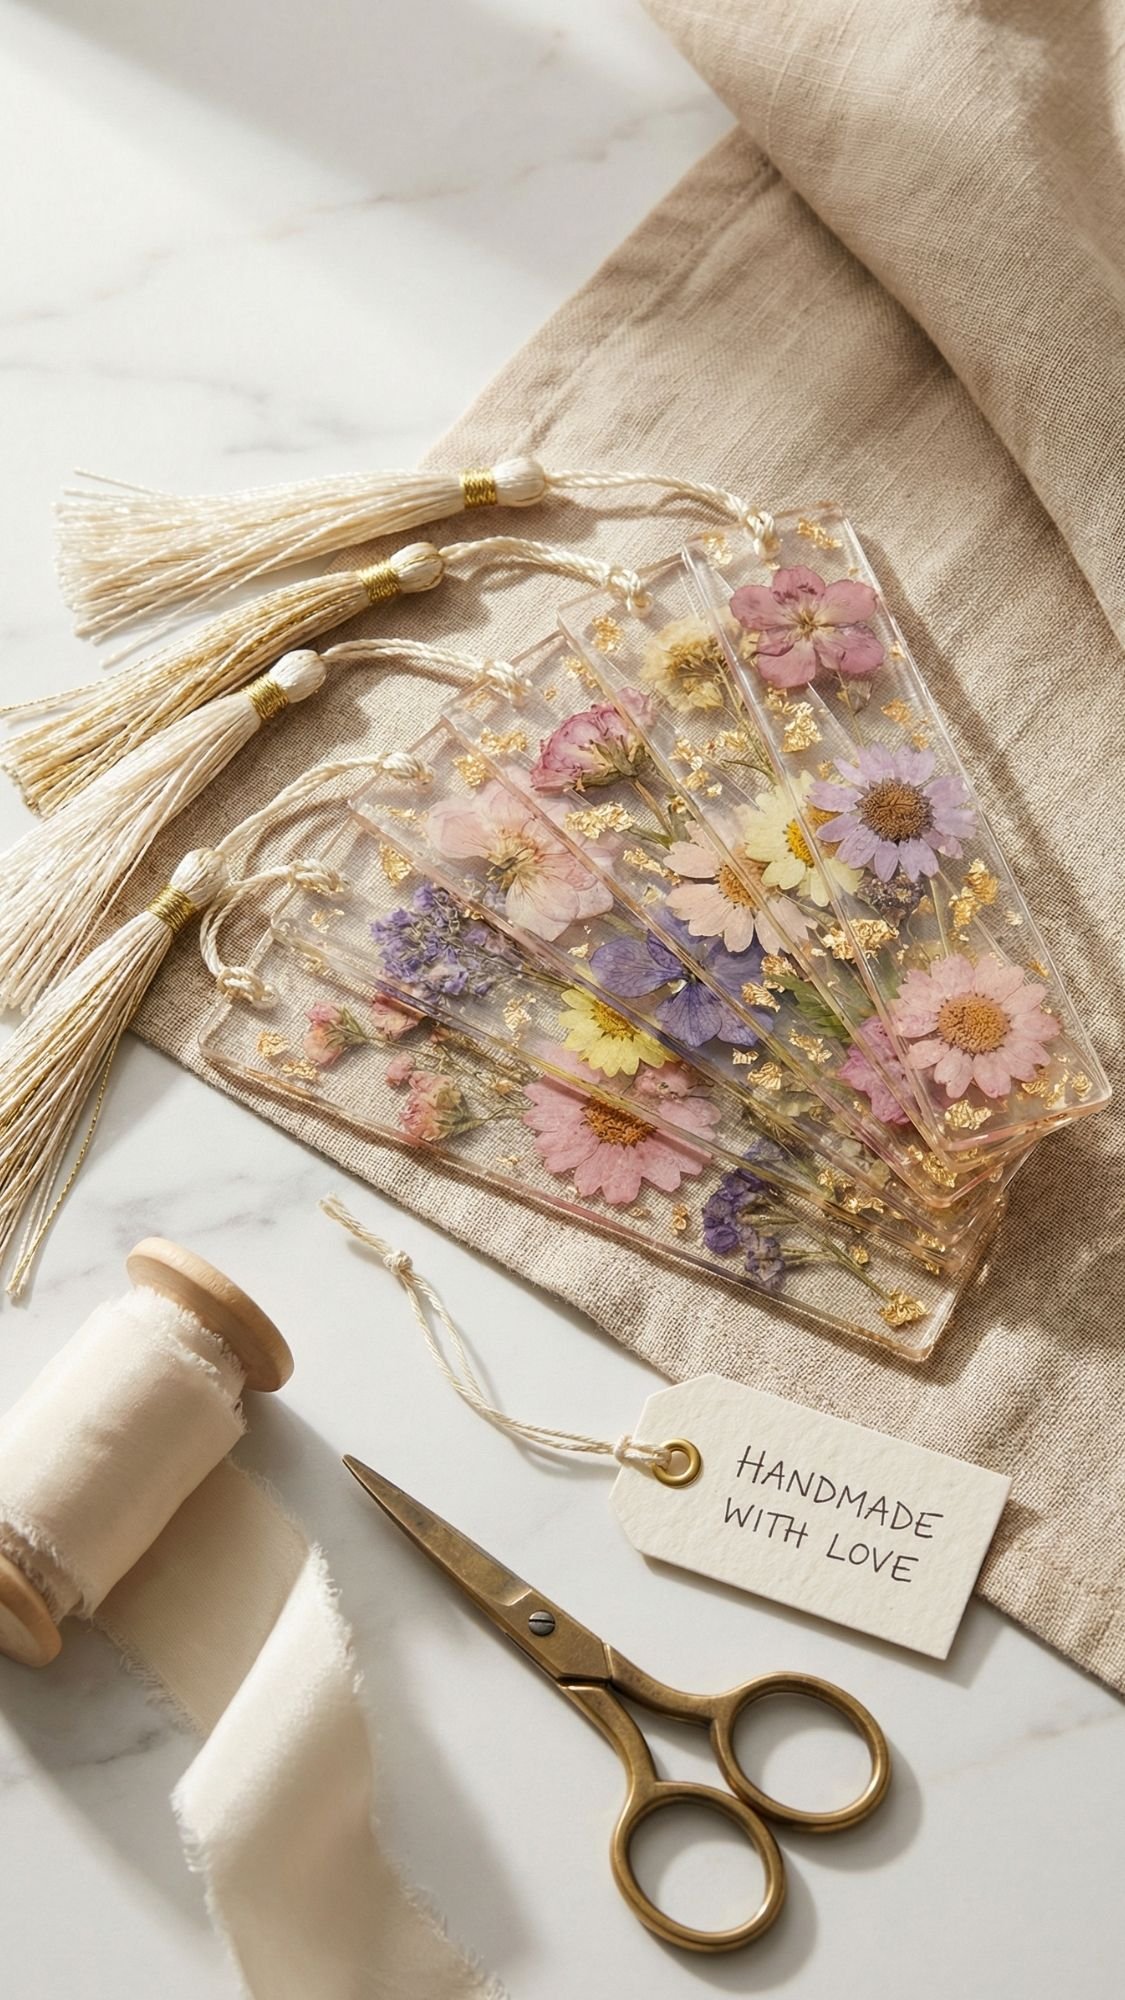
1) Resin Pressed Flower Bookmarks With Tassels (easy, pretty, and weirdly addictive)
These are the gateway project. They feel fancy, they cost little, and people actually use them. Plus, if you mess one up, you don’t have to mourn a huge tray full of resin. Win.
Why this gift works
- Fast payoff: you can finish a set in an afternoon, cure time aside
- Looks boutique: clear resin plus a clean floral layout screams “gift shop”
- Great for sets: make 3 to 6 and tie them together with ribbon
Materials
- Silicone bookmark mold
- Epoxy resin (clear, reliable brand with clear ratios)
- Pre-sealed pressed flowers
- Mixing cups with measurement lines
- Stir sticks, tweezers
- Heat tool for bubbles (used carefully)
- Tassels and jump rings
- Optional: gold foil flakes, fine glitter, tiny fern pieces
How to make it (step-by-step)
- Prep the mold. Wipe it clean, dust shows up like it’s trying to ruin your life.
- Mix resin slowly. Scrape the sides and bottom, mix until it turns completely uniform.
- Pour a thin base layer. About 1/8 of the mold depth works well.
- Place flowers. Use tweezers, keep petals away from the edges for cleaner finishing.
- Pop bubbles. Quick heat passes, don’t hover in one spot.
- Add the top layer. Pour slowly, let resin self-level.
- Cure fully. Don’t demold early just because it feels firm.
- Finish edges if needed. Sand lightly, then wipe clean.
- Add the tassel. Attach jump ring, then tassel.
Pro-tips that make these look store-bought
- Warm your resin bottles in lukewarm water first if your room runs cool, it reduces bubbles.
- Use a “tack coat” before the full pour if your flowers try to float.
- Don’t overcrowd the layout. Negative space looks modern and expensive.
- Make a matching set. Repeat one tiny filler flower across all bookmarks.
Common problems and quick fixes
- Bubbles clinging to petals: seal flowers well, and pour a thin base first.
- Cloudy finish: you likely trapped moisture or mixed too aggressively, slow down and check dryness.
- Flowers floating: pour in layers, place flowers after the base thickens slightly.
Care card you can include with the gift
- Keep away from extreme heat
- Wipe with a soft cloth
- Don’t leave it baking in a sunny car window for days
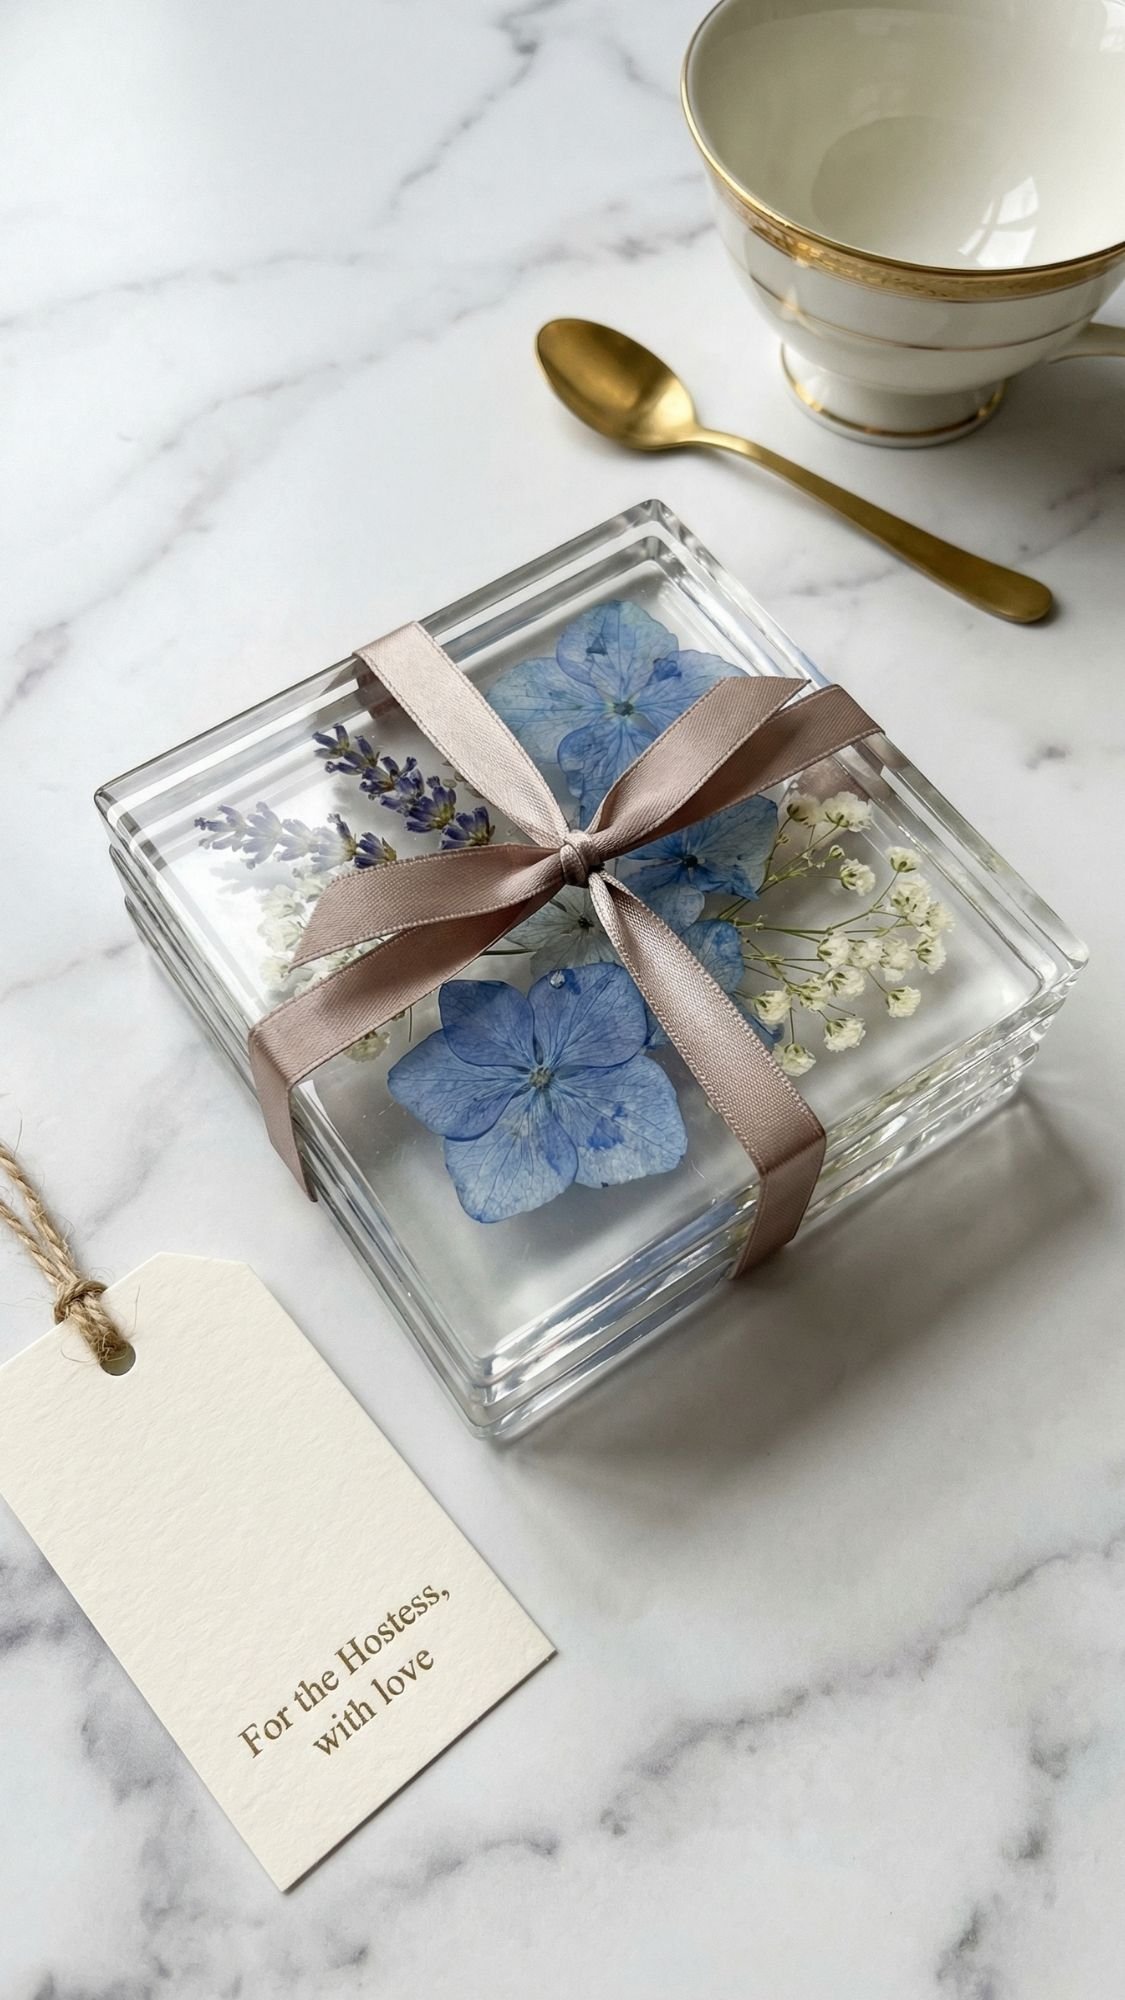
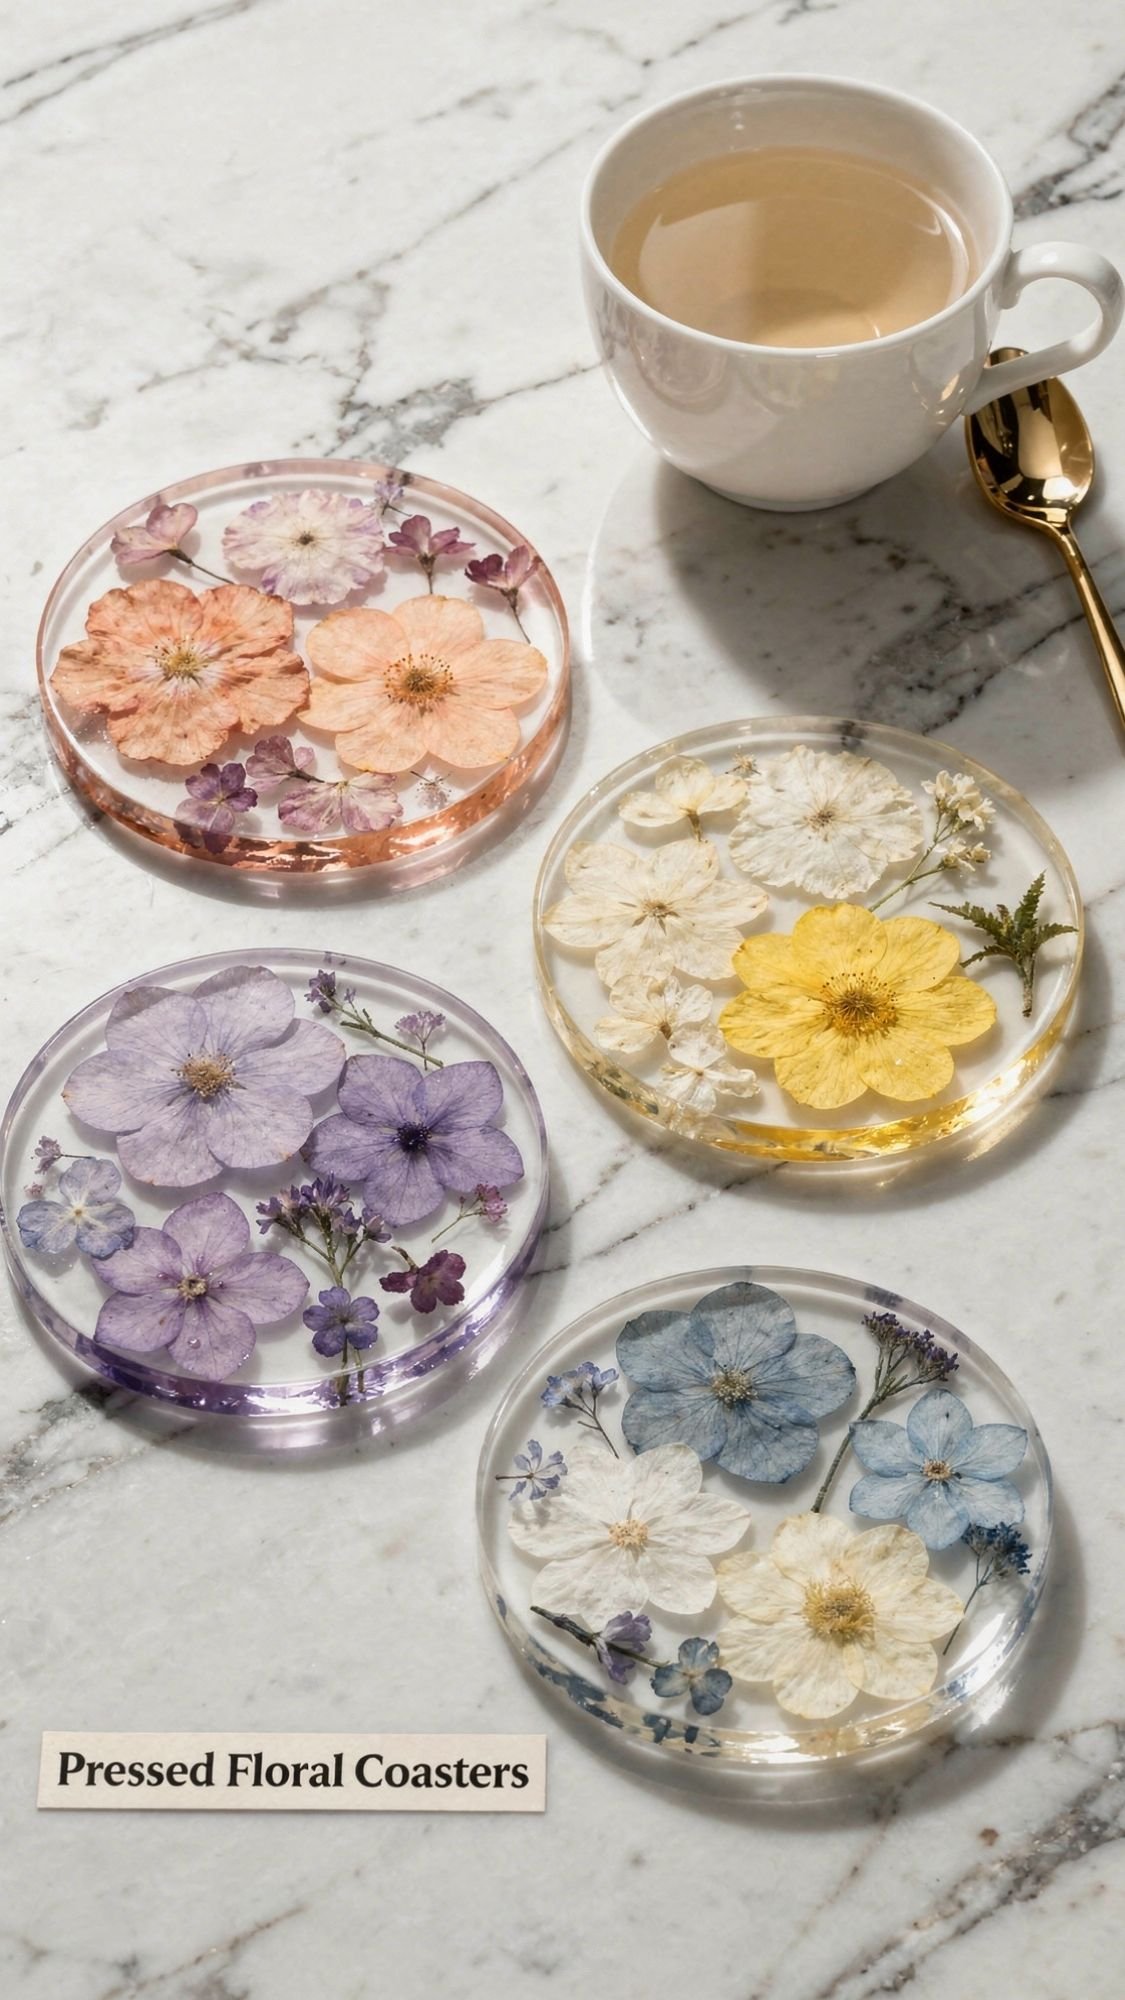
2) Pressed Flower Resin Coasters Set (The Hostess Gift Hero)
These are the “I swear I bought this” gift. Coasters feel grown-up and useful, and the pressed flowers make them sentimental without getting cheesy. Plus, you can make a coordinated set that looks like it came from a boutique, not a craft explosion.
Why This Gift Works
- People Actually Use Them, especially if they host or love coffee and tea
- A Set Feels Expensive, even if each coaster costs just a few dollars
- They Photograph Beautifully, so they’re perfect for gifting and for your blog visuals
Materials
- Silicone coaster molds
- Epoxy resin (clear, low-bubble if possible)
- Pre-sealed pressed flowers
- Mixing cups with measurement lines, stir sticks
- Tweezers
- Heat tool for bubbles (quick passes only)
- Cork backing circles or dots
- Optional: gold foil, mica powder, tiny fern sprigs
How To Make Them (Clean, Clear, And Flat)
- Clean your molds. Any dust shows up forever.
- Mix the resin slowly. Scrape the sides and bottom, then mix a little more.
- Pour a thin base layer. This helps bubbles rise and gives you control.
- Place your flowers. Keep them away from the edge so sanding doesn’t nick petals.
- Pop bubbles. Use fast, light heat passes, don’t hover.
- Pour your top layer. Pour slowly so you don’t trap new bubbles.
- Let them cure fully. Don’t stack them just because they feel “dry.”
Pro-Tips That Make Them Look Store-Bought
- Do a matching layout rule. Repeat one small flower across all coasters so the set feels cohesive.
- Avoid the edge zone. Resin edges get bumped, sanded, and scuffed, so keep petals about 1/4 inch in.
- Sand the bottom only. Keep the top glossy and glass-like for the wow factor.
- Add cork backing after full cure. If you stick it on too early, it can shift or peel.
Common Problems And Fixes
- Coaster feels tacky: you likely mixed too little or measured wrong, don’t guess ratios.
- Flowers floated: you poured too deep too fast, pour in layers next time.
- Cloudy resin: moisture or cold room usually caused it, make sure flowers feel crisp-dry and keep your space warm.
Care Card (Include This With The Gift)
- Wipe with a microfiber cloth
- Don’t soak in hot water
- Keep out of harsh direct sun when possible
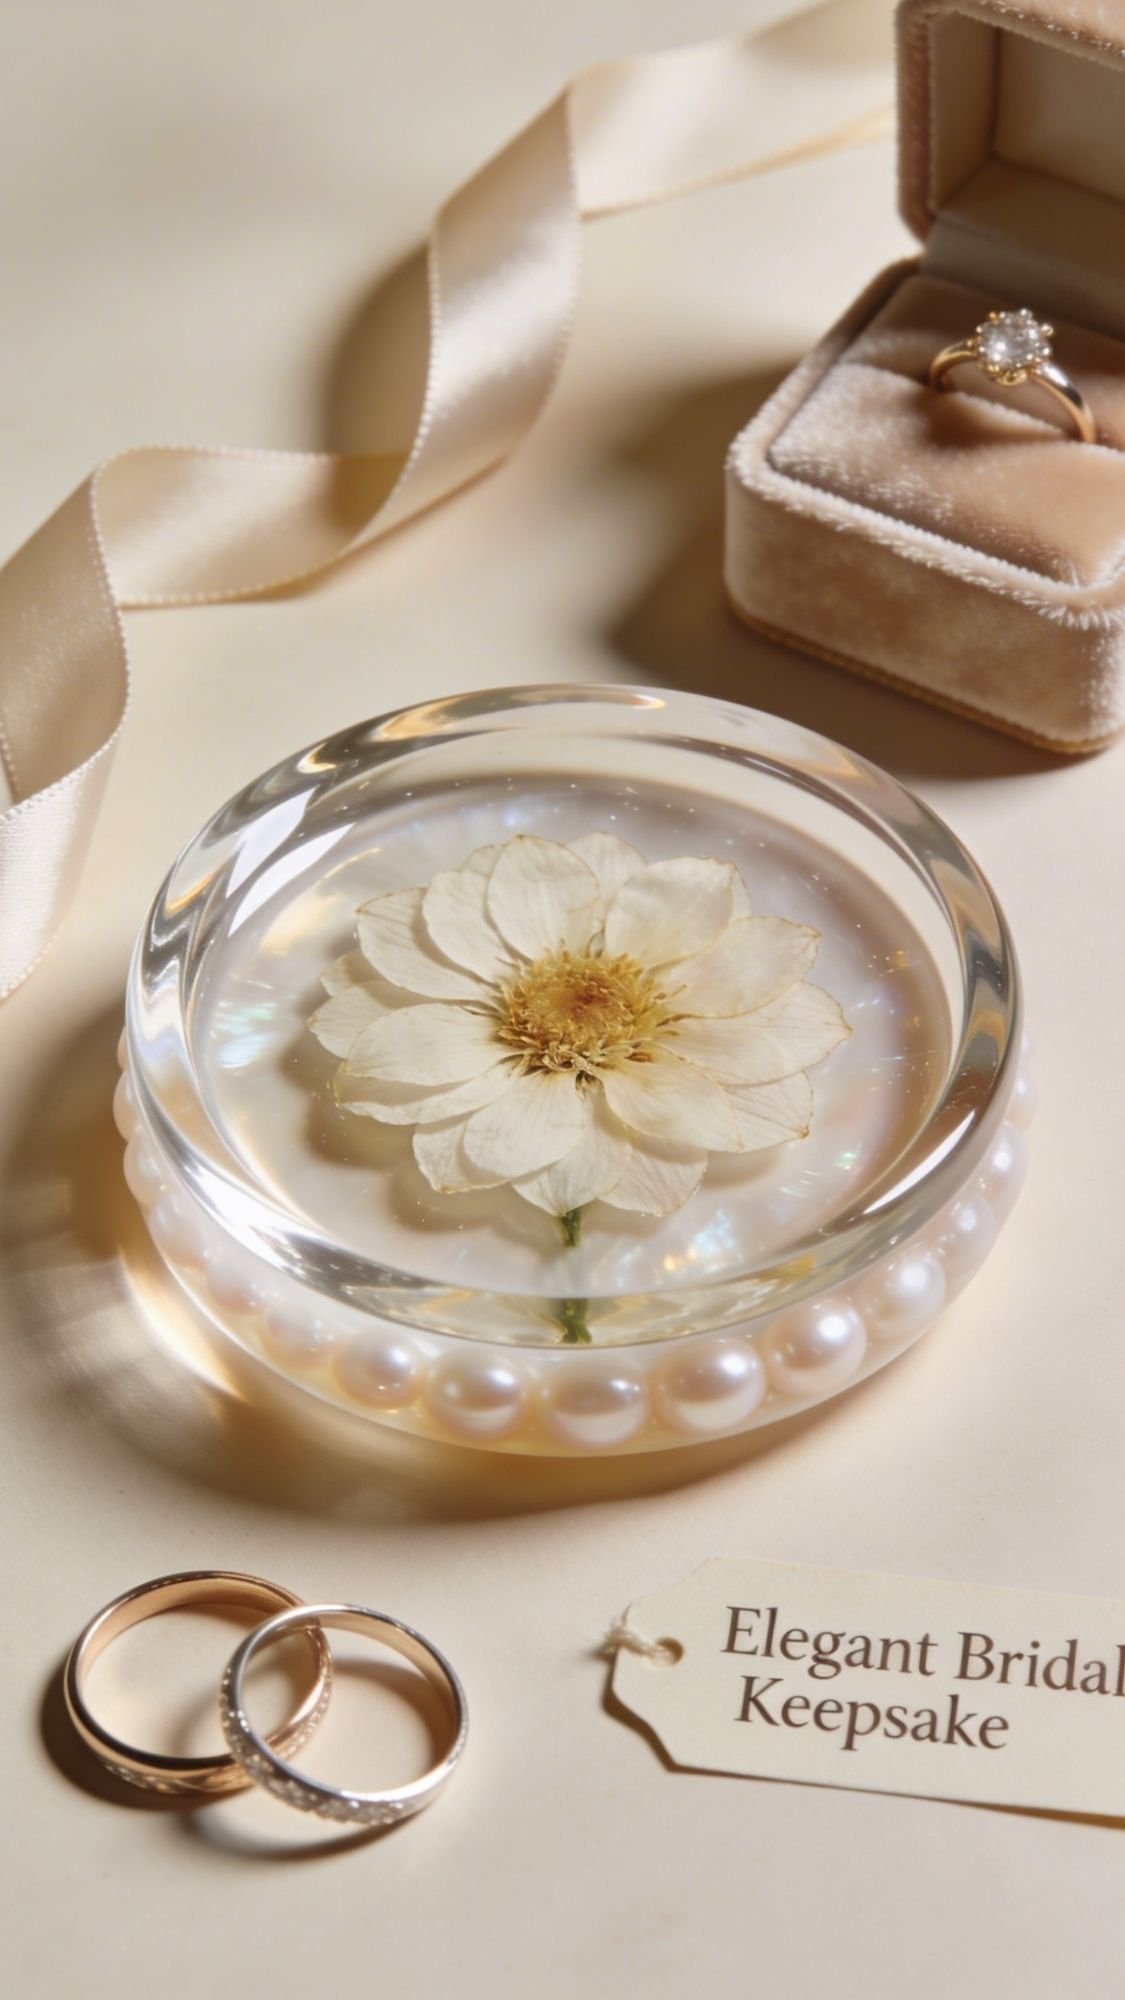
3) Resin Ring Dish With A Pressed Flower Center Medallion
This one feels like a tiny luxury item. People put it on their nightstand, dresser, or kitchen sink, and it instantly looks intentional. Also, it’s one of the easiest ways to make one flower look like a whole design.
Why This Gift Works
- It’s Useful Every Day, rings, earrings, hair pins, all the little things
- It Looks High-End Fast, especially with a clean color palette
- It Makes One Special Flower The Star, which feels personal without being cluttered
Materials
- Silicone ring dish or trinket dish mold
- Epoxy resin
- Pre-sealed pressed flower (one statement bloom works best)
- Tweezers
- Mixing cup, stir sticks
- Heat tool for bubbles
- Optional: pearl mica powder, gold foil flakes, a metallic pigment pen for edging
How To Make It (So The Flower Stays Centered And Crisp)
- Prep the mold. Wipe it clean, dust ruins glossy resin.
- Mix resin slowly. Scrape sides and bottom, then mix again.
- Pour a tinted base layer if you want a soft background. Keep it light, heavy pigment can look cloudy.
- Wait for the “thick honey” stage. You want the resin slightly thicker so the flower doesn’t sink.
- Place the flower in the center. Use tweezers, then tap the mold lightly to level it.
- Add a clear top layer. Pour slowly right over the center first, then around the edges.
- Pop bubbles quickly. Fast heat passes only.
- Cure fully before you demold or handle it.
Pro-Tips That Make It Look Like A Boutique Find
- Use one hero flower. One bloom plus a tiny sprig of filler reads modern and expensive.
- Keep petals away from the rim. The rim gets bumped, and sanding near petals looks messy.
- Do a clear topcoat layer last. It gives the glassy finish people love.
- Optional fancy move: lightly paint the rim with a metallic pigment pen after full cure, then seal it with a thin clear coat.
Common Problems And Fixes
- Flower sank: you placed it too early, wait until resin thickens.
- Flower floated: you poured too deep too fast, do a thin base and tack coat next time.
- Bubbles trapped under petals: seal flowers well and press them gently into the base layer.
Care Card (Simple And Helpful)
- Wipe with a soft cloth
- Keep away from high heat
- Don’t use abrasive cleaners
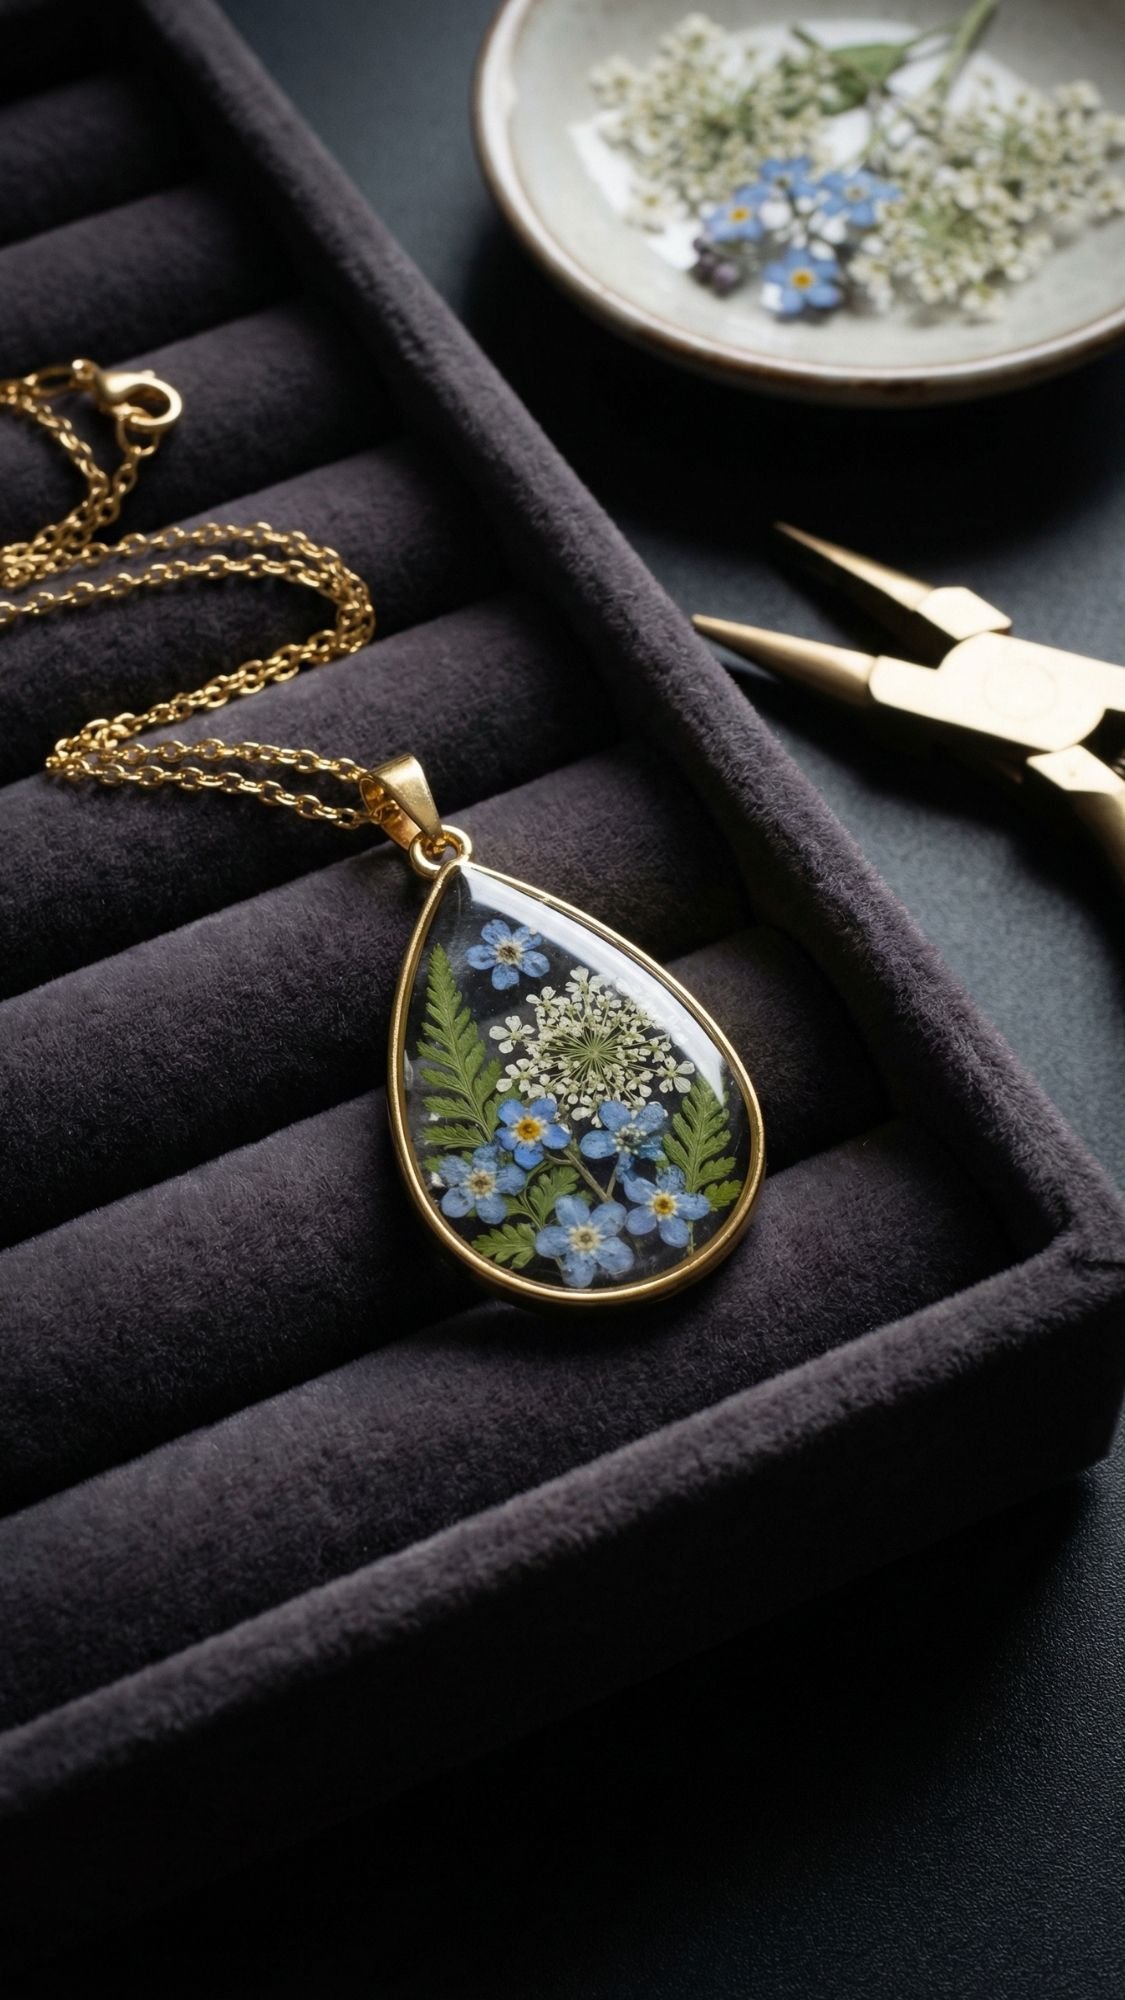
4) Pressed Flower Pendant Necklace (UV Resin Bezel Style)
This is the one that makes people lean in and squint, like, “Wait, you MADE that?” Yep. A pressed flower pendant feels personal, but it still looks clean and modern when you keep the flower tiny and the layout simple.
Why This Gift Works
- It Turns A Tiny Flower Into A Keepsake, especially great for bouquet blooms
- It Looks Boutique, even if you use budget-friendly bezels
- It’s Quick, UV resin cures fast, so you’re not babysitting it for hours
Materials
- Open bezel pendant (or a small pendant mold)
- UV resin and a UV light
- Pre-sealed micro pressed flowers (tiny is your best friend here)
- Tweezers and a toothpick
- Rubbing alcohol and a microfiber cloth
- Jump rings and a necklace chain
- Optional: gold foil flakes, tiny fern bits, a neutral background pigment
How To Make It (So It Cures Clear And Smooth)
- Clean the bezel. Wipe with rubbing alcohol so resin grips and stays clear.
- Add a thin resin layer first. Don’t fill it all at once.
- Place the flower. Use tweezers, then nudge it into position with a toothpick.
- Cure that first layer. Full cure before you add more keeps the flower from shifting.
- Top off with resin. Fill slowly so you don’t trap bubbles.
- Cure again. Move the UV light around so the whole surface cures evenly.
- Check tackiness. If it feels sticky, cure a bit longer and make sure you hit the edges.
- Attach hardware. Add jump rings and your chain.
Pro-Tips That Make It Look Store-Bought
- Use Micro Flowers Only. Big petals wrinkle and trap bubbles, then the pendant looks cloudy.
- Layer Your Pour. Thin layers cure clearer and reduce bubbles.
- Keep The Background Simple. One bloom plus a tiny sprig reads intentional, not crowded.
- Avoid Dust Like It’s Your Job. Dust lands in UV resin fast, and it shows up forever.
Common Problems And Fixes
- Pendant surface stays sticky: you didn’t cure evenly, cure longer and hit edges.
- Bubbles won’t go away: pour thinner layers and use a toothpick to tease bubbles out before curing.
- Flower shifts position: cure a base layer first, then place the flower.
Care Card (Because Jewelry Deserves It)
- Keep away from harsh chemicals and perfume sprays
- Wipe with a soft cloth after wearing
- Store out of direct sun when possible
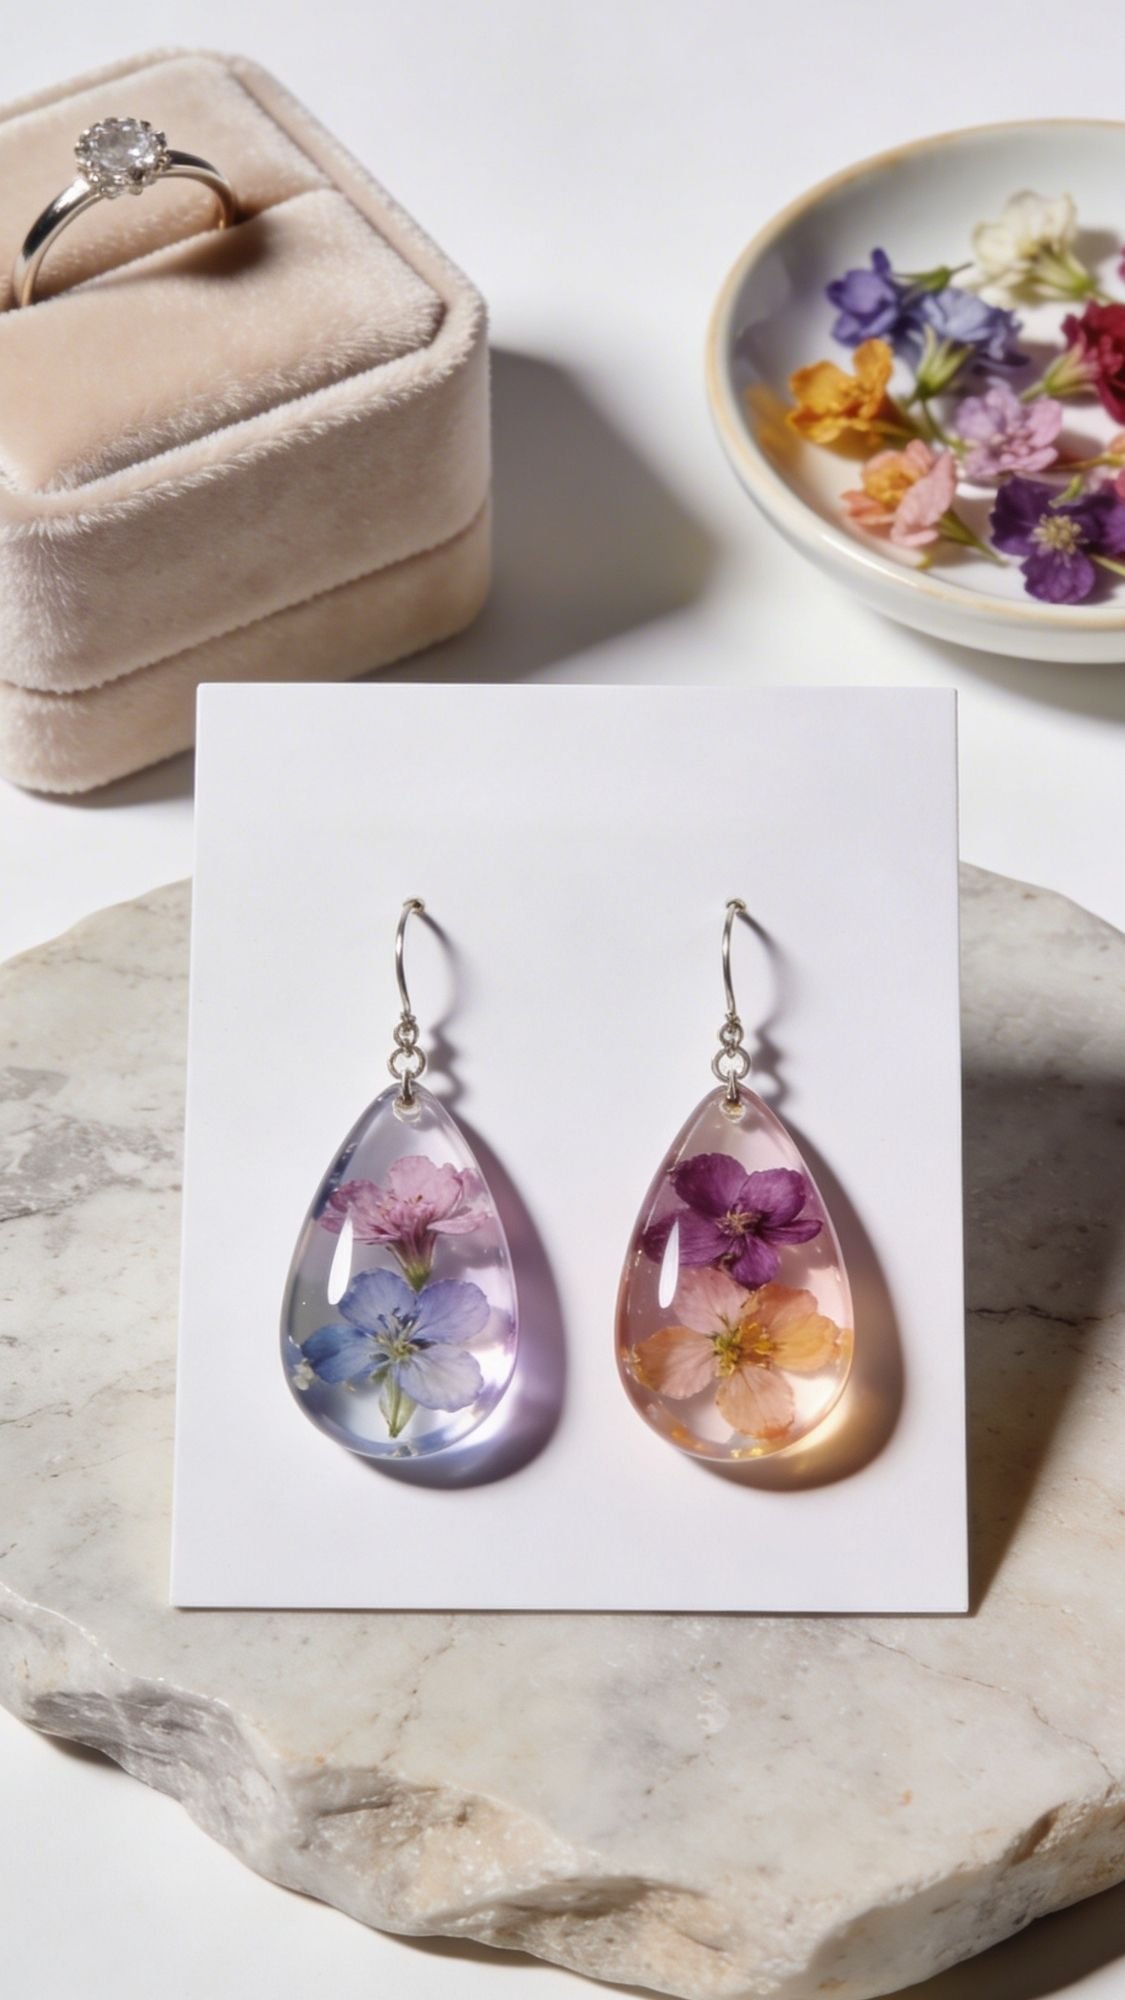
5) Pressed Flower Drop Earrings (They Look Store-Bought, Promise)
These are shockingly giftable. Earrings feel like a “real” present, and pressed flowers make them sentimental without being too much. The trick is keeping everything tiny and balanced so they look intentional, not like you trapped a whole garden in plastic.
Why This Gift Works
- It Feels Like Boutique Jewelry, but you control the colors and vibe
- It’s Personal Without Being Overly Personal, if that makes sense
- You Can Make Sets, matching earrings plus a pendant feels extra fancy
Materials
- Small earring bezels or mini resin molds (drops, ovals, circles)
- UV resin or epoxy resin (UV is faster for small bezels)
- Pre-sealed micro pressed flowers
- Earring hooks or posts (hypoallergenic hardware is a nice upgrade)
- Jump rings
- Tweezers, toothpick
- Rubbing alcohol, microfiber cloth
- Optional: gold foil, tiny fern bits, pearl mica
How To Make Them (So They Look Clean And Even)
- Clean your bezels. Oils and dust mess with clarity.
- Add a thin base layer of resin. Don’t fill it to the top yet.
- Place your flowers. Keep the layout simple, one to two tiny blooms max.
- Match the pair. Mirror the layout or repeat the same shape and color story.
- Cure the first layer. This locks the flowers in place.
- Top off with resin. Fill slowly to the rim for a smooth dome.
- Cure fully. Make sure the edges cure too, not just the center.
- Attach hardware. Add jump rings and hooks, then check the hang direction.
Pro-Tips That Make Earrings Look Expensive
- Balance The Design. If one side looks heavier, the whole pair looks off.
- Keep Flowers Away From The Edge. Resin edges can chip or scuff, and petals there look messy.
- Do A “Dry Layout” First. Arrange flowers on a piece of tape or parchment before committing.
- Upgrade Hardware. Better hooks instantly make it feel like real jewelry.
Common Problems And Fixes
- One earring looks different: commit to either mirrored pairs or intentionally mismatched, not accidental.
- Resin dome looks lumpy: pour slower, then let it self-level before curing.
- Cloudy spots: moisture or dust, seal flowers well and keep your workspace clean.
Care Card (Quick And Helpful)
- Keep away from perfume and hairspray
- Wipe with a soft cloth after wearing
- Store in a box, not loose in a bag
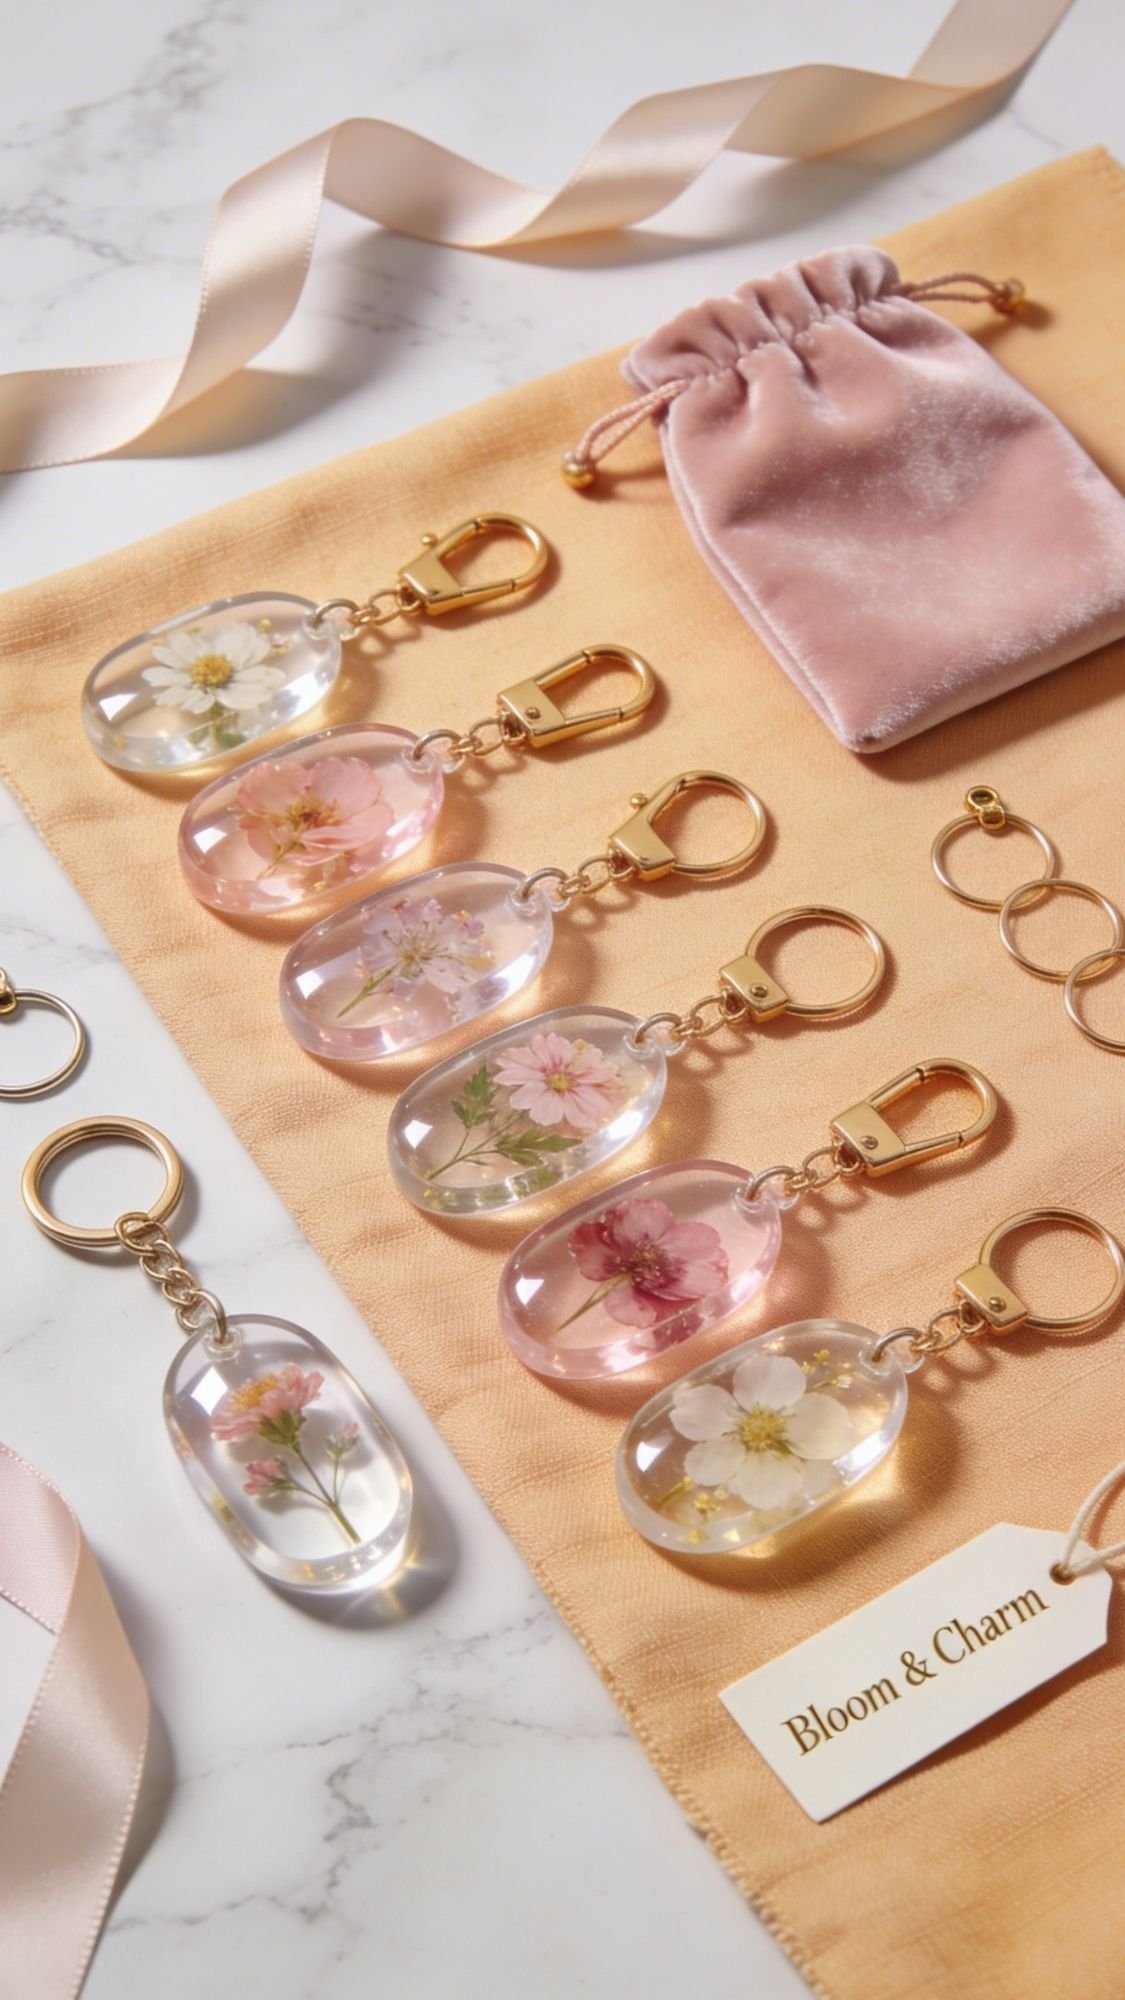
6) Pressed Flower Keychains (The Easiest “Wow” Gift)
Keychains are the low-effort, high-reward project. They’re quick, they’re cute, and people love them because they’re practical. Also, if you’re making gifts for a group, this one saves your sanity. Nobody needs 12 handmade shadow boxes in their life.
Why This Gift Works
- Fast To Make In Batches, perfect for teachers, friends, party favors
- Affordable, even if you use nicer hardware
- Easy To Personalize, initials, colors, tiny meaning, all that good stuff
Materials
- Silicone keychain molds (circle, arch, rectangle, heart)
- Epoxy resin or UV resin for smaller molds
- Pre-sealed pressed flowers
- Keychain hardware set (jump rings, clasps, screws if needed)
- Mixing cups, stir sticks
- Tweezers
- Heat tool for bubbles
- Optional: letter charms, glitter, gold foil, tiny fern sprigs
How To Make Them (Clear, Flat, And Not Bubbly)
- Clean the mold. Dust and lint show up forever.
- Mix resin slowly. Scrape the sides and bottom like you mean it.
- Pour a thin base layer. This helps you place flowers without them drifting.
- Place flowers. Keep them away from edges and holes.
- Pop bubbles. Quick heat passes, then let resin settle.
- Top off the mold. Pour slowly to avoid new bubbles.
- Cure fully. No early demolding, soft resin dents easily.
- Attach hardware. Add jump rings, clasp, and any charms.
Pro-Tips That Make Them Look Like A Boutique Gift
- Keep layouts simple. One main flower plus a few tiny fillers beats a crowded mess.
- Make a “set” look. Use the same flower type or palette across a batch.
- Add a clean border. Leave a little clear space around the floral design, it reads high-end.
- Seal the drill hole edges if you drill after curing, a tiny resin topcoat makes it look finished.
Common Problems And Fixes
- Hole cracks when drilling: drill slowly, use a sharp bit, and support the piece on a flat surface.
- Flowers float: do a tack coat or let the base thicken slightly before placing.
- Hardware loosens: use the correct screw size and a tiny dab of strong adhesive if needed.
Care Card (Short And Sweet)
- Keep away from extreme heat
- Wipe clean with a soft cloth
- Avoid harsh chemicals
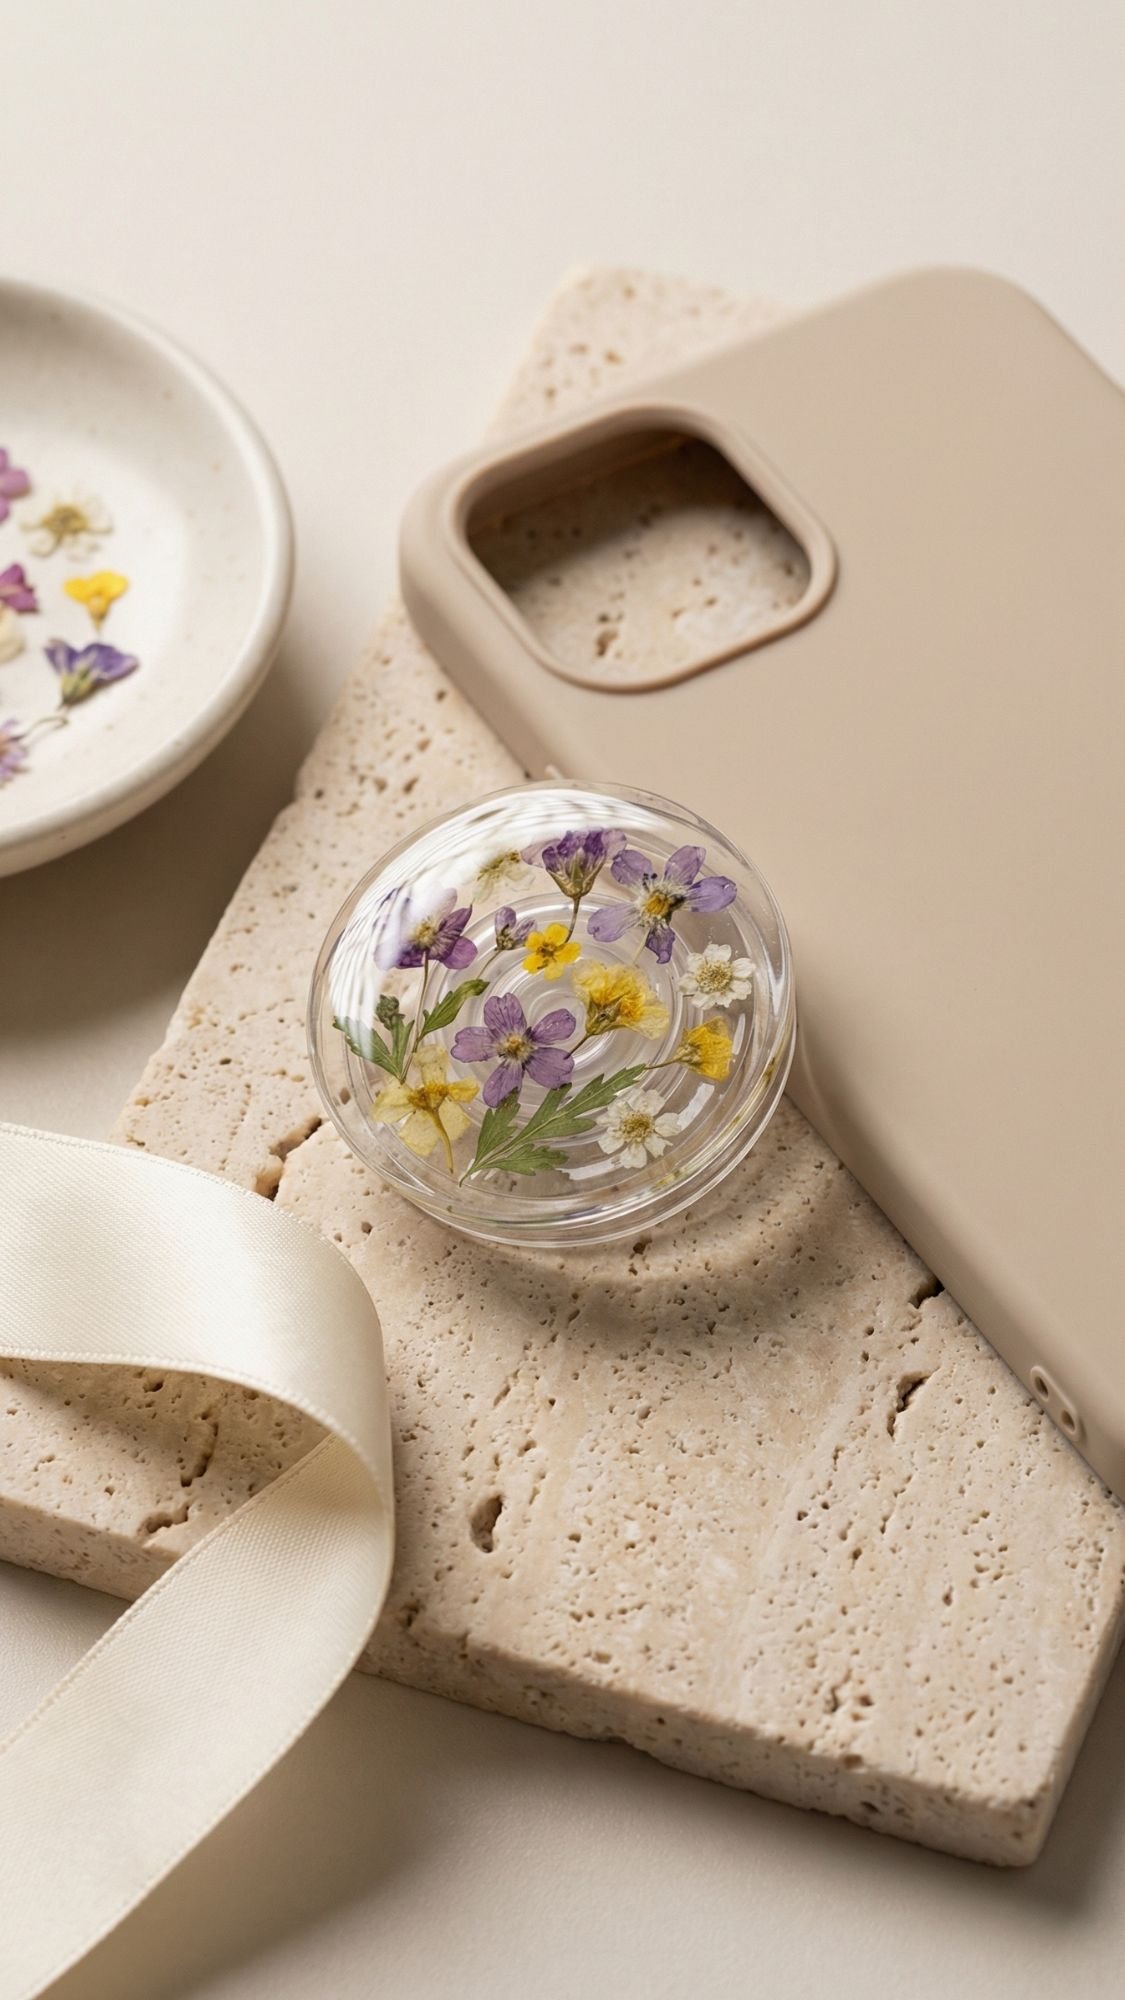
7) Pressed Flower Phone Grip Topper (Small, Cute, And Actually Useful)
This one feels trendy in a good way, like something you’d see on a cute phone case display wall. It’s also a great option if you want a pressed flower gift that’s not jewelry, not home decor, and not a whole resin coaster commitment.
Why This Gift Works
- It’s Practical, people touch their phone constantly
- It Feels Modern, especially with minimal layouts
- It’s Quick, small pours cure faster and waste less resin
Materials
- Blank phone grip topper or small round resin topper mold
- UV resin or epoxy resin (UV is easiest for small toppers)
- Pre-sealed micro pressed flowers
- Tweezers, toothpick
- Rubbing alcohol and microfiber cloth
- Optional: gold foil flakes, tiny fern bits, pearl mica
How To Make It (Thin, Smooth, And Pocket-Friendly)
- Clean the topper surface. Wipe with rubbing alcohol, let it dry.
- Add a thin resin layer. Don’t overfill, thick toppers feel bulky fast.
- Place micro flowers. One tiny bloom plus a filler looks intentional.
- Pop bubbles manually. Use a toothpick, UV resin sets fast.
- Cure fully. Cure from multiple angles so edges harden too.
- Check thickness. If it feels too tall, adjust your next pour smaller.
- Attach to the grip. Follow the grip’s attachment method, then press firmly.
Pro-Tips That Make It Look Clean, Not Clunky
- Stay thin. Thick toppers catch on pockets and annoy people, then they stop using it.
- Use micro flowers only. Big petals wrinkle and trap air.
- Leave a clear border. Negative space makes it look modern and intentional.
- Cure the edges. If edges stay tacky, they collect lint like it’s their job.
Common Problems And Fixes
- Topper feels sticky: you didn’t cure evenly, cure longer and hit edges.
- Flowers shift: cure a base layer first, then add the flowers.
- Surface looks dusty: wipe the surface, then do a thin final topcoat.
Care Card (Optional But Helpful)
- Avoid harsh cleaners and alcohol wipes directly on the topper
- Wipe with a soft cloth
- Keep out of direct sun for long periods
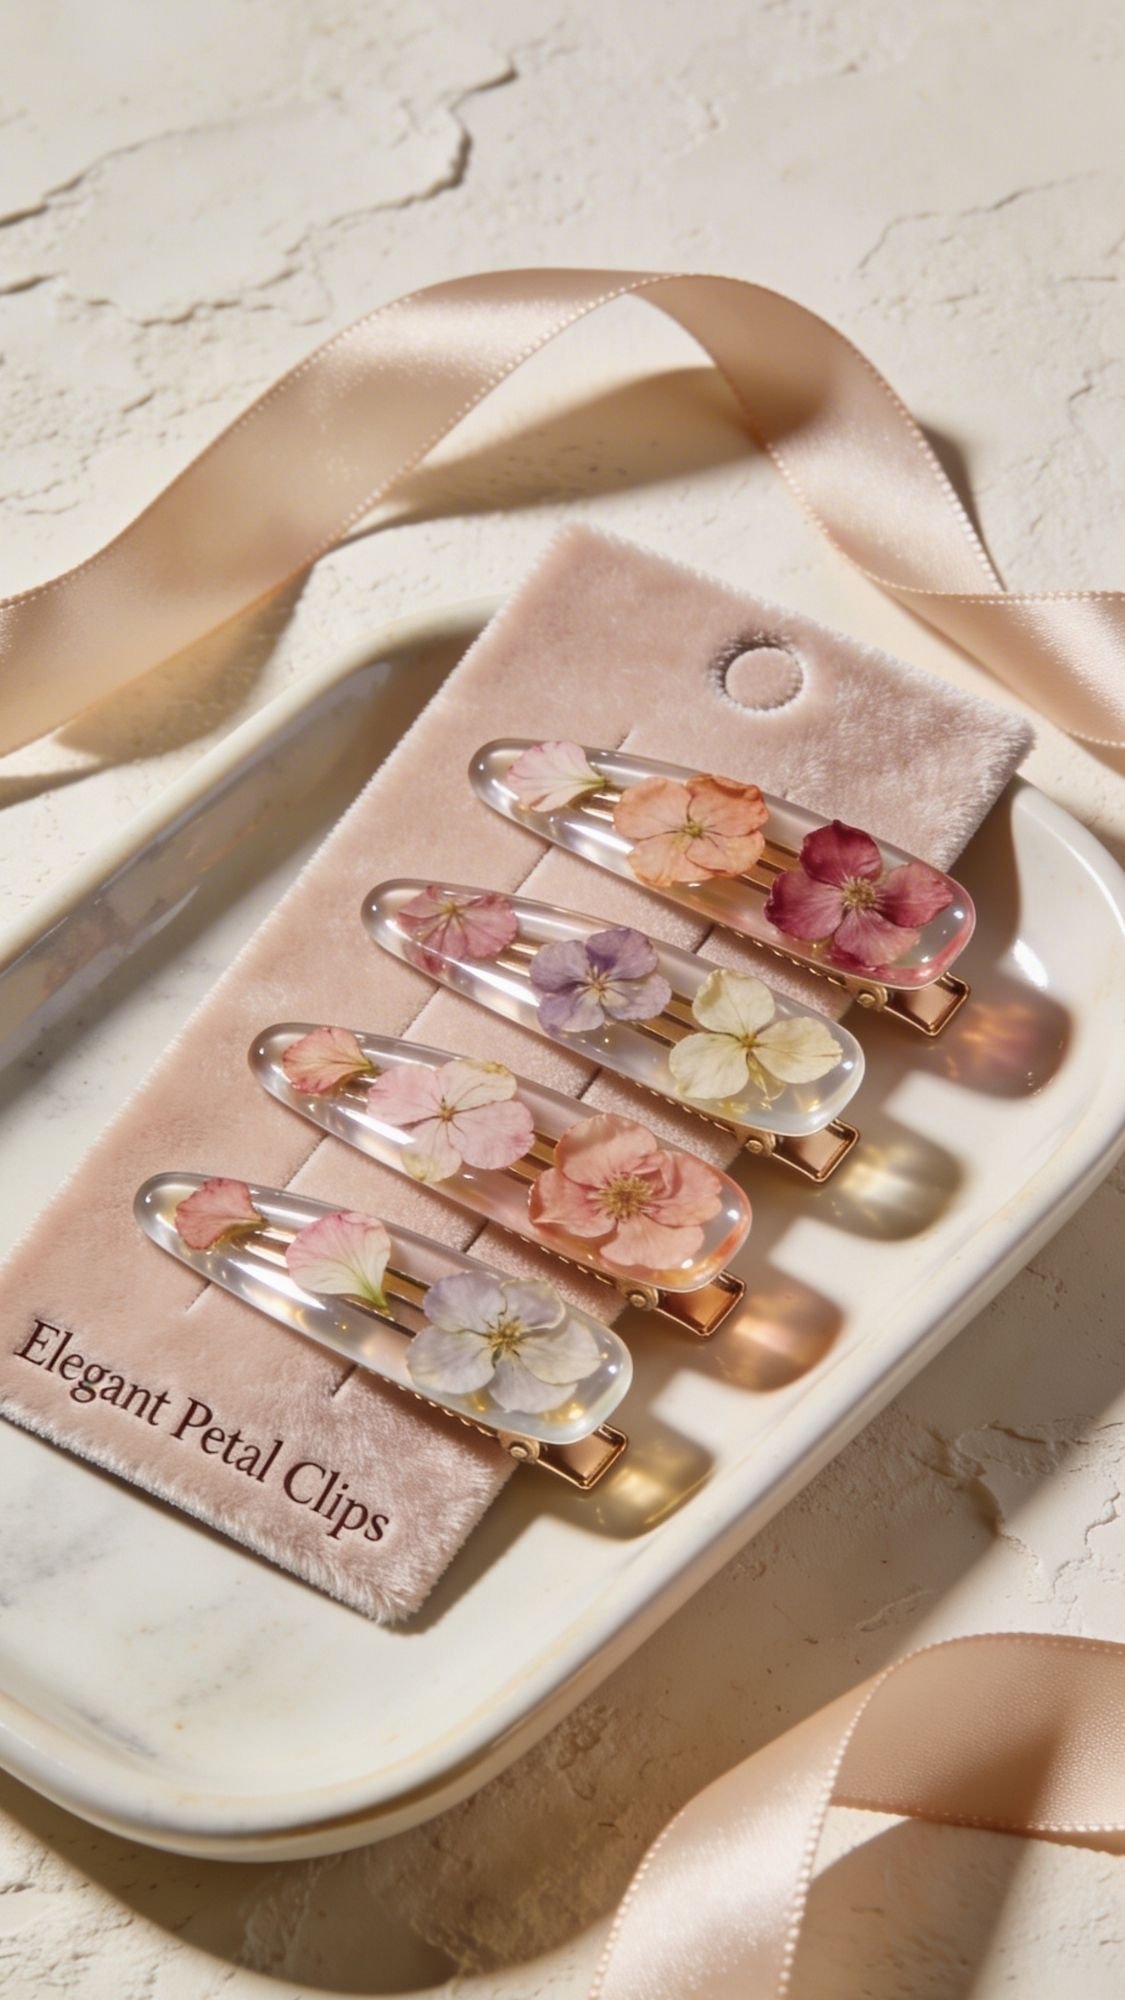
8) Resin Hair Clips With Pressed Petals (Cute, Wearable, And Not Too Precious)
These clips give you that “tiny luxury” vibe without needing jewelry tools. You also get a gift people actually use, because everyone loses hair clips like they evaporate. Ever noticed that?
Why This Gift Works
- You Gift Something Practical, not just decorative
- You Can Match Any Style, minimalist, boho, glam, whatever
- You Can Batch Make Them, which helps when you need multiple gifts fast
Materials
- Hair clip blanks (alligator clips, snap clips, or barrettes)
- Small resin molds or flat resin “cabochon” molds, or you can dome directly on the clip
- Epoxy resin or UV resin
- Pre-Sealed Micro Pressed Petals
- Strong adhesive (choose one rated for metal and plastic)
- Tweezers, toothpick
- Rubbing alcohol, microfiber cloth
- Optional: gold foil flakes, pearl mica, tiny fern bits
How To Make Them (Two Reliable Methods)
Method A, Mold Then Glue
- Clean the mold, then remove dust with a microfiber cloth.
- Mix resin slowly, then scrape the sides and bottom of your cup.
- Pour a thin base layer.
- Place petals with tweezers, keep them away from the edge.
- Pop bubbles, then pour a thin top layer.
- Cure fully, then demold.
- Clean the hair clip blank with alcohol, let it dry.
- Glue the resin piece to the clip, then clamp it gently until set.
Method B, Dome Directly On The Clip
- Clean the clip top surface with alcohol, let it dry.
- Add a thin resin layer right on the clip top.
- Place petals, then nudge them into position with a toothpick.
- Dome with a final thin layer, keep it smooth and level.
- Cure fully, then check edges for tackiness.
Pro-Tips That Make Them Look Store-Bought
- Scuff The Clip Surface Lightly before glue, smooth metal fights adhesion.
- Stay Thin so the clip feels comfortable and closes properly.
- Use A Simple Layout like one petal cluster on one side, plus negative space.
- Seal Petals First so the petals keep their color and stay crisp under resin.
Common Problems And Fixes
- Glue Won’t Stick
- Likely cause: oils or a slick surface
- Fix: wipe with alcohol, lightly scuff, then re-glue
- Prevention: prep the clip every time
- Resin Dome Looks Lumpy
- Likely cause: you poured too much at once
- Fix: sand lightly after full cure, then add a thin top coat
- Prevention: dome in thin layers
- Clip Feels Stiff Or Won’t Close
- Likely cause: resin overflowed onto the hinge area
- Fix: trim or sand overflow carefully
- Prevention: tape off hinge area before doming
Care Card (Quick And Honest)
- Avoid heat, like leaving it in a hot car
- Wipe with a soft cloth
- Skip harsh cleaners and alcohol wipes on the resin surface
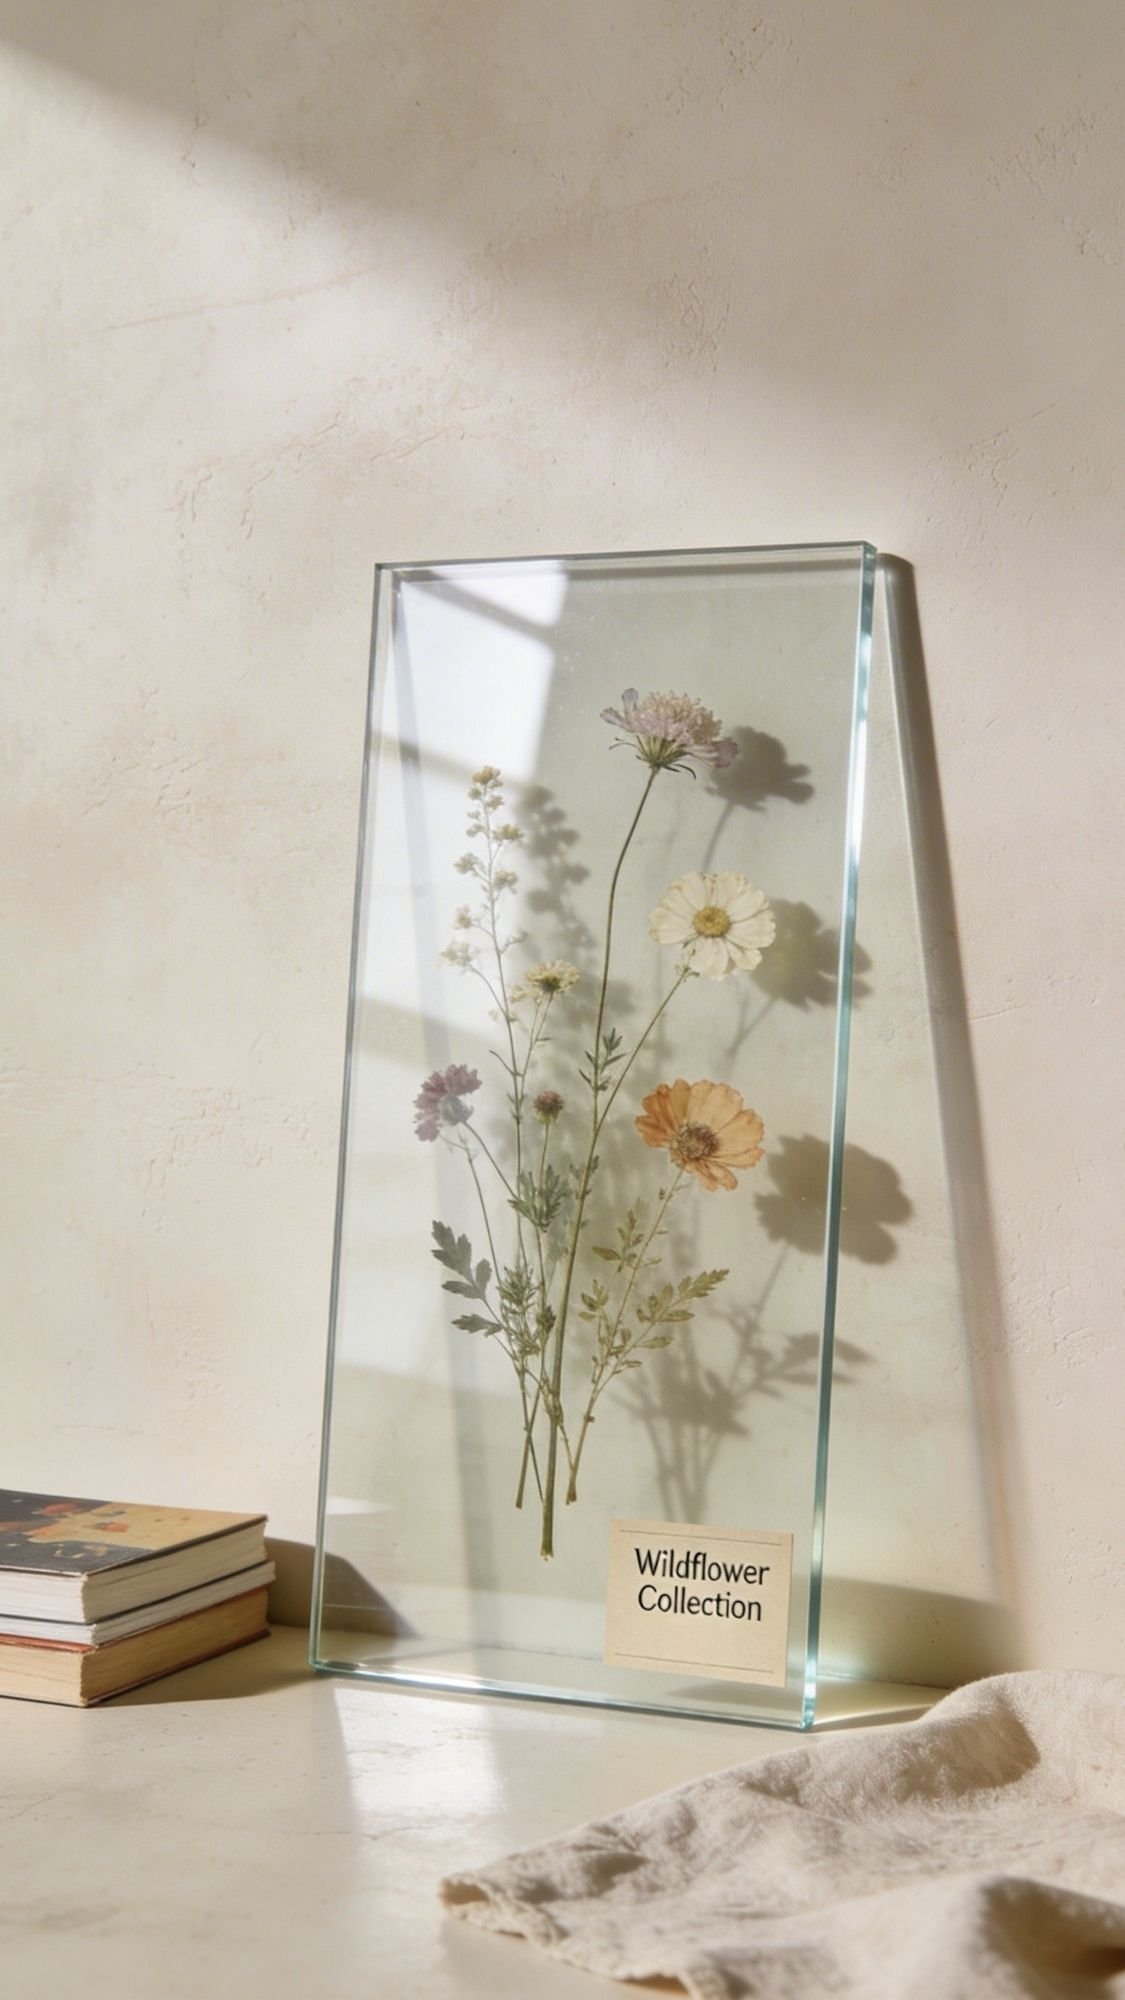
9) Floating Frame Pressed Flower Art (The “I Bought This At A Gallery” Look)
This is the project that makes pressed flowers feel modern, not crafty. A floating frame keeps everything crisp and clean, and it turns even simple backyard blooms into something that looks intentional. Also, it’s a great gift for someone who already owns too many mugs. You know the one.
Why This Gift Works
- It Looks High-End Without Resin, so it feels fancy but not messy
- It Preserves Sentimental Flowers, like bouquet blooms or garden favorites
- It Fits Any Style, modern, boho, farmhouse, glam, you can adjust the palette
Materials
- Double glass floating frame (the kind with two panes)
- Pressed flowers and greenery
- Tweezers
- Micro dots of clear adhesive or archival tape dots
- Microfiber cloth and glass cleaner
- Optional: a printed label card with date, location, flower names
How To Make It (So The Layout Stays Put And Looks Clean)
- Clean both glass panes first. Fingerprints show up like neon once you close the frame.
- Plan your layout on the table. Take a photo when it looks perfect, this saves you later.
- Place flowers on the glass. Use tweezers, start with the largest pieces first.
- Secure lightly. Use tiny tape dots behind thicker areas, not on delicate petal tips.
- Close the frame slowly. Watch for shifting, then tighten or latch.
- Clean the outside again. Dust and smudges will haunt your photos if you skip this.
Pro-Tips That Make It Look Like A Real Art Piece
- Pick One Layout Style
- Minimal: one bloom and a few leaves
- Meadow: scattered wildflowers with lots of breathing room
- Cluster: a floral corner or wreath shape
- Leave negative space. It makes the whole piece feel modern and expensive.
- Don’t over-tape. Too much tape looks obvious through glass.
- Add a tiny label card. Date and place make it feel like a keepsake, not just decor.
Common Problems And Fixes
- Flowers shift when you close the frame
- Fix: take the photo of the layout first, then secure a couple key points with tape dots
- Prevention: start with sturdier pieces, then add fragile petals last
- Dust trapped inside
- Fix: open it, wipe both panes, use a puff of air, then close fast
- Prevention: assemble in a clean area, then close quickly once placed
- Glass looks cloudy in photos
- Fix: microfiber cloth and glass cleaner, then wipe again with a dry cloth
- Prevention: clean before and after assembly
Care Card (Worth Including)
- Keep out of harsh direct sun if you want colors to stay bright
- Dust the frame gently, don’t spray cleaner directly onto it
- If petals shift over time, open and re-secure with a fresh dot
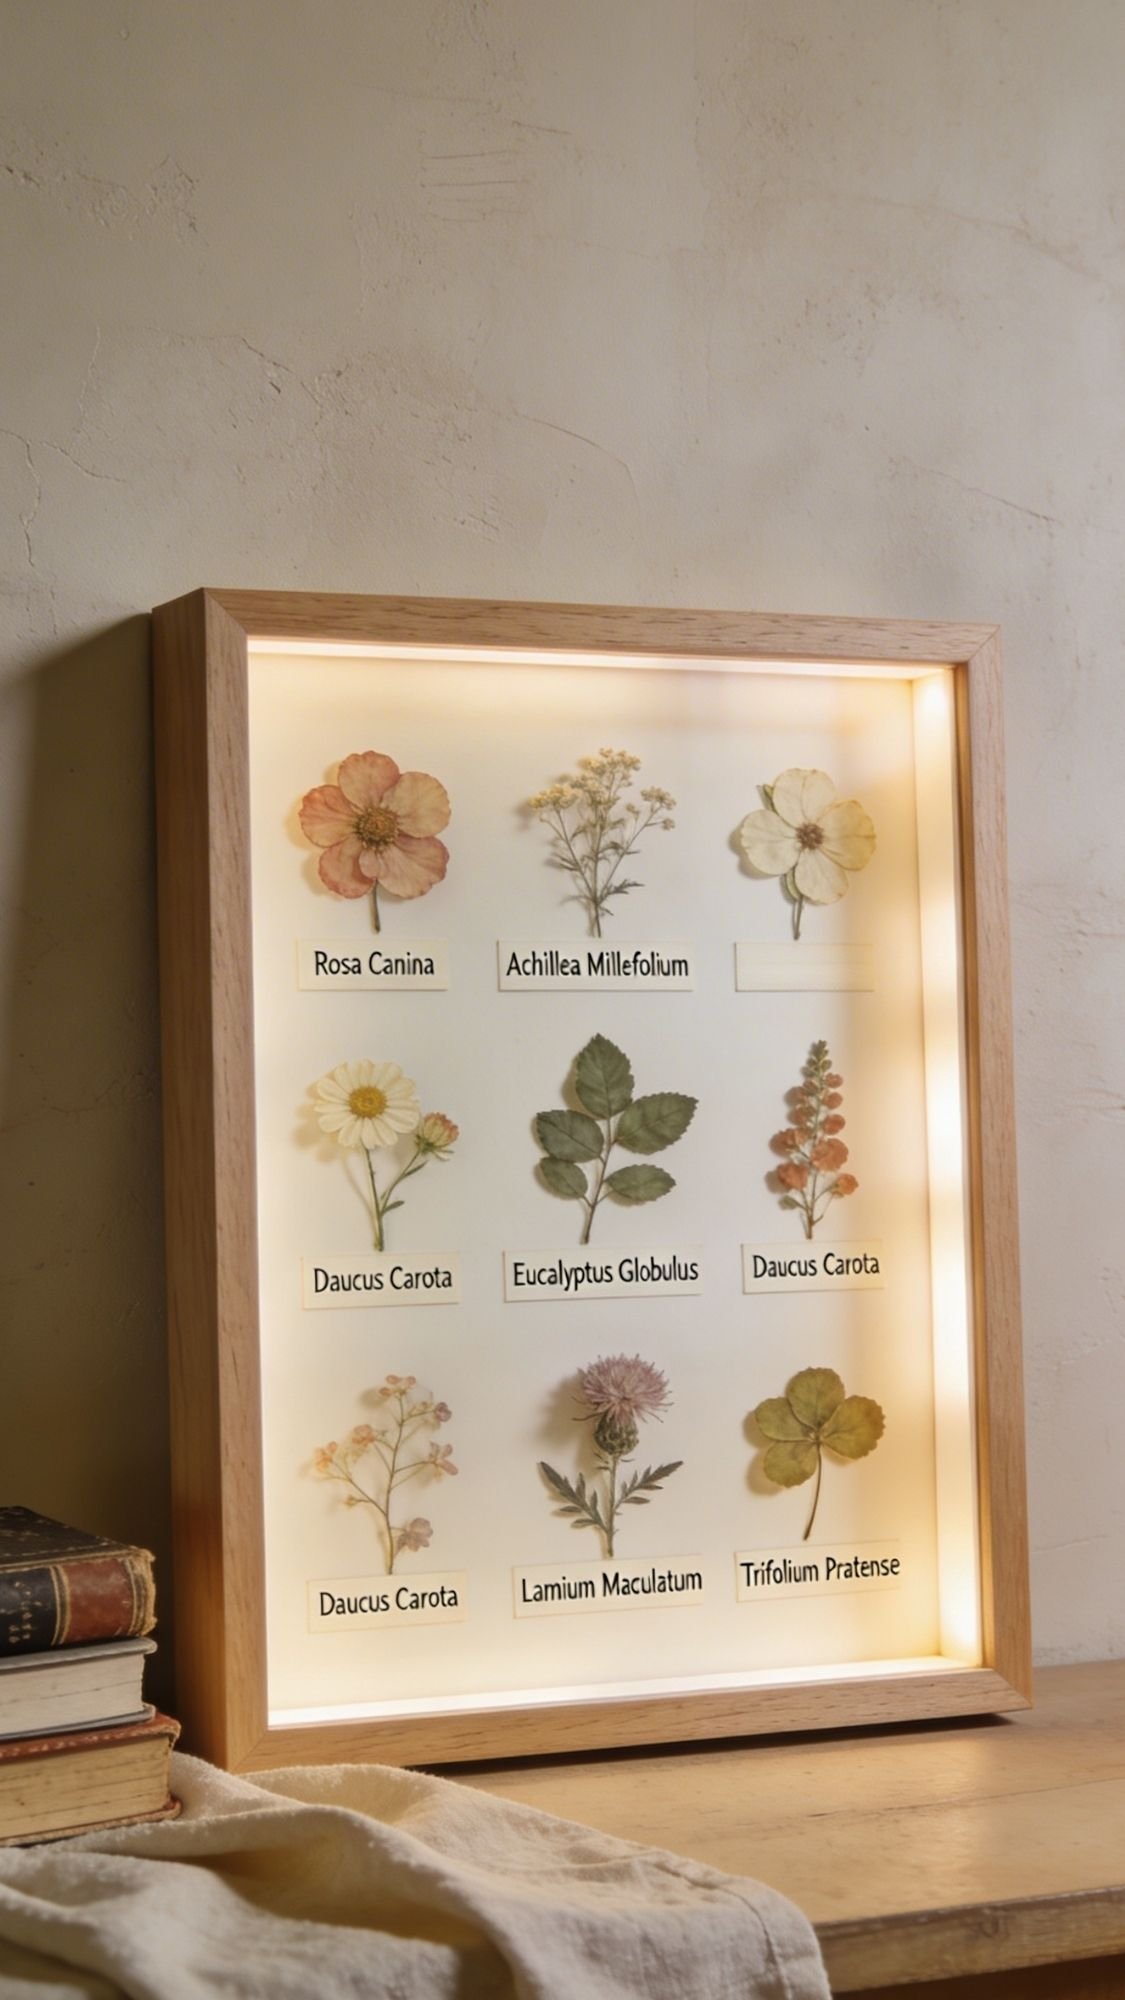
10) Herbarium Specimen Shadow Box With Labels (Science Class, But Make It Chic)
This one feels like a tiny museum display, and people love it because it tells a story. You don’t just give someone flowers, you give them a moment in time with a date and a place. Also, it looks ridiculously expensive on a shelf for something you can DIY with a shadow box and some patience.
Why This Gift Works
- It Feels Personal Without Being Loud, the labels do the storytelling
- It Looks Like Real Decor, not just a craft project
- It Preserves Sentimental Blooms, garden flowers, bouquet bits, vacation finds
Materials
- Shadow box frame (deeper works better, less smushing)
- Pressed flowers and greenery
- Acid-free cardstock or archival paper for the background
- Tweezers
- Glue pen or archival adhesive dots
- Fine-tip pen or printable label stickers
- Microfiber cloth
- Optional: linen backing paper, tiny metal corners, wax seal for the label card
How To Make It (So It Looks Crisp And Not Messy)
- Choose your background. Pick white for clean modern, pick warm cream for vintage herbarium vibes.
- Plan the layout outside the frame. Take a photo once it looks right.
- Mount the flowers lightly. Use tiny adhesive dots behind thicker parts, avoid putting adhesive on fragile petal tips.
- Add labels. Include flower name, date, and location, even if you keep it simple.
- Close the shadow box carefully. Check spacing so flowers don’t press against the glass.
- Clean the glass last. Fingerprints ruin the whole look in photos.
Label Ideas That Make It Feel Like A Keepsake
- Flower name, even if you write “Wildflower Mix”
- Date collected, like “June 2026”
- Location, like “Backyard Garden” or “Beach Walk”
- Optional line: “Pressed And Preserved” or “Saved From A Special Day”
Ever notice how one tiny detail, like a date label, suddenly makes a gift feel heirloom-level? That’s the magic here.
Pro-Tips That Make It Look Like A Boutique Display
- Leave breathing room. Negative space makes it look curated.
- Stick to one layout style. Minimal, meadow, or corner cluster.
- Use consistent label formatting. Same font, same size, same placement.
- Press a few extra pieces. Tiny leaves and filler flowers help you balance the composition.
Common Problems And Fixes
- Flowers lift off the backing
- Likely cause: adhesive too weak or dusty paper
- Fix: switch to archival dots, press firmly, let adhesive set
- Prevention: wipe the background paper lightly with a clean cloth first
- Dust trapped inside
- Likely cause: you left it open too long
- Fix: open, wipe glass, use a puff of air, close quickly
- Prevention: assemble everything first, then close right away
- Flowers look too dark
- Likely cause: background color too deep or flowers browned during pressing
- Fix: switch to a lighter backing, use brighter pressed blooms
- Prevention: change blotting paper early during pressing
Care Card (Worth Including)
- Keep out of harsh direct sun to slow fading
- Dust the frame gently, avoid spraying cleaner directly on it
- Store in a dry room, humidity can soften pressed petals over time

11) Pressed Flower Initial Monogram Frame (Personalized Without Feeling Cheesy)
This is the sweet spot for personalization. You get the “it’s made just for you” factor without turning the gift into a giant name sign. The key is keeping the letter clean, using a tight palette, and letting negative space do its thing.
Why This Gift Works
- It Feels Custom, but it still looks like decor
- It Uses Small Flowers Really Well, even leftover petals work
- It’s Easy To Match Any Style, modern, boho, farmhouse, glam
Materials
- Frame (simple is best, white, light wood, or gold)
- Thick cardstock or watercolor paper (acid-free if possible)
- Letter template (printed or cut from cardstock)
- Pressed flowers and tiny greenery
- Glue pen or precision craft glue
- Tweezers
- Optional: vellum overlay, archival spray sealant
How To Make It (Clean Letter, Clean Layout)
- Pick your letter and size. Bigger letters look more modern and less crowded.
- Trace the letter onto cardstock. Keep lines crisp, avoid wobbly edges.
- Plan your flower placement first. Lay flowers on top of the traced letter without glue.
- Glue flowers down in sections. Start with larger petals, then fill gaps with tiny bits.
- Keep the edges sharp. Don’t let petals spill outside the letter outline unless you want that intentionally.
- Seal lightly if needed. A light seal helps prevent petals from flaking.
- Frame it. Clean the glass before you close it.
Pro-Tips That Make It Look Like Real Wall Art
- Choose one palette. Two to three colors plus greenery reads intentional.
- Use tiny fillers as “confetti.” Mini petals make the letter look full without bulky flowers.
- Add a vellum layer. Vellum softens the look and hides minor glue spots.
- Leave lots of white space. It makes the monogram feel modern and premium.
Common Problems And Fixes
- Glue shows around petals
- Likely cause: too much glue or glue that dries shiny
- Fix: use a glue pen, dab lightly, add vellum overlay if needed
- Prevention: apply glue to the paper, not the flower
- Letter looks messy
- Likely cause: too many colors and no spacing
- Fix: remove a few pieces, simplify, leave breathing room
- Prevention: pick a palette first and do a dry layout
- Petals flake off
- Likely cause: weak adhesive or dry brittle petals
- Fix: add tiny glue dots under problem spots, seal lightly
- Prevention: seal petals, press firmly, and let glue set fully
Cute Personalization Options
- Add a small line under the letter, like “Est. 2026” or a short date
- Use birth month flowers for the letter fill
- Match wedding colors for a bouquet-inspired monogram
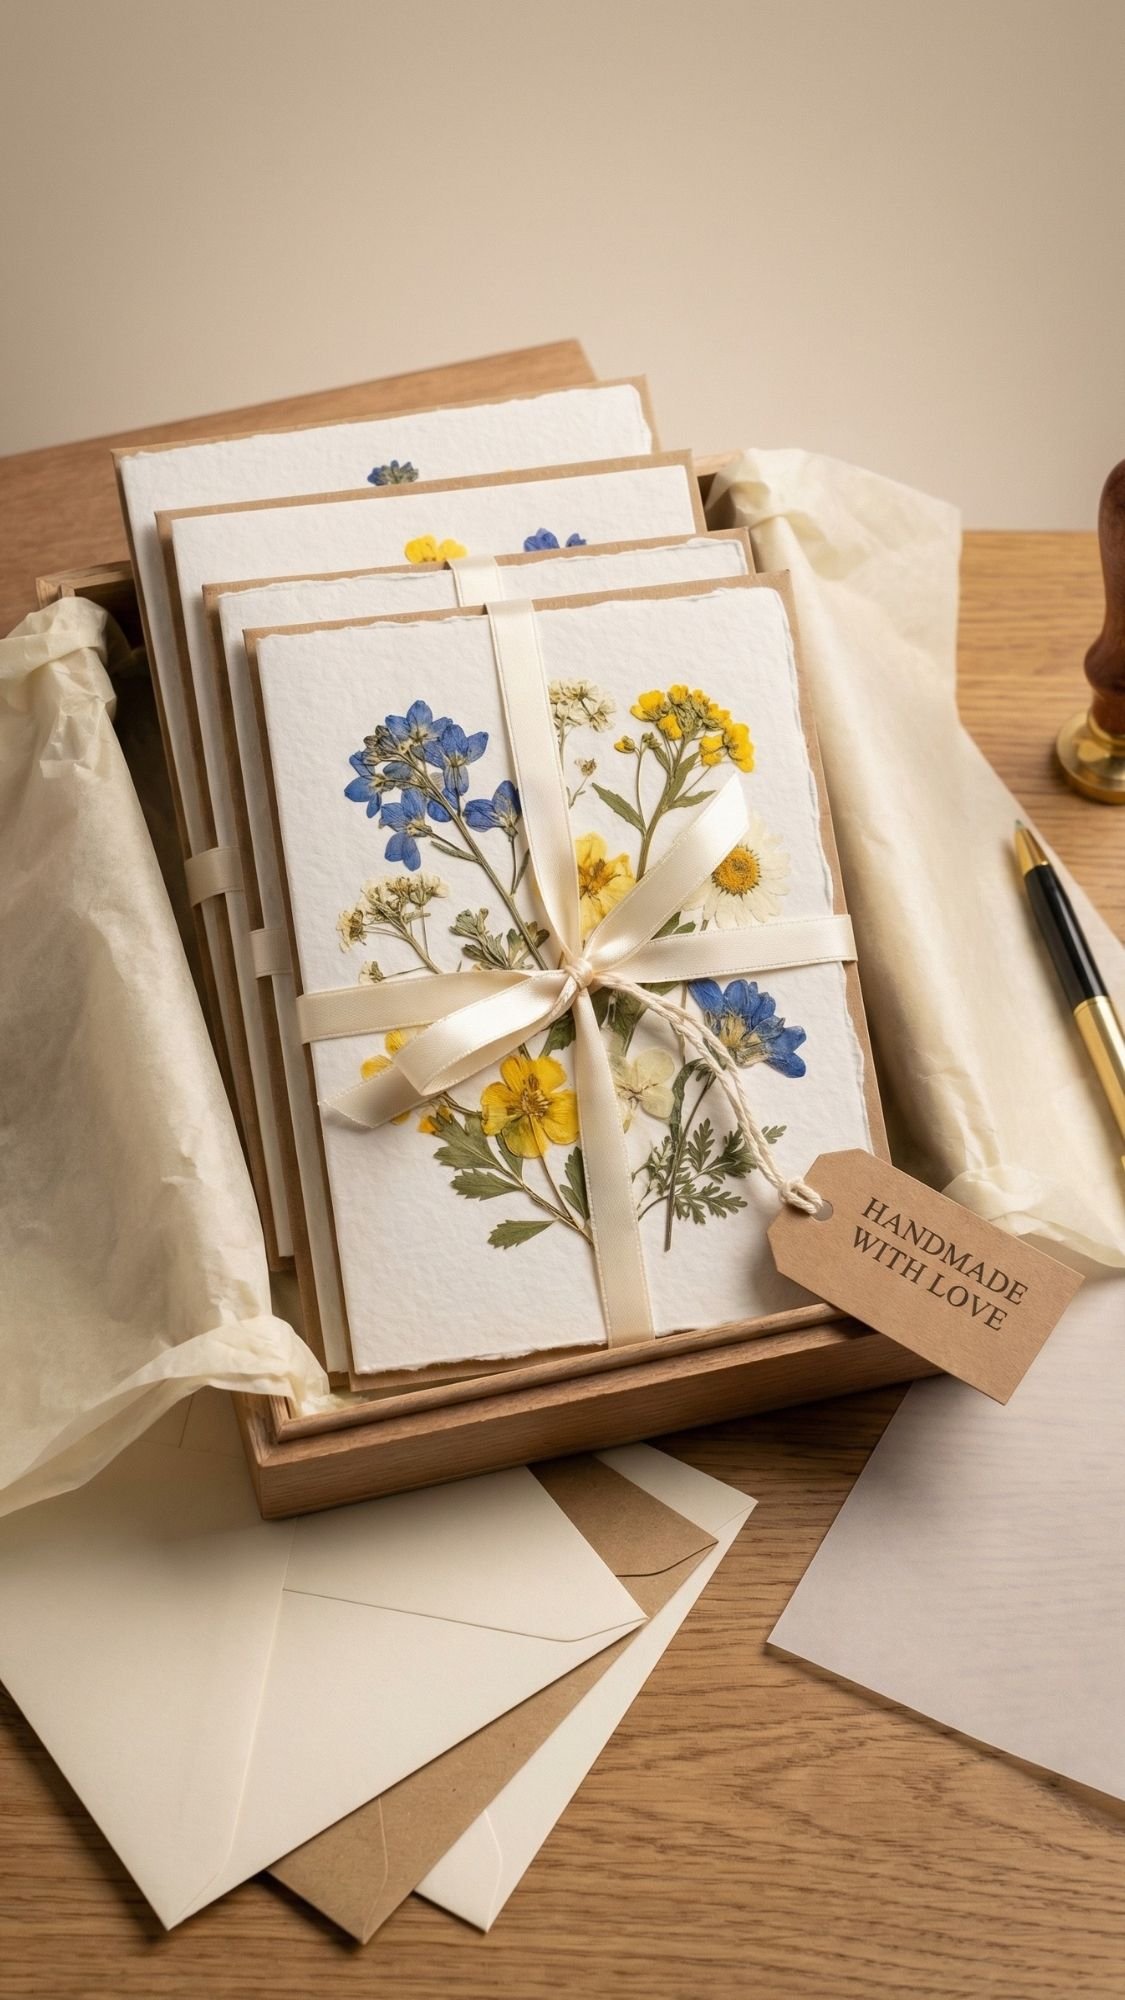
12) Pressed Flower Greeting Card Set (Fast, Affordable, And Always Appreciated)
If you want a gift that feels thoughtful but doesn’t take over your entire day, make a set of pressed flower cards. People love having beautiful cards ready to go, and handmade ones feel extra special without being overly precious. Also, you can use tiny petals that feel too small for resin projects, so nothing goes to waste.
Why This Gift Works
- It’s Practical, everyone needs cards, birthdays keep happening
- It’s Budget-Friendly, paper craft supplies cost less than resin setups
- It’s Easy To Batch Make, one press session can fuel a whole card set
Materials
- Blank cards and envelopes (heavyweight cardstock looks nicer)
- Pressed flowers and greenery
- Glue pen or precision craft glue
- Tweezers
- Optional: vellum sheets, wax seals, ribbon, gold gel pen
- Optional but smart: clear archival spray sealant
How To Make Them (So They Look Crisp And Not Messy)
- Choose a theme. Birthday, thank you, sympathy, blank “just because.”
- Plan a simple layout. One corner cluster, a single stem, or a tiny wreath shape.
- Glue flowers down lightly. Use tiny dots, too much glue shows through petals.
- Add a clean sentiment area. Leave space for writing, don’t cover the whole card.
- Seal lightly if needed. A light spray helps prevent flaking and protects color.
- Let everything dry fully. Then slide into envelopes carefully so petals don’t snag.
Pro-Tips That Make These Look Boutique
- Use vellum overlays. Vellum makes the card feel expensive and hides minor glue shine.
- Stick to a palette. Matching flowers across the set makes it feel curated.
- Add one premium detail. A wax seal, a ribbon belly band, or a gold foil accent.
- Flatten everything well. If petals are too raised, the card can buckle or snag.
Common Problems And Fixes
- Flowers snag inside the envelope
- Likely cause: raised petals or bulky blooms
- Fix: use flatter pieces, add vellum overlay, use a slightly larger envelope
- Prevention: keep layouts low-profile and press flowers extra flat
- Glue shows through petals
- Likely cause: too much glue or shiny glue
- Fix: switch to a glue pen, use tiny dots only
- Prevention: apply glue to paper, not directly on delicate petals
- Card warps
- Likely cause: too much moisture from glue or spray
- Fix: press the finished card under a book once fully dry
- Prevention: use light glue, light spray coats, and allow dry time
Packaging Idea (So It Feels Like A Real Gift)
- Stack 6 to 8 cards
- Tie with satin ribbon or a paper belly band
- Add a small tag that says “Handmade With Pressed Flowers”
- Include a mini care note: keep cards flat and dry
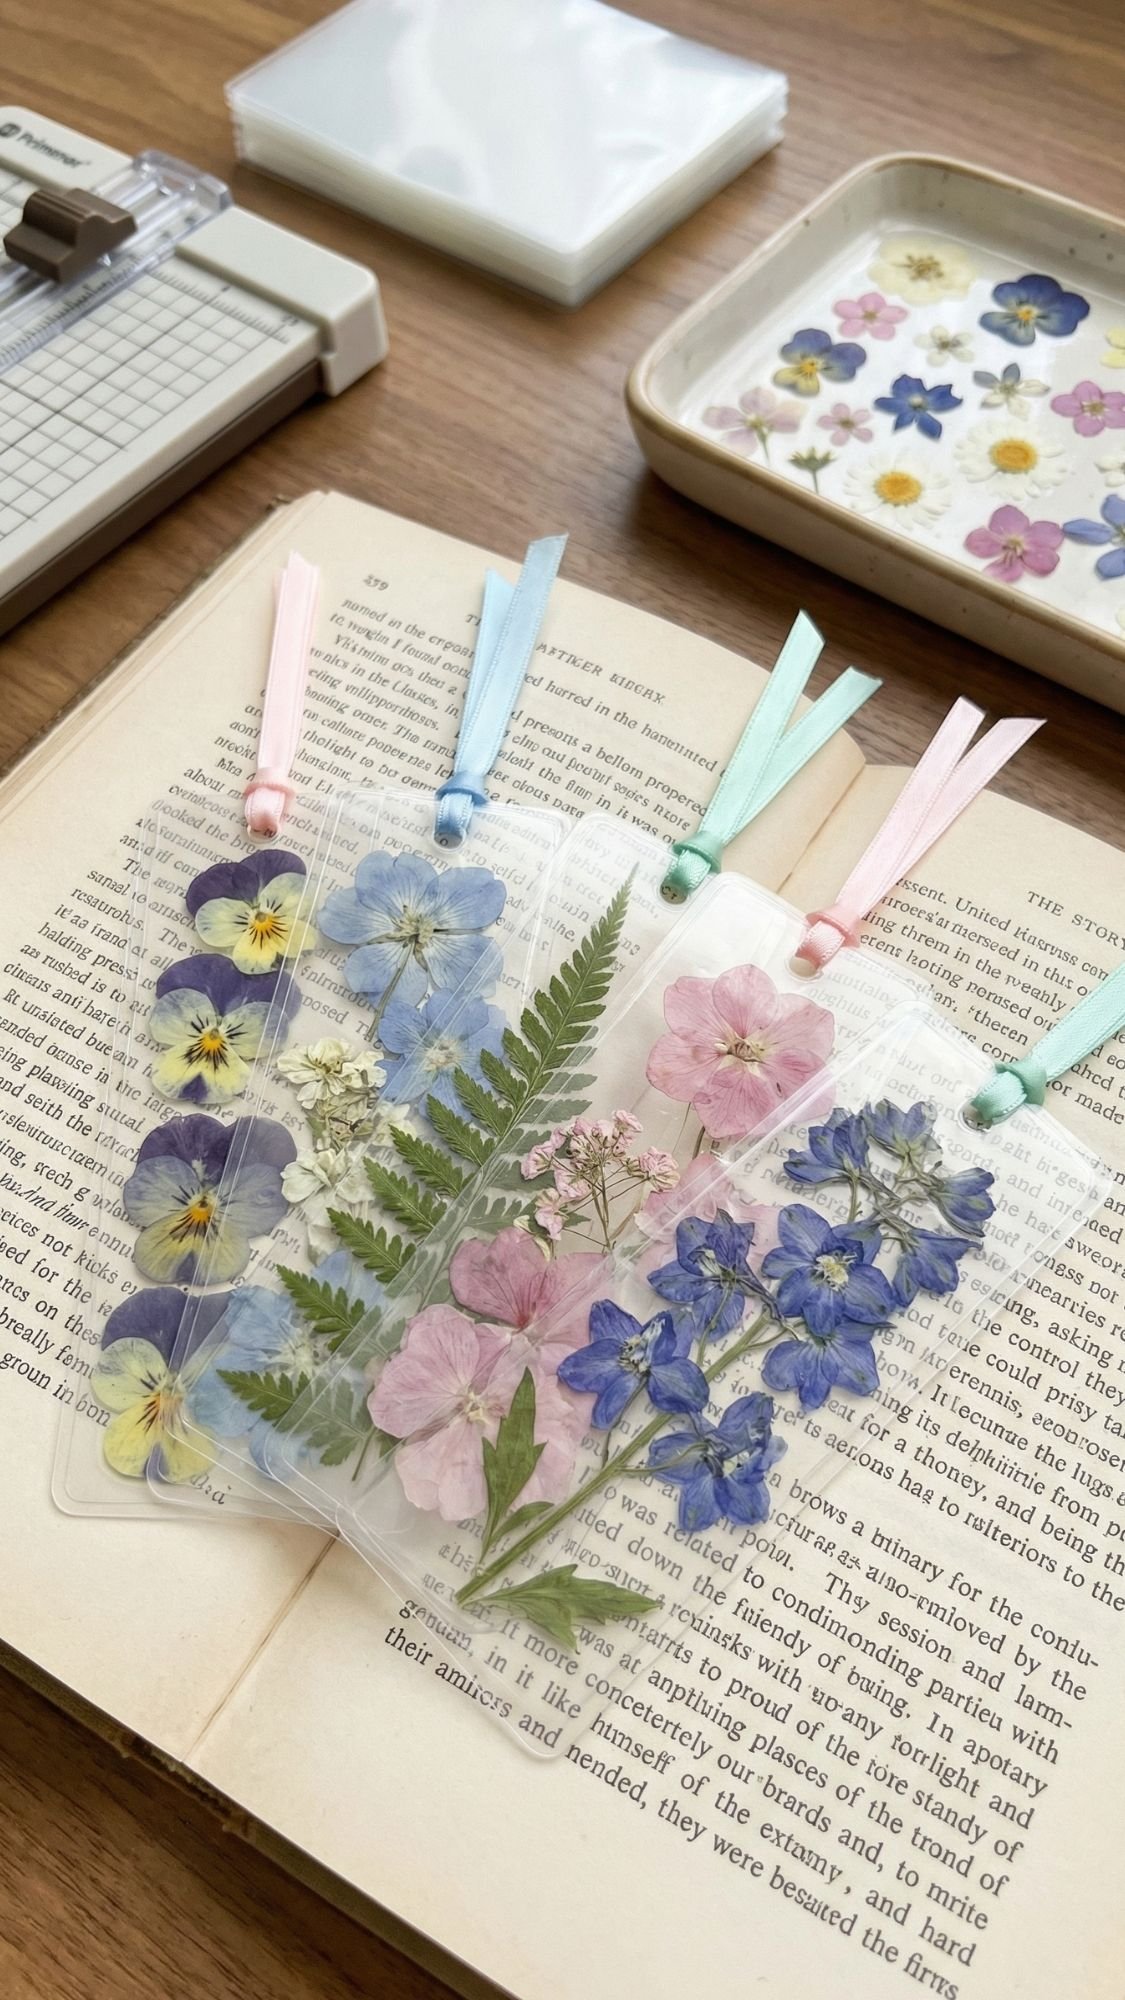
13) Laminated Pressed Flower Bookmarks (The Kid-Friendly, No-Resin Option)
These feel like the easiest “everyone can do it” project, and they still look really pretty when you keep the layout simple. I also love this one for gifting because it’s lightweight, mail-friendly, and you don’t have to deal with resin cure times. If someone wants a pressed flower vibe without the mess, this is the move.
Why This Gift Works
- Beginner-Friendly, no resin, no mixing ratios, no panic
- Great For Kids Or Class Gifts, especially if you batch make them
- Super Durable, laminate protects delicate petals from crumbling
Materials
- Fully dried, flat pressed flowers
- Laminator and laminating pouches
- Scissors or a paper trimmer
- Hole punch
- Ribbon or thin tassel cord
- Optional: cardstock strips for a clean backing, gold foil sticker accents
How To Make Them (So They Don’t Bubble Or Turn Weird)
- Double-check flower dryness. If petals feel cool, bendy, or slightly soft, keep pressing. Moisture causes cloudy laminate and browning over time.
- Arrange flowers inside the pouch. Leave a clear border around everything, laminate seals best with breathing room.
- Add a cardstock backing if you want higher contrast and a more polished look.
- Run through the laminator slowly. Don’t stop halfway, keep it moving.
- Trim the bookmark. Leave at least a small sealed edge all around so it stays closed.
- Punch a hole and add ribbon. Keep the hole below the sealed top edge so it doesn’t tear.
Pro-Tips That Make These Look Clean And Boutique
- Choose flat flowers only. Thick petals trap air and make bubbles.
- Keep the layout minimal. One stem or a tiny meadow strip looks way more intentional than stuffing the pouch.
- Use a warm laminator. A laminator that runs too cool leaves cloudy spots and weak seals.
- Press extra long in humid weather. Humidity messes with drying and can brown flowers faster.
Common Problems And Fixes
- Bubbles Around Petals
- Likely cause: flowers too thick, or pouch not sealing evenly
- Fix: re-laminate in a new pouch, use flatter blooms, and leave a wider border
- Prevention: press flowers extra flat, avoid bulky centers
- Flowers Look Brown
- Likely cause: blooms started wilting before pressing, or moisture stayed trapped
- Fix: use fresher blooms next time, swap pressing paper earlier
- Prevention: press flowers the same day you pick them, dry them fully
- Edges Peel Open
- Likely cause: you trimmed too close to the flowers
- Fix: re-laminate or trim farther out next time
- Prevention: keep a clean sealed border all around
Care Card (Optional, But Nice)
- Store flat, not bent inside a stuffed bag
- Keep away from high heat, like a hot car dashboard
- Wipe with a soft cloth if it gets smudged
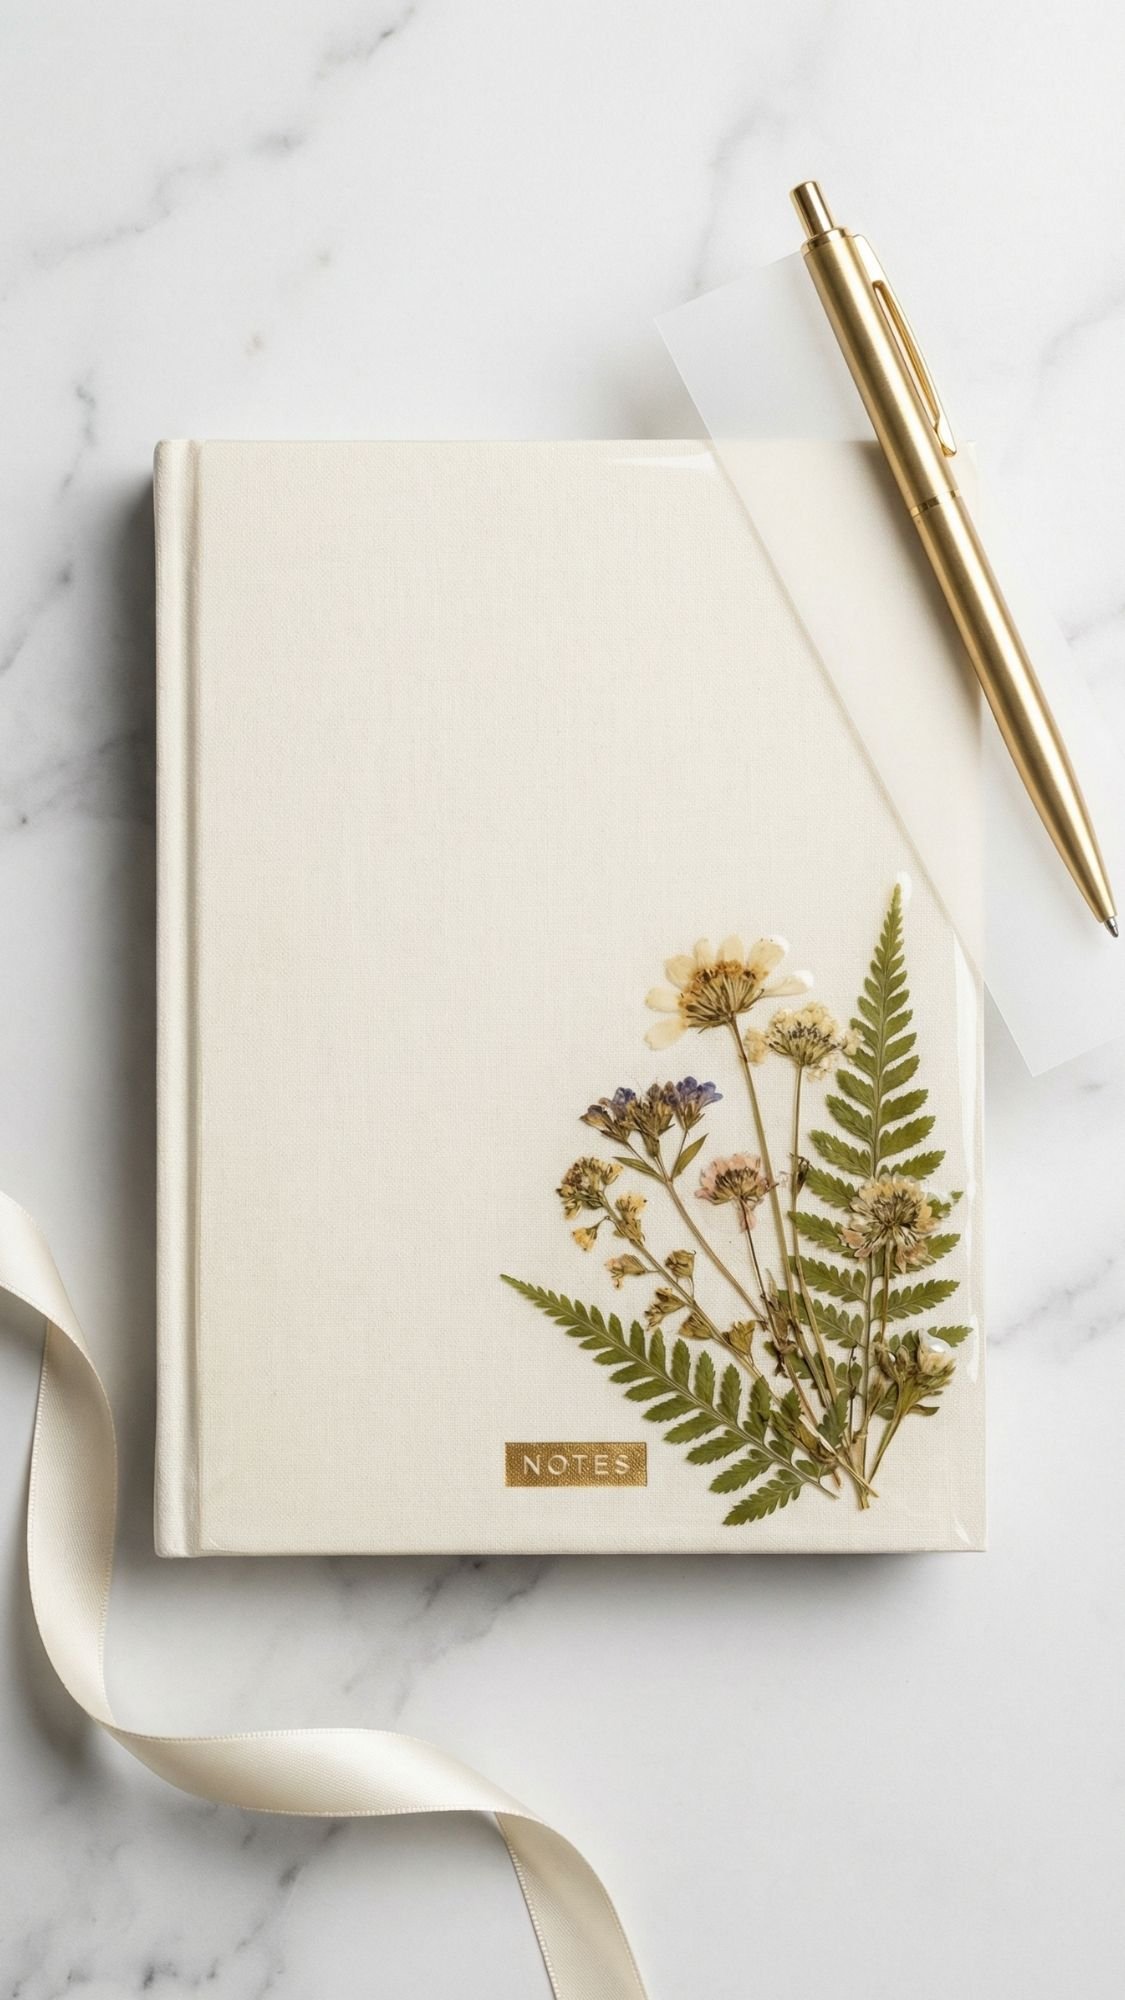
14) Pressed Flower Journal Cover (A One-Of-One Gift People Actually Keep)
This one feels so personal, in the best way. A pressed flower journal looks like something from a high-end stationery shop, especially if you keep the design clean and protect it properly. And if you’re gifting to someone who journals, plans, or doodles, this hits hard.
Why This Gift Works
- It’s Functional And Sentimental, the journal becomes a keepsake
- It Uses Flat Pressed Flowers Beautifully, no bulky resin required
- It Photographs Like A Dream, which helps your post look premium
Materials
- Plain hardcover journal (linen, faux leather, or smooth hardboard cover works great)
- Pressed flowers and greenery
- Glue pen or decoupage glue
- Soft brush (for smoothing)
- Clear self-adhesive laminate sheet or clear book cover film
- Optional: archival spray sealant, vellum, gold foil letter stickers
How To Make It (So It Doesn’t Peel Or Warp)
- Clean the cover. Wipe it down so glue sticks evenly.
- Plan your layout. Minimal corner cluster or a vertical stem looks modern and not busy.
- Glue flowers down lightly. Use a glue pen or thin decoupage layer, too much glue darkens petals.
- Let it dry fully. If it’s even slightly damp, laminate can trap moisture and cause cloudiness.
- Seal the design.
- Option A: mist with a light clear spray sealant
- Option B: apply a thin decoupage topcoat with a soft brush
- Add the protective layer. Apply clear laminate or book film slowly, smoothing as you go to avoid bubbles.
- Trim edges cleanly. Use a craft knife or sharp scissors for crisp edges.
Pro-Tips That Make It Look Boutique
- Choose a cover with texture carefully. Heavy texture creates bubbles under film, smoother covers look cleaner.
- Leave negative space. A little breathing room makes it feel high-end.
- Add a small title detail. A tiny gold initial or “Notes” label keeps it elegant.
- Do a test piece first. Some glues darken certain petals, testing saves heartbreak.
Common Problems And Fixes
- Film Bubbles Or Wrinkles
- Likely cause: cover texture or applying too fast
- Fix: lift the film gently and re-smooth, or use a soft card to push bubbles out
- Prevention: apply slowly, smooth in small sections
- Flowers Peel Up Over Time
- Likely cause: weak adhesive or dusty cover
- Fix: re-glue edges with a glue pen, then reseal
- Prevention: clean cover first, press firmly, allow full dry time
- Cover Warps
- Likely cause: too much wet glue
- Fix: press the journal under books once fully dry
- Prevention: use thin glue layers and let them dry fully
Gift Packaging Idea
- Wrap with a vellum belly band
- Tie with satin ribbon
- Add a tag that says what flowers you used and the date you pressed them

15) Resin Paperweight With A “Mini Meadow” Layout (Luxe Desk Gift, Zero Clutter)
This one feels like a tiny sculpture. A resin paperweight looks fancy on a desk, and it’s a great gift for someone who loves stationery, works from home, or just appreciates pretty objects that also do a job. Also, the “mini meadow” layout makes it look intentional, not like you tossed petals into resin and hoped for the best.
Why This Gift Works
- It Feels Like A Premium Object, especially with a clear cube shape
- It’s Functional, paperweight, desk decor, shelf styling
- It Preserves Flowers In A Really Clean Way, layers make it look like depth, not mess
Materials
- Silicone cube mold or thick paperweight mold
- Epoxy resin
- Pre-sealed pressed flowers plus tiny greenery
- Mixing cups, stir sticks, scraper
- Tweezers
- Heat tool for bubbles
- Optional: a tiny metallic accent like gold foil, very sparingly
How To Make It (Layered So Flowers Look Suspended)
- Clean the mold. Dust shows up forever in a clear cube.
- Mix resin slowly. Scrape sides and bottom, then mix a bit more.
- Pour the first layer. Keep it thin, this becomes your base.
- Let it thicken slightly. You want it to hold flowers in place.
- Add your first flower layer. Use tweezers, keep spacing airy.
- Pop bubbles. Quick heat passes, then let it settle.
- Pour the next layer. Thin again, don’t rush.
- Repeat until full. Layering is what creates that floating, suspended look.
- Cure fully. Cube molds often need longer cure time because they’re deep.
- Demold carefully. Avoid bending the mold too aggressively, edges can scuff.
Pro-Tips That Make It Look Like A Boutique Desk Piece
- Think in layers, not piles. One layer of flowers at a time keeps it crisp.
- Keep flowers off the outer walls. Flowers pressed against the mold edge look messy and make sanding annoying.
- Warm resin if your room runs cool. It reduces bubbles and helps clarity.
- Finish edges like you mean it. Light sanding and a polish step makes it look glassy.
Common Problems And Fixes
- Flowers drift or float upward
- Likely cause: you poured too deep too fast
- Fix: use thinner layers and wait until resin thickens before placing flowers
- Prevention: tack coat and gel-stage timing
- Cloudy center
- Likely cause: trapped moisture or cold curing
- Fix: sand and topcoat if surface haze, remake if deep cloudiness
- Prevention: fully dry flowers, stable warm room
- Bubbles trapped in corners
- Likely cause: deep mold corners catch air
- Fix: tap the mold lightly, use a toothpick to coax bubbles out before curing
- Prevention: pour slowly along the side of the mold
Care Card (Simple And Useful)
- Wipe with microfiber cloth
- Avoid harsh cleaners
- Keep out of harsh direct sun if you want flowers to stay bright
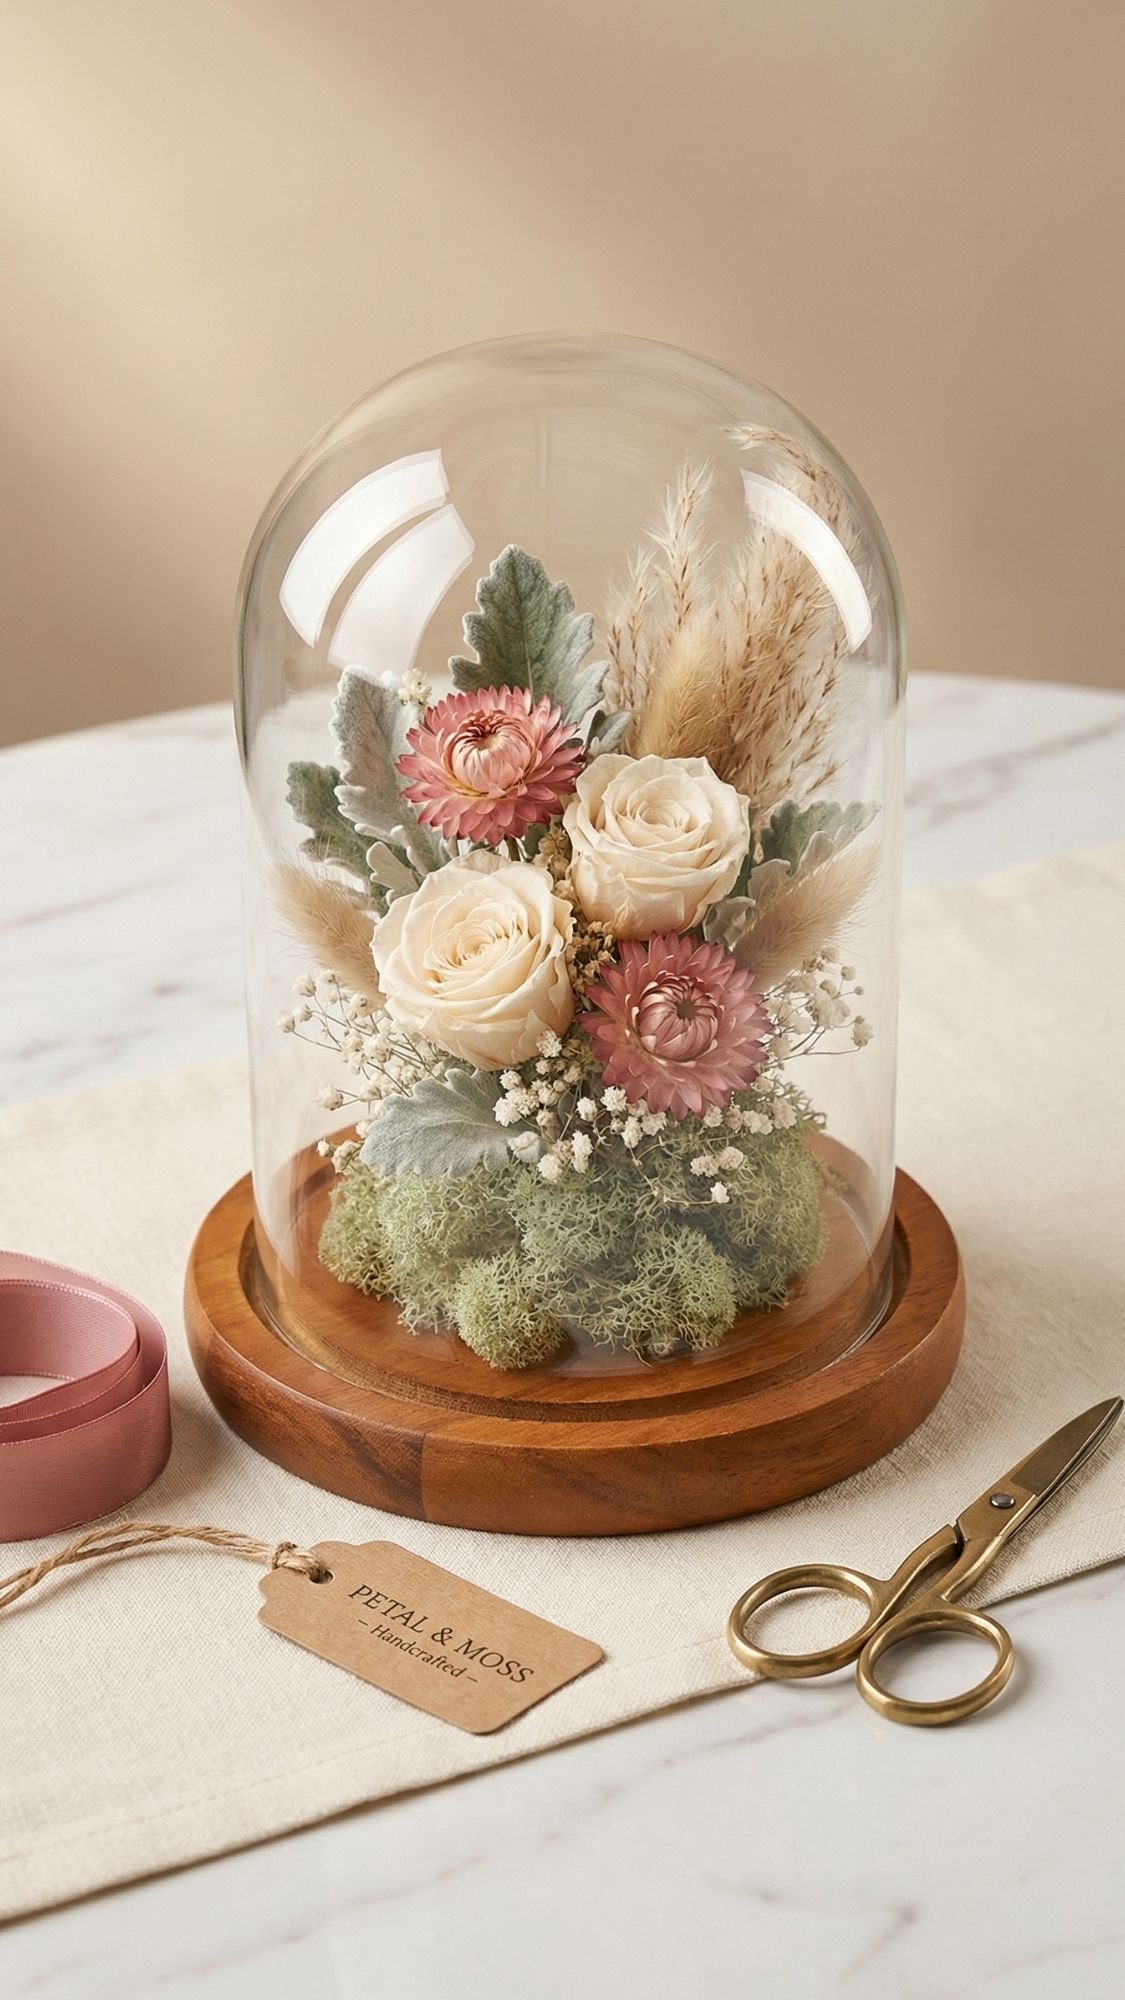
16) Dried Flower Cloche Display (Looks Expensive, Costs Weirdly Little)
This is one of those gifts that makes people say, “You bought that at a boutique, didn’t you?” Nope. You just trapped a tiny dried flower moment under glass like a fancy museum exhibit, and it works every time. Want a pressed and preserved flower gift that feels luxe without resin? This one nails it.
Why This Gift Works
- It Looks Like Home Decor, not a craft project
- It Protects Fragile Flowers, glass keeps dust and hands off
- It Feels Custom, especially if you use flowers that mean something
Materials
- Glass cloche with a base (wood, marble, or acrylic)
- Dried flowers (air-dried or silica-dried)
- Floral foam, air-dry clay, or a small chunk of craft putty
- Small scissors and tweezers
- Optional: preserved moss, mini fern pieces, ribbon, tiny label tag
- Optional: clear spray sealant for extra protection on delicate blooms
How To Make It (So It Looks Curated, Not Crowded)
- Pick a simple color story. Two to three colors looks high-end fast.
- Anchor your base. Add floral foam, clay, or putty to the center of the base.
- Build the focal point first. Place one main bloom or a mini bouquet shape.
- Add supporting pieces. Tuck in fillers like tiny blooms, fern bits, or moss.
- Check height clearance. Make sure nothing touches the glass.
- Clean the cloche. Wipe fingerprints off before you seal it up.
- Cover it. Lower the cloche straight down so you don’t bump your arrangement.
Pro-Tips That Make It Look Boutique
- Use odd numbers. Three small blooms often looks more natural than two.
- Leave breathing room. Negative space makes it feel intentional.
- Keep it low and layered. Tall stems can look messy inside a cloche.
- Add a grounding element. Moss or a neutral filler makes everything feel finished.
- Avoid humid placement. Bathrooms can create condensation and ruin delicate petals over time.
Common Problems And Fixes
- Condensation Inside The Glass
- Likely cause: humidity or not fully dried flowers
- Fix: open it, let everything air out, replace any damp materials
- Prevention: dry flowers fully, keep the cloche in a dry room
- Arrangement Looks Chaotic
- Likely cause: too many colors or equal-height stems
- Fix: pull out a few stems, create one focal point, add negative space
- Prevention: pick a palette, build focal first, fill second
- Flowers Shift When You Move It
- Likely cause: base anchoring too weak
- Fix: switch to clay or stronger putty, press stems in deeper
- Prevention: secure stems firmly, test with a gentle tap before covering
Care Card (Include This With The Gift)
- Keep out of harsh direct sun to slow fading
- Dust the outside glass with a microfiber cloth
- Avoid humid rooms to prevent condensation
- Lift the cloche straight up when you need to clean the base
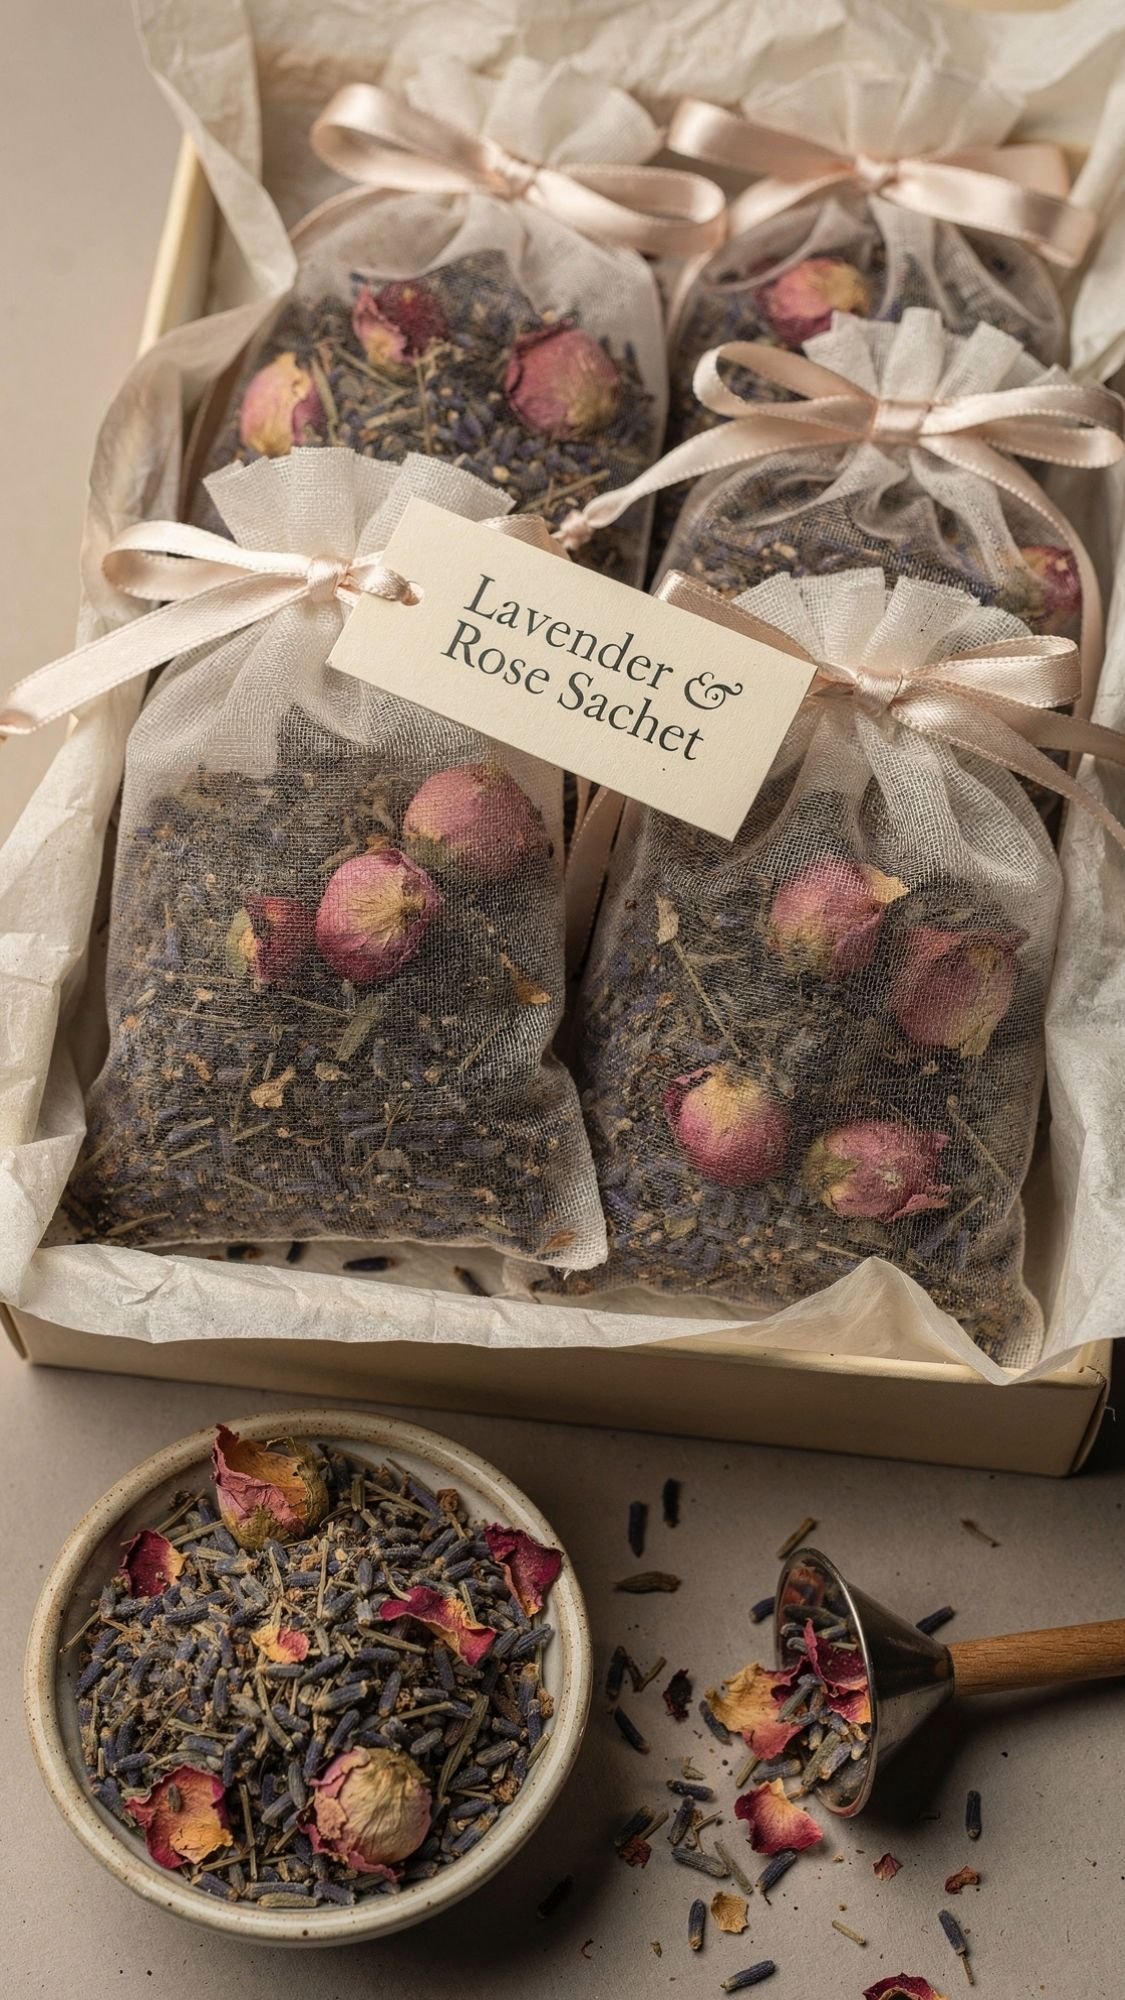
17) Dried Flower Sachets (Pretty, Useful, And They Smell Like You Have Your Life Together)
These are such an easy win. They feel thoughtful, they’re practical, and they’re perfect for anyone who loves cozy details. Dried flower sachets also work great as add-ons, like you pair them with a pressed flower card set or a journal and suddenly the gift feels complete.
Why This Gift Works
- It’s Practical, drawers, closets, gym bags, linen cabinets
- It’s Easy To Batch Make, perfect for multiple gifts
- It Uses Dried Flowers Beautifully, especially lavender and rose petals
Materials
- Small linen or cotton sachet bags (drawstring or tie style)
- Dried lavender buds, dried rose petals, or a blend
- Optional: a tiny amount of essential oil
- Optional: rice or dried herbs for filler
- Funnel or spoon
- Ribbon and a small label tag
How To Make Them (So They Smell Nice, Not Overwhelming)
- Choose your scent blend. Lavender alone is classic, lavender plus rose feels extra pretty.
- Fill the sachet. Use a funnel or spoon, don’t overstuff.
- Add essential oil carefully. One to two drops on the filler is plenty. Too much oil can stain fabric and smell sharp.
- Close and shake gently. This spreads the scent without clumping.
- Tie with ribbon. Add a label tag so it feels gift-ready.
Pro-Tips That Make These Feel Boutique
- Use a consistent scent profile. One main scent plus one supporting note feels intentional.
- Add a “care” tag. Tell them how to refresh the scent, it makes it feel professional.
- Blend in a little filler. Rice or dried herbs can help sachets hold their shape and scent longer.
- Match fabrics to your vibe. Linen for modern, cotton muslin for farmhouse, velvet for glam.
Common Problems And Fixes
- Sachet Smells Too Strong
- Likely cause: too much essential oil
- Fix: open it, air it out, add more plain dried filler
- Prevention: start with one drop, you can always add more
- Sachet Smells Like Nothing
- Likely cause: old dried flowers or not enough scent material
- Fix: replace with fresher dried buds, add a tiny drop of oil
- Prevention: store dried flowers in airtight containers
- Oil Stains The Bag
- Likely cause: oil touched fabric directly
- Fix: dab stain lightly, then add a liner next time
- Prevention: put oil on filler material, not on the fabric
Care Card (Include This With The Gift)
- Refresh by gently squeezing the sachet to release scent
- Add one drop of essential oil after a few weeks if needed
- Keep away from direct contact with delicate fabrics if you used oil
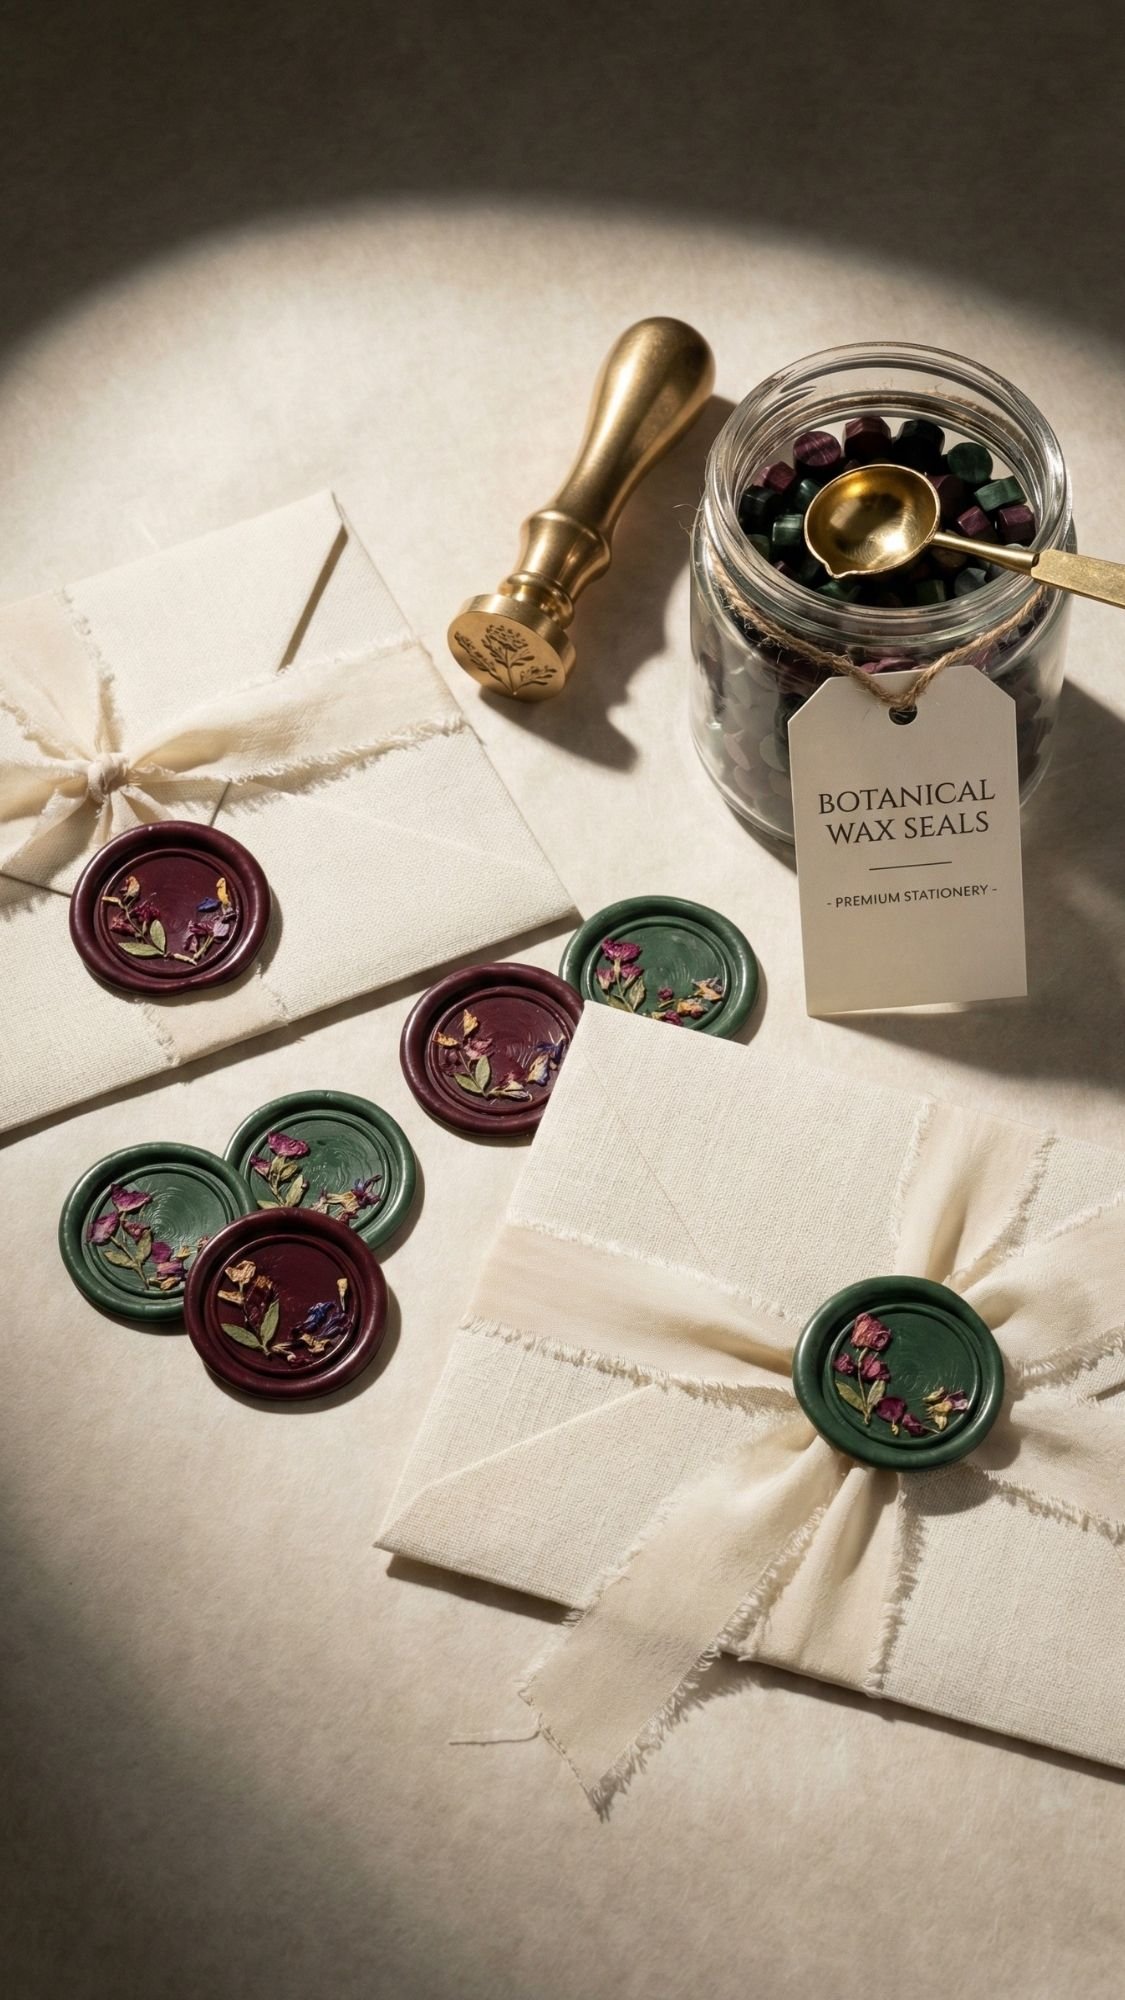
18) Botanical Wax Seal Gift Set (Pressed Petals Plus Old-School Fancy Vibes)
This gift feels like you time-traveled in the best way. Wax seals look expensive, and adding tiny pressed petals makes them feel extra special. It’s also a great “crafty but still useful” present for anyone who loves stationery, journaling, or sending cards like a romantic main character.
Why This Gift Works
- It Feels Luxe, wax seals instantly read premium
- It’s A Fun Experience Gift, not just an object
- It Pairs Perfectly With Other Projects, like card sets or gift tags
Materials
- Wax seal stamp (initial, floral, or classic crest style)
- Wax beads or sealing wax sticks
- Spoon and small candle (if using beads)
- Tiny pressed petals (super flat, tiny pieces)
- Envelopes, gift tags, or parchment paper for practice seals
- Optional: a silicone wax seal mat, metallic marker, ribbon
How To Make It (So Petals Don’t Crack The Seal)
- Practice a few seals first. You want your wax amount consistent.
- Melt the wax. Keep heat gentle and steady.
- Pour the wax puddle. Small and controlled works best.
- Add a tiny petal piece. Place it near the edge or slightly off-center, not piled in the middle.
- Stamp firmly. Hold for a few seconds, then lift straight up.
- Let it cool fully. Don’t peel or bend it early.
Pro-Tips That Make Seals Look Clean And Intentional
- Use micro petals only. Thick petals crack seals or make stamping uneven.
- Place petals near the edge. The stamp detail stays crisp in the center.
- Keep wax puddles consistent. Too much wax makes seals bulky.
- Make a mini palette. Match wax color to the flower tones for a curated look.
Common Problems And Fixes
- Seal Cracks
- Likely cause: petals too thick or wax cooled too fast
- Fix: use smaller petal pieces, warm the stamp slightly
- Prevention: micro petals only, steady heat
- Stamp Sticks To Wax
- Likely cause: wax too hot or stamp not clean
- Fix: let wax cool a few seconds longer, wipe stamp clean
- Prevention: consistent timing, clean stamp surface
- Seal Looks Blobby
- Likely cause: too much wax
- Fix: reduce wax amount, practice on parchment first
- Prevention: measure wax beads, keep a steady pour size
Packaging Idea (So It Feels Like A Full Gift)
- Wax stamp plus wax beads in a small box
- Mini envelope pack or gift tags
- A handful of pre-made wax seals as samples
- Tiny bag of micro pressed petals with a label
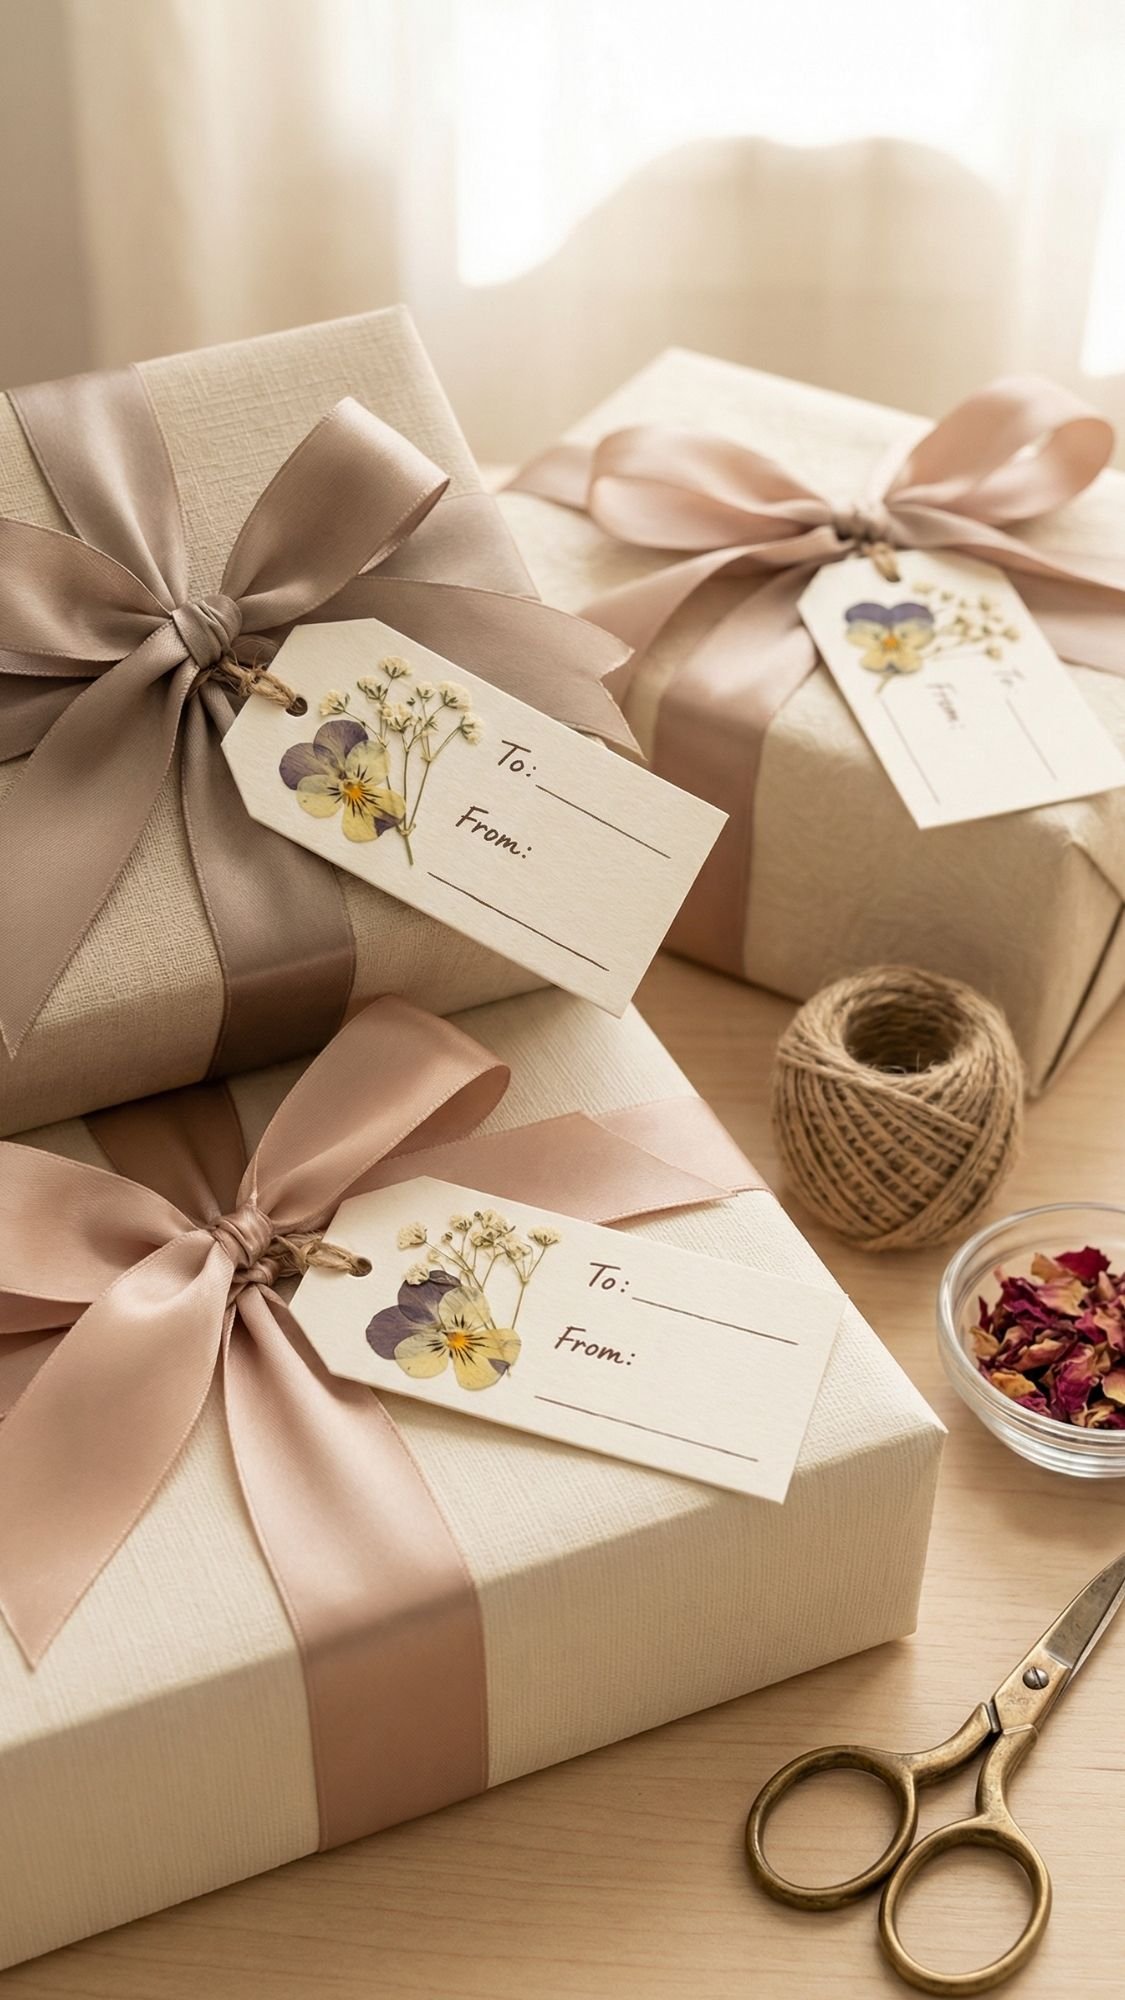
19) Pressed Flower Gift Tags (Tiny Project, Huge Upgrade)
These are small, but they do a lot. A pressed flower gift tag makes even a basic wrapped present look thoughtful and boutique. It also lets you use leftover petals that feel too tiny for bigger projects. Basically, it’s a great way to look extra without doing extra.
Why This Gift Works
- It Makes Any Gift Look Premium, even store-bought ones
- It’s Fast, perfect when you need a last-minute handmade touch
- It’s Easy To Batch Make, and you can match them to different occasions
Materials
- Heavy cardstock gift tags (blank or pre-cut)
- Pressed flowers and tiny greenery
- Glue pen or precision craft glue
- Tweezers
- Hole punch
- Twine, ribbon, or thin velvet cord
- Optional: vellum pieces, metallic gel pen, clear archival spray sealant
How To Make Them (Clean And Durable)
- Choose a layout style. Corner cluster, a single stem, or a mini wreath.
- Dry lay your flowers first. Arrange on the tag before gluing.
- Glue down lightly. Use tiny dots, too much glue shows and warps paper.
- Add a name line. Leave space to write “To” and “From.”
- Seal lightly if needed. A light spray helps keep petals from flaking.
- Punch the hole last. This keeps the layout centered and clean.
- Add ribbon or twine. Tie neatly, keep it simple.
Pro-Tips That Make Tags Look Boutique
- Use negative space. Tags look cleaner when you don’t fill the whole thing.
- Stick to a palette. Two to three flower colors looks curated.
- Add a vellum overlay. Vellum protects petals and hides minor glue shine.
- Make sets. A stack of matching tags tied together is a gift by itself.
Common Problems And Fixes
- Petals Flake Off
- Likely cause: weak adhesive or brittle petals
- Fix: add tiny glue dots under loose areas, seal lightly
- Prevention: use a glue pen and let it dry fully
- Tag Warps
- Likely cause: too much glue or too-wet sealant
- Fix: press it under a book once dry
- Prevention: use small glue dots, light spray coats
- Hole Tears
- Likely cause: hole too close to edge or paper too thin
- Fix: reinforce with a sticker ring or small punched circle
- Prevention: use heavyweight tags and punch cleanly
Packaging Idea
- Stack 10 to 15 tags
- Tie with ribbon
- Add a small label like “Handmade Pressed Flower Tags”
- Pair with matching twine and a wax seal sticker
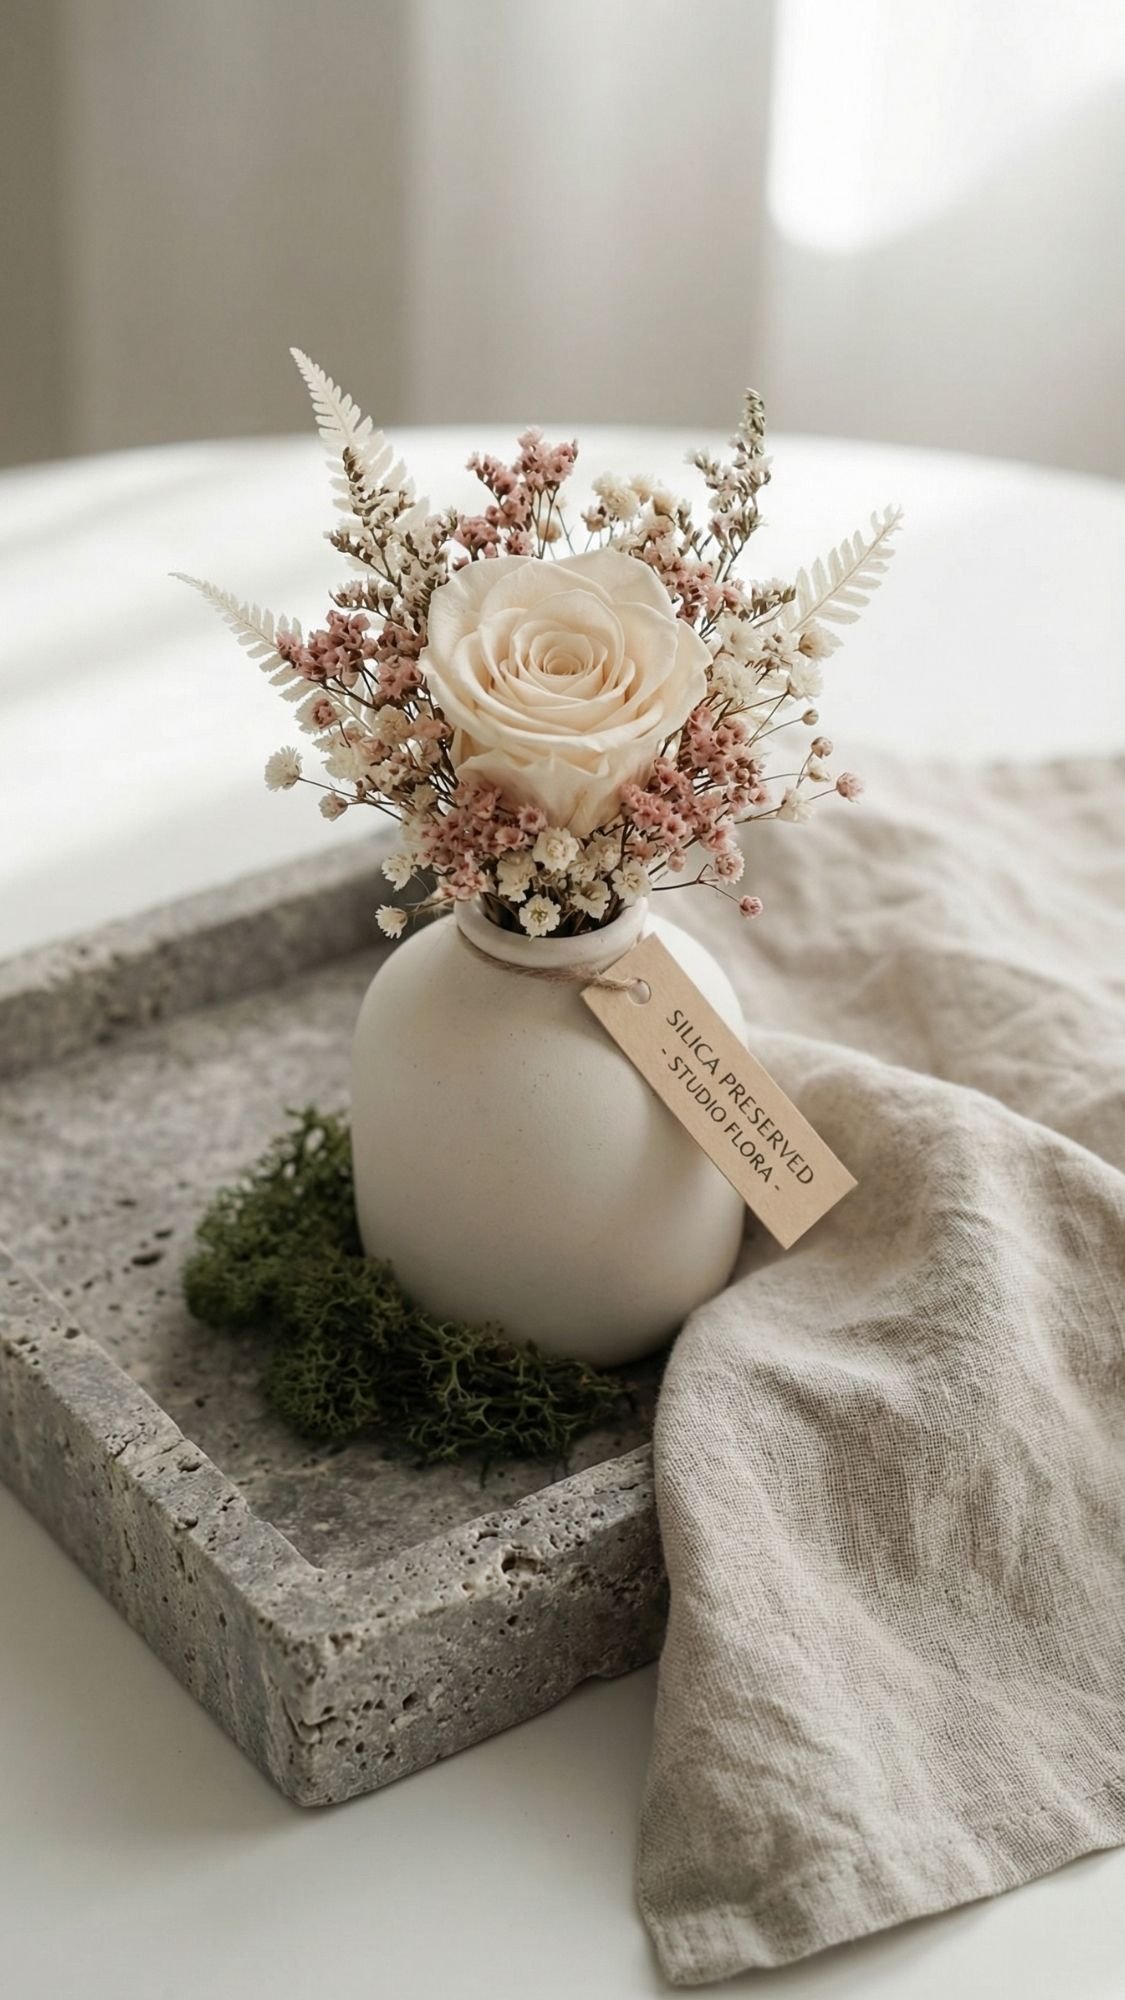
20) Silica-Dried Mini Bouquet In A Bud Vase (3D Blooms That Still Look Fresh)
This one is perfect if you want the “real flower” look, but you also want it to last. Silica drying keeps blooms more dimensional and often keeps color better than pressing, especially for thicker petals. The mini bouquet format also feels gift-shop polished, because it’s small, curated, and easy to display.
Why This Gift Works
- It Feels Like A Real Floral Gift, but it lasts way longer
- It Looks High-End In A Tiny Vase, minimal, clean, intentional
- It’s Great For Sentimental Flowers, like bouquet leftovers you can’t bear to toss
Materials
- Silica gel
- Airtight container with a lid
- Small blooms (roses, ranunculus, mums, mini peonies, small dahlias)
- Soft brush
- Bud vase
- Optional: preserved moss, ribbon, mini label tag
- Optional: clear spray sealant for delicate petals
How To Make It (So Flowers Keep Their Shape)
- Choose fresh blooms. Old blooms dry darker and look tired.
- Pour silica into the container. Start with a base layer.
- Place the blooms gently. Keep them upright, don’t crush petals.
- Cover fully with silica. Pour slowly around petals so they keep their shape.
- Seal the container. Leave it undisturbed until dry.
- Remove and brush off silica. Use a soft brush, don’t yank petals.
- Arrange in a bud vase. Keep it simple, one focal bloom plus tiny filler works best.
- Optional seal. A light spray can help protect fragile petals from crumbling.
Pro-Tips That Make It Look Boutique
- Use a tight color palette. Two tones plus greenery looks curated.
- Keep it mini. A small vase makes it feel intentional, not like you ran out of space.
- Add a grounding element. A little preserved moss hides stems and looks polished.
- Don’t overcrowd. Negative space makes 3D flowers feel elegant.
Common Problems And Fixes
- Petals Look Crushed
- Likely cause: silica poured too fast or petals pressed down
- Fix: choose smaller blooms, pour silica slowly around petals
- Prevention: pour from the side and use gentle coverage
- Flowers Dried Too Dark
- Likely cause: blooms were older or started wilting
- Fix: use fresher blooms next time, pick earlier in the day
- Prevention: dry flowers the same day you pick them
- Silica Stuck In Petals
- Likely cause: petal texture holds crystals
- Fix: soft brush, then gentle tapping upside down
- Prevention: use a finer silica grain, brush gently
Care Card (Worth Including)
- Keep out of harsh direct sun
- Dust gently, don’t spray with water
- Store in a dry room, humidity can soften petals
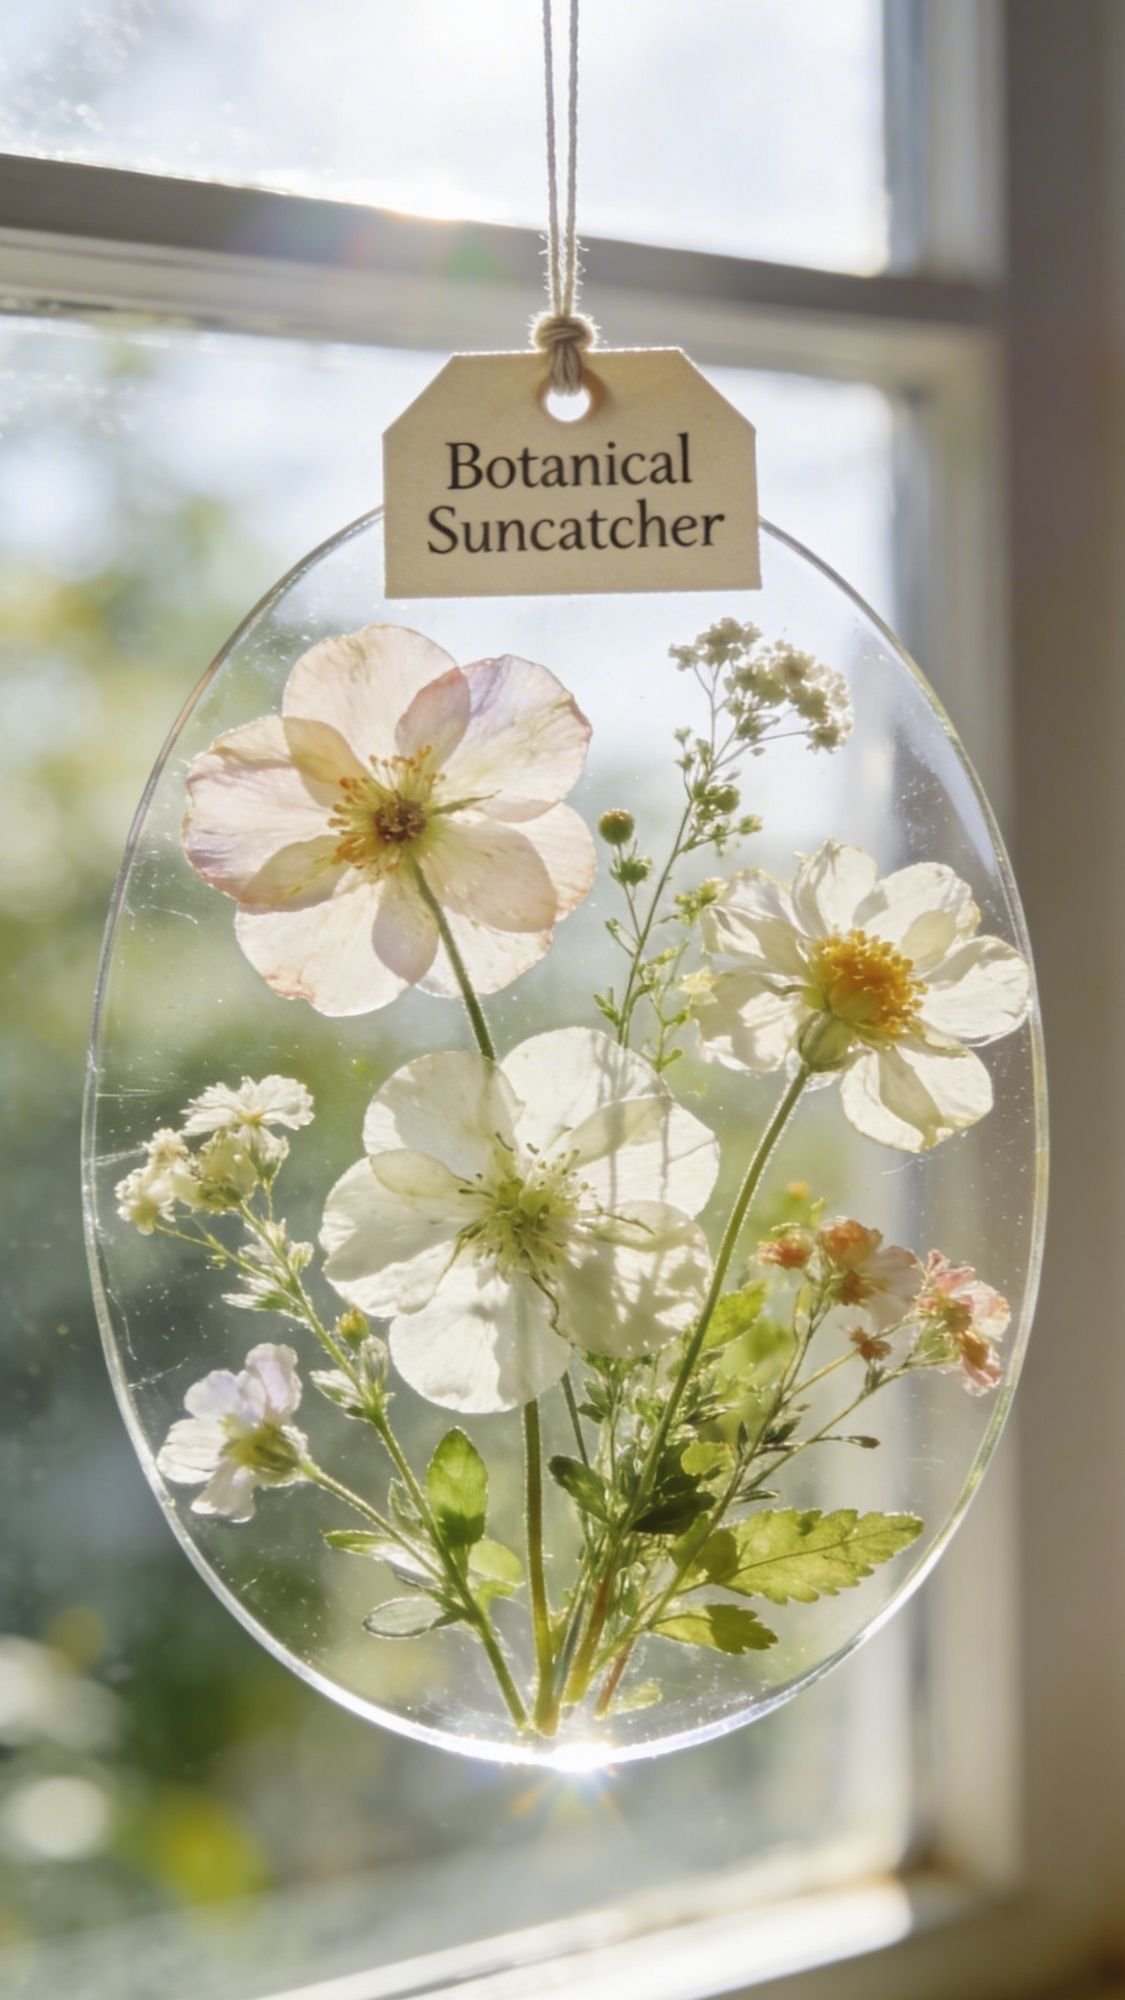
21) Pressed Flower Suncatcher (Glass Vibes Without Stained Glass Tools)
This project gives you that dreamy “sunlight through petals” look, and it’s way easier than actual stained glass. You can keep it super minimal, or you can do a little wildflower meadow vibe. Either way, it looks expensive when the edges are clean and the layout has breathing room.
Why This Gift Works
- It’s A Showpiece, it catches light and looks magical in a window
- It’s Lightweight And Mail-Friendly, great for gifting from a distance
- It’s Not Resin-Heavy, so it’s less messy and faster to make
Materials
- Clear acrylic circle or oval blank, or a clear laminating pouch
- Fully dried pressed flowers and greenery
- Clear-drying adhesive (or laminate to seal)
- Hole punch or small drill for acrylic
- Fishing line or clear cord
- Optional: a thin gold hoop, ribbon, tiny charm
How To Make It (So It Looks Clean And Not Cloudy)
- Choose your clear base. Acrylic looks crisp and modern, laminate feels easy and beginner-friendly.
- Plan your layout. Keep it airy, sunlight needs space to shine through.
- Attach flowers.
- Acrylic: use tiny dots of clear adhesive and press flat
- Laminate: arrange inside the pouch and seal with the laminator
- Trim edges cleanly. A clean border makes it look high-end.
- Add the hanging hole. Place it slightly above center so it hangs straight.
- Attach fishing line. Keep knots neat and small.
Pro-Tips That Make It Look Boutique
- Use flat flowers only. Thick blooms trap air and create cloudy spots.
- Leave negative space. It makes the whole piece feel modern and intentional.
- Keep the border wide. Borders look like “finished product,” skinny edges look like “craft.”
- Avoid harsh sun for storage. Sunlight looks gorgeous, but it fades petals over time, so recommend a window that gets softer light.
Common Problems And Fixes
- Cloudy Spots
- Likely cause: trapped moisture or adhesive smears
- Fix: redo with drier flowers, use less glue, wipe acrylic clean
- Prevention: press flowers fully dry, apply glue sparingly
- Flowers Peel Off Acrylic
- Likely cause: weak adhesive or dusty surface
- Fix: clean acrylic with alcohol, reattach with stronger clear glue
- Prevention: clean the surface first, press flowers flat
- Suncatcher Hangs Crooked
- Likely cause: hole placement off-center
- Fix: re-hole slightly higher and adjust knot placement
- Prevention: mark center point and test hang before final knot
Care Card (Include This With The Gift)
- Hang in a window with gentle light for best color longevity
- Dust lightly with a microfiber cloth
- Avoid water sprays and harsh cleaners
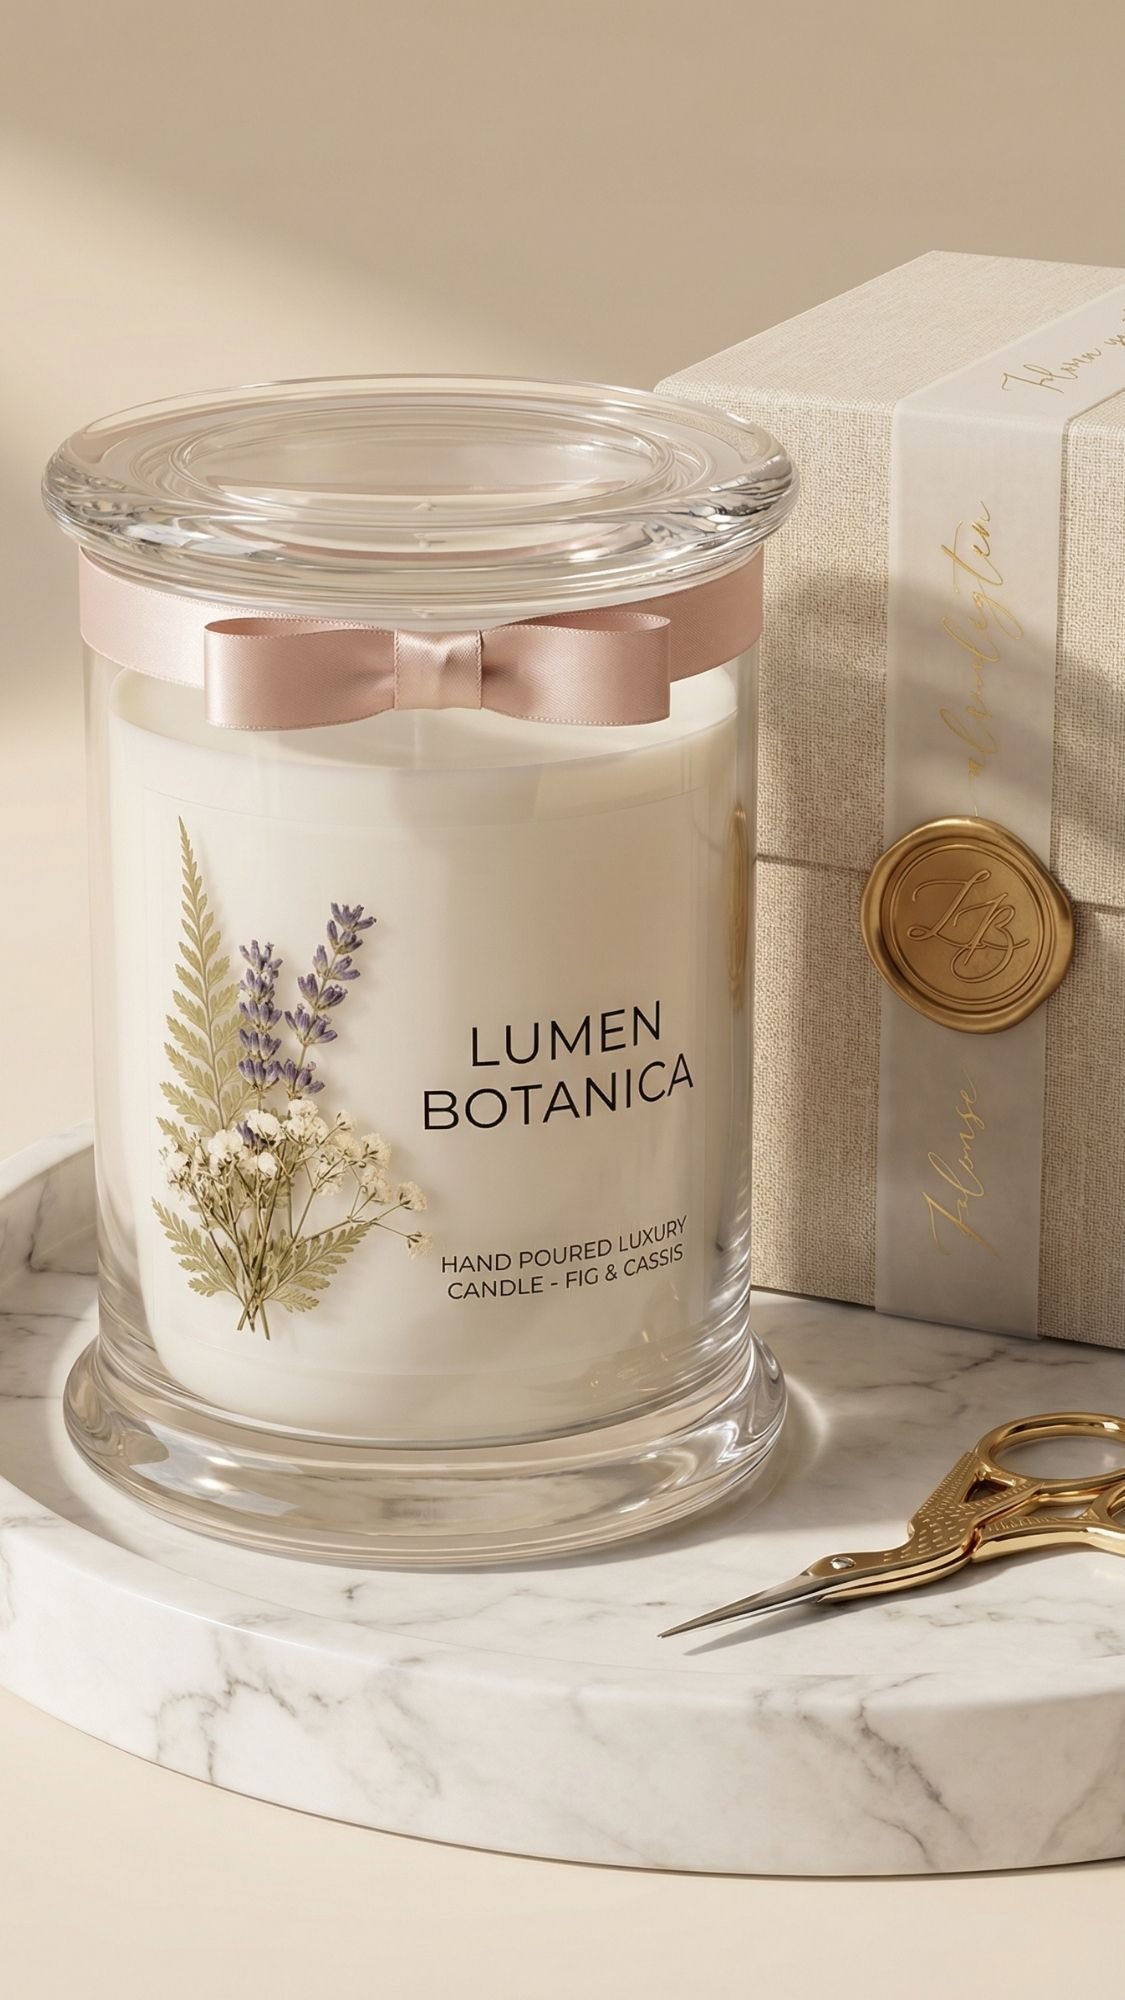
22) Pressed Flower Candle Label And Lid Topper (Pretty, But Keep It Safe)
Let’s be clear, flowers and open flames don’t belong together. But you can still make a candle gift that gives pressed flower vibes without doing anything risky. The trick is keeping the botanicals on the outside only, like a label wrap or a decorative lid topper. It looks boutique, it feels thoughtful, and nobody has to worry about a surprise fire situation.
Why This Gift Works
- It Looks Like A Boutique Candle, especially with clean labeling
- It’s Safer Than Floral Candles, because flowers stay away from the flame
- It’s Easy To Customize, match the scent, colors, and vibe of the recipient
Materials
- Candle jar with lid (plain jar looks best for decorating)
- Pressed flowers (flat, fully dry)
- Clear label film, clear sticker paper, or vellum wrap
- Glue pen or decoupage glue
- Scissors, tweezers
- Optional: gold foil accents, ribbon, wax seal sticker
- Optional: a small wooden or metal lid topper blank
How To Make It (Label Wrap Method)
- Measure the jar. Cut a strip of clear label film or vellum to wrap around.
- Plan your flower layout. Keep it minimal, leave space for the candle name.
- Attach flowers to the label film. Use tiny glue dots, don’t overdo it.
- Let it dry fully. Any dampness causes cloudiness or wrinkles.
- Wrap the jar. Align carefully and smooth as you go.
- Add the text. Keep it simple, like “Lavender Bloom” or “Wildflower Cozy.”
How To Make It (Lid Topper Method)
- Choose a topper base. A thin round wood disc or a flat lid insert works well.
- Glue pressed flowers down. Keep petals flat and away from the edge.
- Seal it. Use a clear topcoat so petals don’t crumble or snag.
- Attach to the lid. Use strong adhesive and let it set fully.
Pro-Tips That Make It Look High-End
- Pick a clean font and layout. Too many words makes it look homemade fast.
- Use one floral cluster. One corner cluster plus negative space looks premium.
- Match the flowers to the scent vibe. Soft lavender petals for lavender scents, warm tones for vanilla, etc.
- Keep it removable if possible. Some people reuse jars, and that’s a selling point.
Safety Notes (Quick And Clear)
- Don’t place flowers inside the jar near the wax
- Don’t glue anything where heat can affect it
- Keep the lid topper decorative, remove it while burning if needed
Common Problems And Fixes
- Label Wrinkles
- Likely cause: film too thin or applied too fast
- Fix: rewrap with a thicker film or apply slower with smoothing
- Prevention: use a sturdy label film and smooth gradually
- Flowers Lift Off The Label
- Likely cause: weak adhesive or dusty film
- Fix: switch to stronger glue dots, press flat
- Prevention: clean film first, use minimal but strong adhesive
- Topper Feels Fragile
- Likely cause: no sealant
- Fix: add a clear topcoat
- Prevention: always seal toppers
Care Card (Include This With The Gift)
- Keep label dry, wipe jar gently
- Store out of direct sun to slow fading
- Remove lid topper when burning if it sits close to heat
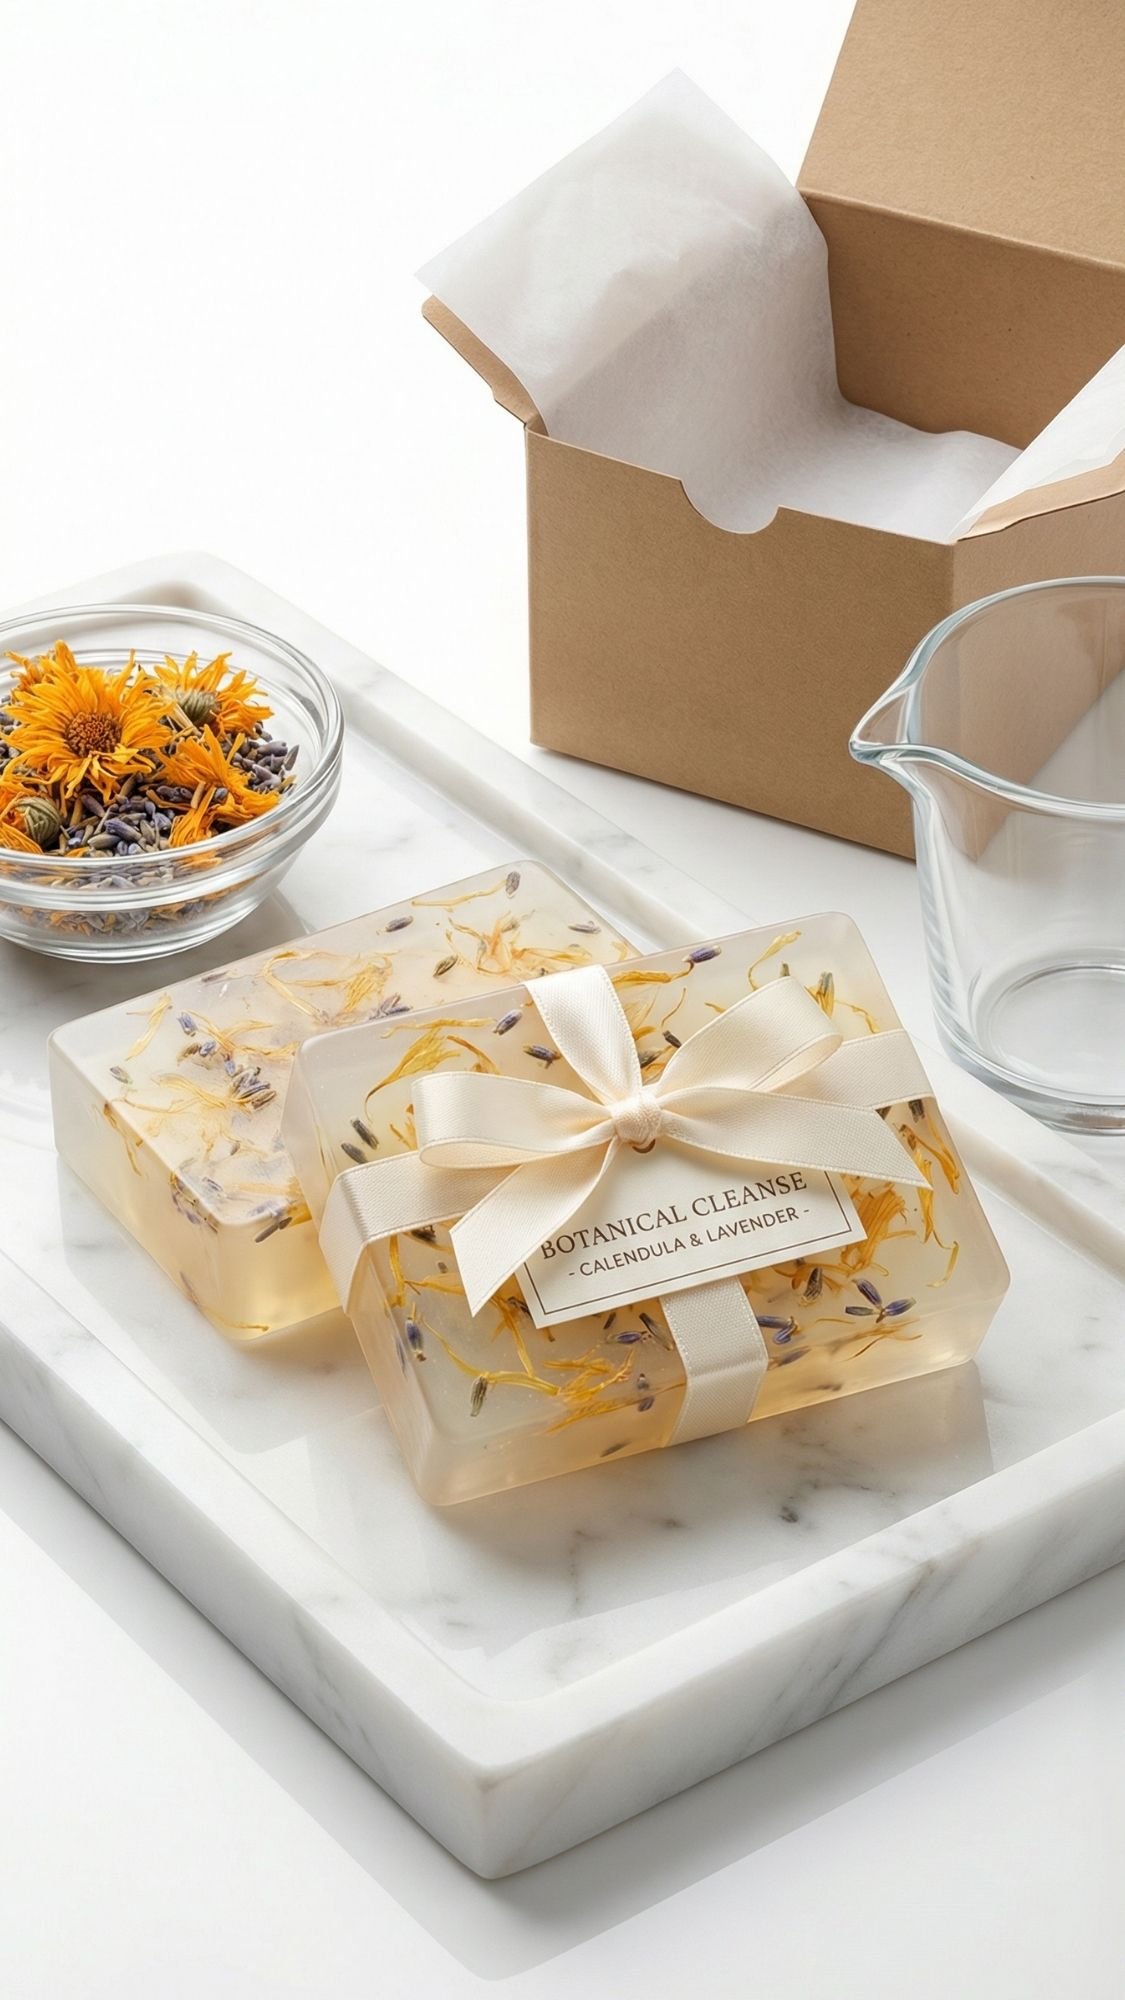
23) Melt And Pour Soap With Dried Petals (Pretty, Simple, And Slightly Tricky)
These soaps look adorable in gift boxes, and they feel like a real treat. But I’m going to be honest, dried petals in soap can behave like little drama queens. Some petals turn brown, some bleed color, and some float to the top like they’re trying to escape. The fix is using petals sparingly and choosing the right ones.
Why This Gift Works
- It’s A Real Self-Care Gift, people actually use soap
- It Looks Boutique In A Set, especially with matching tags and ribbon
- It’s Beginner-Friendly, melt and pour keeps it simple
Materials
- Melt and pour soap base (clear or white)
- Silicone soap mold
- Dried petals (lavender buds, calendula, rose petals in small amounts)
- Rubbing alcohol in a spray bottle (for bubbles)
- Microwave-safe measuring cup
- Stir stick
- Optional: skin-safe fragrance oil, mica for color, dried herbs for texture
How To Make It (So It Stays Pretty, Not Brown And Sad)
- Cut and melt the soap base. Melt in short bursts, stir between.
- Add color and fragrance. Keep fragrance within the recommended amount for your soap base.
- Pour a thin base layer. This helps petals stay where you want them.
- Let it cool slightly. If soap is too hot, petals discolor faster.
- Add petals sparingly. Sprinkle lightly, don’t pack them in.
- Top with more soap. Pour slowly so petals don’t clump.
- Spritz rubbing alcohol. This pops surface bubbles.
- Let it cool fully. Don’t unmold too early or it can warp.
Pro-Tips That Make It Look Boutique
- Less petals, more elegance. A few petals looks luxe, a lot looks messy.
- Choose petals that behave. Calendula and lavender tend to hold up better than many rose petals.
- Keep petals away from the edges. Edges show everything.
- Wrap like a pro. Clear wrap plus a label and ribbon makes it gift-ready.
Common Problems And Fixes
- Petals Turn Brown
- Likely cause: soap too hot or petals not fully dry
- Fix: let soap cool a bit before adding petals, use different petals
- Prevention: add petals at a cooler temp and test a small batch first
- Petals Float
- Likely cause: petals too light and soap too thin
- Fix: pour a thin base, let it thicken slightly, then add petals
- Prevention: layer your pour and don’t over-stir
- Soap Sweats
- Likely cause: humidity and glycerin attracting moisture
- Fix: wrap soaps tightly once fully cool
- Prevention: store in a dry place and wrap promptly
Care Card (For The Gift)
- Store in a cool, dry spot
- Use within a reasonable time for best scent
- Keep wrapped until ready to use

24) Jesmonite Or Clay Trinket Dish With Pressed Flower Imprints (Modern, Textured, And Very Giftable)
If you want the pressed flower look without resin clarity stress, this is your project. You get that botanical detail, but in a matte, modern finish that feels more like designer decor. Also, it’s a great gift for someone who loves neutrals and clean styling, because it doesn’t scream “craft,” it whispers “I shop expensive.” 😌
Why This Gift Works
- It Feels Like Modern Home Decor, matte finish reads high-end
- It Holds Up Well, especially if you seal it correctly
- It Looks Custom, every imprint comes out slightly different
Materials
- Air-dry clay or jesmonite (choose one based on what you like working with)
- Rolling pin or smooth bottle
- Pressed flowers and leaves (flatter is better)
- Dish template or bowl for shaping
- Craft knife
- Sandpaper (fine grit)
- Sealant (water-resistant, matte or satin)
- Optional: gold rim paint pen, pigment for tinting, cork feet
How To Make It (Two Options, Same Gorgeous Result)
Option A, Clay Imprint Dish
- Roll out clay evenly. Keep thickness consistent so it dries flat.
- Press flowers gently into the clay. Don’t mash them, press just enough to leave texture.
- Lift flowers carefully. Use tweezers if needed, you want the imprint, not the flower stuck forever.
- Cut the dish shape. Use a template for clean edges.
- Form the dish. Lay it over a bowl to shape, then let it dry completely.
- Sand edges smooth. This is what makes it look finished.
- Seal it. Seal the whole dish, top and bottom, so it resists moisture.
Option B, Jesmonite Botanical Inlay Dish
- Mix jesmonite. Follow your ratio exactly, no freestyle math here.
- Pour into the mold. Tap to release trapped air.
- Add pressed flower pieces as an inlay. Press them in lightly once the surface thickens a bit.
- Let it set. Don’t demold early, you can chip edges.
- Sand and seal. This step makes it feel boutique.
Pro-Tips That Make It Look Like A Designer Piece
- Use leaves for clean texture. Ferns and simple greenery create crisp imprints.
- Keep the layout minimal. One botanical corner feels modern and intentional.
- Seal like you mean it. Unsealed clay stains fast, and it ruins the vibe.
- Add cork feet. They protect surfaces and make it feel store-bought.
- Optional glam detail: paint a thin rim, then seal again so it lasts.
Common Problems And Fixes
- Edges Crack
- Likely cause: clay dried too fast or dish too thin
- Fix: sand smooth, fill tiny cracks with a bit of clay, reseal
- Prevention: roll slightly thicker, dry slowly, avoid direct heat
- Dish Warps
- Likely cause: uneven thickness or drying on one side
- Fix: sand the base flat if possible, reseal
- Prevention: roll evenly, flip during drying if your clay allows it
- Imprint Looks Faint
- Likely cause: you pressed too lightly or flowers were too dry and stiff
- Fix: press a bit firmer next time, use greener leaves for clearer veins
- Prevention: choose flexible leaves and press evenly
- Stains Show Up
- Likely cause: not sealed enough
- Fix: clean gently, dry fully, add another sealant coat
- Prevention: seal top and bottom, allow full cure time for sealant
Care Card (Include This With The Gift)
- Wipe with a soft cloth, don’t soak
- Keep away from harsh cleaners
- Refresh sealant later if the surface starts looking dull

25) Bouquet Preservation Frame With A Photo Or Invitation (The Emotional Knockout)
This is the one that gets the “I’m not crying, you’re crying” reaction. You take real flowers from a meaningful day, press them properly, and pair them with something personal like a photo, an invitation, or even a handwritten note. It instantly becomes a keepsake, not just decor.
Why This Gift Works
- It Preserves A Real Memory, weddings, anniversaries, graduations, memorials
- It Looks Like Custom Art, especially in a deep frame
- It’s High Impact, but you can still keep the layout simple and modern
Materials
- Deep frame or shadow box frame (floating style works great)
- Pressed flowers from the bouquet or meaningful blooms
- Printed photo, invitation, or a note
- Acid-free cardstock backing
- Archival adhesive dots or photo corners
- Tweezers
- Microfiber cloth
- Optional: a small label card with date and location
How To Make It (So It Looks Clean And Not Crowded)
- Choose your story element. Photo, invitation, vow snippet, or a short handwritten note.
- Pick the best pressed blooms. Use statement flowers plus small fillers.
- Plan the layout on the table. Take a photo once it looks right.
- Mount the story element first. Use photo corners or archival dots.
- Add pressed flowers. Keep them spaced, and avoid cramming every bloom in.
- Add a date label. One small line adds so much meaning.
- Close and clean the frame. Clean glass inside and out before final close.
Ever notice how the same flowers feel completely different when you add a date and one tiny note? That’s why this works so well.
Pro-Tips That Make It Look Like Custom Framing
- Use negative space. Empty space makes the frame feel modern and expensive.
- Stick to a palette. Use a few key blooms, not the entire bouquet.
- Keep thicker pieces toward the back. This prevents the glass from pressing petals.
- Press blooms as soon as possible. Older flowers brown faster, and it’s heartbreaking to lose them.
Common Problems And Fixes
- Flowers Browned During Pressing
- Likely cause: flowers were old or pressing paper stayed damp
- Fix: use fresher blooms next time, swap paper early
- Prevention: press the same day, change blotting paper quickly
- Paper Backing Warps
- Likely cause: humidity or too much adhesive moisture
- Fix: replace backing with thicker acid-free cardstock
- Prevention: use minimal adhesive and store in a dry room
- Dust Inside Frame
- Likely cause: frame sat open too long
- Fix: open, wipe, use a puff of air, close quickly
- Prevention: assemble everything first, close immediately
Care Card (Include This With The Gift)
- Keep out of harsh direct sun to slow fading
- Dust frame gently, don’t spray cleaner directly on glass edges
- Store in a dry room, humidity can soften pressed petals over time
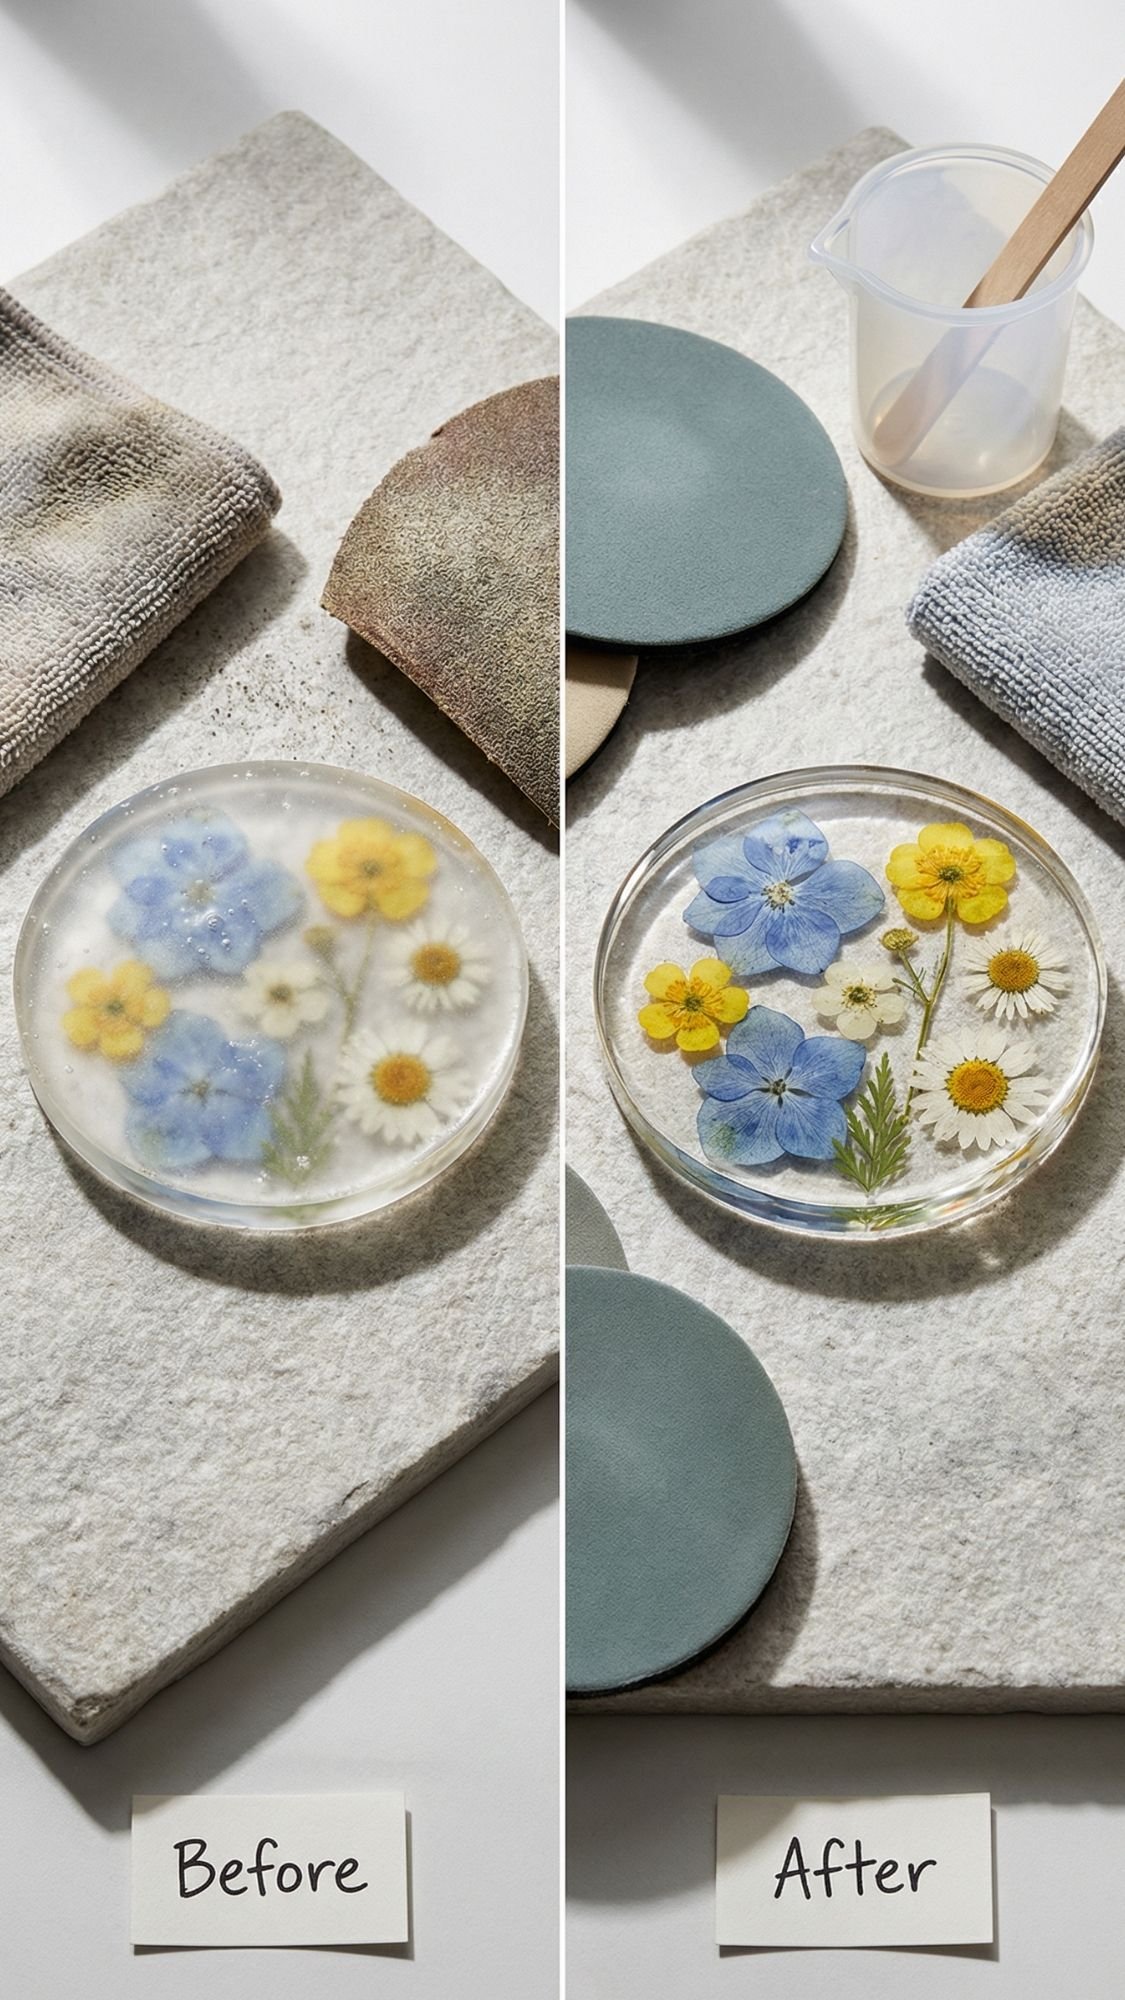
I Once Made The Cloudiest Resin Coasters On The Planet
I got cocky and poured resin over flowers that weren’t fully dry. They looked dry, they felt mostly dry, and my brain said, “Good enough.” Spoiler, it was not good enough. The next morning I found a coaster set that looked like fog rolled in and never left, plus tiny bubbles clung to every petal like they paid rent. Have you ever stared at a craft fail and thought, “Cool, so I guess I live here now”? Yeah, that.
What Went Wrong
- I trapped moisture inside the resin, so the cure turned cloudy.
- I poured too deep too fast, so flowers tried to float and grabbed bubbles.
- I worked in a room that felt a little humid, which made everything worse.
How I Fixed It (And Saved The Set)
- I let the coasters cure fully, even though they looked awful.
- I sanded the top surface until it looked evenly matte, no shiny low spots.
- I wiped the dust off with rubbing alcohol and a microfiber cloth.
- I poured a thin, clear top coat and popped bubbles with quick heat passes.
- I let them cure completely before stacking or packaging.
They didn’t turn into crystal-clear perfection, but they went from “cloudy science project” to “soft dreamy botanical.” People still loved them, and I stopped spiraling. 🙂
How I Prevent It Now (So You Don’t Have To Learn This The Hard Way)
- I press flowers longer than I think I need, then I press them longer again.
- I pre-seal both sides of every flower with clear spray before resin.
- I pour in thin layers, I let each layer thicken slightly, then I place flowers.
- I keep petals away from edges so finishing stays clean.
- I avoid pouring resin on rainy days when my space feels damp.
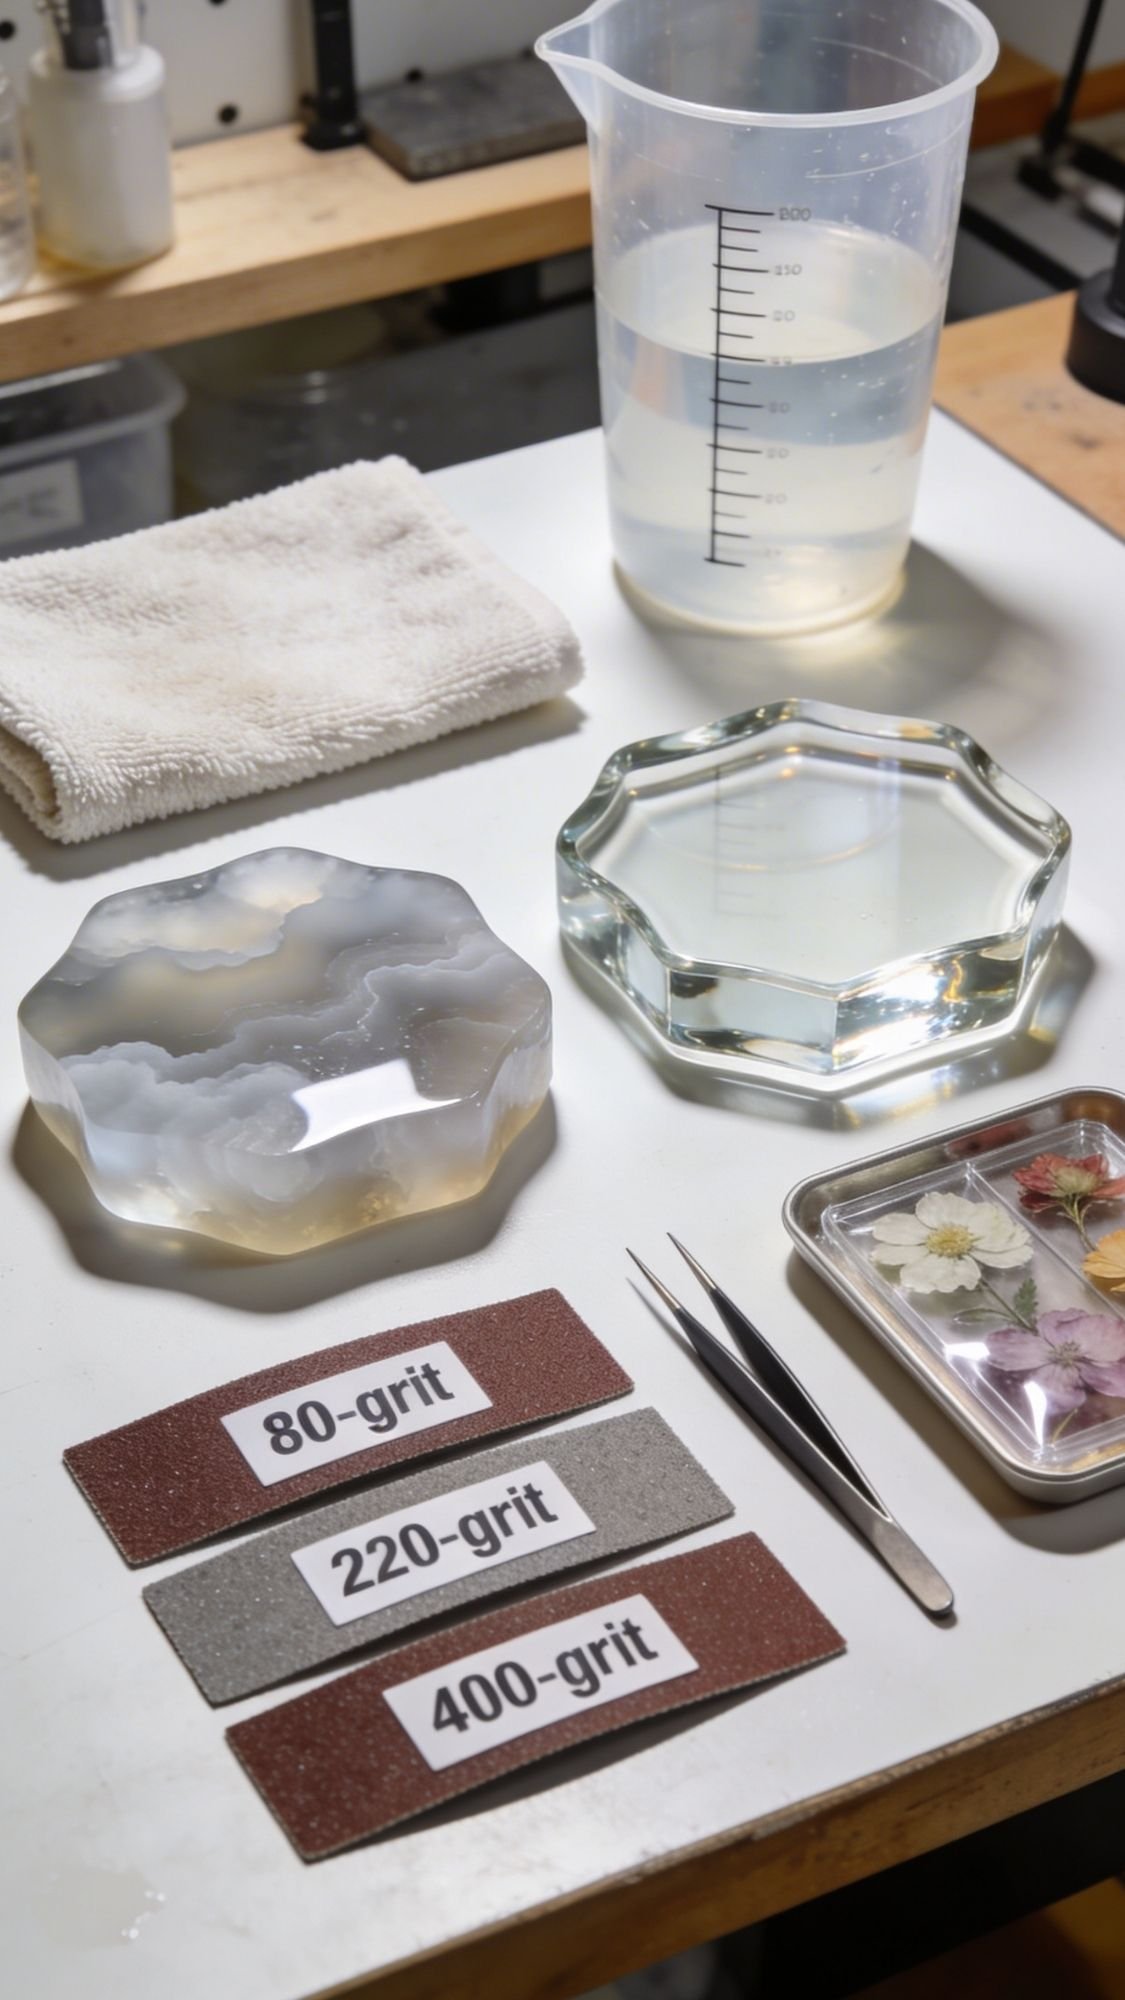
Fix The Weird Stuff Before You Rage Quit
Pressed flowers and resin love to act perfect right up until the moment you gift something. So let’s talk about the most common issues, what usually causes them, how to fix them, and how to avoid a repeat performance. Sound good?
1) Symptom: Flowers Turn Brown
- Likely Cause: You pressed older blooms, you trapped moisture, or your paper stayed damp too long.
- Fix: Swap blotting paper more often, press longer, and use fresher blooms next time.
- Prevention Next Time: Press flowers the same day you pick them, and check them within 24 to 48 hours.
2) Symptom: Mold Or Mildew Spots In The Press
- Likely Cause: Flowers carried too much moisture, and the press held it in.
- Fix: Toss the affected flowers and paper, wipe the press, restart with fresh paper.
- Prevention Next Time: Use absorbent paper, press thinner blooms, and swap paper early.
3) Symptom: Petals Curl Or Crinkle
- Likely Cause: Thick petals fought the press, or pressure sat unevenly.
- Fix: Trim bulky centers, press between firm flat boards, and add more even weight.
- Prevention Next Time: Choose flatter flowers for pressing, and silica-dry thick blooms instead.
4) Symptom: Resin Looks Cloudy Or Hazy
- Likely Cause: Moisture in the flowers, cold room temps, or inaccurate measuring.
- Fix: Let it fully cure, sand the surface evenly, wipe clean, add a thin clear top coat.
- Prevention Next Time: Dry flowers until they feel papery, measure carefully, and keep your workspace warm and dry.
5) Symptom: Flowers Float To The Top
- Likely Cause: You poured too deep too fast, so the flowers drifted upward.
- Fix: Pour a thin base layer, let it thicken slightly, then place flowers and add a thin tack coat.
- Prevention Next Time: Work in layers, and avoid placing flowers into a deep pour right away.
6) Symptom: Bubbles Cling To Petals And Stay There
- Likely Cause: Textured petals grabbed air, and you didn’t seal the flowers enough.
- Fix: Use a toothpick to tease bubbles off petals before curing, then use quick heat passes.
- Prevention Next Time: Pre-seal flowers, pour a thin base layer first, and warm resin bottles if your room runs cool.
7) Symptom: Resin Stays Tacky
- Likely Cause: You measured wrong, under-mixed, or cured too cold.
- Fix: Scrape off soft resin if it won’t cure, then re-pour with correct ratios and thorough mixing.
- Prevention Next Time: Mix longer than you think, scrape cup sides and bottom, and keep temps stable.
8) Symptom: Edges Feel Sharp Or Look Rough
- Likely Cause: Resin cured with a lip, or you demolded a little early.
- Fix: Sand edges in stages, then polish or add a thin clear edge coat.
- Prevention Next Time: Let pieces cure fully before demolding, and use molds with clean rims.
9) Symptom: Glue Won’t Stick To Metal Or Plastic (Clips, Toppers, Hardware)
- Likely Cause: Oils and slick surfaces block adhesion.
- Fix: Wipe with rubbing alcohol, lightly scuff the surface, then re-glue and clamp.
- Prevention Next Time: Prep surfaces every time, even when they look clean.
10) Symptom: Frames Trap Dust Or Smudges Inside
- Likely Cause: You left the frame open too long, and dust landed on the glass.
- Fix: Open it, wipe both panes with microfiber, use a puff of air, close quickly.
- Prevention Next Time: Assemble everything first, then close the frame right away.
Quick Reminder: If a fix depends on humidity, temperature, or the flower type, test one scrap flower first. That tiny test saves so much frustration.
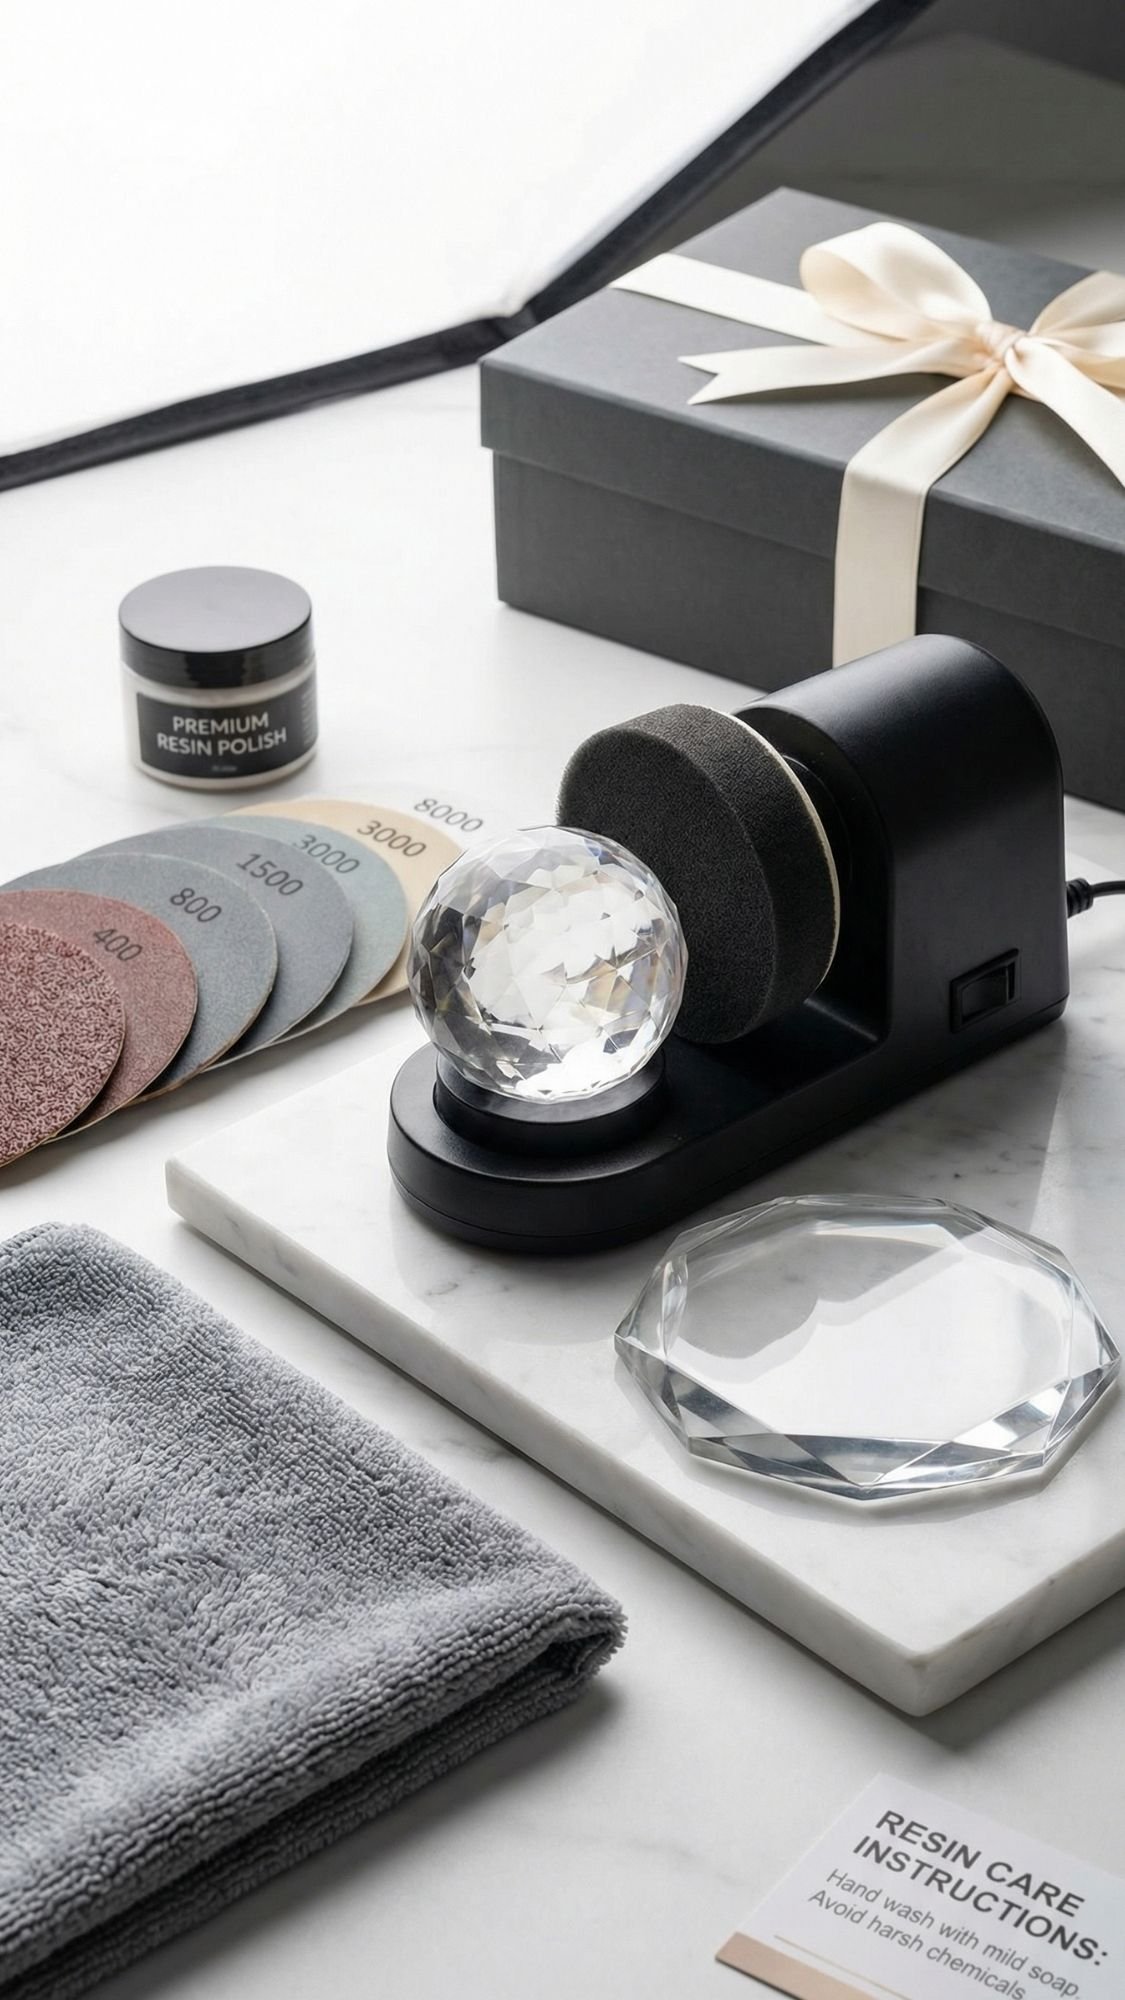
Make It Last, Not Just Look Cute For A Day
This is the part that separates “handmade gift” from “handmade gift that still looks good six months later.” Finishing is where you get that clean, professional look. Care instructions are what keep your gift from getting scratched, cloudy, or faded, and then blamed on you. Fun.
How To Finish Each Type Of Project Like A Pro
Resin Pieces (Bookmarks, Coasters, Keychains, Jewelry, Dishes)
Finish steps
- Wait for full cure before finishing. Resin can feel hard early, but it reaches full durability later.
- Sand edges in stages if you have sharp rims or tiny lips. Start with a lower grit, then move up.
- Polish for a glassy look or add a thin clear top coat if sanding dulled the surface.
- Add backing last (cork dots, felt, hardware), after the piece fully cures.
Pro-tips
- Keep petals away from the edge, it makes sanding clean and safe.
- Use a dust-free cover while curing, dust loves resin like it’s obsessed.
Framed Projects (Floating Frames, Shadow Boxes, Bouquet Keepsakes)
Finish steps
- Clean the inside glass before closing, then clean the outside after.
- Use acid-free backing paper so it doesn’t yellow over time.
- Close the frame quickly once the layout looks right, dust moves fast.
Pro-tips
- A tiny label with date and location makes the gift feel heirloom-level.
- Avoid direct sun if you want flowers to stay brighter longer.
Paper Crafts (Cards, Tags, Journal Covers)
Finish steps
- Seal lightly when needed, especially if petals feel brittle.
- Press finished pieces under a book once fully dry if any warping happens.
- Keep envelopes and packaging slightly roomy so petals don’t snag.
Pro-tips
- Vellum overlays protect petals and hide minor glue shine.
- Heavy cardstock instantly makes paper projects feel more premium.
Clay Or Jesmonite Pieces (Imprint Dishes)
Finish steps
- Sand edges smooth, sharp edges make it look unfinished.
- Seal top and bottom, unsealed clay stains fast.
- Let sealant cure fully before gifting.
Pro-tips
- Add cork feet, it protects surfaces and looks store-bought.
Dry Time Vs Cure Time (Plain Language, No Confusion)
Dry Time
- Something stops feeling wet or sticky.
Cure Time
- Something reaches full strength and durability.
Here’s why this matters. Resin can feel solid but still dent if you stack it too soon. Sealants can feel dry but still scuff if you package too fast. If you rush, you get fingerprints, dents, and scratches that show up later.
Cleaning And Care Instructions (What To Tell The Gift Recipient)
Resin Care
- Wipe with a microfiber cloth.
- Avoid abrasive cleaners and scrubbing pads.
- Don’t soak resin pieces in hot water.
- Keep away from extreme heat, like hot car dashboards.
Frame Care
- Dust with a dry microfiber cloth.
- Don’t spray cleaner directly into frame edges.
- Hang away from harsh direct sun for best color longevity.
Paper Craft Care
- Keep flat and dry.
- Don’t bend or overstuff into tight bags.
- Store cards and tags away from moisture.
Clay Or Jesmonite Care
- Wipe gently, don’t soak.
- Avoid harsh cleaners.
- Refresh sealant later if the surface starts looking dull.
How Long It Lasts (And How To Refresh It)
- Resin pieces: can last for years with gentle care, refresh scratches with a thin top coat.
- Framed pressed flowers: last a long time, fading depends on sunlight exposure.
- Paper crafts: last best when stored flat and dry.
- Clay dishes: last well when sealed, re-seal if they start absorbing stains.
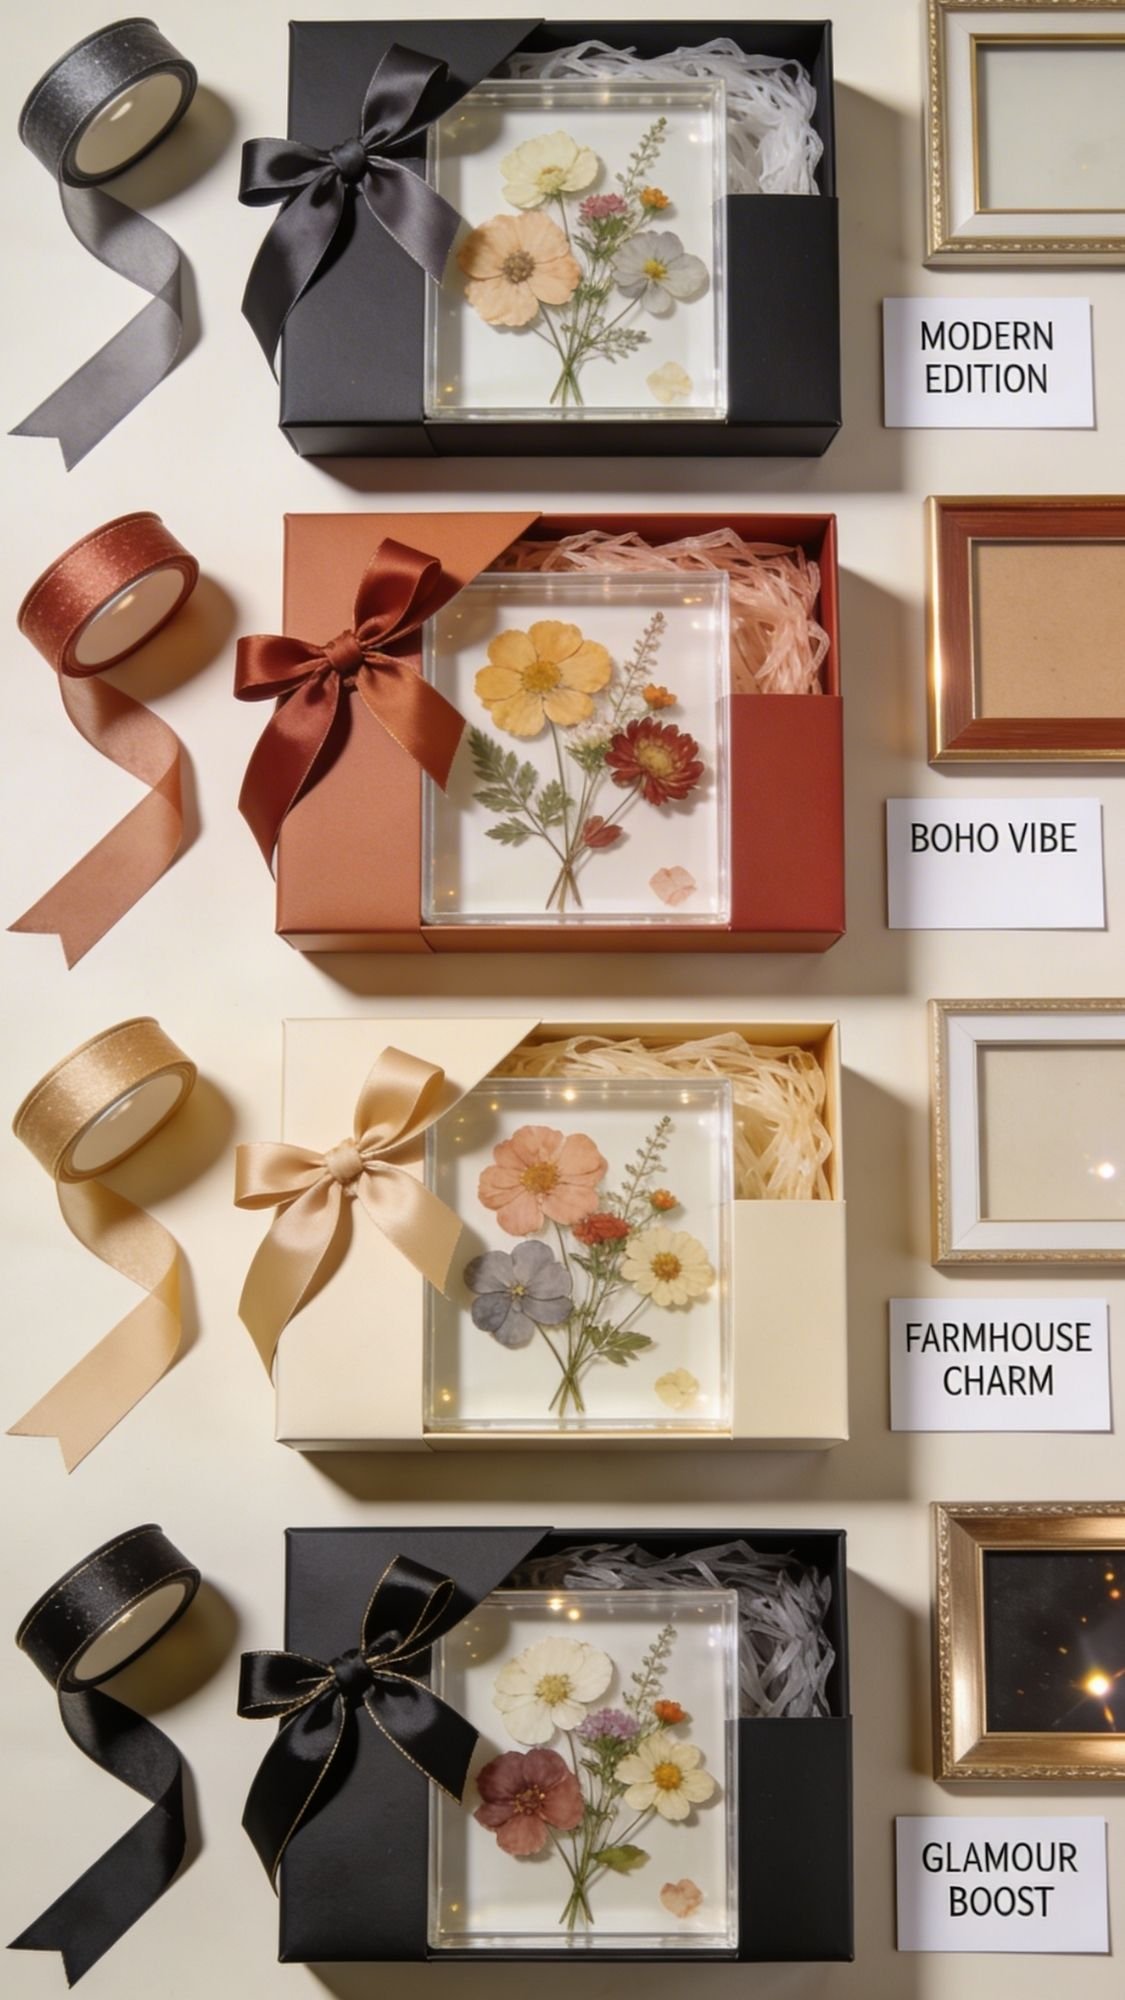
Style Swaps, Color Palettes, And Personal Touches
This is where you take the same exact DIY and make it feel totally different depending on who you’re gifting it to. Ever made something cute, then realized it looks nothing like the person you’re giving it to? Yeah. Customizing fixes that.
Variation 1, Style Swaps (Modern, Boho, Farmhouse, Glam)
Modern
- Use one hero bloom and lots of negative space
- Stick to clear resin, white backgrounds, black accents, or thin gold frames
- Choose simple shapes, circles, arches, clean rectangles
Boho
- Use warm tones, dried textures, and a little layered “meadow” vibe
- Add linen ribbon, raw wood frames, and natural twine
- Mix small wildflowers and ferns, keep it airy
Farmhouse
- Lean into simple florals, muted colors, and cozy packaging
- Use kraft tags, cotton muslin sachets, and light wood frames
- Choose daisies, baby’s breath, and greenery-heavy layouts
Glam
- Add subtle sparkle and sharp edges
- Use gold foil accents, black velvet packaging, and metallic rims
- Keep flowers minimal so the glam details don’t fight the botanicals
Variation 2, Color Palette Ideas (Easy Recipes That Always Look Good)
- Soft Neutral Botanical: cream, blush, sage, warm beige
- Moody Romantic: burgundy, dusty rose, deep green, black accents
- Bright Garden: yellow, coral, fresh green, crisp white
- Coastal Wildflower: pale blue, white, sand, soft greenery
- Minimal Black And White: white blooms, greenery, clear or white base, thin black frame
Variation 3, Personalization Options (Names, Meaning, And Memory)
- Initials or monograms
- Put initials on gift tags, candle labels, or a small label card inside a frame
- Date stamping
- Add a tiny date line like “06.2026” on labels, tags, or frame inserts
- Birth month flowers
- Use the recipient’s birth month flower palette for the design
- Location story
- Add “Pressed From” plus a place name on herbarium labels, like “Backyard Garden”
- Theme sets
- Make matched sets, like a bookmark plus a coaster plus a gift tag in the same palette
Material Upgrades (When You Want It To Look Extra Premium)
- Upgrade to archival paper for frames and cards
- Use better hardware for jewelry and keychains
- Add cork or felt feet to resin and clay pieces
- Choose glass floating frames instead of plastic ones
- Use clear label film for candle wraps instead of thin sticker paper

FAQ
1) How Long Do Pressed Flowers Last In Resin?
Pressed flowers can last for years in resin if you dry them fully and seal them first. Sunlight can fade colors over time, so recommend keeping resin gifts out of harsh direct sun when possible.
2) Why Did My Resin Turn Cloudy After I Added Flowers?
Moisture usually causes cloudiness. Flowers can hold moisture even when they look dry, and cold curing temps can make haze worse. Dry longer, pre-seal flowers, and keep your space warm and stable.
3) Do I Need To Seal Pressed Flowers Before Using Them In Resin?
Yes, if you want the cleanest results. Sealing helps reduce color bleed, bubbles clinging to petals, and that “wet petal” look.
4) What Flowers Press The Best For Beginners?
Flatter blooms press easiest, pansies, daisies, cosmos, and small wildflowers. Ferns and simple greenery also press beautifully and stay crisp.
5) How Do I Stop Flowers From Floating In Resin?
Pour a thin base layer first, let it thicken slightly, place flowers, then add a thin tack coat before the full pour. Deep pours right away usually cause floaters.
6) Can I Use Fresh Flowers In Resin?
No, fresh flowers hold too much moisture and can rot, discolor, or create cloudy resin. Always dry and seal flowers first.
7) How Do I Keep Pressed Flower Frames From Getting Dust Inside?
Clean glass inside and out, assemble in a clean spot, and close the frame quickly. Dust lands fast and shows up forever once it’s trapped inside.
8) What Is The Best Way To Preserve A Wedding Bouquet?
Pressing works great for flatter blooms and greenery, silica drying works better for thick blooms. Many people combine both methods, then frame the results with a photo or invitation for a keepsake.
9) Why Is My Resin Still Sticky After 24 Hours?
You likely measured wrong, under-mixed, or cured too cold. Sticky resin usually won’t magically fix itself, so you may need to scrape and re-pour with correct ratios.
10) How Do I Make Pressed Flower Gifts Look More Expensive?
Choose a tight color palette, leave negative space, keep flowers away from edges, and finish cleanly. Packaging matters too, ribbon, a tag, and a short care card goes a long way.
11) Can Pressed Flowers Fade Over Time?
Yes, especially in direct sunlight. Resin and frames can slow damage, but light still fades pigments eventually. Recommend softer light placement and avoiding harsh sun exposure.
12) What Is The Best Way To Store Pressed Flowers Before Using Them?
Store them flat in a book or an airtight container with a piece of paper between layers. Keep them dry, dark, and away from humidity.
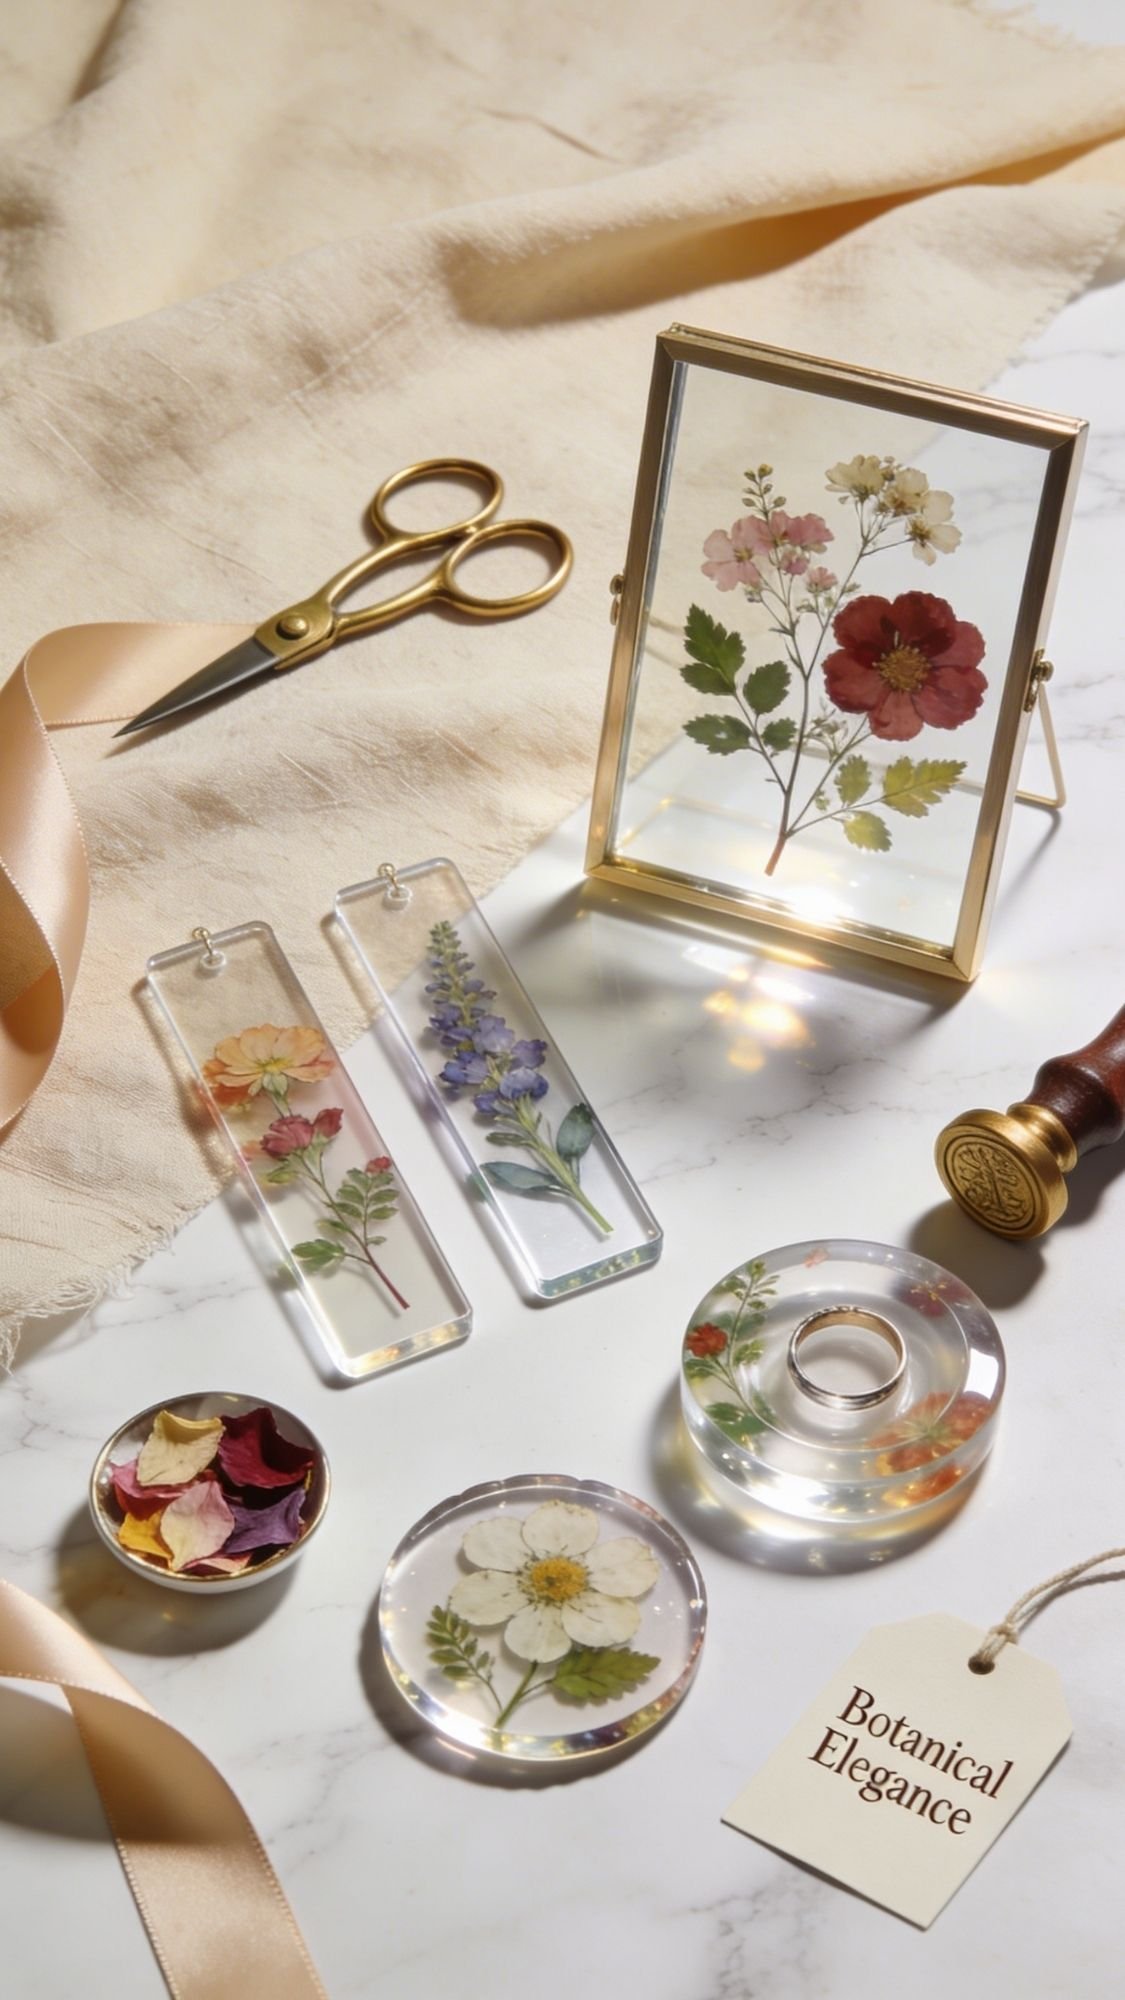
Pressed Flowers, But Make Them Gift-Worthy
Pressed and preserved flower gifts hit different because they’re both useful and sentimental, and they don’t feel like clutter. You can keep things super simple, like laminated bookmarks and gift tags, or go full keepsake mode with bouquet preservation frames. Either way, you control the palette, the layout, and the finishing, so the final gift looks intentional, not accidental.
If you take one thing with you, take this. Dry your flowers fully, seal them, and build your project in controlled layers. That’s how you avoid cloudy resin, floating petals, and the kind of mistakes that make you question all your life choices.
Want the easiest place to start? Make resin bookmarks or gift tags, then work your way up to coasters and frames once you feel confident. And if a project goes sideways, don’t panic, you can usually sand, top coat, or reframe your way out of it.
- Pick one project from the list and try it this week.
- Save your scraps and make tags, cards, or bookmarks with the leftovers.
- Add a tiny care card, it makes your handmade gift feel professional.