
Mother’s Day sneaks up fast, and suddenly you’re panic-scrolling like, “What can I make that doesn’t look like a last-minute science fair?” Been there. Over the last few years of DIYing, I’ve learned something simple, moms don’t want more stuff, they want a gift that feels like you actually thought about her. So this list mixes quick wins (cute, useful, not a time trap) with keepsakes (the kind she puts away carefully because it means something).
Here’s the deal, I’m not just tossing you vague ideas and vibes. For every project, I’ll give you what to grab, what to do, why it works, and the little “don’t do what I did” mistakes that save you from rage-crafting at 11:47 PM. I’ll also share one legit pro trick I use when I want projects to look clean and expensive, seal stencil edges with the base color first, then paint your top color. Ever wondered why some stencil projects look crisp and yours look fuzzy, yeah, that’s usually it.
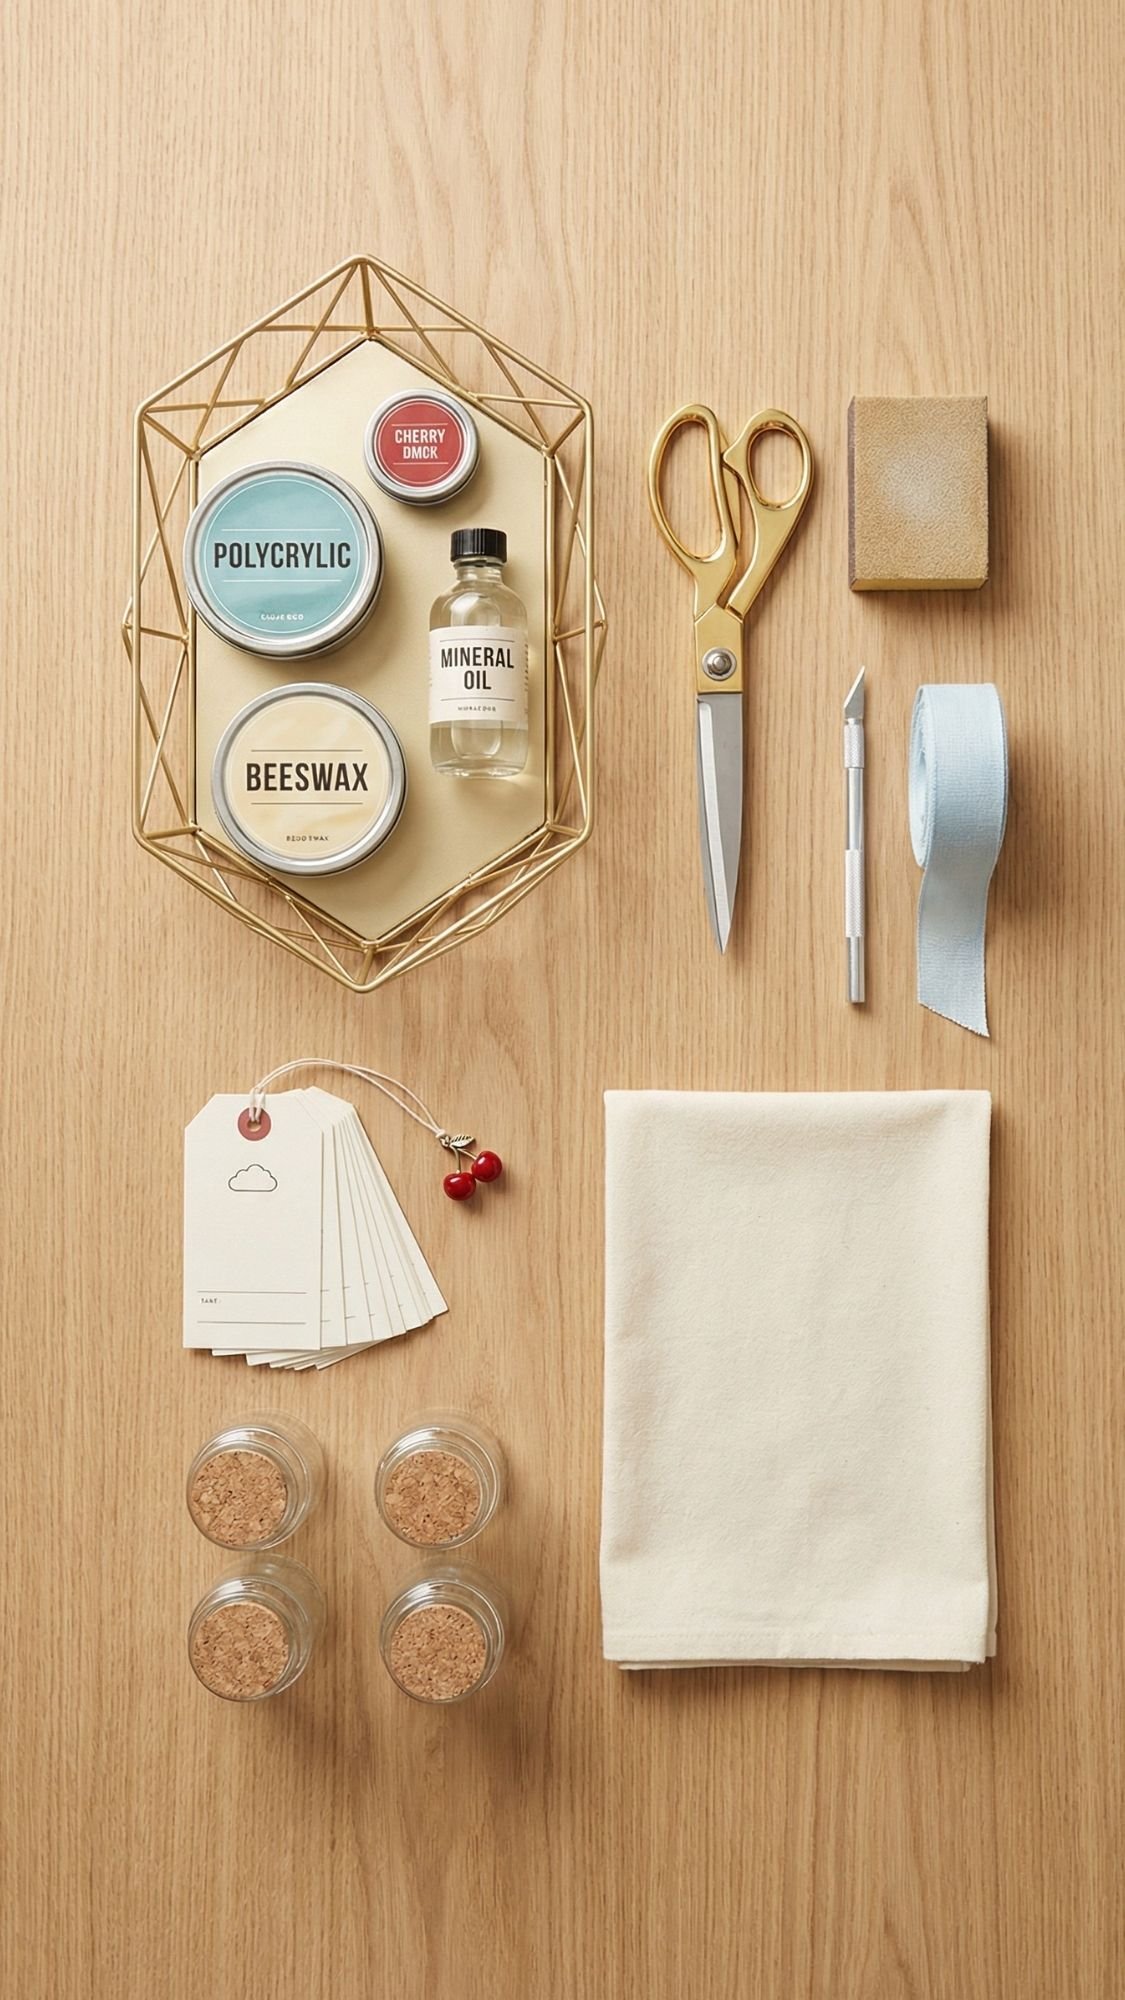
Before You Start: One Smart Supply Haul That Covers Most Projects
Let’s save you from the “I have 14 half-used glues and none of them work” situation. If you grab a small set of reliable basics, you can make most of these gifts without running back to the store five times. Also, your finished gifts will look more cohesive if you stick to one or two color stories for the whole batch. Think Cloud Dancer creamy white with icy blue accents, or a neutral base with a tiny cherry-coded pop. Small detail, big “boutique set” energy.
Here’s my go-to haul, plus why each thing earns a spot.
Adhesives That Don’t Betray You Mid-Project
- All-purpose craft glue for paper, felt, light trims
- Wood glue for anything that needs real hold, like wood pieces or boxes
- Mod Podge for photo transfers and sealing paper crafts
- Double-sided tape for wrapping and labels, it hides better than regular tape
- Hot glue for quick assembly, bows, embellishments, not for anything you want to survive a heat wave
Common mistake beginners make: using hot glue on smooth glass or glossy plastic and acting shocked when it pops off later. Hot glue loves texture, not slick surfaces.
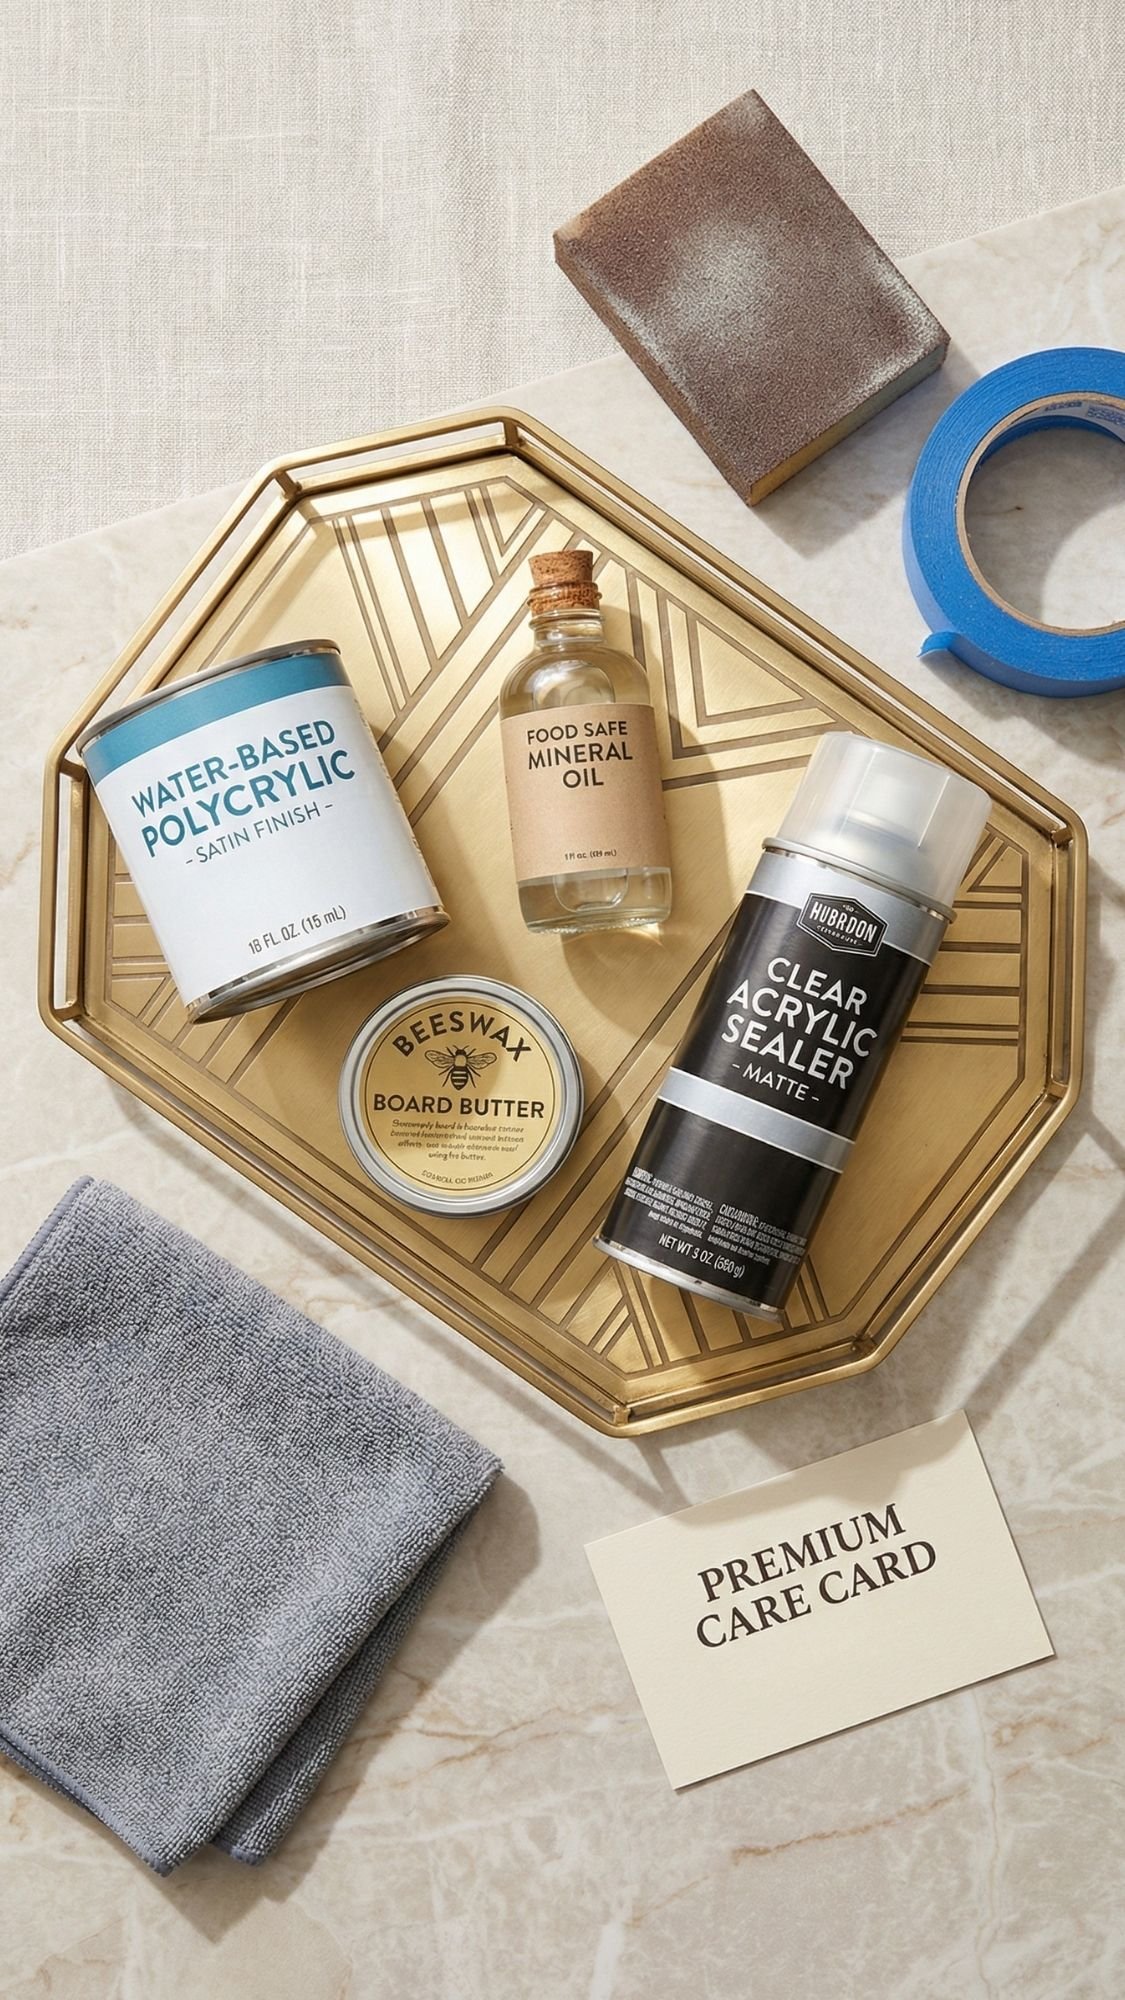
Finishes + Sealers That Make Projects Look Store-Bought
- Water-based polycrylic for painted wood gifts like trays, boxes, coasters
- Clear acrylic spray for paper crafts and anything delicate that you don’t want to brush-seal
- Mineral oil for cutting boards and wooden utensils
- Beeswax board butter for that soft, “I bought this at a fancy market” finish
FYI, sealing isn’t optional if you want the gift to last. Even “display” pieces get dusty, smudged, and handled.
Tools That Pay For Themselves
- Sanding block or sanding sponge (smooth edges = instantly more professional)
- Craft knife + cutting mat for clean cuts and straight lines
- Metal ruler so your knife doesn’t chew your plastic one
- Painter’s tape for crisp paint lines
- Weeding tool if you use vinyl, or if you like removing tiny things without losing your mind
- Small detail brushes for touch-ups, because touch-ups save projects
Blank Bases That Unlock Like 10 Gift Ideas Each
- Flour sack tea towels
- Canvas zipper pouches
- Plain mugs
- Glass jars with lids
- Small unfinished wood plaques or rounds
- Neutral baskets for bundling gifts into sets
Pro-tip: Buy 2–3 matching jars or containers instead of random singles. Matching packaging makes everything look intentional, even if the DIY itself is simple.

1) Neo Deco Trinket Dish (Air-Dry Clay, Looks Boutique)
If you want a gift that feels like it came from a pricey little shop, this is it. A trinket dish is one of those “small but constant” gifts. She’ll use it every day for rings, earrings, hair ties, bobby pins, all the tiny stuff that otherwise teleports to the void. Also, the Neo Deco look is having a moment, clean geometry, arches, metallic lines, and it photographs like a dream.
Why This Works
- It’s functional, so it doesn’t become clutter.
- Air-dry clay feels fancy, but it’s beginner-friendly.
- A simple shape + clean finish reads high-end fast.
Materials
- Air-dry clay
- Rolling pin (or a smooth bottle)
- Craft knife
- Sanding sponge or fine sandpaper
- Acrylic paint (matte works great)
- Metallic paint pen (gold or champagne looks luxe)
- Painter’s tape (optional for crisp lines)
- Clear sealer (spray sealer or brush-on, see notes below)
Step-By-Step
- Roll your clay to an even thickness, aim for about 1/4 inch so it feels sturdy without taking forever to dry.
- Cut a clean arch shape, circle, or rectangle with rounded corners. Keep the silhouette simple.
- Smooth edges with a damp finger, then let it dry flat on parchment paper.
- Flip it halfway through drying so it dries evenly. This helps prevent warping.
- Once fully dry, lightly sand the edges until they feel smooth and intentional.
- Paint your base color in thin coats. Let each coat dry.
- Add Neo Deco lines with your metallic pen. Think arches, stripes, clean geometry.
- Seal it. Let it cure fully before gifting.
Pro-Tips That Make It Look Expensive
- Roll it evenly. Uneven thickness causes warping and cracks.
- Sand the edges. Sharp, clean edges make it look store-bought.
- If you want super crisp metallic lines, use painter’s tape as a guide, then remove it carefully.
- Don’t go wild with the design. This is one of those “less is more” projects.
Sealing Notes (Because Clay Can Be Dramatic)
- Use a spray sealer if you want the most even finish with minimal streaks.
- If you brush on a sealer, use thin coats and a soft brush, thick coats can leave drag marks.
- Humidity changes dry times. If your dish still feels cool to the touch, it’s not fully dry yet.
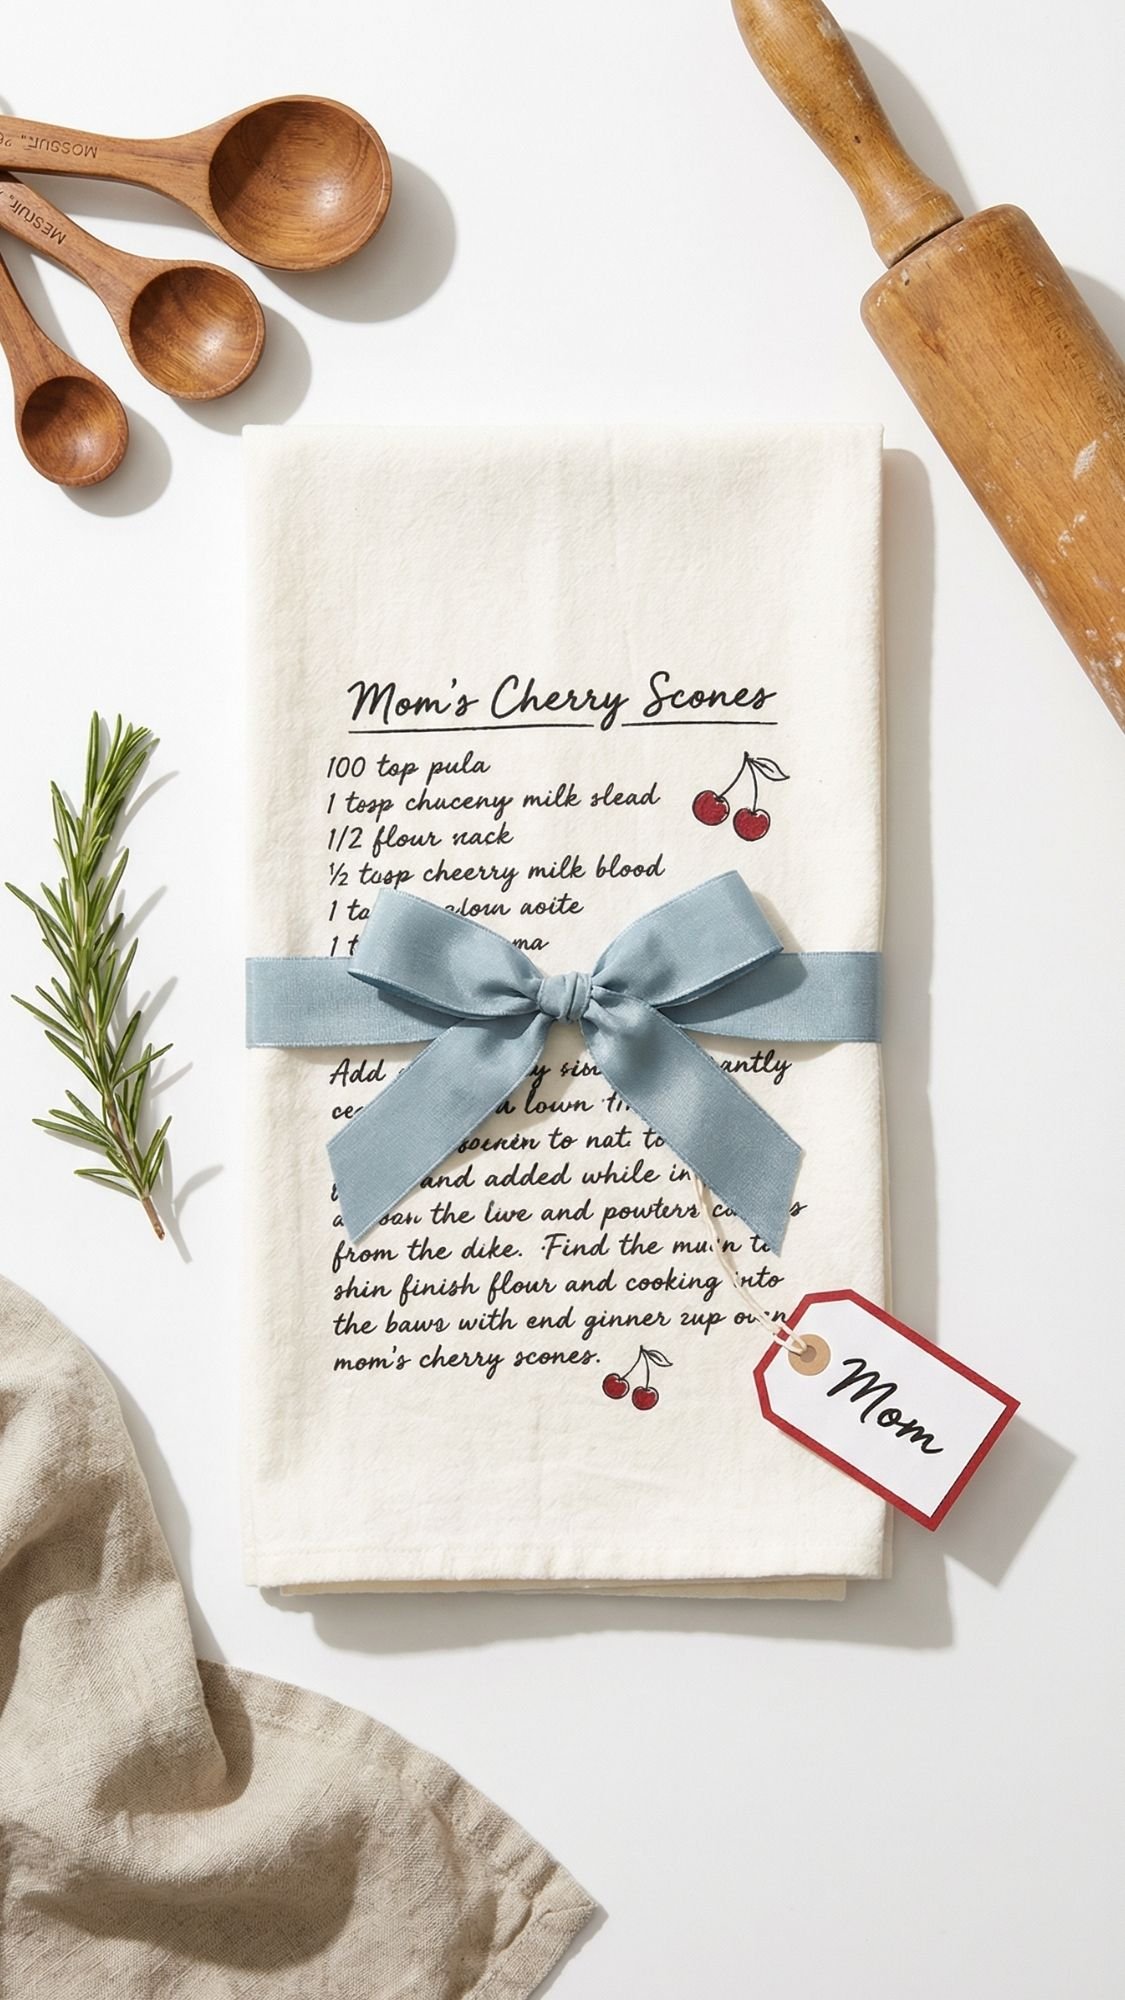
2) Recipe Tea Towel (Her Signature Dish, In Her Actual Handwriting)
This one hits the sweet spot between practical and sentimental. She can hang it in the kitchen like decor, actually use it, and get a little heart punch every time she sees it. Have you noticed how the “useful gifts” get kept, but the random trinkets quietly disappear? Yeah. This is why I love this idea.
Why She’ll Treasure It
- You turn a family recipe into something she can keep out, not tucked in a drawer.
- Handwriting makes it personal in a way that fonts never will.
- It works even if you feel “not crafty,” because the design already exists.
What You Need
- Flour sack tea towel or plain cotton kitchen towel (pre-washed)
- A scanned photo of the recipe or handwriting note
- Heat transfer paper for fabric (or freezer paper + fabric paint if you prefer hand-painted)
- Printer (inkjet or laser, depending on the transfer paper you buy)
- Iron or heat press
- Parchment paper
- Ruler or measuring tape
- Optional: fabric-safe marker for small touch-ups
How To Make It
- Wash and dry the towel first. This stops shrinking later and keeps the transfer crisp.
- Scan or photograph the handwriting in bright natural light. Make sure the paper lies flat.
- Clean up the image if needed. Increase contrast so the writing looks bold.
- Mirror the image before printing if your transfer paper requires it. Most do.
- Print a test on plain paper first to confirm size and placement.
- Print on the transfer sheet, then trim close to the text if the paper leaves a visible edge.
- Press the towel flat first with your iron. You want a smooth surface.
- Place the transfer where you want it. I like it centered and slightly higher than the middle so it shows when folded on a bar.
- Press with firm, steady pressure for the exact time your transfer instructions say. Don’t slide the iron around.
- Let it cool if the instructions say to cool, then peel carefully.
- Cover with parchment and press again for a few seconds to lock it in.
Pro Tips That Save The Whole Project
- Choose a towel with a tight weave. Loose weave towels can make the print look fuzzy.
- Keep the design simple. A full-page recipe looks busy, a signature recipe plus a small note looks intentional.
- If the handwriting looks light, increase contrast and sharpen the image before printing.
- Add a small line at the bottom like “Love, [Name], Mother’s Day 2026.” It turns this into a keepsake.
Common Problems And Quick Fixes
- If the transfer looks faded, you likely under-pressed. Press again with parchment on top.
- If letters look broken, you may have wrinkles under the transfer. Press the towel flat first, always.
- If the print shifts, you moved the iron. Press straight down in sections instead.
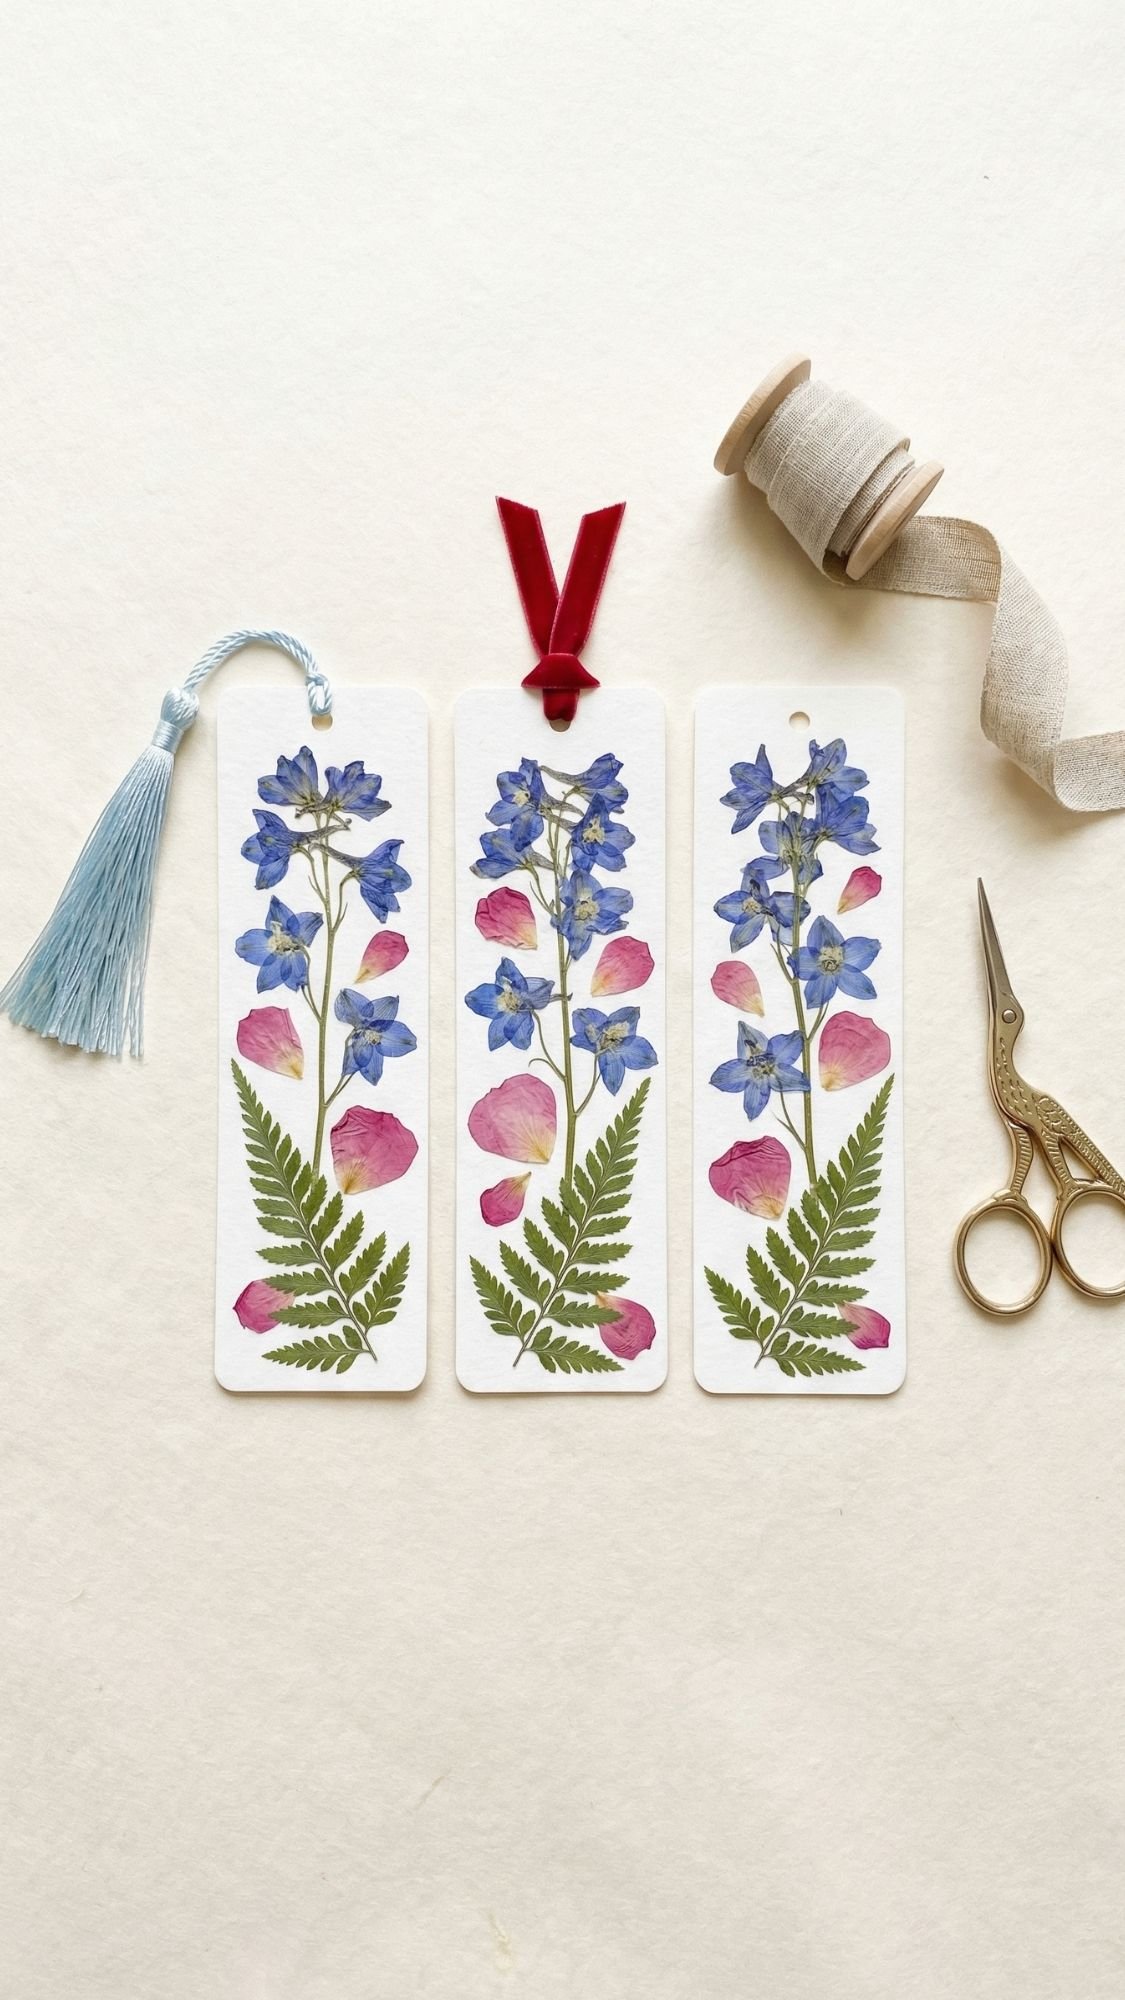
3) Pressed Flower Bookmark Set (Pretty, Practical, Easy To Gift In Multiples)
This is one of my favorite “small but meaningful” gifts because it feels delicate and personal, but you can make a whole set in one sitting. A bookmark also dodges the clutter problem, she can actually use it, and it still feels special. Ever notice how moms love anything that looks like you put thought into it, even if it didn’t take 12 hours? That’s the sweet spot.
Why This Works
- You can make 3 to 6 bookmarks quickly, so it works as a standalone gift or a bonus add-on.
- Pressed flowers look expensive when you keep the design clean.
- It ships well if you need to mail Mother’s Day gifts.
What You Need
- Pressed flowers or pressed leaves (fully dry, flat)
- Laminating sheets or self-adhesive laminating film
- Cardstock or watercolor paper (optional backing)
- Scissors or a paper trimmer
- Corner rounder (optional, but it looks polished)
- Hole punch
- Ribbon or tassels
- Tweezers (highly recommended for tiny petals)
How To Make It
- Decide your bookmark size first. I like about 2 inches by 6 inches because it looks classic and fits most books.
- Cut your backing paper if you want one. A soft creamy white looks timeless, icy blue feels fresh.
- Arrange your flowers dry on the backing before you laminate anything. Keep it simple, one focal bloom plus a couple small pieces looks clean.
- Use tweezers to place petals so you don’t smudge or curl them.
- Lay the arrangement into your laminating sheet or film, then press from the center outward to push out air.
- Trim the bookmark, then round the corners so it doesn’t catch on pages.
- Punch a hole at the top, add ribbon or a tassel, and keep the knot tidy.
Pro Tips That Make These Look Boutique
- Use smaller, flatter flowers. Thick blooms trap air and create bubbles.
- Leave a thin border around the edges. It makes the bookmark look intentional and prevents peeling at the cut line.
- Mix textures, like one daisy plus one fern, but keep the palette tight so it looks curated.
- If you want a “set” vibe, make three bookmarks in the same color family with tiny variations.
Common Problems And Quick Fixes
- If you get bubbles, you pressed too fast or used thick flowers. Press slowly from the center outward, and switch to flatter botanicals next time.
- If corners peel, you trimmed too close. Leave a border, and round the corners for better durability.
- If the bookmark warps, your backing paper holds moisture. Use fully dry paper, and store finished bookmarks under a book overnight.
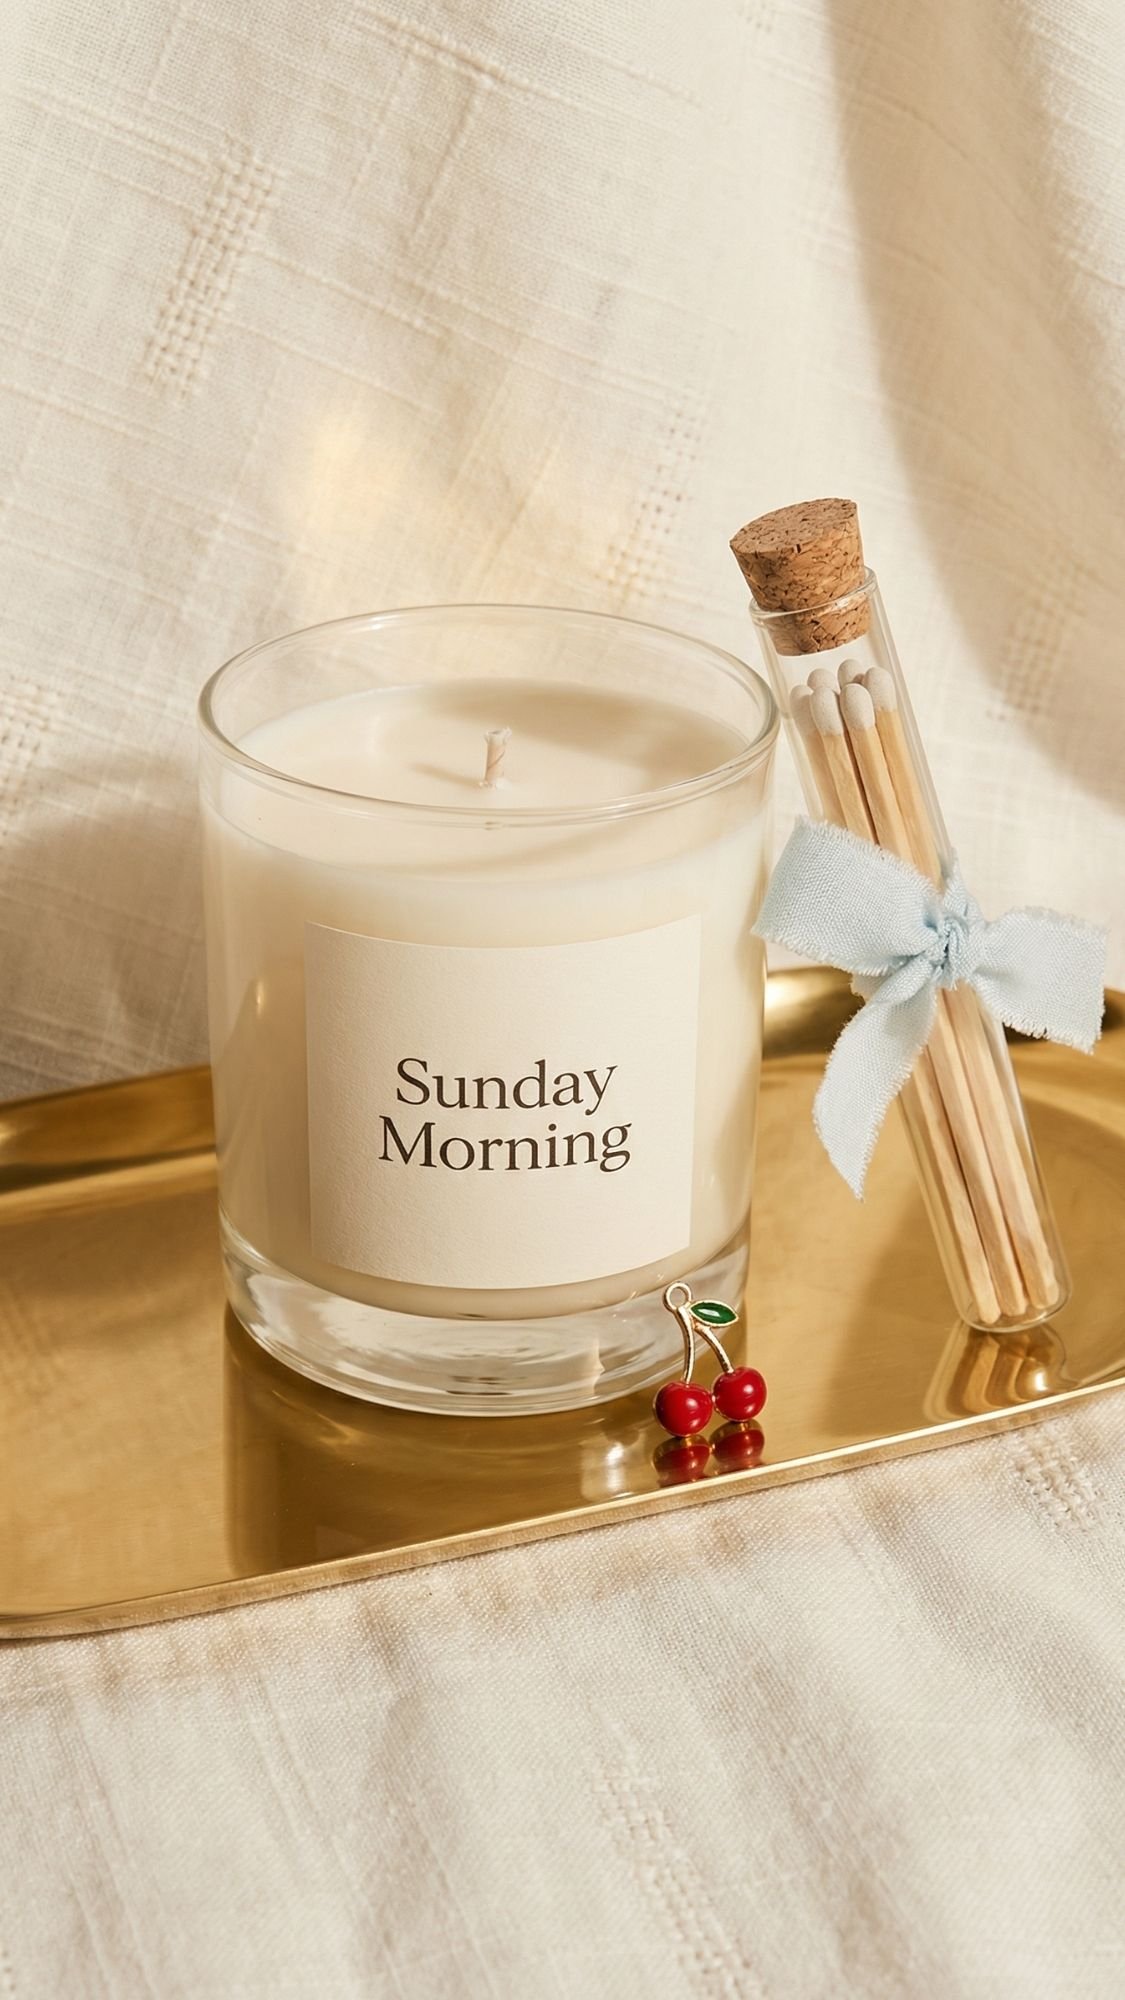
4) Custom Scent “Memory Candle” (The Gift That Smells Like A Good Moment)
This one feels extra special because scent hits memory fast. Like, faster than a photo sometimes. If you match a scent to something she loves, fresh laundry, garden blooms, vanilla coffee, it stops being “a candle” and turns into “that thing you made for me.” Ever smelled something and instantly time-traveled? Yeah, that.
Why This Works
- It feels luxe, but you can keep the steps simple.
- You can personalize it with a name and a story, and that’s what makes it a keeper.
- It pairs perfectly with other gifts, like a bookmark set or bath salts.
What You Need
- Soy wax flakes (or a soy blend)
- Candle-safe jar or tin
- Wick (sized for your jar width)
- Wick sticker or hot glue dot
- Fragrance oil (candle-safe, not random essential oil blends)
- Thermometer (seriously, it matters)
- Pouring pitcher or heat-safe container
- Wooden skewer or chopstick (to center the wick)
- Labels or printable sticker paper
How To Make It
- Clean and dry your jar. Even tiny dust can mess with adhesion and look messy.
- Stick the wick to the center of the jar and keep it upright with a skewer across the top.
- Melt the wax slowly. Don’t crank the heat, wax likes patience.
- Let the wax cool a bit before adding fragrance oil. The exact temperature depends on your wax brand, so follow the wax supplier’s guidance here.
- Stir gently but thoroughly for about 1 to 2 minutes. You want it mixed, not whipped.
- Pour the wax into the jar slowly, aiming for a smooth top.
- Let it set undisturbed. Don’t poke it every five minutes, I know it’s tempting.
- Trim the wick to about a quarter inch once fully set.
- Let it cure before gifting. Most soy candles perform best after at least several days, and many makers wait 1 to 2 weeks for the scent to throw well.
Pro Tips That Make It Look High-End
- Use a minimal label and one good font. Busy labels can look homemade in the wrong way.
- Add a subtitle that ties to her life, like:
- “Sunday Morning”
- “Garden Walk”
- “Fresh Laundry, But Fancy”
- If you want a perfectly smooth top, you can hit the surface lightly with a heat gun after it sets. Keep it gentle.
Common Problems And Quick Fixes
- If your candle tunnels, your wick is too small or the first burn was too short. Tell her to let the melt pool reach the edges on the first burn.
- If the top looks bumpy, you poured too hot or cooled too fast. Next time cool a little more before pouring.
- If you see wet spots on the jar, wax shrank as it cooled. It’s cosmetic, not a safety issue. A gentle warm-up can help.
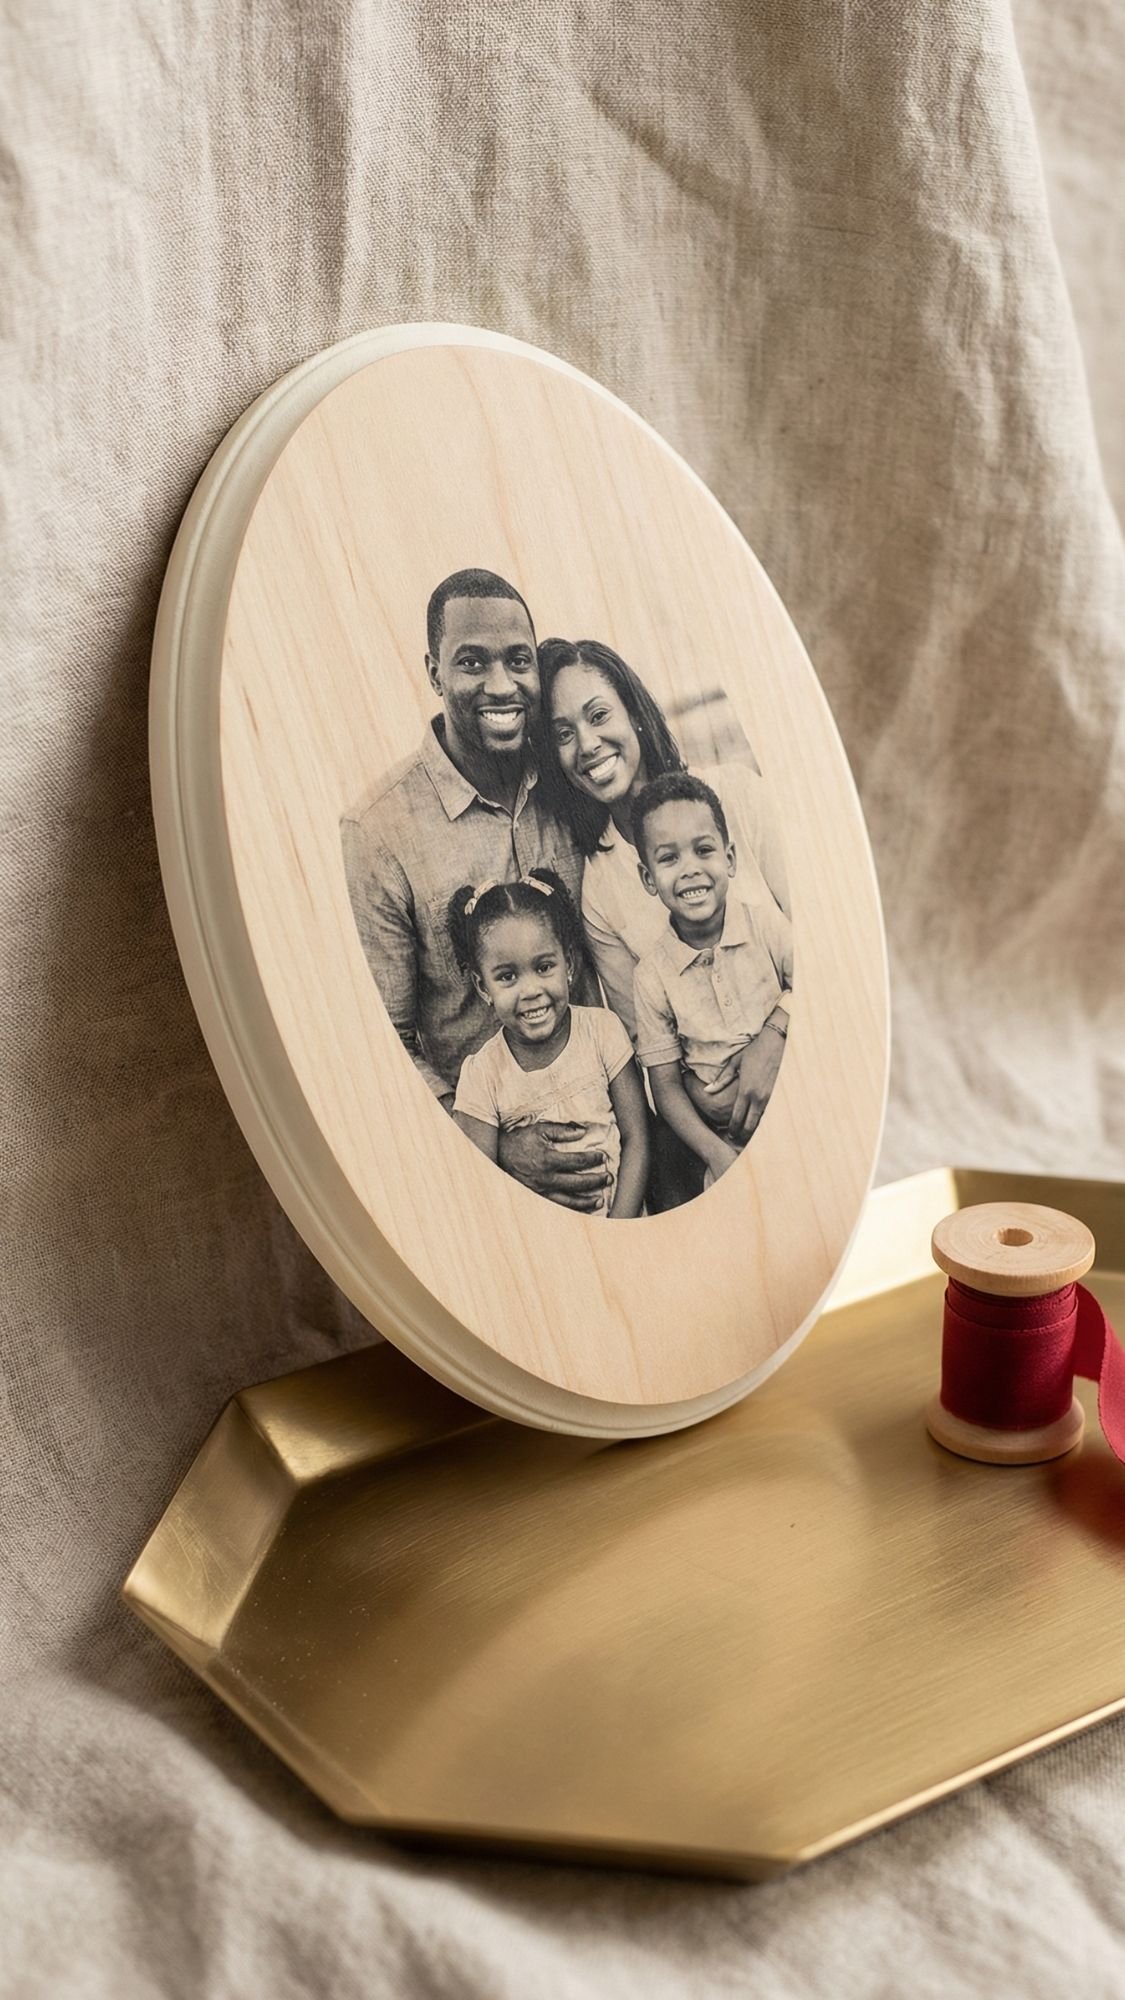
5) Photo Transfer Wood Plaque (The “She Will Tear Up” Keepsake)
If you want a gift that hits her right in the feelings, this is the one. You take a favorite photo and turn it into a piece she can actually display, not just scroll past. I love this project because it looks like boutique farmhouse art when you do the finish right. Also, you can keep it modern and clean, so it doesn’t scream “I learned this on the internet yesterday.”
Why This Works
- It feels deeply personal without needing fancy tools.
- It turns a digital photo into something tangible.
- It displays beautifully on a shelf, entry table, or nightstand.
What You Need
- Smooth sanded wood plaque (the smoother, the better)
- Printed photo (laser prints usually work best for many transfer methods)
- Photo transfer medium or Mod Podge Photo Transfer
- Foam brush or soft brush
- Brayer or old gift card for smoothing
- Spray bottle or damp sponge
- Soft cloth or fingers for rubbing paper pulp off
- Clear sealer (matte looks modern, satin looks warm)
How To Make It
- Sand the wood until it feels smooth, then wipe off dust. Dust ruins transfers fast.
- Print your photo with good contrast. Low contrast photos can look muddy after transfer.
- Apply an even coat of transfer medium to the wood. Keep it smooth and not too thick.
- Place the photo face-down and smooth it from the center outward. Don’t trap bubbles.
- Let it dry fully. I like to give it a full overnight dry when I can.
- Mist the paper lightly with water, then rub off the paper pulp gently. Go slow, you control the result here.
- Let it dry again, then seal it with thin coats so the image stays protected.
Pro Tips That Make It Look Clean And Expensive
- Pick photos with strong lighting and simple backgrounds. Busy backgrounds can turn into visual mush.
- Don’t rush the dry time. The transfer needs time or you’ll rub the image right off.
- If you want a modern finish, paint the plaque edges Cloud Dancer creamy white and seal matte.
- If you want a warmer keepsake look, stain the edges lightly and seal satin.
Common Problems And Quick Fixes
- If you rub off part of the image, you used too much pressure or didn’t dry long enough. Let it dry more next time and rub gently.
- If the image looks patchy, you likely had uneven medium or trapped bubbles. Smooth carefully with a brayer.
- If the wood shows through too much, choose a higher-contrast image next time, and don’t over-rub.
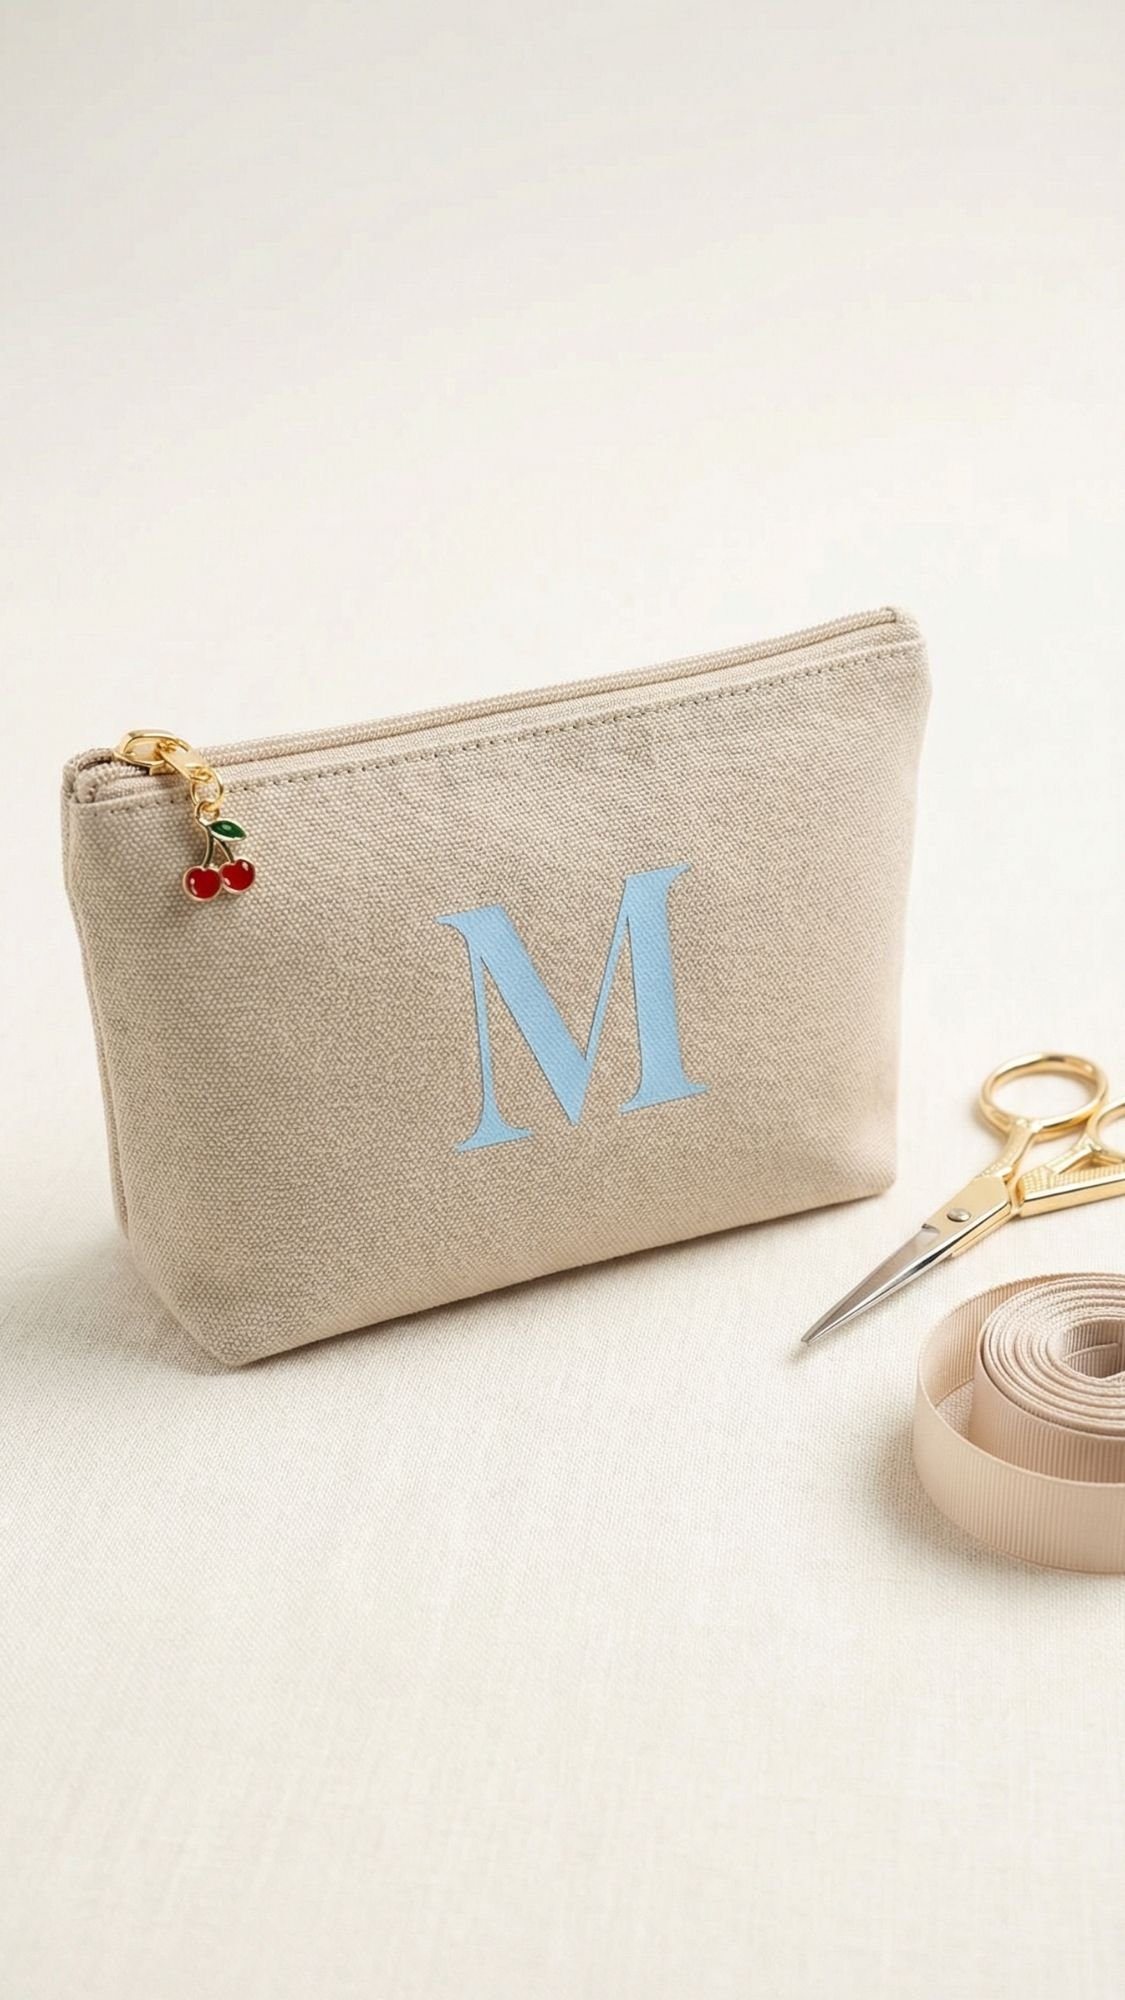
6) Monogram Makeup Bag (No Sewing, Still Looks Like A Boutique Gift)
This is one of those gifts that looks like you spent way more time than you did. A simple canvas pouch turns into a “custom” gift the second you add a monogram, her name, or a cute little phrase she’d actually use. And because it’s practical, it won’t get tossed in the “sweet but… where do I put this?” pile. Ever opened a bag and thought, wow, this is way too nice for my chaos? That’s the goal.
Why This Works
- It feels personalized without requiring a big, complicated project.
- It’s useful for makeup, travel, charger cords, receipts, mom snacks, you know, the essentials.
- It photographs beautifully, which matters if you’re styling a gift basket or blog images.
What You Need
- Blank canvas zipper pouch (cream or neutral reads luxe)
- Heat transfer vinyl, iron-on letters, or fabric paint
- Iron or heat press
- Teflon sheet or parchment paper
- Lint roller
- Ruler or measuring tape
- Optional: zipper charm, tassel, or tiny cherry charm for a trendy pop
How To Make It
- Lint roll the pouch. This sounds boring, but lint loves ruining clean designs.
- Measure the front panel and mark the center lightly. I use a tiny piece of painter’s tape as a guide.
- Set your letters or design in place. Step back and eyeball it. Crooked personalization looks tragic.
- Press the pouch flat first for a few seconds to remove moisture and wrinkles.
- Place your vinyl or transfer, cover with parchment or a Teflon sheet, then press with firm pressure.
- Let it cool if your vinyl needs a cool peel. Follow your brand’s directions here.
- Peel slowly, then press again for a few seconds to lock down edges.
- Add a charm or tassel if you want it to feel extra boutique.
Pro Tips That Keep It Crisp
- Don’t slide the iron around. Press straight down in sections.
- If the pouch has seams or a zipper bump, stuff it with a folded towel so the surface stays flat.
- Choose one clean font. Two fonts can work, but three fonts screams “craft store aisle panic.”
- If you want a trendy look, try a subtle icy blue monogram on a creamy pouch, then add a tiny cherry accent on the zipper.
Common Problems And Quick Fixes
- If vinyl lifts at the corners, you under-pressed or didn’t use enough pressure. Cover and press again.
- If letters wrinkle, you pressed over a zipper bump. Stuff the pouch so it’s flat next time.
- If paint bleeds, your brush was too wet. Use thin layers and let them dry.
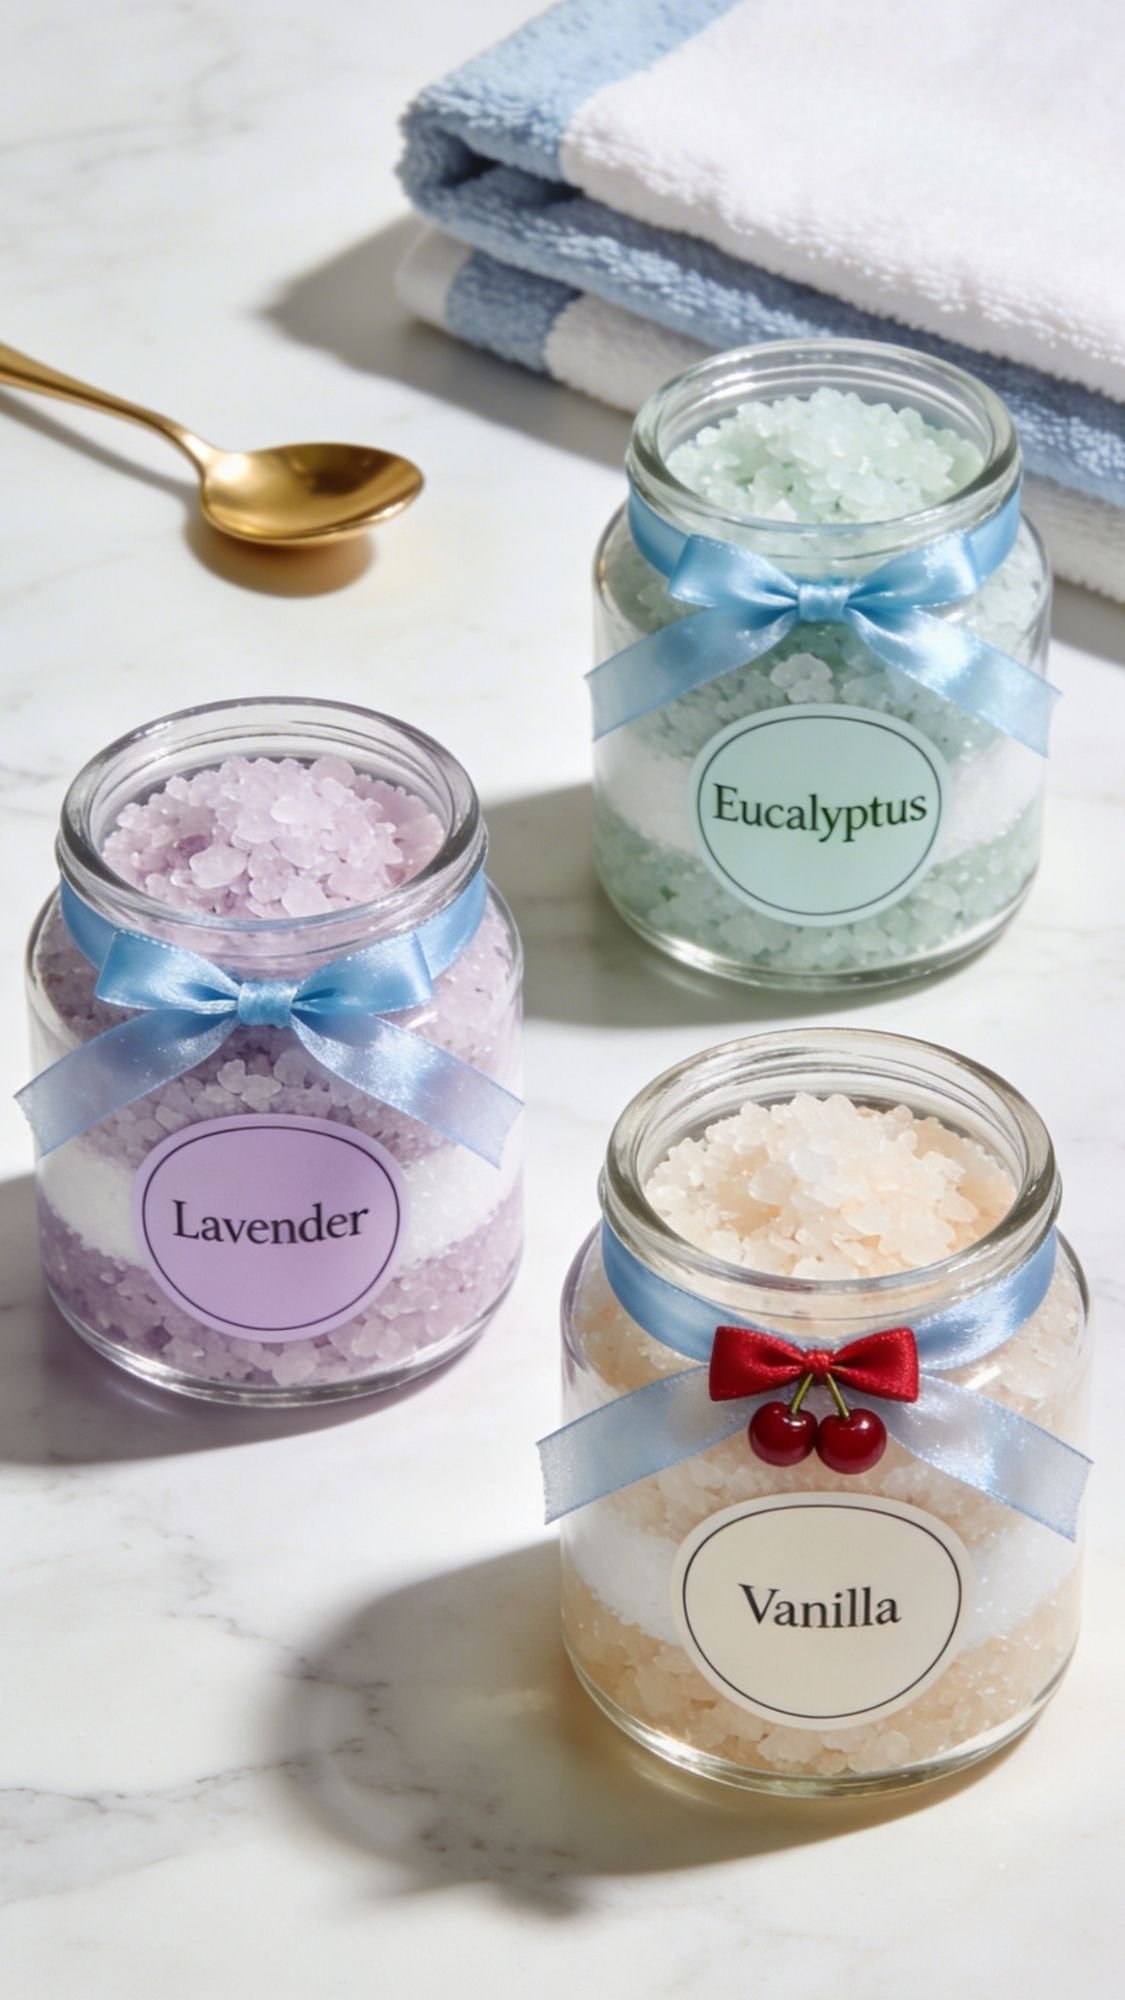
7) Luxury Bath Salt Trio (One Base Recipe, Three “Moods”)
This is the kind of gift that looks like a high-end spa set when you package it right. And honestly, moms deserve the kind of bath that feels like a hard reset, not the “I have three minutes before someone yells my name” bath. The best part, you make one base recipe, then split it into three jars with different scents and add-ins. Easy, pretty, and it feels thoughtful.
Why This Works
- It looks expensive because it comes as a matching set.
- You can tailor scents to what she likes, floral, clean, or herbal.
- It pairs perfectly with a candle or a note set for a full “self-care” bundle.
What You Need
- Epsom salt (main base)
- Baking soda (optional, helps soften water feel)
- Fine sea salt (optional for texture)
- Essential oils or fragrance oils suitable for bath use
- Dried botanicals (optional, keep them minimal)
- Food-safe colorant or mica (optional, use very little)
- Three matching jars with lids
- Labels and a pen or printable stickers
- Small funnel or spoon
Base Recipe (Enough For 3 Small Jars)
- 3 cups epsom salt
- 1/2 cup baking soda
- 1/2 cup fine sea salt
Mix it dry first, then split evenly into three bowls.
Three Variations That Feel Curated
Clean + Fresh
- Scent: eucalyptus or a fresh linen-style fragrance
- Add-in: a pinch of dried eucalyptus or a tiny sprinkle of mica
Soft Floral
- Scent: lavender or rose
- Add-in: a few crushed dried petals, not a whole garden
Warm + Cozy
- Scent: vanilla, chamomile, or a gentle honey note
- Add-in: none needed, let it feel minimalist and luxe
How To Make It
- Mix your dry base ingredients in a large bowl until even.
- Split the mix into three smaller bowls.
- Add scent slowly. Start with a small amount and stir, then adjust. Scents get stronger after they sit.
- If you add botanicals, keep them sparse. Too many petals look pretty, but they can clog drains and feel annoying.
- Spoon or funnel into jars, tap gently to settle, then wipe rims clean.
- Label each jar with the scent name and a simple use note.
Pro Tips That Make This Look Like A Boutique Set
- Use matching jars. Mismatched containers make it look like leftovers.
- Keep labels clean and minimal. One font, centered text, done.
- Add a small ribbon around the neck of each jar, and keep the bow consistent.
- Include a tiny instruction tag like “Add 2 to 4 tablespoons to warm water.”
Safety Notes (Quick, But Important)
- If she has sensitive skin, keep scents light and avoid heavy blends.
- If you use essential oils, dilute properly and keep amounts conservative.
- Botanicals can look cute, but they can also be messy. Give her a drain strainer tip if you include petals.
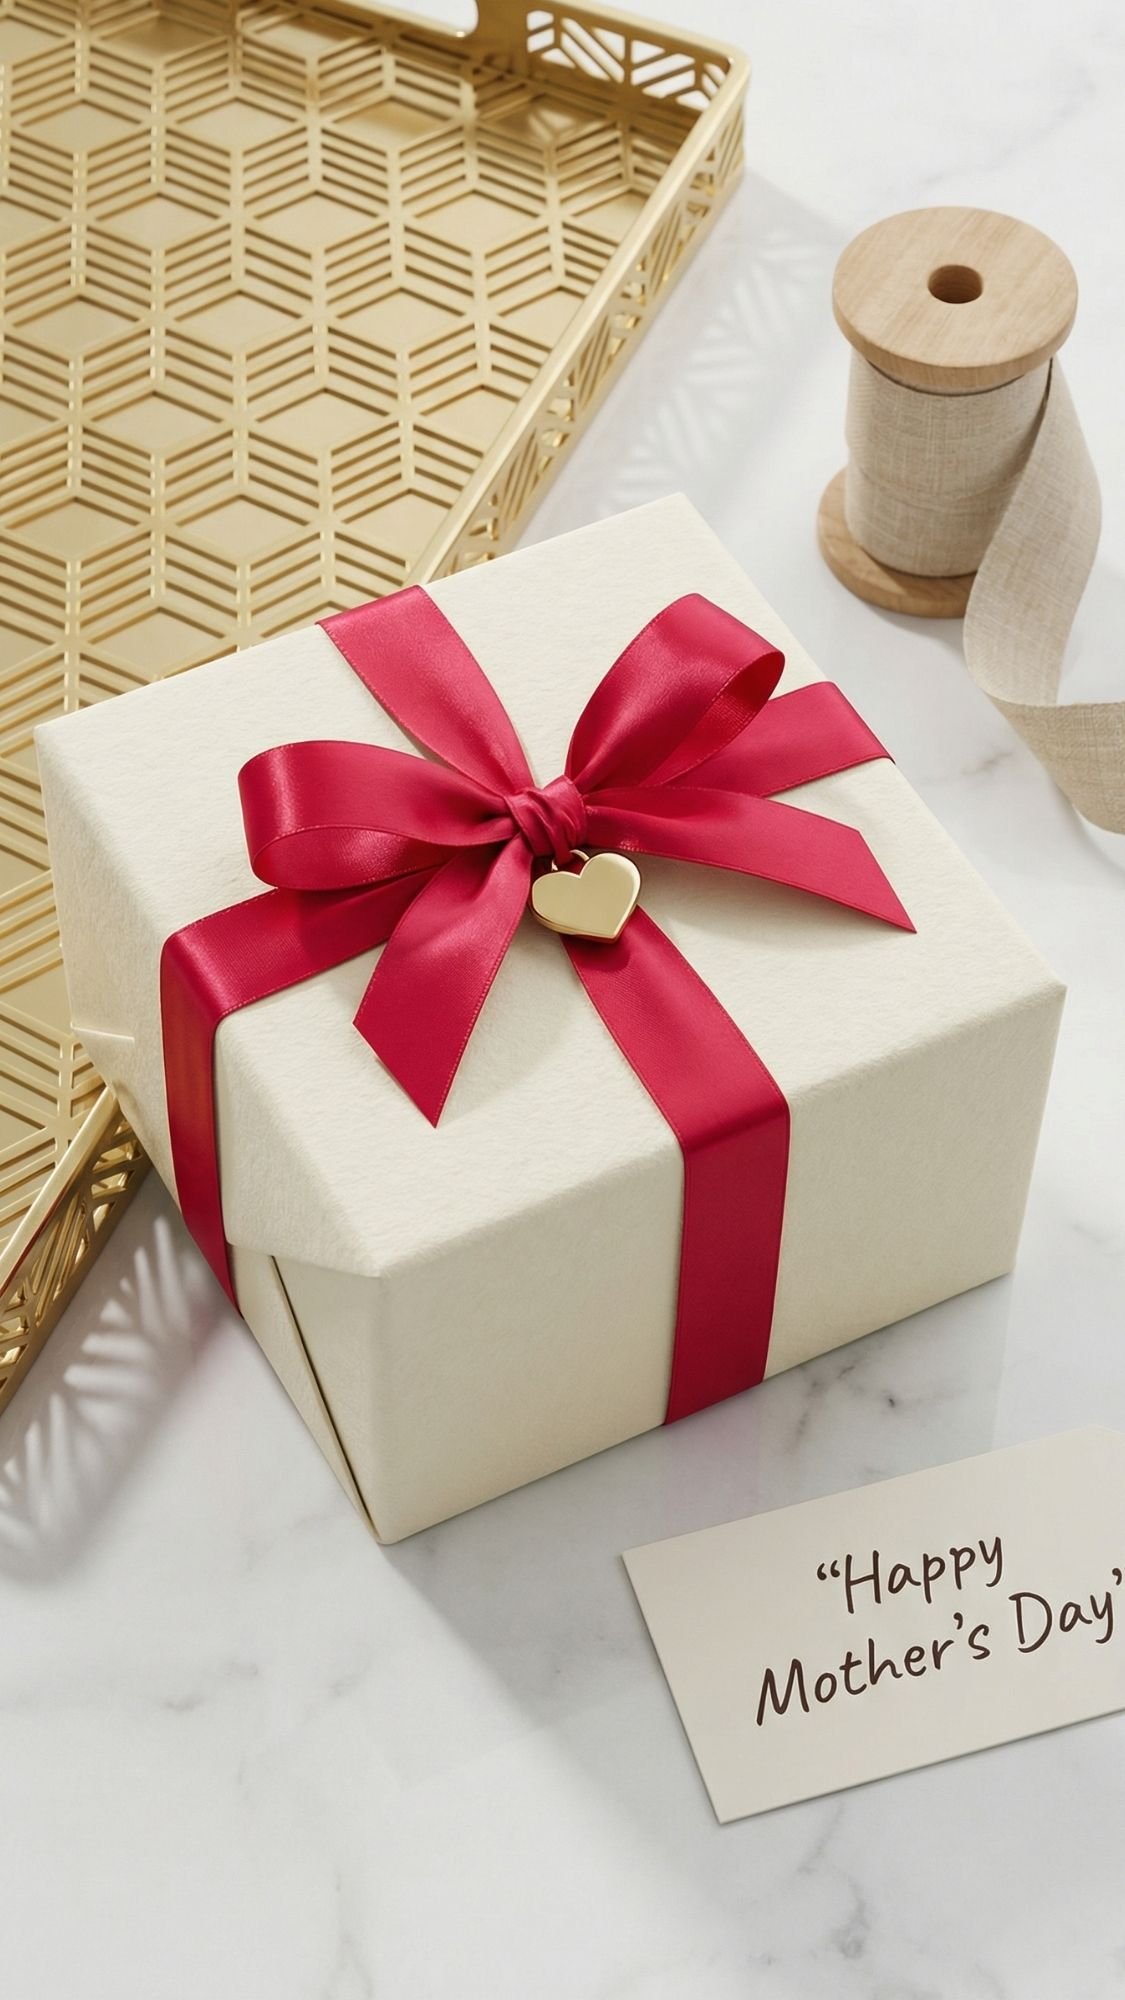
8) Coquette Gift Wrap Upgrade (Because Packaging Counts, Sorry Not Sorry)
You can make the simplest DIY gift feel ridiculously high-end with good packaging. Like, it’s unfair how much a clean wrap job and a pretty bow changes everything. And right now, the whole coquette, cherry-coded vibe is still everywhere, satin ribbons, little charms, soft neutrals with a pop of red. So if you want your gift to look like it belongs in a boutique window display, this is your cheat code.
Why This Works
- It makes any DIY gift instantly feel more expensive.
- It creates a cohesive look if you’re gifting multiple items.
- Moms notice the effort. They just do.
What You Need
- Solid-color wrapping paper (creamy white, soft pink, or kraft looks luxe)
- Double-sided tape (trust me)
- Satin ribbon (wide ribbon makes a statement)
- Optional: thin ribbon for layering
- Gift tag or cardstock for a handwritten tag
- Wax seal sticker or a small charm (cherry, pearl, or gold)
- Scissors and a ruler
How To Wrap It So It Looks Clean
- Measure your paper so you don’t end up with bulky overlaps.
- Fold your edges in and secure with double-sided tape so no tape shows on the outside.
- Keep your corners crisp. Use your fingernail or a bone folder if you have one.
- Wrap ribbon around the box in a cross, then tie a bow on top or slightly off-center.
- Add your charm at the knot, then add a tag.
Pro Tips That Make It Look Like A Boutique Gift
- Stick to one color story. Creamy neutral base, icy blue ribbon, and one tiny cherry red pop looks insane in photos.
- Keep the tag handwriting neat. If your handwriting goes rogue, print a simple tag and sign it.
- Use a wax seal sticker for a quick “fancy” moment without actual wax drama.
- Avoid patterned paper if your gift already has a lot going on. Solid paper looks more luxe.
Common Problems And Quick Fixes
- If your paper wrinkles, you pulled too tight or used thin paper. Use heavier paper and smooth as you go.
- If your bow looks sad, you used ribbon that’s too narrow. Go wider, it fixes everything.
- If tape shows, switch to double-sided tape and hide it under folds.
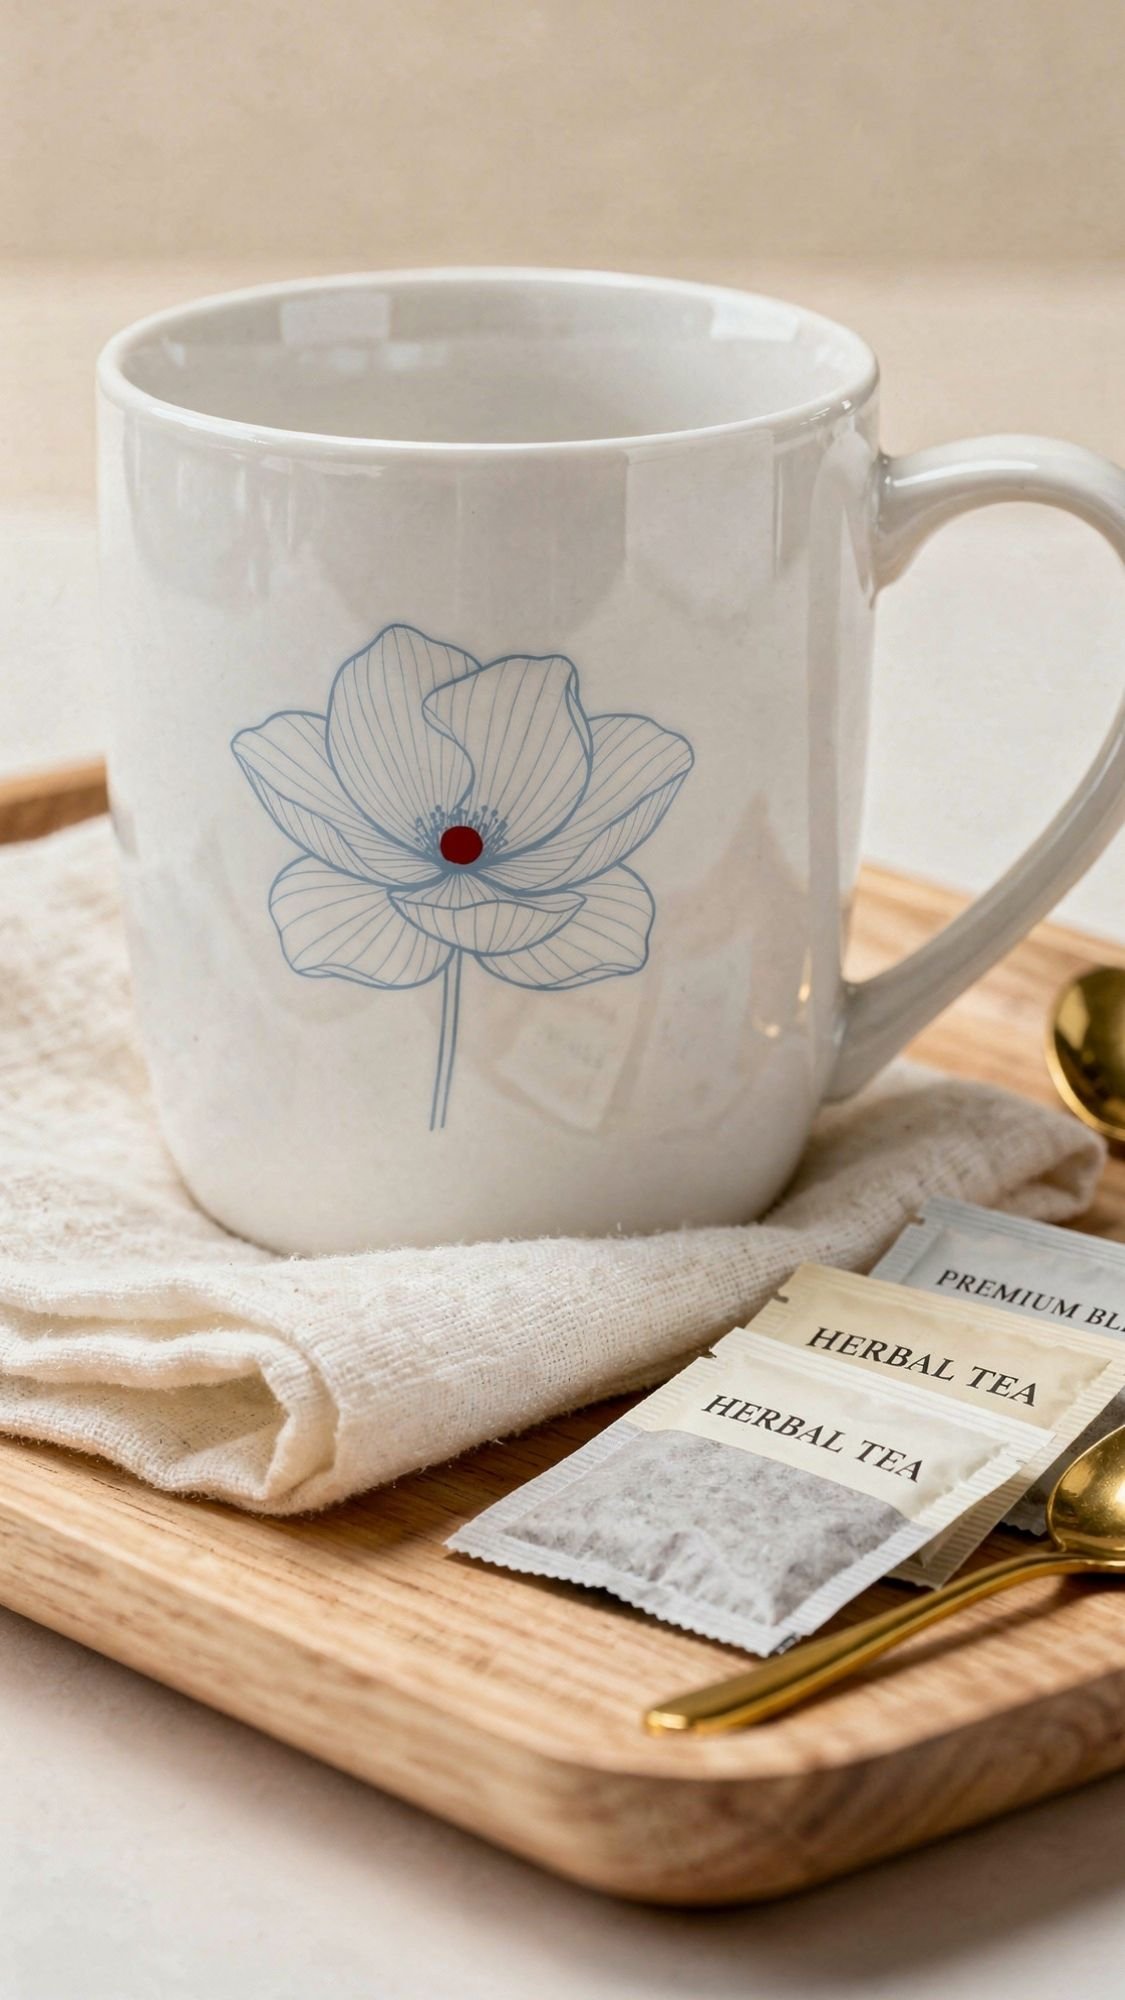
9) Hand-Painted Mug (Simple Motif, Big Impact)
A painted mug feels personal in a way store-bought mugs never quite nail. She’ll reach for it on sleepy mornings, and every time she does, she’ll remember you made it on purpose, not just grabbed something on the way to brunch. Also, you can keep the design super minimal and still make it look expensive. Ever noticed how one clean little detail can look more high-end than a busy pattern? Same concept here.
Why This Works
- It feels custom, even if you only paint a tiny motif.
- It fits almost every “type” of mom, coffee mom, tea mom, hot cocoa mom, all of the above.
- It pairs well with a candle, tea towel, or bath salts for a full gift bundle.
What You Need
- Plain ceramic or porcelain mug (smooth glaze works best)
- Rubbing alcohol and a lint-free cloth
- Painter’s tape (optional, for clean lines)
- Oil-based paint pens made for ceramic, or porcelain paint
- Oven-safe marker instructions from your brand
- Parchment paper or foil (for baking protection)
How To Make It
- Wash the mug, then wipe it down with rubbing alcohol. You want it squeaky clean.
- Plan your design placement. I like the design on the side opposite the handle, so it shows in photos.
- Tape off any lines or borders if you want a crisp geometric look.
- Draw your design with light pressure first, then go back to deepen the lines.
- Let the paint dry fully before you touch it again. Smudges happen fast on glossy glaze.
- Bake it if your paint brand tells you to. Follow their temperature and timing exactly.
- Let the mug cool completely in the oven. Quick temperature swings can stress the paint.
Pro Tips That Make It Look Boutique
- Keep it minimal. One small flower, a monogram, or a clean stripe looks modern and expensive.
- Use a tight palette. Cloud Dancer creamy white mugs with icy blue accents look fresh, and a tiny cherry red dot detail looks trendy.
- If you want a crisp border, tape it and paint thin layers. Thick paint can ridge and chip.
- Test your pen flow on paper first. Some pens start watery, and that first blob can ruin the vibe.
Common Problems And Quick Fixes
- If the paint scratches off, you skipped surface prep or baking. Clean with alcohol, repaint, and follow cure instructions.
- If lines look shaky, slow down and brace your hand on the table. You control the pen better that way.
- If paint bleeds under tape, you used too much paint. Use lighter passes and press tape edges firmly.
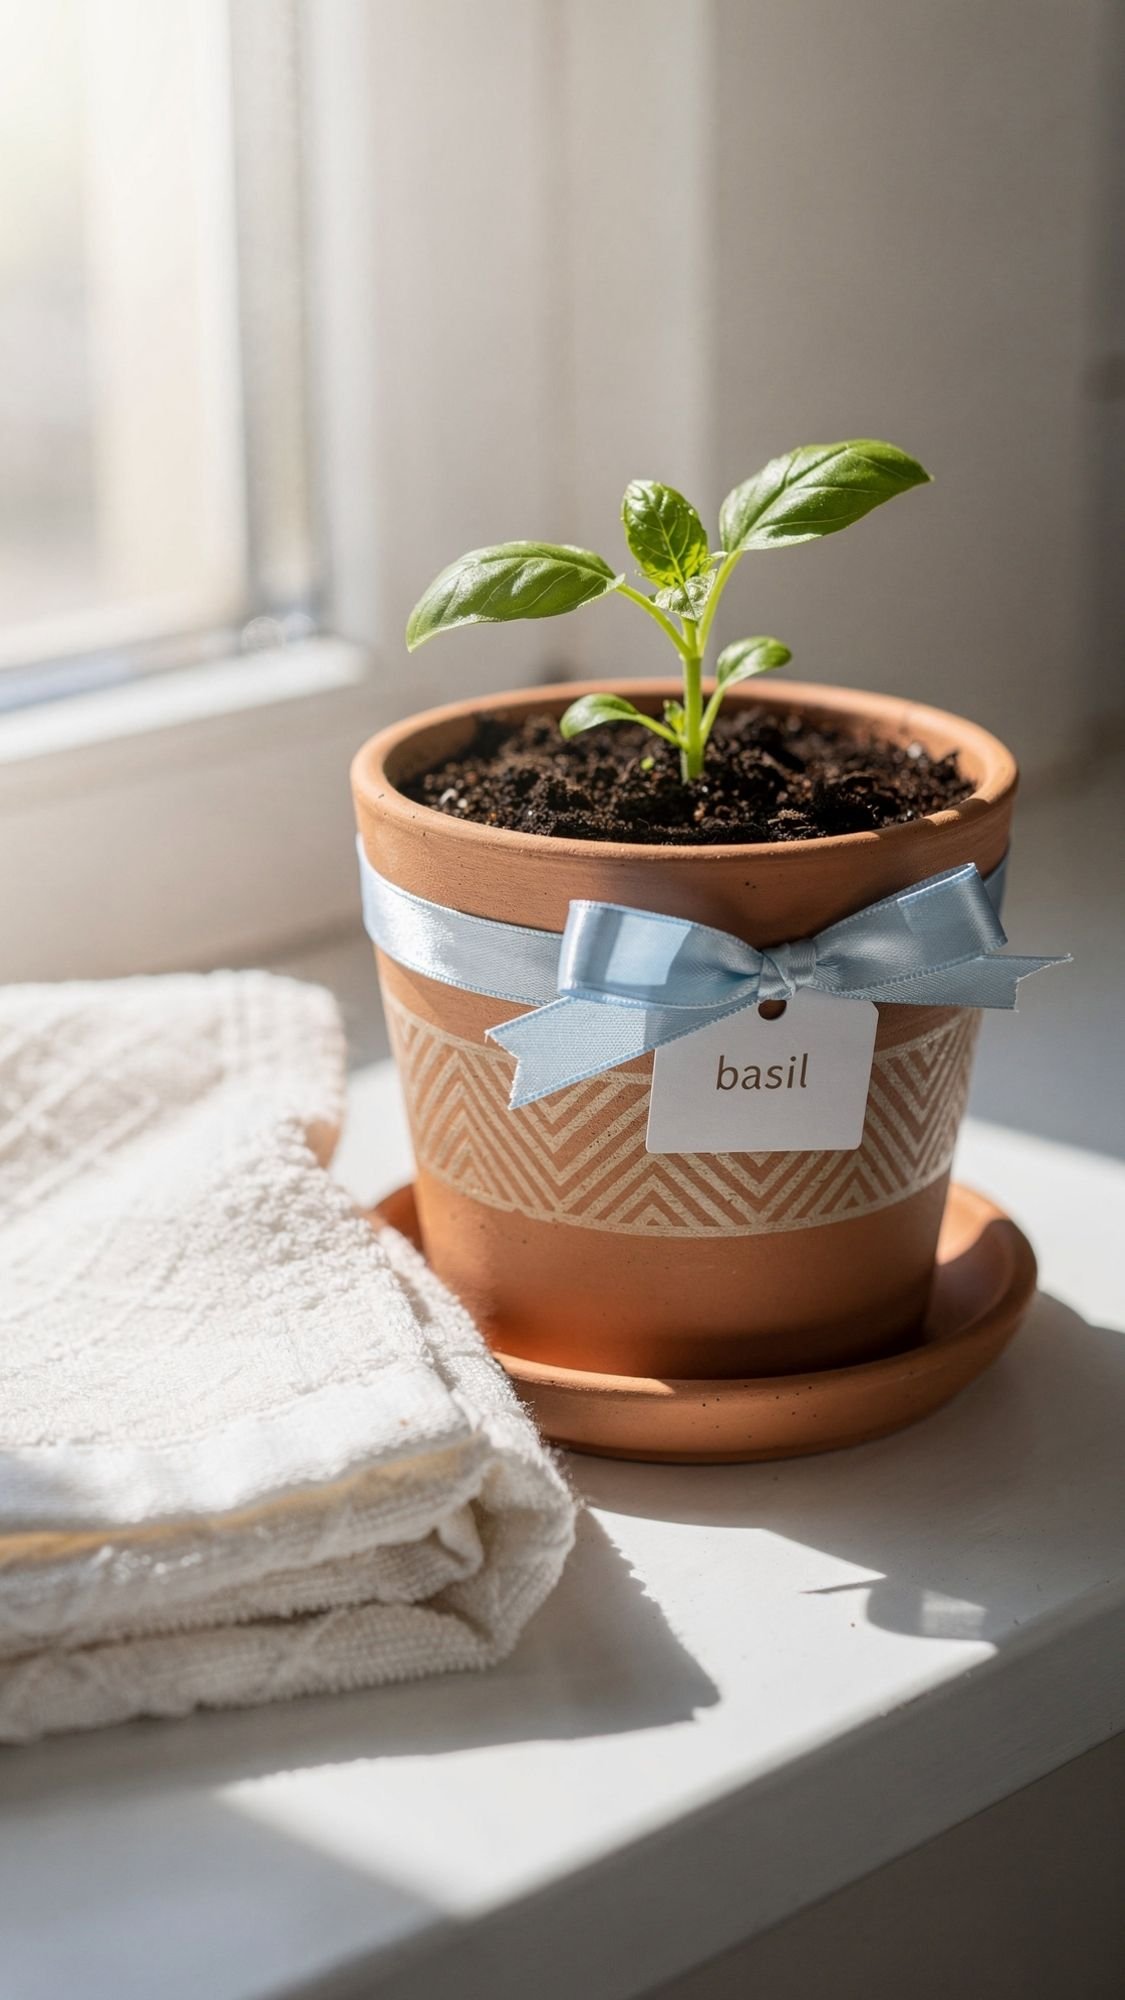
10) Herb Garden Starter Pot (Cute Now, Better Later)
This one feels sweet on Mother’s Day, then it keeps getting better every week after. A little herb pot says, “I want you to have something lovely,” without adding more clutter to her counters. Plus, it looks gorgeous in photos, and it works for moms who love cooking, gardening, or just having something green in the window. Who doesn’t love a gift that literally grows?
Why This Works
- It’s a living gift, so it stays meaningful past the holiday.
- It looks high-end when you keep the paint clean and the label simple.
- You can tailor it to her life, basil for the cook, lavender for the relaxing mom, mint for the iced tea mom.
What You Need
- Terracotta pot with saucer (4 to 6 inches is a great size)
- Acrylic paint or outdoor craft paint
- Paint brush and a small detail brush
- Painter’s tape (for crisp stripes or shapes)
- Clear sealer (matte or satin)
- Potting soil
- Herb seeds or a small starter plant
- Optional: plant marker or small tag
How To Make It
- Wipe the pot clean and let it dry fully. Terracotta holds dust and sometimes moisture.
- Paint your base coat in thin layers. Let each layer dry before the next.
- Add a simple design. Thin stripes, a Neo Deco arch, or a tiny monogram looks modern and polished.
- Let paint dry completely, then seal the outside of the pot. Keep the inside unsealed so the pot can breathe.
- Add soil, plant seeds or a starter, then water lightly.
- Add a marker tag so she knows what it is and how to care for it.
Pro Tips That Keep It From Looking Messy
- Paint thin coats. Thick paint cracks and chips faster on terracotta.
- If you use tape, press edges down firmly, then paint lightly to avoid bleed.
- Keep the palette tight. Creamy neutral pot, icy blue accent stripe, and one tiny cherry pop looks fresh and trendy.
- Add a quick care tag that says “Bright window, water when top inch feels dry.” That little detail makes it feel premium.
Common Problems And Quick Fixes
- If paint chips, you skipped sealing or handled it too soon. Let it dry longer, then seal in thin coats.
- If the pot looks streaky, you used too little paint or didn’t let layers dry. Add one more thin coat.
- If your plant struggles, it may need more light. Move it closer to a bright window and water less often.
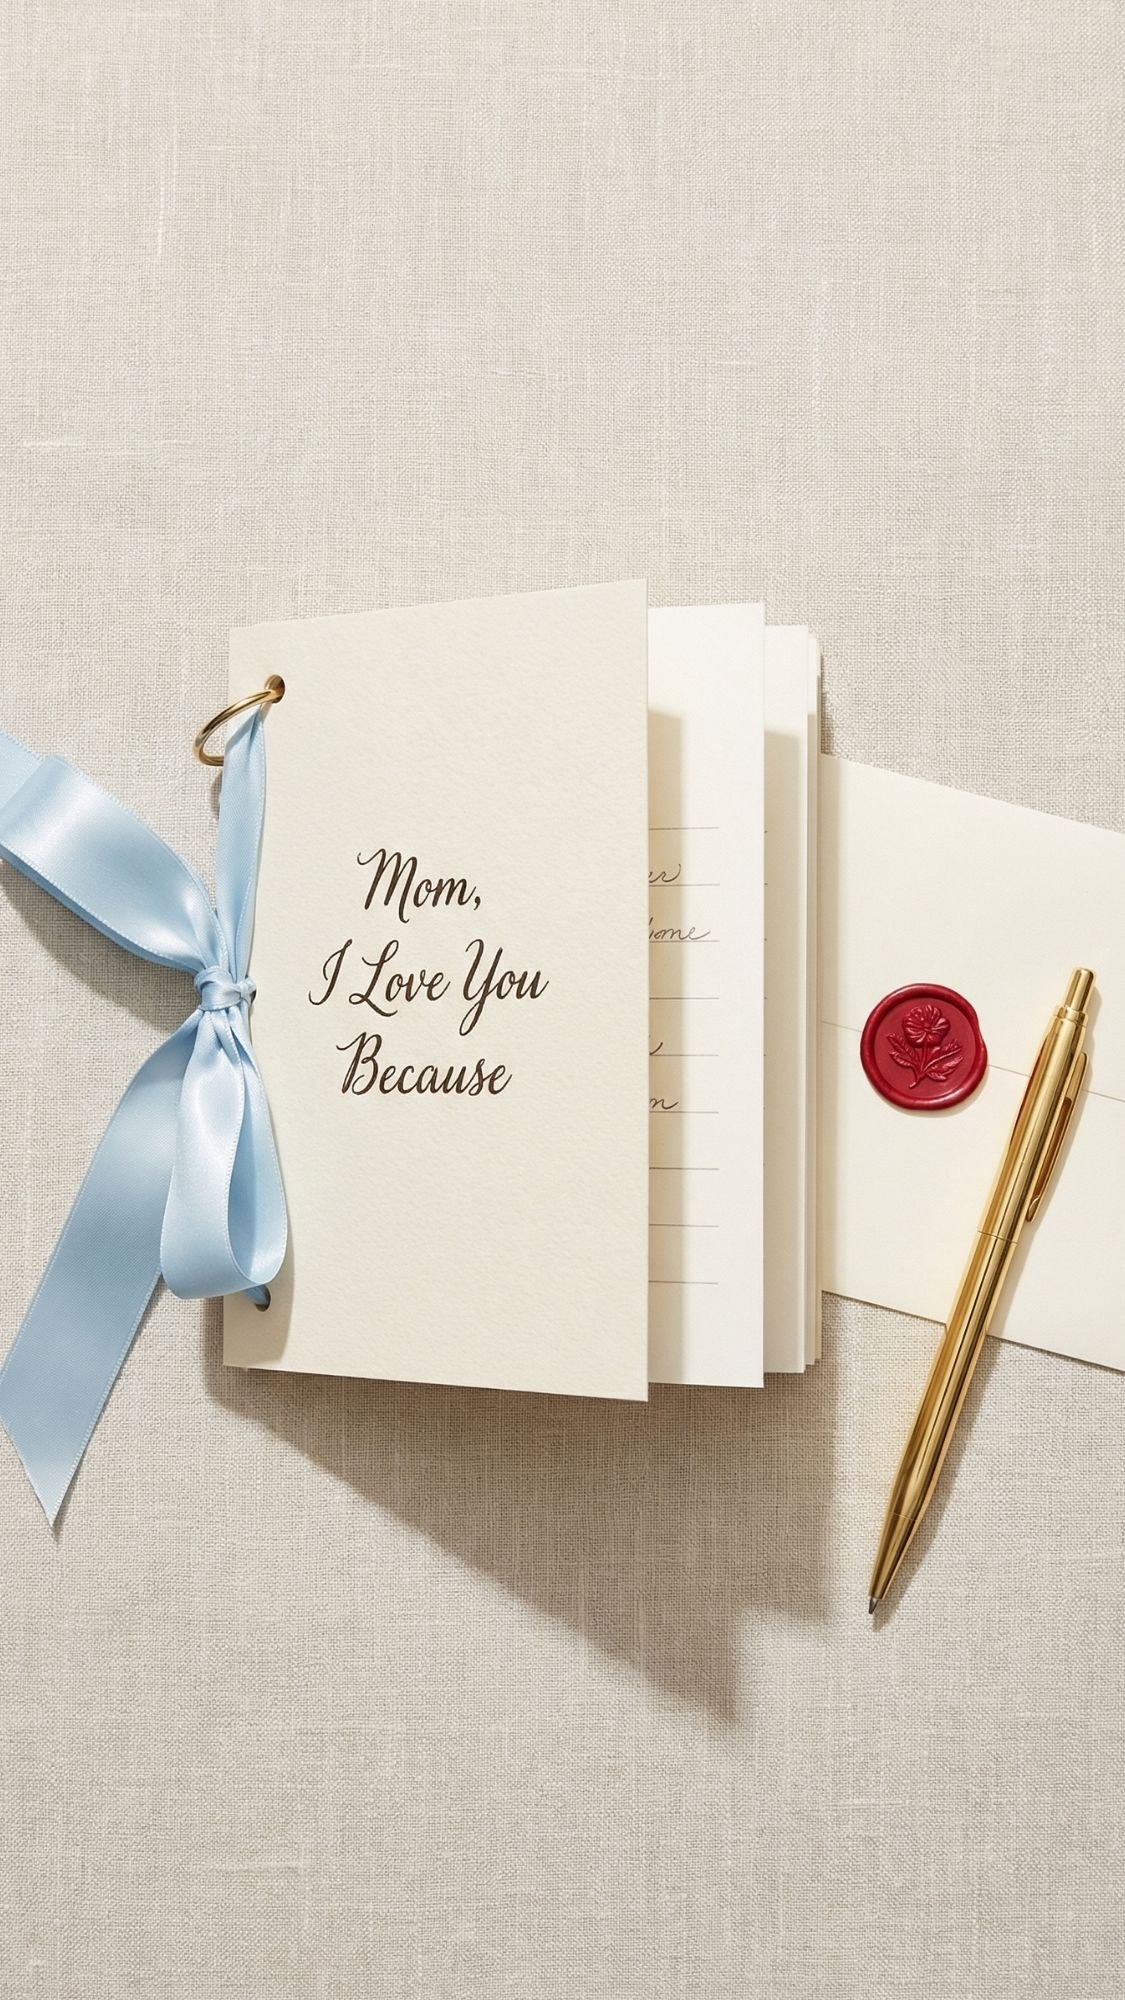
11) “Reasons I Love You” Mini Booklet (Short, Sweet, Actually Gets Kept)
If you want a gift that feels deeply personal without needing a pile of supplies, make this. It’s tiny, but it hits hard, because it’s basically proof you pay attention. And unlike a long letter that can feel intimidating to write, this breaks it into little bite-sized moments. Ever tried to write something heartfelt and suddenly your brain goes blank like a dial-up modem? This format fixes that.
Why This Works
- It feels meaningful, but you can finish it in one sitting.
- She can flip through it whenever she needs a boost.
- You can make it funny, sentimental, or both, depending on your mom.
What You Need
- Cardstock or thick paper (cut into small cards)
- One binder ring or mini book ring
- Hole punch
- Pen, marker, or printed text strips
- Optional: stickers, washi tape, ribbon, envelope, or a small keepsake box
How To Make It
- Cut your cards to a consistent size, like 3 x 4 inches. Consistency makes it look polished.
- Punch one hole in the same corner of every card. Use a template card so spacing stays even.
- Make a cover card, then 20 to 40 “reasons” cards behind it.
- Write one reason per card, and keep it specific. “You always showed up to my stuff” beats “you’re the best.”
- Add a few memory-based ones. Those land the hardest.
- Put them on the ring, tie a ribbon on the ring if you want it to feel gift-ready.
Pro Tips That Make It Feel Next-Level
- Mix the types of reasons so it doesn’t feel repetitive:
- Something she taught you
- A habit you love about her
- A memory you replay in your head
- A thing she does that makes everyone feel safe
- Add one card that’s funny. Moms love a real laugh, not a forced one.
- Keep your handwriting neat, or type and print strips and glue them on. You’re not auditioning for a calligraphy job.
Common Problems And Quick Fixes
- If it looks messy, your card sizes don’t match. Trim them together as a stack for clean edges.
- If the hole placement looks off, punch one “template” card first and mark every other card from it.
- If you feel stuck, start with prompts like “I love how you…” and “Thank you for…” and the rest will flow.
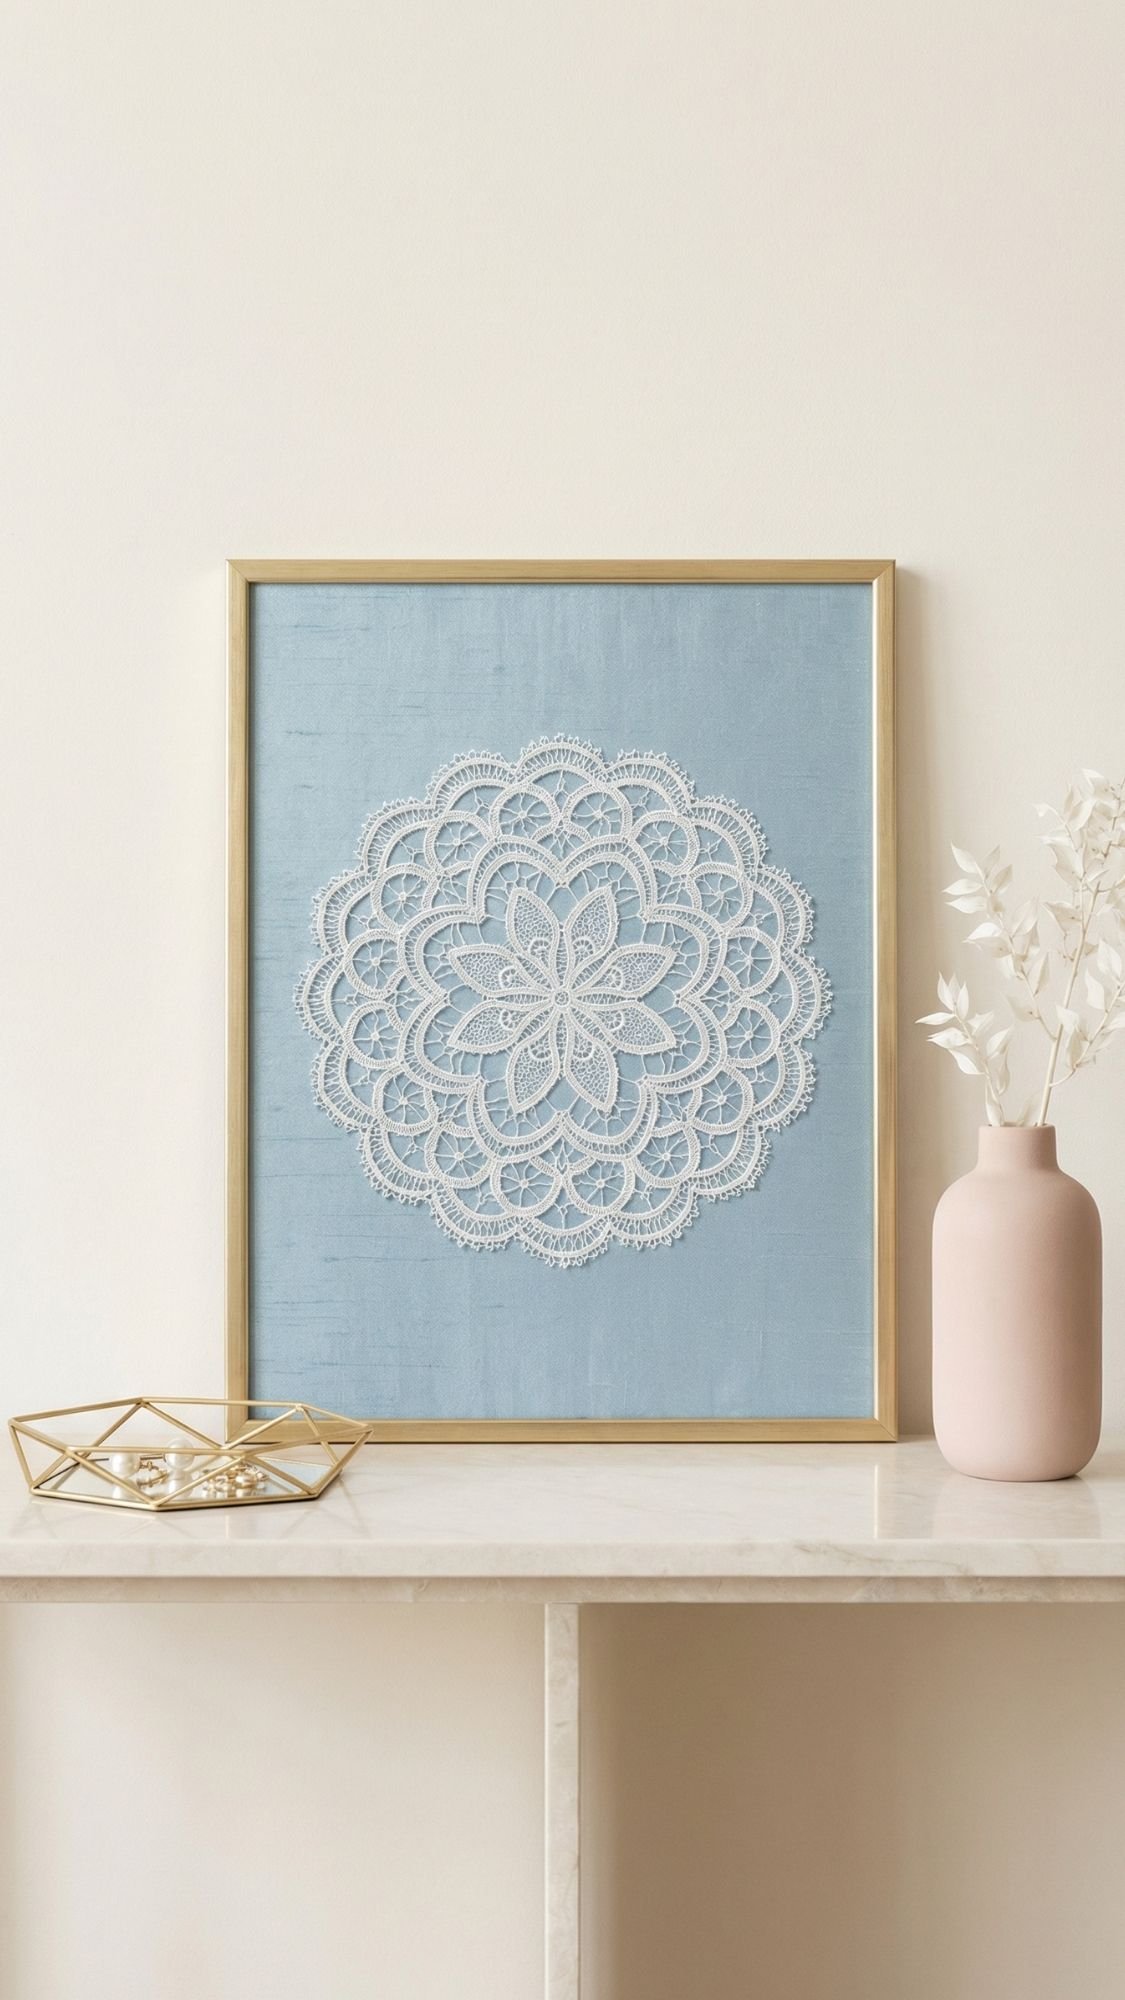
12) Framed Doily Art (Vintage, Soft, And Weirdly Trendy Again)
This project feels like something you’d spot in a little boutique, then immediately try to justify buying even though you could totally make it. A doily sounds old-school, but framed the right way, it reads delicate and intentional, not “grandma’s drawer.” You also get a big visual payoff with very little time, which honestly feels like cheating. Want a gift that looks curated, not cluttery? This one nails it.
Why This Works
- You turn something simple into wall-worthy art with one clean frame.
- It fits a lot of home styles, modern, farmhouse, boho, even glam if you use gold.
- You can keep it neutral and timeless, or add a color backdrop that feels fresh.
What You Need
- Doily or lace piece (paper or fabric both work)
- Frame (thin gold, light wood, or white looks great)
- Backing paper (cardstock, scrapbook paper, or fabric)
- Spray adhesive or glue stick
- Scissors
- Optional: iron or steamer if you use a fabric doily
How To Make It
- Pick your frame first, then choose a doily that fits inside with a little breathing room.
- If your doily has wrinkles, press it flat. Fabric doilies behave better when you steam them first.
- Cut your backing paper to fit the frame. Choose a backing color that makes the pattern pop.
- Center the doily on the backing before you glue anything. Eyeballing it can betray you, so measure if you want it perfect.
- Apply adhesive lightly, then press the doily down from the center out so it stays smooth.
- Frame it and clean the glass. Smudges ruin the “I bought this” illusion.
Pro Tips That Make It Look High-End
- Use a backing color that feels intentional. Creamy white-on-white reads soft and minimal, icy blue looks modern, blush looks romantic.
- Choose a thin frame. Chunky frames can overwhelm delicate lace patterns.
- If you want a Neo Deco vibe, layer two doilies, one slightly offset, and use a metallic frame.
- Add a tiny title tag on the back, not the front. Keep the front clean and art-like.
Common Problems And Quick Fixes
- If the doily wrinkles, you used too much glue or pressed unevenly. Lift it gently while the glue stays tacky, then smooth it again.
- If it looks crooked, you centered by feel instead of measuring. Mark the backing center lightly with pencil next time.
- If the pattern disappears, your backing color matches too closely. Swap the backing for higher contrast.
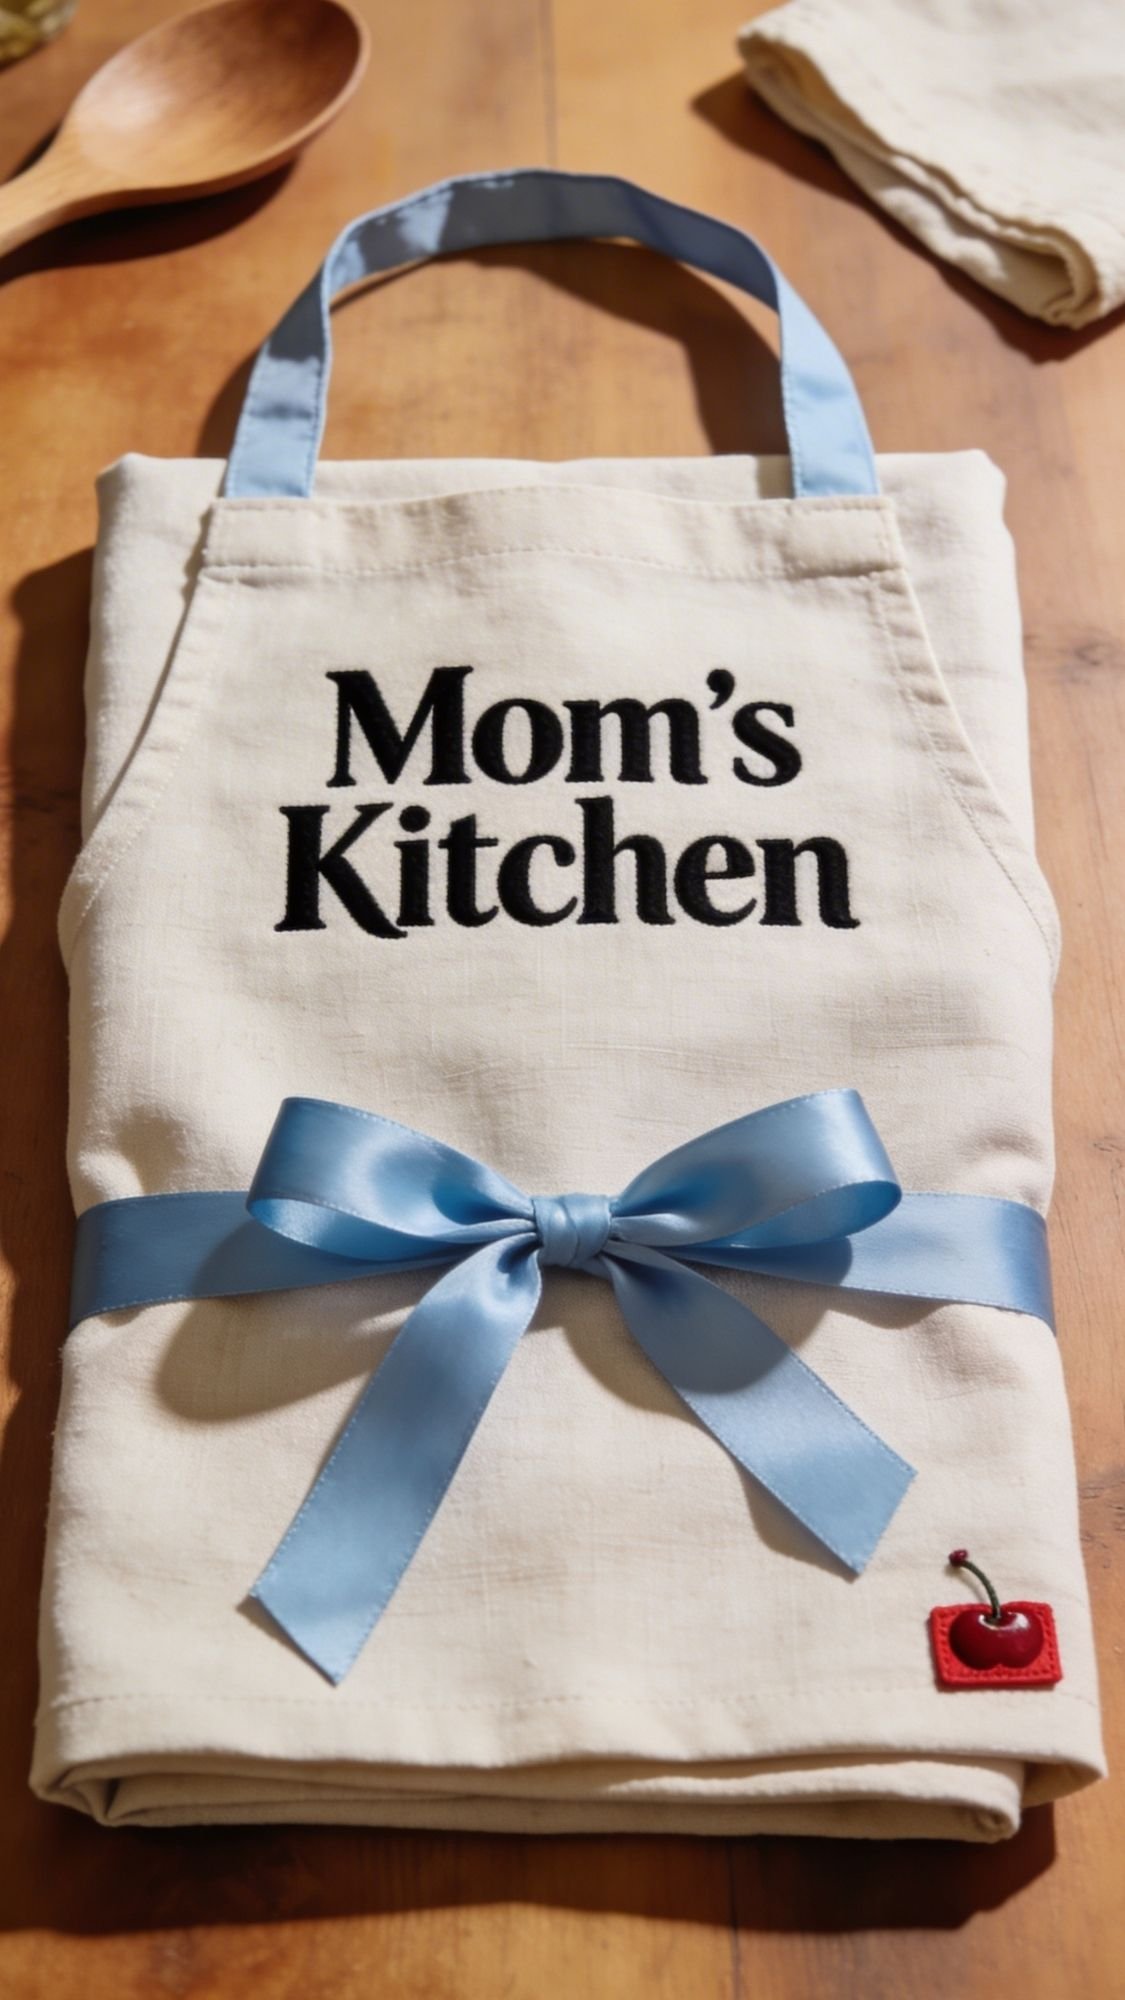
13) Personalized Apron (For The Mom Who Feeds Everyone, Even When She’s Tired)
An apron is such a good Mother’s Day gift because it feels personal, it’s useful, and it can still look cute hanging on a hook like decor. Also, you can customize it to match her vibe. Minimalist mom gets a clean monogram. Funny mom gets a phrase that makes her laugh. And if you add a little recipe card or wooden spoon with it, it becomes a full gift without much extra work. Pretty smart, right?
Why This Works
- It’s practical, and moms actually use it.
- It feels custom, even if you only add a small design.
- It’s easy to bundle with other kitchen gifts.
What You Need
- Apron in cotton, canvas, or linen blend
- Heat transfer vinyl or iron-on letters, or fabric paint
- Iron or heat press
- Parchment paper or Teflon sheet
- Lint roller
- Ruler or measuring tape
- Optional: fabric-safe marker for small details
How To Make It
- Wash and dry the apron if the label allows it. Shrinking after customization feels rude.
- Lint roll the front panel. Tiny fibers show under vinyl more than you’d think.
- Measure and mark the center lightly. I like the design centered on the chest area.
- Press the apron flat for a few seconds to remove moisture and wrinkles.
- Place your design and press with firm pressure for the time your vinyl brand recommends.
- Let it cool if needed, then peel slowly and press again to lock down edges.
- Let it rest before washing. Most heat transfers do better when they sit at least a day.
Personalization Ideas That Don’t Feel Cheesy
- “Mom’s Kitchen”
- “Queen Of Snacks”
- Her name in a clean script
- Initials with a tiny heart or small cherry icon
- “Ask Mom, She Knows” if your family runs on that energy
Pro Tips That Keep It Looking Clean
- Choose one main design, not a full front print. Big prints can feel loud.
- If the apron has seams or pockets, place the design above them so it stays flat.
- If you use fabric paint, use thin coats and let it dry fully between layers.
- Add a matching ribbon tie or tag when you gift it, it makes it feel boutique.
Common Problems And Quick Fixes
- If vinyl peels after washing, you under-pressed or washed too soon. Re-press with parchment and wait longer next time.
- If letters look crooked, you didn’t use a center guide. Use painter’s tape as a straight line guide.
- If paint bleeds, your brush was too wet. Use a stencil sponge and dab lightly.
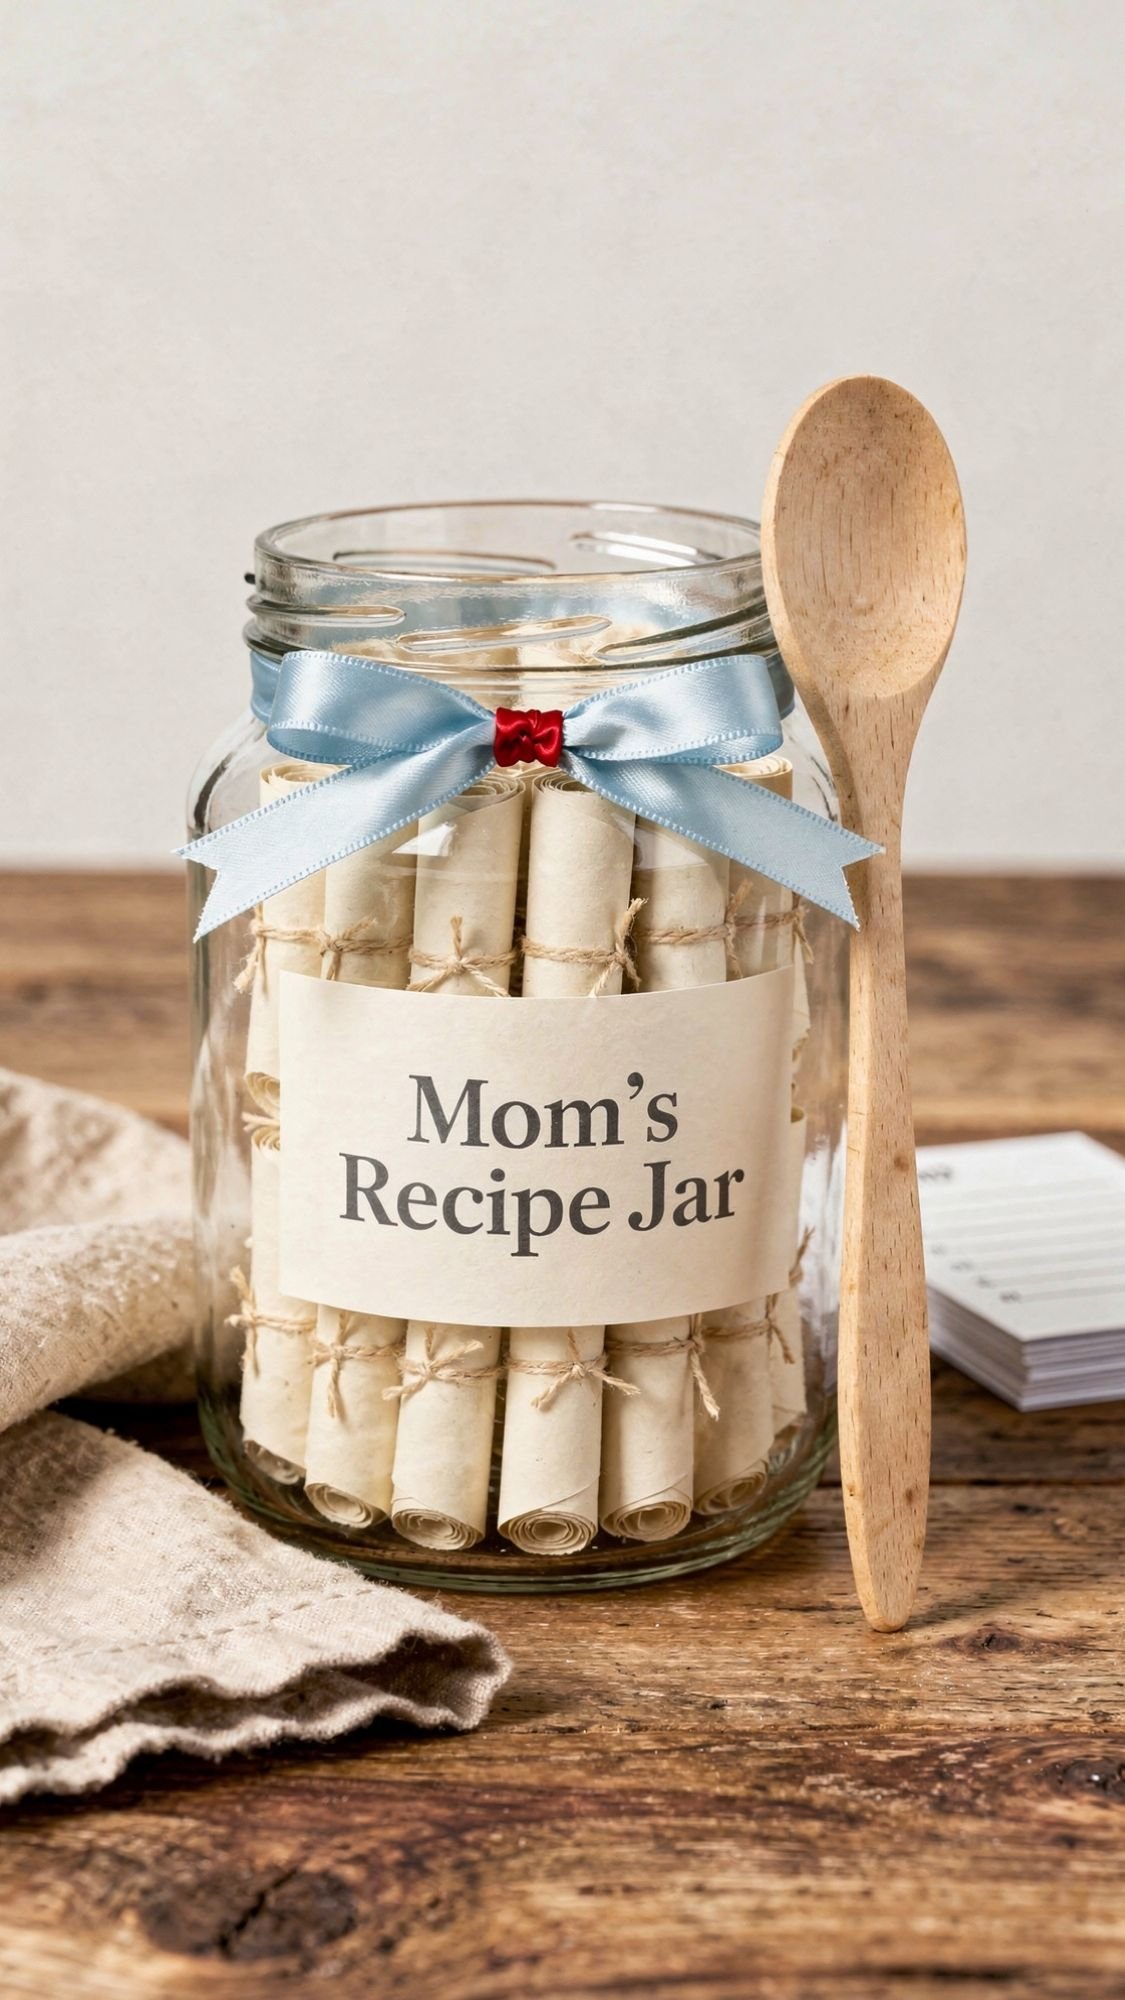
14) Wooden Spoon + Recipe Jar Gift Set (Small Gift, Big Heart)
This one feels so simple, but it lands every time. You’re basically gifting her a little “family cookbook starter kit,” and she can keep adding to it. Also, it looks ridiculously cute on a counter, which matters because moms love anything that feels both useful and pretty. Ever notice how the best gifts are the ones that become a habit, not a one-day thing?
Why This Works
- It feels personal without needing fancy tools.
- It encourages memories, not clutter.
- It bundles beautifully with an apron or tea towel from earlier sections.
What You Need
- Clear jar with lid (wide-mouth works best)
- Recipe cards or thick paper cut into strips
- Pen or fine marker
- Wooden spoon (new, clean)
- Ribbon or twine
- Label or tag
- Optional: hole punch + mini ring (if you want the recipes to be removable as a set)
How To Make It
- Decide how many recipes you want to include. I like 10 to 20 to start, enough to feel full but not overwhelming.
- Write the recipes on cards or strips. Keep them short and readable, you can add “see back for notes” if needed.
- Add a few “memory lines” on each card, like “You made this when…” or “Best served with…”
- Roll the cards loosely and tie with a tiny bit of string, or fold them neatly to fit your jar.
- Fill the jar, then wipe the outside so it looks clean in photos and in real life.
- Tie the wooden spoon to the jar with ribbon, then add a tag with a sweet title.
Pro Tips That Make It Look Boutique
- Pick one label style and stick to it. Matching labels create that curated gift set look.
- Use a spoon with a nicer shape, like a flat edge or an oval bowl. The tiny detail reads more premium.
- Add one “lazy day” recipe on purpose. Moms appreciate honesty more than perfection.
- If you want the jar to feel fuller, add a few blank recipe cards too, so she can keep building the collection.
Common Problems And Quick Fixes
- If the jar looks messy, your cards vary too much in size. Trim them to match.
- If the ribbon slips, tie a double knot first, then add the bow on top.
- If the label peels later, wipe the jar with rubbing alcohol before applying the sticker.
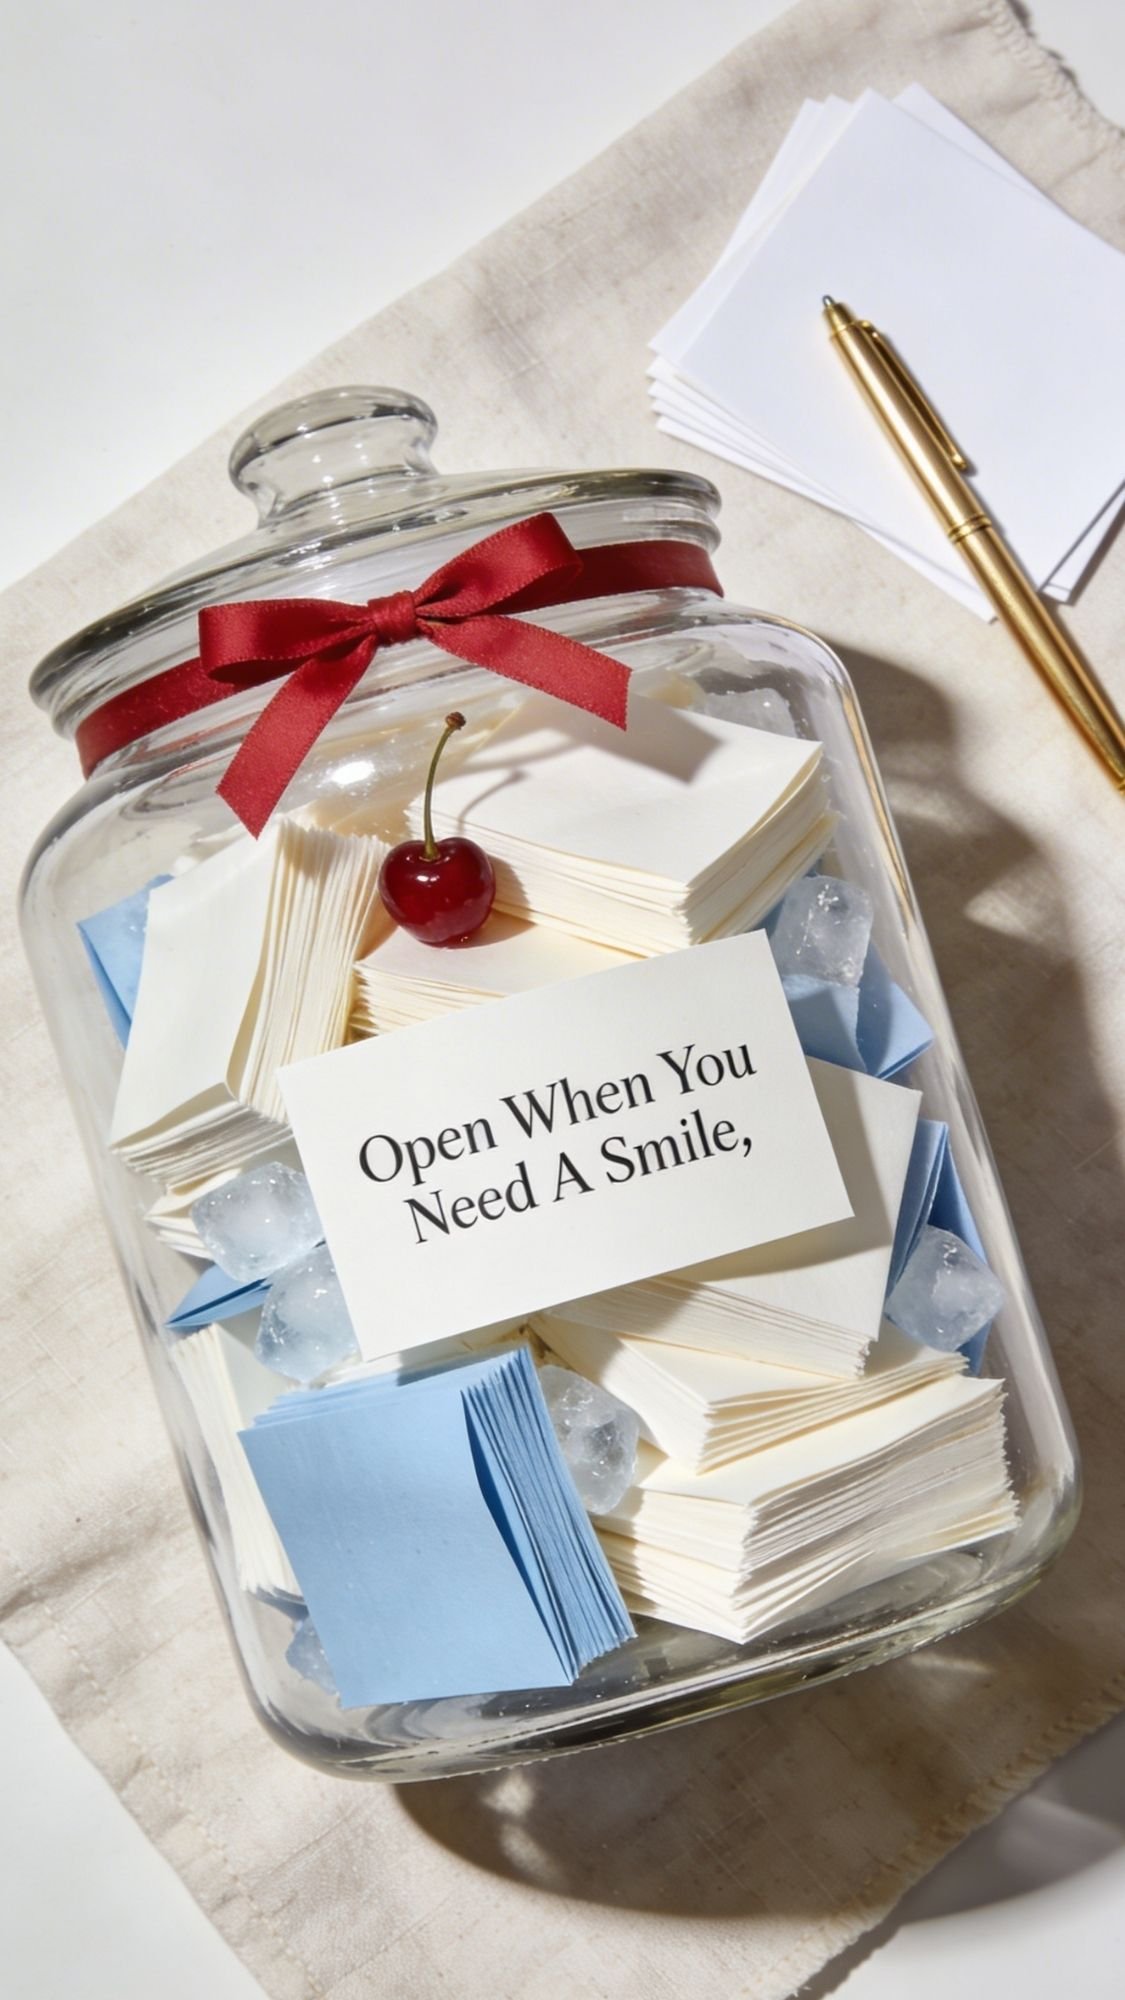
15) Memory Jar (A Year Of Notes, Not A One-Day Gift)
This one is sneaky powerful. It looks simple, but it turns into a gift she can open again and again. And it doesn’t require you to be “crafty,” it requires you to be thoughtful, which is honestly the point. Ever had a day where one sweet note would’ve fixed your mood instantly? Same. This jar becomes that, on demand.
Why This Works
- She can enjoy it long after Mother’s Day.
- It’s meaningful without taking advanced skills.
- It works for any relationship, kids, teens, adult kids, even grandkids.
What You Need
- Glass jar with lid (clear looks best)
- Paper strips or small folded note paper
- Pen or fine marker
- Ribbon or twine
- Label or tag
- Optional: tiny envelopes, mini binder clips, or a jar insert card with instructions
How To Make It
- Decide your goal, 30 notes, 52 notes, or a full 100 if you’re ambitious.
- Cut paper into matching strips or small squares. Matching sizes make the jar look curated.
- Write a mix of notes, don’t do all compliments. Add memories, gratitude, and little future moments.
- Fold notes neatly. If you want extra polish, fold them the same direction so the jar looks tidy.
- Fill the jar and tap it gently so notes settle.
- Tie ribbon around the neck and add a label with a simple instruction.
Note Ideas That Don’t Feel Generic
- “A time you made me feel safe was…”
- “Something you taught me that I still use is…”
- “My favorite meal you make is… because…”
- “A funny thing you do that I secretly love is…”
- “One moment I felt proud to be your kid was…”
- “When you need a laugh, remember the time we…”
- “A little reminder for a hard day, you are…”
Pro Tips That Make This Look Premium
- Use a tight color palette for paper. Creamy white with a few icy blue notes looks clean, and one cherry red accent note here and there feels trendy.
- Add a tiny “How To Use” card on the outside tag, like:
- “Open one when you need a smile, or open one every Sunday.”
- If you want it to feel extra luxe, add mini envelopes inside the jar. It takes longer, but it looks incredible.
Common Problems And Quick Fixes
- If the jar looks chaotic, your note sizes vary too much. Trim them to match.
- If labels peel, you applied them over oils or dust. Wipe jar with rubbing alcohol first.
- If it feels repetitive, switch categories. Memories, gratitude, funny moments, future plans.
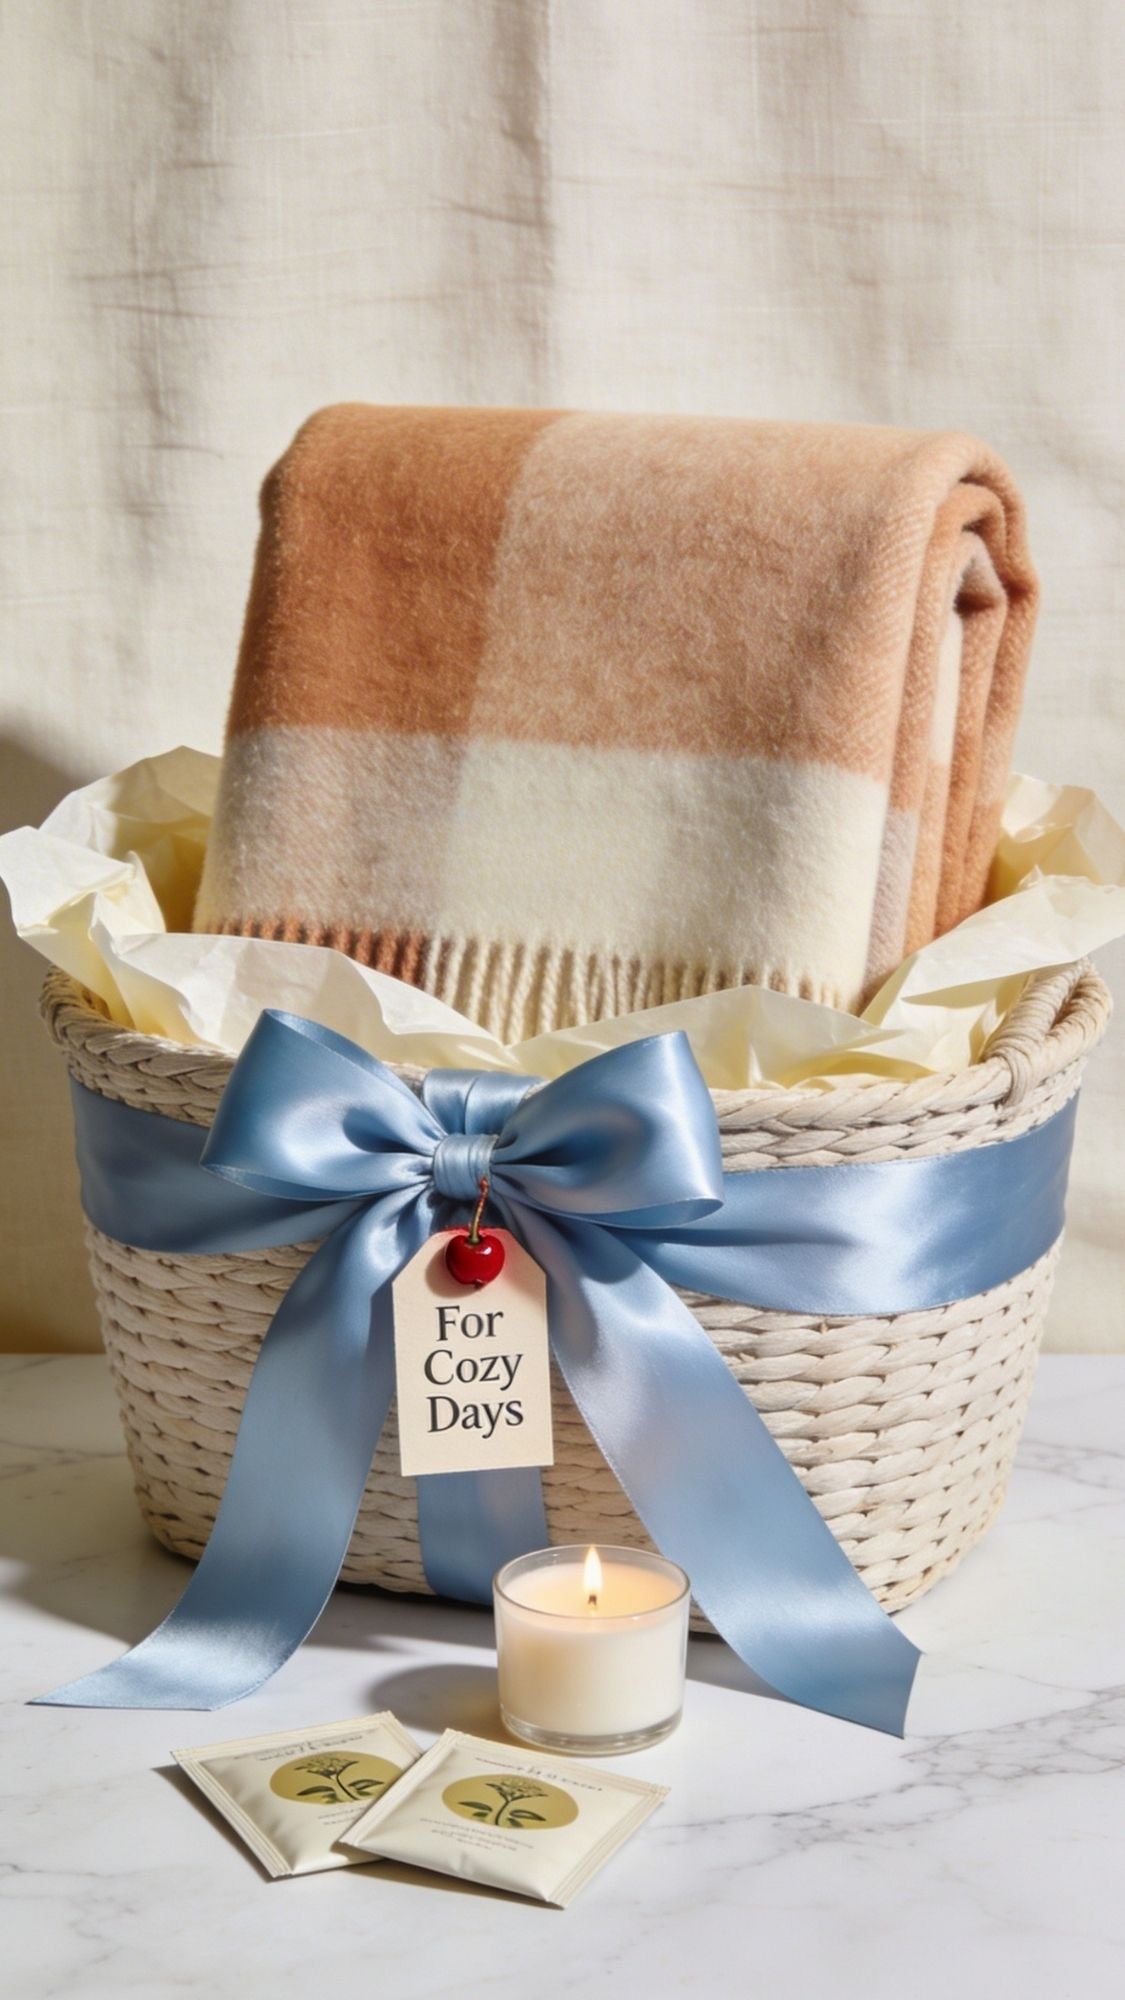
16) No-Sew Fleece Throw Basket (Cozy Gift That Looks Store-Bought)
This one feels like a warm hug in gift form, and it takes almost zero crafting skills, which sometimes is the real luxury. You basically build a cozy “pause and breathe” moment for her, and it looks like something she’d grab from a boutique display. Plus, moms actually use throws. They keep them on the couch, in the car, in a chair “just in case,” because mom logic stays undefeated. Want a gift that looks high effort but won’t eat your whole weekend? This is it.
Why This Works
- You get a big visual impact fast, especially when you use a matching basket and ribbon.
- You can personalize it with a tag and one small add-on, like tea or a candle.
- It works for every style, modern, farmhouse, boho, glam, just swap the colors and texture.
What You Need
- Soft fleece throw or lightweight knit blanket
- Basket (neutral, woven, or a clean fabric bin)
- Wide satin ribbon or soft linen ribbon
- Tissue paper or a linen tea towel for lining (optional but makes it look premium)
- Gift tag or small card
- Optional add-ons: tea sachets, a small candle, hand cream, a bookmark
How To Assemble It
- Steam or tumble the throw briefly if it looks wrinkled. Wrinkles make it feel rushed.
- Line the basket with tissue or a folded tea towel so the inside looks finished.
- Fold the throw into a neat rectangle, then place it slightly upright so it looks full and gift-y.
- Add one or two small add-ons in front, not buried, so they show.
- Wrap ribbon around the basket or around the folded throw, then tie a clean bow.
- Add a tag with a short note, like “For quiet mornings” or “For couch naps.”
Pro Tips That Make It Look Boutique
- Stick to one color story. Creamy neutrals with an icy blue ribbon looks fresh, and one tiny cherry accent on the tag feels trendy.
- Choose a throw with texture, like a subtle waffle knit or brushed fleece. Texture photographs like luxury.
- Keep add-ons minimal. Two small items look curated, five items look like you cleaned out a drawer.
- If you use a candle or lotion, match the label style. Coordinated packaging makes the whole basket look expensive.
Common Problems And Quick Fixes
- If it looks flat, fold the blanket less tightly and prop it slightly taller in the basket.
- If the bow looks sad, use wider ribbon and fluff the loops with your fingers.
- If items slide around, tuck a little tissue behind them to hold them in place.
- If the basket looks messy, you need a liner. A simple tea towel instantly fixes it.
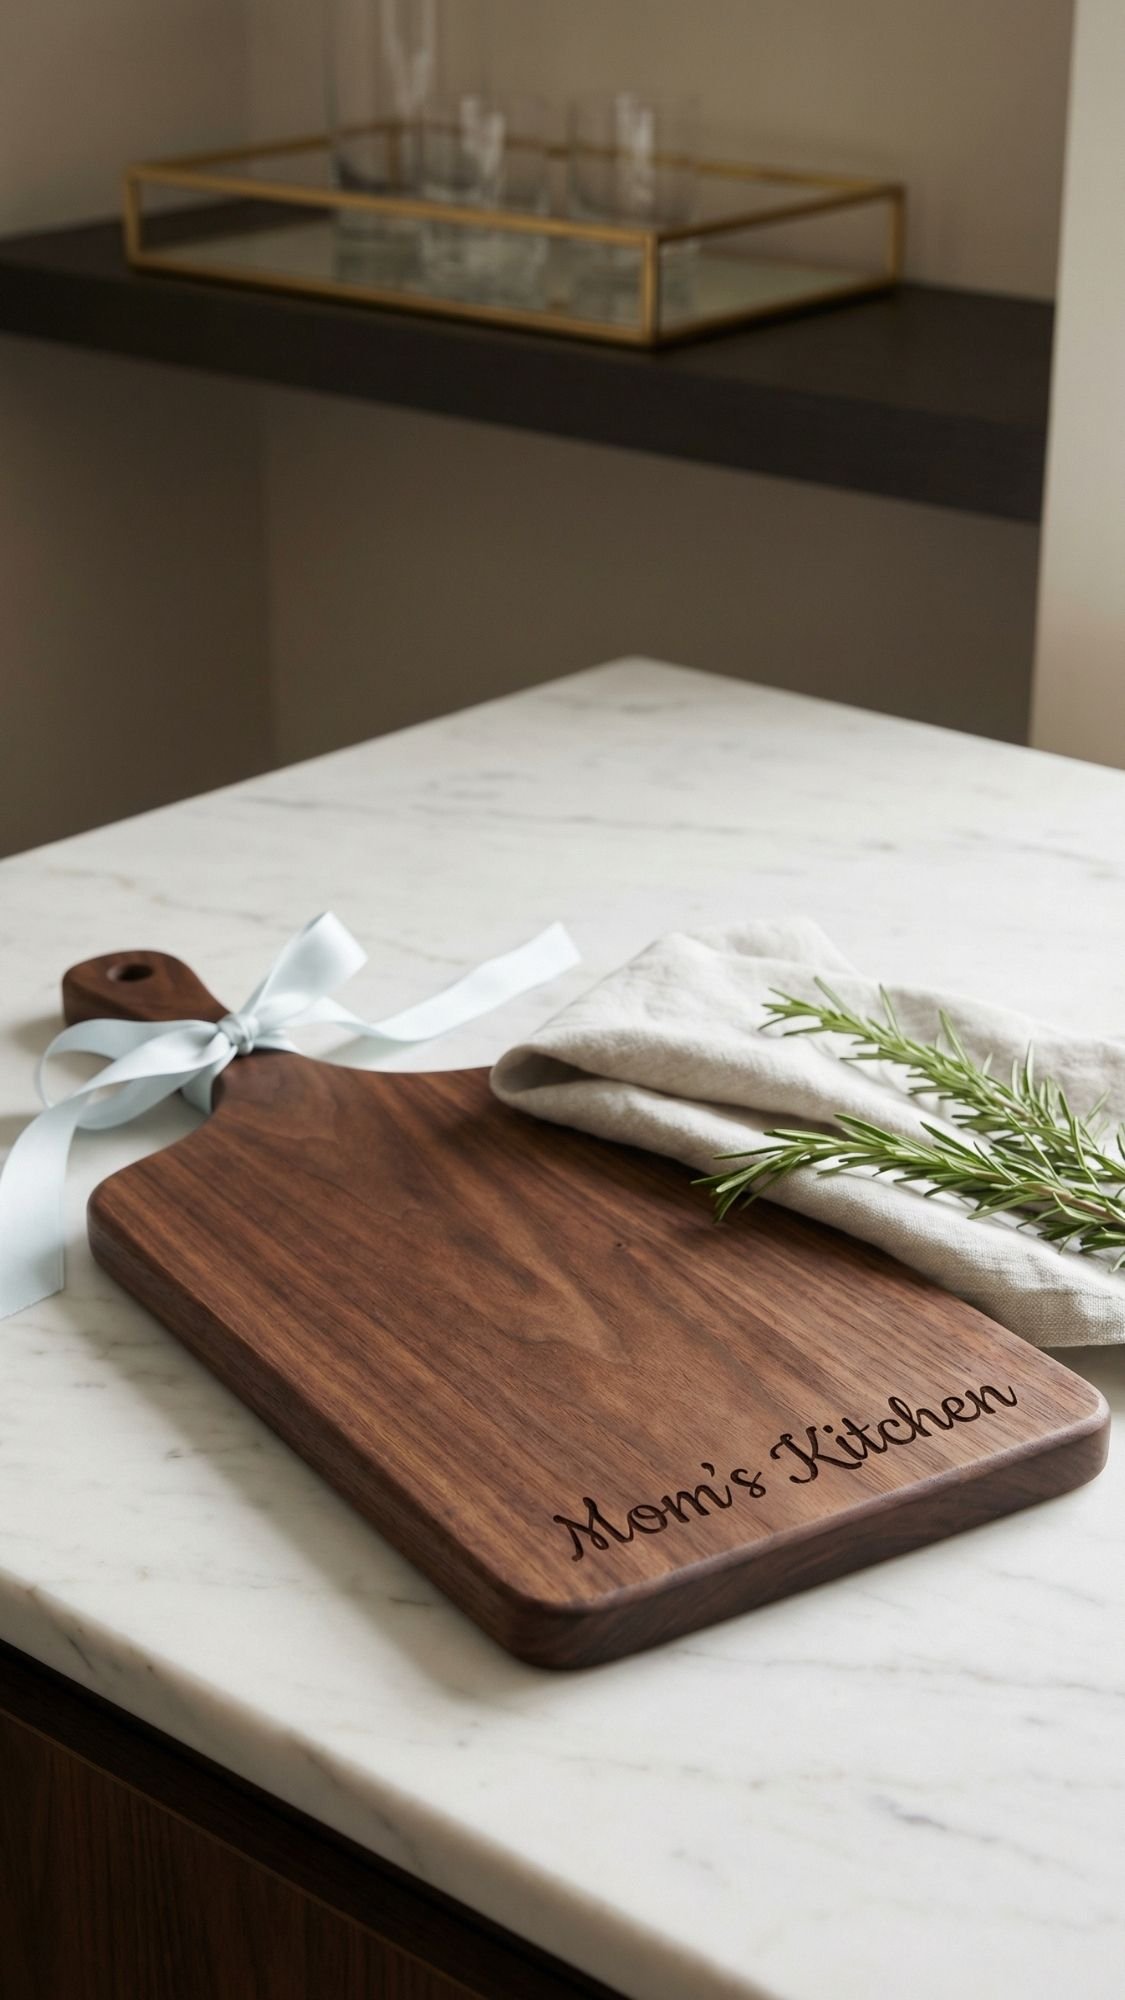
17) Custom Cutting Board (The One That Turns Into A Family Thing)
This gift feels classic for a reason. A personalized cutting board becomes the board she reaches for when she cooks, when she hosts, and when she does that thing moms do where they feed everyone before they feed themselves. If you choose good wood and finish it correctly, it lasts for years. And yes, I know, it sounds “simple,” but the finishing is where most people mess it up. You want it smooth, sealed, and food-safe, not dry and scratchy like a sad craft board.
Why This Works
- It’s useful, and it holds sentimental value when you engrave a name or date.
- It looks high-end when you finish it properly.
- It pairs beautifully with the recipe jar, tea towel, or apron from earlier.
What You Need
- Unfinished wood cutting board (or a plain board that needs refreshing)
- Sandpaper or sanding sponge (180 and 220 grit)
- Clean rag or tack cloth
- Wood burning tool, stencil, or professional engraving option
- Food-safe mineral oil
- Beeswax board butter (optional, but it’s the glow-up)
- Optional: ribbon and a small care card
How To Make It
- Sand the board lightly with 180 grit, then finish with 220 grit. Focus on edges and corners so it feels smooth in the hands.
- Wipe all dust off completely. Dust + oil = gritty finish.
- Add personalization. Burn a name, family title, or date in one corner, or get it engraved if you want a super crisp look.
- Oil the board generously with mineral oil. Let it soak for at least a few hours, then wipe off excess.
- Repeat the oil soak once more if the wood looks thirsty. Some boards drink oil like they’ve been waiting for it.
- Buff on board butter to seal and soften the finish. Wipe off extra until it feels smooth, not greasy.
Pro Tips That Make It Look Expensive
- Sand the edges until they feel like satin. Smooth edges make the board feel high-end instantly.
- Keep the personalization placement subtle. Bottom corner or handle area looks intentional.
- If you want a modern look, choose a board with clean lines and minimal grain pattern.
- Add a tiny care card. It feels professional and keeps the board from getting ruined.
Care Instructions You Can Include With The Gift
- Hand wash only. No soaking.
- Dry right away.
- Re-oil monthly or whenever it looks dry.
- Avoid the dishwasher. Not even once.
Common Problems And Quick Fixes
- If it feels rough after oiling, you didn’t sand enough. Let it dry, sand lightly again, then re-oil.
- If it looks blotchy, oil didn’t absorb evenly. Apply a second coat and buff thoroughly.
- If it feels sticky, you used too much board butter. Buff more with a clean cloth.
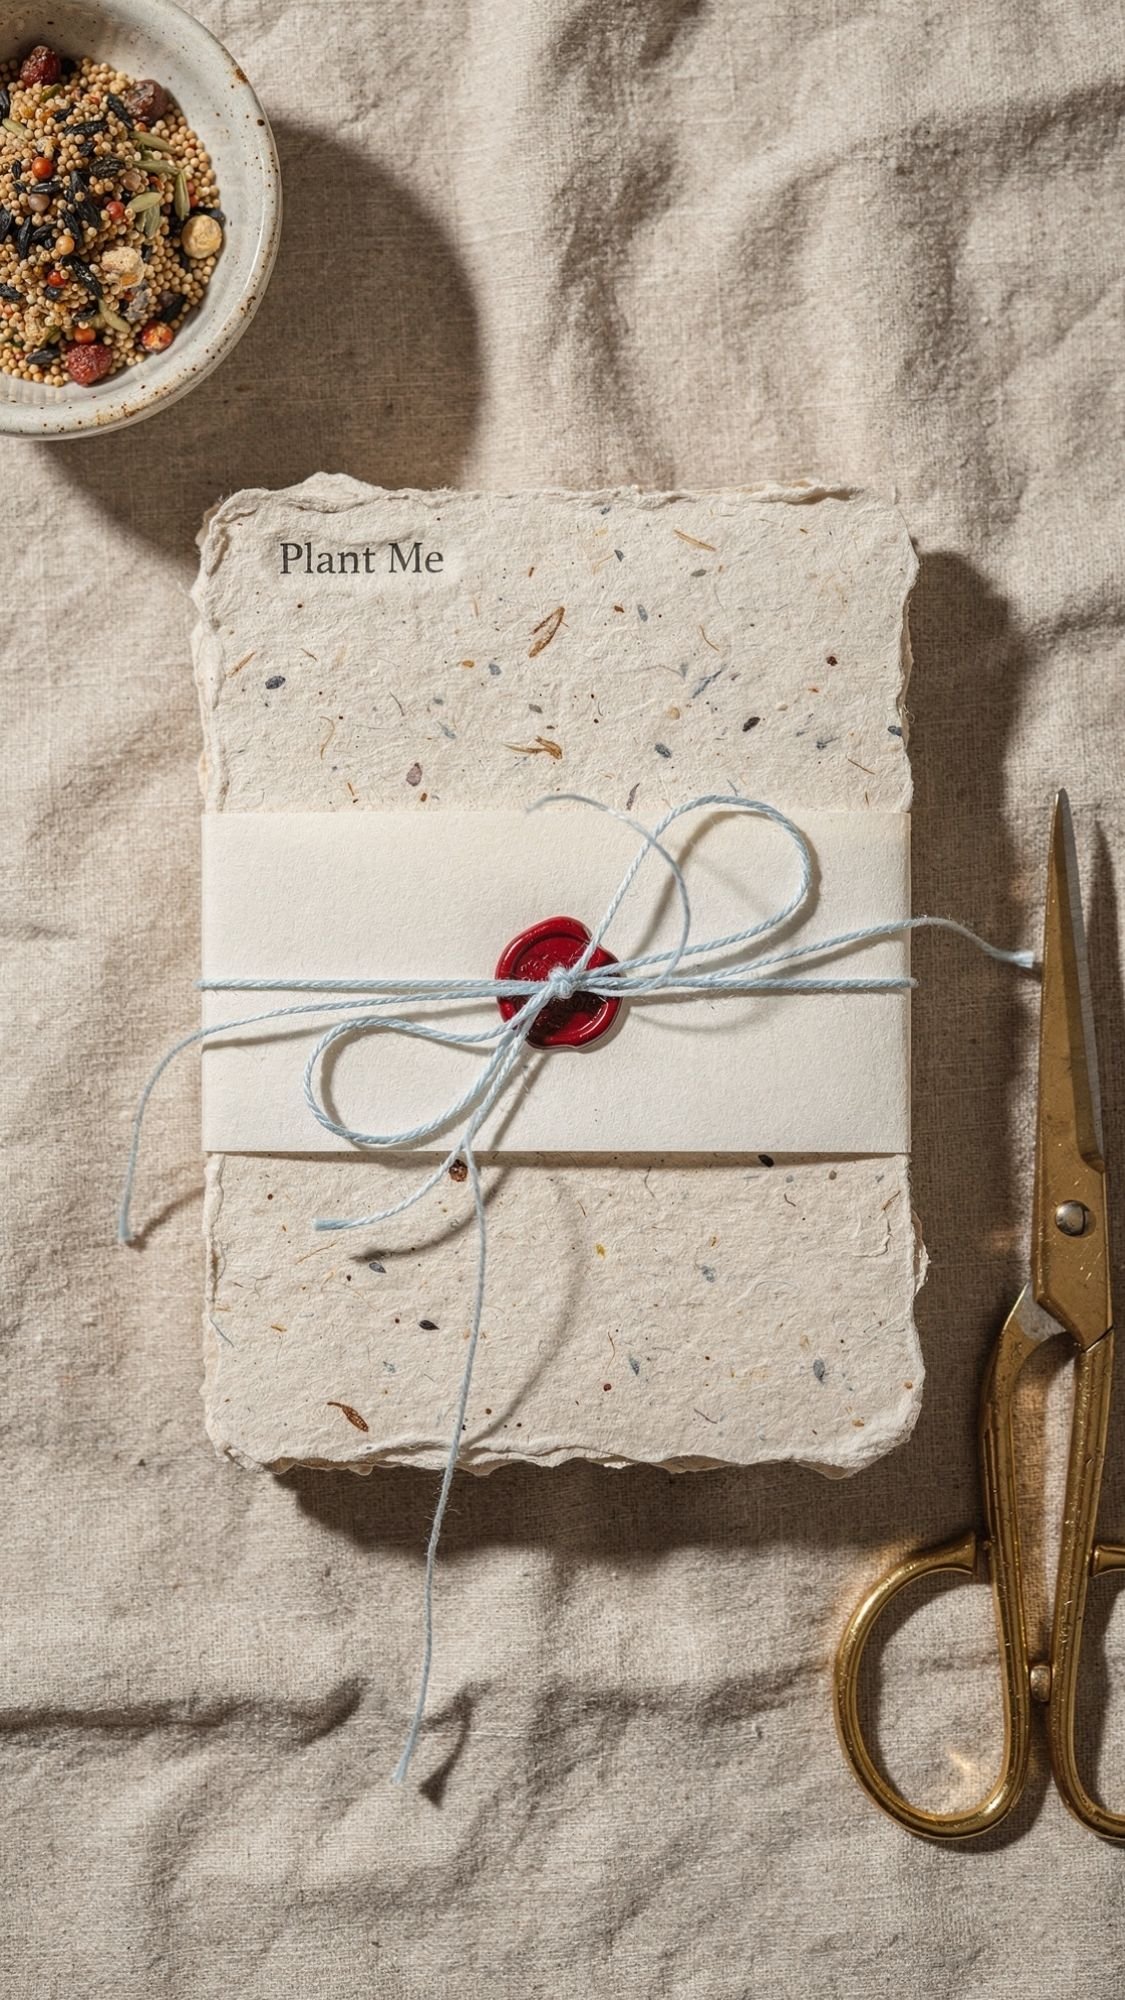
18) Seed Paper Card (A Card That Turns Into Flowers)
This is one of those gifts that feels light and sweet, but it still feels thoughtful because it turns into something real later. A Mother’s Day card that becomes flowers is honestly a flex. And it’s perfect if you want to tuck something meaningful into a bigger gift basket without adding clutter. Also, it makes you look wildly put-together, even if you made it while watching TV. 🙂
Why This Works
- It’s a card plus a future surprise.
- It’s eco-friendly and trendy without being preachy.
- It pairs well with herb pots, candles, and any “garden mom” gift vibe.
What You Need
- Seed paper sheets, or DIY paper pulp if you want to make your own
- Seeds that do well in containers, like wildflowers, basil, or herbs
- Cookie cutter or scissors
- Towels for drying
- Rolling pin or flat surface
- Stamp or pen for the message
- Optional: twine and a mini instruction tag
How To Make It Using Store-Bought Seed Paper
- Cut your card shape. Hearts, circles, or simple rectangles all work.
- Stamp or write your message lightly. Don’t press so hard you tear the paper.
- Add a small instruction tag, like “Plant me under a thin layer of soil and keep me moist.”
How To Make It If You DIY The Paper
- Tear scrap paper into small pieces and soak in water for a few hours.
- Blend into pulp, then squeeze out some water so it’s wet but not dripping.
- Mix seeds in gently. Don’t blend seeds, you’ll destroy them.
- Spread pulp onto a towel, flatten it evenly, and press out extra water.
- Let it dry fully in a warm airy spot. Humidity can slow this down a lot.
- Cut your shapes, then write your message and instructions.
Pro Tips That Make It Work Better
- Use small seeds. Big seeds can fall out or make the paper crumble.
- Keep the paper thin. Thick seed paper can mold if it stays damp too long.
- Include the planting directions. Most people don’t automatically know what to do with seed paper.
- If you want it to look luxe, add a simple belly band in Cloud Dancer cream paper and tie with icy blue ribbon.
Common Problems And Quick Fixes
- If the paper tears easily, it’s too thin or you pressed too hard while stamping. Support it on cardstock when writing.
- If it molds while drying, it’s too thick or drying in high humidity. Make thinner sheets and dry with airflow.
- If seeds fall out, you used too many or didn’t press the pulp enough. Mix gently and press firmly before drying.
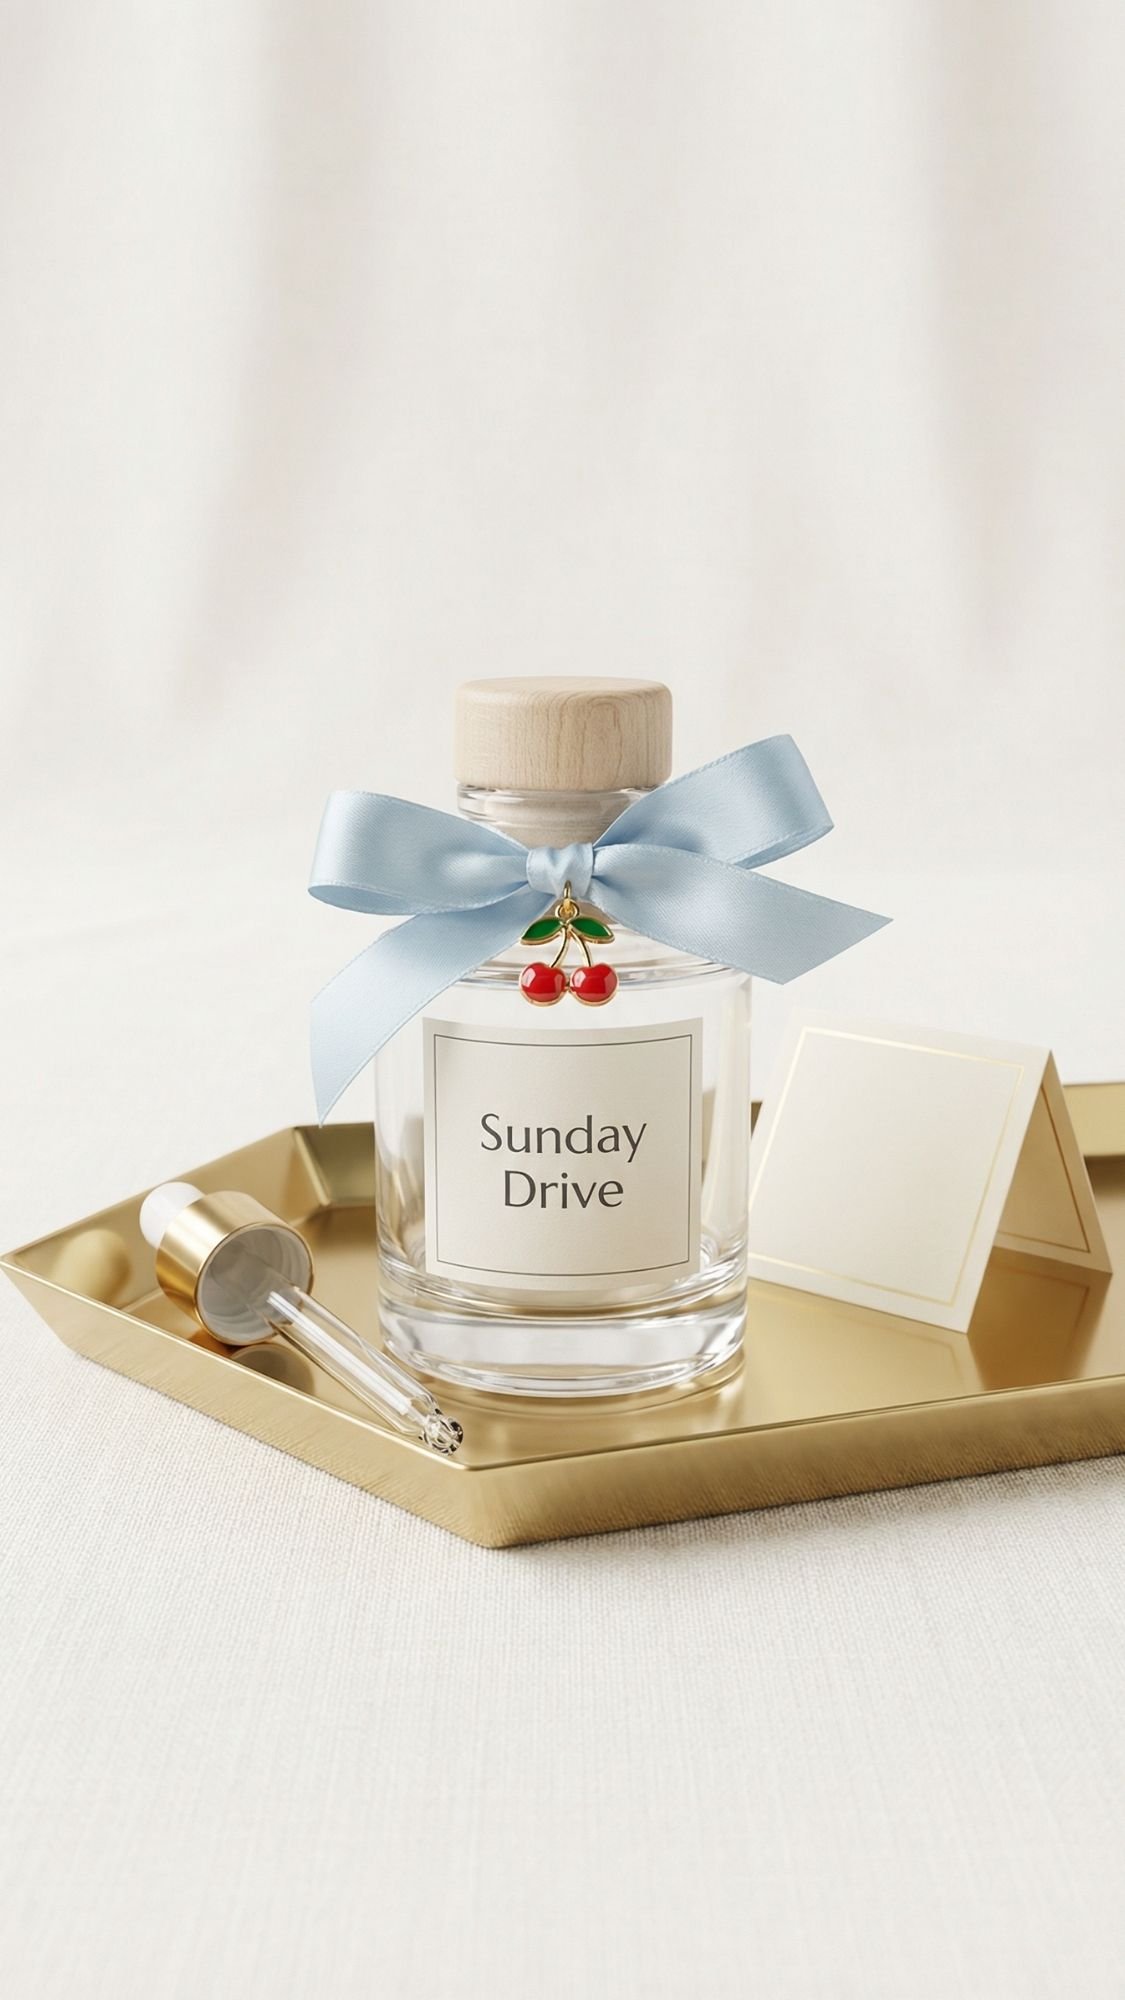
19) Car Diffuser (Tiny Gift, Used Every Day)
This is the kind of gift that seems small until you realize she’ll use it constantly. A cute car diffuser makes her daily drive smell good, and it feels like a “thinking of you” moment every time she gets in the car. Also, it looks super polished when you label it nicely and package it like a mini boutique product. Ever sat in a car that smells like stale coffee and regrets? Yeah, we’re not gifting that.
Why This Works
- It’s practical and gets used daily.
- It’s easy to personalize with a scent name and cute label.
- It’s perfect as an add-on in a gift set, especially with a candle or bath salts.
What You Need
- Small hanging diffuser bottle (wood cap style works great)
- Diffuser base or carrier oil made for car diffusers
- Fragrance oil suitable for diffuser use
- Tiny funnel or dropper
- Labels or printable sticker paper
- Ribbon or cord for hanging
- Optional: small charm, cherry-coded bow, or minimalist tag
How To Make It
- Mix your diffuser base and fragrance oil according to your base instructions. Different bases need different ratios, so follow the label for accuracy.
- Funnel the mixture into the bottle without overfilling. Leave a little space at the top.
- Screw on the cap tightly. Wipe the bottle clean so it looks crisp.
- Add a label with the scent name. Keep it minimal and centered.
- Tie on the hanging cord and any charm you want.
- Add a small care note so she uses it safely.
Pro Tips That Make It Look Boutique
- Name the scent like a vibe, not a chemical list. “Clean Linen,” “Morning Coffee,” “Fresh Garden,” “Sunday Drive.”
- Keep the label simple. One clean font, aligned center, no clutter.
- Stick to a soft neutral palette, then add a tiny icy blue ribbon or cherry accent for trend styling.
- Package it in a small pouch or box so it feels intentional, not random.
Safety Notes (Important, But Quick)
- Make sure the cap stays tight. Spills can stain interior surfaces.
- Tell her to tip the bottle briefly to wet the wood cap, then keep it upright.
- Avoid placing it where it swings into surfaces. Keep it stable.
Common Problems And Quick Fixes
- If scent feels weak, increase fragrance slightly within safe guidelines for your base.
- If it leaks, you overfilled or didn’t tighten fully. Empty a little and re-tighten.
- If label peels, wipe bottle with rubbing alcohol before applying.
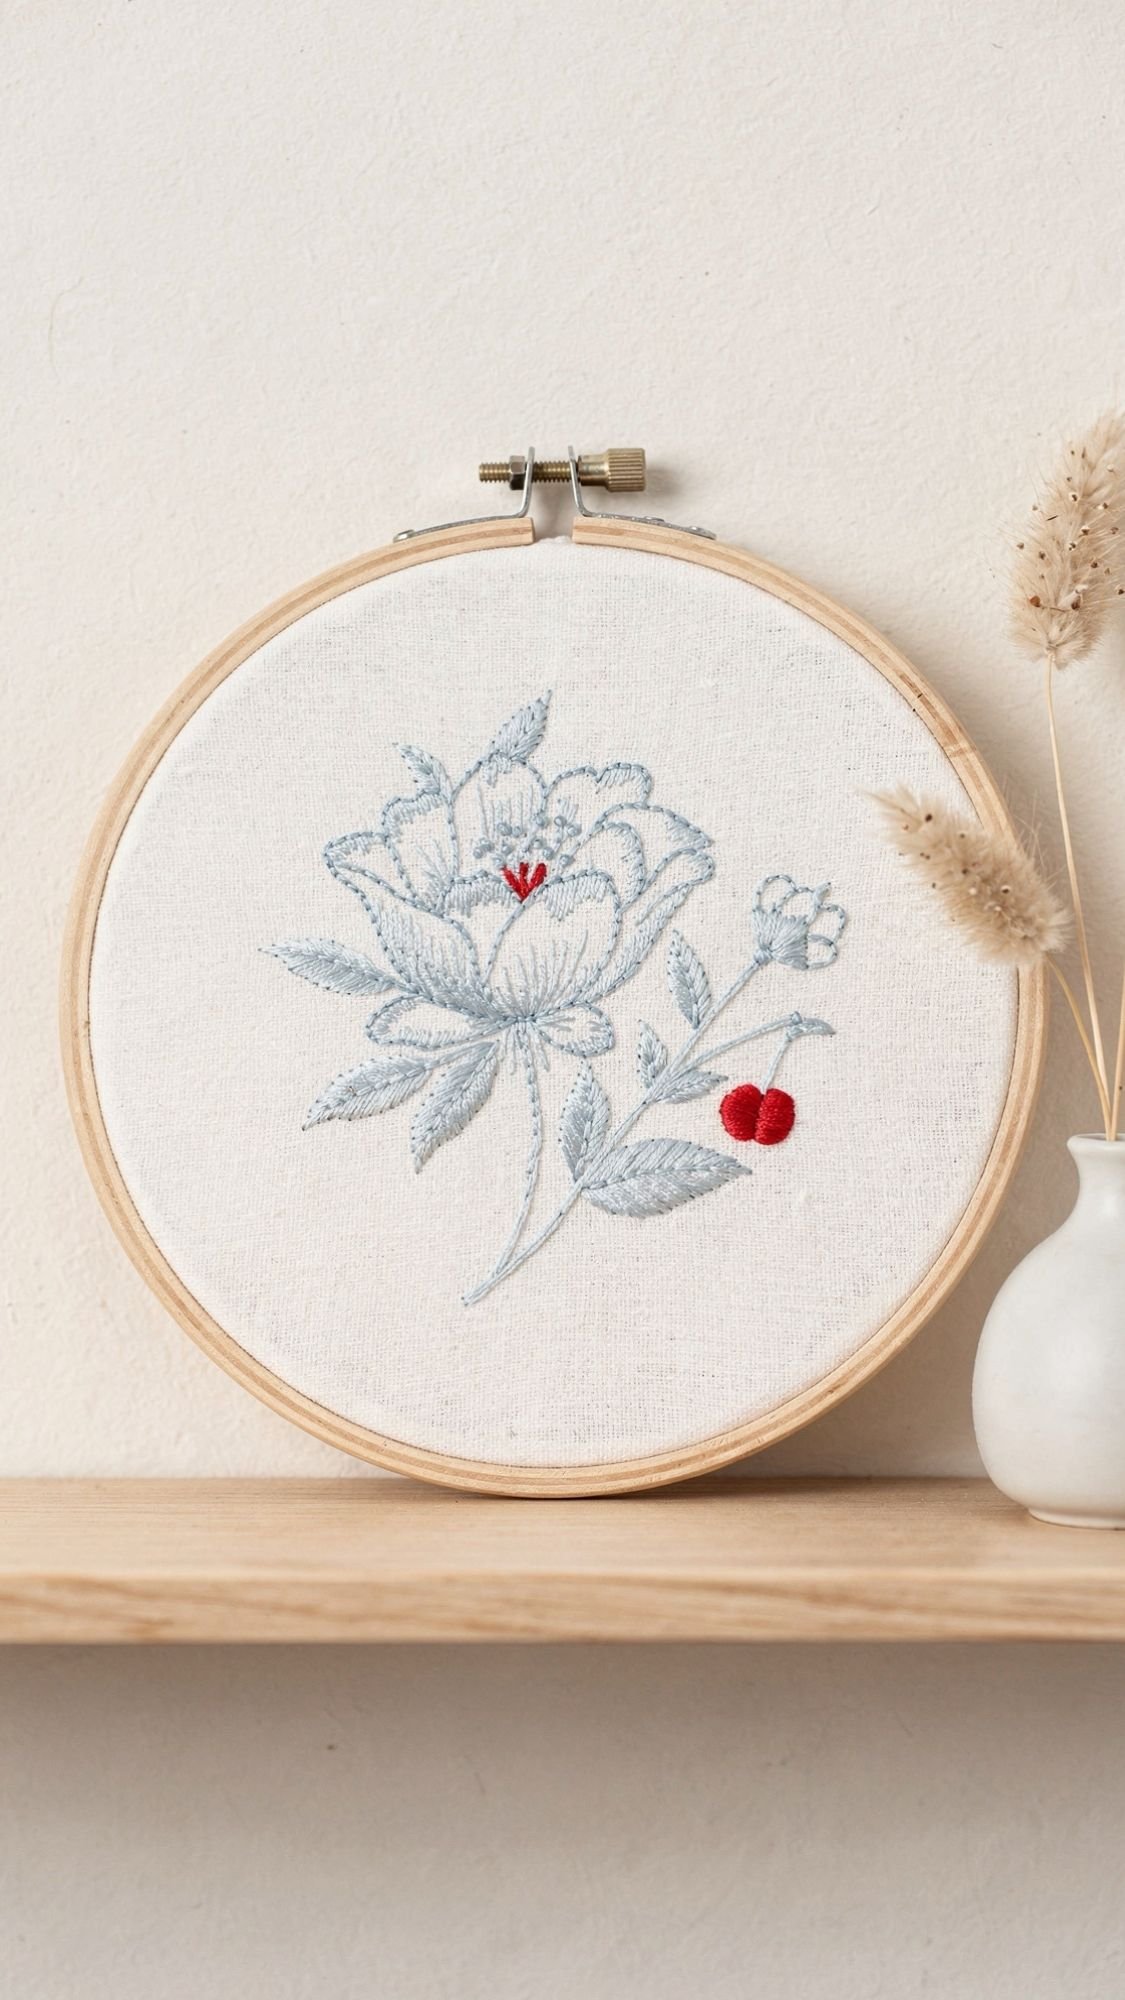
20) Embroidery Hoop Florals (The “I Can’t Believe You Made That” Gift)
This one always gets that wide-eyed reaction because embroidery looks fancy, even when the design is simple. And because it’s slow, intentional work, it feels extra meaningful as a Mother’s Day gift. You can keep it minimalist, or go soft and romantic, either way it looks like art when you frame it in a hoop. Ever wanted a project that feels calming instead of chaotic? This is your sign.
Why This Works
- It looks high-effort, but you can choose an easy pattern.
- It becomes decor she can hang up, not something that gets stuffed in a drawer.
- You can personalize the colors to match her home.
What You Need
- Embroidery hoop (6 to 8 inches is a great beginner size)
- Cotton or linen fabric (light neutral looks luxe)
- Embroidery floss
- Needle
- Scissors
- Water-soluble fabric marker or transfer paper
- Optional: felt backing for a clean finish, and ribbon for hanging
How To Make It
- Pull your fabric tight in the hoop. If it’s loose, your stitches will look sloppy.
- Transfer your design. Keep it simple, one floral stem, small bouquet, or her initial with a tiny flower.
- Thread your needle and start with basic stitches, back stitch for outlines, satin stitch for small fills, French knots if you want tiny dots.
- Keep your stitch length consistent. Short and even looks cleaner.
- When you finish, tie off securely and trim threads neatly.
- Add a felt backing to hide the messy back. It makes the whole thing look professional.
- Add a ribbon loop for hanging if you want it wall-ready.
Pro Tips That Make It Look Clean And Modern
- Pick one main color and one accent. Icy blue florals with a tiny cherry red detail looks fresh and trendy.
- Keep negative space. Lots of blank fabric makes it feel airy and expensive.
- Don’t overcomplicate the pattern. Simple stitches done neatly beat complicated stitches done messy.
- Tighten the hoop again as you stitch. Fabric relaxes over time.
Common Problems And Quick Fixes
- If stitches look uneven, you’re pulling too tight or changing stitch length. Slow down and keep stitch sizes consistent.
- If the fabric puckers, tension is off. Loosen slightly and re-tighten the fabric.
- If the back is chaotic, add a backing. No one needs to see the thread crime scene.
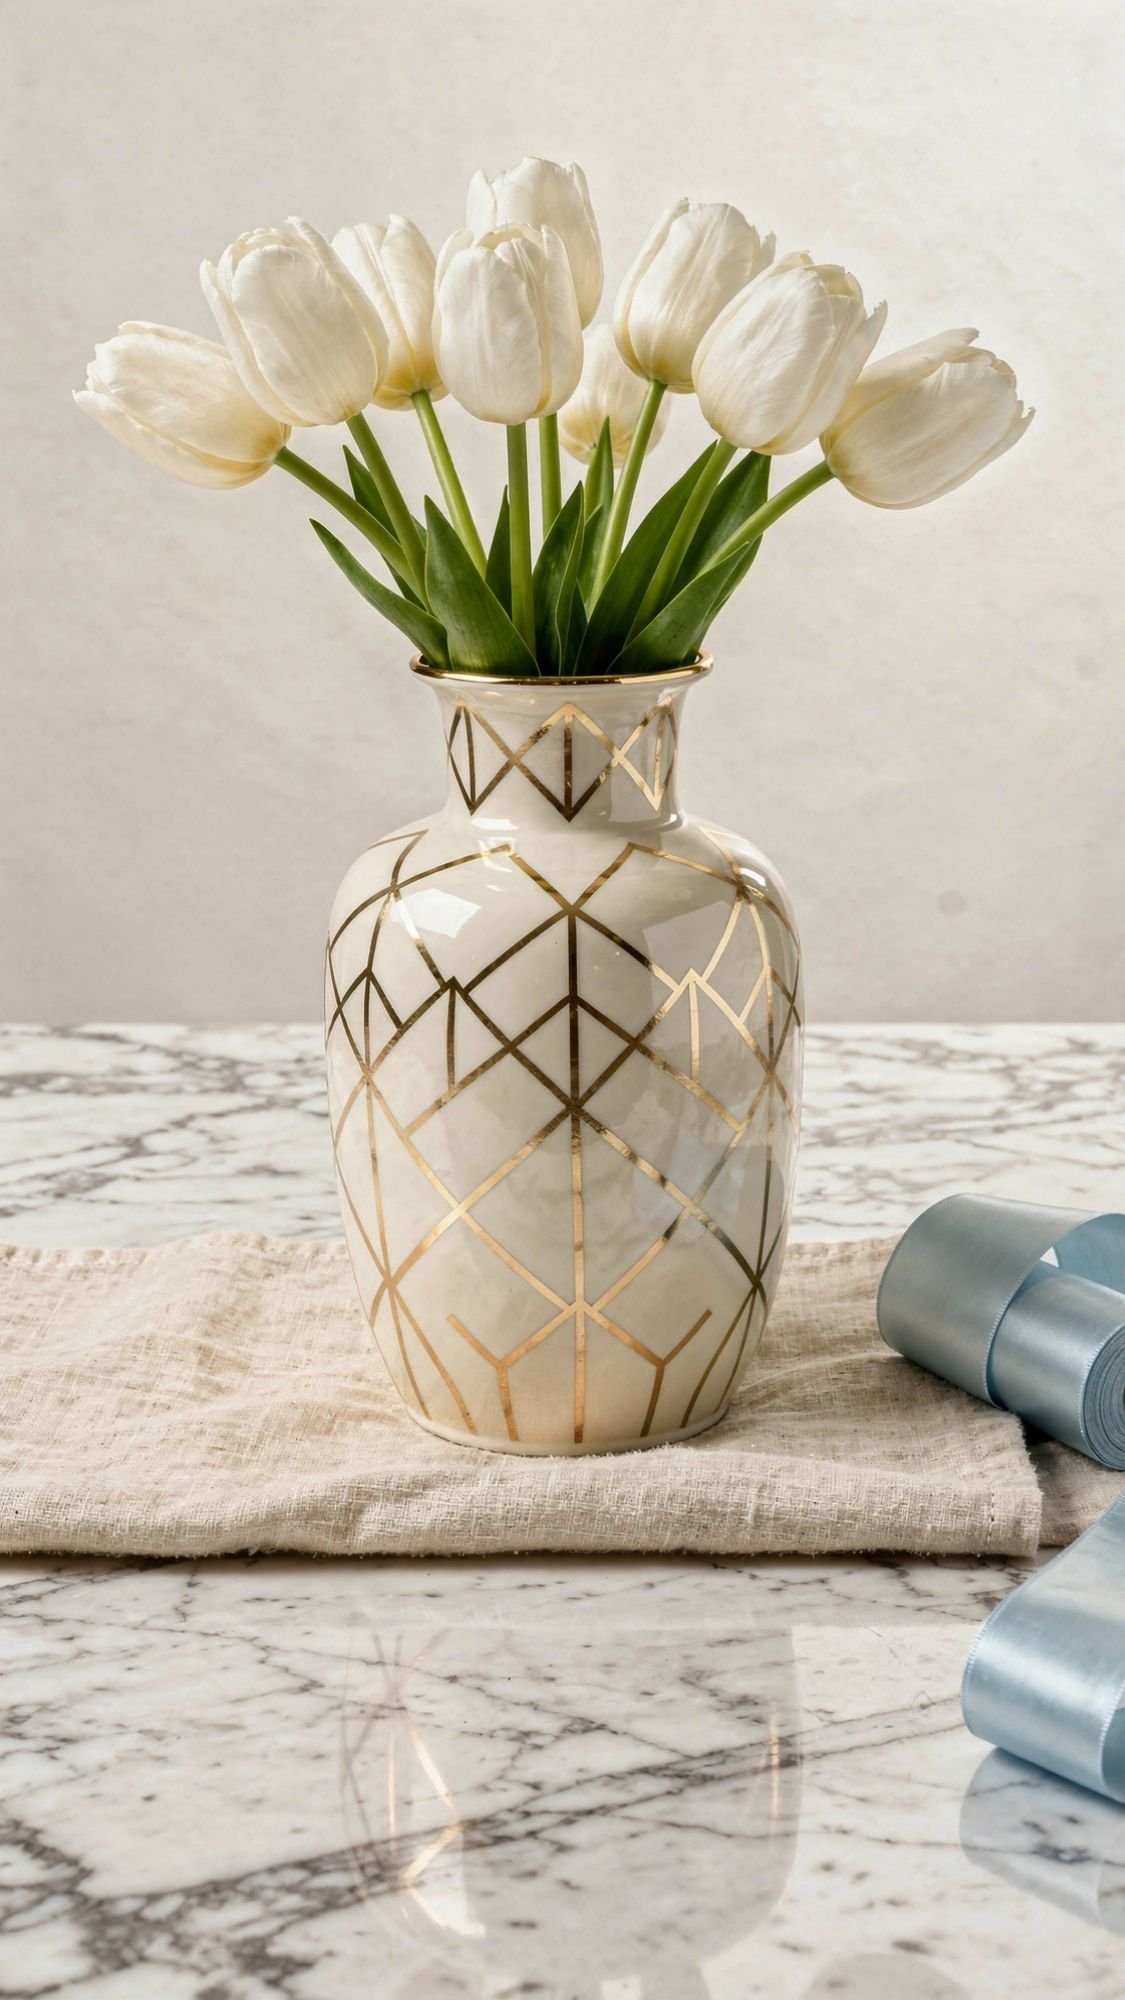
21) Painted Flower Vase (Thrifted Glass, High-End Finish)
This is the easiest way to make something look designer without paying designer prices. You thrift a plain vase, give it a clean modern paint job, and suddenly it looks like a boutique find. Also, moms love vases because flowers magically appear in their homes on Mother’s Day, funny how that works, right?
Why This Works
- Thrifted glass keeps it budget-friendly, paint makes it look brand new.
- You can match her home style, modern, boho, glam, whatever.
- It looks amazing styled with one simple bouquet.
What You Need
- Glass vase (thrifted or plain)
- Rubbing alcohol and lint-free cloth
- Painter’s tape (for stripes or shapes)
- Glass paint or spray paint made for glass
- Optional: primer made for slick surfaces
- Clear sealer if your paint requires it
- Cardboard box or spray area protection
- Optional: fine grit sandpaper for light scuffing
How To Make It
- Wash the vase, then wipe it with rubbing alcohol. Oils from hands can mess with paint adhesion.
- If the glass feels extra slick, lightly scuff it with fine sandpaper, then wipe again.
- Tape off your pattern if you want clean stripes or a Neo Deco geometric look.
- Paint in light coats. Thin coats look smoother and chip less.
- Let each coat dry before adding the next. Rushing is how you get drips.
- Remove tape carefully once paint feels set but not fully rock-hard, it helps prevent peeling edges.
- Let the vase cure fully before using it. Dry to touch doesn’t mean durable.
Pro Tips That Make It Look Boutique
- Use one neutral base color, then add a tiny metallic or icy blue accent stripe.
- Keep patterns simple. One bold stripe or arch motif looks modern.
- If you want a glam Neo Deco vibe, add a thin gold line with a metallic paint pen after the paint cures, then seal lightly if needed.
- Style it with one type of flower, like tulips or ranunculus, for a clean high-end look.
Common Problems And Quick Fixes
- If paint scratches easily, it hasn’t cured or you used paint not meant for glass. Let it cure longer or switch to glass-specific paint.
- If tape pulls paint up, the paint layer was too thick or too dry. Use thinner coats and remove tape sooner next time.
- If you see drips, you sprayed too close. Sand lightly after curing and recoat thinly.
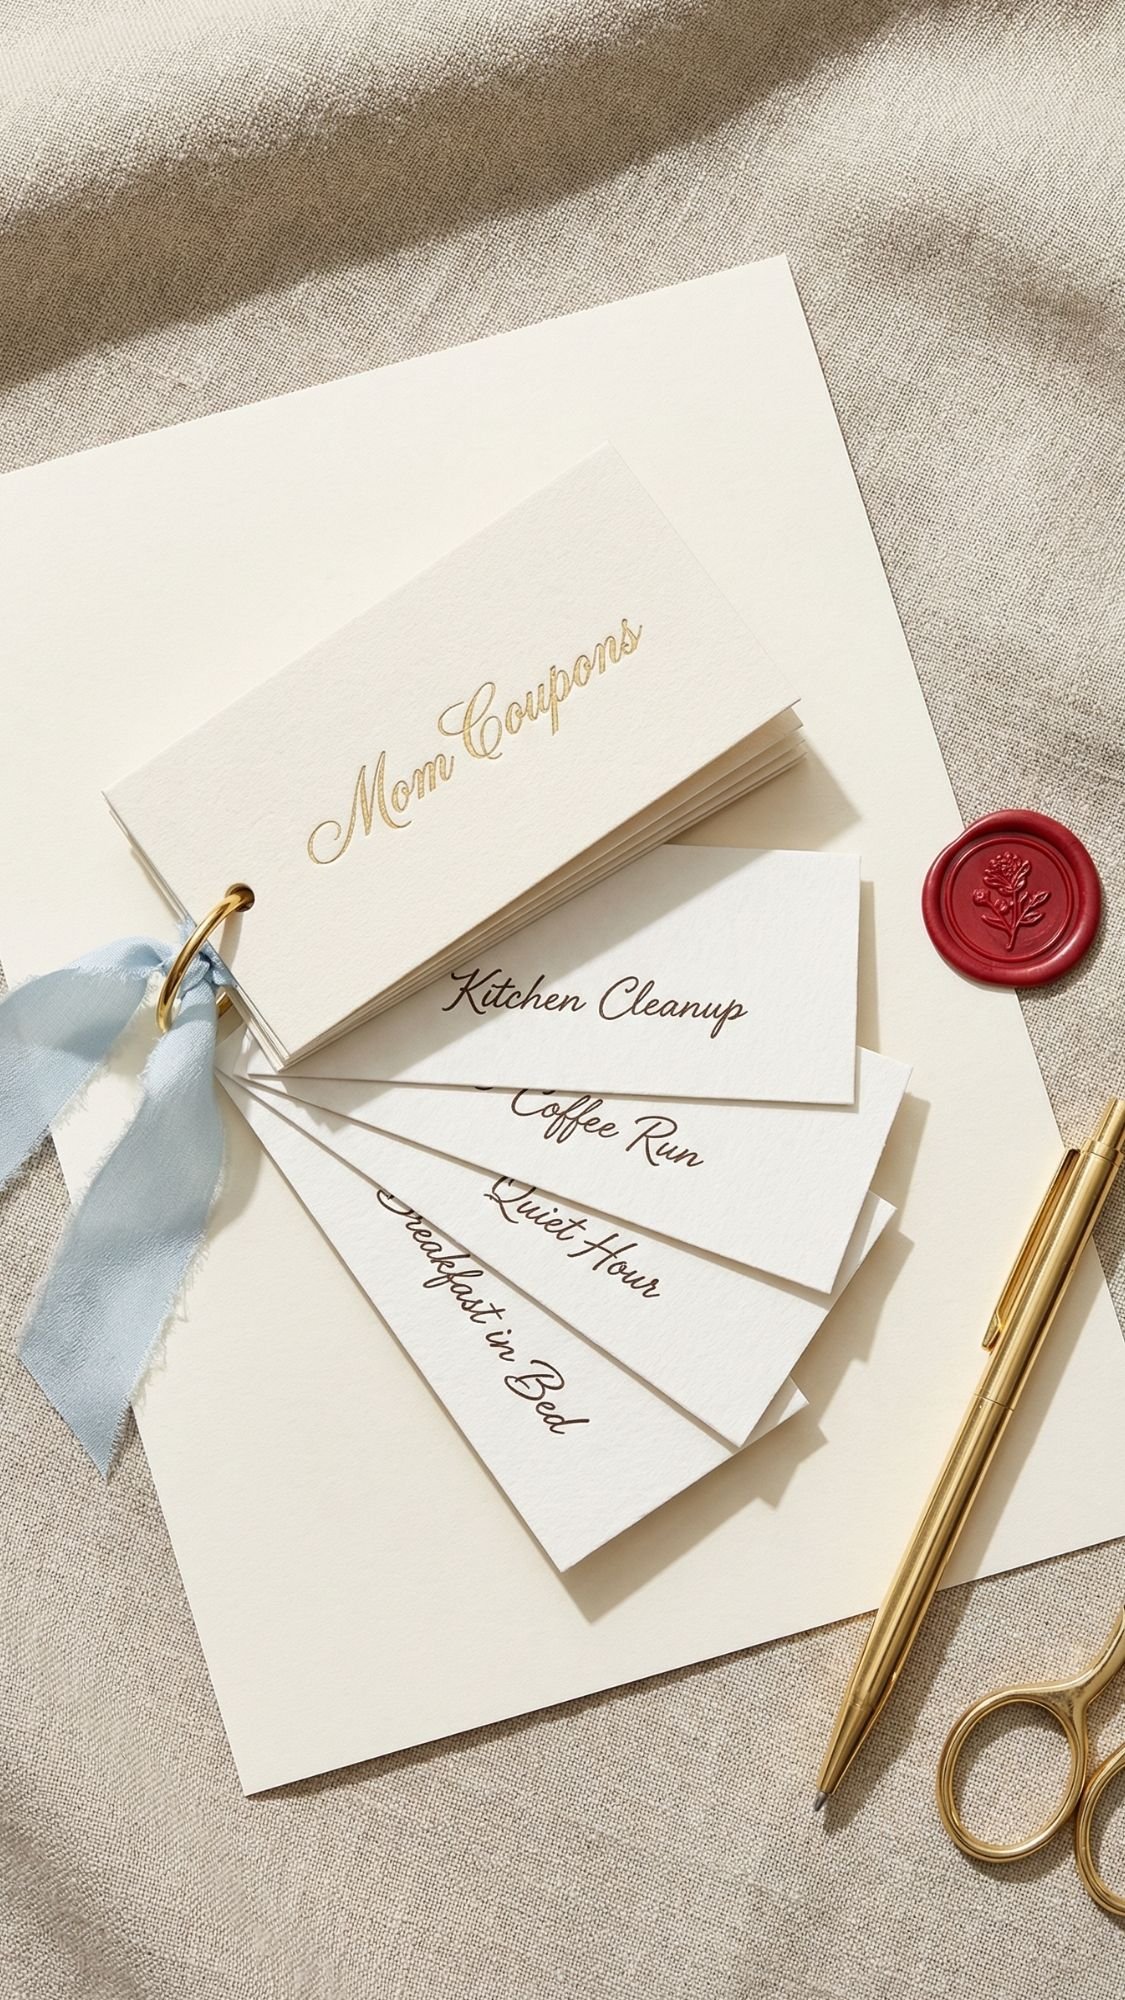
22) Coupon Book She’ll Actually Redeem (Not The Cheesy Kind)
A coupon book can either be adorable and useful, or it can be that thing that gets shoved in a drawer because it feels like a joke. We’re doing the first one. The trick is to make coupons that match her real life and to add a little structure so they don’t turn into “someday” promises. Ever given someone a coupon for “one free hug” and felt your soul leave your body? Same. We’re not doing that.
Why This Works
- It’s personal, but it doesn’t require fancy materials.
- It gives her time and help, which is honestly the best gift.
- It’s perfect for kids, teens, or adult kids because you can scale the coupons.
What You Need
- Cardstock or thick paper
- Pen or printer
- Scissors or paper trimmer
- Stapler, binder ring, or small ribbon
- Optional: envelope or small gift box
How To Make It
- Decide how many coupons you want. 10 to 20 is plenty.
- Cut the coupons to the same size. Consistent sizing makes it look polished.
- Write the coupon title big, then details smaller underneath.
- Add a “redeem by” or “valid for” note on the bottom so it feels real.
- Bind them with a ring or staple them like a little booklet.
- Add a cover card so it feels like a finished gift.
Coupon Ideas That Moms Actually Want
- “One kitchen cleanup, you do zero dishes.”
- “Coffee run, your order, no questions.”
- “Phone-free walk together.”
- “I’ll handle the laundry start to finish.”
- “Movie night pick, and I won’t complain.”
- “Errand buddy day, we knock it all out.”
- “Breakfast in bed, and I’ll clean the tray too.”
- “Two hours of quiet time, I manage everyone else.”
Pro Tips That Keep It From Feeling Fake
- Make coupons specific. “Help around the house” is vague, “vacuum and mop the kitchen” is real.
- Put realistic limits. One coupon per week keeps it from being forgotten.
- Add one “big” coupon and several small ones. It balances effort and impact.
- If you’re gifting from kids, add a “snuggle and story” coupon. That one’s actually cute and not cringe.
Common Problems And Quick Fixes
- If it feels childish, upgrade the design. Use one clean font or tidy handwriting, and keep it minimal.
- If coupons never get redeemed, add dates. “Redeem any Sunday in May” makes it happen.
- If it looks messy, your cuts are uneven. Trim them as a stack for cleaner edges.
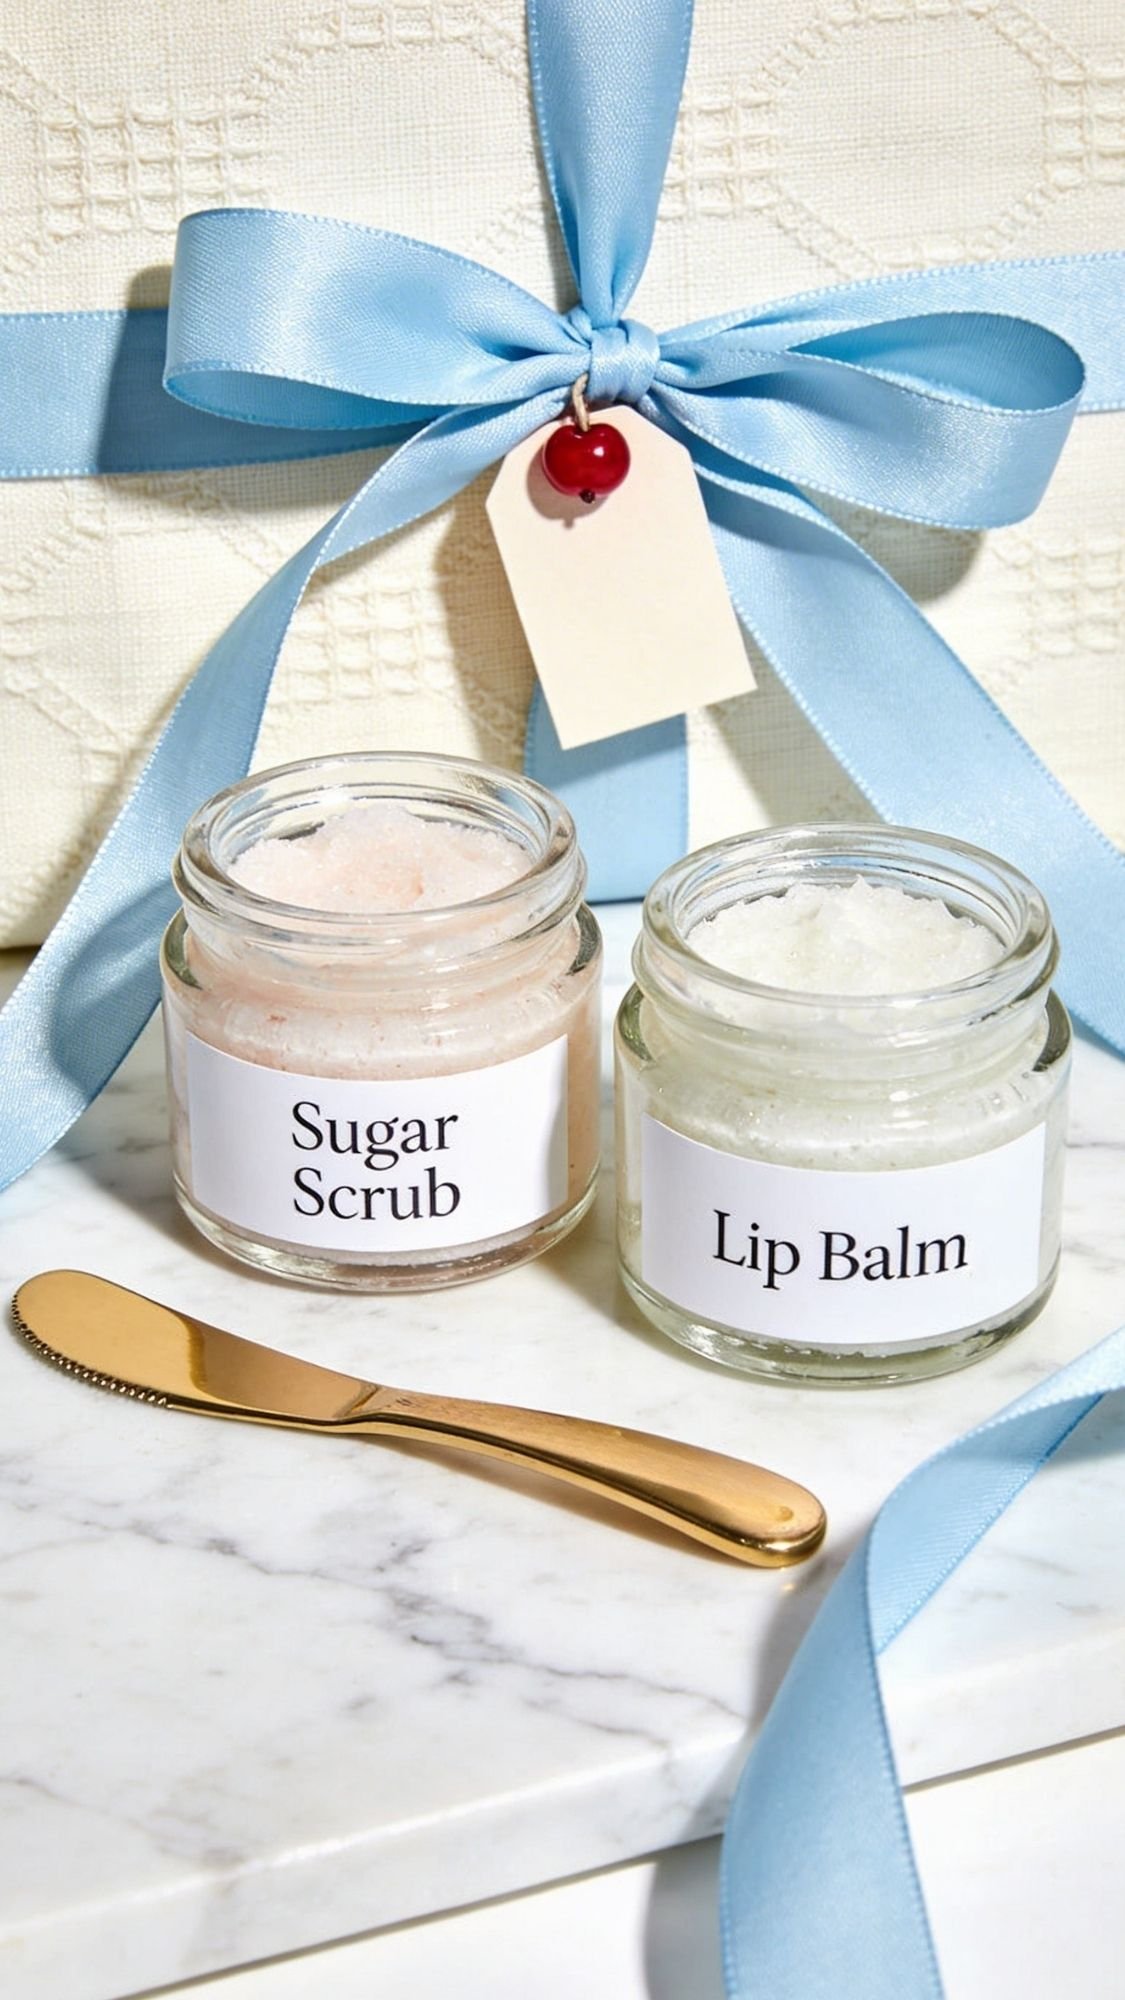
23) Sugar Scrub + Lip Balm Duo (Cute, Useful, And Easy To Make In A Batch)
This is the “small jar glow-up” gift that always looks adorable on a tray. Plus, it’s actually useful, which makes it way more likely she’ll use it instead of politely admiring it and then… forgetting it exists. The trick is to keep it simple, label it clearly, and package it like a mini spa set. Ever seen a tiny matching duo and thought, okay this is fancy? That’s exactly what we’re doing.
Why This Works
- It looks high-end because it comes as a matching set.
- You can customize scents without overcomplicating it.
- It bundles perfectly with bath salts or a candle.
What You Need
- Two small jars with lids (matching is best)
- For scrub: sugar, oil, optional scent
- For balm: beeswax pellets, oil or butter, optional tint
- Small saucepan and heat-safe bowl for a double boiler
- Spoon or mini spatula
- Labels
- Optional: tiny scoop for the scrub, ribbon, and a simple care card
Sugar Scrub Recipe (Small Jar)
- 1/2 cup sugar (fine sugar feels smoother)
- 2 to 3 tablespoons oil (coconut, sweet almond, jojoba, or olive)
- Optional: a few drops of skin-safe fragrance or diluted essential oil
- Optional: tiny pinch of mica for a pretty glow
Mix until it looks like wet sand. Add oil slowly so you don’t make it soupy.
Lip Balm Recipe (2 to 3 Small Tins Or 1 Jar)
- 1 tablespoon beeswax pellets
- 1 tablespoon oil (sweet almond, jojoba, or coconut)
- 1 tablespoon butter (shea or cocoa butter works well)
- Optional: a tiny pinch of cosmetic mica or a tiny bit of lipstick shaving for tint
Melt, stir, pour quickly, and don’t overthink it.
How To Make It
- Make the scrub first. Mix sugar and oil slowly, then add scent lightly.
- Spoon into a jar and wipe the rim clean. Clean rims make it feel premium.
- For balm, melt beeswax, oil, and butter in a double boiler.
- Stir until smooth, then pour into tins or a jar right away.
- Let balm set completely before putting the lid on to avoid condensation.
- Label both jars with the name, scent, and a simple use note.
Pro Tips That Keep It Looking Luxe
- Keep scents gentle. Over-scented products feel cheap fast.
- Skip dried petals in scrub unless you know she’ll love it. They can feel scratchy or clog drains.
- Choose minimal labels and one color story. Creamy labels, icy blue accent, tiny cherry pop looks trendy and clean.
- Add a tiny instruction card: “Use scrub 1 to 2 times a week, balm anytime.”
Safety Notes (Quick, But Real)
- Label ingredients if she has sensitive skin.
- Keep essential oils conservative and skin-safe.
- This is skincare, so keep tools and jars clean. Don’t scoop with wet hands.
Common Problems And Quick Fixes
- If scrub separates, you used too much oil. Stir again and add more sugar if needed.
- If balm feels grainy, you overheated or cooled too slowly. Remelt gently and cool faster next time.
- If balm is too hard, add more oil. If it’s too soft, add more beeswax.
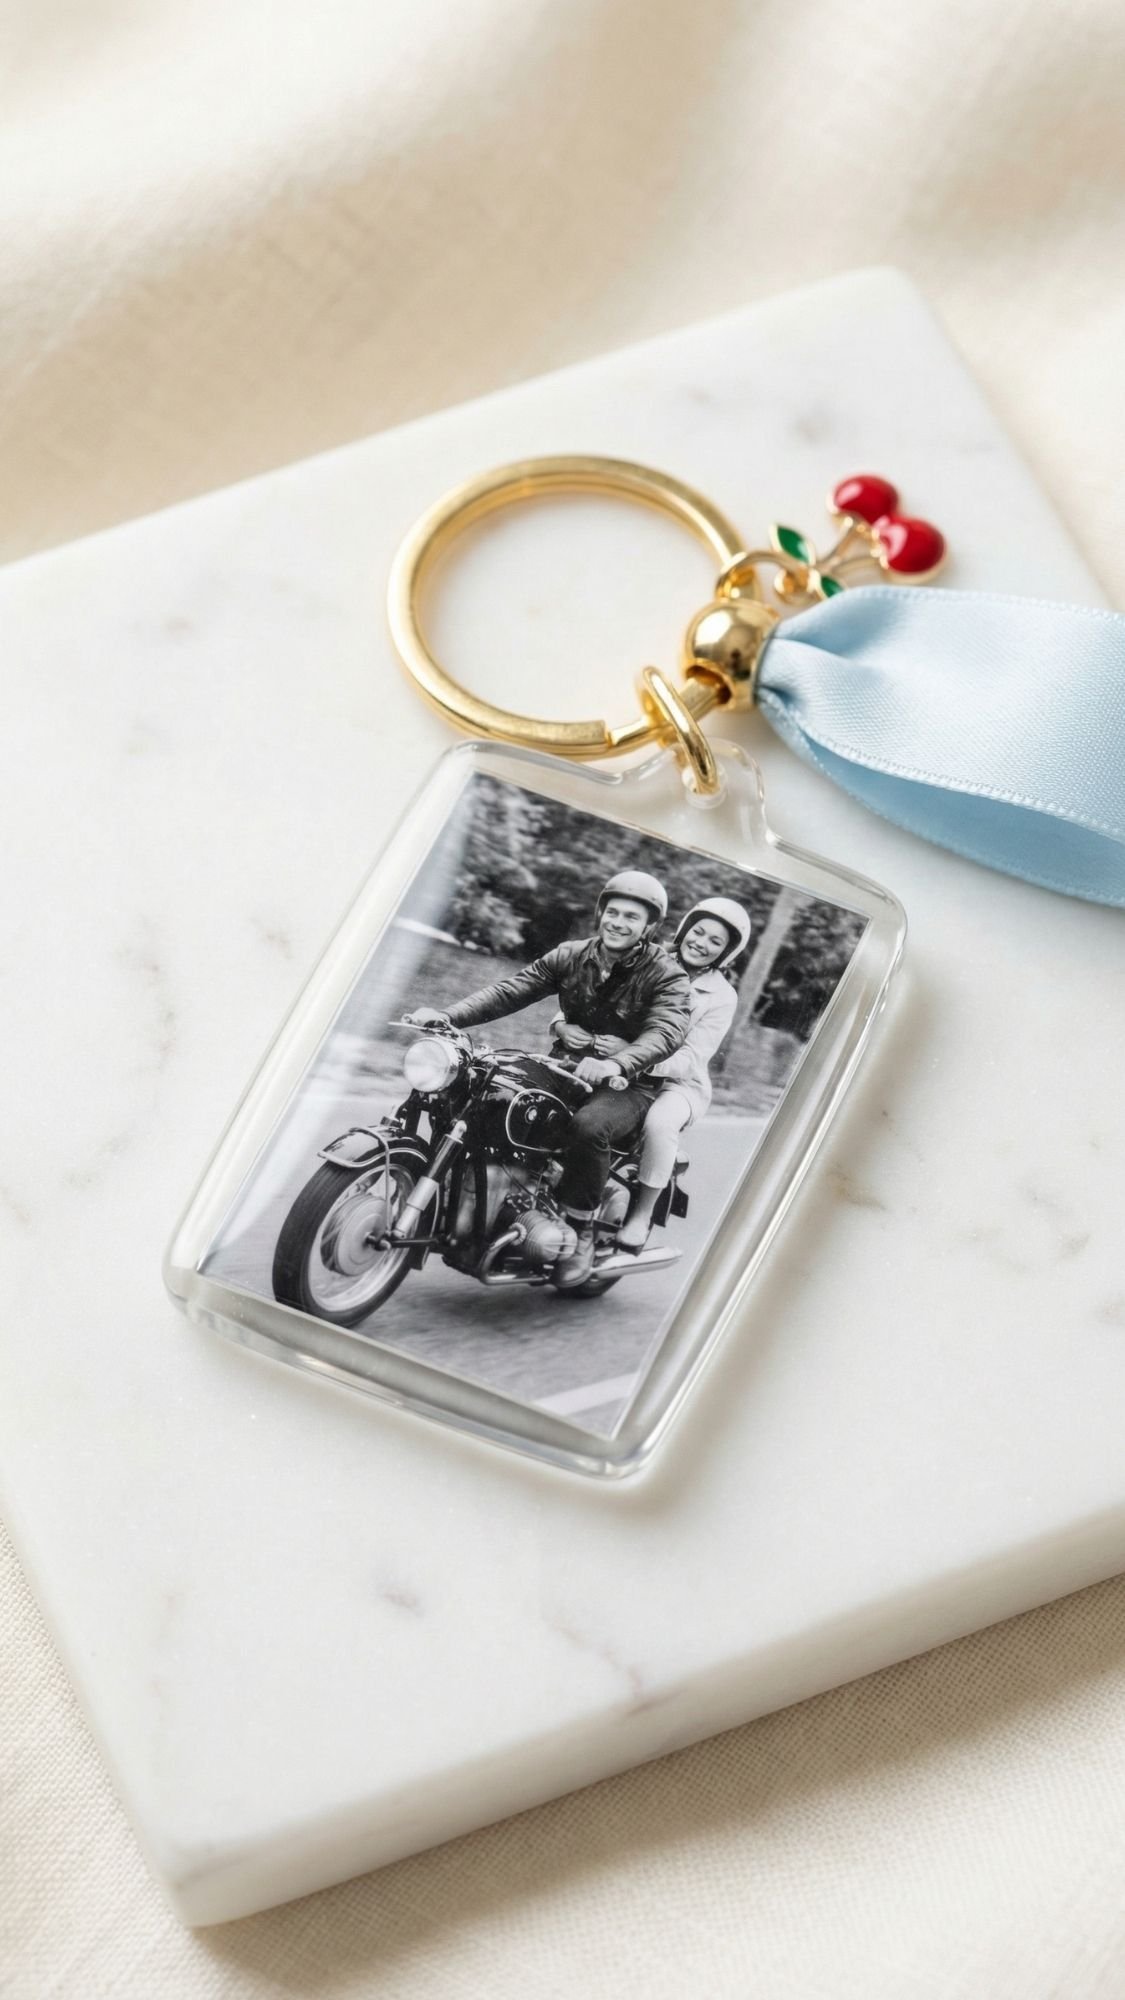
24) Photo Keychain (Tiny, Sentimental, Hard To Misplace)
This is one of those small gifts that punches way above its weight. She’ll carry it every day, which means your gift doesn’t sit on a shelf. It goes with her, and that’s kind of the point, right? You can keep it sleek and modern, or go more vintage with a soft matte finish. Either way, it feels personal without being complicated.
Why This Works
- It turns a favorite photo into something she actually uses.
- It works as a stand-alone gift or a sweet add-on to a bigger bundle.
- It’s quick, but it doesn’t look quick when you finish it cleanly.
What You Need
- Printed photo (small, high-contrast works best)
- Clear laminating sheets or self-adhesive laminating film
- Optional: clear resin kit for a thicker, glossy “heirloom” look
- Keychain hardware (split ring, swivel clasp, or key fob set)
- Hole punch or small drill
- Scissors or paper trimmer
- Optional: small tassel, charm, or a tiny cherry accent
How To Make It
- Pick a photo with simple lighting and a clear subject. Busy backgrounds turn into mush when you shrink them.
- Crop it small, I like about 1.5 inches to 2 inches tall for a classic keychain look.
- Seal it. Laminate the photo fully, or if you use resin, seal the paper photo first so it doesn’t cloud.
- Trim it neatly, then round the corners. Sharp corners peel faster.
- Punch your hole at the top center, then attach your hardware.
- Add a charm if you want, but keep it minimal so it doesn’t feel bulky in a purse.
Pro Tips That Make It Look Boutique
- Use a black-and-white photo for a super timeless look, it hides tiny imperfections too.
- Leave a small clear border around the photo so it looks intentional and stays sealed.
- If you use resin, mix slowly and warm the bottle slightly in warm water to reduce bubbles.
- Keep the hardware nice. Cheap hardware can make a beautiful keychain look like a giveaway prize.
Common Problems And Quick Fixes
- If the laminate peels, you trimmed too close. Leave a border next time and round corners.
- If resin looks cloudy, moisture or unsealed paper caused it. Seal the photo first and make sure everything stays fully dry.
- If the hole tears, you punched too close to the edge. Move the hole slightly lower and use thicker laminate.
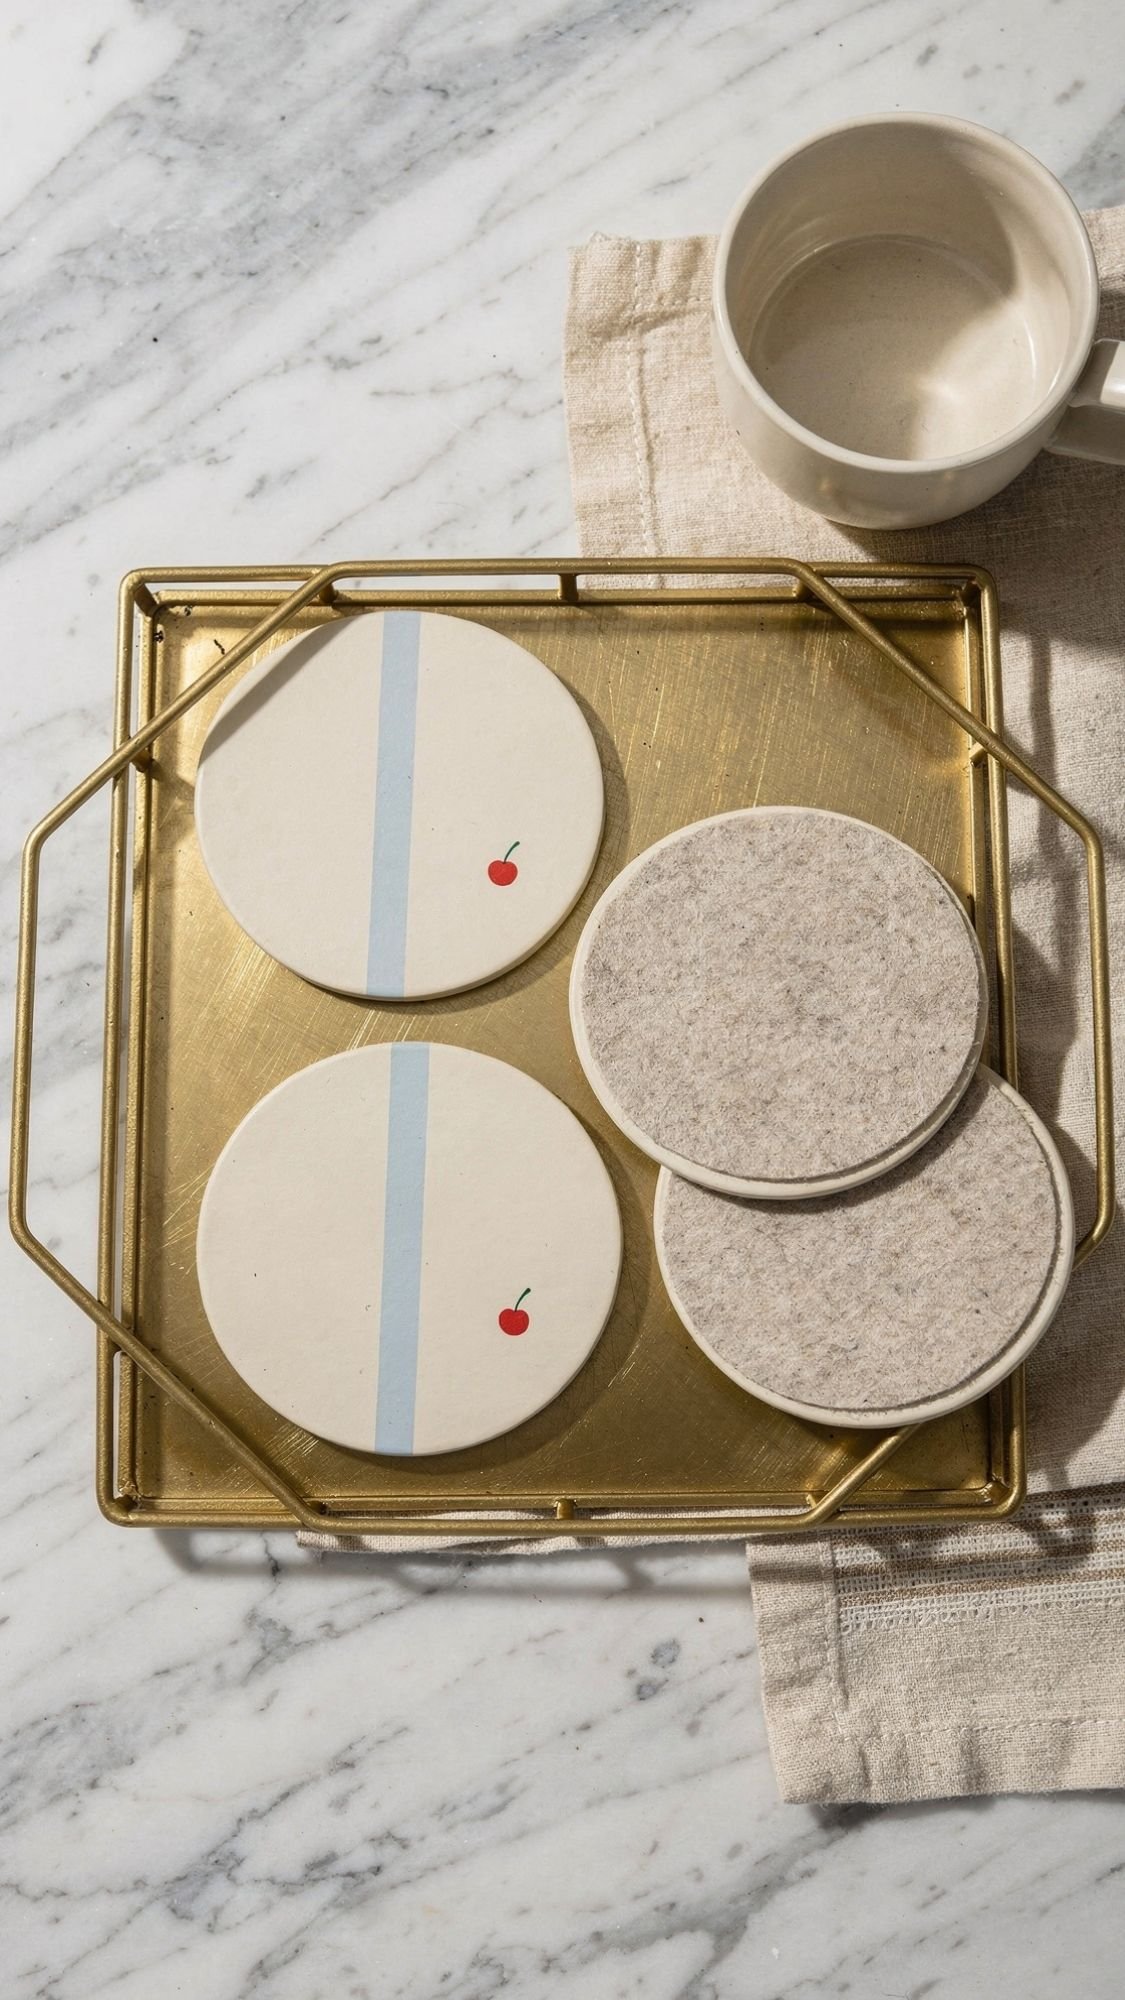
25) Matching Coaster Set (Quick Project, Polished Result, Actually Gets Used)
Coasters sound basic until you realize two things. First, moms hate water rings on tables. Second, a matching set looks weirdly fancy when you keep the design clean. This is one of my favorite “I need a gift that looks put-together fast” projects, and it works for every style. Want modern minimal, boho, farmhouse, or glam? Same base, different finish.
Why This Works
- It’s useful every day, and it protects her furniture.
- A matching set looks curated, not random.
- You can batch-make these in an afternoon.
What You Need
Pick your base:
- Cork coasters (easy, lightweight)
- Tile coasters (heavier, feels premium)
- Unfinished wood coasters (warm and classic)
Then add:
- Acrylic paint or paint pens
- Painter’s tape (for crisp stripes)
- Small brush or stencil sponge
- Clear sealer (matte for modern, satin for warm)
- Felt pads (for the bottom)
- Optional: metallic paint pen for a tiny Neo Deco line detail
How To Make It
- Wipe your coaster bases clean. Dust and oils mess with paint and sealer.
- Paint your base color in thin coats. Let each coat dry before the next.
- Add a simple design. Stripes, arches, or one clean border looks high-end fast.
- Let the paint dry fully, then seal in thin coats. Don’t flood the surface.
- Let the sealer cure before you stack or gift them. Dry to touch does not equal durable.
- Stick felt pads on the bottom so they don’t scratch tables.
Pro Tips That Make Them Look Boutique
- Keep the set consistent. Same design, same spacing, same placement.
- Use a tight palette. Cloud Dancer creamy neutrals plus an icy blue accent looks fresh, and one tiny cherry pop on one coaster can look trendy without going loud.
- Seal the edges too. Spills always hit edges first.
- Add a simple belly band when gifting, like “Mom’s Coasters,” and tie with ribbon.
Common Problems And Quick Fixes
- If the sealer looks streaky, you used a thick coat. Sand lightly once cured, then re-seal thin.
- If paint lifts with tape, you didn’t let the paint dry long enough, or you used thick paint. Let it dry longer and pull tape back slowly at an angle.
- If coasters stick together after sealing, you stacked them before the finish cured. Separate them and let them cure longer with airflow.
- If the design looks crooked, you eyeballed it. Measure once and mark light guide points first next time.
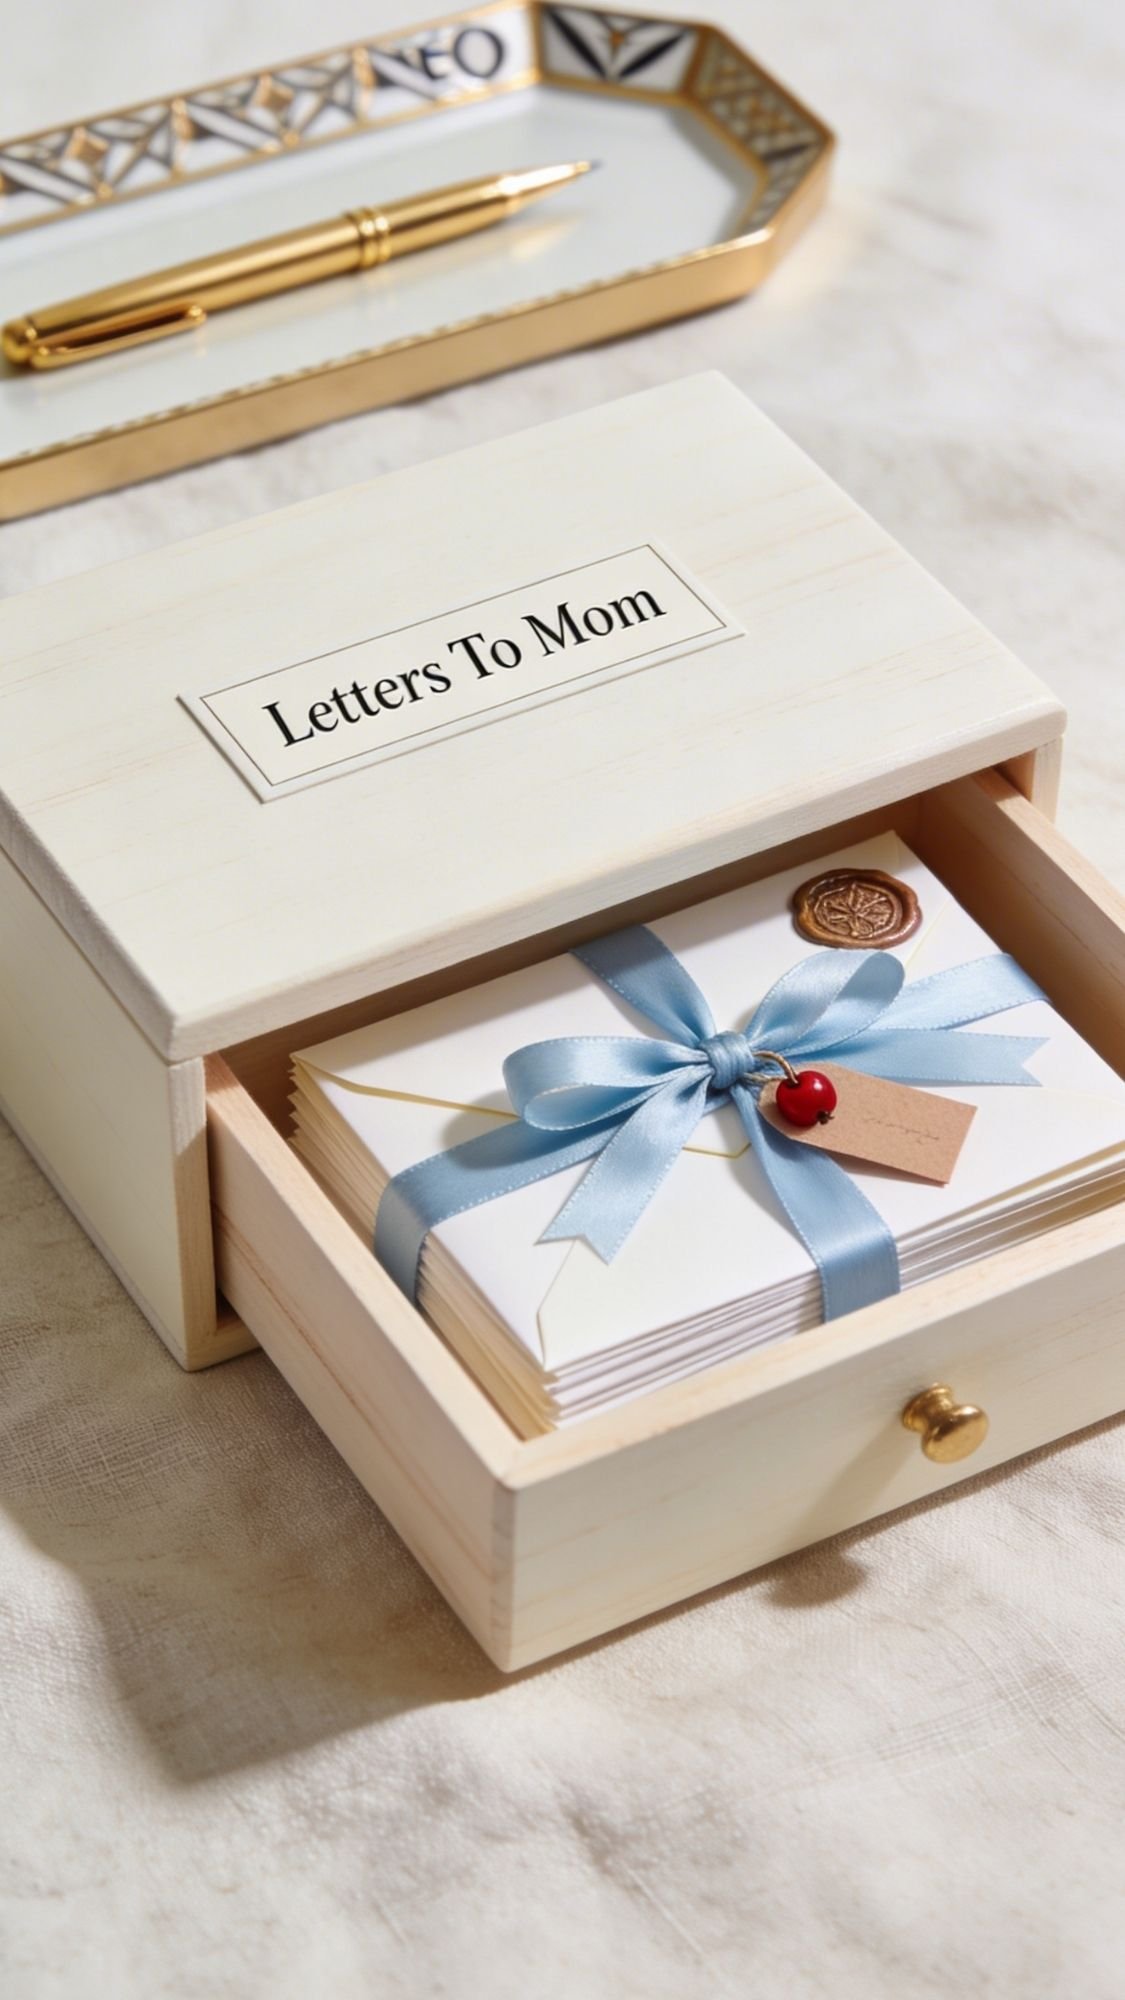
26) “Letters To Mom” Keepsake Box (The Kind Of Gift She Saves Forever)
This one feels like a time capsule. It’s not just “a cute box,” it’s a place for words she can reread on the days she needs them. And yes, this project can make you emotional while you’re making it, which is annoying but also kind of the point. Ever written something heartfelt and then sat there like… wow, I should do this more? Same.
Why This Works
- It becomes a forever keepsake, not a one-season item.
- You can make it as simple or as fancy as you want.
- It’s deeply personal without requiring advanced crafting skills.
What You Need
- Small wooden box (unfinished works best)
- Sandpaper or sanding sponge (180 and 220 grit)
- Paint or stain (matte paint looks modern, stain looks warm)
- Clear sealer (matte or satin)
- Small brush or foam brush
- Envelopes (mini envelopes are adorable)
- Paper for letters
- Ribbon or twine
- Optional: vinyl decal or paint pen for a clean label on the lid
- Optional: wax seal stickers for the envelopes
How To Make It
- Sand the box lightly, especially edges and corners. Smooth edges make it feel expensive.
- Wipe off dust completely.
- Paint or stain in thin coats. Let each coat dry before the next.
- Seal the box in thin coats, especially if you plan to handle it a lot.
- Write 5 to 10 letters. Keep them short if that helps you start.
- Put each letter in an envelope and label the front like “Open When You Need…” or “Read This On…”
- Stack the envelopes neatly in the box, tie a ribbon bundle if you want extra polish.
Letter Prompts That Hit Without Feeling Cheesy
- “Open when you’re having a hard day.”
- “Open when you miss me.”
- “Open when you need a reminder of what you’ve done for me.”
- “Open on your birthday.”
- “Open when you need a laugh.”
- “Open when you need to feel proud.”
Pro Tips That Make It Look Boutique
- Keep the outside clean and minimal. Let the letters be the emotional part.
- Use a simple label like “Letters To Mom” on the lid, centered. A paint pen or vinyl decal looks super crisp.
- Add a soft interior liner, like a folded linen scrap, if you want it to feel extra luxe.
- If you stain, sand lightly between coats for a smoother finish.
Common Problems And Quick Fixes
- If stain looks blotchy, you didn’t condition the wood or sand evenly. Sand back lightly and re-stain, and use conditioner next time.
- If paint feels tacky, you sealed too soon or humidity slowed curing. Let it cure longer with airflow.
- If the lid sticks, paint built up on the edges. Sand the lid edges lightly and re-seal thin.
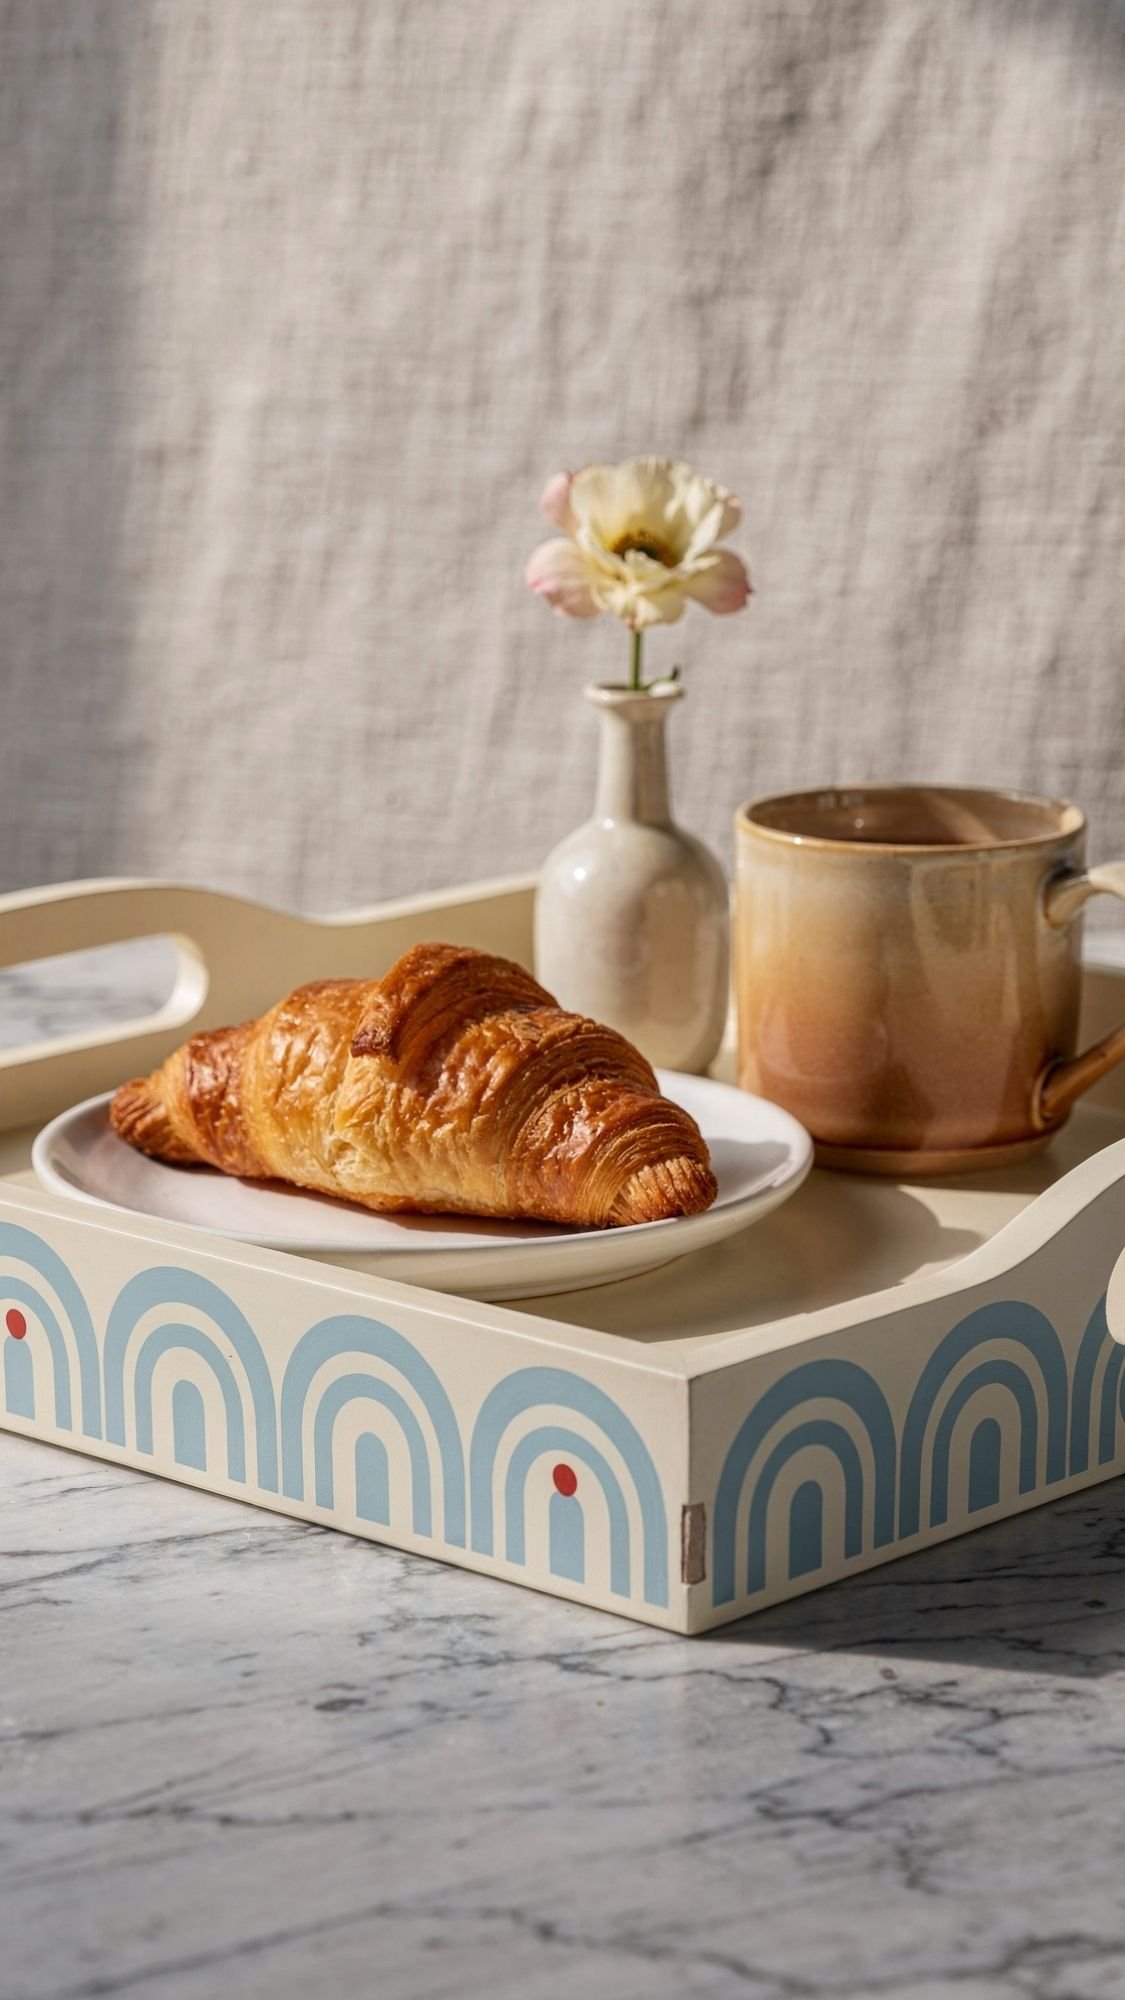
27) Breakfast-In-Bed Tray Upgrade (The Gift Is The Routine)
This one is less about the tray and more about what the tray represents. It says, “I’m going to take something off your plate,” which is basically Mother’s Day poetry. And if you paint it cleanly and seal it right, it looks like a boutique piece she’ll keep out all year. Also, this is where my favorite pro trick shows up, because crisp painted lines make or break the whole look.
Why This Works
- It’s practical, and it turns into a tradition fast.
- It looks high-end when you keep the design minimal.
- You can personalize it without making it feel cheesy.
What You Need
- Wooden tray (unfinished or lightly finished)
- Sanding sponge (220 grit)
- Tack cloth or lint-free rag
- Acrylic paint (matte looks modern)
- Painter’s tape or a stencil
- Small brush and foam roller (roller helps keep it smooth)
- Clear topcoat, water-based polycrylic works great
- Felt feet (optional, but protects surfaces)
- Optional: vinyl lettering or paint pen for a small phrase
How To Make It
- Sand the tray lightly and wipe off dust. Smooth prep equals smooth finish.
- Paint your base coat in thin layers. Let each layer dry.
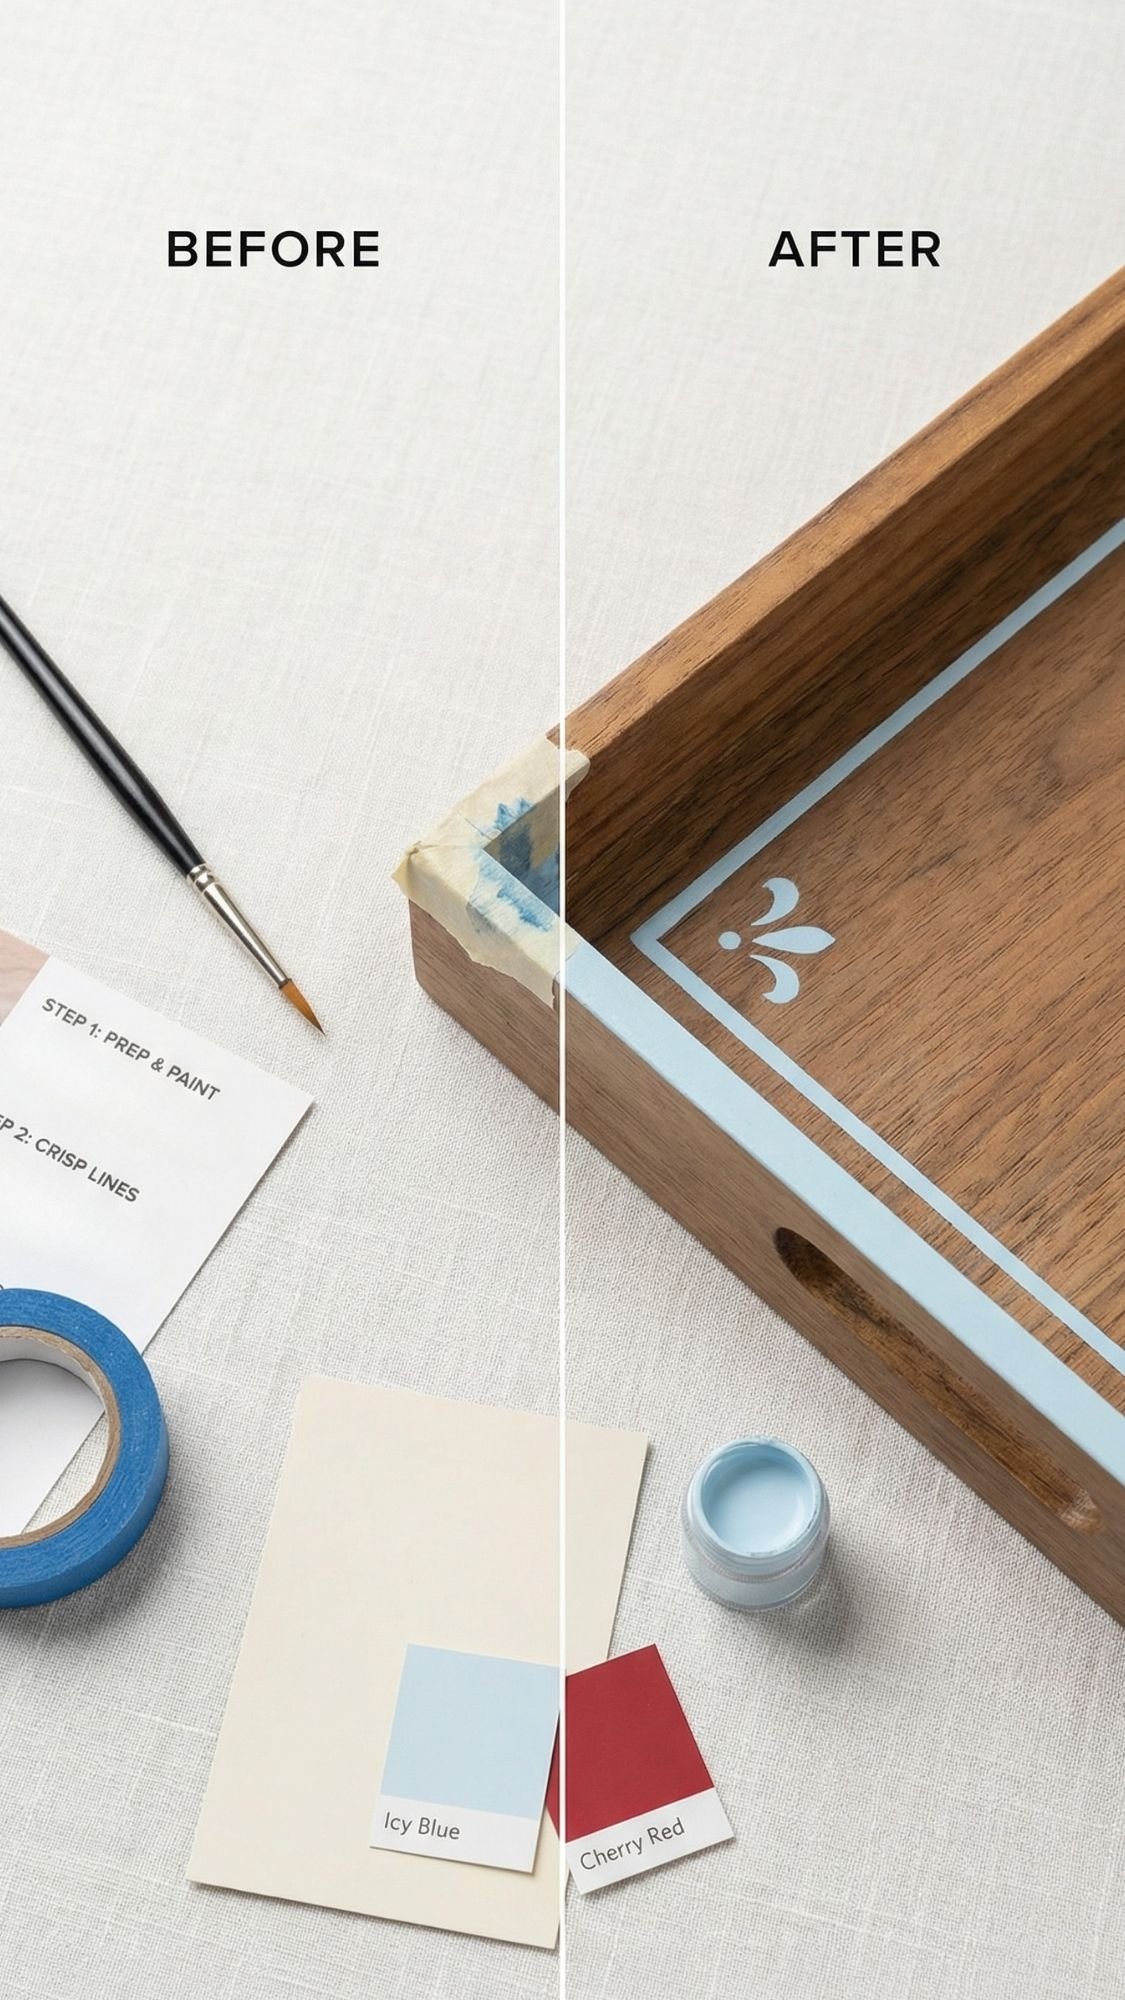
- Tape or place your stencil for the design.
- Here’s the pro trick, and yes, it matters. Paint a thin layer of the base color along the stencil edges first. This seals the edges so your top color can’t bleed under.
- Once that base edge layer dries, paint your top color in light passes. Don’t flood it.
- Peel tape carefully while the paint still feels slightly set, not fully rock hard. This helps avoid peeling.
- Let everything dry, then seal the tray with thin coats of polycrylic.
- Let it cure fully before you use it, especially if you’ll wipe it down often.
Pro Tips That Make It Look Boutique
- Use a foam roller for the base coat to avoid brush lines.
- Keep the design simple. One arch motif, stripe, or small monogram reads modern.
- Choose a calm palette. Cloud Dancer creamy base with icy blue accents looks fresh, and a tiny cherry detail can feel trendy without screaming.
- Add felt feet so the tray doesn’t scratch tables. It’s a small detail that feels “store-bought.”
Common Problems And Quick Fixes
- If paint bleeds under the stencil, you used too much paint or didn’t seal edges. Touch up with a small brush, and use the base coat sealing trick next time.
- If the finish feels tacky, humidity slowed curing or you sealed too soon. Let it cure longer with airflow.
- If polycrylic looks streaky, you used thick coats. Sand lightly after curing and recoat thin.
- If tape pulls paint, you peeled too late or paint layers were too thick. Peel earlier and use thinner layers next time.
Fix The Most Common DIY Gift Problems Fast
DIY gifts feel a lot more fun when they don’t peel, crack, or look like you fought the project and lost. So here are the issues I see the most, plus the fixes that actually work.
Paint Peels Off Glass
- Symptom: Paint scratches or flakes off a vase or mug.
- Likely cause: You skipped degreasing, or you used paint not made for glass.
- Fix: Wipe with rubbing alcohol, strip loose paint, repaint with glass-rated paint in thin coats.
- Prevention next time: Clean with 91% alcohol, and choose paint specifically labeled for glass or ceramic.
Vinyl Won’t Stick Or Lifts At The Edges
- Symptom: Corners lift, bubbles show, or vinyl peels after a day.
- Likely cause: Dusty surface, curved surface tension, or not enough pressure.
- Fix: Clean with alcohol, warm vinyl slightly with gentle heat, burnish hard, then press again.
- Prevention next time: Apply on smooth sealed surfaces, and avoid touching adhesive with your fingers.
Paint Bleeds Under A Stencil Or Tape
- Symptom: Fuzzy edges, messy lines, bleeding under tape.
- Likely cause: Too much paint, tape edges not sealed, or you used a wet brush.
- Fix: Let it dry, touch up with a detail brush, then seal with a clear coat.
- Prevention next time: Seal stencil edges with the base color first, then apply the top color in light passes.
Clay Dish Warps While Drying
- Symptom: The trinket dish curls upward or dries unevenly.
- Likely cause: Uneven thickness or drying too fast on one side.
- Fix: Flip halfway through drying, gently reshape while it’s still slightly flexible, then dry under light weight.
- Prevention next time: Roll clay evenly, dry slowly, and rotate it during drying.
Mod Podge Photo Transfer Looks Patchy
- Symptom: Missing spots, torn image, or cloudy transfer.
- Likely cause: Uneven medium, trapped bubbles, or you rubbed too hard too soon.
- Fix: Let it dry fully, mist paper lightly, rub gently in layers, then seal once dry.
- Prevention next time: Smooth the paper down with a brayer, and give it a full overnight dry if you can.
Wood Stain Looks Blotchy
- Symptom: Dark patches, uneven color, weird absorption.
- Likely cause: Softwood absorbed stain unevenly, or sanding stayed inconsistent.
- Fix: Sand back lightly, apply wood conditioner, re-stain in thin layers.
- Prevention next time: Condition pine and birch before staining, and sand evenly.
Sealer Looks Streaky Or Sticky
- Symptom: Brush marks, cloudy patches, or the finish feels tacky.
- Likely cause: Coats went on too thick, humidity slowed curing, or you sealed before paint cured.
- Fix: Let it cure longer with airflow, then sand lightly and apply a thin recoat.
- Prevention next time: Use thin coats, and respect cure time, especially in humid weather.
Heat Transfer Cracks Or Peels After Washing
- Symptom: Letters crack, edges lift, or vinyl feels brittle.
- Likely cause: Under-pressed, wrong heat setting, or you washed too soon.
- Fix: Re-press with parchment, firm pressure, and correct heat, then let it rest 24 to 48 hours before washing.
- Prevention next time: Follow vinyl brand temp and time, wash inside out, and skip high heat drying.
Labels Peel Off Jars
- Symptom: Labels curl, slip, or fall off after a day.
- Likely cause: Oils, condensation, or low-quality labels.
- Fix: Remove label, wipe jar with alcohol, apply waterproof label or add clear tape overlay.
- Prevention next time: Clean first, and choose waterproof labels for anything bath-related.
Candle Tunnels Or Smells Weak
- Symptom: Candle burns down the middle, or scent barely shows.
- Likely cause: Wick too small, first burn too short, or candle not cured long enough.
- Fix: Do a longer first burn until the melt pool reaches the edges, and let candles cure longer for better throw.
- Prevention next time: Match wick size to jar diameter, and cure your candle before gifting when possible.
My Failure Story (Because DIY Humility Keeps Us Honest)
I once rushed a stencil on a tray, pulled the tape, and got that fuzzy bleed that makes you stare at your project like it personally insulted you. I fixed it by letting it dry fully, sanding the worst spots smooth, repainting the base, then doing the base-color edge seal trick before the top color. The second try looked crisp enough that you’d never know the first one happened. I call that a win, even if my eye twitched a little.
Finishing, Sealing, And Care (So Your Gift Still Looks Good After Mother’s Day)
If you want your DIY gift to look legit, the finish does the heavy lifting. Paint looks prettier when you seal it. Wood feels expensive when you sand it right. Fabric stays crisp when you heat set it properly. This is the part people skip, then they wonder why things peel, scratch, or get weird after a week. You don’t need perfection, you just need the right finish for the right surface.
Dry Time Vs Cure Time (In Normal Human Language)
- Dry time means the surface feels dry when you touch it lightly.
- Cure time means the finish hardens all the way through and becomes more scratch-resistant and washable.
A project can feel dry and still scratch easily. That’s why people think sealers “don’t work.” They do work, they just need time.
What Changes Dry And Cure Time
- Humidity: High humidity slows drying and curing.
- Paint thickness: Thick coats stay soft longer.
- Surface type: Raw wood drinks product, glossy surfaces resist it.
- Brand formulas: Two “acrylic paints” can cure very differently.
When in doubt, give it an extra day. Future-you will feel smug about it.
Finishing Picks By Project Type (Quick And Practical)
Painted wood (trays, coasters, boxes):
- Use a water-based clear topcoat (polycrylic) for a smooth, durable finish.
- Apply thin coats, sand very lightly between coats if it feels rough.
- Let it cure before heavy use. If it still feels tacky, it needs more time and airflow.
Raw wood (cutting boards, spoons):
- Use food-safe mineral oil, then add beeswax board butter for a soft, protected finish.
- Re-oil as needed. Wood tells you when it’s thirsty.
Glass and ceramic (vases, mugs):
- Use paint pens or paint labeled for glass or porcelain.
- Follow the brand’s curing method. Some require heat setting.
- Avoid aggressive scrubbing, especially during the first week.
Air-dry clay (trinket dishes):
- Seal both sides to reduce moisture changes and warping.
- Use a spray sealer for a more even finish, or brush sealer in thin coats.
Fabric (tea towels, aprons, pouches):
- Heat set if your product requires it.
- Wait before washing. Most transfers and fabric paint do better when they rest 24 to 48 hours.
- Wash inside out, cold or warm, gentle cycle. Skip high heat drying when you can.
Paper crafts (bookmarks, seed paper cards, labels):
- Spray sealer works well if you want protection without brush marks.
- Keep paper crafts away from moisture unless you designed them to be planted, like seed paper.
Candles and bath goods:
- Candles often smell better after they cure for several days.
- Label ingredients for any self-care product if sensitivity matters.
How To Make It Look Professional Without Extra Work
- Sand edges and corners lightly before you paint or stain. Smooth edges scream “store-bought.”
- Use thin coats. Thick coats make drips, brush marks, and sticky finishes.
- Wipe surfaces with rubbing alcohol when you work with glass, vinyl, or labels.
- Add a tiny care card. That tiny card makes everything feel premium.
Care Card Copy You Can Paste Into Your Post
- Painted wood: Wipe with a damp cloth, avoid soaking, let cure fully before heavy use.
- Cutting board: Hand wash only, dry immediately, oil monthly or when dry.
- Mug: Hand wash gently for best longevity, avoid abrasive scrubbers, follow paint brand cure instructions.
- Fabric items: Wash inside out, gentle cycle, avoid high heat drying.
- Candle: Trim wick to 1/4 inch, allow a full melt pool on first burn, keep away from drafts.
How Long It Lasts, And How To Refresh It
- Most sealed painted gifts last a long time with gentle handling.
- If a tray or coaster looks worn, you can lightly sand and re-seal.
- If a cutting board looks dry, re-oil it and buff on board butter.
- If labels peel, wipe the surface with alcohol and use waterproof labels or a clear overlay.
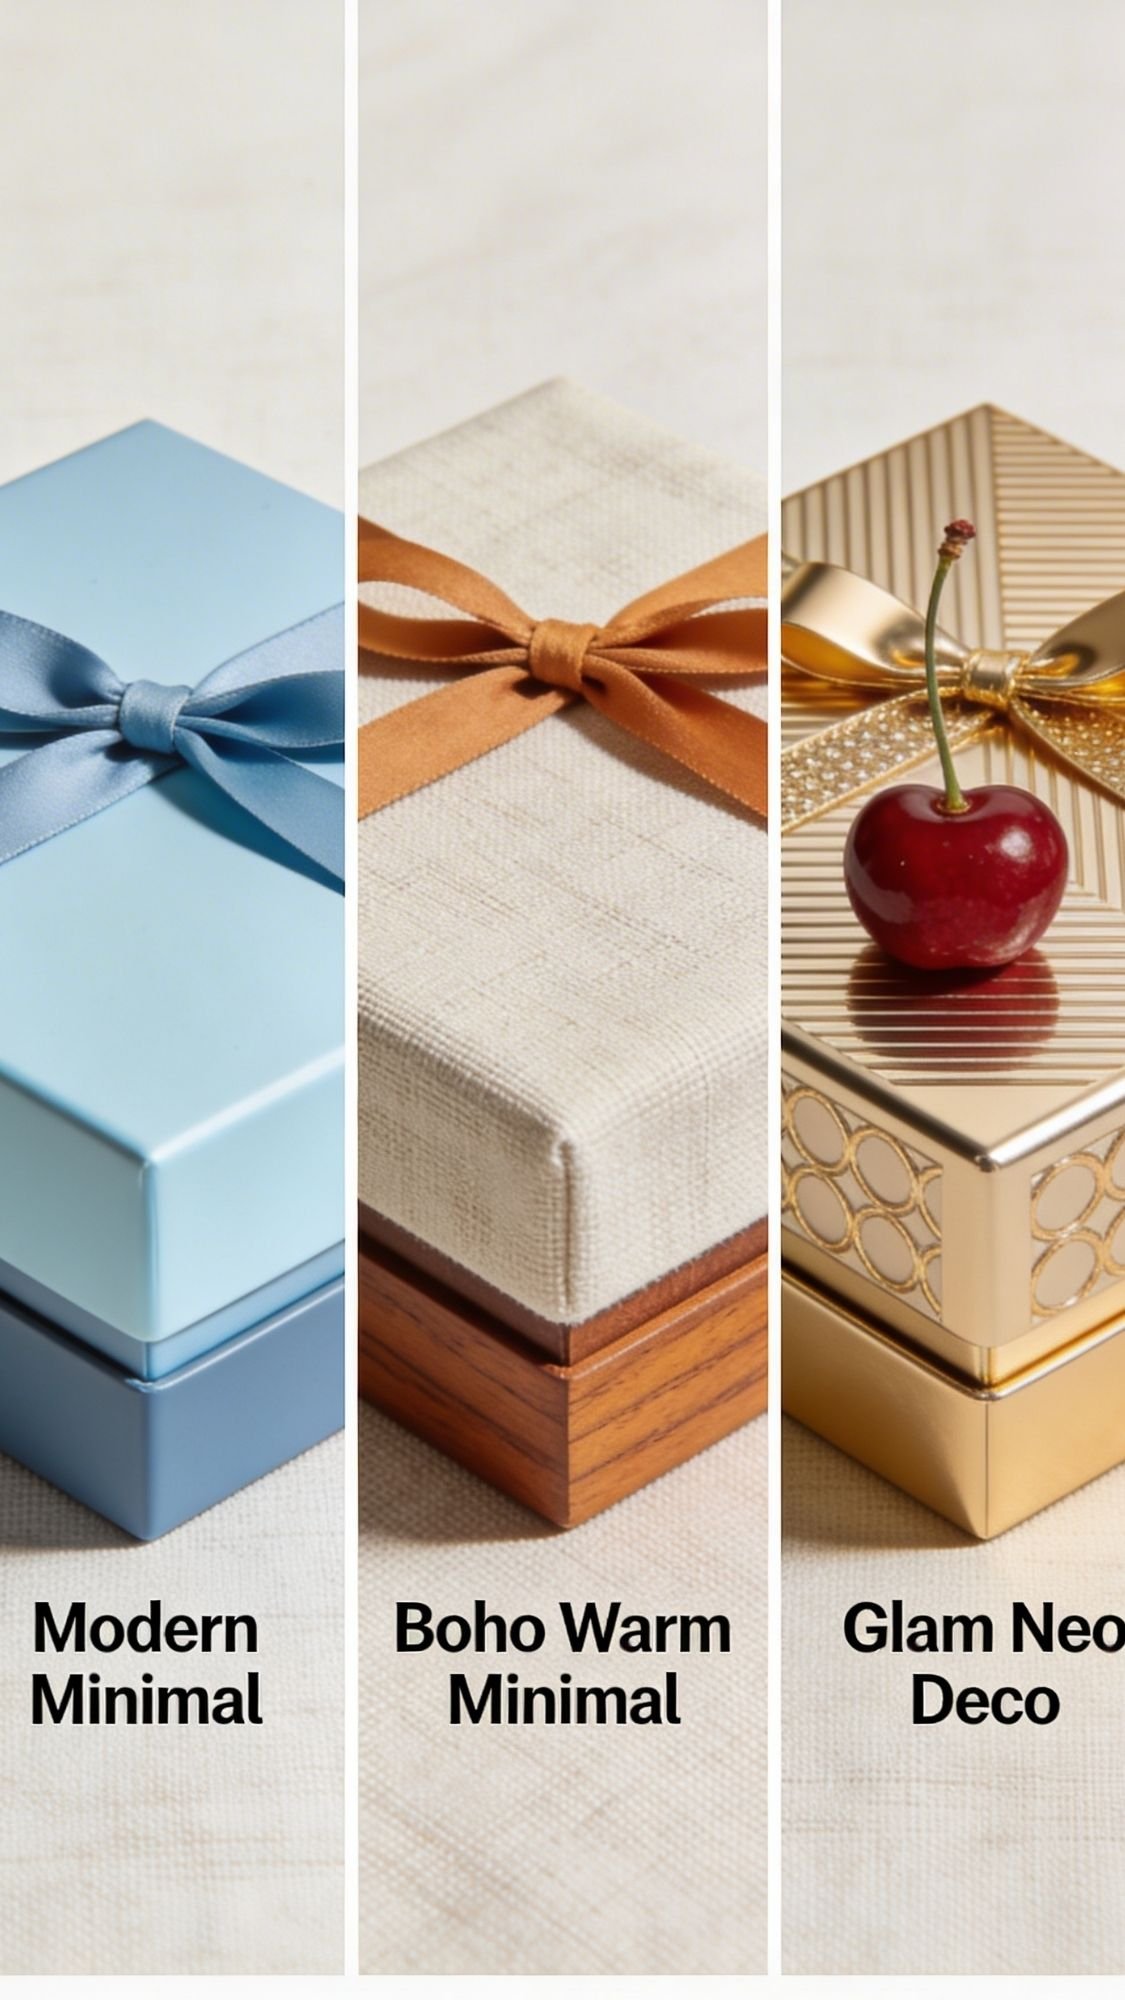
3 Easy Ways To Match Her Style
If you want your DIY gift to feel like it was made for her, not just made, customization does the magic. You don’t need to change the whole project either. You can swap colors, switch materials, and add personalization in tiny ways that scream “I know you.” Ever seen the same DIY look totally different just because of color and finish? Yeah, it’s basically a cheat code.
1) Modern Minimal (Clean, Calm, And Expensive-Looking)
This style works best for moms who love neutrals, tidy counters, and decor that feels intentional.
- Style swaps: matte finishes, clean lines, simple stripes, tiny monograms
- Color palette ideas: creamy Cloud Dancer white, soft beige, icy blue accents, soft gray
- Personalization options: initials on a pouch, subtle name engraving on a board, a simple label like “Mom” in a clean font
- Material upgrades: linen ribbon, glass jars, light wood frames, matte gold hardware
Try this style on the trinket dish, coaster set, vase, and breakfast tray. It’ll look like it came from a design store, not your kitchen table.
2) Boho Warm Minimal (Texture, Natural Materials, Cozy Vibes)
This style feels soft and homey without looking cluttered. Think linen, warm wood, and handmade textures.
- Style swaps: raw wood edges, soft tassels, woven baskets, pressed florals, imperfect handmade charm
- Color palette ideas: warm beige, clay, soft brown, muted sage, creamy white
- Personalization options: handwritten recipe towels, stamped tags, “open when” notes, custom prompts in the memory jar
- Material upgrades: wooden beads on ribbon, kraft tags, cotton twine, handmade paper
This style is perfect for the throw basket, recipe jar, seed paper cards, and memory jar.
3) Glam Neo Deco (Arches, Metallics, Boutique Energy)
If your mom loves a little shine, this is the vibe. Keep the design clean and geometric so it feels luxe instead of loud.
- Style swaps: arches, scallops, geometric lines, clean blocks of color, minimal but bold details
- Color palette ideas: creamy base, black accents, metallic gold, cherry red pops, icy blue as a fresh highlight
- Personalization options: monograms in metallic vinyl, gold-lined trinket dishes, chic label names like “Sunday Morning”
- Material upgrades: metallic paint pens, mirrored trays, gold frames, satin ribbon, wax seal stickers
This style shines on the trinket dish, candle labels, gift wrap, and the painted tray.
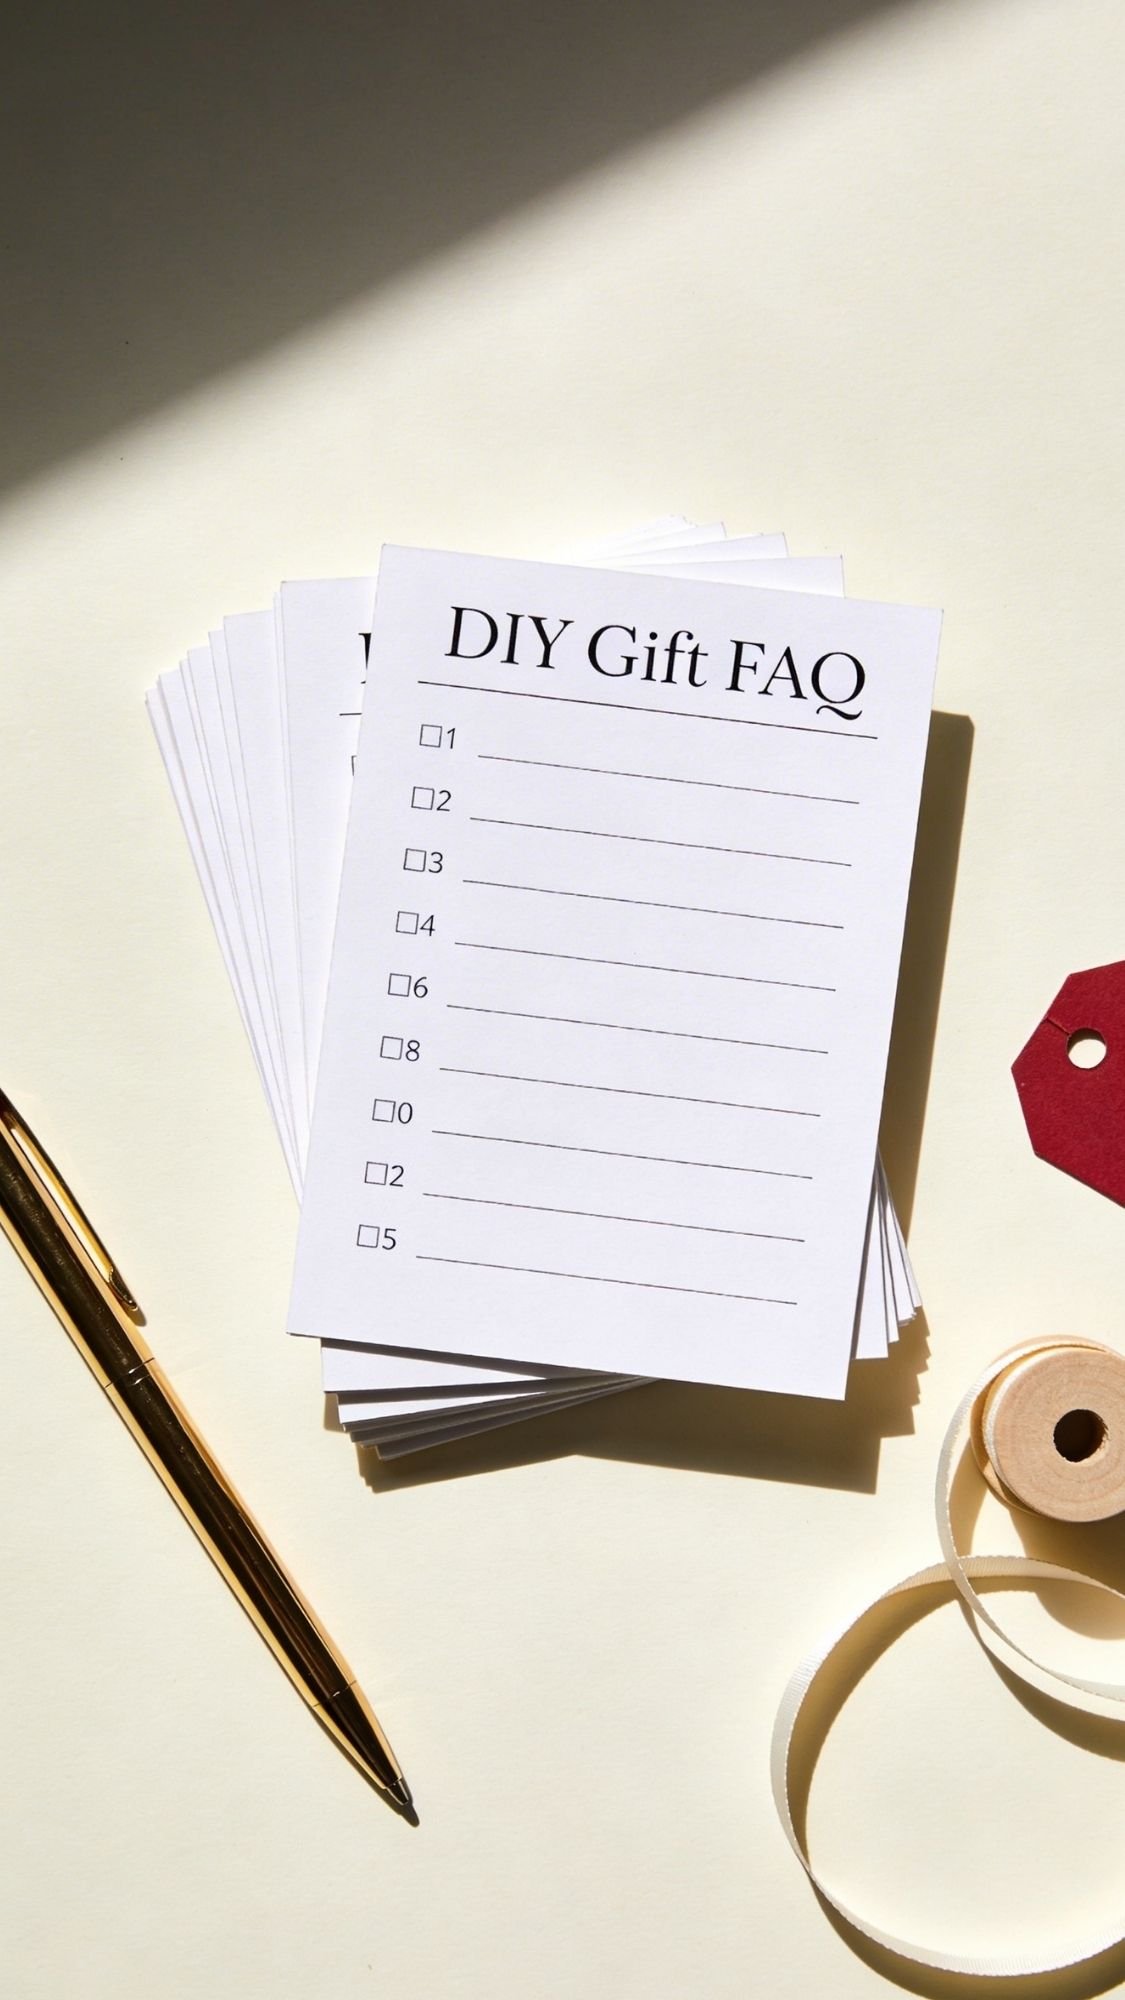
Quick Answers People Actually Search For
What are the best DIY Mother’s Day gifts for beginners?
Start with projects that don’t require precision tools or long cure times. The memory jar, recipe tea towel, bath salt trio, no-sew throw basket, and coupon book all look impressive without advanced skills.
How far in advance should I make DIY Mother’s Day gifts?
If you’re painting, sealing, or making candles, start at least 5 to 7 days ahead so finishes can cure and candles can settle. Paper crafts and packaging can happen closer to the day.
What’s the easiest way to personalize a handmade gift for Mom?
Use her name, initials, a meaningful date, or a reference to something only your family says. A simple “Mom’s Kitchen” engraving or a handwriting recipe transfer feels personal without being complicated.
How do I stop paint from peeling off glass or ceramic?
Clean the surface with rubbing alcohol, use paint rated for glass or porcelain, and follow the brand’s cure instructions. Most peeling comes from skipped prep or using the wrong paint.
Why does vinyl lift after I apply it?
Vinyl lifts when the surface has dust or oils, the surface curves too sharply, or you didn’t burnish enough. Clean with alcohol, warm the vinyl slightly, then burnish firmly and press again.
How do I stop paint bleeding under stencils?
Use the trick that saves everything. Seal the stencil edges with the base color first, let it dry, then paint your top color in light coats. Thick wet paint causes bleed.
What’s the difference between dry time and cure time?
Dry time means it feels dry to the touch. Cure time means the finish hardens completely and becomes more durable. A project can feel dry and still scratch easily if it hasn’t cured.
How can I make DIY gifts look expensive on a budget?
Keep the design minimal, stick to a tight color palette, sand edges smooth, and package it like a set. Matching jars, clean labels, and a simple ribbon do more than extra decorations.
Can I wash a hand-painted mug?
Most paints hold up best with gentle hand washing. If you bake-cure your mug paint and let it cure fully, it will last longer. Avoid abrasive scrubbers, especially in the first week.
How do I package DIY gifts so they look like a boutique set?
Use matching containers, one label style, and one ribbon color across the whole gift. Add a small tag and a care card. Keep it cohesive and it instantly looks higher-end.
How do I keep DIY labels from peeling off jars?
Wipe jars with rubbing alcohol first, then use waterproof labels or cover the label with a clear overlay strip. Condensation and oily surfaces cause most label failures.
What should I write in a Mother’s Day memory jar?
Write a mix of memories, gratitude, funny moments, and little reminders. Keep them specific, like “I still laugh about…” or “You made me feel safe when…”
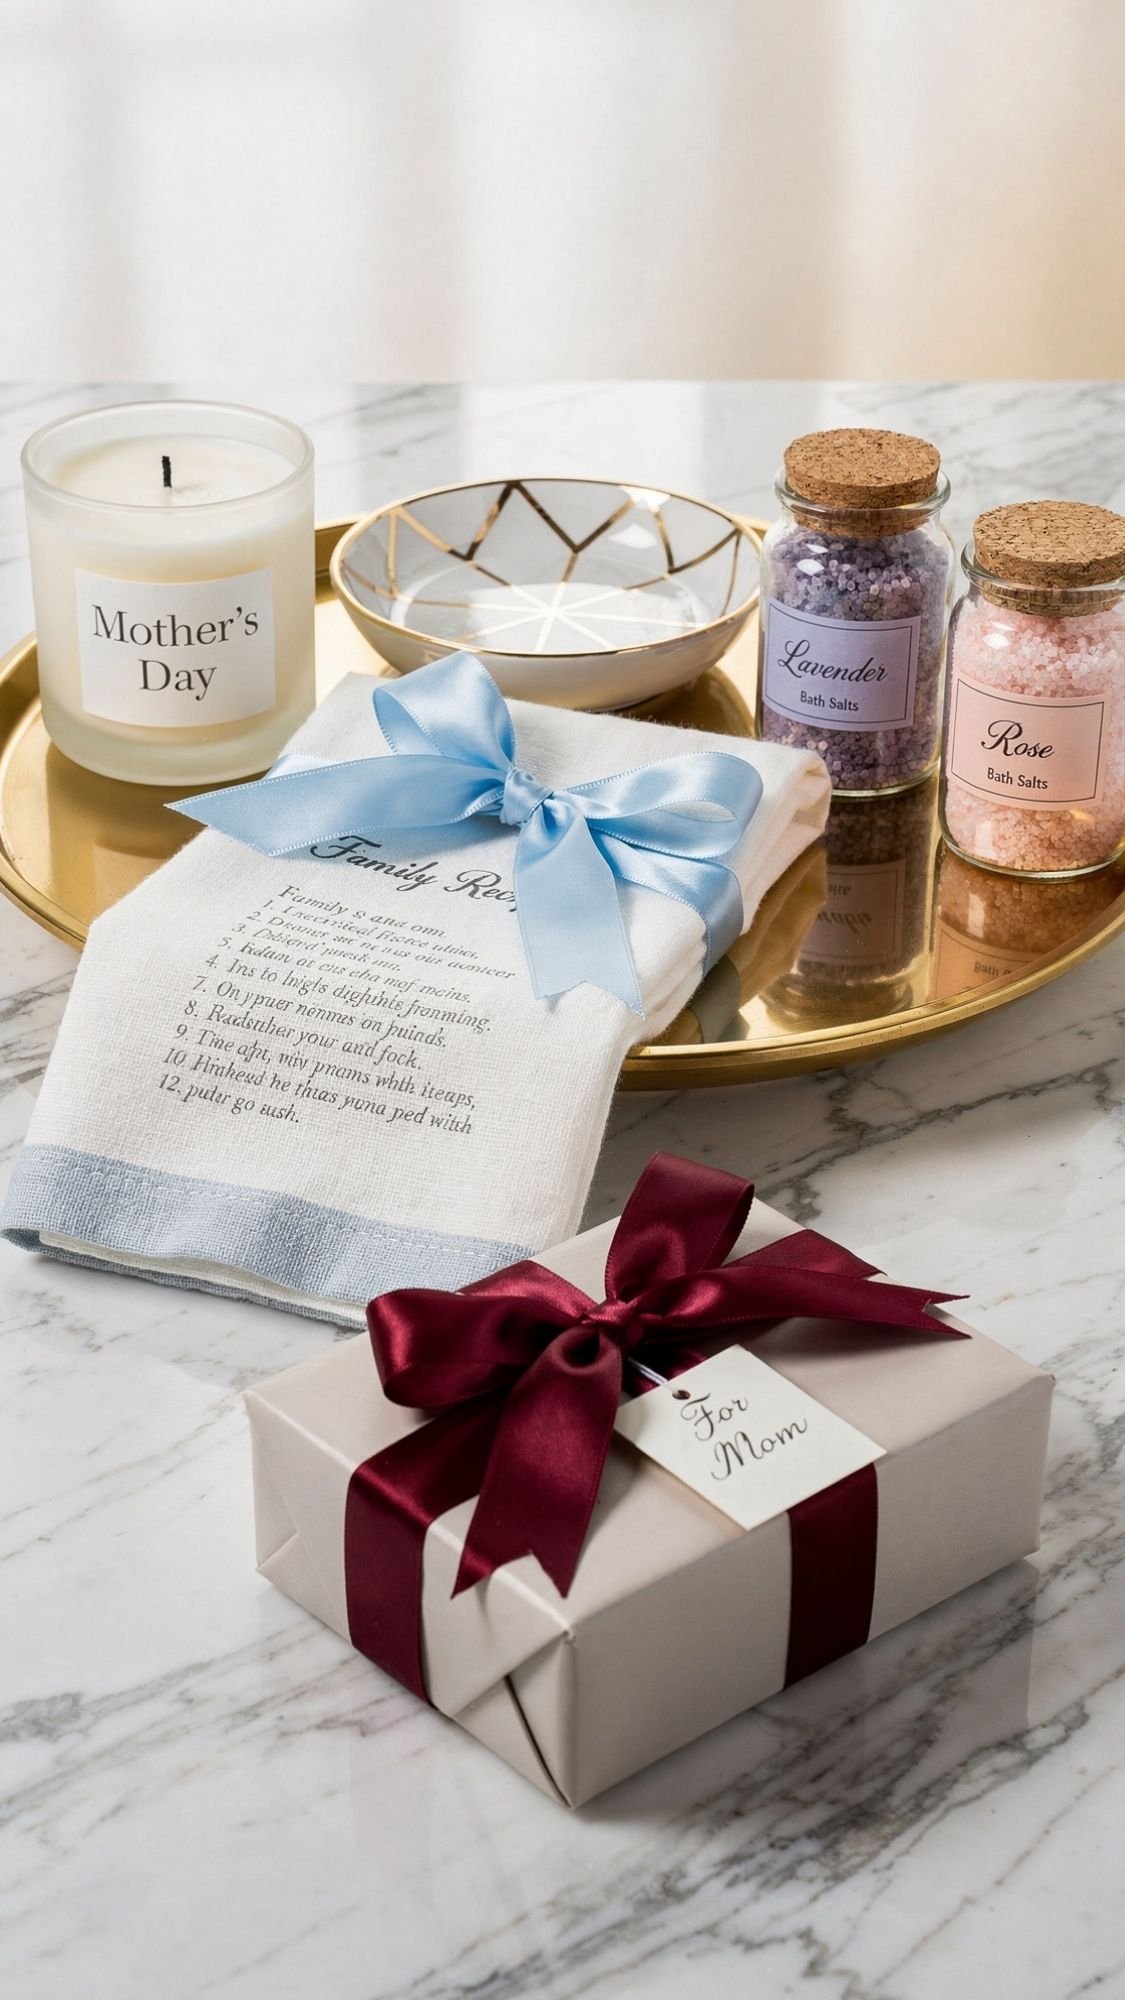
Pick One, Start Today, And Make It Personal
If you’re still staring at this list like “Cool, but which one do I actually make,” pick the gift that matches your time. If you have one evening, do the recipe towel, memory jar, or bath salt trio. If you have a few days, do the photo transfer plaque, cutting board, or letters box so everything cures and finishes properly. Either way, your gift feels more special when you add one small personal detail, a date, a nickname, a scent name that means something, or a note that makes her laugh.
Also, don’t skip the finishing and packaging. I know it’s tempting to rush, but a clean seal, a crisp label, and a pretty bow turns “handmade” into “boutique.” And if something goes sideways, it happens, you’re a real person with real paint and real humidity, not a craft robot. Fix it, touch it up, and move on. She won’t remember the tiny flaw, she’ll remember that you made something for her.
Now go pick one project and start. What’s the worst that happens, you end up with extra ribbon and an emotional support jar of bath salts? Sounds fine to me

