Your craft area should spark joy and efficiency – not gather dust as a forgotten storage zone. Think beyond pegboards and plastic bins (though those have their place). What if your workspace could fuel projects through thoughtful organization and visual appeal?
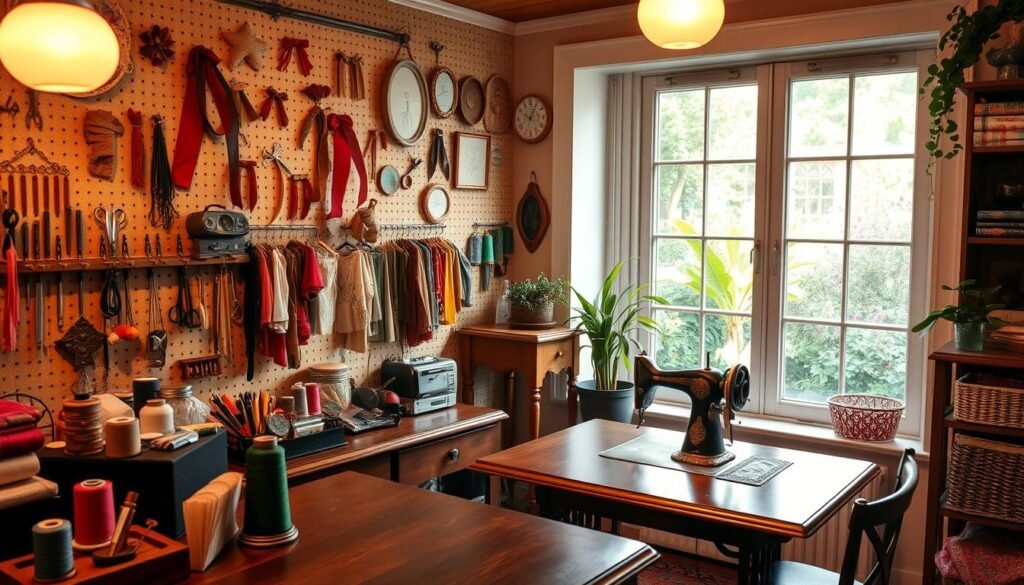
Many makers assume beautiful studios require magazine-worthy budgets. Not true. With smart planning, even compact nooks become productivity powerhouses. The secret? Treat this zone like your favorite café – where every tool has a home, lighting flatters your work, and colors energize your mood.
We’ll show you how to balance form and function without overhauling your entire setup. From vertical storage solutions to accent walls that spark imagination, these strategies work for apartment corners and dedicated studios alike. Because when your environment reflects your creative spirit, you’ll naturally spend more time doing what you love.
Ready to rethink your space? Let’s create a setup that celebrates your craft while keeping scissors, threads, and patterns right where you need them. Your future self (and projects) will thank you.
Introduction to Creative Sewing Room Decor
Think of your studio as a blank canvas – one that needs both practical brushstrokes and artistic flair. The magic happens when storage solutions dance with personality-packed accents.
Setting the Tone for an Inspiring Craft Space
Your environment shapes your creative flow. Bright colors might energize quilt-making marathons, while soft neutrals could calm pattern-drafting sessions. Lighting matters too – warm lamps beat harsh overheads for late-night stitching.
| Functional Element | Inspirational Twist | Dual Benefit |
|---|---|---|
| Thread organizers | Color-coded jars | Quick access + visual appeal |
| Fabric storage | Open shelving display | Easy selection + texture showcase |
| Tool holders | Vintage teacup collection | Scissor storage + nostalgic charm |
Understanding the Importance of Unique Decor
That embroidered hoop isn’t just wall art – it’s a reminder of your first completed project. Strategic decor does heavy lifting: motivates through memories, guides workflow, and sparks new ideas.
Your space should grow with your skills. Start with three key zones: cutting station, machine area, and inspiration corner. Let each evolve organically as your craft develops.
DIY Sewing Room Wall Art: Transform Your Space

Blank walls become storyboards when your tools become the medium. Let’s turn functional supplies into conversation-starting displays that cost less than a latte.
Step-by-Step 3D Wall Art Projects
Grab that IKEA Ribba frame collecting dust. Disassemble it carefully – the passepartout becomes your template. Cut sturdy cardboard to match the frame’s dimensions. Now the fun begins:
Arrange thread spools like a color wheel or gradient pattern. Use hot glue dots for temporary placement (no commitment issues here). Once satisfied, secure everything permanently. Add glass-head pins as finishing flourishes – they catch light beautifully.
Creative Use of Recycled Materials and Thread
Those bargain-bin threads too rough for fabric? They’re gold for textural art. Wrap cardboard shapes to make abstract bobbin sculptures. Layer different thicknesses for depth.
Pro tip: Use mismatched spools as mini shelves for tiny scissors or thimbles. Your piece becomes both decorative and functional.
This approach solves two problems: hiding unattractive supplies while celebrating your craft’s essence. Best part? You’re reusing materials that might otherwise end up in landfills.
Sewing Room Decorations Ideas Wall Decor

Your creative nook deserves more than just functional furniture – it craves personality. The right accents transform blank surfaces into visual storytellers, blending practicality with pieces that spark joy during marathon crafting sessions.
Highlighting the Must-Have Decorative Elements
Think beyond basic bulletin boards. A vintage-inspired clock shaped like a spool becomes both conversation piece and productivity tracker. Display finished quilts as rotating textile exhibits – they’ll remind you what’s possible during frustrating projects.
| Element | Practical Purpose | Mood Boost |
|---|---|---|
| Themed clocks | Time management | Whimsical focal point |
| Fabric displays | Project storage | Color inspiration |
| Personalized signs | Zone identification | Ownership pride |
Mirrors work double duty here. Position one near your cutting table to check garment fits, while its reflective surface amplifies natural light. For smaller spaces, try grouping three circular mirrors in varying sizes – instant art installation with spatial benefits.
One maker shares: “My ‘Thread Happens’ plaque gets more compliments than my actual quilts!” This playful approach creates an environment that feels authentically yours. Rotate DIY pieces with family heirlooms for walls that evolve with your craft journey.
Innovative Storage Solutions for Your Craft Space

Smart organization transforms chaotic corners into creative command centers. The secret lies in solutions that work harder than they look – like IKEA’s Kallax system. Its modular design lets you mix drawers for tangled threads with open cubbies for fabric displays, proving functionality can be beautiful.
Practical Tips for Organizing Tools and Materials
Start by claiming your vertical real estate. Wall-mounted shelves hold pattern binders while pegboards dangle scissors like metallic wind chimes. For floor space, try tiered carts – their spinning tops become rotating stations for pins and measuring tapes.
Containers should serve dual purposes. Clear jars showcase button collections while protecting them from dust. Opaque baskets hide half-finished projects without killing your vibe. One maker swears by upcycled cookie tins: “They store zippers quietly until I need a nostalgic creativity boost.”
Repurpose with purpose. Those wooden spools from Grandma’s attic? Stack them as risers for thread towers. Clip pattern pieces to curtain rods with colorful clothespins – instant accessible art. Remember: every item deserves a home, even if that home wears polka dots or machine-embroidered flair.
Inspiring Color Schemes & Lighting Tips

Light transforms your creative zone from functional to fabulous. The right palette and illumination work like silent collaborators – boosting focus during intricate tasks while reflecting your unique style.
Choosing Colors That Energize Your Space
Soft pastels act as blank canvases for vibrant fabrics. A maker shared: “My light pink walls make floral prints pop without overwhelming my senses during 3-hour quilting sessions.” Neutral bases let you switch accent colors seasonally – mint jars in spring, burnt orange baskets in fall.
Consider your natural light sources. North-facing areas benefit from warm yellows, while south-facing spaces can handle cooler grays. Darker accent walls add depth behind shelving units, creating visual interest without shrinking the area.
Creative Lighting Ideas for a Bright Sewing Room
Layer illumination like a pro. Start with daylight-mimicking bulbs in overhead fixtures. Add adjustable task lamps with 360° necks – perfect for spotlighting buttonholes or pattern markings. Finish with string lights draped over inspiration boards for evening creativity boosts.
Pro tip: Install LED strips under floating shelves. They’ll cast a gentle glow on thread collections while saving desk space. One crafter notes: “My under-cabinet lights make matching navy fabrics at night actually possible!”
Remember to test lighting positions at different times. What works for morning embroidery might cast shadows during evening zipper installations. Your eyes – and finished projects – will thank you.
Maximizing Functionality with Pegboards, Shelves, & Mirrors

The right tools deserve more than drawer purgatory. Meet your new organizational heroes: pegboards that double as art installations and shelves that moonlight as design statements. These elements create visual order while keeping essentials at arm’s reach.
Smart Vertical Solutions for Daily Workflow
White pegboards act like chameleons – blending into walls while showcasing colorful threads and metallic tools. Limit accessories to 8-10 essentials per board to maintain calm visuals. One maker shares: “My pegboard holds rulers like abstract sculptures – functional and Instagram-worthy!”
| Pegboard Use | Shelf Strategy | Daily Impact |
|---|---|---|
| Clip magazines to hooks | Float shelves near machines | Reference materials stay visible |
| Hang scissors vertically | Corner units for bulk storage | Prevents table clutter |
| Display bobbins in rows | High shelves for patterns | Creates airy workspace |
Reflective Surfaces That Pull Double Duty
Full-length mirrors aren’t just for fashion checks. Position them opposite windows to amplify natural light – your morning stitching sessions just got brighter. Sliding mirror doors conceal fabric stashes while making compact areas feel expansive.
Consider placement carefully. A mirror behind your machine lets you monitor garment drape without turning around. For smaller nooks, try hexagonal mirrors arranged like honeycomb – they scatter light in unexpected ways while adding geometric interest.
Budget-Friendly Sewing Room Accessories and Decor
Revamping your creative space doesn’t require a lavish budget—just a dash of ingenuity. Start by exploring your existing supplies with fresh eyes. Those neglected thread spools? They’re waiting to become 3D wall art when paired with a thrifted frame.
Affordable DIY Projects and Upcycled Finds
Join the growing movement of makers transforming castoffs into statement pieces. A simple craft space makeover might involve repurposing cookie tins as zipper organizers or turning vintage clogs into quirky pincushion holders. One creator shares: “My IKEA frame project cost less than lunch money but boosted my studio’s vibe instantly.”
Monthly de-stash challenges offer structured inspiration for using materials you already own. Try grouping mismatched buttons in clear jars or wrapping fabric scraps around plain storage boxes. These small changes create big visual impact while keeping your workspace functional and uniquely yours.

