You’ve scrolled past those flawless Pinterest posts—the ones that make handmade decor look impossible without a degree in art. Here’s a secret: creating beautiful pieces for your space doesn’t require perfection or a hefty budget. It just needs a spark of inspiration and materials you likely already own.
Maybe you’re holding a glue gun for the first time or rediscovering your creative side after years away. These ideas meet you where you are—no complicated techniques or specialty tools required. We’ve focused on designs that enhance your daily life, not clutter it. Think functional wall art that organizes jewelry or planters that breathe life into empty corners.
Short on time? Try a 15-minute macramé keychain during your coffee break. Prefer weekend projects? Build a custom shelf that becomes your home’s new focal point. The magic lies in transforming dollar-store finds or forgotten items into conversation starters.
You’ll notice something unexpected along the way: the process itself becomes therapy. Carving out creative space in a busy week feels like reclaiming a piece of yourself. And when you step back? You’ve made something that reflects your taste—not a mass-produced decor piece everyone else owns.
Ready to turn spare fabric scraps into bold throw pillows or old jars into rustic candle holders? Let’s explore how ordinary materials become extraordinary additions to your living space.
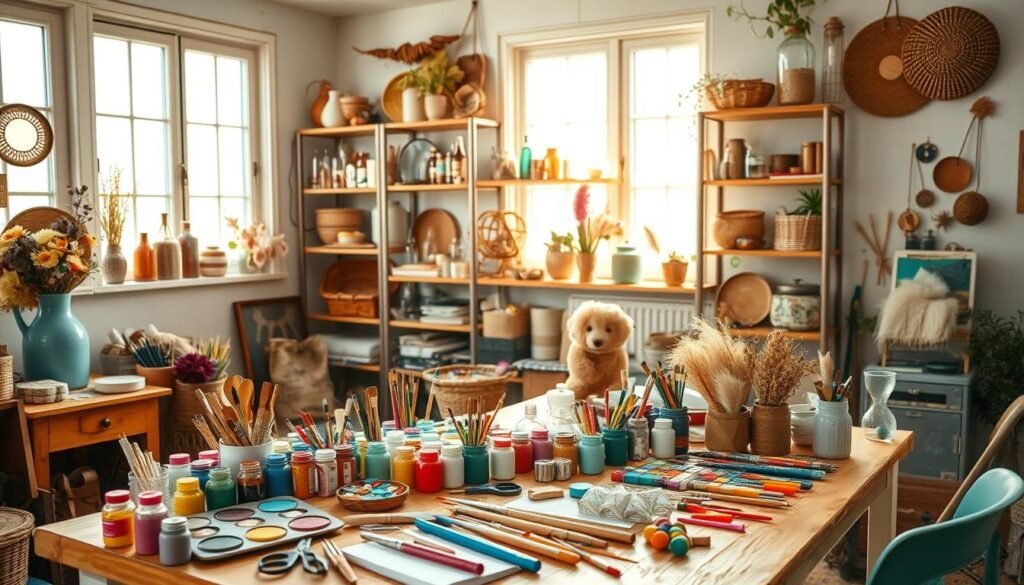
Overview of Simple Crafts for Adults DIY
Imagine transforming ordinary moments into creative victories—no gallery-worthy skills required. Working with your hands offers more than pretty results; it rewires how you experience daily life. Let’s explore why these activities matter and how to begin.
Why Your Brain Loves Making Things
Neuroscientists confirm what makers instinctively know: creative engagement lowers cortisol levels by 30% compared to passive activities. Regular sessions act like mental yoga—stretching problem-solving skills while calming racing thoughts. The bonus? Unique decor that tells your story.
| Project Type | Mental Benefit | Average Time |
|---|---|---|
| Textile Arts | Enhances focus | 1-2 hours |
| Upcycling | Boosts creativity | 30-90 mins |
| Nature Crafts | Reduces anxiety | 45-60 mins |
First Steps in Personal Creation
Begin with materials already in your home—old magazines become decoupage trays, while spare fabric transforms into wall hangings. Pro tip: Keep a “maybe box” for interesting scraps. Match projects to your schedule: try 20-minute painted coasters before tackling weekend furniture flips.
Remember, skill grows through doing—not waiting for perfection. Changed your mind mid-project? That’s not a mistake; it’s creative evolution. Your space deserves pieces that spark joy, not stress.
Inspiring Home Project Ideas for Adults

Your home deserves signature pieces that spark conversation—not cookie-cutter decor from big-box stores. These four ideas blend practicality with artistic flair, using materials you might otherwise overlook.
Nature Meets Functionality
Turn Saturday walks into creative sessions with leaf-imprinted clay dishes. Press fern fronds or maple leaves into air-dry clay using a rolling pin—the organic textures create museum-worthy patterns. Pro tip: Seal finished pieces with beeswax for water resistance.
“The magic happens when you lift the leaf—like unwrapping nature’s own blueprint.”
Revive last week’s grocery tote with floral stencils. Sarah Hearts’ technique uses painter’s tape to secure designs before applying acrylics. Let dry overnight, then heat-set with an iron for washable durability.
| Project | Key Materials | Skill Level |
|---|---|---|
| Leaf Dish | Air-dry clay, foliage | Beginner |
| Floral Tote | Stencils, fabric paint | Intermediate |
Unexpected Luxuries
Transform wilting roses into spa-worthy bath salts. Dry petals completely, then mix with Epsom salts and lavender oil. Store in mason jars tied with ribbon—instant thoughtful gifts that cost less than store-bought versions.
Make visitors smile before they knock with a hand-painted rainbow doormat. Use chalk to sketch arcs on coir, then fill with weatherproof paints. The cheerful design withstands foot traffic while hiding dirt between cleanings.
simple crafts for adults diy: A Step-by-Step Guide

Ever stared at a blank canvas or pile of materials, unsure where to begin? Structured guidance transforms hesitation into action. Let’s explore how clear frameworks empower your creative journey while leaving space for self-expression.
Step-by-Step Craft Instructions
Start with the basics: gather materials listed in your chosen tutorial. Missing an item? Swap it—that glass jar makes a fine paintbrush holder. Follow these key phases:
- Prep surfaces (sand wood, wash fabrics)
- Measure twice, cut once
- Assemble components dry before gluing
- Add finishing touches gradually
“The first stitch anchors the pattern; the hundredth completes the design.”
Notice how instructions build skills progressively? A painted coaster project teaches brush control before advancing to intricate patterns.
Creative Variations to Personalize Your Projects
Once comfortable with the core craft, make it yours. Try these twists:
- Swap acrylic paints for fabric dyes
- Use vintage buttons instead of new beads
- Experiment with unexpected color pairings
One maker transformed basic shelving into art by staining wood with coffee grounds—proof that ideas flourish when you bend the rules. Track modifications in a dedicated notebook; future you will appreciate the documentation.
| Original Project | Customized Version | Key Change |
|---|---|---|
| Macramé plant hanger | Beaded wall hanging | Added recycled glass beads |
| Stenciled pillowcase | Ombré dye effect | Used tea bags for gradient |
Remember—the way you create matters as much as the result. Each adjustment reflects your growing confidence in the DIY process.
Budget-Friendly DIY Home Decor Projects

Who says elegance demands deep pockets? Your most stunning decor could emerge from a $5 shopping spree. The thrill lies in proving style and savings coexist—especially when repurposing items others overlook.
Modern dollar stores stock more than plastic bins. Find glass vases perfect for ombré paint effects, or woven baskets begging for pom-pom trim. One creator transformed adhesive vinyl scraps into geometric statement walls—all materials under $10.
“Thrifted frames become luxe-looking displays with metallic spray paint. It’s not about the price tag—it’s about seeing potential.”
Upcycling reduces stress and costs. Turn chipped teacups into succulent planters or stain mismatched chairs with coffee grounds for a cohesive dining set. Seasonal updates? Swap summer seashells for autumn leaves in your DIY home decor crafts without buying new bases.
| Project | Cost | Key Materials |
|---|---|---|
| Textured Wall Art | $8 | Canvas, joint compound |
| Dyed Curtains | $12 | White sheets, Rit dye |
| Decoupage Trays | $6 | Thrifted tray, napkins |
Build your craft collection gradually. Start with multi-use adhesives and paints—they’ll fuel countless ideas. Remember: perfection isn’t the goal. That slightly uneven brushstroke? It’s proof your space reflects your hands’ brilliant imperfection.
Creative Paper Crafts and Floral Designs

Paper holds magic you can shape with your hands—no green thumb required. These projects turn humble sheets into lasting beauty that outlives fresh blooms. Let’s explore techniques that elevate wrapping paper scraps into heirloom-worthy pieces.
Paper Flower Gift Topper Techniques
Transform presents into keepsakes with dimensional paper flower gift toppers. The House That Lars Built’s method uses basic folds to create peony-like layers. Mistaken a petal? No worries—replace it faster than saying “scrap bin.”
These toppers shine brightest when matching your recipient’s style. Try metallic papers for anniversary gifts or recycled newsprint for eco-conscious friends. As one maker notes: “It’s like handwriting a love note through craft.”
Accordion Paper Flowers for Elegant Decor
Master the accordion fold, and you’ll dress entire events with paper botanicals. Follow this step-by-step tutorial for daffodils that fool the eye:
- Cut four identical paper rectangles
- Create crisp vertical folds
- Secure centers with double-sided tape
- Build dimension through layered assembly
| Project | Best For | Material Tips |
|---|---|---|
| Gift Toppers | Last-minute personalization | Use cardstock for structure |
| Accordion Flowers | Table centerpieces | Try crêpe paper for realism |
Scale designs from delicate boutonnieres to statement wall installations. Unlike fresh arrangements, these paper creations adapt to any season or color scheme. Your craft collection gains versatility while your wallet stays intact.
Modern DIY Crafts Featuring Mod Podge

What if your craft supplies could multitask as brilliantly as your daily schedule? Meet Mod Podge—the unassuming hero hiding in your art drawer. This all-in-one formula sticks, seals, and finishes projects while sparking ideas you’d never expect from one bottle.
Screen Printing Without the Fuss
Ditch expensive equipment for a Mod Podge screen printing hack. Cut stencils from freezer paper, adhere to fabric, then brush on the magic formula. Peel away after drying—crisp designs emerge like store-bought prints. Bonus: Use leftover paint from last month’s furniture flip.
Soap That Doubles as Art
Upgrade basic bars into spa-worthy treasures through decoupage. Press botanical napkin layers onto soap using Mod Podge as glue. The finish? A waterproof seal that lasts through showers. One maker gushes: “Guests think I splurged at boutique shops—it’s just clever crafting!”
| Project | Materials | Time |
|---|---|---|
| Printed Tea Towels | Cotton fabric, stencil | 45 mins |
| Decorative Soaps | Napkins, unscented bars | 20 mins |
Storage That Sparks Joy
Transform dollar-store bins with fabric scraps and Mod Podge. Brush the adhesive onto plastic surfaces, smooth material over edges, then seal with a topcoat. Suddenly, that boring organizer becomes a custom storage solution matching your office palette perfectly.
The real win? These techniques turn leftovers into headliners. Those fabric swatches from last year’s quilt project? They’re now chic drawer organizers. Mod Podge isn’t just a tool—it’s your partner in reimagining possibilities.
Innovative Jewelry and Accessory DIY
Your hands hold the power to turn raw materials into wearable confidence. Accessory-making blends self-expression with practicality—you craft pieces that whisper your personality to the world. Let’s explore two designs proving jewelry creation isn’t reserved for experts.
Rainbow Bangles for a Pop of Color
The House That Lars Built reveals how wood bangles become vibrant wrist art. Paint base coats using acrylics, then layer stenciled patterns with contrasting hues. Let dry between stages—patience builds depth. Swap colors seasonally or match them to your favorite outfits.
Tassel Earrings: Quick and Chic
Tell Love and Party’s tutorial masters speed without sacrificing style. Thread silk tassels through gold end caps, securing with jewelry glue. Attach earring hooks—done in under five minutes. Pro tip: Mix metallic tones for daytime-to-evening versatility.
There’s radical joy in wearing something you designed. Unlike mass-produced accessories, these pieces carry the energy of your creative time investment. Start with one project, and you might just discover a new form of personal storytelling.

