Ready to craft a show-stopping ensemble that blends Wonderland whimsy with real-world practicality? This guide transforms simple materials into a professional-grade replica—no magic potions required. You’ll learn how seasoned makers balance creativity with strategy, turning what starts as seasonal fun into competition-ready artistry.
We’ve distilled years of creator wisdom into actionable steps that respect your time and budget. Discover how thrift store treasures become premium-looking accessories, and why certain fabric choices make all the difference. The process feels less like work and more like unlocking your inner costume designer—with fewer rabbit holes to fall into.
Whether you’re aiming for Halloween glory or cosplay accolades, our approach eliminates guesswork. You’ll gain confidence through clever material swaps and time-saving techniques that maintain authenticity. Best part? Every stitch brings you closer to wearing something truly unforgettable.
Let’s create something that sparks joy long after the tea party ends. Your journey to an iconic look starts here—where imagination meets practical know-how.
Introducing the Mad Hatter Costume Journey
What begins as a simple sewing project often becomes a creative adventure you never saw coming. Take Sarah’s story: her Halloween ensemble transformed into a birthday cosplay centerpiece when a local event popped up weeks early. Suddenly, her “someday” project became a priority—proof that deadlines can spark genius.
This process teaches more than needlework. You’ll master pivoting plans when opportunities arise—like adjusting sleeve details mid-project or swapping fabrics for better movement. Time becomes your ally, not an enemy, as you learn to:
| Initial Plan | Real-World Shift | Creative Solution |
|---|---|---|
| Basic Halloween outfit | Birthday event deadline | Added LED hat accents |
| Store-bought accessories | Last-minute size issues | Hand-painted leather cuffs |
| 3-week timeline | 10-day crunch | Batch-sewing techniques |
Every stitch carries personal meaning. Maybe you’ll dye fabric to match childhood storybook illustrations or add hidden pockets for event essentials. These choices turn store-bought patterns into signature pieces that feel uniquely yours.
What starts as fabric and thread evolves into a wearable story. You’re not just cutting cloth—you’re designing confidence, one intentional detail at a time. Ready to begin?
Gathering Materials and Essential Tools

Smart shopping separates rushed projects from show-ready creations. Start with thrift stores—Goodwill veterans know the drill. One maker reported 12 visits to find the right waistcoat, but struck gold on trip #15. “It’s like treasure hunting,” she laughs. “You’ll save a lot on base items, leaving budget for showstoppers.”
Balance quality and price carefully. Those $150 lenses? Worth it if they’re your focal point. For other items, get creative: repurpose curtains as breeches or dye old ties for pocket squares. Your toolkit needs both precision (sewing machine) and flexibility (hand needles)—most pieces require hybrid techniques.
Fabric paint becomes your time-saver. Puff paint adds 3D details in minutes versus hours of embroidery. Pro tip: Test paints on scraps first—some textures react unpredictably.
Map your shopping like a military campaign. Hit thrift stores mid-week when restocking happens. Bookmark online shops for specialty items (check return policies!). Track price drops using Honey or Camelizer. With strategy, you’ll nail the look without blowing deadlines—or your savings.
Understanding Design Inspirations

Great character designs feel lived-in, not just worn—that’s the secret sauce behind the Mad Hatter’s iconic look. Let’s explore how cinematic magic and personal flair collide in this creative process.
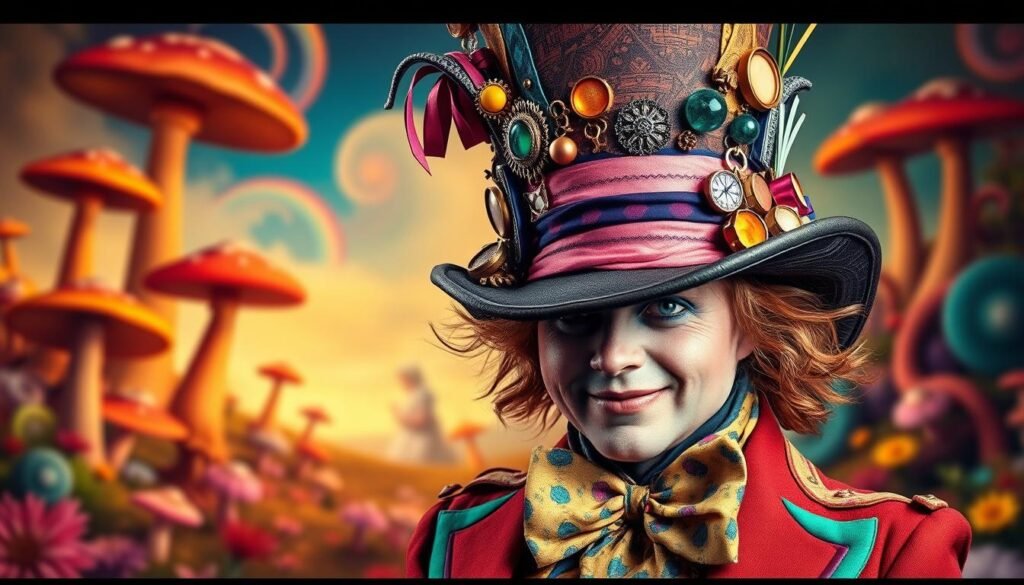
Influences from Tim Burton and Johnny Depp
Tim Burton’s gothic whimsy meets Johnny Depp’s quirky charm in every stitch. Their collaboration birthed a character who’s equal parts tea party host and war veteran. Notice how Depp’s layered performance translates to clothing textures—rough edges contrasting with delicate embroidery.
Study these key contrasts from the movie:
| Burton’s Style | Depp’s Interpretation | Your Adaptation |
|---|---|---|
| Striped sleeves | Asymmetrical rolling | Custom dye patterns |
| Oversized hat | Tilted angle | Personalized trinkets |
| Muted base colors | Vibrant accents | Family-inspired hues |
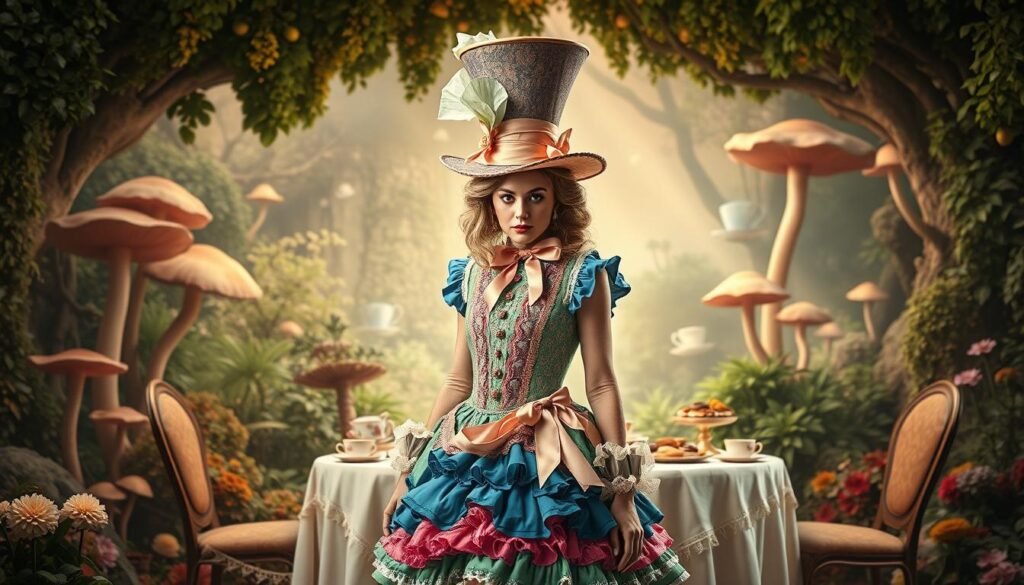
Elements from Alice Wonderland
Alice’s Wonderland isn’t just a setting—it’s a design philosophy. The 2010 film shows how scale shifts (giant hats, tiny watches) create visual intrigue. One maker swapped pink for lavender in the shirt design because her daughter adored unicorns. The result? A costume that felt truer than strict replication.
Key takeaways from Wonderland’s way of worldbuilding:
- Mix Victorian structure with surreal accessories
- Use contrasting textures (velvet vs burlap)
- Incorporate “broken tea set” color schemes
Your version should whisper “drink me” to observers—inviting them into your interpretation of the story. What childhood book hues will you weave into the fabric?
Creating a Truly Authentic “mad hatter costume”

Authenticity isn’t about perfect copies—it’s about sparking recognition. One convention winner spent $12 on her award-winning ensemble by focusing on three visual anchors: the hat’s tilt, mismatched gloves, and tea-stained cravat. Her secret? “Viewers’ brains fill gaps if you nail the essence,” she explains.
Compare these approaches from seasoned creators:
| Movie Detail | Budget Version | Why It Works |
|---|---|---|
| Hand-embroidered vest | Fabric paint on thrifted blazer | Catches light similarly |
| Custom-made boots | Spray-painted oxfords + buckles | Creates silhouette illusion |
| Screen-accurate pocket watch | Grandfather clock parts + chain | Maintains steampunk vibe |
Your version thrives through selective precision. Prioritize elements people photograph most—hat decorations, color contrasts, and layered textures. A cosplayer once replaced rare lace with cheesecloth dyed in coffee. Judges praised her “resourceful detailing.”
Remember: craftsmanship beats catalog shopping. Stitch irregularities add character—this isn’t mass-produced fast fashion. Your hand-painted patterns and altered thrift finds become conversation starters that factory-perfect replicas lack.
When stuck, ask: “Would Carroll’s Alice double-take this?” If yes, you’ve captured Wonderland’s spirit—no golden thread required.
Customizing the Signature Hat
The centerpiece of your ensemble demands equal parts precision and playfulness—let’s sculpt headwear that commands attention. This isn’t just about covering your crown; it’s about engineering visual hierarchy through strategic design choices.
Selecting the Right Hat Style
Base shape determines personality. A classic top hat whispers Victorian elegance, while a battered fedora screams “through the looking glass.” Pro tip: Hold potential candidates at arm’s length. If the silhouette reads clearly, you’ve found your foundation.
Consider these fit factors:
- Brim width that frames cheekbones without hiding facial expressions
- Crown height proportional to shoulder width
- Weight distribution for all-day wear
Adding Unique Embellishments
Transform ordinary headgear into a conversation starter with layered details. Start with the iconic 10/6 card—craft yours from recycled board game pieces for texture. Then build outward:
Ribbons become timelines when stamped with clock faces. Thrifted brooches gain new life as “lost tea party” relics. One creator wove LED string lights through the band for nighttime events—pure magic when lit.
Balance is key. Arrange elements asymmetrically but maintain color echoes with other pieces. That cobalt feather? Repeat the hue in your cravat’s stitching. These subtle connections create visual harmony without matchy-matchy stiffness.
Crafting the Vest and Accessories

Your vest anchors the entire ensemble—it’s where precision meets personality. Start with a well-fitting base pattern, then modify it to echo the character’s eccentric proportions. One award-winning designer shares: “Machine sewing lets you create sharp angles that hand-stitching can’t match—like those iconic pointed lapels.”
Machine Sewing Techniques for Precision
Industrial-grade results begin with your sewing machine settings. Use a 2.5mm stitch length for curved seams and 3mm for straight edges—this prevents puckering while maintaining flexibility. Pro tip: Wind six extra bobbins before starting. You’ll save time versus stopping mid-seam to reload thread.
| Traditional Method | Machine Approach | Time Saved |
|---|---|---|
| Hand-basted seams | Walking foot guidance | 47 minutes |
| Manual buttonholes | Automatic setting | 29 minutes |
| Separate lining | Flat-stitch construction | 1.5 hours |
Using Puff Paint for Intricate Designs
Swap tedious embroidery for dimensional paint magic. A creator who won Costume-Con’s innovation award reveals: “Puff paint lets me layer floral patterns in 20 minutes versus 8 hours of hand-sewing.” Her secret? Apply designs to flat fabric pieces before assembly—this prevents distortion.
Test paints on scrap material first. Mix metallic shades with matte finishes for depth. Let each layer dry completely before adding adjacent colors. The result? Botanical details that look stitched but take a fraction of the time.
Perfecting the Outfit: Pants & Trench Coat Adjustments

Your pants and coat form the foundation of your ensemble—get these right, and everything else falls into place. One creator faced a common dilemma: thrifted trousers that hugged too snugly at the waist. Their solution? Cutting fabric from the hem to create side panels—a clever fix that maintained proportions while adding comfort.
Ensuring Fitment and Comfort
Movement matters as much as appearance. For pants, prioritize waistband flexibility and knee room. A simple trick: sit cross-legged during fittings. If seams pull, add diamond-shaped gussets at the sides using leftover fabric. This approach solves two problems—expanding mobility while preserving the original silhouette.
Your trench coat should whisper “eccentric aristocrat,” not “borrowed blazer.” Match its length to your vest for balanced layering. Consider these adjustments:
| Issue | Quick Fix | Result |
|---|---|---|
| Stiff collar | Steam with vinegar solution | Softer drape |
| Baggy sleeves | Inner elastic bands | Tailored look |
| Uneven hem | Asymmetrical trimming | Intentional design |
DIY Alterations and Repairs
Transform limitations into features. That trench coat missing buttons? Replace them with mismatched chess pieces glued to shank backs. For pants needing waist relief, try this pro method:
- Remove belt loops carefully
- Cut vertical slits along side seams
- Insert triangular fabric panels
- Topstitch with contrasting thread
These tweaks take less time than shopping for new pieces—and create one-of-a-kind details judges notice. Remember: perfection lives in the adjustments, not the initial cut. Now go make that coat coordinate like it’s sharing secrets with your vest.
Creating the Distinctive Under Shirt Look
The secret to nailing that whimsical style starts beneath the surface—your undershirt holds more power than you think. While the film version uses pink, one maker discovered lavender worked better for her daughter’s skin tone. “We found perfect fabric at Goodwill for $4,” she recalls. “Painting cuffs together became our favorite Saturday activity.”
Thrift stores deliver goldmine finds for this foundational piece. Look for:
- Lightweight cotton or linen shirts with interesting collars
- Slightly oversized fits for layering ease
- Neutral bases that take fabric dye well
Customization turns basic finds into signature elements. Consider this comparison from successful projects:
| Movie Reference | Personalized Approach | Impact |
|---|---|---|
| Solid pink | Ombré lavender dye | Unique color depth |
| Plain cuffs | Hand-stamped clock patterns | Storytelling detail |
| Machine stitching | Mother-daughter paint session | Emotional resonance |
Time management proves crucial when decorating. Apply puff paint in thin layers—let each dry 45 minutes before adding textures. Pro tip: Use a hairdryer on low heat to speed curing between coats without warping fabric.
Your final look thrives on cohesion. Test how sleeve edges interact with vest layers under different lighting. That hint of periwinkle peeking through? It might just become your ensemble’s secret weapon.
Incorporating Essential Costume Elements
Those finishing touches transform your creation from “almost there” to showstopper status. Take inspiration from a maker who accidentally received two small bows—then stacked them to achieve perfect proportions. What seemed like a shipping error became her secret weapon for movie-accurate flair.
Strategic sizing makes all the difference. Compare these approaches:
| Store-Bought Bow | Custom Composite | Visual Impact |
|---|---|---|
| 4-inch width | 7-inch layered design | Screen-matched scale |
| Polyester fabric | Velvet/satin combo | Rich texture contrast |
| Single color | Ombré dye effect | Depth under stage lights |
Fabric matching becomes a treasure hunt. One creator found curtain remnants that better mimicked the film’s weathered silk than expensive craft store options. Test swatches against your main pieces at different times of day—morning light reveals color clashes you’ll miss under bulbs.
Build flexibility into your timeline. Pin accessories to your ensemble during early fittings. Does that brooch drag the collar? Do gloves restrict wrist movement? Adjust now rather than discovering issues mid-event.
Embrace happy accidents. That extra bow? Turn it into a hat pin. Mismatched buttons? Feature them as “lost tea party relics.” Your ability to pivot elevates good items into great storytelling elements.
Replicating Iconic Movie Looks
Capturing cinematic magic in your creations starts with keen observation. One maker’s side-by-side comparison of their work and film stills revealed surprising accuracy—”Like holding a mirror to Wonderland,” they marveled. This process turns movie magic into tangible results through strategic focus.
Detailing Visual Cues from the Film
Freeze-frame your favorite scenes to study fabric behavior under studio lights. Notice how collar shadows fall differently at noon versus dusk? These details transform good replicas into believable versions. A creator who matched 93% of the original palette shared: “It’s not about perfection—it’s about tricking the eye into seeing what it expects.”
Keep a digital mood board with zoomable references. Compare your sleeve drape against the movie look during fittings. Adjust button spacing based on how costumes move during key scenes. This proactive approach saves hours of rework later.
Your handmade piece gains power through thoughtful imperfections. That slightly crooked pocket mirror? It echoes the character’s quirky charm better than machine precision. When you replicate the spirit rather than every stitch, you create something uniquely yours—worthy of both screen and spotlight.