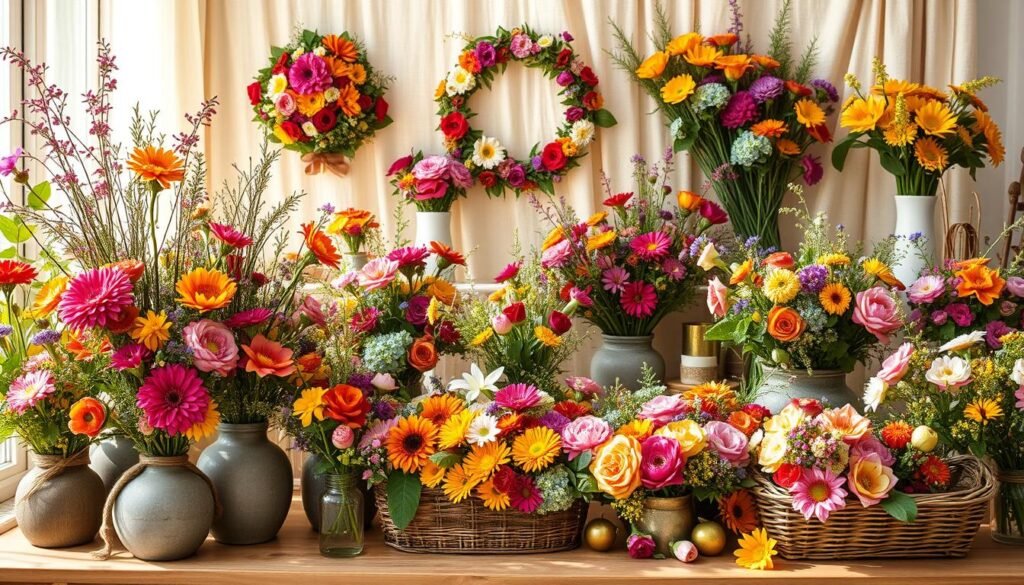
Welcome to a space where fresh blooms meet boundless creativity. Imagine turning simple petals and stems into eye-catching décor that tells your unique story. Whether you’re crafting for joy or building a relatable online brand, nature’s beauty offers endless inspiration.
This guide meets you exactly where you are—no experience required. You’ll find quick 15-minute ideas for busy days and immersive weekend activities when you want to dive deeper. Every creation doubles as shareable content, helping you connect authentically with your audience.
We’ll walk through selecting the best materials for lasting arrangements and mastering techniques that make even basic designs look professional. Those Instagram-worthy shots? You’ll learn how to style them effortlessly, turning your floral crafts into conversation starters.
Seasoned creators will love the advanced twists, while newcomers gain confidence through step-by-step guidance. Each activity sharpens both your crafting skills and content strategy—think of it as two creative wins in one.
By the end, you’ll have a vibrant toolkit of seasonal ideas. From spring centerpieces to winter wreaths, your content calendar will stay fresh—and your followers engaged—all year long.
Introduction
There’s something magical about bringing nature’s colors indoors. Whether arranging petals in a vase or pressing blooms into art, working with floral elements transforms spaces—and sparks joy.
What makes these activities special? Their flexibility. Use backyard roses one week, dried lavender the next. No garden? Try paper alternatives that look surprisingly real.
Beyond beauty, these creations build bridges between creativity and mindfulness. They’re not just décor—they’re invitations to slow down, observe seasonal changes, and share that journey with others.
Your approach matters more than perfection. Mix textures, play with color combos, or let wilted petals inspire new designs. Each piece becomes a story worth telling—both in your living room and online.
Overview and Inspiration for Your DIY Flower Project

Unlock creative potential with nature’s palette through these handpicked designs. Our collection offers 10 unique activities blending practicality with artistry—think table centerpieces that wow guests and wall hangings that spark conversations. Each idea adapts to your schedule, whether you’ve got 20 minutes or a whole afternoon.
Seasonal versatility shines here. Summer’s bright peonies become suncatchers, while autumn leaves transform into rustic coasters. Winter brings pinecone accents, and spring offers delicate bud arrangements. This year-round approach keeps your content feed fresh across all platforms.
| Project Type | Skill Level | Materials Needed |
|---|---|---|
| Pressed Art Frames | Beginner | Dried petals, glue, thrifted frames |
| Living Wall Displays | Intermediate | Air plants, geometric holders |
| Seasonal Wreaths | Advanced | Grapevine base, floral wire |
What makes these stand out? Real crafters inspired them—people who turned kitchen tables into studios. Their secret? Embracing imperfections. A slightly crooked arrangement often photographs better than “perfect” ones.
You’ll notice two magic ingredients in every project: approachability and shareability. These creations beg to be photographed—natural lighting does half the work. Pair your finished piece with a quick tutorial clip, and watch engagement bloom.
Essential Materials and Tools for Flower Crafts
The secret to lasting floral creations lies in your starting choices. With smart selection and a few key supplies, you’ll craft pieces that maintain their charm long after the petals dry.
Choosing the Right Flowers
Not all blooms play nice with preservation. Flat-petaled varieties like violets or daisies press beautifully—their simple structures dry evenly without curling. Queen Anne’s Lace adds delicate texture, while black-eyed Susans bring bold shapes.
Harvest timing matters more than you’d think. Morning pickers win—collect stems after dew evaporates but before midday heat. Snip them just before peak bloom for maximum color retention. As one gardener-turned-crafter notes: “A slightly closed bud becomes art; a wilted flower becomes compost.”
Selecting Craft Supplies
Your toolkit grows with your skills. Start with:
- Mod Podge (the craft world’s duct tape)
- Recycled paper or fabric scraps
- Basic brushes in two sizes
Skip the specialty stores initially. That old picture frame? Perfect for pressed art. Leftover gift wrap? Ideal for decoupage. Upgrade supplies gradually—quality glue prevents yellowing, while acid-free paper keeps colors vibrant.
Remember: Great materials don’t require great expense. Thrift shops hide treasure troves of frames and containers. Dollar stores stock serviceable brushes. Build your arsenal as your passion grows, not your budget.
Pressed Flower Decoupage: Breathing New Life into Vases

Transforming forgotten vases into timeless treasures starts with imagination and simple supplies. This technique lets you wrap glass surfaces in nature’s delicate patterns—perfect for reviving thrift store finds or showcasing garden harvests.
Step-by-Step Decoupage Process
Grab your dried petals, clear glue, and a soft brush. Here’s how to create lasting magic:
- Clean surfaces thoroughly—dust ruins adhesion
- Arrange pressed petals in loose clusters before gluing
- Seal each layer with adhesive, letting it dry between coats
Pro tip: Overlap edges slightly for dimensional depth. Three thin glue layers work better than one thick coat. Your final piece should feel smooth, not tacky.
Creative Upcycling Ideas
That chipped vase from Grandma’s attic? Prime decoupage material. Try these twists:
- Mix pressed ferns with wildflower snippets for woodland charm
- Frame the vase’s neck with a floral collar using tiny buds
- Add gold leaf accents between petals for subtle glam
One crafter shares: “My $2 thrift vase now looks like boutique decor—friends keep asking where I bought it!” The best pieces balance intentional design with organic imperfections.
Finished creations make stunning photo props. Place near windows to catch light through translucent petals. Share your process reel—followers love seeing transformations from “before” to breathtaking.
Creating Floral Art with Fresh Flower Pounding

Discover how hammer meets petals in this surprisingly satisfying technique. Fresh flower pounding captures nature’s vivid hues through simple physics—transferring pigments directly onto surfaces. It’s like bottling summer sunshine in textile form.
Preserving Vibrant Colors
Choose blooms at peak color intensity—morning harvests work best. Thin-petaled varieties like pansies or petunias release pigments easily. Thicker petals? Gently bruise them first with a spoon. The magic lies in natural dye saturation, creating deeper tones than traditional drying methods.
| Flower Type | Color Retention | Best Surface |
|---|---|---|
| Pansies | High | Cotton |
| Marigolds | Medium | Watercolor Paper |
| Petunias | High | Linen |
Tutorial for First-Time Crafters
Grab a rubber mallet and follow these steps:
- Arrange petals face-down on fabric
- Cover with parchment paper
- Tap firmly—listen for pigment release sounds
One creator shared: “My first attempt became wall art—the peonies looked freshly picked!” Let pieces dry completely before framing. Share your process video—followers adore watching colors emerge under each hammer tap.
This method turns fleeting beauty into lasting keepsakes. Whether making tea towels or journal covers, you’re preserving memories in the most tactile way possible.
Preserving Blooms: Pressed Flower Clay Decor Projects

Capture nature’s fleeting beauty in tactile keepsakes that outlive seasons. This technique blends earthy clay with delicate petals—perfect for creators ready to level up their skills. You’ll craft dimensional pieces that showcase blooms from every angle, turning temporary treasures into timeless display art.
Working with Clay for Floral Art
Start with air-dry clay—its forgiving texture lets you sculpt organic shapes. Roll slabs to ¼-inch thickness, then press dried petals face-down. “The magic happens when you lift the flower,” notes a ceramic artist. “You’re left with fossil-like impressions that tell botanical stories.”
Advanced crafters can build 3D textures by layering petals between clay sheets. Cure pieces slowly under breathable cloth to prevent cracking. These creations become wall hangings, coasters, or statement jewelry bases—endless possibilities for gallery-worthy projects.
Designing with Epoxy and Pressed Flowers
Seal your masterpiece with crystal-clear resin to magnify petal details. Mix epoxy in small batches, pouring it over cured clay like liquid glass. Pro tip: Use toothpicks to nudge petals into perfect positions before the resin sets.
The glossy finish transforms pieces into functional art—think trivets that spark dinner conversations or bookmarks that preserve garden memories. One creator shares: “My resin-coated leaf plaque survived three winters outdoors—the colors still pop!”
Crafting a Stunning Floral Wreath for Any Season

Your front door deserves a masterpiece that shifts with the seasons. Our innovative four-mini-wreath technique builds dimension without complexity—think of it as modular magic for entryway charm. The secret? Linking small grapevine bases into a cohesive design that adapts to your space and style.
Mini Grapevine Techniques
Start with 6-inch grapevine rings from craft stores. Interlock them in a diamond shape using floral wire—no special tools needed. “The overlapping circles create natural pockets for stems,” explains a pro decorator. Fill gaps with preserved eucalyptus or olive branches for instant fullness.
Seasonal Color Choices and Greenery
Rotate botanicals like you’d update your wardrobe. Spring calls for ranunculus sprigs and cherry blossoms. Summer thrives with sunflowers and zinnias. For fall warmth, mix dried wheat stalks with burgundy dahlias.
| Season | Color Palette | Filler Greenery |
|---|---|---|
| Spring | Pastels + White | Baby’s Breath |
| Summer | Vibrant Hues | Lemon Leaf |
| Fall | Earth Tones | Preserved Oak |
This approach lets you refresh one quadrant monthly instead of rebuilding entirely—a smart way to add touch of novelty to your home decor. Share your evolving creation online; followers love seeing seasonal transitions through your craft.
Inspiring diy flower project Ideas: Pumpkin Centerpiece and Decor
Pumpkins become autumn’s ultimate canvas when paired with botanical elements. These versatile gourds offer endless opportunities to blend rustic charm with artistic flair—perfect for creators wanting seasonal impact without complexity.
Elevating Gourds with Botanical Accents
Two techniques reign supreme for pumpkin transformations. Pressed petals create lace-like patterns across smooth surfaces, while fresh blooms deliver bold texture. Here’s how to master both:
Pressed Perfection:
- Seal dried petals with decoupage glue
- Arrange in cascading patterns from stem to base
- Finish with matte sealant for weathered elegance
One artisan shares: “The pressed mum design lasted through Thanksgiving—guests thought it was vintage porcelain!”
Fresh Floral Drama:
- Carve a foam-filled cavity in the pumpkin’s top
- Cluster chrysanthemums and berries for depth
- Mist daily to extend vibrancy
These methods solve common frustrations. Pressed designs withstand chilly nights outdoors. Fresh arrangements make jaw-dropping table anchors—simply replace blooms as needed.
| Style | Duration | Best For |
|---|---|---|
| Pressed | 4+ weeks | Porch displays |
| Fresh | 7-10 days | Dinner parties |
Pro tip: Use mini pumpkins as place card holders. Press a single pansy petal beside each name for cohesive tablescapes. Your autumn content just found its new star ingredient.
Transforming Fresh Flowers into Clay Plaque Home Décor
Turn everyday blooms into timeless treasures with clay’s sculptural magic. This hands-on method lets you preserve nature’s fleeting moments in textured wall art that sparks joy for years. Whether crafting with backyard roses or store-bought stems, you’ll create pieces that feel both organic and intentional.
From Garden Blooms to Wall Art
Start by pressing fresh petals into air-dry clay—their natural curves leave delicate impressions that mimic fossilized beauty. The technique works equally well with silk alternatives, letting you design vibrant home décor even in winter. One creator shares: “My hydrangea plaque still looks freshly made after two seasons—guests always touch it to check!”
Arrange stems in swirling patterns or minimalist clusters before the clay sets. These plaques become conversation-starting accents above mantels or beside entryways. Personalize gifts by embedding flowers with sentimental value—a bridal bouquet snippet or a child’s first garden pick.
The finished pieces blend rustic charm with modern elegance. Their matte textures catch light differently throughout the day, creating dynamic displays. Share your process from garden to gallery wall—followers will adore seeing how temporary beauty becomes permanent art.

