Winter gatherings just got warmer. Imagine a station where guests design their dream drink—swirling marshmallows, drizzling caramel, or adding a spicy kick with chili flakes. This interactive experience has become the secret weapon for hosts wanting to elevate birthdays, holiday parties, and even corporate events. Why? Because everyone loves feeling like a kid in a candy store (minus the sugar crash).
The magic lies in customization. Some might reach for crushed peppermint, while others opt for espresso shots to fuel late-night conversations. It’s not just about the drink—it’s about creating shared moments. When people gather around steaming mugs, laughter flows as freely as the chocolatey goodness.
What makes these setups so versatile? They work in cramped apartments and ballrooms alike. You don’t need fancy equipment—a rustic tray or tiered stand becomes an instant focal point. Bonus: They’re budget-friendly. Dollar-store jars filled with sprinkles look just as charming as artisan ceramics.
Social media’s obsession makes sense here. Picture-perfect stations invite guests to snap photos while crafting their creations. But the real win? Watching your cousin’s face light up when she discovers the cinnamon-vanilla syrup. That’s the stuff lasting memories—and Pinterest boards—are made of.
Ready to turn your next event into a sensory celebration? Let’s explore how to build a station that’s equal parts practical and magical.
Setting Up Your Cozy Cocoa Station
Transform your next get-together into a memorable experience with a customizable drink hub that works in any space. Whether you’re using a compact kitchen counter or sprawling dining table, smart layout choices make all the difference.
Location Strategy Made Simple
Your cocoa bar thrives on smart space planning. Position your slow cooker or carafe near outlets, leaving room for toppings on either side. Create clear zones: warm drinks here, mix-ins there, cups and napkins within easy reach. This prevents traffic jams when three friends reach for whipped cream simultaneously.
Winter Magic on a Budget
Dollar-store finds shine here. A $7 galvanized tray corrals marshmallows and sprinkles while adding rustic charm. Scatter pinecones dipped in cinnamon oil ($2.50/bag) for subtle scent and texture. Drape brown craft paper ($3.50 roll) across surfaces—it hides stains while looking intentionally woodsy.
Twinkling lights transform basic areas into storybook scenes. Drape them over faux evergreen branches ($2.50 after discounts) for instant hygge. Complete the vibe with pine-scented candles and a holiday playlist murmuring in the background. Your guests will swear they’re sipping cocoa in a snow-dusted cabin.
Creative DIY Hot Cocoa Bar Concepts

Unlock the charm of custom drink stations that adapt to every occasion. Whether hosting a woodland-inspired gathering or a glittering holiday soirée, your setup becomes an extension of your creative vision. The secret? Themes that spark joy while keeping practicality in check.
Seasonal Storytelling Through Design
Rustic log cabin vibes shine with burlap runners and pinecone garnishes—perfect for lumberjack-themed events. Swap decor as seasons change: autumn calls for cinnamon sticks in mason jars, while winter welcomes frosted branches and plaid accents. This approach keeps your station feeling fresh year-round.
| Season | Color Palette | Signature Toppings | Ambiance Elements |
|---|---|---|---|
| Fall | Burnt orange, brown | Pumpkin spice dust, candied pecans | Faux maple leaves, lanterns |
| Winter | Emerald, gold | Peppermint bark, gingerbread crumbles | Twinkle lights, velvet ribbons |
| Valentine’s | Blush, crimson | Edible rose petals, ruby chocolate | Heart-shaped chalkboard signs |
Personalization turns guests into co-creators. Try chalkboard labels letting visitors name their creations, or flavor profile cards suggesting combinations like “Snowflake Sweet” (vanilla + coconut) or “Spiced Explorer” (chili + dark chocolate). These touches encourage interaction without complicating setup.
Balance is key. A Halloween station might feature black sugar “spider webs,” but keep marshmallow ghosts within easy reach. For Christmas, cluster candy canes near kid-friendly zones while placing bourbon-infused syrups at adult height. Smart placement maintains both theme integrity and flow.
Hot Cocoa Bar Ideas: A How-To Guide

Crafting a memorable drink station starts with smart prep work and intentional design. Let’s transform your kitchen counter into a self-serve wonderland where guests feel like master chocolatiers—without the cleanup stress.
Essential Supplies and Tools
Start with thermal carafes or a 6-quart slow cooker for your base. Choose between disposable paper cups (Starbucks-style with sleeves) or ceramic mugs for reusable charm. Wooden spoons prevent clinking noises, while mini scoops keep portions tidy—no one wants a marshmallow avalanche!
Mason jars become your secret weapon. Use tall ones for striped paper straws, medium sizes for crushed nuts, and tiny vessels for flaky sea salt. Red baker’s twine adds rustic flair when wrapped around lids. Pro tip: Print labels on cardstock using free Canva templates—they’ll look boutique-bought without the price tag.
Step-by-Step Setup Instructions
Three days before:
- Wash and dry all jars
- Print signage and labels
- Test your slow cooker settings
Day-of setup:
- Arrange jars on tiered stands for height variation
- Place cups/mugs at the station’s front edge
- Position stirring tools beside each topping category
You’ll love how muffin tins with liner cups corral smaller toppings like chocolate shavings. For crowds over 20? Double your slow cookers and use paper products to simplify cleanup. A smart trick: Cluster kid-friendly options (sprinkles, mini marshmallows) at lower levels while keeping adult add-ons (espresso shots, liqueurs) higher up.
Delicious Hot Chocolate Recipes for Your Bar

Your drink station’s star attraction? A velvety-smooth chocolate foundation. Let’s craft recipes that turn first-time sippers into lifelong fans.
Slow Cooker vs. Stovetop Methods
Slow cookers shine for stress-free hosting. Combine cocoa powder with hot water first—this prevents gritty texture. Add chopped chocolate bars (never chips—they contain stabilizers) and dairy. Let it simmer while you prep toppings. Perfect for events lasting 3+ hours.
Stovetop versions offer control. Whisk constantly over medium heat to avoid scorching. Ideal when serving 6-8 guests quickly. Pro tip: Use heavy-bottomed pans for even heat distribution.
| Method | Best For | Prep Time | Key Tip |
|---|---|---|---|
| Slow Cooker | Large crowds | 3-6 hours | Stir every 60 minutes |
| Stovetop | Small gatherings | 15 minutes | Use double boiler |
Incorporating Real Chocolate and Cocoa Powder
Choose Dutch-process cocoa powder for deeper flavor. Its alkaline treatment reduces acidity, pairing beautifully with creamy dairy. Combine with real chocolate bars (60-70% cacao) for layered richness.
Evaporated milk works magic—its concentrated proteins prevent separation. For dairy-free options? Swap whole milk for oat milk and use coconut cream. Always melt chocolate slowly to avoid grainy texture.
Remember: Sugar becomes optional when using quality ingredients. Taste before adding sweeteners—your toppings might provide enough sweetness. Now go make that molten masterpiece!
Innovative Hot Chocolate Toppings and Mix-Ins

The magic of customization lies in the details—those crunchy, creamy, and colorful extras that turn a simple drink into a personal masterpiece. Let’s craft a topping selection that sparks joy for both nostalgia lovers and flavor adventurers.
Classic Treats and Modern Twists
Start with familiar favorites: fluffy whipped cream towers and pillowy marshmallows. Then, layer in surprises like chili-lime sugar or matcha-dusted almonds. This balance keeps your station welcoming yet intriguing—like meeting an old friend who just got interesting.
Texture plays lead singer here. Crushed pretzels add salty crunch beside smooth caramel sauce. Toasted coconut flakes bring tropical vibes, while freeze-dried raspberries deliver tart bursts. Think of each topping as a band member—they should harmonize, not compete.
| Type | Classic Options | Modern Twists | Pairing Tips |
|---|---|---|---|
| Crunchy | Graham crackers | Wasabi peas | Pair with creamy sauces |
| Sweet | Chocolate chips | Browned butter toffee | Balance with nuts |
| Festive | Candy canes | Peppermint bark | Use sparingly |
For kid-friendly zones, cluster rainbow sprinkles and mini Reese’s cups at eye level. Adults? Elevate their experience with bourbon-soaked cherries or cardamom-infused honey. Always label potential allergens clearly—nobody wants a sneaky peanut surprise.
Presentation matters. Use tiered stands to create visual height, and chill dairy-based toppings in nested bowls with ice. Pro tip: Place sauces in squeeze bottles for mess-free drizzling. Your guests will love crafting Instagram-worthy creations that taste even better than they look.
Themed Cocoa Stations for a Festive Atmosphere

Themed stations turn sipping into storytelling. Imagine guests swirling candy cane dust into peppermint-infused drinks or crafting vegan masterpieces with dairy-free toppings. These curated experiences let you celebrate diverse tastes while maintaining cohesive design.
Holiday, Peppermint, and Vegan Variations
Peppermint themes shine with crushed candy canes and striped straws. Balance sweetness with bitter chocolate shavings—it keeps flavors from becoming cloying. For vegan guests, use oat milk bases and clearly labeled plant-based toppings like coconut cream clouds.
| Theme | Base | Signature Toppings | Accents |
|---|---|---|---|
| Peppermint Twist | Dark chocolate | Candy cane dust, white chips | Silver sprinkles |
| Vegan Delight | Almond milk | Maple syrup, vegan marshmallows | Reusable bamboo stirrers |
| Winter Spice | Mexican chocolate | Cinnamon sticks, ancho chili | Copper mugs |
Kid-Friendly and Boozy Options
Create magic for little ones with rainbow sprinkles and mini marshmallow shooters. Use plastic squeeze bottles for mess-free sauce drizzling. Adults? Elevate their experience with spiked whipped cream stations featuring Baileys or peppermint schnapps.
| Audience | Must-Haves | Safety Tip | Fun Extra |
|---|---|---|---|
| Kids | Colorful straws, cookie dippers | Non-breakable cups | DIY sprinkle shakers |
| Adults | Liqueur carafes, espresso shots | Separate serving area | Chocolate-dipped citrus peel |
Always cluster kid toppings at lower heights—tiny hands reach what they see. For boozy additions, use distinctive glassware to prevent mix-ups. This thoughtful setup lets everyone craft their perfect moment safely.
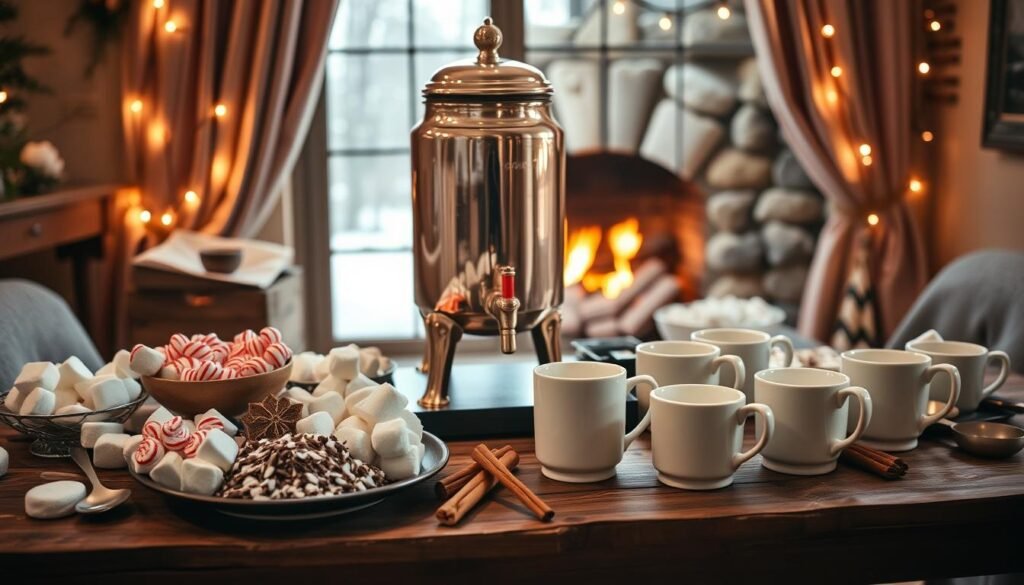
Utilizing a Hot Water Dispenser for Effortless Preparation
Streamline your setup with a tool that does the heavy lifting. A temperature-controlled dispenser keeps liquids at perfect serving warmth—no more reheating burnt bases or lukewarm disappointments. You’ll love how it frees up counter space while ensuring every guest gets piping-rich sips.
Benefits of Quick and Consistent Heat
Instant access means no waiting for kettles to whistle. Adjustable settings handle everything from delicate white chocolate melts to robust dark blends. This consistency matters—your peppermint syrup won’t seize, and caramel stays silky.
Safety shines here too. Locking lids prevent spills when elbows bump during lively chats. Place it near mix-ins for seamless flow: grab a mug, pour base, customize. Pro tip? Use insulated carafes alongside for dairy-free alternatives.
Hosts gain peace of mind knowing the station runs itself. You’re free to mingle—or finally try that spiced orange twist you’ve been eyeing. Because memorable gatherings shouldn’t mean babysitting appliances.

