Ever feel like your space needs a personal touch—something that whispers “you” without shouting for attention? Imagine turning spare moments into opportunities to create pieces that spark joy and calm your mind. This isn’t just about making pretty things—it’s about carving out time to reconnect with your creative side.
Why has hands-on creation become so popular? It’s simple: blending mindfulness with productivity hits different. Studies show creative activities reduce stress by up to 75%—like yoga for your imagination. You’ll find everything here from 30-minute refreshers to weekend endeavors that become conversation starters.
No expertise? No problem. Whether you’re mastering the art of macramé or giving old furniture a modern twist, each project meets you where you are. The best part? Every completed piece builds confidence—like leveling up in real life.
Ready to transform idle hours into something extraordinary? Let’s dive into techniques that fit your rhythm, tools that feel like extensions of your hands, and results that’ll make you think: “I made that?” Spoiler: You totally did.
Introduction: The Appeal of Adult Crafts
Creating with your hands offers a unique blend of therapy and productivity. Studies reveal that tactile activities reduce stress hormones by 25% while boosting dopamine levels—a natural mood enhancer. You’re not just making decor; you’re rewiring your brain for calm.
In our screen-dominated lives, tangible projects provide grounding moments. Think of it as mindfulness with results—a painted vase or woven wall hanging becomes proof of time well spent. Best part? These pieces often cost less than store-bought items while reflecting your exact taste.
| Traditional Crafting | Modern Approach | Key Difference |
|---|---|---|
| Solitary activity | Community-driven | Shared learning |
| Basic materials | Upcycled + luxury | Sustainable options |
| Fixed patterns | Custom designs | Personal expression |
Online groups have transformed how makers connect. Platforms like Instagram and local workshops let you swap tips with enthusiasts worldwide—no expertise required. One survey found 68% of participants felt more motivated when sharing progress photos.
Whether you choose simple paper quilling or intricate textile art, each session becomes a mini-retreat from daily pressures. The rhythm of repetitive motions—cutting, stitching, arranging—creates space for mental clarity. Suddenly, that thrifted lamp base isn’t just a project; it’s a pathway to presence.
Mental and Emotional Benefits of DIY Projects

What if your next hobby could sharpen your mind while soothing your nerves? Hands-on creation acts like a reset button for modern stress. Studies show rhythmic activities—knitting, painting, or arranging dried flowers—trigger your body’s relaxation response. It’s meditation with measurable results.
Your brain gets a full workout during these sessions. Left side solving problems, right side choosing colors. This cross-talk strengthens neural pathways—proven to boost memory and delay cognitive decline. One UCLA study found regular creative engagement reduces dementia risk by 63%.
“Finishing a tangible object floods your system with dopamine—nature’s reward chemical. That ‘I made this!’ feeling? Pure neuroscience.”
| Benefit Type | Physical Impact | Mental Impact |
|---|---|---|
| Repetitive Motion | Lowers heart rate | Reduces anxiety |
| Creative Problem-Solving | Improves dexterity | Enhances focus |
| Social Sharing | Boosts oxytocin | Builds confidence |
Sharing progress photos or joining local workshops adds another layer. Humans thrive on connection—68% of makers report feeling more motivated when exchanging ideas. That reclaimed wood shelf isn’t just decor; it’s proof you’re growing skills while grounding yourself.
These activities create space between thoughts. No room for mental chatter when you’re matching fabric patterns or calculating glue drying times. The satisfaction lasts long after tools are put away—a quiet pride that says, “I’m capable of wonderful things.”
DIY Inspiration: crafts for adults diy for Every Skill Level

Ever wonder how a single afternoon can transform “I can’t” into “I did”? The secret lies in matching projects to your current abilities—then stretching just enough to grow. From quick wins to intricate masterpieces, there’s a perfect fit waiting.
New to hands-on creation? Start with easy crafts like painted plant pots or stamped fabric napkins. These require minimal supplies but deliver maximum satisfaction—ideal for building momentum. Tutorials with step-by-step visuals make techniques approachable, even if you’ve never held a brush.
Seasoned makers thrive on challenges. Think hand-stitched leather journals or geometric wall sculptures. Platforms like Skillshare offer advanced tutorials to refine your methods. The key? Choose projects that excite rather than intimidate.
| Skill Level | Project Example | Average Time |
|---|---|---|
| Beginner | Washi tape coasters | 45 minutes |
| Intermediate | Macramé wall hanging | 3 hours |
| Advanced | Resin art trays | 6+ hours |
Customization bridges gaps between levels. Add metallic accents to simple clay beads for instant sophistication. Simplify complex patterns by breaking them into phases. One survey found 82% of creators feel more confident when modifying tutorials to suit their pace.
Ready to get tutorial recommendations tailored to your skills? Online communities categorize projects by difficulty—no guesswork needed. Remember: Progress beats perfection every time. That first imperfect creation? It’s proof you’re evolving.
Step-by-Step Guide: Essential Tools and Supplies

Your toolkit can make or break your creative flow—let’s fix that. With the right gear, even complex projects feel manageable. We’ll focus on must-haves that deliver professional results without overwhelming your workspace.
Hot Glue Gun Basics and Safety Tips
This versatile tool bonds materials in seconds—but misuse leads to messy joins or burns. Low-temperature guns work for delicate fabrics, while high-heat models handle wood or metal. Always keep a silicone mat nearby to catch drips.
| Glue Type | Best For | Safety Tip |
|---|---|---|
| Low-temp sticks | Paper, ribbon | Wait 2 mins before touching |
| High-temp sticks | Wood, ceramics | Use heat-resistant gloves |
Test glue consistency on scrap material first. If strings form, lower the temperature. Store your gun upright to prevent leaks—trust me, you don’t want melted adhesive on your table.
Choosing Quality Craft Supplies
Not all materials are created equal. Fabric paints should feel creamy, not watery. Brushes with tightly packed bristles last longer. Here’s when to invest versus save:
| Splurge On | Budget Pick | Why |
|---|---|---|
| Fabric scissors | Disposable blades | Precision cuts fabric |
| Acrylic paints | Sample sizes | Vibrant color payoff |
Organize supplies in clear bins with labels. Pegboards keep frequently used tools visible. Need a tutorial? Search “get tutorial” filters on YouTube for skill-specific guides. Prep your space first—it’s the secret to stress-free creating.
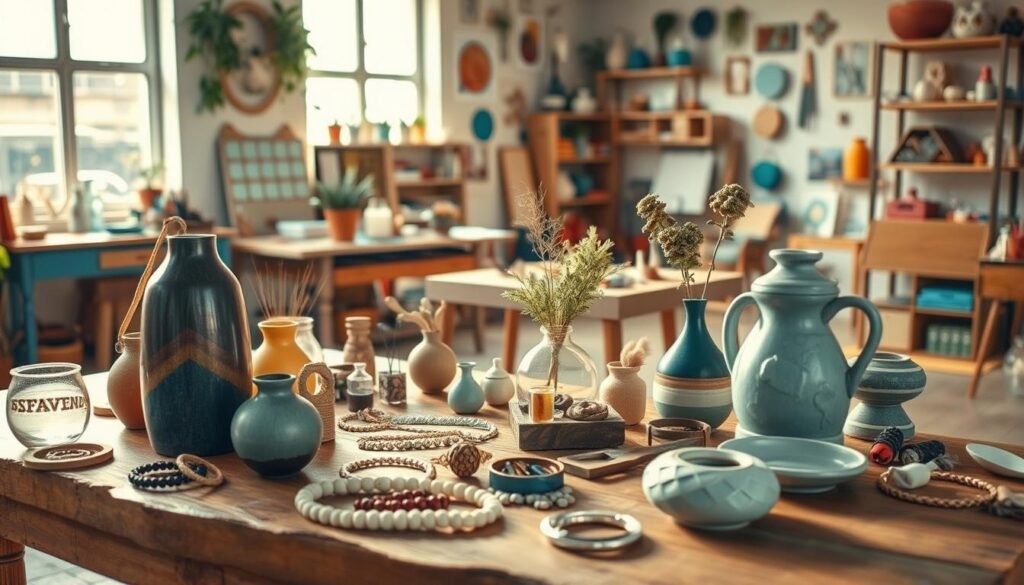
Simple DIY Jewelry and Accessory Ideas

What if your next accessory could tell a story? With a few basic supplies, you transform ordinary materials into wearable art that reflects your personality. Silk tassels become earrings whispering bohemian charm, while wooden bangles turn into rainbow-hued wrist candy.
Let’s start with five-minute tassel earrings. Attach silk tassels to gold end caps using jewelry glue, then screw on earring hooks. Boom—instant boho chic. Prefer arm candy? Paint geometric patterns on wood bangles using acrylics and stencils. Both projects cost less than store-bought equivalents.
| Project | Time Needed | Key Materials |
|---|---|---|
| Tassel Earrings | 5 minutes | Silk tassels, glue |
| Rainbow Bangles | 20 minutes | Wood bangles, stencils |
| Beaded Necklaces | 30 minutes | Waxed cord, gemstones |
The magic lies in customization. Swap silk for leather tassels. Use metallic paints instead of pastels. Online tutorials make it easy—search “get tutorial” filters to find skill-matched guides. One creator told me: “My mismatched earrings became my signature look—people ask where I bought them!”
These projects require minimal tools: scissors, glue, and imagination. Gift them or keep your favorites. Either way, you’ll master techniques that turn “I wish” into “I made this” faster than you’d think.
Creative Home Decor Projects on a Budget

Who says stylish home updates require designer prices? Transform your space with clever decor projects that cost less than dinner for two. The secret? Strategic color choices and everyday materials turned extraordinary.
Take the mid-century modern side table from Sugar and Cloth. Store versions cost $100+, but their DIY blueprint uses plywood and hairpin legs for under $40. Spray-paint metallic accents on the edges for luxe flair—no carpentry skills needed.
| Project | Cost | Key Materials |
|---|---|---|
| Rainbow Doormat | $12 | Coir mat, acrylic paints |
| Colorblock Vase | $8 | Spray paint, painter’s tape |
| Modern Side Table | $38 | Plywood, hairpin legs |
Color becomes your design superpower here. That plain vase? Diagonal stripes in matte black and gold make it gallery-worthy. A natural coir mat turns into a rainbow welcome with outdoor paints—just stencil triangles first for crisp lines.
These home refresh ideas deliver maximum impact in minimal time. The vase takes 20 minutes (mostly drying time!), while the doormat dries by lunch. You’ll gain confidence to tackle bigger walls or furniture projects later.
Best part? Each piece reflects your taste perfectly. No settling for store-bought “almost rights.” Your living room gets personality-packed upgrades that friends will swear came from a boutique.
Upcycled Crafts and Dollar Store DIY Projects
Who knew that a dollar could unlock a world of designer-worthy decor? Those plain organizer bins and basic glasses hiding in discount aisles hold serious potential—you just need vision and a few simple techniques. Let’s turn “meh” materials into showstoppers.
Take those Dollar Tree storage bins. With fabric scraps and Mod Podge, they become luxe-looking organizers that blend seamlessly with your decor. Pro tip: Use geometric-patterned cloth for modern flair. The transformation takes under an hour but looks straight from a boutique.
| Dollar Store Find | Upgrade Technique | Result |
|---|---|---|
| Plastic bins | Fabric decoupage | Designer storage |
| Plain glasses | Vinyl stenciling | Artisanal drinkware |
| Wood frames | Metallic leafing | Gallery-worthy art |
Those IKEA-like coupe glasses? A $1 vinyl roll from the craft aisle turns them into Mad Men-worthy cocktail cups. Cut crescent moon shapes, apply with transfer tape, and watch guests marvel at your “expensive” taste. Trust me—they’ll never guess the origin story.
The magic lies in strategic upgrades. Focus on items with clean lines and neutral bases. Matte finishes hide cheap plastics, while metallic accents add instant sophistication. You’ll master spotting hidden gems—like that basket begging for dip-dyed handles.
These projects prove style isn’t about price tags. With clever tweaks, you create pieces that spark joy and conversations. Bonus? Keeping usable items from landfills never looked so chic.
Modern Techniques: Decoupage, Stenciling, and Painting
What separates a Pinterest-worthy project from a craft fail? Often, it’s mastering three powerhouse techniques that turn basic materials into gallery-ready pieces. Let’s demystify methods anyone can learn—no prior experience needed.
Decoupage Secrets for a Professional Finish
That vintage magazine collage look? Achieve it without trapped air bubbles or peeling edges. Start with thin, even layers of adhesive—mod podge applied in one direction prevents wrinkles. Use a brayer roller to smooth paper onto curved surfaces like vases or trays.
| Common Issue | Quick Fix | Pro Tip |
|---|---|---|
| Bubbles under paper | Prick with pin, re-roll | Work from center outward |
| Uneven edges | Sand with 220-grit paper | Seal with clear acrylic |
| Glue cloudiness | Use matte finish | Test on scrap first |
Stenciling opens endless possibilities. Sarah Hearts’ floral tote bag tutorial shows how painter’s tape secures designs on fabric. For crisp lines, dab paint vertically—don’t brush. Acrylics dry fast, letting you layer colors without smudging.
Not confident with a brush? Bless’er House proves landscapes are achievable through strategic washes and blending tools. Their step-by-step way of building layers turns nervous strokes into confident sweeps. Search “get tutorial” filters to find skill-matched guides for any project.
These techniques adapt across mediums. A decoupaged tray becomes a stenciled accent table. Combine methods for truly unique pieces—like discovering pro decoupage methods that elevate thrift store finds. Your hands? They’re about to become magic wands.
Trending Crafts: Paper Flowers and Pressed Flower Lanterns
Why settle for fleeting beauty when your creations can bloom year-round? Paper and pressed flower projects combine artistry with practicality—no watering needed. These pieces capture nature’s elegance while letting you control every hue and shape.
Master the accordion folding method to create dimensional peonies or roses. One tutorial from The House That Lars Built shows how varying paper lengths produce cascading petals. “Cutting angled edges creates realistic curves,” their guide notes. Soon, gift boxes sport custom blooms that outlast fresh bouquets.
| Project Type | Key Materials | Time Investment |
|---|---|---|
| Gift Toppers | Cardstock, floral wire | 15 minutes |
| Pressed Lanterns | Dried flowers, mod podge | 45 minutes |
| Wall Arrangements | Crepe paper, hot glue | 2 hours |
Pressed flower lanterns add enchantment to any room. Sandwich dried petals between glass panels using decoupage glue. When lit, they cast botanical shadows—ideal for cozy evenings or garden parties. FIRST DAY OF HOME’s design proves even beginners can achieve this ethereal look.
Search “get tutorial” filters to find skill-matched guides. Scale projects from single stems to full centerpieces. Your creations? They’ll thrive through seasons, spills, and moves—proof that patience blooms into lasting beauty.
Fun Projects: Colorful Game Upgrades and More
What transforms a rainy afternoon into a burst of creative energy? Sometimes, the simplest tweaks spark the most joy—like revamping classic games with bold personality. Take that wooden Jenga set gathering dust: with acrylic paints and foam brushes, you’ll create a vibrant showstopper in under 30 minutes.
Paint each block’s edges in sunset hues or neon stripes. Let dry between coats—perfect time for a coffee break. This project works solo or with kids, turning routine play into artful moments. Bonus? No two towers will ever look alike.
Search “get tutorial” filters for pro tips on color combos that pop. Love metallic accents? Swap basic paints for pearlescent finishes. Want durability? Seal with clear varnish. The best upgrades balance creativity with practicality.
These playful refreshes prove creativity thrives in small doses. Your refreshed Jenga set becomes more than a game—it’s proof that imagination turns ordinary into extraordinary. Ready to get tutorial ideas flowing? Your next burst of inspiration is just one brushstroke away.

