Ever thought your plant containers could be more than just dirt holders? Imagine turning humble terracotta into vibrant conversation starters that reflect your unique style. This isn’t just about decoration—it’s about merging functionality with self-expression through color and texture.
Whether you’re using acrylics for punchy patterns or chalk paint for vintage charm, these projects let you revive tired containers in minutes. That chipped planter gathering dust? It’s about to become your favorite DIY canvas. The best part? You don’t need formal training—just enthusiasm and a willingness to experiment.
We’ll show you how traditional art techniques translate beautifully to curved surfaces. From color theory basics to texture layering tricks, you’ll discover methods that make each piece gallery-worthy. It’s where gardening meets craftsmanship, creating pieces that enhance both your patio and living room.
Why has this trend exploded? Beyond the Instagram-worthy results, there’s something deeply satisfying about transforming everyday objects. It’s equal parts stress relief and home makeover magic. Ready to dip your brush into this colorful world?
Introduction to Flower Pot Painting and Canvas Creations
Have you ever looked at a plain clay container and seen a blank slate for creativity? The DIY revolution has turned ordinary household items into opportunities for self-expression—and plant holders are no exception. What began as simple upcycling projects has blossomed into a full-fledged art movement, blending practicality with personal flair.
When Craft Meets Container
Terracotta’s porous surface becomes a playground for brushes and pigments. Unlike flat canvases, these rounded forms challenge you to think dimensionally. That half-finished acrylic set in your closet? It’s about to find new purpose. Artists and hobbyists alike are discovering how basic techniques—like layering washes or dry brushing—translate beautifully to curved surfaces.
Functional Art for Everyday Spaces
Why limit artwork to walls? A hand-decorated planter serves dual roles: nurturing greenery while showcasing your style. “The best decor solves problems and sparks joy,” notes a Portland-based designer. This approach lets you practice color theory on a small scale before tackling larger projects—perfect for testing bold patterns or intricate botanicals.
Beyond aesthetics, there’s science behind the satisfaction. Studies show repetitive brushstrokes lower stress hormones, making this craft therapeutic. Plus, you’re giving discarded items new life—a win for your mental space and the planet.
Essential Materials and Techniques for a Successful Project

The right supplies transform simple projects into gallery-worthy pieces. Let’s cut through the clutter—you need three things: quality pigments, smart workspace setup, and surface prep that sticks (literally).
Choosing the Right Paints and Tools
Acrylic paints are your new best friend—they dry fast and play nice with both indoor and outdoor surfaces. For containers facing the elements? Gloss enamel laughs at rain and UV rays. Prefer matte finishes? Chalk paint gives that velvety look perfect for tabletops.
Grab these essentials:
- Flat brushes for broad strokes
- Foam applicators for streak-free coverage
- Paint pens (Sharpies bleed; Posca markers rule)
Pro tip: Always test colors on scrap material first. That “sunshine yellow” might dry closer to mustard.
Preparing Your Workspace and Pot
Clear your kitchen table—this isn’t a crumb-friendly operation. Lay down kraft paper, open windows for ventilation, and keep rubbing alcohol handy for quick cleanups.
Before dipping your brush:
- Scrub terracotta with vinegar solution—no soap residue allowed
- Sand rough edges gently
- Apply primer like you’re frosting a cake—thin, even layers
Remember: Paint clings better to clean, slightly rough surfaces. Those “distressed” pots from the thrift store? Prime candidates for makeovers.
Inspiring “flower pot painting ideas on canvas” for Artistic Expression

Your living space deserves more than mass-produced decor—let’s talk transformative accents. These creative approaches turn functional containers into storytelling pieces that marry botanical beauty with personal artistry. Whether you’re accenting a windowsill or crafting centerpieces, these concepts adapt to any skill level.
Abstract and Geometric Designs
Clean lines meet playful patterns in this modern approach. Try alternating triangles and diamonds using painter’s tape for crisp edges—perfect for achieving that gallery-worthy precision. Not confident in freehand work? Stencils create sharp chevrons or honeycomb textures in minutes.
| Style | Technique | Best For |
|---|---|---|
| Bold Geometric | Tape resist method | Modern interiors |
| Soft Abstract | Wet-on-wet blending | Bohemian spaces |
| Mixed Media | Marker + paint combos | Eclectic decor |
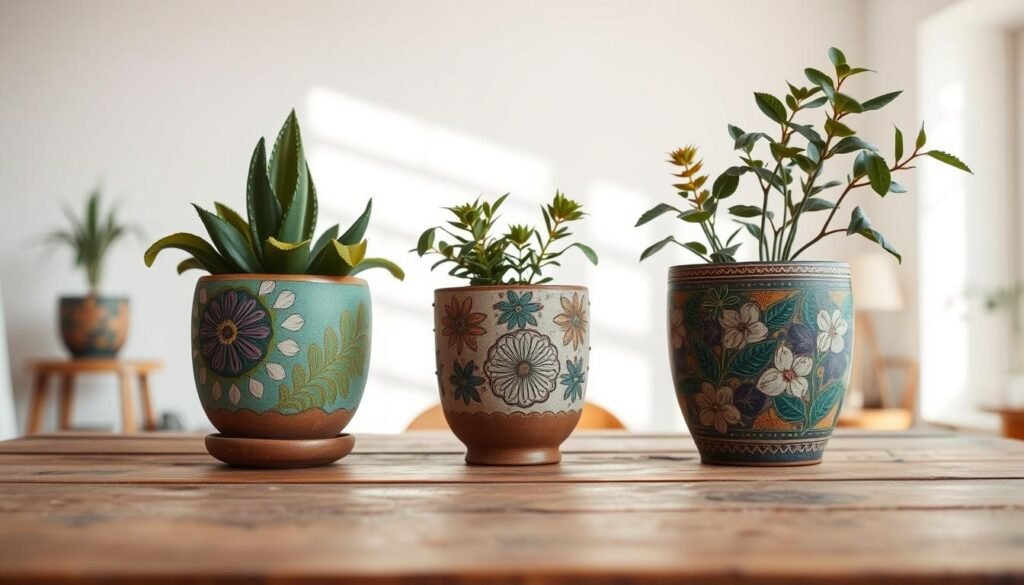
Floral and Nature-Inspired Motifs
Bring outdoor charm inside with layered petal designs. Start with light washes for watercolor effects, then build depth using dry brush techniques. Pro tip: Match your plant’s foliage with complementary hues—silver succulents pop against terracotta stained with cobalt blues.
Color theory becomes your secret weapon here. Pair peach tones with sage greens for calming arrangements, or go bold with magenta-and-teal contrasts. “The right palette turns containers into extensions of your garden,” notes a San Diego-based botanical artist.
Bright and Bold Acrylic Painting Techniques for Pots
What if your planters could steal the spotlight? Acrylics transform ordinary containers into radiant showpieces through their intense pigmentation and versatile application. These water-based wonders dry faster than oil paints—perfect for creators who love instant gratification.
Master three essential methods to elevate your work. Wet-on-wet blending creates sunset-like gradients, while dry brushing adds textured depth. For crisp edges, try the tape-resist method—it’s like stenciling for grown-ups. Rotate your container as you paint to maintain even coverage around curves.
| Technique | Visual Effect | Ideal Pairings |
|---|---|---|
| Layered Washes | Translucent depth | Pastel containers |
| Impasto Strokes | 3D texture | Modern decor |
| Color Blocking | Graphic contrast | Minimalist spaces |
Electric color combos make designs pop. Pair tangerine with teal for tropical vibes, or mix magenta and charcoal for urban edge. “High-contrast palettes demand attention without overwhelming spaces,” advises a Chicago muralist. Seal your masterpiece with UV-resistant varnish—especially for outdoor use.
Quick-drying properties let you build layers fast. Start with base coats in daylight hours, add details by evening. Store finished pieces under covered patios or use them as striking indoor accents. Your vibrant creations will stay gallery-ready for seasons.
Exploring Chalk Paints, Enamels, and Spray Options

Ready to elevate your container game? The right coating transforms functional planters into design statements. Let’s decode three game-changing finishes—each with unique strengths for indoor dazzle or outdoor endurance.
Chalk-based formulas deliver velvety matte finishes that whisper vintage elegance. Perfect for tabletops and shelves, they hide surface imperfections while letting you layer distressed effects with sandpaper. Pro tip: Try testing different chalk paint formulas on ceramic before committing.
For weather warriors, enamel’s glossy armor shines. Its UV-resistant formula laughs at summer storms and winter frosts. “Enamel turns basic containers into year-round showstoppers,” notes a Miami landscape designer. Use it for porch displays needing extra protection.
| Paint Type | Best Use | Finish | Durability |
|---|---|---|---|
| Chalk | Indoor accents | Matte | Moderate |
| Enamel | Outdoor displays | Glossy | High |
| Spray | Complex shapes | Variable | Medium |
Spray cans unlock next-level effects. Create marble swirls with metallic shades or gradient ombrés using overlapping mists. Masking tape becomes your secret weapon—crisp stripes emerge where you block the nozzle. Always work in ventilated spaces and wear gloves.
Three ways to maximize results:
- Rotate containers during spraying for even coverage
- Apply chalk paints in thin layers to prevent cracking
- Seal enamel finishes with clear topcoat for added shine
Whether chasing rustic charm or modern gloss, these coatings let your creativity bloom without formal training. Now go make that thrift-store find unrecognizable.
DIY Prep: Cleaning, Priming, and Outlining Your Pot

Great art starts with smart prep work. Before your brush touches clay, proper groundwork ensures colors pop and designs endure. This isn’t just cleaning—it’s creating a canvas that holds your vision through seasons of watering and sunlight.
New containers need sticker residue removed with rubbing alcohol. For used ones, mix equal parts white vinegar and water—scrub until terracotta stops whispering about its previous life. Dry completely with microfiber cloths (paper towels leave lint).
Priming becomes your secret weapon. Flip the container upside-down to avoid filling drainage holes. Wrap aluminum foil around areas you’re not painting yet—like rim interiors. Two thin coats beat one gloopy layer every time.
| Primer Type | Surface Type | Application Tip |
|---|---|---|
| Multi-surface | Raw terracotta | Use foam brush for smooth base |
| Outdoor-grade | Glazed ceramics | Light sanding first |
| Specialty | Metal/plastic | Test adhesion first |
Design transfers don’t require Picasso skills. Trace patterns using graphite paper or project images with a phone flashlight. “Prep work separates hobbyists from pros,” shares a Brooklyn-based muralist. Let sketches guide your brush, not limit it.
Workspace setup matters as much as technique. Use:
- Clip lights for shadow-free detailing
- Rotating tray to access all angles
- Wax paper under projects for easy cleanup
Now your blank canvas awaits—primed, prepped, and begging for personality. Next stop? Transforming outlines into showpieces that make neighbors peek over fences.
Step-by-Step Guide to Creating a Masterpiece on Your Pot

Transform ordinary planters into gallery pieces through deliberate layering and precision. Your journey begins with strategic preparation and evolves into confident brushwork—no prior expertise required. Let’s break down the process that turns blank surfaces into durable art.
Blueprint to Brushstrokes
Start with a fully dried primer base. Apply your first acrylic layer using horizontal strokes—think of it as laying foundation bricks. Rushing this stage? That’s how brush hairs end up embedded in your work. Allow 90 minutes between coats for proper curing—humidity above 60%? Add 20 extra minutes.
Transferring designs requires finesse. For intricate patterns:
- Secure tracing paper with painter’s tape
- Use chalk pencils for erasable guidelines
- Project digital designs onto curved surfaces
Freehand artists: Rotate your container like a pottery wheel while sketching. This maintains proportion on rounded forms. “Your wrist should dance, not dig,” advises a Denver muralist. Made a mistake? Cotton swabs dipped in rubbing alcohol erase pencil marks without damaging primer.
| Layer Type | Dry Time | Tool |
|---|---|---|
| Base Coat | 2 hours | Foam roller |
| Design Layer | 45 minutes | Round brush #4 |
| Protective Seal | 24 hours | Spray nozzle |
Seal your work with UV-resistant spray—three light passes beat one heavy coating. Outdoor pieces? Choose sealers with fungicide additives. Spot a drip? Sand gently once fully cured, then spot-repair with matching pigment.
Remember: Great art survives watering schedules and afternoon showers. Your terracotta transformation now stands ready to host greenery while showcasing hard-won creativity.
Combining Stencils, Markers, and Freehand Art
Ever wished your planters could tell stories through their designs? The magic happens when structured patterns meet spontaneous creativity. Stencils provide the roadmap, while markers and freehand work add your signature flair—think of it as collaborative art between precision and intuition.
Paint markers glide like butter on primed surfaces, making intricate herringbone patterns achievable for newcomers. While Sharpies bleed on porous materials, oil-based pens deliver crisp lines that withstand weather changes. Tape down geometric stencils for clean edges, then switch to free-flowing swirls using angled brushes.
Here’s the sweet spot: Use stencils for 70% of your design, reserving 30% for hand-drawn accents. This balance keeps projects looking polished yet personal. “Let the stencil breathe by leaving intentional gaps,” suggests a Texas-based DIY instructor. Fill those spaces with dotted textures or organic vines using fine-tip pens.
Rotate your container as you work—what seems sideways now becomes upright later. Seal your mixed-media masterpiece with matte varnish to protect both marker ink and acrylic layers. Suddenly, that thrifted planter becomes a conversation piece showcasing multiple techniques in harmony.
The real win? You’re not just decorating a container. You’re proving that structured tools and freestyle art aren’t rivals—they’re partners in creating pieces that feel both deliberate and delightfully human.

