
Let’s gift her something she will actually use
If you’ve ever tried to “pick the perfect gift” for a brand-new mom, you already know the trap. You can either buy something adorable that ends up living on a chair forever, or you can give something genuinely helpful that makes her day easier. Which one sounds better, honestly?
I’m all about gentle, low-fuss, usable gifts right now, the kind that help on day three when the sleep feels fake and the house runs on snacks and hope. I’ve made a lot of new-mom gifts over the years, and the ones that get texted about later always share the same vibe. They feel soft, they work with one hand, they clean easily, and they don’t create extra chores.
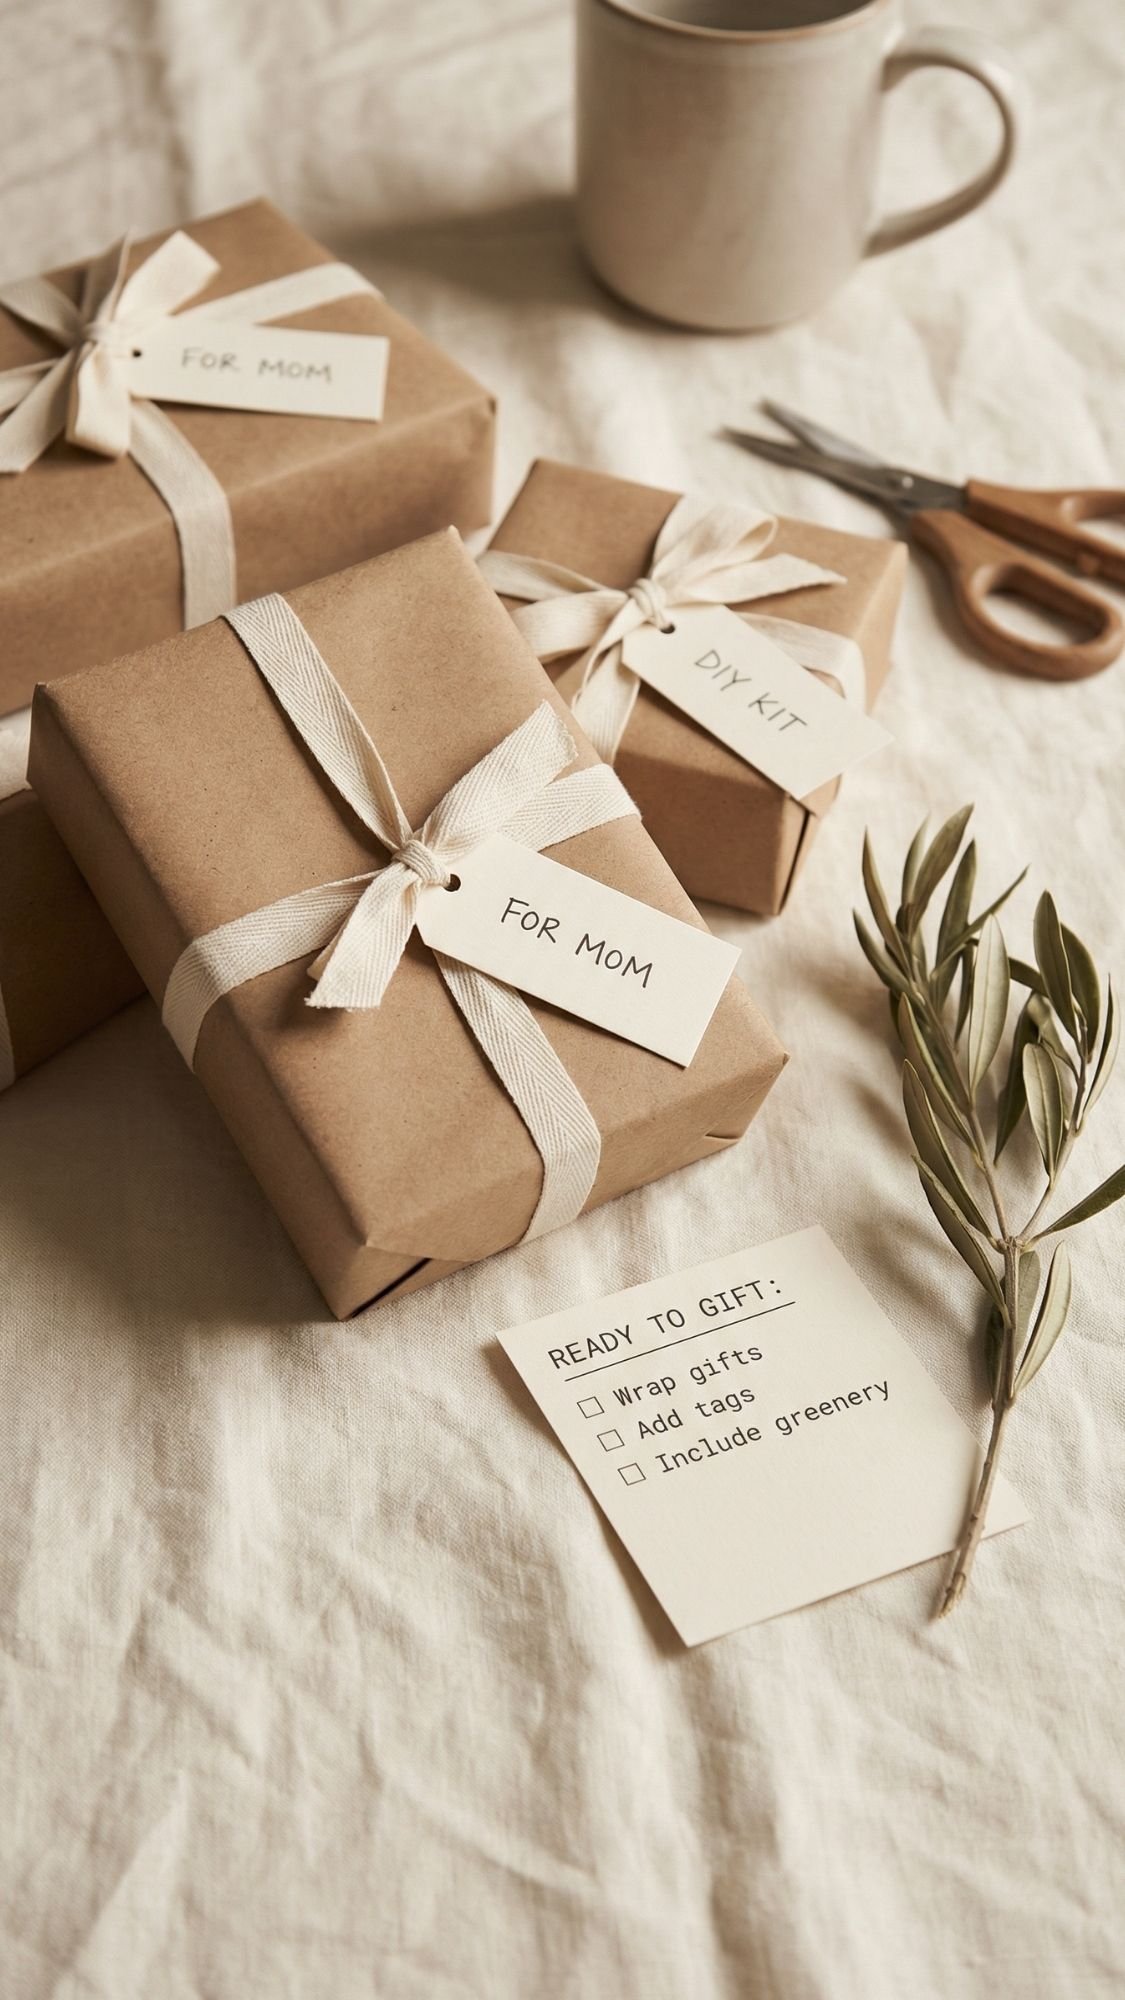
In this list, I’m giving you 19 DIY gifts that support real life, not Instagram fantasy life. I’ll tell you what to make, why it helps, what to avoid, and how to finish each project so it looks polished and lasts. Ready to be the friend who brings the gift that actually gets used?

Quick “Gentle Gift” Checklist Before You DIY Anything
Before we jump into the list, I want you to steal my tiny mental checklist. Because the difference between a DIY gift that gets used daily and one that quietly disappears into a drawer usually comes down to a few choices you make up front.
Here’s what I stick to every time I make something for a new mom.
1) Keep it low-scent or fragrance-free when possible
A lot of households prefer it, and postpartum can come with sensory overload. If you’re adding any personal care items or fabric pieces, skip heavy fragrance and aim for simple, gentle options. If you’re unsure, the American Academy of Pediatrics suggests choosing fragrance-free or avoiding strong scents.
2) Make it one-hand friendly
If she has to set the baby down to use it, it won’t get used as much. Harsh truth, but true.
Look for:
- handles
- clips
- bins
- wide openings
- tear-off pages
- big labels
3) Prioritize washable and wipeable
Newborn life is messy. If it can’t be cleaned easily, it becomes “later,” and later becomes never.
My safest materials:
- cotton, muslin, flannel, terry
- canvas, denim, wipeable liners
- laminated printables
4) Choose “ready to use” over “assembly required”
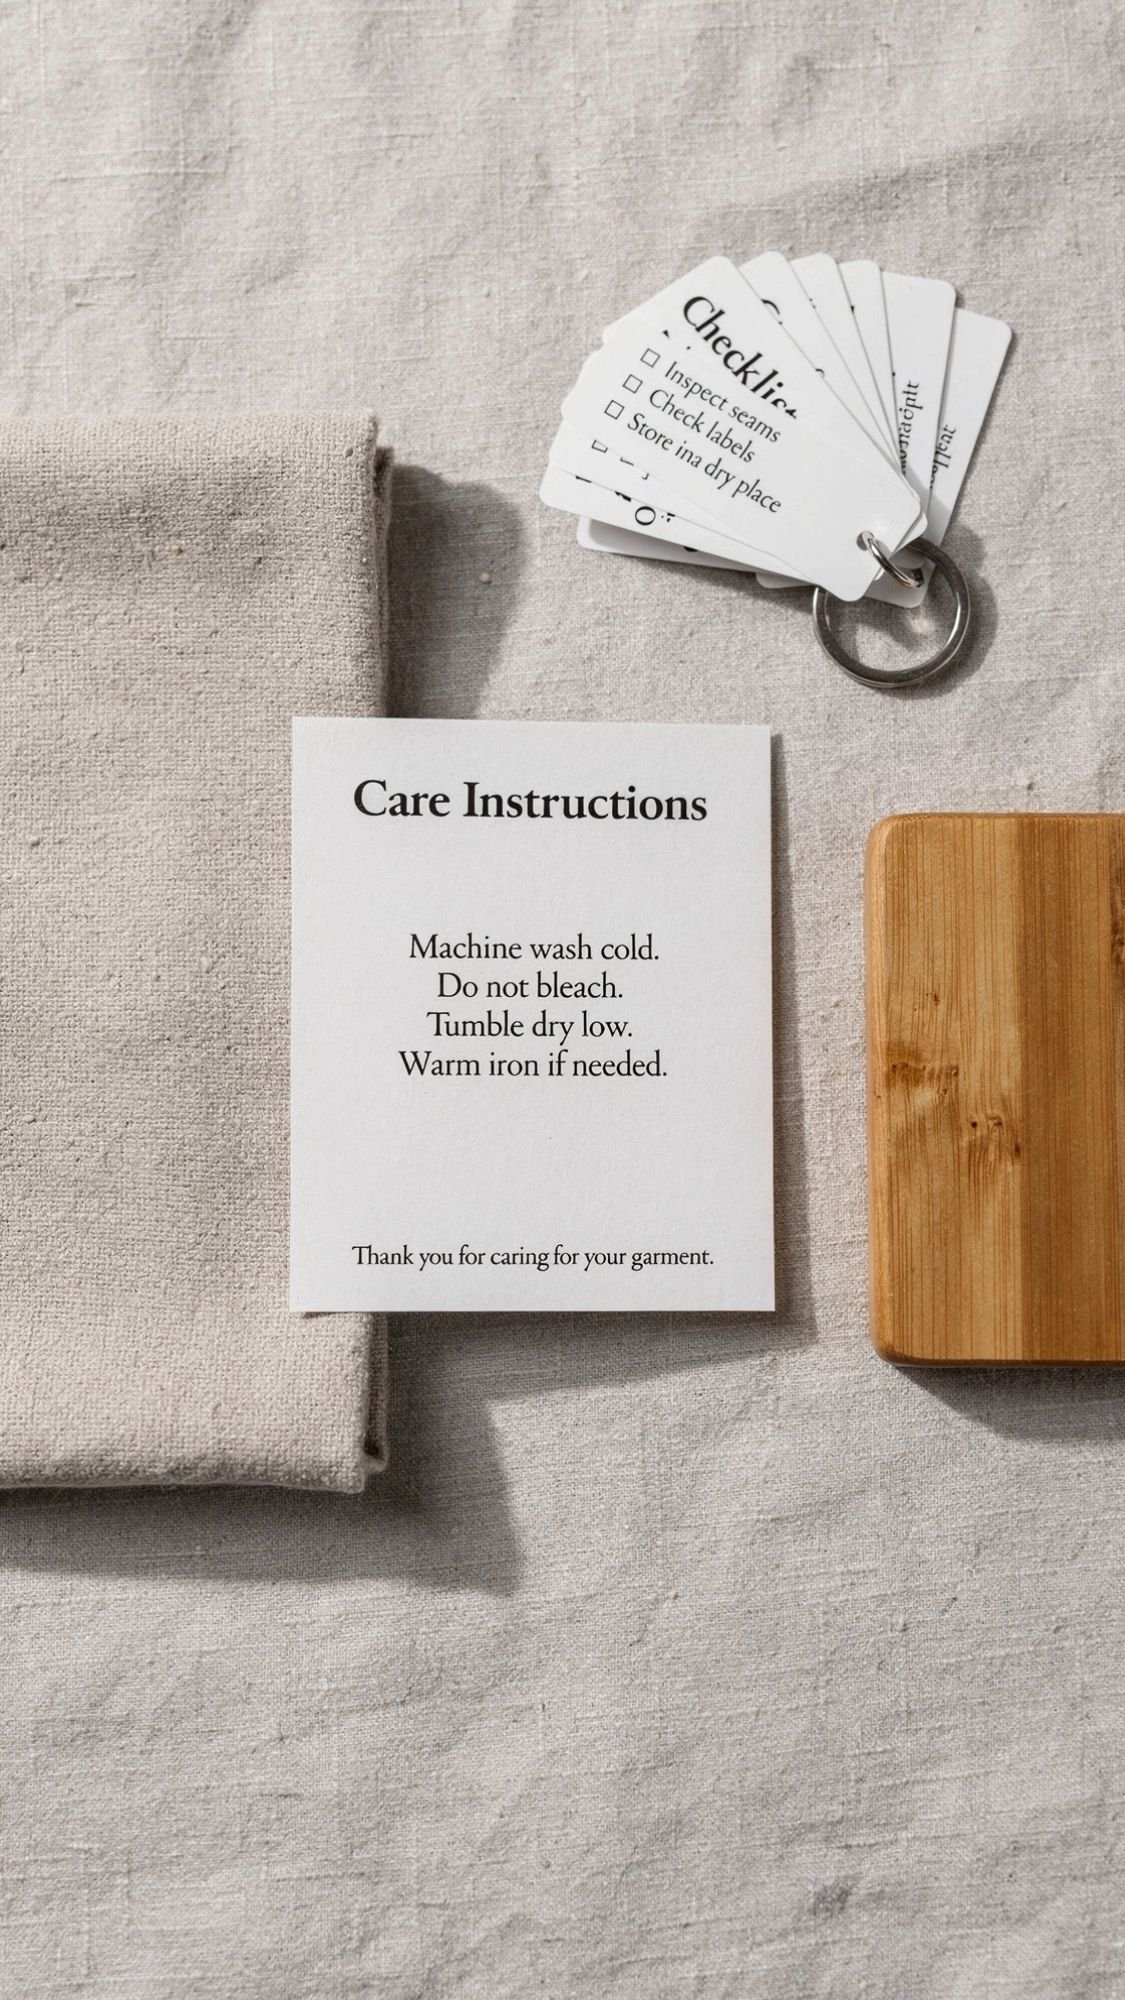
If your gift needs sorting, reading, and setting up, it feels like homework. I always include a little instruction card so she can open it and use it immediately.
5) My key pro secret that saves you from disappointing burp cloths
Pre-wash any fabric gifts in fragrance-free detergent, then run one extra rinse.
This removes sizing and improves absorbency. And skip fabric softener on anything meant to soak up mess, it can reduce absorbency fast.
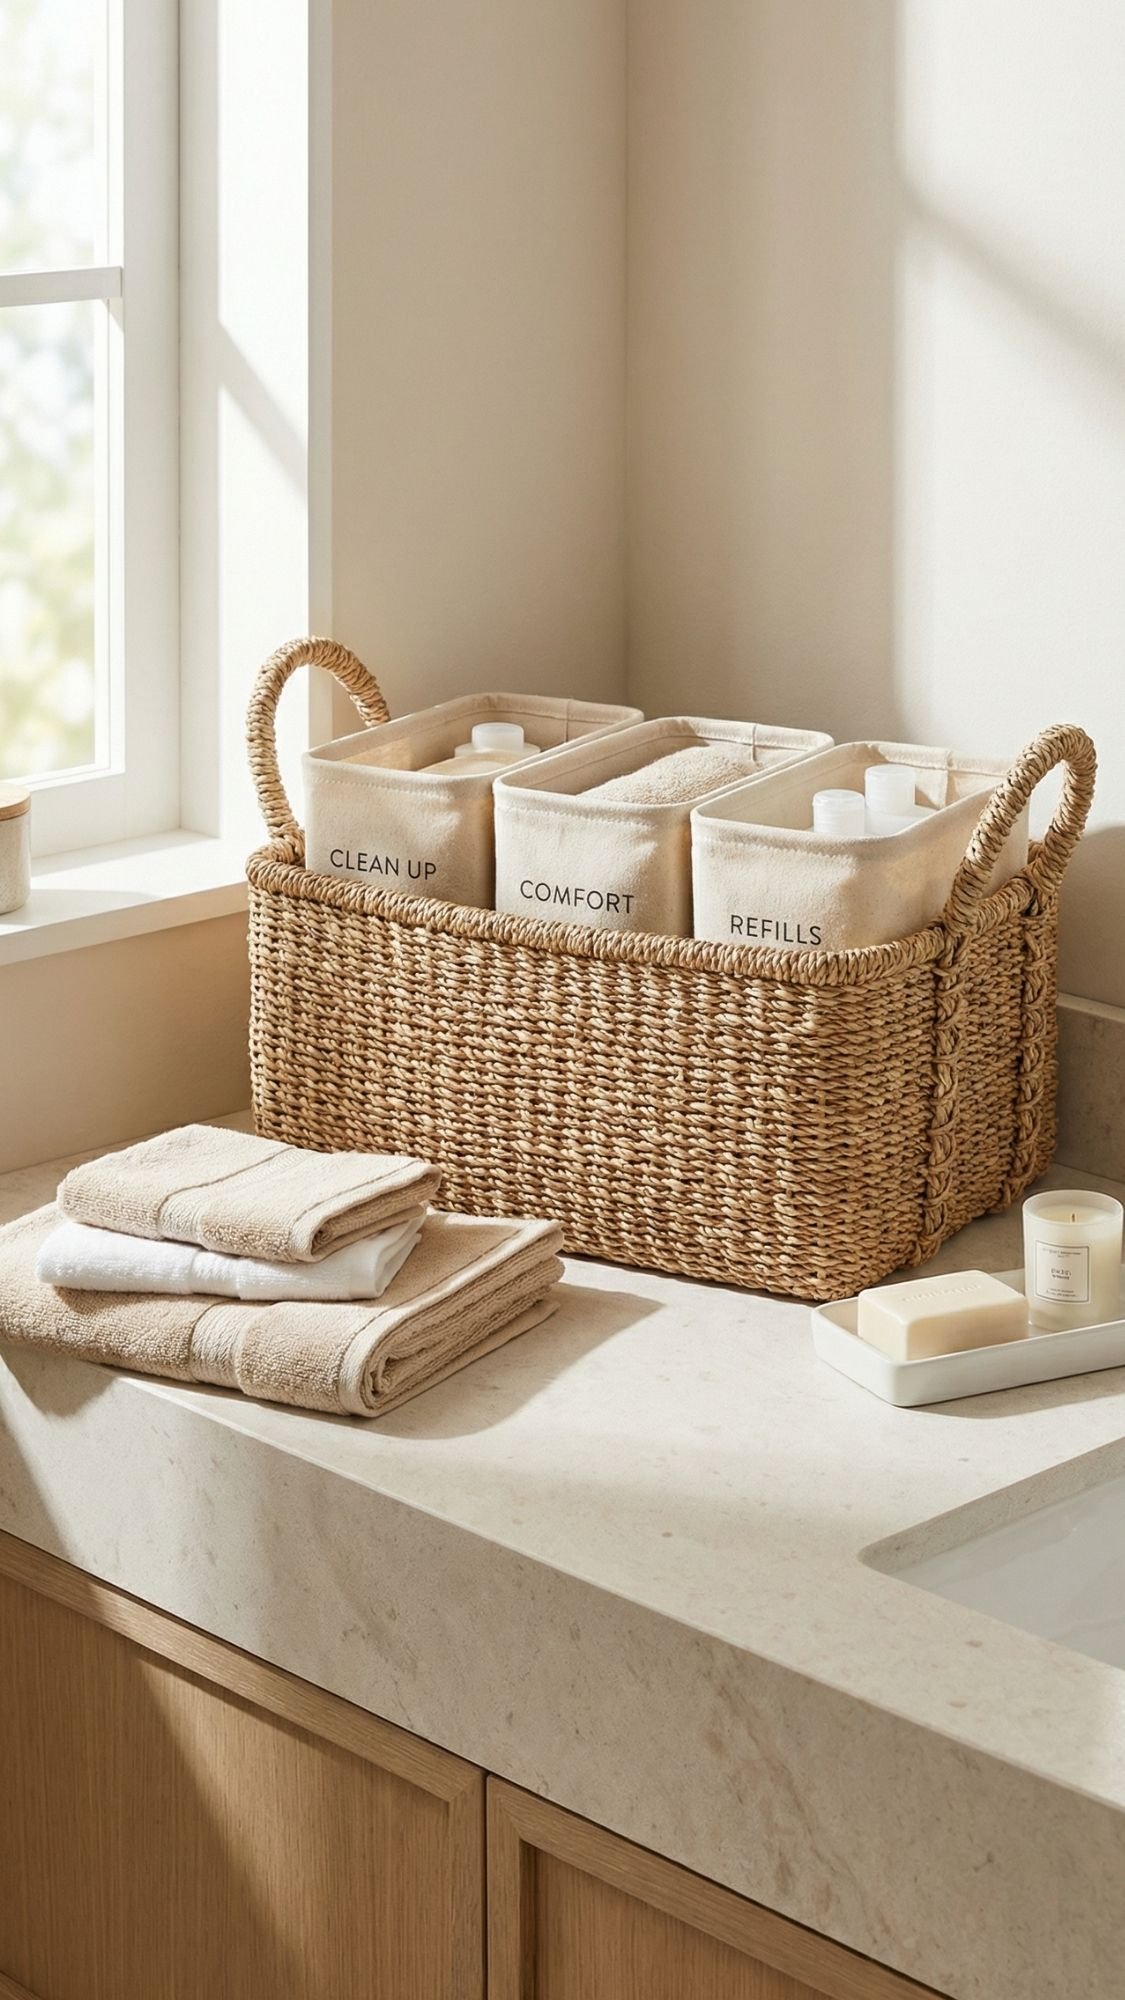
1) Postpartum Bathroom Basket With Labeled Zones
Why this gift works so well
A new mom uses the bathroom a lot in those first weeks, and she does it on very little sleep. A basket that keeps the essentials sorted saves time, stress, and that annoying “where did I put that?” moment. Have you ever tried to find one specific item when you feel exhausted and everything looks the same? Yeah. Not fun.
This gift also feels caring without being weirdly personal, because you’re giving organization and comfort, not unsolicited advice.
What you’ll need
- A medium basket or handled caddy
- 3 to 5 small bins or pouches that fit inside
- Label paper, label maker, or printable labels
- Clear packing tape or waterproof label tape
- Optional: a mini lidded container for tiny items
- Optional: cardstock for tag-style labels if your basket has texture
Step-by-step
- Choose your zones first. Keep it simple so she actually uses it. I like:
- Clean Up
- Comfort
- Refills
- Add bins inside the basket. The bins stop the “everything slides to the bottom” problem.
- Label the bins, not just the basket. She grabs the right bin fast, even half-asleep.
- Seal your labels. Cover the label surface with clear tape so splashes and wipes do not ruin them.
- Add a one-card guide. Tuck a small card under the handle that lists what goes where. Make it readable in two seconds.
- Finish it like a gift. Wrap cotton ribbon around the handle and add a tag that says “Open and use.”
Pro-Tips that make it feel pro, not homemade
- Use clear bins for refills. She sees what’s low without digging around.
- Keep labels short. Long labels look cute until nobody reads them.
- If your basket weave feels textured, label a tag panel instead. You can punch a cardstock tag, tie it on, and label that. Textured surfaces can fight vinyl and paper labels.
Common mistake beginners make
People label the outside only, then everything inside turns into a mystery pile. Label the inner bins, and you win.
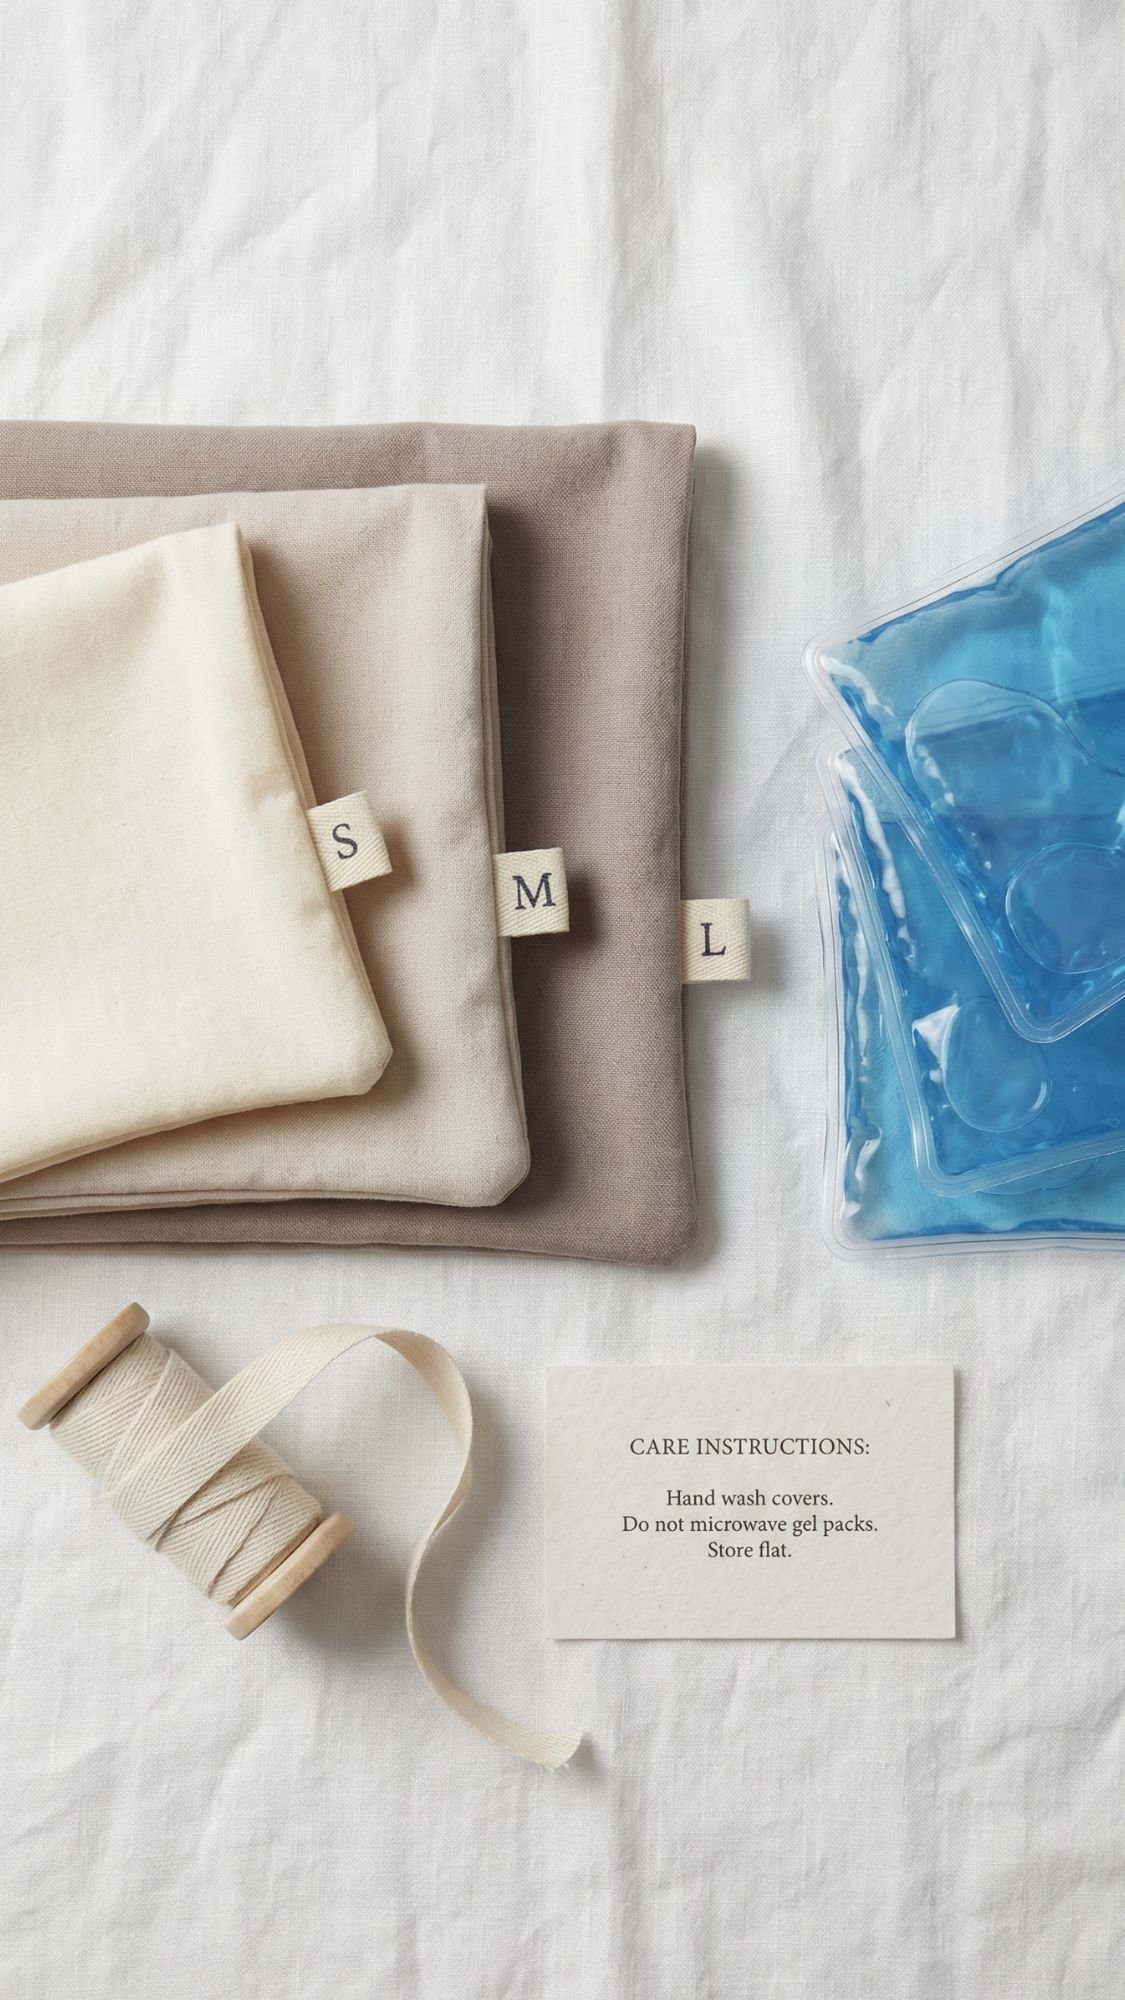
2) Washable Cold Pack Covers, Set of 3 Sizes
Why this gift works so well
Cold packs can feel amazing for sore spots, but bare plastic against skin feels… not amazing. A soft washable cover makes the whole experience gentler and more comfortable. And because you’re giving a set in multiple sizes, she can use them for different areas without hunting for the “right” one. Ever tried to shove a big cold pack into a tiny sleeve? It’s like wrestling a slippery fish.
What you’ll need
- Soft fabric, think cotton jersey, bamboo blend, or flannel
- Matching thread
- Hook-and-loop tape, snaps, or an envelope-style overlap
- Sewing machine (or hand-sew, but machine lasts longer)
- Optional: small tags or ribbon scraps for size labels
Step-by-step
- Pick your cold packs first. Buy or measure what she already uses, then sew to fit.
- Cut your fabric. Add seam allowance and a little ease so the pack slides in smoothly.
- Choose a closure style:
- Envelope overlap for simplest construction
- Snaps for a flatter finish
- Hook-and-loop for quick access, but keep it soft and trimmed so it doesn’t snag
- Sew the cover. Stitch around edges, reinforce corners, and turn right side out.
- Make three sizes. I like:
- Small: quick spot comfort
- Medium: back or hip comfort
- Large: shoulder or full coverage comfort
- Add size labels. Stitch in a tiny tag that says S, M, L so she grabs the right one fast.
Pro-Tips that make it feel high-end
- Double stitch the seams. These get washed a lot, and a second line of stitching prevents blowouts.
- Add an absorbent inner layer if condensation bugs you. A thin cotton flannel lining helps.
- Make two covers per size if you can. One can be in the wash while the other is in use.
Common mistake beginners make
People sew the covers too tight, then the cold pack fights back every time. Give it a little ease, and it slides in without drama.
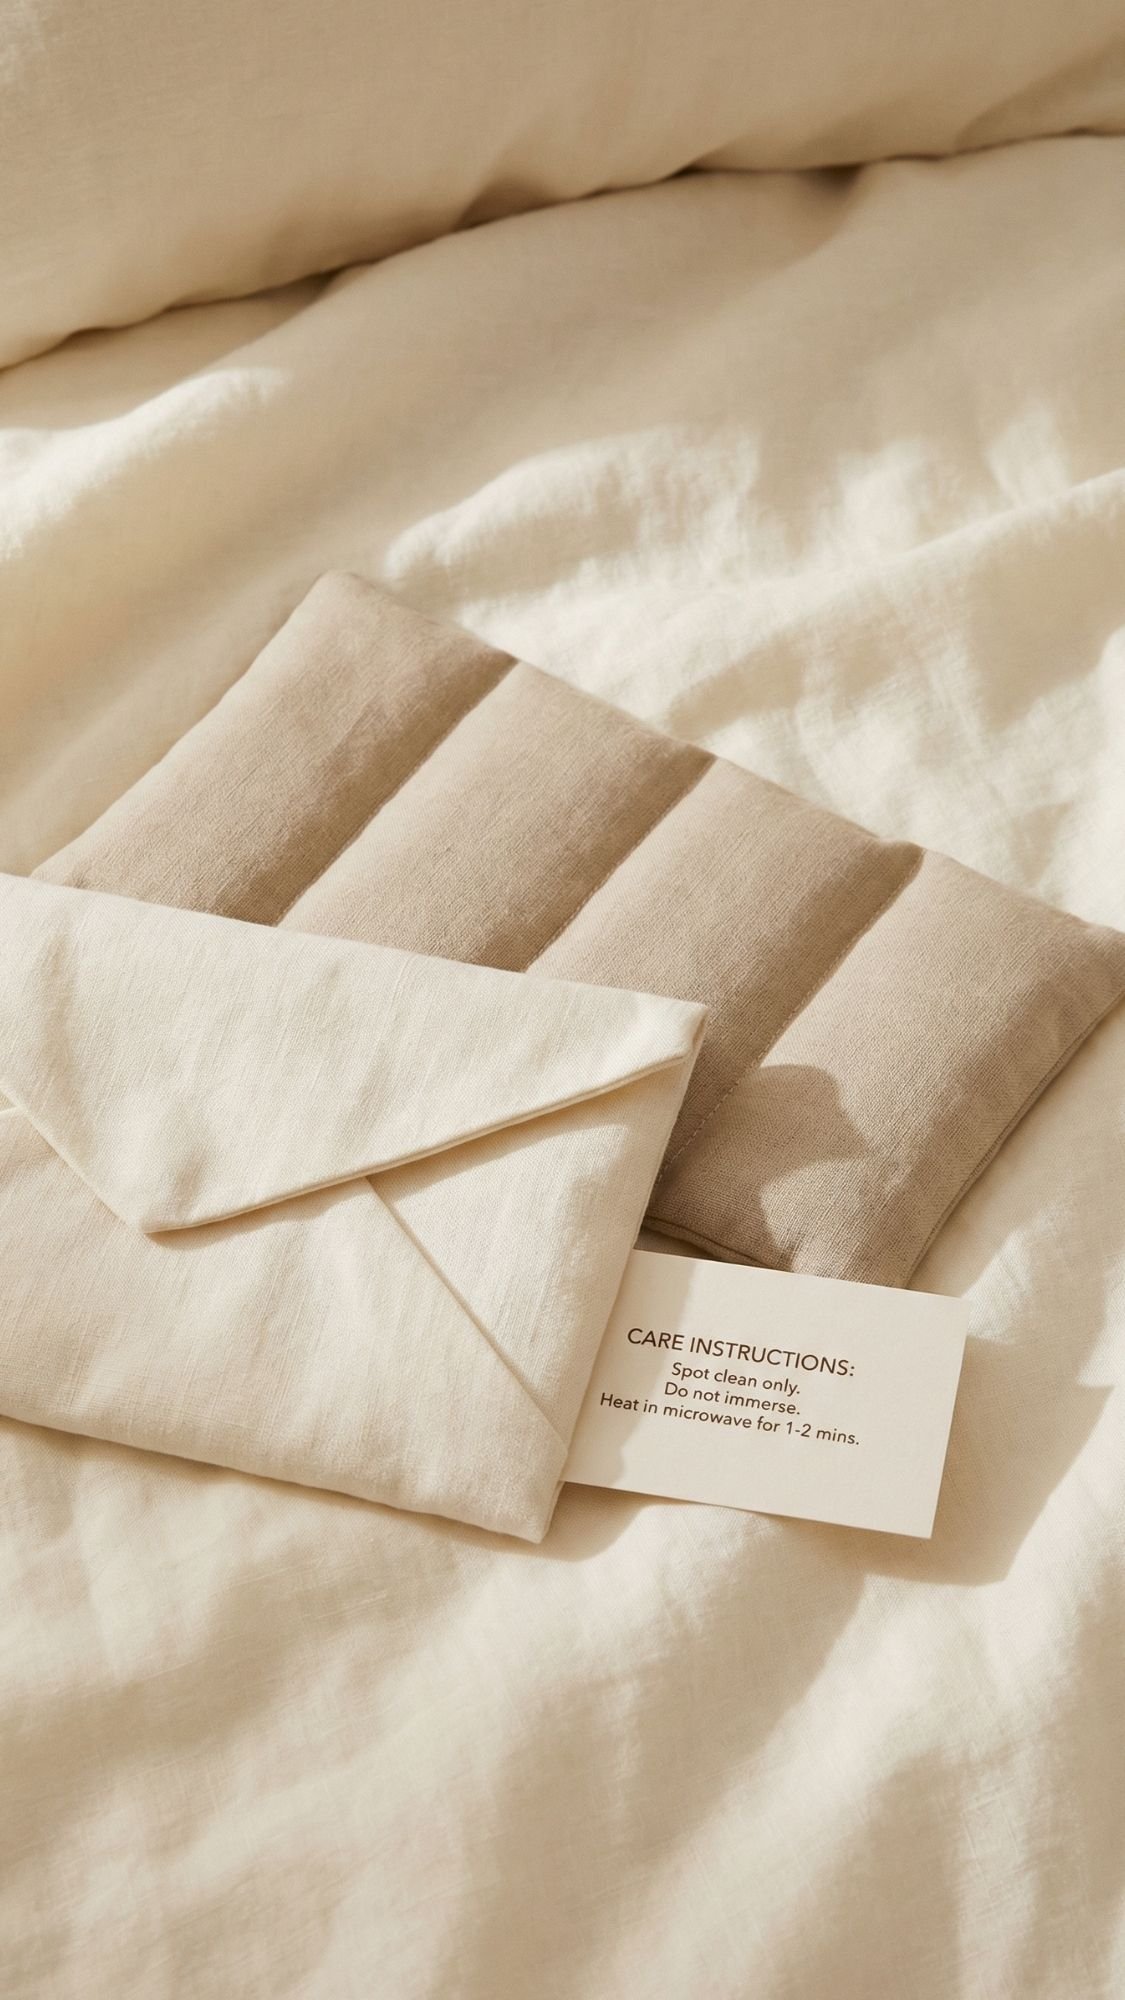
3) Channel-Stitched Rice Heat Pack With Removable Cover
Why this gift works so well
New moms end up hunched over a lot, feeding, rocking, burping, staring lovingly at a tiny human who refuses to sleep. A gentle heat pack can feel so good on shoulders, neck, or lower back. The removable cover matters because it lets her wash the outside easily and keep the inner pack clean and intact.
Also, this one looks “boutique,” even though it’s simple. And we love a gift that looks expensive without acting expensive.
What you’ll need
Inner heat pack
- 100% cotton fabric (tight weave works best)
- Thread
- Funnel or paper cone
- Rice (regular long grain works great)
- Sewing machine, pins, scissors
Removable cover
- Soft cotton, bamboo blend, or flannel
- Optional: label tag
- Optional: snaps or an envelope overlap closure
Step-by-step
- Cut the inner pack fabric. A good starter size is about 6 x 20 inches, but you can scale it.
- Sew the long sides and one short side. Leave one short side open for filling.
- Create channels before filling. This is the whole secret.
- Mark 3 to 4 long channel lines evenly spaced.
- Stitch those lines now while it’s flat.
- Fill with rice evenly. Use the funnel and shake the pack so rice spreads into each channel.
- Close the opening. Fold the raw edge in, pin, then stitch closed twice.
- Sew the removable cover.
- Envelope overlap works easiest.
- Snaps look cleaner and stay put.
- Add a simple heat instruction card. Keep it short and safe: heat in short bursts, shake between heats.
Pro-Tips that make it work better
- Channels prevent clumping. Without channels, rice piles up, overheats in one spot, and feels lumpy.
- Do not overfill. You want it flexible, not stiff.
- Use a tight weave fabric inside. You stop tiny rice dust from sneaking out over time.
- Add a hanging loop on the cover. She can store it on a hook instead of losing it in a blanket pile.
Common mistake beginners make
People fill first, then try to stitch channels. That turns into chaos because rice tries to escape like it pays rent. Stitch channels first, then fill.
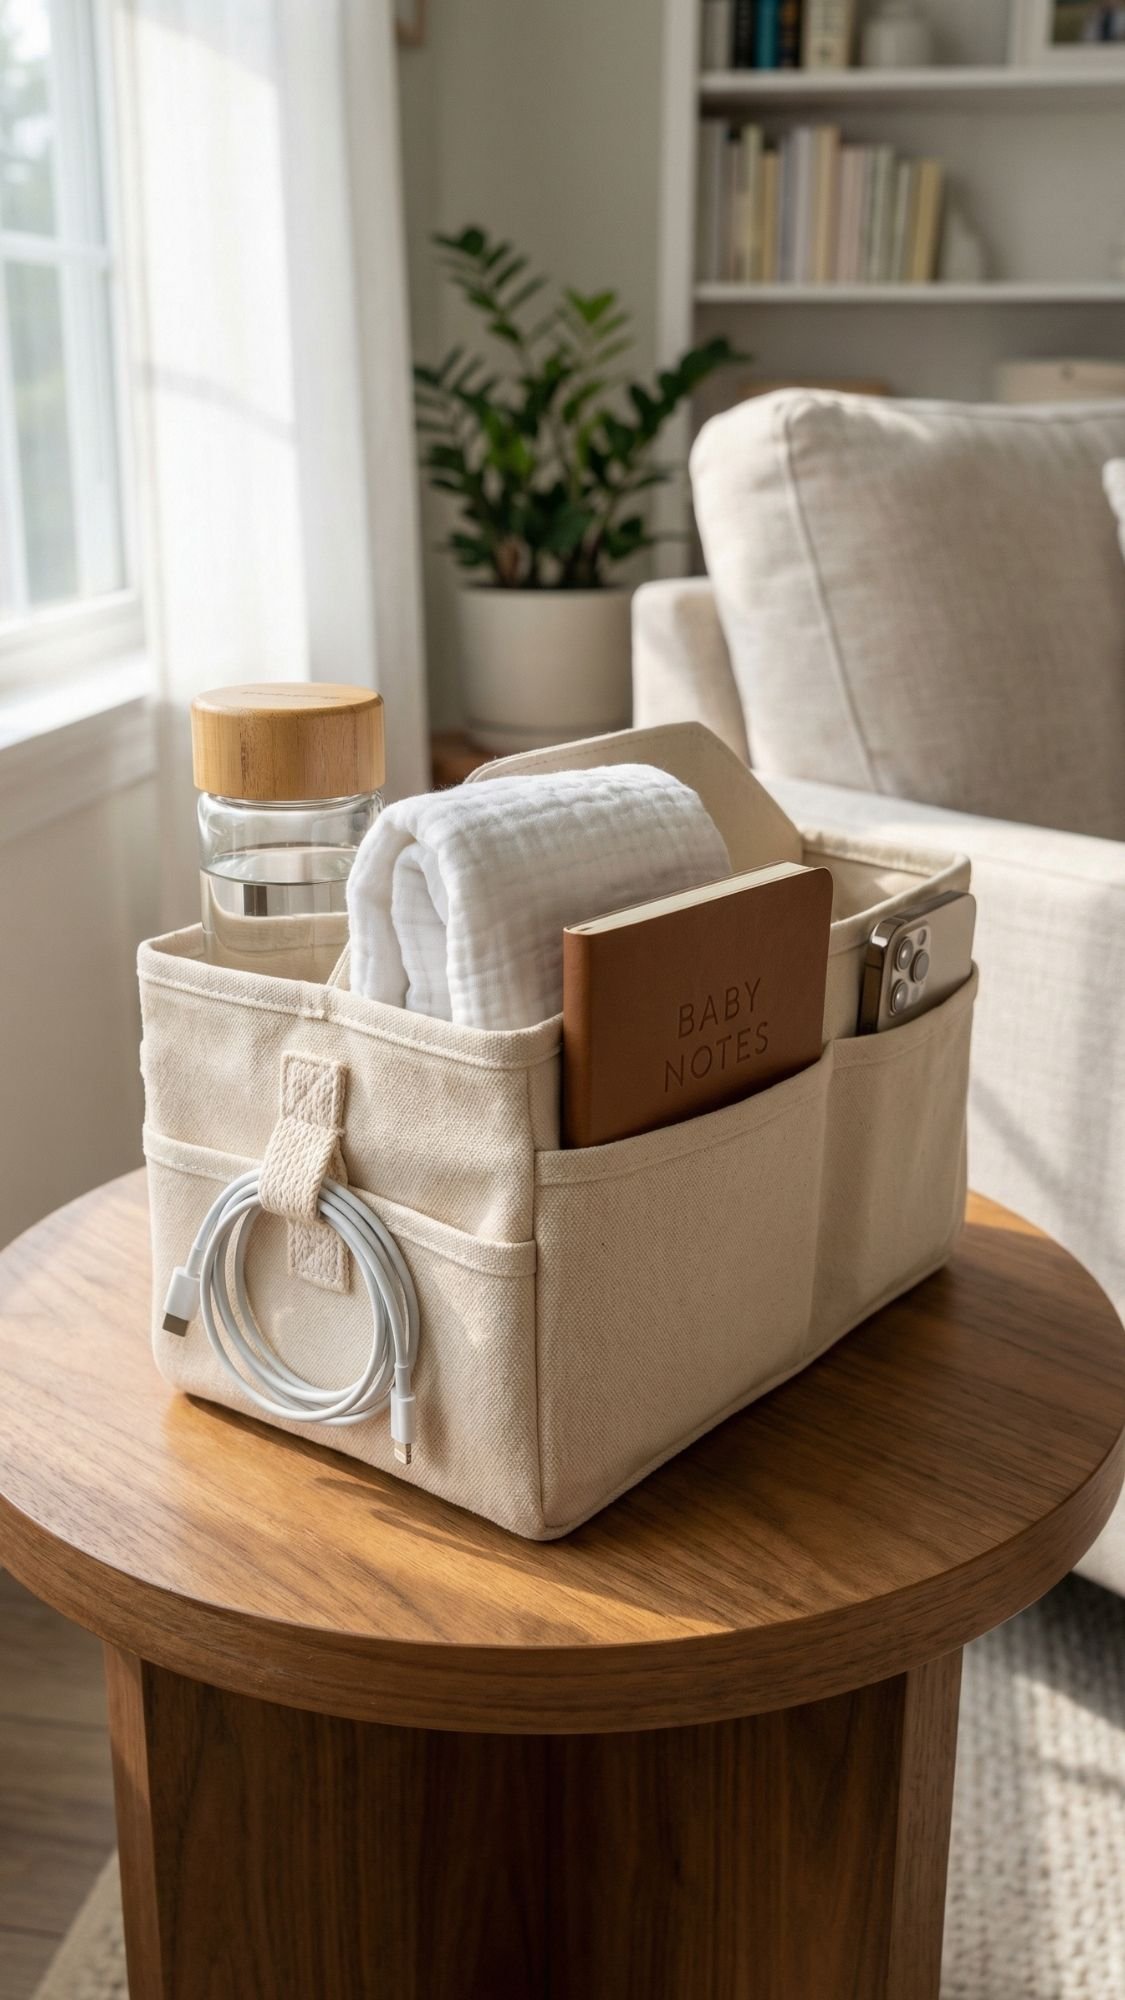
4) Nursing Station Side Caddy With a Cord Loop
Why this gift works so well
A nursing station can turn into a chaotic little ecosystem. Water bottle, snacks, burp cloth, nipple balm, pump bits, phone, charger, hair tie, a random sock that appeared out of nowhere. A structured side caddy gives her one “home base” so she doesn’t spend her tiny scraps of free time searching for stuff.
The cord loop is the quiet hero here. It keeps a charging cable anchored, so it doesn’t fall behind the couch and start a new life there.
What you’ll need
- Heavy fabric like canvas, denim, or upholstery-weight cotton
- Optional: fusible interfacing or foam stabilizer (highly recommended)
- Webbing for handles, or cut fabric handles
- Thread, scissors, pins or clips
- Optional: grommet kit or just fabric strip for a cord loop
- Optional: thin plastic canvas or a stiff base insert
Step-by-step
- Decide your caddy size. I like a medium box shape that fits:
- 1 water bottle
- 1 snack
- 2 burp cloths
- 1 small pouch for tiny items
- Cut your panels. You need a base, two long sides, two short sides, and pocket pieces.
- Stabilize the fabric. Fuse interfacing to all panels, especially the base and sides.
- Sew the outer pockets first. Add at least:
- one wide pocket for wipes or cloths
- one tall pocket for a water bottle
- one medium pocket for a phone or remote
- Create the cord loop. Pick one:
- Stitch a fabric loop into a side seam
- Add a grommet near the top edge for the cord to pass through
- Assemble the caddy. Sew sides to base, box corners, then bind or line the inside.
- Add handles. Reinforce with a box stitch and an X stitch so they don’t rip out.
- Optional: add a stiff base insert. This keeps it standing even when it’s half empty.
Pro-Tips that make it feel store-bought
- Use clips instead of pins on thick fabric so it stays aligned.
- Topstitch around the top edge for a cleaner, sturdier finish.
- Keep pockets shallow. Deep pockets hide items, and she won’t dig for them.
- Add one “tiny stuff” pocket for lip balm, hair ties, or a nursing pad.
Common mistake beginners make
People skip interfacing, then the caddy collapses like a sad paper bag. Stabilize it. It’s the difference between “handmade” and “I bought this at a nice store.”
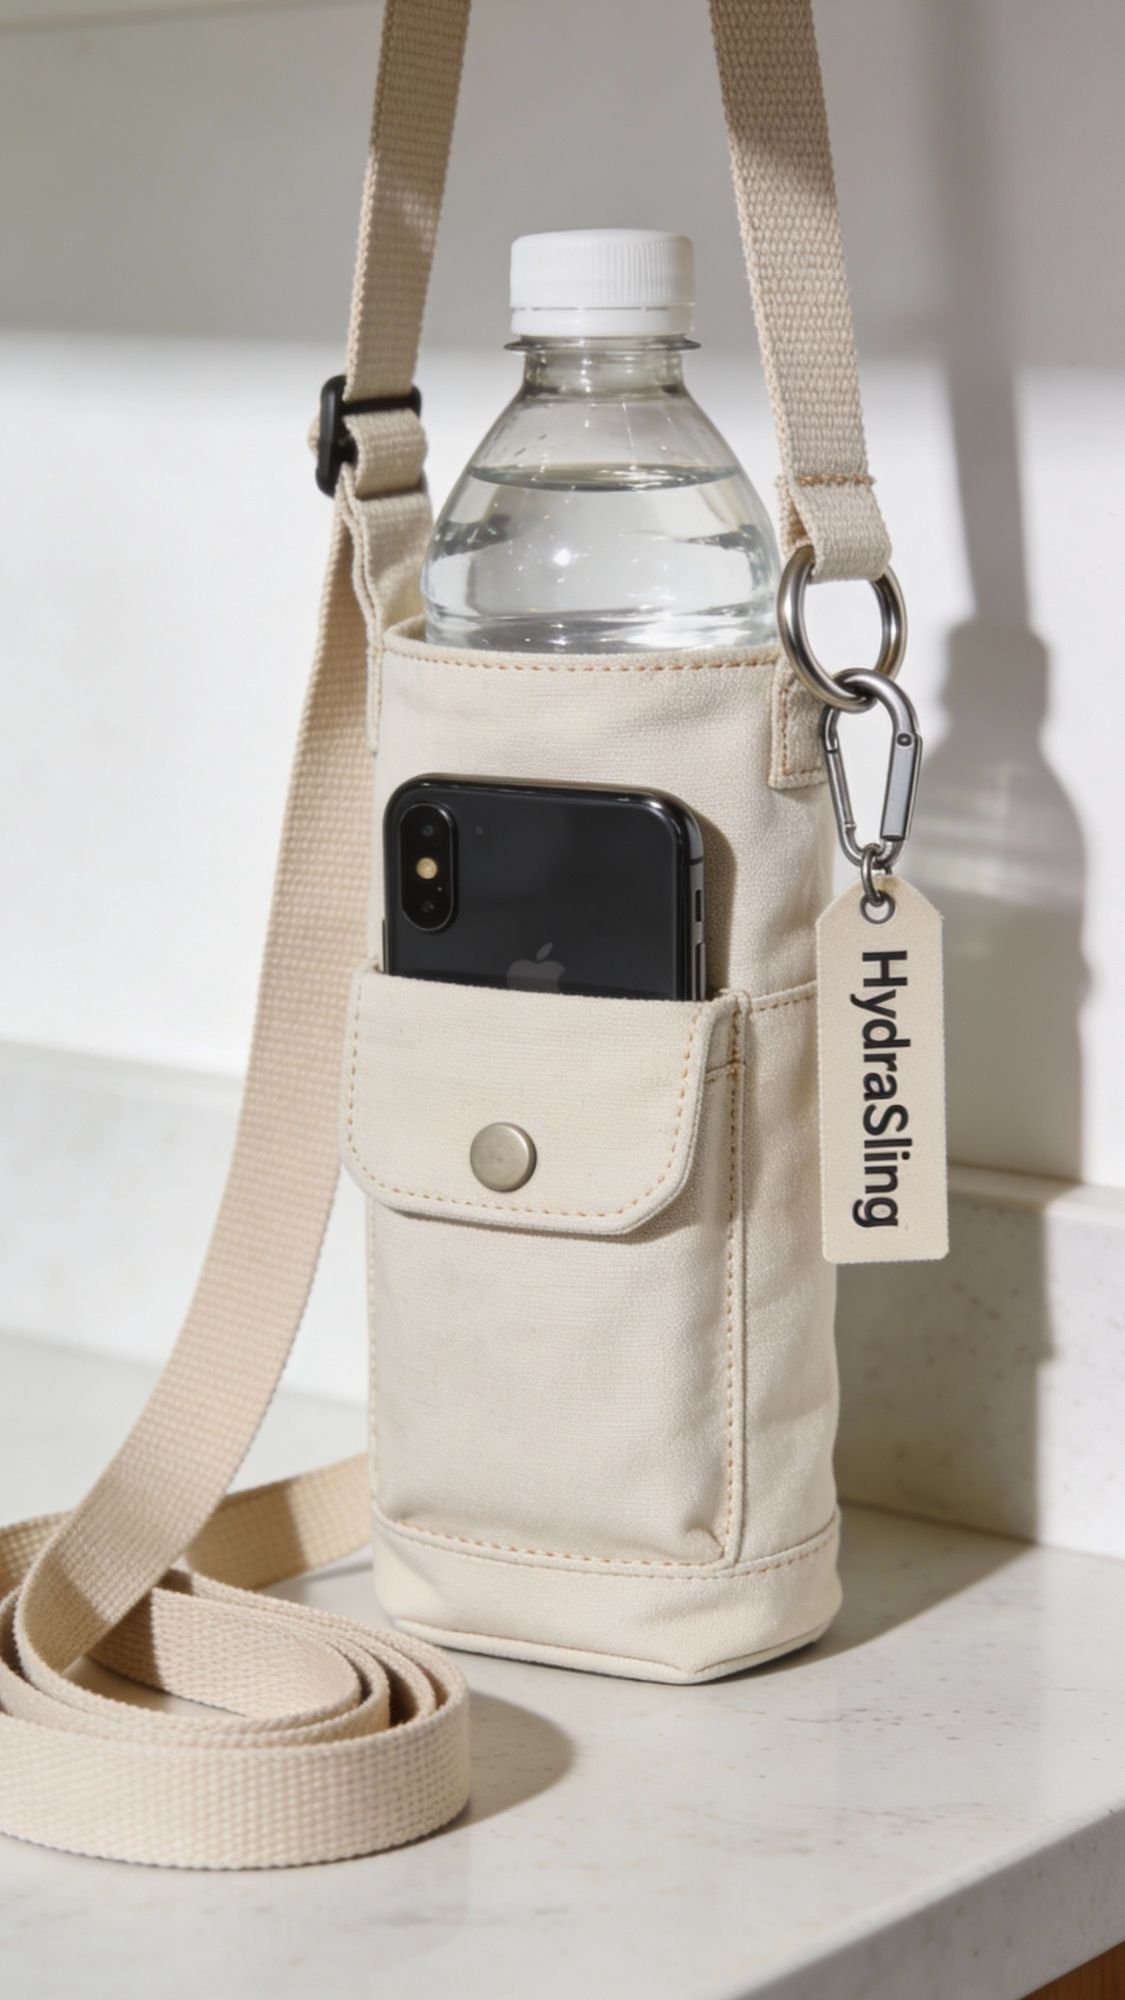
5) Hands-Free Water Bottle Sling With a Phone Pocket
Why this gift works so well
New moms get thirsty in a way that feels personal. They also end up walking around holding a baby, and carrying a water bottle plus a phone plus a burp cloth turns into a juggling act. A bottle sling solves that. It keeps hydration close, leaves her hands free, and makes “I need water right now” way easier.
And the phone pocket is non-negotiable. Because where else does the phone go, in the baby’s laundry pile? Exactly.
What you’ll need
- Medium to heavy fabric like canvas, denim, or cotton duck
- Webbing strap, 1 to 1.5 inches wide
- Strap slider buckle (for adjustability)
- 1 D-ring (optional but useful)
- Thread, scissors, clips or pins
- Optional: snap or magnetic closure for the phone pocket
- Optional: thin foam stabilizer to help it keep shape
Step-by-step
- Measure the bottle. Wrap a measuring tape around the widest part and add a little ease.
- Cut your sling pieces.
- A side panel sized to the bottle circumference
- A base circle or oval
- A phone pocket panel
- Stabilize the outer fabric if it’s floppy. This keeps it from sagging when the bottle gets heavy.
- Sew the bottle body. Stitch side panel into a loop, then attach the base.
- Add the phone pocket.
- Position it on the front so it sits flat when the bottle is inside
- Add a snap at the top if you want it secure
- Attach the strap. Use webbing and a slider buckle so it adjusts for different heights.
- Reinforce strap points. Sew a box stitch and then an X stitch. This is not the place to be lazy.
- Optional: add a D-ring. She can clip keys or a pacifier case.
Pro-Tips that make it feel expensive
- Add a little padding to the strap. A heavy water bottle can dig into your shoulder.
- Make the pocket slightly wider than the phone. Tight pockets frustrate people fast.
- Use a contrast topstitch if you want it to look polished without being loud.
Common mistake beginners make
People sew the sling too loose, then the bottle wobbles around and feels unstable. Aim for snug with a tiny bit of ease, and it stays secure.
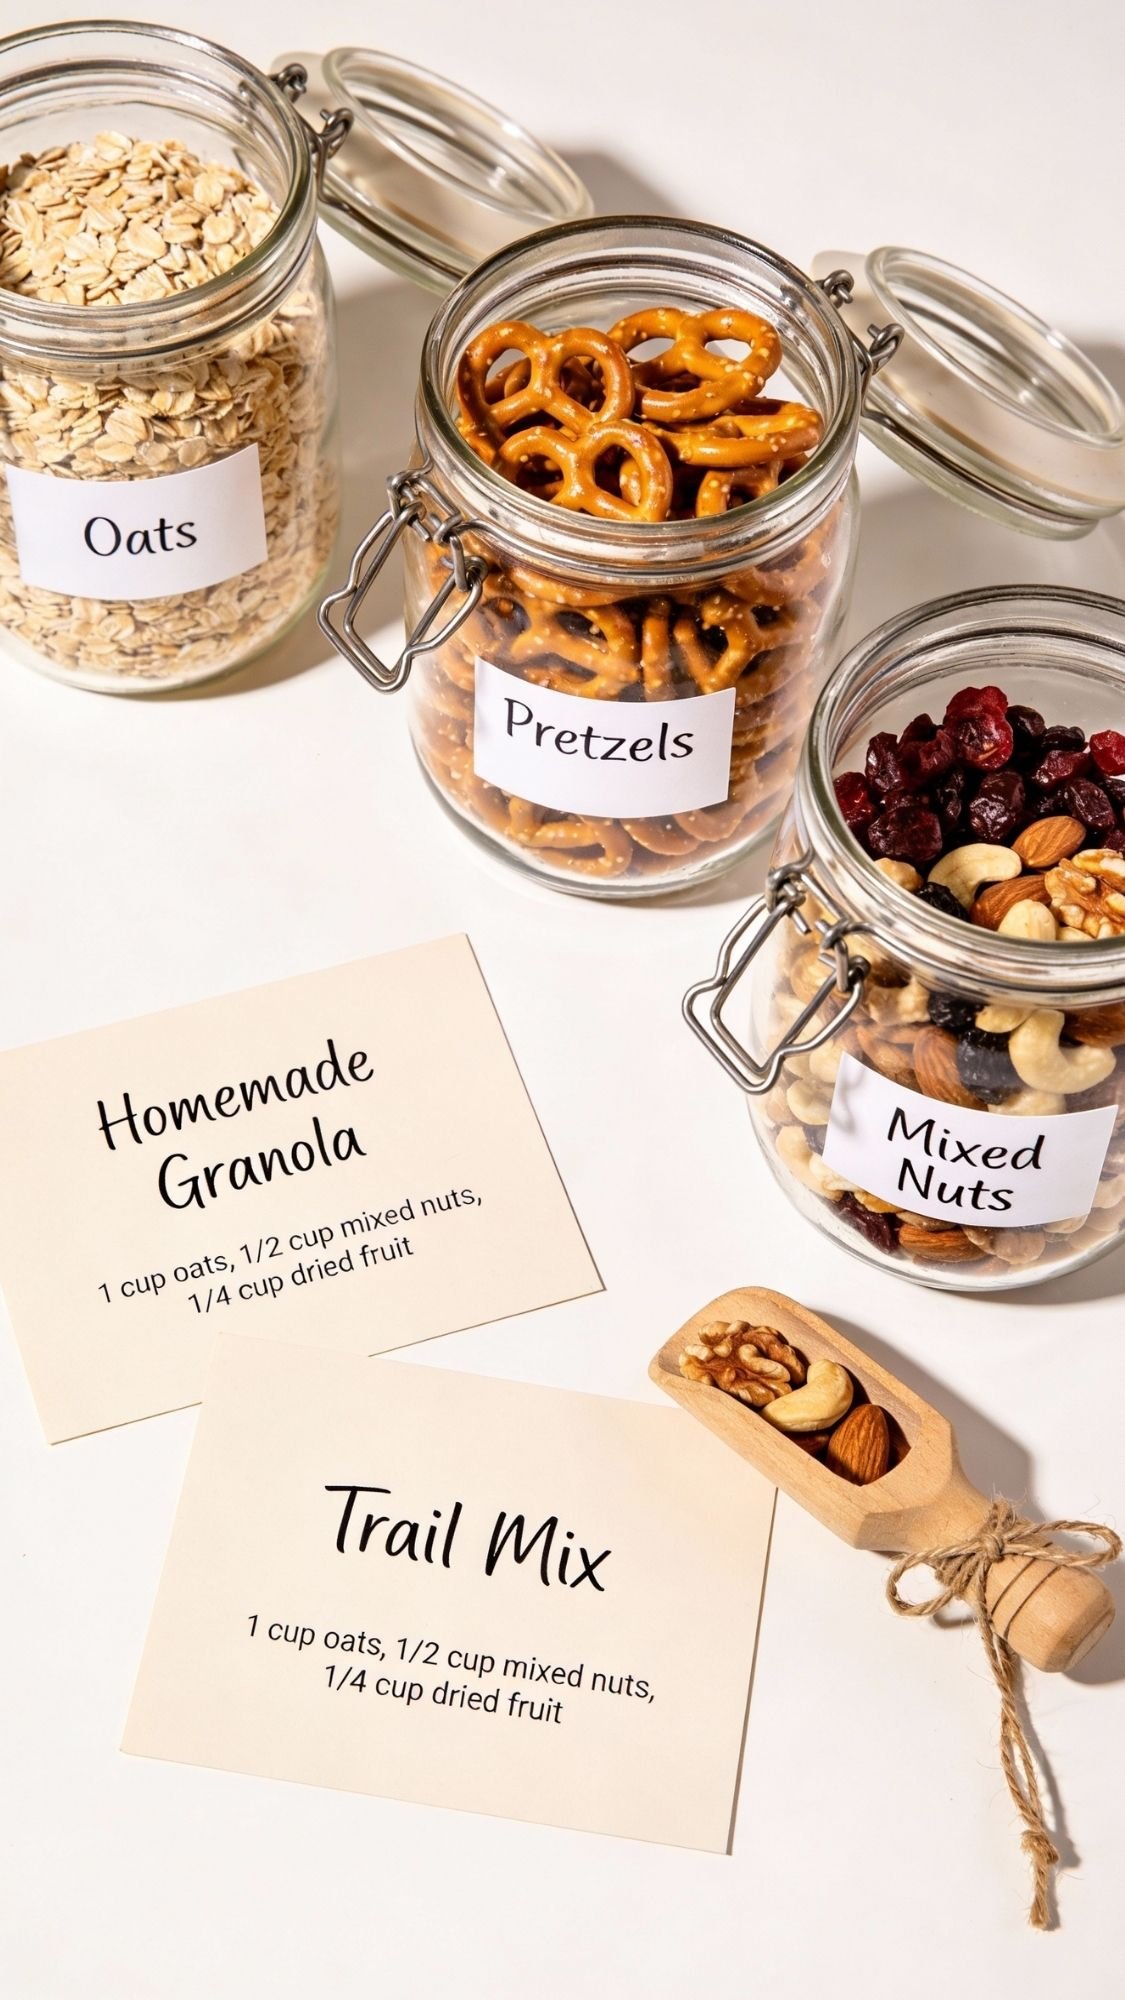
6) Snack Jar Label Set With a Portion Scoop Kit
Why this gift works so well
New moms forget to eat. Not on purpose. It just happens because the baby needs something every ten seconds and suddenly it’s 3 p.m. and she’s running on coffee fumes. A snack setup helps because it removes decision-making. She sees the jar, she grabs something, she eats. Done.
Also, this gift feels supportive without being intense. You’re not saying “you should eat,” you’re quietly making it easier for her to do it.
What you’ll need
- 3 to 6 clear jars or lidded containers (glass or plastic)
- Printable labels or a label maker
- Clear tape or waterproof label covers
- One small scoop or measuring spoon
- One bag clip
- Optional: mini recipe cards
- Optional: a small tray or bin to keep it all together
Step-by-step
- Pick snack categories that make sense. I like:
- One-Hand Snacks
- Quick Protein
- Sweet
- Salty
- Make labels that are readable fast. Large font, short words, high contrast. Cute is fine, readable wins.
- Seal the labels. Cover with clear tape so sticky fingers and pantry life don’t destroy them.
- Add a scoop or spoon. This makes it easier to portion quickly and it keeps hands out of the jar.
- Include two simple snack mix cards. Keep them basic, not a culinary project:
- trail mix style
- granola or oatmeal add-in mix
- Bundle it as a kit. Tie the scoop to the jar set with twine and add a card that says “Eat something. Love you.”
Pro-Tips that make it actually helpful
- Avoid strong-smelling snacks if you’re gifting to a sensitive household. Some postpartum moms feel extra sensitive to scent and taste shifts. Keep it mellow.
- Add a “refill list” card clipped to the back of one jar. She will know what to restock without thinking.
- Use wide-mouth jars. Narrow jars spill, and nobody wants to vacuum pretzels.
Common mistake beginners make
People fill jars with snacks that crumble into dust. Pick snacks that hold up, and she can actually eat them one-handed without a mess explosion.
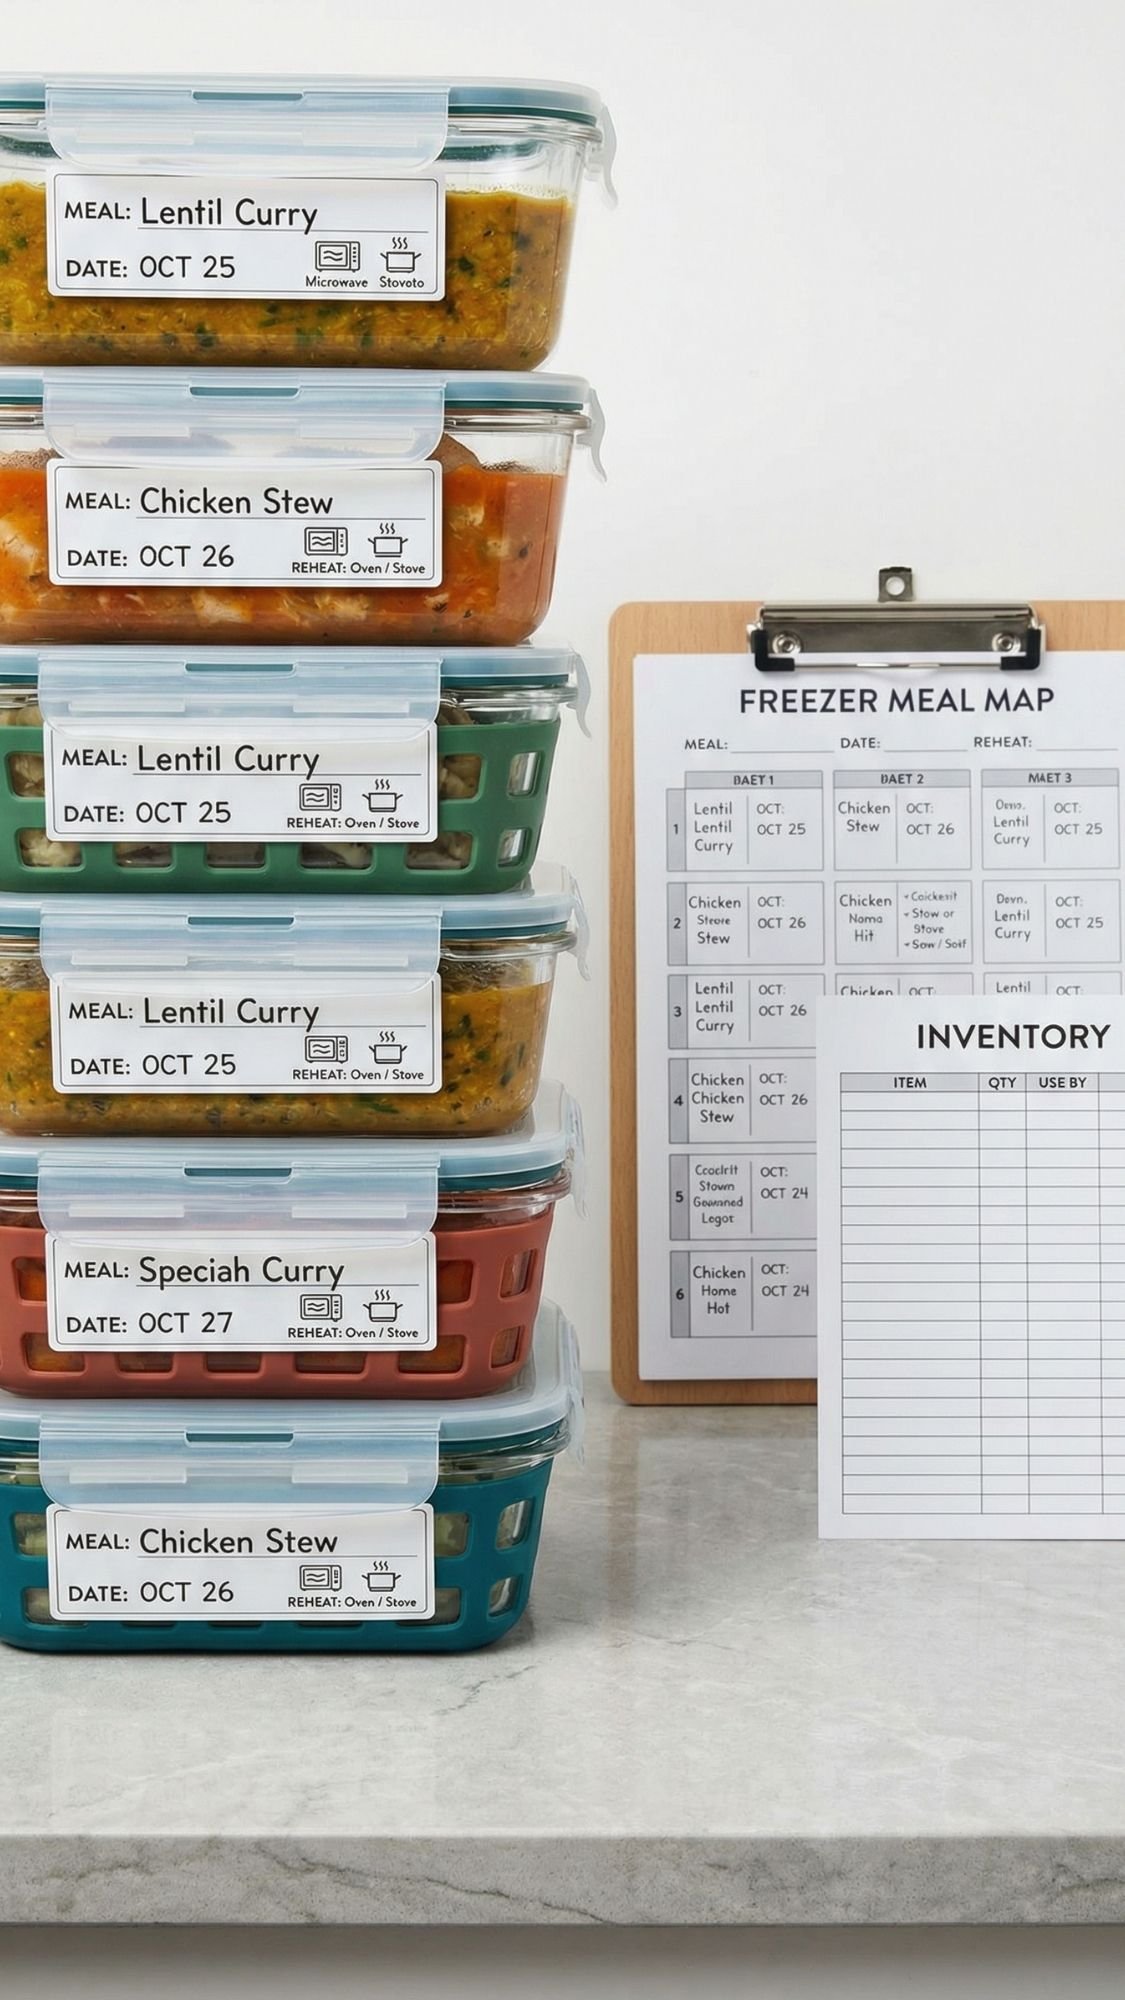
7) Freezer Meal Starter Kit With Labels and a Mini “Meal Map”
Why this gift works so well
Food support hits different in the newborn phase. She might not cook, but she still needs to eat, and freezer meals remove a huge chunk of daily stress. This gift works because it doesn’t just hand her containers, it gives her a system. Have you ever stared into a freezer and thought “what even is this mystery brick?” Your labels prevent that.
What you’ll need
- Freezer-safe containers or foil pans with lids
- Freezer tape or waterproof label covers
- Printable labels or a label maker
- Sharpie
- A one-page freezer inventory sheet
- 5 to 8 recipe cards or meal cards
- Optional: gallon freezer bags for soups and sauces
- Optional: binder clip or small clipboard for the “meal map”
Step-by-step
- Decide the meal categories. Keep it simple so she can scan fast:
- Breakfasts
- Dinners
- Snacks
- Make labels that answer the only questions that matter:
- What is it?
- How do I heat it?
- How long do I heat it?
- What date did it go in?
- Add a quick “meal map.” This is a tiny sheet that says something like:
- Top shelf: breakfasts
- Middle: dinners
- Door: snacks
- Create an inventory sheet. She checks off meals as she uses them, so she stops guessing what’s left.
- Include short meal cards. Keep each card to 3 lines:
- Thaw method
- Heat method
- One optional add-on, like “serve with rice” or “add a salad”
- Bundle it nicely. Stack containers, clip the meal map to the top, and tie it with cotton ribbon.
Pro-Tips that make your kit feel next-level
- Use freezer tape under the label. Regular labels peel when condensation hits.
- Add allergen check boxes on your label template. She can mark dairy, gluten, nuts, egg, soy.
- Write reheating instructions for real life. Use plain language like “cover loosely” and “stir halfway.”
- Include one card that says “If you can’t finish it, portion it.” That advice saves meals from getting wasted.
Common mistake beginners make
People write long reheating instructions in tiny font, then nobody reads it. Keep it short, bold the time, and she will actually use it.
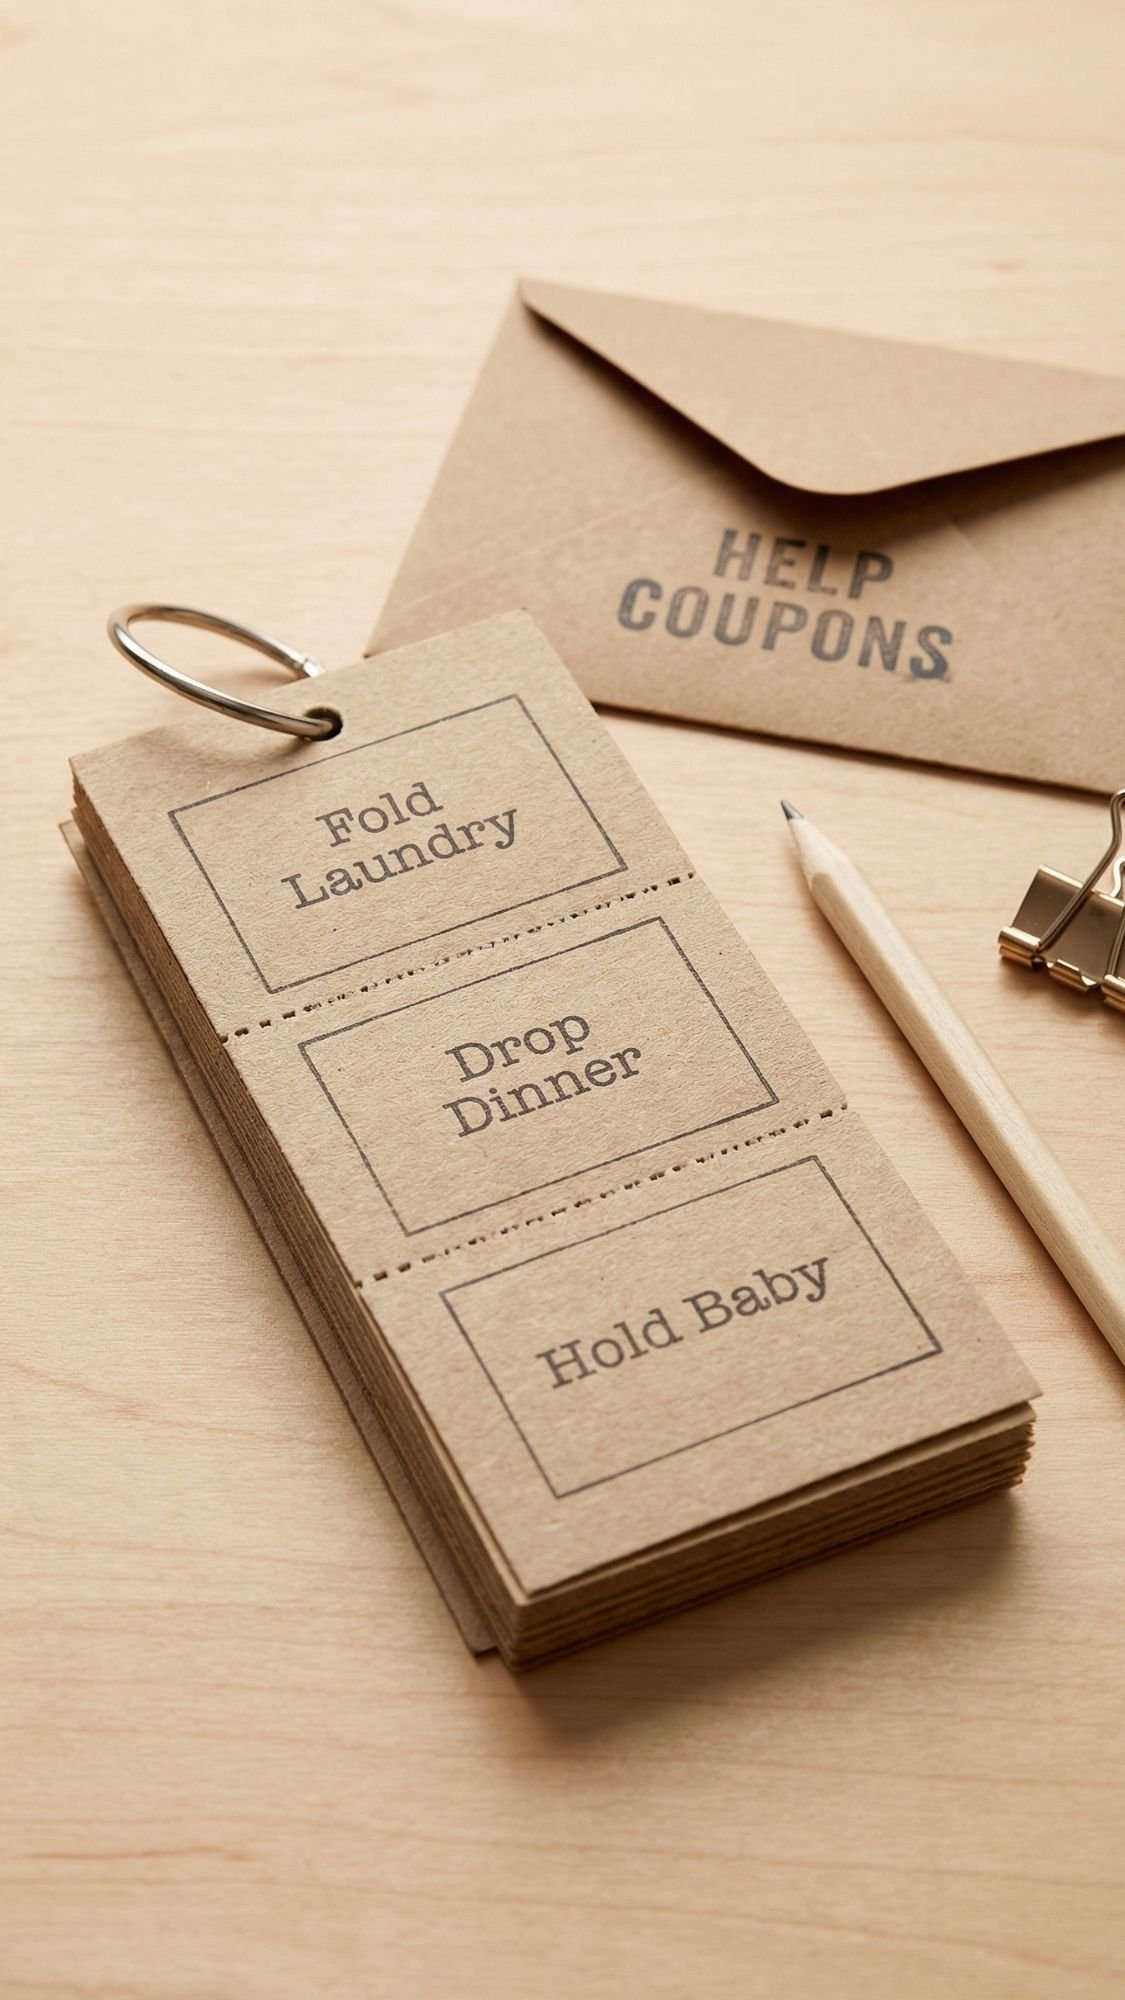
8) Tear-Off “Help Coupons” That Don’t Feel Awkward
Why this gift works so well
Everyone tells a new mom “let me know if you need anything,” and it’s sweet, but it’s also useless. Because when she actually needs help, she’s tired and she doesn’t want to invent tasks for people. These coupons make help specific, normal, and easy to accept.
Also, the best part is the coupons feel like permission. She can use one without feeling like she’s “asking too much.” That’s the whole point.
What you’ll need
- Printable coupon template or blank cardstock
- Pen or printer
- Stapler, binding rings, or a small notebook binding
- An envelope or small pouch
- Optional: magnet clip for the fridge
- Optional: a “blank coupons” page
Step-by-step
- Write coupons that are specific and realistic. Not “I’ll help anytime,” but:
- Drop dinner at 6 p.m.
- Pick up groceries
- Fold one laundry basket
- Take out trash and recycling
- Hold baby while you shower
- Walk the dog
- Add time limits. This makes it easier to say yes:
- “30 minutes of dishes”
- “One load of laundry start to finish”
- Include a blank page. She might want help you didn’t think of.
- Bind it. Staple on the side or punch and add a ring.
- Package it like a real gift. Put it in an envelope labeled “Use Me” and add a little note.
Pro-Tips that make it actually used
- Add one coupon for “sit with me.” Emotional support counts, and it doesn’t require energy.
- Make one “no talking needed” coupon. Something like “quiet folding laundry while you rest.”
- Make the writing friendly, not formal. This isn’t a contract, it’s help.
Common mistake beginners make
People make the coupons too vague, then the mom still has to plan and direct. You’re trying to remove mental load, not give her a group project.
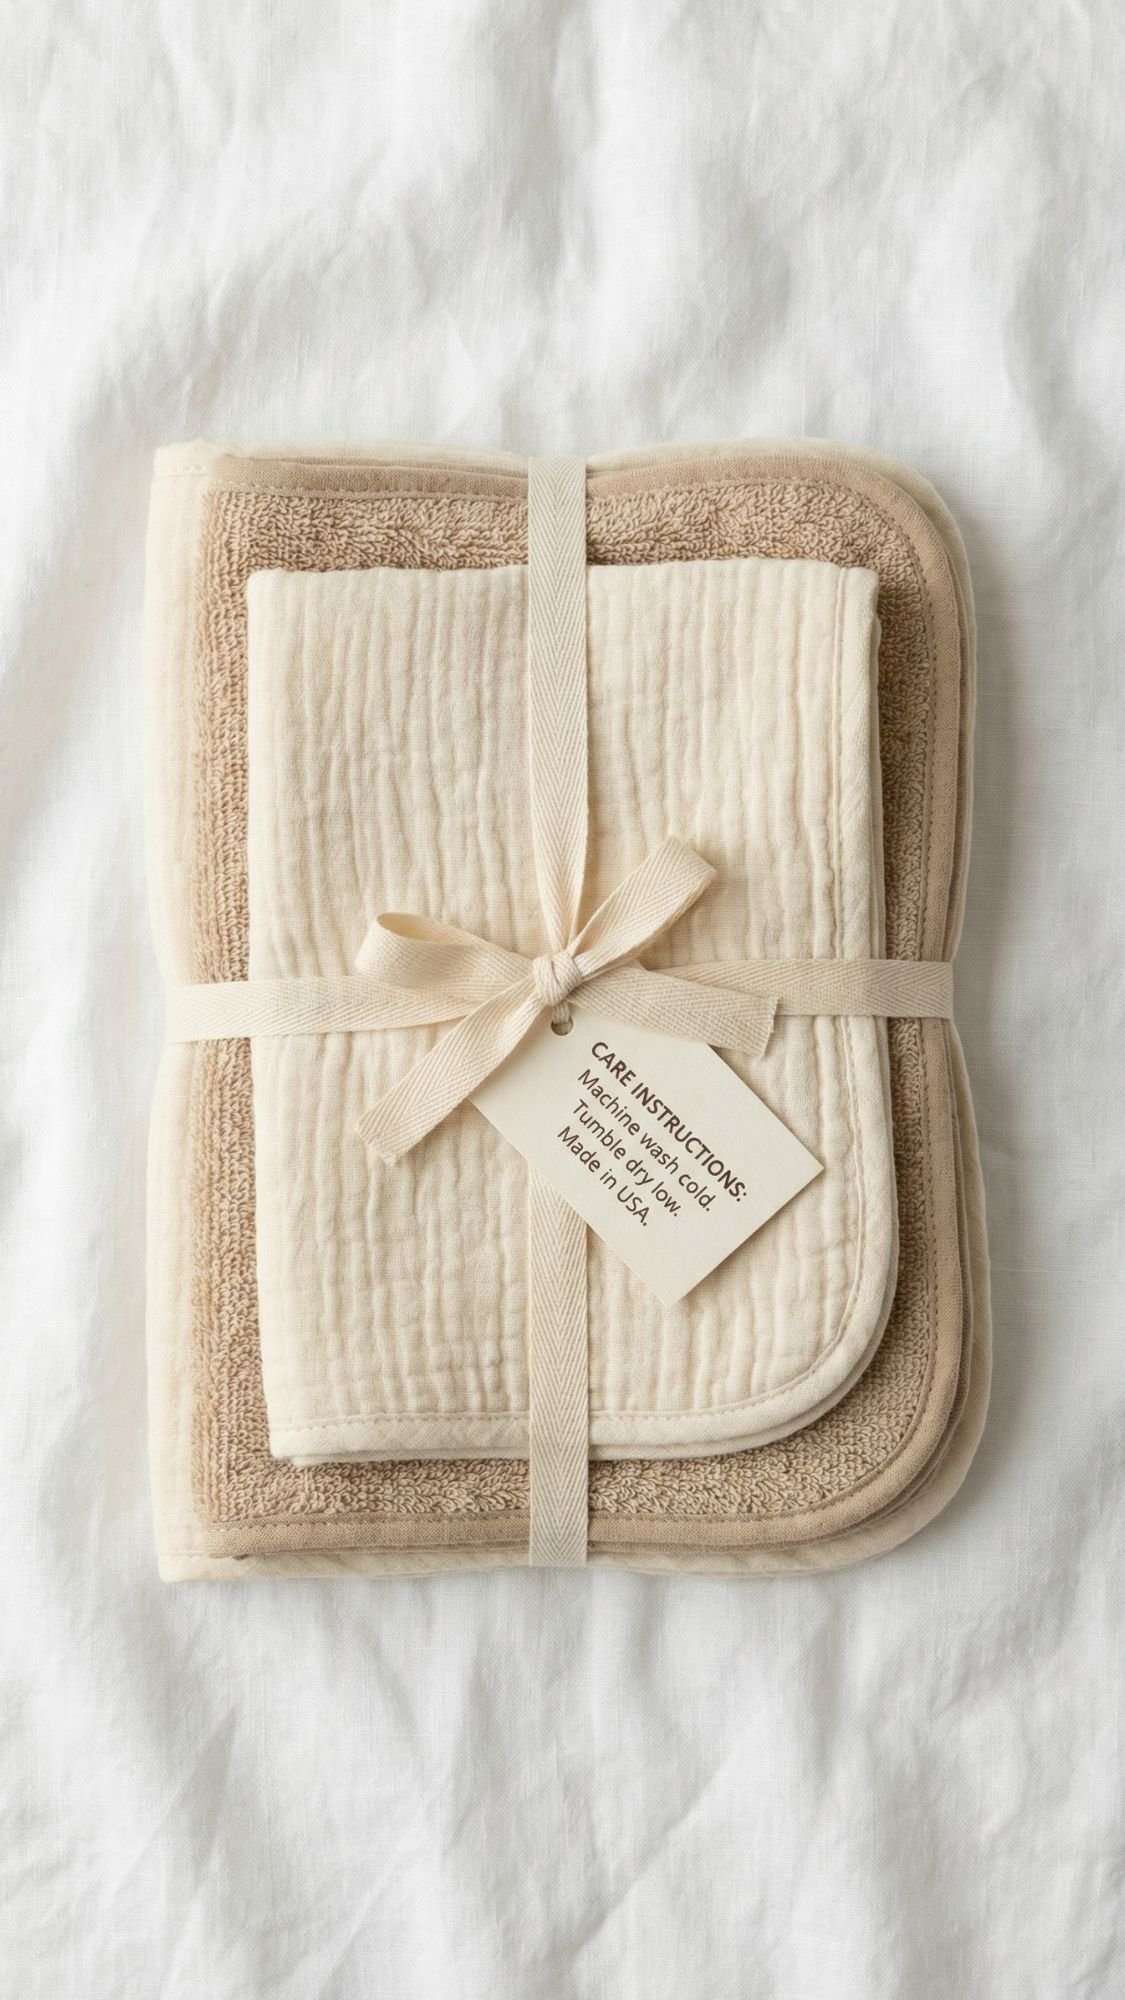
9) Ultra-Absorbent Burp Cloth Set That Actually Absorbs
Why this gift works so well
Burp cloths look like an easy gift, until you realize a lot of them don’t absorb anything. They just smear mess around and then act innocent about it. If you make a burp cloth with the right layers, it becomes one of those items that lives on her shoulder 24/7.
This is one of my most repeated gifts because it’s practical, washable, and instantly useful. And because you’re making it yourself, you can size it properly. Most store ones feel tiny.
What you’ll need
- Front fabric: cotton muslin or cotton flannel
- Absorbent core: cotton terry cloth or 100% cotton batting
- Back fabric: cotton flannel, muslin, or terry
- Thread
- Rotary cutter and mat (nice, not required)
- Clips or pins
- Optional: bias tape for edging
- Optional: corner rounder template (a bowl works fine)
Step-by-step
- Pick a generous size. I like a rectangle around 10 x 18 inches, then I round the corners.
- Cut your layers.
- Front layer
- Core layer
- Back layer
- Stack and clip. Keep the core centered so it doesn’t shift while you sew.
- Sew around the edge. Leave a turning gap.
- Turn and press. Pressing makes it look clean and helps it stitch flat.
- Topstitch twice. One line close to the edge, one line slightly in. This makes it strong and polished.
- Optional: quilt a few lines across the center. This prevents the core from bunching after washes.
Pro-Tips that make these superior
- Prewash your fabrics. This improves absorbency and prevents shrinking after you gift it.
- Skip fabric softener. It can reduce absorbency on cotton, especially terry.
- Use two absorbent layers for “power cloths.” One terry plus one batting layer makes a difference.
- Make one oversized “shoulder towel” cloth. It covers more area and saves shirts.
Common mistake beginners make
People pick cute fabric first and performance second. Cute is fun, but if it doesn’t absorb, it won’t get used. Choose a good core, then pick your pretty fabric.
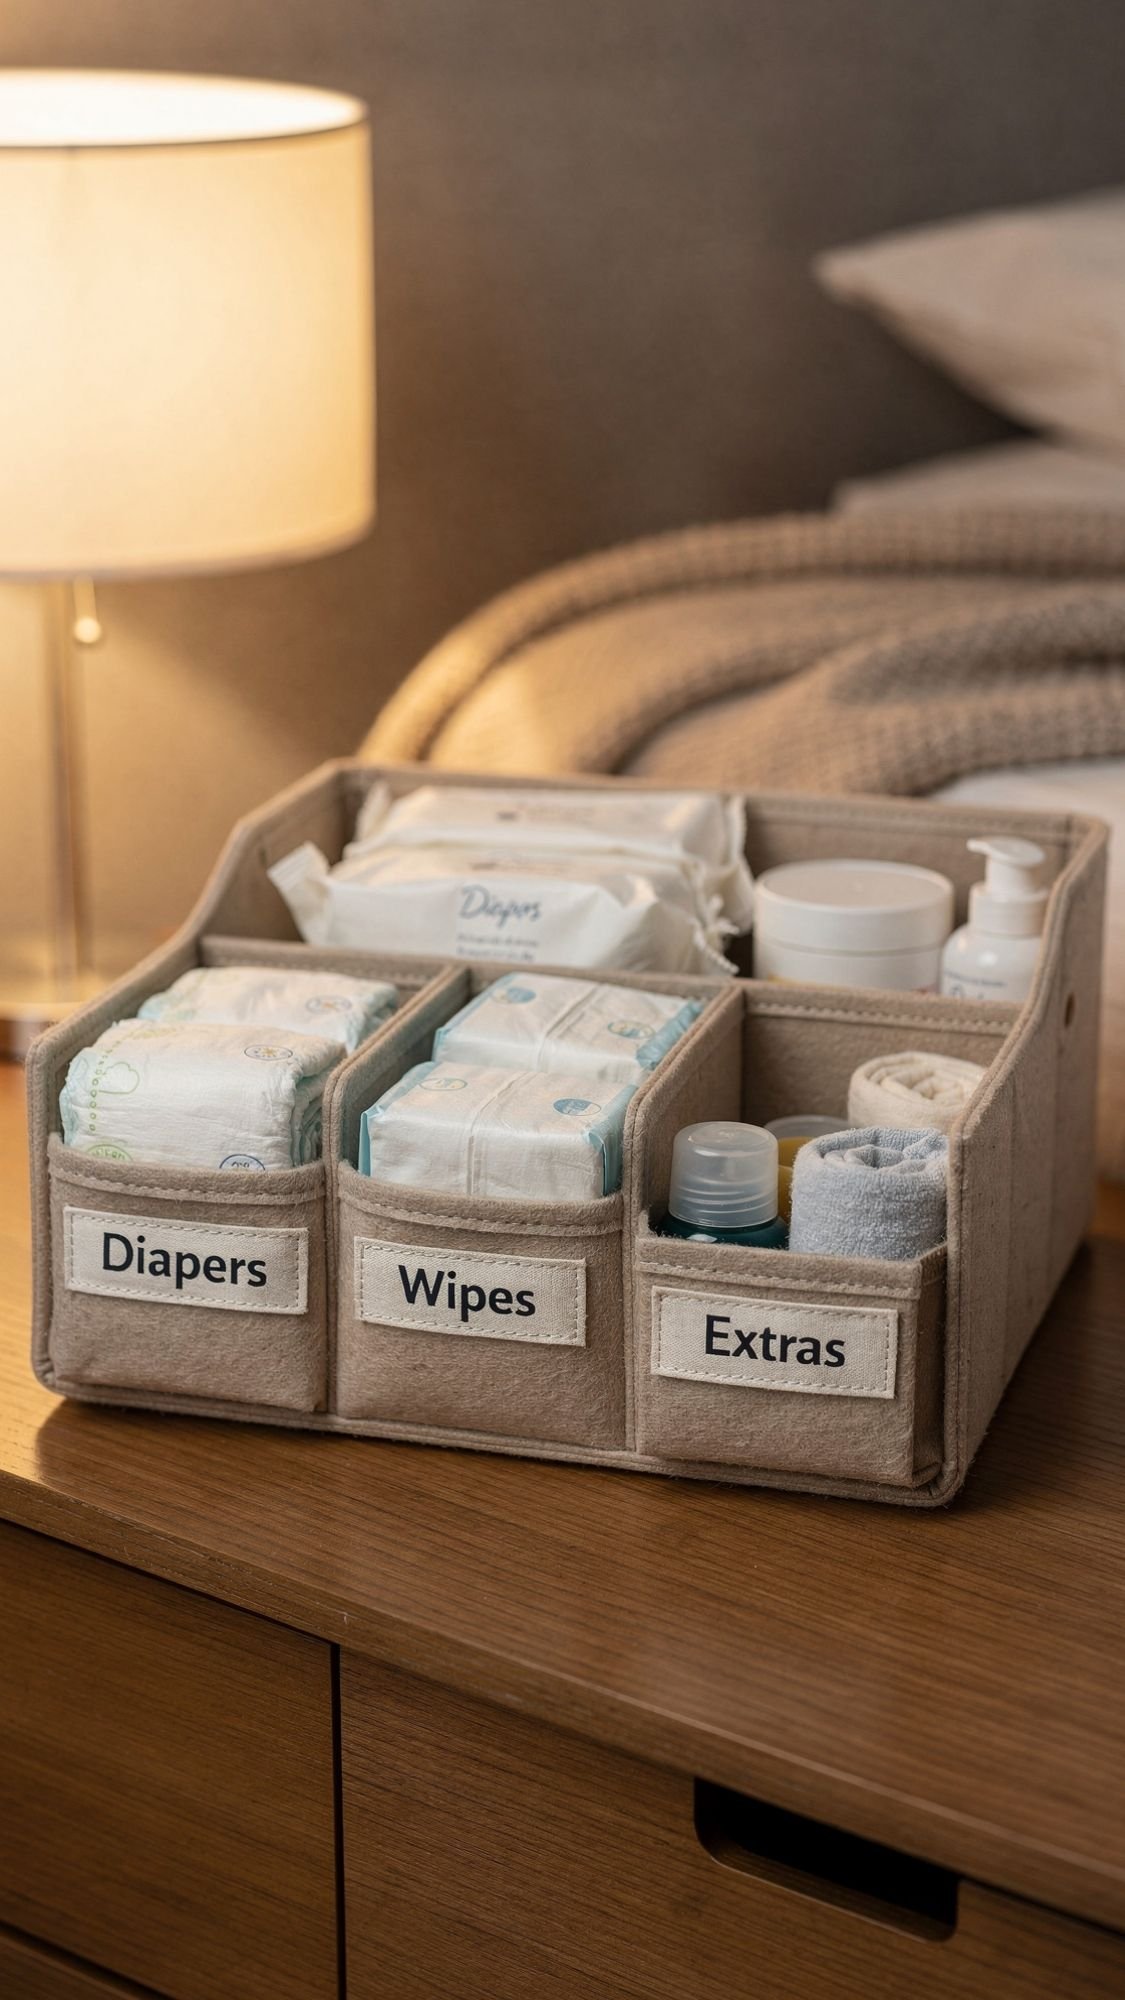
10) No-Sew Bedside Diaper Caddy With Dividers
Why this gift works so well
Nighttime changes are a whole different sport. A bedside diaper caddy saves her from stumbling to the nursery and waking everyone up. It also stops the “where are the wipes” panic when she’s half asleep. This gift feels simple, but it makes nights smoother fast.
And because it’s no-sew, it’s perfect if you want a useful DIY without pulling out the machine.
What you’ll need
- A soft bin or felt caddy, medium size
- Divider material: plastic canvas, corrugated plastic, or sturdy cardboard
- Double-sided tape, hot glue, or strong adhesive strips
- Label tags or a label maker
- Optional: small mesh pouch for tiny items
- Optional: a restock checklist card
Step-by-step
- Choose your divider layout. Keep it practical:
- Diapers
- Wipes
- Extras (cream, nail file, disposable bags, spare outfit)
- Cut your dividers to fit. Slide them into the bin first to test spacing.
- Secure the dividers.
- Use adhesive strips for a clean look.
- Use hot glue for a stronger hold, but let it cool fully before loading the caddy.
- Add labels. Label the divider tops or the inside front edge so she can see it instantly.
- Add one tiny “mom pocket.” Toss in a lip balm, hair tie, or hand cream. This small detail makes it feel thoughtful.
- Add a restock card. Clip it inside the bin or tie it to the handle. Keep it short, like:
- diapers
- wipes
- bags
- one spare outfit
Pro-Tips that make it feel upgraded
- Pick a lightweight caddy. She will move it one-handed between couch, bed, and nursery.
- Use wipeable divider material. Cardboard works, but plastic canvas lasts longer.
- Do not make sections too tight. Tight sections slow her down when she’s grabbing items quickly.
Common mistake beginners make
People over-organize this. Too many compartments turns it into a puzzle. Keep it to 3 main zones and one tiny pocket, and it stays useful.
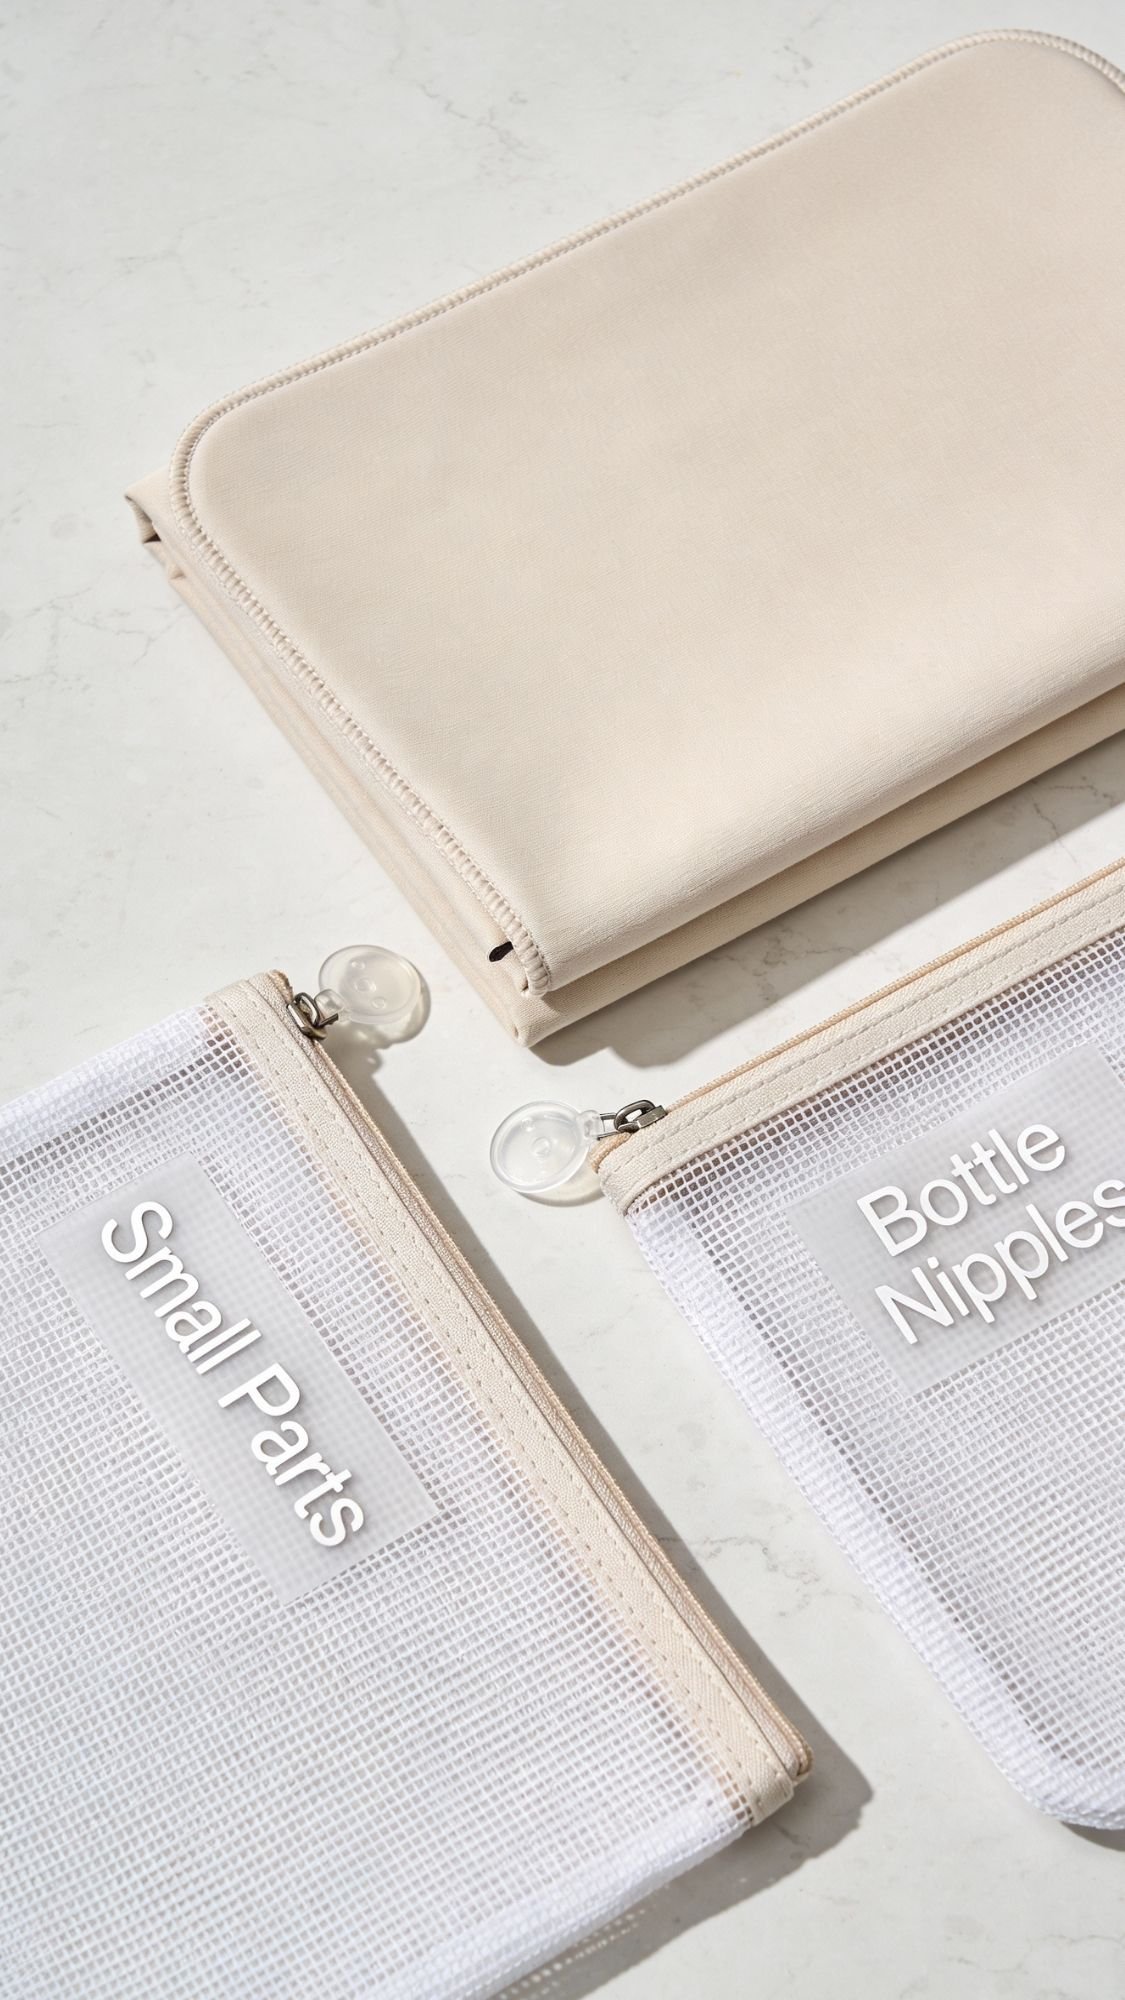
11) Pump Parts Wash Bag Plus Drying Mat Set
Why this gift works so well
If she pumps, she washes parts constantly. Tiny pieces. Multiple times a day. Forever. A wash bag and drying mat set keeps everything contained, easier to clean, and less likely to end up scattered across the counter like a plastic puzzle.
This gift also feels “quietly luxurious” because it looks clean and organized, not like random supplies tossed in a bag.
What you’ll need
Wash bags
- 2 mesh zipper bags (one for small parts, one for larger parts)
- Optional: bright zipper pulls or key rings to make them easy to grab
Drying mat
- Absorbent fabric, like cotton terry or microfiber towel fabric
- Waterproof backing fabric (optional but great), like PUL or a wipeable liner
- Bias tape or binding to finish edges
- Thread, scissors, clips
- Optional: hanging loop
Labels
- Waterproof labels or fabric tags
Step-by-step
- Label the mesh bags clearly. Keep it simple:
- “Small Parts”
- “Bottle Nipples”
- “Larger Parts”
- Make the drying mat.
- Cut absorbent top layer.
- Add optional waterproof backing if you want it to protect counters.
- Bind the edges with bias tape for a clean finish.
- Add a hanging loop. Sew it into one corner so she can dry the mat quickly.
- Bundle the set.
- Fold the mat.
- Tuck the bags inside.
- Add a small instruction card.
Pro-Tips that make it last
- Use a bright zipper pull. It saves time when she’s searching with wet hands.
- Bind edges instead of folding and hemming thick fabric. Binding stays flatter and looks more polished.
- If you add waterproof backing, stitch slowly. Thick layers can shift, clips help more than pins here.
- Make the mat big enough. It needs space for parts to dry without stacking.
Common mistake beginners make
People make the mat too small because it looks cute. Cute is fine, but she needs space. Give her a mat that fits a whole drying session, not one lonely bottle part.
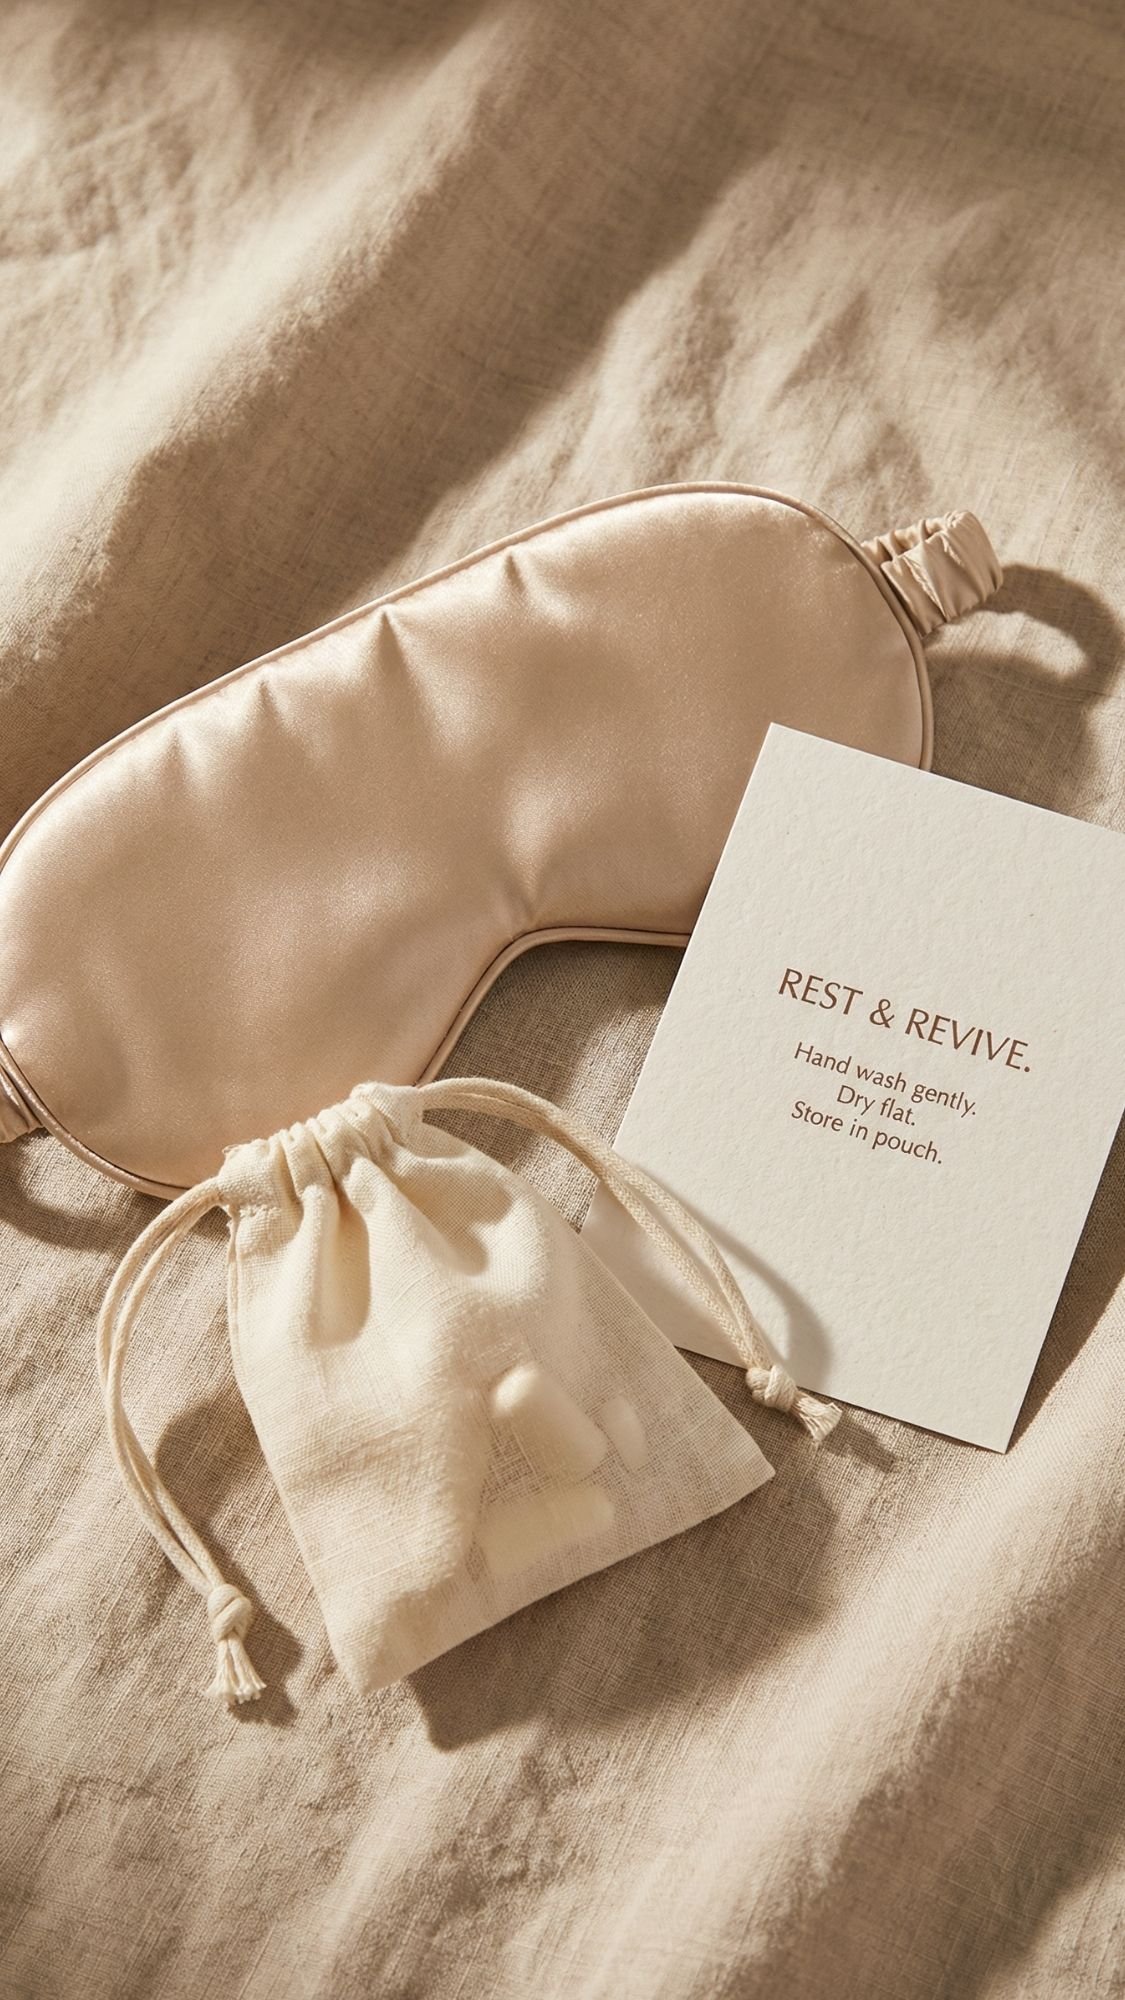
12) Sleep Mini-Kit: Eye Mask Plus Earplug Pouch
Why this gift works so well
New moms sleep in tiny windows. Like, “I have 27 minutes, go go go” windows. A sleep mini-kit helps her grab rest fast, especially if the house is noisy or bright. It’s gentle, it’s small, and it feels thoughtful without taking up space.
Also, this gift says “your rest matters” without getting preachy. That’s the sweet spot.
What you’ll need
Eye mask
- Soft fabric, think cotton jersey or satin
- A thin layer of batting (optional for extra comfort)
- Elastic, preferably adjustable
- Thread, scissors, pins or clips
Earplug pouch
- Small scrap fabric (cotton works great)
- Drawstring cord or ribbon
- Optional: soft liner fabric
Extras
- A small care card
- Optional: a little travel case or envelope
Step-by-step
- Sew the eye mask.
- Cut two mask shapes and one optional batting layer.
- Stitch around edges, leave a small opening, turn right side out.
- Insert elastic and stitch it securely.
- Make the elastic adjustable.
- Use a small slider or sew a longer elastic and tie it like a soft loop.
- The goal is comfort, not forehead dents.
- Sew the earplug pouch.
- Make a tiny rectangle pouch.
- Create a casing at the top and thread a drawstring.
- Package it.
- Add a note card that says “Nap kit, no guilt.”
- Include simple wash instructions.
Pro-Tips that make it feel high-end
- Keep seams flat and smooth. Bulky seams feel annoying on the face.
- Use a breathable fabric. Satin looks luxe, jersey feels cozy, both work if sewn cleanly.
- Make two masks if you can. One lives by the bed, one lives in the diaper bag.
Common mistake beginners make
People make the mask too tight because they think it needs pressure to block light. It doesn’t. A comfortable fit blocks light better because she actually keeps it on.

13) Postpartum Hair Helper Set: Satin Scrunchies Plus a Soft Headband
Why this gift works so well
Hair gets weird postpartum. New moms also end up living in messy buns and quick ponytails because, well, time. A gentle hair set helps her feel put together in 15 seconds without pulling or headaches.
This gift is also easy to personalize, you can match her style without being loud about it. Neutral, soft, and useful. That’s the vibe.
What you’ll need
Scrunchies
- Satin or silk-like fabric, or a very smooth cotton
- Elastic
- Thread, scissors, pins or clips
Headband
- Soft knit fabric, like jersey or a stretchy rib knit
- Optional: thin elastic to keep it secure
Optional extras
- A small pouch or travel case
- A lint roller sheet or two
- A simple care tag
Step-by-step
- Make 2 to 3 scrunchies.
- Cut fabric strips, fold and sew into a tube.
- Thread elastic through, tie securely, then close the opening.
- Make at least one “loose” scrunchie.
- A tighter scrunchie looks neat, but a loose one feels better on headache days.
- Sew the headband.
- Cut a wide strip, twist front if you like the look, then stitch and turn.
- Keep seams hidden inside so it feels smooth.
- Package it as a set.
- Fold the headband, stack scrunchies, tuck into a pouch.
- Add a note that says “for the days you want your hair out of your face.”
Pro-Tips that make it feel luxe
- Use a wider headband. It spreads pressure and feels gentler.
- Avoid tight elastic. Postpartum hormones can make you more prone to headaches, so comfort wins.
- Add a tiny case. A case makes it feel gift-worthy and keeps it from getting lost in a bag.
Common mistake beginners make
People make scrunchies with scratchy seams or stiff fabric. If it feels annoying on your wrist, it’ll feel annoying on her hair. Pick soft fabric and hide seams cleanly.
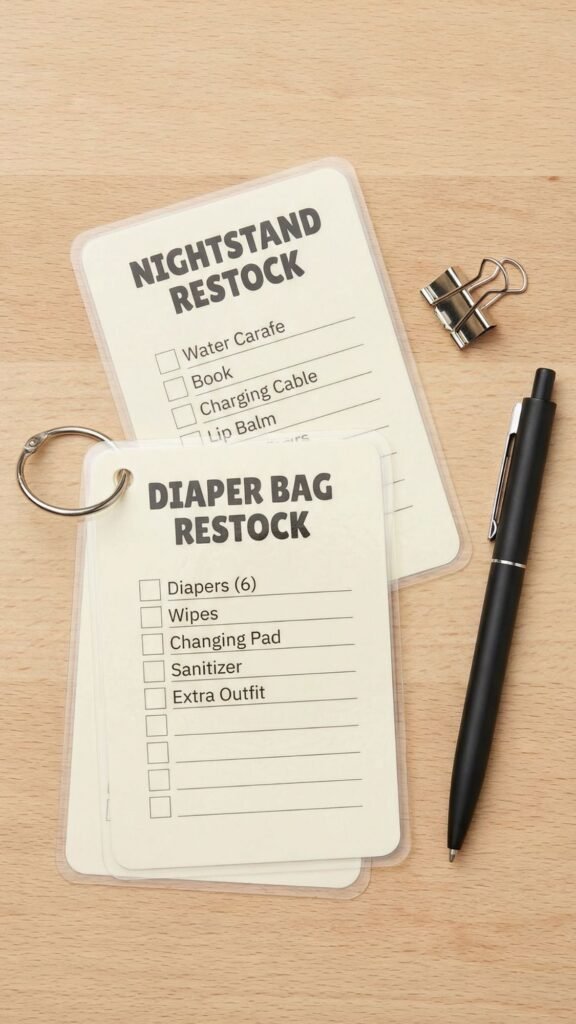
14) Laminated “First Weeks” Cheat Cards on a Ring
Why this gift works so well
A new mom forgets everything. Not because she’s not capable, but because sleep deprivation is a bully. Cheat cards help because they turn “I should remember this” into “I can glance at this.” They’re also easy to keep near the diaper station or fridge, and they don’t require logging into anything.
This is the kind of gift that feels small but gets used constantly. Ever wished you had a brain backup? Same.
What you’ll need
- Printable cards (you can design them in Canva or Google Docs)
- Heavyweight cardstock
- Laminating sheets or a laminator
- Hole punch
- Binder ring
- Optional: magnet clip or command hook for hanging
- Optional: dry-erase marker if you want reusable checklists
Step-by-step
- Pick 8 to 12 cards that solve real problems. Here are my best starters:
- Nightstand restock checklist
- Diaper bag restock checklist
- Freezer meal inventory mini list
- One-hand snack ideas
- “Text this friend” quick scripts for help
- Laundry quick routine
- Pump part wash routine
- “When you have 10 minutes” reset list
- Keep fonts big and simple. She needs to read it quickly.
- Print on cardstock, then laminate. Lamination makes them wipeable and durable.
- Punch one corner and ring-bind. Put the most-used card first.
- Add a hanging option. A hook by the changing station makes it easy to grab.
Pro-Tips that make these feel polished
- Use icons sparingly. Too many visuals make it busy. One icon per card is plenty.
- Add one blank laminated card. She can write custom reminders with a dry-erase marker.
- Make one card a “restock photo reminder.” Encourage her to snap a photo of her ideal setup. It helps her reset quickly later.
Common mistake beginners make
People add too much text. A cheat card is not a blog post. Keep each card to one purpose, and keep it scannable.
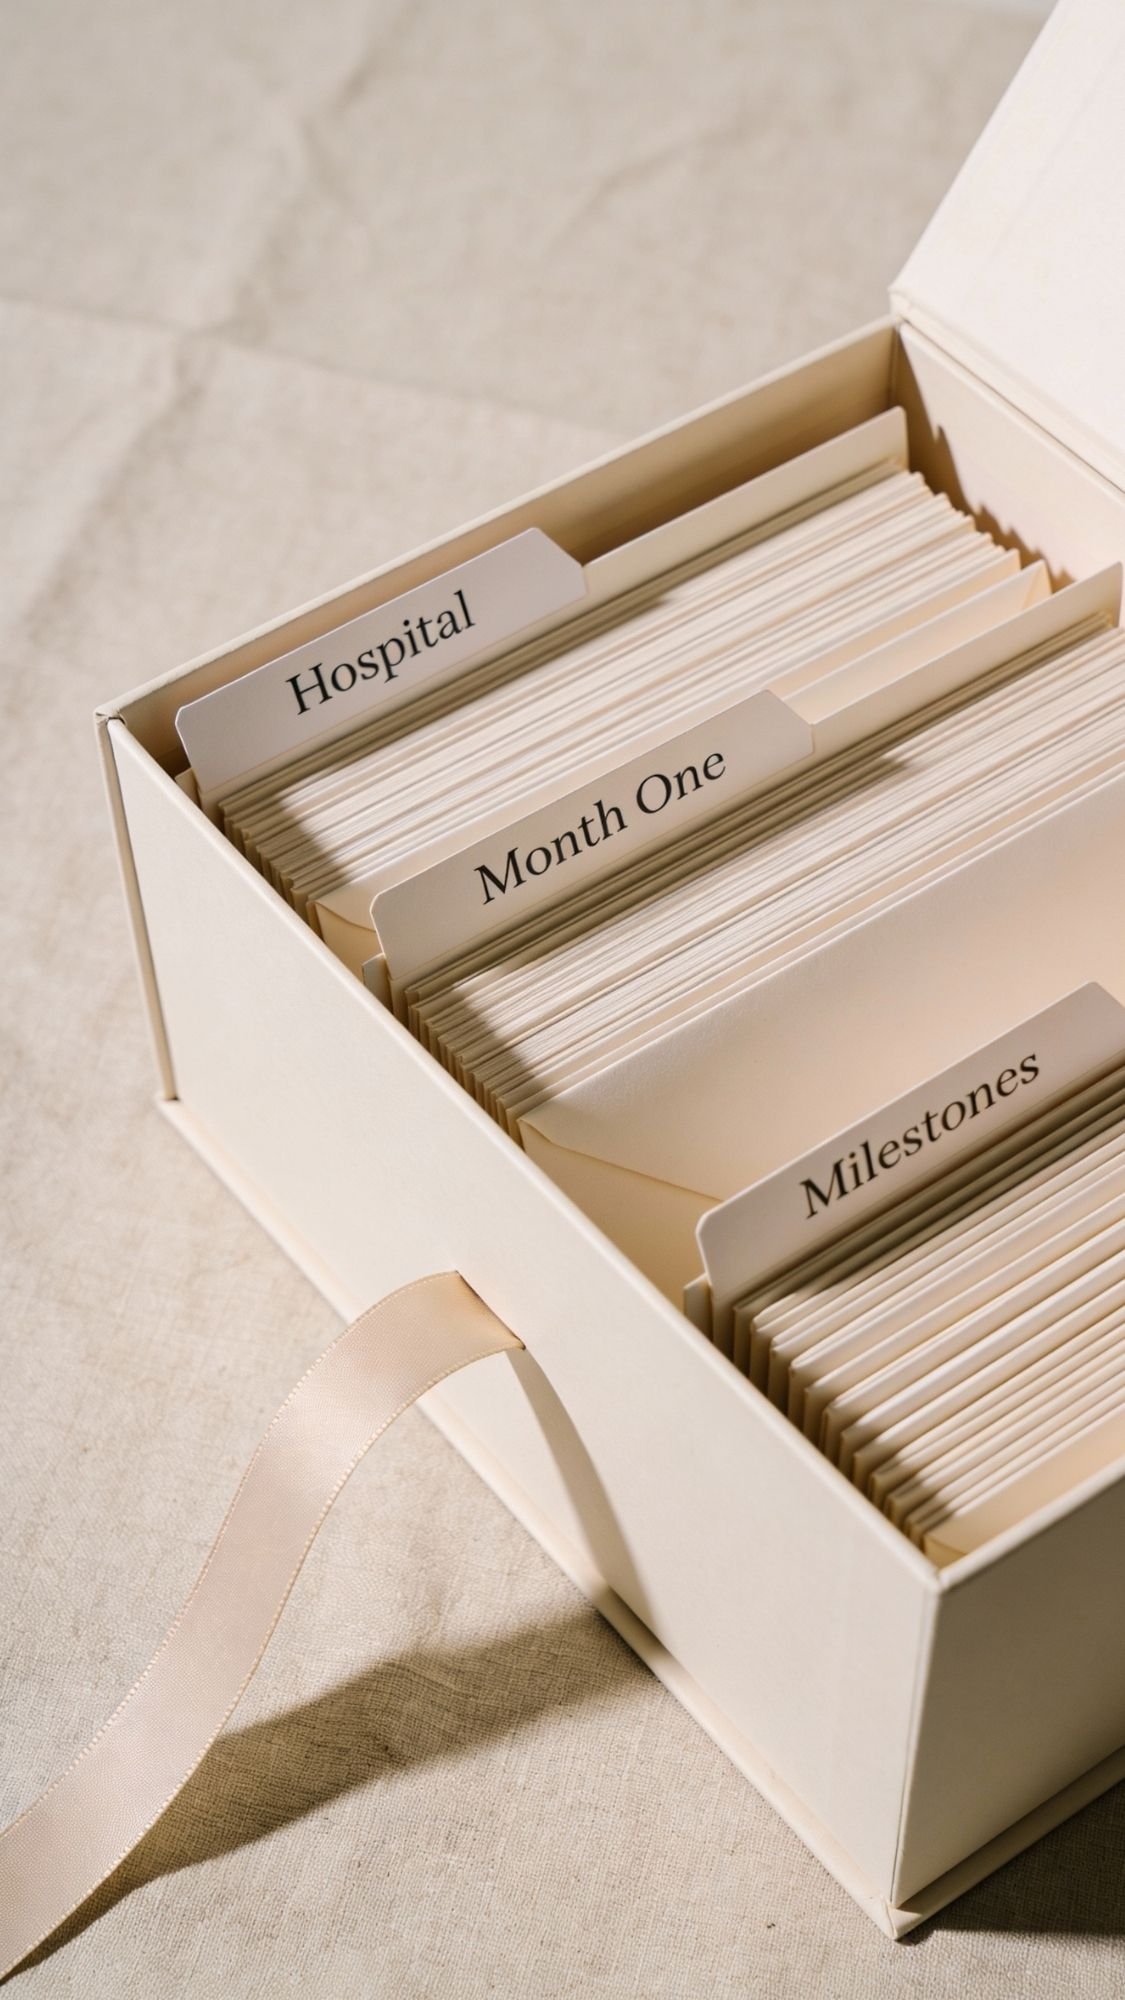
15) Keepsake Memory Box With Labeled Dividers
Why this gift works so well
New moms want to keep the tiny stuff. Hospital bracelet, first hat, a note, a little photo, a card from grandma. The problem is they get busy and those items end up scattered. A memory box with dividers turns keepsakes into a simple system. She drops things in the right spot without thinking, and future her stays grateful.
This gift feels sentimental and practical at the same time, which is honestly rare.
What you’ll need
- A sturdy lidded box (wood, heavy cardstock, or fabric-covered)
- Acid-free envelopes or small folders
- Divider tabs or cardstock dividers
- Label maker or printable labels
- Glue dots or double-sided tape
- Optional: small clear sleeves for photos
- Optional: ribbon pull inside the box to lift everything out easily
Step-by-step
- Pick divider categories that stay broad. Broad categories get used. Overly detailed categories get ignored.
- Hospital
- Week One
- Month One
- Milestones
- Notes and Cards
- Photos
- “Later” (this folder is magic)
- Make or insert dividers. Use cardstock tabs, folders, or envelope sets.
- Label everything clearly. Big readable labels. No tiny script.
- Add envelopes for small items. Things like bracelets and tiny socks need a home.
- Tape an index card under the lid. List what goes where in one glance.
- Optional: add a “memory prompt” card set.
- “What surprised you this week?”
- “A funny moment you want to remember”
- “A small win”
Pro-Tips that make it feel like a boutique gift
- Add a “Later” folder. When she can’t decide where something goes, she still has a place to put it.
- Add a ribbon pull. Tape a ribbon strip to the bottom so she can lift out contents easily.
- Use acid-free materials. Keepsakes last longer and photos stay safer.
Common mistake beginners make
People over-label with too many categories. That makes the box feel like homework. Keep it broad, and it stays easy.
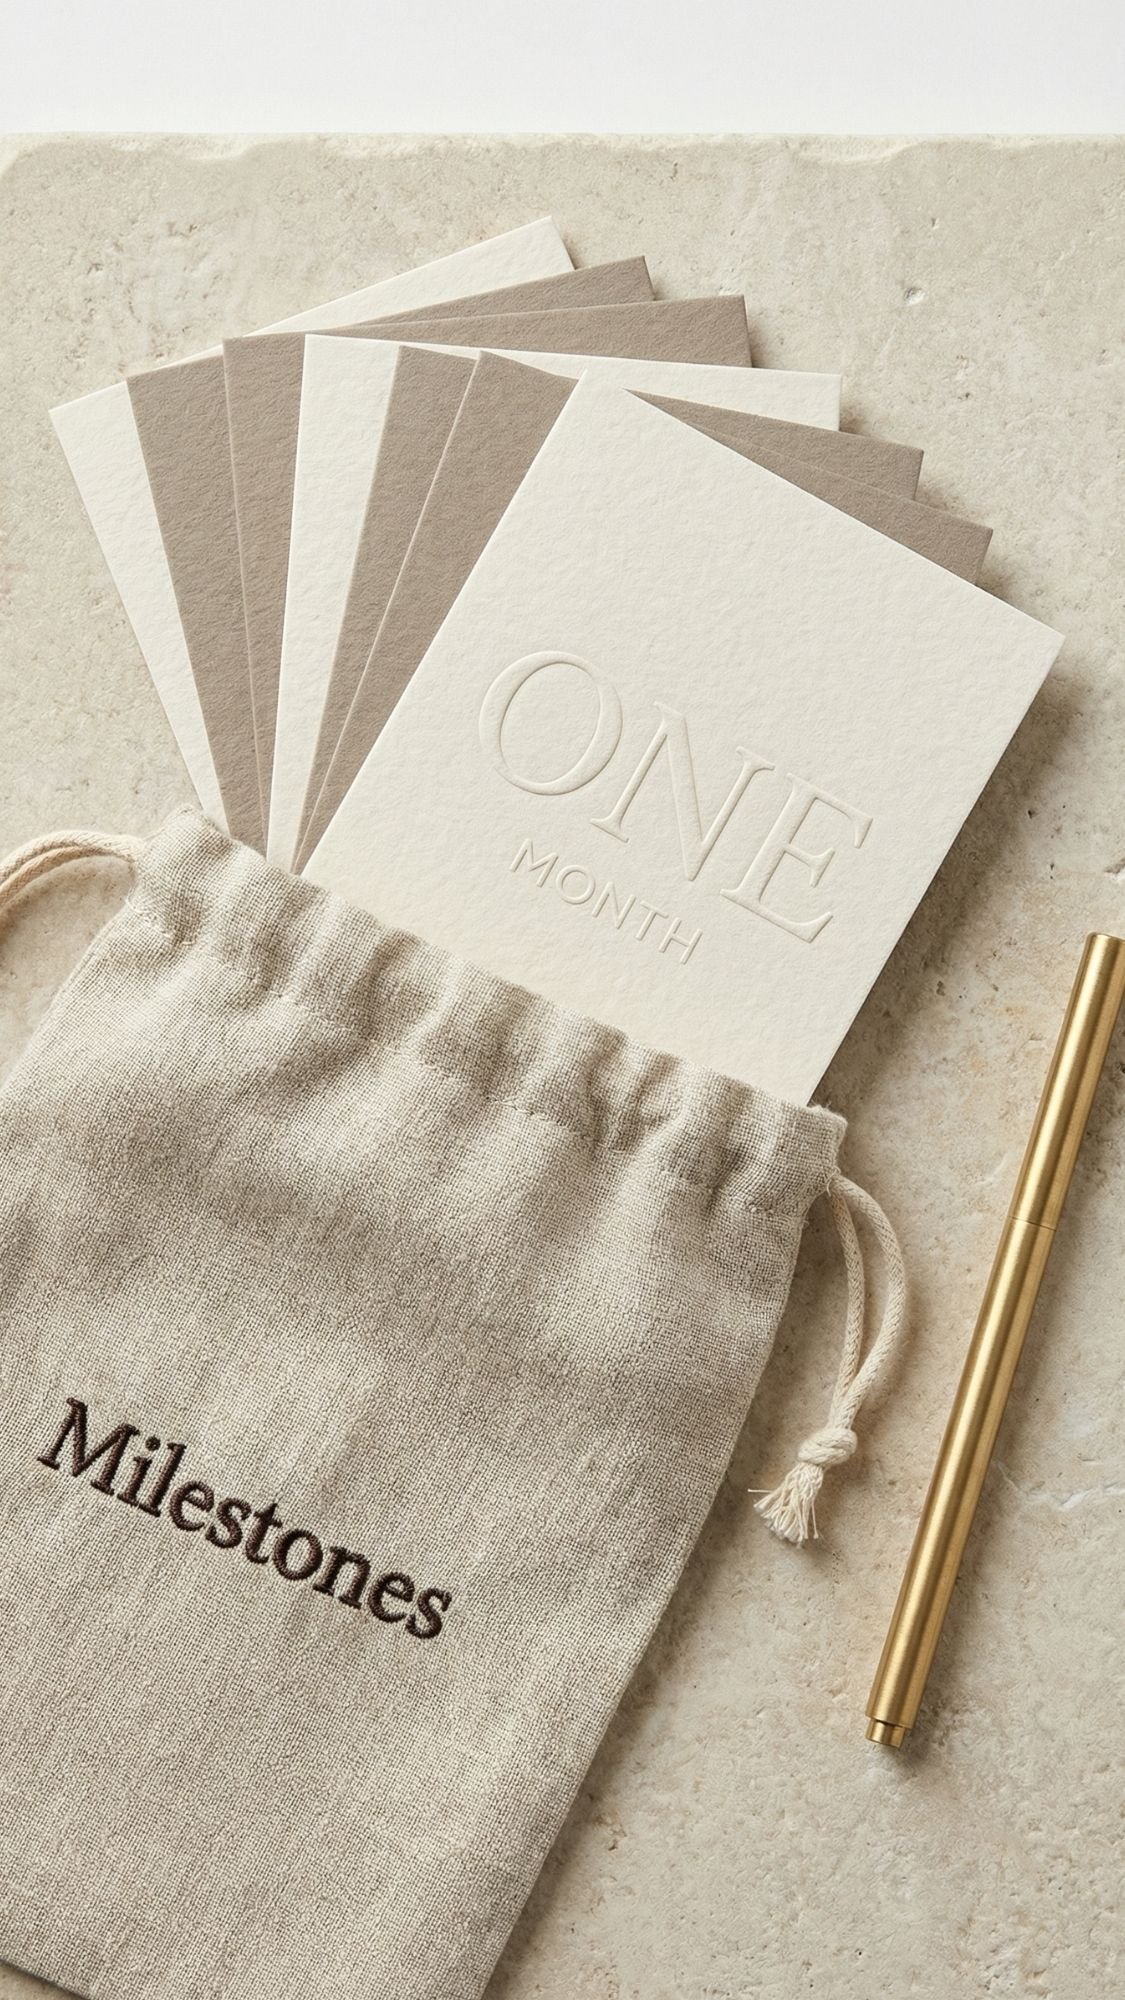
16) Minimal Milestone Photo Cards, DIY Printable Set
Why this gift works so well
Milestone cards are popular for a reason. They make photos quick, they keep memories organized, and they help the mom feel like she captured something meaningful even if the day felt like chaos. The trick is keeping them minimal so they work with any photo style and don’t look dated in six months.
This is also a great DIY because it feels polished, especially when you laminate or package it well.
What you’ll need
- Card design template (Canva, Google Docs, or Illustrator)
- Heavyweight cardstock
- Printer or print service
- Corner rounder (optional but makes it look pro)
- Laminator or clear sleeves (optional)
- Linen pouch, small box, or envelope for packaging
- Optional: label tag and care card
Step-by-step
- Choose your card set. I like:
- “Hello World”
- 1 week
- 2 weeks
- 1 month
- 2 to 12 months
- optional: “First Smile,” “First Roll,” “First Steps”
- Design with readability first.
- Large numbers
- Lots of blank space
- One simple icon at most
- Print on thick cardstock. Thin paper curls and looks cheap.
- Cut and round corners. Rounded corners feel premium and last longer.
- Optional: laminate. If you laminate, keep it matte or lightly glossy so photos don’t glare.
- Package it. Put the set in a pouch with a label like “Milestone Cards” and include a quick note.
Pro-Tips that make these feel luxury
- Keep colors soft and neutral. The photo should be the star, not the card.
- Leave space for handwriting. A little note on the card makes it personal.
- Do one “blank” card. She can add her own milestone like “slept 4 hours” and yes, that counts.
Common mistake beginners make
People over-design these with too many fonts and graphics. Then the cards clash with every photo and feel busy. Minimal wins here.
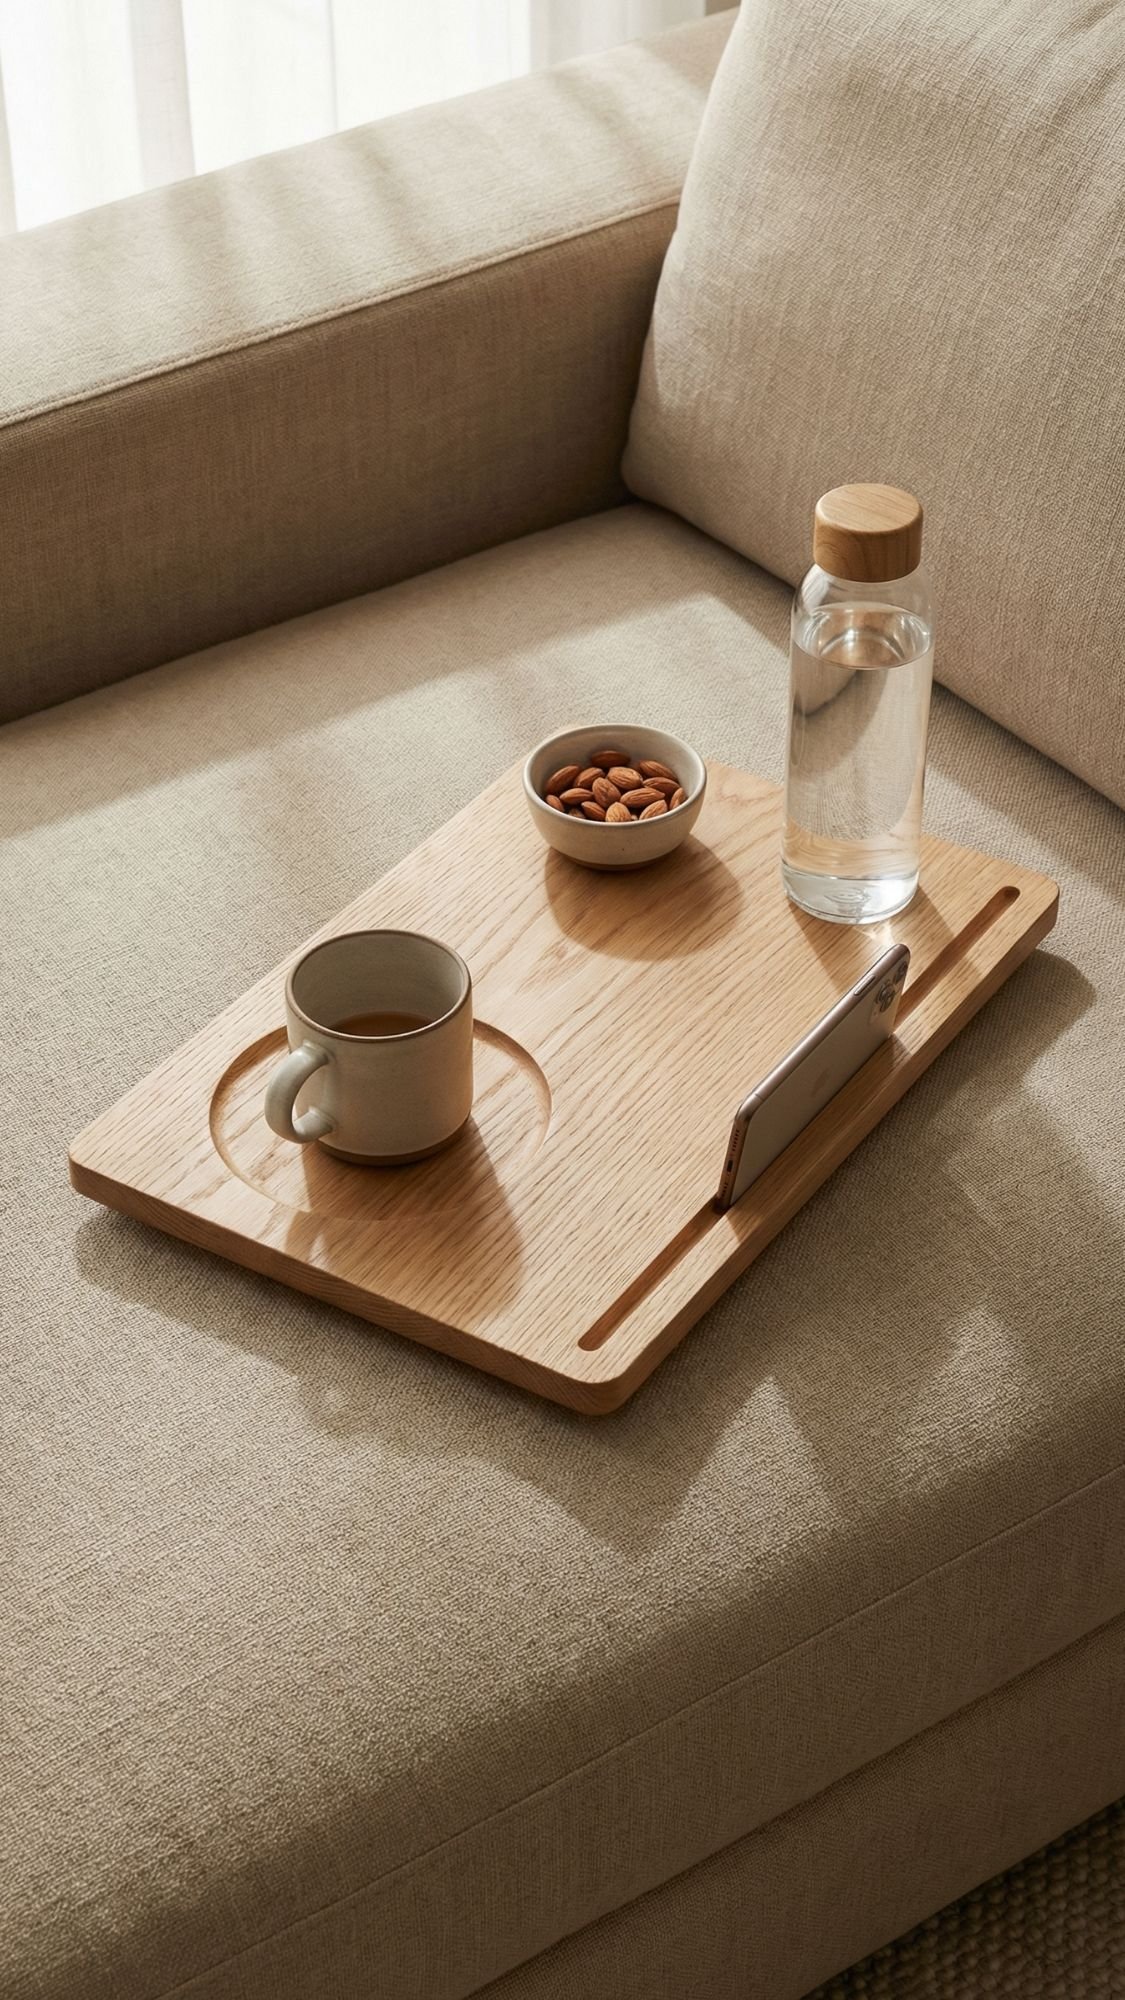
17) One-Hand Snack Tray or Lap Desk With a Cup Recess
Why this gift works so well
New moms eat in weird places. On the couch. In bed. Standing at the counter while bouncing a baby. A simple tray gives her a stable surface, and the cup recess keeps drinks from tipping when life gets chaotic. This is one of those gifts that seems basic until you live without it.
Also, if you make it look clean and minimal, it feels like something she would actually leave out.
What you’ll need
- Pre-cut wood panel or a simple serving tray base
- Sandpaper: 120, 180, 220 grit
- Wood glue (optional if adding rails)
- Non-slip feet (rubber bumpers)
- Drill or hole saw for cup recess, or a clamp-on cup holder instead
- Food-safe, wipeable finish (a clear topcoat works well)
- Clean cloth and tack cloth for dust removal
- Optional: small wood strip for a raised edge rail
- Optional: router for a phone groove (not required)
Step-by-step
- Decide the tray size. Big enough for a plate and drink, not so big it feels awkward on a lap.
- Sand properly.
- Start with 120 grit to smooth
- Move to 180 grit
- Finish with 220 grit for a soft touch
- Add the cup recess.
- Use a hole saw to cut a shallow recess, not all the way through.
- If you don’t want to cut wood, attach a simple cup holder instead.
- Optional: add a raised edge rail.
- This keeps snacks from sliding off when she shifts position.
- Attach non-slip feet.
- Rubber bumpers keep it from sliding on blankets.
- Seal it.
- Apply thin coats of your finish.
- Let it dry between coats, then let it cure fully before gifting.
- Add a care card.
- “Wipe with damp cloth. Do not soak. Avoid harsh cleaners.”
Pro-Tips that make it feel store-bought
- Round the edges slightly. Sharp corners snag blankets and feel harsh.
- Apply thin coats of finish. Thick coats turn tacky and take forever to cure.
- Let it cure before wrapping. Dry to the touch is not the same as fully cured.
- Add a phone groove if you can. It’s a tiny detail that gets used daily.
Common mistake beginners make
People rush the finish, then wrap the tray too soon. The finish ends up tacky, fingerprints show, and the tray looks messy. Give it time to cure and it looks polished.
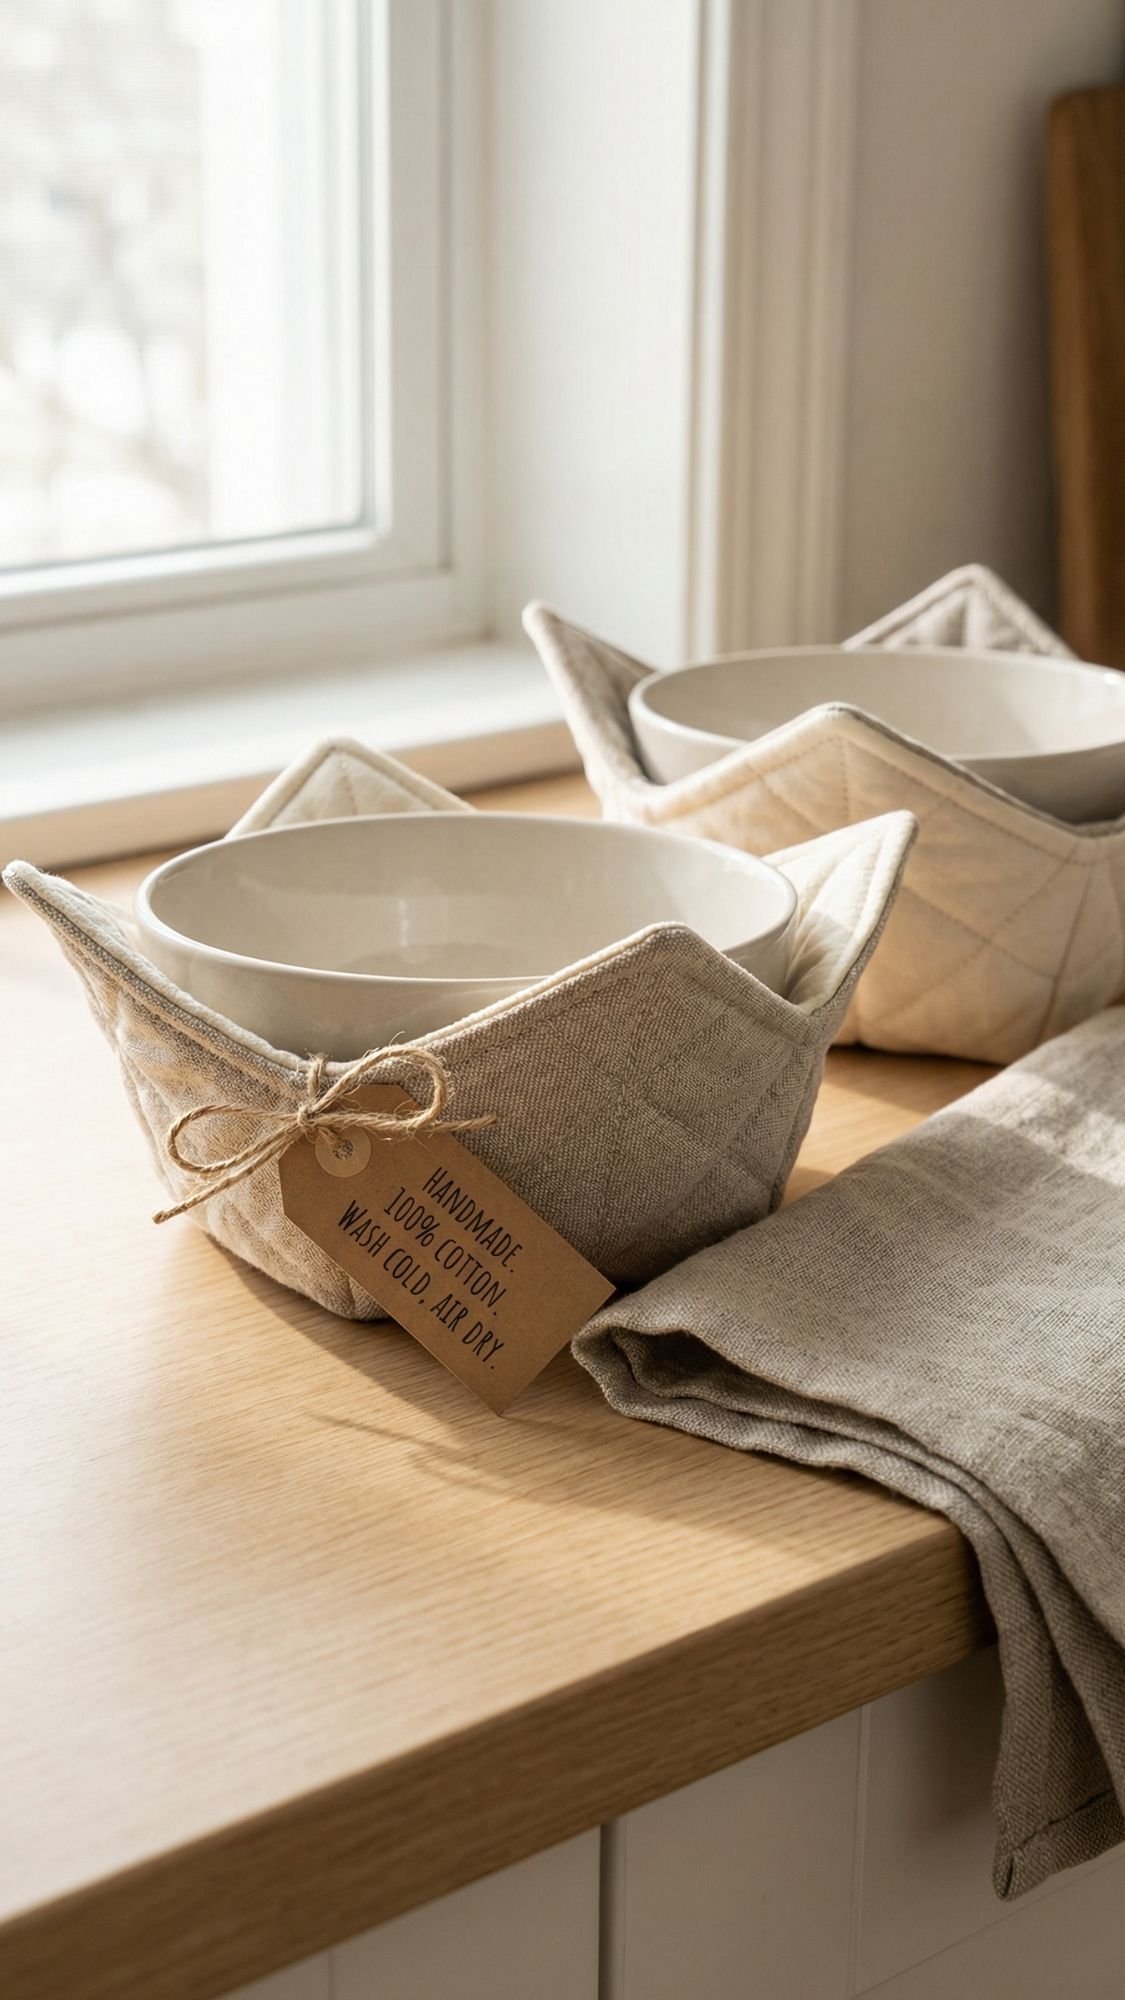
18) Microwave-Safe Bowl Cozy Set for Warm Meals
Why this gift works so well
This one is simple but sneaky helpful. New moms reheat food constantly, and grabbing a hot bowl with one hand while holding a baby with the other is a risky sport. Bowl cozies make hot bowls easier to hold and reduce spills. They also feel cozy and homey, which is a vibe a lot of new moms crave.
Important note, this gift only stays safe if you use the right materials. I keep it simple and 100% cotton. No mystery fabrics.
What you’ll need
- 100% cotton fabric (avoid metallic prints)
- 100% cotton batting (no polyester, no “insulated” batting)
- Thread
- Scissors or rotary cutter
- Clips or pins
- Sewing machine
- Optional: a template, you can make one from cardstock
Step-by-step
- Cut your pieces. You need:
- 2 fabric squares
- 2 cotton batting squares
- Size depends on the bowl, but a common starter is around 10 x 10 inches.
- Layer them.
- Fabric right side down
- Batting
- Batting
- Fabric right side up
- Quilt the layers.
- Sew an X corner-to-corner, then add a few extra lines.
- Quilting keeps batting from shifting and helps it hold shape.
- Shape the cozy.
- Fold and stitch darts at each corner to create the bowl shape.
- Trim and tidy.
- Clip threads, press lightly if needed.
- Add a care and safety tag.
- “100% cotton materials only. Heat in short bursts. Do not leave unattended.”
Pro-Tips that make it feel professional
- Test one cozy before making a full set. Heat an empty bowl for a short time and see how the cozy behaves.
- Use two sizes. One for soup bowls, one for oatmeal bowls.
- Keep stitching clean and even. These look simple, so sloppy stitching shows.
Common mistake beginners make
People grab whatever batting they have. Some batting contains synthetic fibers that can overheat. Stick to 100% cotton batting and cotton fabric, and you keep it safer and more reliable.
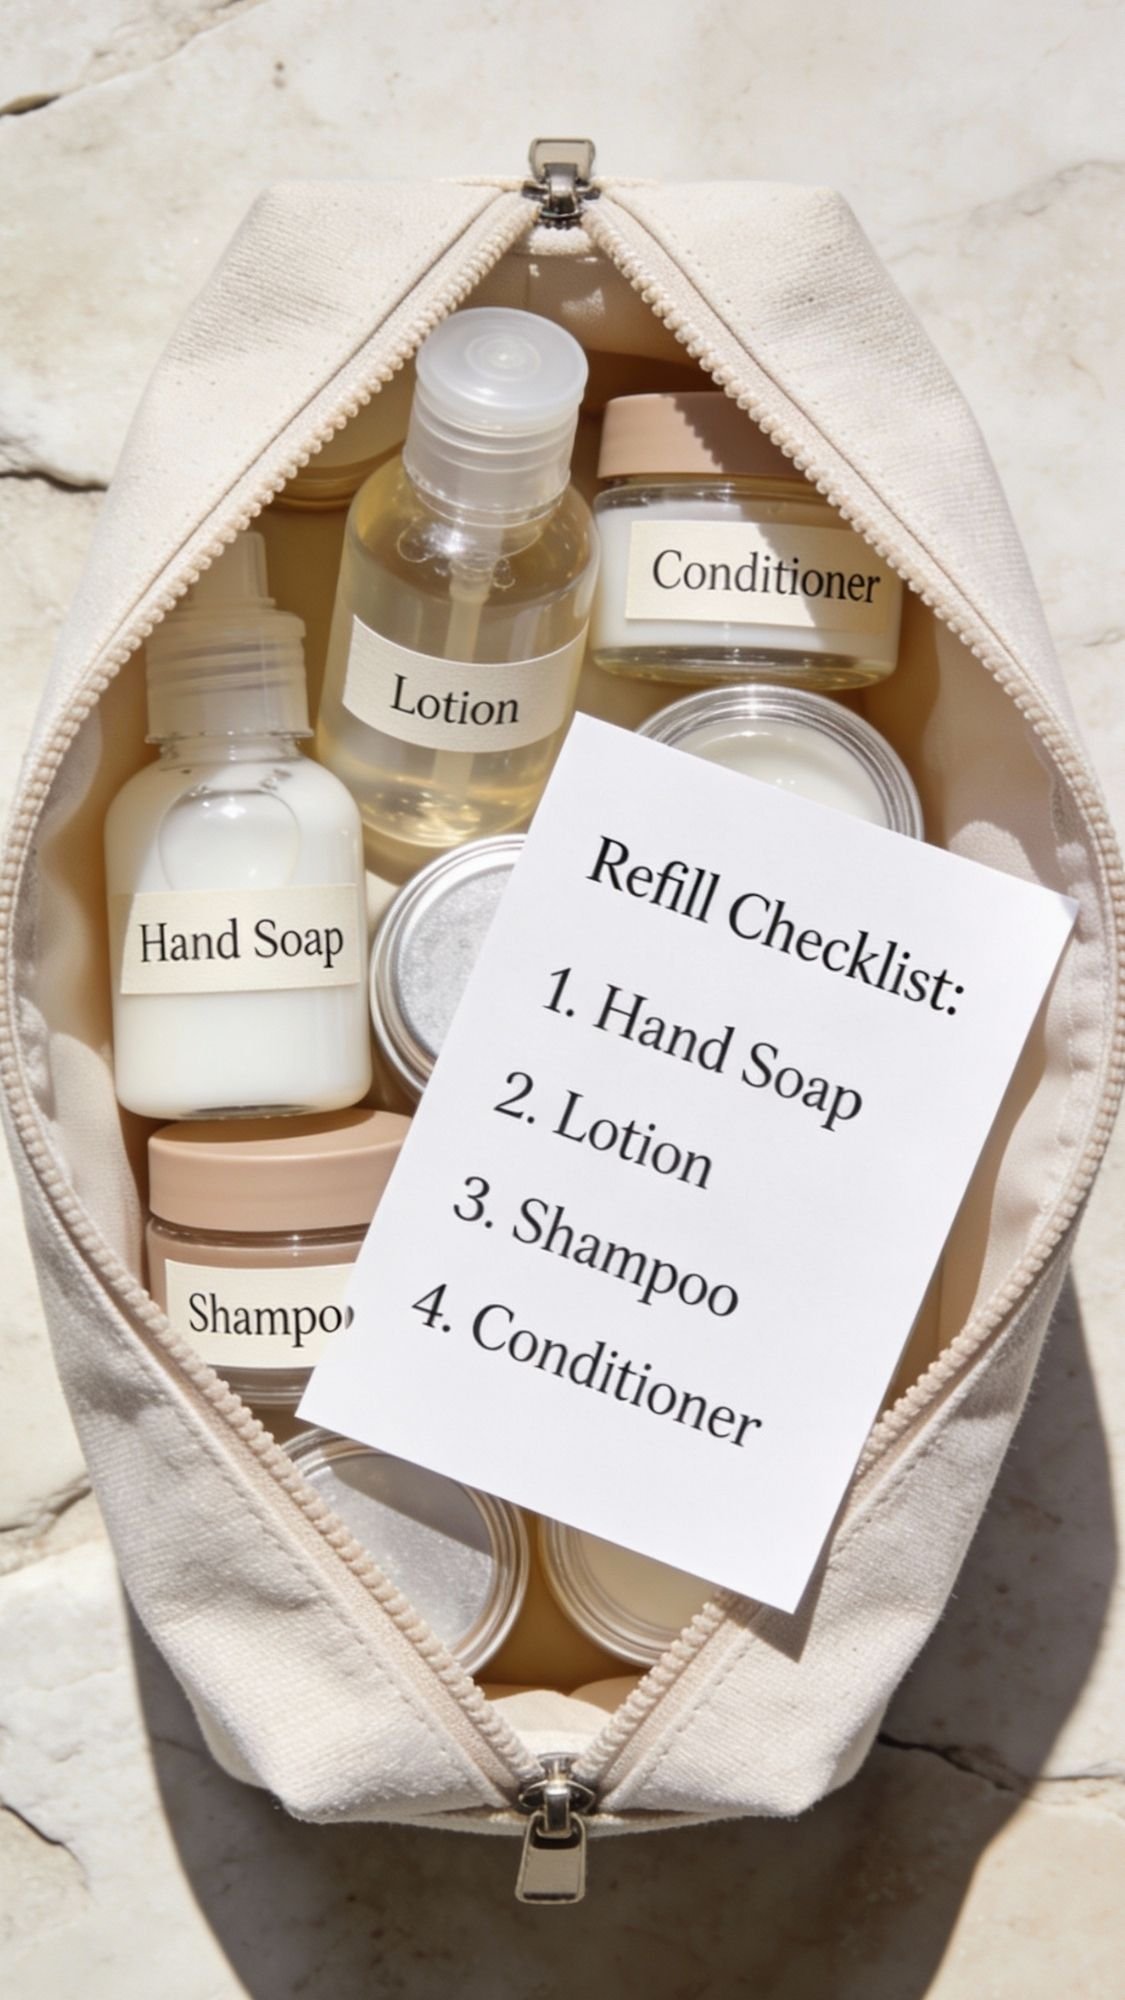
19) Postpartum “Refill Kit” Tote With Mini Bottles and a Checklist
Why this gift works so well
Running out of basics postpartum is the worst. It always happens at the wrong time, like when the baby finally falls asleep and the last thing you want to do is a Target run. A refill kit tote gives her a system for restocking, and it keeps the essentials in one spot.
This one also works for second-time moms because it’s practical, not trendy. And practical always wins.
What you’ll need
- A small zip tote or pouch, structured if possible
- Refillable travel bottles and mini jars (leakproof)
- Waterproof labels or label tape
- Printable refill checklist card
- Optional: a small inner zip pouch for tiny items
- Optional: a mini funnel for refilling
Step-by-step
- Pick the refill categories. Label by use, not brand. Keep it simple:
- Gentle soap
- Lotion
- Hand sanitizer
- Lip balm
- Hand cream
- Label everything clearly. Big readable labels, no tiny script.
- Add a refill checklist. A small card she can keep in the tote:
- soap
- lotion
- sanitizer
- balm
- wipes
- snacks (yes, snacks count)
- Add a “low-scent note” card. Something short like:
- “I kept this kit low-scent and gentle on purpose.”
- Bundle it neatly.
- Fill bottles if you’re including product.
- If you’re not including product, include a tiny list of what to fill them with.
- Finish it like a gift.
- Tie a cotton ribbon around the tote
- Add a tag: “Refill kit, for easier days.”
Pro-Tips that make this kit feel premium
- Only use leakproof bottles. Cheap bottles ruin the whole vibe, fast.
- Add a tiny funnel. It makes refilling easy and less messy.
- Include one “tiny stuff” pouch. Hair ties, nail file, travel lotion, all the small things.
Common mistake beginners make
People label by brand or scent name. That becomes confusing later. Label by purpose, and she will always know what goes where.
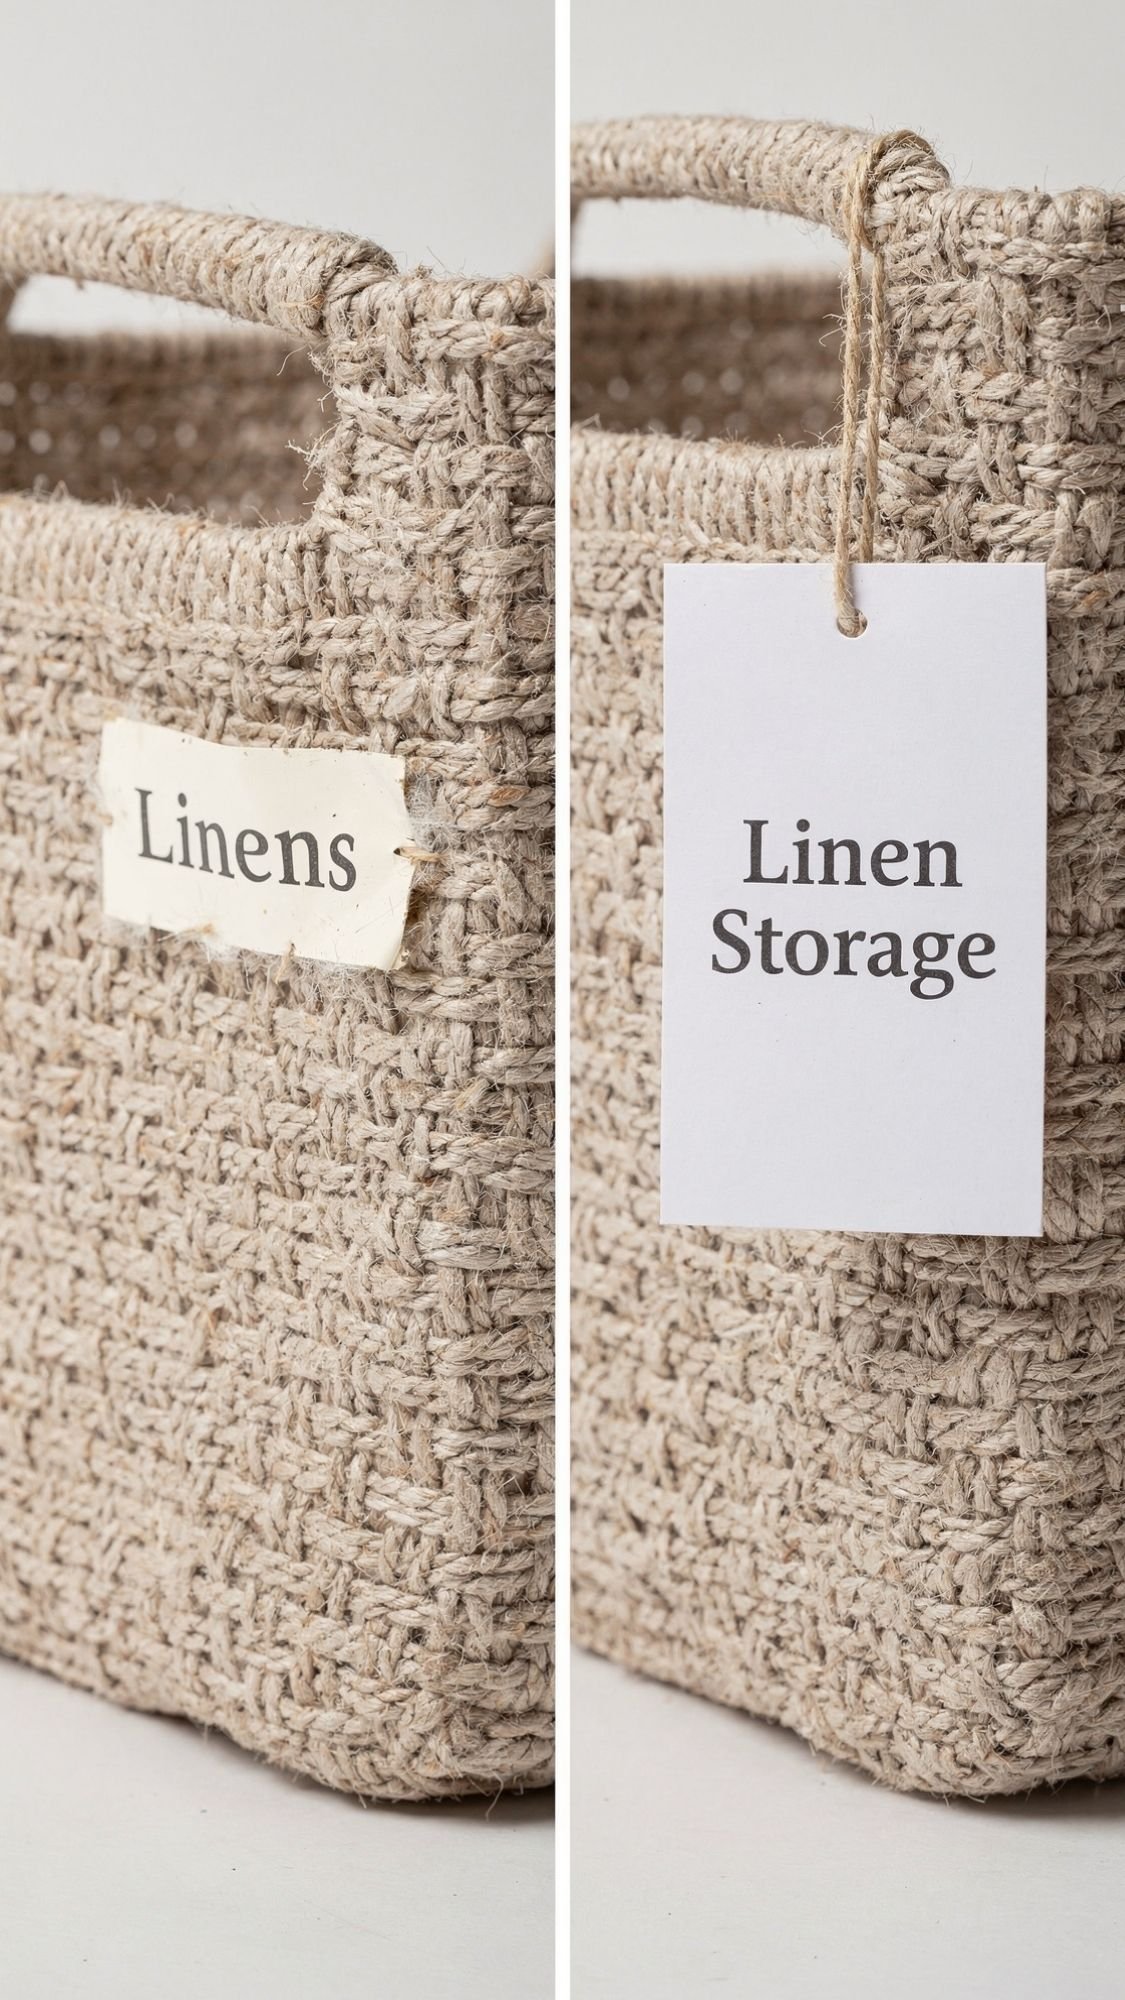
Failure Story: I ruined my own labels, then I fixed them
Okay, confession time. I once made a gorgeous postpartum basket, neutral bins, clean typography, the whole “I definitely have my life together” look. I used vinyl labels right on the woven basket because I thought it would look seamless.
It looked seamless for about 12 hours.
By the next day, the corners started lifting, then they caught lint, then they turned into fuzzy little dirt magnets. I felt personally offended. I tried pressing them back down, but textured weave does not care about your feelings.
What I did to fix it
- I removed the vinyl and stopped fighting the basket texture.
- I cut simple smooth tag panels from cardstock.
- I sealed the cardstock with clear tape so it could handle splashes.
- I tied the tags to the basket handle with cotton twine.
- Then I put the labels on the smooth tags instead of the weave.
The basket instantly looked cleaner and the labels stayed put. Lesson learned the hard way. If a surface has texture, it will test your adhesive choices every time.
The takeaway
Match the label method to the surface. Smooth bins love vinyl. Woven baskets love hang tags. Your future self will thank you.
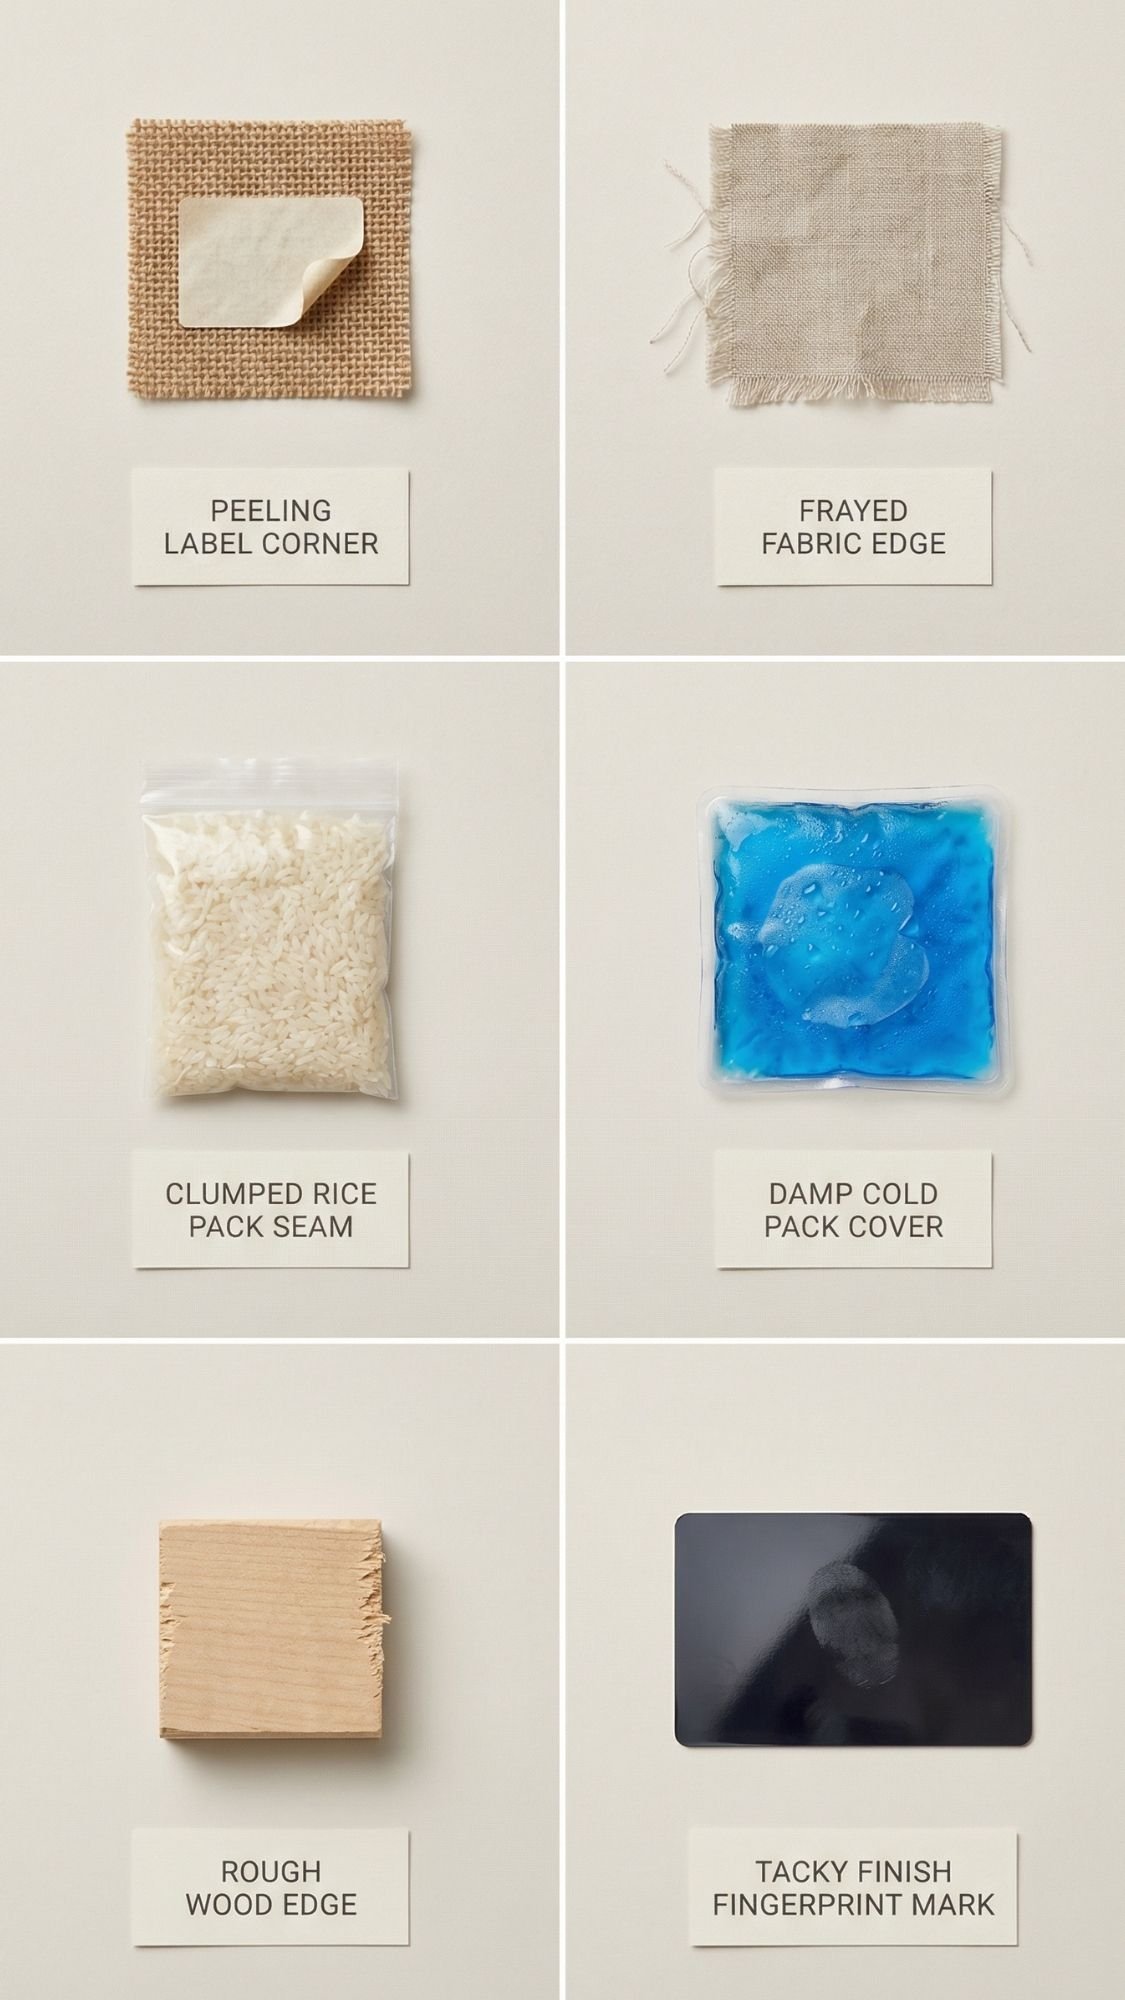
10 Common DIY Gift Issues, With Fixes That Actually Work
This is the section people skip until something goes wrong, and then they come back like, “Wait, why is my label peeling and my fabric doing that weird rippling thing?” So let’s save you the rage crafting. If you run into any of these issues, you can fix it fast and avoid repeating it next time.
1) Vinyl label lifts at the corners
- Symptom: Corners peel, edges curl, lint sticks
- Likely cause: Textured surface, oils on the surface, humidity, or weak pressure
- Fix: Move the label to a smooth tag panel, burnish again, seal edges with clear tape
- Prevention next time: Clean surface first, choose smooth bins for vinyl, use hang tags for woven baskets
2) Paper labels smear or bleed
- Symptom: Ink smudges, label looks cloudy, text runs
- Likely cause: Inkjet print without sealing, moisture exposure
- Fix: Seal with clear tape or laminate, reprint if needed
- Prevention next time: Use waterproof label paper or print with a laser printer
3) Fabric edges fray after the first wash
- Symptom: Threads pull out, edges look fuzzy
- Likely cause: Loose weave fabric, unfinished seams, aggressive wash cycle
- Fix: Zigzag or serge edges, then topstitch again
- Prevention next time: Use tighter weave fabric and finish edges before gifting
4) Burp cloth absorbs poorly
- Symptom: It pushes liquid around instead of soaking it up
- Likely cause: Fabric softener residue, high polyester content, not prewashed
- Fix: Rewash with gentle detergent, run an extra rinse, air dry once
- Prevention next time: Use cotton terry or cotton batting core, skip fabric softener
5) Rice heat pack clumps or heats unevenly
- Symptom: One hot spot, one cold spot, lumpy feel
- Likely cause: No channels, overfilled pack, rice shifts into one area
- Fix: Stitch channels into the inner pack, redistribute rice evenly
- Prevention next time: Sew channels before filling, do not overfill
6) Cold pack cover feels damp too quickly
- Symptom: Cover gets wet from condensation fast
- Likely cause: Condensation builds up, fabric too thin
- Fix: Add a thin absorbent lining, swap covers mid-use
- Prevention next time: Make two covers per pack, use flannel as a lining
7) Tote or caddy handles pull loose
- Symptom: Stitching pops, strap starts separating
- Likely cause: Weak reinforcement, fabric not stabilized
- Fix: Reinforce with a box stitch plus X stitch, add interfacing
- Prevention next time: Stitch handles into seams and stabilize thick fabric
8) Fabric caddy collapses and won’t stand up
- Symptom: It slumps, pockets flop over, looks messy
- Likely cause: No interfacing or base support
- Fix: Add a stiff base insert, sew a lining with stabilizer
- Prevention next time: Use interfacing on all panels, especially the base
9) Wood tray feels rough or snags fabric
- Symptom: Rough edges, splinters, fabric catches on corners
- Likely cause: Skipped progressive sanding, sharp edges
- Fix: Sand 120, then 180, then 220, round edges, wipe dust
- Prevention next time: Always sand in stages and finish edges first
10) Wood finish stays tacky or fingerprints show
- Symptom: Sticky feel, smudges, finish never feels “done”
- Likely cause: Thick coats, high humidity, not enough cure time
- Fix: Move to a warm dry area, let it cure longer, apply thinner coats next time
- Prevention next time: Use thin coats, follow cure time, do not wrap early
Finishing, Sealing, and Care: Make These Gifts Look Polished and Last
This is the part that turns “cute DIY” into “wait, you MADE this?” Finishing matters because new moms don’t need fragile gifts. They need things that survive washing, wiping, spills, and being used while half-asleep.
How to finish each type of gift professionally
Fabric gifts (burp cloths, caddies, covers, scrunchies)
- Press everything before your final topstitch. Pressing is what makes seams look clean.
- Topstitch twice on high-wash items. Burp cloths and covers get abused, double stitching helps.
- Reinforce stress points. Handles, strap anchors, and pocket corners need extra stitching.
- Use washable labels. If you add a tag, stitch it in, don’t glue it.
Wood gifts (tray, lap desk)
- Sand in stages. 120 grit, then 180, then 220. This gives you a smooth finish without swirl marks.
- Round edges slightly. Sharp edges feel harsh and snag fabric.
- Apply thin coats of finish. Thin coats dry better and look cleaner.
- Let it cure fully before wrapping. Wrapping too early traps moisture and creates tackiness.
Printables (cheat cards, labels, coupon books)
- Laminate or seal anything that gets handled. Lamination makes it wipeable.
- Use large readable fonts. New moms do not read tiny text.
- Round corners. It prevents bent edges and looks premium.
Dry time vs cure time, in plain language
This matters the most for wood finishes and adhesives.
- Dry time means it feels dry to the touch.
- Cure time means it becomes fully hardened and durable.
If you wrap something after it feels dry but before it cures, you can:
- trap moisture
- imprint ribbon texture into the finish
- create tacky spots
- leave fingerprints forever
And yes, it’s annoying. But it’s less annoying than re-sanding a tray at midnight.
Cleaning and care instructions you can include on a small gift card
Fabric care
- Wash cold or warm on gentle
- Use mild detergent
- Skip fabric softener on absorbent items
- Tumble low or air dry
- Trim loose threads if needed, don’t pull them
Wood care
- Wipe with a damp cloth
- Dry immediately
- Do not soak
- Avoid harsh cleaners
- Refresh with a light recoat if the finish dulls over time
Printable care
- Wipe laminated cards with a damp cloth
- Store coupon book flat to prevent bending
- Keep labels away from direct heat sources if they’re tape sealed
How long these gifts last, and how to refresh them
- Fabric items: years, if stitched well. You can refresh by re-topstitching loose edges.
- Labels: replace when they scuff. It’s normal. It doesn’t mean the gift failed.
- Wood tray: refresh by lightly sanding and adding a new thin coat if it dulls.
- Cheat cards: basically forever, unless she spills coffee on them, which is honestly likely.
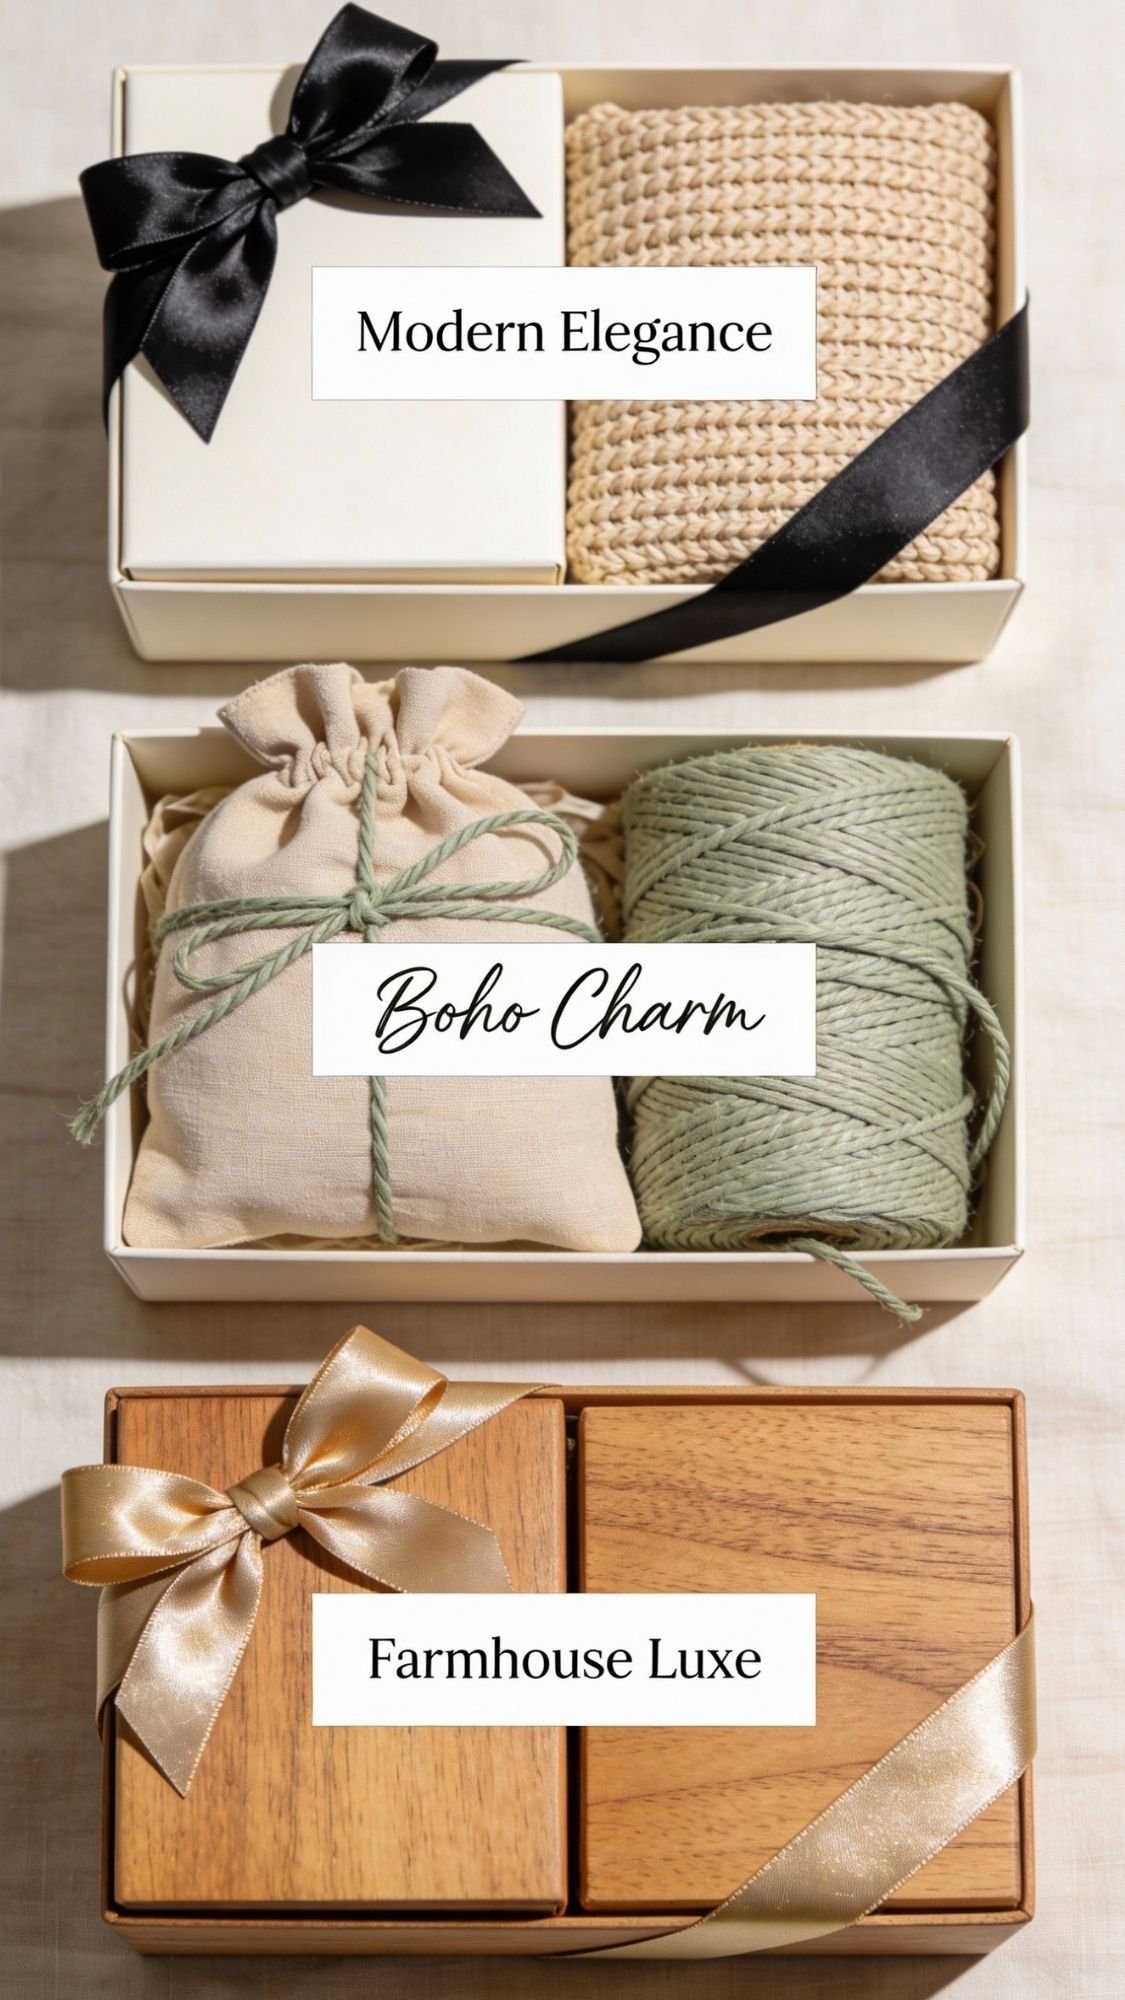
3 Easy Ways to Match Her Style Without Making It Complicated
This is where you make the gifts feel personal without turning them into a 12-hour design project. You can swap the vibe fast with color, labels, and materials. Have you ever noticed how the same basket looks totally different with a different tag and ribbon? Exactly.
Variation 1: Modern Minimal
Clean, crisp, and calm. This works for almost everyone.
Style swaps
- Simple typography labels, no fancy scripts
- Structured canvas, smooth bins, clean edges
- Minimal tags with one small icon, like a tiny heart or star
Color palette ideas
- Cream, taupe, soft black accents
- White and natural wood
- Warm gray with beige
Personalization options
- Initials on a hang tag
- Baby’s birth month icon on the cheat cards
- Monogram sticker on the pouch
Material upgrades
- Heavy canvas or cotton duck
- Leatherette tag
- Matte laminate for printables
Variation 2: Soft Boho
Textured, cozy, and earthy, but still tidy.
Style swaps
- Linen-look fabric, woven baskets, cotton ribbon
- Soft organic shapes on milestone cards
- Tonal labels, think tan-on-cream
Color palette ideas
- Sand, clay, oatmeal, muted sage
- Warm beige with soft terracotta
- Cream with dusty rose accents
Personalization options
- Hand-stamped name tag
- Subtle pattern on the back of the milestone cards
- “Mama” label on the caddy pocket
Material upgrades
- Washed linen covers
- Bamboo blend fabric for cold pack covers
- Brass hardware on straps
Variation 3: Farmhouse to Glam, Pick Your Lane
This is for when you want the gift to match her home style.
Style swaps
- Farmhouse: kraft tags, gingham accent ribbon, warm wood tray
- Glam: satin ribbon, glossy labels, pearl-toned pouch
Color palette ideas
- Farmhouse: cream, black, natural wood
- Glam: champagne, pearl, soft blush
Personalization options
- Name patch on the caddy
- Foil-stamped title on the cheat cards
- Monogram on the refill kit tote
Material upgrades
- Better zippers, thicker webbing straps
- Higher quality cardstock
- Small metal ring binder instead of plastic

12 SEO-Friendly Questions New Moms and Gift-Givers Actually Ask
I’m answering these like I would if you texted me mid-project and needed a straight answer, not a lecture.
1) What are the most useful DIY gifts for a new mom?
The most useful gifts reduce daily friction. Think organization, comfort, food support, and washable essentials. The top “always used” gifts from this list are the postpartum basket, burp cloths, nursing caddy, freezer kit, and help coupons.
2) What DIY gift helps a new mom the fastest?
A ready-to-use basket or caddy helps immediately, because she opens it and uses it the same day. Anything that requires setup usually sits until she has energy, and that can take a while.
3) What should I avoid gifting a postpartum mom?
Avoid anything that creates extra work or sensory overload, like:
- strong fragrances
- delicate items that need special washing
- clutter-y decor that needs shelf space
- complicated “assembly required” gifts
4) How do I make a postpartum care basket feel gentle and not overwhelming?
Keep it simple and organized. Use 3 zones with clear labels, include a small guide card, and leave extra space so it doesn’t look jam-packed.
5) Are fragrance-free gifts better for postpartum care?
Often, yes. Many families prefer low-scent or fragrance-free options, especially early postpartum when sensitivity can feel heightened. If you’re unsure, aim neutral and simple.
6) What can I put in a nursing station caddy?
Focus on items she reaches for constantly:
- water bottle
- burp cloths
- snacks
- lip balm
- phone and charger
- a small pouch for tiny items like hair ties
7) What fabric works best for burp cloths that actually absorb?
Use a performance stack:
- muslin or flannel on the outside
- cotton terry or cotton batting inside
- Skip fabric softener, and prewash to remove sizing so it absorbs better.
8) Should I wash handmade gifts before I give them?
If it’s fabric, yes, especially burp cloths and baby-adjacent items. Prewashing removes sizing, improves absorbency, and helps prevent surprise shrinking after gifting.
9) How do I label freezer meals so new parents can use them easily?
Your labels should answer:
- what it is
- date it went in
- how to reheat
- whether it needs thawing
- Keep it short and bold the reheating time.
10) What DIY gifts work well for a second-time mom too?
Second-time moms usually want practical things that make logistics easier:
- help coupons
- refill kit tote
- snack jars
- freezer label kit
- bedside caddy
11) How do I personalize gifts without creating clutter?
Personalize the packaging and labels, not the whole item. Add:
- a name tag
- initials
- a tiny icon or birth month
- Avoid giant names across everything unless you know she loves that.
12) What can I DIY if I only have one hour?
Try:
- help coupons
- snack jar labels
- laminated cheat cards
- no-sew bedside caddy dividers
- refill kit labels and checklist
Gentle gifts win because they make real life easier
If you take one thing from this list, let it be this. The best gifts for new moms don’t demand attention, they quietly solve problems. A labeled basket saves minutes when she feels exhausted. A caddy keeps essentials within reach. Burp cloths that actually absorb prevent outfit changes. A freezer kit reduces that daily “what are we eating” panic.
So if you feel stuck, pick one project that fits your time and skill level, then keep it simple, washable, and ready to use. You don’t need to make all 19. You just need to make one gift that makes her Tuesday easier.

