If you already have photos on your phone, you’re halfway done. The other half is turning those memories into a gift that feels intentional, not like you panic-printed a collage at 11:48 PM and hoped for the best. Been there. No judgment.
After years of making DIY gifts, I’ve learned something the hard way. Photo gifts look “easy” until the ink smears, the paper bubbles, or the topcoat stays sticky forever. The fix is not talent, it’s a better process.
Here’s the pro secret I use on repeat when I’m working with printed photos, especially inkjet prints:
Pro Secret, Spray, Rest, Seal
- Spray: Hit your printed photos with a light clear fixative spray first.
- Rest: Let them sit, ideally overnight, so the ink fully sets.
- Seal: Then you glue, seal, topcoat, or transfer with way less risk of bleeding.
Ever watched a black-and-white photo turn into a grey smudge under Mod Podge? Yeah, that little spray step saves your sanity.
What you’re getting in this post:
- 18 photo-filled DIY gifts that feel heartfelt and look polished
- The exact materials I use
- The “why” behind each method
- How to fix the most common mess-ups without starting over
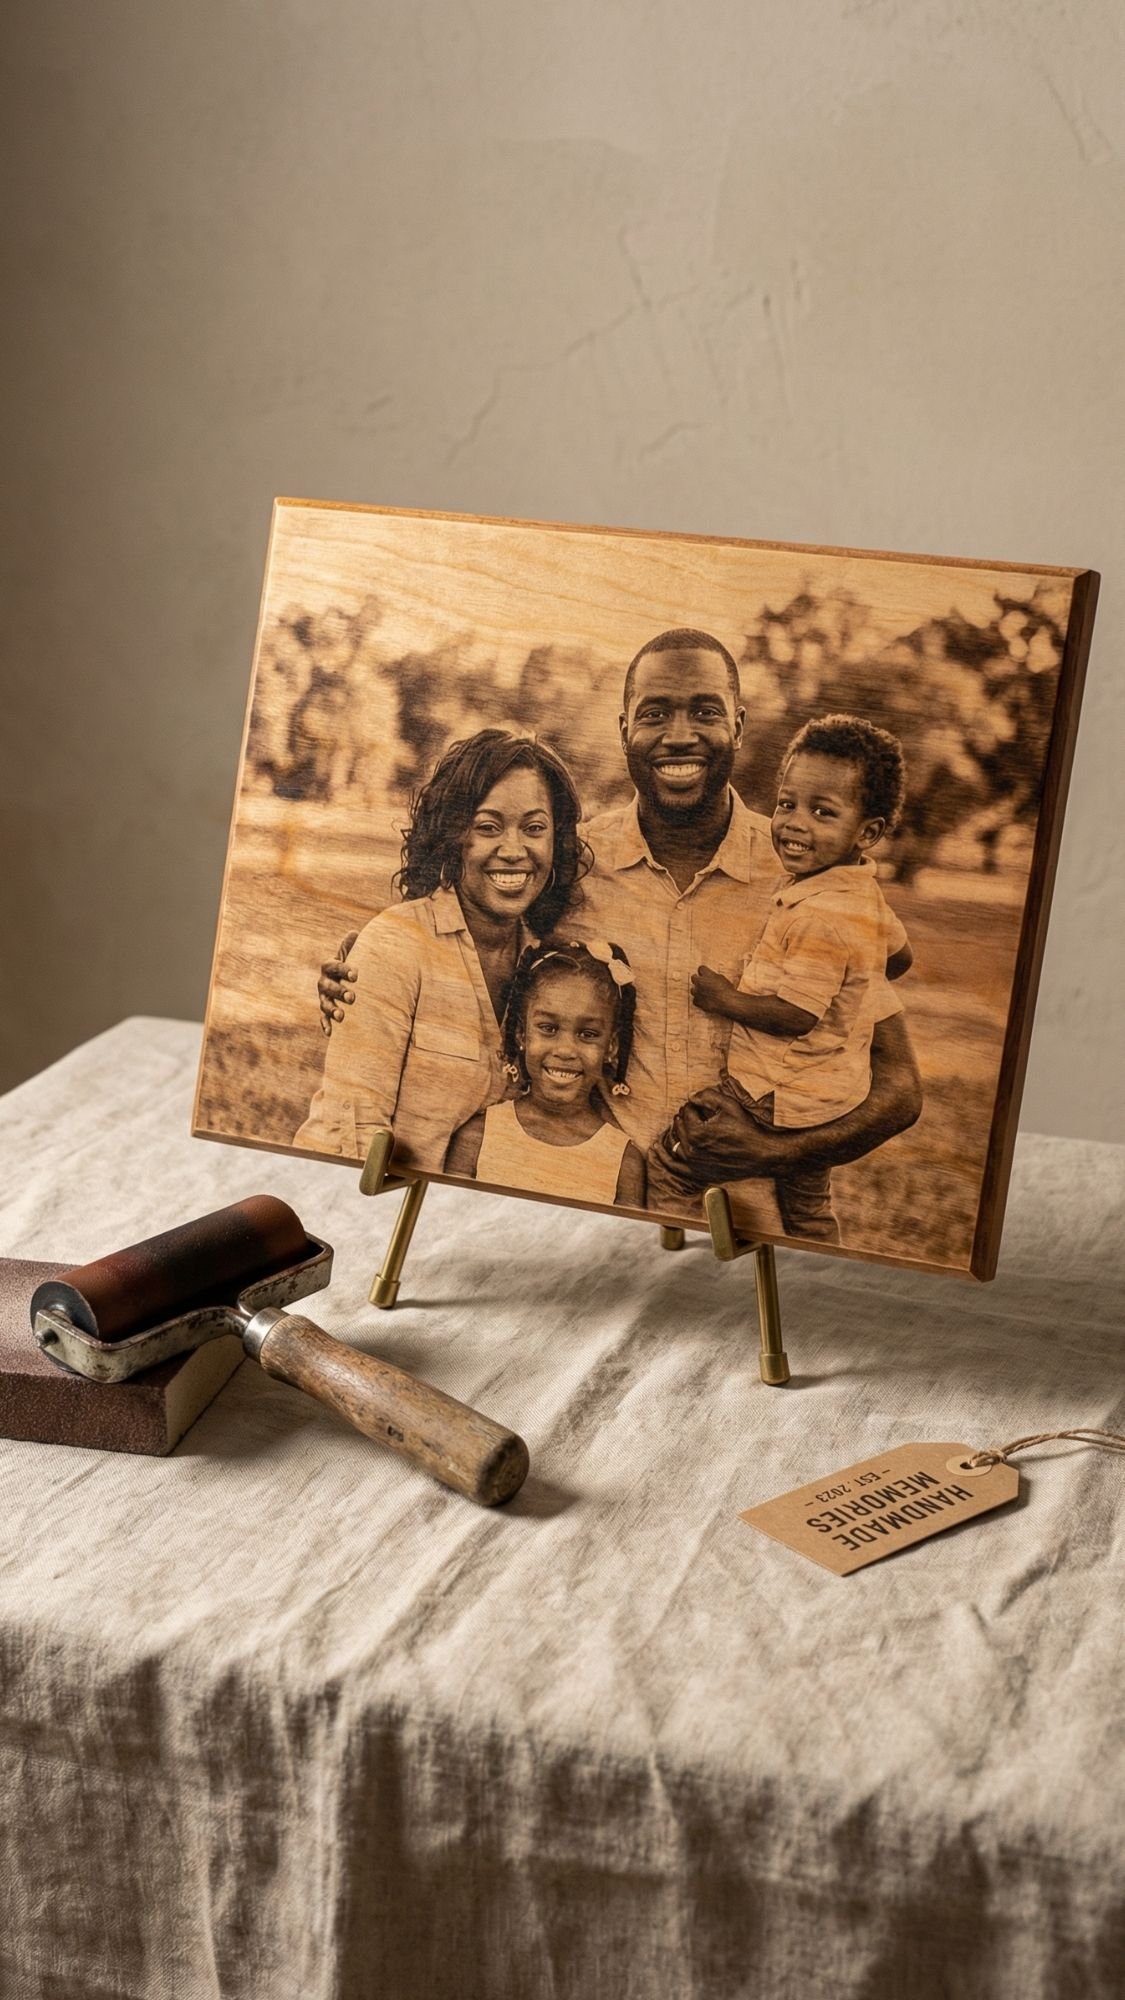
DIY Gift #1: Photo Transfer Wood Plaque (the “heirloom” one)
This one always gets the “Wait… you made this?” reaction, because it looks like something you’d find in a boutique home shop with a $68 price tag. You know, the kind you pick up and immediately check the back for the brand name. Spoiler, it’s you. You’re the brand name.
Why this works so well
A photo transfer on wood feels warm and real. The grain shows through just enough to make the photo look timeless, not glossy and printed. It also holds up well when you seal it correctly, and that’s where most people mess up.
Best photos to use
- High-contrast images, think bright highlights and defined shadows
- Simple backgrounds, clutter turns into mud after transfer
- Close-up moments, faces read better than tiny full-body shots
Materials
- Smooth wood plaque or sign blank (I like pine or birch for this)
- Fine sandpaper, 220 grit plus 320 grit
- Tack cloth or a lint-free rag
- Photo print
- Laser print works best for many transfer methods
- Inkjet can work, but you need more care so it doesn’t smear
- Transfer medium or Mod Podge
- Foam brush
- Brayer or old gift card
- Spray fixative, optional but helpful
- Clear sealer, matte or satin looks the most expensive IMO
Steps
- Prep the wood:
- Sand the plaque smooth with 220, then finish with 320. Wipe off every speck of dust. Dust ruins transfers, it loves chaos.
- Prep the photo:
- Trim it to size. If your method needs mirroring, mirror it now. If you print at home with an inkjet, do the Spray, Rest, Seal trick. Light spray fixative, let it rest.
- Apply medium evenly:
- Brush a smooth, even coat of transfer medium on the wood. You want full coverage, no dry patches, no puddles.
- Lay the photo down and burnish hard:
- Place the photo face-down. Burnish from the center outward with a brayer or gift card. Push out bubbles like your life depends on it.
- Let it cure:
- This is the step people rush. Let it sit until it fully sets. If you peel early, you tear the image. You don’t want that heartbreak.
- Remove the paper backing:
- Dampen the paper with a soft cloth, then rub gently. Let it dry, then rub again. You remove it in layers.
- Seal it:
- Apply thin coats of clear sealer. Let each coat dry before the next. Thin coats beat thick coats every time.
Pro Tips (the stuff I learned the hard way)
- You prevent patchy transfers when you keep your medium layer consistent. If you see streaks, fix them before you press the photo down.
- You avoid bubbles when you burnish slowly and firmly, center outward. Fast burnishing traps air.
- You stop cloudy spots when you rub paper off gently, then let it dry between rounds. Wet rubbing tears the image layer.
- You get a “real decor” finish when you choose matte or satin sealer. Gloss looks craft-y fast.
Common mistake
A common mistake beginners make is picking a super dark photo and expecting it to transfer perfectly. Transfers soften and fade a little. You get the best results when you pick photos with bright midtones and clear contrast.

DIY Gift #2: Photo Tile Coasters (practical, but still emotional)
These are the gift equivalent of “I thought of you every single day,” because they actually get used. Plus, they’re perfect when you want something photo-based that feels polished, but you don’t want to fight with a full transfer.
Why this works so well
A coaster is small, so you can control the finish way easier than on a big surface. The key is protecting the edges and giving the topcoat enough time to cure so it doesn’t stay tacky or water-spot.
Best photos to use
- Bright photos with simple backgrounds
- Close-up moments, faces, hands, little details
- Black-and-white works beautifully here because it looks intentional and modern
Materials
- Ceramic tiles or plain coaster blanks
- 4×4 tiles work great for sets
- Sandpaper, 220 grit, optional if the tile feels slick
- Printed photos (matte prints reduce glare)
- Adhesive: thin even glue layer or a decoupage medium
- Brayer or old gift card
- Clear sealer or waterproof topcoat
- Felt pads for the bottom
- Painter’s tape, optional for clean edges
Steps
- Prep the tile:
- Wipe the tile clean. If it feels glossy-slick, lightly scuff it with 220 grit so the adhesive grips.
- Size and prep the photo:
- Trim the photo to fit. If you want a clean border, cut the photo slightly smaller so the tile frames it.
- Adhere the photo:
- Apply adhesive in an even layer. Press the photo down and burnish from the center outward. You want zero bubbles.
- Seal the edges first:
- This is where people skip and regret it. Brush a thin line of sealer around the edges of the photo. Edges lift first, always.
- Topcoat in thin layers:
- Apply multiple thin coats on top, letting each one dry. Thick coats trap moisture and stay sticky.
- Cure before you stack:
- Dry feels dry. Cure means it’s done. Let these sit before you stack, wrap, or gift.
- Finish the bottom:
- Add felt pads after everything cures. Pads keep the tile from scratching tables and make it feel higher-end.
Pro Tips (so your coasters don’t look DIY in a bad way)
- You prevent edge lifting when you seal edges first. I know I’m repeating it, but it matters that much.
- You avoid tacky finishes when you use thin coats and give it cure time. If you rush, fingerprints show up forever.
- You prevent water rings when you use a truly water-resistant topcoat. “Sealer” and “waterproof” don’t always mean the same thing, so check the label.
- You get a boutique look when you add a cork backer or felt pads. It’s a small detail that screams “real product.”
Mini checklist before you gift
- No bubbles
- Edges sealed
- Finish feels hard, not rubbery
- Felt pads on
- You tested it with a cold drink for 10 minutes

DIY Gift #3: Glass Photo Magnets (tiny gift, huge reaction)
These are small, fast, and weirdly addictive. You’ll make four, then suddenly it’s 1 AM and you’ve made twenty-eight and you’re “just finishing one more.” Ask me how I know.
They’re also perfect when you need a heartfelt gift on a budget, because you can turn a handful of photos into a full set in one evening.
Why this works so well
The glass dome magnifies the image and makes it look high-quality, even if the photo is tiny. The trick is printing the right size and using the right glue amount so you don’t get haze.
Best photos to use
- Faces with strong contrast
- Close-ups, selfies, baby pics, goofy candid moments
- Simple backgrounds, the glass will magnify everything
Materials
- Flat glass gems or clear domes
- Printed photos, sized to the dome
- Strong clear-drying glue
- You want something that dries clear and grabs glass well
- Small round magnets (neodymium magnets work great)
- Scissors or a circle punch
- Tweezers, optional but helpful
- Rubbing alcohol and a microfiber cloth
Steps
- Clean the glass:
- Wipe the flat side with rubbing alcohol. Oils and dust cause haze and weak bonding.
- Size the photos:
- Trace the dome onto the back of the photo and cut slightly inside the line. If the photo edge sticks out, it will look sloppy under glass.
- Glue the photo to the glass:
- Apply a thin even layer of glue on the flat side of the dome, then press the photo on. Press once and don’t slide it around, sliding traps bubbles.
- Let it dry completely:
- Give it time. If you rush, you trap moisture and get cloudy spots.
- Attach the magnet:
- Glue a magnet to the back of the photo. Let it set fully before you slap it on the fridge like a victory lap.
Pro Tips (so they look crisp, not cloudy)
- Print slightly darker than you think you need. The glass brightens and can wash out light prints.
- Use less glue than you want. Too much glue causes haze and makes the image look foggy.
- Press once, then stop touching it. Every time you lift and re-press, you invite bubbles.
- Seal the photo surface first if your prints smear easily. Especially with inkjet.
Common mistake
A common mistake beginners make is using hot glue for this. Hot glue sets too fast, adds bulk, and can look messy from the sides. A clear-drying glue gives you a cleaner finish.
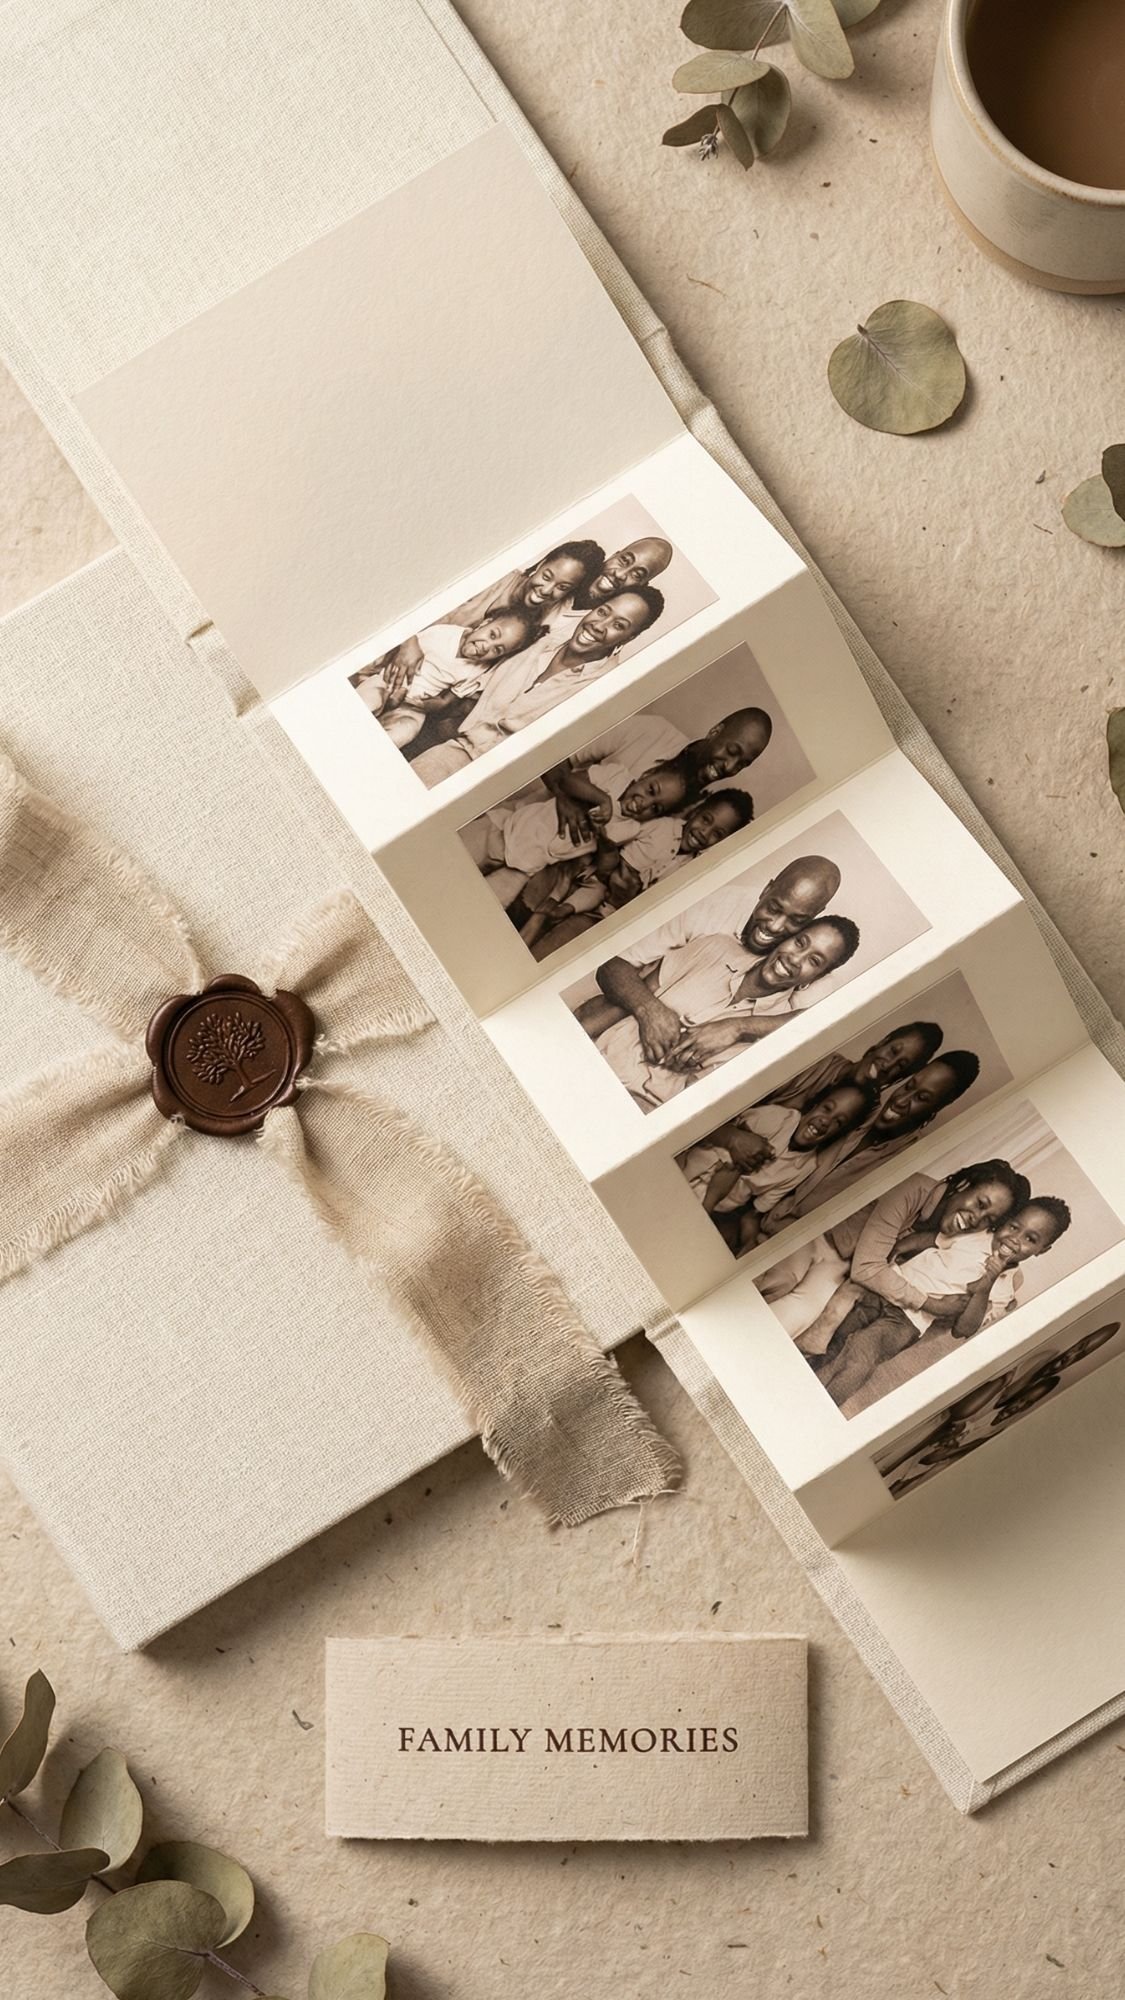
DIY Gift #4: Photo Strip Accordion Mini Book (fast, trendy, and shockingly cute)
This is one of my go-to gifts when I want maximum “aww” factor without committing to a full scrapbook situation. It’s tiny, it’s tidy, and it feels way more special than handing someone a stack of prints like, “Here, enjoy these loose memories.”
Why this works so well
Photo strips tell a story fast. They also feel modern and nostalgic at the same time, which is honestly a rare combo. You can make it romantic, funny, family-focused, or even themed like “our best kitchen disasters.”
Best photos to use
- A sequence of moments, not random images
- Same event or same vibe, so it flows
- Photos with similar lighting, so it doesn’t look chaotic
Materials
- Cardstock, 65–110 lb
- Photo strip prints
- You can format strips in Canva or a photo strip template
- Tape runner or double-sided tape
- Scoring board or scoring tool
- Bone folder or the back of a spoon
- Ribbon, twine, or a belly band
- Optional: corner rounder punch
Steps
- Plan your strip layout:
- Decide how many panels you want, 6, 8, or 10 is a sweet spot. Too many and it becomes a tiny accordion monster.
- Cut and score the cardstock:
- Cut a long strip, then score evenly for your folds. Score first, fold second. You get crisp folds and less cracking.
- Fold the accordion:
- Fold back and forth carefully. Press folds with a bone folder for that clean, store-bought look.
- Attach photo strips:
- Use a tape runner for smooth, flat adhesion. Start with one panel, align carefully, then press down.
- Add covers:
- Cut two cover pieces slightly larger than the accordion panels. Glue them to the first and last panels. This makes it feel like a real mini book.
- Finish with a tie:
- Wrap ribbon around the closed book or make a belly band. The tie upgrades it instantly.
Pro Tips (so it looks polished, not wobbly)
- You get perfect folds when you score, then fold. Folding without scoring makes bumpy edges.
- You keep it from springing open when you add a snug belly band. Ribbon works too, but belly bands look super clean.
- You avoid crooked strips when you draw faint alignment marks first. Light pencil, then erase after.
- You make it feel luxe when you round the corners. It’s small, but it changes the whole vibe.
Cute add-ons that make it more heartfelt
- Add a tiny handwritten caption under each strip panel
- Include a mini envelope on the back for one extra photo
- Add a small tag that says “Open when you miss us”

DIY Gift #5: Polaroid Shadow Box (the “wow” frame that holds a whole story)
If you want a photo gift that feels like an actual keepsake, not just “I printed a picture,” this is it. A shadow box gives you depth, layers, and that museum-display vibe. It’s also perfect for milestones like anniversaries, graduations, new baby, memorials, and big trips.
Why this works so well
You’re not just showing photos, you’re building a little scene. The layers make it feel intentional, and the shadow box protects everything behind glass so it stays nice.
Best photos to use
- 6–12 Polaroid-style photos max, you want breathing room
- A theme that makes sense, like “first year,” “best trips,” “Sunday dinners,” “our chaos highlights”
- A few close-ups mixed with a few wide shots
Materials
- Shadow box frame, any size that fits your photo count
- Polaroid-style prints, matte looks best
- Foam tape or adhesive dots for depth
- Backing paper or fabric, linen or neutral cardstock looks clean
- Tiny memorabilia, optional
- ticket stubs, a pressed flower, a small note, a ribbon piece
- Ruler, pencil, tweezers
- Microfiber cloth for cleaning the glass before closing
Steps
- Plan the layout before you stick anything:
- Lay everything out on the backing. Move pieces around until it looks balanced. You want even spacing, not a photo traffic jam.
- Mark a light grid:
- Use a ruler and pencil to mark tiny reference points. This is how you avoid the “why is everything drifting left” problem.
- Attach the backing:
- Wrap the backing paper or fabric neatly and secure it to the insert board.
- Add photos with dimension:
- Use foam tape behind the photos for depth. Don’t put foam tape at the edges only, it can bow the photo.
- Add memorabilia sparingly:
- Pick 2–4 small items. Too many makes it look cluttered. One pressed flower and one ticket stub can say more than 14 random things.
- Final clean and close:
- Right before you close it, clean the inside of the glass with a microfiber cloth. That last-minute dust speck will haunt you forever otherwise.
Pro Tips (this is where it goes from cute to high-end)
- You create an expensive-looking layout when you keep consistent spacing. I aim for even gaps, not perfect math, just consistent.
- You prevent crooked placement when you mark a light grid first. This saves you from re-sticking everything.
- You avoid bowed photos when you place foam tape in the center too. Edges-only tape causes lifting.
- You get a calm, premium feel when you choose one color story. Warm neutrals, black and white, or soft pastels all work great.
Common mistake
A common mistake beginners make is using glossy prints. Glossy looks fine until the glass reflects everything and the photos become mirrors. Matte prints read cleaner behind glass.

DIY Gift #6: Memory Jar With Photos and Notes (simple, personal, and impossible not to love)
This one looks effortless, but it hits hard emotionally. It’s basically a jar full of “Hey, remember when…” moments, and the recipient can pull one whenever they need a little boost. If you want a gift that feels heartfelt without needing power tools, this is your winner.
Why this works so well
It turns photos into an experience, not just a display. People don’t just look at it once, they interact with it over and over. That repeat joy is the whole point.
Best photos to use
- Mini prints of candid moments
- A mix of goofy and sweet
- Photos that match the notes, so each pull feels intentional
Materials
- Clear jar with lid
- Mason jar, apothecary jar, anything that feels giftable
- Mini photo prints
- 2×3 or wallet-size works great
- Paper for notes
- Kraft paper, colored cardstock, or pre-cut slips
- Pens or fine-tip markers
- Twine or ribbon
- Optional upgrades
- tiny envelopes, wax seal stickers, label maker, mini clothespins
Steps
- Pick your theme:
- This makes the jar feel curated.
Examples:
- “52 reasons I love you”
- “Open when you need a laugh”
- “Our best moments this year”
- “When you miss home”
- Print and trim mini photos:
- Keep sizes consistent. Consistency makes it look expensive, even when it’s not.
- Write the notes:
- Keep each note short, specific, and real. “You’re great” is fine. “That time you danced in the kitchen in socks and almost took out the dog” is better.
- Pair photos to notes:
- You can attach a photo to a note with a tiny clip, or just drop them in together. Pairing makes the memory land.
- Fill the jar:
- Alternate notes and photos so the jar looks full and interesting from the outside.
- Finish the outside:
- Add a simple label and a ribbon. Keep it clean. The jar already has personality, you don’t need to bury it in decorations.
Pro Tips (so it looks curated, not chaotic)
- You make it feel premium when you limit your paper colors to 2–3. Too many colors reads messy fast.
- You prevent curled photos when you print on heavier matte paper. Thin glossy prints curl like they’re mad at you.
- You keep it readable when you use one pen type. Mixing markers can look like a middle school notebook, unless that’s the vibe.
- You boost the “wow” factor when you add 5–10 tiny sealed envelopes. People love a mystery.
Note ideas that actually feel meaningful
- “Remember when we…”
- “One thing I admire about you is…”
- “A moment I’m proud of you for…”
- “The funniest thing you’ve ever said was…”
- “When you feel stressed, read this…”

DIY Gift #7: Resin Photo Keychain (tiny, durable, and always carried)
This one works when you want a photo gift that someone actually takes with them. It’s small, it’s sturdy, and it feels like a “real product” when you finish it cleanly. Ever had a gift live in a drawer forever? Yeah, this one doesn’t.
Why this works so well
Resin locks the memory in place. You protect the photo from fingerprints, water splashes, and daily wear, as long as you seal the print first and you cure the resin properly.
Best photos to use
- Simple close-ups, faces, pets, one clear focal point
- High contrast so the image stays readable at keychain size
- Avoid super dark photos, resin can deepen shadows
Materials
- Silicone mold (round, rectangle, heart, whatever fits your vibe)
- Two-part resin (follow your brand’s mixing ratio exactly)
- Mini photo prints, trimmed to fit
- Clear spray sealant or brush-on sealer for the photo
- Mixing cups, stir sticks
- Gloves, respirator or mask rated for fumes, and good ventilation
- Heat tool or lighter for bubbles (use carefully)
- Keychain hardware, jump rings, small pliers
- Optional: glitter flakes, dried flowers, gold foil
Steps
- Seal the photo first:
- This step decides everything. Spray or brush on a sealer and let it dry fully. If you skip this, resin can soak into the paper and dull the image, or it can make ink bleed.
- Mix resin slowly:
- Measure accurately, then stir slowly and thoroughly. Fast stirring whips in bubbles that you’ll chase forever.
- Pour a thin base layer:
- Pour a small amount into the mold first. This gives you a clean front surface.
- Place the photo:
- Set the photo into the resin, image side down if you want it to face forward through the clear front. Press gently so it sits flat.
- Top it off:
- Pour more resin until you cover the photo. Don’t overfill unless you love sanding.
- Remove bubbles:
- Tap the mold on the table. Pop surface bubbles with a quick pass of heat. Keep heat moving, you can scorch resin if you hover.
- Cure completely:
- Let it cure the full time. Resin feels firm before it reaches full strength.
- Finish and assemble:
- Demold, sand rough edges if needed, then add hardware with jump rings and pliers.
Pro Tips (so it looks crisp, not cloudy)
- You keep photos sharp when you seal both sides of the print. Paper can absorb resin from the back too.
- You get fewer bubbles when you mix slowly and let the cup sit for 2–3 minutes before pouring.
- You avoid soft, bendy resin when you measure exactly and cure in a stable temperature range. Cold rooms slow curing, high humidity can mess with clarity.
- You make it look expensive when you add a tiny border. Trim the photo slightly smaller than the mold so resin frames it.
Common mistake
A common mistake beginners make is trying to “fix” a bubble by blasting heat for too long. You can warp the surface or cause ripples. Use quick heat passes, then stop touching it.
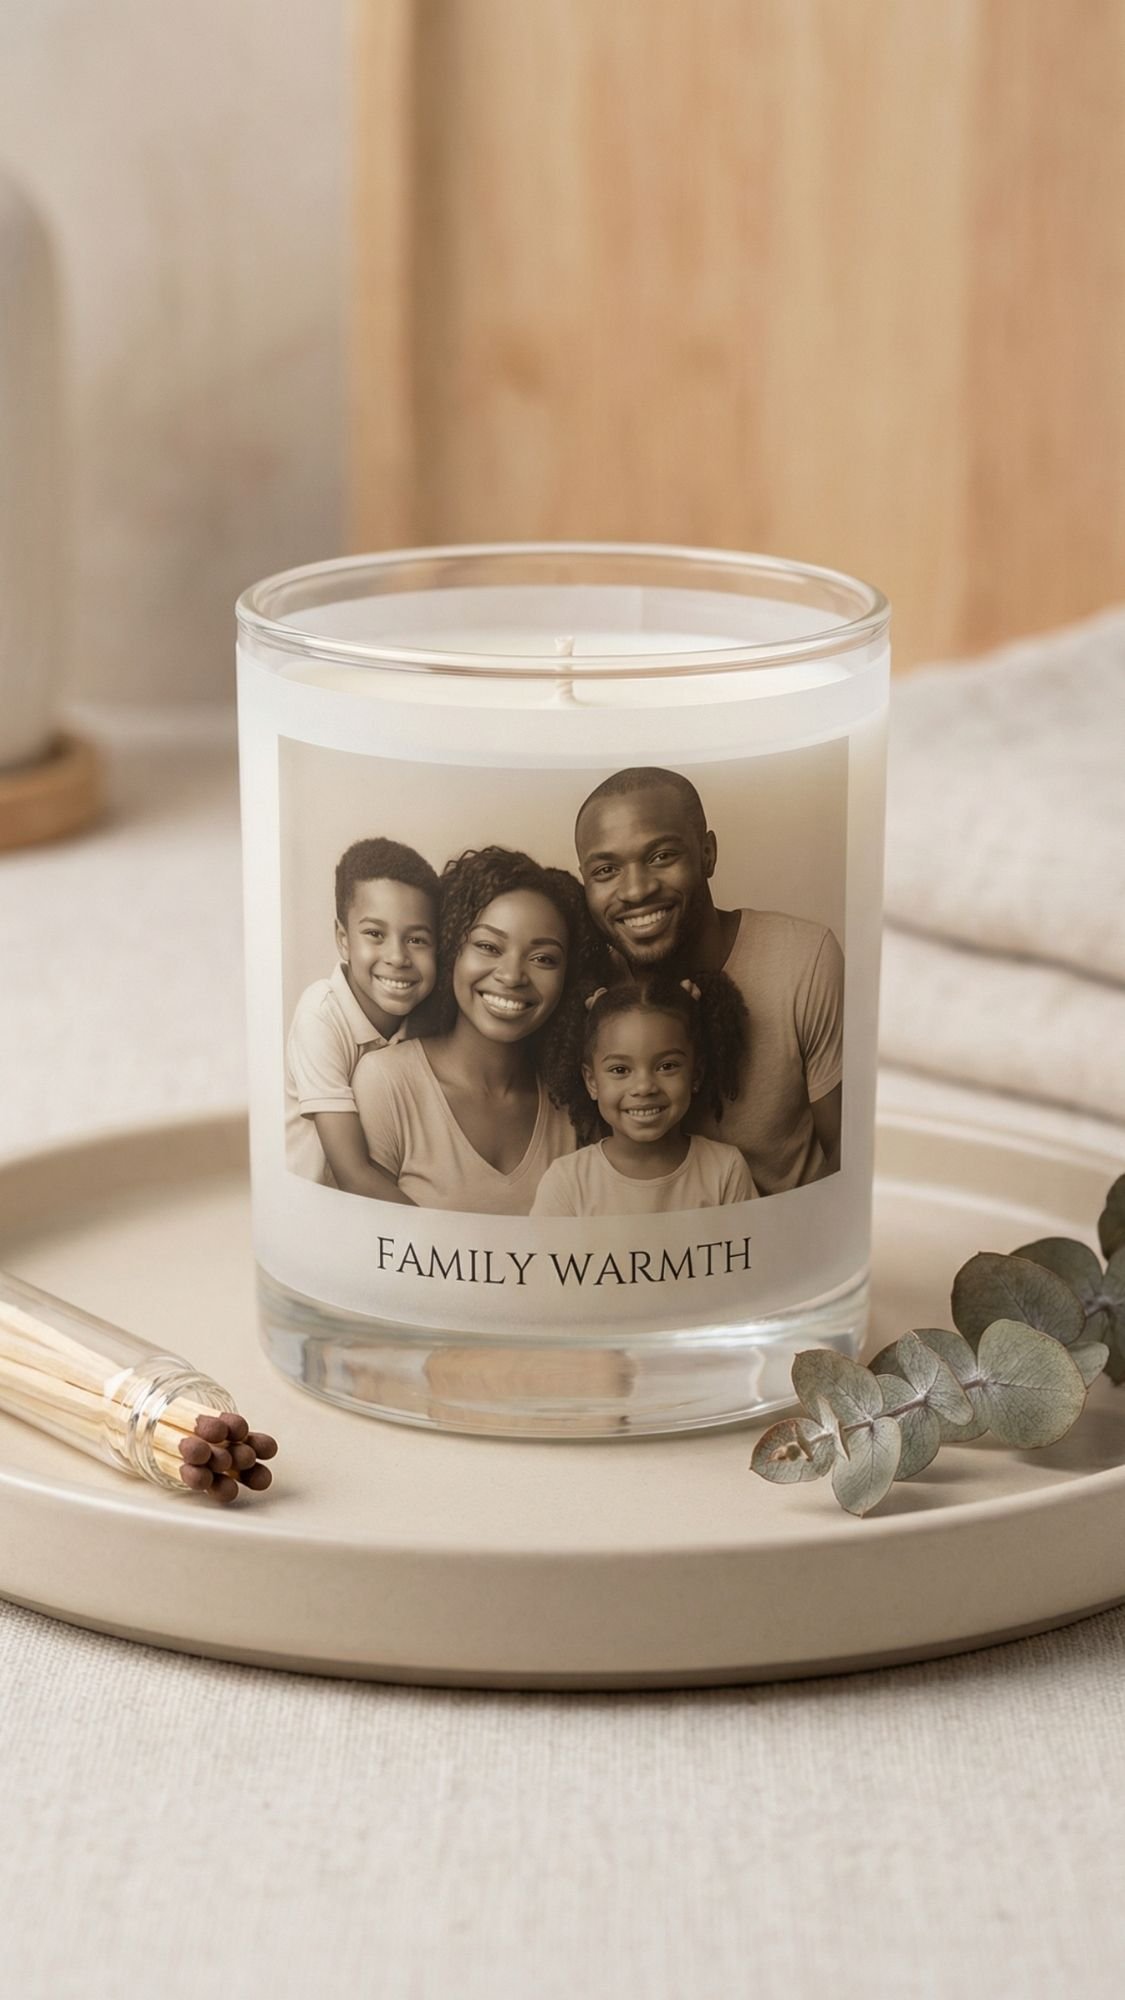
DIY Gift #8: Custom Photo Candle Wrap (looks store-bought, smells like “I tried” in the best way)
This is one of those gifts that people swear you bought. You take a plain candle, wrap it with a photo label that feels intentional, and suddenly it becomes a full moment. It’s also a great option when you don’t want to mess with heavy sealing on the photo itself.
Why this works so well
The candle does the heavy lifting visually. Your photo wrap adds the personal touch. When you keep the wrap clean and minimal, it reads luxury, not craft fair.
Best photos to use
- One strong image per candle, not a collage
- Soft, warm-toned photos look extra cozy here
- Black and white also looks insanely classy
Materials
- Plain candle in a glass jar
- Smooth sided jars wrap easiest
- Photo printed on one of these:
- Vellum for a soft high-end look
- Matte sticker paper for clean adhesion
- Regular paper works too, but you need cleaner finishing
- Double-sided tape or clear adhesive dots
- Scissors or a paper trimmer
- Optional upgrades
- Ribbon, wax seal sticker, small kraft tag
- Label maker for a neat caption
Steps
- Measure the candle:
- Measure the height and the circumference of the glass. Cut your wrap to fit with a small overlap.
- Print and trim:
- Print your photo wrap. Trim cleanly, sharp edges matter here. If you want it extra polished, round the corners.
- Add the wrap:
- Apply double-sided tape to the back edges, then wrap around the candle. Keep tension gentle so it doesn’t wrinkle.
- Add a caption:
Keep it short:
- “Home”
- “Our favorite year”
- “Sunday mornings”
- “For the moments we keep”
- Finish with one detail:
- Add a ribbon or a tag, not ten things. One intentional detail wins every time.
Pro Tips (so it reads luxe, not scrapbook)
- You avoid wrinkles when you use vellum or sticker paper. Regular printer paper can crease easier.
- You prevent peeling when you use a strong double-sided tape on both ends and one small strip in the center.
- You get the cleanest look when you keep the photo centered and leave a little breathing room. Full-bleed wraps can look busy.
- You make it gift-ready when you pair it with matches in a small bag. Tiny add-on, big impact.
Common mistake
A common mistake beginners make is putting the photo wrap too high on the glass so it fights with the wax line and looks crowded. Center it on the jar, and it looks like a real label.
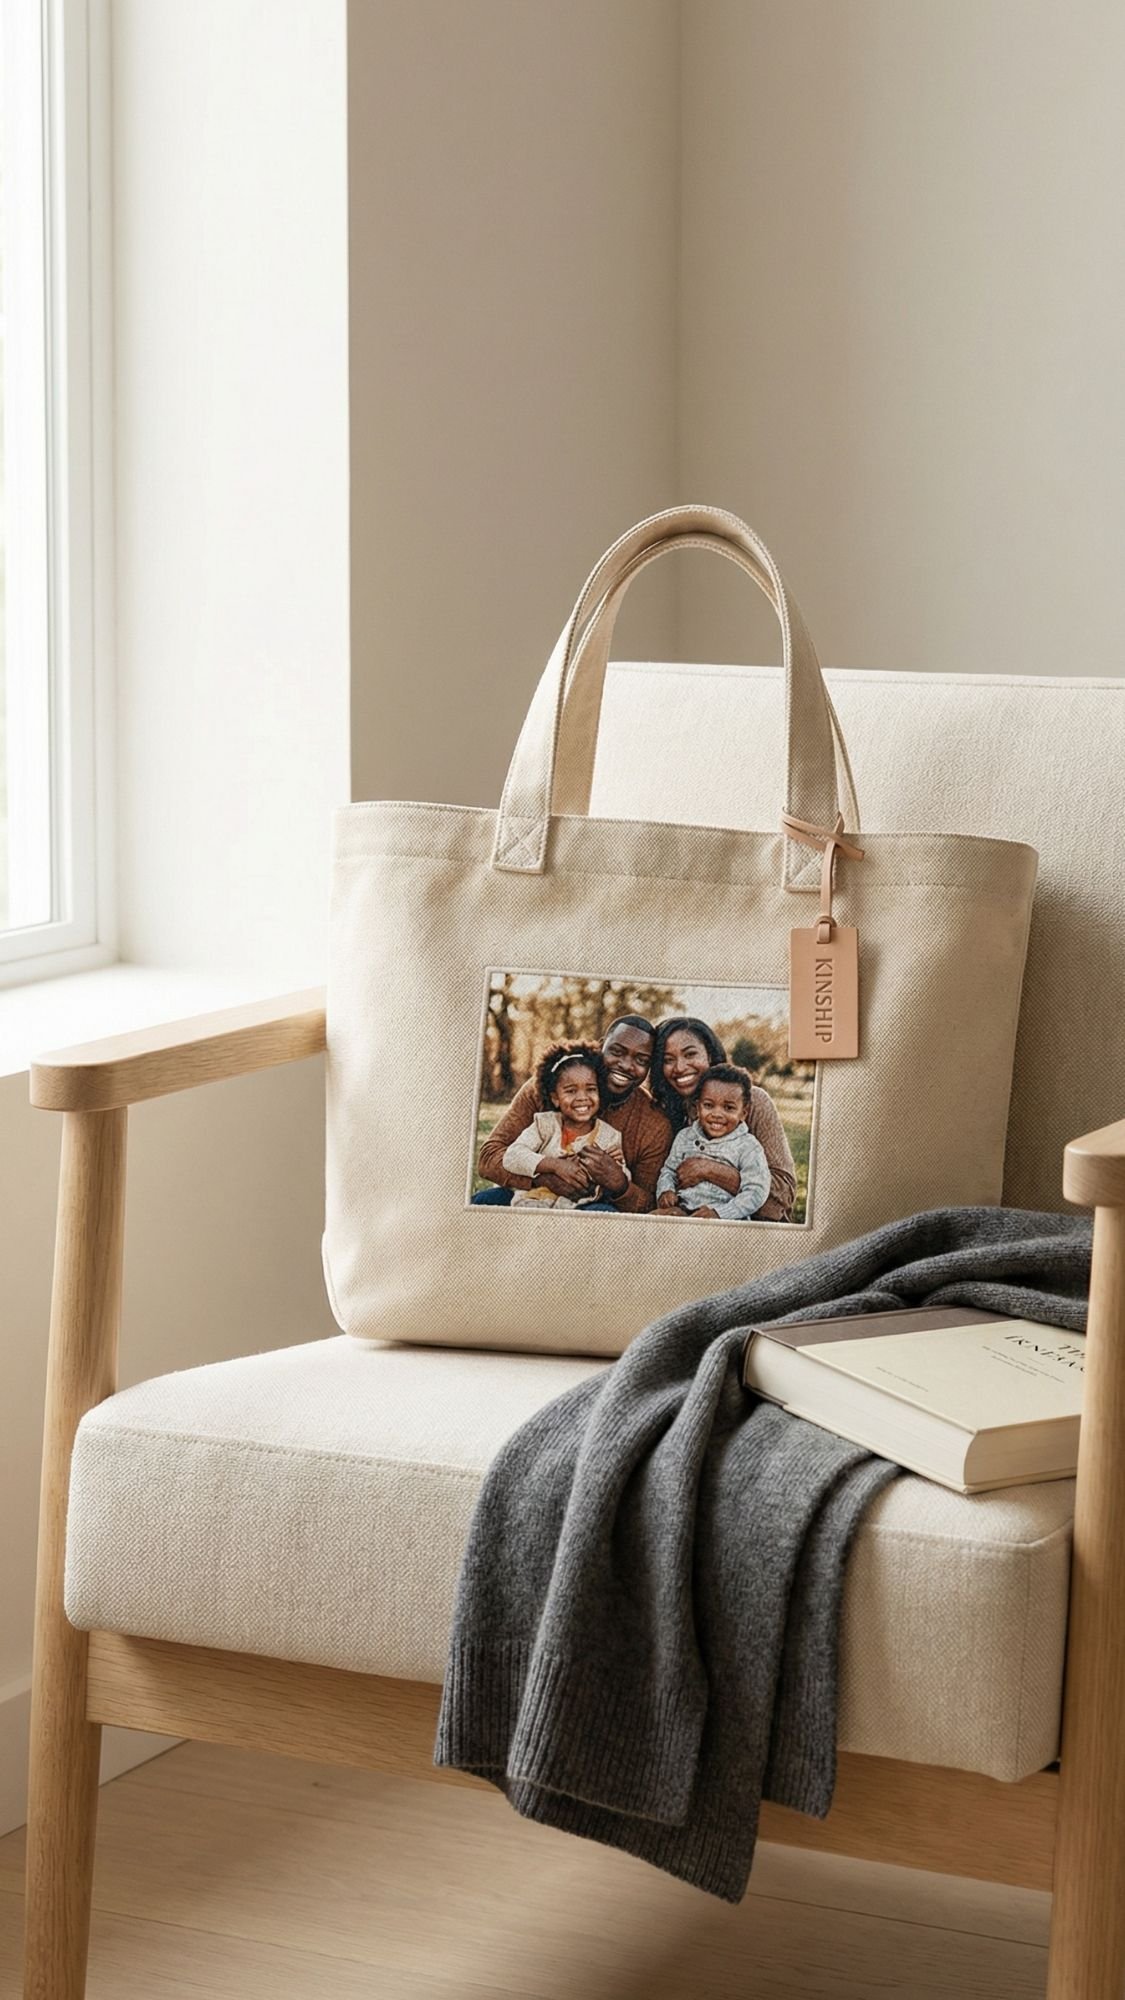
DIY Gift #9: Photo Fabric Patch Tote (wearable memories, daily use)
This is the gift that turns into an everyday flex. A tote is practical, but the photo patch makes it personal. Done right, it feels like something from a small-batch handmade shop, not a quick iron-on that cracks after two grocery trips.
Why this works so well
Fabric gives you a warmer, more “lived-in” feel than glossy photo gifts. Plus, a tote is big enough for one strong photo moment, but you can keep it clean and minimal.
Best photos to use
- One bold photo with a clear focal point
- High contrast, avoid washed-out images
- Simple backgrounds, busy details get lost on fabric texture
Materials
- Canvas tote bag (thicker canvas looks more premium)
- Photo patch method, pick one:
- Printable fabric sheets (easy, clean finish)
- Iron-on transfer paper (works well, needs careful heat)
- Sublimation patch if you have the setup (extra durable)
- Iron and ironing board or heat press if you own one
- Parchment paper or Teflon sheet
- Scissors or rotary cutter
- Optional upgrades
- Zigzag stitch around the patch edge
- Fabric glue for edge security
- Twill tape trim for a framed patch look
Steps
- Prep the tote:
- Iron the tote first. Wrinkles mess with adhesion and can cause weird patch lifting later.
- Prep and print your photo:
- Size it to your patch. Keep it centered and clean. If you use transfer paper, follow the instructions for mirroring.
- Trim the patch:
- Trim cleanly. If you want a boutique look, leave a small border around the photo so it feels framed.
- Press the patch on:
- Place the patch where you want it. Cover with parchment paper. Press with firm, even pressure.
- Let it cool completely:
- Cooling sets the bond. If you peel too soon, you can lift corners.
- Optional, stitch for durability:
- A quick zigzag stitch around the edge makes it feel like a real sewn patch and helps it survive washing.
Pro Tips (so it doesn’t crack or peel)
- You prevent cracking when you press evenly and long enough. Quick presses look good day one and fail week two.
- You get cleaner edges when you use a heat press, but an iron still works if you press in sections.
- You make it last longer when you heat-set, then wait 24–48 hours before washing. Patience pays here.
- You level up the look when you stitch the edges. It screams “handmade on purpose,” not “I tried something once.”
Common mistake
A common mistake beginners make is ironing like they’re smoothing a shirt, fast and moving around. For transfers, you want steady pressure, slow, and controlled. Think “press,” not “glide.”

DIY Gift #10: Desk Flip Photo Calendar (daily smiles, zero extra effort)
This one feels sneaky-good because it’s useful and sentimental. They don’t need to “find a place” for it like wall decor, they just plop it on a desk or kitchen counter and see a photo every day. That’s the whole win.
Why this works so well
You build a gift that lasts all year, and you control the vibe. You can make it sweet, funny, or a mix, like “January: cute, March: chaotic, December: emotional damage in a good way.”
Best photos to use
- 12 photos, one per month, plus a cover photo
- Bright, clear images with one main focal point
- Similar editing or color tone so the set looks cohesive
Materials
- Printed photos (4×6 works great), or designed pages from Canva
- Cardstock backing, 80–110 lb
- Paper trimmer or sharp scissors
- Hole punch (single-hole punch works, a binding punch is even better)
- Binder rings or a small tabletop easel stand
- Tape runner or glue stick
- Optional upgrades
- Corner rounder punch
- Laminating sheets or clear protective covers
- Kraft belly band for gifting
Steps
- Choose your calendar format:
Pick one:
- Photo on top, month grid on bottom
- Full photo page with a small month label
- Photo plus a short caption, like “This is my favorite Tuesday ever”
- Design and print:
- Keep margins consistent. Use the same font for month names. Trust me, consistency makes it look expensive.
- Trim everything clean:
- Cut all pages to the exact same size. Crooked edges ruin the “product” feel fast.
- Mount photos to cardstock:
- Use a tape runner for flat adhesion. Glue sticks can wrinkle paper if you get heavy-handed.
- Punch holes:
- Line up pages perfectly, then punch holes in the same spot on every page. If you use binder rings, two holes usually keeps things straighter than one.
- Assemble:
- Put the pages on rings in order. Add a stiff backing so it stands well.
- Add the stand:
- Use a small tabletop easel or build a folded cardstock stand. You can also lean it in a little tray. It still counts.
Pro Tips (so it flips smoothly and looks professional)
- You keep pages aligned when you punch using a simple template. Make one “master” page, then use it to mark the rest.
- You stop ink transfer when you let prints rest overnight before stacking. Fresh prints love to smudge when you rub them together.
- You make it feel boutique when you round the corners. Sharp corners scream “printer paper,” rounded corners feel finished.
- You add durability when you use a clear cover page or laminate. Coffee spills happen. Life happens.
Common mistake
A common mistake beginners make is using thin paper for everything. Thin pages flop, curl, and bend on rings. Use sturdier cardstock backing and the calendar suddenly behaves.
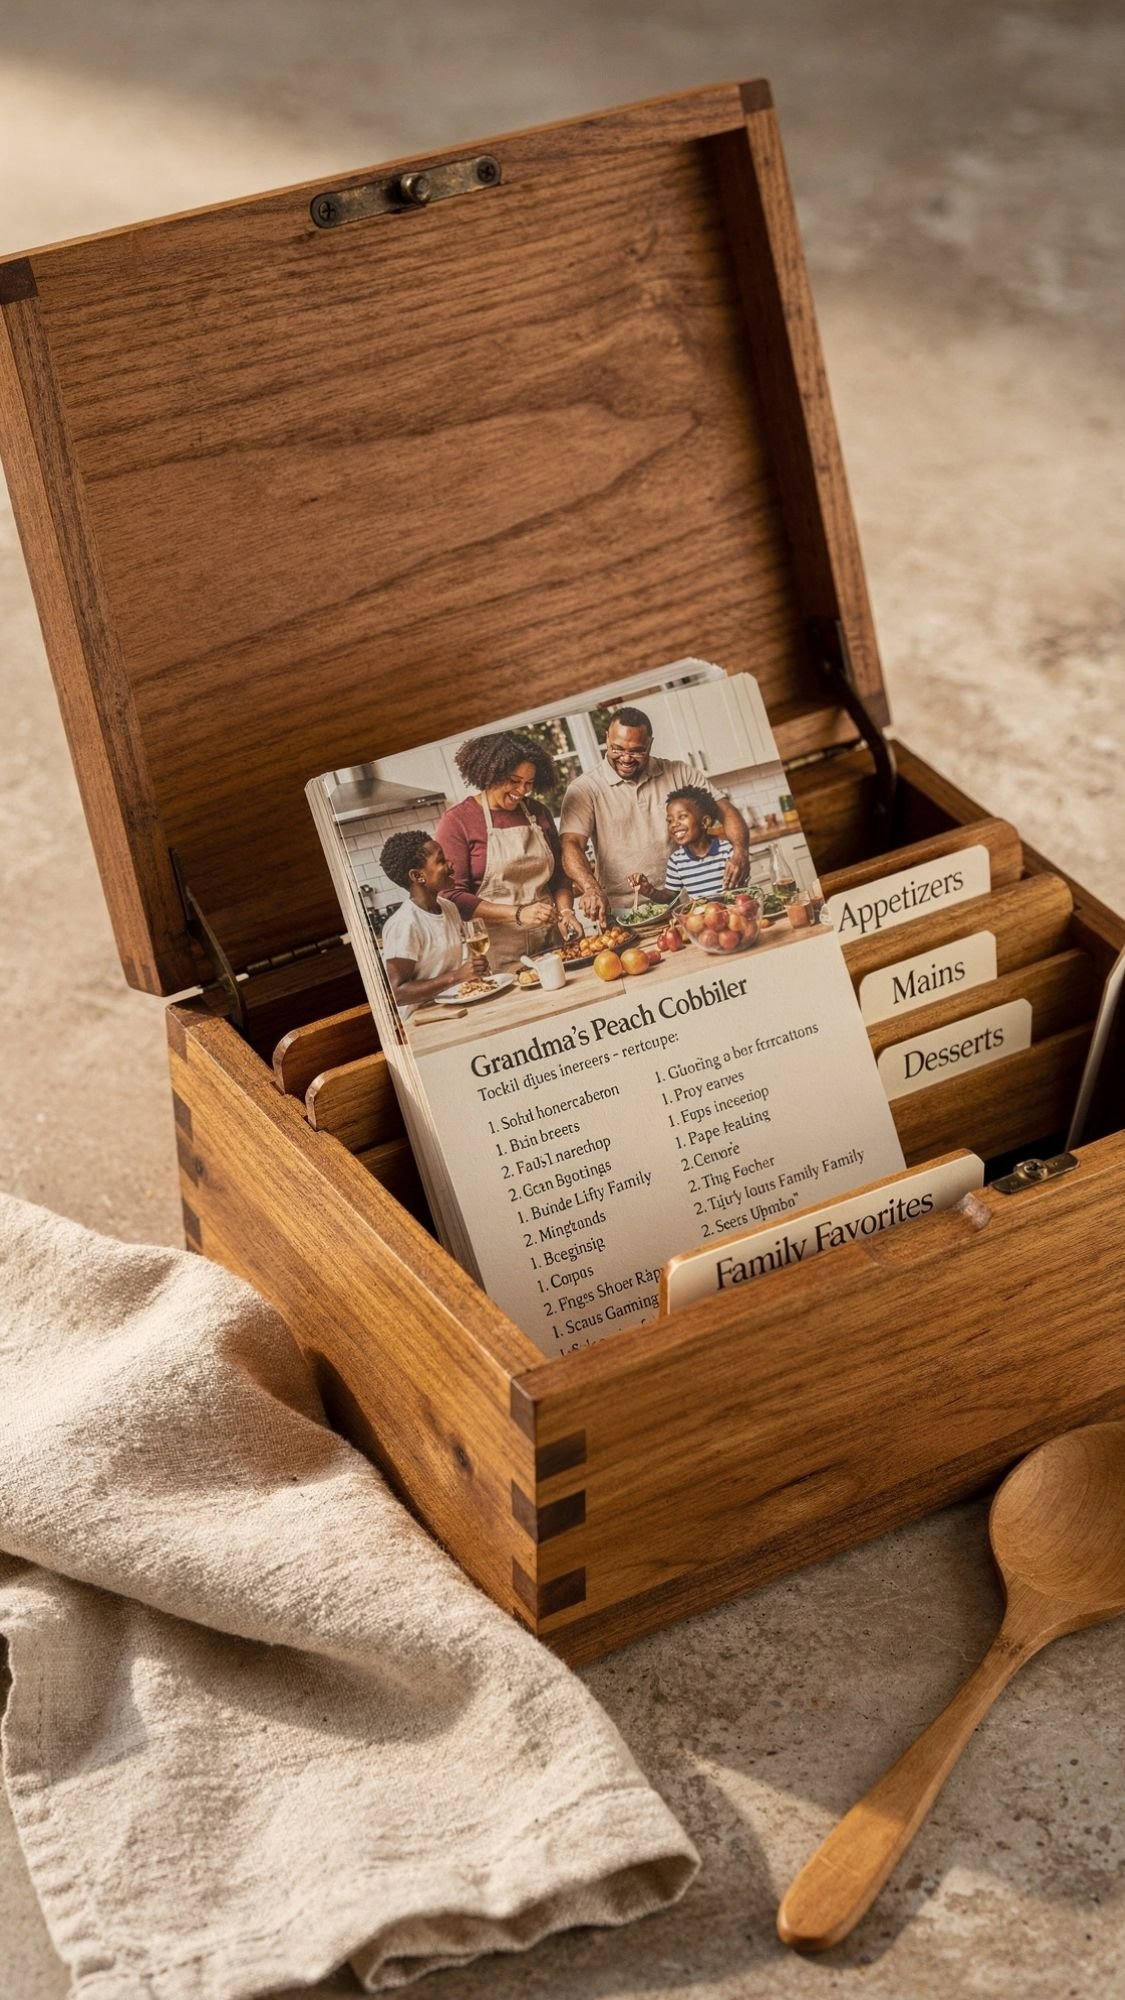
DIY Gift #11: Recipe Card Photo Box (family food plus faces)
This one hits different because it’s not just “here’s a recipe,” it’s “here’s the person behind the recipe.” Adding photos turns a simple recipe box into a full-on family archive. It’s perfect for moms, grandparents, newlyweds, or anyone who says “I never wrote it down” and then panics when they forget the exact amount of cinnamon.
Why this works so well
Recipes already carry memories. Photos make them instant. You can also build this gift over time, which means you can start with 12 cards and keep adding more later.
Best photos to use
- Photos of the person who makes the recipe
- Kitchen moments, holiday dinners, baking chaos
- One photo per recipe is plenty, keep it clean
Materials
- Recipe box, wood or sturdy cardstock
- Recipe cards, 4×6 or 3×5
- Printed photos, small, 2×2 or 2×3 works great
- Adhesive: tape runner for flat mounting
- Clear sleeves or laminating sheets, optional but highly recommended
- Divider tabs, optional
- Pen that won’t smear, fine-tip marker works well
Steps
- Choose your recipe set:
Pick a theme to make it feel curated:
- “Family classics”
- “Holiday favorites”
- “Weeknight go-tos”
- “Desserts that disappear”
- Write the recipes clearly:
You want real instructions, not vibes. Include:
- Exact measurements
- Oven temp
- Cook time
- What it should look like when it’s done
- Add a photo to each card:
- Place a small photo at the top corner or centered at the top. Keep placement consistent across all cards.
- Add a memory line:
This is the secret sauce. Add one sentence like:
- “You made this every Sunday after church.”
- “This was my birthday request every year.”
- “We burned the first batch and still ate it.”
- Protect the cards:
- Slide them into sleeves or laminate them. Food splatters will happen, and you want these to survive.
- Organize in the box:
- Use tabs, alphabetical order, or by meal type. Whatever makes sense for the recipient.
Pro Tips (so it feels heirloom, not school project)
- You make it look cohesive when you use the same photo size and placement on every card. Consistency is your best friend.
- You prevent smearing when you write recipes first, then add photos. Hands get gluey, ink gets messy.
- You make it last longer when you use sleeves or lamination. Tomato sauce does not respect your hard work.
- You help the reader succeed when you add “how to know it’s done.” For example, “edges should look golden” or “a toothpick comes out clean.”
Common mistake
A common mistake beginners make is leaving out the tiny details that make the recipe work, like pan size or whether to cover it while baking. Add those details. That’s what makes it usable.

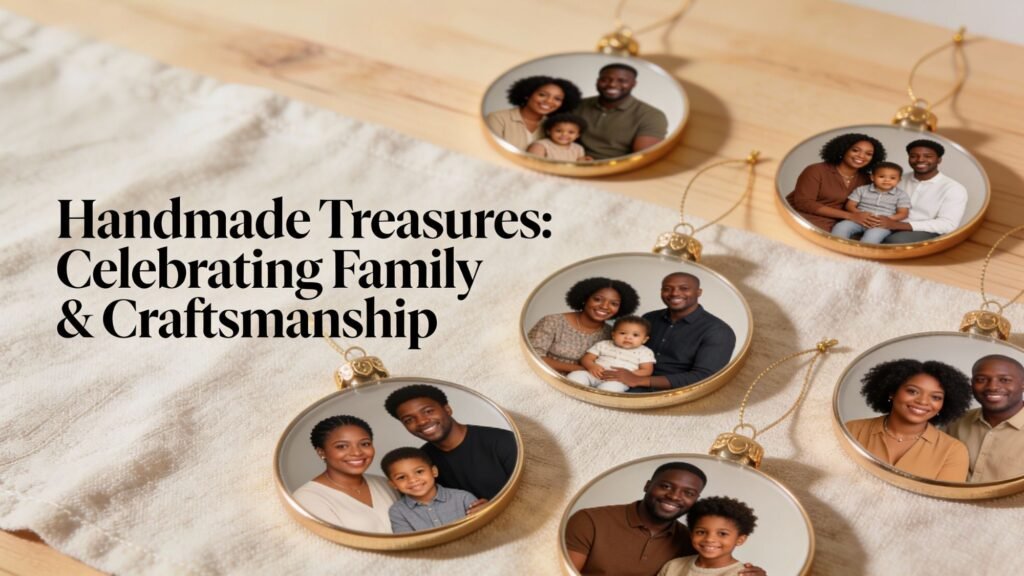
DIY Gift #12: Photo Ornament Set (holiday tears, the good kind)
This one is a classic for a reason. Photo ornaments don’t just decorate a tree, they mark time. You pull them out every year and instantly remember the year that baby was tiny, the year everyone matched, the year the dog ate the wrapping paper, all of it.
You can also make a whole set, which makes the gift feel generous without being expensive.
Why this works so well
Ornaments become tradition. They also store easily, so the recipient actually keeps them. The trick is making them durable so the photo doesn’t peel, warp, or fade.
Best photos to use
- Faces or close-up moments, they read best at ornament size
- One photo per ornament, keep it clean
- Black and white photos look super high-end and timeless
Materials
- Ornament blanks, pick your style:
- Clear fillable ornaments
- Wooden rounds
- Acrylic discs
- Metal ornament blanks
- Printed photos
- Scissors or craft knife
- Adhesive or decoupage medium
- Clear sealer, matte or satin
- Ribbon or velvet hanging loop
- Optional upgrades
- Vinyl names or dates
- Small charm
- Glitter edge, if that’s your vibe
Steps
- Choose your blank:
- Clear ornaments feel modern. Wooden rounds feel cozy and classic. Acrylic looks sleek and clean. Pick the vibe the recipient would actually love.
- Size and cut the photo:
- Trace the ornament shape, then cut slightly smaller so the edges stay clean.
- Attach the photo:
- Apply adhesive evenly, then press the photo down smoothly. Burnish it flat.
- Seal it:
- Seal the photo surface and edges with thin coats. This protects against fingerprints and humidity.
- Add personalization:
- Names and dates make these feel priceless. Keep text small and clean.
- Add ribbon:
- Velvet ribbon looks expensive. Satin looks classic. Twine looks rustic. Pick one and stay consistent.
Pro Tips (so they survive more than one season)
- You prevent warping when you seal both sides evenly. One-sided sealing can curl thinner blanks.
- You avoid bubbles when you burnish from the center outward. Same rule as everything else, bubbles ruin the vibe.
- You make them look store-bought when you keep the ribbon style consistent across the set.
- You stop edge lifting when you seal edges first, then topcoat.
Common mistake
A common mistake beginners make is sealing too thick. Thick coats can stay tacky and grab dust. Thin coats dry cleaner and cure harder.

DIY Gift #13: “Open When” Photo Letters Bundle (structured sentimental, in the best way)
If you want a gift that feels deeply personal without needing fancy materials, this is one of the best. It’s basically emotional support in envelope form. You create a bundle of letters for different moments, and you tuck a photo into each one so it hits instantly.
Why this works so well
It’s not one gift, it’s many little gifts. The recipient gets to open them at the exact time they need them, which makes it feel thoughtful and ongoing. Also, you can customize this for literally anyone, partner, best friend, college kid, new mom, long-distance family.
Best photos to use
- One photo per envelope, keep it simple
- Match the photo to the envelope theme
- Choose photos that make the message land fast
Materials
- Envelopes, same size for a clean look
- Cardstock or stationery paper for letters
- Mini photo prints
- Pen or marker that won’t smear
- Ribbon or twine
- Optional upgrades
- Wax seal stickers
- Label maker for envelope titles
- Mini kraft tags
- Tiny photo corners
Step-by-step
- Pick your envelope themes:
You can do 6, 10, or 12 envelopes depending on time. Ideas:
- Open when you miss us
- Open when you need a laugh
- Open when you feel overwhelmed
- Open when you feel proud
- Open when you can’t sleep
- Open when you need motivation
- Write each letter with one clear purpose:
Don’t write a novel. Write like you’re talking to them. Keep it specific. If you get stuck, start with:
- “I love you because…”
- “I remember when…”
- “Here’s what I want you to remember right now…”
- Add a photo that matches:
- Tuck in one photo that connects to the letter theme. That photo does half the emotional work for you.
- Add one small extra:
This makes it feel deluxe:
- a tea bag
- a small affirmation card
- a pressed flower
- a tiny playlist QR code
- Label and bundle:
- Label envelopes clearly, then tie them with ribbon. Add a small tag that says “Start with this one first” if you want to guide the order.
Pro Tips (so it feels meaningful, not generic)
- You get the strongest reaction when you write about one real moment per letter. Specific beats general every time.
- You keep it readable when you limit yourself to one page per envelope. If you write too long, people feel pressure to “perform” reading.
- You avoid messy handwriting regret when you draft in your phone first, then copy neatly.
- You make it look premium when every envelope matches. Mixed envelopes can look like you ran out and raided the junk drawer.
Common mistake
A common mistake beginners make is writing “Open when you’re sad” and then writing something vague like “It’ll be okay.” Add something concrete:
- a specific compliment
- a memory
- a reminder of a strength you’ve seen in them
- That’s what makes it land.
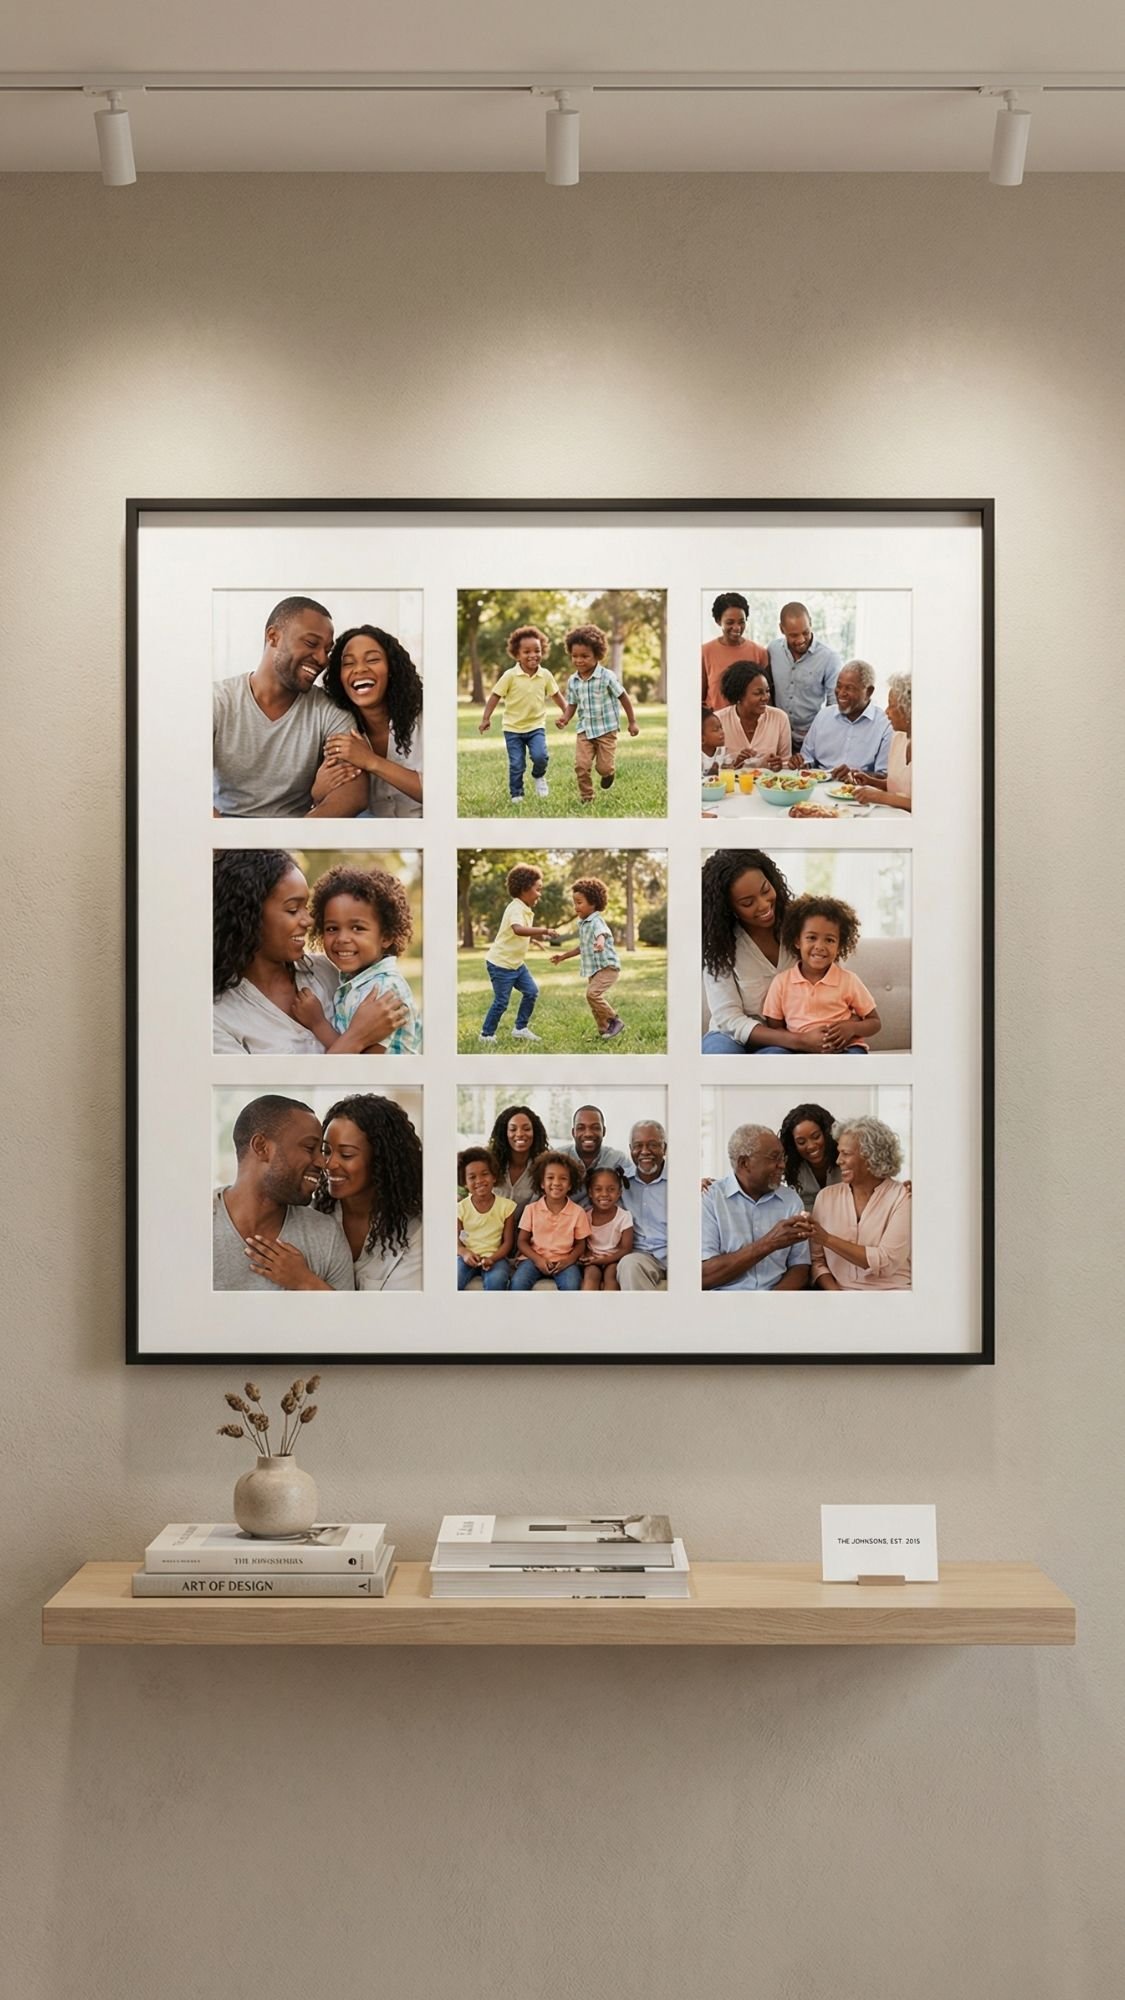
DIY Gift #14: Photo Collage Frame With Mat Grid (clean, modern, and impossible to mess up)
This is the one I recommend when someone says, “I want it to look classy, not crafty.” A grid collage with a mat looks intentional, balanced, and straight-up expensive when you keep the spacing consistent. It also works for every style, modern, farmhouse, glam, boho, you name it.
Why this works so well
A grid layout removes chaos. Your brain loves symmetry, and a mat makes the photos look curated even if they’re random moments. The mat basically does the heavy lifting for you.
Best photos to use
- 6, 9, or 12 photos, grids behave best in even numbers
- Similar lighting or editing, so the collage feels cohesive
- A mix of close-ups and wide shots, but keep the vibe consistent
Materials
- Frame with mat, or a mat board you cut yourself
- Printed photos, matte finish looks best
- Ruler and pencil
- Double-sided tape or photo-safe adhesive
- Craft knife and cutting mat, if cutting your own mat
- Microfiber cloth for the glass
Steps
- Choose your grid:
Pick a simple layout:
- 2×3 grid for 6 photos
- 3×3 grid for 9 photos
- 3×4 grid for 12 photos
- Print photos consistently:
- Same size, same border style. Consistency makes this look professional instantly.
- Dry-fit behind the mat:
- Before you tape anything down, place the mat over the photos and check alignment. This prevents the classic “why is their forehead cut off” crisis.
- Mark alignment guides:
- Light pencil marks on the backing board help you keep everything straight.
- Attach photos:
- Tape photos down carefully. Press firmly. Keep edges clean.
- Clean and close:
- Clean the inside of the glass right before closing. Dust shows up the second you seal it, like magic, but rude.
Pro Tips (so it looks like a gallery piece)
- You get a high-end look when you use a mat with wide borders. Skinny mats feel cheap.
- You avoid glare when you choose matte prints and anti-glare acrylic if you can.
- You keep the grid perfect when you use a printed alignment guide behind the mat. Print a simple grid on regular paper, lay it under the backing board, and follow it.
- You make it feel curated when you pick one color story. Warm neutrals, black and white, or one consistent filter.
Common mistake
A common mistake beginners make is mixing random photo sizes and trying to force a grid. Don’t do that. Print them all the same size. Your future self will thank you.

DIY Gift #15: Framed Photo + QR Code to a Voice Note (aka “scan and instantly cry”)
This is one of the most meaningful upgrades you can add to a photo gift. The photo gives the memory. The QR code gives the voice, the message, the laugh, the “I love you,” the story behind the photo. It’s simple, but it feels insanely personal.
Why this works so well
A photo freezes a moment. Audio brings the moment back to life. You can link the QR code to:
- a voice memo
- a private video
- a playlist
- a private photo album
- a written letter online
You get a gift that feels modern, but still heartfelt. Ever heard someone’s voice and instantly felt calm? That’s the power here.
Materials
- Frame, any size
- Printed photo, matte finish looks clean
- QR code generator (free online options work fine)
- Small cardstock for the QR code card
- Printer
- Optional upgrades
- tiny caption card
- wax seal sticker
- ribbon on the frame stand
- a small “how to use” instruction card
Steps
- Choose what the QR code will open:
- Pick one thing, not five. It feels more intentional.
Examples:
- “A message from me”
- “Our best voice notes”
- “The story behind this photo”
- “Playlist for when you miss home”
- Upload or host the content:
- Use a private link if possible. Make sure the recipient can access it easily without needing your login.
- Generate the QR code:
- Create the QR code and download it at high quality. Don’t screenshot it, screenshots can blur it.
- Print a clean QR card:
- Print it on cardstock.
Add a short line like:
- “Scan to hear the story”
- “Scan for a message”
- “Scan when you miss me”
- Test it:
Test it on:
- your phone camera
- a different phone
- in different lighting
- Because nothing kills the moment like “it’s not scanning” while everyone is watching.
- Place the QR card in the frame:
- Do not cover faces. Put it in a corner, bottom right or bottom left, like a museum label.
- Add a tiny caption:
- Optional, but powerful.
One line:
- “Summer 2019, we laughed until 2 AM”
- “The day everything felt simple”
- Keep it short and real.
Pro Tips (so it works every single time)
- Keep the QR code big enough. Too small and it becomes a scanning nightmare.
- Use high contrast. Black QR code on white card scans best.
- Put it on a separate card, not printed on the photo. It looks cleaner and you can update it later if needed.
- Add a short instruction card if the recipient isn’t techy. “Open camera, point at code, tap the link.” Done.
Common mistake
A common mistake beginners make is using a link that later breaks. If you can, host the audio somewhere stable and test the link again right before gifting. You want this to work in 6 months too.
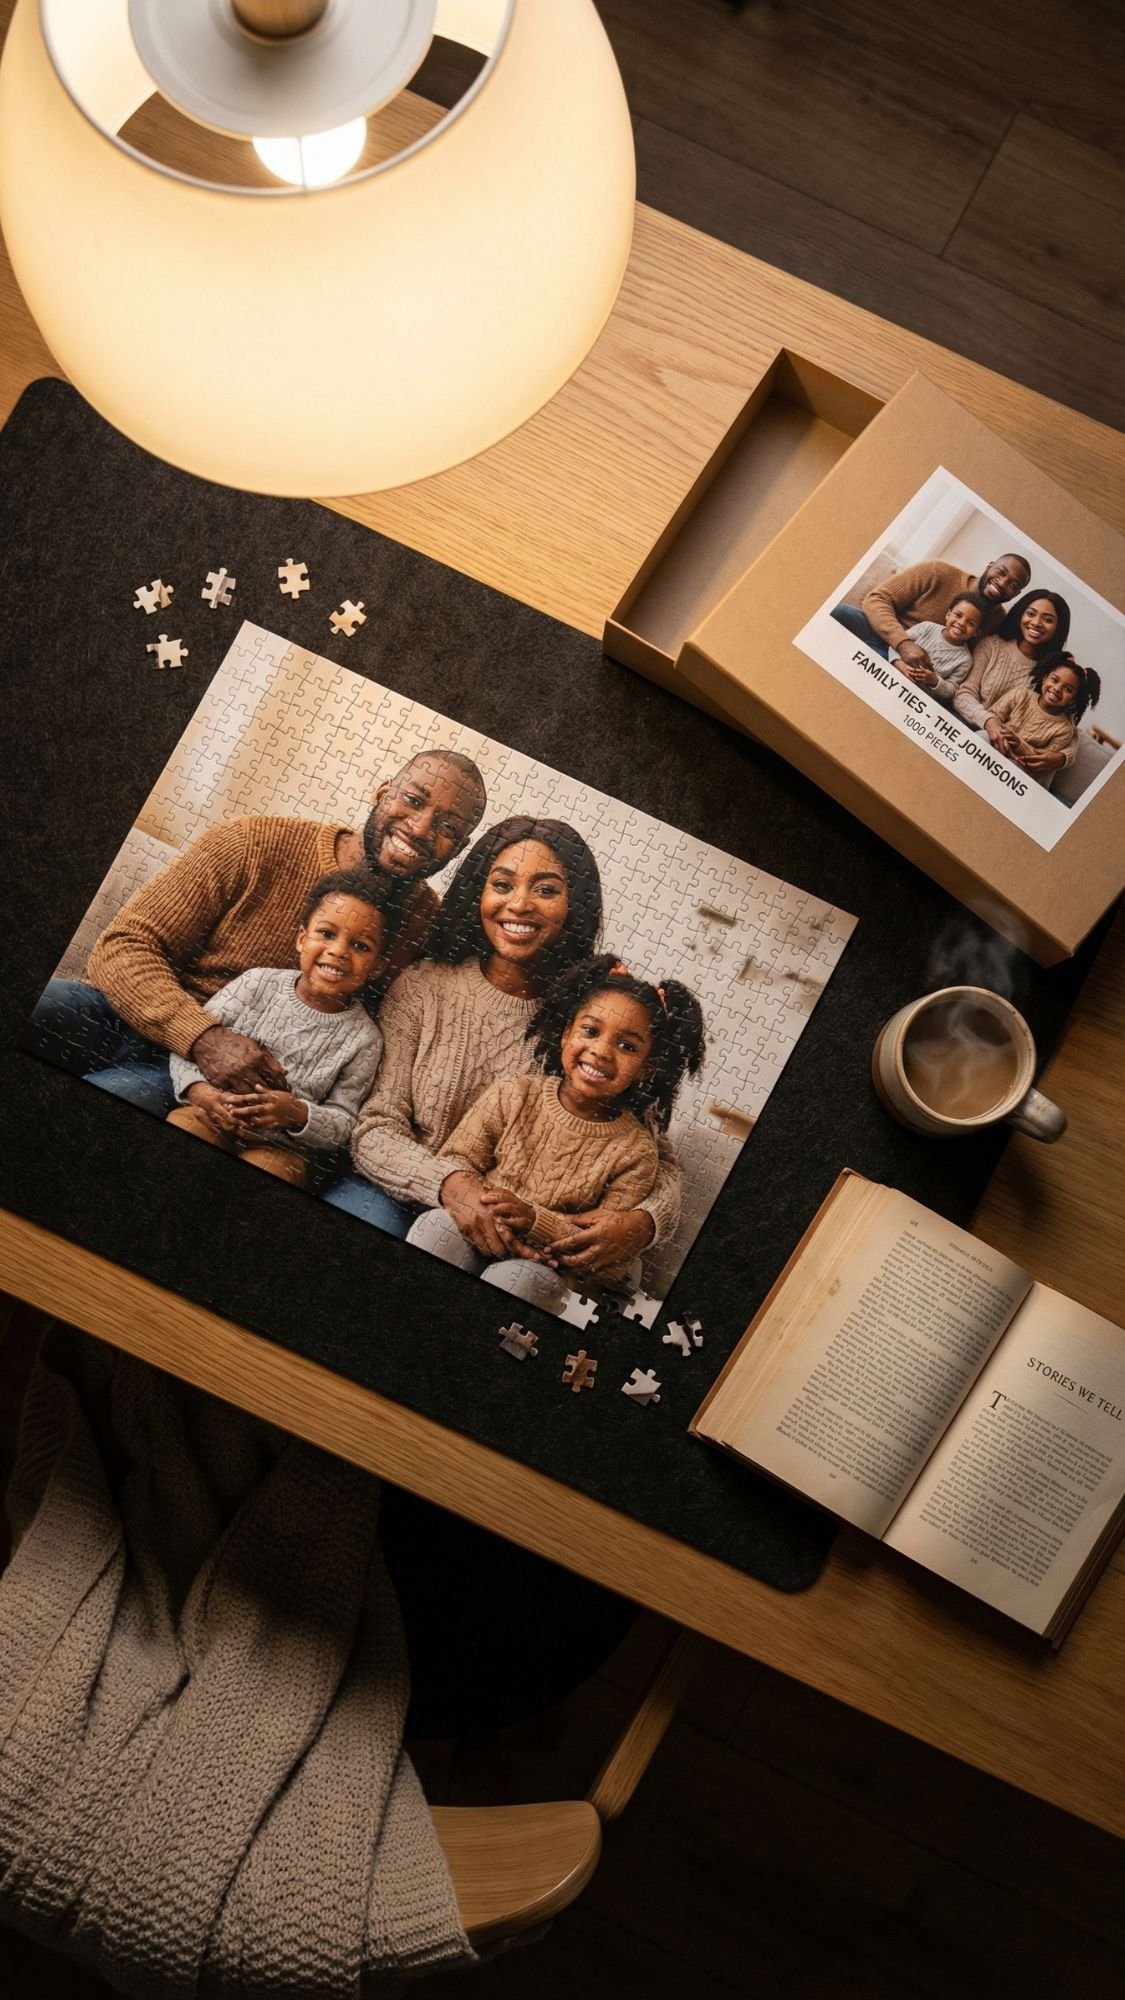
DIY Gift #16: DIY Photo Puzzle (fun, nostalgic, and secretly genius)
A photo puzzle is one of those gifts that feels interactive, not just sentimental. They don’t just look at the memory, they rebuild it. It’s perfect for couples, kids, grandparents, or anyone who loves game night. Also, it’s a sneaky way to get people off their phones for 20 minutes. You’re basically a hero. 🙂
Why this works so well
It turns one photo into an activity. You can pick an inside joke photo, a vacation shot, a family portrait, or even a pet pic that deserves main character energy.
Best photos to use
- A photo with strong color contrast
- Avoid super busy backgrounds, puzzles get visually noisy
- Photos with clear faces and a simple focal point
Materials
- Puzzle blank or thick chipboard
- Printed photo (matte works best)
- Adhesive, even coverage matters here
- Brayer or rolling pin
- Craft knife and cutting mat, or a puzzle cutter if you own one
- Clear sealer for the top
- Optional upgrades
- small gift box
- printed “puzzle cover” label
- zip bag for pieces
Steps
- Mount the photo:
- Spread adhesive evenly on the puzzle blank or chipboard. Press the photo down and burnish from center outward.
- Let it set:
- Give it time to bond. If you cut too soon, the photo can shift or tear.
- Seal the top:
- Apply a thin sealer coat before cutting. This helps protect the photo surface and reduces chipping on the edges.
- Cut puzzle pieces:
- You can go simple squares, classic puzzle shapes, or a mix. Use a sharp blade. Dull blades tear paper edges.
- Seal again:
- After cutting, add a light seal coat if the edges need extra protection.
- Package it nicely:
- Add the pieces to a bag and place it in a box with a printed cover image. That packaging detail makes it feel legit.
Pro Tips (so it doesn’t peel, bubble, or look rough)
- You prevent bubbles when you burnish slowly and press evenly. Bubbles show up more once you cut pieces.
- You avoid peeling when you seal edges and let it cure before heavy handling.
- You get cleaner cuts when you use a fresh blade and cut with confidence. Tiny hesitant cuts create jagged edges.
- You make it feel store-bought when you add a cover label and a simple “pieces count” note.
Common mistake
A common mistake beginners make is using thin cardboard. Thin board warps and bends, and puzzle pieces feel flimsy. Use thick chipboard or a real puzzle blank if you want it to last.
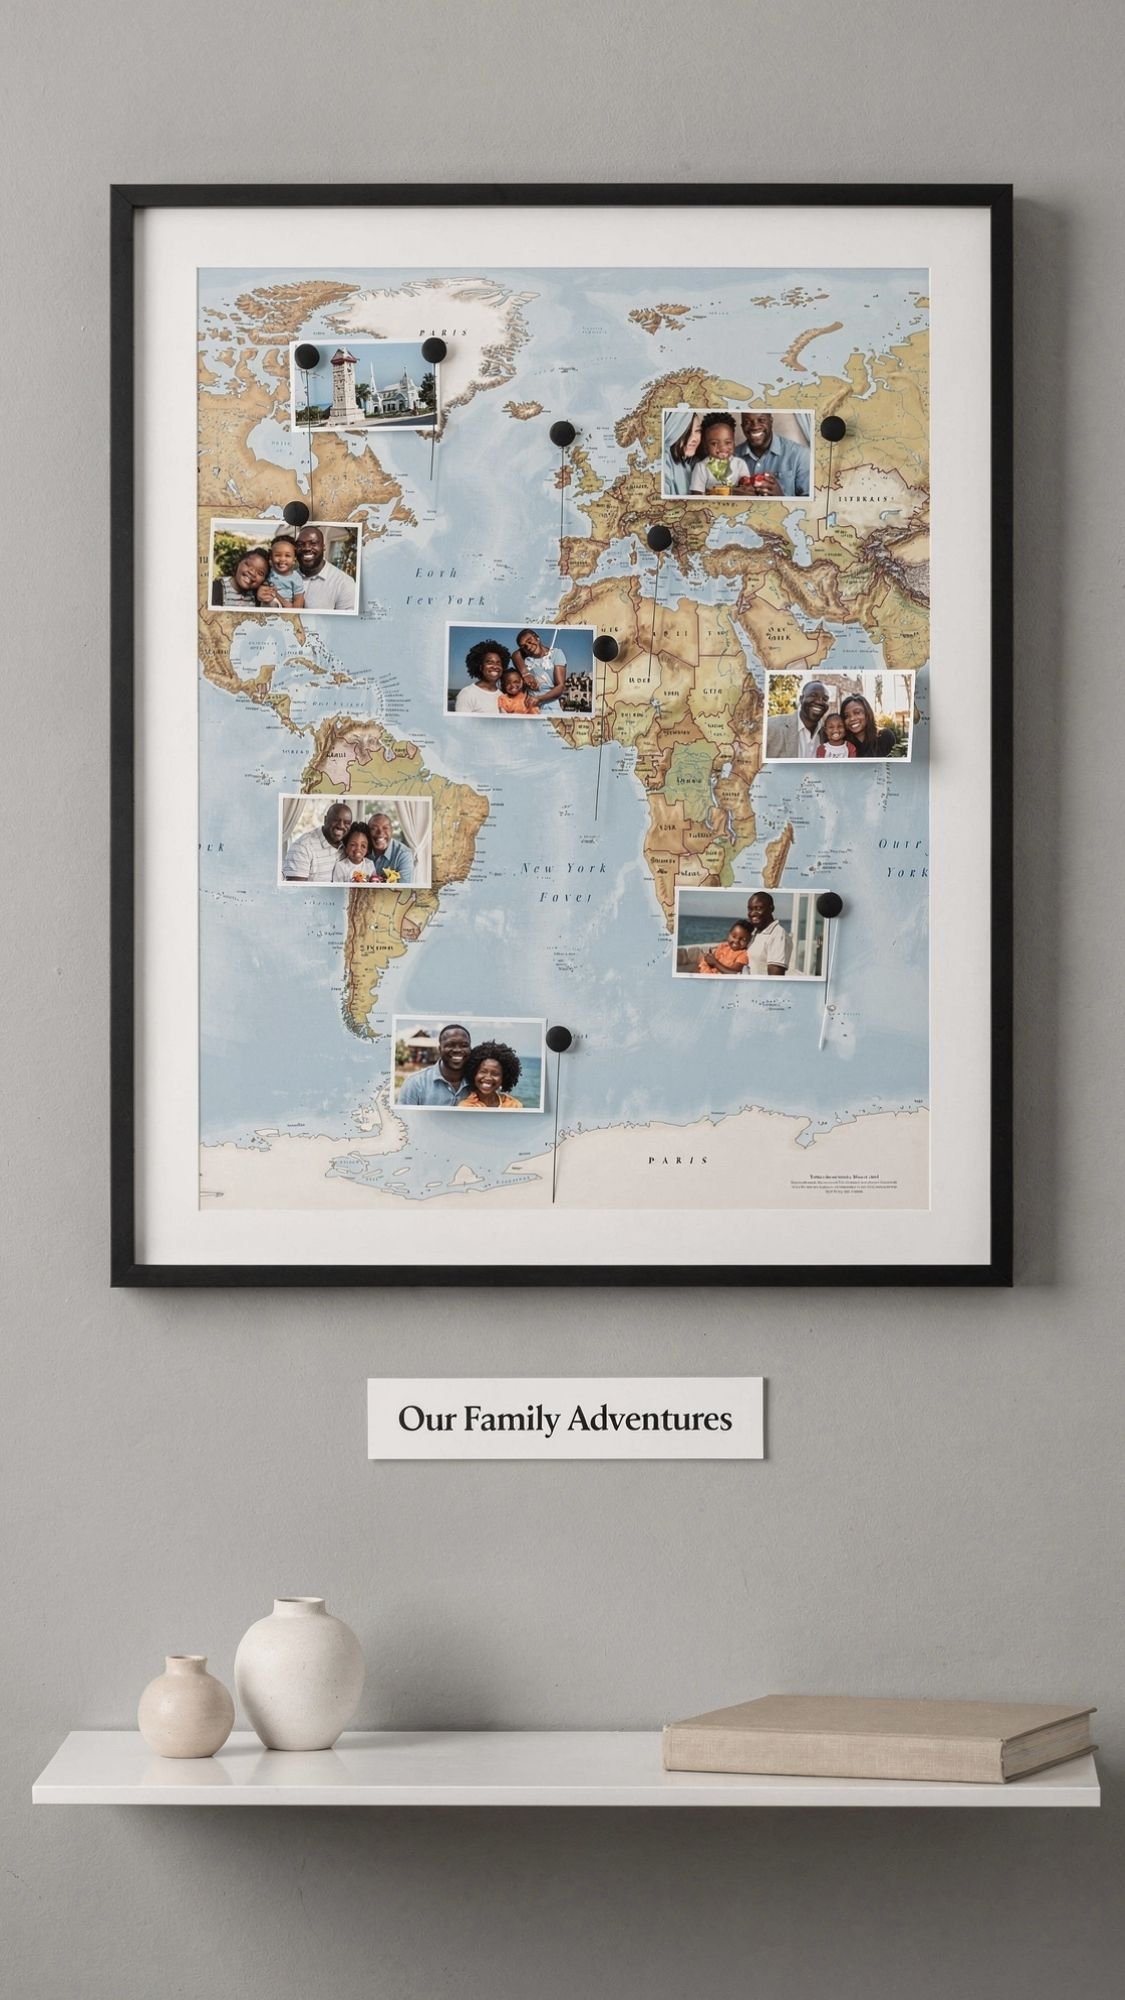
DIY Gift #17: Memory Map With Photos and Pins (travel story in one frame)
This is one of my favorite “conversation piece” gifts. People don’t just glance at it, they walk up and start pointing like, “Wait, that’s where we got lost,” “That’s the restaurant,” “That’s the hotel with the weird elevator.” It turns memories into a visual story.
Why this works so well
A map gives structure. The photos add emotion. Pins connect them. It’s sentimental, but it also looks like real decor, which matters if the recipient likes their home to look intentional, not cluttered.
Best photos to use
- 8–12 photos max, so it stays clean
- Photos tied to specific places, not random moments
- A mix of landmarks and candid shots
Materials
- Map, choose one:
- World map
- Country map
- City map
- Custom printed map of a specific region
- Frame, ideally with enough depth for pins
- Mini photo prints, 2×2 or 2×3
- Push pins or map pins
- Keep pin heads consistent for a premium look
- Double-sided tape or photo corners
- Optional upgrades
- small caption labels
- a title card like “Our Adventures”
- string to connect points, use sparingly
Steps
- Pick a theme:
- This keeps it from turning into a chaotic geography lesson.
Examples:
- “Our First Year Married”
- “Where Our Family Has Been”
- “The Places We Call Home”
- “Best Trips Ever”
- Choose and print photos:
- Keep photo sizes consistent. This is not the time for one tiny photo next to one giant photo.
- Plan layout before pinning:
- Lay photos around the map first. Decide where you want clusters and where you want open space.
- Pin locations:
- Pin the exact locations first. Then place photos near them. If you do photos first, you’ll end up moving everything.
- Attach photos:
- Use photo corners or tiny tape pieces so you can swap photos later if you want.
- Add captions, optional:
Small captions look amazing when they’re consistent:
- city name
- year
- one short word like “laughs,” “home,” “chaos”
- Frame it:
- Make sure pins fit without crushing. If the frame is shallow, skip pins and use flat markers.
Pro Tips (so it looks like decor, not a science project)
- You make it feel intentional when you limit it to 8–12 locations. Less clutter, more impact.
- You get a clean look when you use matching pinheads. Mixed colors look messy unless you’re doing a deliberate color code.
- You keep photos from drooping when you use photo corners instead of heavy glue.
- You level it up when you add a simple title card. One line, clean font, done.
Common mistake
A common mistake beginners make is using a super busy map background and then adding busy photos. It becomes visual noise fast. Choose a clean map style if you’re using colorful photos, or use black and white photos if the map has a lot going on.
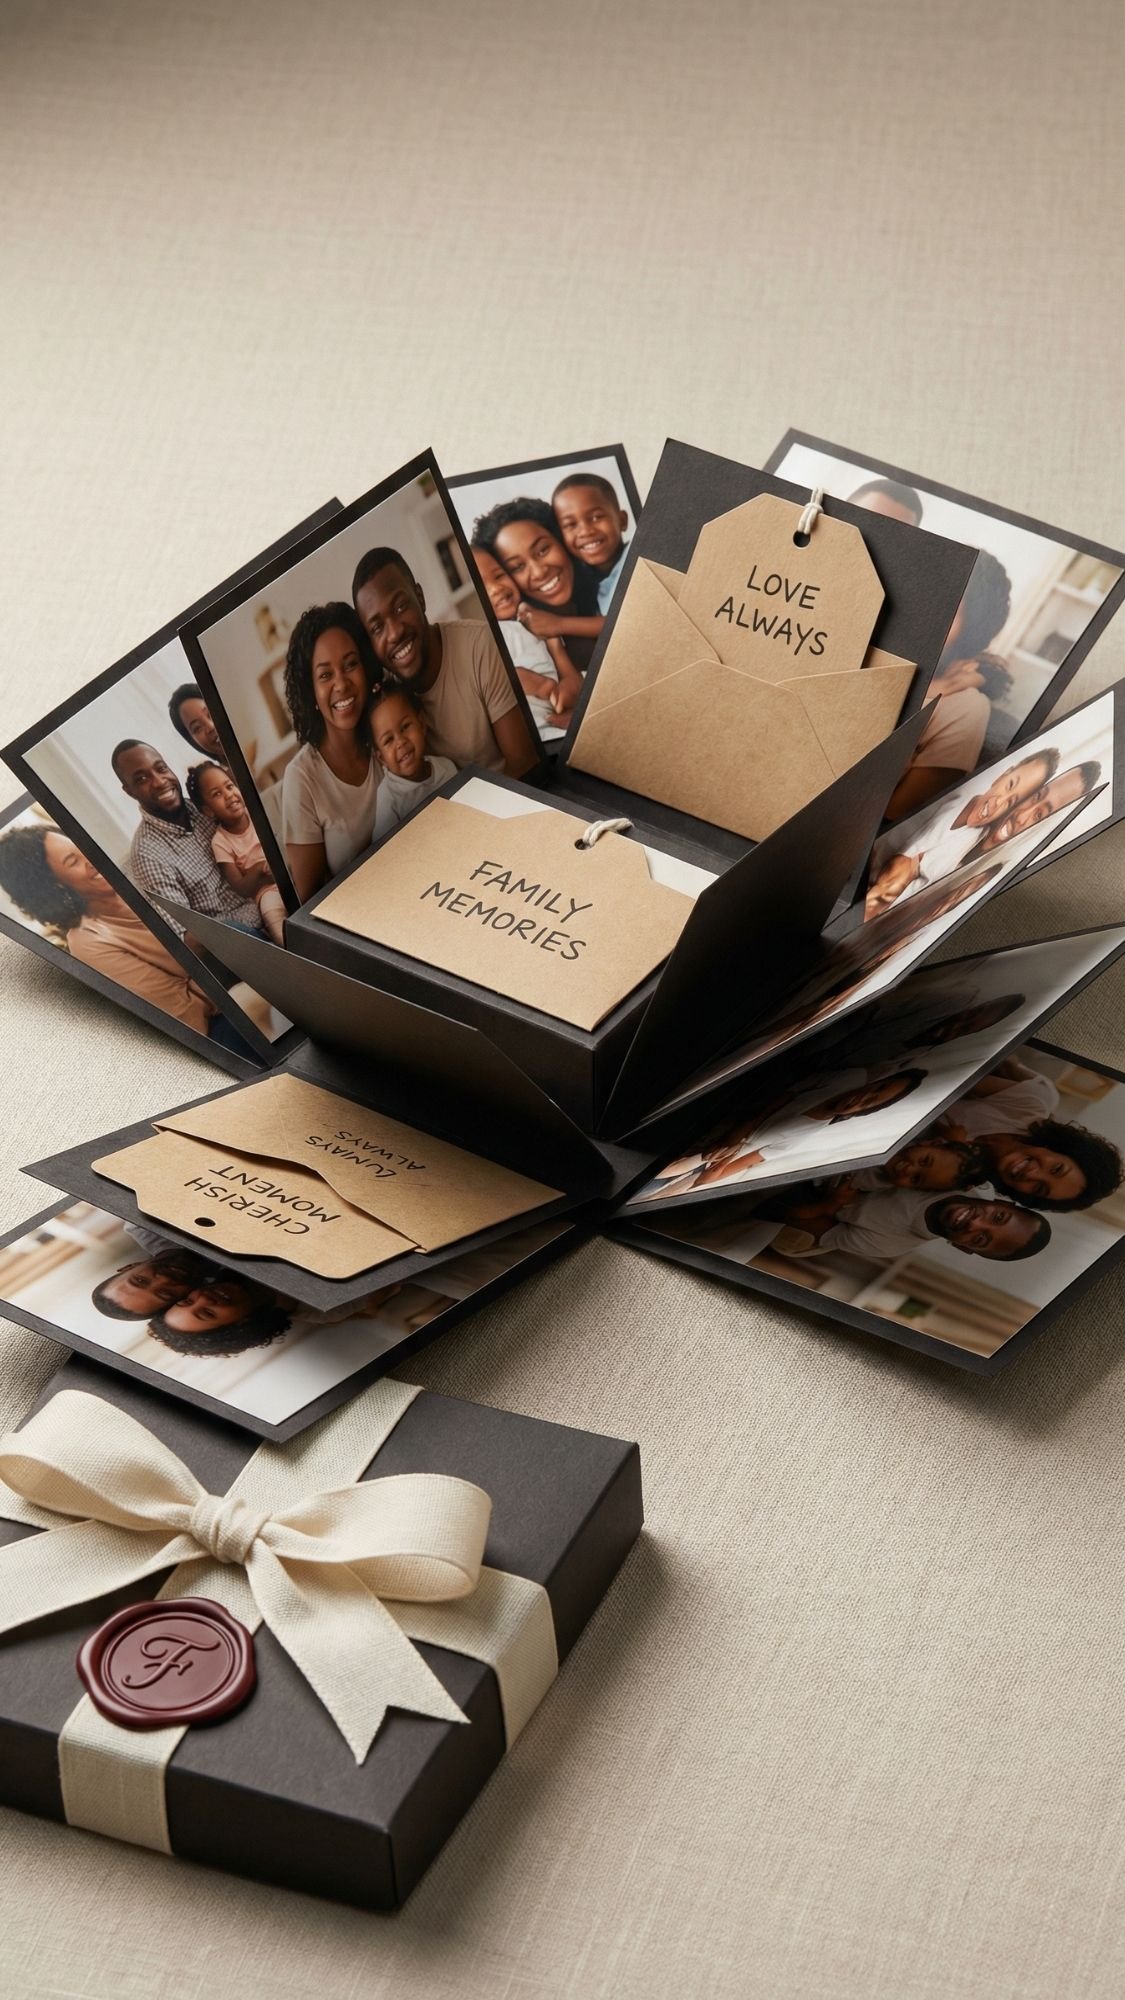
DIY Gift #18: Explosion Box Photo Gift (maximum impact, compact size)
This gift looks like you put in a ridiculous amount of effort. In reality, you mostly just cut, fold, and layer smartly. The moment they lift the lid and the sides fall open, it’s instant drama, in the best way. It’s also perfect for people who love to sit and look through details, because every panel can hold a photo, a note, a pocket, or a surprise.
Why this works so well
It turns photos into a full experience. It also packs a lot of memories into a small box, which makes it great for long-distance gifts, milestone moments, and “I need this to feel big” occasions.
Best photos to use
- 8–16 photos max, depending on box size
- Mix of close-ups and a few wide shots
- Stick to one theme: relationship timeline, family year recap, trip highlights
Materials
- Cardstock, 65–110 lb
- Use lighter cardstock for inner layers so it doesn’t get bulky
- Paper trimmer or sharp scissors
- Scoring tool and ruler
- Double-sided tape or tape runner
- Mini photo prints
- Embellishments, optional
- pockets, tags, tiny envelopes, ribbon, wax seal stickers
- Small gift box for the outer shell, or you can build one
Steps
- Decide your box size:
- A 4×4 base is a great beginner size. Bigger boxes look cool but get bulky fast.
- Cut and score the base:
- Your base is the foundation. Score carefully so folds stay crisp and edges line up.
- Build the inner layers:
- Add one or two inner “boxes” inside the main layer. Each layer gives you more photo panels.
- Attach photos and notes:
- Work one panel at a time. You’ll stay aligned and avoid crooked chaos.
- Add pockets and mini surprises:
Pockets are a cheat code. You can tuck in:
- extra photos
- little notes
- a tiny playlist QR
- a gift card
- Make the lid:
- The lid should fit snugly, not loose. You want the “pop open” moment when they lift it.
- Finish the outside:
- Keep it clean. A simple ribbon or tag looks better than over-decorating.
Pro Tips (so it closes properly and looks polished)
- You prevent bulky boxes when you use lighter cardstock for inner layers. Heavy paper stacks fast.
- You keep folds crisp when you score first, then fold. You already know the rule, it always wins.
- You avoid crooked panels when you dry-fit everything before taping.
- You get a premium look when you limit your embellishments. One ribbon, one tag, maybe a wax seal. Done.
Common mistake
A common mistake beginners make is using too much adhesive. Tape runner is your friend here because it stays flat. Thick glue can warp panels and make layers buckle.

My Failure Story (because crafts love to humble us)
Let me tell you about the time I got cocky with a photo project and paid for it immediately.
I made a photo tile coaster set as a gift, and I thought, “I’ve done this a million times, I don’t need to test anything.” I slapped an inkjet print down, brushed on sealer like I was frosting a cake, and I felt very accomplished for about 30 seconds.
Then the blacks started bleeding.
Not slowly. Not politely. It bled like the photo was melting, and I stood there watching it happen like, “Oh. So this is how I lose my mind today.”
What went wrong
- I used a fresh inkjet print that hadn’t fully set.
- I brushed on a wet coat too thick.
- I skipped a spray seal step because I was rushing.
How I fixed it without throwing everything away
- I let the coaster dry completely. I didn’t keep brushing, because that makes the smear worse.
- I lightly sanded the ruined top layer once it hardened enough to handle.
- I reprinted the photo, then used my Spray, Rest, Seal method.
- I applied thin coats after that, and I let each coat dry before adding the next.
The second version looked clean, crisp, and professional. The first version looked like a ghost tried to watercolor my memories.
Lesson learned
A common mistake beginners make is thinking the topcoat will “fix” everything. It won’t. The photo prep step decides the outcome. When you take five extra minutes to seal and let ink set, you save yourself hours of redo work.

Troubleshooting Photo-Based DIY Gifts
This is the section that saves people from rage-quitting mid-project. Photo gifts are amazing, but they also love to pull little stunts like bubbling, warping, and peeling. Here’s how you fix the most common problems, plus how you prevent them next time.
1) Ink smears or bleeds when you glue or seal
- Symptom: The photo smudges, dark areas spread, edges blur.
- Likely cause: Fresh inkjet print, too-wet adhesive or topcoat, heavy brush pressure.
- Fix: Stop touching it, let it dry fully. If it’s salvageable, lightly sand once hard, then reapply with thin coats. If it’s ruined, reprint and use Spray, Rest, Seal.
- Prevention next time: Spray seal prints lightly, let them rest overnight, then glue and topcoat in thin layers.
2) Bubbles form under the photo
- Symptom: Air pockets or bumps show up after drying.
- Likely cause: Uneven adhesive, rushed placement, not burnishing.
- Fix: If still wet, lift carefully and re-lay. If dry, slit the bubble with a craft knife, inject a tiny bit of adhesive, press flat and weight it.
- Prevention next time: Apply full, even adhesive coverage and burnish from the center outward with a brayer or card.
3) Paper wrinkles under the photo
- Symptom: Ripples, wrinkles, warped photo surface.
- Likely cause: Too much liquid glue, thin paper, glue stick applied unevenly.
- Fix: Press flat under wax paper with a heavy book while it dries. If it’s severe, reprint on thicker paper and redo.
- Prevention next time: Use a tape runner or thin even decoupage layer, choose thicker matte paper, press firmly.
4) Wood plaque or cardstock warps
- Symptom: The piece curls or bows as it dries.
- Likely cause: Moisture applied to one side only, heavy wet coats.
- Fix: Flip it and weight it flat as it dries. Seal the back with a light coat to balance moisture.
- Prevention next time: Apply thin coats and seal both sides when working on thin wood or cardstock.
5) Edges lift or peel over time
- Symptom: Corners lift, edges peel, photos start to separate.
- Likely cause: Not enough adhesive at edges, no edge sealing, handled too soon.
- Fix: Add a tiny bit of adhesive under the lifted edge, press down, weight it. Reseal the edge with thin coats.
- Prevention next time: Seal edges first, then topcoat. Give full cure time before gifting.
6) Sticky finish that never fully hardens
- Symptom: The surface feels tacky days later, fingerprints appear easily.
- Likely cause: Coats applied too thick, humidity, incompatible products, not enough cure time.
- Fix: Move to a warm dry space and give it more time. If needed, lightly sand the tacky layer and recoat thinly with a compatible topcoat.
- Prevention next time: Thin coats, longer dry times between coats, and don’t stack or wrap until fully cured.
7) Cloudy topcoat or hazy finish
- Symptom: The surface dries cloudy, especially over dark photos.
- Likely cause: Thick coats, humidity, trapped moisture, overworking the brush.
- Fix: Let it cure. Often haze clears as moisture evaporates. If it stays cloudy, lightly sand and apply a thin clean coat.
- Prevention next time: Use thin coats, avoid high humidity, don’t over-brush.
8) Crooked cuts or uneven photo placement
- Symptom: The photo looks off-center, tilted, or poorly aligned.
- Likely cause: No dry-fit, no guide marks, rushed trimming.
- Fix: Trim into an intentional border, add a mat, or redesign the layout so it looks intentional. If it’s really off, redo it.
- Prevention next time: Dry-fit first, mark light pencil guides, use a metal ruler and sharp blade.
9) Rough edges or “fuzzy” photo cuts
- Symptom: Jagged, torn edges that look messy up close.
- Likely cause: Dull blade, scissors chewing paper, cutting too fast.
- Fix: Recut with a fresh blade. If edges are already sealed, carefully sand and touch up.
- Prevention next time: Replace blades often and cut in one confident pass.
10) Photo transfers look patchy or missing areas
- Symptom: The image looks faded in spots or missing sections.
- Likely cause: Uneven medium layer, poor burnishing, rubbing too aggressively.
- Fix: Re-wet the paper backing and rub gently in layers. Seal once fully dry to even the look.
- Prevention next time: Apply medium evenly, burnish firmly, rub paper slowly and gently.

Finishing, Sealing, and Care: How to make it look professional and last
This is the part that separates “cute DIY” from “this looks like I bought it from someone who knows what they’re doing.” You can build the prettiest photo gift on earth, but if you seal it wrong, it’ll peel, haze, or stay sticky forever. Let’s not do that.
Dry time vs cure time, in plain language
- Dry time: The surface feels dry when you touch it lightly.
- Cure time: The finish fully hardens, so it resists scratches, fingerprints, and moisture.
If you wrap a project when it’s only dry, not cured, you can trap moisture and end up with a tacky finish, or the paper can lift later. Annoying, but common.
My finishing flow (works for most photo DIY gifts)
- Seal the photo first:
If you’re working with inkjet prints, do Spray, Rest, Seal.
- Spray light coats of fixative.
- Let it rest, ideally overnight.
- Then glue and seal.
- Seal edges before you topcoat:
- Edges lift first. Always. Brush a thin seal line around edges, let it dry, then topcoat.
- Topcoat in thin layers:
- Thin coats look clearer and cure harder. Thick coats trap moisture and get hazy.
- Let it cure fully before wrapping:
- I know it’s tempting to “just wrap it.” Don’t. Give it the time it needs to harden.
Finish options and when I use them
- Matte finish: Best for modern, clean, and high-end looks. Hides fingerprints.
- Satin finish: My go-to for most gifts. Soft shine, still classy.
- Gloss finish: Use only when you want that shiny look on purpose. Gloss highlights imperfections fast.
Care instructions to include in the post (copy-paste friendly)
For sealed plaques, frames, ornaments, and decor gifts
- Dust with a soft dry cloth.
- Don’t use harsh cleaners directly on the surface.
- Keep out of direct sun if you want photos to stay bright longer.
For coasters
- Use a water-resistant topcoat if you want true protection.
- Wipe spills quickly, don’t soak.
- Don’t put them in the dishwasher unless you built them for that life.
For fabric transfers
- Wait 24–48 hours before washing.
- Wash cold, gentle cycle.
- Air dry when possible, or low heat.
For resin keychains
- Avoid prolonged heat, like leaving it on a car dashboard.
- Wipe with a soft cloth, no harsh chemicals.
How long it lasts and how to refresh it
Most sealed photo gifts last a long time when you:
- keep them dry
- avoid harsh cleaners
- don’t scratch them up with rough handling
If a piece starts looking dull or lightly scratched:
- clean it
- lightly scuff if needed
- apply one fresh thin topcoat
- That refresh coat brings it back.
Customization Ideas
This is where you make the same base project feel totally different depending on who you’re gifting. Ever given something that was cute, but not their vibe? Yeah, customization fixes that.
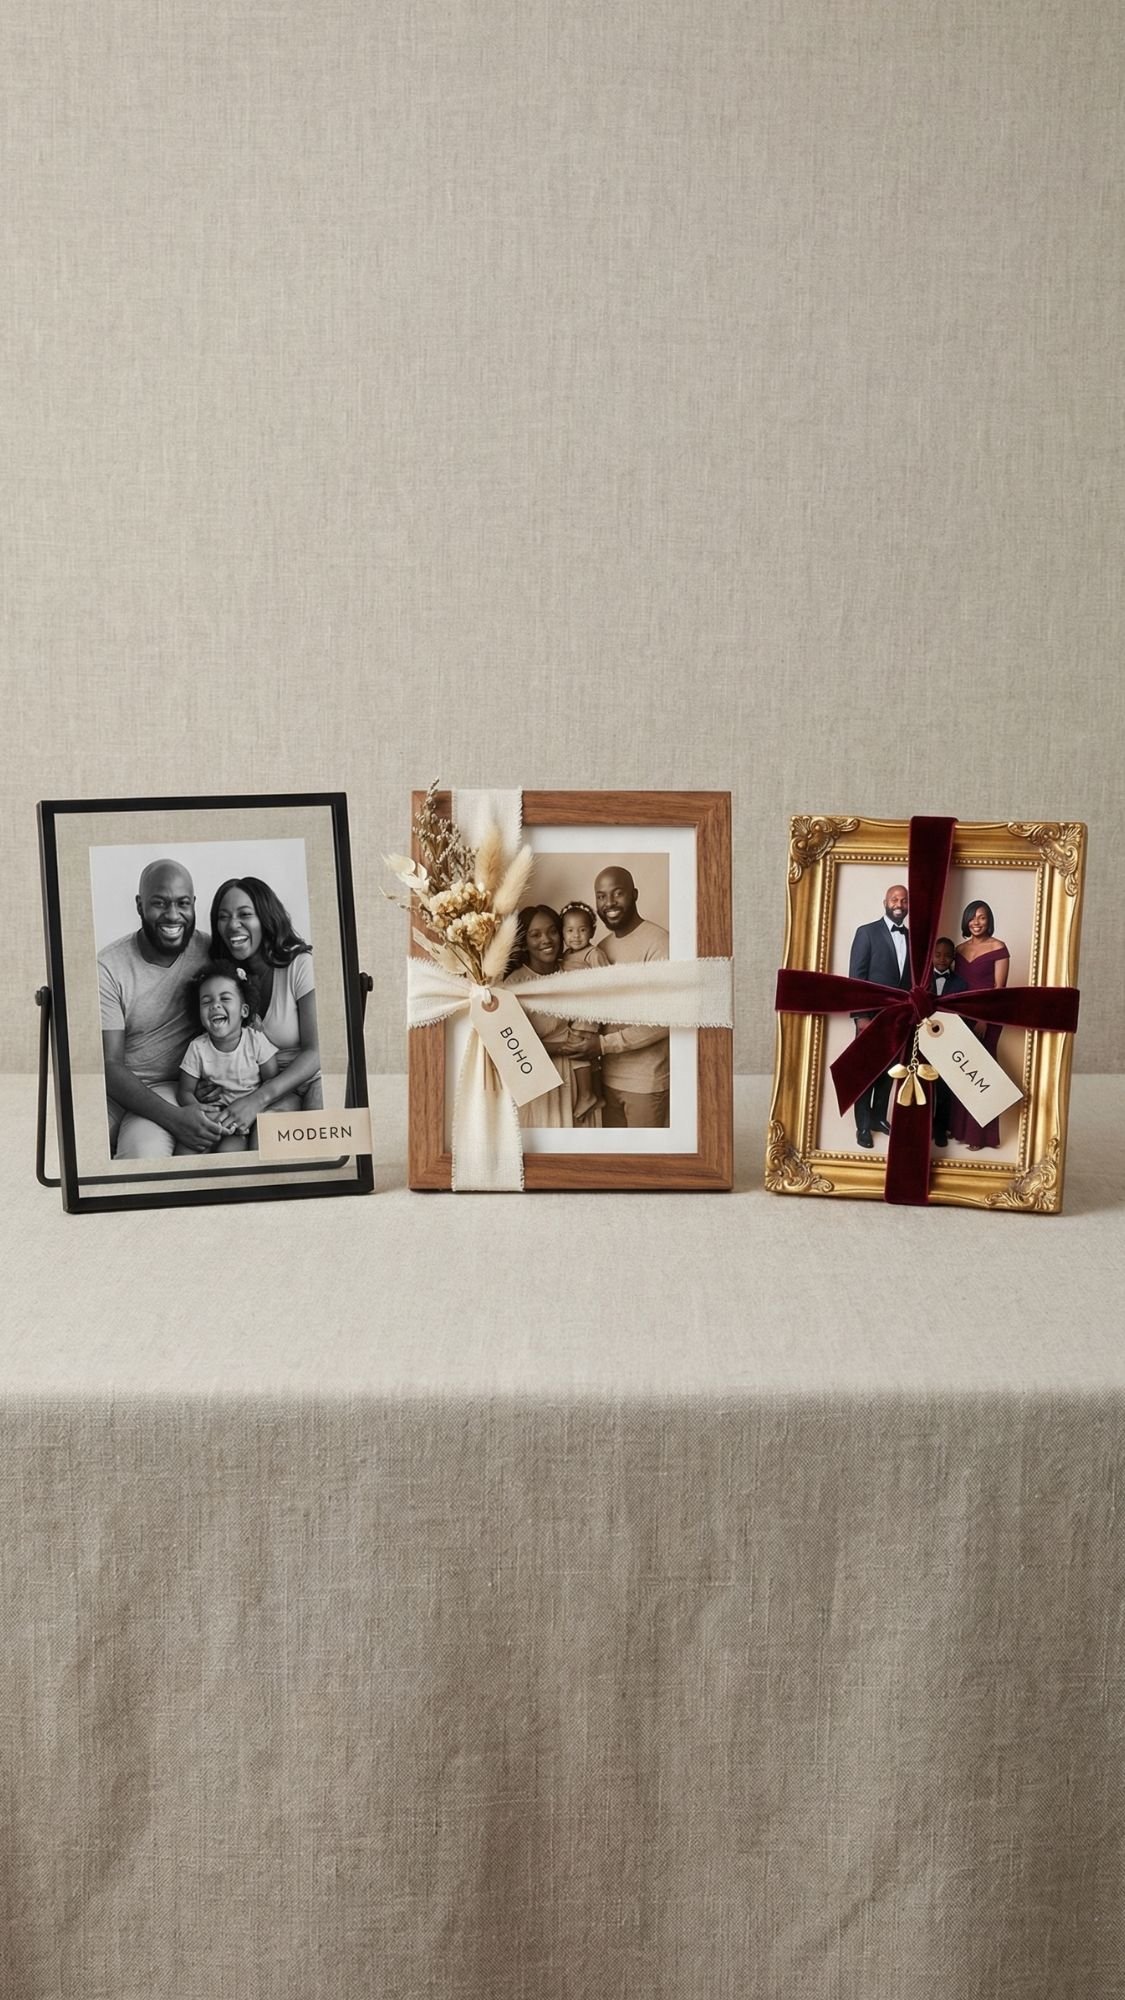
Variation 1: Style swaps (modern, boho, farmhouse, glam)
- Modern:
- matte black frames
- clean grid layouts
- simple captions in one font
- black and white photos or neutral-toned prints
- Boho:
- linen ribbon, twine, soft textures
- warm neutrals, sage, terracotta accents
- torn deckle edges or handmade paper tags
- pressed flowers tucked into shadow boxes or jars
- Farmhouse:
- natural wood plaques and frames
- kraft tags, simple serif labels
- ticking stripe ribbon, jute twine
- family recipes and “home” themes
- Glam:
- gold corners, metallic accents
- velvet ribbon
- acrylic frames or glossy resin finishes
- a clean monogram, keep it minimal so it stays classy
Variation 2: Color palette ideas (keep it cohesive)
Pick one palette and stick to it across the whole gift. That’s how it looks intentional.
- Warm neutrals + brass: cream, tan, espresso, gold
- Soft modern: white, black, greige, muted olive
- Romantic: blush, cocoa, champagne gold
- Bold but clean: black, white, deep emerald, gold
Variation 3: Personalization options (names, themes, upgrades)
This is the “make it priceless” category.
- Names and dates:
- Put names on a small tag, not over faces
- Add a date on the back of plaques and frames
- Short captions:
- One sentence under the photo, like a tiny memory label
- Example: “Sunday mornings, always loud, always ours.”
- Theme sets:
- anniversary timeline
- “best year ever” recap
- graduation highlights
- new baby firsts
- memorial keepsake set
- Material upgrades:
- swap ribbon for velvet
- use thicker cardstock for mini books
- choose anti-glare acrylic for frames
- add sleeves or lamination for recipe cards
FAQ (SEO-friendly, clear answers, no fluff)
1) What are the easiest DIY photo gifts for beginners?
Start with glass photo magnets, a photo strip accordion mini book, or a memory jar. You get a big emotional impact without complicated sealing or tricky measuring.
2) How do I stop ink from bleeding when I seal photos?
Use my Spray, Rest, Seal method:
- Spray light coats of clear fixative on the print
- Let it rest, ideally overnight
- Then glue and seal with thin coats
Also, avoid brushing wet sealer aggressively over fresh inkjet prints.
3) Do I need a laser printer for photo transfers?
Laser prints often work best for photo transfers because the ink sits differently than inkjet. If you only have inkjet, you can still do photo projects, but you need extra prep and testing.
4) Why do my photo gifts get bubbles under the paper?
You usually apply adhesive unevenly or you don’t burnish. Use even coverage, press from the center outward, and work slowly.
5) How long should I wait before wrapping a sealed photo gift?
Wait until it fully cures, not just dry to the touch. Dry means it feels dry. Cure means it’s hard enough to handle, stack, and wrap without sticking or denting.
6) What finish looks most expensive on DIY photo gifts?
Matte or satin. Gloss can look nice, but it highlights every little ripple, fingerprint, and brush stroke.
7) Can I add a QR code to a photo gift?
Yes, and it’s one of the most meaningful upgrades. Link it to a voice note, video, playlist, or private album. Print the QR code on a clean card and place it in the corner of the frame.
8) What photos work best for small projects like magnets and keychains?
Choose photos with:
- one clear focal point
- strong contrast
- simple backgrounds
- Busy photos turn into visual mush when you shrink them.
9) How do I make photo gifts look less “crafty” and more professional?
- Keep sizes consistent
- Use clean edges and spacing
- Limit decorations
- Choose matte prints
- Add one premium detail like velvet ribbon or a simple caption tag
10) How do I protect photo gifts from fading over time?
Keep them out of harsh direct sunlight, use a protective sealer, and choose quality prints. You can also refresh some projects later with a thin recoat if the surface gets dull.
11) What’s the best adhesive for photo paper?
Use something that spreads evenly and dries flat. Tape runners and thin decoupage layers work well for paper projects. Heavy wet glue increases wrinkling and warping.
12) Can I make these gifts if I’m short on time?
Yes. For fast gifts:
- photo magnets
- memory jar
- photo strip mini book
- framed photo + QR code
- You can finish all of these in one evening if you prep your photos first.

