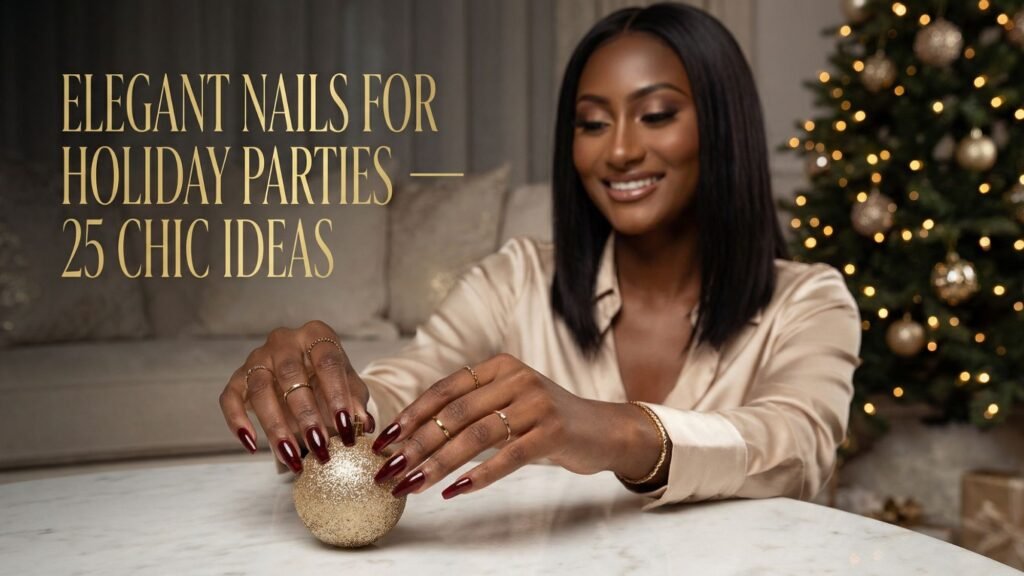
Holiday party season sneaks up every year, and suddenly your calendar looks like Tetris while your nails still look like “random Tuesday.” I treat my December manicure like a tiny accessory that walks into the room before I even say hi. Every clink of a glass, every selfie, every “wait, show me your ring” moment puts your hands on display, so what you put on your nails really matters. You want elegant holiday nails that look luxe at the office party, chic at date night, and still feel normal when you grab groceries the next morning, not like leftover costume nails. Same.
That’s why I pulled together 25 elegant nails for holiday parties that feel chic, wearable, and seriously screenshot-ready. I skip the cartoony stuff and focus on velvet finishes, chrome French tips, rich jewel tones, pearls, bows, and tiny details that read “quiet luxury” instead of “ugly sweater contest winner.” In this guide, we’ll figure out what actually fits your life—your nail length, your job, your party schedule, and how much maintenance you honestly want to deal with. Then we go through 25 specific designs you can show your nail tech or recreate at home, with the exact kind of notes I give mine (think: “short almond, office-friendly, no chunky glitter, but still festive”). By the end, you’ll have at least one everyday elegant mani and one high-drama party option saved and ready for your next appointment. Sound good?
How to Choose Elegant Holiday Nails That Actually Fit Your Life
You scroll through nail inspo, save 47 screenshots, and still sit in the salon chair thinking, “So… what do I actually ask for?” Before you pick a design, you need a quick game plan. Use this mini checklist so your elegant holiday nails match your real life, not just your camera roll.
1. Start with Your Actual Holiday Calendar
Ask yourself: “Where will my nails show up the most?”
- Office parties or client dinners
- Family photos and cozy nights in
- One big NYE event
- A mix of all of the above
If your week mixes laptops, parties, and errands, lean toward polished but flexible designs that work everywhere (think neutrals, French, subtle shimmer). If your calendar screams “glam nights only”, you can push deeper colors and bolder finishes.
Quick guide:
- Mostly work + everyday → soft nudes, French, hazelnut neutrals, micro-glitter
- Mostly evening events → garnet red, wine, emerald, black + gold accents
2. Be Honest About Your Nail Length and Shape
Before you fall in love with a dramatic shape, ask: “Can I live my normal life with this?”
- Short squoval
- Easy to maintain
- Perfect for chrome tips, glitter tips, or deep solid colors
- Short to medium almond
- Slim, elegant, works with almost every design in this post
- Great for aura nails, C-French, velvet finishes
- Long coffin or stiletto
- Full glam energy
- Great for cat-eye, ombré, 3D accents
- Only pick these if you happily baby your nails for two weeks
If you chase kids, haul luggage, or type all day, you probably want short or short-to-medium. Your nails should work with you, not fight you every time you open a can.
3. Choose a Color Story That Matches Your Style
Think about your clothes and jewelry first, then pick your polish.
Classic elegant holiday shades:
- Garnet, deep wine, and merlot – luxe and dramatic
- Emerald and forest green – rich and moody
- Black with gold or silver accents – chic, modern, very NYE
Cozy, neutral holiday shades:
- Hazelnut, caramel, chocolate brown – soft and elevated
- Milky nudes and sheers – perfect for minimalist designs
- Champagne, soft gold, and silver – work with everything
Non-traditional but still seasonal:
- Icy pastels (blue, lilac, shell pink) with chrome
- Aura nails with milky bases and subtle glow
Ask yourself, “Do I want my nails to match everything or stand out on purpose?” That answer picks your color lane for you.
4. Add Trendy Details (Without Losing the Elegance)
You don’t need ten different trends on ten fingers. Pick one star detail and let it shine.
Great elegant holiday add-ons:
- Curved C-French in nude + white
- Champagne chrome tips on a milky base
- Velvet finishes in garnet, wine, emerald, or silver
- Aura glow with milky bases
- Tiny pearls, gold studs, or a single bow charm
- One 3D ornament or gem accent nail
If you love more than one trend, split them by manicure: one mani for everyday, one for that big party.
5. Talk to Your Nail Tech Like a Pro
Walking in and saying “something cute for the holidays” sets you up for chaos. Try this instead:
- Bring 2–3 inspo photos, not your whole camera roll
- Say the vibe out loud:
- “Elegant holiday, office-friendly.”
- “Rich and glam for NYE, not too long.”
- List your hard boundaries:
- Short only
- No chunky glitter
- Must look good in photos
- Ask:
- “Which of these works best with my nail length?”
- “How can we make this easier to maintain?”
You walk out with nails you actually love when you pair good inspo + clear words. No more “this is cute, but not what I meant” energy.
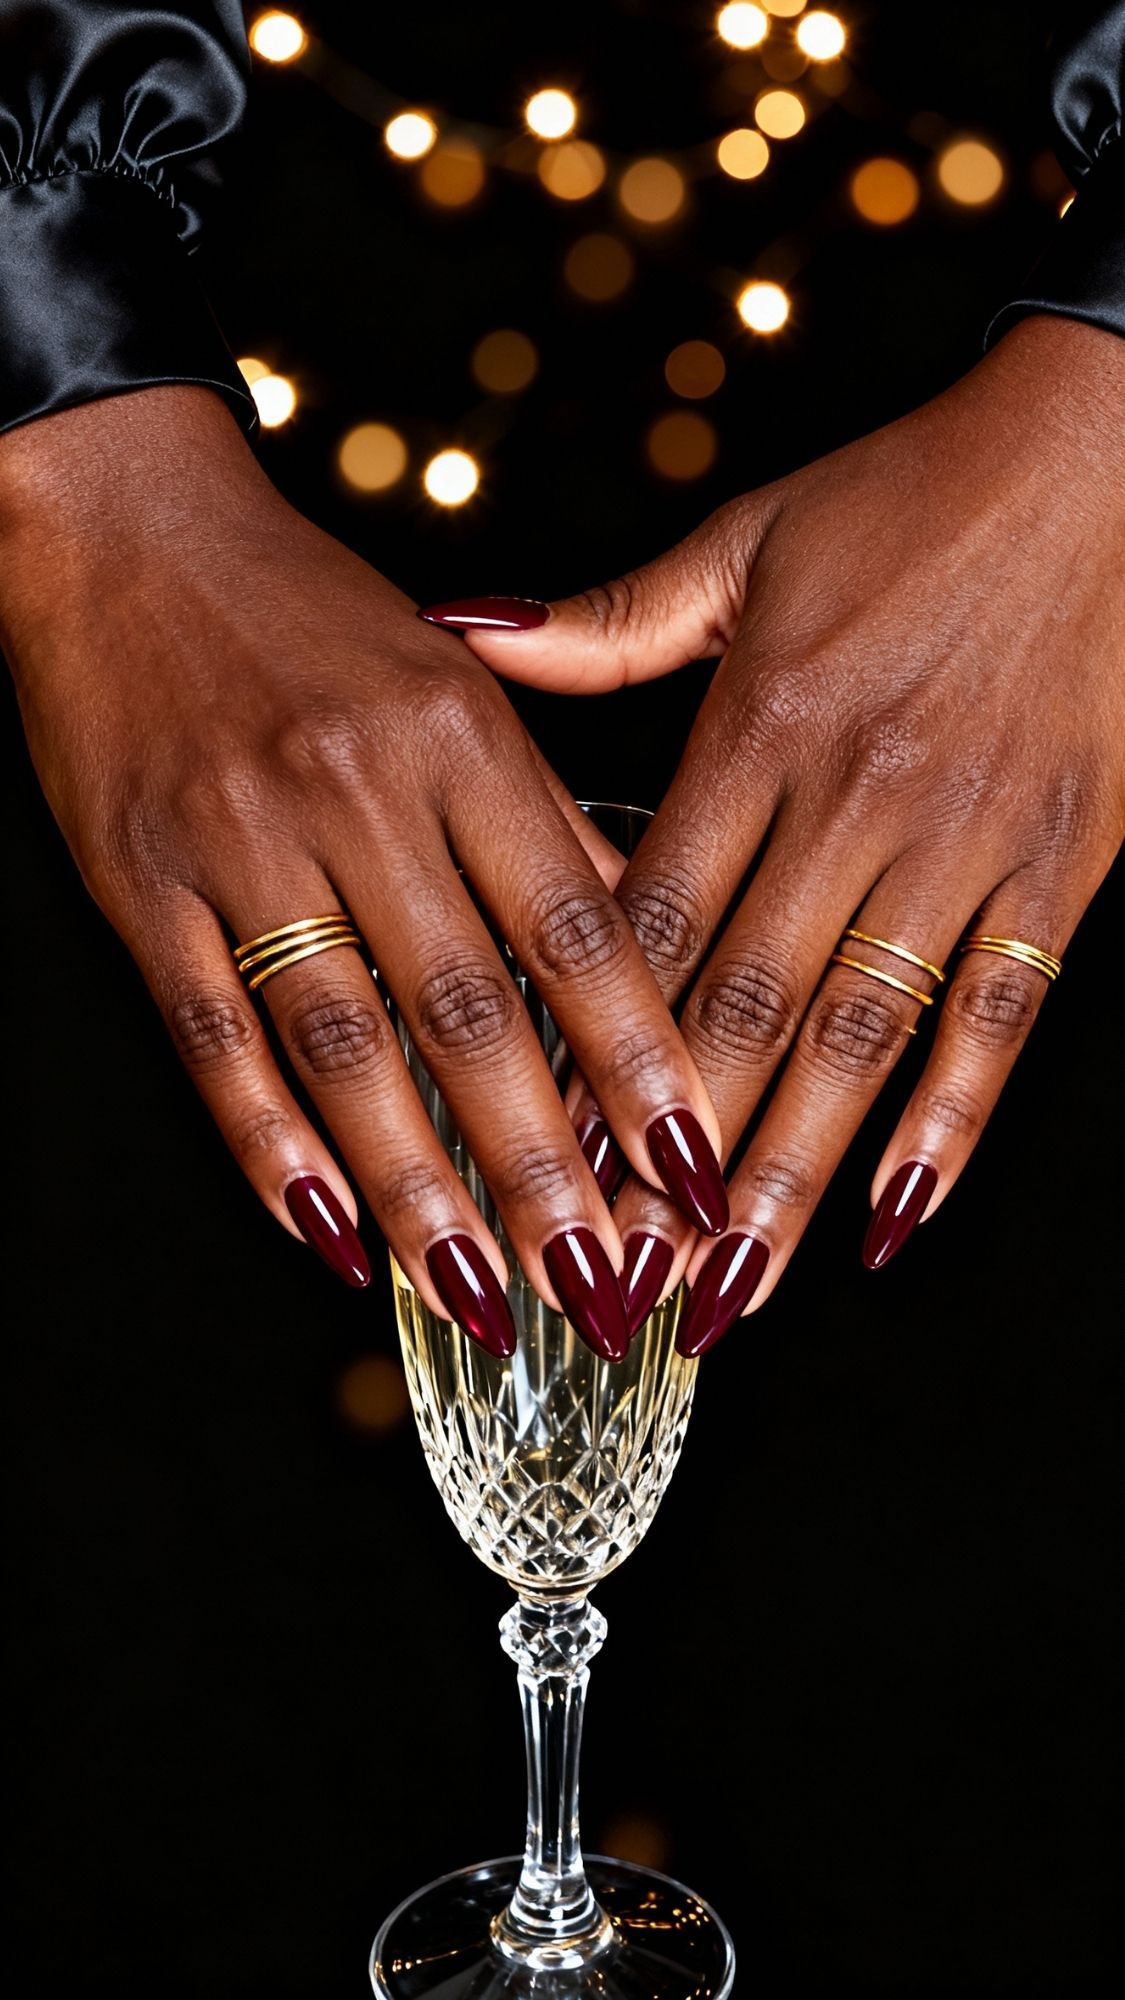
1. Garnet Glass Nails: The New-Age Red for Holiday Parties
If classic bright red nails feel a little too loud for you, garnet glass nails fix that instantly. Think deep wine-red with a glossy, jelly-like finish that looks almost like stained glass when the light hits. The shade still says “holiday,” but it feels grown, rich, and a little mysterious instead of candy-cane cute. When you wrap your fingers around a champagne glass or snap a mirror selfie, that deep garnet tone gives you main-character energy without screaming for attention.
Why this look feels so elegant:
- The sheer-but-deep finish gives your nails depth, not just flat color.
- Garnet sits in that perfect sweet spot between classic red and vampy burgundy.
- The super glossy top coat makes everything look expensive and polished.
Best length and shape for garnet glass nails:
- Short almond – soft, feminine, and perfect for parties and everyday life.
- Short squoval – easy to manage if you type a lot, cook, or live in your DMs.
- If you love drama, you can take it to medium almond, but you don’t need length for this to look luxe.
When to wear it:
- Office parties where you still want to look professional.
- Dressy dinners and date nights with candles and low light.
- New Year’s Eve when you want glam without glitter overload.
How to ask your nail tech (or do it yourself):
- Say you want “garnet glass nails – deep wine jelly, super glossy, short almond (or squoval)”.
- Ask for:
- A sheer, deep red or wine jelly polish layered until it looks rich but still dimensional.
- Two glossy top coat layers so the finish looks glassy, not dull.
- DIY version:
- Start with a clear base coat.
- Use a jelly or sheer wine polish in 2–3 thin coats.
- Finish with a thick, high-shine top coat and cap the free edge so it lasts.
Styling tips:
- Pair these nails with gold jewelry, black or cream outfits, and a bold lip.
- For daytime, they still look chic with sweaters and jeans.
- At night, they pick up every bit of candlelight and look like tiny garnet stones on your fingertips.
Ever wanted nails that say, “Yes, I have my life together and also I might own a vintage red lipstick collection”? That’s exactly what garnet glass nails give you.
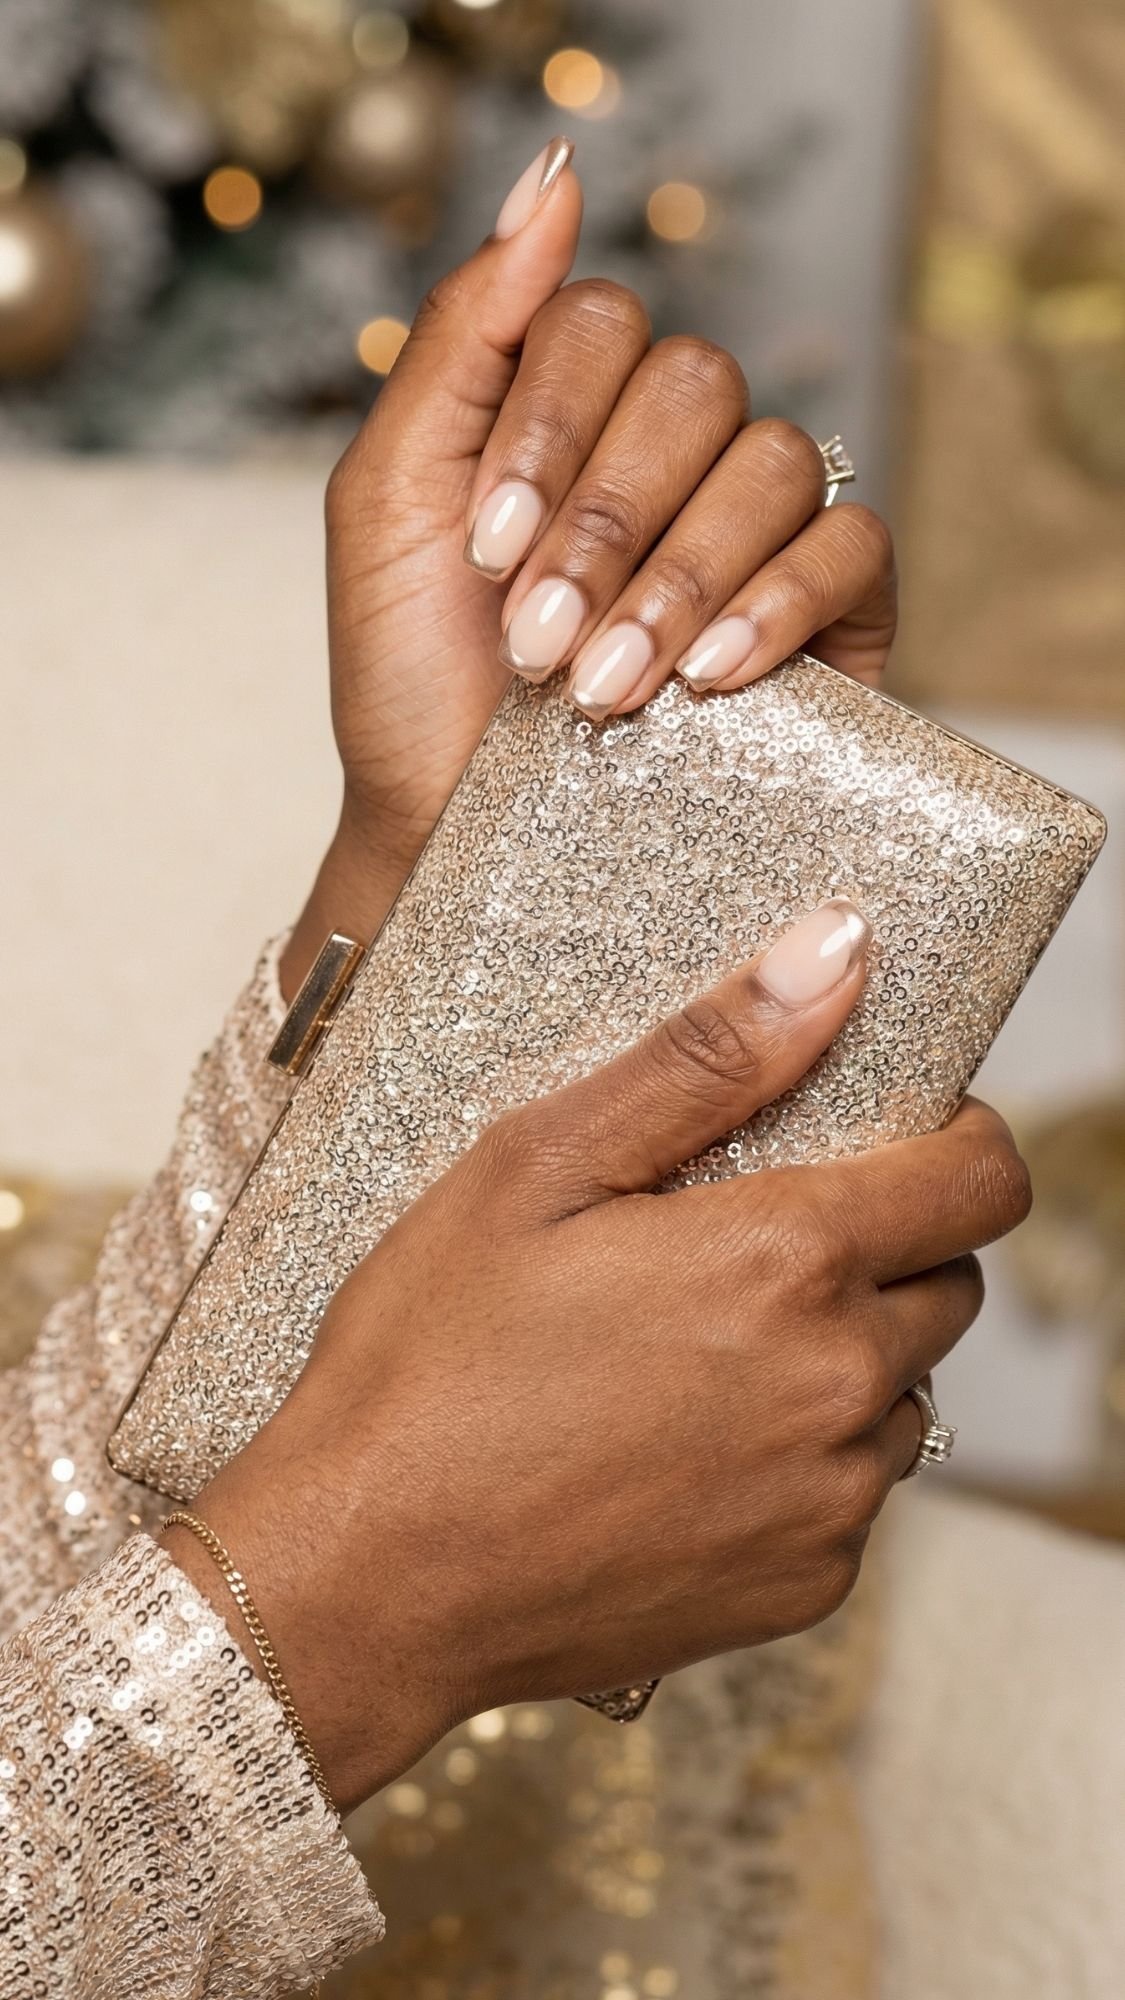
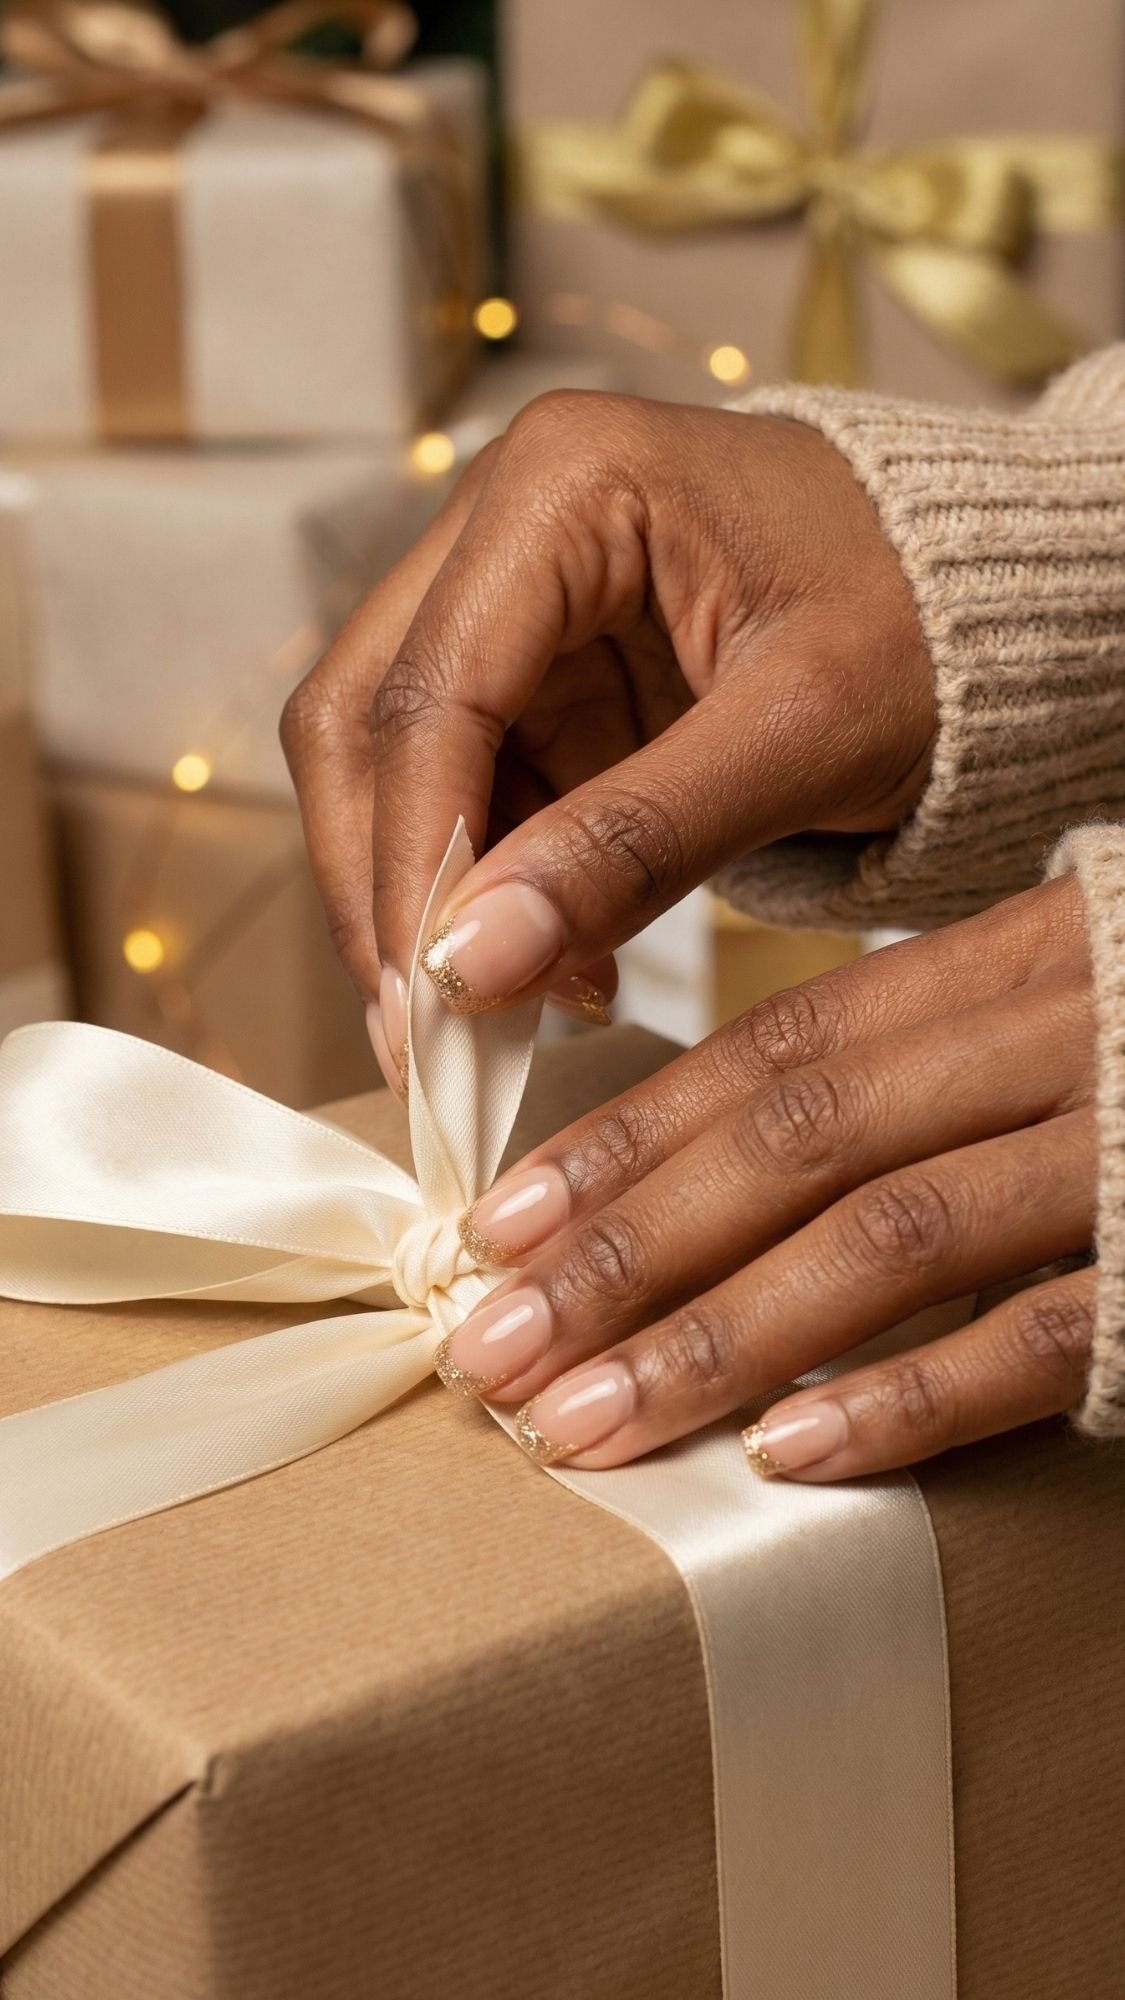
2. Champagne Chrome French Tips for Subtle Sparkle
If you want your nails to look festive without committing to full glitter drama, champagne chrome French tips hit that sweet spot. Picture a soft nude or milky base with a slim, reflective champagne tip that only really shows off when the light hits. Your nails still feel clean and neutral, but when you raise a glass or type on your laptop, the chrome catches the light and quietly flexes. It gives you “I have a holiday bonus and a calendar full of events” energy without looking overdone.
Why this look stays classy
- The chrome only lives on the tip, so the design stays minimal.
- Champagne reads softer than silver, so it flatters every skin tone.
- The combo of nude + metallic feels polished enough for work and glam enough for night.
You basically get the best of both worlds: office-approved nails that still show up in flash photos.
Best base + shape combo
For the most elegant version, ask for:
- Base colors:
- Sheer milky nude
- Soft pink-beige
- Light neutral nude close to your skin tone
- Shapes:
- Short squoval – easy to live with, very “clean girl” chic
- Short almond – a bit softer and more feminine
- Keep the tips thin and curved, not thick and chunky
If you ever looked at a French manicure and thought, “Cute, but a little basic,” this chrome version answers that.
How to ask your nail tech (or do it yourself)
Use clear language so your tech gets the vision right away:
- Say you want “champagne chrome French tips on a milky nude base, very thin tip line, short length.”
- Ask them to:
- Build a sheer nude or milky base first.
- Use chrome powder or chrome gel in a soft champagne tone just on the tips.
- Seal everything with a super glossy top coat so the chrome really reflects.
DIY idea:
- Apply base coat.
- Paint 1–2 thin coats of sheer nude or milky pink.
- Use chrome polish or a chrome powder on the tips only (you can cheat with French tip guides if you need).
- Finish with a glossy top coat and clean up any edges with a brush dipped in remover.
When this mani shines (literally)
- Office parties where you need professional-but-festive nails.
- Holiday dinners and date nights where you dress up a little but still want soft glam.
- New Year’s Eve if you prefer a chic, neutral outfit with metallic accents.
This design basically says, “Yes, I showed up to the holidays, but I kept my standards.”

3. Curved C-French in Classic Nude and White
If you love a French manicure but feel like the traditional straight line looks a little… 2008, the curved C-French quietly upgrades everything. Instead of a flat band across the tip, the white follows a soft curve along the sides of your nail, almost like a subtle “C” hugging the edges. You get the same clean, elegant vibe, but it feels modern and intentional, not like you just picked the default option at the salon.
Why the curved C-French feels so chic
- The curved line hugs your nail shape, so everything looks softer and more flattering.
- Nude + white stays timeless and versatile for every holiday event.
- The design looks expensive in photos, especially when you hold a glass, a clutch, or a wrapped gift.
You still get that “I always have my life together” French energy, just with more style and personality.
Best base, colors, and shapes
For the most elegant result, keep everything simple and clean:
- Base colors:
- Sheer pink
- Soft nude that matches or flatters your skin tone
- Milky neutral beige
- Tip color:
- Crisp white for the classic look
- Very soft off-white if you want something gentler
- Shapes that work best:
- Short to medium almond – shows off the curve beautifully
- Short squoval – great if you like something practical but polished
Ask yourself, “Do I want this to look like a French mani on purpose or like my natural nails just happen to be perfect?” The curved C-French can vibe both ways depending on how sheer you keep the base.
How to ask your nail tech (or try it at home)
At the salon, use these exact words so nothing gets lost:
- “I’d love a curved C-French—soft nude or sheer pink base, with a thinner white tip that curves along the sides of the nail, not a straight line.”
Ask them to:
- Shape your nails into short almond or squoval.
- Apply 1–2 thin coats of your chosen sheer nude or pink.
- Paint the French tip in a curved motion, following the natural edge of your nail instead of drawing one flat band.
- Keep the white on the thinner side so it looks sleek, not chunky.
If you DIY:
- Use French tip guides or tape as training wheels, then hand-draw the curve on a couple of nails at a time.
- Clean up with a thin brush dipped in remover if the line looks uneven.
When the curved C-French works best
- Work events and office parties where you need classic but polished nails.
- Family gatherings and photos where you want your hands to look clean and elegant.
- Multiple back-to-back events—this mani goes with literally every outfit.
If you want something you can wear for two or three weeks straight without getting tired of it, a curved C-French in nude and white stays classy from the first party to the last leftover-sandwich day.
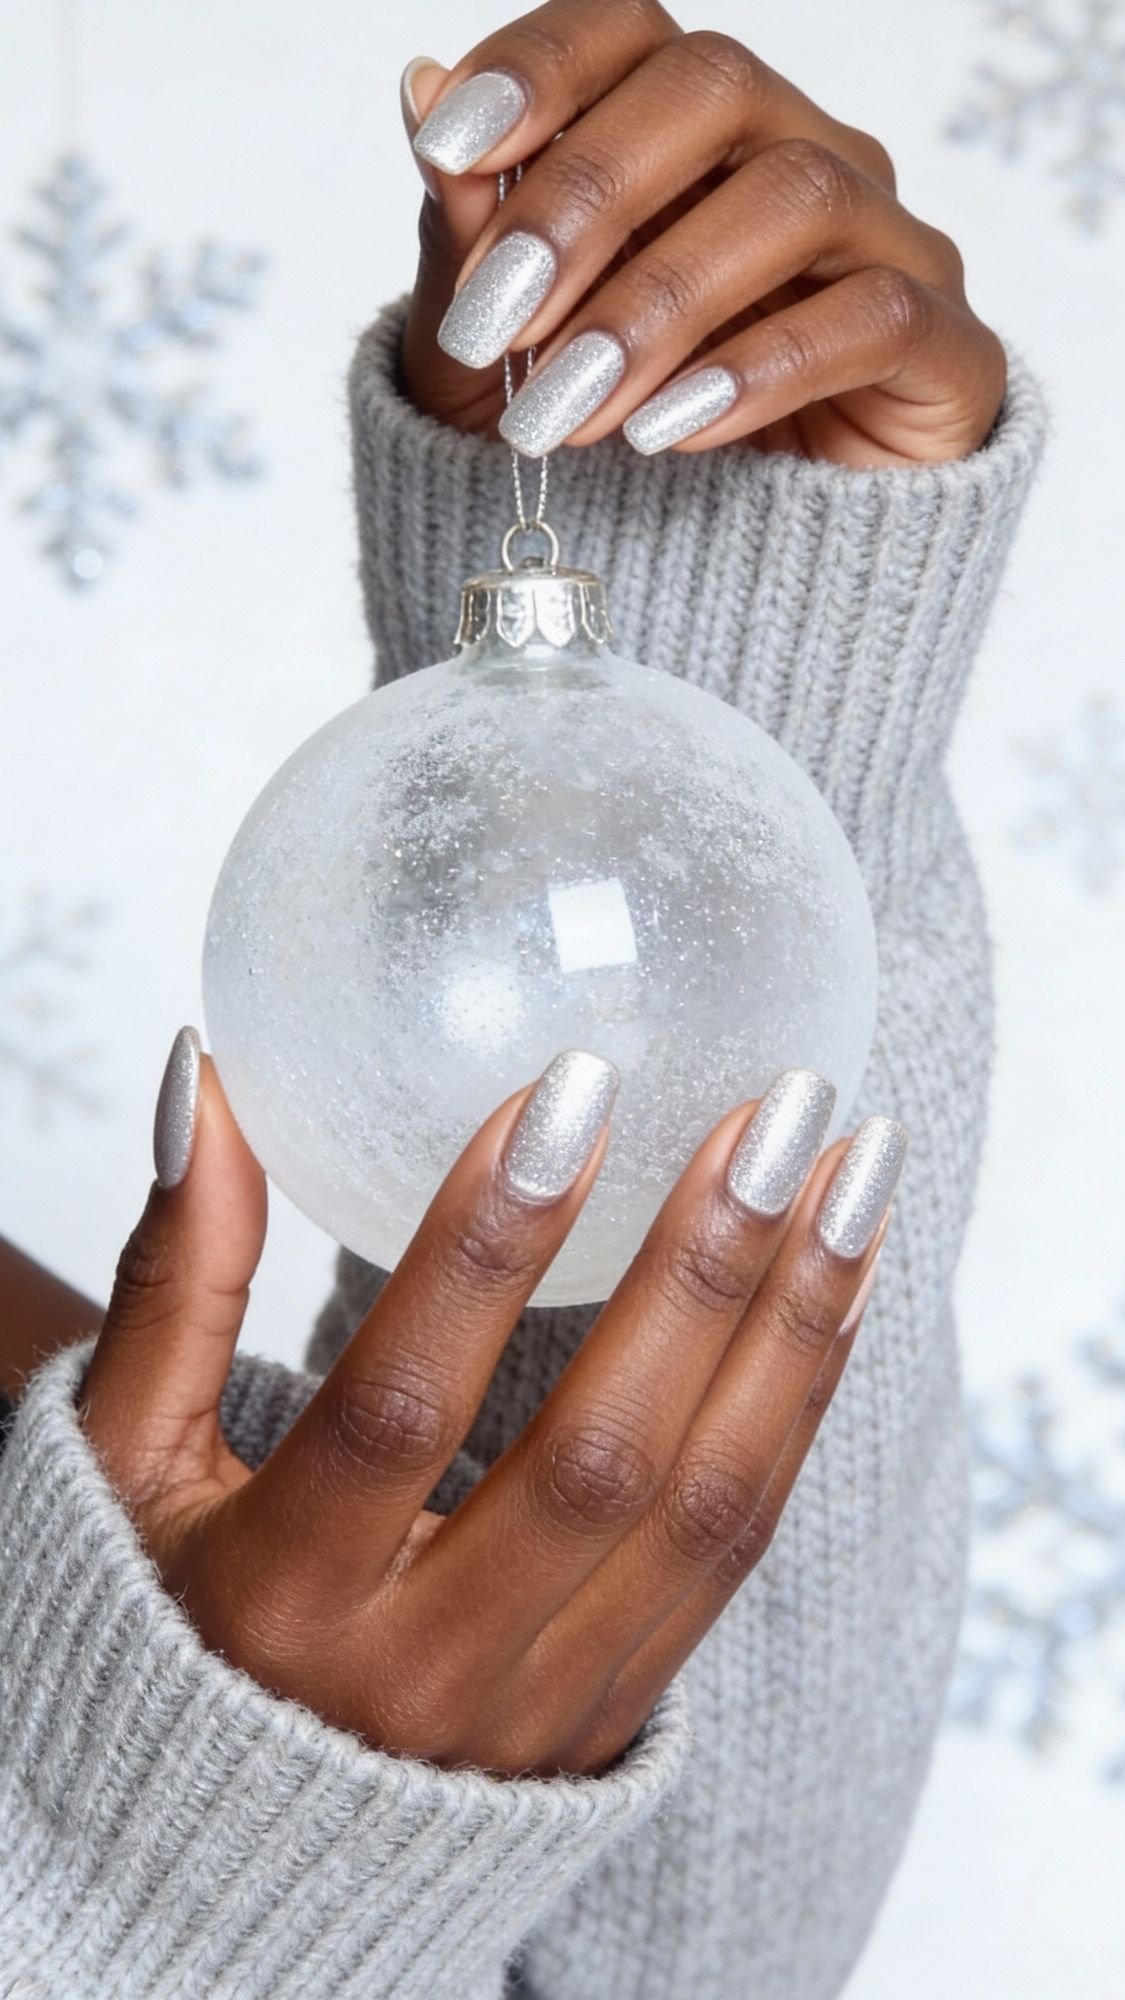
4. Icy Silver Velvet Nails for Snow-Glow Hands
If you want your nails to look like fresh snow under twinkle lights, icy silver velvet nails do that in two coats flat. Velvet polish gives this soft, lit-from-within shimmer that shifts as you move your hands, kind of like you trapped moonlight on your fingertips. Silver keeps everything neutral and classy, so you still slide into any outfit or event without looking like a disco ball.
Why icy silver velvet feels so luxe
- The velvet effect creates a soft, fuzzy glow instead of harsh glitter.
- Silver reads festive but neutral, so it works with gold, silver, or mixed metals.
- The finish catches light in photos and videos, which holiday season loves.
You basically get high-impact nails that still feel wearable with jeans, loungewear, and sequins.
Best length and shape for this look
Velvet nails already bring the drama, so you don’t need claws to make the point:
- Short squoval – perfect if you live in the real world (dishes, typing, packing).
- Short to medium almond – soft, elegant, and extra pretty with shimmer.
If you want “snow queen but still functional,” keep them short to medium. Let the finish do the heavy lifting.
How to ask your nail tech (or do it yourself)
At the salon, keep it simple but specific:
- Ask for “short silver velvet nails—icy, not chunky glitter, very soft shimmer.”
Then ask them to:
- Shape your nails into short squoval or almond.
- Use a silver velvet or magnetic shimmer polish that gives that soft-texture look.
- Adjust the light line (if it’s a magnetic formula) so it runs down the center or diagonally for more depth.
- Seal everything with a glossy top coat to protect the effect.
DIY plan:
- Apply a base coat.
- Use a velvet or magnetic silver polish, one nail at a time.
- If it’s magnetic, hold the magnet over the nail as directed to create that soft, shimmery pattern.
- Finish with a top coat and let it fully dry before you start touching, well, everything.
When to choose icy silver velvet nails
- Winter weddings where you want glam nails that don’t clash with your outfit.
- Holiday dinners when you dress up but still keep your wardrobe neutral.
- NYE when you want glow without full-on glitter overload.
If you want your nails to look like they RSVP’d as “frosted chic” to every event on your calendar, icy silver velvet nails handle that for you.
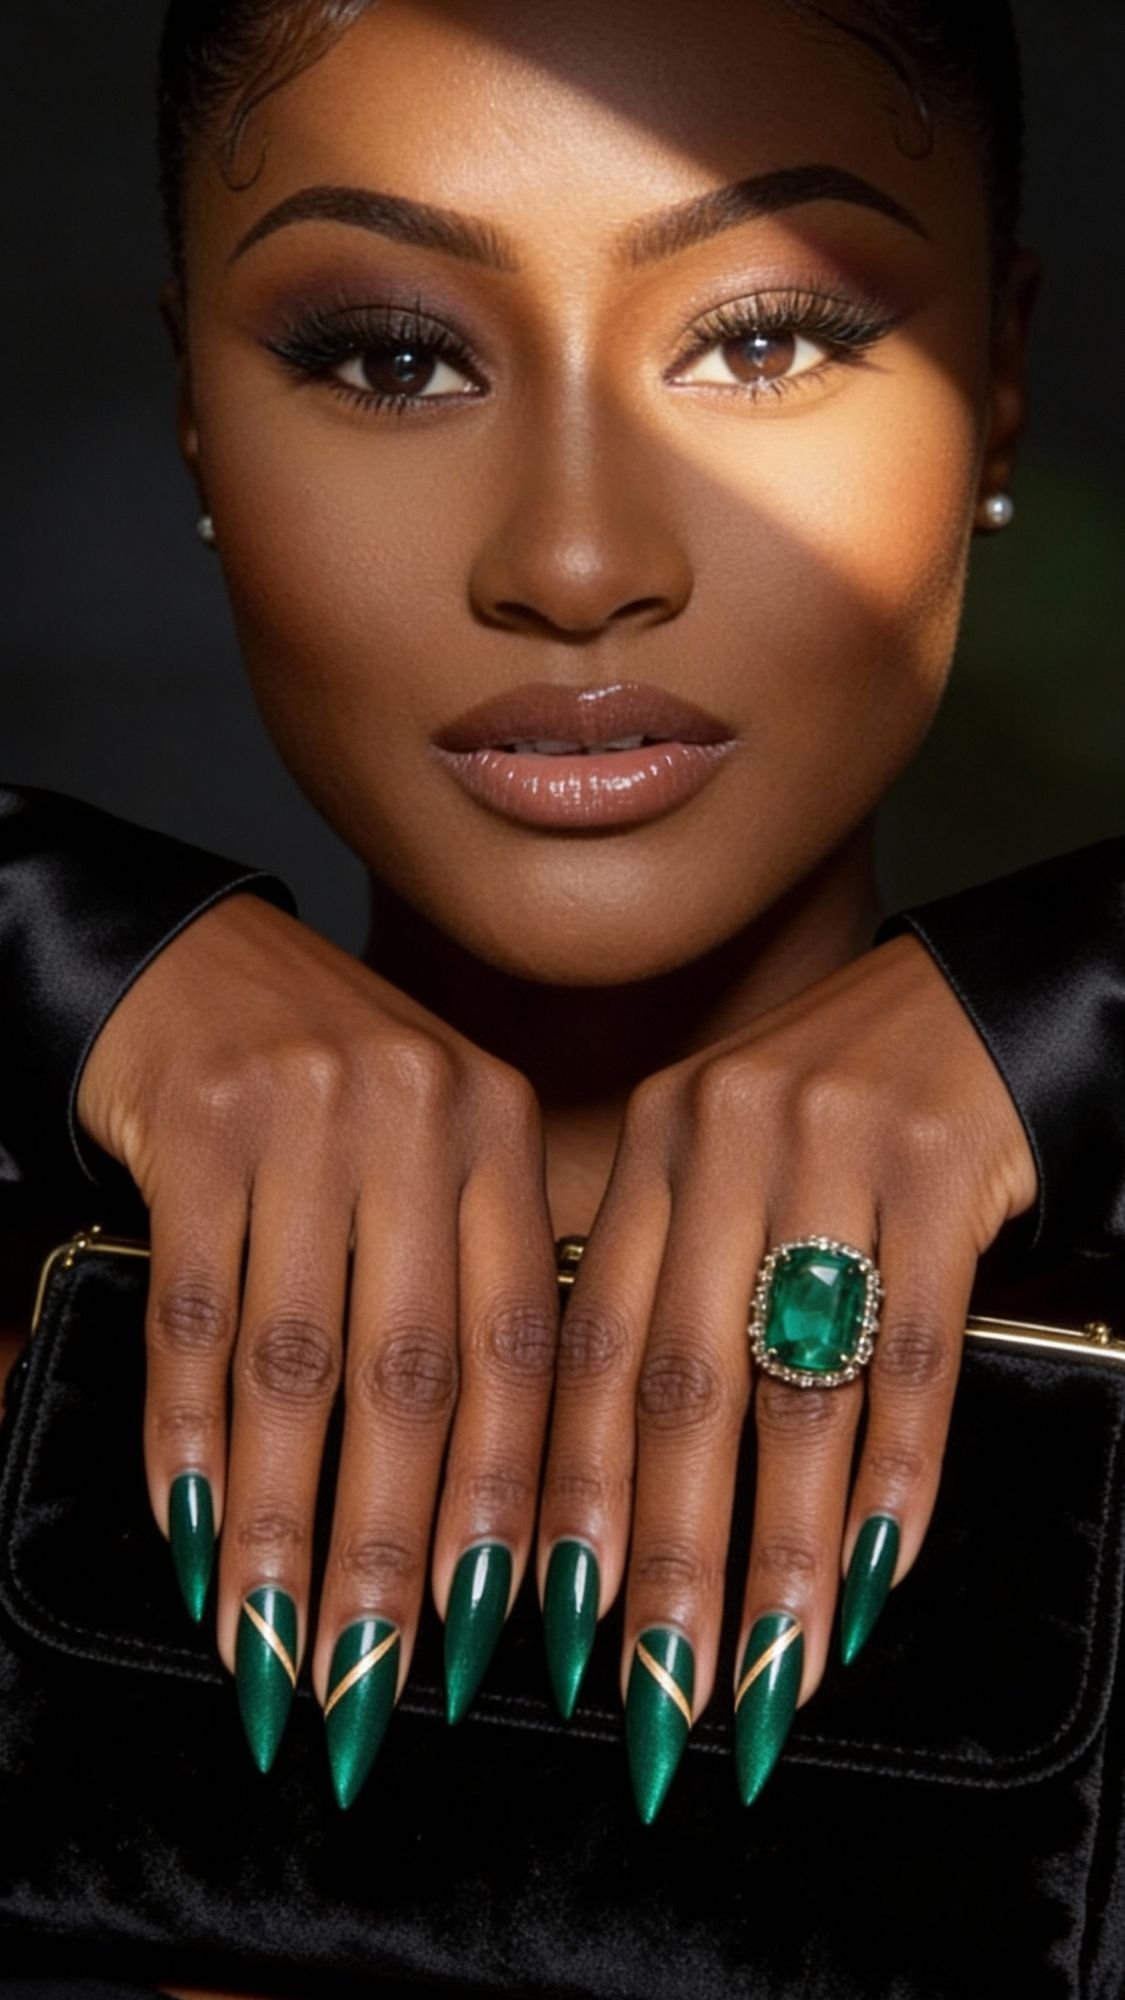
5. Emerald Cat-Eye Nails That Look Like Party Jewelry
If you want your nails to look like actual jewelry, emerald cat-eye nails do that without even trying. The polish uses magnetic pigments that pull into a bright, shifting line of light, so every time you move your hands, your nails flash like tiny gemstones. It gives “I own something from a luxury jewelry counter” energy, even if you absolutely do not.
Why emerald cat-eye feels like built-in accessories
- The magnetic stripe catches light the way a faceted stone does.
- Deep emerald shades flatter every skin tone and scream holiday chic.
- The finish looks extra dramatic in low light, flash photos, and candlelit rooms.
You get instant glam without touching a single ring, which helps a lot on nights when you run late and throw your outfit together in five minutes.
Best length and shape for cat-eye drama
You don’t need super-long claws, but a little length helps the effect show:
- Medium almond – the perfect balance of glam and wearable.
- Medium coffin – extra dramatic, great for NYE or black-tie events.
- Short almond still works if you want subtle gemstone vibes without extra length.
Ask yourself, “Do I want my nails to look pretty, or do I want them to look expensive?” If you lean toward expensive, go for a bit of length.
How to ask your nail tech (or do it yourself)
At the salon, say exactly what you mean so you don’t walk out with a random green glitter:
- “I’d love emerald cat-eye nails—deep green base with a strong cat-eye line on each nail, medium almond shape.”
Then ask your tech to:
- Shape your nails into short or medium almond/coffin.
- Use cat-eye magnetic gel in a deep emerald shade.
- Hold the magnet over each nail to pull the shimmer into a diagonal or center stripe (you can choose the angle you like most).
- Finish with a high-shine top coat so the effect looks glossy and rich.
DIY version:
- Apply your base coat first.
- Paint one thin coat of emerald cat-eye polish on each nail.
- Work one nail at a time for the second coat: paint, then immediately hold the magnet above or at the side of the nail to create the stripe.
- Lock it all in with a glossy top coat and let everything cure or dry fully.
When emerald cat-eye nails make the most sense
- Black-tie events and formal dinners where you want full glam nails.
- Holiday parties and NYE when you wear black, gold, metallics, or jewel tones.
- Any time you plan to hold a glass, a clutch, or a microphone in photos and you want your nails to show up.
If you want your nails to look like you layered an emerald ring on every finger, emerald cat-eye nails do that with zero effort (and zero jewelry budget 😌).
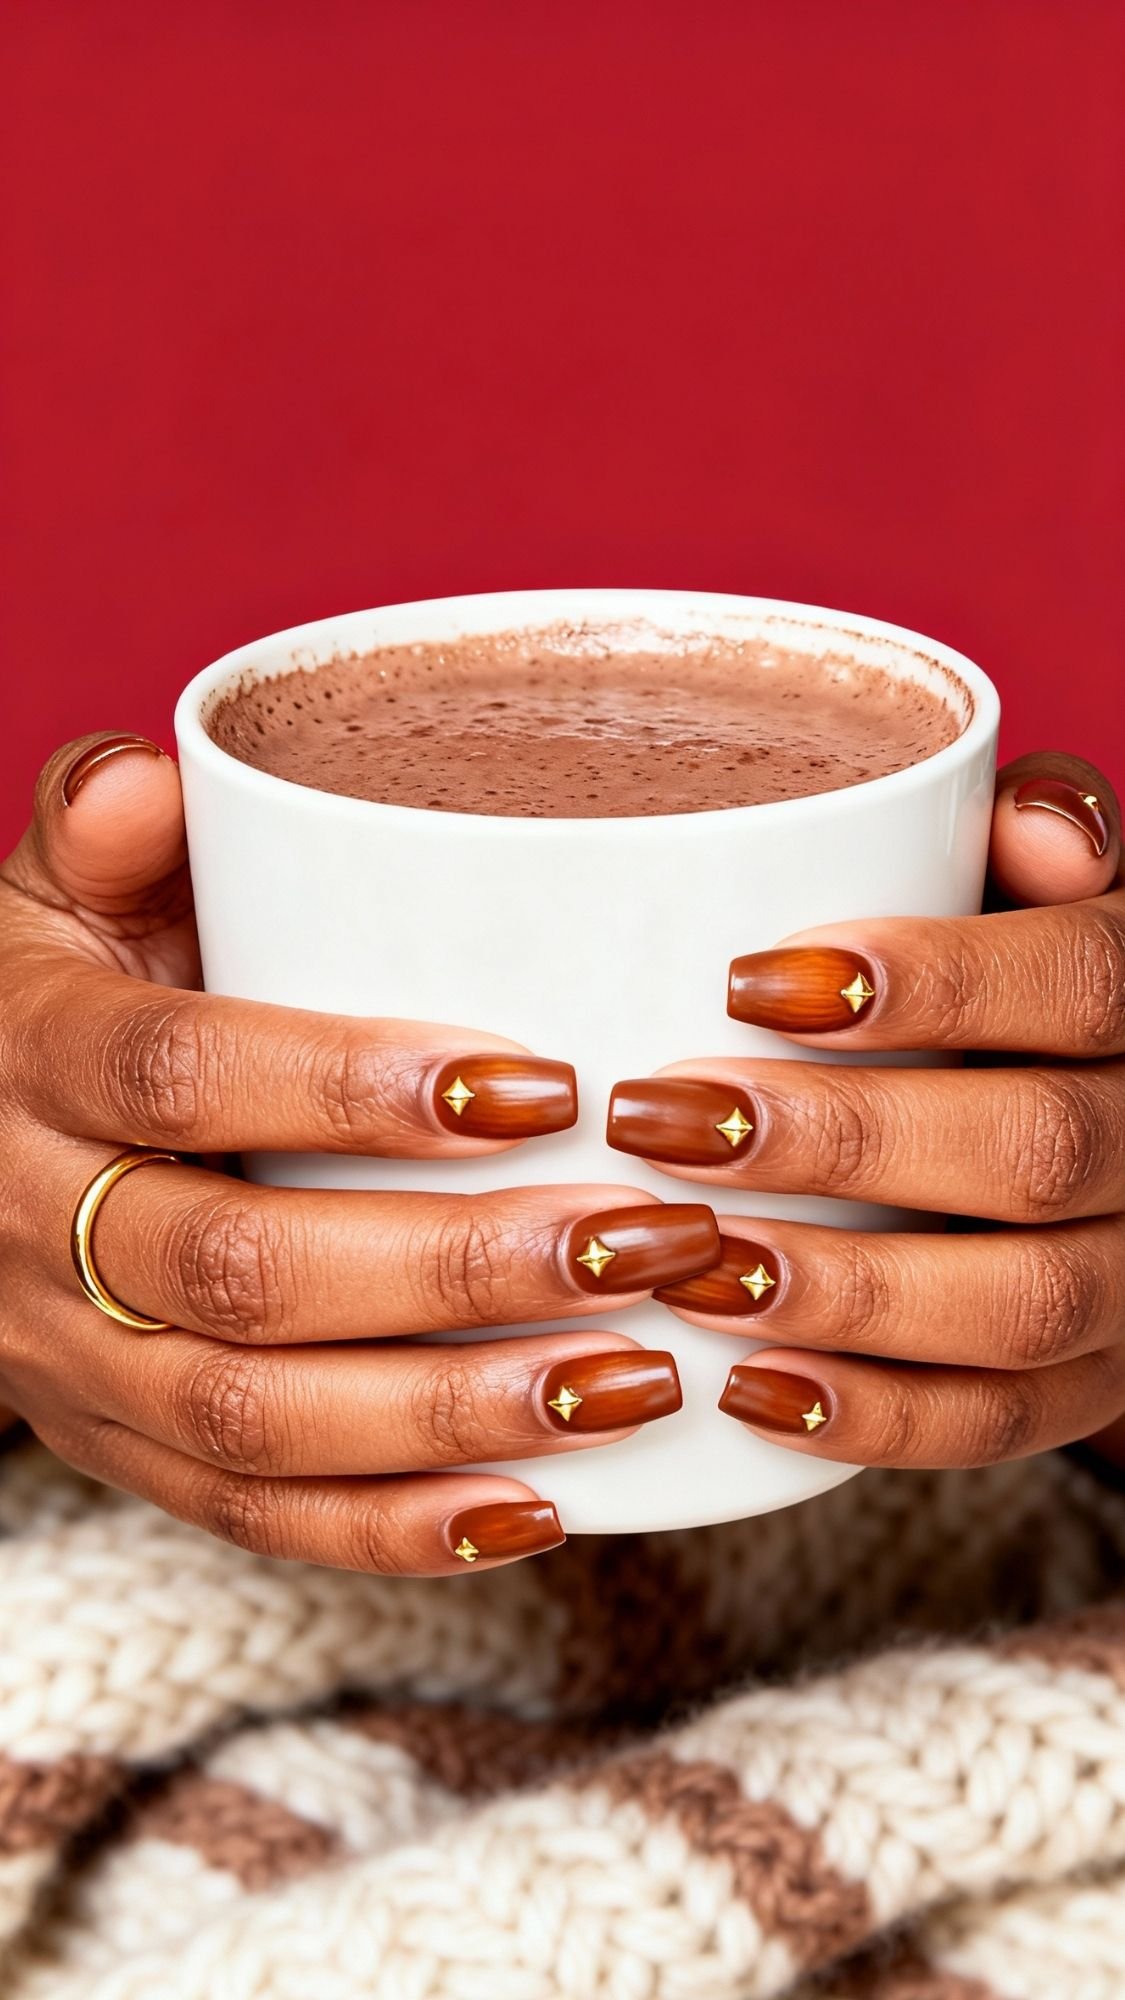
6. Hazelnut Neutral Nails with Tiny Gold Studs
When you want your nails to look put-together every single day of December—school runs, Zoom calls, date nights, Target runs—hazelnut neutral nails with tiny gold studs never miss. The hazelnut shade sits right between nude and chocolate, so it feels warm and cozy without disappearing on your hands. Then the gold studs add just enough detail to say, “Yes, I remembered it’s holiday season,” without screaming it.
Why this look feels effortlessly elegant
- Hazelnut tones flatter a wide range of brown skin shades and look rich, not flat.
- Tiny gold studs bring subtle interest instead of loud nail art.
- The look pairs easily with gold jewelry, cozy knits, and everyday outfits, so you never feel overdone.
If you want nails that behave like a reliable capsule wardrobe piece, this is it.
Best shades and shapes for hazelnut + gold
To keep everything soft and chic, stick with:
- Shades to ask for:
- Hazelnut brown
- Caramel latte
- Soft mocha with warm undertones
- Shapes that work best:
- Short squoval – super practical and clean
- Short almond – adds a little softness and elegance
You can do studs on every nail for a tiny hint of glam, or just on one or two accent nails if you like a more minimal look.
How to ask your nail tech (or do a simple DIY)
At the salon, you can keep it this straightforward:
- “Can we do a hazelnut brown neutral on short squoval nails with tiny gold studs near the cuticles?”
Then ask them to:
- Shape your nails short and neat (squoval or almond).
- Apply 2 thin coats of a warm hazelnut or caramel-brown polish.
- Place tiny round gold studs close to the cuticle line—either centered on each nail or just on accent nails.
- Seal everything with a glossy top coat so the studs stay put and don’t catch.
DIY version:
- Paint your base coat + 2 coats of hazelnut or caramel brown.
- While the polish or top coat still feels a bit tacky, use a dotting tool or toothpick to place tiny gold studs where you want them.
- Press gently, then add another thin layer of top coat over the entire nail to lock them in.
When hazelnut neutral nails make the most sense
- Busy weeks when you have work, errands, and the occasional event all stacked together.
- Travel days when you want your nails to go with multiple outfits.
- Minimalist, cozy holiday vibes—think knit sweaters, long coats, and hot drinks in every photo.
If you want nails that quietly say, “I’m polished and I pay attention to details,” without trying too hard, hazelnut neutrals with tiny gold studs do the job all season.
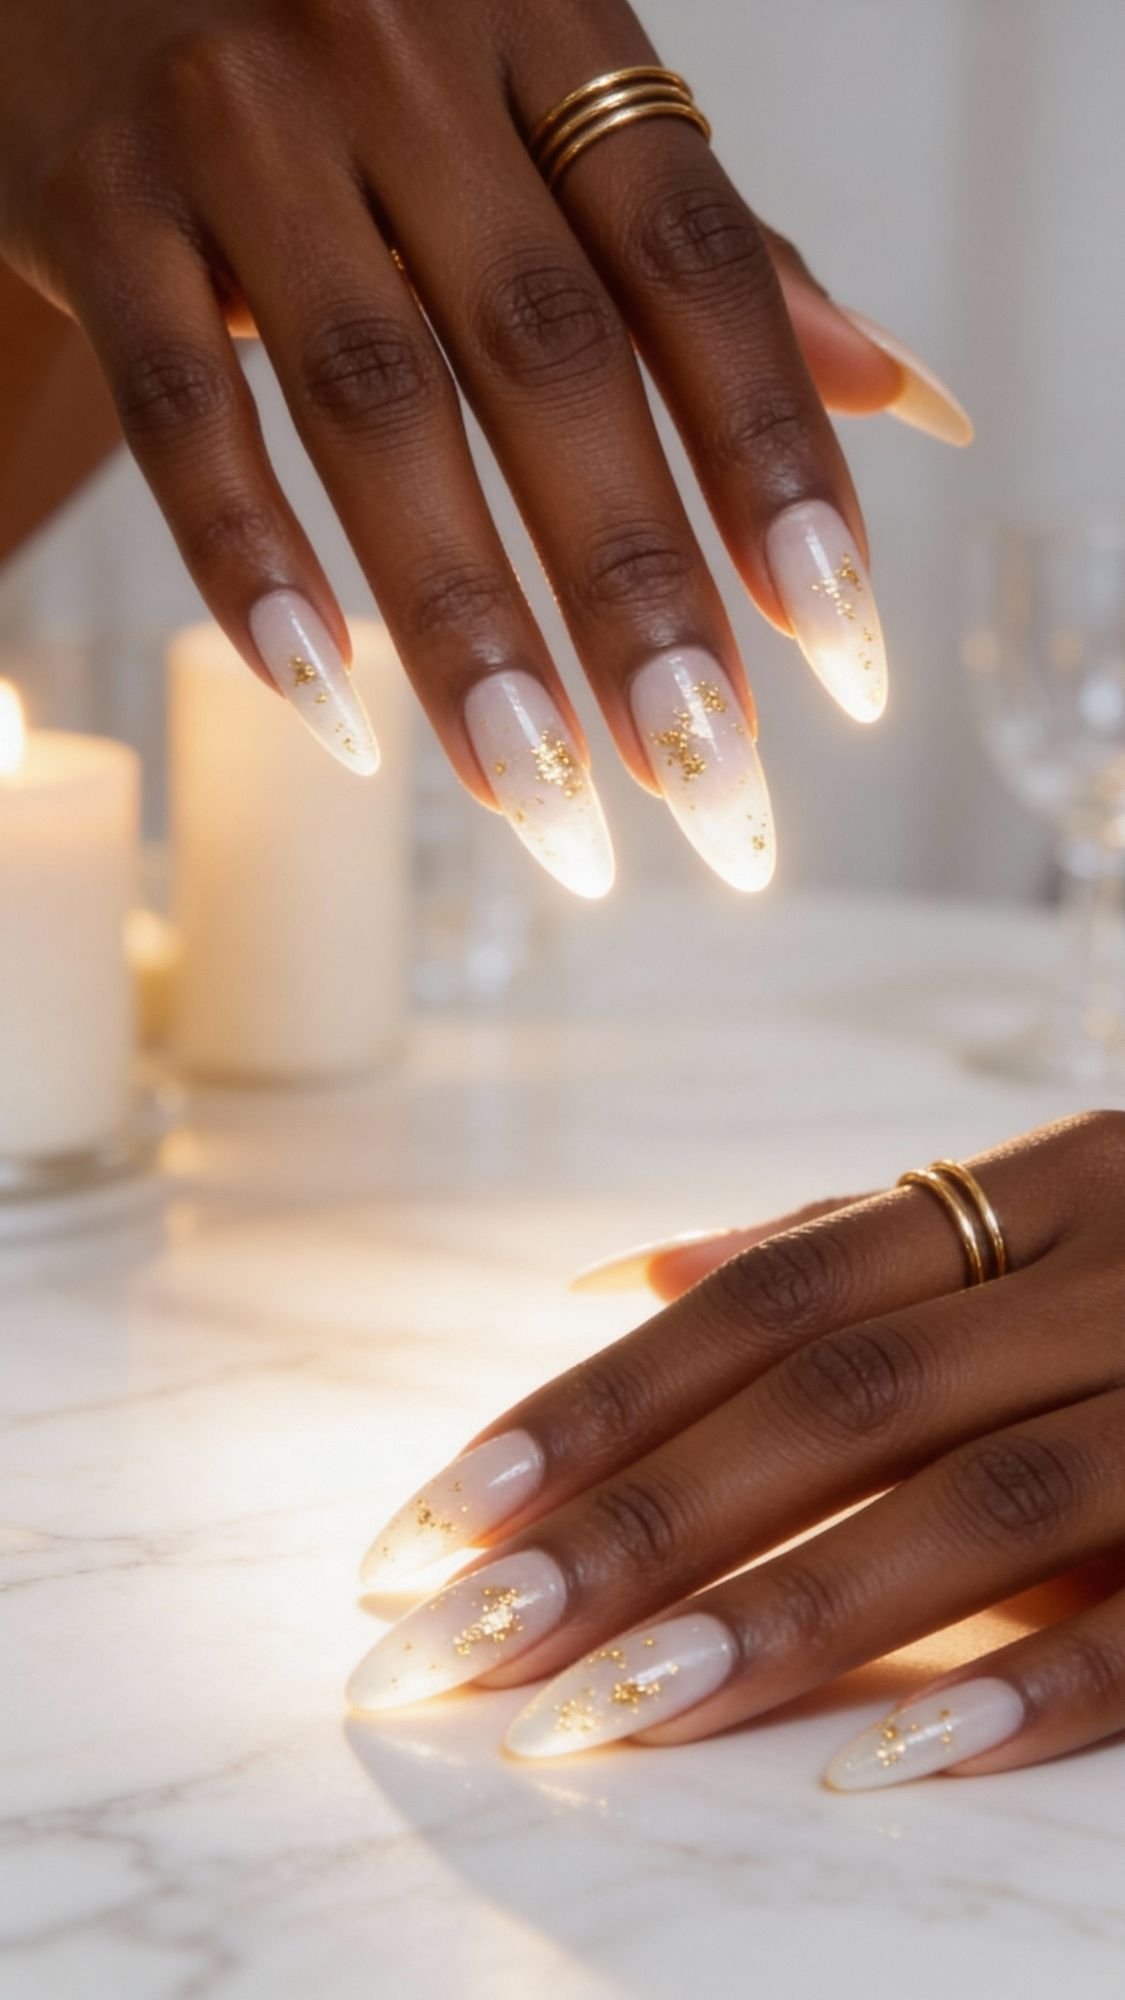
7. Milky Aura Nails with Soft Gold Foil Flecks
If you want your nails to look soft, glowy, and expensive without going full sparkle, milky aura nails with soft gold foil flecks hit that sweet spot. Picture a sheer milky base that fades into a subtle halo of color, then tiny bits of gold foil floating like shimmer in a latte. The overall look feels dreamy and delicate, but it still reads holiday-ready when you hold a mug, a clutch, or someone’s hand in photos.
Why milky aura nails feel so “quiet luxury”
- The aura effect gives your nails a soft glow instead of harsh contrast.
- The milky base keeps everything clean, glossy, and neutral.
- Tiny gold foil flecks add just enough festive sparkle without turning your nails into glitter bombs.
This mani basically says, “Yes, I care about details, but no, I don’t need to yell about it.”
Best color combos and shapes
You can keep the look super neutral or add a hint of color in the aura:
- Base:
- Milky white
- Sheer off-white or creamy nude
- Aura glow:
- Soft champagne
- Blush pink
- Very pale gold
- Shapes:
- Short to medium almond – perfect for soft, diffused designs
- Short squoval – practical but still pretty with a milky base
If you want nails that look good with literally every outfit, this combo wins.
How to ask your nail tech (or do a simplified DIY)
At the salon, you don’t need a whole speech—just clear details:
- “Can we do milky aura nails with a soft champagne or blush glow and tiny gold foil flecks, short almond?”
Ask them to:
- Apply a sheer milky base first.
- Use airbrush, sponging, or soft brush blending to create a subtle halo in the center or near the tip of each nail.
- Add tiny torn pieces of gold foil near the tip, the aura area, or slightly scattered.
- Top everything with a smooth, glossy top coat so the foil lies flat.
DIY version (simplified but still cute):
- Apply 1–2 coats of sheer milky white.
- Dab a tiny bit of champagne or blush polish in the center or near the tip, then blend it out with a sponge or fluffy brush for a soft halo.
- Place small pieces of gold foil on slightly tacky polish where you want them.
- Seal with a thick, glossy top coat and smooth everything out.
When to pick milky aura nails with gold flecks
- Holiday date nights when you want something romantic and soft.
- Winter brides or wedding guests who need elegant-but-subtle nails.
- Multi-event weeks where you bounce between work, family dinners, and parties.
If you want your nails to glow softly in every lighting situation—from office overheads to fairy lights—milky aura nails with soft gold foil flecks stay pretty and polished the whole time.
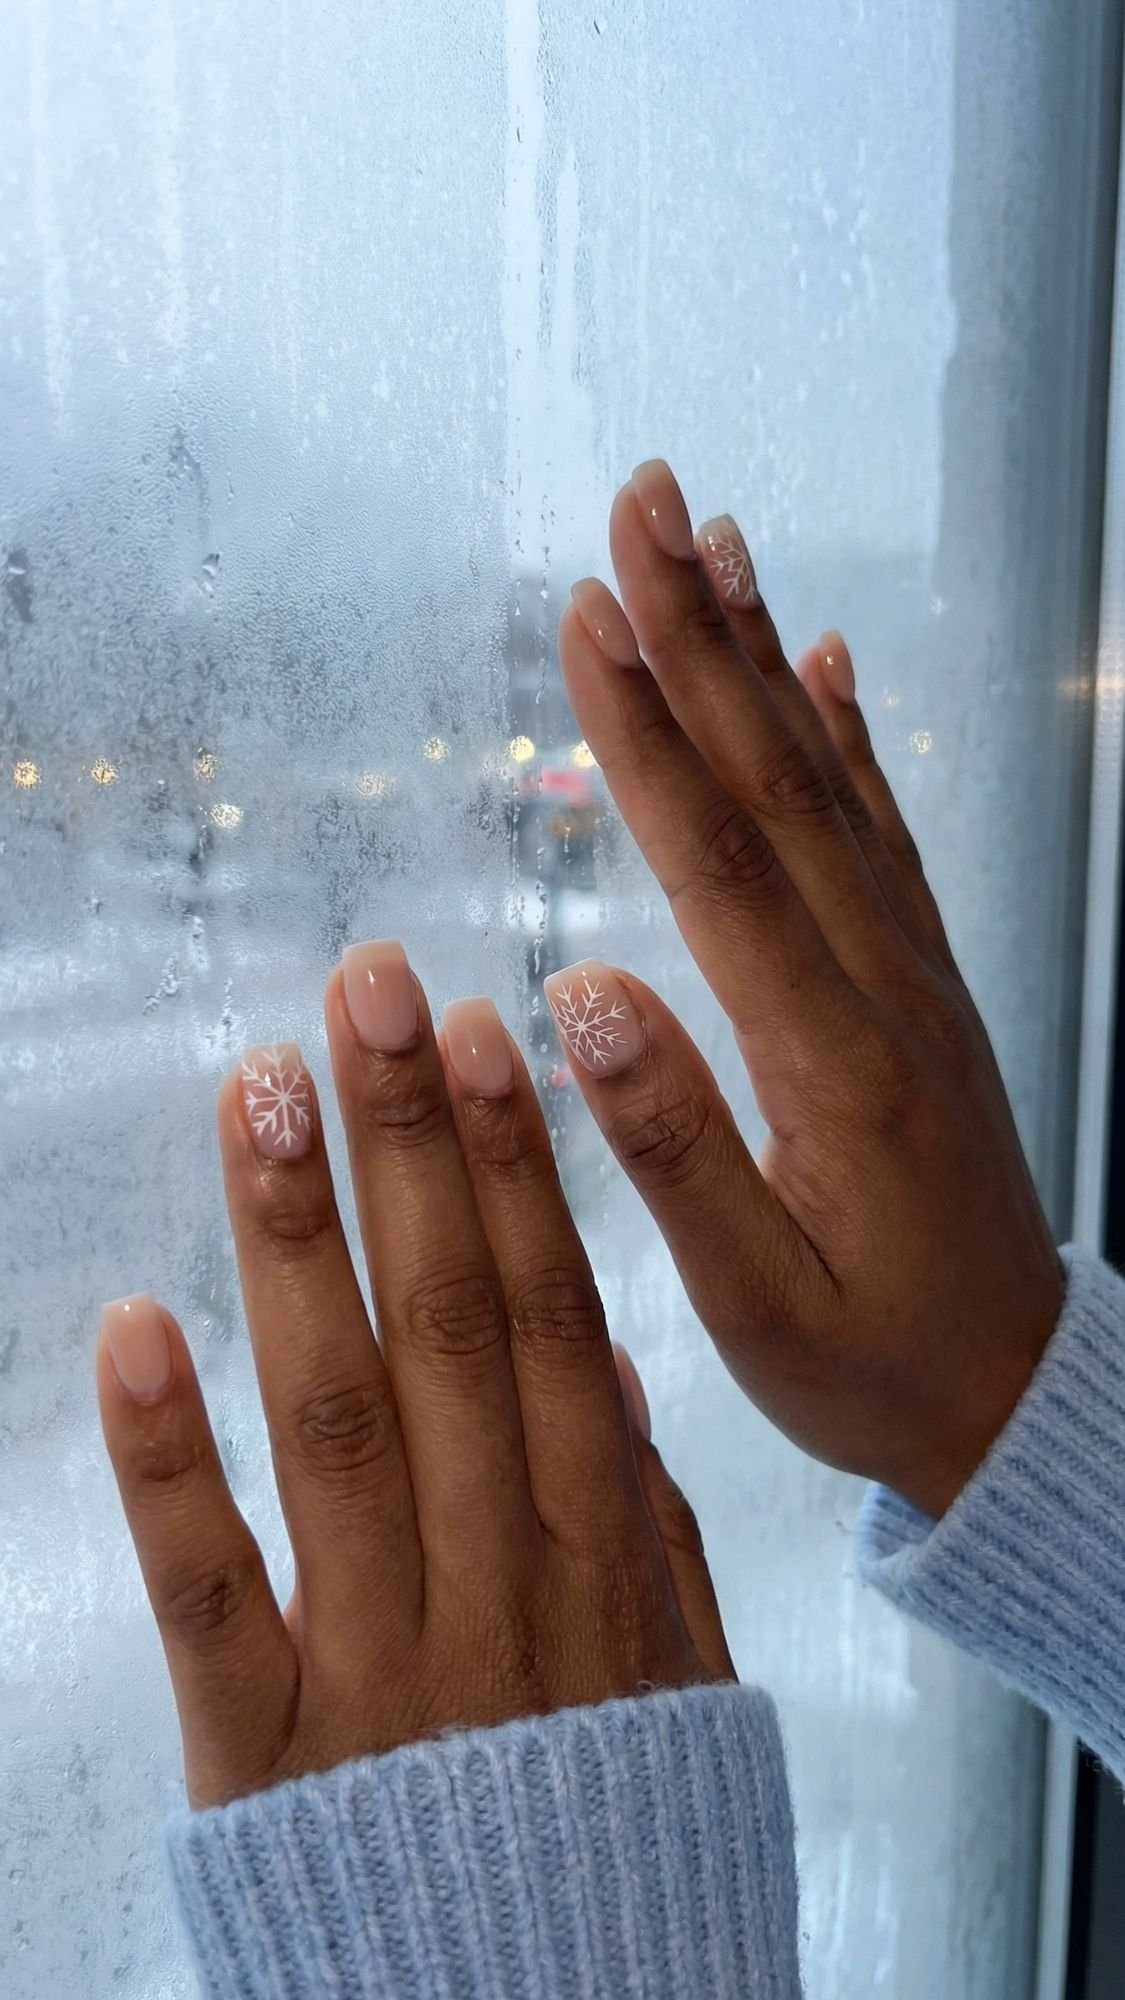
8. Negative Space Snowflake Nails for Minimalists
If full-on Christmas nail art makes you cringe a little, negative space snowflake nails give you a softer, grown-up way to play with winter themes. Instead of covering the whole nail in designs, you keep most of the nail sheer or nude and let a few tiny, delicate snowflakes float over the top. The result feels clean, airy, and minimal—more “Scandi winter Pinterest board” than “Santa’s workshop.”
Why negative space snowflakes stay elegant
- You let your natural nail peek through, so the design never looks heavy.
- Tiny, fine-line snowflakes read as delicate details, not cartoon stickers.
- The look works for people who want holiday nails but still need them to blend into everyday outfits.
Think of this as the nail version of a subtle snowflake necklace—seasonal, but not screaming.
Best base, colors, and placements
You keep the base simple and let the art sit on top like a whisper:
- Base options:
- Sheer nude that matches your skin tone
- Soft milky pink
- Clear base with a very light sheer wash
- Snowflake color:
- Crisp white for classic winter
- Soft silver if you want a hint of shimmer
- Placement ideas:
- One small snowflake on each ring finger only
- A couple of tiny snowflakes clustered near the tip on just two nails
- Mix of single snowflakes and tiny white dots that mimic falling snow
You keep everything small and spaced out so the design looks intentional, not crowded.
How to ask your nail tech (or simplify it at home)
At the salon, skip the vague “snowflake nails” ask and go specific:
- “I’d like negative space snowflake nails—sheer nude base, tiny white snowflakes on just a couple of nails, very minimal.”
Ask them to:
- Apply 1–2 coats of sheer nude or milky pink.
- Use a fine detail brush or nail art pen to draw small, thin snowflakes.
- Add a few micro dots around the snowflakes to mimic falling snow.
- Seal everything with a glossy top coat so the art looks smooth and finished.
DIY idea:
- Paint your sheer base and let it dry.
- Use a white nail art pen, ultra-fine brush, or even a toothpick to draw tiny snowflakes (simple crosses with little branches still look cute).
- Add a few white dots around them.
- Finish with a top coat so the lines look crisp and protected.
When to choose negative space snowflakes
- You work in a more conservative office but still want a hint of holiday.
- You love minimalist style and avoid loud designs.
- You want a mani that still looks chic in January, not just December.
If you want your nails to nod to the season instead of yelling “holiday party,” negative space snowflake nails give you that quiet winter magic.

9. Black Micro-French Tips for Black-Tie Holiday Nights
When you want nails that feel sleek, sharp, and a little mysterious, black micro-French tips always deliver. Instead of a thick white band, you keep a super thin black line along the edge of a nude nail. The line barely shows from far away, but up close it looks graphic, intentional, and insanely chic. It gives “tuxedo, but make it nails” energy and fits every black-tie event without feeling boring.
Why black micro-French looks so elevated
- The micro tip keeps the design delicate instead of chunky.
- Black + nude always reads modern and sophisticated.
- The look works with gowns, suits, slip dresses, and power blazers.
If you want something that feels dressy but not glittery, this is your move.
Best base shades and nail shapes
To keep the look elegant instead of harsh, let the nude do some of the softening:
- Base colors that work best:
- Sheer nude that matches your undertone
- Soft pink-beige
- Milky neutral beige
- Shapes that flatter the micro tip:
- Short square – super chic and very “designer”
- Short squoval – a little softer but still clean
- Short almond if you like a more feminine silhouette
Ask yourself, “Do I want classic chic or editorial chic?” Square leans editorial, almond leans classic.
How to ask your nail tech (or nail it at home)
At the salon, you want to stress the “micro” part so no one gives you thick black bands:
- Say: “I’d love a black micro-French—sheer nude base, very thin black line right on the tips, short square.”
Then ask them to:
- Shape nails short and square or squoval with crisp edges.
- Apply 1–2 coats of a sheer nude or pink-beige.
- Use a thin brush to paint a super slim black line just along the free edge.
- Keep the line even and curved with your natural nail, not straight and blocky.
- Finish with a glossy top coat so the black line looks clean and smooth.
DIY version:
- Paint your sheer nude base and let it dry.
- Use a striping brush or nail art brush with black polish to trace a thin curve on each tip.
- Clean any wobbles with a tiny brush dipped in remover.
- Top coat everything to smooth and seal.
When to choose black micro-French tips
- Black-tie events, galas, or fancy dinners where you wear black, metallics, or jewel tones.
- Work holiday parties when you want something cooler than a classic French, but still polished.
- Minimalist outfits that rely on clean lines, tailoring, and subtle details.
If you want your nails to look like they belong with a floor-length dress, a tuxedo blazer, and your best pair of heels, black micro-French tips show up and match the assignment every time.
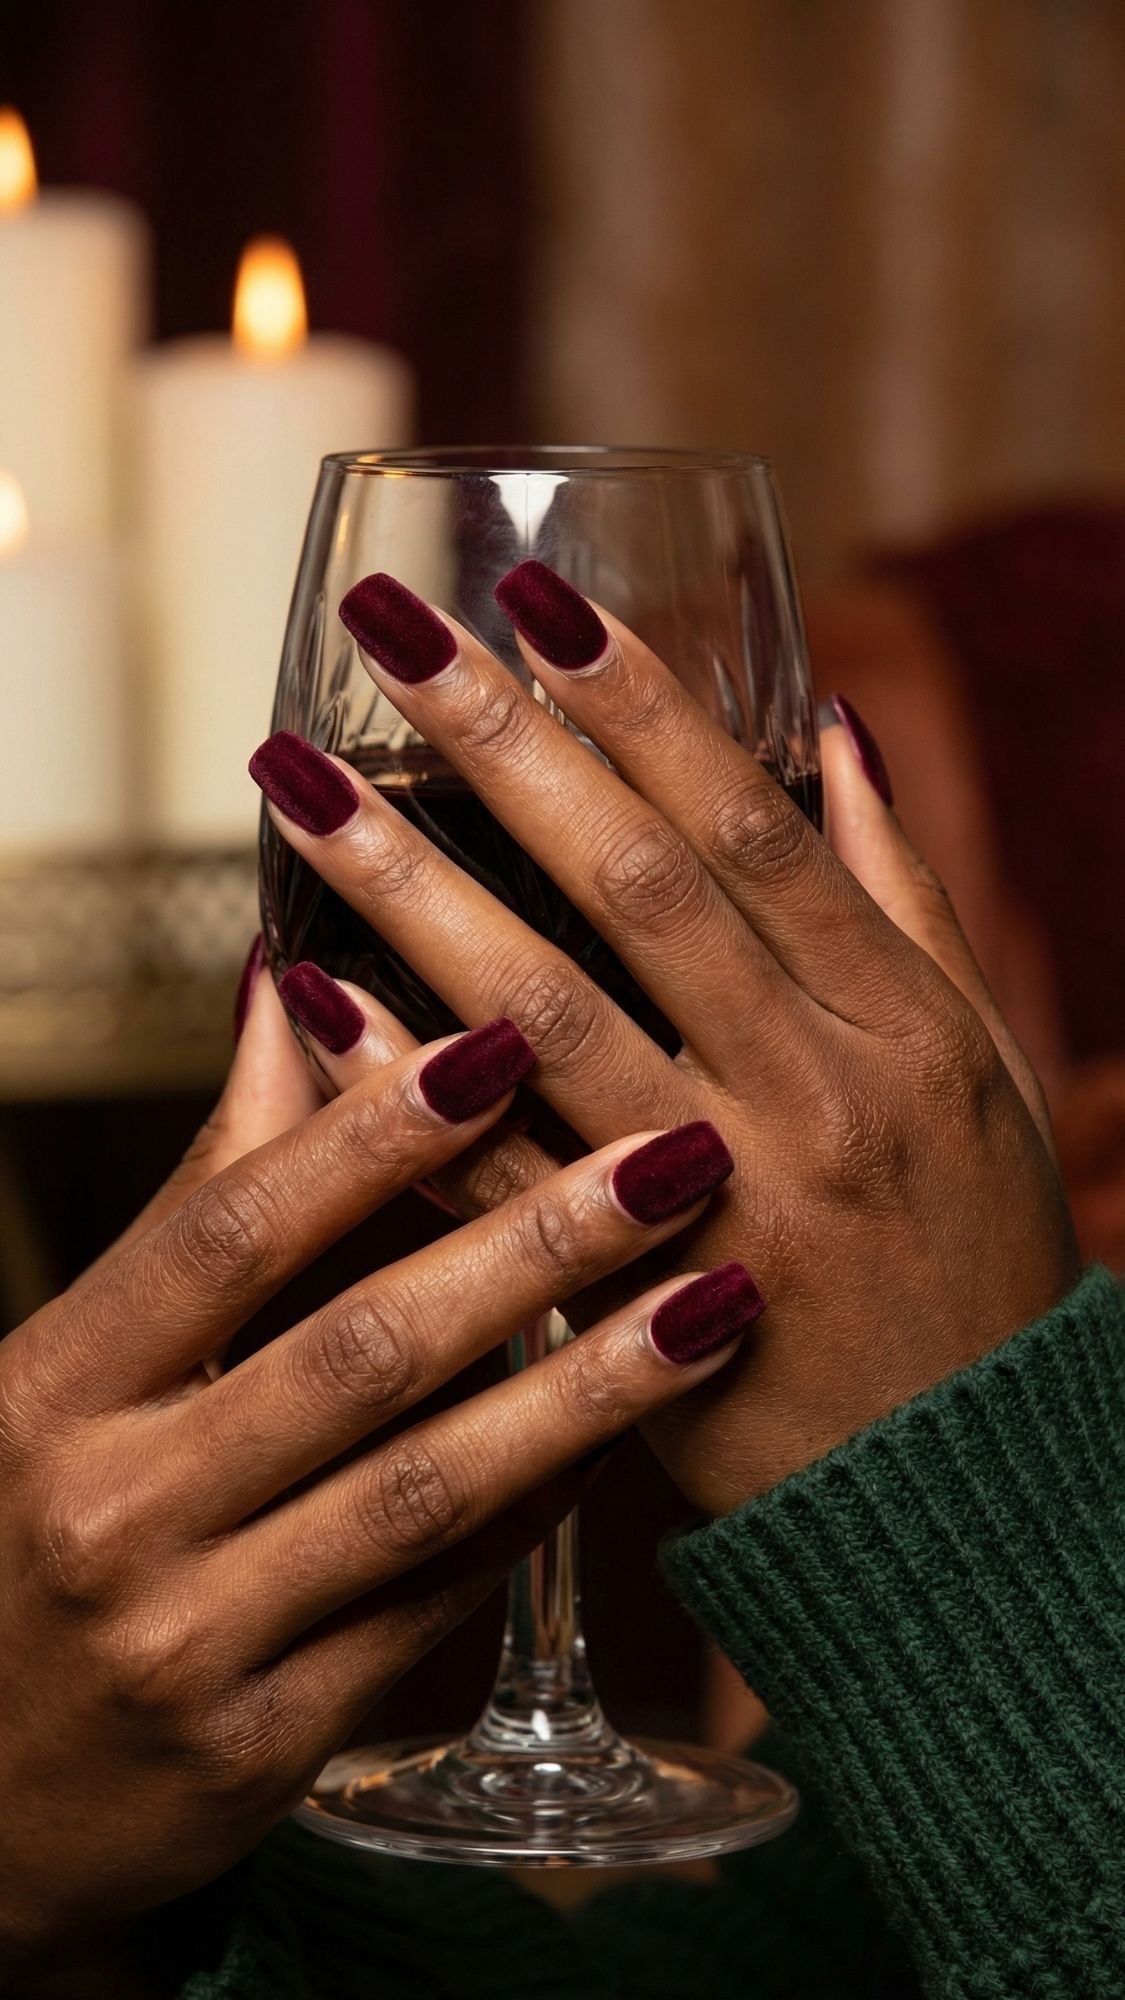
10. Deep Wine Velvet Nails on Short Squoval Tips
If you want drama without the hassle of long nails, deep wine velvet nails on short squoval tips might be your new go-to. The color gives full winter richness—think merlot, cabernet, cozy red wine by the fire—while the velvet finish adds a soft, almost fuzzy shimmer. Because you keep the length short and the shape squoval, the look stays practical and comfortable, even if you live in dishwater, keyboards, or gift-wrapping mode.
Why deep wine velvet feels rich but wearable
- Wine tones bring that moody, holiday glam without feeling harsh or gothic.
- The velvet effect adds dimension, so your nails glow instead of just sitting flat.
- The short squoval shape makes this look feel intentional and chic, not “I broke my nails but kept the color.”
You get “evening-ready” nails you can still use to open boxes, buckle shoes, and chase kids.
The perfect shade + shape combo
To nail the vibe (pun fully intended), focus on:
- Shades to ask for:
- Deep wine
- Merlot or cabernet
- Blackened berry red
- Shape and length:
- Short squoval – soft corners, straight-ish edge, super comfortable
- Shorter length lets the velvet finish shine without competing with length
If you usually avoid dark colors because you worry they look too intense, the velvet finish softens everything and makes the shade feel plush instead of harsh.
How to ask your nail tech (or do a cozy DIY set)
At the salon, keep it direct so they know you care about both color and finish:
- Say: “I’d like short squoval nails in a deep wine velvet finish—rich color, soft shimmer, no extra length.”
Ask them to:
- File your nails into a short squoval shape—no sharp corners, just a soft square.
- Apply a deep wine or berry base in thin layers.
- Use a velvet or magnetic shimmer polish to create that soft, suede-like reflect.
- Adjust the light line (if it’s magnetic) so it runs through the center or diagonally for extra depth.
- Finish with a top coat that keeps the velvet look glowing but protected.
DIY version:
- Shape your nails short and squoval.
- Apply base coat, then 1–2 coats of deep wine polish.
- Layer a velvet or magnetic topper if you have one in a similar shade.
- Use the magnet as directed to pull the shimmer into a soft pattern, then lock it in with top coat.
When deep wine velvet nails make the most sense
- Holiday dinners and date nights where candles and low light make that velvet finish glow.
- Casual-but-cute gatherings—think potlucks, game nights, cozy couch hangs with friends.
- Weeks when you want something bold and moody that still works with jeans, knits, and all your neutral coats.
If you want your nails to say, “I’m cozy, but I did not come to play,” deep wine velvet on short squoval tips delivers that exact energy.
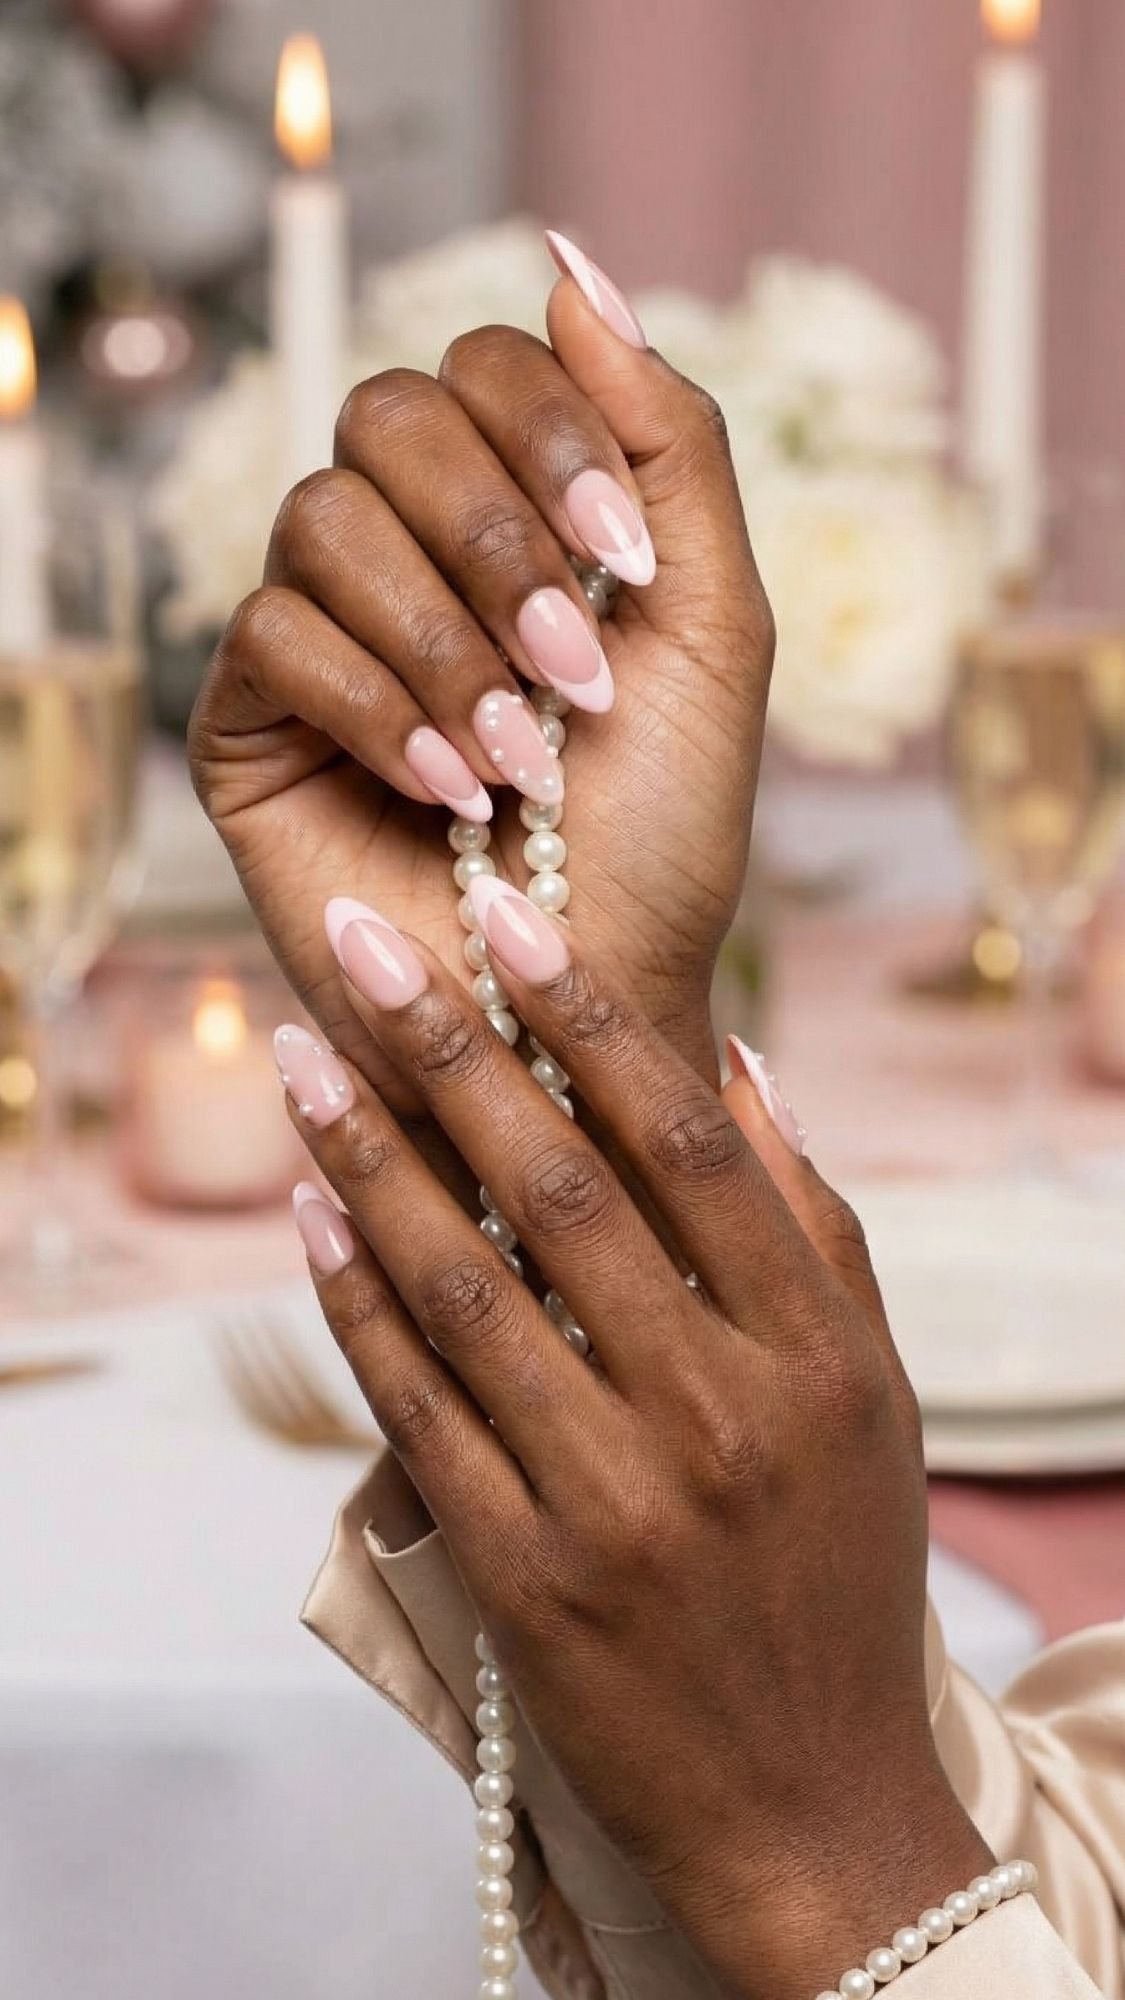
11. Pearl-Studded French Manicure for Elegant Holiday Nails
If you want your nails to look like they belong at a candlelit dinner or a winter wedding, a pearl-studded French manicure does that in the softest way possible. You start with a classic French—sheer pink base, clean white tips—and then add tiny pearls as accents. The pearls turn something timeless into something special, without tipping over into “full bridal” territory when you keep them small and minimal.
Why a pearl French feels extra elegant
- A soft pink French base already looks clean and polished.
- Tiny pearls add dimension and texture without loud color.
- The look pairs beautifully with satin, silk, lace, and dainty jewelry.
It gives “I actually read the dress code and took it personally” energy in the best way.
Best way to place the pearls
Pearls can look super chic or way too much, depending on how you place them. For an elegant holiday look, keep it light:
- Base:
- Sheer baby pink
- Soft nude-pink
- Milky neutral that suits your skin tone
- Tip:
- Classic crisp white French tip
- Pearl placements that work best:
- One tiny pearl at the center of the cuticle on each ring finger
- A few micro pearls following the smile line on just one or two accent nails
- A single pearl near the base of each nail for a subtle “dotted” effect
The key? Tiny pearls, minimal nails. Not every finger needs a full pearl party.
How to ask your nail tech (or pearl it yourself)
At the salon, paint the picture clearly so it stays chic, not costume:
- Say: “I’d love a soft pink French with tiny pearl accents—very delicate and minimal, not full bridal.”
Ask your tech to:
- Build a classic French manicure first: sheer pink base, thin white tips.
- Use small flat-back pearls, not oversized ones.
- Place pearls on one or two nails per hand, or in a very fine line along the French on just a couple of nails.
- Secure with nail glue or gel, then seal around (not over the top of) the pearls with top coat so they stay put.
DIY version:
- Do your usual French (or use French tip stickers if you need help with the line).
- Once the top coat feels slightly tacky, pick up tiny nail pearls with a wax pencil or orangewood stick.
- Place them gently where you want them, then add a little extra top coat around the base to hold them in place.
When pearl-studded French nails shine
- Holiday dinners at nicer restaurants or hotel bars.
- Engagement parties, winter weddings, or fancy family photos.
- Anytime you wear satin, silk, pearls, or delicate gold jewelry and want your nails to match that energy.
If you want your nails to look soft, romantic, and pulled-together in every photo—without doing heavy nail art—a pearl-studded French manicure absolutely delivers.

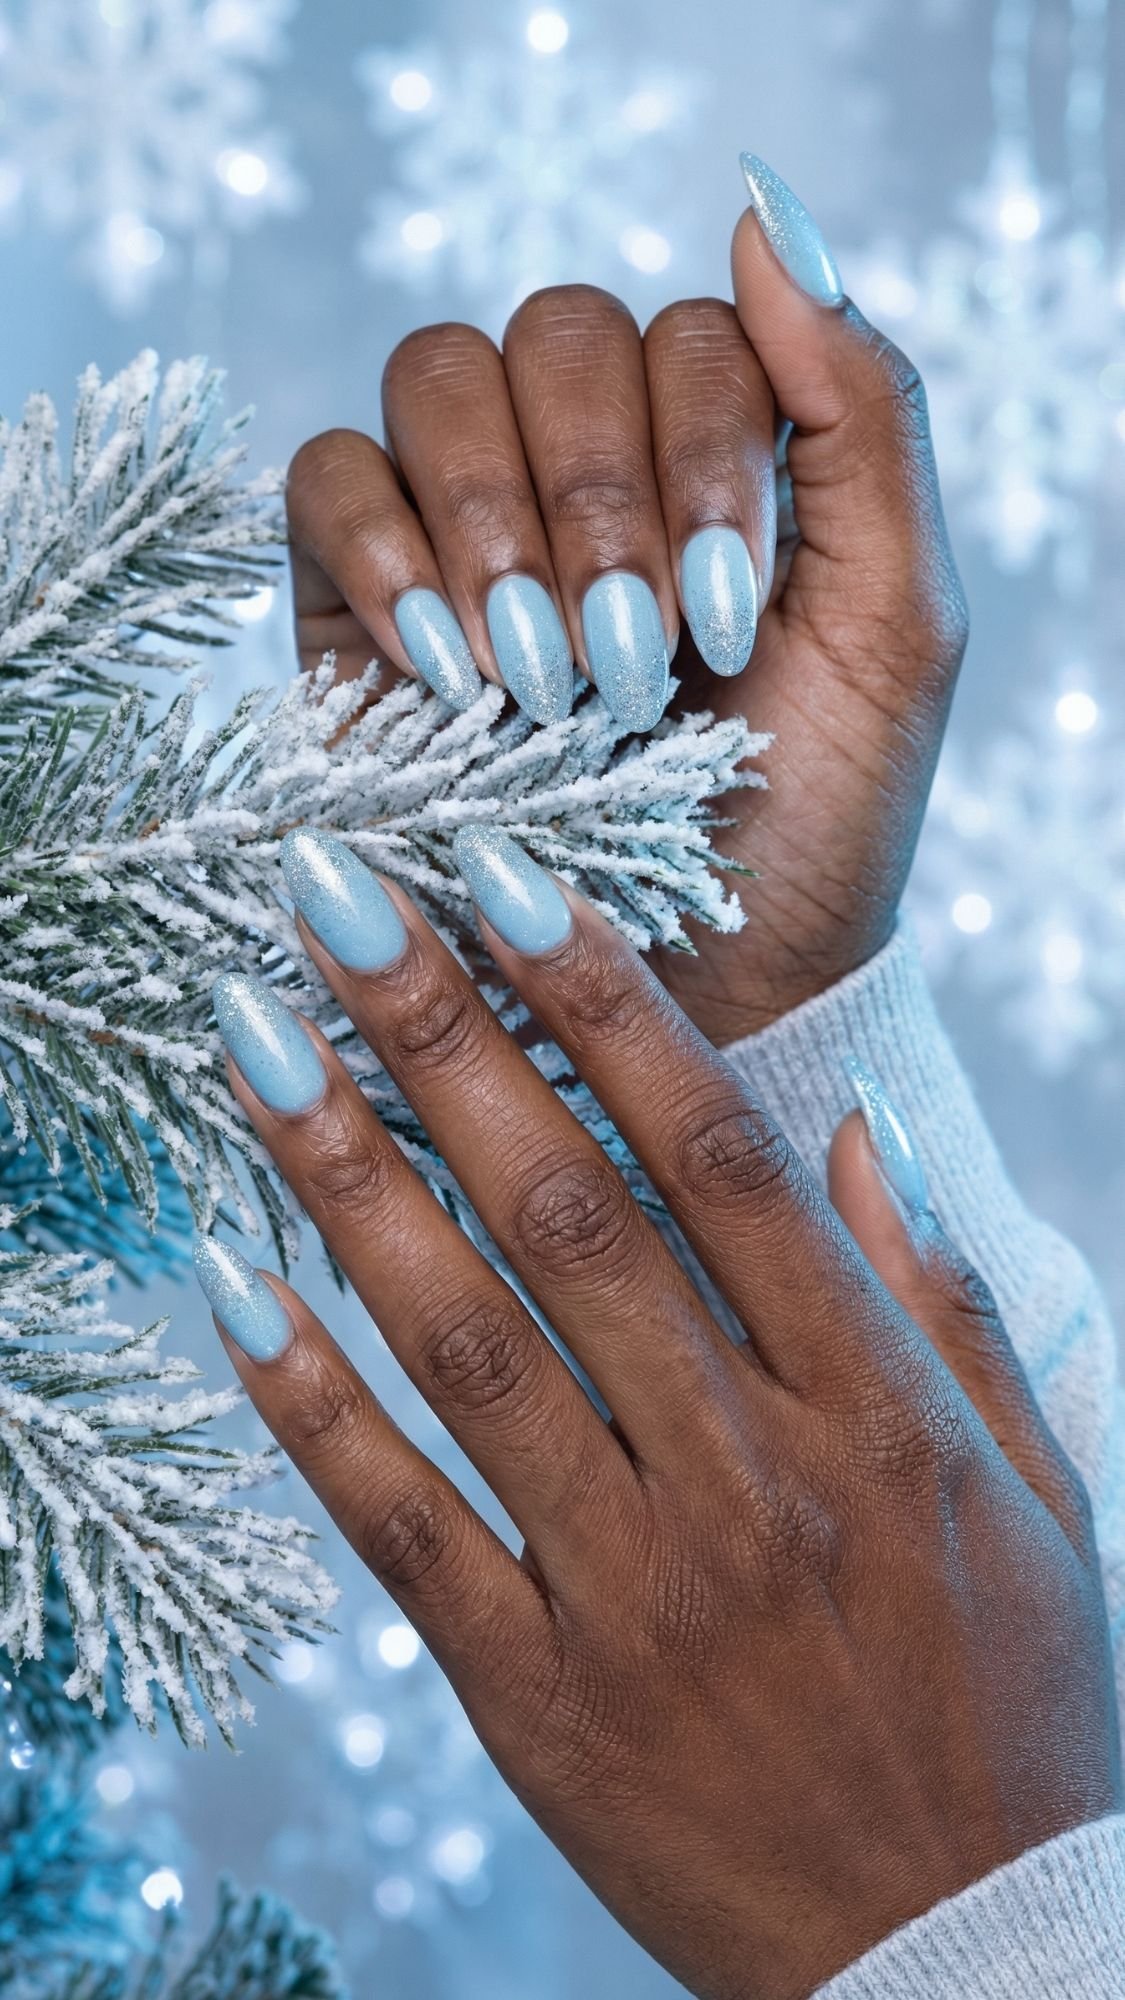
12. Soft Pastel Chrome Nails for Frosty Party Vibes
If you love color but still want your nails to feel soft and elegant, soft pastel chrome nails give you that icy, frosted vibe without leaning childish. Think lilac, baby blue, or shell pink—but with a chrome sheen that makes them look like frosted glass ornaments. The colors stay light and pretty, while the chrome finish adds that “I absolutely RSVP’d yes” shimmer.
Why pastel chrome feels wintery, not springy
- The chrome finish adds a metallic, reflective layer that reads “holiday glowy,” not “Easter brunch.”
- Icy tones like blue, lilac, and cool pink feel like snow, sky, and frost.
- The look still stays soft and feminine, so it fits a lot of outfits and makeup styles.
If traditional red and green make you roll your eyes, these nails still say “seasonal,” just in your own way.
Best pastel shades and shapes to ask for
You can go monochrome or mix a few shades across your nails. Either way, you keep it light and chilly:
- Pastel chrome shades that work beautifully:
- Icy baby blue
- Soft lilac or lavender
- Shell pink with cool undertones
- Pearlized soft white as an accent
- Shapes that flatter the chrome look:
- Medium almond – elegant and elongating
- Short almond or squoval if you prefer lower maintenance
Ask yourself, “Do I want these to look like frosted ornaments or frosty pops of color?” If you like variety, mix two or three shades across your ten nails.
How to ask your nail tech (or build it at home)
At the salon, focus on the finish and the vibe:
- Say: “I’d love soft pastel chrome nails—icy blue, lilac, or shell pink, with a reflective chrome finish, almond shape.”
Then ask your tech to:
- Shape nails into short or medium almond.
- Apply a pastel gel base (blue, lilac, or pink).
- Rub chrome powder over the cured base to create that mirrorlike, frosty reflect.
- Seal everything with a glossy top coat so the chrome doesn’t dull or chip.
DIY version (if you feel brave):
- Apply base coat, then 2 thin coats of your chosen pastel polish and let everything dry or cure.
- Use chrome pigments or a chrome top coat in a pearly, icy tone.
- Rub the powder in gently with an applicator, then brush off excess.
- Finish with a glossy top coat and wrap the tips to help prevent chipping.
When pastel chrome nails make the most sense
- Holiday parties with a lighter, softer dress code—think knit dresses, shimmery tops, and fluffy coats.
- NYE looks built around silver jewelry, cool-toned makeup, or sequins.
- Any time you want your nails to feel fun and feminine without diving into bold, dark colors.
If you want your nails to look like tiny frosted ornaments every time you move your hands, soft pastel chrome nails keep things playful, polished, and very screenshot-worthy.
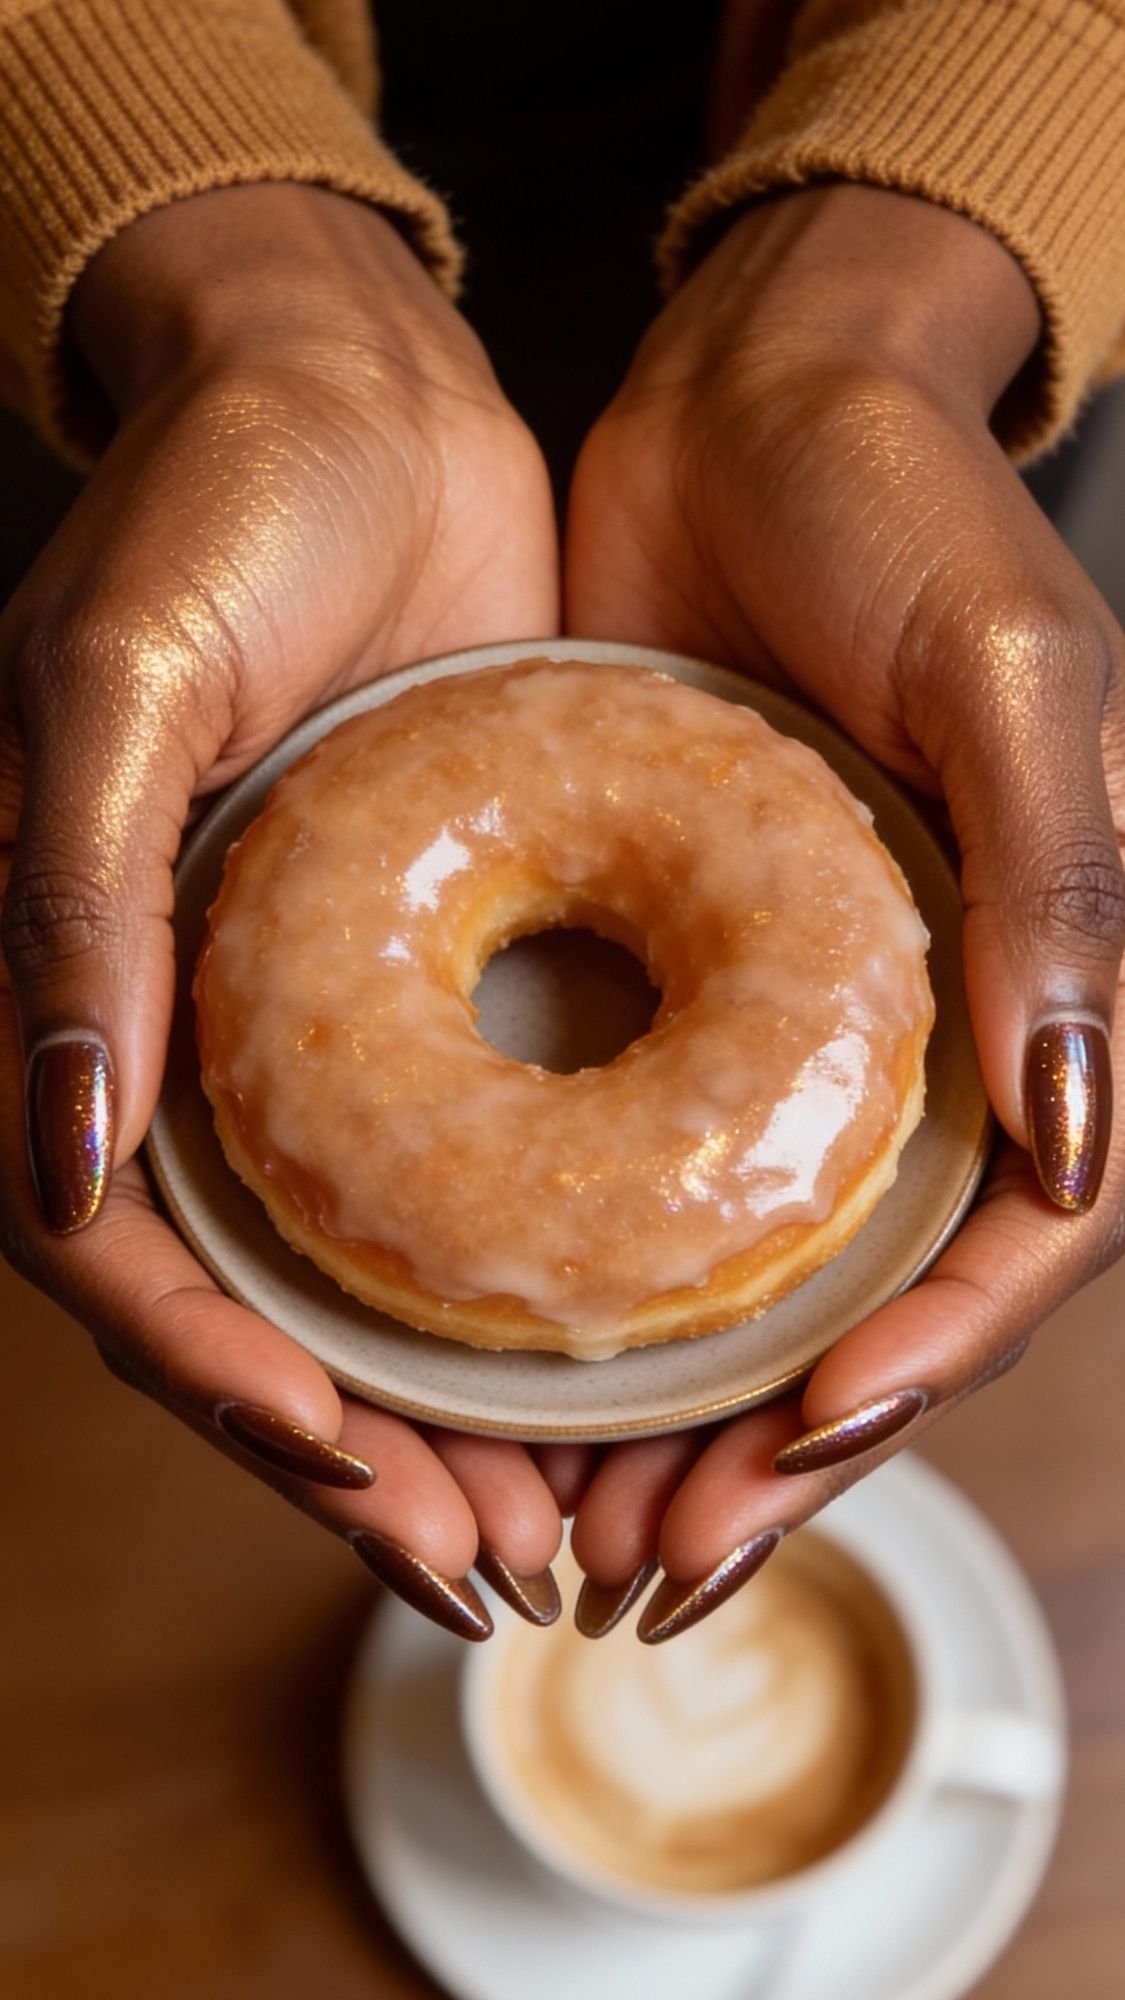
13. Chocolate Glazed Donut Nails with Holiday Shimmer
If you live for cozy vibes but still want your nails to look put-together, chocolate glazed donut nails with holiday shimmer feel like a warm dessert for your hands. Think rich chocolate or hazelnut brown as the base, then a fine iridescent sheen over the top—like a glossy glaze catching the light. You get that same “glazed donut” trend energy, just in a deeper, winter-approved shade that looks perfect wrapped around a coffee mug or holding a dessert plate.
Why chocolate glazed nails feel cozy and chic
- Brown tones feel warm, expensive, and way more interesting than basic nude.
- The glazed shimmer adds dimension so your nails glow instead of looking flat.
- The combo works with sweaters, boots, trench coats, and all your neutral outfits.
You basically wear a cozy latte on your nails—but make it elevated.
Best shades and shapes for the chocolate glaze
To keep the look delicious and elegant (without drifting into muddy), focus on:
- Base shades:
- Milk-chocolate brown
- Hazelnut or caramel latte
- Deep mocha with warm undertones
- Shimmer/glaze type:
- Fine, pearly shimmer top coat in champagne or soft gold
- Sheer iridescent topper that gives a subtle glow, not chunky glitter
- Shapes:
- Short squoval – everyday-friendly and polished
- Short almond – soft and feminine while still low maintenance
Ask yourself, “Do I want my nails to look like a cozy drink or a glossy chocolate truffle?” Pick your shade depth based on that.
How to ask your nail tech (or glaze them at home)
At the salon, paint the picture so you don’t walk away with full glitter:
- Say: “Can we do chocolate glazed donut nails—rich brown base with a soft, pearly shimmer on top, short squoval?”
Then ask your tech to:
- Shape nails short and squoval or almond.
- Apply 1–2 coats of a chocolate or hazelnut brown.
- Layer a sheer shimmer or pearly top coat over the entire nail—fine sparkle only.
- Seal with a high-shine top coat for that glossy, glazed finish.
DIY version:
- Paint your base coat, then 2 coats of your chosen brown polish.
- Add 1 thin coat of a sheer pearly or champagne shimmer top coat.
- Finish with a glossy top coat and let everything fully dry before you start scrolling or snacking.
When chocolate glazed donut nails make sense
- Coffee dates, brunches, and cozy holiday catch-ups.
- Weeks when you live in knits, UGGs, and long coats, but still want polished nails.
- Anytime you want a neutral mani with more personality than a standard nude.
If you want nails that whisper “cozy, put-together, and low-key delicious,” chocolate glazed donut nails with a hint of holiday shimmer will cover your whole season.
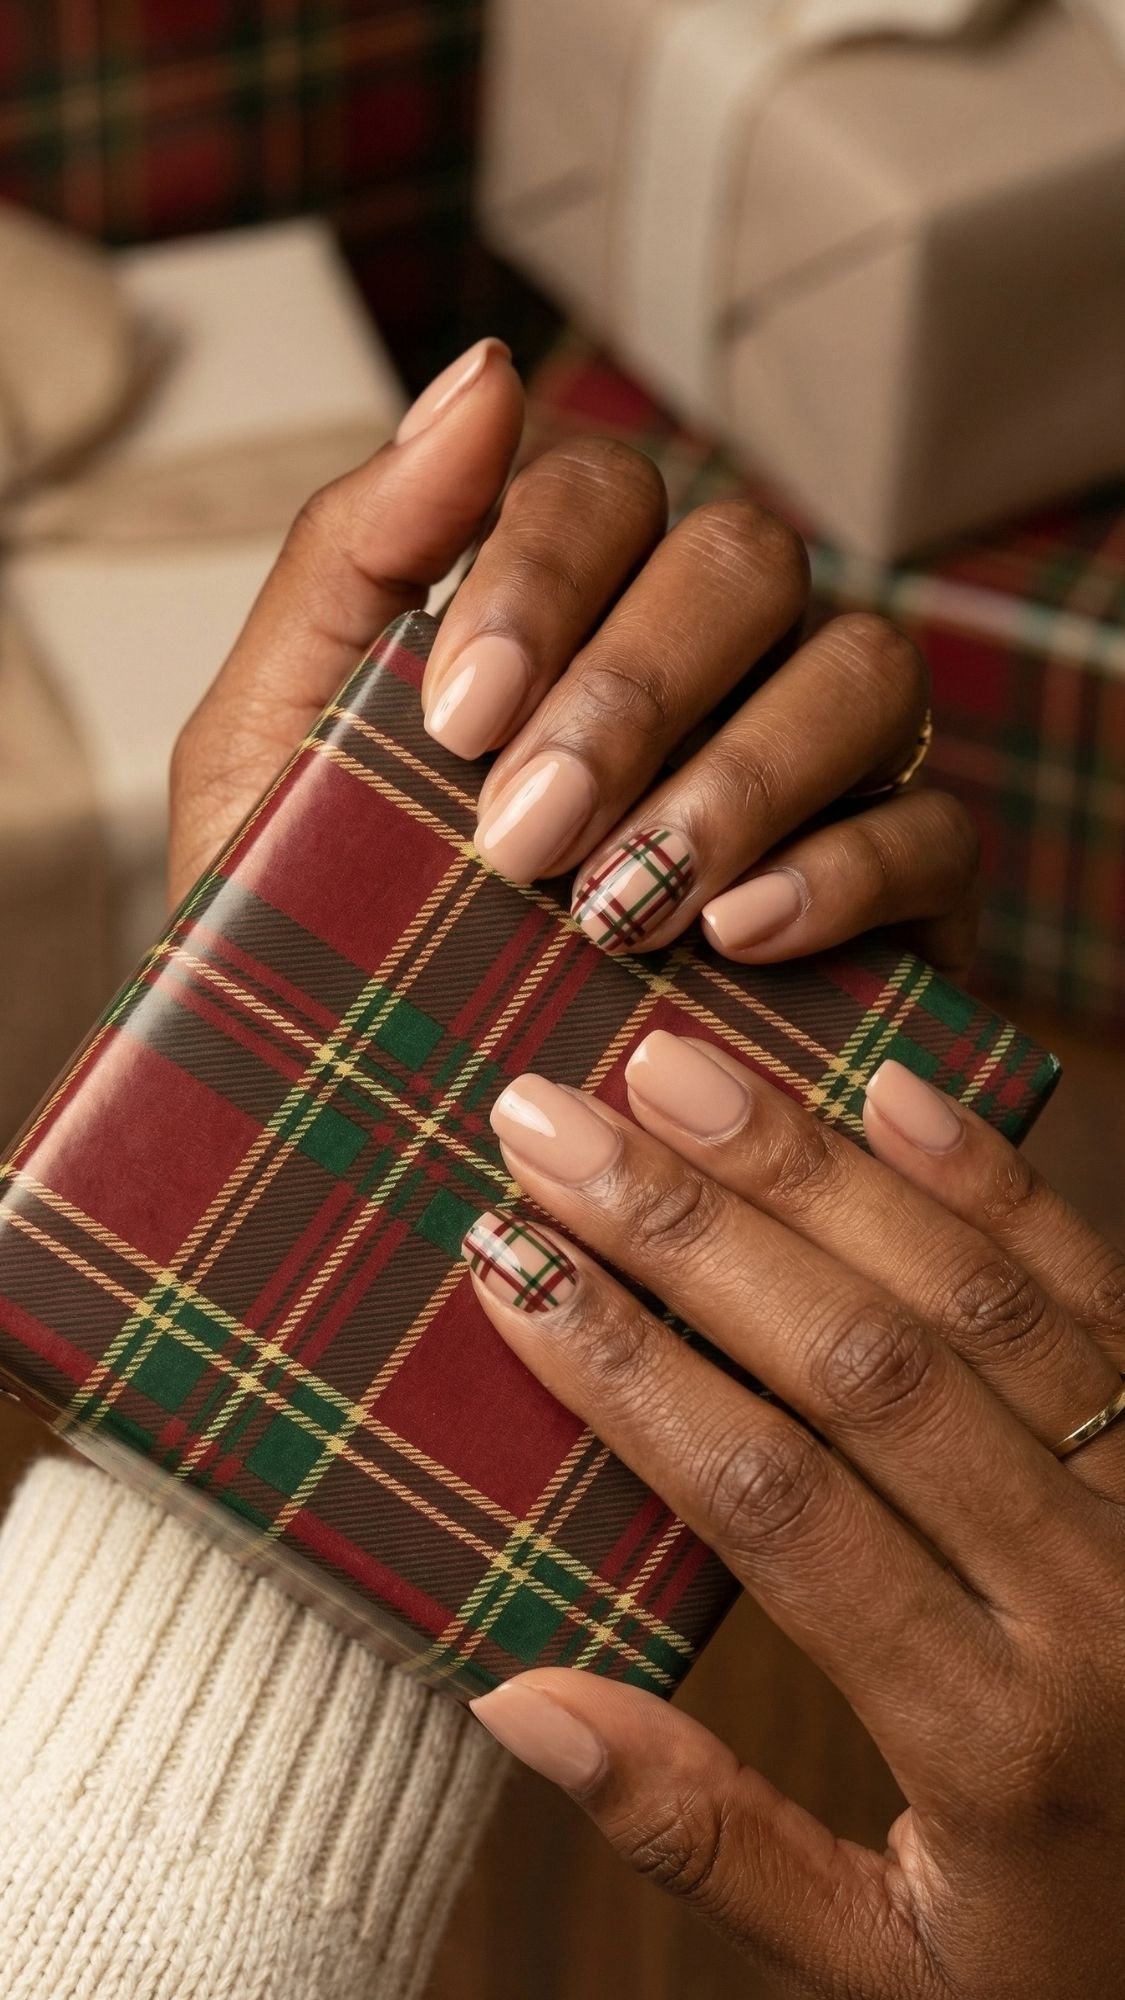
14. Plaid Accent Nail on a Nude Mani
If you love holiday plaid scarves, pajamas, and gift wrap, but you don’t want that pattern all over your nails, a plaid accent nail on a nude mani is the perfect compromise. Most of your nails stay clean, nude, and wearable, while one plaid nail on each hand quietly brings the festive vibes. It’s like your nails are saying, “Yes, I’m in the holiday spirit, but I still have emails to answer.”
Why a single plaid accent looks so classy
- One patterned nail per hand keeps things chic instead of busy.
- The nude base on the other nails makes your hands look clean and elongated.
- The plaid accent ties into your outfits, scarves, and gift wrap without clashing.
You get the cuteness of seasonal nail art without committing your whole mani to the theme.
Best nude + plaid color combos
To keep this look elegant, think “holiday, but curated”:
- Base for most nails:
- Milky nude
- Soft beige
- Nude that matches or slightly brightens your skin tone
- Plaid accent nail colors:
- Garnet or deep red
- Forest or deep green
- Fine gold or white lines to add dimension
- Placement:
- One plaid accent nail on each ring finger
- Optional: a second accent on the thumb if you want more plaid without overwhelming all ten nails
The goal: plaid that looks stylish and intentional, not like wrapping paper exploded on your hands.
How to ask your nail tech (or create your own plaid)
At the salon, be clear about the ratio of nude to pattern:
- Say: “I’d like a nude manicure with one plaid accent nail on each hand—nude on most nails, then garnet, green, and gold plaid on the accent, very thin lines.”
Ask them to:
- Paint all nails in your chosen nude base.
- On the accent nails:
- Lay down a light background (cream or soft nude).
- Use a fine brush to paint thin vertical and horizontal lines in garnet and green.
- Add gold or white line accents to make the pattern pop.
- Keep the lines thin and spaced, not thick and crowded.
- Seal with a glossy top coat for a smooth, finished look.
DIY version (if you’re patient):
- Paint all nails nude.
- On your chosen accent nail(s), start with a lighter base if needed.
- Use a striper brush or nail art pen to draw straight lines in your plaid colors—start with the darkest shade, then layer lighter ones.
- Add a couple of gold or white details last.
- Top coat everything so the pattern looks smooth and polished.
When plaid accent nails are a great choice
- Work weeks when you still want nails that feel appropriate but a little festive.
- Family photos and holiday gatherings where plaid outfits and scarves show up.
- If you want a mani that looks just as good with jeans and a sweater as it does with a dress.
If you love the idea of holiday patterns but prefer your nails on the cleaner side, a nude mani with plaid accent nails keeps things cute, polished, and totally screenshot-worthy.
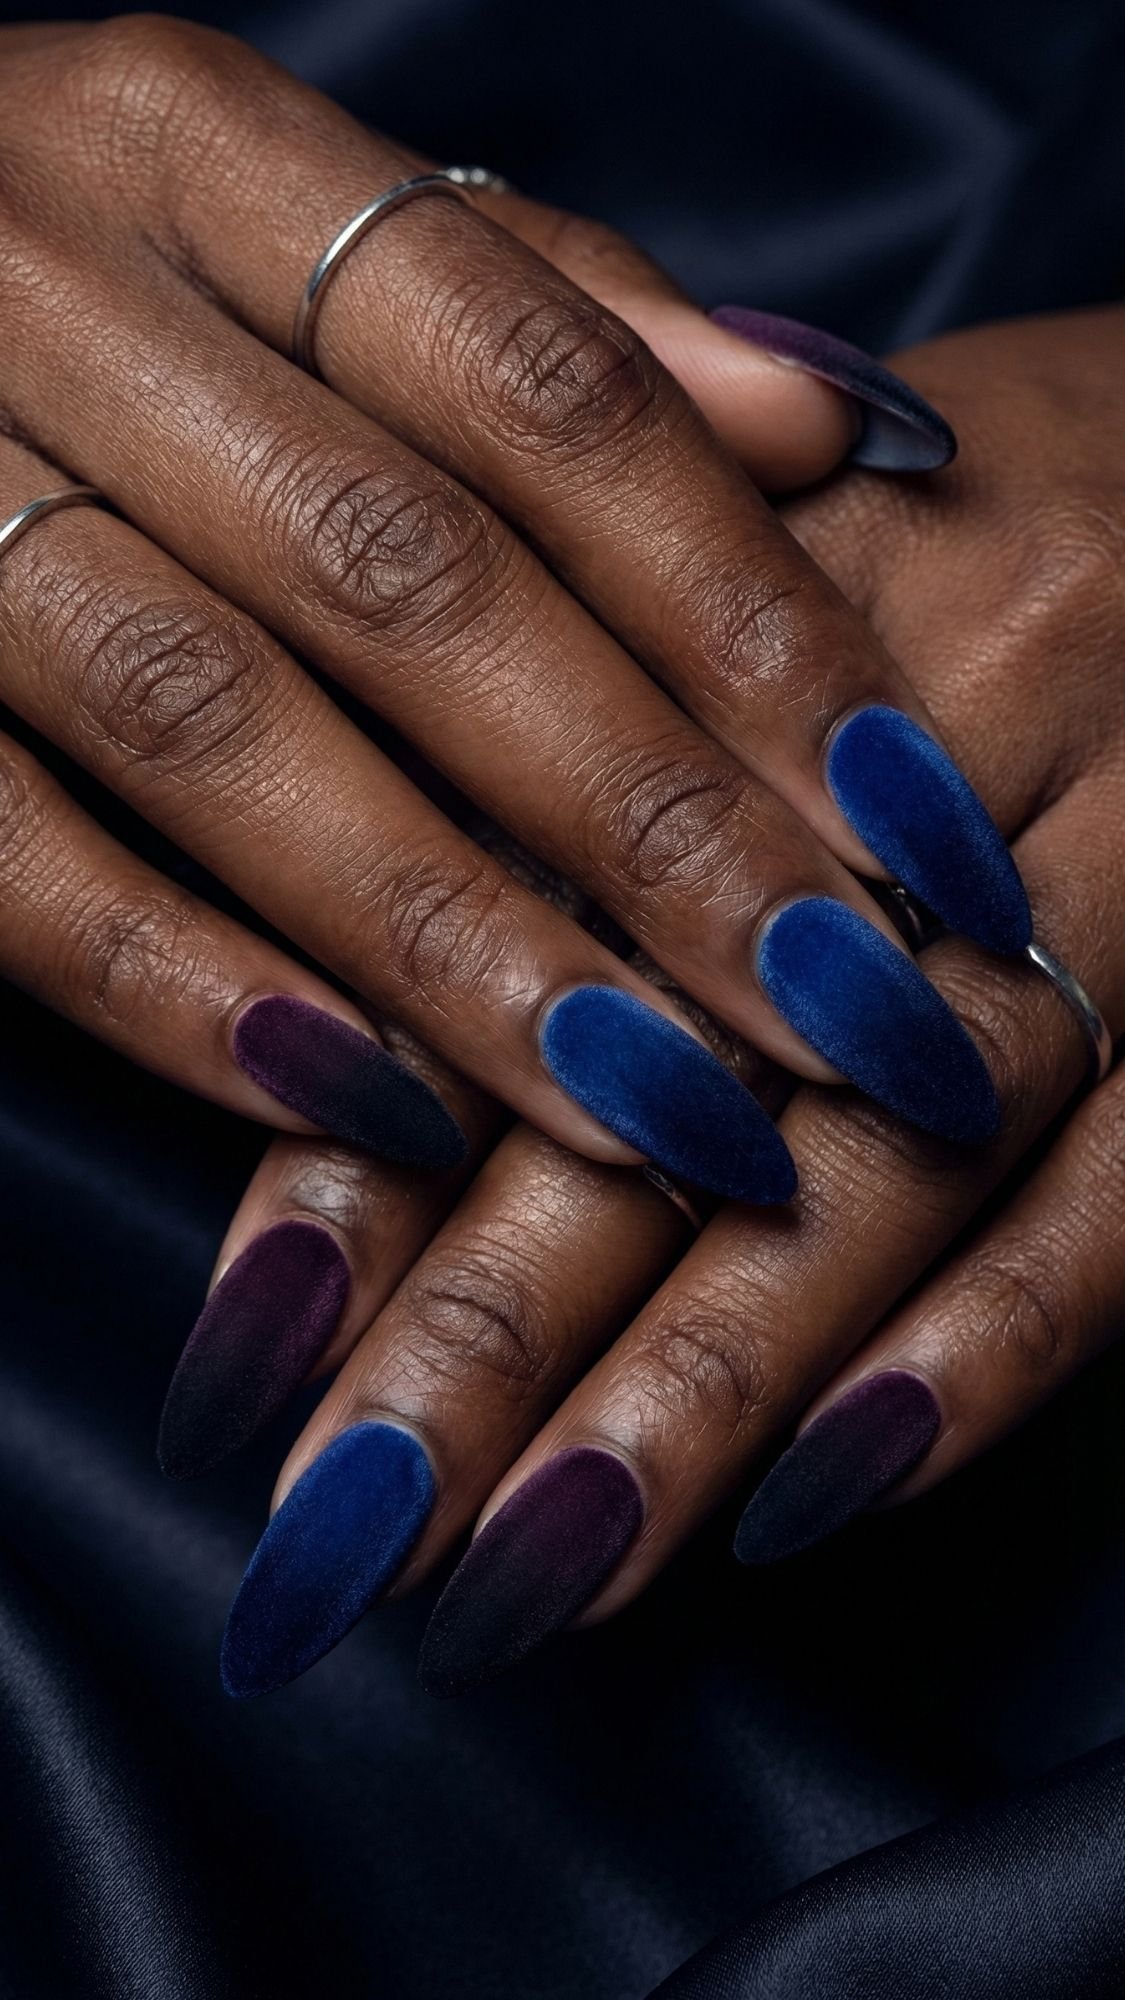
15. Velvet Ombré Nails in Jewel Tones
If you want your nails to look like they walked off a campaign shoot, velvet ombré nails in jewel tones are that girl. You blend rich shades like sapphire, plum, or emerald into something deeper—usually navy or black—then layer a velvet or magnetic finish on top. The result looks like a gradient gemstone under soft light, and every tiny hand movement feels dramatic in the best way.
Why velvet ombré in jewel tones looks so expensive
- Jewel shades (sapphire, emerald, amethyst) already scream luxury.
- The ombré fade adds depth so your nails never look flat or basic.
- The velvet effect throws a soft, almost velvety shimmer that moves with the light.
You basically turn each nail into a tiny, moody art piece.
Best color combos and shapes
You can pick one jewel tone or mix a few across your nails, depending on how extra you feel:
- Gorgeous color pairings:
- Sapphire → fades into deep navy
- Plum → melts into black or eggplant
- Emerald → blends into blackened forest green
- Shapes that show ombré beautifully:
- Medium almond – slender and elegant
- Medium coffin – more dramatic, perfect for nights out
- Shorter almond still works if you want less length but all the impact
Ask yourself, “Do I want bold or movie-poster bold?” If you pick the second one, go jewel-toned and medium length.
How to ask your nail tech (or recreate a beginner version)
At the salon, be specific about both the ombré and the velvet finish:
- Say: “I’d like velvet ombré nails in jewel tones—sapphire (or plum, emerald) fading into a darker tip, with a soft velvet shimmer, medium almond.”
Ask them to:
- Shape nails into medium almond or coffin.
- Create an ombré gradient by blending your chosen jewel color into a darker shade toward the tips.
- Apply a velvet or magnetic shimmer polish over the gradient to add that soft, shifting glow.
- Use a magnet (if needed) to direct the light line and then seal with top coat.
DIY version (simplified but still cute):
- Paint your whole nail in the lighter jewel shade.
- Use a sponge to tap the darker shade onto the tips, blending upward for a fade.
- Once dry, add a thin layer of velvety or shimmery topper.
- Finish with top coat and admire how dramatic your hands suddenly look.
When velvet ombré nails really hit
- New Year’s Eve when you want nails as extra as your outfit.
- Holiday nights out—concerts, parties, rooftop bars, you name it.
- Anytime you wear all-black or simple outfits and want your nails to do the talking.
If you want a mani that looks like it belongs in slow-motion champagne cheers videos, velvet ombré in jewel tones will 100% give you that main-character entrance.
16. Icy Blue Glitter Gradient Nails for Winter Wonderland Parties
If your ideal holiday aesthetic looks like a snow globe, icy blue glitter gradient nails will feel like your personality in manicure form. You start with a soft, wintry blue and let fine silver glitter build up toward the tips, like frost climbing up a window. The gradient keeps things light and elegant, while the sparkle gives every hand movement a little “main character in a winter movie” moment.
Why icy blue gradients feel like a snow-day glam moment
- Icy blue already gives strong winter energy without using obvious holiday icons.
- A fine glitter gradient looks soft and magical instead of chunky or messy.
- The clear-to-glitter fade keeps the design elegant and grown, not costume-y.
You get full festive nails that still pair well with neutrals, denim, whites, and metallics.
Best shades, glitter, and nail shapes
To keep this mani looking polished instead of kiddie, focus on tone and texture:
- Base shade ideas:
- Icy baby blue
- Soft gray-blue
- Very pale sky blue with a cool undertone
- Glitter type:
- Fine silver glitter only (no big chunky hex pieces)
- Optional: a touch of holographic sparkle if you want extra twinkle
- Shapes that show off the gradient:
- Medium almond – soft and elongating
- Short almond or squoval if you prefer practical but still pretty
Ask yourself, “Do I want my nails to look like fresh snow or like a glitter bomb?” If you choose fresh snow, stick to fine glitter and a soft fade.
How to ask your nail tech (or create the gradient at home)
At the salon, describe both the color and how you want the glitter to sit:
- Say: “Can we do icy blue nails with a fine silver glitter gradient toward the tips—soft fade, not full coverage, almond shape?”
Then ask them to:
- Apply 1–2 coats of icy blue or gray-blue polish as the base.
- Use a sponge or brush to tap fine silver glitter starting at the tip and fading it downward.
- Heaviest sparkle at the tip
- Light scatter in the middle
- Almost clear near the cuticle
- Seal with a glossy top coat so the surface feels smooth, not gritty.
DIY version:
- Paint your base coat and 1–2 layers of icy blue.
- Put a bit of glitter polish on a makeup sponge and dab it on the tips first, then lightly press upward for a fade.
- Repeat until you like the density, then add a thick glossy top coat to even everything out.
When icy blue glitter gradient nails shine (literally)
- Winter wonderland–themed parties and events.
- NYE looks built around silver jewelry, cool-toned makeup, or white and blue outfits.
- Holiday photos where you hold mugs, sparklers, or ornaments and want your nails to catch the light.
If you want your nails to look like they just stepped out of a frosty fairytale, icy blue glitter gradient nails make every hand pose look photo-ready.
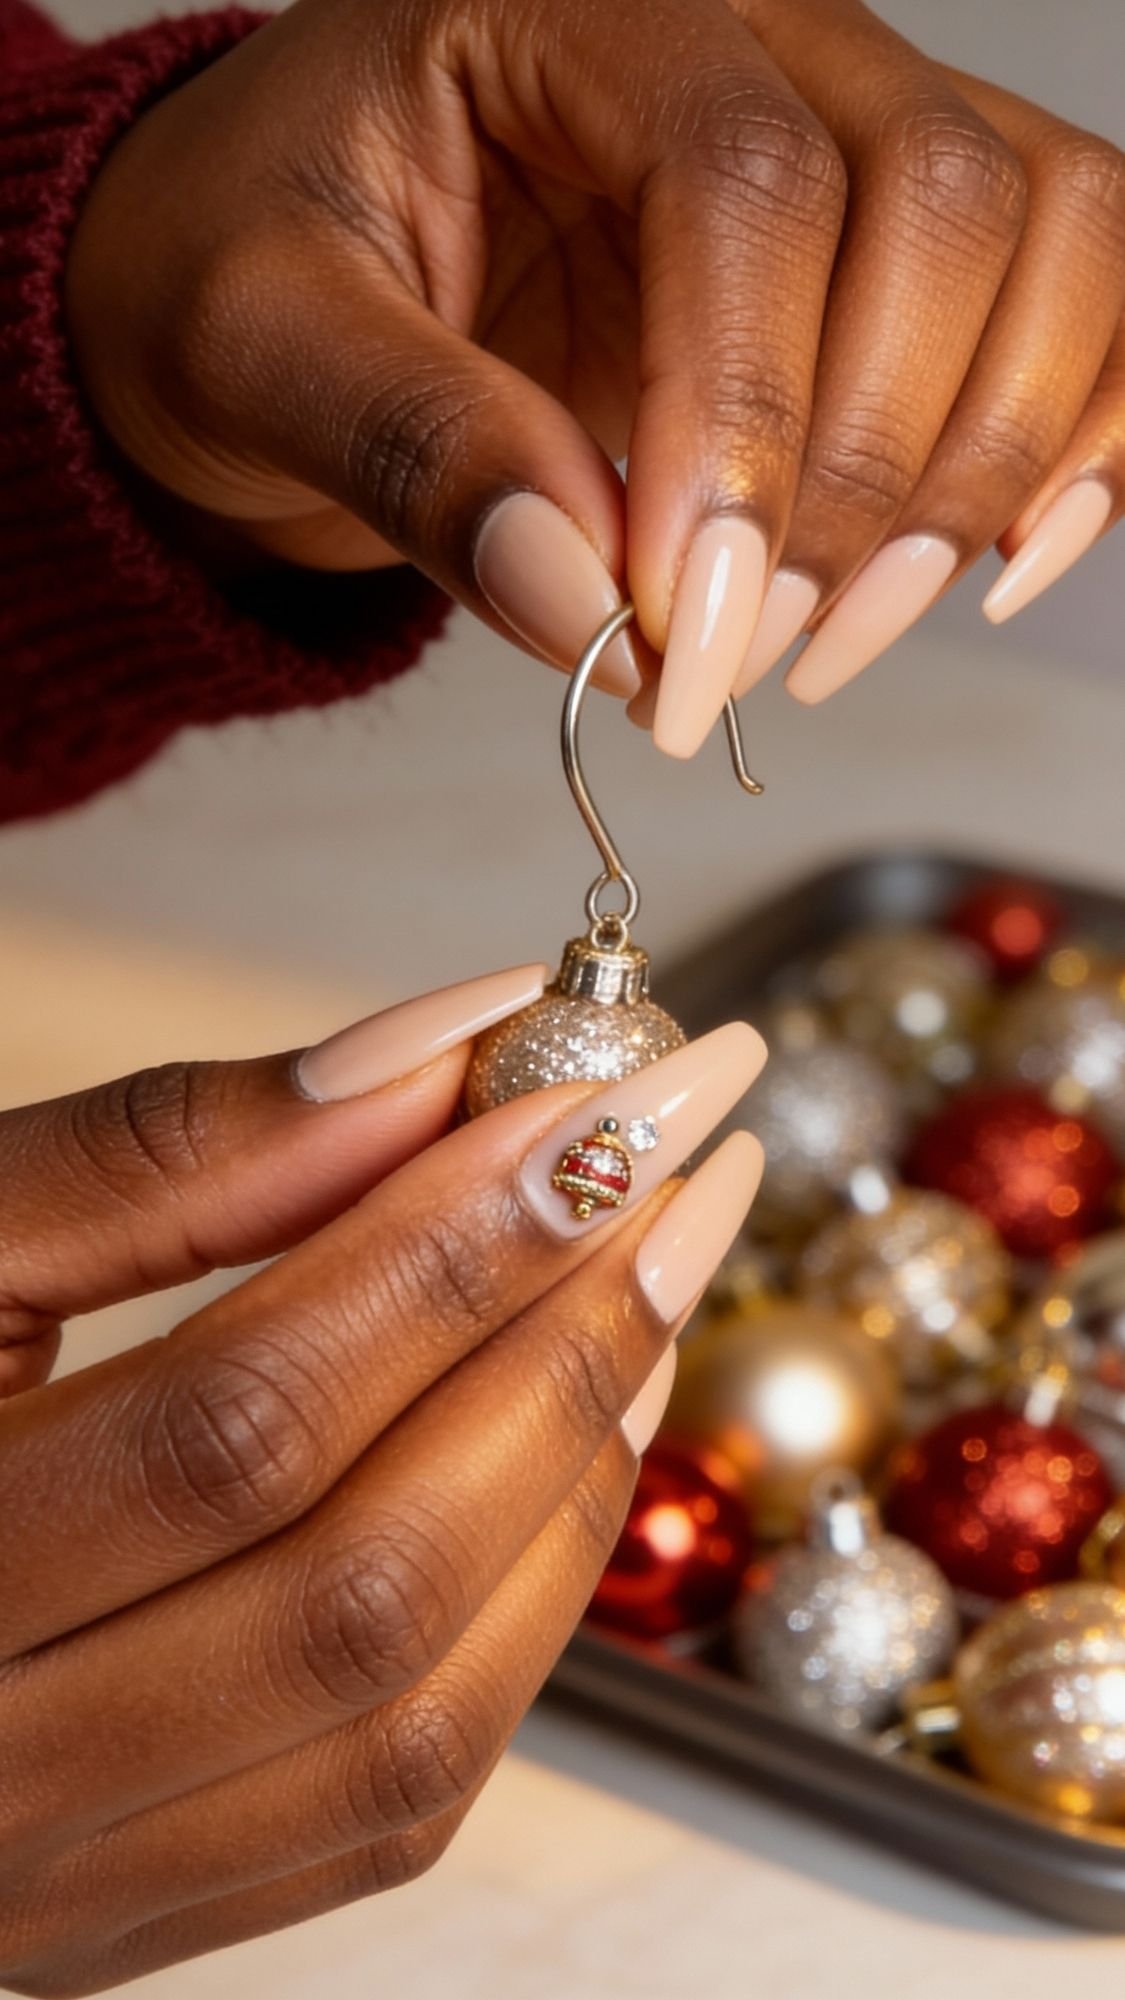
17. 3D Ornament Accent Nail (On Just One Finger, Promise)
If you want to play with 3D nail art without turning your hands into a craft project, a 3D ornament accent nail gives you the fun and the elegance. You keep most of your nails simple—think nude, velvet, or chrome—and let one nail per hand wear a tiny ornament charm or gem cluster. It feels playful and festive, but you still move through your life without snagging every sweater and scarf in your closet.
Why a single 3D ornament nail actually works
- You keep nine nails smooth and wearable, so your mani still feels chic.
- The one 3D accent brings that holiday “wow” moment in photos.
- The contrast between simple base + detailed accent looks intentional and stylish.
You get to enjoy the trend without committing your whole hand to it.
Best base colors and accent ideas
The base creates the vibe; the ornament just finishes the story:
- Great base options:
- Velvet garnet, emerald, or deep wine
- Nude or milky pink with a sheer glossy finish
- Black or deep navy for a dramatic contrast
- Cute but classy ornament ideas:
- Tiny metallic ball charm that looks like a mini ornament
- Small gem cluster near the tip or cuticle
- Pearl + crystal combo that hints at ornaments without going cheesy
- Placement:
- One accent nail on each ring finger or middle finger
- Keep ornament closer to the cuticle or center, not sticking far off the tip
Ask yourself, “Can I still put on my coat without swearing?” If the answer feels like “no,” go smaller with the charm.
How to ask your nail tech (or add one accent at home)
At the salon, you want to stress that you only want a little 3D moment:
- Say: “Let’s do a simple base (nude/velvet/etc.) with one 3D ornament-style accent nail on each hand—tiny, chic, not too bulky.”
Ask your tech to:
- Paint your chosen base color on all nails.
- Choose a small, low-profile charm or gem cluster for the accent nail.
- Place the charm near the cuticle or center of the nail, not hanging off the free edge.
- Secure it with nail glue or builder gel, then seal around the charm with top coat so it stays put.
DIY version:
- Paint your nails in your preferred base (velvet, nude, chrome, etc.).
- Grab small nail charms or crystals and a strong nail glue.
- Place one tiny ornament or gem cluster on your chosen accent nail.
- Press gently, let it set, then add top coat around the base of the charm to lock it in.
When a 3D ornament accent nail makes sense
- One big holiday party or event where you want your nails to feel special.
- NYE when you plan to hold a glass or sparkler in photos.
- Any time you want to try 3D art without dealing with a full set of bulky designs.
If you want your mani to flirt with the “extra” side of holiday nails while staying elegant and wearable, one 3D ornament accent nail per hand nails the balance perfectly.
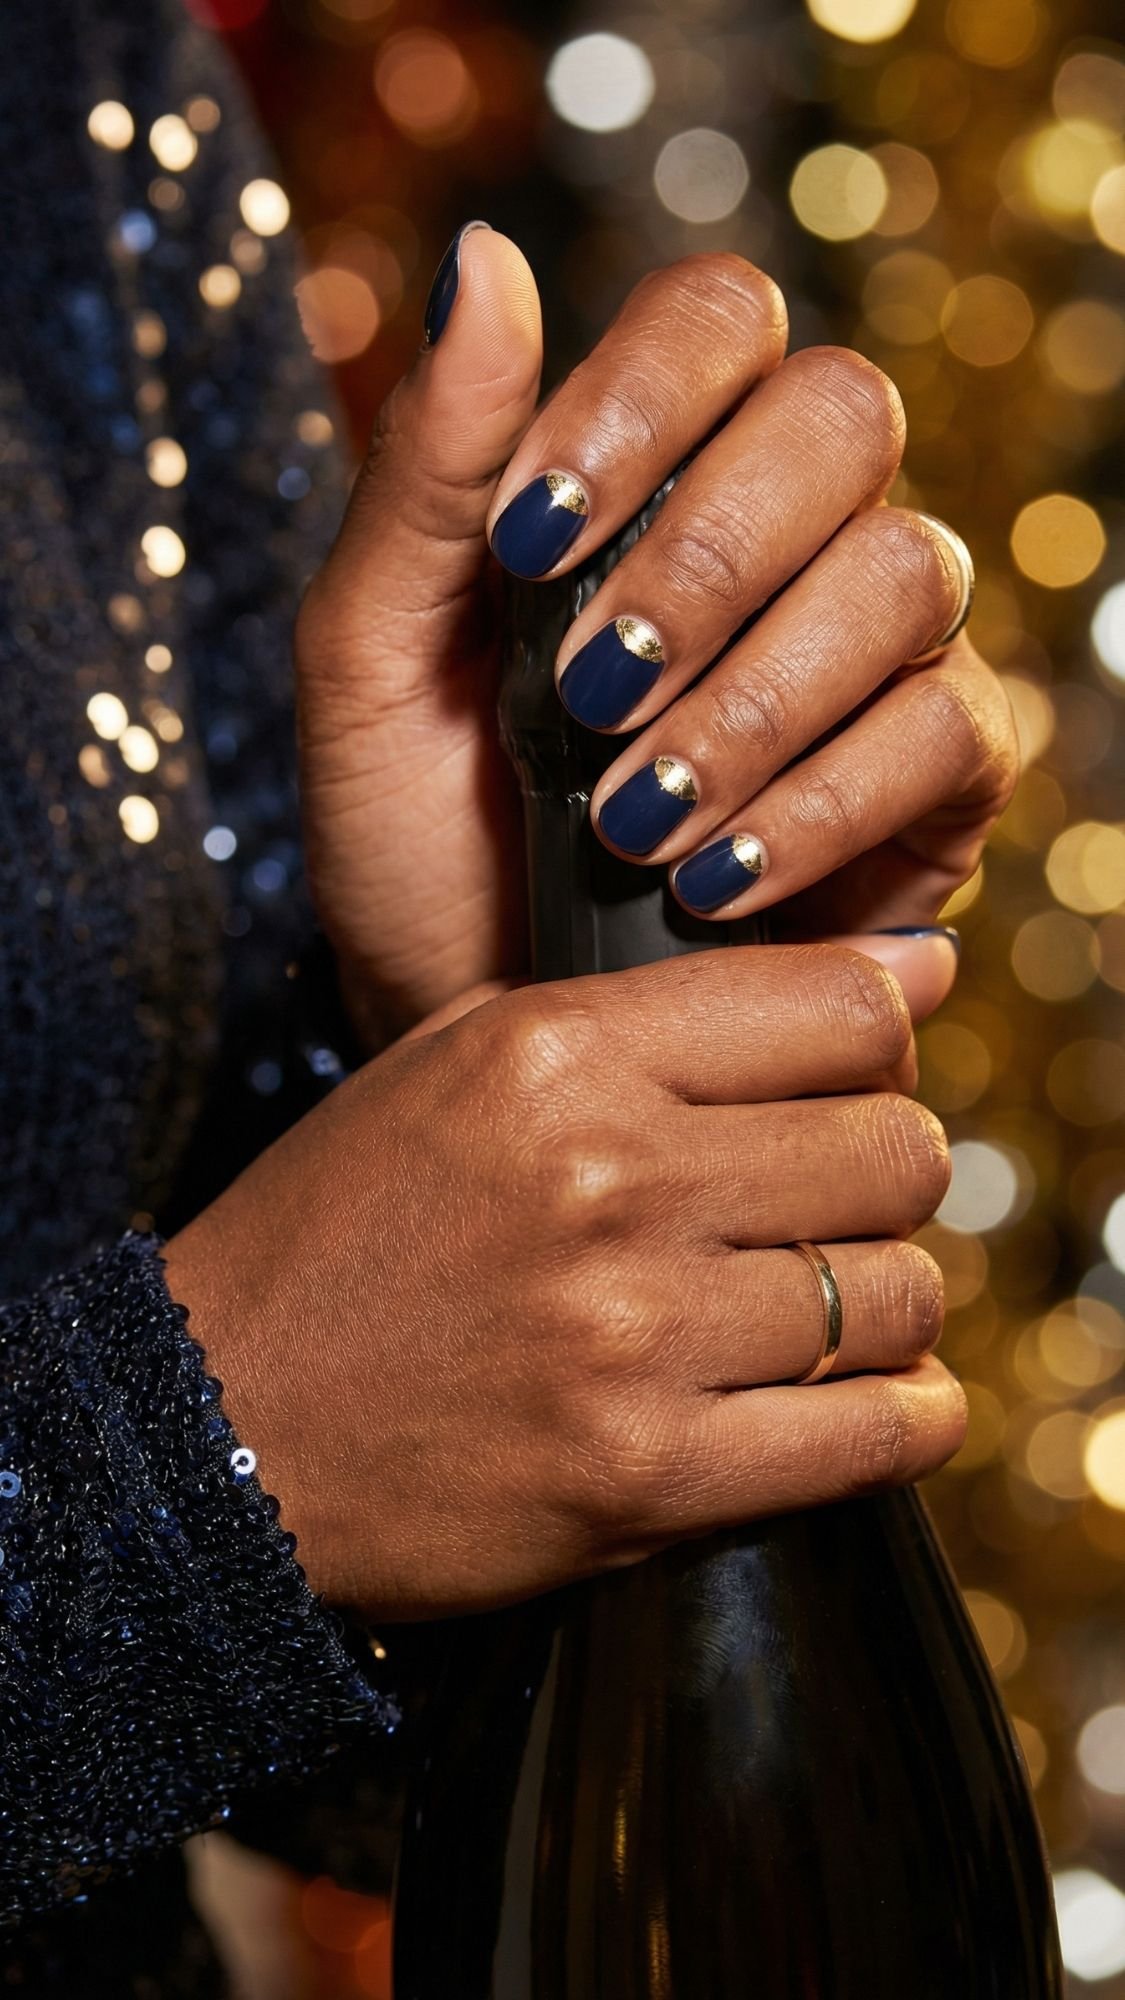
18. Gold Foil Half-Moon Manicure for NYE
If you want nails that look like they RSVP’d “VIP only,” gold foil half-moon nails serve that energy on sight. Instead of putting all the drama at the tip, you trace a gold half-moon at the base of the nail, right along your cuticle. It gives that vintage, almost Art Deco vibe, but the gold foil makes it feel fresh and perfect for New Year’s Eve.
Why gold half-moons feel so NYE
- The half-moon detail draws attention to the base of the nail in a very chic way.
- Gold foil catches every bit of light—bar lights, candles, phone flash, you name it.
- The combo of gold + deep polish says “evening glam” without needing extra nail art.
You basically give your nails tiny gold collars, and they act like jewelry.
Best color combos and shapes
You create a lot of drama just with color and contrast, so you don’t need anything wild:
- Base colors that look stunning with gold foil:
- Deep navy (classic NYE pairing)
- Inky black
- Rich wine or garnet
- Deep emerald if you want jewel-tone drama
- Half-moon style:
- Clean gold arch hugging the natural curve of your cuticle
- Use foil, not chunky glitter, so the gold looks luxe and reflective
- Shapes that flatter the half-moon:
- Short round – soft and elegant
- Short oval or almond – slightly dressier but still comfortable
Ask yourself, “Do I want my nails to match my jewelry or my dress?” Then pick navy, black, or wine based on which one you want to highlight.
How to ask your nail tech (or try it at home)
At the salon, you want to highlight both the half-moon placement and the foil finish:
- Say: “Can we do a gold foil half-moon at the cuticle with a deep navy (or black, wine) over the rest of the nail, short round?”
Ask your tech to:
- Shape your nails into short round or oval.
- Paint a thin layer of gold polish or apply gold foil along the natural half-moon at the base.
- Add your deep main color (navy, black, wine) above the gold, leaving the half-moon visible.
- Clean the curve with a fine brush so the line looks neat and intentional.
- Seal everything with a glossy top coat so the foil lies flat and shines.
DIY version:
- Paint a thin gold arc at the base of each nail first (or press on gold foil pieces).
- Once that dries, paint your darker shade from just above the half-moon to the tip.
- Use a small brush dipped in remover to sharpen the curve if you need to.
- Finish with a glossy top coat so the gold reflects and the surface feels smooth.
When gold foil half-moons make the most sense
- New Year’s Eve, obviously—this mani basically counts as an accessory.
- Any fancy holiday party where you wear satin, sequins, or metallic heels.
- Nights when you carry a glass, a clutch, or a little sparkler and want your nails to show up in every photo.
If you want nails that look like you planned your whole outfit around them (in a good way), gold foil half-moon nails deliver high-glam energy from the very first toast to the very last “Happy New Year.”
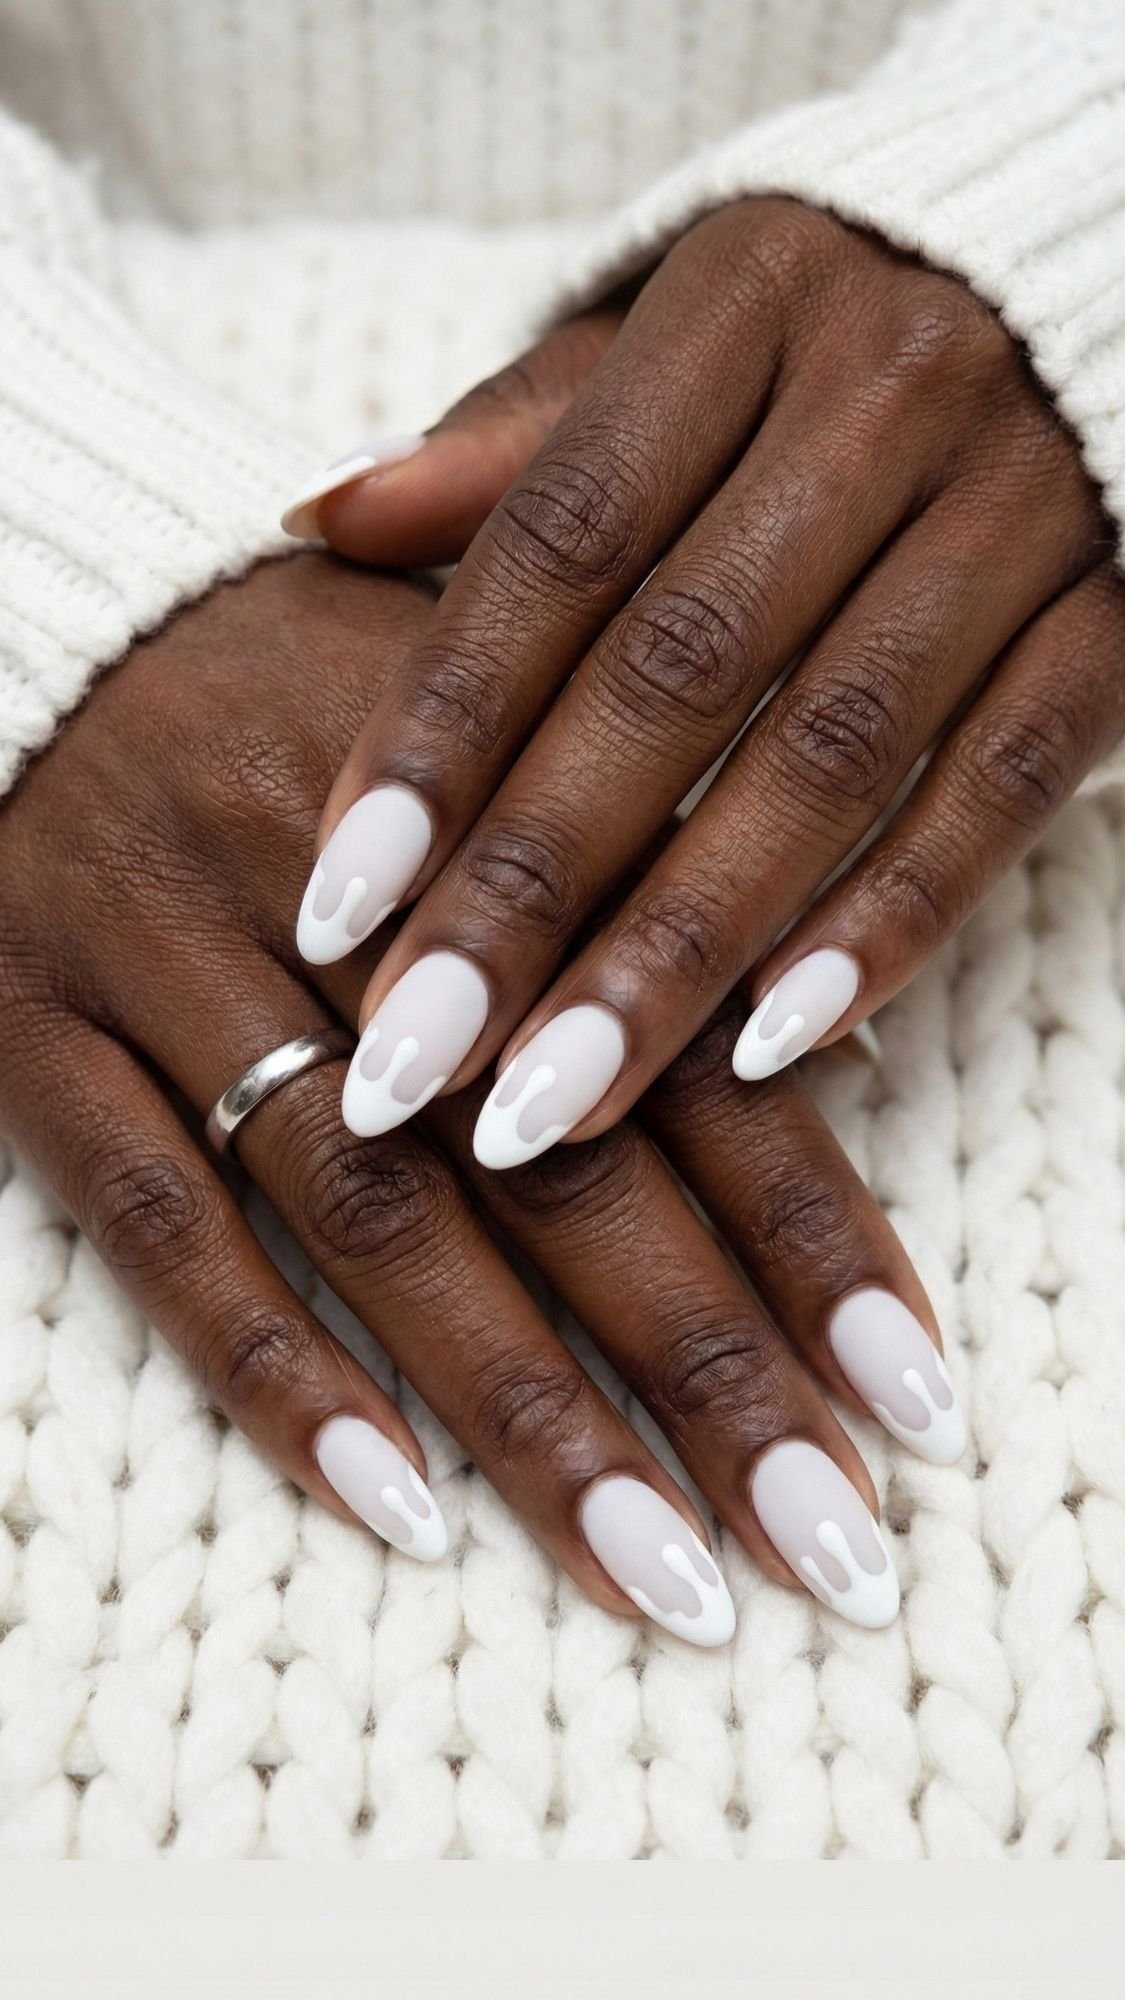
19. Matte White Nails with Glossy Snow-Drip Tips
If you want something playful that still reads chic, matte white nails with glossy snow-drip tips hit that exact balance. You keep the whole nail a soft, snowy matte white, then add glossy “drips” at the tips that look like melting snow or icing on a sugar cookie. It feels fun and wintery without cartoon characters or bright colors, so you still walk into a room looking polished, not like you escaped from a kids’ party.
Why matte + glossy snow-drips feel so cool
- The matte base gives your nails that soft, frosted look.
- The glossy drip detail adds contrast and texture in the most minimal way.
- White-on-white keeps everything clean, graphic, and surprisingly sophisticated.
You get a little “nail art moment” that still works with neutral outfits and gold or silver jewelry.
Best nail shapes and drip style
You control the vibe through shape and how dramatic you make the drip:
- Shapes that suit this design:
- Medium almond – soft, wintry, very flattering
- Short to medium coffin – more statement, still wearable
- Short squoval if you want the look but live a very practical life
- Drip style tips:
- Keep the drips thin and smooth, not chunky or gloopy.
- Let the drips start near the tip and flow slightly downward, not halfway down the nail.
- Use just one shade of glossy white so the effect stays subtle.
Ask yourself, “Do I want cute and chic or cartoon snowman nails?” Then keep the drips minimal to stay on the chic side.
How to ask your nail tech (or pull it off at home)
At the salon, you only need one clear sentence with the vibe nailed down:
- Say: “I’d love matte white nails with glossy white snow-drip tips—thin, subtle drips, not chunky.”
Then ask your tech to:
- Shape the nails into short/medium almond, coffin, or squoval.
- Paint 1–2 coats of solid white polish.
- Apply a matte top coat over the whole nail and let it dry.
- Use glossy white polish or clear top coat to draw thin “drip” shapes starting at the tip and flowing slightly downward.
- Build the drips slowly so they look smooth and intentional.
DIY version:
- Paint your nails white, let them dry, then add a matte top coat.
- Take a thin nail art brush or dotting tool and use glossy white polish or clear top coat to trace drips at the tips.
- Create small rounded “drops” and connect them back to the tip edge.
- Let everything dry completely so the glossy parts really pop against the matte base.
When matte snow-drip nails make sense
- Casual holiday parties, cookie swaps, game nights, and cozy hangs.
- Weeks when you live in sweaters, leggings, and fuzzy socks but still want your nails to feel fun.
- If you want something festive that doesn’t clash with your outfits or feel too over-the-top for daily life.
If you want nails that feel like winter, cookies, and snow days—but still look editorial in a close-up—matte white nails with glossy snow-drip tips absolutely get you there.
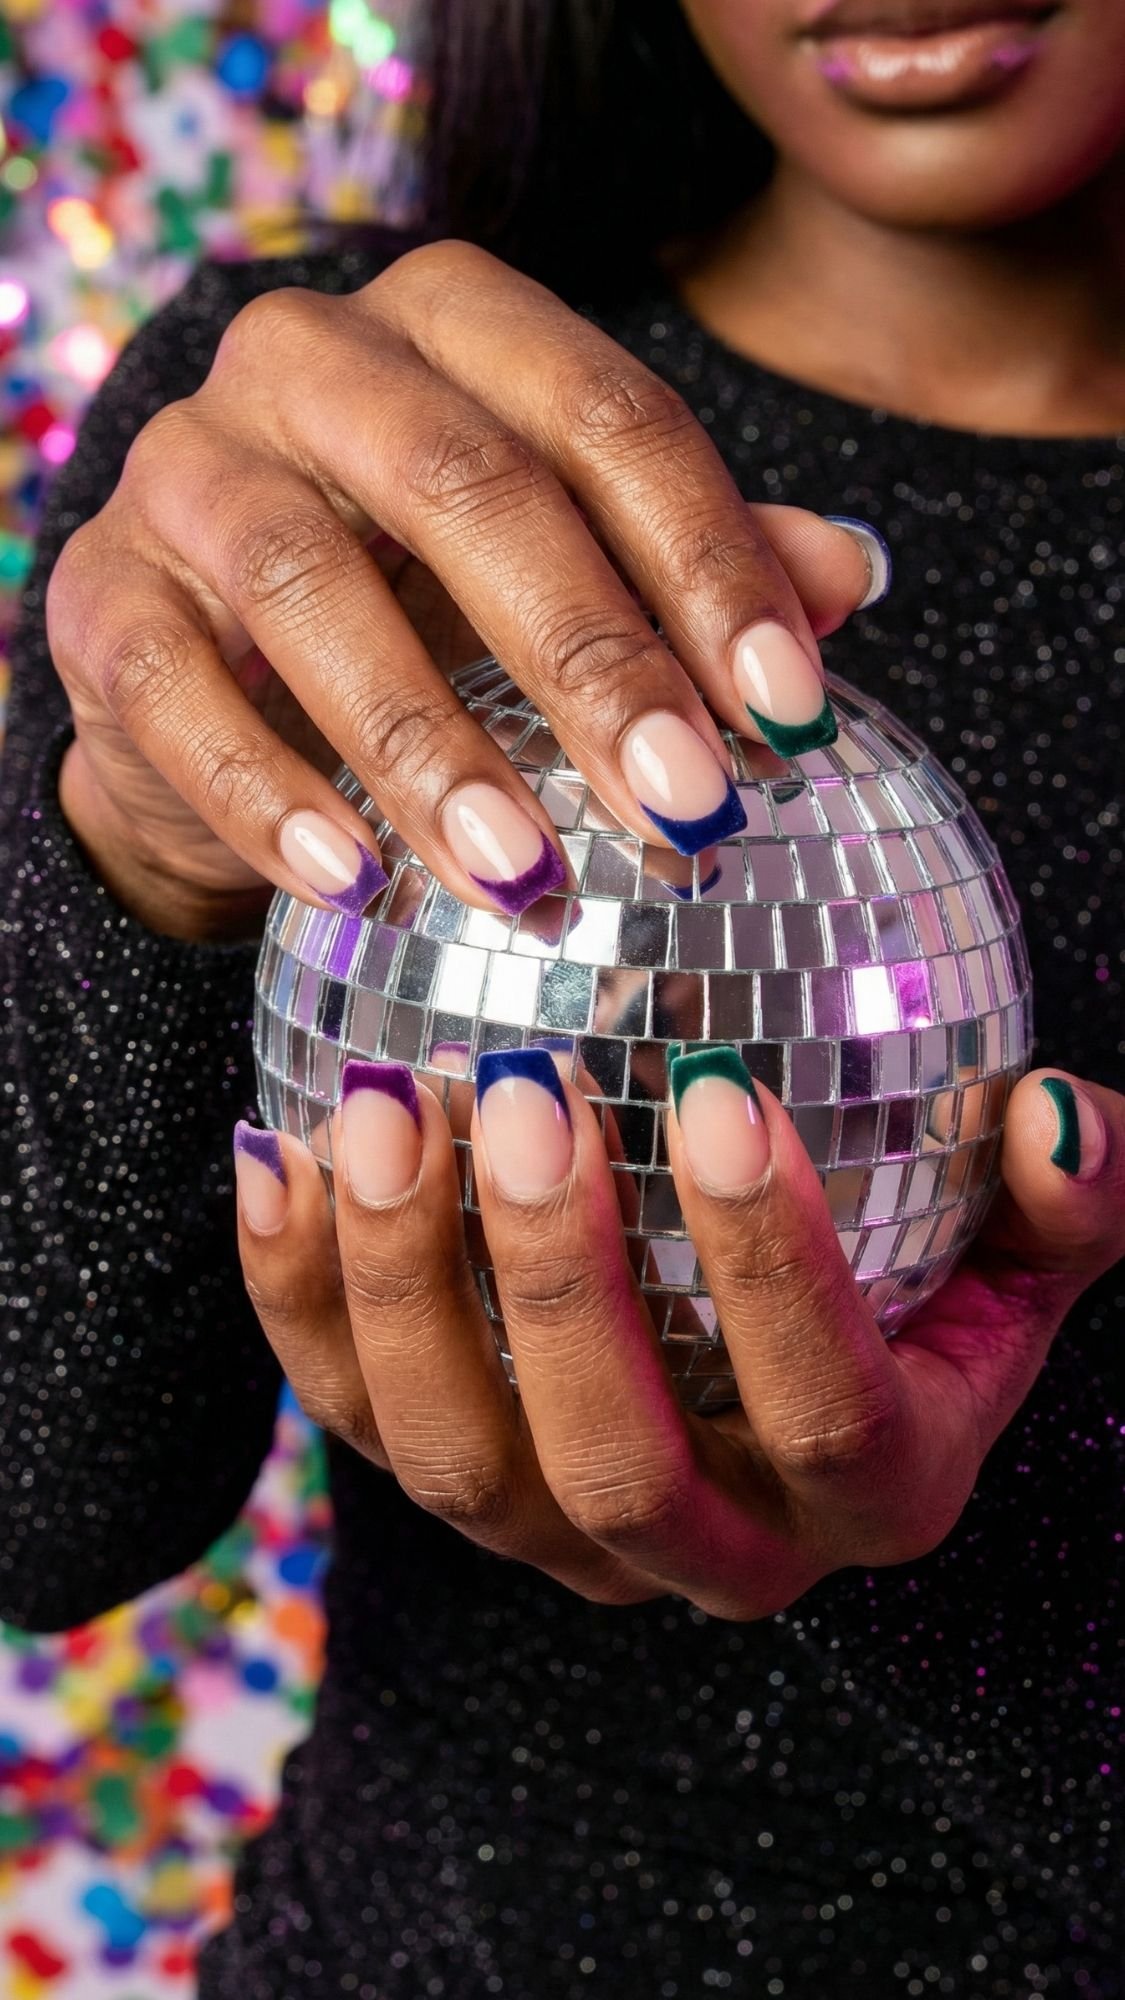
20. Rainbow Velvet French Tips for New Year’s Eve
If you want your nails to scream “I showed up to celebrate,” but you still love a clean base, rainbow velvet French tips give you the perfect mix. You keep your nails nude and polished, then add thin velvet tips in different jewel tones—emerald, sapphire, amethyst, ruby—across your fingers. It looks fun and festive, but because the tips stay slim and the base stays neutral, the whole mani still feels chic and elegant.
Why rainbow velvet tips feel party-ready and polished
- The nude base keeps your nails looking clean and wearable.
- The velvet tips add rich, dimensional color that glows under party lights.
- Using different jewel tones across your nails makes your mani feel playful without looking chaotic.
Think of it as your nails wearing little party dresses while your base stays in a satin slip.
Best base, colors, and shapes
You can customize the color story, but jewel tones stay the move for NYE:
- Base color:
- Sheer nude that matches your skin tone
- Soft beige or milky pink
- Velvet French tip colors:
- Emerald green
- Sapphire blue
- Amethyst purple
- Ruby red
- Optional: deep gold or garnet on one or two nails
- Shapes that flatter velvet tips:
- Short squoval – cute, practical, and easy to live with
- Short almond – slightly softer and more glam
Keep the tips thin and curved so the design looks refined, not chunky.
How to ask your nail tech (or DIY your rainbow French)
At the salon, you’ll want to emphasize “thin velvet French, different jewel tones”:
- Say: “Can we do a sheer nude base with thin velvet French tips in different jewel tones—emerald, sapphire, ruby, amethyst—short squoval?”
Ask them to:
- Shape your nails short and squoval or almond.
- Apply 1–2 coats of a sheer nude or milky neutral base.
- Use velvet or magnetic polishes in jewel tones to create a thin French line on each nail, changing the color per finger.
- Adjust the shimmer or magnetic effect so each tip glows softly when the light hits.
- Finish with a glossy top coat to seal the design and keep everything smooth.
DIY version:
- Start with your nude base and let it dry.
- Use a detail brush to paint thin French tips in different jewel-tone polishes across your fingers.
- If you have a velvet or magnetic formula, work one nail at a time and use the magnet to pull the shimmer into a soft effect.
- Top coat everything and admire how your nails suddenly look ready for confetti.
When rainbow velvet French tips make the most sense
- New Year’s Eve, obviously—this mani literally looks like a countdown in polish form.
- Holiday parties where you wear black, white, or neutral outfits and want your nails to bring the color.
- Any event where you know your hands will show up in photos holding drinks, sparklers, or noisemakers.
If you want your nails to look like the fun friend who still has standards, rainbow velvet French tips are that friend.
21. Short Minimalist Glitter Tips for Busy Holiday Schedules
When your calendar looks wild and you barely remember what day it is, short minimalist glitter tips save you. You keep a clear or sheer nude base, then dust just the very edge of each nail with fine glitter. The result feels clean and low-maintenance, but your nails still sparkle when you reach for a gift bag, a steering wheel, or a champagne glass.
Why minimalist glitter tips work for real life
- The short length lets you live your life: typing, cooking, cleaning, wrapping.
- The sheer base grows out gracefully, so you avoid harsh regrowth lines.
- The tiny line of glitter at the tip gives just enough holiday sparkle.
You get nails that still look polished on week three, which feels like a miracle in December.
Best base, glitter, and shapes
You keep things simple and soft so the glitter detail does the talking:
- Base options:
- Sheer nude that matches your skin tone
- Soft pink-beige
- Clear base with one sheer wash of color
- Glitter type:
- Fine gold, champagne, or silver glitter
- No chunky pieces if you want that elegant, grown vibe
- Shapes that love a minimalist tip:
- Short natural squoval – your nails, but upgraded
- Short round – soft, easy, and low chip risk
Ask yourself, “Will I still like this when my week turns chaotic?” Minimalist glitter tips usually handle that answer.
How to ask your nail tech (or keep it easy at home)
At the salon, lean into the “simple but festive” angle:
- Say: “Can we do short natural nails with a sheer nude base and a fine glitter tip—very thin, just at the edge?”
Ask your tech to:
- Shape your nails short and squoval or round.
- Apply a sheer nude or clear-with-a-tint in 1–2 coats.
- Use a fine glitter polish or loose glitter to create a slim band along the very tip of each nail.
- Fade the glitter very slightly downward if you want a tiny gradient, or keep it as a crisp line.
- Finish with a smooth glossy top coat so everything feels even and protected.
DIY version:
- Paint your sheer base and let it dry.
- Load a small brush with fine glitter polish and run it just along the free edge.
- For a softer gradient, bounce a bit of glitter just below the tip, then drag it upward.
- Top coat to seal in the glitter and stop it from feeling rough.
When short minimalist glitter tips shine
- Nonstop weeks where you juggle work, errands, kids, travel, and events.
- Times when you want your nails to match every outfit, not just party looks.
- Moments when you want sparkle that still feels calm, clean, and grown.
If you want nails that quietly keep up while you run through holiday chaos, short minimalist glitter tips stay pretty, practical, and party-friendly the whole way through.
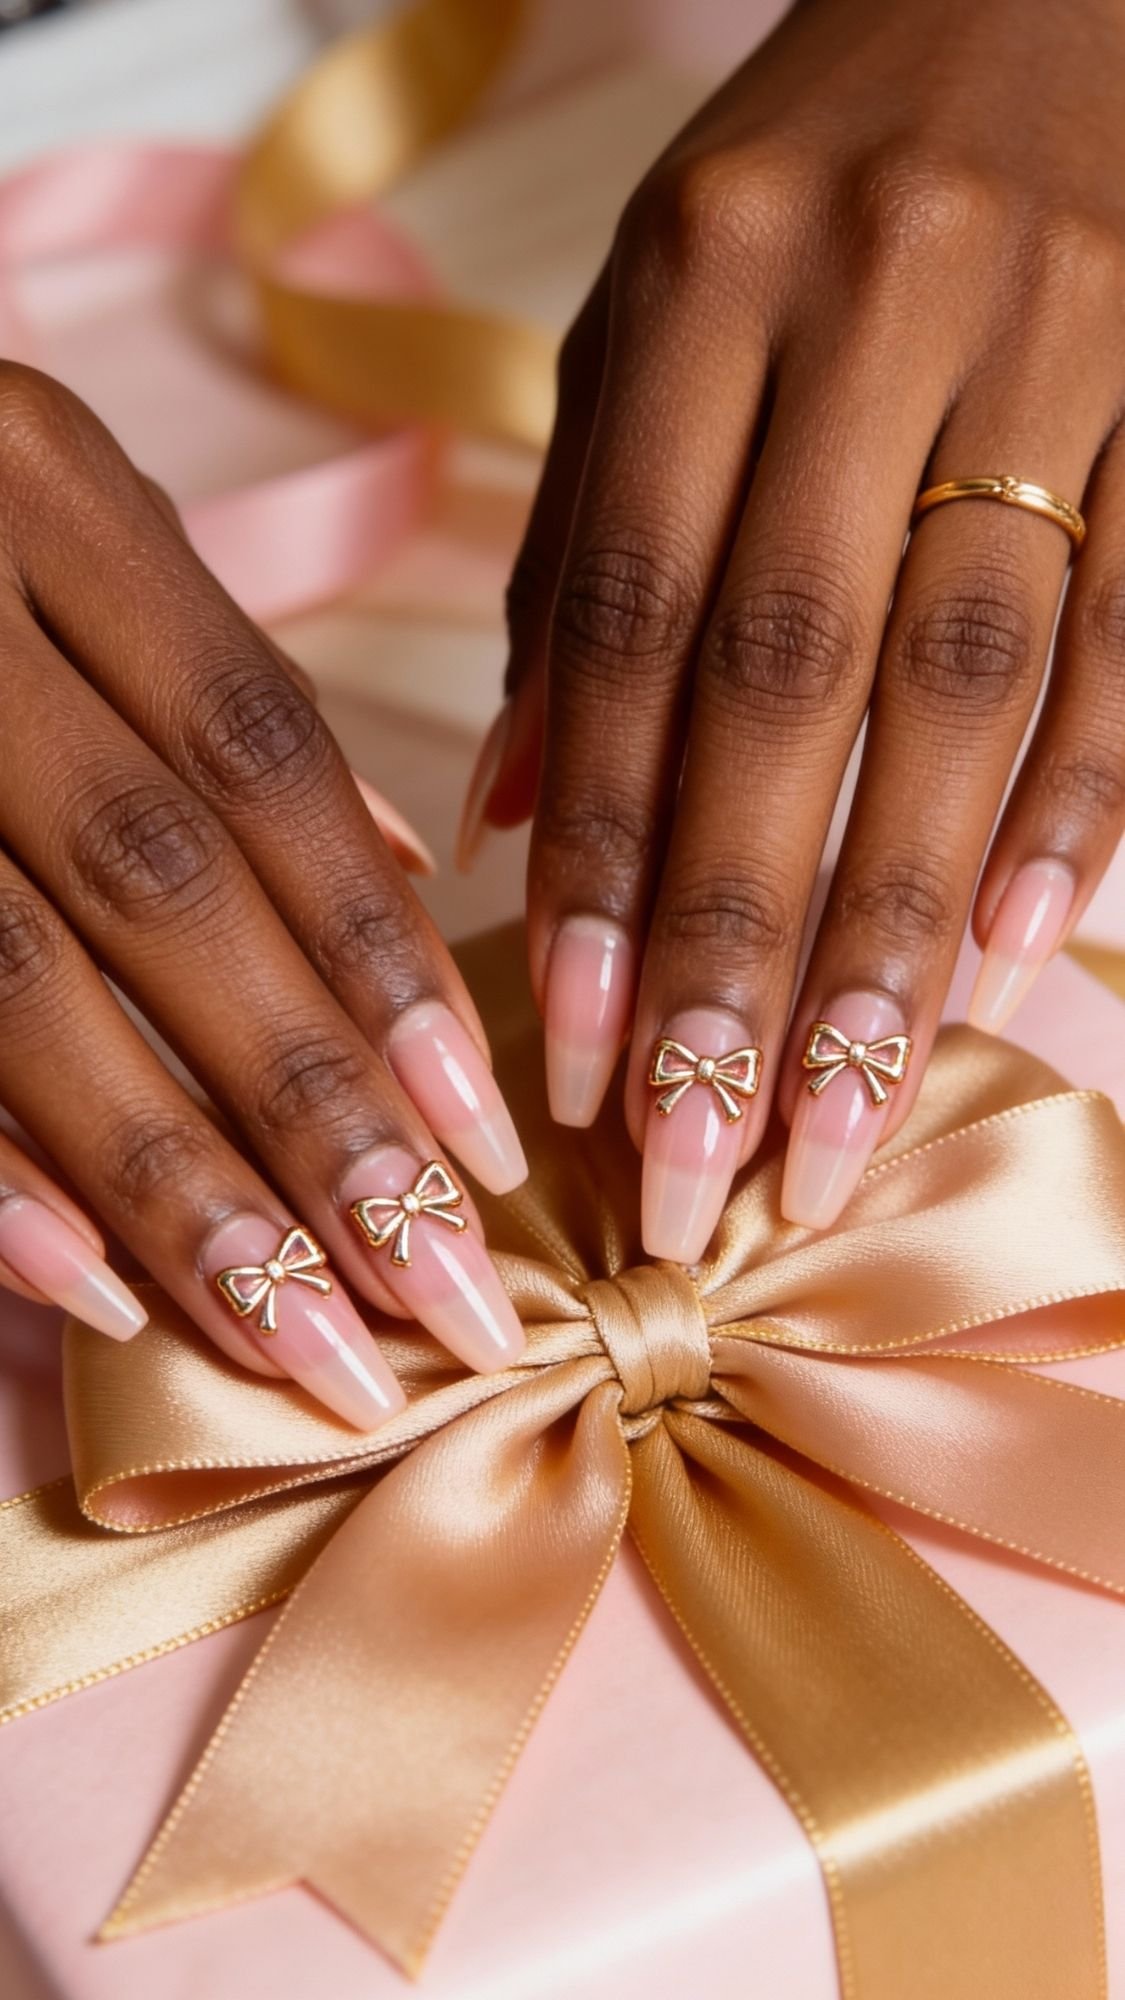
22. Bow Charm Accent Nails on a Sheer Pink Base
If your style leans soft, feminine, and a little bit coquette, bow charm accent nails on a sheer pink base will feel like your personality in nail form. You let most of the nail stay sheer and glossy, then add one tiny bow charm on an accent nail. The bow feels playful and flirty, but the sheer base keeps everything light and grown. It’s giving “gift-wrapped, but make it subtle.”
Why bow accents feel cute and classy
- A sheer pink base keeps your nails looking clean, healthy, and soft.
- One tiny bow charm adds a clear focal point without overwhelming your hands.
- The look pairs beautifully with pearls, ribbons, satin, and romantic outfits.
You basically dress your nails like a present without turning them into full wrapping paper.
Best base, bow style, and placement
You control the vibe with how sheer, how shiny, and how detailed you go:
- Base colors that work perfectly:
- Sheer baby pink
- Soft blush nude
- Milky pink-beige
- Bow charm styles:
- Tiny metallic bows in gold or silver
- Pearl bows for softer, bridal-adjacent energy
- Crystal bows if you want extra sparkle
- Placement ideas:
- One bow on each ring finger only
- Optional: a single bow on one hand if you want it ultra minimal
If you ask yourself, “Would this catch on everything in my closet?”, choose flatter, smaller bows.
How to ask your nail tech (or add bows at home)
At the salon, you just need a clear picture and a few key words:
- Say: “I’d love sheer pink nails with one tiny bow charm on each ring finger—very delicate, nothing bulky.”
Then your tech:
- Shapes your nails short or medium in almond, squoval, or round.
- Applies 1–2 coats of sheer pink or blush nude for that clean, glossy base.
- Places a tiny bow charm near the cuticle or slightly above the center on each accent nail.
- Uses nail glue or builder gel to secure the bows.
- Adds top coat around the charms so everything stays smooth and secure.
DIY version:
- Paint your nails with 1–2 coats of sheer pink and let them dry.
- Use nail glue and tweezers or a wax pencil to place a tiny bow charm on your chosen accent nail.
- Press gently until it grips.
- Add a thin layer of top coat around the bow’s base to lock it in.
When bow charm nails make the most sense
- Holiday dates, parties, or events where you wear dresses, skirts, bows, or lace.
- Photoshoots, content days, or special dinners where you want cute detail shots of your hands.
- Any time you want your nails to feel soft and romantic instead of bold and loud.
If you want your mani to say, “Yes, I am the gift,” without sounding annoying, sheer pink nails with one tiny bow charm do the talking for you.
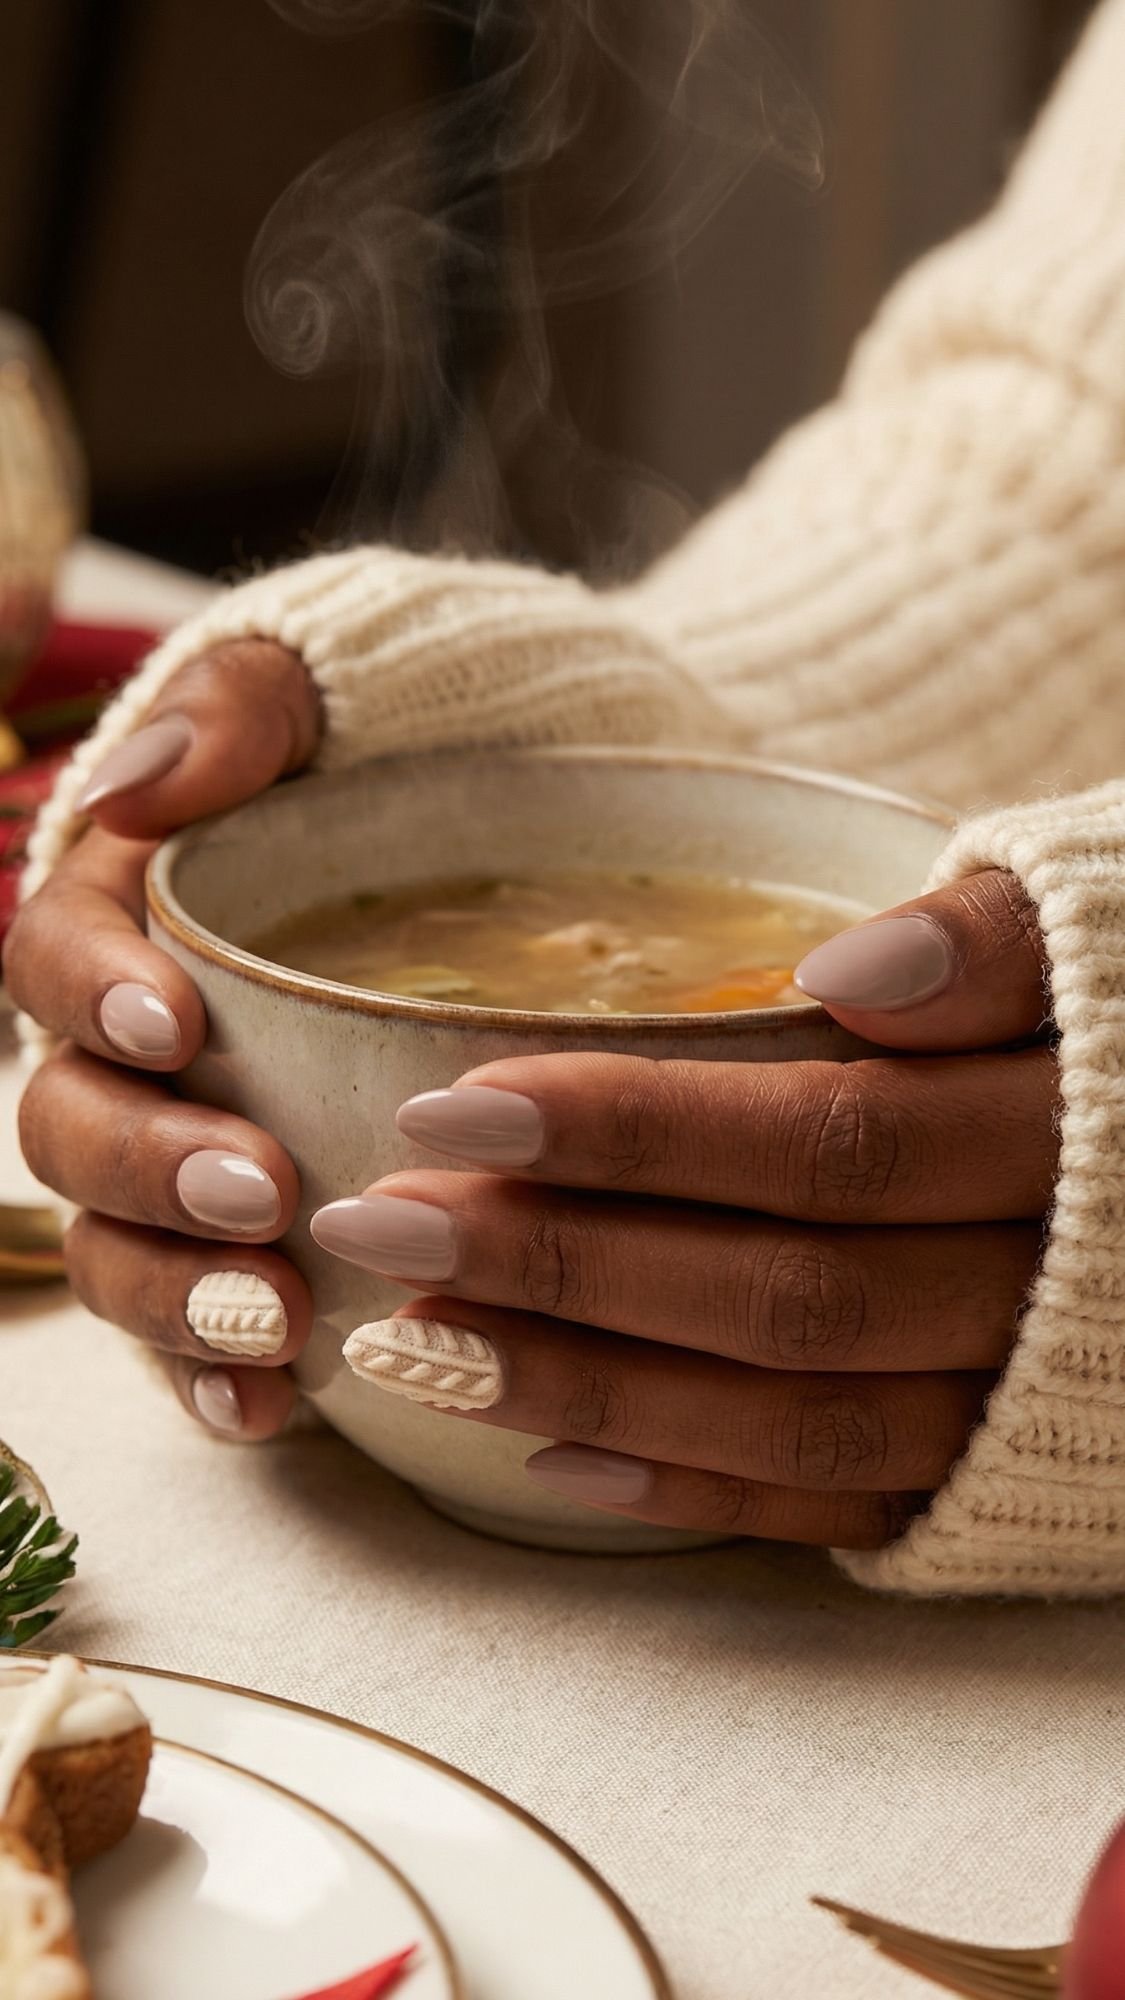
23. Mohair Sweater Texture Nails for Cozy Holiday Dinners
If your December personality is “blanket, soup, soft music, no chaos please,” mohair sweater texture nails match that perfectly. You keep most of your nails smooth and glossy, then give one or two nails a raised, cable-knit texture that looks like your favorite sweater. It feels cozy and cute without turning your hands into a full Pinterest craft project.
Why sweater nails feel so cozy and chic
- The raised knit texture instantly gives soft, wintery vibes.
- You keep the color palette neutral and calm, so it still reads elegant.
- One or two textured nails sit next to simple glossy nails, which keeps everything balanced.
You basically let your nails wear tiny sweaters while you wear the big one.
Best colors and shapes for sweater texture
This look hits hardest when you go soft and neutral instead of loud and bright:
- Perfect sweater shades:
- Soft taupe
- Cream or off-white
- Dusty rose
- Pale greige
- Shapes that flatter the texture:
- Short almond – cozy and feminine
- Short squoval – practical but still pretty
- Texture placement:
- One or two accent nails per hand (ring finger, middle finger, or both)
- Keep the rest smooth and glossy in the same shade so it all feels cohesive
Ask yourself, “Would this color look good as an actual sweater?” If yes, it probably works on your nails.
How to ask your nail tech (or try a simplified DIY)
At the salon, describe both the vibe and the placement:
- Say: “Can we do soft taupe nails with one or two sweater texture accent nails—raised knit pattern, cozy but minimal?”
Ask your tech to:
- Shape your nails into short almond or squoval.
- Paint all nails in your chosen soft neutral shade.
- On the accent nails:
- Use thicker gel or acrylic paint in the same color to draw little sweater patterns (lines, braids, cable-knit details).
- Build the lines up slightly so they look raised and 3D.
- Add a matte or velvet top coat over the textured nails if you want an extra “fabric” feel, and a glossy top coat on the rest.
DIY idea (easier version):
- Paint all nails in a taupe, cream, or dusty rose shade.
- On one or two accent nails, use a thin brush and the same polish to draw little lines, X’s, and braids once your base dries.
- Go over those lines a second time so they look slightly raised.
- Seal everything with a matte or glossy top coat (matte looks extra cozy).
When mohair sweater nails make the most sense
- Holiday dinners at home where you dress cute but cozy.
- Soup nights, movie nights, and “I’m not going out” weekends.
- Anytime you want your nails to match your knitwear and your whole soft-girl winter energy.
If you want your nails to feel comforting and cute every time you wrap your hands around a mug or bowl, mohair sweater texture nails give you that exact “I live in cozy mode” vibe.
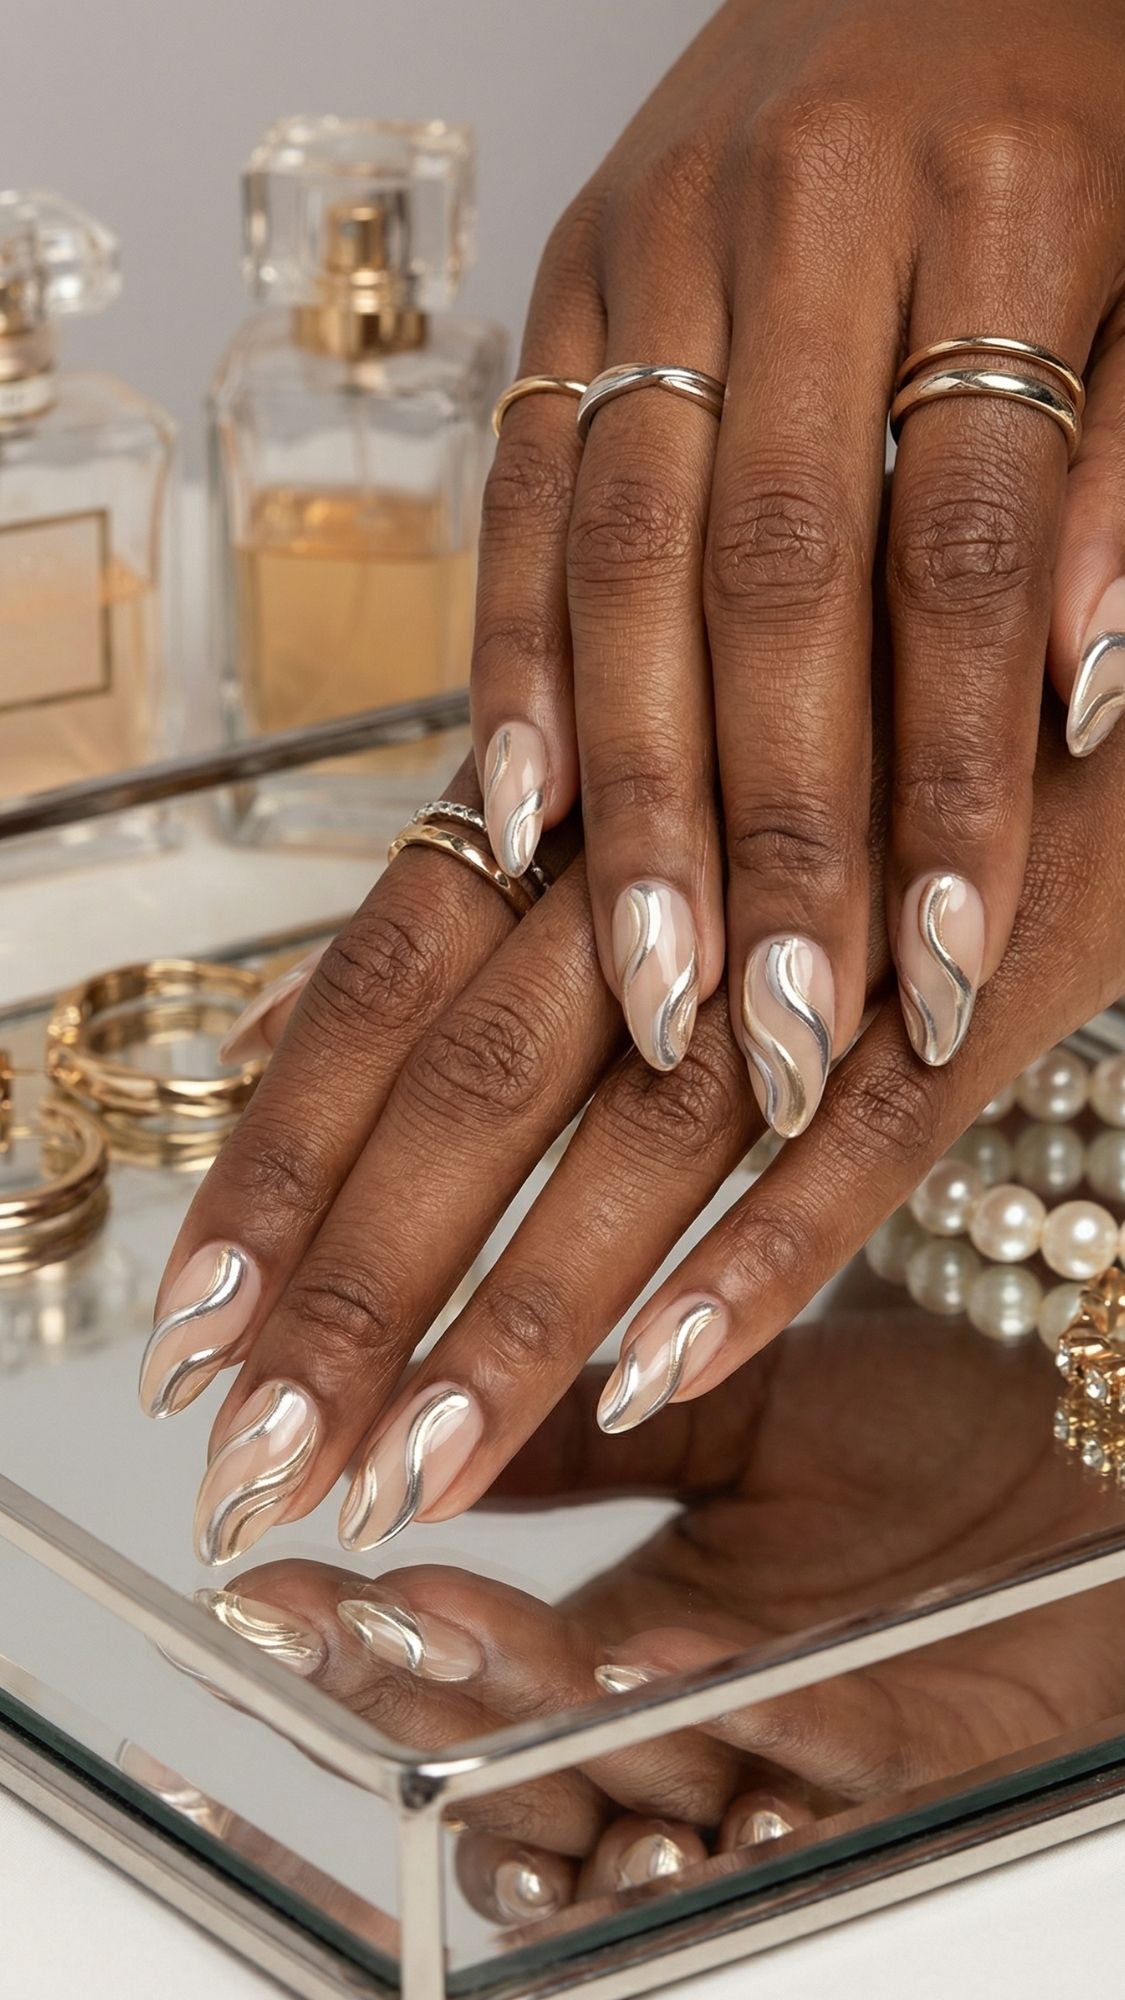
24. Chrome Swirl Nails in Silver and Champagne
If you want your nails to look artsy without going full color explosion, chrome swirl nails in silver and champagne give you that chic, minimal drama. You start with a sheer nude or beige base, then layer thin metallic swirls over the top like little flowing ribbons. Silver and champagne keep the palette neutral, so the design feels modern and expensive instead of loud.
Why chrome swirls look so effortlessly elevated
- Thin metallic lines add movement and interest without covering the whole nail.
- Silver + champagne sit in that sweet spot where they match gold, silver, and mixed-metal jewelry.
- The sheer base keeps your nails looking light, clean, and grown, even with nail art.
You basically turn your nails into tiny abstract paintings that still go with everything in your closet.
Best base, colors, and shapes
This look shines most when you keep the base soft and the swirls delicate:
- Base shades that work best:
- Sheer beige
- Soft neutral nude
- Milky pink-beige that flatters your skin tone
- Swirl colors:
- Cool chrome silver
- Warm champagne chrome
- You can layer them together for extra dimension
- Shapes that flatter the swirls:
- Medium almond – perfect canvas for curved lines
- Short to medium squoval if you want it more practical but still artsy
Ask yourself, “Do I want these lines to whisper or shout?” Then keep them thin and spaced out if you lean whisper.
How to ask your nail tech (or swirl at home)
At the salon, focus on describing the vibe and thickness of the lines:
- Say: “I’d love a sheer nude base with thin abstract chrome swirls in silver and champagne on top—soft, flowing lines, not too dense.”
Ask your tech to:
- Shape nails into almond or squoval, short to medium length.
- Apply 1–2 coats of sheer nude or beige for a clean base.
- Use a fine nail art brush and chrome gels or polishes in silver and champagne to draw thin, wavy lines that curve along the nail.
- Think flowing “S” shapes, not tight spirals.
- Leave plenty of negative space so the design breathes.
- Seal everything with a glossy top coat so the chrome reflects smoothly.
DIY version:
- Paint your sheer nude base and let it dry.
- Load a thin brush with chrome or metallic polish and draw gentle swirls down the nail.
- Keep your hand relaxed so the lines stay fluid instead of stiff.
- Top coat to level everything out and make the metallics shine.
When chrome swirl nails really hit
- Holiday dinners, work events, and nights out when you want subtle art that still looks put-together.
- Weeks when you wear a lot of neutrals, blazers, slip dresses, or satin shirts.
- Any time you want nail art that feels sophisticated instead of cutesy.
If you want nails that look like they belong in a minimalist art gallery but still feel totally wearable, chrome swirls in silver and champagne check every box.
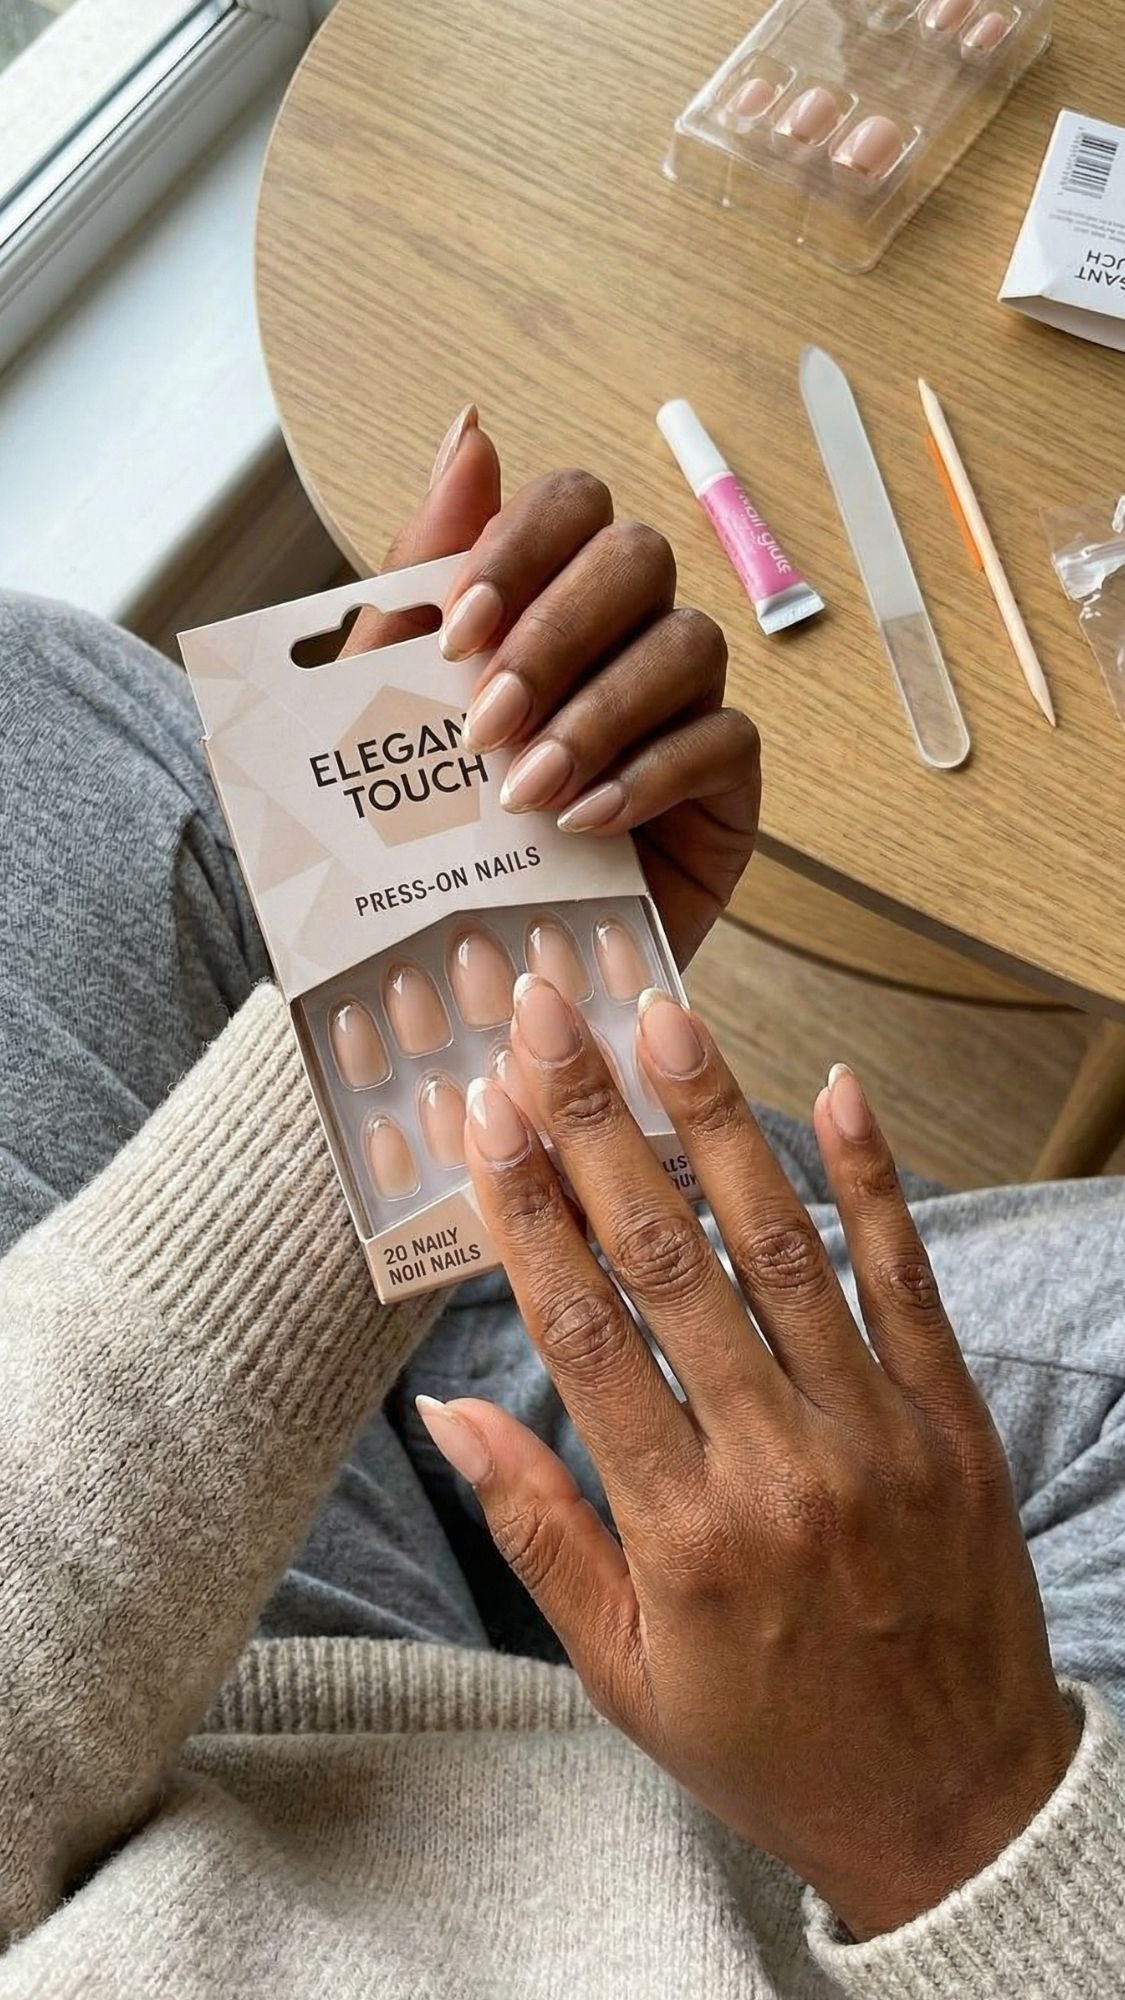
25. Elegant Press-On Nail Hacks for Last-Minute Holiday Parties
Salons book up fast during the holidays, and sometimes your nails still look “Tuesday at 3 p.m.” an hour before a party. That’s where elegant press-on nails save the whole situation. You can grab a glam set, shape it, customize it, and walk out the door looking like you planned this three weeks ago. When you pick the right style and apply them properly, nobody clocks them as press-ons unless you tell them.
Why press-ons totally count as elegant holiday nails
- Brands now drop styles with velvet finishes, chrome French tips, aura glow, and garnet reds that look salon-level.
- You control the length and comfort because you shape and file them to fit your real life.
- You can swap designs fast—one set for a work week, one for NYE, no long-term commitment.
It’s basically an at-home nail wardrobe for chaotic holiday schedules.
How to choose the right elegant press-on set
Scroll past the cartoon designs and look for sets that feel like the rest of this list:
- Finishes to look for:
- Velvet (wine, emerald, silver, chocolate)
- Chrome French tips (champagne, gold, silver)
- Milky aura or glazed neutral sets
- Classic red or garnet in almond or squoval shapes
- Shapes & lengths that feel chic and wearable:
- Short almond or squoval for everyday life
- Medium almond if you want glam for a night or two
- Avoid super-long stilettos if you still need to cook, zip dresses, or do child-wrangling on the side 😅
Ask yourself, “Would this design work as a salon set I paid full price for?” If yes, it probably works as a press-on set too.
Application hacks so they actually last
You can slap press-ons on in five minutes and hope for the best, or you can use a few hacks and make them last:
- Prep your natural nails
- Wash your hands and dry them well.
- Gently push back your cuticles.
- Lightly buff the surface of your nails so the glue grips better.
- Wipe your nails with alcohol or a dehydrator to remove oils.
- Size and shape the press-ons first
- Lay them out from thumb to pinky before you start.
- File the sidewalls of each press-on so they match your nail curve.
- If the length feels too extra, pre-file the tips shorter so you can function.
- Glue like you mean it
- Place a small drop of strong nail glue on your natural nail and a tiny bit on the inside of the press-on.
- Press down near the cuticle first, then roll the tip down and hold for 20–30 seconds.
- Wipe away any extra glue right away so it doesn’t crust around the sides.
- Blend and finish
- Once everything sets, lightly file the free edge so it looks natural.
- Add a thin layer of clear top coat if the finish looks dull or if you want extra protection.
Build a “party emergency” press-on kit
Keep a tiny kit ready so you never panic before a holiday event again:
- 1 box of elegant press-ons (neutral, garnet, or chrome French)
- Nail glue, a mini file, and a buffer
- Alcohol wipes or a tiny bottle of rubbing alcohol
- A little cuticle oil for after everything dries
You can throw that kit in your suitcase, your work bag, or your bathroom drawer and feel smug every time someone complains about not getting a nail appointment.
If you want a backup plan that still looks expensive and on-theme, a well-applied set of elegant press-ons absolutely counts as a holiday manicure—no shame, just strategy.
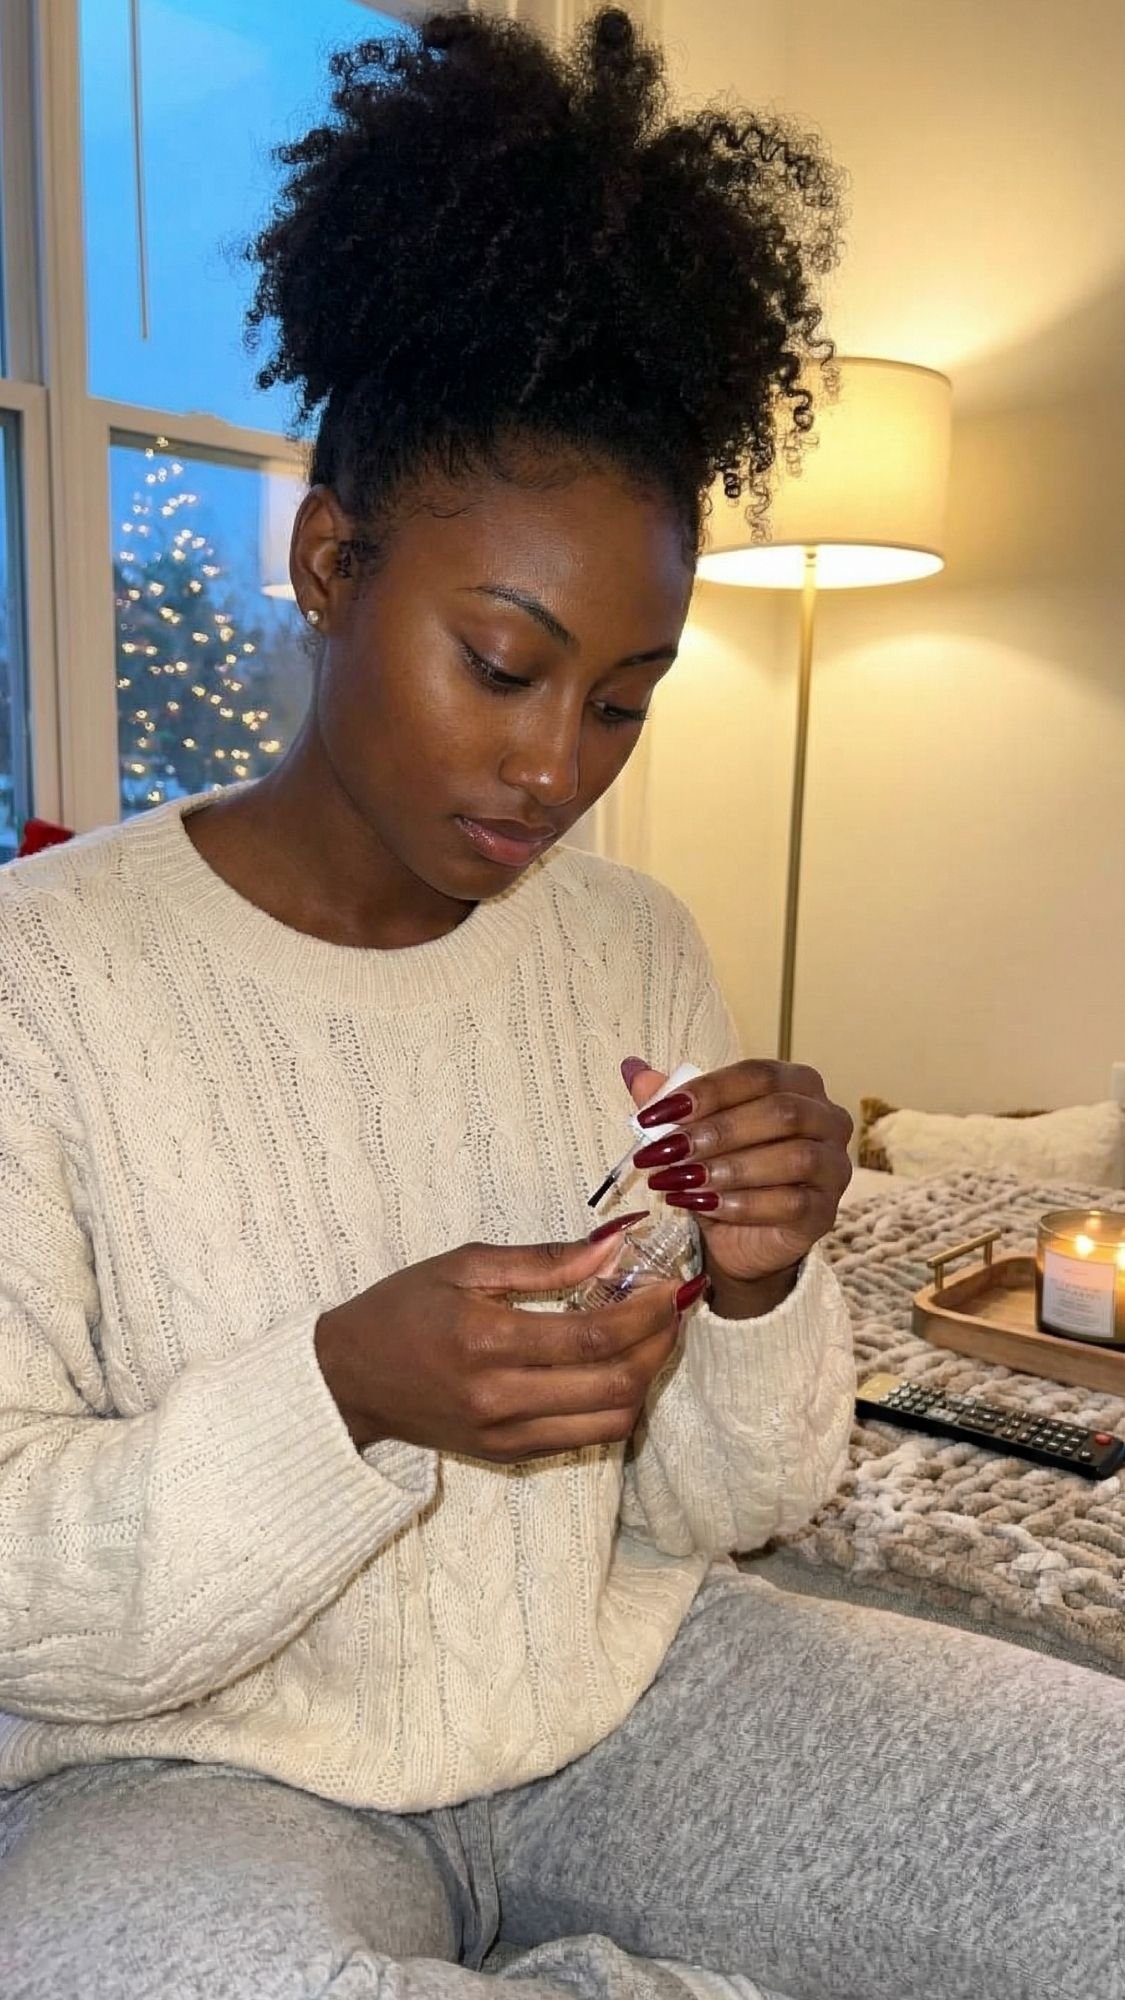
How to Make Your Elegant Holiday Nails Last All Season
You book the perfect manicure, take 47 photos, and then two days later a chunk peels off while you open the fridge. The disrespect. If you want your elegant holiday nails to survive the full season—parties, dishes, wrapping paper, random Amazon boxes—you need a little strategy. The good news? You don’t need anything fancy. You just treat your nails the way you treat your favorite shoes: with prep, protection, and tiny check-ins.
1. Prep Your Nails Like You Mean It
Great nails start before the polish hits. Rushed prep always shows later.
- Clean nails only. You wash and fully dry your hands so oil and lotion don’t mess with adhesion.
- Shape with intention. You file in one direction (not back and forth like a saw) and pick a shape that doesn’t catch on everything—short squoval or almond stays strong.
- Push back, don’t attack, your cuticles. You soften them in warm water, then gently push them back so polish sits on nail, not skin.
- Buff lightly. You use a gentle buffer so the surface feels smooth and slightly grippy, not scratched to death.
- Never skip base coat. You lay down a good base coat so dark shades don’t stain and color actually has something to hold onto.
Ask yourself, “Would I build a house on a slippery foundation?” Same answer for your polish.
2. Baby Your Nails for the First 24 Hours
Once you walk out of the salon (or finish your DIY set), you enter the danger zone. Your nails look dry, but the layers still settle and cure.
- You avoid long hot showers right after you paint. Heat and steam make polish soften and lift faster.
- You skip heavy cleaning or anything that soaks your hands in water.
- You use the pads of your fingers to open cans, drawers, and packages instead of your nail tips.
- If you wear press-ons or glue-ons, you avoid soaking your hands that first night so the glue reaches full strength.
Give your nails a day to “lock in,” and they pay you back with extra wear time.
3. Use Gloves Like an Adult Who Loves Their Mani
I know, it feels dramatic, but water and harsh products ruin even the best manicure.
- You throw on rubber gloves for dishes, scrubbing, or cleaning with chemicals.
- You wear gloves when you handle super hot water or do long kitchen sessions.
- You keep a spare pair under the sink so you don’t say, “I’ll skip it just this once,” every time.
Water sneaks under your polish and makes it lift. Gloves keep your color, shape, and shine intact way longer.
4. Make Cuticle Oil and Hand Cream Non-Negotiable
Dry nails crack. Moisturized nails flex and survive. Simple.
- You keep cuticle oil near your bed, desk, or couch and swipe a little around your nails once or twice a day.
- You massage it in so your cuticles stay soft and your nails feel hydrated, not brittle.
- You follow with hand cream, especially in cold weather when the air tries to roast your skin.
- You pick formulas that sink in fast so you don’t feel greasy and avoid smearing oil on everything.
Every time you moisturize, you extend the life of your mani and keep your hands looking photo-ready.
5. Refresh with Top Coat Instead of Starting Over
Sometimes you don’t need a new set; you just need a glow-up.
- You add a thin layer of clear top coat every few days to boost shine and seal tiny scratches.
- If you chip a tip, you gently file the edge, add a little polish just on the chipped area, then top coat the whole nail.
- You turn grow-out into a look:
- Add glitter just at the tips for a fresh glitter French.
- Add a slim contrasting line at the base to fake a half-moon design.
Before you book another appointment, ask, “Can I rescue this mani with 5 minutes and a top coat?” You’ll be surprised how often the answer comes out yes.
6. Choose Designs That Work With Your Life
Not every design lives the same way. Some looks love real life more than others.
- You pick shorter lengths when you know you’ll travel, cook, wrap gifts, or carry kids.
- You reach for solid shades, French tips, and simple shimmer when you need low-maintenance elegance.
- You save heavy 3D details, long stilettos, and full-chrome drama for weekends or one-off parties instead of your busiest weeks.
- You listen to your nail tech when they say, “This design may chip faster on your nail type,” because that’s free science.
Your nails should match your schedule, not fight it. Elegant holiday nails last longer when you plan like you know your own chaos level.
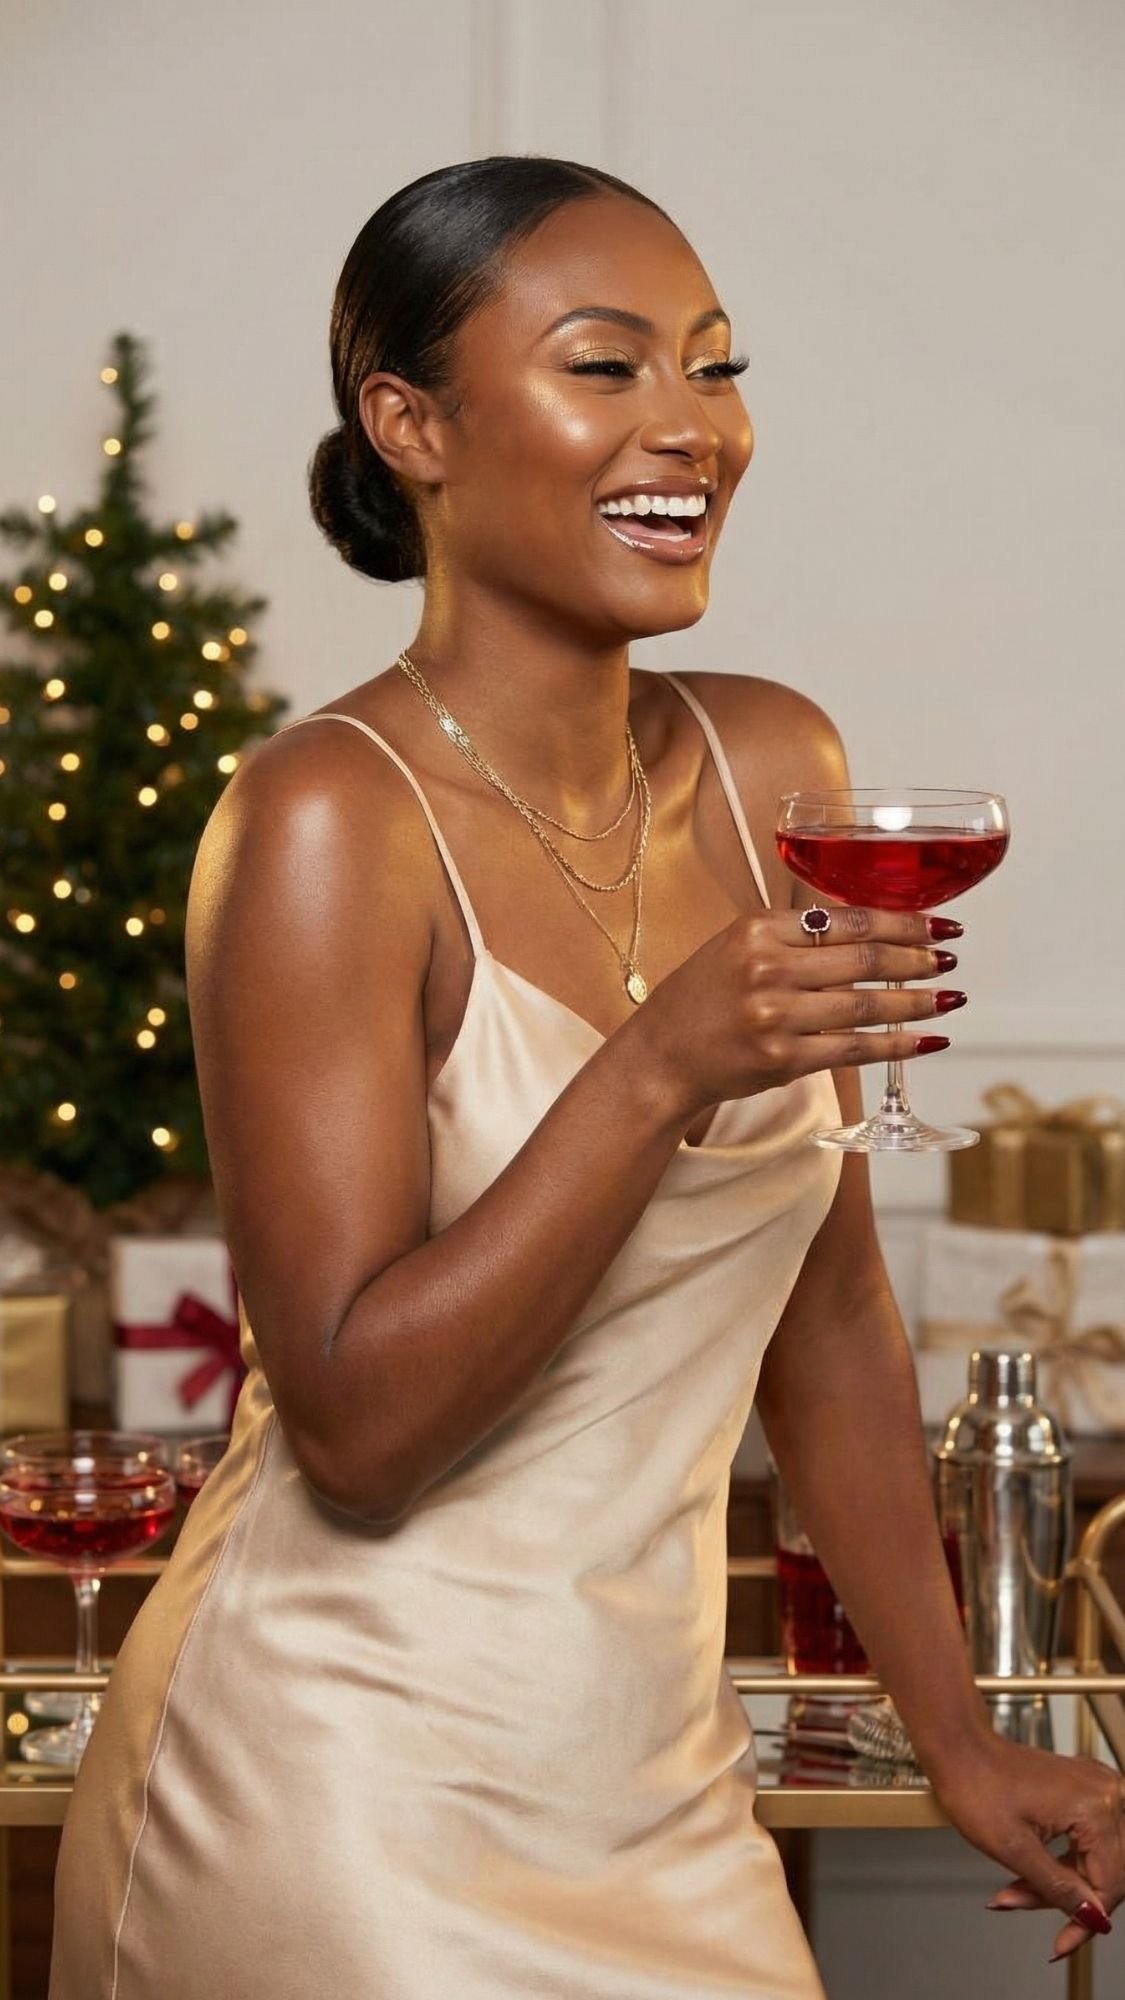
Your Nails, Your Holiday Energy
Holiday nails do more than “match the season.” They set the tone every time you raise a glass, grab a gift, tap your card, or jump into a photo you didn’t plan on. Elegant holiday nails don’t yell for attention; they show up quietly and still steal the shot. That’s the sweet spot you hit with these ideas: rich colors, velvet finishes, chrome details, tiny pearls, bows, foils, and just enough glitter to catch the light.
You don’t need to try all 25 ideas (unless you’re on that level, in which case, respect). You just need a tiny system:
- Pick one everyday mani that works for office days, errands, and family time
- Think hazelnut neutrals, minimalist glitter tips, milky aura, or a soft French.
- Pick one “it’s a whole event” mani for parties, black-tie nights, or NYE
- Think emerald cat-eye, velvet ombré, gold half-moons, or rainbow velvet tips.
Screenshot the ones that made your brain say “yes,” drop them into a “Holiday Nails” folder, and bring 2–3 favs to your nail tech. You don’t walk in saying, “Something cute and festive.” You walk in saying, “Short almond, champagne chrome French, office-friendly, no chunky glitter,” and suddenly your nails match the life you actually live.
At the end of the day, your nails should feel like the physical version of your holiday energy. Cozy? Go sweater texture, chocolate glaze, or hazelnut neutrals. Glam? Grab emerald, chrome, cat-eye, or velvet ombré. Minimal but festive? Think negative space snowflakes, thin glitter tips, or a single plaid accent.
So the real question isn’t, “What’s trending?” It’s: “How do I want my hands to introduce me this season?” Whatever answer you land on, there’s a mani in this list that fits it perfectly.