Disclosure: This post contains affiliate links. As an Amazon Associate I earn from qualifying purchases. If you buy through my links, I may earn a small commission at no extra cost to you. Thanks for supporting my cozy-obsession.
Cozy Mornings, Zero Stress
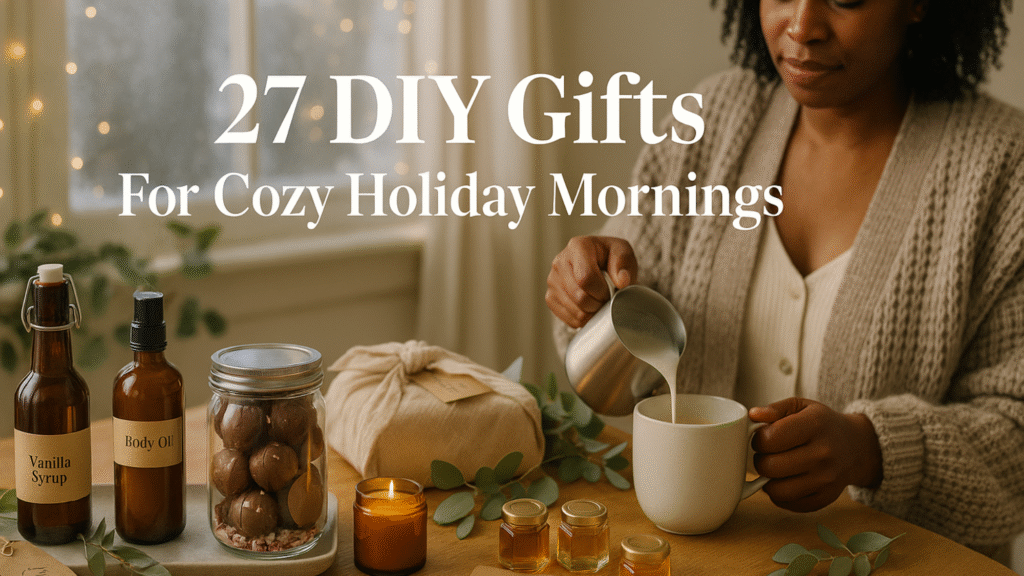
I built my entire holiday rhythm around cozy morning rituals, and my people now expect them like clockwork. You want gifts that feel personal, smell amazing, and don’t torch your budget, right? Same. I keep a stash of simple staples and turn them into DIY gifts for cozy holiday mornings that look luxe and land big. Need something meaningful that you can make in batches without pulling an all-nighter? I’ve got you. Want that “I woke up in a cabin” vibe without leaving your apartment? You’ll get it—27 DIY gifts incoming, all tested in my own kitchen and wrapped with ridiculous care. 🙂
I keep the tone chill, the steps short, and the ingredients easy to source because no one enjoys chaos before coffee. I also sneak in packaging tricks so your gifts look boutique, not “Pinterest panic.” Ever notice how amber glass and a clean label instantly upgrade anything? You’ll use that. I call out time and cost for each idea so you plan like a pro. IMO, you’ll knock out three or four gifts in a single afternoon and still have time for a movie marathon.
How To Use This Guide (And Not Spiral)
Think of this like a menu, not a marathon. Skim the list, circle your easy wins, and build a plan that respects your time and your kitchen counter real estate. I group gifts by theme (coffee lovers, tea people, breakfast fans) so I can batch supplies and knock out multiples in one go. Why juggle twenty-seven projects when three hits deliver bigger impact? I also keep a tiny packaging bin—amber bottles, kraft labels, twine, and a good pen—so everything looks boutique without drama. You want DIY gifts for cozy holiday mornings to feel thoughtful, not chaotic, right?
Plan Your Picks (Fast)
- Pick 3–5 gifts that share ingredients or tools (syrups + chai + latte kit play nice together).
- Note Time and Cost callouts as you decide; stack one quick win with one “showpiece.”
- Choose your audience: coffee crew, spa crew, breakfast crew.
- Set a batch size (usually 6–8 units) so you shop once and cruise.
Shop & Prep Like a Pro
- Write one master list and group by store section to save laps.
- Buy bulk staples (sugar, oats, jars) to lower cost-per-gift.
- Wash and dry jars the night before; line them up like an assembly.
- Pre-print minimal labels so you never handwrite in a rush.
Run a Mini Assembly Line
- Clear a counter and assign stations: measure → mix → fill → label → stage.
- Use a sheet pan as a tray to shuttle projects and catch crumbs.
- Set a cooling zone for candles, granola, and anything that needs to set.
- Keep a damp cloth nearby so spills never slow you down.
Package & Label For the Win
- Keep copy short and bold the essentials: WHAT, HOW TO USE, DATE.
- Add tiny instruction cards (example: “1–2 tbsp syrup + hot milk”).
- Tuck one sprig of eucalyptus or rosemary for texture and scent.
- Snap a quick photo so you remember what you gifted to whom next year.
Storage, Allergens & Timing
- Mark “Refrigerate” or “Shelf-stable” when it matters.
- List common allergens (nuts, dairy, gluten) and offer swaps when possible.
- Schedule your big batch day one week before gifting to keep flavors peak.
- Stash two extra gifts; last-minute heroes save mornings.
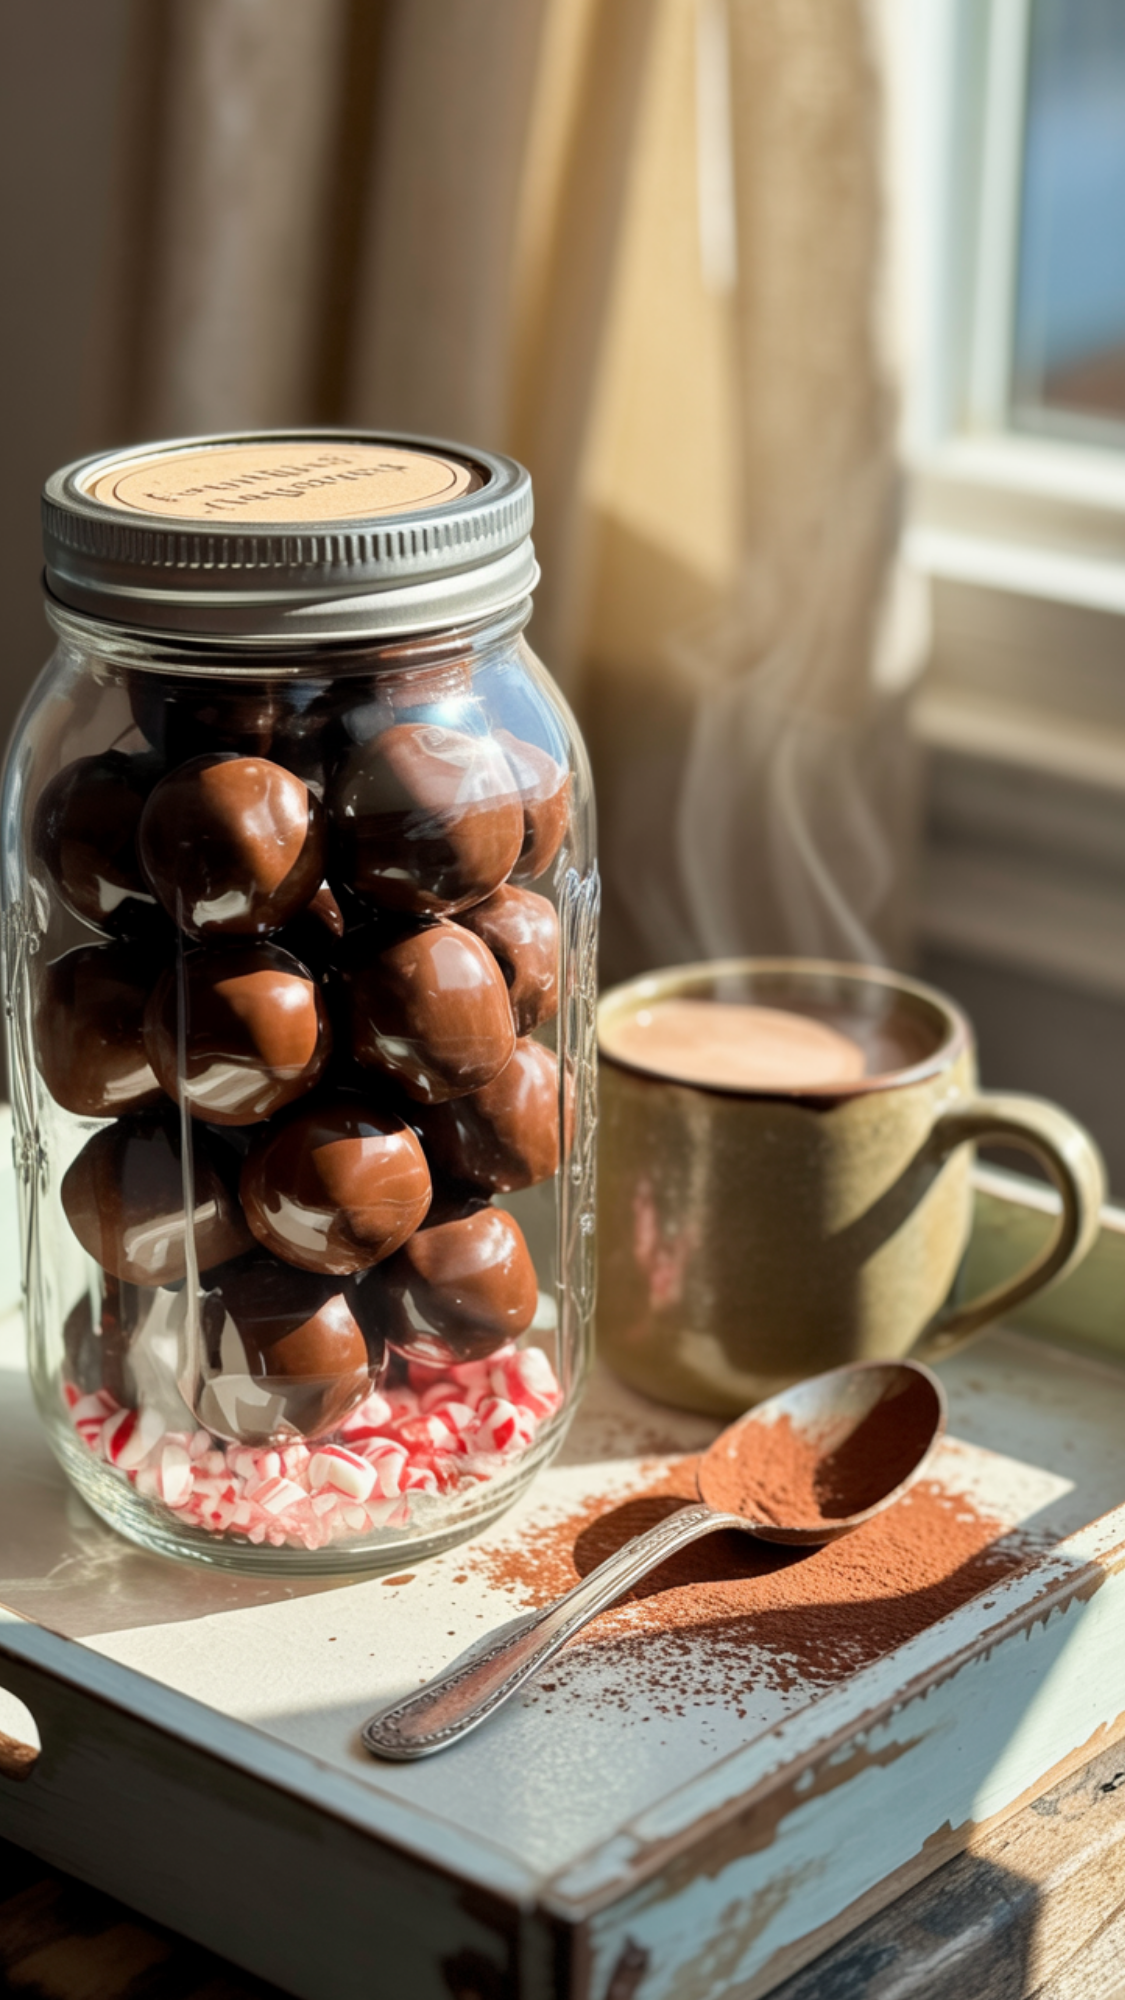
1) Hot Cocoa Bomb Jar
You want that hot-chocolate theater without a mess, right? These cocoa bomb kits in jars make mornings feel like a mini movie scene—drop, melt, swoon. I stack the ingredients so they look gorgeous, then add a tiny card so nobody panics about ratios. You can batch these like a champ and knock out six gifts before your first reheat of coffee. Got kids on your list or coworkers who live for novelty? This one lands every time.
What It Is
A show-stopping cocoa bomb kit layered in a wide-mouth jar that lets your giftee assemble 2–3 bombs at home. DIY gifts for cozy holiday mornings don’t get more photogenic.
You’ll Need
- Silicone sphere mold (2.5–2.8″)
- Good cocoa (Dutch-process hits richer), powdered sugar, pinch of salt
- Chocolate wafers or bars for shells (dark or milk)
- Mini marshmallows, crushed peppermint, optional espresso powder
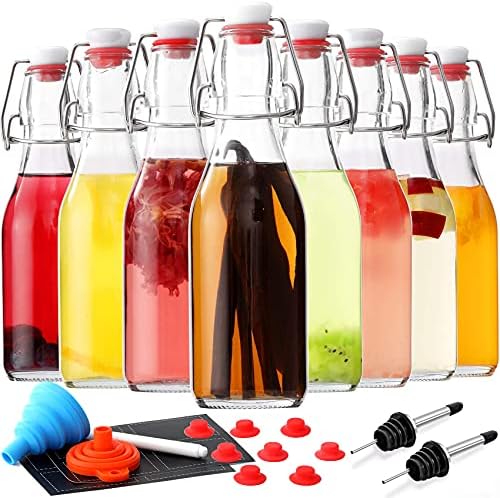
- Wide-mouth jars (16–24 oz), kraft labels, twine

Steps (Fast + Tidy)
- Temper chocolate (microwave in short bursts; stir until glossy).
- Coat molds, chill, then recoat thin spots so shells don’t crack.
- Release halves, warm a sheet pan for seam work.
- Fill halves with cocoa mix + mallows + peppermint.
- Seal by warming rims on the pan and pressing halves together.
- Dust finished bombs with cocoa sugar; let set, then nestle in the jar with extra toppings.
Wrap & Present
- Add a minimal instruction tag: “Heat 10–12 oz milk until hot. Drop bomb. Stir like you mean it.”
- Tie on a small candy cane or a tiny whisk for flair.
- Label with flavor, yield, and best by (2–3 weeks room temp).
Time & Cost (Per Jar When Batched)
- Time: ~60–90 minutes for 4–6 jars
- Cost: $–$$ depending on chocolate quality (shells drive price)
Personal Tip
I always add ¼ tsp espresso powder inside each bomb. You don’t taste coffee—you taste deeper chocolate. Ever wonder why bakery cocoa tastes richer? That’s why.
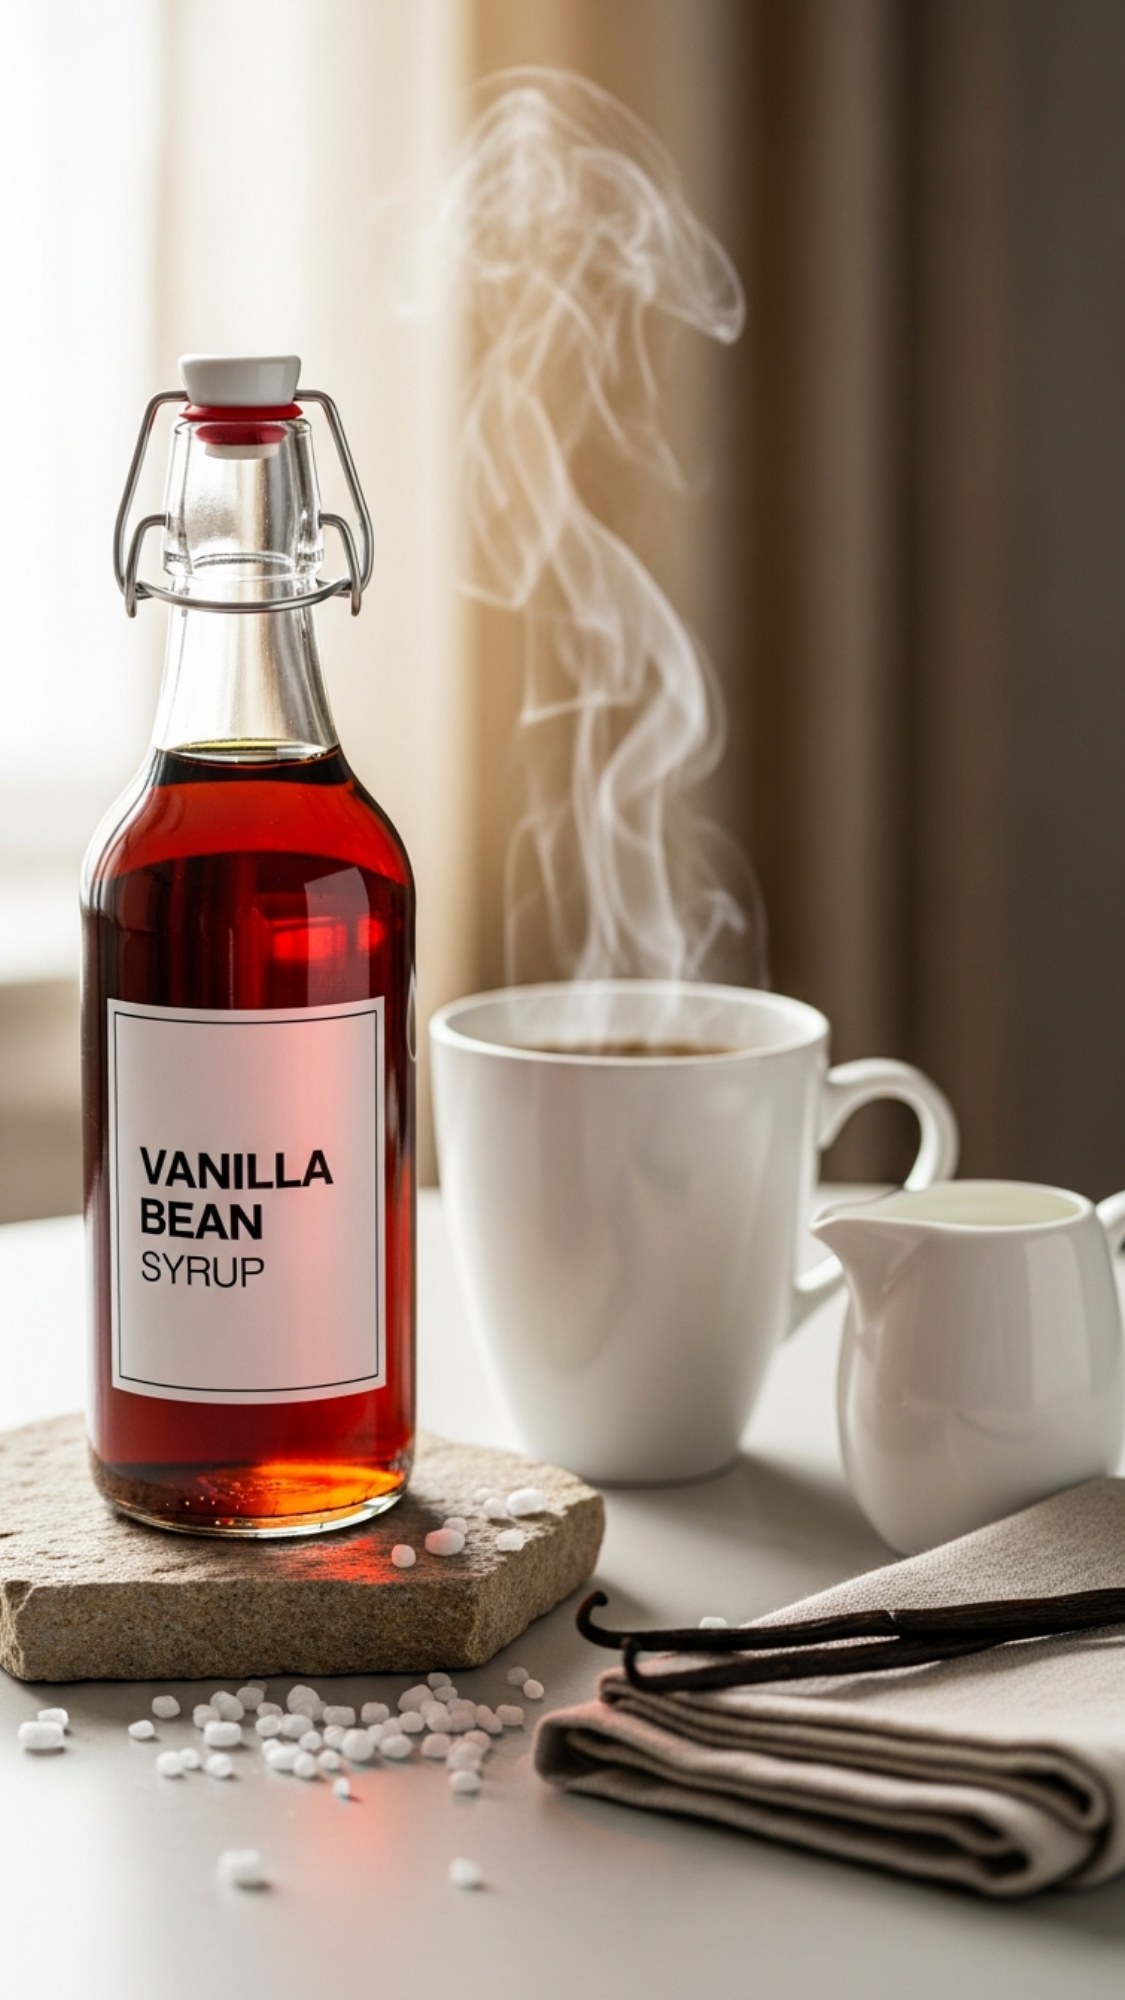
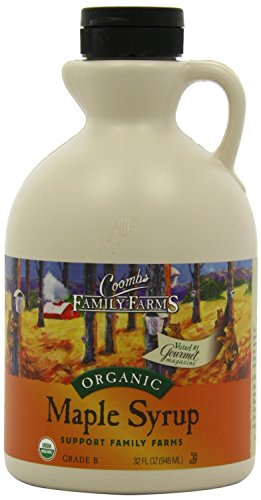
2) Vanilla Bean Coffee Syrup
I call this five-star café in a bottle because it turns a sleepy mug into a latte moment in about ten seconds. You control the sweetness, you skip weird aftertastes, and you score a gift people actually finish. I keep a few bottles on standby for neighbors, teachers, and that one cousin who shows up early and raids the coffee station. You want DIY gifts for cozy holiday mornings that feel polished without drama, right? This checks every box and still leaves you time to wrap.
What It Is
A barista-level vanilla syrup that blends cleanly into hot or iced coffee, tea, and cocoa. You get real vanilla flavor, not the “cupcake perfume” thing. You adjust intensity with a quick 1–2 tbsp per 8–12 oz rule, and you can scale this in minutes for multiple bottles.
You’ll Need
- 1 cup sugar (white for classic; demerara for caramel notes)
- 1 cup water
- 1–2 vanilla beans, split lengthwise (or 2–3 tsp pure extract)
- Pinch of fine salt (wakes up flavor)
- 8–12 oz swing-top or pour-spout bottle, funnel, label


Steps (Smooth + Reliable)
- Simmer sugar and water over medium, stir until clear (3–4 minutes).
- Split beans; scrape seeds; toss pods and seeds into the pot.
- Lower heat and steep 10–15 minutes; keep it just shy of a boil.
- Fish out pods; stir in the pinch of salt.
- Cool 5–10 minutes; bottle warm with a funnel; cap tightly.
- Label: “Vanilla Coffee Syrup — 1–2 tbsp per cup. Store chilled. Best within 3–4 weeks.”
Wrap & Present
- Use an amber bottle for the boutique look and better light protection.
- Tie on a mini pour spout or a tiny wooden tag with usage instructions.
- Add a latte card: “Heat milk, froth, add 1–2 tbsp syrup, top coffee.”
Time & Cost (Per Bottle When Batched)
- Time: 25–30 minutes total
- Cost: $–$$ (beans set the price; extract lowers it)
Flavor Variations (Same Base, New Personality)
- Brown Sugar Vanilla: swap half the sugar for brown; deeper, toasty finish.
- Vanilla-Cinnamon: steep a ½ stick for 5 minutes; remove before bottling.
- Vanilla-Maple Hybrid: replace ¼ cup sugar with maple syrup at the end; warm, breakfasty vibe.
- Decaf-Friendly Trick: add 1 tsp vanilla extract right at the end to boost aroma.
Personal Tip
I double the beans for my “gift batch” and halve the dose on the label (“Start with 1 tbsp”). Friends rave about the flavor and feel like they “use less,” which stretches the bottle and the compliments. Ever notice how a tiny pinch of salt makes vanilla taste rounder? You’ll taste it here.

3) Chai Concentrate
You want coffee-shop chai without the wait or the price, right? I brew this spiced chai concentrate once, stash a few bottles, and gift the rest with smug satisfaction. You control the sweetness, you control the heat, and you get a morning ritual that feels intentional. I toast the spices so the house smells like a cozy market stall, then I bottle the concentrate while it’s still warm. You mix it 1:1 with milk, heat or ice it, and call it a win. Ever wonder why some chai tastes flat? You probably skipped toasting and under-salted the syrup—two tiny fixes that make a huge difference.
What It Is
A bold, aromatic chai base you mix with milk (dairy or alt) at a 1:1 ratio. It makes DIY gifts for cozy holiday mornings feel luxe and effortless.
You’ll Need
- 4 cups water
- 8–10 black tea bags (Assam or English Breakfast) or 4 tbsp loose tea in a sachet
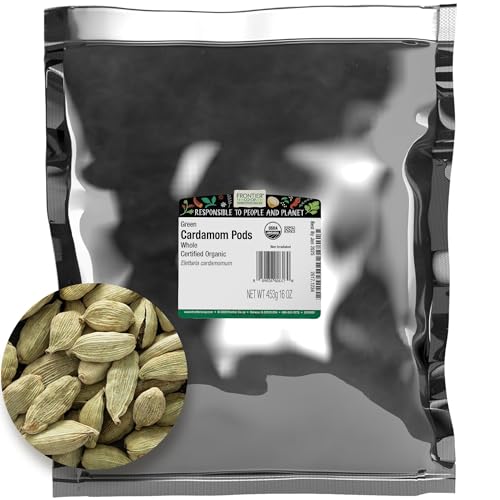
- 10 cardamom pods, lightly crushed
- 2 cinnamon sticks
- 8 whole cloves
- 8 black peppercorns
- 1–2 inches fresh ginger, sliced
- 2 strips orange peel (no pith)
- ½–¾ cup sugar or honey (sweeten to taste)
- Pinch of fine salt (boosts flavor)
- Two 16-oz amber bottles with tight caps, funnel, labels

Steps (Max Flavor, No Fuss)
- Toast cardamom, cinnamon, cloves, and peppercorns in a dry pot over medium heat until fragrant (60–90 seconds).
- Add water, ginger, and orange peel; simmer 10 minutes.
- Kill the heat, add tea, and steep 5–7 minutes (strong but not bitter).
- Strain solids; stir in sugar (or honey) and the pinch of salt until dissolved.
- Cool 10–15 minutes; bottle warm with a funnel; cap and refrigerate.
Wrap & Present
- Label: “Chai Concentrate — Mix 1:1 with milk. Heat or pour over ice. Best within 2–3 weeks.”
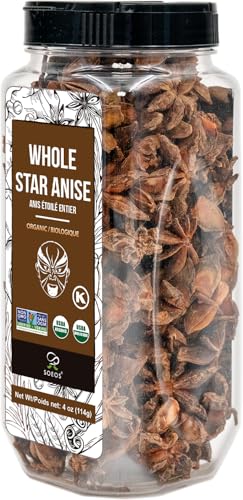
- Tie on a cinnamon stick or a star anise for instant pretty.
- Add a mini recipe card with hot and iced directions.
Time & Cost (Per 32 oz Batch)
- Time: ~40 minutes start to bottle
- Cost: $ (tea + spices; bulk saves more)
Variations (Choose Your Vibe)
- Extra Cozy: add ¼ tsp vanilla after straining.
- Maple Chai: swap ¼ cup sugar for maple syrup at the end.
- Decaf: use decaf black tea; keep everything else the same.
- Spicy: bump peppercorns to 12 and ginger to 3 inches.
Make-Ahead & Storage
- Fridge: up to 2–3 weeks.
- Freeze: pour into ice-cube trays; pop cubes into hot milk for instant chai.
- Allergens: naturally dairy-free; note caffeine unless you use decaf.
Personal Tip
I set the sweetness on the lower side and tell the giftee to add a drizzle of honey in the mug if they want more. That keeps the base versatile for dirty chai (add a shot of espresso) or a lighter breakfast latte.
4) Stovetop Simmer Pot Kit
Crave a house that smells like you baked three pies before 9 a.m.? Same. I pack these stovetop simmer kits in clear jars so people drop them in a pot, add water, and let the cozy-cabin aroma roll. You gift instant mood, zero effort. I love these for neighbors, hosts, and that friend who lights a candle before coffee. Want DIY gifts for cozy holiday mornings that work on autopilot? This one practically runs itself.
What It Is
A fragrant simmer blend of dried citrus and warm spices that you simmer with water for an all-morning scent.
You’ll Need
- Dried orange wheels (2–3 per jar)
- Cinnamon sticks (2)
- Star anise (2–3)
- Whole cloves (6–8)
- Bay leaf (1)
- Fresh or dried rosemary (small sprig)
- Optional: juniper berries or vanilla bean tip for depth
- 12–16 oz clear jars, twine, kraft labels, instruction tag
Steps (Simple + Pretty)
- Layer orange wheels upright along the glass for a pretty ring.
- Nestle cinnamon, star anise, and cloves in the center.
- Tuck bay and rosemary near the top so they frame the lid.
- Add optional juniper or vanilla for a woodsy or creamy note.
- Cap the jar and shake gently to settle the blend.
Wrap & Present
- Tie on a tag: “Tip into a small pot + 3 cups water. Simmer low. Replenish water as needed.”
- Add a safety note: “Do not leave unattended.”
- Finish with twine and a tiny wood clothespin for charm.
Time & Cost (Per Jar When Batched)
- Time: 10–15 minutes
- Cost: $ (dry your own citrus to save big)
Variations (Swap the Vibe)
- Cran-Orange: add dried cranberries for tart brightness.
- Apple Pie: swap orange for dried apple, add allspice.
- Forest Cabin: use cedar tips and juniper; skip citrus.
Personal Tip
I dehydrate citrus at 200°F (93°C) until crisp and store extras in a bag. That move keeps the jars from fogging and gives you emergency gift filler for weeks.

5) Hand-Poured Soy Candle (Peppermint Mocha)
I love gifting candles that actually fill a room and don’t smother the vibe. This peppermint mocha soy candle smells like a coffee shop decided to wear a cozy sweater, and everyone relaxes instantly. I keep the ingredients clean, the label minimal, and the scent balanced so mornings feel bright, not cloying. You pour a small batch in under an hour, then let the jars cure while you tackle other gifts. Want that slow, even burn and a smooth top that doesn’t crater? You’ll get it with a few easy moves. Ready to turn your kitchen into a tiny candle studio that nobody complains about?
What It Is
A clean-burning, coffee-mint candle in amber jars that throws well in kitchens and living rooms without overwhelming small spaces.
You’ll Need
- 100% soy wax flakes (container blend)
- Cotton wicks with tabs (try CD 12 or ECO 10 for 2.75–3″ jars)
- Peppermint and coffee/frappuccino fragrance oils (skin-safe, phthalate-free)
- 8 oz amber jars with lids, wick stickers, wick centering sticks
- Thermometer, pouring pitcher, heat-safe pot (double-boiler style)
- Isopropyl alcohol + lint-free cloth for jar prep
- Warning labels + simple front label


Steps (Smooth Tops, Great Throw)
- Prep jars: wipe with alcohol; stick wicks dead center.
- Melt wax in a double boiler to 170–185°F (77–85°C); keep it steady, not boiling.
- Blend scent to 6–8% total fragrance load (example: 0.6–0.8 oz per 10 oz wax). Stir 2 minutes at 170°F to bind.
- Cool to pour at 135–145°F (57–63°C) for smoother tops; pour slowly to reduce bubbles.
- Center wicks with a stick; cool undisturbed until fully set (2–4 hours).
- Cure with lids 24–48 hours for best hot throw; trim wicks to ¼” before gifting.
Wick & Vessel Quick Guide
- 2.75–3″ jar: start with CD 12 / ECO 10; test one jar before scaling.
- Want a stronger throw? Test the next wick size up (don’t exceed safe flame height).
- If you see mushrooming or soot, trim the wick shorter and size down next pour.
Wrap & Present
- Minimal kraft label on front: “Peppermint Mocha — Soy Candle — 8 oz”.
- Bottom warning label with icons: Burn within sight, away from drafts, keep out of reach, trim wick to ¼”.
- Add a match striker on the side or tuck in a tiny box of matches for the boutique look.
Time & Cost (Per 8 oz Jar When Batched)
- Time: ~30 minutes active; 24–48 hours cure
- Cost: $$ (wax and quality fragrance drive price)
Safety & Use Notes
- First burn: 2–3 hours to set an even melt pool.
- Always trim wicks before relighting for a cleaner burn.
- Keep on a heat-safe surface; stop burning when ¼–½” wax remains.
Personal Tip
I blend 3 parts coffee to 1 part peppermint so the mint lifts without taking over. Crave a creamier finish? Add a whisper of vanilla and label it Peppermint Mocha Latte so expectations match the vibe.
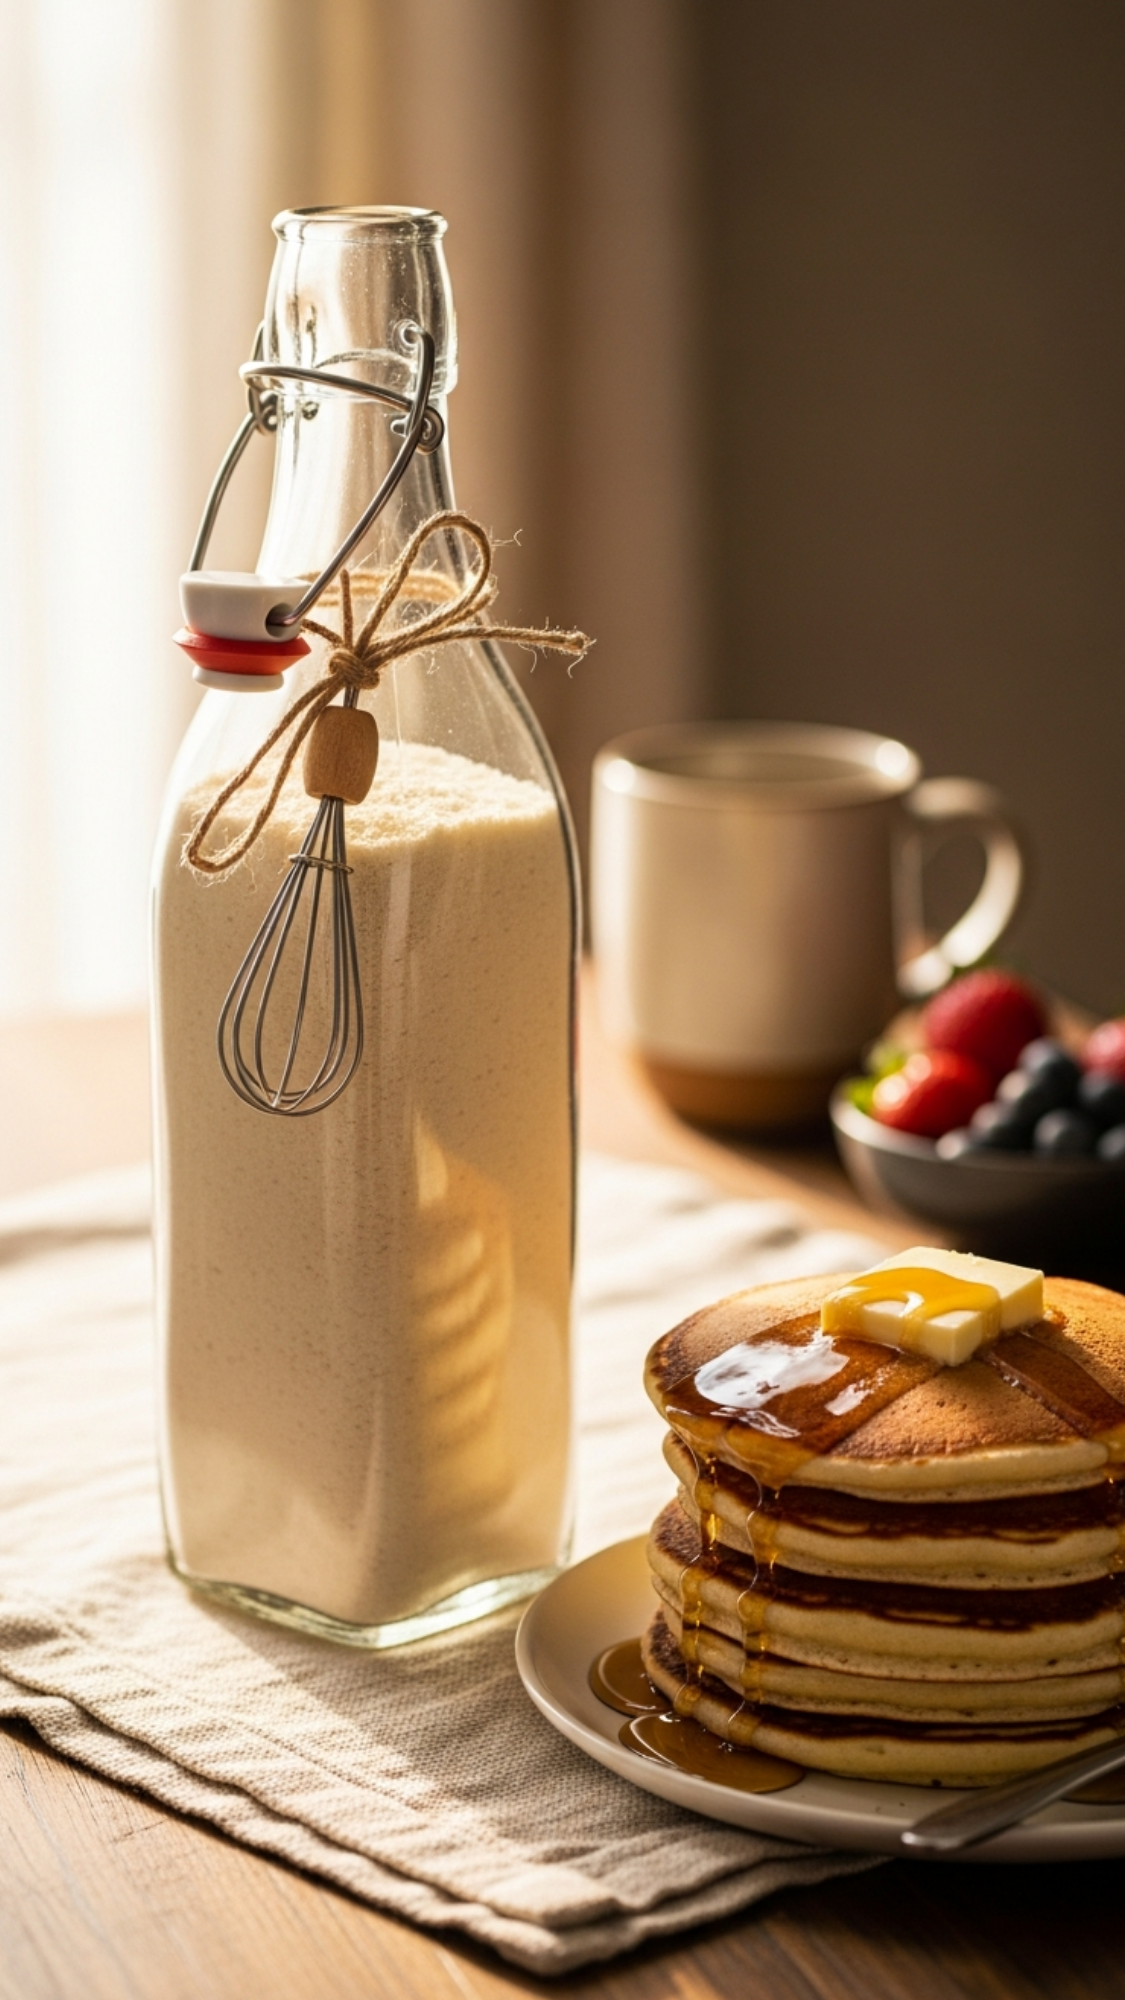
6) Fluffy Pancake Mix (Bottle)
I call this the brunch-in-a-bottle gift because people shake, pour, and suddenly plate golden, puffed pancakes while the coffee finishes brewing. You layer the dry mix, add a cute label, and watch recipients brag like they trained at diner boot camp. I blend in vanilla sugar and a touch of cardamom so the kitchen smells warm before the first flip. Want an easy crowd-pleaser that still looks boutique on a breakfast tray? This one wins with kids, roommates, and that picky uncle who “doesn’t do sweet” until the maple comes out. Ever notice how most mixes taste flat? You fix that with the right leavening ratio and a pinch of salt that actually does the heavy lifting.
What It Is
A shake-and-pour pancake mix layered in a swing-top bottle. Your giftee adds wet ingredients, shakes for ten seconds, and pours straight onto a hot pan. Hello DIY gifts for cozy holiday mornings that feel foolproof.
You’ll Need
- 2 cups all-purpose flour
- 2 tbsp sugar (or vanilla sugar)
- 1 tbsp baking powder
- ½ tsp baking soda
- ¾ tsp fine salt
- Optional flavor: ½ tsp cardamom or cinnamon
- 16–20 oz swing-top bottle or tall jar, funnel, label, twine


Steps (Layer → Label → Gift)
- Whisk flour, sugar, baking powder, baking soda, salt, and spice in a bowl.
- Funnel the blend into the bottle; tap to settle for that neat, layered look.
- Seal the bottle and wipe the glass so it photographs like a dream.
- Label with wet add-ins and quick cooking cues (see below).
- Tie on a mini whisk or spatula for instant charm.
Instruction Tag (Attach To Bottle)
- Add: 1 large egg, 1½ cups milk (dairy or alt), 2 tbsp neutral oil or melted butter.
- Shake 10–12 seconds until smooth with a few small lumps.
- Rest batter 5 minutes for max fluff.
- Cook on a lightly oiled medium skillet; flip when bubbles pop and edges look set (about 2 minutes per side).
- Serve with maple, berries, or a dust of Breakfast Spice Dust (#21).
Time & Cost (Per Bottle When Batched)
- Time: 10–15 minutes
- Cost: $ (far cheaper than boxed mixes, prettier too)
Variations & Swaps
- Buttermilk Version: replace baking powder with 2 tsp, keep ½ tsp baking soda, and change tag to 1¾ cups buttermilk.
- Gluten-Free: swap a 1:1 GF flour with xanthan; keep everything else the same.
- Whole-Grain Cozy: use 1 cup AP + 1 cup white whole wheat; add 1 tbsp extra milk on the tag.
- Citrus Morning: include a zest packet (dried lemon zest + sugar) and tell them to whisk it in before the shake.
Wrap & Present
- Use a kraft belly band with bold essentials: WHAT, WET ADD-INS, DATE.
- Add a serves 3–4 note and a tiny maple pairing suggestion.
- For a set, pair with Vanilla Bean Coffee Syrup (#2) or Infused Honey Trio (#10).
Troubleshooting (On the Tag’s Back)
- Flat cakes? Pan ran too cool or batter sat too long—turn up heat slightly and mix a fresh half-batch.
- Dry texture? Add 2–3 tbsp more milk and don’t overmix.
- Pale surface? Your pan needs another minute to preheat.
Personal Tip
I pre-measure a tiny vial of vanilla sugar and tie it to the neck. They stir it in for bakery aroma without extra fuss. Want diner-style edges? Brush the pan with melted butter right before each pour and listen for that gentle sizzle.
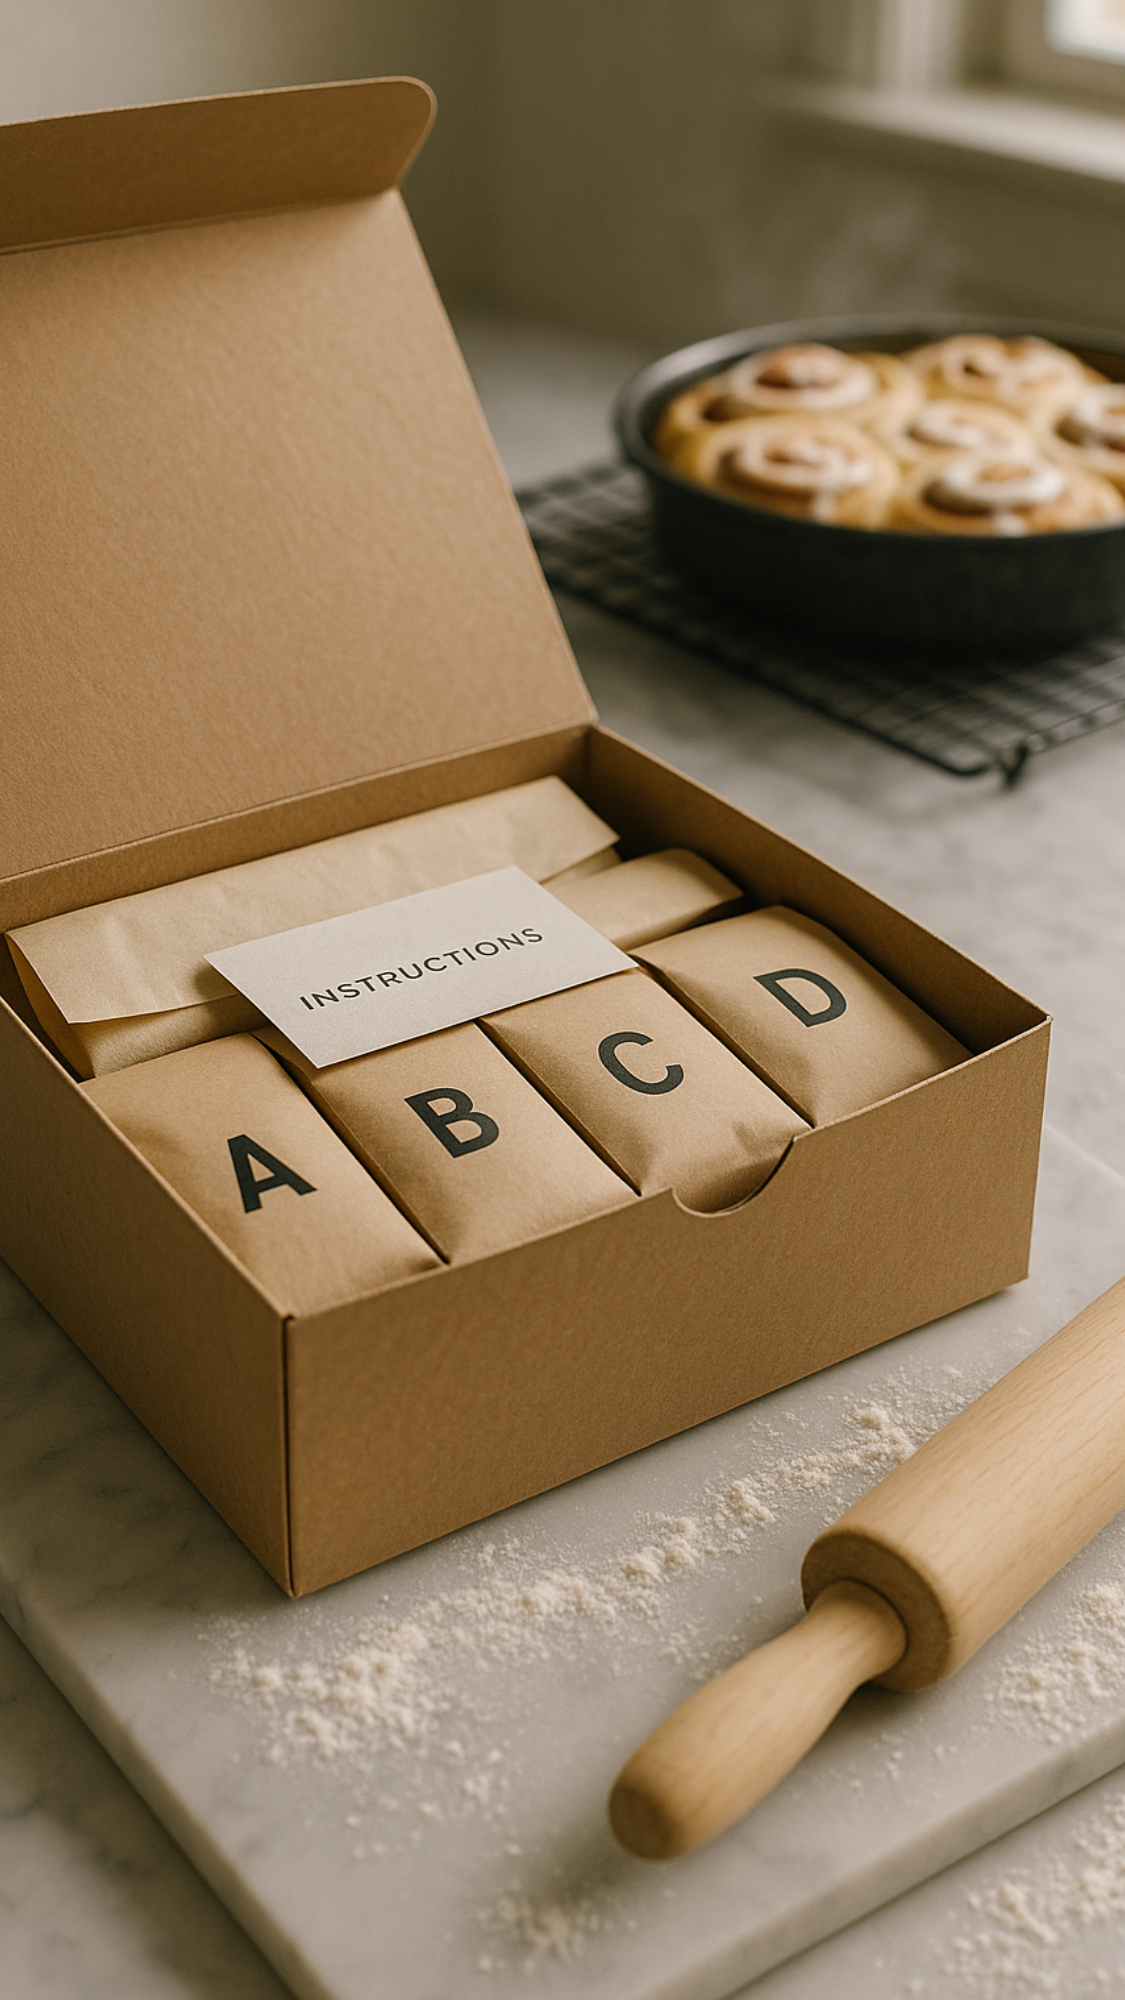
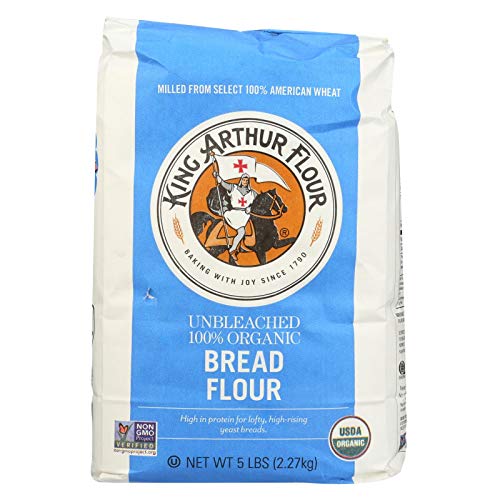
7) Cinnamon Roll Kit
You want bakery-level rolls without waking up at 5 a.m., right? I pack this pre-measured cinnamon roll kit so your giftee only adds wet ingredients, does one easy rise, and bakes into ooey-gooey glory. You deliver the experience without the spreadsheet of steps. I split everything into tidy pouches, tuck in parchment, and include a panic-proof card with rise shortcuts. This one wins with families, brunch hosts, and anyone who believes frosting counts as breakfast (correct).
What It Is
A ready-to-assemble kit with dry dough mix, yeast, cinnamon-sugar filling, and icing sugar—designed for DIY gifts for cozy holiday mornings that feel special and stress-free.
You’ll Need
- Dough Mix (bag A): 3½ cups bread flour, ¼ cup sugar, 1 tsp fine salt
- Instant yeast (bag B): 2¼ tsp (one packet)
- Filling (bag C): ¾ cup brown sugar, 1½ tbsp cinnamon, pinch salt
- Icing (bag D): 1½ cups powdered sugar + 1 tsp vanilla sugar (optional)
- Parchment sheet, 9×13” disposable pan (optional but clutch)
- Kraft box, labels, twine, instruction card


Steps (Assembly For You)
- Mix dough ingredients into separate labeled pouches (A–D).
- Cut parchment to fit the pan; fold neatly for the kit.
- Pack all pouches + parchment in a kraft box; add the instruction card.
- Label the outside with WHAT, SERVES, and BEST BY (1 month room temp, cool/dry).
Instruction Card (For Your Giftee)
- Add to Bag A + B: 1 cup warm milk, 1 egg, 4 tbsp melted butter.
- Knead 6–8 minutes until smooth. Cover and rise until puffy (45–60 min, warm spot).
- Roll into a 12×16″ rectangle. Spread 3 tbsp softened butter. Scatter Bag C.
- Roll up, slice 12 pieces, nestle in pan on parchment.
- Rise 30–40 minutes until pillowy. Bake at 350°F (175°C) for 22–26 min.
- Whisk Bag D with 2–3 tbsp warm milk + ½ tsp vanilla; drizzle over warm rolls.
Wrap & Present
- Print a bold minimalist label: “Cinnamon Roll Kit — Makes 12 — Morning Magic Inside.”
- Tie a mini offset spatula or bench scraper to the box for instant pro vibes.
- Add a “Bake-Now Shortcut” sticker: warm oven to 200°F, turn off, proof dough inside door-ajar for faster rise.
Time & Cost (Per Kit When Batched)
- Time: 30–40 minutes to assemble
- Cost: $$ (flour + butter add-ins listed on the card keep your kit ambient)
Variations & Swaps
- Orange Morning: add a zest packet to Bag C and tell them to add 1 tsp zest to icing.
- Pecan Roll: include a ¼ cup pecan pouch with a note to sprinkle over the filling.
- Gluten-Free: sub a 1:1 GF bread blend and add 1 tsp xanthan if not included; cue a slightly shorter rise.
- Make-Ahead Tip: instruct them to cover and chill sliced rolls overnight; bake straight from the fridge + 3–5 extra minutes.
Troubleshooting (On Card Back)
- Dough tight? Rest 10 minutes and try rolling again.
- Slow rise? Move to a warmer spot or proof in a turned-off oven with a mug of hot water.
- Pale tops? Bake 2–3 minutes longer; finish with a quick broiler kiss if needed (watch closely).
Personal Tip
I tuck a tiny packet of flake salt and tell them to sprinkle the warm icing. That little sparkle makes the sweetness sing and makes people ask for “your bakery’s address.”
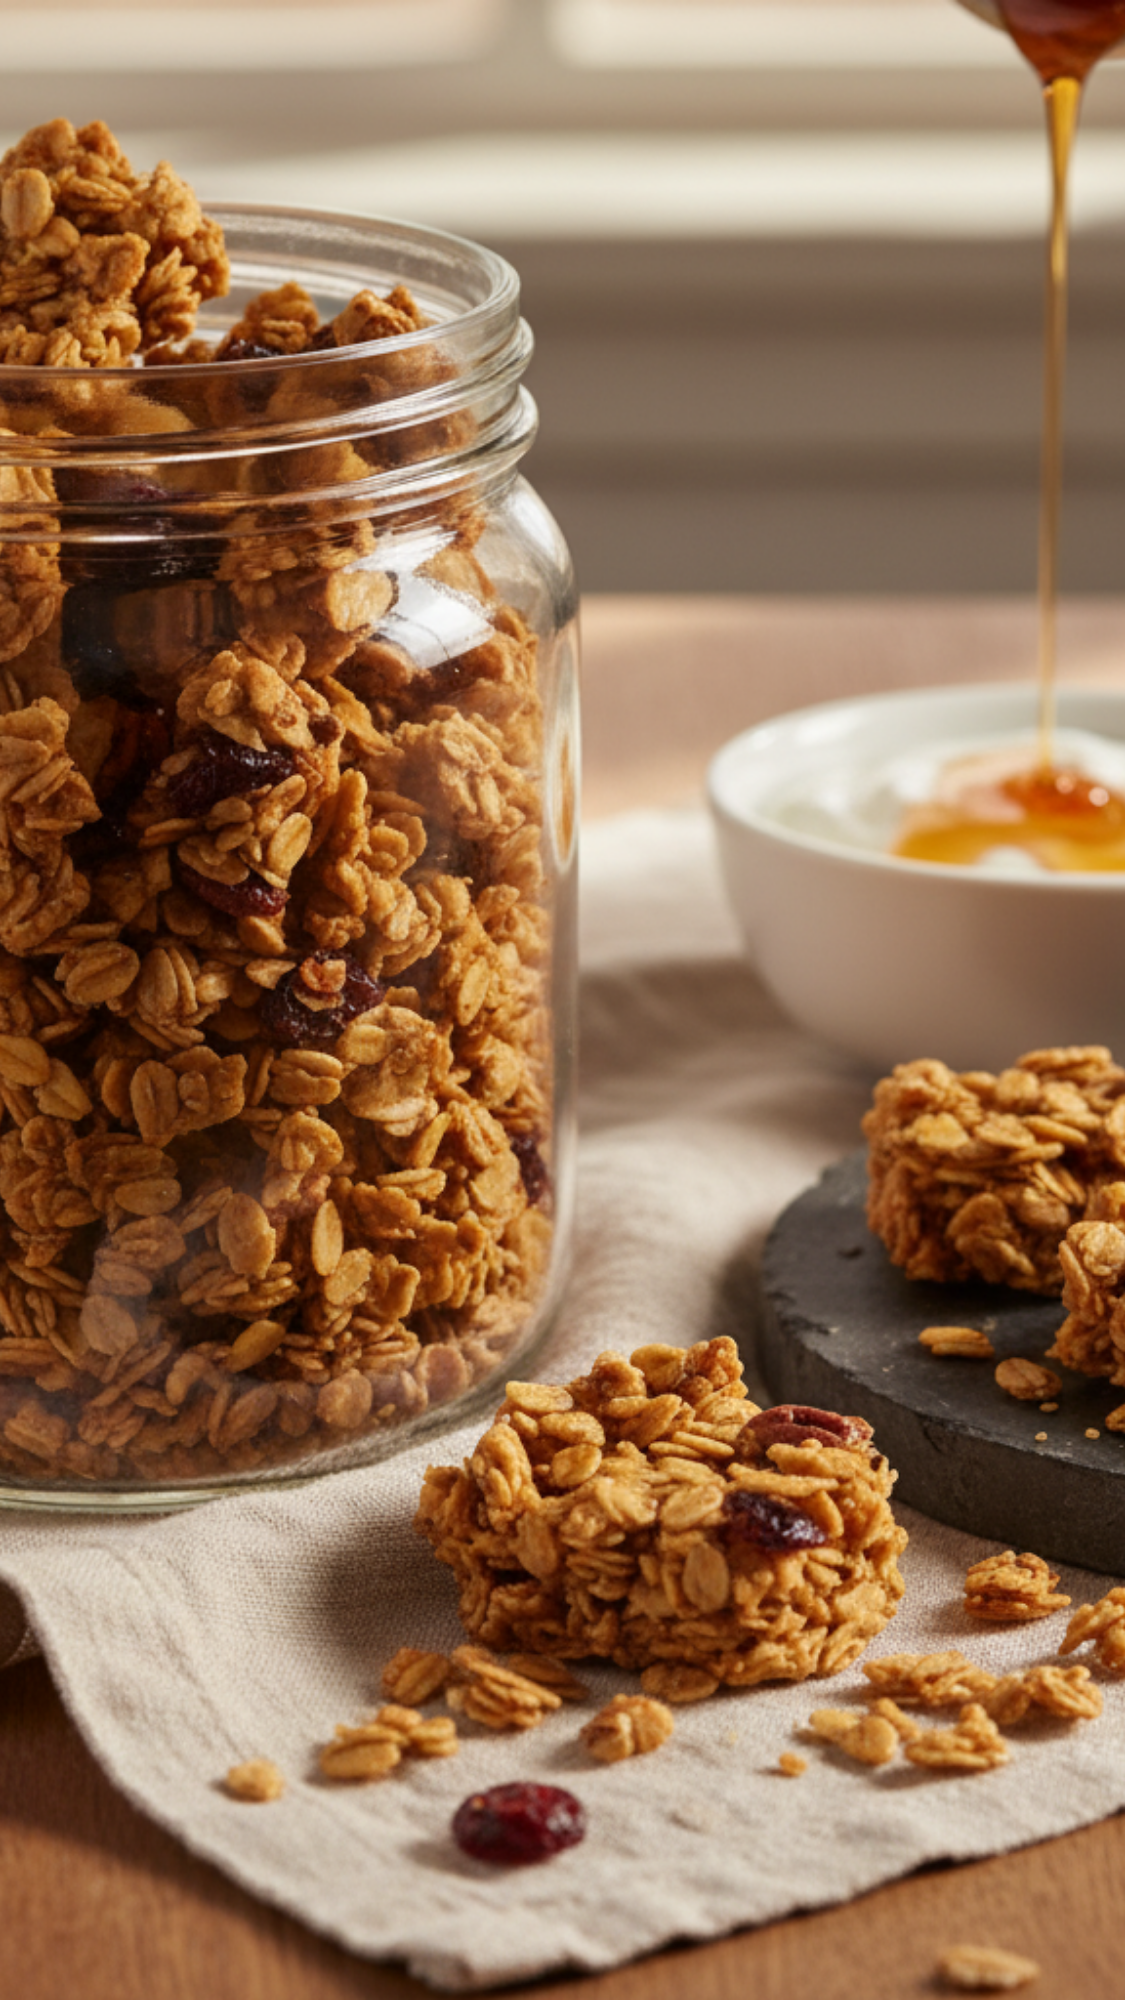
8) Granola Cluster Jar (Maple Pecan)
I chase giant granola clusters like they’re a sport, and this recipe delivers every single time. You get crunchy hunks that sit proudly on yogurt, snack straight from the jar, and make your kitchen smell like a bakery did a holiday album. I use maple syrup + coconut oil for gloss and flavor, then press the whole tray into one sheet so it bakes into a slab. You let it cool completely before you break it, which feels like torture and tastes like victory. Want an easy, make-ahead gift that feels gourmet but uses pantry stuff? This jar turns casual breakfast people into granola evangelists.
What It Is
A big-cluster granola with maple, vanilla, and toasted pecans that stays crisp and breaks into photogenic chunks. Perfect for DIY gifts for cozy holiday mornings and snack attacks.
You’ll Need
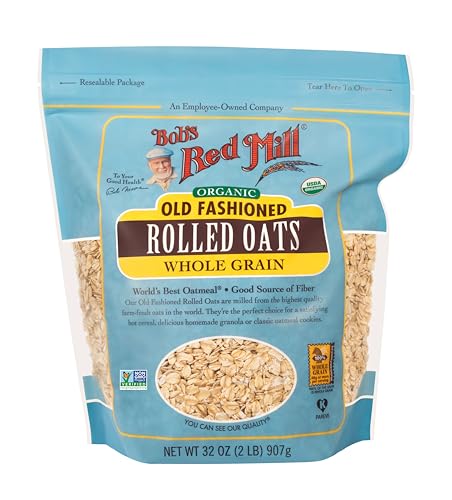
- 3 cups old-fashioned oats (not quick)
- 1 cup pecans, roughly chopped (swap seeds for nut-free)
- ¾ cup unsweetened coconut flakes (optional but lovely)
- ½ cup pure maple syrup
- ⅓ cup melted coconut oil (or light olive oil)
- 2 tsp vanilla extract
- ½ tsp fine salt
- 1 egg white, lightly whipped (vegan swap: 2 tbsp aquafaba)
- Large sheet pan, parchment, mixing bowl, spatula
- 32–40 oz wide jar for gifting, label, twine
Steps (Crunchy Clusters, Zero Crumbs)
- Heat oven to 300°F (150°C) and line the pan with parchment.
- Stir oats, pecans, coconut, and salt in a bowl.
- Whisk maple, oil, and vanilla; pour over the dry mix and coat evenly.
- Fold in the whipped egg white (or aquafaba) until the mix looks glossy and tacky.
- Dump onto the pan and press firmly into a flat, even 1/2-inch slab—use another sheet of parchment to press hard.
- Bake 35–45 minutes until edges are deeply golden; do not stir.
- Cool completely on the pan (30–40 minutes). Break into big clusters only after it’s cool and set.
Wrap & Present
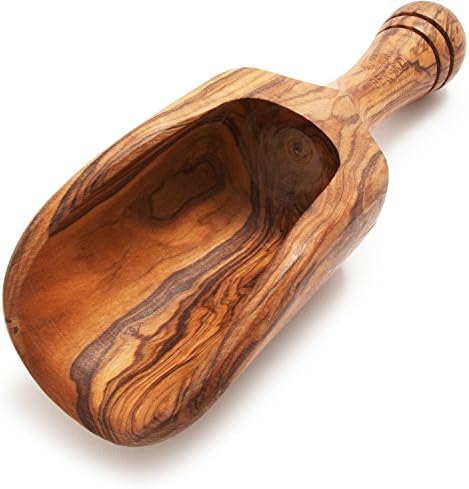
- Fill a wide jar so clusters show off; add a minimal label with flavor and date.
- Tie on a tiny wooden scoop and a “Serving Ideas” tag.
- Label note: “Crunchy Maple Pecan Granola — Best within 3 weeks”.
Time & Cost (Per Jar When Batched)
- Time: ~60 minutes including bake + cool
- Cost: $–$$ (pecans set the price; seeds lower it)
Serving Ideas (Tag This)
- Yogurt bowl: granola + sliced pears + drizzle of Infused Honey (#10).
- Hot cereal topper: sprinkle over oatmeal for crunch + maple.
- Snack mix: add dark chocolate chunks and dried cherries for a trail blend.
Variations & Swaps
- Nut-Free: sub pumpkin + sunflower seeds for pecans.
- Gingerbread Morning: add 1 tsp cinnamon, ½ tsp ginger, pinch clove.
- Cran-Orange: stir in dried cranberries and 1 tsp orange zest after baking.
Troubleshooting
- Sandy granola? You stirred during baking or didn’t press firmly—press harder next time.
- Soft clusters? Bake 5–8 minutes longer and cool fully on the pan.
- Bitter notes? Nuts over-toasted—lower oven to 285°F and extend bake a few minutes.
Personal Tip
I sprinkle flake salt over the slab the second it leaves the oven. That tiny sparkle makes the maple pop and turns every bite into a “who made this?” moment.

9) Tea Sampler Tins
I gift tiny tea flights when I want mornings to feel intentional without yelling “I made this at 1 a.m.” You curate three complementary blends, add a clean steep-time card, and suddenly your friend stirs a mug like they run a tea bar. I keep one classic, one spiced, and one caffeine-free so every mood gets a match. You can scale this fast, stack the tins in a kraft tray, and watch people text you photos of steam and sunshine. Crave a gift that feels calm, smells gorgeous, and actually gets used? Build these tins and call it done. FYI, labeling temps and minutes saves more questions than any FAQ ever will.
What It Is
A 3-tin morning tea flight (think black, chai, herbal) with a clear steep guide so anyone brews like a pro. Perfect for DIY gifts for cozy holiday mornings that don’t require kitchen counter space.
You’ll Need
- Three 2–4 oz metal tins with tight lids
- Loose-leaf teas (examples below) or pyramid sachets
- Food-safe labels (name + steep time/temperature)
- Kraft tray or small box, paper crinkle, belly band
- Steep-time card + tiny honey dipper or rock candy swizzle
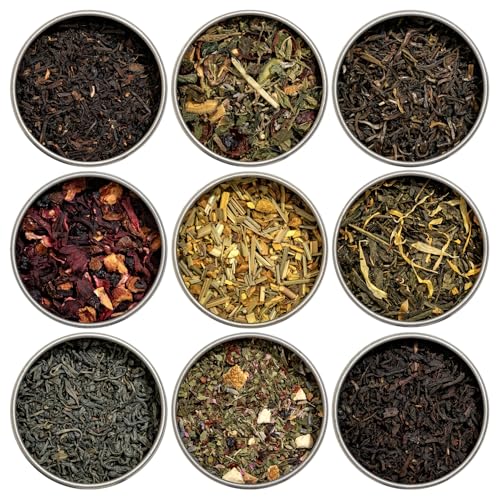

Flight Ideas (Pick a Theme)
- Cozy Classic: English Breakfast, Masala Chai, Lemon Verbena
- Bright & Brisk: Darjeeling, Earl Grey, Peppermint
- Caffeine-Mellow: Decaf Assam, Rooibos Chai, Chamomile–Lavender
- Winter Garden: Jasmine Green, Orange–Clove Black, Spearmint
Steps (Neat & Gift-Ready)
- Portion teas into tins (label bottoms with lot/date if you want to be extra).
- Seal and wipe tins so they look boutique-clean.
- Arrange tins in a kraft tray; add crinkle for a snug fit.
- Slide in your steep-time card and a honey dipper; band the set with a belly strip.
Wrap & Present
- Front label: “Morning Tea Sampler — 3 Blends — Brew Card Inside.”
- Add a tiny note: “Start with 1 tsp per 8–10 oz water. Adjust to taste.”
- Punch up the vibe with a sprig of thyme or dried citrus under the band.
Time & Cost (Per Set When Batched)
- Time: 15–20 minutes
- Cost: $–$$ (loose tea quality sets the range)
Steep Guide (Print This On The Card)
- Black Tea: 200–212°F (93–100°C), 3–5 min
- Green Tea: 170–180°F (77–82°C), 2–3 min
- Oolong: 185–200°F (85–93°C), 2–4 min
- Herbal/Rooibos: 208–212°F (98–100°C), 5–7 min
Variations & Add-Ons
- Latte Lovers: include Vanilla Bean Coffee Syrup (#2) as a sweetener crossover.
- Spice Route: tuck a whole cinnamon stick and a cardamom pod for aroma.
- Iced-Tea Card: add a line: “Brew double strength over ice.”
Personal Tip
I include a “first sip ritual” on the card—sniff the lid, warm the mug first, breathe between sips. People slow down, and the gift lands as a mini routine, not just a tin of leaves. Ever notice how a tiny ritual makes a regular morning feel deluxe? That’s the point.
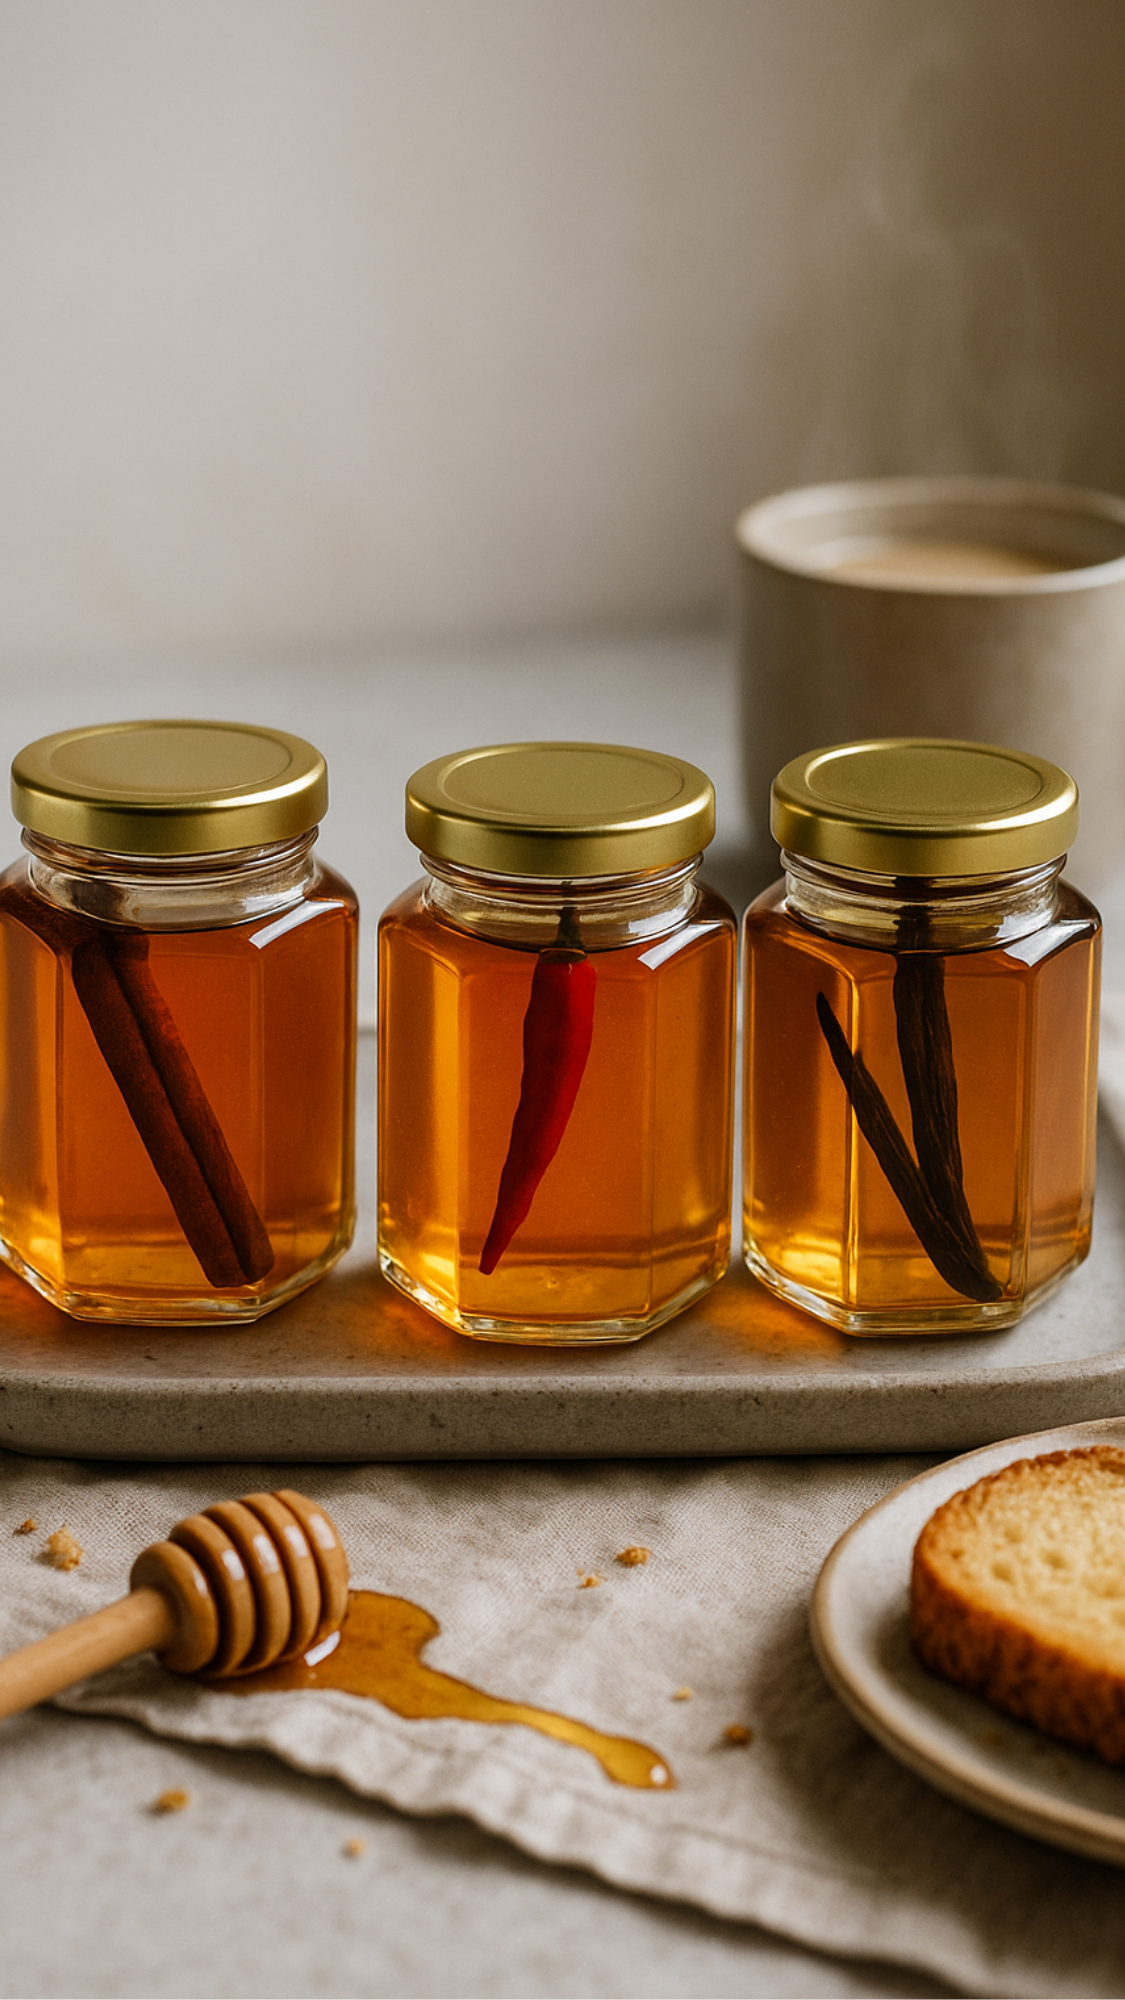
10) Infused Honey Trio (Cinnamon, Chili, Vanilla)
I reach for this infused honey trio whenever I want breakfast to taste like it put on lipstick. You drizzle a little over toast, oats, yogurt, pancakes, or even a latte, and it turns a plain morning into a “wait, who made this?” moment. I keep the infusions simple and dry so the flavors stay clean and the jars stay gorgeous on a tray. You deliver three personalities—cozy cinnamon, warm chili, and creamy vanilla—so every mood gets a drizzle. Want DIY gifts for cozy holiday mornings that people actually finish? These jars come back empty.
What It Is
A three-pack of flavored honeys that add instant breakfast drama without a single pot or pan.
You’ll Need
- Good honey (light wildflower or clover lets the flavors shine)
- Cinnamon sticks (1 per 4–6 oz jar)
- Dried chili (whole arbol or crushed flakes; start small)
- Vanilla bean (½ bean per jar, split)
- Three 4–6 oz jars with tight lids (hex jars look boutique)
- Small saucepan or warm-water bath, funnel, labels, twine

Steps (Glossy, Fragrant, Fast)
- Warm honey gently to 95–105°F—just enough to thin; don’t boil.
- Cinnamon Honey: slide a stick into Jar 1; cover with warm honey.
- Chili Honey: add a few flakes or ½ small dried chili to Jar 2; cover with honey.
- Vanilla Honey: tuck ½ split bean into Jar 3; cover with honey.
- Cap tightly; invert once to distribute; label flavors and date.
Wrap & Present
- Bundle all three in a mini carrier with a wood honey dipper.
- Print a tiny “Try it on…” card: toast, oats, pancakes, yogurt, tea, cheese boards.
- Keep labels bold and minimal: Cinnamon • Chili • Vanilla + “Best within 6 months.”
Time & Cost (Per Trio When Batched)
- Time: 25–30 minutes
- Cost: $$ (vanilla sets the price; buy beans in bulk)
Heat & Flavor Control
- Chili: start with ¼–½ tsp flakes per 4–6 oz; taste after 24 hours. Too spicy? Strain the solids.
- Cinnamon: leave the stick in for a steady, cozy build.
- Vanilla: the bean softens and perfumes more each week; leave it in.
Variations & Swaps
- Lemon–Ginger Honey: use dried lemon peel + dried ginger.
- Cocoa–Cinnamon Honey: stir in 1 tsp cocoa nibs per jar with a cinnamon stick.
- Rosemary Honey: add a tiny dried sprig for savory breakfasts and cheese plates.
Safety & Storage (Print This On The Card)
- Use dry additions only (no fresh fruit/garlic) for shelf stability.
- Store at room temp; use a clean, dry spoon every time.
- If you see moisture or fresh add-ins, refrigerate and use within 2 weeks.
- Do not serve honey to infants under 1 year.
Personal Tip
I taste the chili jar at 24 hours and often remove the chili so it lands warm, not wild. I also add a pinch of flake salt on my toast after drizzling—the honey pops and everyone thinks you catered brunch.
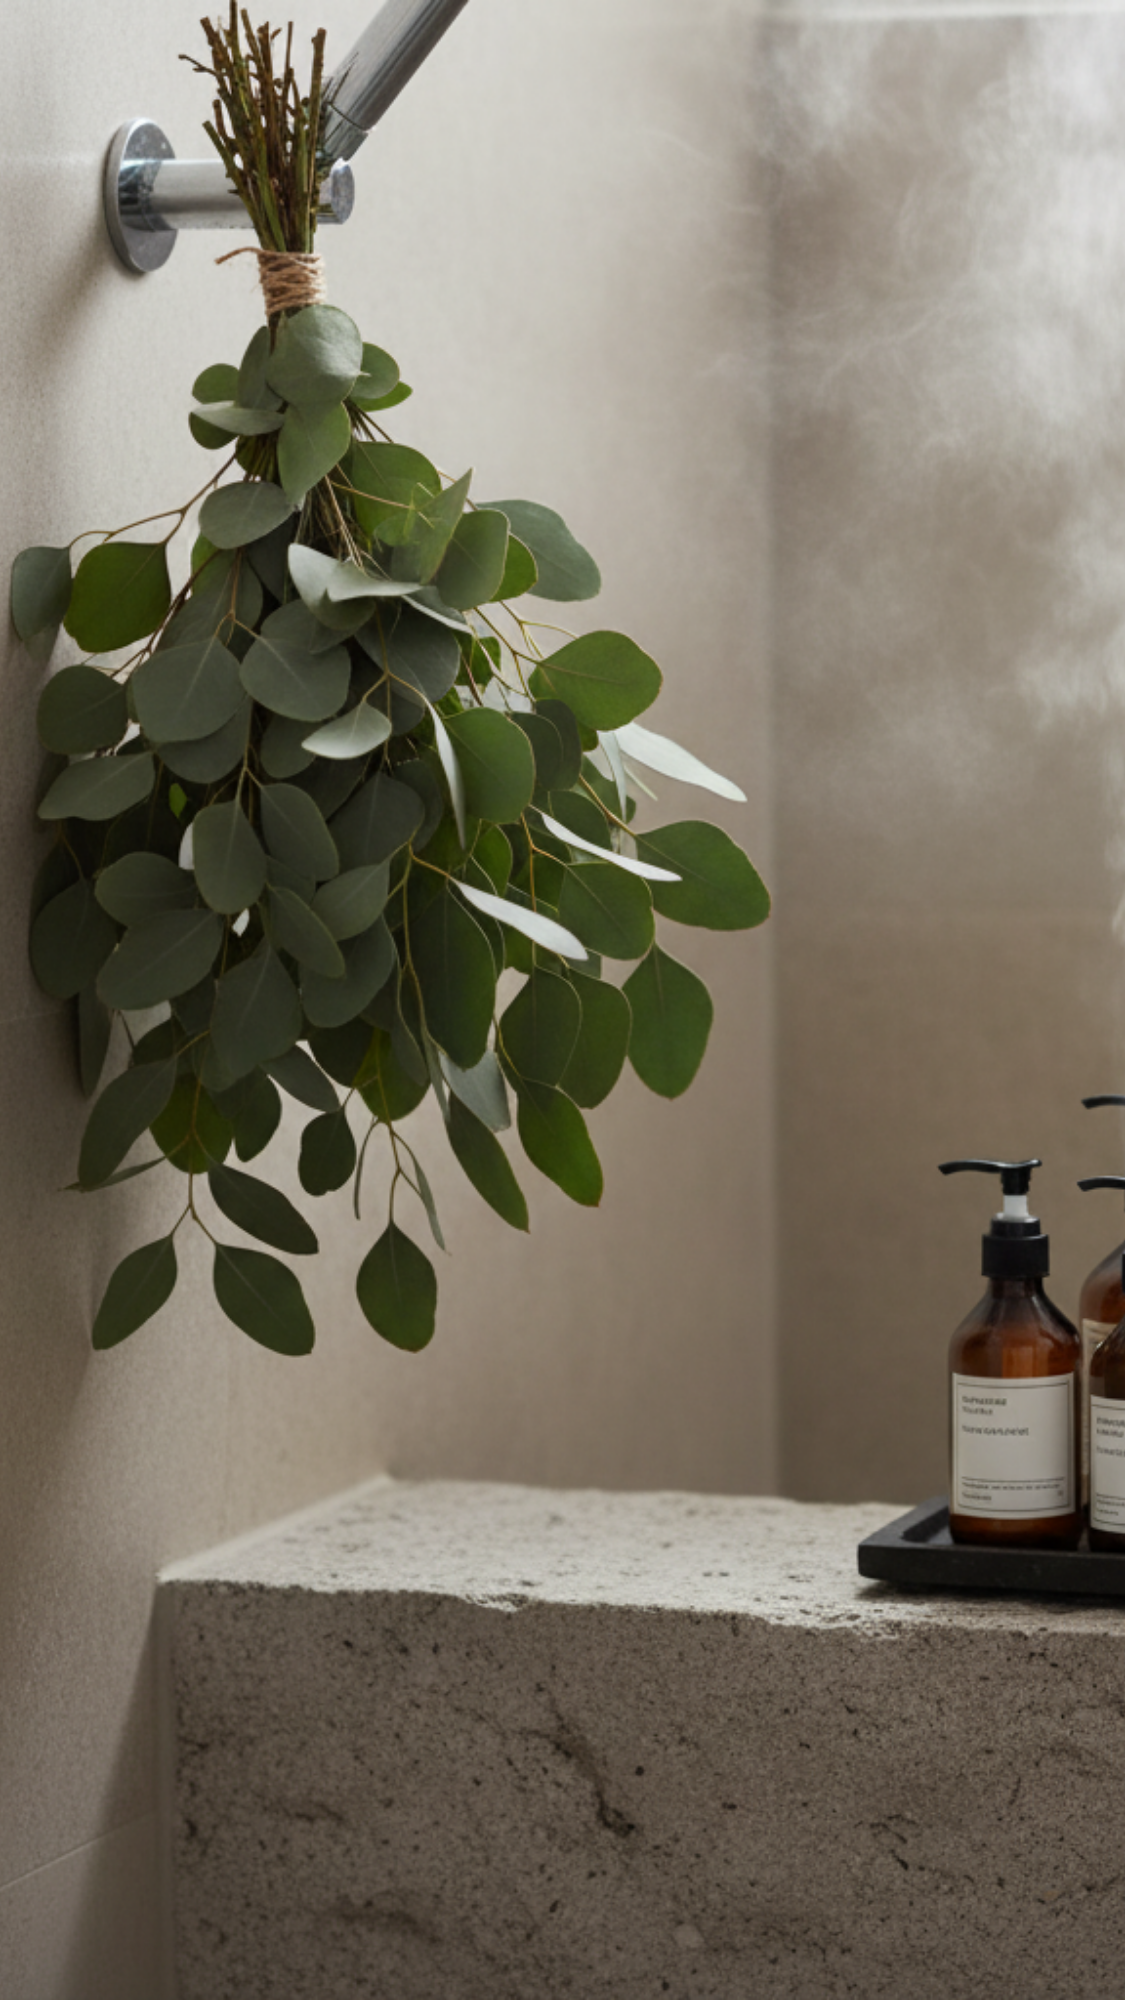
11) Eucalyptus Shower Bundle
I call this the two-minute spa hack because you hang a small bouquet in the shower and the steam does the work. You skip fancy diffusers, you skip cleanup, and you gift an instant I live well energy before coffee. I grab fresh bunches, strip the lower leaves so they don’t sit in splash zones, and tie everything with twine and an S-hook. Your giftee hangs it by the showerhead, turns the water on, and boom—cozy holiday morning mood with zero brain cells required. Want DIY gifts for cozy holiday mornings that look chic in a tiny bathroom and smell like a boutique? This is the move.
What It Is
A steam-activated shower bouquet that releases crisp, calming aroma every morning.
You’ll Need
- Fresh eucalyptus (silver dollar or seeded; 8–12 stems per bundle)
- Optional accents: rosemary or lavender sprigs for depth
- Twine or cotton cord, S-hook or removable adhesive hook
- Kraft sleeve or breathable paper for gifting
- Instruction tag + minimal label


Steps (Fast & Pretty)
- Trim stems to ~12–16″ and strip leaves from the bottom 4–6″.
- Bundle stems; wrap tightly with twine in a neat spiral.
- Tie a loop in the twine and attach an S-hook (or supply a stick-on hook).
- Tap-crush stems gently with a rolling pin to open the oils (tiny bruise, big payoff).
- Sleeve in breathable paper so the bundle looks fresh and intentional.
Wrap & Present
- Tag text: “Hang near showerhead (not in direct spray). Steam 5–10 minutes. Replace in 2–3 weeks.”
- Add a tiny care card: “If scent fades, re-crush stems. Keep bundle above splash zone.”
- Finish with a clean label: Eucalyptus Shower Bundle — Spa Morning, Zero Effort.
Time & Cost (Per Bundle When Batched)
- Time: 10–15 minutes
- Cost: $ (buy stems in bulk at a florist or market)
Variations & Swaps
- Deep Forest: add rosemary + a pinch of cedar tips (dried).
- Relax Mode: tuck lavender sprigs inside the bundle.
- Bright Citrus: tie on a dried orange slice for a subtle visual pop.
Safety & Care (Print This On The Card)
- Not for infants, pets, or people with strong scent sensitivities.
- If pregnant or asthmatic, consult your provider before use.
- Do not submerge; keep the tie point dry so it doesn’t mold.
- Compost the bundle when it fades; replace every 2–3 weeks.
Personal Tip
I include a tiny “reset ritual”: turn on warm water, breathe three slow inhales under the bouquet, then start the day. That 30-second pause changes the whole morning, no fancy spa required.
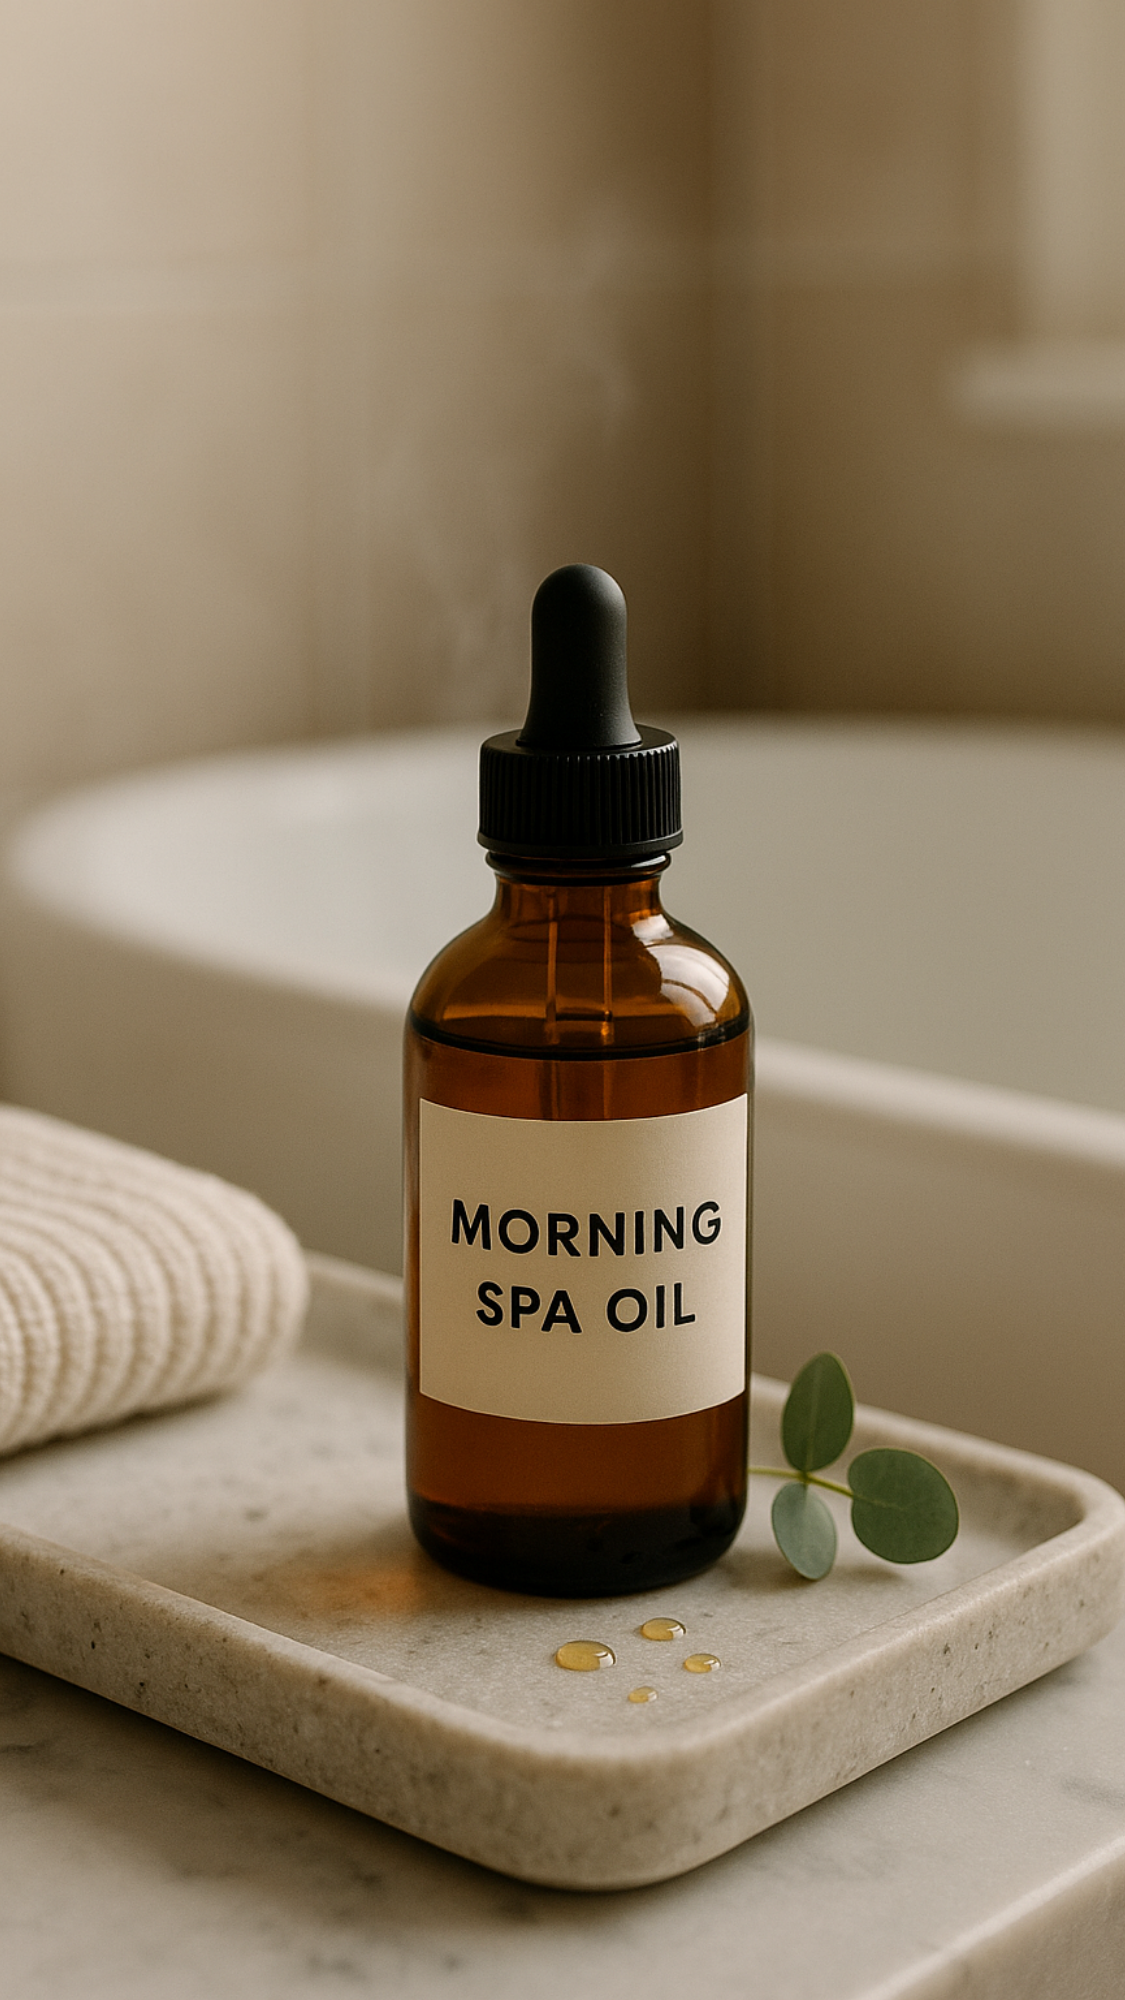
12) Morning Spa Oil (Body + Bath)
I bottle this lightweight morning spa oil when I want skin to feel soft before the first sip of coffee. You blend two friendly carrier oils, add a cozy lavender–vanilla note, and call it a win. I keep the scent gentle so it plays nice with perfume or candles and never shouts over breakfast. Use it straight on damp skin or splash a tablespoon into the tub for a silky soak. Want DIY gifts for cozy holiday mornings that read “small luxury, big mood”? This lands every time. Ever notice how a tiny drop of oil makes hands look instantly polished? That’s the energy.
What It Is
A silky, fast-absorbing body/bath oil in an amber dropper bottle with a soft lavender–vanilla profile.
You’ll Need
- 4 oz sweet almond oil (light, crowd-pleasing)
- 2 oz jojoba oil (balances and mimics skin’s sebum)
- Lavender essential oil (12–18 drops, ~0.5–0.75%)
- Vanilla oleoresin or fragrance oil (skin-safe; 6–10 drops, ~0.25–0.4%)
- Optional: vitamin E (1–2 drops) as an antioxidant
- 4–8 oz amber bottle (dropper or pump), small funnel, labels
Steps (Glow, Not Grease)
- Sanitize bottle and tools (hot soapy rinse, air-dry).
- Combine almond + jojoba in a measuring cup; stir gently.
- Add lavender and vanilla (start low; you can build).
- Drop in vitamin E; stir 30–60 seconds to blend.
- Bottle with a funnel; cap tightly; label with usage + date.
Wrap & Present
- Front label: “Morning Spa Oil — Lavender • Vanilla — Body + Bath”.
- Back tag: “Massage a few drops onto damp skin, or add 1 tbsp to warm bath.”
- Tie on a tiny linen ribbon and tuck into a stone-colored gift pouch.
Time & Cost (Per 4–6 oz Bottle)
- Time: 10–15 minutes
- Cost: $$ (carrier oils are budget-friendly; bottles add polish)
Variations & Swaps
- Uplift: lavender + bergamot (photo-safe FCF bergamot) for a bright AM vibe.
- Unscented Sensitive: skip essential oils; add 1–2 drops vanilla extract to the label as an option to mix per use.
- Warmer Cozy: lavender + tonka/benzoin for a soft, marshmallow finish.
- Nut-Free: swap almond for fractionated coconut or grapeseed.
Safety & Patch Test (Print This On The Card)
- Patch test on inner arm for 24 hours before full use.
- Keep oils out of eyes and off broken skin.
- If pregnant, nursing, or sensitive to fragrance, consult your provider and choose the unscented version.
- External use only; discontinue if irritation occurs.
- Store cool and dark; best within 6 months.
Personal Tip
I apply on damp skin right after the shower so the oil locks in moisture and sinks faster. I also add one extra drop of vanilla to my own bottle for a hint of “bakery but make it elegant.”
13) Oatmeal Breakfast Jars (4-Pack)
I build these overnight oat jars when I want breakfast to clock in before my brain does. You line up four jars, drop in a base mix, and add flavor packs that turn humble oats into a grab-and-go morning. I stack a fill line on the label so nobody measures while half-asleep, and I keep the mix shelf-stable so you gift it now and they enjoy it later. You give calm, not chaos. Want DIY gifts for cozy holiday mornings that feel healthy without tasting like homework? These jars deliver.
What It Is
A set of four 8-oz jars preloaded with a base oat mix and flavor add-ins. Your giftee adds milk to the fill line, shakes, and chills overnight.
You’ll Need
- 4 x 8-oz wide-mouth jars with tight lids
- Base mix (per jar): ½ cup old-fashioned oats, 1 tbsp chia seeds, 1 tsp vanilla sugar (or 1 tsp sugar + pinch vanilla powder), pinch of salt
- Flavor packs (choose 4): see ideas below
- Waterproof labels, a fine-tip marker, small funnel, wood caddy or small box


Steps (Assembly-Line Easy)
- Label each jar with the flavor name and a fill line about ¾” below the rim.
- Add base mix to all four jars.
- Drop in flavor pack for each jar (keep wet add-ins separate; see notes).
- Cap the jars, wipe them clean, and stage them in a caddy with an instruction card.
- Date-stamp the set so they remember when you packed the goods.
Instruction Card (Print This)
- Add milk (dairy or alt) to the fill line.
- Shake 10 seconds, then chill overnight (at least 4 hours).
- Stir in the morning; top with fresh fruit or nuts if you want extra texture.
- Best within 1 week after adding milk; unopened dry jars keep 1 month in a cool, dry spot.
Flavor Pack Ideas (Per Jar)
- Maple Pecan Crunch: 1 tbsp maple sugar, 2 tbsp chopped pecans (bag nuts separately to keep crisp)
- Apple Pie: 1 tbsp brown sugar, ½ tsp cinnamon, 2 tbsp freeze-dried apples
- Berry Vanilla: 1 tbsp vanilla sugar, 2 tbsp freeze-dried berries
- Peanut Butter Cup: 1 tbsp coconut sugar, 1 tbsp powdered peanut butter, 1 tsp cacao nibs
- Chai Morning: 1 tbsp maple sugar, ½ tsp chai spice blend
- Citrus Glow: 1 tbsp sugar, 1 tsp dried orange zest, 1 tsp poppy seeds
Pro move: Use freeze-dried fruit for color and crunch that won’t sog. Bag anything that needs crunch (nuts, nibs) and clip it to the jar.
Wrap & Present
- Slot all four jars in a small wood caddy with crinkle paper.
- Add a belly band that lists flavors and a milk suggestions line (almond, oat, dairy).
- Tie on a tiny stainless spoon and a “Shake • Chill • Enjoy” tag.
Time & Cost (Per 4-Jar Set When Batched)
- Time: 20–25 minutes
- Cost: $–$$ (freeze-dried fruit nudges cost; bulk oats keep it friendly)
Variations & Swaps
- Gluten-Free: choose certified GF oats.
- Dairy-Free: note “add any plant milk” on the card.
- High-Protein: add 2 tbsp vanilla protein powder to any jar and bump milk to the fill line plus 2 tbsp.
- No-Chia Texture: swap chia for 2 tsp ground flax.
Troubleshooting (Put This On Card Back)
- Too thick? Stir in 2–3 tbsp more milk.
- Too loose? Let it sit 10 more minutes, or add 1 tsp chia and shake.
- Not sweet enough? Drizzle Infused Honey (#10) or Vanilla Syrup (#2).
Personal Tip
I line the inside of each lid with a round of parchment so oat dust stays tidy. I also add a tiny pinch of flake salt to “treat” flavors like PB Cup or Maple Pecan—dessert energy before noon, zero regrets.
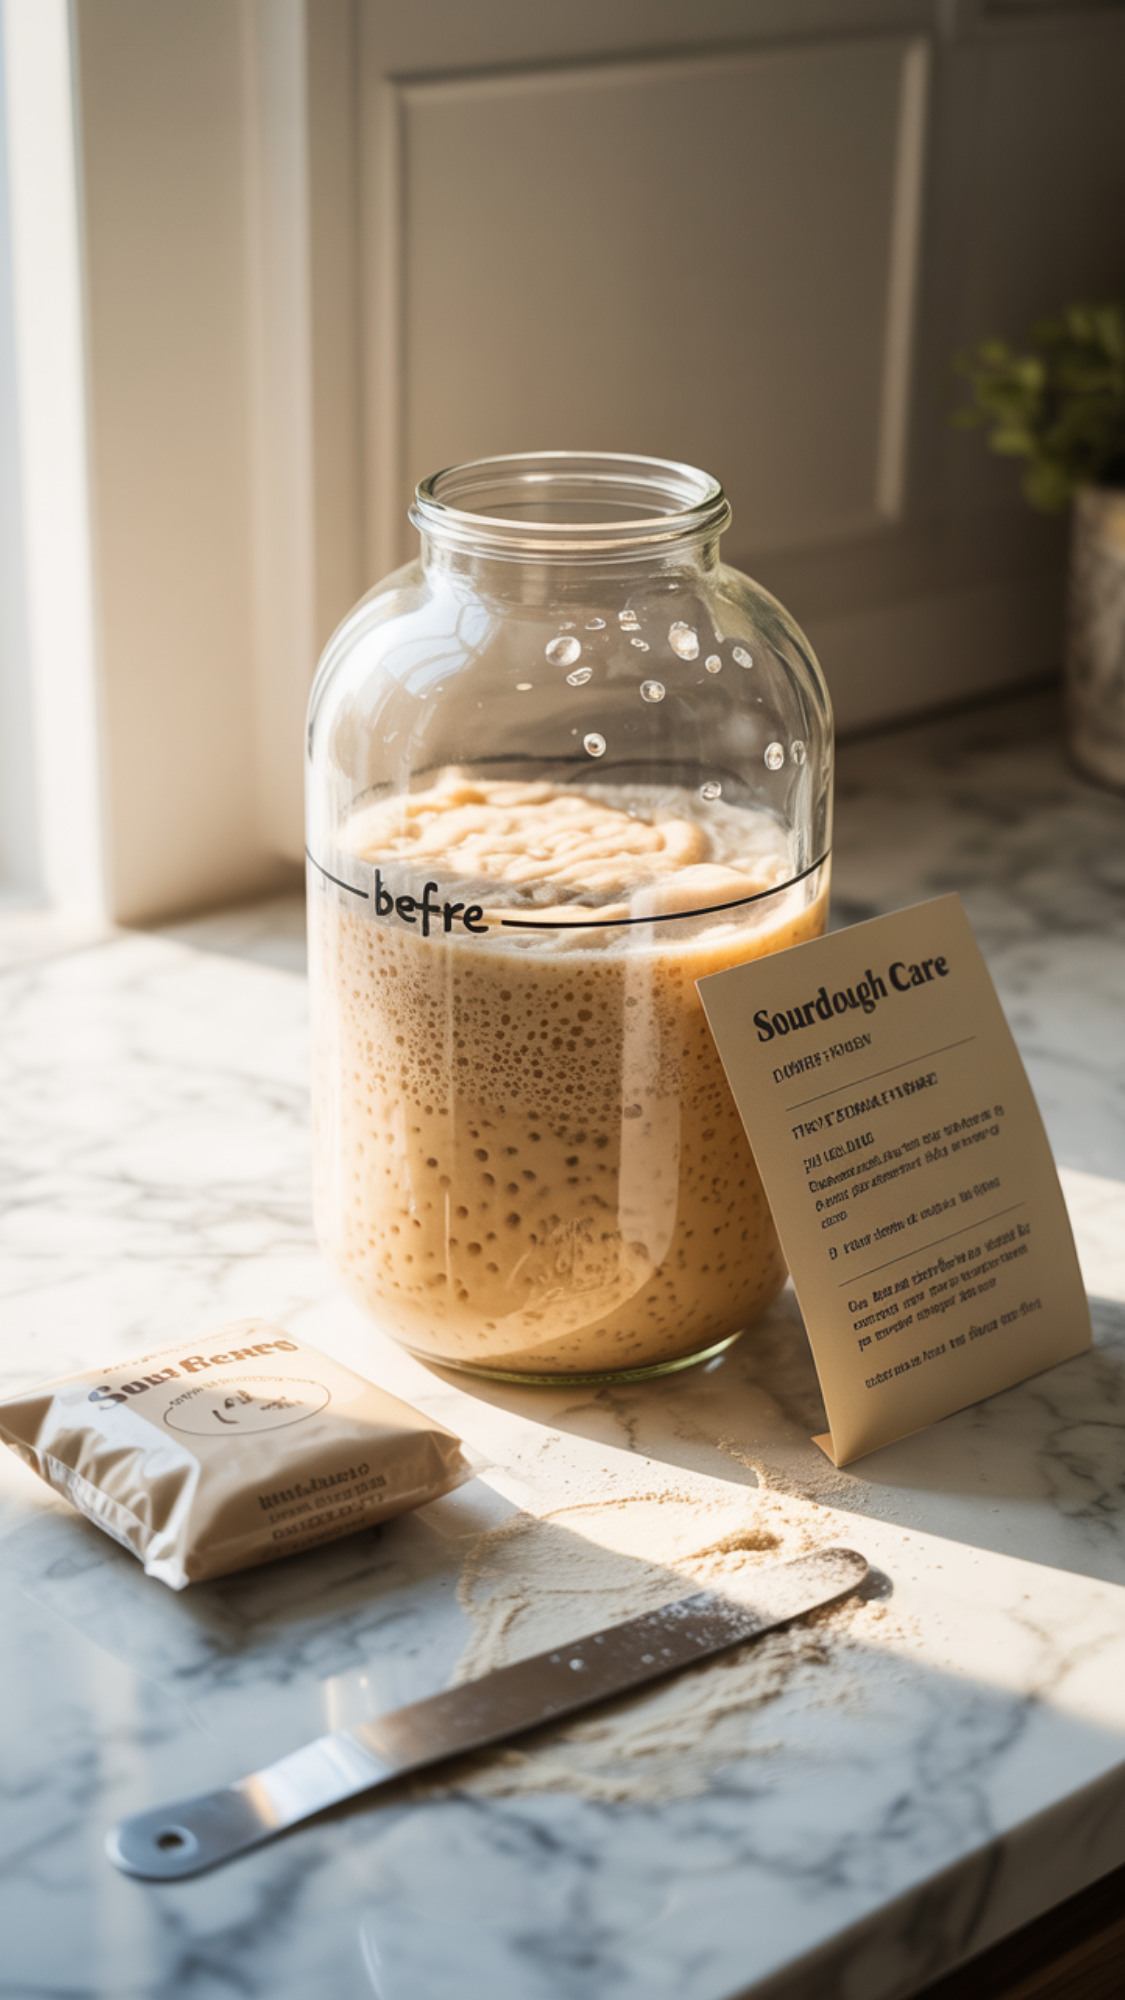
14) Sourdough Starter + Care Card
I treat this like gifting a tiny, bubbly pet that makes breakfast legendary. You portion a lively starter, tuck in a simple feeding schedule, and give someone the keys to pancakes, waffles, and boules that make neighbors stare. I mark the jar with a rubber band so they watch the rise like a science show, then I add a troubleshooting line so nobody spirals if they see “hooch.” Want a gift that keeps paying off long after the tree’s down? This starter turns sleepy mornings into toast-with-audience moments. Ever wonder why bakery bread tastes deeper? You’re handing them that flavor engine.
What It Is
A happy, active sourdough starter (100% hydration) with a care card and a backup dry packet—because insurance tastes like bread.
You’ll Need
- Mature starter, bubbly and doubling predictably
- 8–12 oz glass jar with breathable lid (loose cap or coffee filter + band)
- Rubber band (rise marker)
- Small pouch for dried backup flakes (optional but clutch)
- Care card with feed schedule, ratios, and safety notes
- Label with starter name + date (naming = bonding)


Steps (Prep & Portion)
- Feed your mother starter 6–8 hours before portioning so it peaks.
- Portion 100 g into a clean jar; wipe the rim and cap loosely (never airtight).
- Mark the current level with a rubber band so rise shows clearly.
- Dry a backup: spread a thin layer of active starter on parchment; air-dry until brittle; crumble into a labeled zip bag.
- Print the care card and tie it to the jar with twine.
Care Card (Print This)
- Feed Ratio (by weight): 1:1:1 starter:water:flour for routine maintenance (ex: 30 g : 30 g : 30 g).
- Flour: all-purpose works; add 10–20% whole wheat for pep.
- Water: room temp, filtered if chlorinated.
- Schedule (Fridge): feed, let rise 1 hour, then refrigerate; refresh weekly.
- Bake Day: pull from fridge, discard to 30 g, feed 1:1:1, repeat 2–3 feeds until it doubles in 4–6 hours, then use.
- Use-Now Ideas: waffles, pancakes, crackers with the discard—zero waste, big flavor.
- Storage: keep lid loose to vent gas; keep jar half-empty to prevent overflow.
Wrap & Present
- Front label: “Sourdough Starter — 100% Hydration — Alive & Friendly”.
- Add a mini bench scraper or dough whisk tie-on.
- Include a QR to your favorite beginner loaf and a “Pancake-from-Discard” recipe snippet.
Time & Cost (Per Jar)
- Time: 10 minutes (plus drying time for the backup flakes)
- Cost: $ (flour + jar)
Variations & Swaps
- Rye-Boost: swap 20–30% rye flour on feed days for a tangier, speedier rise.
- Gluten-Sensitive Note: gift a rice/buckwheat starter instead, and label it clearly as gluten-free (avoid cross-contact).
Troubleshooting (Add To Card Back)
- Hooch (grey liquid): your starter’s hungry—pour off or stir in and feed.
- Slow rise: warm it up (75–80°F/24–27°C), give two consecutive feeds.
- Too sour: shorten time at peak; feed more frequently.
- Pink/orange streaks or off smell: discard and use the dry backup.
- Overflow risk: use a bigger jar or reduce feed size.
Allergen & Safety Notes
- Contains gluten (unless gifting a GF starter).
- Use clean utensils; never seal airtight (CO₂ needs an exit).
- Keep out of reach of pets and curious toddlers (ask me how I know).
Personal Tip
I tape a tiny “First Bake Plan” on the lid: Night before—2 feeds. Morning—mix dough. Afternoon—shape. Evening—bake. People follow that rhythm, and their first loaf pops with a proud ear.
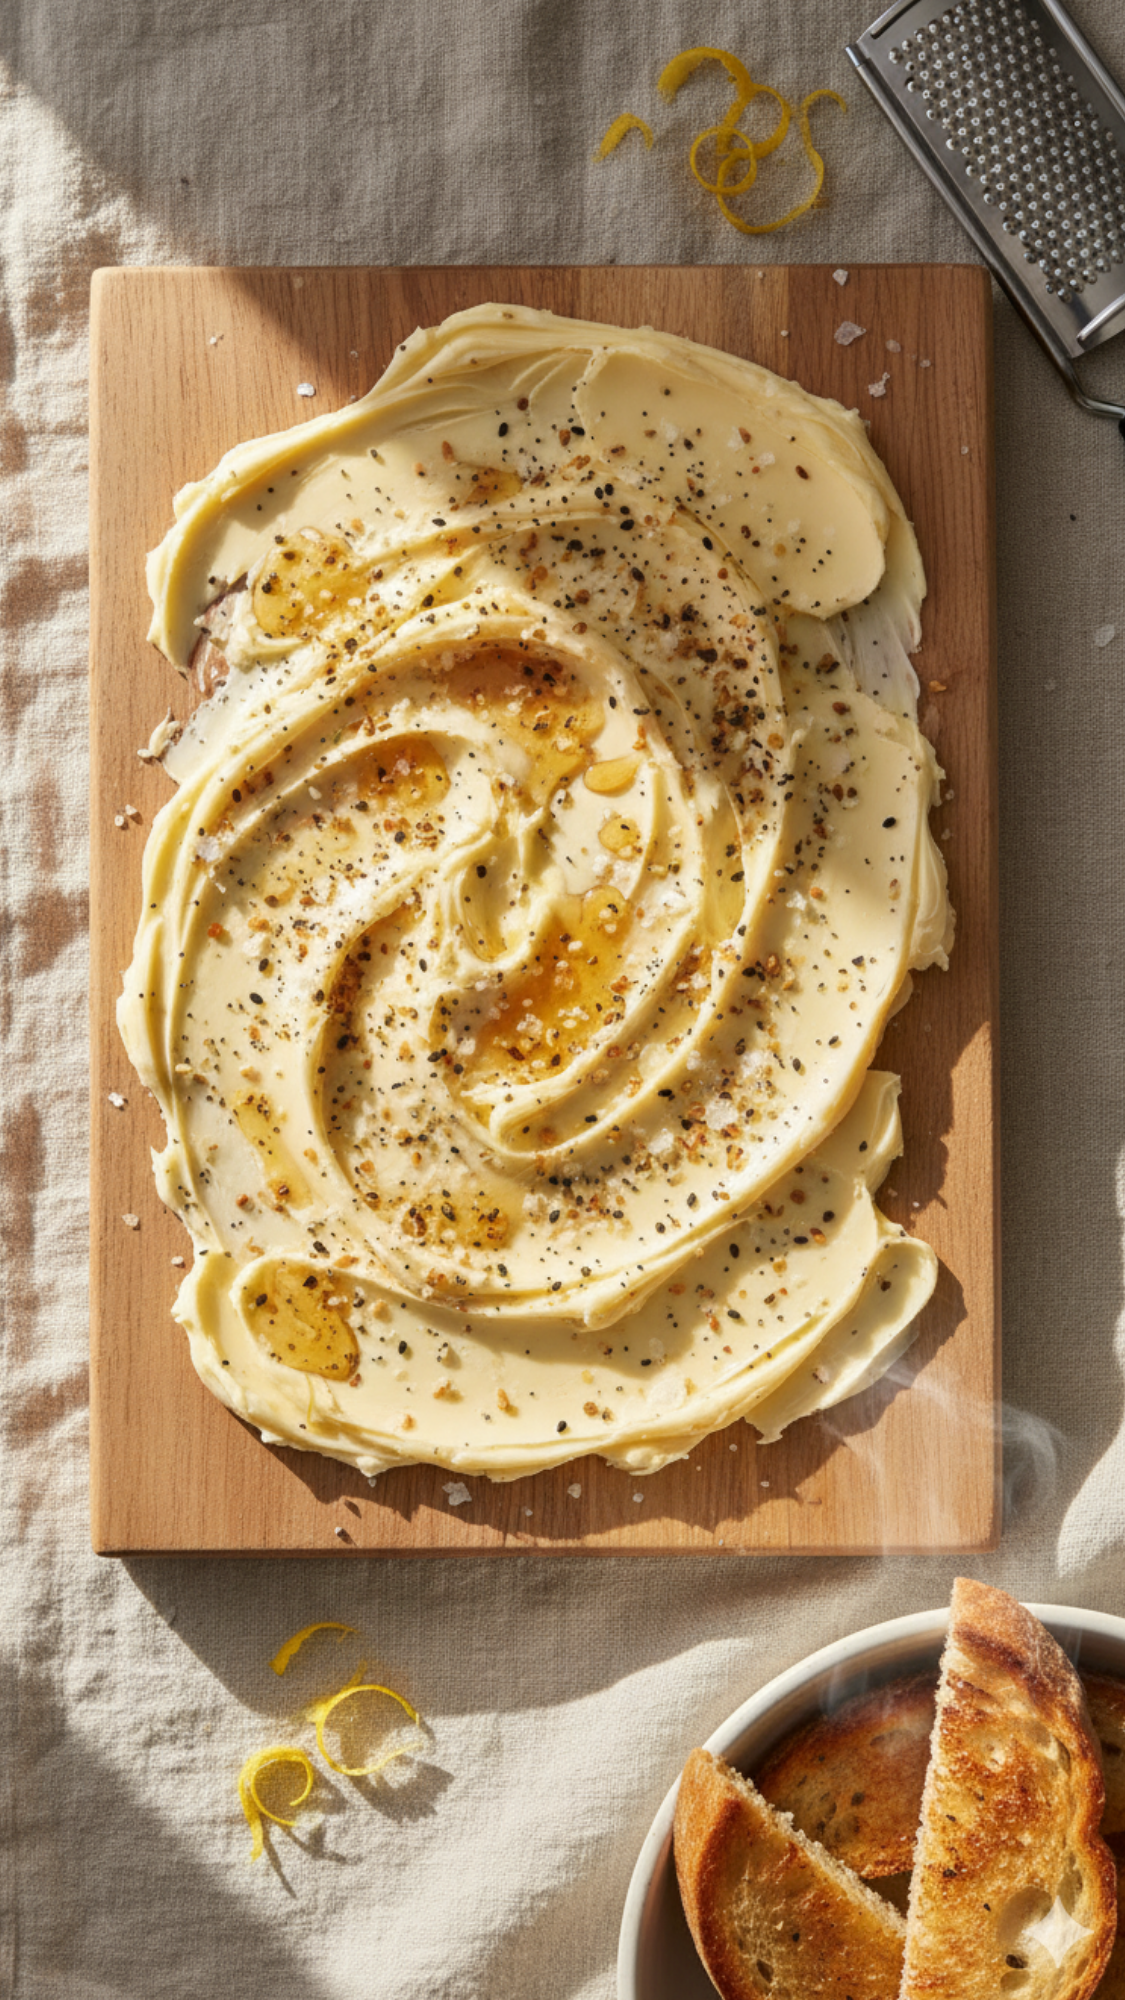
15) Butter Board Kit
Want a morning toast party in one box with zero spreadsheets? Build a Butter Board Kit and let your giftee swoop, spread, and sparkle like a brunch showrunner. You smooth good butter across a small board, tuck in toppings that wake up sleepy taste buds, and include a card so nobody overthinks ratios. I keep the flavors bright and breakfast-friendly—think flake salt, everything spice, lemon zest, and a soft honey drizzle. You deliver the “wow” without baking a thing. Ever notice how a little salt and citrus make butter taste fancier than it has any right to? That’s the move.
What It Is
A ready-to-style butter board with toppings and tools, designed for DIY gifts for cozy holiday mornings where toast steals the spotlight.
You’ll Need
- Small wooden or stone board (8–10″)
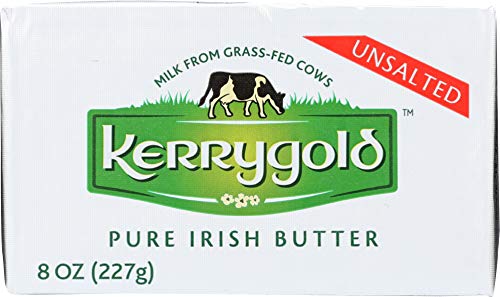
- High-fat European butter (1–2 sticks), or your Maple Cinnamon Ghee (#20) for shelf-friendlier gifting
- Flake salt, everything bagel seasoning, fresh lemon (for zest)
- Honey or Infused Honey (#10)
- Optional: thinly sliced radish, fresh herbs (chives, dill), cracked pepper
- Mini offset spatula or butter knife, parchment for lining, kraft box, ice pack if traveling
- Instruction card + simple label


Steps (Your Assembly)
- Sanitize and dry the board; line with parchment if you want easy cleanup.
- Pack butter cold (leave wrapped), plus small jars of toppings: flake salt, everything spice, honey.
- Add a lemon for zest and a mini offset spatula.
- Slip in the instruction card and nestle everything in a kraft box with crinkle paper.
- If you’ll deliver later the same day, include an ice pack and note “refrigerate on arrival.”
Instruction Card (For Your Giftee)
- Soften butter 15–30 minutes at room temp.
- Swoosh butter on the board with the spatula (think waves and pockets).
- Season with flake salt and everything spice.
- Zest lemon lightly over the top; drizzle honey in a thin ribbon.
- Serve with warm toast, baguette slices, or crispbread.
- Leftovers: scrape back into a ramekin; refrigerate and use within 3–4 days.
Wrap & Present
- Label the box: “Butter Board Kit — Morning Toast, Upgraded.”
- Tie the mini spatula to the lid with twine.
- Tuck a tiny pairing card: Great with coffee, chai, and citrusy jams.
Time & Cost (Per Kit When Batched)
- Time: 15–20 minutes
- Cost: $$ (butter + board set the range; ghee stretches shelf life)
Variations & Swaps
- Savory Herby: chives, dill, lemon zest, cracked pepper, no honey.
- Sweet Brunch: cinnamon sugar, vanilla salt, honey, thin pear slices.
- Heat Kiss: a dust of Aleppo pepper or chili honey from #10.
- Shelf-Friendlier: swap butter for Maple Cinnamon Ghee (#20); note “serve at room temp.”
Safety & Storage
- Keep dairy chilled until gifting; don’t ship unrefrigerated butter.
- Mark “Refrigerate on arrival” on the lid if you deliver with a cool pack.
- Use clean tools on the board; discard after 3–4 days or earlier if flavors fade.
Personal Tip
I add a microplane for tableside zesting because the aroma sells the first bite before anyone eats. If I pack radishes or herbs, I bag them separately so the board stays crisp, not soggy.
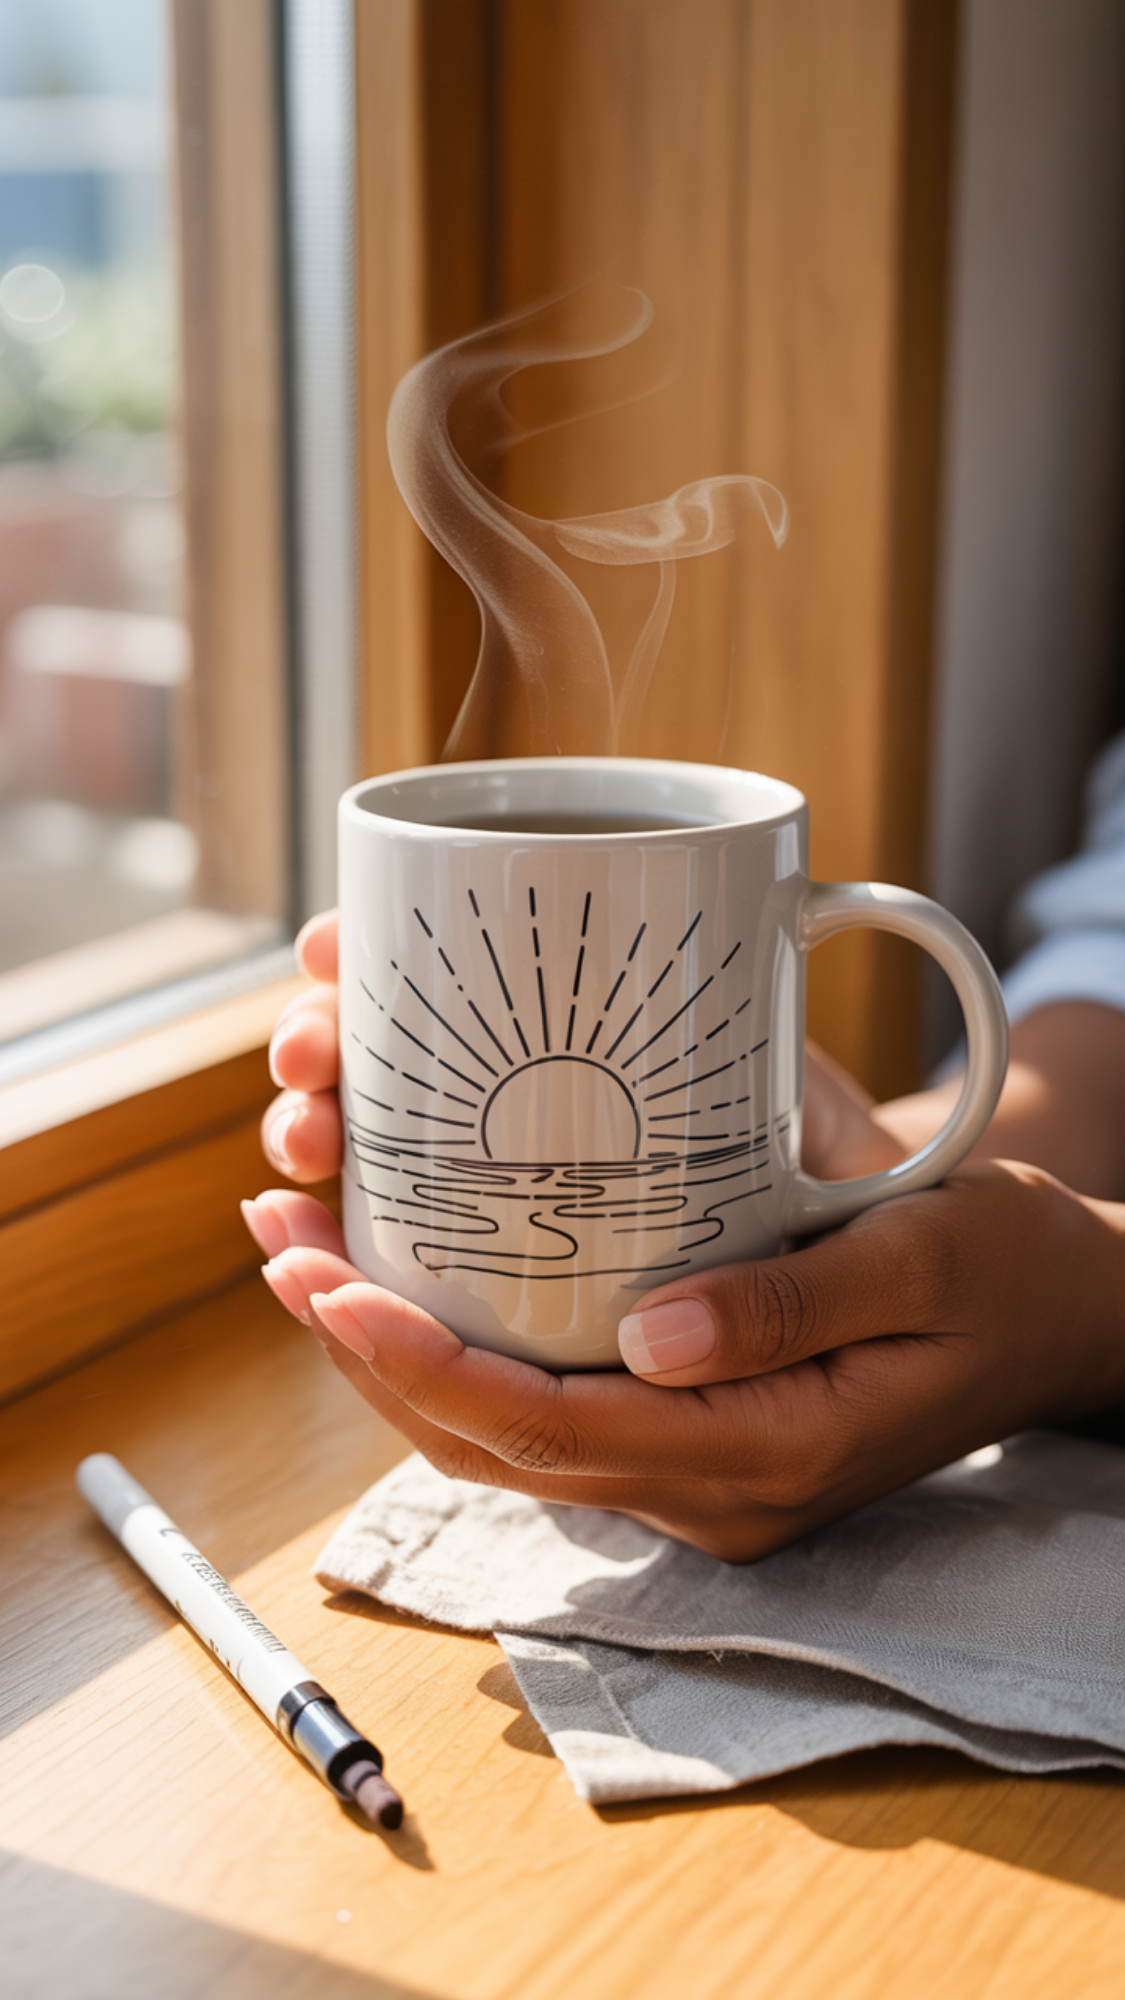
16) Personalized Mug (Oil-Based Marker)
I love this gift because you draw once and your friend sips joy for months. You grab a plain ceramic mug, sketch something simple and chic, and bake the design so it sticks. I keep the art minimal—initials, a tiny sunrise, a cheeky phrase—so it reads boutique, not camp craft. You create a set in under an hour and hit every coffee lover on your list without leaving your kitchen. Want DIY gifts for cozy holiday mornings that feel custom without a Cricut? This mug nails the brief and still leaves you time for pancakes.
What It Is
A dishwasher-tolerant (top-rack, gentle) custom mug drawn with oil-based paint markers, then oven-cured for staying power.
You’ll Need
- Plain ceramic mug (glossy white or matte stoneware)
- Oil-based paint marker (fine or extra-fine tip; black or gold looks luxe)
- Rubbing alcohol + lint-free cloth (degrease the surface)
- Low-tack tape (guidelines) and a pencil (light sketch if needed)
- Oven + baking sheet + parchment
- Label or tag for care instructions


![McKesson Isopropyl Rubbing Alcohol 70% [1 Count] USP First Aid An...](https://m.media-amazon.com/images/I/31543p-oNkL.jpg)

Steps (Crisp Lines, No Smears)
- Degrease the mug with alcohol and dry completely.
- Tape a straight guideline or lightly sketch your design.
- Draw the art; let the first pass dry 10 minutes; touch up if needed.
- Air-dry 30–60 minutes so the ink sets.
- Place the mug on a parchment-lined sheet in a cold oven.
- Bake per your marker brand’s instructions (commonly 300–350°F / 150–175°C for 30–35 minutes).
- Turn off the oven and let the mug cool inside to prevent cracks.
- Remove tape if used and wipe any pencil marks.
Wrap & Present
- Tie on a packet of Hot Cocoa (#1) or Vanilla Syrup (#2).
- Add a minimal tag with the design’s meaning (“Rise & Shine,” initials, date).
- Slip the mug into a kraft window box with crinkle for instant gift-ready vibes.
Time & Cost (Per Mug When Batched)
- Time: 15–20 minutes art + 30–35 minutes bake + cool
- Cost: $ (markers and blank mugs run friendly, especially in sets)
Design Ideas (Quick Wins)
- Monogram + tiny starburst near the handle.
- Line-art sunrise over a wavy horizon.
- Mini mantra: “Morning Magic,” “Sip Slow,” or a private joke.
- Micro pattern: dots or dashes around the base like confetti.
Care & Safety (Print On Tag)
- Hand-wash recommended for maximum life; top-rack dishwasher usually holds up after curing.
- Avoid scrubbing directly on the art.
- Food-contact note: keep ink outside lip line; leave ½″ gap from rim.
- If the design dulls over time, rebake once using the same method.
Troubleshooting
- Skipping ink? You left oils on the mug—wipe with alcohol and redraw.
- Feathering lines? Your marker flooded—switch to extra-fine and light pressure.
- Faded after wash? You under-cured—rebake and cool in-oven.
Personal Tip
I outline with extra-fine, then dot the ends of lines so everything feels intentional and premium. I also place the art opposite the handle so right- or left-handed friends show the design while they sip.
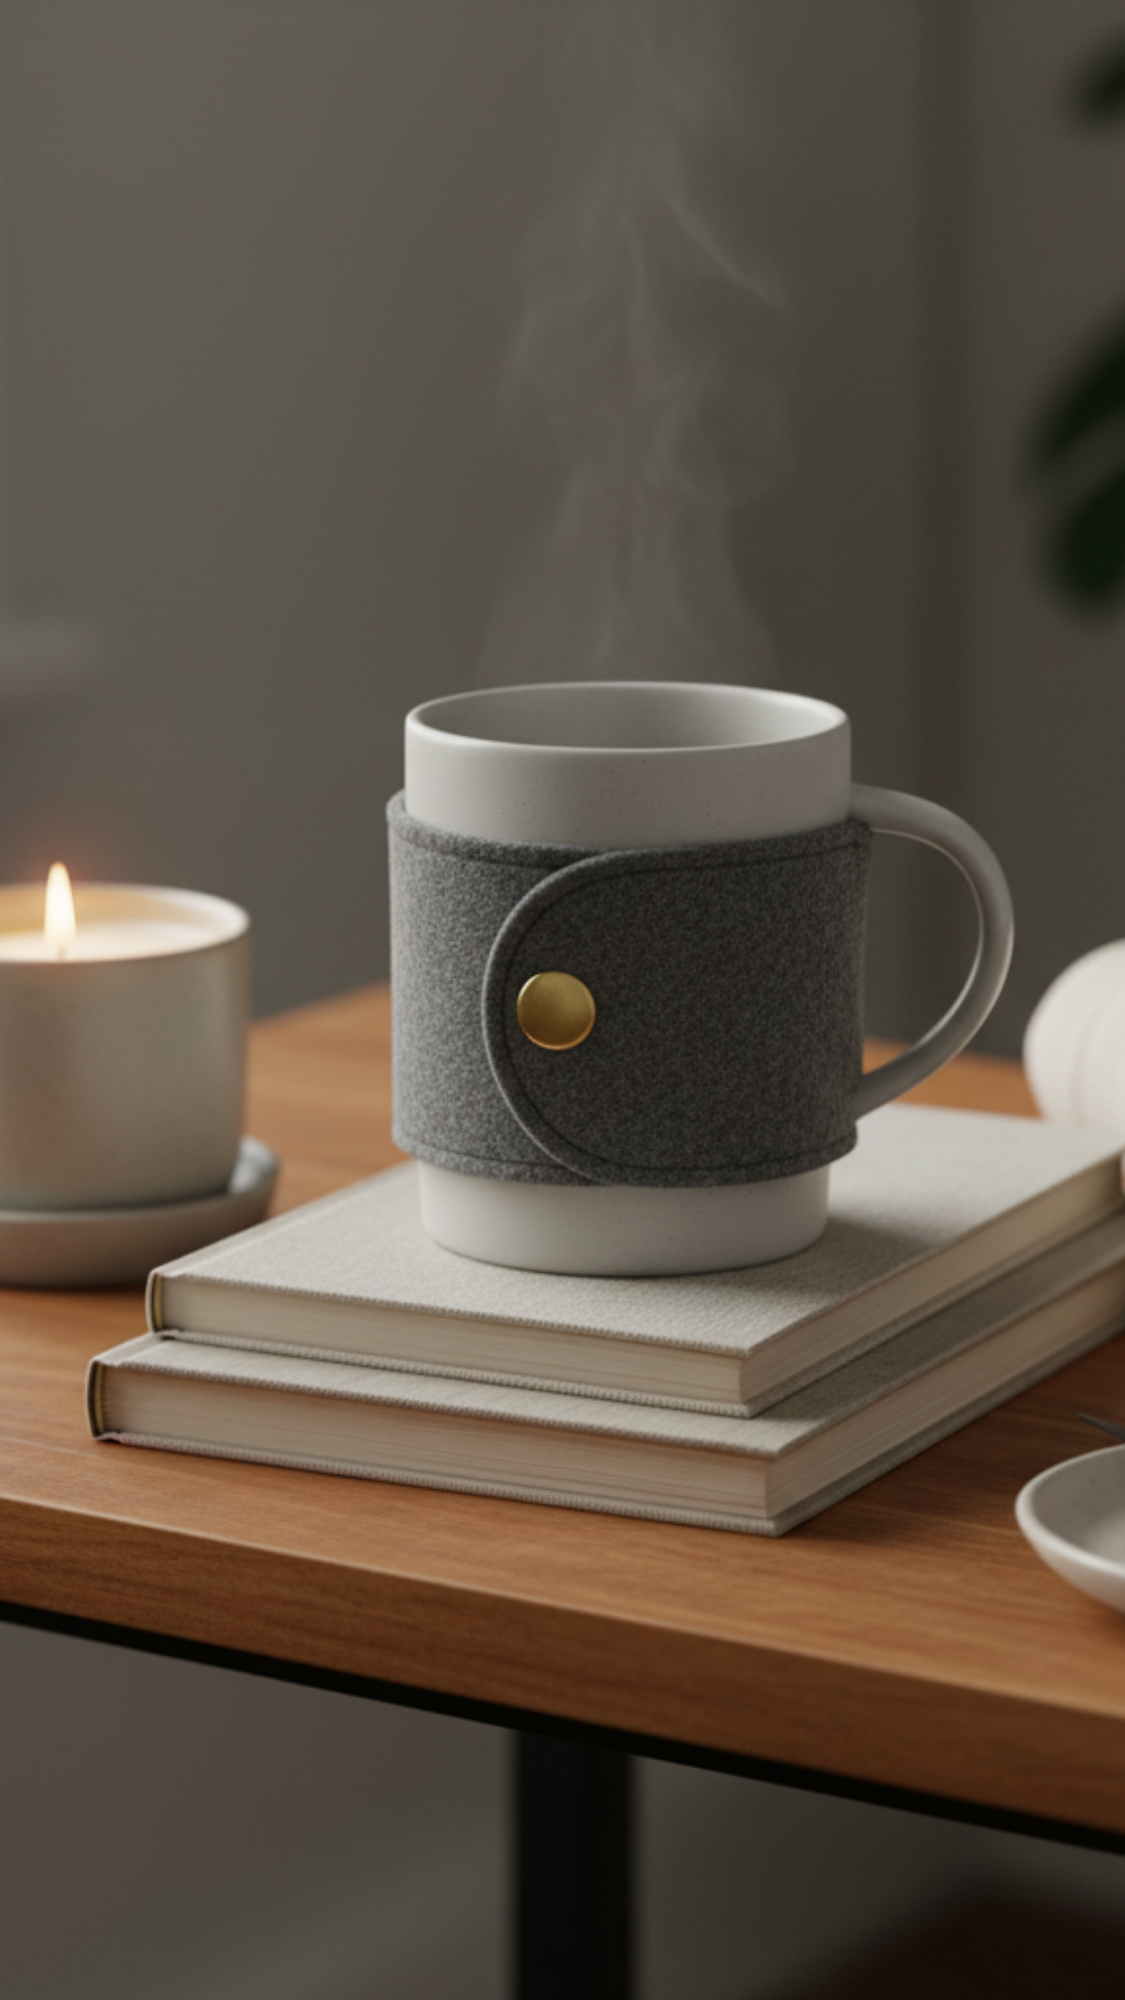
17) No-Sew Felt Mug Sleeve
I love this because it looks handmade in the best way and actually saves fingertips from too-hot mugs. You measure once, glue once, and boom—your mug wears a sweater and your morning looks styled. I keep thick wool felt on hand because it holds shape, insulates, and takes a clean edge. I add a button-and-elastic closure so the sleeve hugs different mugs without drama. Want DIY gifts for cozy holiday mornings that ship flat, cost little, and still feel custom? This cozy wins on all three.
What It Is
A reusable cup cozy cut from thick felt and closed with a simple button loop—no sewing, just clean lines and instant grip.
You’ll Need
- 3–4 mm wool or wool-blend felt (one 9×12″ sheet makes 2 sleeves)
- Fabric glue rated for washing (Beacon Fabri-Tac or similar)
- Elastic cord loop (or hair elastic) + 1 large button (¾–1″)
- Ruler, pencil, sharp scissors (or rotary cutter), binder clips
- Optional: pinking shears (pretty edge), silicone grip dots/tape for the inside, iron-on label or tiny monogram tag


Steps (Measure → Cut → Glue)
- Measure the mug: wrap a strip of paper around the widest part; mark the overlap. Add ½″ overlap to that length. Set height to 2½–3″ so lips and handles stay clear.
- Cut felt to your rectangle. For open-handle mugs, notch a small U where the handle sits so the sleeve lies flat.
- Glue the loop: form a 1–1½″ elastic loop, glue/stick one end to the short edge (inside face). Clip to hold.
- Finish the edge you’ll see most: run pinking shears or keep a crisp straight cut.
- Mark button spot on the opposite short edge so the loop will meet it snugly. Glue button down; weight it with a book for 10–15 minutes.
- Test-fit around the mug; if it slides, add two thin silicone grip strips inside the top and bottom edges.
- Cure glue fully per label (usually 24 hours) before gifting so nothing slips.
Wrap & Present
- Wrap the sleeve around a blank travel mug or your Personalized Mug (#16).
- Add a tiny care tag: “Spot-clean only. Let glue cure 24 hrs before use.”
- Tie with twine and tuck a chai concentrate card (#3) for the full cozy moment.
Time & Cost (Per Sleeve When Batched)
- Time: 15–20 minutes (+ glue cure)
- Cost: $ (felt + button + elastic; cheapest win on the list)
Variations & Swaps
- Faux-Leather or Cork fabric for a sleeker, wipeable look (still no-sew).
- Pocket add-on: glue a tiny felt pocket for tea bags or a sugar packet.
- Monogram: iron-on letter or a heat-transfer vinyl initial for that boutique vibe.
- Holiday Edge: cut the top with scallops or a mountain peak line—graphic and cute.
Troubleshooting
- Sleeve slides? Add more silicone dots inside or tighten the loop length ¼″.
- Glue peels? You used craft glue—switch to fabric glue and press longer.
- Loop too long? Snip and re-glue a tighter loop; clip until set.
- Edge fuzz? Burnish with your nail or trim one clean pass with sharp scissors.
Safety & Care
- Keep the sleeve below the lip line so no glue touches lips.
- Spot-clean only; do not machine-wash.
- Keep away from open flame; it’s felt, not a trivet.
Personal Tip
I hide two tiny magnet dots (inside corners) on some sleeves so they snap closed around to-go cups without a button. It feels clever, and people think you bought it from a design shop.

18) Waffle Morning Box
I pack this mini waffle party when I want breakfast to come with applause. You give a crisp, golden waffle mix, a little syrup, and fun toppings, then watch people line up like it’s a hotel buffet—but cozier. I build the mix for maximum crunch (hello, cornstarch) and keep the instructions bold so nobody over-stirs and cries into their batter. You can include an overnight yeasted option for the friend who loves a plan, or stick with the classic quick mix for instant gratification. Ever notice how waffles slump after five minutes? You fix that with heat, rest, and a smart fat ratio, and yes, I wrote the tag so they can’t mess it up.
What It Is
A giftable waffle kit with a crisp waffle dry mix, maple, and toppings, plus a card for classic or overnight yeasted waffles.
You’ll Need
- Dry Mix (bag A, classic crisp):
- 2 cups all-purpose flour
- ¼ cup cornstarch (crisp factor)
- 2 tbsp sugar
- 1 tbsp baking powder
- ½ tsp baking soda
- ¾ tsp fine salt
- Yeasted Boost (bag B, optional): 1 packet instant yeast (7 g) + 2 tbsp sugar (for the overnight version)
- Toppings: mini maple syrup, chocolate chips, berry jam, or cinnamon sugar
- Tools: kraft box or crate, instruction card, parchment, tiny scoop, twine
- Optional: nonstick-safe silicone brush for oiling the iron


Steps (Assembly For You)
- Whisk the classic dry mix, then funnel into a labeled bag (Bag A — Waffle Mix).
- Bag B (optional): yeast + extra sugar with a big “For Overnight” label.
- Nestle toppings and a mini maple in the box; add parchment as a liner.
- Tuck the instruction card in front so it’s the first thing they see.
- Finish with a bold belly band: “Waffle Morning Box — Crispy, Cozy, Ready.”
Instruction Card (Print This)
Classic Crisp (Same Day)
- Add to Bag A: 1¾ cups milk (dairy or alt), 2 eggs, ⅓ cup neutral oil (or melted butter), 1 tsp vanilla.
- Whisk gently just to combine (a few small lumps are fine). Rest 10 minutes.
- Preheat waffle iron hot (medium-high). Lightly oil plates.
- Cook until deep golden and crisp; hold finished waffles on a 200°F (93°C) rack in the oven.
- Serve with maple and toppings.
Overnight Yeasted (Extra Flavor)
- Whisk Bag A + Bag B with 2 cups milk and ¼ cup melted butter.
- Cover and chill overnight (8–12 hours). In the morning, stir in 2 eggs.
- Cook as above; expect airier, custardy middles and crisp edges.
Notes: Don’t overfill the iron; steam = cooking. Crisp loves a hot plate and a brief rest on a rack.
Time & Cost (Per Box When Batched)
- Time: 20–25 minutes
- Cost: $$ (maple and toppings set the range; dry mix stays budget-friendly)
Variations & Swaps
- Buttermilk Version: swap milk with buttermilk and increase baking soda to ¾ tsp; skip Bag B.
- Gluten-Free: use a 1:1 GF flour with xanthan; keep cornstarch.
- Dairy-Free: specify plant milk + oil instead of butter on the card.
- Cinnamon Toast Waffles: add 1 tsp cinnamon to Bag A and a tiny cinnamon sugar shaker.
Troubleshooting (Back of Card)
- Floppy waffles? Iron too cool or batter under-rested—preheat longer, rest 5–10 minutes.
- Pale but cooked? Leave one more cycle; crisp happens at the end.
- Sticking? Oil plates lightly each round and wait until steam subsides before opening.
- Dense? Overmixed—fold gently next time; lumps are life.
Wrap & Present
- Label the box front with WHAT, SERVES 4, and “Hold finished waffles in a warm oven for max crisp.”
- Tie on a silicone brush or mini ladle for portioning like a pro.
- Add a pairing strip: great with Vanilla Syrup (#2) or Infused Honey (#10).
Personal Tip
I add 1 tbsp malted milk powder to Bag A when I want that diner aroma and gorgeous browning. I also cue rack holding in a low oven on every card—stacking on a plate traps steam and ruins the crunch you worked for.
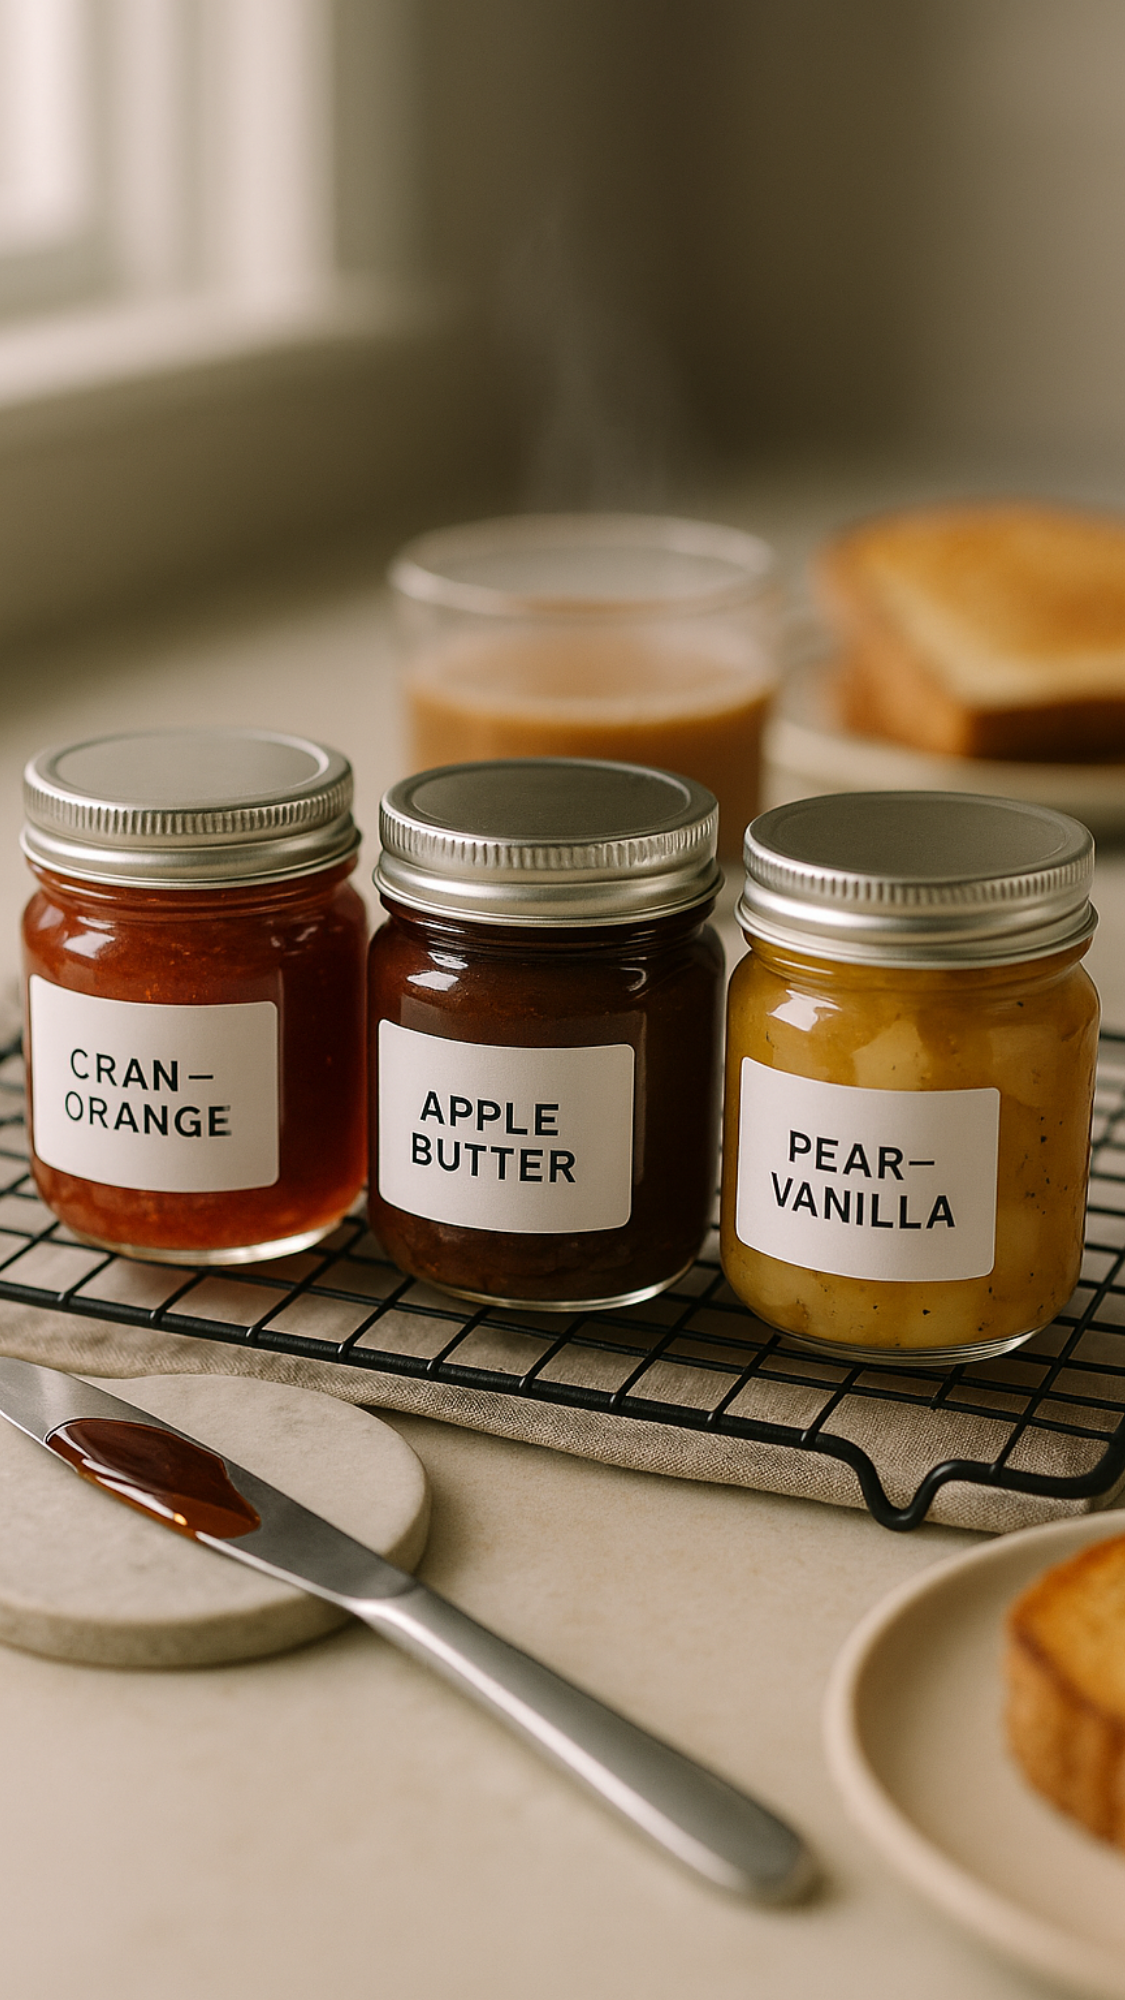
19) Breakfast Jam Trio (Cran-Orange, Apple Butter, Pear–Vanilla)
I pull out this small-batch jam flight when I want toast to taste like a weekday flex. You cook three quick, bright spreads, label them like a boutique, and hand someone months of cozy mornings. I keep the flavors complementary so your giftee rotates through the jars without getting bored. You’ll make Cran–Orange Jam for sparkle, Slow Apple Butter for comfort, and Pear–Vanilla Preserves for that soft, elegant sweetness. Want a gift that looks artisanal and disappears one spoon at a time? This trio crushes it.
What It Is
A three-jar set of breakfast spreads that cover tart, warm, and mellow notes. You cook them stovetop, bottle hot, and chill—no water-bath canning required for gifting within the fridge window.
You’ll Make (3 Mini Batches)
Cran–Orange Jam (tart + jewel-bright)
- 12 oz fresh or frozen cranberries
- ¾ cup sugar (bump to 1 cup for sweeter)
- ½ cup orange juice + 1 tsp zest
- 1–2 tbsp water as needed
- Pinch of salt
Slow Apple Butter (cozy + spreadable)
- 2 lb apples, peeled and chopped (Honeycrisp, Fuji, or mix)
- ½ cup apple cider or water
- ¼–½ cup brown sugar, to taste
- 1 tsp cinnamon, ¼ tsp nutmeg, pinch clove, pinch salt
- 1 tsp vanilla, optional (stir at end)
Pear–Vanilla Preserves (soft + elegant)
- 4 ripe pears, peeled and chopped (Anjou/Bosc)
- ½ cup sugar (pears run sweet; adjust after tasting)
- 1 tbsp lemon juice
- ½ vanilla bean, split (or 1 tsp vanilla extract at the end)
- Pinch of salt
Jars & Gear: 6–9 4–6 oz jars with lids (2–3 per recipe), heavy pot, spatula, thermometer (nice-to-have), labels, funnel.


Steps (Cook → Jar → Chill)
For Cran–Orange Jam
- Combine cranberries, sugar, OJ, zest, and salt in a pot.
- Simmer on medium; burst berries with a spatula as they soften.
- Cook until thick and glossy, 8–12 minutes (target ~220°F / 104°C if using a thermometer).
- Taste and adjust sugar; splash in water if it tightens too fast.
- Ladle hot into clean warm jars; cap and refrigerate.
For Slow Apple Butter
- Add apples, cider, brown sugar, spices, and salt to a pot.
- Cover and simmer on low, stirring every 5–10 minutes until apples collapse (30–40 minutes).
- Uncover and cook down to a smooth, thick ribbon that holds a trail when you drag the spatula (15–25 minutes more).
- Blend smooth (immersion blender) if you want a silkier texture; stir in vanilla off heat.
- Jar hot, cap, refrigerate.
For Pear–Vanilla Preserves
- Combine pears, sugar, lemon, salt, and vanilla bean in a pot.
- Simmer on medium-low and stir gently so pears keep some shape.
- Reduce to a jammy syrup with tender cubes (15–25 minutes).
- Fish out the bean; stir in extract if using instead.
- Jar hot, cap, refrigerate.
Wrap & Present
- Label each jar clearly: WHAT, FLAVOR NOTES, DATE, and “Refrigerate”.
- Bundle all three in a 3-pack carrier with a tiny spreader.
- Tuck a “Try it on…” card: toast, yogurt, pancakes, oatmeal, cheese boards.
Time & Cost (Per Trio When Batched)
- Time: 2–3 hours total (you’ll overlap simmer times)
- Cost: $$ (fruit + jars set the range; cranberries stay friendly)
Make-Ahead & Storage (Print On Card)
- Refrigerate after cooling; enjoy within 3–4 weeks.
- Always use a clean, dry spoon.
- For shelf-stable gifting, follow tested water-bath canning methods; otherwise keep this a fridge gift.
Variations & Swaps
- Ginger Cran–Orange: add 1–2 tsp grated fresh ginger in step 1.
- Maple Apple Butter: swap half the brown sugar for maple syrup and cook a few minutes longer.
- Cardamom Pear: add ¼ tsp ground cardamom for a floral lift.
Troubleshooting
- Runny jam? Simmer 3–5 minutes longer or chill a test spoon; it thickens as it cools.
- Too thick? Loosen with a spoon of hot water while it’s still warm.
- Too tart? Stir in 1–2 tsp more sugar while hot.
- Too sweet? Hit with ½–1 tsp lemon juice to brighten.
Personal Tip
I pre-warm jars in hot tap water so the fill goes smooth and the jam doesn’t seize near the rim. I also label pairings right on the lid—Cran–Orange + yogurt, Apple Butter + biscuits, Pear–Vanilla + brie—so breakfast decisions take five seconds.
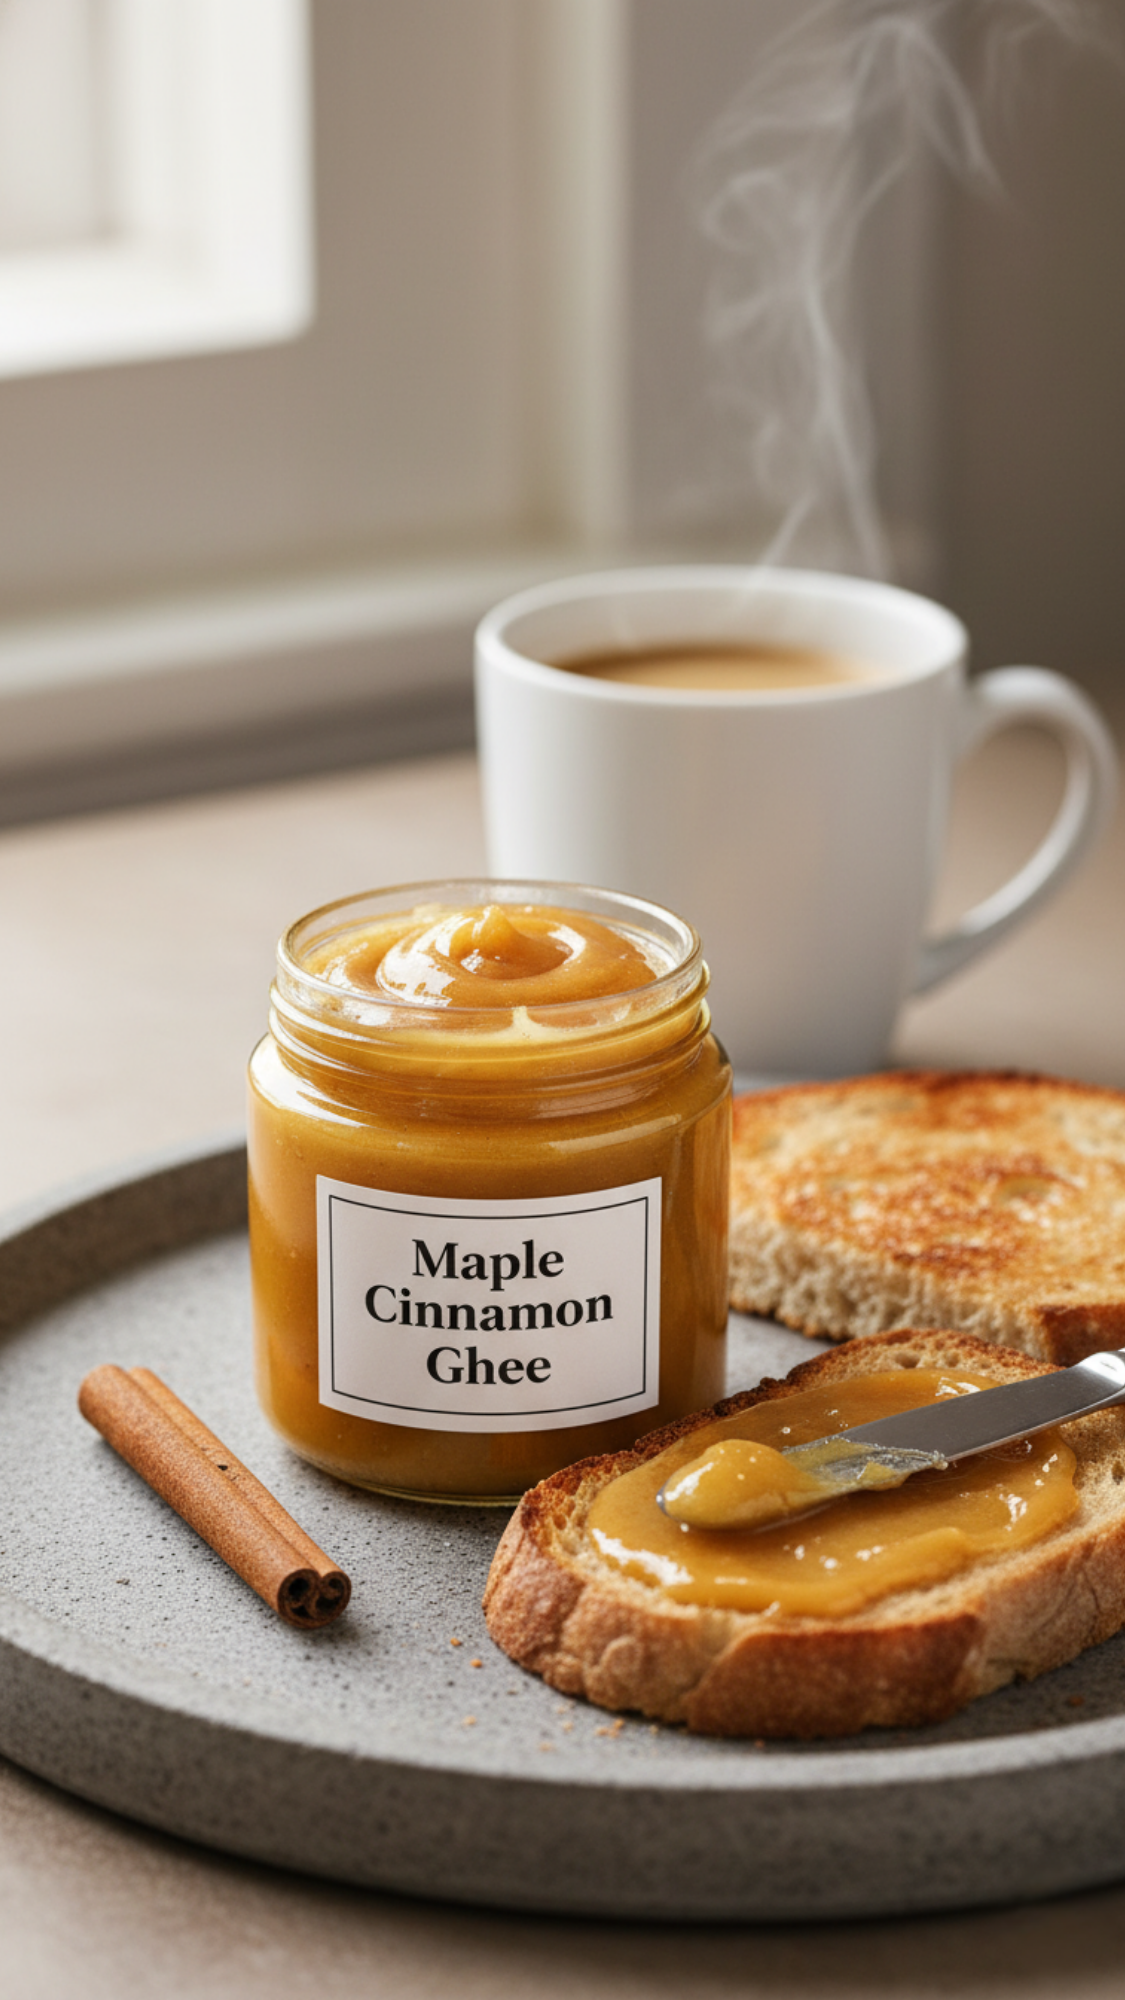
20) Maple Cinnamon Ghee
I reach for this when I want butter flavor without the dairy drama. You clarify butter until the milk solids toast nutty (that’s ghee), then you layer in maple and cinnamon so toast tastes like a cozy weekend even on a Tuesday. It spreads silk-smooth at room temp, fries pancakes like a champ, and turns oatmeal into dessert with one spoon. Want DIY gifts for cozy holiday mornings that feel gourmet and travel better than butter? This jar wins road trips and care packages.
What It Is
A spreadable, lactose-friendly butter with warm maple + cinnamon notes. Use it on toast, waffles, pancakes, or to fry eggs for a caramelized edge.
You’ll Need
- 1 lb (454 g) unsalted butter (European style browns beautifully)
- 1–2 cinnamon sticks (or ½–1 tsp ground cinnamon)
- 2–3 tbsp maple sugaror½–1 tsp maple extract
- (If you insist on liquid maple syrup, see storage notes.)
- Pinch of fine salt (makes the flavor pop)
- Small heavy saucepan, fine mesh strainer + cheesecloth, heatproof jar (8–12 oz), label

Steps (Nutty, Not Burnt)
- Melt butter over medium-low heat until it separates: foam on top, clear golden fat, milk solids sinking.
- Simmer gently 8–12 minutes, stirring occasionally, until the solids turn tan to light brown and it smells nutty (listen for quieter bubbling).
- Kill the heat. If using sticks, steep cinnamon for 2–3 minutes, then remove. If using ground, whisk it in now.
- Whisk in maple sugar (preferred for shelf stability) or maple extract, plus a pinch of salt.
- Strain through cheesecloth into a warm jar to catch any toasty bits. Cool, then cap and label.
Wrap & Present
- Front label: “Maple Cinnamon Ghee — Spread • Fry • Drizzle”.
- Tie on a tiny spreader and a toast/waffle serving card.
- Add a pairing note: great with Butter Board Kit (#15), Granola (#8), and Jam Trio (#19).
Time & Cost (Per Jar When Batched)
- Time: 35–45 minutes (mostly gentle simmer + cool)
- Cost: $–$$ (butter sets the range; maple sugar bumps slightly)
Variations & Swaps
- Vanilla–Maple Ghee: add ¼ tsp vanilla extract off heat with maple.
- Chai Ghee: steep ½ cinnamon stick + 2 cardamom pods + 1 clove for 2 minutes; strain.
- Savory Breakfast Ghee: skip sweeteners; stir in pinch garlic powder + black pepper off heat for eggs and hash.
Safety & Storage (Print On Card)
- Using maple sugar or extract: store cool, dark pantry up to 3 months; refrigerate for longer.
- Using liquid maple syrup: refrigerate and use within 4 weeks (added water = shorter life).
- Always use a clean, dry spoon; discard if you ever see moisture pockets or off smells.
- Ghee firms when cold; soften at room temp before spreading.
How To Use (Tag Ideas)
- Toast: spread while warm; finish with flake salt.
- Pancakes/Waffles: melt a spoon in the pan for crisp edges.
- Oatmeal: swirl 1 tsp on top with cinnamon sugar.
- Eggs: fry on medium for buttery, nutty edges.
Personal Tip
I stop the simmer when the solids hit light hazelnut brown—they keep darkening off heat. I also prefer maple sugar for a clean, shelf-stable sweet that doesn’t separate, and I label a tiny “soften before spreading” reminder so giftees don’t fight a chilled jar.
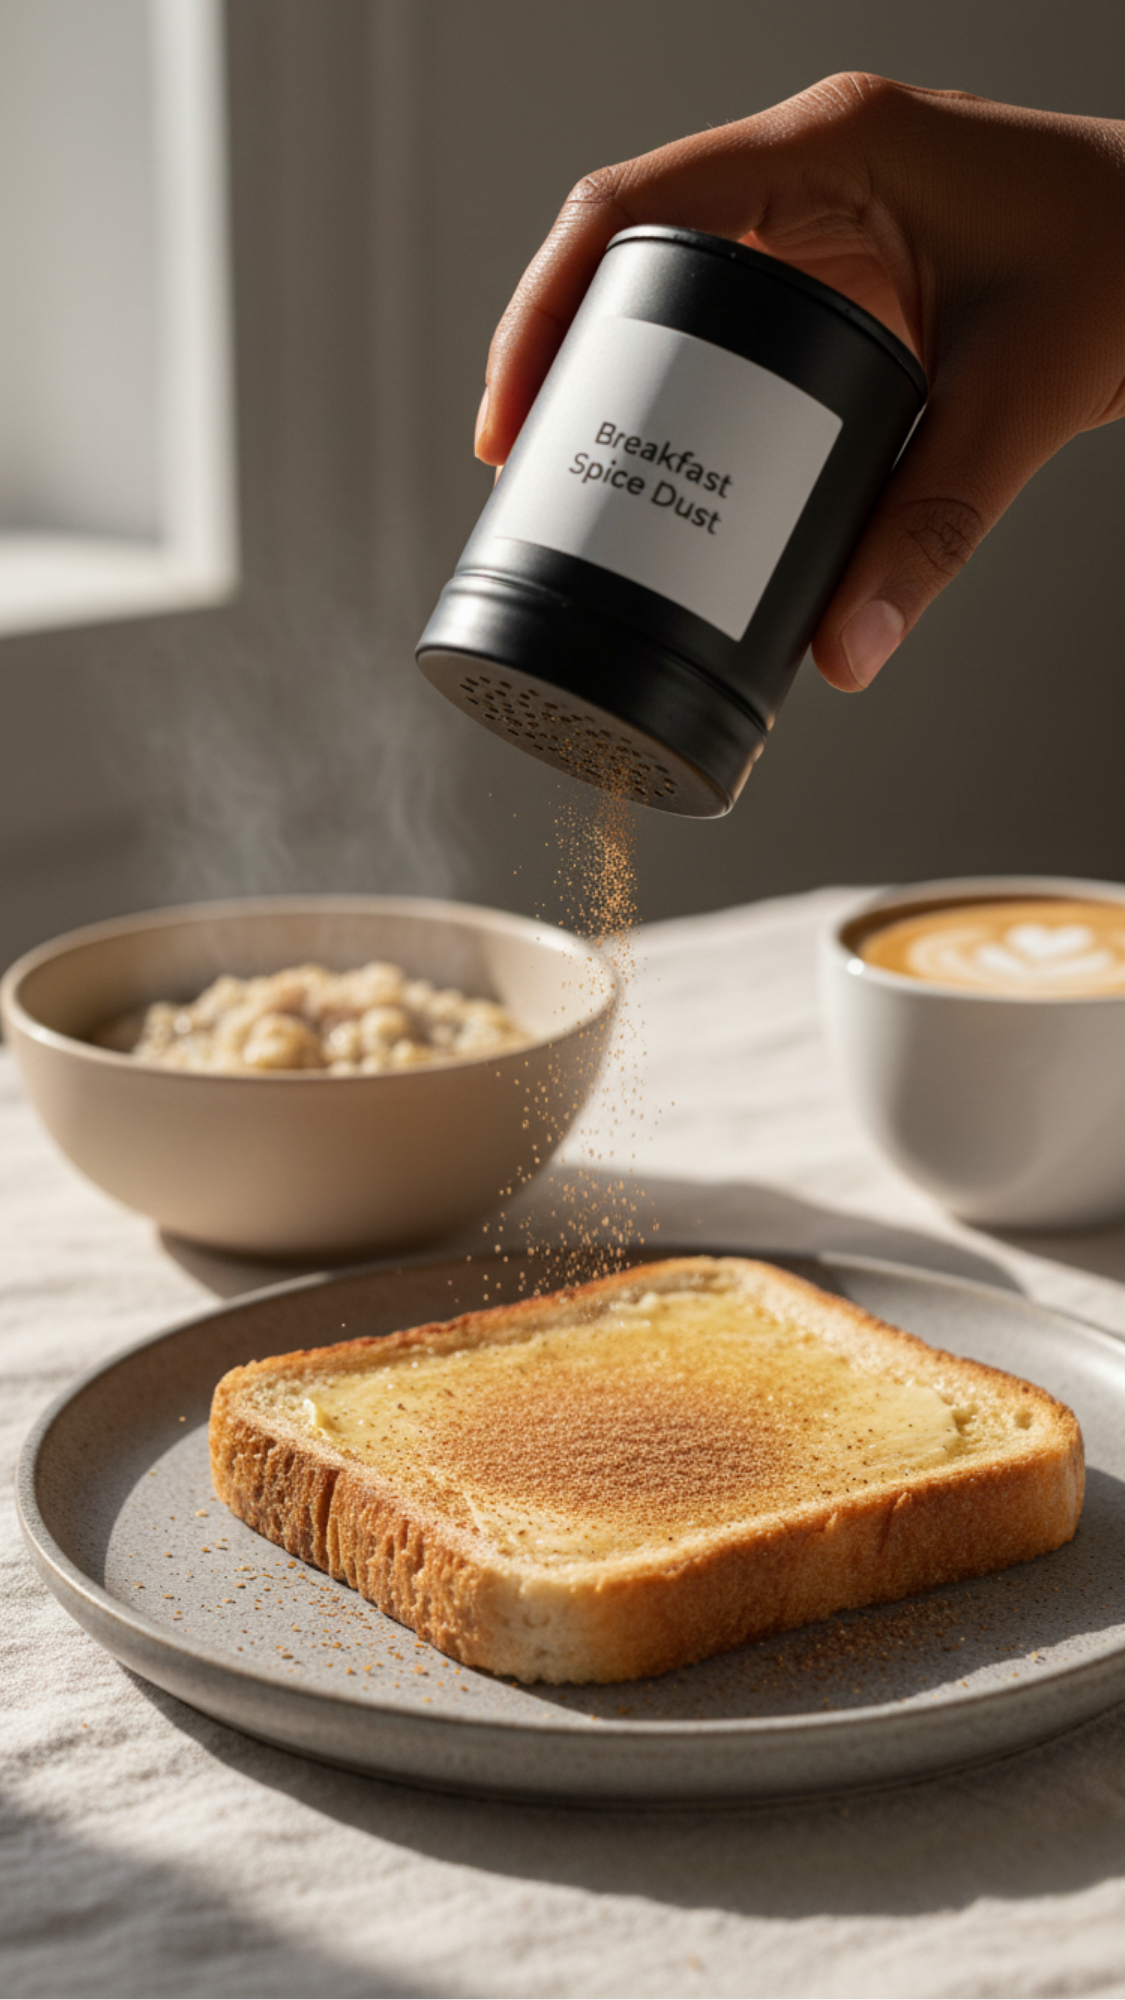
21) Breakfast Spice Dust (Cinnamon–Cardamom Sugar)
This finishing sprinkle turns toast, oats, pancakes, and lattes into a five-second flex. You shake once, the kitchen smells like a bakery, and everyone asks what you changed. I blend warm cinnamon, fragrant cardamom, and a touch of vanilla powder so the sugar tastes round, not one-note. You pack it in a little shaker, add a “try it on” card, and suddenly mornings feel curated. Want DIY gifts for cozy holiday mornings that cost pennies and get used daily? This shaker earns permanent counter space. Ever notice how a micro pinch of salt makes sweet flavors pop? You’ll taste it here.
What It Is
A ready-to-sprinkle flavor dust for toast, oatmeal, French toast, pancakes, and coffee—sweet, warm, and lightly floral.
You’ll Need
- ½ cup fine sugar (caster sugar coats evenly)
- 2 tsp ground cinnamon (fresh jar = brighter)
- ¾ tsp ground cardamom (green cardamom; sift if clumpy)
- ½ tsp vanilla powder (or ¼ tsp ground vanilla bean)
- ⅛ tsp fine salt
- Small metal shaker (4–6 oz) or spice jar with sifter top, funnel, label


Steps (Even Blend, No Lumps)
- Whisk sugar, cinnamon, cardamom, vanilla powder, and salt in a bowl until the color looks uniform.
- Sift once if you see clumps (cardamom loves drama).
- Funnel into a clean, dry shaker; tap to settle.
- Label with name, date, and simple uses; cap tightly.
Wrap & Present
- Print a tiny card: “Shake over toast, oats, pancakes, yogurt, cappuccinos.”
- Tie to the shaker with twine; slip into a muslin bag for the café vibe.
- Pair with Maple Cinnamon Ghee (#20) or the Pancake Mix (#6) for a breakfast duo.
Time & Cost (Per Shaker When Batched)
- Time: 10 minutes
- Cost: $ (spices + sugar; the shaker is the only “splurge”)
Variations & Swaps
- Gingerbread Dust: add ¼ tsp ground ginger + pinch clove for holiday mode.
- Mocha Dust (for coffee): stir in 1 tsp cocoa powder and bump cinnamon to 2½ tsp.
- Citrus Spark: add ½ tsp dried orange zest (finely ground) for a bright lift.
- Low-Sugar: cut sugar to ⅓ cup and add 2 tbsp erythritol; label as low-sugar blend.
Troubleshooting
- Clogged shaker? Sugar met steam—keep away from kettles and store cool/dry.
- Muted flavor? Your cinnamon’s tired—open a fresh jar or increase to 2½ tsp.
- Too sweet on coffee? Use the mocha dust variant or sprinkle before milk so it disperses.
Personal Tip
I dust buttered toast, then hit with a tiny pinch of flake salt. That spark turns the sweetness vivid and makes the butter taste extra, well… buttery.
22) Linen Napkins (Hand-Stamped)
Ever want your table to look styled without committing to a full tablescape? Hand-stamped linen napkins do that in five minutes flat and scream “boutique” for pennies on the dollar. I keep the designs minimal—one small motif in a single corner—so the texture of real linen does the heavy lifting. You’ll heat-set the ink so it survives the wash and still looks sharp. I bundle sets of four and add a tiny care tag so nobody panics over laundry. Want DIY gifts for cozy holiday mornings that feel elevated and timeless? This set lands on every brunch table and photobombs all the cinnamon rolls.
What It Is
A set of reusable linen napkins stamped with a simple motif (star, pine sprig, sunrise arc) and heat-set for washability.
You’ll Need
- Linen fabric (medium weight), prewashed; cut to 18–20″ squares
- Fabric ink or textile-safe stamp pad (permanent when heat-set)
- Rubber stamp (minimal design) or soft linoleum/eraser you can carve
- Foam pad or magazine to place under the fabric (crisp impression)
- Iron + parchment (or follow your ink’s heat-set method)
- Optional finishes: pinking shears for a neat fringe, fabric glue for a skinny hem, masking tape for alignment
- Labels/twine for packaging


Steps (Crisp Print, Clean Edges)
- Prewash + dry linen to remove sizing and prevent future shrink surprises; press smooth.
- Cut squares to 18–20″; either pull a thread around each edge for a tidy ¼” fringe or run a skinny glue hem for no-fray corners.
- Tape a light guide grid (if you want perfect repeats) or keep it organic and stamp just one corner.
- Ink the stamp lightly, test on scrap, then press straight down on the napkin over a foam pad; lift cleanly—no wiggle.
- Repeat for each napkin; let air-dry per ink directions.
- Heat-set: cover the print with parchment and iron on cotton setting (no steam) for 3–5 minutes, moving continuously.
- Press the napkins flat and fold with the motif showing like a tiny signature.
Wrap & Present
- Stack four, add a kraft belly band with flavor words like “Linen • Hand-Stamped • Washable”.
- Tie with twine and tuck a care tag: “Cold wash, gentle. Tumble low or line-dry. Iron on reverse.”
- Slip one accent napkin with a second ink color for a quiet pop.
Time & Cost (Per 4-Pack)
- Time: 45–60 minutes (faster once you find your rhythm)
- Cost: $$ (linen sets the price; stamps and ink stretch for dozens of sets)
Variations & Swaps
- Monogram Set: alphabet stamp in the lower-right corner only—hotel energy.
- Block Print Moment: carve a mini leaf from an eraser; ultra-custom, still easy.
- Two-Tone Fade: stamp once in a darker ink, ghost-stamp again without re-inking for a soft gradient.
- Seasonal Palette: charcoal, pine, cinnamon inks feel wintery without screaming holiday.
Troubleshooting
- Blurry edges? You over-inked or stamped on a hard surface—dab off excess and use a foam pad.
- Patchy print? Your fabric texture fought you—press longer and re-ink lightly, or place a cardstock shim under the fabric.
- Crooked repeat? Use masking-tape guides or commit to single-corner placement and call it “artful.”
- Fray drama? Pull one weft thread and trim, or switch to the skinny glue hem.
Safety & Care
- Use non-toxic, fabric-safe ink and heat-set fully before gifting.
- Cold wash, gentle cycle preserves the print; iron on reverse to keep it crisp.
- Avoid bleach and harsh stain removers on the motif.
Personal Tip
I only stamp one corner so the motif shows when folded and stacks like a magazine spread. I also mix one “hero” napkin with a slightly larger stamp in each set—people always stage that one on top for photos.
23) Painted Ceramic Tray (Catch-All For Tea Things)
I love a tiny landing zone that makes mornings feel organized on purpose. This hand-painted ceramic tray corrals spoons, tea sachets, and a candle so your counter looks styled before your first sip. I keep the art minimal—ring marks, tiny lines, a slim gold rim—so the texture and glaze do the flexing. You draw, seal, and boom: a boutique-looking piece that says, “yes, I have my life together (at least near the kettle).” Want DIY gifts for cozy holiday mornings that photograph beautifully and actually help? Park this by the mug tree and call it zen.
What It Is
A small ceramic catch-all with a hand-drawn motif and protective topcoat—perfect for tea bags, spoons, and a votive.
You’ll Need
- Unglazed or matte-glazed ceramic tray (6–8″ oval or rectangle)
- Paint pens or porcelain/ceramic paint (fine tip; black + optional metallic)
- Rubbing alcohol + lint-free cloth (prep)
- Masking tape (clean edges/lines)
- Sealant: clear water-based polyurethane or bake-to-cure porcelain medium (follow brand)
- Felt pads for the underside, labels, muslin bag or box


Steps (Clean Lines, Boutique Vibe)
- Degrease the tray with alcohol and dry completely.
- Lightly sketch or tape your design (think coffee-ring circles, thin dashes, single-line arc).
- Draw with paint pen using light pressure; let it flash-dry 5–10 minutes; add any second passes.
- If your paint requires it, bake to cure per brand directions (common: 300–350°F / 150–175°C for 30–35 minutes; cool in-oven).
- Seal for durability (skip if your paint cures food-safe per label): brush on two thin coats of water-based poly with 1 hour between coats.
- Stick felt pads on the base corners so it won’t scratch wood shelves.
Wrap & Present
- Card text: “Catch-All Tray — For spoons, tea, and small things. Wipe clean. Not for direct food contact.”
- Slip into a muslin bag or nestle in a kraft box with crinkle.
- Pair with Tea Sampler Tins (#9) or a mini candle for an instant vignette.
Time & Cost (Per Tray)
- Time: 60–90 minutes active (plus cure/dry per product)
- Cost: $$ (tray sets the range; pens and sealant cover many pieces)
Variations & Motifs
- Ringed Mug Marks: overlapping circles in charcoal + one ghosted circle for depth.
- Edge Gild: ultra-thin metallic line around the rim (mask with tape for crispness).
- Star Scatter: tiny five-point stars in a corner cluster—sweet with tea themes.
- Monogram Corner: one initial, micro size, for that hotel energy.
Troubleshooting
- Streaky lines? Your pen flooded—shake, test on scrap, draw with lighter pressure.
- Bleed under tape? Burnish tape edges before drawing; peel while paint is semi-wet.
- Tacky topcoat? You went heavy—thin coats, longer dry between.
- Rough underside? Sand lightly then add felt pads.
Safety & Care
- Treat as decorative and not food-contact safe unless your paint specifically says so.
- Wipe-clean only with a damp cloth; avoid soaking/scrubbing.
- Keep away from open flame; place candles in their own vessel on top.
Personal Tip
I freehand one imperfect ring first, then add three tiny dashes somewhere unexpected. That asymmetry reads intentional and artsy without requiring art school.
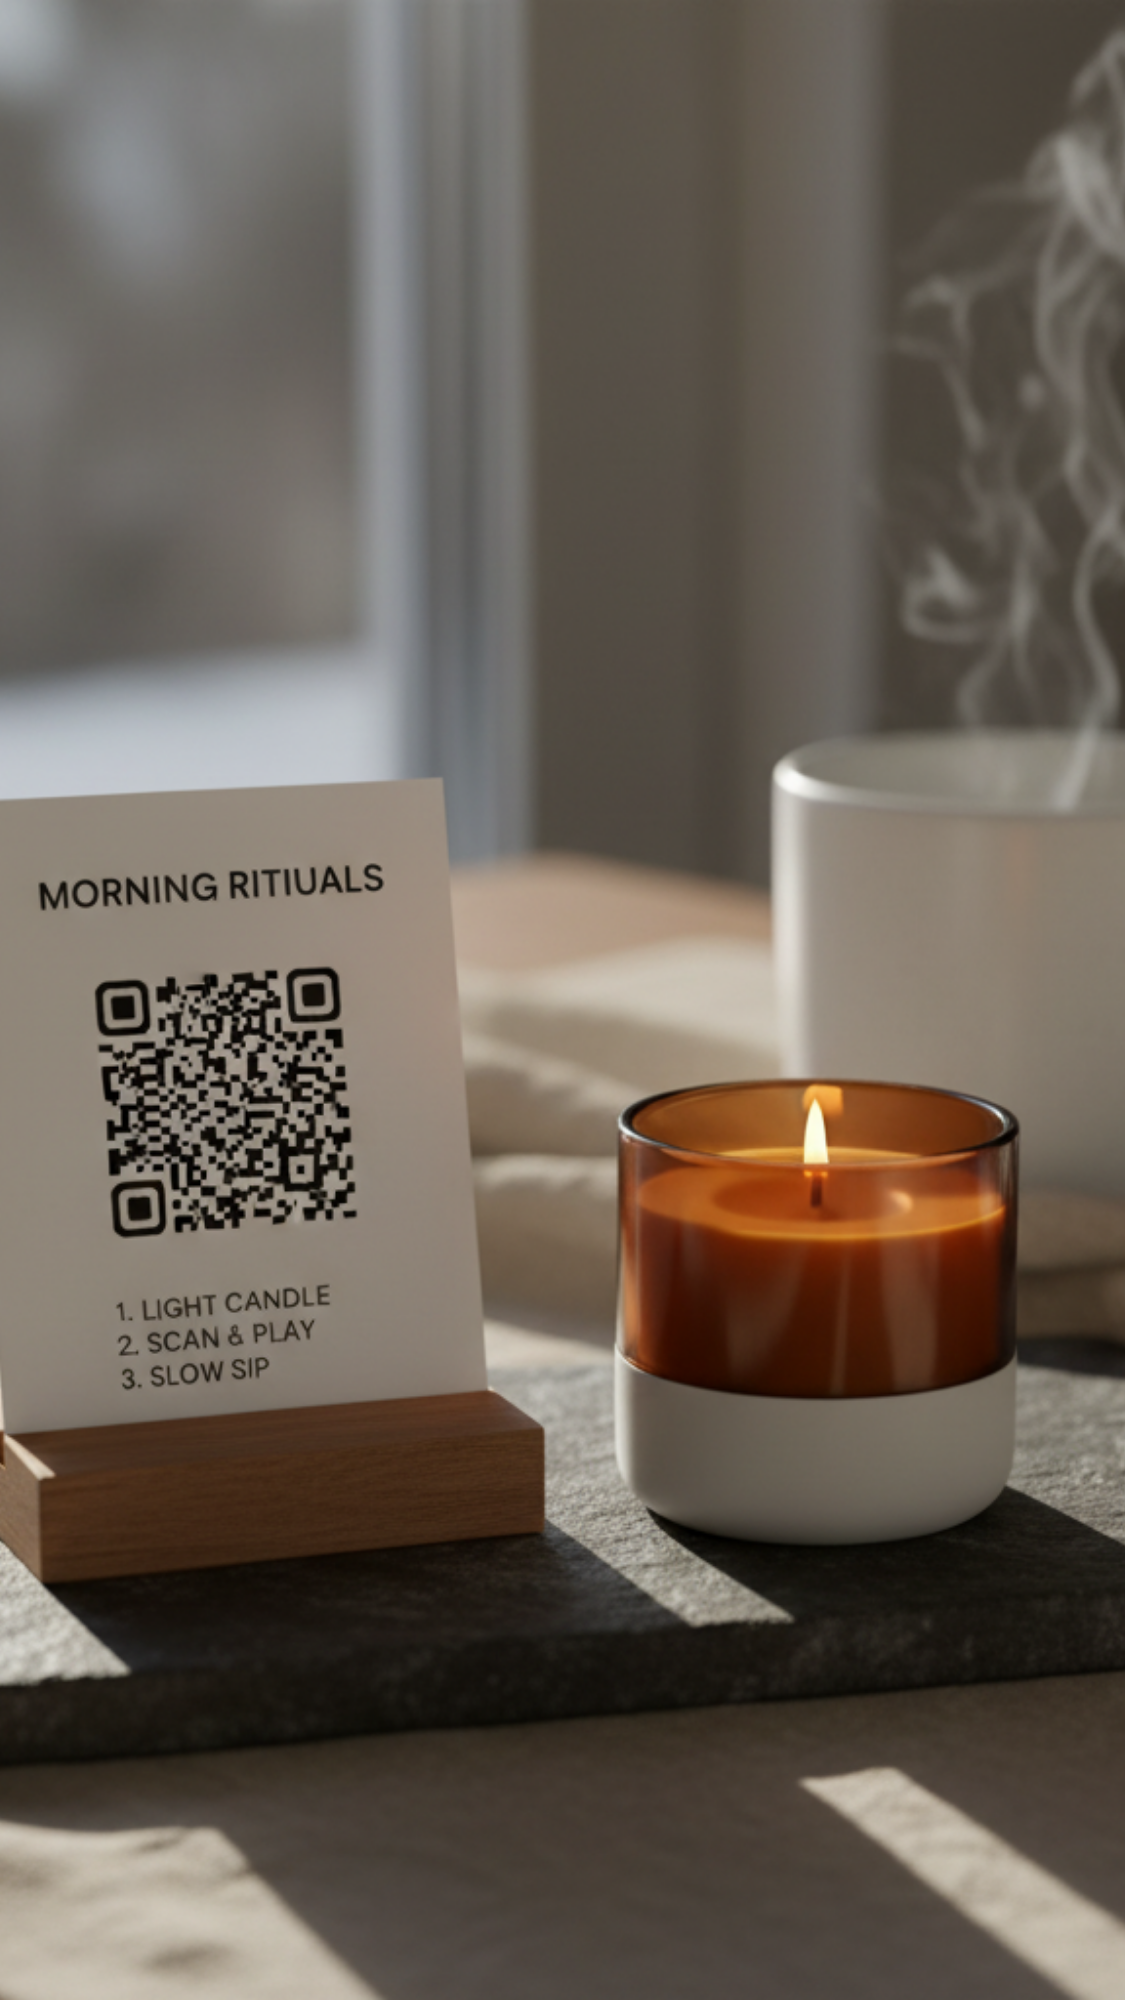
24) Morning Playlist Card (QR + Candle)
I love gifting instant mood you can trigger with one tap. You print a clean QR playlist card, tuck it with a tiny candle, and you’ve basically bottled calm. I build the playlist to open soft—acoustic, piano, a little lo-fi—then rise just enough to nudge people toward waffles. You keep the design minimal so the card looks chic on a tray, and you test the QR so nobody rage-taps before coffee. Want DIY gifts for cozy holiday mornings that cost little and feel luxe? This one sneaks in vibe without hogging counter space.
What It Is
A QR-coded playlist card paired with a mini candle for a 60–90 minute “morning set.” Tap, light, sip, exhale.
You’ll Need
- Public playlist link (Spotify, Apple Music, YouTube Music)
- QR generator (built into your music app or any ad-free generator)
- Heavy cardstock (100–120 lb) or pre-cut A6 cards + printer
- Mini candle (tealight or 2–4 oz jar) + safety label
- Glassine sleeve or kraft envelope, wax seal or sticker
- Optional: wood stand or mini easel for display, linen ribbon


Build the Playlist (Flow > Filler)
- Track 1–3: soft openers (piano, acoustic, instrumental).
- Track 4–7: warm mid-tempo (neo-soul, indie folk, mellow jazz).
- Track 8–10: gentle lift (think “I might make waffles”).
- Track 11–14: wind-down instrumentals for journaling or dishes.
- Keep it clean lyrics or mark as such; aim for 60–90 minutes.
- Title idea: “Cozy AM • Steam • Sip • Smile.”
Steps (Card → QR → Bundle)
- Make playlist public; copy link.
- Generate a QR; test on two phones (camera app scan + inside the music app).
- Design the card: big title up top, QR centered, tiny “Scan me” line, and a 3-step ritual at the bottom (see below).
- Print on heavy cardstock; trim cleanly (rotary cutter = pro edges).
- Pair with a mini candle; add a safety label if your candle lacks one.
- Sleeve both in glassine or a kraft envelope; seal with wax or a sticker.
Ritual Line (Print On Card)
- Light candle.
- Scan & play.
- Sip slow. Breathe slower.
Wrap & Present
- Label the back: “Morning Playlist + Candle — 60–90 min — Calm, Warm, Unrushed.”
- Add a date line so they remember your mix.
- For a stand-up display, include a tiny wood card stand—instant vignette.
Time & Cost (Per Set When Batched)
- Time: 15–20 minutes (playlist done) + 10 minutes for printing/packaging
- Cost: $ (tealights = ultra-budget; mini jars = still friendly)
Variations & Swaps
- Tea Time Edit: swap candle for Tea Sampler (#9) and title it “Steep & Exhale.”
- Focus AM: add more instrumentals/lo-fi; trim to 45 minutes for workdays.
- Family Mode: curate kid-friendly tracks and use a LED tealight.
Safety & Notes (Tiny Print)
- Candle: burn within sight, trim wick to ¼″, keep away from drafts and pets, stop with ½″ wax left.
- Tech: some phones open QR in a browser first—tap again to launch the music app.
- Privacy: keep the playlist unlisted/public as needed so the QR actually works.
Personal Tip
I start with one minute of quiet piano so the room settles, then let a gentle vocal slide in. That tiny pause makes the first sip feel intentional, and people text me “we used your card again” like I sent a butler.
25) Cozy Morning Coupon Book
You know that person who says, “I don’t need stuff, I want time”? This coupon book hits them right in the love language. You design a stack of tiny tickets—breakfast in bed, dish-free day, latte on me, fresh-sheet swap, walk-and-talk—and bind them into a tear-off pad that looks like a boutique day planner. You gift low-cost, high-impact mornings, and they cash in when life gets crunchy. I keep the rules simple so no one argues about expiration dates before coffee. Want DIY gifts for cozy holiday mornings that actually get used? These tickets turn into memories, not clutter.
What It Is
A tear-off booklet of morning-friendly favors and experiences that your giftee redeems on their timeline. Think service + ritual, not more stuff.
You’ll Need
- Heavy paper or cardstock (65–80 lb for the covers; 32–40 lb for tickets)
- Paper trimmer or craft knife + metal ruler
- Hole punch + mini brads or stapler or padding compound (for real tear-off glue binding)
- Number stamps or fine-tip pen, rubber band or belly band
- Optional: corner rounder, eyelet, washi tape, tiny envelope for “wildcards”


Ticket Specs (Print Guide)
- Size: 2″ × 5.5″ tickets (3 across on US Letter)
- Layout: Title up top, “Good For:” line, Notes/Rules line, Redeemed on: ____
- Cover: thicker cardstock with title “Cozy Morning Coupon Book” and the year
- Back page: How to Redeem + your initials
Steps (Design → Print → Bind)
- Draft 8–12 coupons and keep copy punchy (see ideas below).
- Print tickets on lighter paper and covers on heavier cardstock; trim cleanly.
- Stack tickets with cover + back; align the short left edge.
- Bind one of three ways:
- Staple Bind: three small staples along the left edge, then cover with washi.
- Brad Bind: punch two holes, insert mini brads, fold legs flat.
- Glue Pad: clamp stack; brush padding compound along the edge; dry 1–2 hours for real tear-off feel.
- Number each ticket and add a tiny initial so it feels official.
Coupon Ideas (Mix Practical + Fun)
- Breakfast in Bed — pancakes, fruit, and coffee delivered.
- Dish-Free Day — you handle every dish from sun-up to sun-down.
- Latte On Me — café run or homemade with Vanilla Syrup (#2).
- Fresh-Sheet Morning — new linens + warm duvet fluff.
- Screen-Free Breakfast — music + conversation only.
- Walk & Warm Drink — 30-minute stroll, cocoa after.
- Bakery Pickup — croissant or cinnamon roll redemption (#7).
- Early-Bird Errand — you handle one morning task they dread.
- Wildcard — recipient fills in something reasonable (you approve first).
Wrap & Present
- Belly band copy: “Redeem for Cozier Mornings • No expiration • 1 per day”.
- Tuck two wildcards in a mini envelope at the back for surprise requests.
- Pair with a mini candle (#24) or tea tin (#9) so the first redemption feels extra.
Time & Cost (Per Book When Batched)
- Time: 30–40 minutes
- Cost: $ (paper + a couple of brads/staples; glue padding is optional)
Variations & Swaps
- Family Pack: color-code tickets for each person; add kid-friendly chores and pancake art coupons.
- Partner Edition: include longer vouchers (brunch date, day trip) and a “no backseat cooking” clause.
- Self-Care Book: morning stretch, bath drawn, laundry fold, “you nap, I tidy.”
Rules (Keep It Kind)
- One coupon per morning.
- No expiry (but aim to redeem within the season).
- Schedule together if it requires prep (bakery run, sheet change).
- Trade allowed—if one doesn’t fit, swap for something similar.
Troubleshooting
- Flimsy feel? Upgrade cover stock and add a backing chipboard.
- Messy edges? Use a rotary trimmer and clamp the stack before gluing.
- Tears when removing? Score a light line ⅛″ from the binding before tearing.
Personal Tip
I sneak in a “Two-Coupon Morning” pass and mark it in gold—people save it for a hard week, and it lands like a hug you scheduled in advance.
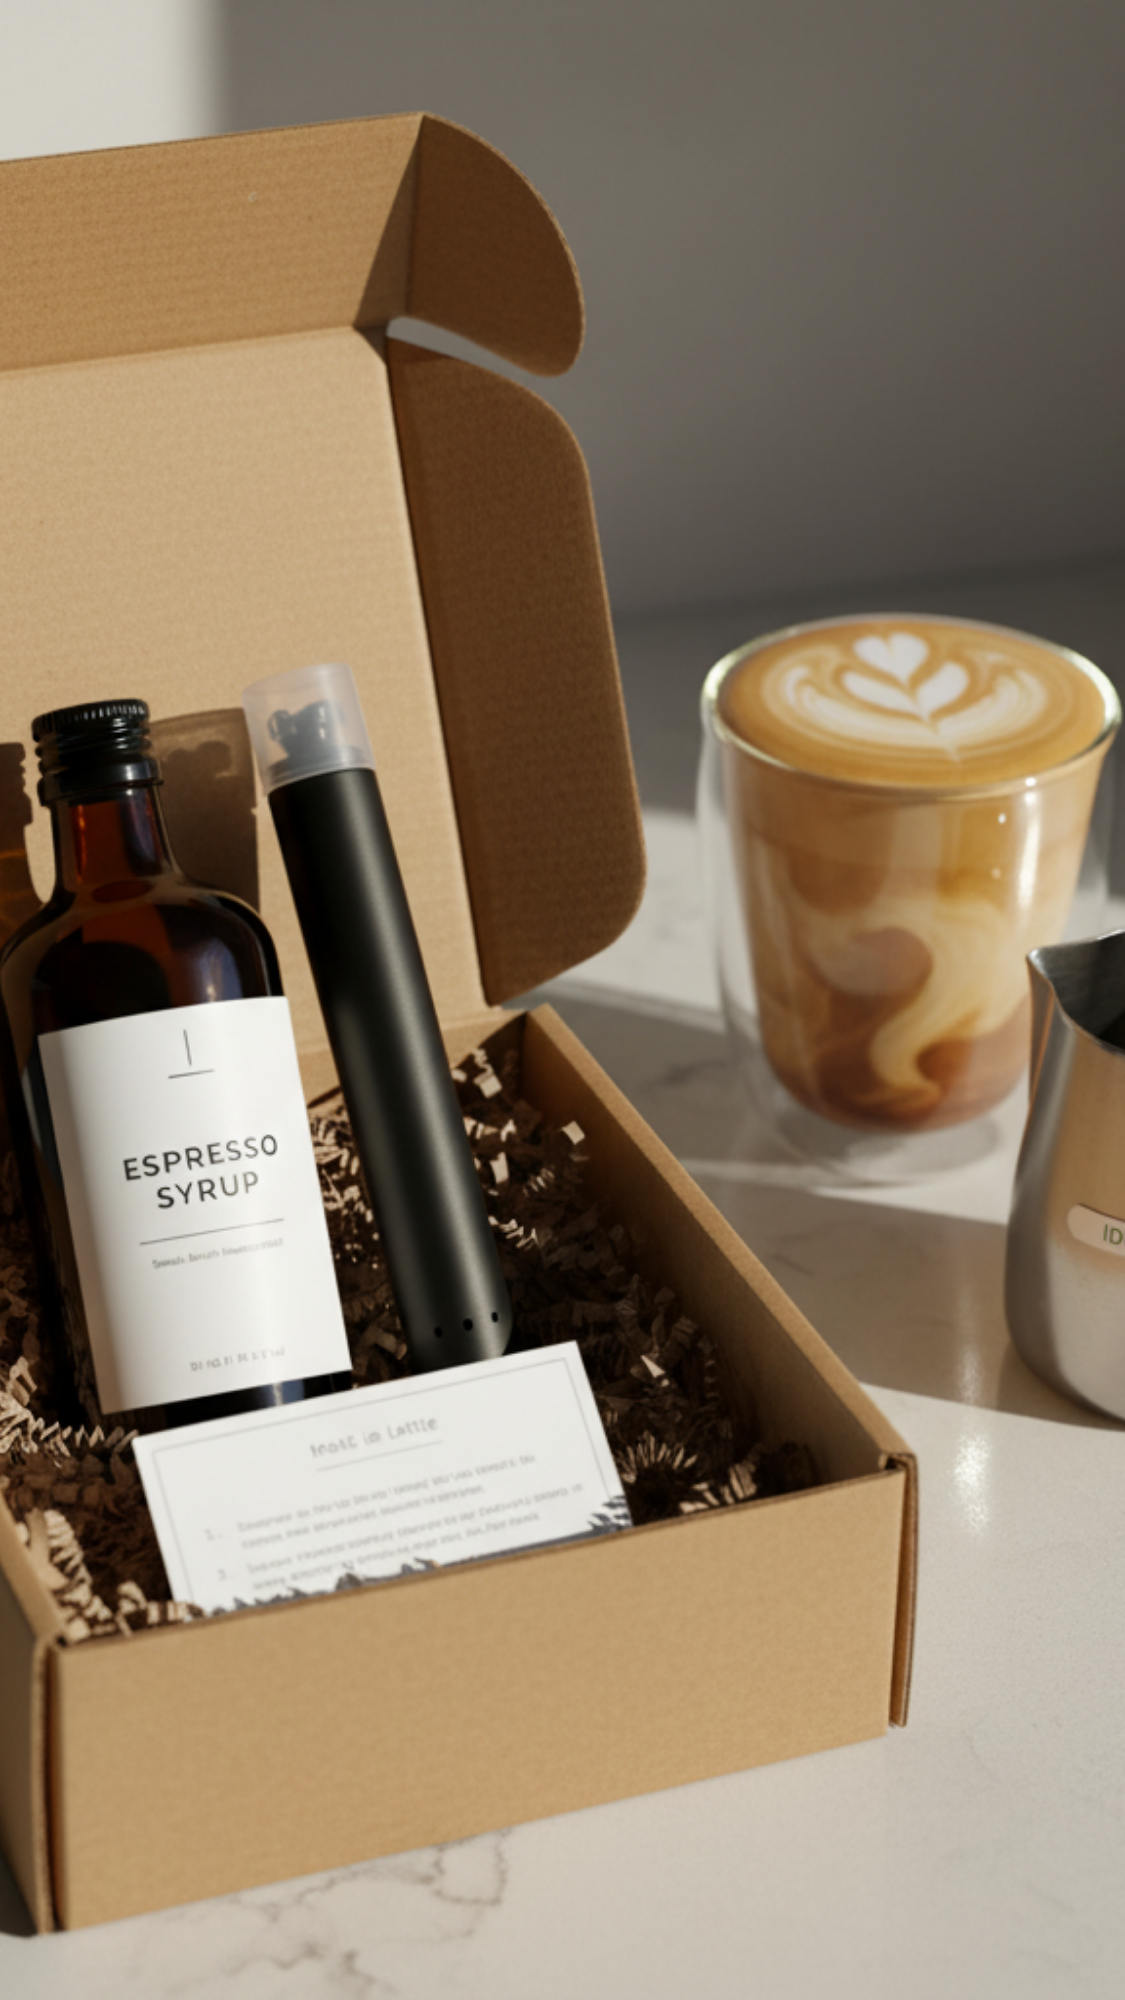
26) Oat-Milk Latte Starter (Syrup + Frother)
I call this the “barista-in-a-box” because you hand someone a bottle of syrup, a trusty frother, and a tiny card that unlocks café vibes in pajamas. You skip the line, you skip the four-dollar upcharge, and you still get that silky microfoam that makes mornings feel fancy. I keep the oat-barista tips short so nobody overheats milk and cries over bubbles. You’ll gift this to coffee people, tea-latte people, and that friend who says they’re “weaning off sweet” (the card gives a low-sugar ratio). Ever wonder why your foam collapses sometimes? You probably heated past 150°F—I fix that in the tag.
What It Is
A latte kit with your homemade syrup (see #2 Vanilla or any flavor), a hand frother, and a brew card that lands café-level results at home.
You’ll Need
- 8–12 oz bottle of Vanilla Bean Coffee Syrup (#2) or another flavor
- Battery hand frother (sturdy whisk head + protective cap)
- Optional add-ons: rechargeable batteries, pour spout, thermometer strip for milk pitcher
- Rigid kraft box or tray, crinkle paper, belly band, instruction card, label


Steps (Assemble In Minutes)
- Bottle your syrup warm; cap and label with ingredients + “Refrigerate”.
- Nest the syrup and frother in the box; add batteries if your frother needs them.
- Slide in the instruction card (front = hot latte, back = iced).
- Band the box: “Oat-Milk Latte Starter — Shake • Froth • Sip”.
- Spot-clean fingerprints so it looks boutique on delivery.
Instruction Card (Print This)
Hot Oat-Milk Latte (12 oz)
- Heat 6–8 oz barista oat milk to 140–150°F (steaming, not boiling).
- Froth 10–20 sec, tilt the cup and move the wand up/down for microfoam.
- Add 1–2 tbsp syrup to a mug, pour in 4–6 oz brewed coffee or 2 shots espresso.
- Top with frothed milk; tap + swirl to smooth.
- Finish with Breakfast Spice Dust (#21) if you want cozy.
Iced Oat-Milk Latte (16 oz)
- Fill a glass with ice.
- Stir 1–2 tbsp syrup into 6–8 oz cold oat milk; froth 5–10 sec to blend.
- Pour over ice; top with 4–6 oz cold brew.
- Optional: dust with Mocha Dust (variant of #21).
Pro Tips
- Stay under 150°F or foam collapses.
- Use barista-style oat for best microfoam.
- Rinse the whisk immediately; dry-spin 2 sec to fling droplets (clean tool = better foam).
Time & Cost (Per Kit When Batched)
- Time: 10–15 minutes
- Cost: $$ (frother sets the price; syrup costs pennies)
Variations (Pick a Personality)
- Brown Sugar Cinnamon Latte: make a brown sugar–vanilla syrup; add pinch of cinnamon on top.
- Maple Cardamom: swap vanilla for maple syrup base + cardamom (strain well).
- Sugar-Light: use allulose or erythritol/monk-fruit blend (note “Refrigerate • 2 weeks”).
- Tea Latte Add-On: include Chai Concentrate (#3) and mark “1:1 with milk.”
Troubleshooting (Back Of Card)
- Big bubbles? You frothed at the surface—submerge tip slightly and tilt cup.
- Foam dies? Milk ran too hot—aim for 145°F next round.
- Too sweet? Drop to 1 tbsp syrup or cut with unsweetened milk.
- Weak coffee vibe? Use espresso or stronger brew (1:2 ratio espresso:milk).
Wrap & Present
- Front label: “Oat-Milk Latte Starter — Vanilla Syrup + Frother — Makes ~12 Lattes.”
- Add a QR to a 60-minute “Cozy AM” playlist (#24).
- Tie a tiny stainless pitcher if you want full café cosplay. FYI, it looks adorable.
Personal Tip
I stash a thermo strip on my milk pitcher so I nail the 145°F sweet spot without guessing. I also cue 1 tbsp syrup as the “start here” dose; people can always add more, and they’ll thank you for not sugar-bombing their morning. 🙂
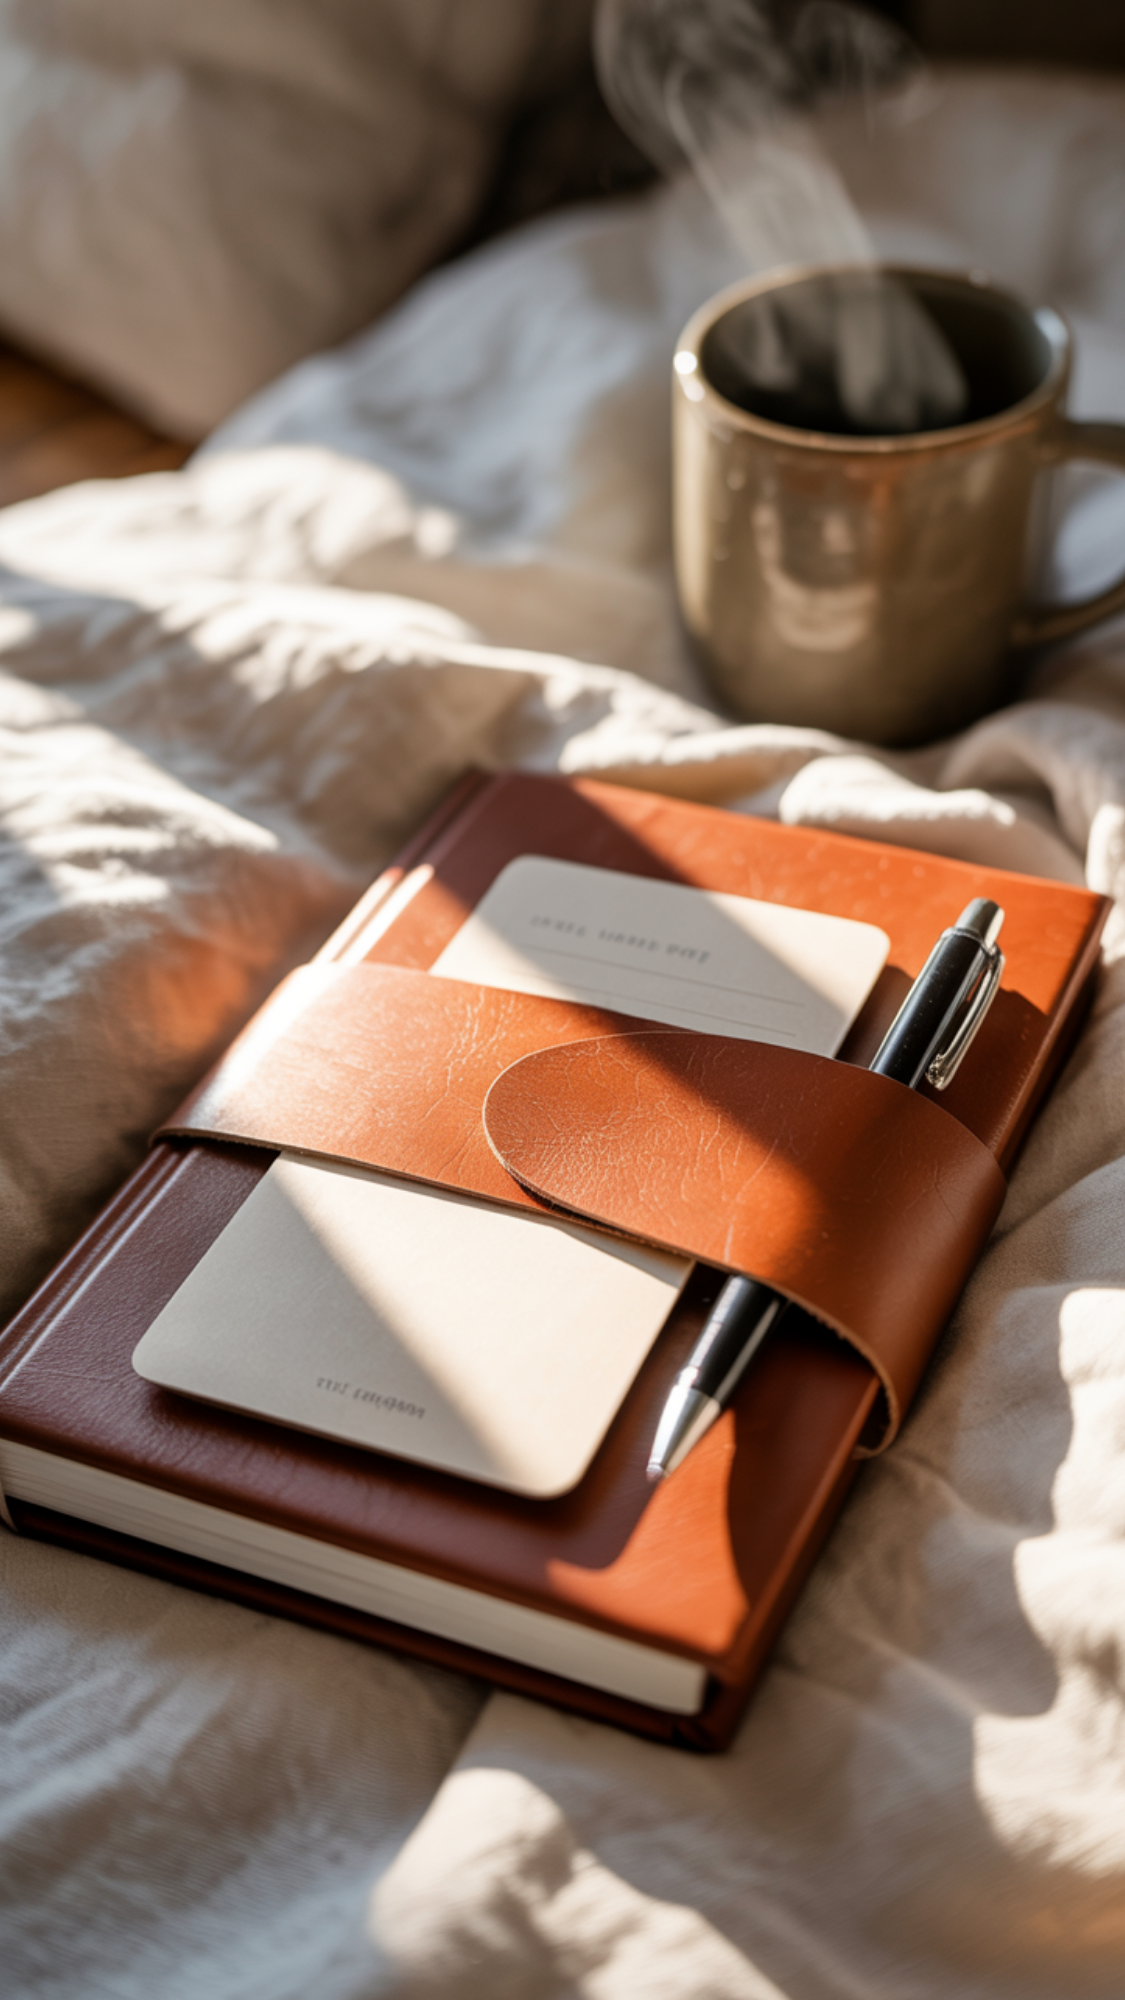
27) Morning Journal + Pen Wrap
I reach for this when I want mornings to feel quiet but productive. You pair a soft guided journal with a simple faux-leather pen wrap, and you basically hand someone a five-minute ritual that sticks. I keep the prompts short and repeatable so the habit lands even on busy days. You craft the wrap with a clean snap or elastic closure so the pen never ghost-hops into couch cushions. Want DIY gifts for cozy holiday mornings that build better days from page one? This set does the heavy lifting while coffee warms up.
What It Is
A guided AM journal bundled with a sleek pen wrap that keeps a favorite pen clipped to the cover, ready for three lines before coffee.
You’ll Need
- A5 softcover journal (dot or lined)
- Faux leather strip (2″ × 10–11″ for A5), or cork/faux suede
- Snap kit or thin elastic (⅜″) + fabric glue
- Pen loop (elastic, 1″ piece) or use a fold-back on the wrap
- Hole punch, ruler, craft knife, cutting mat, binder clips
- Minimal labels/tags, muslin bag or rigid box


Steps (Cut → Close → Clip)
- Cut the faux leather strip to 2″ × 10–11″ (wrap should circle the journal with ½″ overlap).
- Add the closure:
- Snap: punch holes ¾″ from each short edge, set the male/female pieces so they meet snug.
- Elastic band: glue or rivet a 4–5″ loop on one end; test tension around the journal.
- Add a pen loop: glue a 1″ elastic to the inside near one short edge, or fold a tiny leather tab and glue both ends to form a loop.
- Test-fit around the journal; trim ends for a clean square or soft radius corner.
- Weight the glued parts under a book for 20–30 minutes (or per glue spec) so everything cures flat.
Wrap & Present
- Slide the journal into a muslin bag; buckle the wrap around it with a favorite gel pen tucked in.
- Front tag: “Morning Journal — 3 lines before coffee.”
- Back card: “Open • Breathe • Write” with two starter prompts (see below).
Time & Cost (Per Set When Batched)
- Time: 25–35 minutes
- Cost: $$ (journal sets the range; wrap materials cost little)
Prompts Card (Print This)
- Gratitude x3: I’m glad for…
- Today’s anchor: If I only do one thing, I’ll…
- Tiny joy check: What made yesterday feel good?
- Reset line: What can I put down for now?
Variations & Swaps
- Cork Wrap: go plant-based with cork fabric; looks modern, wipes clean.
- Tie Closure: punch a small slot on each end; thread paracord or linen ribbon.
- Pocket Add-On: glue a credit-card–size pocket inside the wrap for stickers or a bookmark.
- Color Story: charcoal wrap + cream journal = calm; cinnamon wrap + kraft = warm.
Safety & Care
- Spot-clean only; keep glue away from the page edges.
- If gifting to kids, skip snaps and use a soft elastic band closure.
- Let adhesives cure fully before packaging so nothing shifts.
Personal Tip
I tuck a mini “first page” sheet under the cover with three lines pre-printed so they win on day one. Tiny momentum beats perfect stationery every single time. FYI, I also clip a sticky bookmark to mark the morning page—no hunting, just write.
Quick Packaging & Labeling Cheat Sheet
- Amber or clear glass always looks elevated.
- Minimal labels: name, flavor/scent, use/ratio, date.
- Add a sprig (rosemary/eucalyptus) for texture.
- Keep a neutral palette with one warm accent.
- Include allergen & storage notes for food items.


Pick Three, Win The Morning
You now hold 27 DIY gifts for cozy holiday mornings that look boutique and still respect your time. You don’t need all twenty-seven; you just pick three, batch them smart, and wrap with intention. You create calm, scent, and flavor before the first sip of coffee, and your people feel the love every time they untie a tag. I lean on one quick win, one edible showstopper, and one ritual-maker (think Vanilla Syrup, Cinnamon Roll Kit, and the Morning Playlist Card) because that mix hits every kind of morning. You add clear labels, a tiny care note, and a sprig of green, and the whole gift reads thoughtful, not fussy. You also stash a spare set for yourself because future-you deserves a cozy Tuesday.
Want a game plan for tonight? Skim your pantry, circle the ideas that share ingredients, and schedule a two-hour batch block. You line up jars, turn on the playlist, and work station to station like a tiny studio. You snap one photo of the finished set so you remember who gets what, and you drop everything into a “gift parking bin” by the door. You’ll head into the holidays with less noise, more ritual, and gifts people actually use. Sounds like the vibe we wanted, right?