Imagine walking into a room that feels entirely yours—where every shelf, wall, and corner tells a story. That’s the power of blending creativity with practicality through hands-on projects. You don’t need a massive budget or professional skills to elevate your space—just a spark of inspiration and a few simple materials.
These projects do more than beautify your home—they’re secret weapons for mental wellness. Studies show creative activities reduce stress by 75% and sharpen cognitive function. Picture unwinding after a long day by turning thrift store finds into showstopping centerpieces.
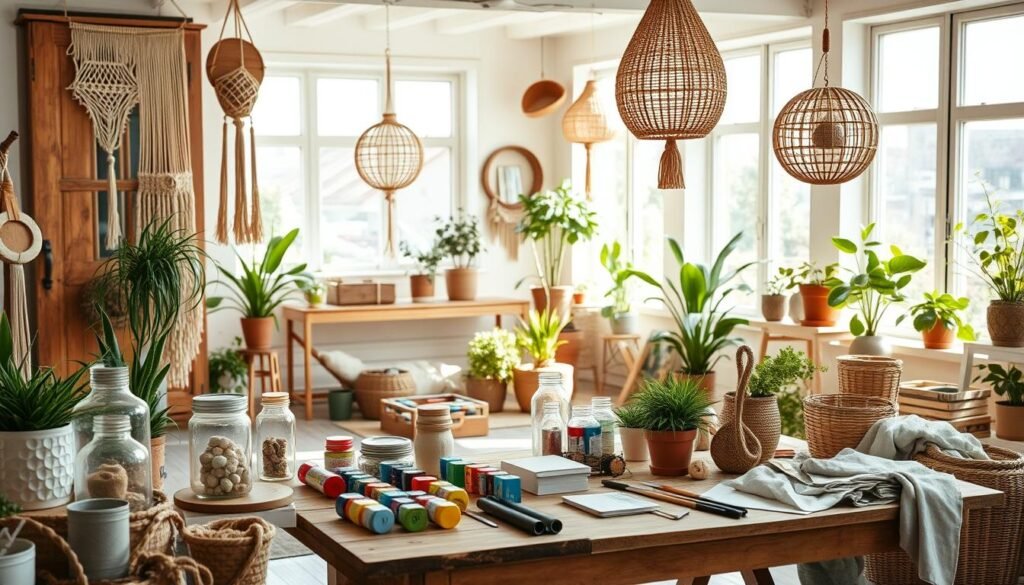
We’ve curated 15 solutions that balance style and function. Think woven wall hangings that soften acoustics, or upcycled furniture that becomes a conversation starter. Projects range from 30-minute quick fixes to weekend endeavors, all designed to meet you where your skills are today.
You’ll discover how to repurpose everyday items into personalized treasures. That chipped teacup? It’s now a succulent planter. Those leftover fabric scraps? Transformed into bold throw pillows. Each tutorial includes material lists and pro tips to ensure success—no hidden costs or vague instructions.
Ready to create pieces that reflect your personality and solve real design challenges? Let’s turn your living space into a sanctuary that works as hard as you do.
Introduction to DIY Home Decor Excellence
Your home becomes a canvas when hands-on projects blend creativity with purpose. Whether you’re refreshing a shelf or reimagining an entire wall, these activities let you shape spaces that truly feel like yours. The magic happens when practicality dances with personal style—no professional skills required.
Overview of Creative Projects
Discover how simple materials transform into statement pieces. A chipped vase becomes a modern candle holder. Fabric scraps evolve into textured wall art. Our curated selection includes:
| Project Type | Time Investment | Key Benefit |
|---|---|---|
| 30-Minute Wall Art | Short session | Instant visual impact |
| Upcycled Side Table | Weekend project | Custom storage solutions |
| Fabric Coasters | 45 minutes | Budget-friendly upgrade |
Benefits of Crafting at Home
Beyond beautifying your space, the process becomes a therapeutic escape. Neuroscience research reveals creative activities lower cortisol levels by 42% while enhancing problem-solving skills. You’ll experience:
• A natural mood boost from tactile creation
• Reduced screen time as hands shape physical objects
• Lasting pride when guests admire your work
These decor solutions prove you don’t need deep pockets—just willingness to experiment. That satisfaction of saying “I made this”? It’s the ultimate home improvement victory.
Exploring Fun Craft Ideas For Adults
Transform spare moments into opportunities for mindful creation. Working with your hands isn’t just about making things—it’s about reshaping your relationship with stress. Neuroscientists call this “flow state,” where time bends and mental clutter dissolves.
Why Crafting is a Great Stress-Reliever
Repetitive motions in activities like clay sculpting or brushstrokes act as moving meditation. Your brain releases dopamine with each completed step—nature’s reward system for progress. This biochemical shift lifts your mood while grounding you in the present.
Consider these benefits:
- Reduces heart rate faster than passive relaxation techniques
- Creates tangible proof of your capabilities
- Offers screen-free mental reset between tasks
Designing Stylish Home Accents
What you make becomes more than decor—it’s a physical manifesto of your growth. A hand-painted vase or macramé wall hanging carries stories in its textures. These pieces spark conversations while quietly affirming your creative courage.
Three principles for meaningful design:
- Choose colors that mirror your energy
- Mix materials for tactile interest
- Scale projects to match available time
Your living space evolves into a gallery of personal victories. Each creation serves as both aesthetic enhancement and reminder: you’re capable of beautiful transformations.
Leaf Imprint Jewelry Dish Project

Nature’s patterns meet functional design in this hands-on project that transforms organic shapes into lasting beauty. You’ll create a jewelry dish celebrating botanical details while solving the eternal “where did I put my ring?” dilemma.
Materials Needed: Air Dry Clay and Rolling Pin
Gather three essential supplies: smooth-surfaced leaves (try magnolia or maple), oven-bake clay, and a basic rolling pin. Pro tip: Fresh leaves work better than dried ones—their flexible surface captures vein details vividly.
Step-by-Step Rolling Techniques
The critical part involves rolling clay to 1/4-inch thickness. Place your leaf vein-side down, then apply firm pressure using the pin. Work from center to edges like a typesetter spreading ink—steady motions prevent air bubbles.
| Leaf Type | Ideal Thickness | Pressure Level |
|---|---|---|
| Delicate Fern | 1/8 inch | Light |
| Maple | 1/4 inch | Medium-Firm |
| Succulent | 3/8 inch | Firm |
Let the clay set before gently peeling the leaf away. Bake according to package instructions, then seal with clear glaze if desired. Your finished piece becomes more than decor—it’s a conversation starter infused with personal meaning.
Floral Stencil Tote Bag Transformation

Your everyday tote becomes a canvas for self-expression with this simple yet striking craft. A blank bag offers endless potential—whether you’re designing market-ready accessories or meaningful gifts that carry personal flair.
Choosing the Right Tote and Stencils
Start with a tightly woven canvas bag in neutral tones. Smooth surfaces prevent paint bleeding, while sturdy handles ensure longevity. For stencils, consider both scale and detail—large florals make bold statements, while intricate vines add delicate charm.
| Stencil Type | Best Material | Design Tip |
|---|---|---|
| Botanical | Mylar plastic | Layer leaves behind blooms |
| Geometric | Acetate sheets | Use painter’s tape for alignment |
| Alphabet | Reusable vinyl | Space letters with cardboard guides |
Tips for Using Acrylic Craft Paint
Shake acrylic paint bottles thoroughly before dipping your brush. Apply thin coats using stippling motions—this prevents seepage under the template. Let each layer dry completely before adding secondary colors or text.
Personalize your creation with metallic accents or fabric medium additives. These tweaks transform basic paint into wash-resistant art that survives grocery runs and beach trips. The finished look? A professional-grade accessory that costs less than store-bought alternatives.
Rose Petal Bath Salts for a Spa-Like Experience

Your bathwater shimmers with rose gold hues as mineral-rich salts dissolve around you. This process turns self-care into an art form—preserving fleeting beauty while creating something enduring. Those fading roses on your counter? They’re about to become your new secret weapon for relaxation.
Begin by air-drying petals in a single layer—a gentle method that locks in color and fragrance. Combine them with Epsom salts and baking soda using a folding technique that maintains petal integrity. The rhythmic motion becomes a moving meditation, your hands transforming ordinary ingredients into sensory magic.
| Salt Type | Benefits | Drying Time |
|---|---|---|
| Epsom | Muscle relief | 24 hours |
| Himalayan | Mineral boost | 36 hours |
| Dead Sea | Skin softening | 48 hours |
Customization elevates the experience. Add lavender oil for calm mornings or peppermint for evening revitalization. Each blend becomes a mood enhancer—personalized aromatherapy in reusable glass jars. The active time? Less than an hour, with most spent waiting for petals to dry naturally.
Package your creation with muslin bags or repurposed candle jars for instant gift appeal. Our friends at The Crafting Nook offer free printable labels that turn simple containers into boutique-worthy presentations. It’s the perfect way to extend a bouquet’s lifespan—from temporary decor to lasting luxury.
One batch yields eight spa-quality soaks. That’s weeks of rose-infused tranquility from what would’ve been compost. Your bathroom becomes a sanctuary, your routine a ritual—and those petals? They’re now part of your wellness story.
Vibrant Rainbow Doormat Craft

Your doorstep becomes a color explosion that stops visitors mid-stride. This project transforms ordinary entries into joyful gateways using nature’s toughest fibers and bold pigments. Unlike store-bought mats, yours will radiate personality while surviving muddy shoes and stormy weather.
Selecting the Best Outdoor Acrylic Paints
Not all pigments handle foot traffic equally. Look for acrylic paint labeled “weatherproof” with UV protection—these resist fading when sunlight hits your entry. The right formula bonds with coir fibers instead of sitting on top, preventing chip-offs after repeated use.
| Brand | Durability | Best For |
|---|---|---|
| DecoArt Outdoor | 18+ months | High-traffic areas |
| FolkArt Multi-Surface | 12 months | Subtle color washes |
| Apple Barrel All Weather | 9 months | Seasonal redesigns |
Designing a Welcoming Entryway
Your home’s first impression begins here. Start with a natural coir mat—its rough texture grips paint like primer on canvas. Use these techniques for lasting results:
- Sketch designs with chalk first
- Layer colors from lightest to darkest
- Seal with clear outdoor varnish
Rainbow stripes create instant cheer, but consider gradients that mirror local sunsets or geometric patterns matching your home’s architecture. The design process becomes a playground—mix metallic accents into stripes or stencil meaningful symbols along borders.
When neighbors ask where you bought that striking welcome piece, you’ll smile knowing it’s your handiwork greeting the world. This mat does more than wipe shoes—it announces your creative spirit in the boldest way possible.
Colorful Jenga Game Upgrade

That wooden tower game hiding in your closet? It’s about to become your home’s most eye-catching accent. With minimal time and basic supplies, you’ll reinvent a classic into vibrant decor that sparks joy during play and display.
Painting Techniques for a Quick Refresh
Separate your Jenga pieces into color groups before dipping brushes. Use acrylic paint for its fast drying time and bold pigment. Apply these pro methods:
- Rotate blocks while painting to cover edges evenly
- Let each side dry 5 minutes before flipping
- Seal with matte varnish for scratch resistance
| Paint Type | Drying Time | Best For |
|---|---|---|
| Metallic | 10 minutes | Accent stripes |
| Pastel | 7 minutes | Ombré effects |
| Neon | 8 minutes | Contrast ends |
Using Foam Brushes for Detailed Work
Those wedge-shaped foam tools? They’re your precision allies. Their tapered edges let you:
- Create crisp lines between colors
- Reach narrow block grooves
- Blend shades without brush marks
Complete the set in one sitting while binge-watching your favorite show. The transformed pieces stack into a radiant sculpture when not in use—proof that quick craft projects can deliver serious style.
Paper Flower Gift Topper for Personalized Presents
Turn ordinary packages into treasures with a touch of handmade elegance. These dimensional paper creations elevate wrapped boxes into heartfelt experiences—a flourish that says “this moment matters.”
Paper Folding and Design Tricks
Start with simple accordion folds—the foundation for layered petals. Choose textured sheets like linen-finish stock for depth, or translucent vellum for ethereal effects. Our friends at Fall for DIY share genius tips for curved edges that mimic real blooms.
Three materials create distinct personalities:
- Tissue paper: airy peonies
- Metallic cardstock: glamorous roses
- Recycled book pages: vintage chic
Mix sizes for visual drama—cluster small buds around a statement flower. Secure stems with floral wire wrapped in satin ribbon. The result? A gift adornment that becomes part of the present itself.
These techniques unlock endless design possibilities. Create matching table centerpieces for weddings or vibrant wall garlands for nurseries. Once mastered, you’ll see potential in every sheet—transforming humble materials into meaningful art.
Mid-Century Modern Side Table with Hidden Storage
That empty corner deserves more than another generic store-bought solution. Our reinvented classic combines clean lines with secret compartments—proving smart design doesn’t require deep pockets. You’ll spend under $30 creating a functional sculpture that outshines $100+ retail versions.
Transforming Everyday Items with Style
Start with a basic round stool or thrifted side table. Sand away imperfections, then customize with paint in earthy tones like ochre or sage. The magic happens beneath the surface—install a lift-top mechanism using inexpensive cabinet hinges from hardware stores.
Three upgrades elevate your piece:
- Felt-lined drawer for jewelry storage
- Adjustable shelf for books or plants
- Brass legs swapped for hairpin designs
This project reimagines decor as multi-layered problem-solving. Your new table becomes a charging station by day, cocktail perch by night—all while hiding clutter in its clever belly. It’s the way to merge vintage appeal with modern living needs, proving everyday objects hold untapped potential.

