Transforming everyday materials into showstopping decor isn’t just possible—it’s downright therapeutic. Studies reveal creative activities reduce stress by 75% while boosting mental clarity, making crafting a triple threat of benefits. Imagine unwinding after a long day while producing pieces that rival boutique finds.
You’ll find no convoluted tutorials here. We’ve curated projects using accessible techniques that deliver polish without perfectionism. That chunky clay vase? It’s intentionally irregular to mimic artisanal ceramics. Those mercury glass candle holders? Achieved with spray paint and patience.
The secret sauce lies in strategic material swaps. Swap pricey marble for contact paper. Use thrifted frames as bases for modern wall art. Each project includes pro tips for elevating basic supplies—like using fabric stiffener to turn $2 napkins into sculptural bowls.
These creations prove sophistication doesn’t require expert skills. With clever finishes and intentional imperfections, you’ll craft pieces that spark conversations. Ready to turn “Did you make that?” into your new favorite compliment?
Introduction to Budget-Chic DIY Projects
Ever questioned whether those elegant home pieces could be DIY? The magic lies in reimagining ordinary objects through intentional design choices. That thrifted picture frame collecting dust? With metallic spray paint and linen backing, it becomes a modern wall accent worthy of design magazines.
Seasoned creators know polished results stem from three elements: cohesive color palettes, thoughtful textures, and strategic finishes. A $4 terra cotta pot transforms with chalk paint and a leather pull. Basic wooden trays gain depth through layered staining techniques.
Consider these comparisons between store-bought and handmade alternatives:
| Item | Retail Price | DIY Cost | Customization |
|---|---|---|---|
| Ceramic Vase | $50-200 | $5-15 | Shape, glaze, size |
| Textured Wall Art | $120-400 | $8-20 | Colors, dimensions |
| Decorative Bowl | $35-150 | $3-12 | Material, finish |
Notice how finishing touches elevate basic materials? A single coat of matte sealant gives painted surfaces professional durability. Twine wrapping disguises imperfect edges on upcycled containers. These subtle details create perceived value without complex skills.
Your secret weapon: viewing limitations as creative challenges. Limited paint colors? Blend them for custom hues. Basic cotton fabric? Stiffen it into geometric shapes. This mindset turns household items into personalized statements that reflect your unique style.
Essential Tools and Affordable Supplies for Crafting

Stocking your creative workspace starts with strategic choices—not endless shopping trips. You’ll be surprised how many stunning projects begin with items already in your drawers. That half-used paint set? Perfect for abstract wall art. Those mismatched buttons? Prime jewelry-making material.
Must-Have Crafting Supplies
Every creator needs core tools that multiply possibilities. Invest in a reliable glue gun—its versatility rivals duct tape. Pair it with acrylic paint (black, white, primaries) and quality brushes for endless color mixing. Sharp scissors and a ruler complete your starter kit.
| Source | Average Cost | Best For | Pro Tip |
|---|---|---|---|
| Dollar Store | $1-5 | Basic containers, ribbons | Check seasonal aisles |
| Thrift Shops | $2-10 | Vintage frames, fabric | Visit mid-week |
| Online Marketplaces | $3-15 | Bulk purchases | Filter by “used” condition |
Where to Source Budget Materials
Your local dollar store hides gold in plain sight—think glass vases begging for metallic spray paint. Thrift stores offer linen napkins ideal for fabric stiffener tutorials. For specialty items, hunt clearance sections after holidays when seasonal hues go half-price.
Remember: Great supplies don’t need premium prices. Combine thrifted finds with basic tools through clever tutorials, and watch ordinary objects become extraordinary statements.
Easy DIY Crafts for Adults: Inspiration and Ideas

Your creative journey begins where curiosity meets self-expression. Imagine a world where meditative stitching coexists with problem-solving woodworking—each project becoming a fingerprint of your evolving style. This isn’t about replicating store-bought items, but crafting narratives through texture and form.
An Overview of Creative Projects
Handmade endeavors span from quick-accessory stitching to multi-layered furniture transformations. A painted terracotta planter becomes a color-blocked masterpiece in 20 minutes. Upcycled leather belts morph into industrial-chic shelving with basic tools. The magic? Each creation adapts to your current abilities while gently stretching your skills.
Mix materials fearlessly—try embedding pressed botanicals into resin coasters or pairing hammered metal with linen textiles. These combinations add tactile intrigue that mass-produced items lack. Pro tip: Limit your palette to three coordinating hues across multiple projects for gallery-worthy cohesion.
“Creativity thrives where rules bend,” as textile artists often say. That slightly uneven ceramic glaze? It tells a better story than factory perfection. Those asymmetrical macramé knots? They reveal the human touch behind the art. Your next conversation-starting piece awaits where experimentation meets intention.
On-Trend Home Decor Craft Projects

Contemporary spaces crave personality—something mass-produced items often lack. Enter unexpected materials like pool noodles and plastic wrap. Transform them into sculptural luminaries with LED tea lights, achieving designer lighting effects under $10. The secret? Crinkle-wrap texturing creates organic shadows that mimic high-end glasswork.
Fabric-covered vases prove customization beats store-bought perfection. Use remnant textiles to dress thrifted glass containers, ensuring your centerpieces align with existing color stories. For rustic charm, wrap natural-fiber ropes around candleholders in varying thicknesses. These textural pieces add warmth to modern tablescapes.
Mason jars shine beyond pantry storage. Paint them in muted tones for wall-mounted herb gardens or floral displays. Group three staggered jars near entryways for functional art. Pro tip: Maintain visual harmony by repeating one color across multiple surfaces in a room.
“The best interiors whisper stories through layered details,” notes a New York stylist. Achieve this by clustering handmade items in odd numbers at different heights. A trio of rope-wrapped votives beside fabric vases creates curated depth. These projects let your space reflect intentional creativity rather than catalog模仿ry.
With strategic material swaps and intentional styling, your home decor becomes an extension of personal style. Each craft carries the quiet confidence of thoughtful design—no luxury price tag required.
Affordable Wall Art & Gallery Displays
Blank walls are canvases whispering for personality—no art degree required. Start with thrifted frames and basic painting techniques that transform empty spaces into curated galleries. That landscape tutorial you’ve been eyeing? It becomes approachable when broken into layered washes of color.
Gallery Wall Techniques
Layout makes or breaks a display. Trace paper cutouts on walls using painter’s tape to test arrangements. “Always include one statement piece that anchors smaller works,” advises interior designer Mara Santos. Mix mediums: pair abstract canvases with woven textiles or framed botanical prints.
Lighting elevates humble creations. Angle spotlights to cast dramatic shadows on textured wall surfaces. For cohesive chaos, maintain 2-3” between frames while varying sizes and orientations.
Framing and Finishing Touches
Revive thrifted finds with matte spray paint for unified gallery cohesion. Stencil floral patterns using leftover paint—the imperfect edges add handmade charm. Create functional art with repurposed window panes: attach bulldog clips to display rotating postcards or fabric swatches.
| Frame Source | Customization Tip | Cost Range |
|---|---|---|
| Estate Sales | Layer gold leaf on corners | $3-15 |
| Facebook Marketplace | Swap glass for chicken wire | $5-20 |
| Garage Sales | Distress edges with sandpaper | $1-8 |
Your gallery becomes a living tutorial in self-expression. Each curated piece tells stories through intentional imperfections—proof that sophistication thrives in thoughtful details, not price tags.
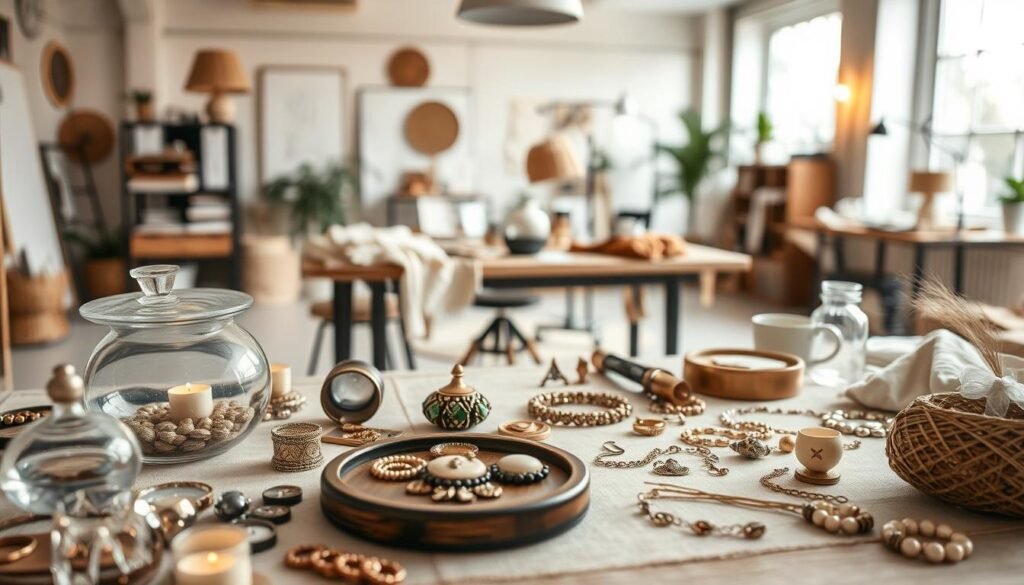
DIY Jewelry, Accessories, and Personal Gifts

Jewelry becomes more meaningful when your hands shape its story. That leaf-pressed dish holding your rings? It carries memories of autumn walks. Those tassel earrings swaying as you laugh? They started as silk scraps and imagination.
Nature-inspired jewelry dishes require only air-dry clay and backyard finds. Press maple leaves into rolled slabs—their veins become organic textures. “Imperfections add character,” says metalsmith Lila Chen. Bake, then accent edges with metallic wax for artisanal flair.
Silk tassels transform into earrings faster than brewing coffee. Attach gold findings to dyed fringe—no special tools needed. Mix blush and charcoal hues for versatile pairs. These make ideal last-minute gifts, wrapped in hand-stamped muslin bags.
Wooden bangles become color playgrounds. Layer geometric patterns using painter’s tape stencils. Try ombré fades or contrasting stripes. Stack multiples for arm candy that matches every outfit—or split them among friends.
When creating pieces for others, consider their daily rituals. A coworker who loses earring backs? Make magnetic trays. A minimalist friend? Opt for monochrome designs. Handmade gifts whisper “I see you” louder than store receipts.
These tutorials thrive on experimentation. Swap clay for resin in leaf dishes. Use leather cords instead of ear wires. Each variation becomes a signature style—proof that personal adornment needs no permission slip.
Crafting with Acrylic Paint and Hot Glue Techniques

Unleash the power of two household heroes hiding in plain sight. Acrylic paint and hot glue become design partners when you know their secret language—one speaks in bold strokes, the other sculpts dimensional detail. Wipe down candle surfaces with rubbing alcohol first, creating a toothy base for brushstrokes that grip like ivy on brick.
Floral candle designs thrive on controlled chaos. Use a liner brush for wispy petals, then add hot glue stamens for 3D texture. Let pieces dry upside-down to prevent drips—gravity becomes your collaborator. For colorblock vases, painter’s tape isn’t just masking material; it’s your geometry tutor. Apply diagonally across thrifted glass, then spray paint in staggered layers.
Stenciled totes need strategic glue placement. Trace patterns with washable markers first, then anchor stencils using hot glue dots at the corners. This prevents bleeding better than tape. Dab acrylic craft paint with makeup sponges for even coverage. Peel carefully to reveal crisp edges worthy of boutique shelves.
“The magic happens between layers,” notes mixed-media artist Clara Ruiz. She recommends sealing projects with matte mod podge—it protects while maintaining handmade charm. Store leftover paint in airtight containers; add water drops to revive thickened pigments.
These tutorial-tested methods turn nervous first strokes into confident gestures. Master the dance between brush and glue gun, and soon you’ll see potential in every blank surface—from lampshades to laptop cases. Your home becomes a gallery of personal triumphs, one layered tutorial at a time.
Vibrant Paper Crafts and Floral Design Ideas
Paper holds untapped potential beyond simple gift wrap—it’s your new medium for botanical masterpieces. Those paper flower toppers you’ve admired? They start with strategic folds that mimic nature’s curves. Gift packages become keepsakes when crowned with peonies made from coffee-filter petals or metallic cardstock leaves.
The accordion method revolutionizes flower crafting. Fold, twist, and fluff textured sheets into dahlias or ranunculus with lifelike depth. Free templates simplify complex shapes—download daffodil guides or design custom blooms matching your decor palette.
Pressed flowers gain new purpose in lantern designs. Sandwich dried botanicals between tissue layers on glass jars—when lit, they cast intricate leaf shadows. Pair these with fabric-lined trays for cohesive tablescapes that wow guests year-round.
Choose mid-weight paper (65-80 lb) for structural integrity without stiffness. Layer hues using watercolor techniques for organic gradients. With these tutorial-tested approaches, your creations will bloom with gallery-worthy polish—no green thumb required.

