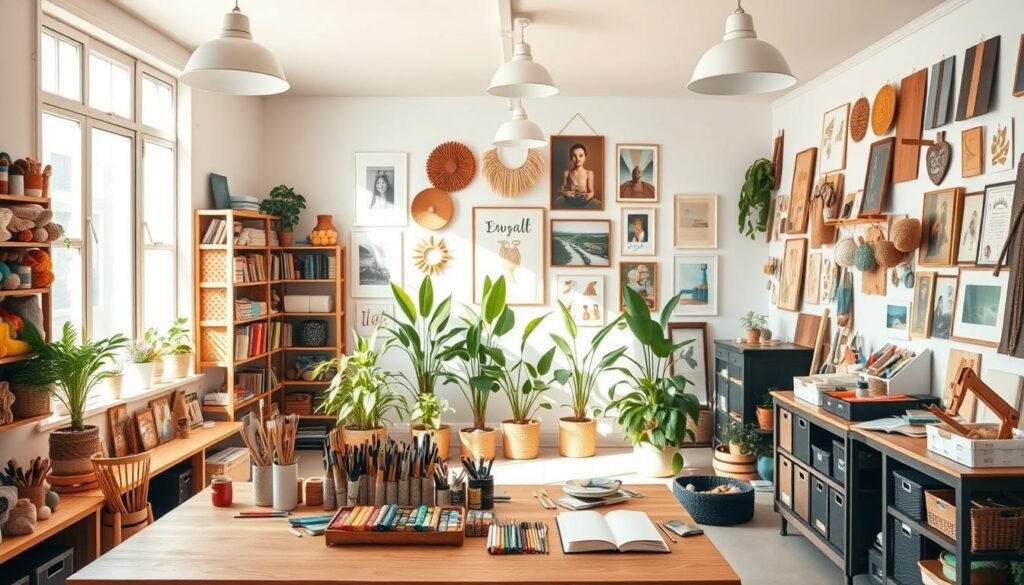
Ever walked into a space that instantly makes your creative gears start turning? That’s the magic of a well-designed workspace—where inspiration meets organization. Whether you’re painting, scrapbooking, or designing handmade goods, your environment plays a huge role in how you create.
Let’s cut to the chase: A functional area shouldn’t sacrifice style. We’ve talked to makers across the U.S. who’ve nailed the balance between pretty and practical. One quilter in Texas uses vertical storage for fabric rolls, while a jewelry designer in Oregon swears by color-coded trays. Their secret? Smart systems that work harder than they do.
No matter your square footage, there’s always room for improvement. Maybe it’s swapping harsh overhead lights for warm task lamps. Or turning that awkward nook into a ribbon station. We’ll break down how to use every inch wisely—without that “stuffed closet” feeling.
From budget-friendly DIY shelves to color palettes that boost focus, you’ll get actionable strategies tailored to your needs. Because when your zone flows better, projects finish faster—and that’s extra time for the fun parts. Ready to build a setup that fuels your best work? Let’s dive in.
Introduction: Embracing Your Creative Craft Room Journey
Your creative journey begins the moment you open the door. That blank canvas of a craft room isn’t just about stashing supplies—it’s where ideas take shape and messy experiments become masterpieces. Think of it as your backstage pass to innovation, where even the scissors seem to whisper, “What’s next?”
We’ve all faced that sinking feeling: tangled yarn piles, paint tubes playing hide-and-seek, or a desk buried under half-finished projects. But here’s the twist—your environment can flip that script. One Minnesota paper artist transformed her cluttered attic into a flowing studio simply by adding adjustable-height tables and mood lighting. Her secret? “Design for how you actually work, not how Pinterest says you should.”
The magic happens when practicality dances with personality. Maybe your glue gun station doubles as a vintage teacup display. Or your fabric drawers secretly organize by project deadline. This isn’t about perfection—it’s about creating a space that feels like your favorite coffee shop and most efficient workshop had a love child.
Throughout this guide, you’ll steal strategies from makers who cracked the code. Like the Florida calligrapher who uses repurposed spice racks for ink bottles, or the Colorado knitter whose color-coded wall grid shaved hours off project prep. Their homespun wisdom proves one thing: when your zone works, you play harder—and create smarter.
Designing a Functional Craft Room Space
What if every inch of your workspace could multitask as hard as you do? Smart design turns cramped quarters into productivity powerhouses. Take Jennifer’s 10’x13’ bedroom-turned-studio—by lining up two black desks, she created a runway for big ideas. Sure, surfaces get buried under active projects, but that’s why floor zones with task lamps become secret weapons.
Maximizing Limited Square Footage
Think vertical first. Floor-to-ceiling shelves or wall-mounted racks turn blank walls into storage powerhouses. One maker uses spice racks for thread spools—genius, right? For tight spots, try these tricks:
| Strategy | Benefit | Best For |
|---|---|---|
| Desk pairing | Expands work surfaces | Large-scale projects |
| Vertical storage | Saves floor space | Supplies organization |
| Floor zones | Flexible work areas | Ongoing tasks |
Creating a Dedicated Workspace for Projects
Your main desk should handle daily grind tasks, but leave breathing room for sudden inspiration. Jennifer keeps her closet gutted to studs—raw space for impromptu brainstorming. Pro tip: Use rolling carts between stations. They’re like butlers for your supplies, always within reach but never in the way.
Remember—good flow matters more than square footage. When your layout works, you’ll spend less time hunting glue sticks and more time making magic.
Essential “craft room decor” Ideas to Spark Creativity

What if your workspace could spark ideas before you even pick up a brush? Jennifer’s transformation from monochrome to rainbow hues proves spaces evolve with our creativity. After adding paper flowers and swapping desk knobs, her studio became a personalized powerhouse—proof that small changes create big inspiration.
Incorporating Color and Pattern
Start with one bold wall or vibrant storage bins. Jennifer’s rainbow wall art became her “creative compass,” guiding projects toward unexpected color combinations. Pro tip: Use patterned containers to hide supplies while adding visual energy.
| Strategy | Impact | Example |
|---|---|---|
| Accent walls | Sets mood | Rainbow paper flowers |
| Patterned storage | Hides clutter | Geometric fabric bins |
| Mixed neutrals | Prevents overwhelm | White shelves + wood accents |
Integrating Multifunctional Storage Items
That vintage suitcase under your bed? It’s actually a ribbon repository. Seek pieces that pull double duty—like ottomans with hidden compartments or wall grids holding tools and displaying postcards. Jennifer’s favorite upgrade? Hobby Lobby knobs that organize drawers while whispering “this space is uniquely yours.”
Remember: Your zone should work like a trusted assistant—quietly efficient but full of personality. When every item serves purpose and pleasure, creativity becomes second nature.
Colorful Inspirations: Adding Vibrancy and Personality

Rainbows aren’t just for rainy days—they belong in your creative zone too. Prism-inspired palettes create harmony where chaos might lurk, turning basic supplies into joyful accents. Think sunset oranges dancing with slate grays, or ocean blues winking at creamy whites.
One paper artist transformed her bland walls using removable rainbow decals. “Now my ideas flow faster,” she says. The secret? Let bold hues lead while neutrals anchor—like turquoise storage bins against white shelves.
Mixing Bold Hues with Neutrals
Follow the 60-30-10 rule: neutral base, dominant color, pops of accent. A charcoal desk paired with sapphire chair cushions? Yes. Mint-green pegboards framing earthy clay pots? Perfect.
Natural light changes everything. Test swatches at different times—morning sun intensifies warm tones, while evening shadows soften them. Those floral-print bins? They’ll look entirely new by moonlight.
Remember: your space should evolve with you. Swap burnt-orange throw pillows for spring-green versions when seasons shift. Rotate framed art to match current projects. Color isn’t just decoration—it’s your silent creative partner.
DIY Decor Projects for a Unique Workspace

Who says your workspace can’t be as original as your creations? Transform basic supplies into statement pieces that reflect your style. Let’s explore how simple techniques—like reverse canvas art and floating shelves—turn functional areas into inspiration hubs.
Custom Shelving and Framed Displays
Building shelves doesn’t require a contractor. Focus on getting brackets level—even uneven planks gain charm with paint. One maker turned scrap wood into floating displays for her felt flower collection. “They’re reminders of past projects—and future possibilities,” she says.
| DIY Strategy | Skill Level | Impact |
|---|---|---|
| Floating shelves | Beginner | Maximizes vertical space |
| Pegboard displays | Intermediate | Customizable layouts |
| Repurposed frames | Novice | Adds vintage character |
Personalized Art and Reverse Canvas Techniques
Reverse canvas art lets you make craft projects look gallery-ready. Stretch fabric over frames, then paint geometric designs or favorite quotes. One artist split letters with painter’s tape—teal tops meeting gold bottoms. “It’s like wearing your favorite jewelry while working,” she laughs.
Giant decorative buttons from old coats? Prime them with metallic spray paint. Those leftover felt blooms from last year’s event? Cluster them in shadowboxes. When your art tells your story, every glance sparks new ideas.
Smart Storage Solutions for Craft Room Organization

Ever felt like your supplies multiply when you’re not looking? Jennifer did—until she swapped her beloved fabric armoire for a weathered wood cubby shelf. “It hurt to let go,” she admits, “but Walmart’s $89 unit tripled my storage capacity overnight.” Her secret? Prioritizing function without sacrificing rustic charm.
Choosing the Right Storage Boxes and Shelving
Closet spaces often become black holes for supplies. Jennifer transformed hers by flanking a built-in tower with $25 bookcases. The result? A custom storage wall that holds everything from yarn skeins to scrapbook paper. Mix-and-match boxes work best when unified—she uses chalkboard tags to label mismatched containers. Pro tip: measure twice, buy once. Deep shelves suit bulk items, while shallow bins keep frequently used tools accessible.
| Solution | Benefit | Best For |
|---|---|---|
| Cubby shelves | High-density storage | Fabric rolls, tools |
| Bookcase additions | Budget expansion | Closet conversions |
| Chalkboard labels | Adaptable organization | Evolving projects |
Using Chalkboard Labels and Pegboards
Why commit to permanent labels when your projects change weekly? Jennifer’s chalkboard tags let her rename containers in seconds—no sticker residue. Pair these with pegboards for ultimate flexibility. One maker hangs her crochet hooks horizontally, then flips them vertical when teaching classes. “It’s like Tetris for real life,” she laughs.
Remember: good organization adapts as you grow. Start with one adjustable system—like wall-mounted grids—before overhauling everything. Your future self will thank you when that new hobby inevitably strikes.
Creative Wall Decor: Chalkboard Walls, Open Shelving, and More

Your walls want to work as hard as you do. Beyond holding up the ceiling, they’re prime real estate for smart storage and visual storytelling. One content creator spent three weekends perfecting her shelving setup—not because she loves leveling tools, but because camera-ready spaces demand intentional design. “Every inch needs to earn its keep,” she explains.
Styling with Chalkboard and Pegboard Accents
Chalkboard paint transforms blank surfaces into evolving mood boards. Jot supply lists in the morning, sketch project ideas at noon, then let kids doodle encouraging messages by evening. Pair this with pegboard accents for tools that double as art—think colorful scissors displayed like museum pieces.
| Wall Solution | Function | Aesthetic Bonus |
|---|---|---|
| Open shelving | Rotating displays | Depth through staggered heights |
| Chalkboard sections | Reusable planning | Industrial-chic texture |
| Pegboard panels | Tool organization | Customizable color pops |
Struggling with uneven brackets? You’re not alone. That same creator used painter’s tape to map layouts before drilling. Her advice: “Check levels at eye height and from your usual workspace angle.” Bonus tip: Use matte black screws—they disappear against dark walls.
When filming tutorials, neutral backdrops let your projects shine. Floating shelves with muted baskets keep supplies hidden yet accessible. One maker alternates woven bins with glass jars—practical storage that reads as intentional decor.
Remember: walls should adapt as quickly as your ideas. Start with one functional accent piece, then build outward. Your future self—and your camera lens—will appreciate the forethought.
Functional Work Areas: Balancing Form and Efficiency
What if your workspace could manage projects before you even start? Jennifer’s solution—a queue system—transforms chaotic piles into organized action plans. By designating temporary homes for incoming materials, you’ll spend less time digging through supplies and more time creating.
Setting Up a Clear Project Queue
Think of your space like a restaurant expo line. New purchases wait in labeled bins until their “shift” begins. Jennifer uses open-top containers near her main desk—visible reminders of upcoming tasks. This approach cuts prep time by 40% according to her tracking app.
| Zone | Function | Time Saver |
|---|---|---|
| Queue bins | Holds incoming materials | Prevents misplaced items |
| Narrow shelves | Displays craft paints | Speeds color selection |
| Photo station | Stores backdrops & lighting | Simplifies documentation |
Vertical storage plays double duty here. Custom-built shelves keep 120 paint bottles accessible while adding a rainbow wall display. “Seeing colors together sparks new combinations,” Jennifer notes. Her permanent photo corner stays camera-ready with rolled backdrops in ceiling-mounted tubes.
Place high-use zones within arm’s reach of your primary surface. Store specialty tools slightly further away—the extra steps help prioritize active projects. When every area has purpose, your space becomes a productivity partner rather than a obstacle course.
Personalized Touches: Displaying Art, Memorabilia, and DIY Items
Your workspace becomes uniquely yours when it tells stories only you could tell. Take inspiration from the maker who framed her Disney cast member ID card beside childhood photos—a daily reminder that creativity thrives where joy lives. These aren’t just decorations; they’re visual anchors for your why.
Showcasing Family Photos and Handmade Details
That quilted wall hanging from your grandma? It’s more than fabric—it’s a legacy. One artist displays her kids’ finger paintings in floating frames above her desk. “They remind me that play fuels progress,” she says. Try these ideas:
- Cluster mismatched frames around inspiration boards
- Use washi tape to create rotating gallery walls
- Turn handwritten notes into mini-canvases with spray adhesive
Creative Use of Upcycled Items
Old becomes extraordinary with fresh vision. A salvaged dress form wears seasonal aprons while modeling current projects. Wooden thread spools from the 1950s? They’re bookends now. Even leftover felt flowers find new life in clear jars—colorful reminders of past triumphs.
Pro tip: Hunt for store closing sales. That’s where our featured maker scored her favorite piece—a factory reject mannequin she calls “perfectly imperfect.” When your items carry history, every glance sparks gratitude for the creative journey.
Budget-Friendly Crafting: Upcycling and Affordable Decor Solutions
Who says style has to break the bank? Jennifer’s workspace proves clever shopping beats big spending every time. By mixing thrifted finds with strategic upgrades, she created a storage system that’s both functional and Instagram-worthy—without emptying her wallet.
Strategies for Smart Shopping
Local stores hide treasure troves of affordable solutions. Jennifer replaced basic drawer pulls with Hobby Lobby’s $3 knobs—instantly refreshing her desk. “It’s like giving old furniture a caffeine boost,” she laughs. Here’s how to spot winners:
| Find | Use | Savings |
|---|---|---|
| Bookcases | Closet organization | 75% vs custom built-ins |
| Chalkboard tags | Labeling containers | $0.50 each |
| Cubby shelves | Vertical storage | 90% less than vintage armoires |
That Walmart shelf? It holds more supplies than her previous pricier unit. Pro tip: Hunt clearance aisles for mismatched boxes—they gain cohesion with uniform labels. Jennifer’s chalkboard tags let her rename bins weekly without sticker residue.
Focus on pieces that solve multiple problems. A $25 bookcase flanking her closet tower created built-in looks for apartment-friendly prices. “Expensive doesn’t mean better,” she notes. “My stuff stays organized—that’s what matters.”
Remember: Small changes create big impact. Swap hardware before replacing furniture. Use retail basics as building blocks. When you shop with intention, every dollar works overtime.
Conclusion
True creative freedom starts when your environment fuels rather than frustrates you. The journey from cluttered corners to flow-driven spaces isn’t about perfection—it’s designing a setup that mirrors how your mind works best. You’ve seen how simple swaps—like vertical storage or mood-boosting hues—can turn chaos into clarity.
Your workspace should feel like a trusted collaborator. Whether it’s pegboards adapting to new projects or chalkboard labels evolving with your needs, flexibility keeps inspiration flowing. Remember: those clever systems you create today will make tomorrow’s ideas easier to chase.
Now’s the time to step back and admire what you’ve built. Every labeled jar, color-coded shelf, and personalized touch whispers “this is where magic happens.” Keep refining, keep experimenting—and most importantly, keep making that corner of the world uniquely yours.